🔧 阿川の電商水電行

上週,我推出了notesGPT ,這是一款免費開源語音記事應用程式,上週迄今為止已有35,000 名訪客、7,000 名用戶和超過 1,000 名 GitHub star。它允許您錄製語音筆記,使用Whisper進行轉錄,並透過Together使用 Mixtral 來提取操作項並將其顯示在操作項視圖中。它也是完全開源的,配備了身份驗證、儲存、向量搜尋、操作項,並且在行動裝置上完全響應,易於使用。
我將向您詳細介紹我是如何建造它的。
架構和技術堆疊
這是架構的快速圖表。我們將更深入地討論每個部分,並同時展示程式碼範例。
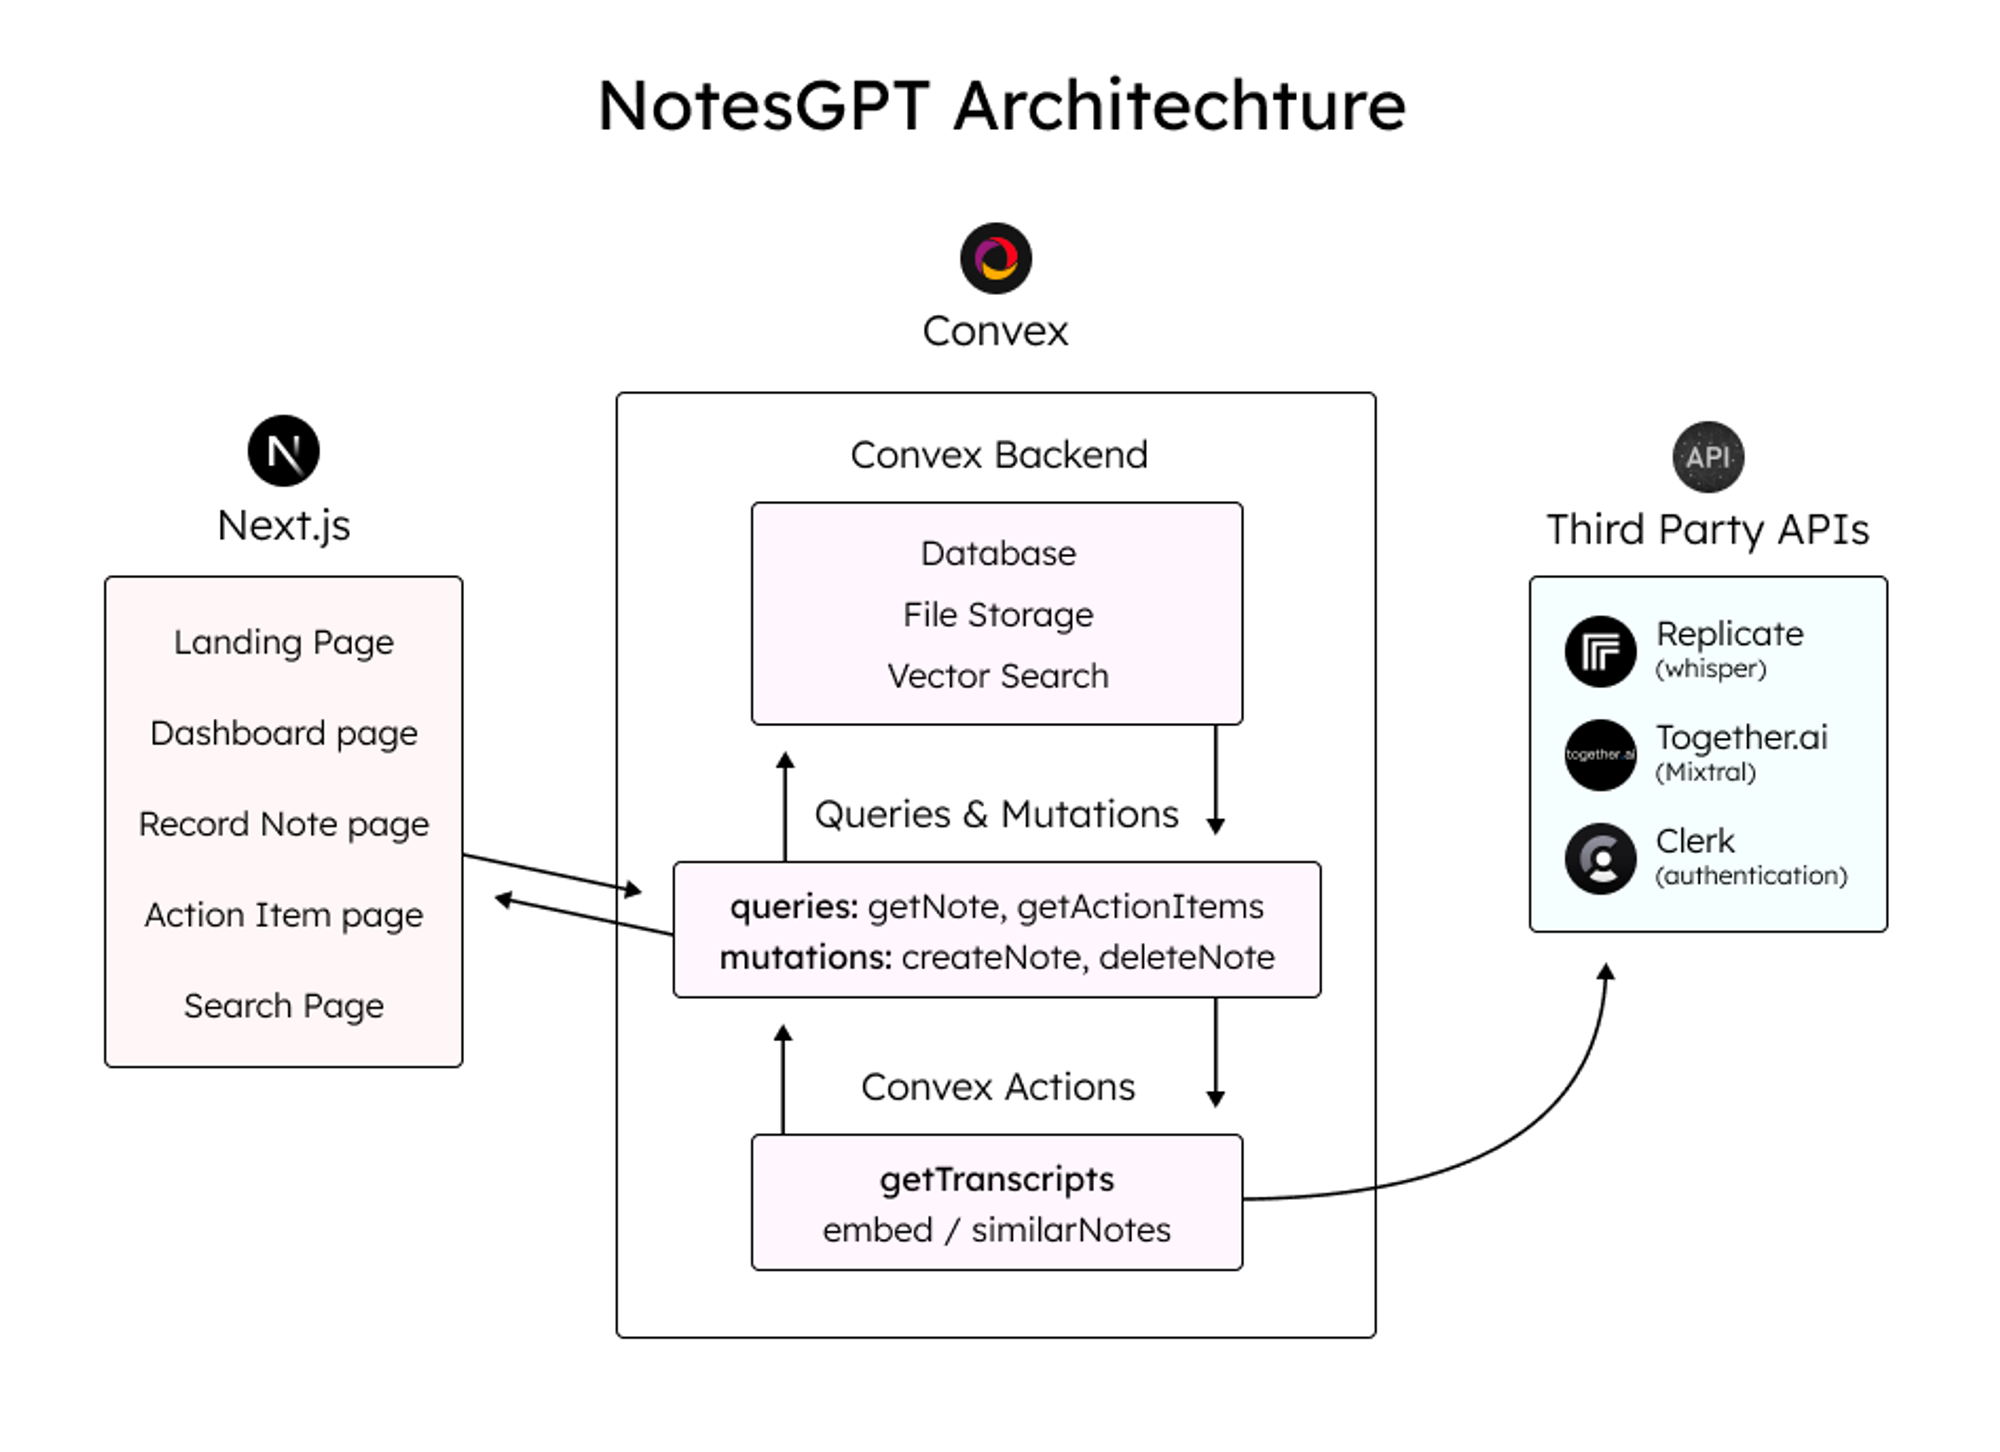
這是我使用的整體技術堆疊:
-
資料庫和雲端函數的convex
-
Next.js App Router框架
-
複製Whisper 轉錄
-
Together.ai用於推理和嵌入
-
用於儲存語音註釋的凸檔存儲
-
凸向量搜尋用於向量搜尋
-
負責使用者身份驗證的職員
登陸頁面
該應用程式的第一部分是您導航到notesGPT 時看到的登入頁面。
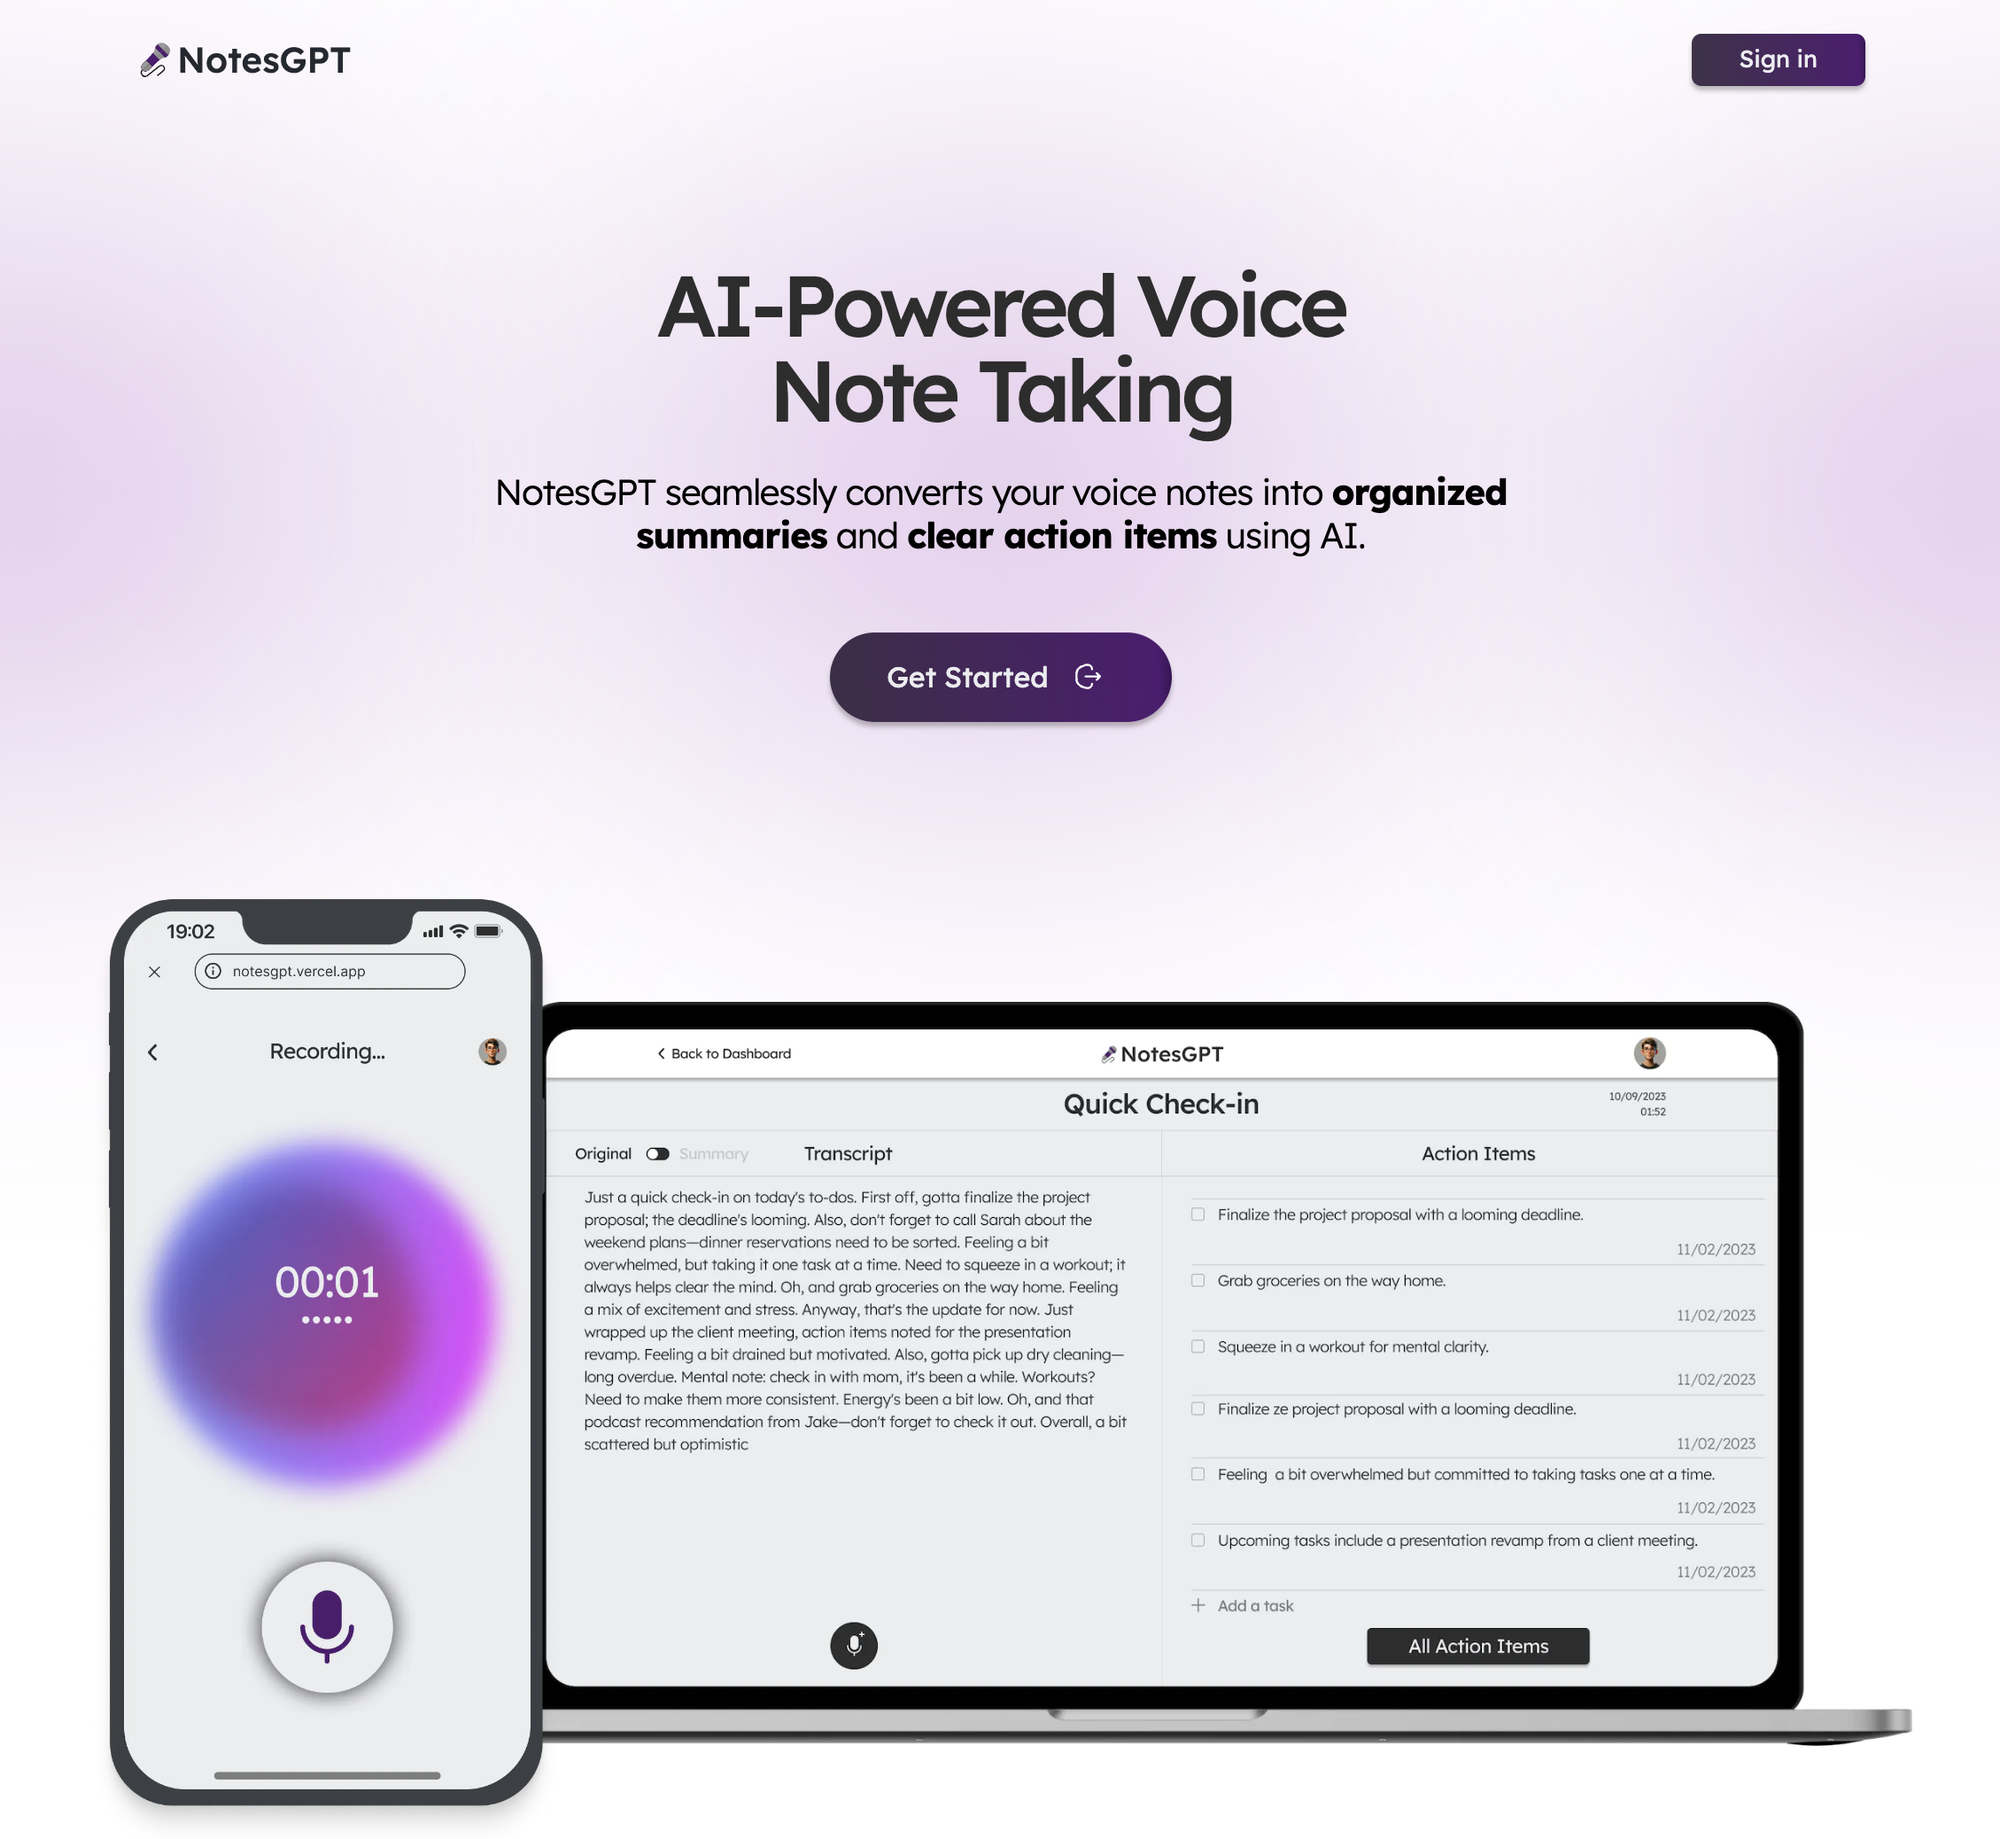
用戶首先看到的是這個登陸頁面,它與應用程式的其餘部分一起使用 Next.js 和 Tailwind CSS 進行樣式建立。我喜歡使用 Next.js,因為它可以輕鬆啟動 Web 應用程式並編寫 React 程式碼。 Tailwind CSS 也很棒,因為它允許您在網頁上快速迭代,同時與 JSX 保持在同一檔案中。
與 Clerk 和 Convex 進行身份驗證
當使用者點擊主頁上的任一按鈕時,他們將被導向到登入畫面。這是由 Clerk 提供支援的,這是一個與 Convex 很好整合的簡單身份驗證解決方案,我們將在整個後端使用它,包括雲端功能、資料庫、儲存和向量搜尋。
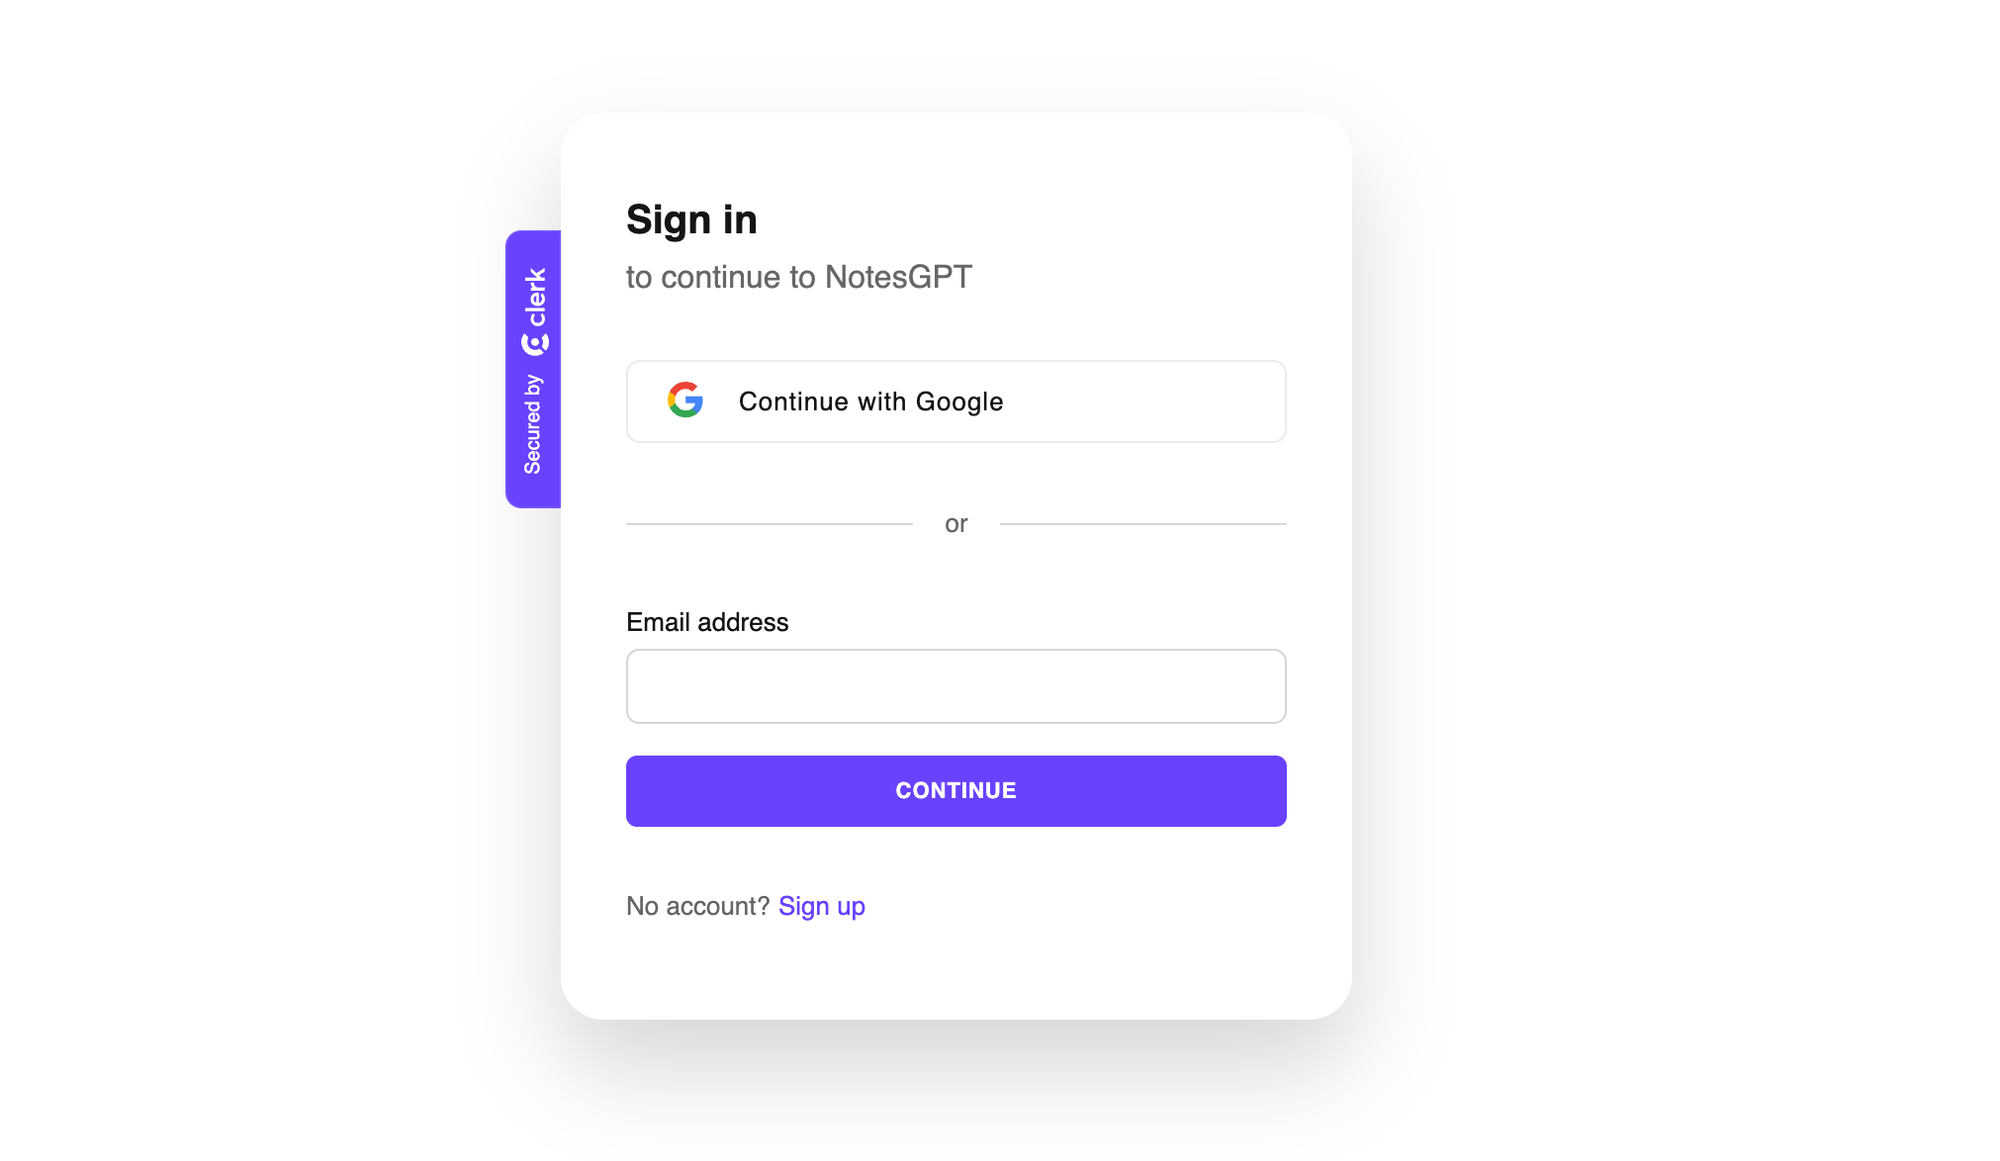
Clerk 和 Convex 都很容易設定。您只需在這兩個服務上建立一個帳戶,安裝它們的 npm 庫,執行npx convex dev來設定您的凸資料夾,然後建立一個如下所示的ConvexProvider.ts檔案來包裝您的應用程式。
'use client';

import { ReactNode } from 'react';
import { ConvexReactClient } from 'convex/react';
import { ConvexProviderWithClerk } from 'convex/react-clerk';
import { ClerkProvider, useAuth } from '@clerk/nextjs';

const convex = new ConvexReactClient(process.env.NEXT_PUBLIC_CONVEX_URL!);

export default function ConvexClientProvider({
  children,
}: {
  children: ReactNode;
}) {
  return (
    <ClerkProvider
      publishableKey={process.env.NEXT_PUBLIC_CLERK_PUBLISHABLE_KEY!}
    >
      <ConvexProviderWithClerk client={convex} useAuth={useAuth}>
        {children}
      </ConvexProviderWithClerk>
    </ClerkProvider>
  );
}請查看Convex Quickstart和Convex Clerk auth 部分以了解更多詳細資訊。
設定我們的架構
您可以在有或沒有模式的情況下使用 Convex。就我而言,我知道資料的結構並想要定義它,所以我在下面這樣做了。這也為您提供了一個非常好的類型安全 API,可以在與資料庫互動時使用。我們定義兩個表格-一個用於儲存所有語音註解資訊的notes表和用於提取的操作專案的actionItems表。我們還將定義索引,以便能夠透過userId和noteId快速查詢資料。
import { defineSchema, defineTable } from 'convex/server';
import { v } from 'convex/values';

export default defineSchema({
  notes: defineTable({
    userId: v.string(),
    audioFileId: v.string(),
    audioFileUrl: v.string(),
    title: v.optional(v.string()),
    transcription: v.optional(v.string()),
    summary: v.optional(v.string()),
    embedding: v.optional(v.array(v.float64())),
    generatingTranscript: v.boolean(),
    generatingTitle: v.boolean(),
    generatingActionItems: v.boolean(),
  })
    .index('by_userId', ['userId'])
    .vectorIndex('by_embedding', {
      vectorField: 'embedding',
      dimensions: 768,
      filterFields: ['userId'],
    }),
  actionItems: defineTable({
    noteId: v.id('notes'),
    userId: v.string(),
    task: v.string(),
  })
    .index('by_noteId', ['noteId'])
    .index('by_userId', ['userId']),
});
儀表板
現在我們已經有了後端和身份驗證設定以及模式,我們可以看看如何獲取資料。登入應用程式後,用戶可以查看其儀表板,其中列出了他們錄製的所有語音筆記。
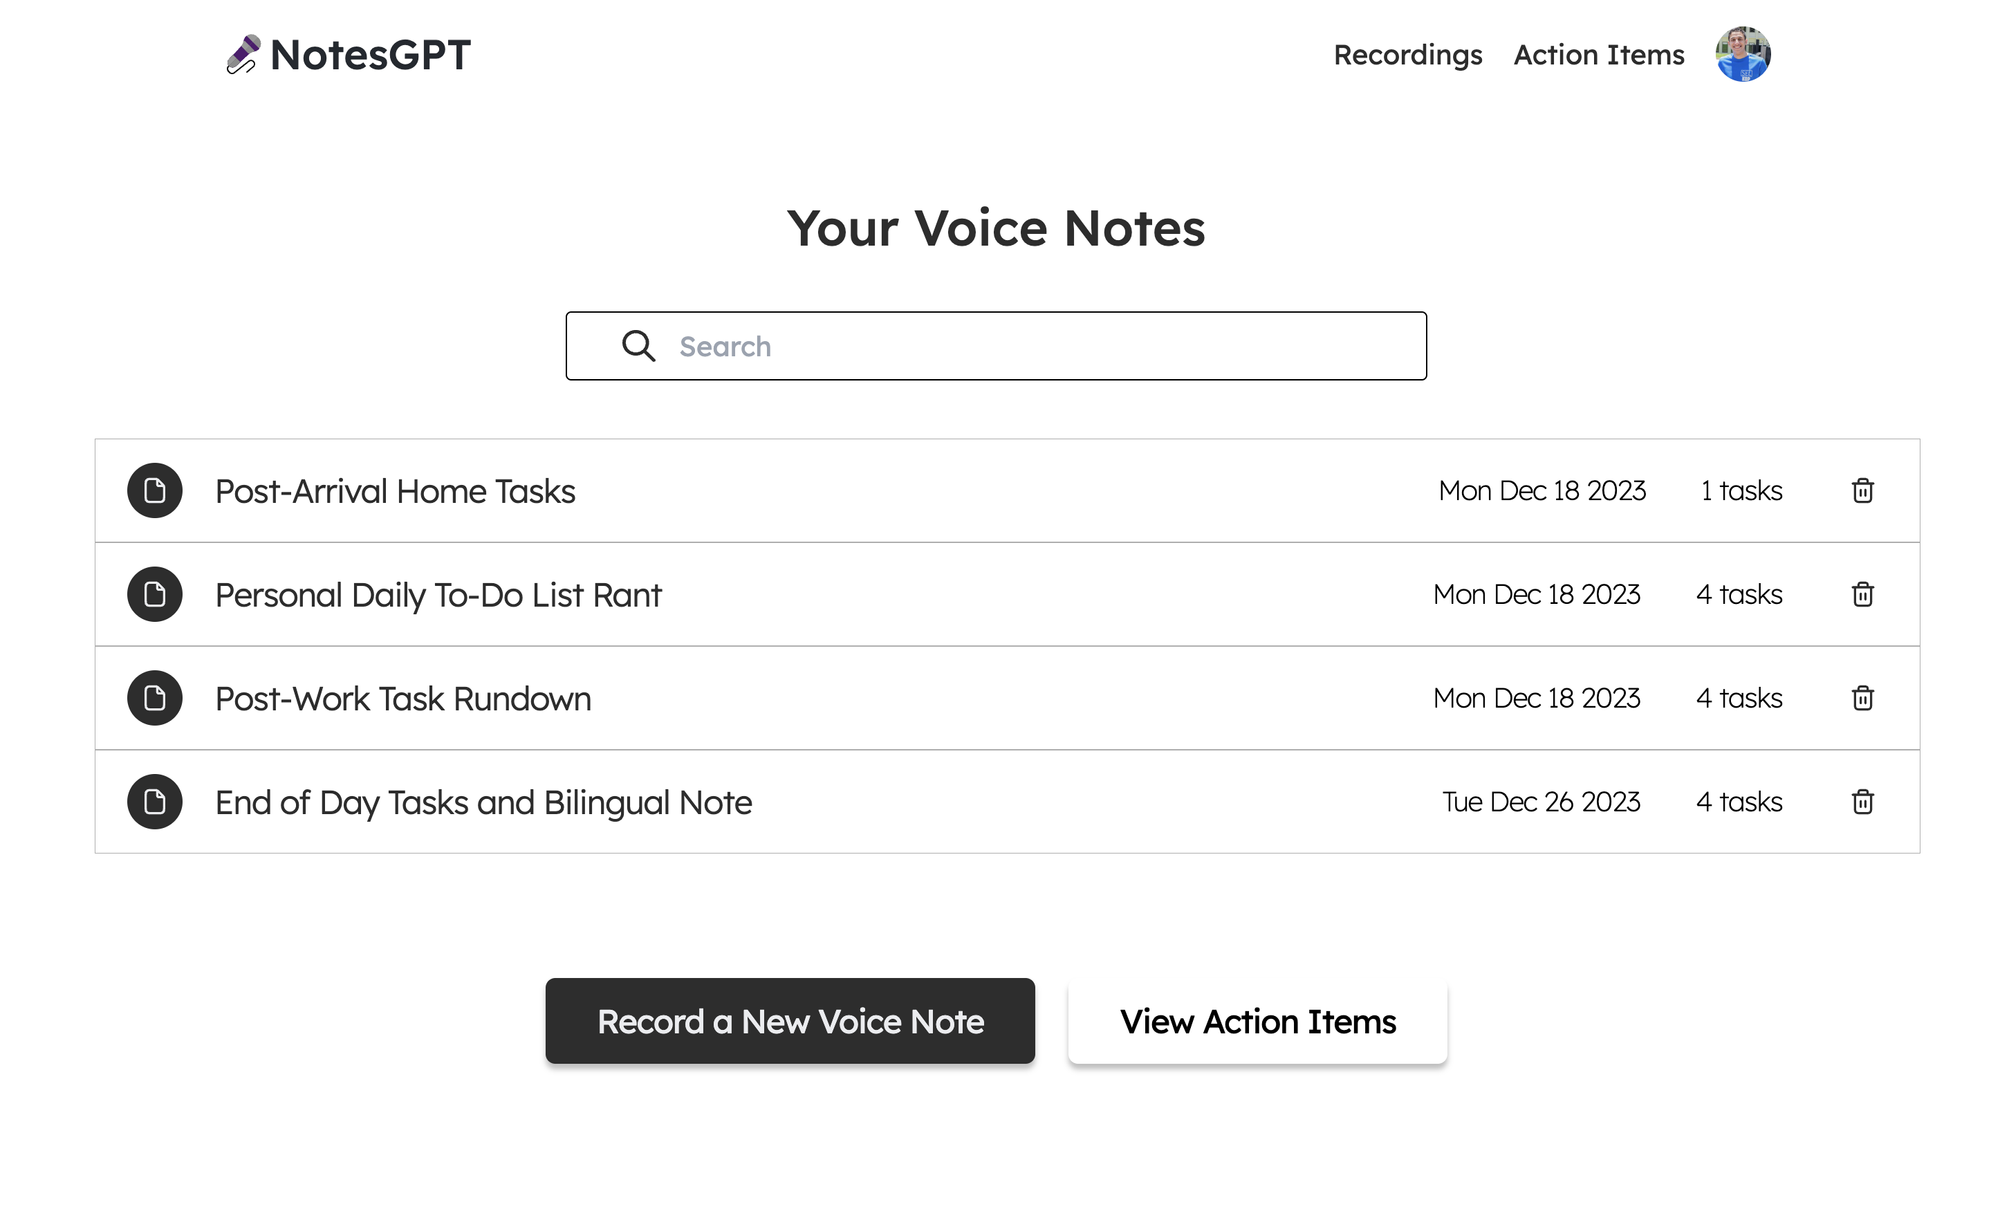
為此,我們首先在凸資料夾中定義一個查詢,該查詢使用 auth 接收userId ,驗證其有效,並傳回與使用者的userId相符的所有註解。
export const getNotes = queryWithUser({
  args: {},
  handler: async (ctx, args) => {
    const userId = ctx.userId;
    if (userId === undefined) {
      return null;
    }
    const notes = await ctx.db
      .query('notes')
      .withIndex('by_userId', (q) => q.eq('userId', userId))
      .collect();

    const results = Promise.all(
      notes.map(async (note) => {
        const count = (
          await ctx.db
            .query('actionItems')
            .withIndex('by_noteId', (q) => q.eq('noteId', note._id))
            .collect()
        ).length;
        return {
          count,
          ...note,
        };
      }),
    );

    return results;
  },
});之後,我們可以透過凸提供的函數使用使用者的驗證令牌來呼叫此getNotes查詢,以在儀表板中顯示所有使用者的註解。我們使用伺服器端渲染在伺服器上取得此資料,然後將其傳遞到<DashboardHomePage />客戶端元件。這也確保了客戶端上的資料也保持最新。
import { api } from '@/convex/_generated/api';
import { preloadQuery } from 'convex/nextjs';
import DashboardHomePage from './dashboard';
import { getAuthToken } from '../auth';

const ServerDashboardHomePage = async () => {
  const token = await getAuthToken();
  const preloadedNotes = await preloadQuery(api.notes.getNotes, {}, { token });

  return <DashboardHomePage preloadedNotes={preloadedNotes} />;
};

export default ServerDashboardHomePage;
錄製語音筆記
最初,使用者的儀表板上不會有任何語音註釋,因此他們可以點擊「錄製新語音註釋」按鈕來錄製。他們將看到以下螢幕,允許他們進行錄製。
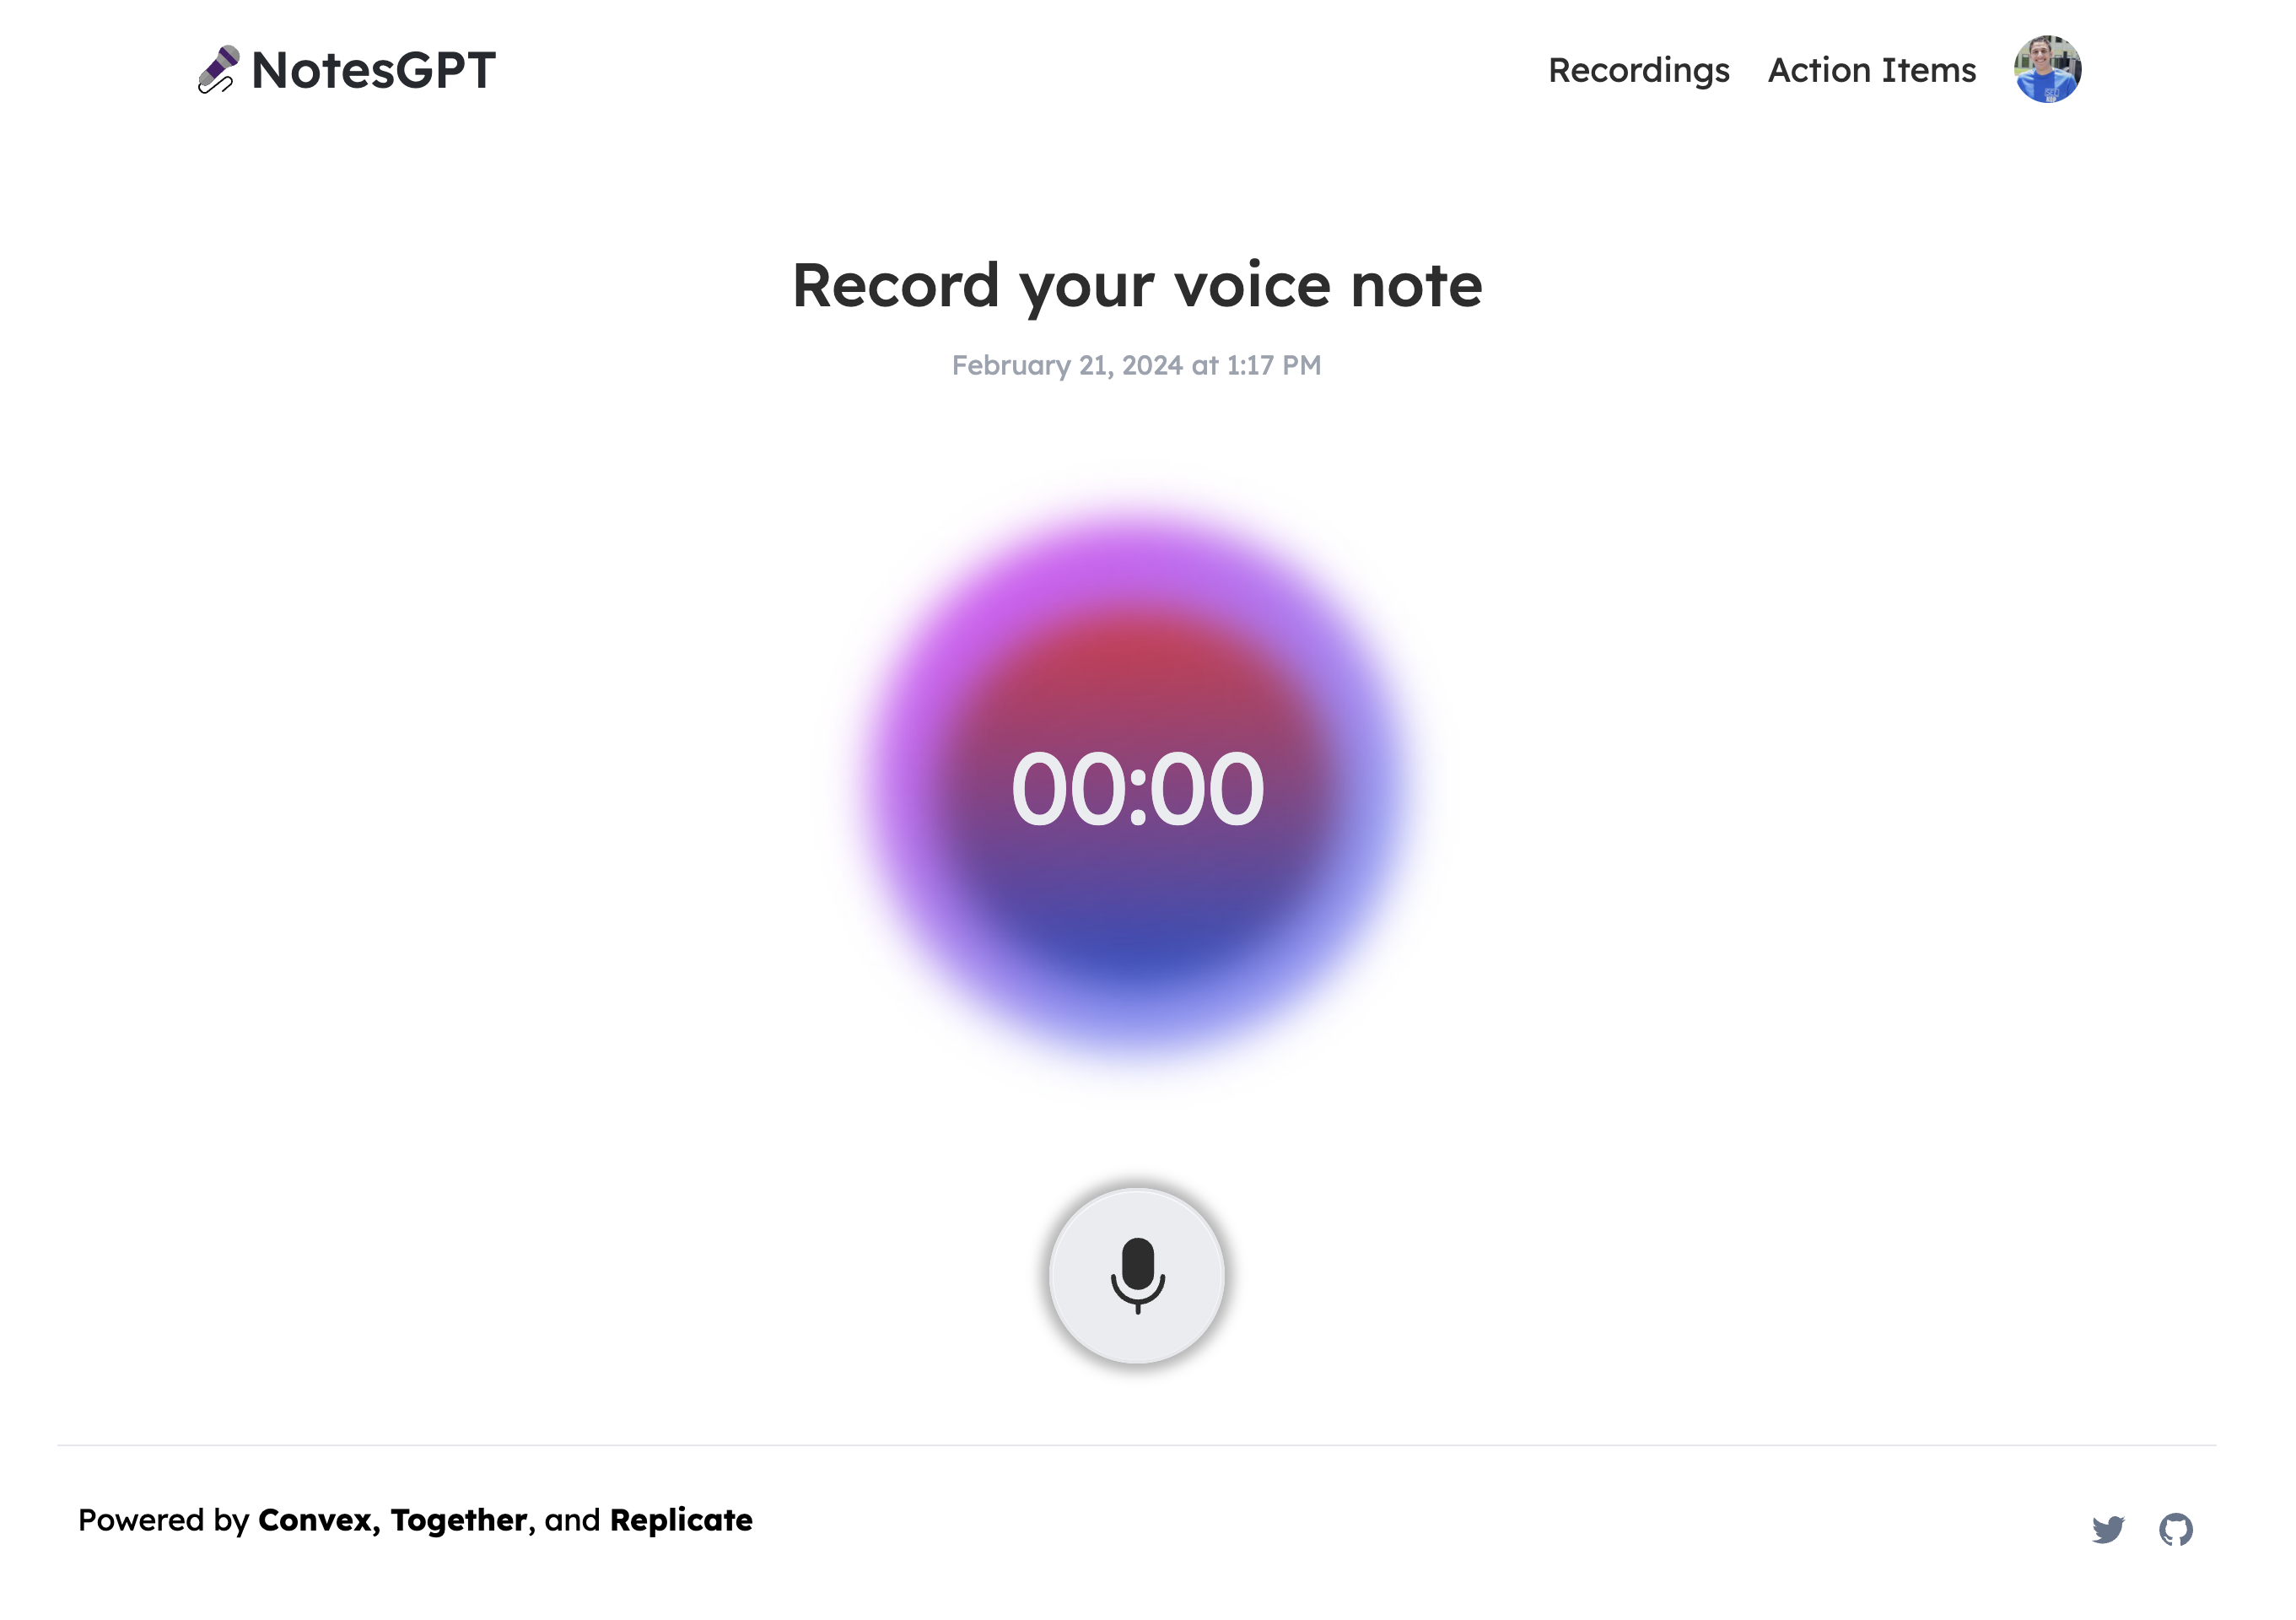
這將使用本機瀏覽器 API 錄製語音筆記,將檔案保存在 Convex 檔案儲存中,然後透過 Replicate 將其傳送至 Whisper 進行轉錄。我們要做的第一件事是在凸資料夾中定義一個createNote突變,它將接收此記錄,在凸資料庫中保存一些訊息,然後呼叫耳語操作。
export const createNote = mutationWithUser({
  args: {
    storageId: v.id('_storage'),
  },
  handler: async (ctx, { storageId }) => {
    const userId = ctx.userId;
    let fileUrl = (await ctx.storage.getUrl(storageId)) as string;

    const noteId = await ctx.db.insert('notes', {
      userId,
      audioFileId: storageId,
      audioFileUrl: fileUrl,
      generatingTranscript: true,
      generatingTitle: true,
      generatingActionItems: true,
    });

    await ctx.scheduler.runAfter(0, internal.whisper.chat, {
      fileUrl,
      id: noteId,
    });

    return noteId;
  },
});
耳語動作如下圖所示。它使用 Replicate 作為 Whisper 的託管提供者。
export const chat = internalAction({
  args: {
    fileUrl: v.string(),
    id: v.id('notes'),
  },
  handler: async (ctx, args) => {
    const replicateOutput = (await replicate.run(
      'openai/whisper:4d50797290df275329f202e48c76360b3f22b08d28c196cbc54600319435f8d2',
      {
        input: {
          audio: args.fileUrl,
          model: 'large-v3',
          translate: false,
          temperature: 0,
          transcription: 'plain text',
          suppress_tokens: '-1',
          logprob_threshold: -1,
          no_speech_threshold: 0.6,
          condition_on_previous_text: true,
          compression_ratio_threshold: 2.4,
          temperature_increment_on_fallback: 0.2,
        },
      },
    )) as whisperOutput;

    const transcript = replicateOutput.transcription || 'error';

    await ctx.runMutation(internal.whisper.saveTranscript, {
      id: args.id,
      transcript,
    });
  },
});
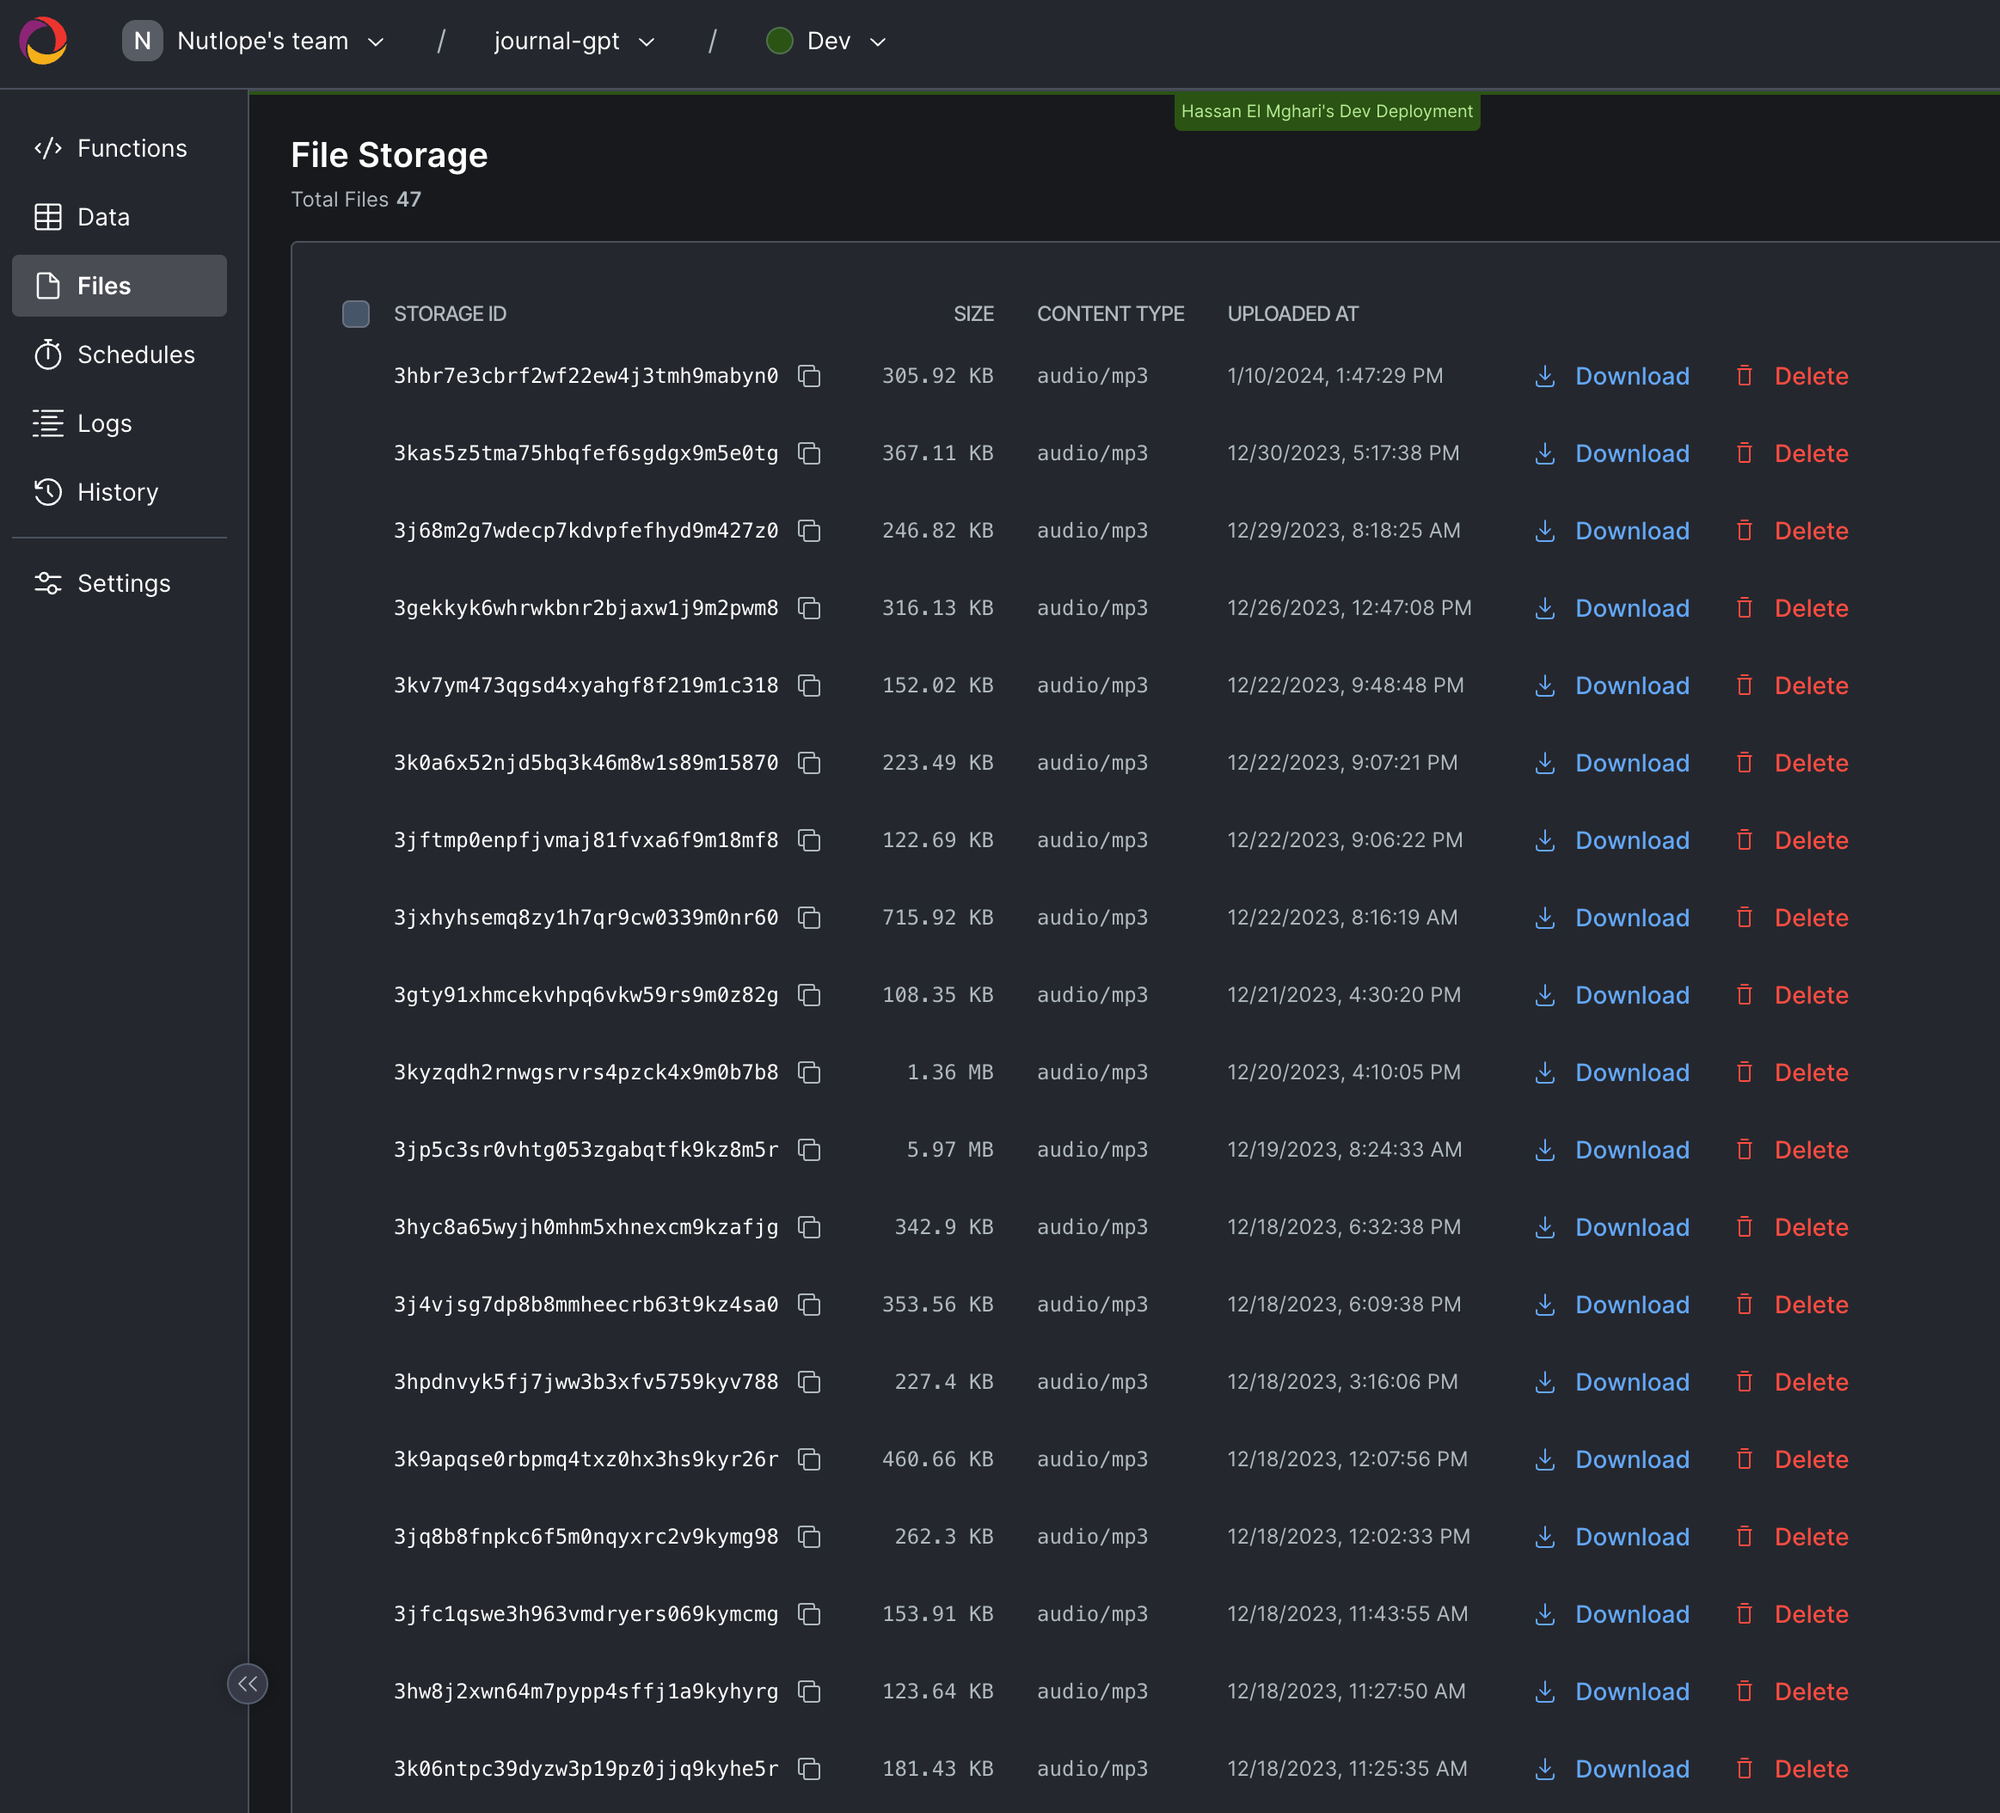
此外,所有這些檔案都可以在 Convex 儀表板的「檔案」下看到。
生成行動專案
使用者完成語音記錄並透過耳語進行轉錄後,輸出將傳遞到 Together AI 中。我們同時顯示此加載畫面。
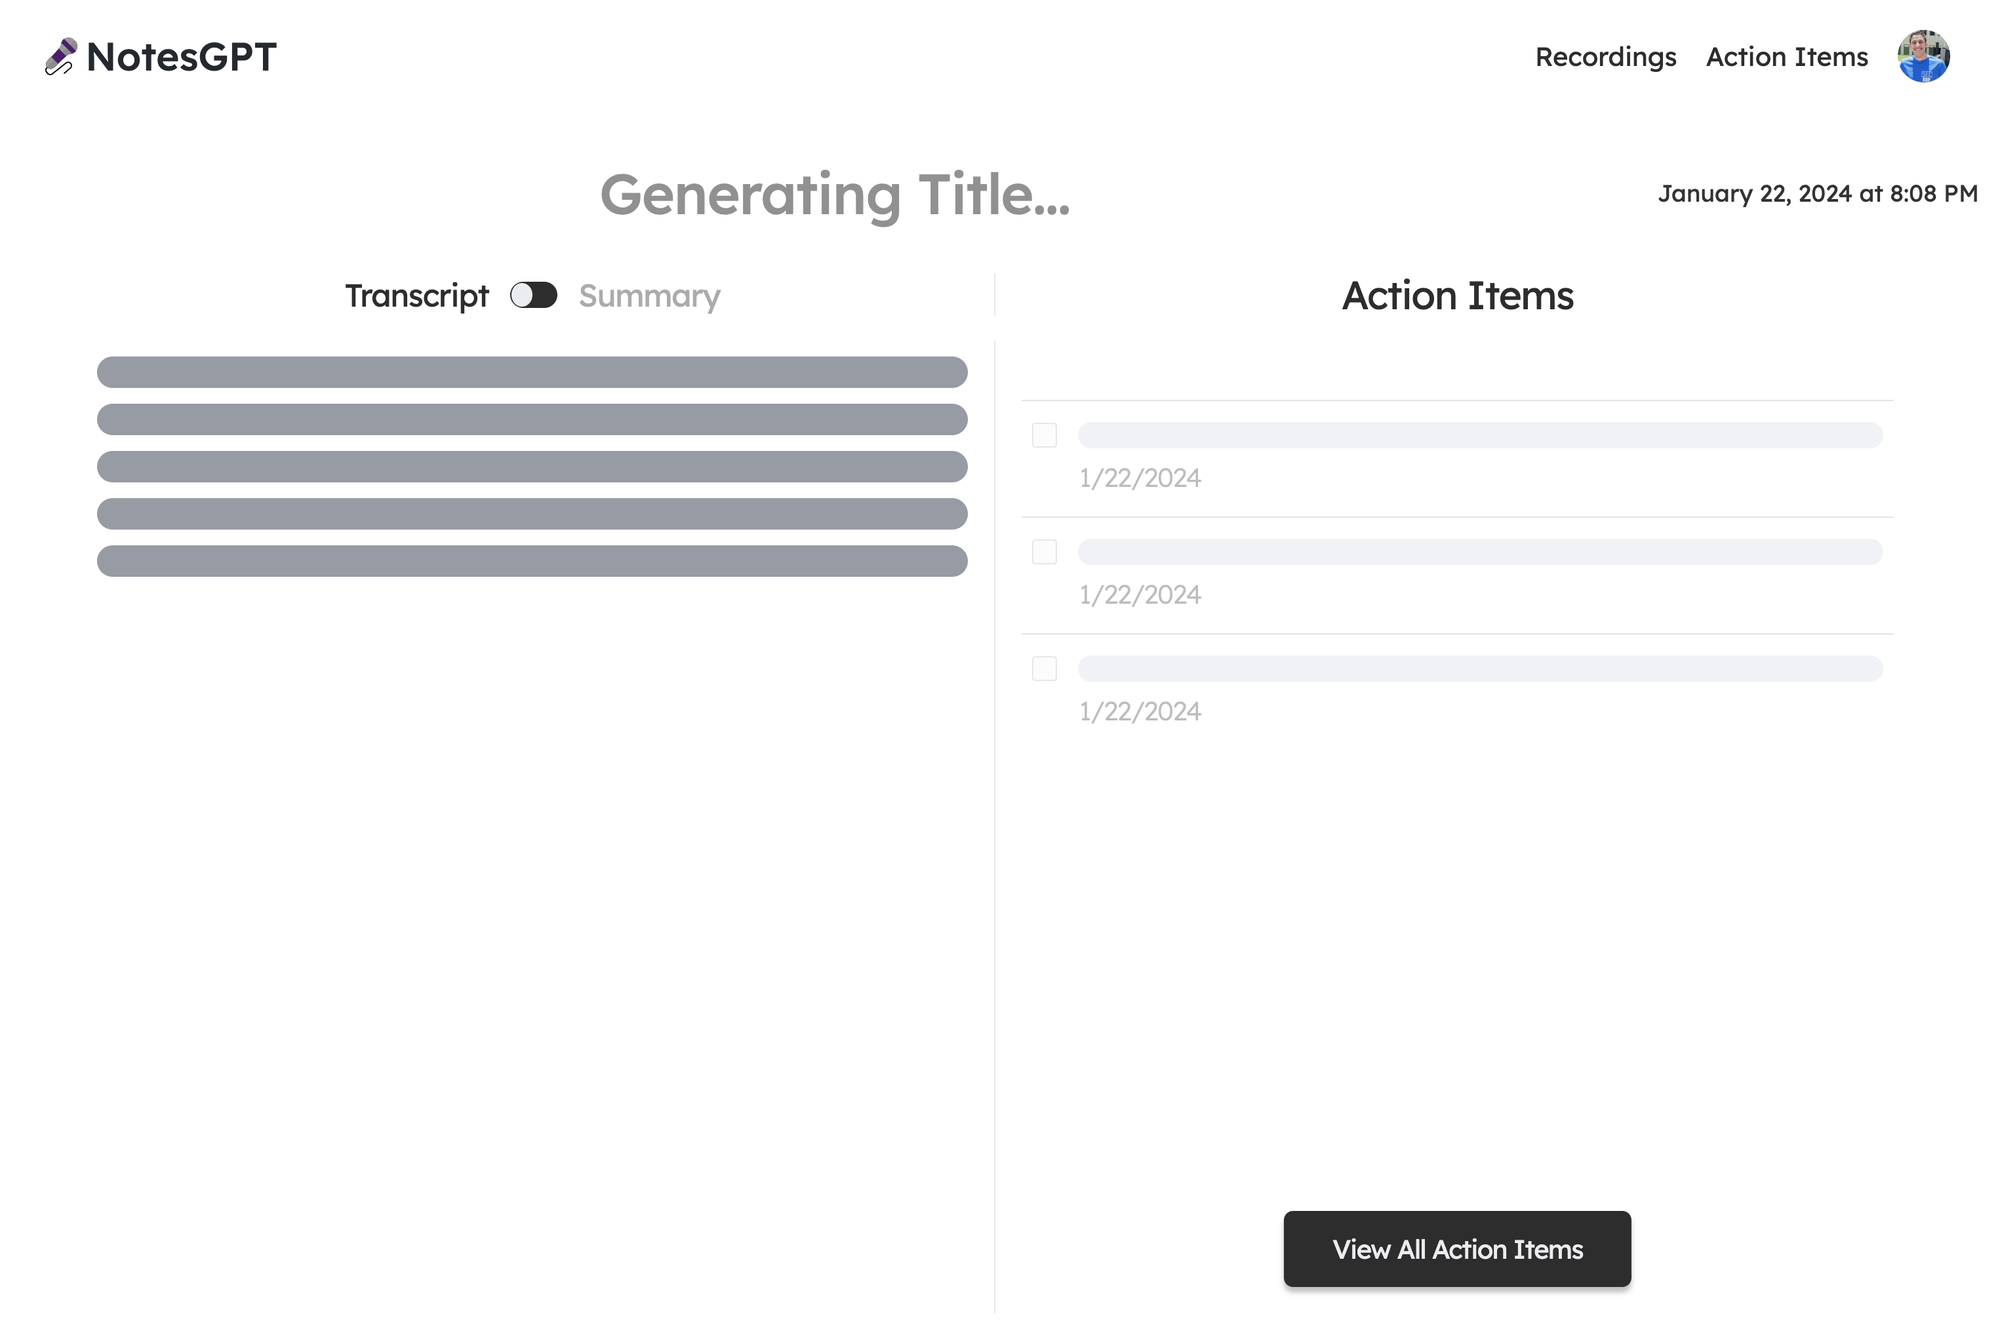
我們首先定義一個我們希望輸出所在的模式。然後,我們將此模式傳遞到 Together.ai 上託管的 Mixtral 模型中,並提示辨識語音註釋的摘要、文字記錄,並根據成績單。然後我們將所有這些資訊保存到 Convex 資料庫中。為此,我們在凸資料夾中建立一個凸動作。
// convex/together.ts

const NoteSchema = z.object({
  title: z
    .string()
    .describe('Short descriptive title of what the voice message is about'),
  summary: z
    .string()
    .describe(
      'A short summary in the first person point of view of the person recording the voice message',
    )
    .max(500),
  actionItems: z
    .array(z.string())
    .describe(
      'A list of action items from the voice note, short and to the point. Make sure all action item lists are fully resolved if they are nested',
    ),
});

export const chat = internalAction({
  args: {
    id: v.id('notes'),
    transcript: v.string(),
  },
  handler: async (ctx, args) => {
    const { transcript } = args;
      const extract = await client.chat.completions.create({
        messages: [
          {
            role: 'system',
            content:
              'The following is a transcript of a voice message. Extract a title, summary, and action items from it and answer in JSON in this format: {title: string, summary: string, actionItems: [string, string, ...]}',
          },
          { role: 'user', content: transcript },
        ],
        model: 'mistralai/Mixtral-8x7B-Instruct-v0.1',
        response_model: { schema: NoteSchema, name: 'SummarizeNotes' },
        max_tokens: 1000,
        temperature: 0.6,
        max_retries: 3,
      });
      const { title, summary, actionItems } = extract;

      await ctx.runMutation(internal.together.saveSummary, {
        id: args.id,
        summary,
        actionItems,
        title,
      });
});
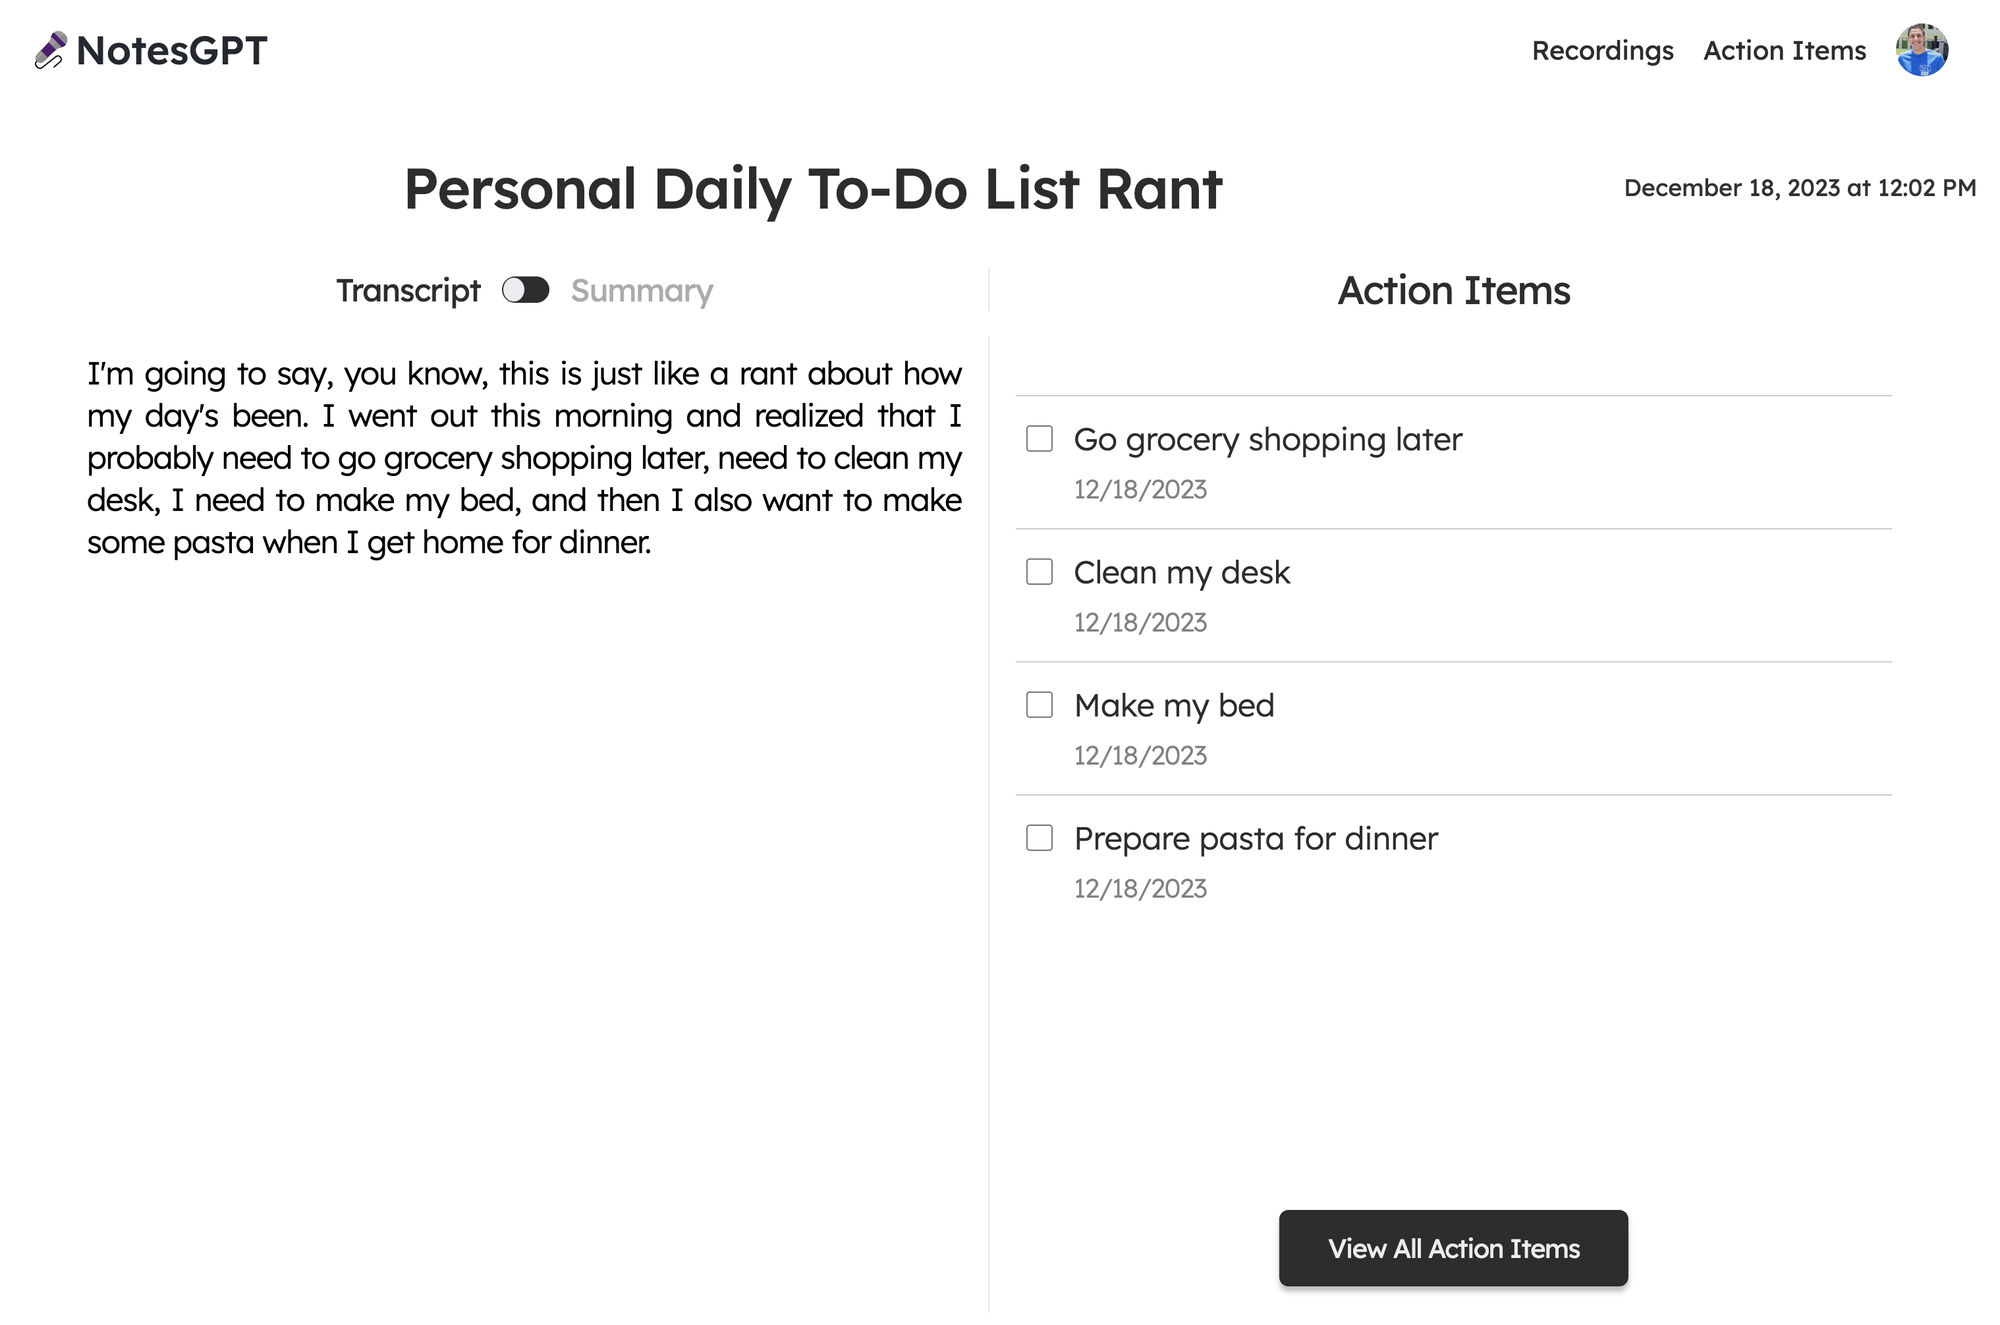
當 Together.ai 做出回應時,我們會看到最終畫面,使用者可以在左側的記錄和摘要之間切換,並查看並勾選右側的操作專案。
向量搜尋
該應用程式的最後一部分是向量搜尋。我們使用 Together.ai 嵌入來嵌入文字記錄,並使人們可以根據文字記錄的語義在儀表板中進行搜尋。
我們透過在凸資料夾中建立一個similarNotes操作來實現此目的,該操作接受使用者的搜尋查詢,為其產生嵌入,並找到要在頁面上顯示的最相似的註釋。
export const similarNotes = actionWithUser({
  args: {
    searchQuery: v.string(),
  },
  handler: async (ctx, args): Promise<SearchResult[]> => {
        // 1. Create the embedding
    const getEmbedding = await togetherai.embeddings.create({
      input: [args.searchQuery.replace('/n', ' ')],
      model: 'togethercomputer/m2-bert-80M-32k-retrieval',
    });
    const embedding = getEmbedding.data[0].embedding;

    // 2. Then search for similar notes
    const results = await ctx.vectorSearch('notes', 'by_embedding', {
      vector: embedding,
      limit: 16,
      filter: (q) => q.eq('userId', ctx.userId), // Only search my notes.
    });

    return results.map((r) => ({
      id: r._id,
      score: r._score,
    }));
  },
});
結論
就像這樣,我們建立了一個可投入生產的全端人工智慧應用程式,配備身份驗證、資料庫、儲存和 API。請隨意查看notesGPT,以從您的筆記或GitHub 儲存庫產生操作專案以供參考。如果您有任何疑問,請私訊我,我將非常樂意回答!
原文出處:https://dev.to/nutlope/how-i-built-notesgpt-a-full-stack-ai-voice-note-app-265o
1) --- 會變成分隔線(上一行必須是空白)
2) # 會變成一級標題
3) ## 會變成二級標題
4) ### 會變成三級標題
5) **粗體文字**會顯示粗體文字
6) ```當第一行與最後一行會顯示程式碼
7) 請搜尋 Markdown 語法,了解各種格式
