🔧 阿川の電商水電行
TL;博士
在本文中,您將了解如何使用 Nextjs、CopilotKit 和 OpenAI 建立人工智慧驅動的簡歷產生器應用程式。
我們將涵蓋:
-
利用 ChatGPT 撰寫履歷和求職信 📑
-
透過與履歷聊天逐漸完善你的履歷💬
-
將您的履歷和求職信匯出為 PDF 🖨️

CopilotKit:建構深度整合的應用內人工智慧聊天機器人 💬
只是簡單介紹一下我們的背景。 CopilotKit 是開源 AI 副駕駛平台。 我們可以輕鬆地將強大的 AI 聊天機器人整合到您的 React 應用程式中。完全可定制和深度集成。

{% cta https://github.com/CopilotKit/CopilotKit %} Star CopilotKit ⭐️ {% endcta %}
現在回到文章。
先決條件
要開始學習本教程,您需要在電腦上安裝以下軟體:
-
文字編輯器(例如 Visual Studio Code)
-
節點.js
-
套件管理器
使用 NextJS 建立簡歷應用程式前端
步驟 1: 開啟命令提示字元並執行下列命令。
npx create-next-app@latest第 2 步: 系統將提示您選擇一些選項,如下所示。

步驟 3: 使用您選擇的文字編輯器開啟新建立的 Nextjs 專案。然後,在命令列上執行以下命令,以使用 Tailwind CSS 安裝帶有 NextJS 的 Preline UI。依照本指南完成 Preline 設定。
npm install preline步驟4: 在resume/app/page.tsx檔案中,新增以下程式碼內容。
export default function Home() {
  return (
    <>
      <header className="flex flex-wrap sm:justify-start sm:flex-nowrap z-50 w-full bg-slate-900 bg-gradient-to-b from-violet-600/[.15] via-transparent text-sm py-3 sm:py-0 dark:bg-gray-800 dark:border-gray-700">
        <nav
          className="relative max-w-7xl w-full mx-auto px-4 sm:flex sm:items-center sm:justify-between sm:px-6 lg:px-8 "
          aria-label="Global">
          <div className="flex items-center justify-between">
            <a
              className="flex-none text-xl text-gray-200 font-semibold dark:text-white py-8"
              href="#"
              aria-label="Brand">
              ResumeBuilder
            </a>
          </div>
        </nav>
      </header>
      {/* <!-- Hero --> */}
      <div className="bg-slate-900 h-screen">
        <div className="bg-gradient-to-b from-violet-600/[.15] via-transparent">
          <div className="max-w-[85rem] mx-auto px-4 sm:px-6 lg:px-8 py-24 space-y-8">
            {/* <!-- Title --> */}
            <div className="max-w-3xl text-center mx-auto pt-10">
              <h1 className="block font-medium text-gray-200 text-4xl sm:text-5xl md:text-6xl lg:text-7xl">
                Craft A Compelling Resume With AI Resume Builder
              </h1>
            </div>
            {/* <!-- End Title --> */}

            <div className="max-w-3xl text-center mx-auto">
              <p className="text-lg text-gray-400">
                ResumeBuilder helps you create a resume that effectively
                highlights your skills and experience.
              </p>
            </div>

            {/* <!-- Buttons --> */}
            <div className="text-center">
              <a
                className="inline-flex justify-center items-center gap-x-3 text-center bg-gradient-to-tl from-blue-600 to-violet-600 shadow-lg shadow-transparent hover:shadow-blue-700/50 border border-transparent text-white text-sm font-medium rounded-full focus:outline-none focus:ring-2 focus:ring-blue-600 focus:ring-offset-2 focus:ring-offset-white py-3 px-6 dark:focus:ring-offset-gray-800"
                href="#">
                Get started
                <svg
                  className="flex-shrink-0 w-4 h-4"
                  xmlns="http://www.w3.org/2000/svg"
                  width="24"
                  height="24"
                  viewBox="0 0 24 24"
                  fill="none"
                  stroke="currentColor"
                  stroke-width="2"
                  stroke-linecap="round"
                  stroke-linejoin="round">
                  <path d="m9 18 6-6-6-6" />
                </svg>
              </a>
            </div>
            {/* <!-- End Buttons --> */}
          </div>
        </div>
      </div>
      {/* <!-- End Hero --> */}
    </>
  );
}
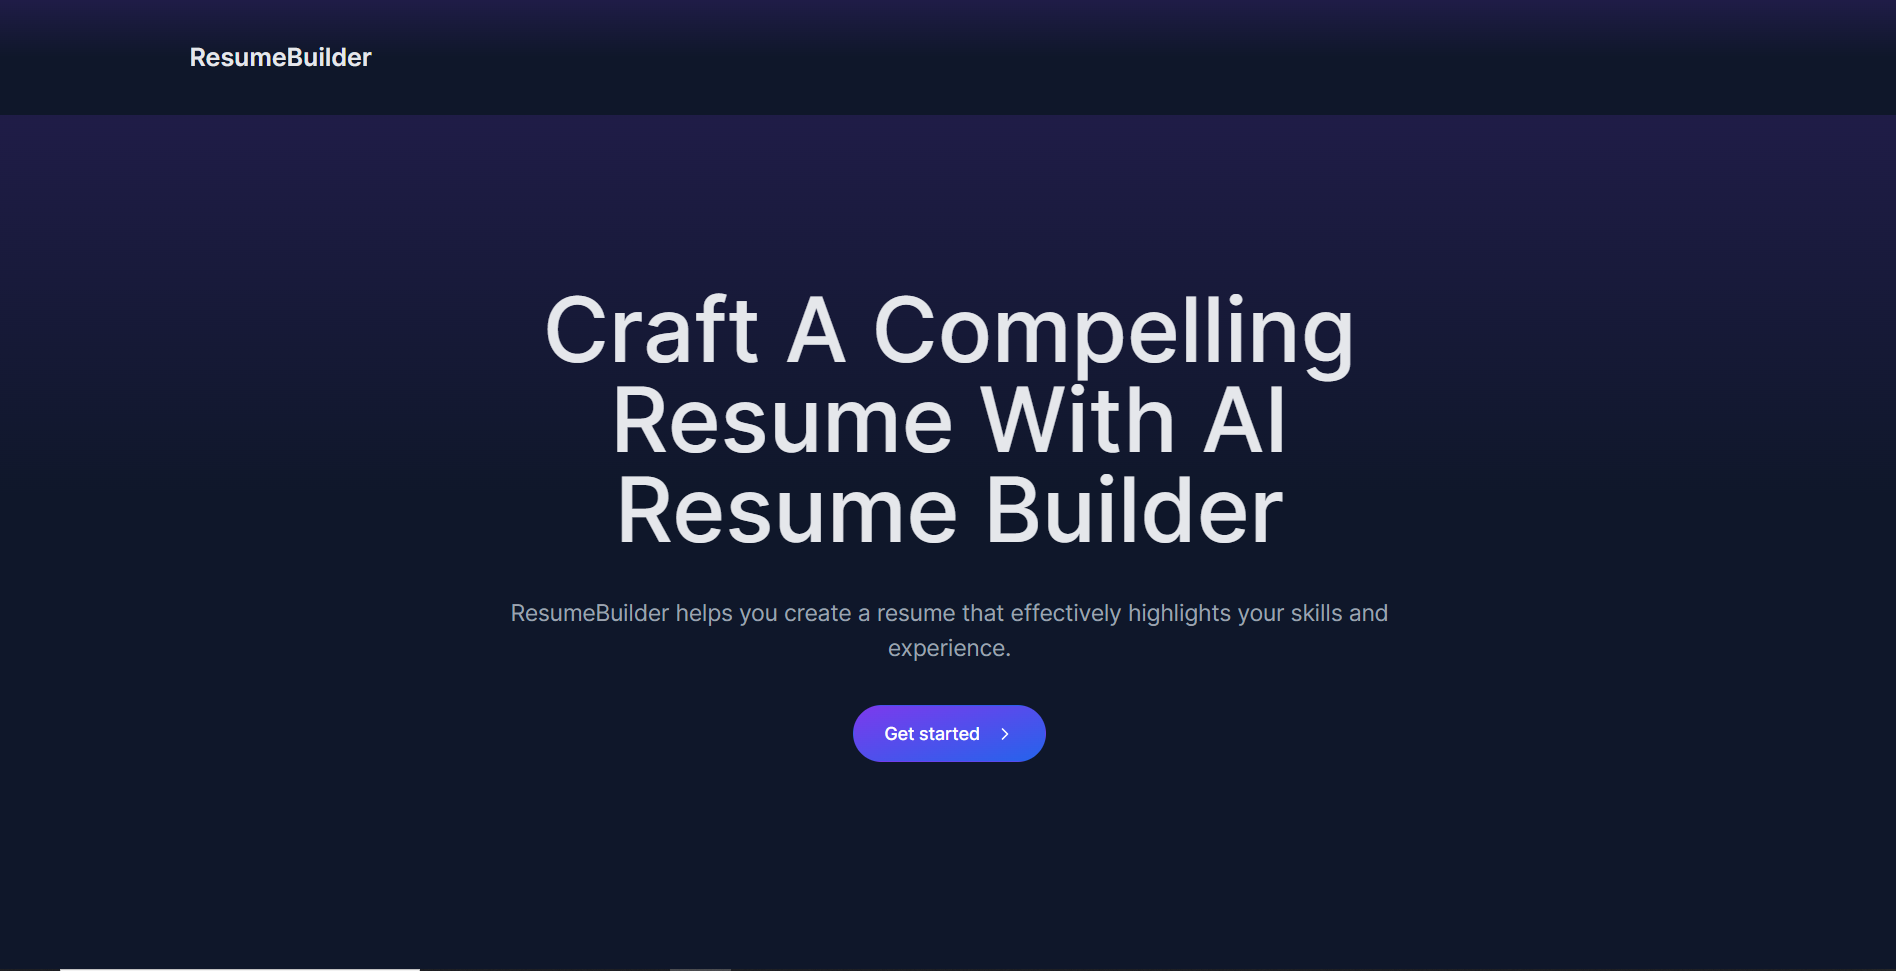
步驟 5: 在命令列上執行命令 npm run dev。導航至 http://localhost:3000/,您應該會看到新建立的 NextJS 專案。
使用 GitHub GraphQL 從 GitHub 取得履歷資料
步驟 1: 使用下列命令安裝 Axios HTTP 用戶端。
npm i axios 步驟 2: 在應用程式資料夾中,建立一個名為 API 的資料夾。然後,在 API 資料夾中建立一個名為 GitHub 的資料夾。在GitHub資料夾中建立一個名為route.ts的檔案並加入以下程式碼。
import { NextResponse } from "next/server";
import axios from "axios";

// Environment variables for GitHub API token and user details
const GITHUB_TOKEN = "Your GitHub personal access token";
const GITHUB_USERNAME = "Your GitHub account username";

// Axios instance for GitHub GraphQL API
const githubApi = axios.create({
  baseURL: "https://api.github.com/graphql",
  headers: {
    Authorization: `bearer ${GITHUB_TOKEN}`,
    "Content-Type": "application/json",
  },
});

// GraphQL query to fetch user and repository data
const getUserAndReposQuery = `
  query {
    user(login: "${GITHUB_USERNAME}") {
      name
      email
      company
      bio
      repositories(first: 3, orderBy: {field: CREATED_AT, direction: DESC}) {
        edges {
          node {
            name
            url
            description
            createdAt
            ... on Repository {
              primaryLanguage{
                name
              }
                stargazers {
                  totalCount
                }
              }
          }
        }
      }
    }
  }
`;

// API route to handle resume data fetching
export async function GET(request: any) {
  try {
    // Fetch data from GitHub
    const response = await githubApi.post("", { query: getUserAndReposQuery });
    const userData = response.data.data.user;

    // Format resume data
    const resumeData = {
      name: userData.name,
      email: userData.email,
      company: userData.company,
      bio: userData.bio,
      repositories: userData.repositories.edges.map((repo: any) => ({
        name: repo.node.name,
        url: repo.node.url,
        created: repo.node.createdAt,
        description: repo.node.description,
        language: repo.node.primaryLanguage.name,
        stars: repo.node.stargazers.totalCount,
      })),
    };

    // Return formatted resume data
    return NextResponse.json(resumeData);
  } catch (error) {
    console.error("Error fetching data from GitHub:", error);
    return NextResponse.json({ message: "Internal Server Error" });
  }
}
步驟 3: 在應用程式資料夾中,建立一個名為 Components 的資料夾。然後,在元件資料夾中建立一個名為 githubdata.tsx 的檔案並新增以下程式碼。
"use client";

import React, { useEffect, useState } from "react";
import axios from "axios";

// Resume data interface
interface ResumeData {
    name: string;
    email: string;
    company: string;
    bio: string;
    repositories: {
      name: string;
      url: string;
      created: string;
      description: string;
      language: string;
      stars: number;
    }[];
  }

  export const useGithubData = () => {
    const [resumeData, setResumeData] = useState<ResumeData | null>(null);

    // Fetch resume data from API
    useEffect(() => {
        axios
        .get("/api/github")
        .then((response) => {
            setResumeData(response.data);
        })
    }, []);

  return { resumeData, };
  }
建立求職信和履歷功能
步驟 1: 透過在命令列上執行以下命令來安裝 CopilotKit 前端軟體包。
npm i @copilotkit/react-core @copilotkit/react-ui @copilotkit/react-textarea步驟2: 在元件資料夾中建立一個名為resume.tsx 的檔案。然後在檔案頂端匯入 useMakeCopilotReadable、useMakeCopilotActionable 和 useGithubData 自訂掛鉤,如下所示。
import React, { useState } from "react";
import { useGithubData } from "./githubdata";
import {
    useMakeCopilotReadable,
    useMakeCopilotActionable,
  } from "@copilotkit/react-core";
第 3 步: 建立一個名為 CoverLetterAndResume 的元件。在元件內部,使用 useGithubData 掛鉤檢索從 GitHub 取得的資料。然後,宣告一個名為 createCoverLetterAndResume 的狀態變數和一個用於更新它的名為 setCreateCoverLetterAndResume 的函數。使用包含 letter 和 resume 兩個屬性的物件初始化 useState,如下所示。
export const CoverLetterAndResume = () => {
    const {resumeData } = useGithubData();
    const [createCoverLetterAndResume, setCreateCoverLetterAndResume] = useState({
      letter: "",
      resume: ""
    });
}
步驟 4: 使用 useMakeCopilotReadable 掛鉤將從 GitHub 取得的資料新增為應用程式內聊天機器人的上下文。
useMakeCopilotReadable(JSON.stringify(resumeData));步驟 5: 使用 useMakeCopilotActionable 掛鉤設定一個名為 createCoverLetterAndResume 的操作,其中包含描述和實作函數,該函數使用提供的求職信和簡歷更新 createCoverLetterAndResume 狀態,如下所示。
useMakeCopilotActionable(
    {
      name: "createCoverLetterAndResume",
      description:
        "Create a cover letter and resume for a software developer job application.",
      argumentAnnotations: [
        {
          name: "coverLetterMarkdown",
          type: "string",
          description:
            "Markdown text for a cover letter to introduce yourself and briefly summarize your professional background as a software developer.",
          required: true,
        },
        {
          name: "resumeMarkdown",
          type: "string",
          description:
            "Markdown text for a resume that displays your professional background and relevant skills.",
          required: true,
        },
      ],
      implementation: async (coverLetterMarkdown, resumeMarkdown) => {
        setCreateCoverLetterAndResume((prevState) => ({
          ...prevState,
          letter: coverLetterMarkdown,
          resume: resumeMarkdown,
        }));
      },
    },
    []
  );
步驟 6: 在 CoverLetterAndResume 元件外部,建立一個名為 CoverLetterResume 的元件,用於在 Web 應用程式 UI 上顯示求職信和履歷。
type CoverLetterResumeProps = {
  letter: string;
  resume: string;
};

const CoverLetterResume = ({ letter, resume }: CoverLetterResumeProps) => {
  return (
    <div className="px-4 sm:px-6 lg:px-8 bg-slate-50 py-4">
      <div className="sm:flex sm:items-center">
        <div className="sm:flex-auto">
          <h1 className="text-3xl font-semibold leading-6 text-gray-900">
            ResumeBuilder
          </h1>
        </div>
      </div>
      {/* Cover Letter Start */}
      <div className="mt-8 flow-root bg-slate-200">
        <div className="-mx-4 -my-2 overflow-x-auto sm:-mx-6 lg:-mx-8">
          <div className="inline-block min-w-full py-2 align-middle sm:px-6 lg:px-8">
            <div>
              <h2 className="text-lg font-semibold leading-6 text-gray-900 mb-4 p-2">
                Cover Letter
              </h2>
              <div className="min-w-full divide-y divide-gray-300 p-2">
                {/* <Thead /> */}
                <div className="divide-y divide-gray-200 bg-white p-2">
                  <ReactMarkdown>{letter}</ReactMarkdown>
                </div>
              </div>
            </div>
          </div>
        </div>
      </div>
      {/* Cover Letter End */}
      {/* Cover Letter Preview Start */}
      <div className="mt-8 flow-root bg-slate-200">
        <div className="-mx-4 -my-2 overflow-x-auto sm:-mx-6 lg:-mx-8">
          <div className="inline-block min-w-full py-2 align-middle sm:px-6 lg:px-8">
            <div>
              <h2 className="text-lg font-semibold leading-6 text-gray-900 mb-4 p-2">
                Cover Letter Preview
              </h2>
              <div className="min-w-full divide-y divide-gray-300">
                {/* <Thead /> */}
                <div className="divide-y divide-gray-200 bg-white">
                  <textarea
                    className="p-2"
                    id="coverLetter"
                    value={letter}
                    rows={20}
                    cols={113}
                  />
                </div>
              </div>
            </div>
          </div>
        </div>
      </div>
      {/* Cover Letter Preview End */}
      {/* Resume Start */}
      <div className="mt-8 flow-root bg-slate-200">
        <div className="-mx-4 -my-2 overflow-x-auto sm:-mx-6 lg:-mx-8">
          <div className="inline-block min-w-full py-2 align-middle sm:px-6 lg:px-8">
            <h2 className="text-lg font-semibold leading-6 text-gray-900 mb-4 p-2">
              Resume
            </h2>
            <div className="min-w-full divide-y divide-gray-300">
              {/* <Thead /> */}
              <div className="divide-y divide-gray-200 bg-white">
                <ReactMarkdown>{resume}</ReactMarkdown>
              </div>
            </div>
          </div>
        </div>
      </div>
      {/* Resume End */}
      {/* Cover Letter Preview Start */}
      <div className="mt-8 flow-root bg-slate-200">
        <div className="-mx-4 -my-2 overflow-x-auto sm:-mx-6 lg:-mx-8">
          <div className="inline-block min-w-full py-2 align-middle sm:px-6 lg:px-8">
            <div>
              <h2 className="text-lg font-semibold leading-6 text-gray-900 mb-4 p-2">
                Cover Letter Preview
              </h2>
              <div className="min-w-full divide-y divide-gray-300">
                {/* <Thead /> */}
                <div className="divide-y divide-gray-200 bg-white">
                  {/* {letter} */}
                  {/* <ReactMarkdown>{letter}</ReactMarkdown> */}
                  <textarea
                    className="p-2"
                    id="resume"
                    value={resume}
                    rows={20}
                    cols={113}
                  />
                </div>
              </div>
            </div>
          </div>
        </div>
      </div>
      {/* Cover Letter Preview End */}
    </div>
  );
};第7步:然後返回CoverLetterAndResume元件內的CoverLetterResume元件,如下圖所示。
return <CoverLetterResume {...createCoverLetterAndResume}/>;第8步: 在應用程式資料夾中建立一個名為resumeandcoverletter的資料夾。然後,建立一個名為 page.tsx 的檔案並新增以下程式碼。
"use client";
import { CopilotProvider } from "@copilotkit/react-core";
import { CopilotSidebarUIProvider } from "@copilotkit/react-ui";
import "@copilotkit/react-textarea/styles.css"; // also import this if you want to use the CopilotTextarea component
import "@copilotkit/react-ui/styles.css"; // also import this if you want to use the chatbot component
import React, { useEffect, useState } from "react";
import { CoverLetterAndResume } from "../components/resume";

function buildResume () {
  return (
    <CopilotProvider chatApiEndpoint="./../api/copilotkit/chat">
      <CopilotSidebarUIProvider>
        <CoverLetterAndResume />
      </CopilotSidebarUIProvider>
    </CopilotProvider>
  );
}

export default buildResume;
步驟 9: 使用下列指令安裝 openai 軟體套件。
npm i openai步驟 10: 在應用程式資料夾中,建立一個名為 API 的資料夾。然後,在 API 資料夾中建立一個名為 copilotkit 的資料夾。在 copilotkit 資料夾中,建立一個名為 chat 的資料夾。然後,在聊天資料夾中建立一個名為route.ts的檔案並新增以下程式碼。
import OpenAI from "openai";

const openai = new OpenAI({
  apiKey: "Your ChatGPT API key",
});

export const runtime = "edge";

export async function POST(req: Request): Promise<Response> {
  try {
    const forwardedProps = await req.json();

    const stream = openai.beta.chat.completions
      .stream({
        model: "gpt-4-1106-preview",
        ...forwardedProps,
        stream: true,
      })
      .toReadableStream();

    return new Response(stream);
  } catch (error: any) {
    return new Response("", { status: 500, statusText: error.error.message });
  }
}
步驟 11: 在應用程式資料夾中的 page.tsx 檔案中,在「開始」按鈕中新增一個連結,用於導航到簡歷和求職信頁面,如下所示。
<div className="text-center">
              <Link
                className="inline-flex justify-center items-center gap-x-3 text-center bg-gradient-to-tl from-blue-600 to-violet-600 shadow-lg shadow-transparent hover:shadow-blue-700/50 border border-transparent text-white text-sm font-medium rounded-full focus:outline-none focus:ring-2 focus:ring-blue-600 focus:ring-offset-2 focus:ring-offset-white py-3 px-6 dark:focus:ring-offset-gray-800"
                href="/resumeandcoverletter">
                Get started
                <svg
                  className="flex-shrink-0 w-4 h-4"
                  xmlns="http://www.w3.org/2000/svg"
                  width="24"
                  height="24"
                  viewBox="0 0 24 24"
                  fill="none"
                  stroke="currentColor"
                  stroke-width="2"
                  stroke-linecap="round"
                  stroke-linejoin="round">
                  <path d="m9 18 6-6-6-6" />
                </svg>
              </Link>
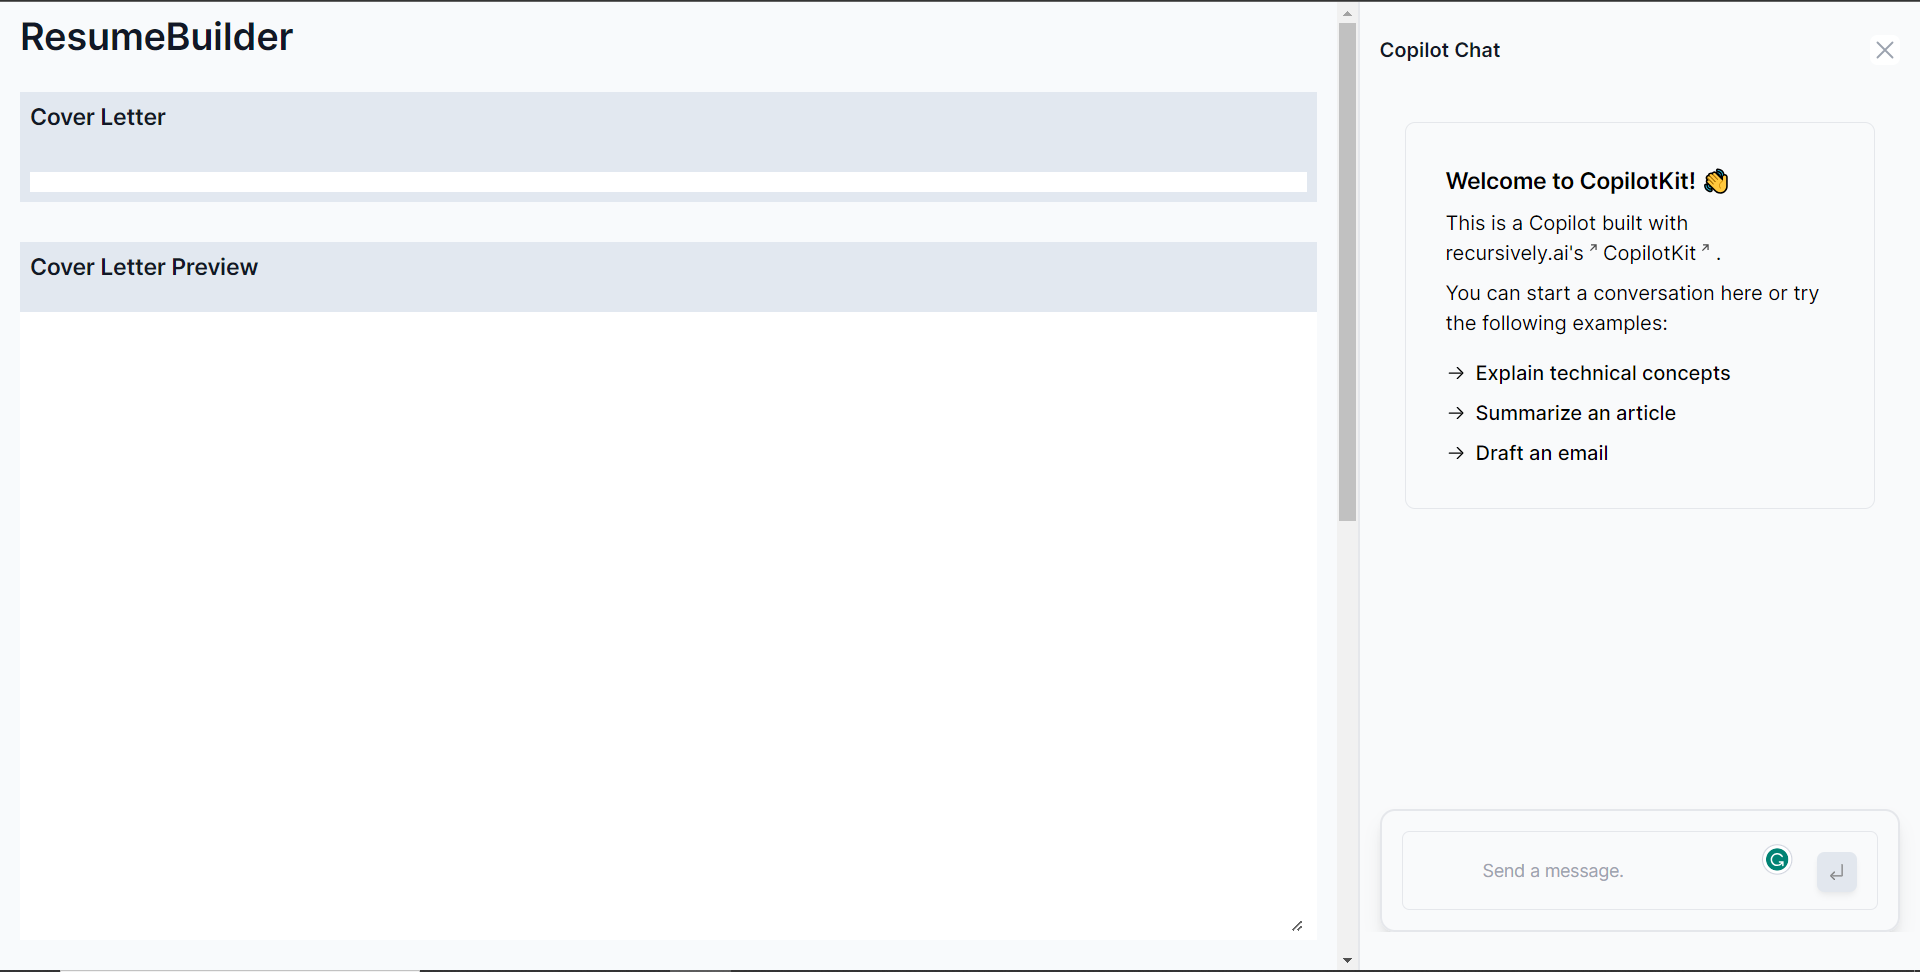
</div>第12步:導航至http://localhost:3000/,點擊「開始」按鈕,您將被重新導向到與聊天機器人整合的履歷和求職信頁面,如下所示。
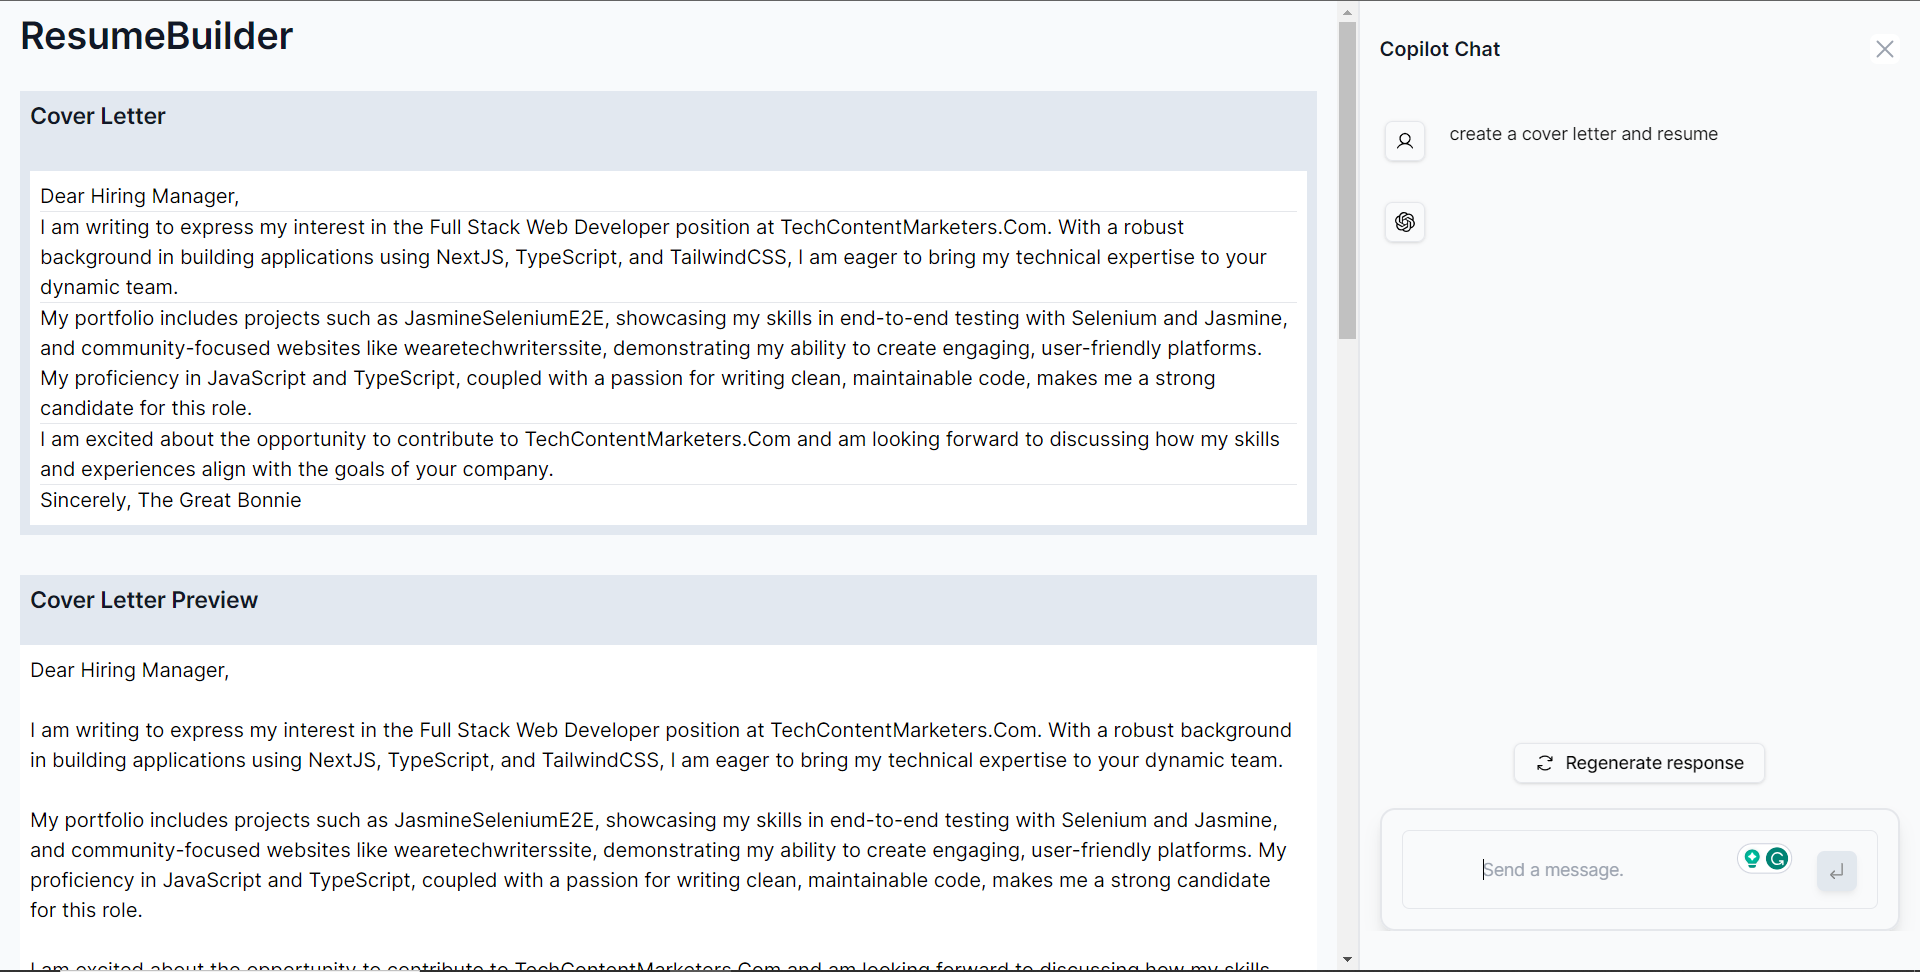
第 13 步: 向右側的聊天機器人發出諸如“建立求職信和簡歷”之類的提示。聊天機器人將開始產生回應,完成後,它將在頁面左側顯示產生的求職信和履歷,如下所示。
建立更新求職信功能
第 1 步: 宣告一個名為 updateLetter 的變數,用於保存先前產生的求職信。
const updateLetter = createCoverLetterAndResume.letter;步驟 2: 使用 useMakeCopilotReadable 掛鉤新增 updateLetter 作為應用程式內聊天機器人的上下文。
useMakeCopilotReadable("Cover Letter:" + JSON.stringify(updateLetter));步驟 3: 使用 useMakeCopilotActionable 掛鉤設定一個名為 updateCoverLetter 的操作,其中包含描述和實作函數,該函數使用提供的求職信更新來更新 createCoverLetterAndResume 狀態,如下所示。
useMakeCopilotActionable(
    {
      name: "updateCoverLetter",
      description:
        "Update cover letter for a software developer job application.",
      argumentAnnotations: [
        {
          name: "updateCoverLetterMarkdown",
          type: "string",
          description:
            "Update markdown text for a cover letter to introduce yourself and briefly summarize your professional background as a software developer.",
          required: true,
        },
        {
          name: "resumeMarkdown",
          type: "string",
          description:
            "Markdown text for a resume that displays your professional background and relevant skills.",
          required: true,
        },
      ],
      implementation: async (updatedCoverLetterMarkdown) => {
        setCreateCoverLetterAndResume((prevState) => ({
          ...prevState,
          letter: updatedCoverLetterMarkdown,
        }));
      },
    },
    []
  );
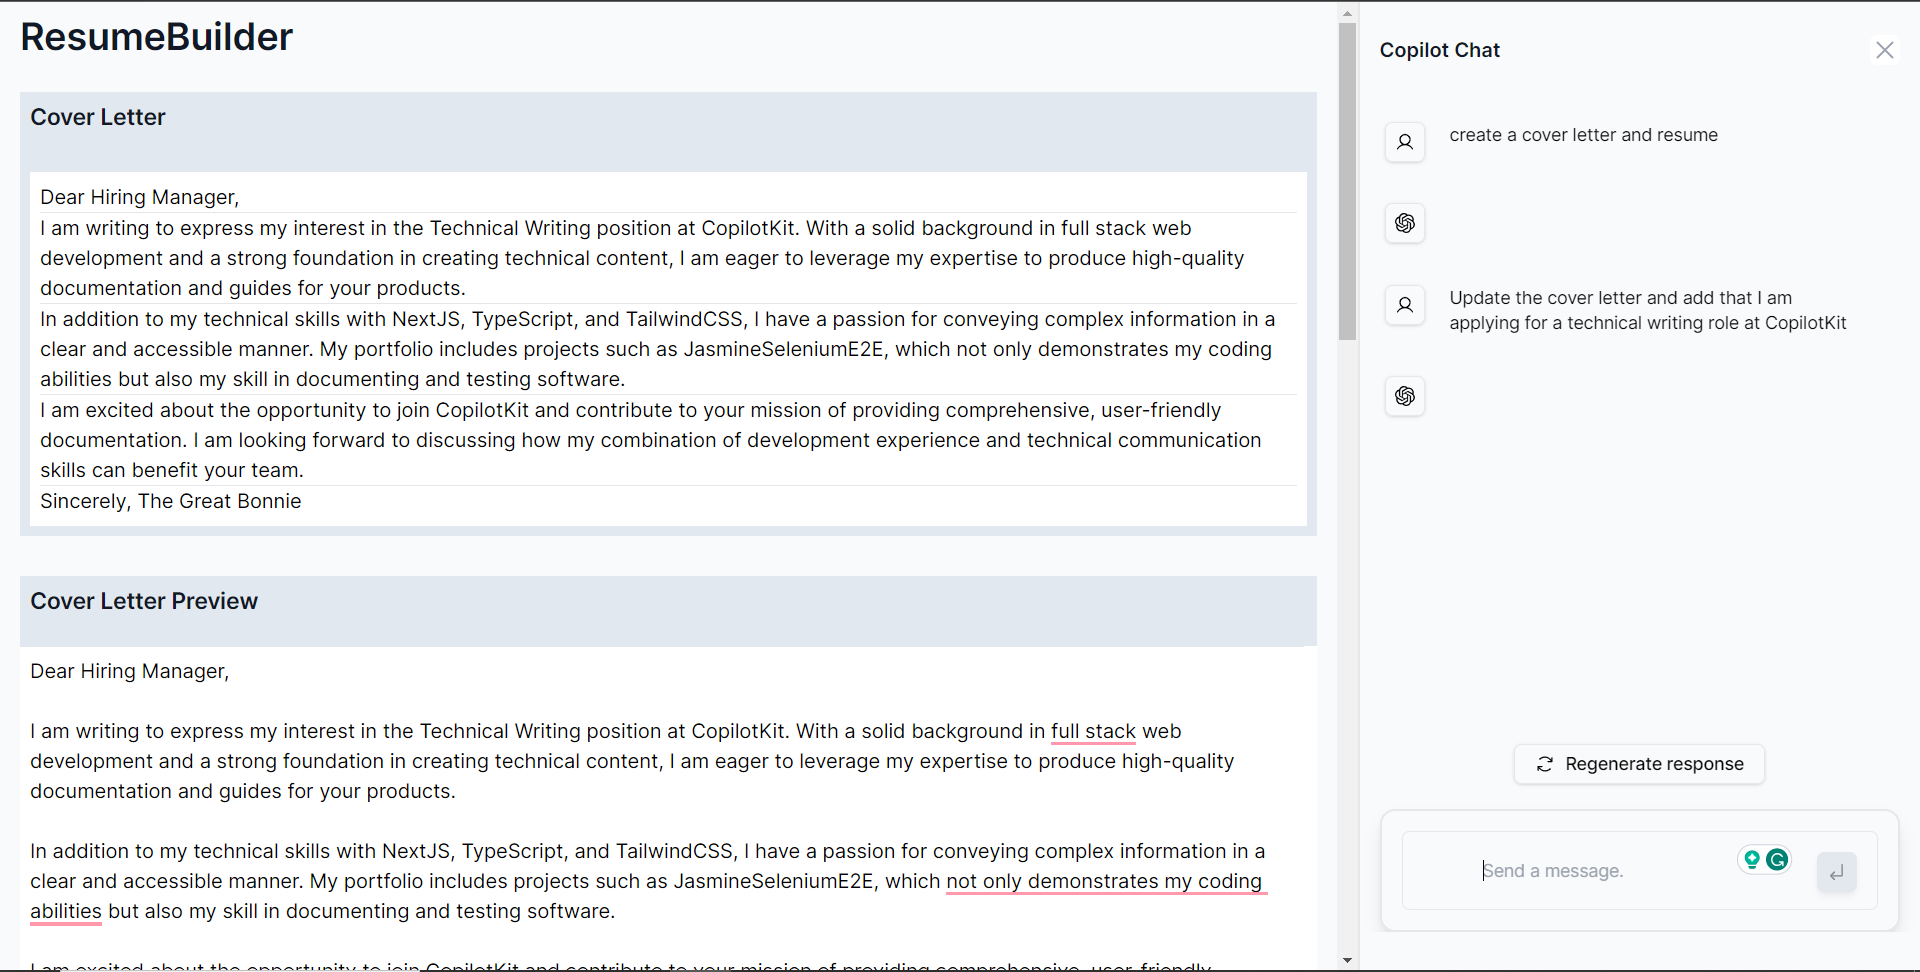
步驟 4: 給聊天機器人一個提示,例如“更新求職信並加入我正在申請 CopilotKit 的技術寫作職位。”如下圖所示,您可以看到求職信已更新。
建立更新復原功能
第 1 步: 宣告一個名為 updateResume 的變數,用於保存先前產生的求職信。
const updateResume = createCoverLetterAndResume.resume;步驟 2: 使用 useMakeCopilotReadable 掛鉤新增 updateResume 作為應用程式內聊天機器人的上下文。
useMakeCopilotReadable("Resume:" + JSON.stringify(updateResume));步驟 3: 使用 useMakeCopilotActionable 掛鉤設定一個名為 updateResume 的操作,其中包含描述和實作函數,該函數使用提供的求職信更新來更新 createCoverLetterAndResume 狀態,如下所示。
useMakeCopilotActionable(
    {
      name: "updateResume",
      description: "Update resume for a software developer job application.",
      argumentAnnotations: [
        {
          name: "updateResumeMarkdown",
          type: "string",
          description:
            "Update markdown text for a resume that displays your professional background and relevant skills.",
          required: true,
        },
      ],
      implementation: async (updatedResumeMarkdown) => {
        setCreateCoverLetterAndResume((prevState) => ({
          ...prevState,
          resume: updatedResumeMarkdown,
        }));
      },
    },
    []
  );
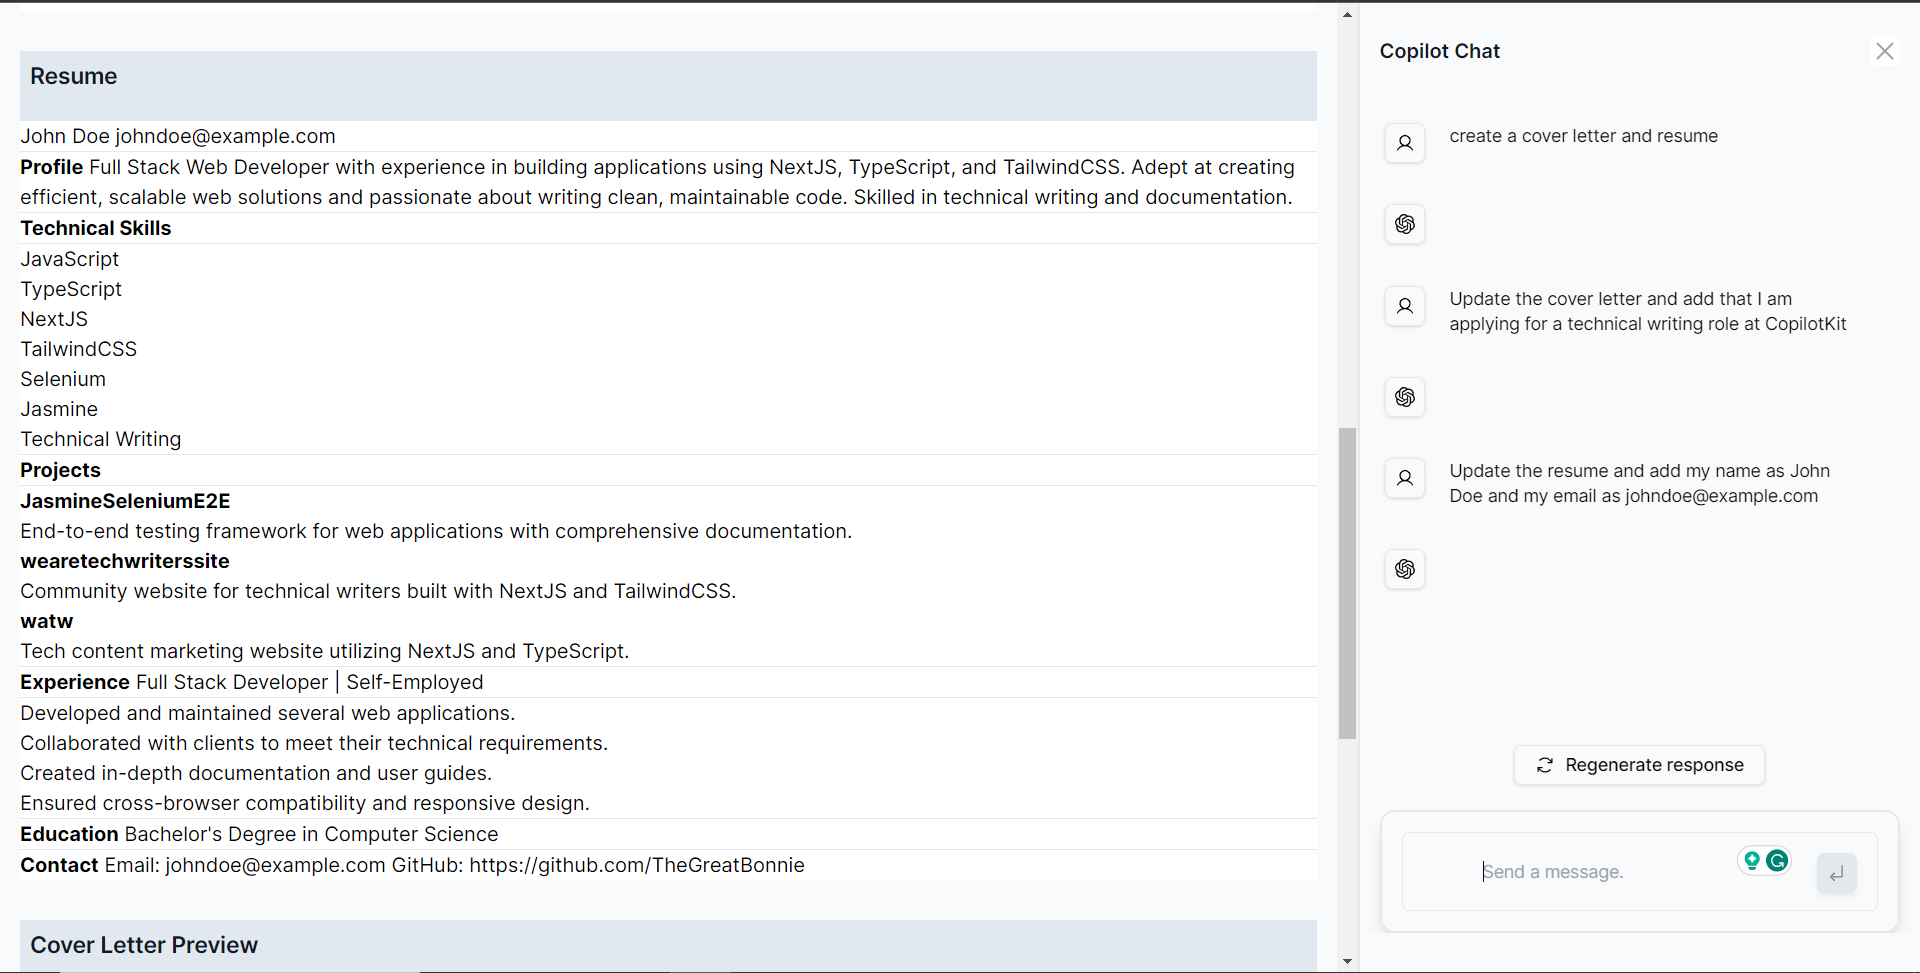
第 4 步: 向聊天機器人發出提示,例如「更新履歷並將我的姓名加入為 John Doe,將我的電子郵件加入為 [email protected]」。如下圖所示,可以看到履歷已更新。
建立下載求職信和履歷表 Pdfs 功能
第 1 步: 安裝 jsPDF,一個用 JavaScript 產生 PDF 的函式庫。
npm i jspdf步驟 2: 在 CoverLetterAndResume 元件內,使用 useMakeCopilotActionable 掛鉤設定一個名為“downloadPdfs”的操作,其中包含描述和實現函數,該函數使用 jsPDF 庫為求職信和簡歷建立 PDF,然後保存它們, 如下所示。
function addTextToPDF(doc: any, text: any, x: any, y: any, maxWidth: any) {
    // Split the text into lines
    const lines = doc.splitTextToSize(text, maxWidth);

    // Add lines to the document
    doc.text(lines, x, y);
  }

  useMakeCopilotActionable(
    {
      name: "downloadPdfs",
      description: "Download pdfs of the cover letter and resume.",
      argumentAnnotations: [
        {
          name: "coverLetterPdfA4",
          type: "string",
          description:
            "A Pdf that contains the cover letter converted from markdown text and fits A4 paper.",
          required: true,
        },
        {
          name: "resumePdfA4Paper",
          type: "string",
          description:
            "A Pdf that contains the resume converted from markdown text and fits A4 paper.",
          required: true,
        },
      ],
      implementation: async () => {

          const marginLeft = 10;
          const marginTop = 10;
          const maxWidth = 180;

          const coverLetterDoc = new jsPDF();
          addTextToPDF(
            coverLetterDoc,
            createCoverLetterAndResume.letter,
            marginLeft,
            marginTop,
            maxWidth
          );
          coverLetterDoc.save("coverLetter.pdf");

          const resumeDoc = new jsPDF();
          addTextToPDF(
            resumeDoc,
            createCoverLetterAndResume.resume,
            marginLeft,
            marginTop,
            maxWidth
          );
          resumeDoc.save("resume.pdf");
      },
    },
    [createCoverLetterAndResume]
  );
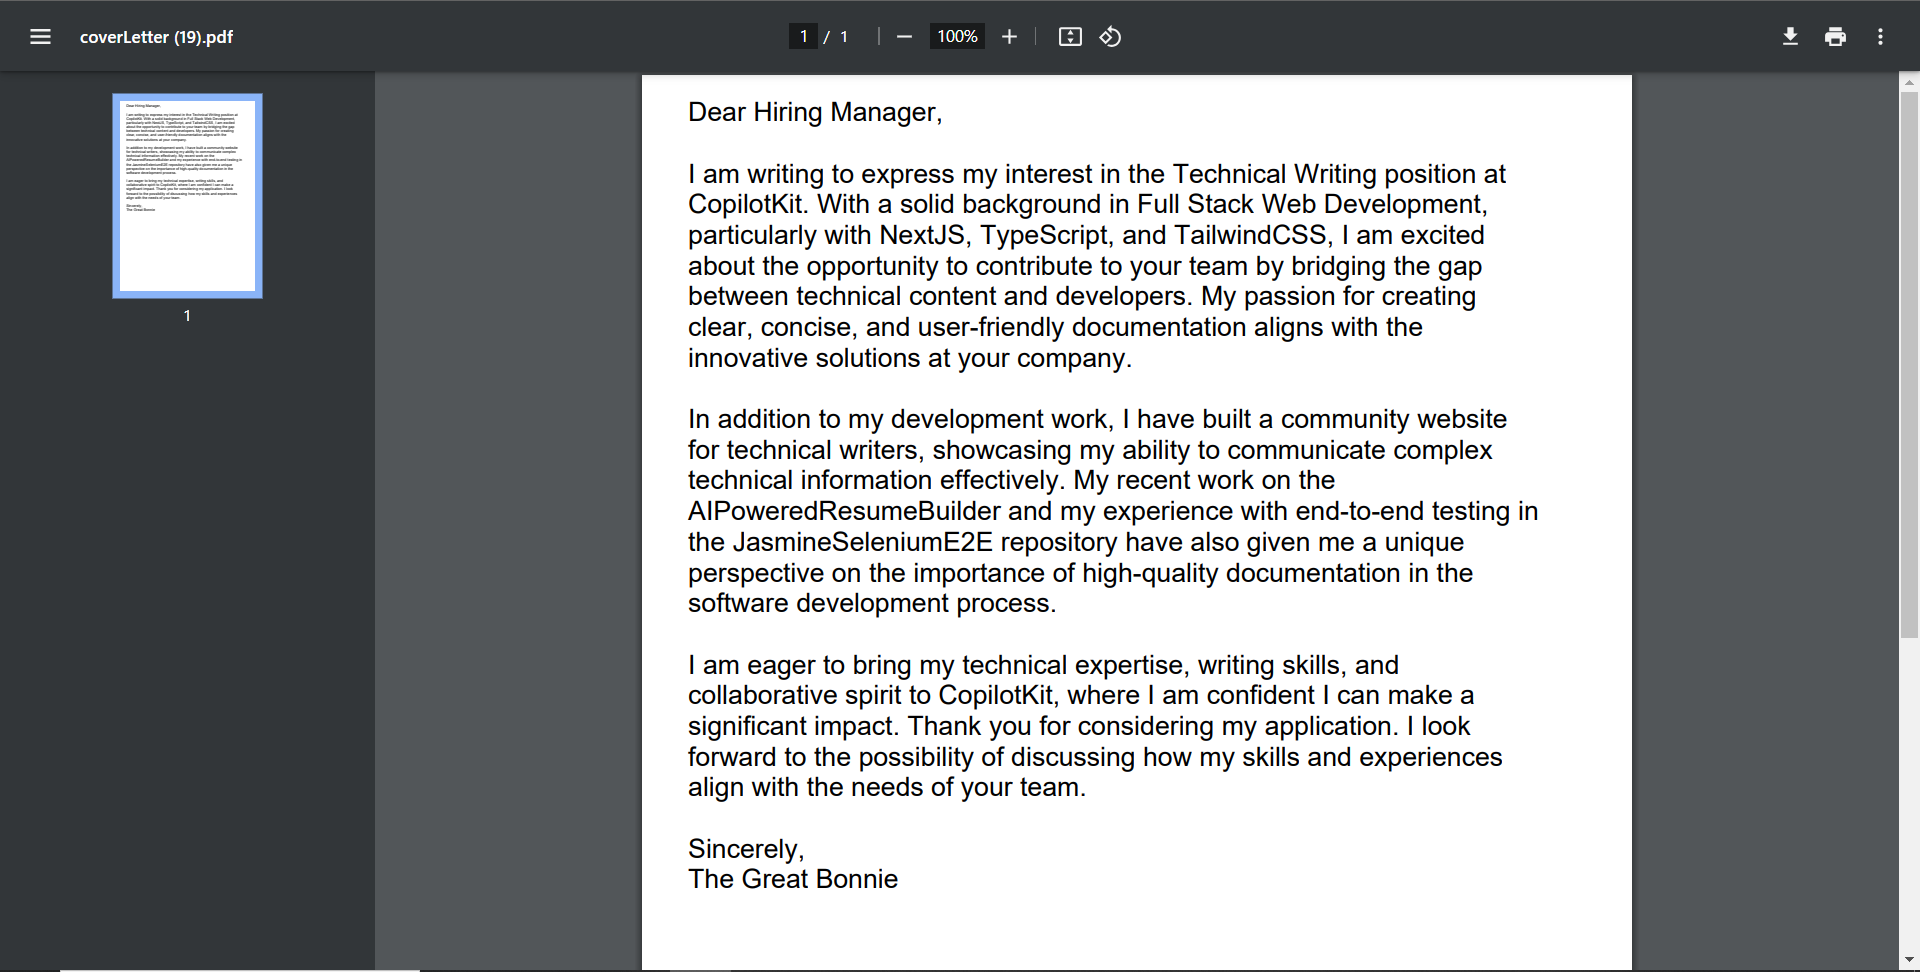
第 3 步: 返回網頁應用程式中的聊天機器人,並提示「下載求職信和簡歷的 pdf 檔案」。 PDF 將開始下載,如果您開啟 coverLetter.pdf,您應該會看到產生的求職信,如下所示。
結論
總而言之,您可以使用 CopilotKit 建立應用內 AI 聊天機器人,該機器人可以查看當前應用程式狀態並在應用程式內執行操作。 AI 聊天機器人可以與您的應用程式前端、後端和第三方服務對話。
對於完整的源程式碼:
https://github.com/TheGreatBonnie/AIPoweredResumeBuilder
原文出處:https://dev.to/copilotkit/how-to-build-the-with-nextjs-openai-1mhb
1) --- 會變成分隔線(上一行必須是空白)
2) # 會變成一級標題
3) ## 會變成二級標題
4) ### 會變成三級標題
5) **粗體文字**會顯示粗體文字
6) ```當第一行與最後一行會顯示程式碼
7) 請搜尋 Markdown 語法,了解各種格式
