🔧 阿川の電商水電行

人工智慧代理正在接近現實世界的應用,但大多數開發人員仍然發現建立一個人工智慧代理很複雜。
因此,我們將建立兩個實用代理:使用即時網路搜尋起草 LinkedIn/X 內容的Post Generator和檢查 GitHub 儲存庫並建立結構化報告的Stack Analyzer 。
我們將使用 Next.js 前端、FastAPI 後端、 CopilotKit 、 LangGraph工作流程和Google Gemini 。您將找到架構、概念、提示和實用內容。
讓我們來建構它。
{% cta https://go.copilotkit.ai/copilot %} 看看 CopilotKit GitHub ⭐️ {% endcta %}
-
我們正在建構什麼?
我們正在使用全端設定來建立兩個實用代理:
✅貼文產生器代理程式:根據即時 Google 搜尋結果建立 LinkedIn/X 貼文。
以下是用戶生成帖子時將發生的簡化呼叫序列。
[User types prompt]
     ↓
Next.js UI (CopilotChat)
     ↓ (POST /api/copilotkit → GraphQL)
Next.js API route (copilotkit)
     ↓ (forwards)
FastAPI backend (/copilotkit)
     ↓ (LangGraph workflow)
Post Generator graph nodes
     ↓ (calls → Google Gemini + web search)
Streaming responses & tool‑logs
     ↓
Frontend UI renders chat + tool logs + final postcards
✅ Stack Analyzer Agent :分析公共 GitHub 儲存庫(元資料、README、程式碼清單)並推斷其堆疊。
以下是使用者分析 repo 技術堆疊時將發生的情況的簡化呼叫序列。
[User pastes GitHub URL]
     ↓
Next.js UI (/stack‑analyzer)
     ↓
/api/copilotkit → FastAPI
     ↓
Stack Analysis graph nodes (gather_context → analyze → end)
     ↓
Streaming tool‑logs & structured analysis cards
這就是我們要建造的東西!
{% 嵌入 https://youtu.be/DJMkP28TdBQ %}
-
技術棧和架構
從本質上講,我們將使用這個堆疊來建立這些代理程式。
-
Next.js 15 :基於 TypeScript 的前端框架
-
CopilotKit SDK :將代理程式嵌入 UI(
@copilotkit/react-core、@copilotkit/runtime、@copilotkit/react-ui) -
LangGraph(StateGraphs) :用於建立有狀態代理工作流程
-
Google Gemini 透過
google-genai(官方 SDK):用於推理和文字生成的 LLM -
LangChain 的 Google 轉接器:將 Gemini 連結到 LangChain 工作流程
-
Pydantic :用於結構化 JSON 工具輸出
這是該專案的高層架構。
{% 嵌入 https://gist.github.com/Anmol-Baranwal/8a833b19cc6a876296ca8df11731cbeb %}
專案結構
我們的目錄如下所示。 agent agent將包含託管 LangGraph 代理的 Python/FastAPI 後端, frontend目錄託管 Next.js 15 應用程式,包括 UI 路由、API 路由和共用元件。
.
├── assets/
├── frontend/                ← Next.js 15 App (UI + API routes)
│   ├── app/
│   │   ├── layout.tsx       ← Wraps the app with `<CopilotKit>`
│   │   ├── post-generator/  ← Post Generator UI routes
│   │   ├── stack-analyzer/  ← Stack Analyzer UI routes
│   │   └── api/             ← Next.js API routes used by the UI
│   │   ...
│   ├── contexts/LayoutContext.tsx
│   ├── wrapper.tsx            ← CopilotKit provider wrapper
│   ├── components/          ← Shared UI components
│   │   ...
├── agent/                   ← FastAPI + LangGraph “agents” (Python)
│   ├── main.py              ← Registers agents and exposes them via FastAPI
│   ├── posts_generator_agent.py  ← Workflow for content creation agent
│   ├── stack_agent.py       ← Workflow for repo analysis agent
│   ├── prompts.py           ← Shared prompt templates
│   ├── agent.py             ← Core agent classes and helpers
│   ...
└── README.md ← Project overview and setup instructions 如果您想自行探索,可以參考GitHub 倉庫copilot-kit-deepmind.vercel.app上的部署。我將在接下來的章節中介紹所有關鍵概念的實作。
最簡單的方法是克隆 repo,但我正在解釋如何從頭開始建立它。
git clone https://github.com/CopilotKit/CopilotKit-Deepmind.git
cd copilotkit-deepmind
新增必要的 API 金鑰。
在agent和frontend目錄下建立一個.env文件,並將你的Gemini API Key加入到該文件中。我已附上文件連結,方便查看。
兩個目錄的命名約定相同。
GOOGLE_API_KEY=<<your-gemini-key-here>>
-
前端
讓我們開始建立前端。我再次附上前端的專案結構,以便您更輕鬆地理解整個佈局。
frontend/
├── app/
│   ├── page.tsx               ← landing redirect
│   ├── post‑generator/page.tsx← Post Generator UI
│   ├── stack‑analyzer/page.tsx← Stack Analyzer UI
│   ├── api/
│   │   ├── copilotkit/route.ts← CopilotKit router endpoint
│   │   └── chat/route.ts      ← OpenAI research demo
│   ├── contexts/LayoutContext.tsx
│   ├── wrapper.tsx            ← CopilotKit provider wrapper
│   └── prompts/prompts.ts     ← UI prompt templates
├── components/…                ← shared UI components (tool‑logs, cards, posts…)
└── layout.tsx, globals.css, etc.
如果您沒有前端,可以使用 TypeScript 建立新的 Next.js 應用,然後安裝 Copilotkit 套件。複製的儲存庫中已經包含該套件,因此您只需在frontend目錄下使用pnpm i安裝依賴項即可。
// creates a nextjs app with typescript
npx create-next-app@latest frontend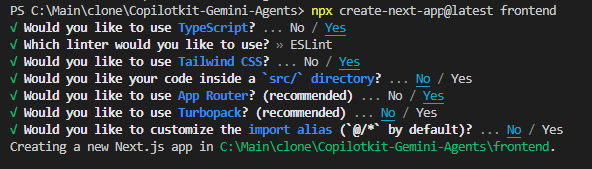
步驟 1:CopilotKit 提供者和佈局
安裝必要的 CopilotKit 套件。
pnpm install copilotkit @copilotkit/react-core @copilotkit/react-ui @copilotkit/runtime @copilotkit/runtime-client-gql-
copilotkit是一個底層 SDK,捆綁了 Python 的後端實用程式。用於連接狀態圖、發送狀態更新以及與 Gemini 通訊。 -
@copilotkit/react-core提供核心上下文和邏輯,將您的 React 應用程式與 CopilotKit 後端和 MCP 伺服器連接起來。 -
@copilotkit/react-ui提供現成的 UI 元件,例如<CopilotChat />以快速建立 AI 聊天或助理介面。 -
@copilotkit/runtime是伺服器端執行時庫。它允許您聲明代理,將其連接到 LangGraph 工作流程,並透過 API 端點公開它們。 -
@copilotkit/runtime-client-gql是 GraphQL 傳輸的客戶端。 Next.js API 路由在背景使用它來代理瀏覽器和後端之間的連線。

<CopilotKit>元件必須包覆應用程式中支援 Copilot 的部分。大多數情況下,最好將其放置在整個應用程式的周圍,例如在layout.tsx中。
根佈局將所有內容包裝在 LayoutProvider 和 CopilotKit 用戶端包裝器中:
import "./globals.css"
import { LayoutProvider } from "./contexts/LayoutContext"
import Wrapper from "./wrapper"

export default function RootLayout({ children }) {
  return (
    <html lang="en">
      <LayoutProvider>
        <Wrapper>
          <body>{children}</body>
        </Wrapper>
      </LayoutProvider>
    </html>
  )
}
LayoutProvider( frontend\app\contexts\LayoutContext.tsx )為佈局狀態設定一個 React 上下文,並使用usePathname()根據目前路由( /post-generator或其他)選擇活動代理程式來偵測路徑。
"use client"

import { usePathname } from "next/navigation"
import React, { createContext, useContext, useState } from "react"

interface LayoutState { … }

interface LayoutContextType {
  layoutState: LayoutState
  updateLayout: (updates: Partial<LayoutState>) => void
}

const LayoutContext = createContext<LayoutContextType | undefined>(undefined)

const defaultLayoutState = { agent: "post_generation_agent", … }
export function LayoutProvider({ children }) {
  const pathname = usePathname()

  const [layoutState, setLayoutState] = useState({
    ...defaultLayoutState,
    agent: (pathname == "/post-generator"
      ? "post_generation_agent"
      : "stack_analysis_agent"),
  })

  const updateLayout = (updates) =>
    setLayoutState((prev) => ({ ...prev, ...updates }))

  return (
    <LayoutContext.Provider value={{ layoutState, updateLayout }}>
      {children}
    </LayoutContext.Provider>
  )
}

export function useLayout() {
  return useContext(LayoutContext)
}
...
以下是 CopilotKit 用戶端包裝器 ( frontend\app\wrapper.tsx ) 的程式碼。每個頁面都在其中渲染,以便 UI 元件知道要呼叫哪個代理程式以及在何處呼叫。
"use client"
import { CopilotKit } from "@copilotkit/react-core";
import { useLayout } from "./contexts/LayoutContext";

export default function Wrapper({ children }: { children: React.ReactNode }) {
  const { layoutState } = useLayout()
  return (
    <CopilotKit runtimeUrl="/api/copilotkit" agent={layoutState.agent}>
      {children}
    </CopilotKit>
  )
}
步驟 2:Next.js API 路由:代理程式到 FastAPI
Next.js API 路由app/api/copilotkit/route.ts上可用的 CopilotKit Runtime 端點僅將所有代理/圖形呼叫代理到 FastAPI 後端。
我們引入了一個瘦代理,而不是直接從瀏覽器呼叫 Python 代理。
為什麼?
-
避免 CORS 和跨域問題
-
讓 Next.js 處理身份驗證、特定於環境的路由和捆綁
-
適用於 React UI 的統一 GraphQL/REST 形狀(沒有 Python 有效負載洩漏到客戶端)
在這個例子中,我們只使用了一個代理,但如果您希望執行多個 LangGraph 代理,請查看官方的多代理指南。
import { CopilotRuntime, copilotRuntimeNextJSAppRouterEndpoint, GoogleGenerativeAIAdapter } from "@copilotkit/runtime";
import { NextRequest } from "next/server";

// You can use any service adapter here for multi-agent support.
const serviceAdapter = new GoogleGenerativeAIAdapter();
const runtime = new CopilotRuntime({
  remoteEndpoints: [{ url: process.env.NEXT_PUBLIC_LANGGRAPH_URL || "http://localhost:8000/copilotkit" }],
});

export const POST = async (req: NextRequest) => {
  const { handleRequest } = copilotRuntimeNextJSAppRouterEndpoint({
    runtime,
    serviceAdapter,
    endpoint: "/api/copilotkit",
  });
  return handleRequest(req);
};
下面對上面的程式碼做一個簡單的解釋:
-
CopilotRuntime:將支援 Copilot 的 UI 與代理端點連接起來的內部引擎。 -
GoogleGenerativeAIAdapter:此適配器將 Google Gemini 插入作為代理工作流程的底層 LLM。 -
remoteEndpoints:指定代理邏輯所在的位置(例如後端服務的端點)。 -
copilotRuntimeNextJSAppRouterEndpoint:一個輔助函數,用於包裝傳入的req並將其路由到 Copilot Runtime 進行代理處理。它傳回一個handleRequest方法。
步驟 3:自動重新導向至貼文產生器
最後一件事是,每當有人點擊frontend\app\page.tsx上的 home /路由時,重定向到/post-generator路由。
"use client"
import "@copilotkit/react-ui/styles.css";
import { useEffect } from "react";
import { useRouter } from "next/navigation";
import { useLayout } from "./contexts/LayoutContext";
export default function GoogleDeepMindChatUI() {
const router = useRouter();
const { updateLayout } = useLayout();
useEffect(() => {
updateLayout({ agent: "post_generation_agent" });
router.push("/post-generator");
}, [router]);
return (
<></>
)
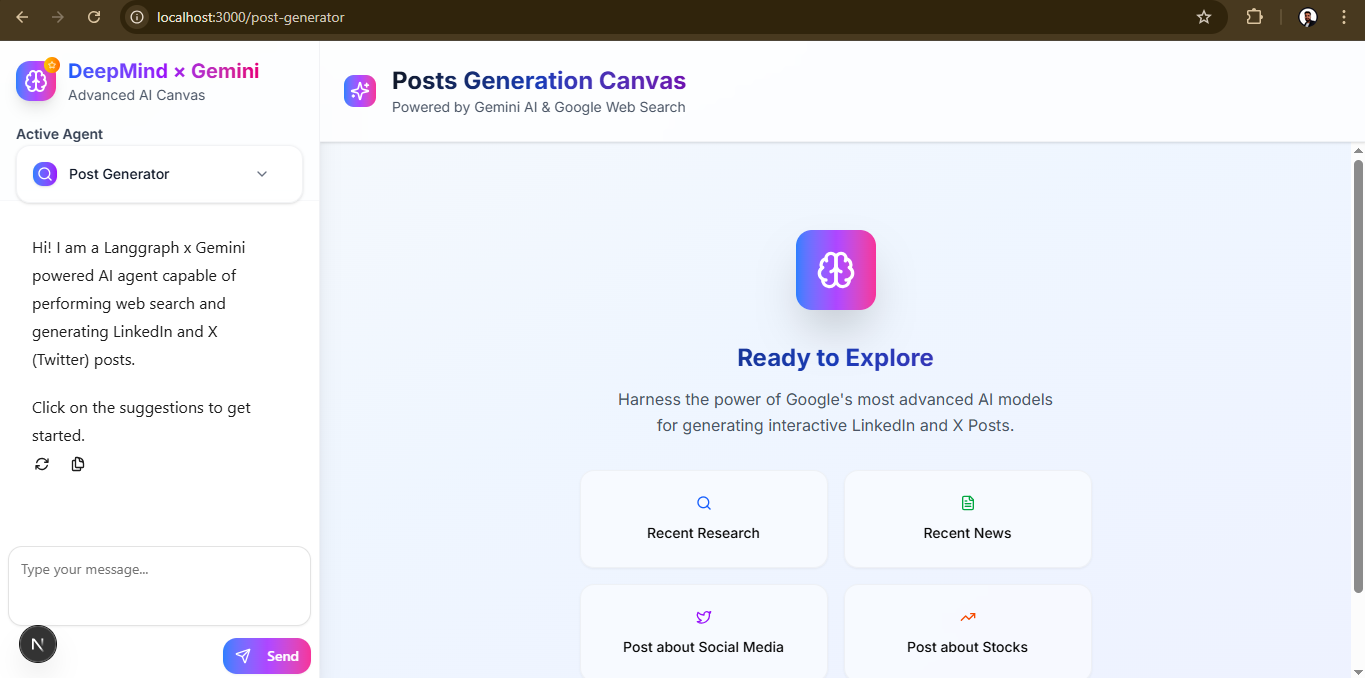
}步驟 4:發布生成器代理程式 UI
讓我們使用 CopilotChat UI( <CopilotChat> )、建議和自訂操作來建立貼文產生器的前端( frontend/app/post-generator/page.tsx )以呈現最終貼文。
實際程式碼庫還包含 UI 附加功能,例如代理切換、快速操作和即時工具日誌。為了清晰起見,我在這裡對它們進行了精簡,因此請查看程式碼以獲取完整的 UI 。
import { CopilotChat, useCopilotChatSuggestions } from "@copilotkit/react-ui"
import { initialPrompt, suggestionPrompt } from "../prompts/prompts"

useCopilotChatSuggestions({
  available: "enabled",
  instructions: suggestionPrompt,
})

return (
  <div className="…">
    {/* …sidebar & header omitted… */}

    {/* Chat canvas */}
    <CopilotChat
      className="h-full p-2"
      labels={{ initial: initialPrompt }}
    />

    {/* Post previews (rendered after generation) */}
    <div className="flex gap-6 mt-6">
      <LinkedInPostPreview title="Generated Title" content="Generated LinkedIn content…" />
      <XPostPreview title="Generated Title" content="Generated X content…" />
    </div>
  </div>
)系統和建議提示來自app/prompts/prompts.ts 。
export const initialPrompt  = "Hi! I am a Langgraph x Gemini-powered AI agent capable of performing web search and generating LinkedIn and X (Twitter) posts.\n\n Click on the suggestions to get started."

export const suggestionPrompt = "Generate suggestions that revolve around the creation/generation of LinkedIn and X (Twitter) posts on any specific topics."
在完整的 UI 程式碼中,我們也使用useCopilotAction定義了一個generate_post操作。這使得代理能夠返回結構化的 LinkedIn/X 帖子,然後將其渲染成預覽。為了簡單起見,以下是精簡的程式碼。
import { useCopilotAction } from "@copilotkit/react-core"
import { XPostCompact, LinkedInPostCompact } from "@/components/ui/posts"

useCopilotAction({
  name: "generate_post",
  description: "Render a LinkedIn and X post",
  parameters: {
    tweet: { title: "string", content: "string" },
    linkedIn: { title: "string", content: "string" }
  },
  render: ({ args }) => (
    <>
      {args.tweet?.content && (
        <XPostCompact title={args.tweet.title} content={args.tweet.content} />
      )}
      {args.linkedIn?.content && (
        <LinkedInPostCompact title={args.linkedIn.title} content={args.linkedIn.content} />
      )}
    </>
  )
})為了進行除錯,我們還使用useCoAgentStateRender渲染tool_logs ,它在代理程式工作時顯示即時工具呼叫。
import { useCoAgentStateRender } from "@copilotkit/react-core"
import { ToolLogs } from "@/components/ui/tool-logs"

useCoAgentStateRender({
  name: "post_generation_agent",
  render: (state) => (
    <ToolLogs logs={state?.state?.tool_logs || []} />
  )
})
這是程式碼的最終輸出。
我不會介紹Badge 、 textarea 、 x-post 、 linkedin-post和button等基本元件的程式碼。您可以在frontend/components/ui倉庫中查看所有元件。
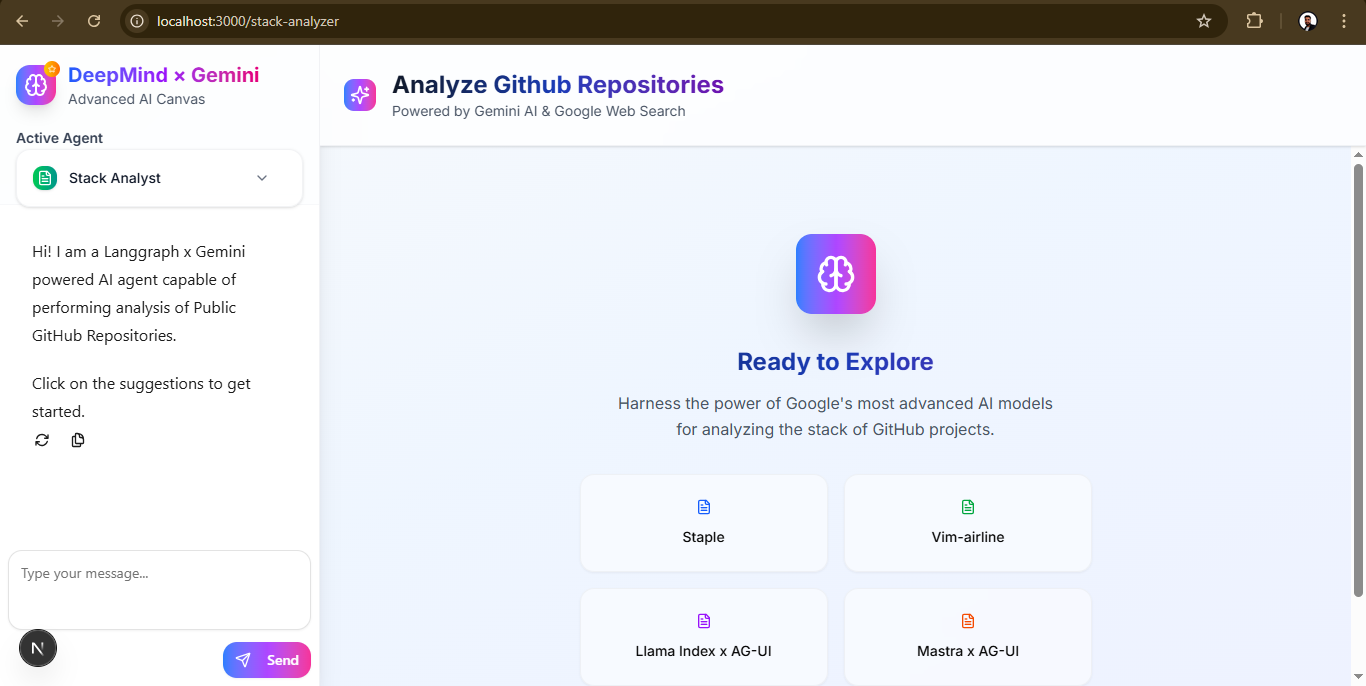
步驟 5:Stack Analyzer 代理 UI
堆疊分析頁面 ( frontend/app/stack-analyzer/page.tsx ) 掛載到stack_analysis_agent並渲染一組卡片。與之前一樣,我精簡了 UI 的一些額外功能,例如代理切換、快速操作和即時工具日誌。您可以查看程式碼來查看完整的 UI 。
這與我們之前所做的相同,所以我跳過了程式碼的解釋。
import { CopilotChat, useCopilotChatSuggestions } from "@copilotkit/react-ui"
import { initialPrompt1, suggestionPrompt1 } from "../prompts/prompts"
import { StackAnalysisCards } from "@/components/ui/stack-analysis-cards"
import { ToolLogs } from "@/components/ui/tool-logs"

useCoAgentStateRender({
  name: "stack_analysis_agent",
  render: (state) => <ToolLogs logs={state?.state?.tool_logs || []} />,
})

useCopilotChatSuggestions({
  available: "enabled",
  instructions: suggestionPrompt1,
})

return (
  <div className="…">
    {/* …sidebar omitted… */}

    <CopilotChat
      className="h-full p-2"
      labels={{ initial: initialPrompt1 }}
    />

    {state.show_cards && <StackAnalysisCards analysis={state.analysis} />}
  </div>
)系統和建議提示來自app/prompts/prompts.ts 。
export const initialPrompt1 = 'Hi! I am a Langgraph x Gemini-powered AI agent capable of performing analysis of Public GitHub Repositories.\n\n Click on the suggestions to get started.'

export const suggestionPrompt1 = `Generate suggestions that revolve around the analysis of Public GitHub Repositories. Only provide suggestions from these public URLs:
[
  "https://github.com/freeCodeCamp/freeCodeCamp",
  "https://github.com/EbookFoundation/free-programming-books",
  "https://github.com/jwasham/coding-interview-university",
  "https://github.com/kamranahmedse/developer-roadmap",
  "https://github.com/public-apis/public-apis",
  "https://github.com/donnemartin/system-design-primer",
  "https://github.com/facebook/react",
  "https://github.com/tensorflow/tensorflow",
  "https://github.com/trekhleb/javascript-algorithms",
  "https://github.com/twbs/bootstrap",
  "https://github.com/vinta/awesome-python",
  "https://github.com/ohmyzsh/ohmyzsh",
  "https://github.com/tldr-pages/tldr",
  "https://github.com/ytdl-org/youtube-dl",
  "https://github.com/taigaio/taiga-back"
]`
這是程式碼的最終輸出。
我不會介紹Badge 、 textarea 、 stack-analysis-cards和button等基本元件的程式碼。您可以在frontend/components/ui倉庫中查看所有元件。
4.後端代理服務(FastAPI + CopilotKit SDK)
/agent目錄下有一個 FastAPI 伺服器,它揭露了兩個基於 LangGraph 的代理程式。以下是後端的專案結構,以便您更輕鬆地了解整個佈局。
agent/
├── main.py                  ← FastAPI + CopilotKitSDK wiring
├── posts_generator_agent.py ← “Post Generator” graph & nodes
├── stack_agent.py           ← “Stack Analysis” graph & nodes
├── prompts.py               ← system prompts
├── pyproject.toml
└── agent.py ← Core agent classes and helpers後端使用Poetry而不是requirements.txt 。如果您的系統中沒有 Poetry,請安裝它。
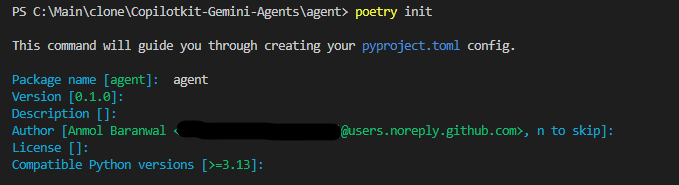
pip install poetry然後,在您的agent目錄中,使用以下命令初始化新的 Poetry 專案。
cd agent
poetry init # creates a pyproject.toml here (answer prompts or skip with --no-interaction)這將產生一個新的pyproject.toml和poetry.lock ,這意味著您的後端現在擁有自己的虛擬環境。
目前,大多數 AI 生態系統(LangChain、LangGraph、Google SDKs)僅支援最高 Python 3.12,因此請務必使用以下命令告訴poetry env use python3.12 use python3.12 。
然後安裝相依性。
poetry add fastapi uvicorn copilotkit langgraph langchain langchain-google-genai google-genai pydantic python-dotenv
-
fastapi:用於服務代理端點(/copilotkit)的 Web 框架。 -
uvicorn:用於在生產或開發模式下執行 FastAPI 的 ASGI 伺服器。 -
copilotkit:將 LangGraph 工作流程與 CopilotKit 狀態流程整合在一起的 CopilotKit Python SDK。 -
langgraph:用於將代理程式定義為節點圖(聊天、分析、結束)的狀態機框架。 -
langchain:提供節點內部使用的核心抽象(RunnableConfig、訊息類型等)。 -
langchain-google-genai:Google Gemini 模型的 LangChain 包裝器(例如ChatGoogleGenerativeAI)。 -
google-genai:Gemini 的官方 Google 用戶端 SDK,用於較低層級的呼叫(例如genai.Client)。 -
pydantic:模式驗證(StructuredStackAnalysis)以強制執行嚴格的 JSON 輸出。 -
python-dotenv→ 載入.env檔案用於管理 API 金鑰(如GOOGLE_API_KEY)。
現在執行以下命令來產生一個固定精確版本的poetry.lock檔案。
poetry install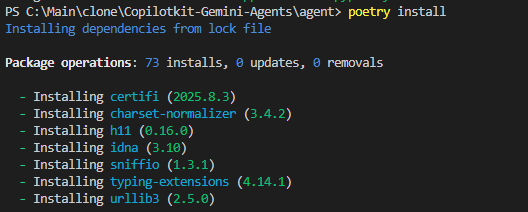
FastAPI 伺服器和 SDK 設定
所有代理程式都位於單一 FastAPI 伺服器( agent/main.py )後面,該伺服器將它們安裝在/copilotkit上。
from fastapi import FastAPI
import uvicorn
from copilotkit.integrations.fastapi import add_fastapi_endpoint
from copilotkit import CopilotKitSDK, LangGraphAgent
from posts_generator_agent import post_generation_graph
from stack_agent import stack_analysis_graph

app = FastAPI()

sdk = CopilotKitSDK(
    agents=[
        LangGraphAgent(
            name="post_generation_agent",
            description="An agent that can help with the generation of LinkedIn posts and X posts.",
            graph=post_generation_graph,
        ),
        LangGraphAgent(
            name="stack_analysis_agent",
            description="Analyze a GitHub repository URL to infer purpose and tech stack (frontend, backend, DB, infra).",
            graph=stack_analysis_graph,
        ),
    ]
)

add_fastapi_endpoint(app, sdk, "/copilotkit")

# A simple endpoint to confirm the server is alive
@app.get("/healthz")
def health():
    return {"status": "ok"}

def main():
    """Run the uvicorn server."""
    port = int(os.getenv("PORT", "8000"))
    uvicorn.run(
        "main:app",
        host="0.0.0.0",
        port=port,
        reload=True,
    )

if __name__ == "__main__":
    main()
以下是幕後發生的事情:
-
它啟動了一個 FastAPI 伺服器
-
在 CopilotKit 註冊兩個 LangGraph 代理程式(
post_generation_agent、stack_analysis_agent) -
將它們暴露在
/copilotkit上,以便前端可以與它們對話 -
與 Uvicorn 一起奔跑
-
代理程式工作流程(LangGraph StateGraphs)
兩個代理程式都表示為 LangGraph 狀態機,並透過一些非同步節點拼接在一起。
每個代理檔案(無論是posts_generator_agent.py還是stack_agent.py )都遵循相同的 LangGraph 框架:
-
定義
StateGraph -
新增節點(每個節點=異步函數)
-
連接邊(
START → … → END) -
使用
MemorySaver()進行編譯
但改變的是每個節點實際執行的操作。
帖子生成器圖表
「帖子產生器」工作流程定義在posts_generator_agent.py中。它將三個節點( chat_node 、 fe_actions_node 、 end_node )連接到已編譯的 StateGraph 中。
# Standard library
import os, uuid, asyncio
from typing import Dict, List, Any, Optional

# Environment
from dotenv import load_dotenv

# Google GenAI
from google import genai
from google.genai import types
from langchain_google_genai import ChatGoogleGenerativeAI

# LangGraph
from langgraph.graph import StateGraph, START, END
from langgraph.checkpoint.memory import MemorySaver
from langgraph.types import Command
from langchain_core.runnables import RunnableConfig
from langchain_core.messages import AIMessage

# CopilotKit
from copilotkit import CopilotKitState
from copilotkit.langgraph import copilotkit_emit_state
from copilotkit.langchain import copilotkit_customize_config

# Local
from prompts import system_prompt, system_prompt_3

load_dotenv()

class AgentState(CopilotKitState):
    tool_logs: List[Dict[str, Any]]
    response: Dict[str, Any]

# --- Nodes ---

async def chat_node(state: AgentState, config: RunnableConfig):

    model = genai.Client(api_key=os.getenv("GOOGLE_API_KEY"))
    state["tool_logs"].append(
        {
            "id": str(uuid.uuid4()),
            "message": "Analyzing the user's query",
            "status": "processing",
        }
    )
    await copilotkit_emit_state(config, state)

    if state["messages"][-1].type == "tool":
        client = ChatGoogleGenerativeAI(
            model="gemini-2.5-pro",
            temperature=1.0,
            max_retries=2,
            google_api_key=os.getenv("GOOGLE_API_KEY"),
        )
        messages = [*state["messages"]]
        messages[-1].content = (
            "The posts had been generated successfully. Just generate a summary of the posts."
        )
        resp = await client.ainvoke(
            [*state["messages"]],
            config,
        )
        state["tool_logs"] = []
        await copilotkit_emit_state(config, state)
        return Command(goto="fe_actions_node", update={"messages": resp})

    grounding_tool = types.Tool(google_search=types.GoogleSearch())
    model_config = types.GenerateContentConfig(
        tools=[grounding_tool],
    )
    # Define config for the model
    if config is None:
        config = RunnableConfig(recursion_limit=25)
    else:
        # Use CopilotKit's custom config functions to properly set up streaming
        config = copilotkit_customize_config(
            config, emit_messages=True, emit_tool_calls=True
        )

    # Bind the tools to the model
    response = model.models.generate_content(
        model="gemini-2.5-pro",
        contents=[
            types.Content(role="user", parts=[types.Part(text=system_prompt)]),
            types.Content(
                role="model",
                parts=[
                    types.Part(
                        text="I understand. I will use the google_search tool when needed to provide current and accurate information."
                    )
                ],
            ),
            types.Content(
                role="user", parts=[types.Part(text=state["messages"][-1].content)]
            ),
        ],
        config=model_config,
    )
    state["tool_logs"][-1]["status"] = "completed"
    await copilotkit_emit_state(config, state)
    state["response"] = response.text
    # Define the system message by which the chat model will be run
    for query in response.candidates[0].grounding_metadata.web_search_queries:
        state["tool_logs"].append(
            {
                "id": str(uuid.uuid4()),
                "message": f"Performing Web Search for '{query}'",
                "status": "processing",
            }
        )
        await asyncio.sleep(1)
        await copilotkit_emit_state(config, state)
        state["tool_logs"][-1]["status"] = "completed"
        await copilotkit_emit_state(config, state)
    return Command(goto="fe_actions_node", update=state)

async def fe_actions_node(state: AgentState, config: RunnableConfig):
    try:
        if state["messages"][-2].type == "tool":
            return Command(goto="end_node", update=state)
    except Exception as e:
        print("Moved")

    state["tool_logs"].append(
        {
            "id": str(uuid.uuid4()),
            "message": "Generating post",
            "status": "processing",
        }
    )
    await copilotkit_emit_state(config, state)
    model = ChatGoogleGenerativeAI(
        model="gemini-2.5-pro",
        temperature=1.0,
        max_retries=2,
        google_api_key=os.getenv("GOOGLE_API_KEY"),
    )
    await copilotkit_emit_state(config, state)
    response = await model.bind_tools([*state["copilotkit"]["actions"]]).ainvoke(
        [system_prompt_3.replace("{context}", state["response"]), *state["messages"]],
        config,
    )
    state["tool_logs"] = []
    await copilotkit_emit_state(config, state)
    return Command(goto="end_node", update={"messages": response})

async def end_node(state: AgentState, config: RunnableConfig):
    print("inside end node")
    return Command(goto=END, update={"messages": state["messages"], "tool_logs": []})

def router_function(state: AgentState, config: RunnableConfig):
    if state["messages"][-2].role == "tool":
        return "end_node"
    else:
        return "fe_actions_node"

# --- Graph wiring ---
workflow = StateGraph(AgentState)
workflow.add_node("chat_node", chat_node)
workflow.add_node("fe_actions_node", fe_actions_node)
workflow.add_node("end_node", end_node)
workflow.set_entry_point("chat_node")
workflow.set_finish_point("end_node")
workflow.add_edge(START, "chat_node")
workflow.add_edge("chat_node", "fe_actions_node")
workflow.add_edge("fe_actions_node", END)

post_generation_graph = workflow.compile(checkpointer=MemorySaver())
大致流程如下:
-
chat_node:透過genai.Client呼叫 Google Gemini,可選擇性地呼叫網路搜尋工具,將中間工具日誌串流傳回 UI -
fe_actions_node:對聊天結果進行後處理,產生最終的 LinkedIn/X 帖子 -
end_node:完成工作流程
堆疊分析圖
類似地,「Stack Analyzer」 工作流程在stack_agent.py中定義。它還將三個節點( gather_context_node 、 analyze_with_gemini_node 、 end_node )連接到已編譯的 StateGraph 中。
# OpenAI‑style tool that ensures the JSON schema is enforced
@tool("return_stack_analysis", args_schema=StructuredStackAnalysis)
def return_stack_analysis_tool(**kwargs) -> Dict[str, Any]:
    """Return the final stack analysis in strict JSON."""
    # …validate and return…
    validated = StructuredStackAnalysis(**kwargs)
    return validated.model_dump(exclude_none=True)

# ...
workflow = StateGraph(StackAgentState)
workflow.add_node("gather_context", gather_context_node)
workflow.add_node("analyze", analyze_with_gemini_node)
workflow.add_node("end", end_node)
workflow.add_edge(START, "gather_context")
workflow.add_edge("gather_context", "analyze")
workflow.add_edge("analyze", END)
workflow.set_entry_point("gather_context")
workflow.set_finish_point("end")

stack_analysis_graph = workflow.compile(checkpointer=MemorySaver())
與 Post Generator 不同,這個代理程式要大得多(約 500 行)。我不會把所有內容都貼出來,而是會逐一講解每個節點的關鍵程式碼片段。
您可以檢查 repo 以了解完整實作(包括重試、詳細日誌記錄和模式驗證)。
每個節點及其實際作用:
✅ gather_context_node :此節點從使用者訊息中解析 GitHub URL,透過 GitHub API 取得元資料(repo 資訊、語言、README、根檔案、清單),並將其儲存在state["context"]中以供下游分析。
async def gather_context_node(state: StackAgentState, config: RunnableConfig):
    last_user_content = state["messages"][-1].content if state["messages"] else ""
    parsed = _parse_github_url(last_user_content)

    if not parsed:
        return Command(goto="analyze", update={...})

    owner, repo = parsed
    repo_info = _fetch_repo_info(owner, repo)
    languages = _fetch_languages(owner, repo)
    readme = _fetch_readme(owner, repo)
    root_items = _list_root(owner, repo)
    manifests = _fetch_manifest_contents(owner, repo, repo_info.get("default_branch"), root_items)

    context = {"owner": owner, "repo": repo, "repo_info": repo_info,
               "languages": languages, "readme": readme,
               "root_files": _summarize_root_files(root_items),
               "manifests": manifests}

    return Command(goto="analyze", update={"context": context, ...})
✅ 2. analyze_with_gemini_node :根據 repo 上下文建立結構化輸出提示,並請求 Gemini ( gemini-2.5-pro ) 進行分析。 Gemini 需要呼叫return_stack_analysis工具,該工具強制使用嚴格的 JSON 模式。
async def analyze_with_gemini_node(state: StackAgentState, config: RunnableConfig):
    prompt = _build_analysis_prompt(state["context"])
    messages = [
        SystemMessage(content="You are a senior software architect..."),
        HumanMessage(content=prompt),
    ]

    model = ChatGoogleGenerativeAI(model="gemini-2.5-pro", temperature=0.4, ...)
    bound = model.bind_tools([return_stack_analysis_tool])
    tool_msg = await bound.ainvoke(messages, config)

    # Extract structured payload (stack details)
    for call in getattr(tool_msg, "tool_calls", []):
        if call.get("name") == "return_stack_analysis":
            args = call.get("args", {})
            state["analysis"] = json.dumps(args)
            state["show_cards"] = True
✅ 3. end_node :這個最終節點清除工具日誌並將完成的分析發回 UI。
async def end_node(state: StackAgentState, config: RunnableConfig):
    state["tool_logs"] = []
    await copilotkit_emit_state(config or RunnableConfig(recursion_limit=25), state)
    return Command(goto=END, update={
        "messages": state["messages"],
        "show_cards": state["show_cards"],
        "analysis": state["analysis"]
})-
提示和工具
在連接圖和節點之前,代理程式嚴重依賴prompts and tools 。提示定義了模型的行為方式(例如「始終使用 Google 搜尋」或「以 LinkedIn 風格產生貼文」),而工具則提供了擷取輸出的結構化方法。
讓我們介紹一下兩個代理程式共享的核心建構塊:系統提示、結構化輸出工具和用於建立分析提示的輔助函數。
✅ 系統提示產生帖子
貼文產生器的所有「系統和使用者提示」範本都位於agent/prompts.py中。這些模板充當了代理的角色。
將提示保存在不同的文件中,可以方便地獨立於工作流程邏輯進行調整。
system_prompt = """You have access to a google_search tool …
You MUST ALWAYS use the google_search tool for EVERY query…"""

system_prompt_2 = """
You are an Amazing artist. You need to generate an image …
"""

system_prompt_3 = """
You are an amazing assistant. You are familiar with the LinkedIn and X (Twitter) algorithms…
Always use the generate_post tool to generate the post.
{context}
"""
使用方法:
-
system_prompt被注入到chat_node內部,迫使 Gemini 使用google_search工具來提供答案。 -
system_prompt_3在fe_actions_node內部使用,以告訴 Gemini 如何建立 LinkedIn/X 貼文。
✅ 建構堆疊分析提示
在 Stack Analyzer 中,我們使用一個輔助函數將 GitHub 倉庫上下文注入到單一「分析堆疊」提示字元中。該函數位於agent/stack_agent.py中。
與提示不同,此幫助程式與堆疊分析邏輯(模式、上下文解析)緊密耦合,因此它位於同一個代理檔案中。
def _build_analysis_prompt(context: Dict[str, Any]) -> str:
    return (
        "You are a senior software architect. Analyze the following GitHub repository at a high level.\n"
        "Goals: Provide a concise, structured overview of what the project does and the tech stack.\n\n"
        f"Repository metadata:\n{json.dumps(context['repo_info'], indent=2)}\n\n"
        f"Languages:\n{json.dumps(context['languages'], indent=2)}\n\n"
        "Root items:\n" + json.dumps(context['root_files'], indent=2) + "\n\n"
        "README content (truncated):\n" + context["readme"][:8000] + "\n\n"
        "Infer the stack with specific frameworks and libraries when possible…"
    )
使用方法:
_build_analysis_prompt被傳遞到analyze_with_gemini_node內的 Gemini 中,提供 repo 元資料、語言、清單和 README 的綜合視圖。
✅ 用於堆疊分析的結構化輸出工具
在stack_agent.py中,我們宣告了一個強制 JSON 輸出的 OpenAI 風格的工具。
@tool("return_stack_analysis", args_schema=StructuredStackAnalysis)
def return_stack_analysis_tool(**kwargs) -> Dict[str, Any]:
    """Return the final stack analysis in a strict JSON structure."""
    validated = StructuredStackAnalysis(**kwargs)
    return validated.model_dump(exclude_none=True)
使用方法:
return_stack_analysis_tool綁定到analyze_with_gemini_node內的 Gemini ,因此它必須輸出 JSON 而不是自由格式的文字。
此模式確保每個 repo 分析具有相同的形狀,以便 UI 能夠可靠地顯示。
-
完成流程
整合所有部分後,端到端資料流就是這樣的。如果你之前看過這篇博文,應該會更容易理解。
{% 嵌入 https://gist.github.com/Anmol-Baranwal/3bbd667d43e8656a4d289b676bfc7e8d %}
-
最終演示
完成所有程式碼部分後,就可以在本地執行了。請確保已將 Google Gemini 憑證新增至.env檔案。
啟動後端(FastAPI 代理)
在agent目錄中執行以下命令。
cd agent
poetry install
# set GOOGLE_API_KEY in agent/.env
poetry run python main.py
啟動前端
執行以下命令在frontend下方本地啟動伺服器,並在瀏覽器中導航至localhost:3000/copilotkit以查看前端。
cd frontend
pnpm install # if you have cloned the repo
pnpm run dev
🎯 帖子生成器代理的輸出
預設路由將引導至post-generator代理程式。如您所見,它正在正確生成深入研究的文章。
它會發出中間“工具日誌”,因此 UI 會即時顯示每個研究/搜尋/生成步驟,您還可以找到一些預先建立的啟動提示,只需單擊即可開始。
{% 嵌入 https://youtu.be/HCXhFovyv8U %}
🎯 Stack Analyzer Agent 的輸出
它分析公共 GitHub 儲存庫(元資料、README、程式碼清單)並推斷其堆疊。
正如我之前提到的,它使用 Pydantic 資料模型( StructuredStackAnalysis )來強制執行嚴格定義的 JSON 輸出涵蓋:
-
專案目的
-
前端堆疊(框架/語言/庫)
-
後端堆疊(框架/語言/函式庫/架構)
-
資料庫詳細訊息
-
基礎設施/託管
-
CI/CD 設定
-
關鍵根文件
-
如何執行說明
-
風險/注意事項部分
{% 嵌入 https://youtu.be/DJMkP28TdBQ %}
與貼文產生器類似,它將每個步驟(URL 解析 → 取得元資料 → 分析 → 總結)串流回 UI。
就是這樣。這裡的模式使用者(狀態圖、工具綁定、結構化輸出)將為您節省大量時間。
希望您能從本指南中有所收穫。如果您之前做過一些作品,請在評論區分享。
祝你今天過得愉快!下次見 :)
| 您可以檢查
我在anmolbaranwal.com上工作。
感謝您的閱讀! 🥰 | 

 |
|
| --------- | -------- |
在Twitter上關注 CopilotKit 並打招呼,如果您想建立一些很酷的東西,請加入Discord社群。
原文出處:https://dev.to/copilotkit/heres-how-to-build-fullstack-agent-apps-gemini-copilotkit-langgraph-15jb
1) --- 會變成分隔線(上一行必須是空白)
2) # 會變成一級標題
3) ## 會變成二級標題
4) ### 會變成三級標題
5) **粗體文字**會顯示粗體文字
6) ```當第一行與最後一行會顯示程式碼
7) 請搜尋 Markdown 語法,了解各種格式