

長話短說
我收集了您應該了解的 React 庫,以建立許多不同類型的專案並成為 React 奇才🧙♂️。
其中每一項都是獨一無二的,並且都有自己的用例。
別忘了給他們加星號🌟
讓我們開始吧!

-
CopilotKit - 建立應用內人工智慧聊天機器人、代理程式和文字區域
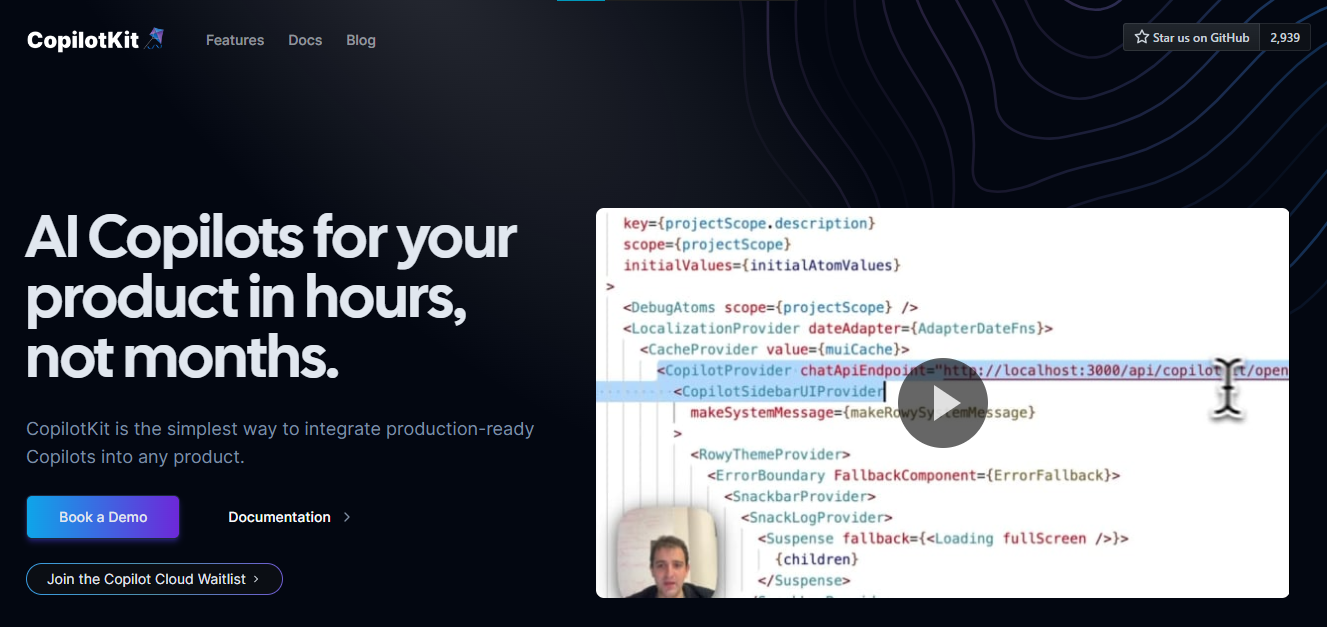
將 AI 功能整合到 React 中是很困難的,這就是 Copilot 的用武之地。一個簡單快速的解決方案,可將可投入生產的 Copilot 整合到任何產品中!
您可以使用兩個 React 元件將關鍵 AI 功能整合到 React 應用程式中。它們還提供內建(完全可自訂)Copilot 原生 UX 元件,例如<CopilotKit /> 、 <CopilotPopup /> 、 <CopilotSidebar /> 、 <CopilotTextarea /> 。
開始使用以下 npm 指令。
npm i @copilotkit/react-core @copilotkit/react-uiCopilot Portal 是 CopilotKit 提供的元件之一,CopilotKit 是一個應用程式內人工智慧聊天機器人,可查看目前應用狀態並在應用程式內採取操作。它透過插件與應用程式前端和後端以及第三方服務進行通訊。
這就是整合聊天機器人的方法。
CopilotKit必須包裝與 CopilotKit 互動的所有元件。建議您也開始使用CopilotSidebar (您可以稍後切換到不同的 UI 提供者)。
"use client";
import { CopilotKit } from "@copilotkit/react-core";
import { CopilotSidebar } from "@copilotkit/react-ui";
import "@copilotkit/react-ui/styles.css";

export default function RootLayout({children}) {
  return (
    <CopilotKit url="/path_to_copilotkit_endpoint/see_below">
      <CopilotSidebar>
        {children}
      </CopilotSidebar>
    </CopilotKit>
  );
}您可以使用此快速入門指南設定 Copilot 後端端點。
之後,您可以讓 Copilot 採取行動。您可以閱讀如何提供外部上下文。您可以使用useMakeCopilotReadable和useMakeCopilotDocumentReadable反應掛鉤來執行此操作。
"use client";

import { useMakeCopilotActionable } from '@copilotkit/react-core';

// Let the copilot take action on behalf of the user.
useMakeCopilotActionable(
  {
    name: "setEmployeesAsSelected", // no spaces allowed in the function name
    description: "Set the given employees as 'selected'",
    argumentAnnotations: [
      {
        name: "employeeIds",
        type: "array", items: { type: "string" }
        description: "The IDs of employees to set as selected",
        required: true
      }
    ],
    implementation: async (employeeIds) => setEmployeesAsSelected(employeeIds),
  },
  []
);您可以輕鬆整合 Vercel AI SDK、OpenAI API、Langchain 和其他 LLM 供應商。您可以按照本指南將聊天機器人整合到您的應用程式中。
基本概念是在幾分鐘內建立可用於基於 LLM 的應用程式的 AI 聊天機器人。
用例是巨大的,作為開發人員,我們絕對應該在下一個專案中嘗試使用 CopilotKit。
https://github.com/CopilotKit/CopilotKit Star CopilotKit ⭐️
-
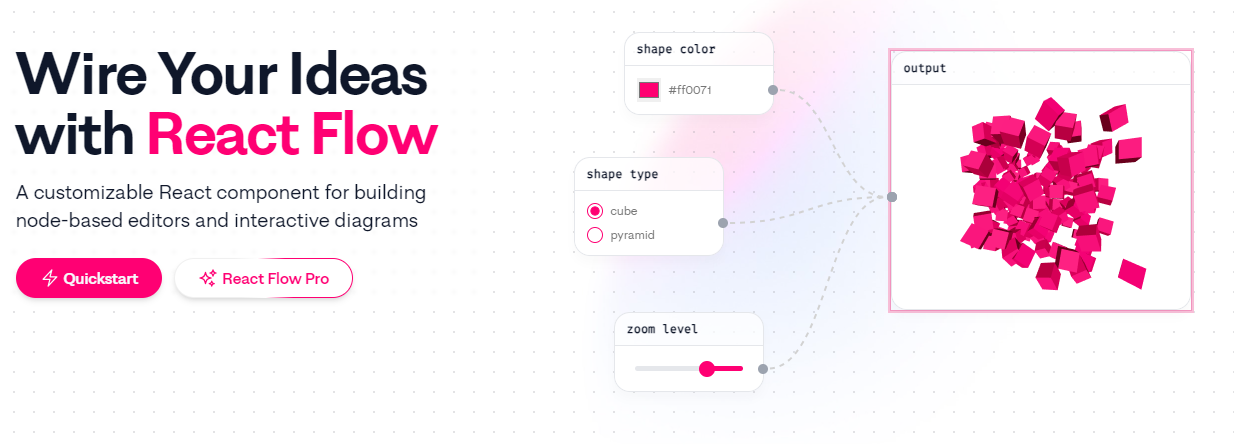
xyflow - 使用 React 建立基於節點的 UI。
XYFlow 是一個功能強大的開源程式庫,用於使用 React 或 Svelte 建立基於節點的 UI。它是一個 monorepo,提供React Flow和Svelte Flow 。讓我們更多地了解可以使用 React flow 做什麼。
您可以觀看此影片,在 60 秒內了解 React Flow。
https://www.youtube.com/watch?v=aUBWE41a900
有些功能在專業模式下可用,但免費層中的功能足以形成一個非常互動的流程。 React 流程以 TypeScript 編寫並使用 Cypress 進行測試。
開始使用以下 npm 指令。
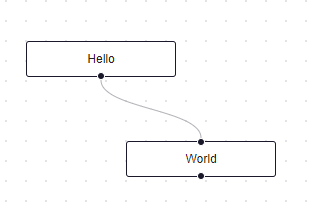
npm install reactflow以下介紹如何建立兩個節點( Hello和World ,並透過邊連接。節點具有預先定義的初始位置以防止重疊,並且我們還應用樣式來確保有足夠的空間來渲染圖形。
import ReactFlow, { Controls, Background } from 'reactflow';
import 'reactflow/dist/style.css';

const edges = [{ id: '1-2', source: '1', target: '2' }];

const nodes = [
  {
    id: '1',
    data: { label: 'Hello' },
    position: { x: 0, y: 0 },
    type: 'input',
  },
  {
    id: '2',
    data: { label: 'World' },
    position: { x: 100, y: 100 },
  },
];

function Flow() {
  return (
    <div style={{ height: '100%' }}>
      <ReactFlow nodes={nodes} edges={edges}>
        <Background />
        <Controls />
      </ReactFlow>
    </div>
  );
}

export default Flow;
這就是它的樣子。您還可以新增標籤、更改類型並使其具有互動性。
您可以在 React Flow 的 API 參考中查看完整的選項清單以及元件、鉤子和實用程式。
最好的部分是您還可以加入自訂節點。在您的自訂節點中,您可以渲染您想要的一切。您可以定義多個來源和目標句柄並呈現表單輸入或圖表。您可以查看此codesandbox作為範例。
您可以閱讀文件並查看 Create React App、Next.js 和 Remix 的範例 React Flow 應用程式。
React Flow 附帶了幾個額外的插件元件,可以幫助您使用 Background、Minimap、Controls、Panel、NodeToolbar 和 NodeResizer 元件製作更高級的應用程式。
例如,您可能已經注意到許多網站的背景中有圓點,增強了美觀性。要實現此模式,您可以簡單地使用 React Flow 中的後台元件。
import { Background } from 'reactflow';

<Background color="#ccc" variant={'dots'} />  // this will be under React Flow component. Just an example.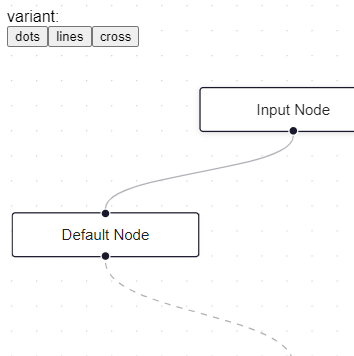
如果您正在尋找一篇快速文章,我建議您查看 Webkid 的React Flow - A Library for Rendering Interactive Graphs 。 React Flow 由 Webkid 開發和維護。
它在 GitHub 上有超過 19k 顆星,並且在v11.10.4上顯示它們正在不斷改進,npm 套件每週下載量超過 40 萬次。您可以輕鬆使用的最佳專案之一。

https://github.com/xyflow/xyflow 星 xyflow ⭐️
-
Zod + React Hook Form - 致命的驗證組合。
第一個問題是:為什麼我在同一個選項中包含 Zod 和 React Hook 表單?好吧,請閱讀它來找出答案。
Zod 的目標是透過最大限度地減少重複的類型聲明來對開發人員友好。使用 Zod,您聲明一次驗證器,Zod 將自動推斷靜態 TypeScript 類型。將更簡單的類型組合成複雜的資料結構很容易。
開始使用以下 npm 指令。
npm install zod這是您在建立字串架構時自訂一些常見錯誤訊息的方法。
const name = z.string({
  required_error: "Name is required",
  invalid_type_error: "Name must be a string",
});
// It does provide lots of options
// validations
z.string().min(5, { message: "Must be 5 or more characters long" });
z.string().max(5, { message: "Must be 5 or fewer characters long" });
z.string().length(5, { message: "Must be exactly 5 characters long" });
z.string().email({ message: "Invalid email address" });
z.string().url({ message: "Invalid url" });
z.string().emoji({ message: "Contains non-emoji characters" });
z.string().uuid({ message: "Invalid UUID" });
z.string().includes("tuna", { message: "Must include tuna" });
z.string().startsWith("https://", { message: "Must provide secure URL" });
z.string().endsWith(".com", { message: "Only .com domains allowed" });
z.string().datetime({ message: "Invalid datetime string! Must be UTC." });
z.string().ip({ message: "Invalid IP address" });請閱讀文件以了解有關 Zod 的更多資訊。
它適用於 Node.js 和所有現代瀏覽器。
現在,第二部分來了。
有很多可用的表單整合。
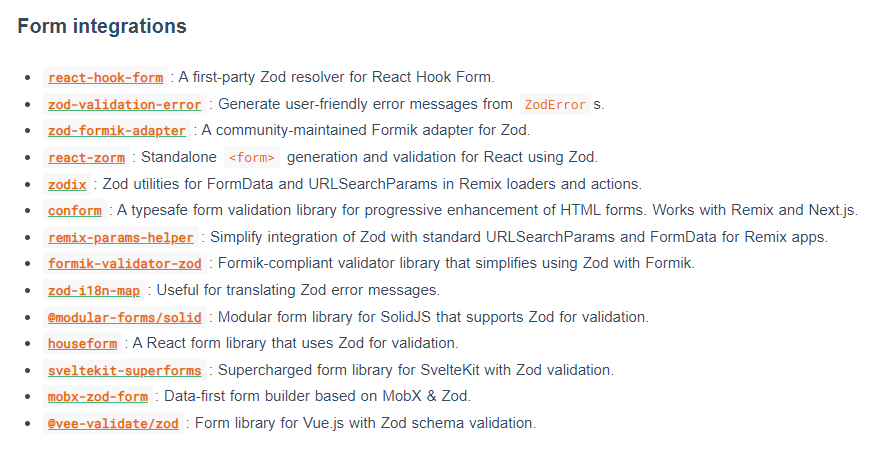
雖然 Zod 可以驗證物件,但如果沒有自訂邏輯,它不會影響您的用戶端和後端。
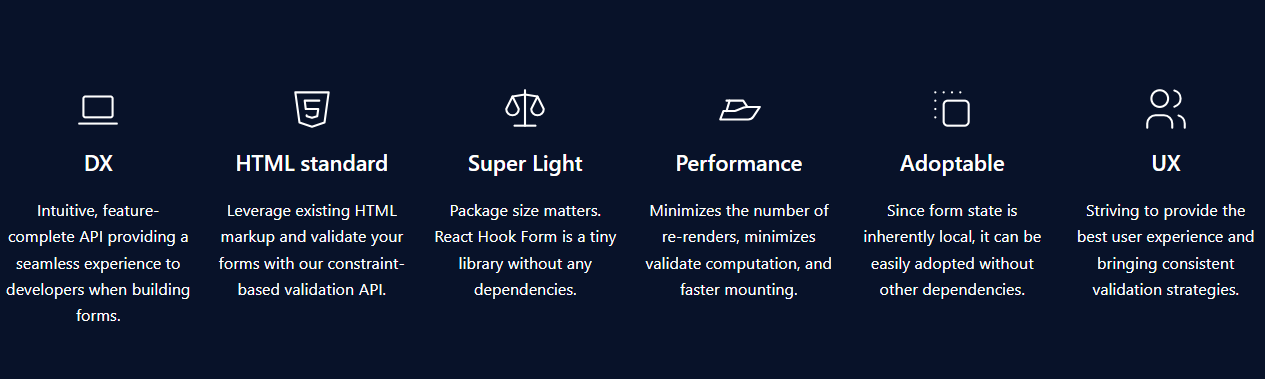
React-hook-form 是用於客戶端驗證的優秀專案。例如,它可以顯示輸入錯誤。
開始使用以下 npm 指令。
npm install react-hook-form這就是如何使用React Hook Form 。
import { useForm, SubmitHandler } from "react-hook-form"

type Inputs = {
  example: string
  exampleRequired: string
}

export default function App() {
  const {
    register,
    handleSubmit,
    watch,
    formState: { errors },
  } = useForm<Inputs>()
  const onSubmit: SubmitHandler<Inputs> = (data) => console.log(data)

  console.log(watch("example")) // watch input value by passing the name of it

  return (
    /* "handleSubmit" will validate your inputs before invoking "onSubmit" */
    <form onSubmit={handleSubmit(onSubmit)}>
      {/* register your input into the hook by invoking the "register" function */}
      <input defaultValue="test" {...register("example")} />

      {/* include validation with required or other standard HTML validation rules */}
      <input {...register("exampleRequired", { required: true })} />
      {/* errors will return when field validation fails  */}
      {errors.exampleRequired && <span>This field is required</span>}

      <input type="submit" />
    </form>
  )
}
您甚至可以隔離重新渲染,從而提高整體效能。
您可以閱讀文件。
兩者結合起來就是一個很好的組合。嘗試一下!
我透過 Shadcn 發現了它,它使用它作為表單元件的預設值。我自己在幾個專案中使用過它,效果非常好。它提供了很大的靈活性,這確實很有幫助。
https://github.com/colinhacks/zod Star Zod ⭐️ https://github.com/react-hook-form Star React Hook Form ⭐️
-
React DND - 用於 React 的拖放。
我還沒有完全實現拖放功能,而且我經常發現自己對選擇哪個選項感到困惑。我遇到的另一個選擇是interactjs.io ,根據我讀過的文件,它似乎非常有用。由於他們提供了詳細的範例,這非常容易。
但我現在只介紹 React DND。
開始使用以下 npm 指令。
npm install react-dnd react-dnd-html5-backend除非您正在編寫自訂後端,否則您可能想要使用 React DnD 隨附的 HTML5 後端。
這是安裝react-dnd-html5-backend方法。閱讀文件。
這是起點。
import { HTML5Backend } from 'react-dnd-html5-backend'
import { DndProvider } from 'react-dnd'

export default class YourApp {
  render() {
    return (
      <DndProvider backend={HTML5Backend}>
        /* Your Drag-and-Drop Application */
      </DndProvider>
    )
  }
}
透過這種方式,您可以非常輕鬆地實現卡片的拖放操作。
// Let's make <Card text='Write the docs' /> draggable!

import React from 'react'
import { useDrag } from 'react-dnd'
import { ItemTypes } from './Constants'

export default function Card({ isDragging, text }) {
  const [{ opacity }, dragRef] = useDrag(
    () => ({
      type: ItemTypes.CARD,
      item: { text },
      collect: (monitor) => ({
        opacity: monitor.isDragging() ? 0.5 : 1
      })
    }),
    []
  )
  return (
    <div ref={dragRef} style={{ opacity }}>
      {text}
    </div>
  )
}
請注意,HTML5 後端不支援觸控事件。因此它不適用於平板電腦和行動裝置。您可以將react-dnd-touch-backend用於觸控裝置。閱讀文件。
import { TouchBackend } from 'react-dnd-touch-backend'
import { DndProvider } from 'react-dnd'
class YourApp {
<DndProvider backend={TouchBackend} options={opts}>
{/* Your application */}
</DndProvider>
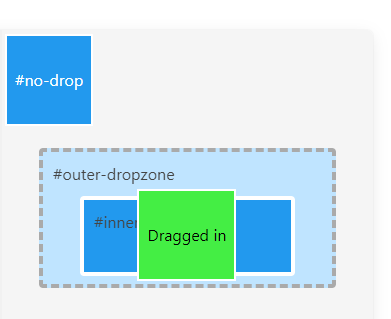
}這個codesandbox規定了我們如何正確使用React DND。
你可以看看React DND的例子。
它們甚至有一個乾淨的功能,您可以使用 Redux 檢查內部發生的情況。
您可以透過為提供者新增 debugModeprop 來啟用Redux DevTools ,其值為 true。
<DndProvider debugMode={true} backend={HTML5Backend}>它提供了多種元件選項,我需要親自測試一下。總的來說,這看起來相當不錯,特別是如果你剛開始的話。
React DND 已獲得MIT許可,並在 GitHub 上擁有超過 20k Stars,這使其具有令人難以置信的可信度。
https://github.com/react-dnd/react-dnd Star React DND ⭐️
-
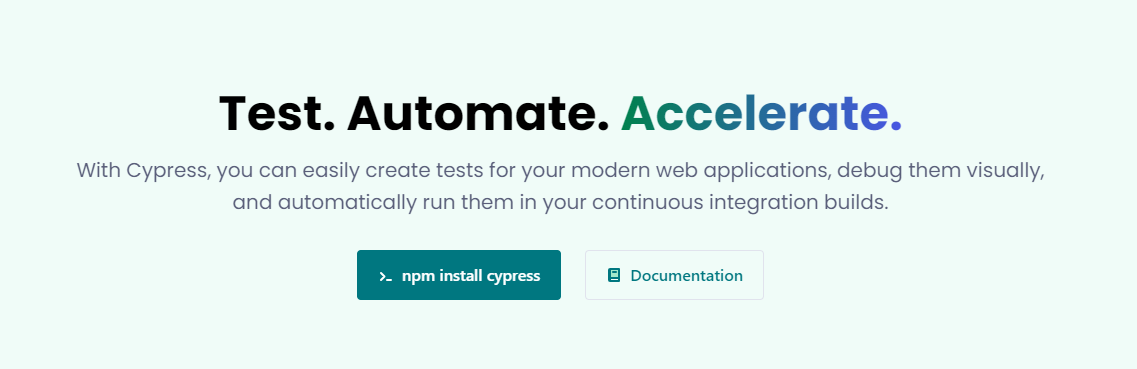
Cypress - 快速測試瀏覽器中執行的內容。
近年來已經證明了測試的重要性,而 Jest 和 Cypress 等選項使其變得異常簡單。
但我們只會介紹 Cypress,因為它本身就很方便。
只需一張圖片就能證明 Cypress 值得付出努力。
開始使用以下 npm 指令。
npm install cypress -D如果您在專案中沒有使用 Node 或套件管理器,或者您想快速試用 Cypress,您始終可以直接從 CDN 下載 Cypress 。
一旦安裝並打開它。您必須使用.cy.js建立一個規範檔案。
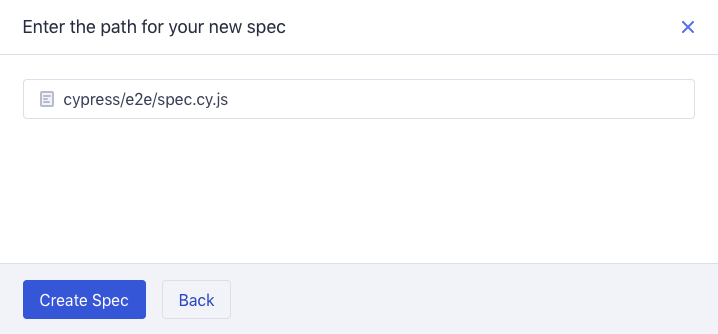
現在,您可以編寫並測試您的應用程式(範例程式碼)。
describe('My First Test', () => {
  it('Does not do much!', () => {
    expect(true).to.equal(true)
  })
})
Cypress 提供了多種選項,例如cy.visit()或cy.contains() 。由於我沒有廣泛使用 Cypress,因此您需要在其文件中進一步探索它。
如果它看起來很可怕,那麼請前往這個為初學者解釋 Cypress 的freeCodeCamp 教程。 Freecodecamp 影片確實是金礦 :D
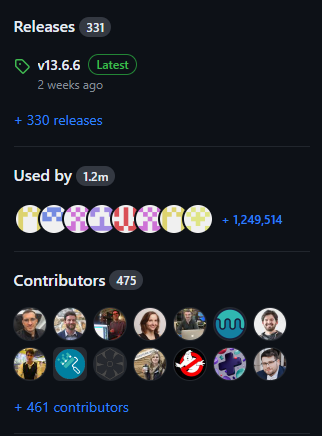
Cypress 在 GitHub 上擁有超過 45,000 顆星,並且在目前的 v13 版本中,它正在不斷改進。
https://github.com/cypress-io/cypress 星柏 ⭐️
6.Refine - 面向企業的開源 Retool。
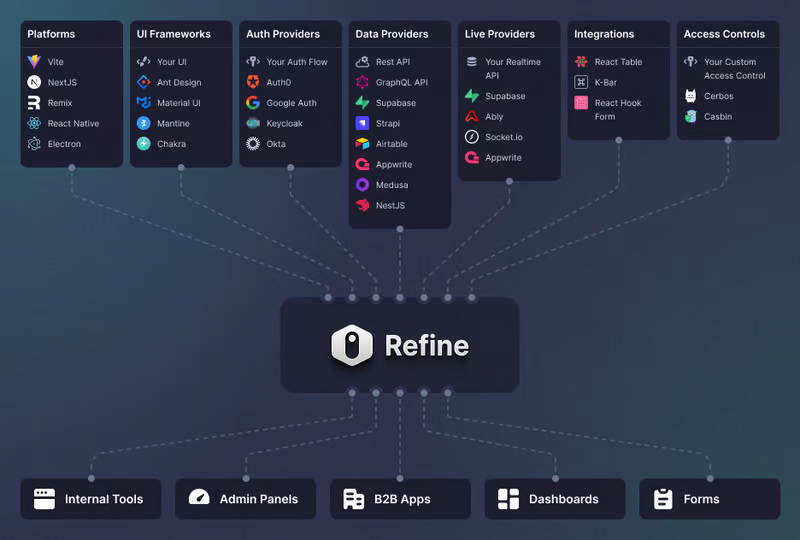
Refine 是一個元 React 框架,可以快速開發各種 Web 應用程式。
從內部工具到管理面板、B2B 應用程式和儀表板,它可作為建立任何類型的 CRUD 應用程式(例如 DevOps 儀表板、電子商務平台或 CRM 解決方案)的全面解決方案。
您可以在一分鐘內使用單一 CLI 命令進行設定。
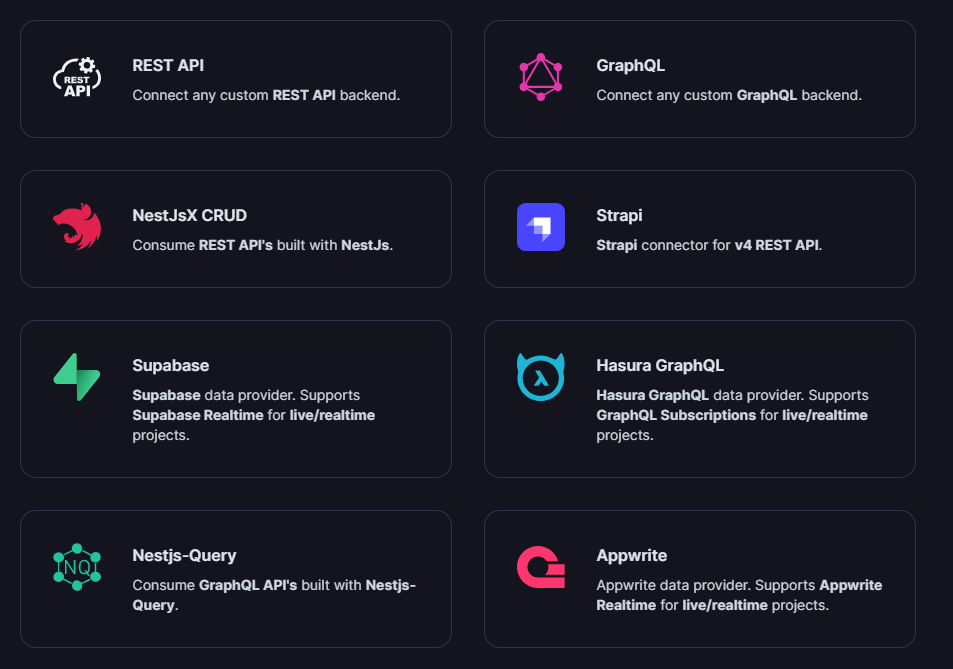
它具有適用於 15 多個後端服務的連接器,包括 Hasura、Appwrite 等。
您可以查看可用的整合清單。
但最好的部分是,Refine headless by design ,從而提供無限的樣式和自訂選項。
由於該架構,您可以使用流行的 CSS 框架(如 TailwindCSS)或從頭開始建立樣式。
這是最好的部分,因為我們不希望最終受到與特定庫的兼容性的樣式限制,因為每個人都有自己的風格並使用不同的 UI。
開始使用以下 npm 指令。
npm create refine-app@latest這就是使用 Refine 新增登入資訊的簡單方法。
import { useLogin } from "@refinedev/core";
const { login } = useLogin();
使用 Refine 概述程式碼庫的結構。
const App = () => (
  <Refine
    dataProvider={dataProvider}
    resources={[
      {
        name: "blog_posts",
        list: "/blog-posts",
        show: "/blog-posts/show/:id",
        create: "/blog-posts/create",
        edit: "/blog-posts/edit/:id",
      },
    ]}
  >
    /* ... */
  </Refine>
);您可以閱讀文件。
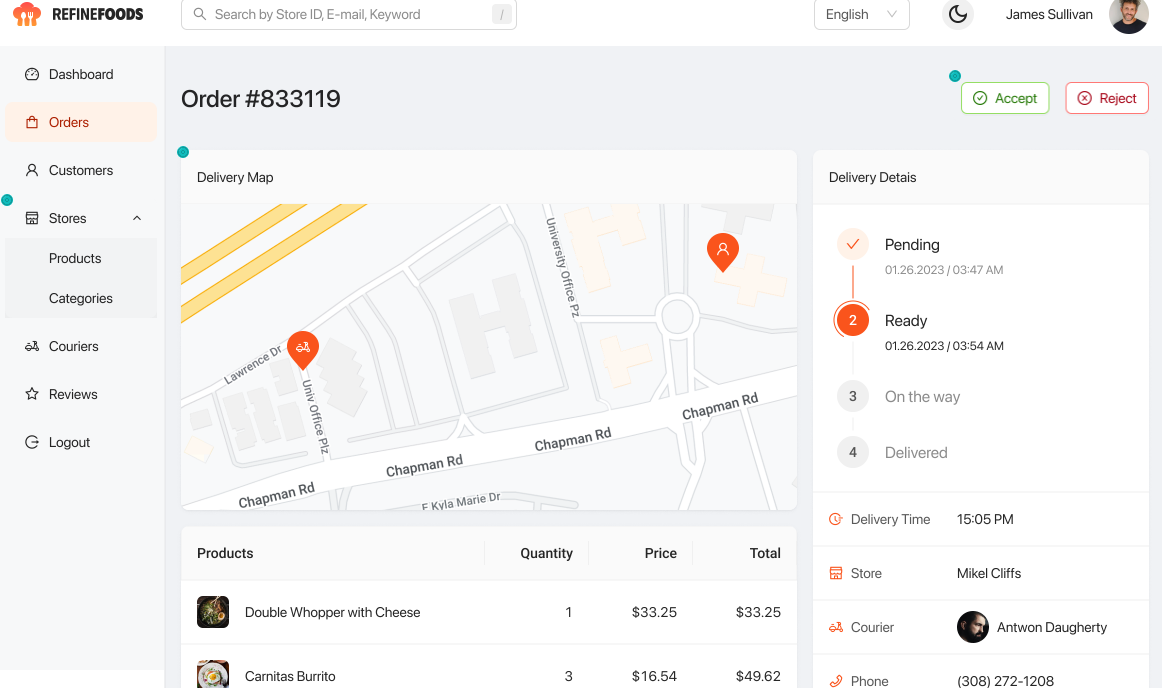
您可以看到一些使用 Refine 建立的範例應用程式:
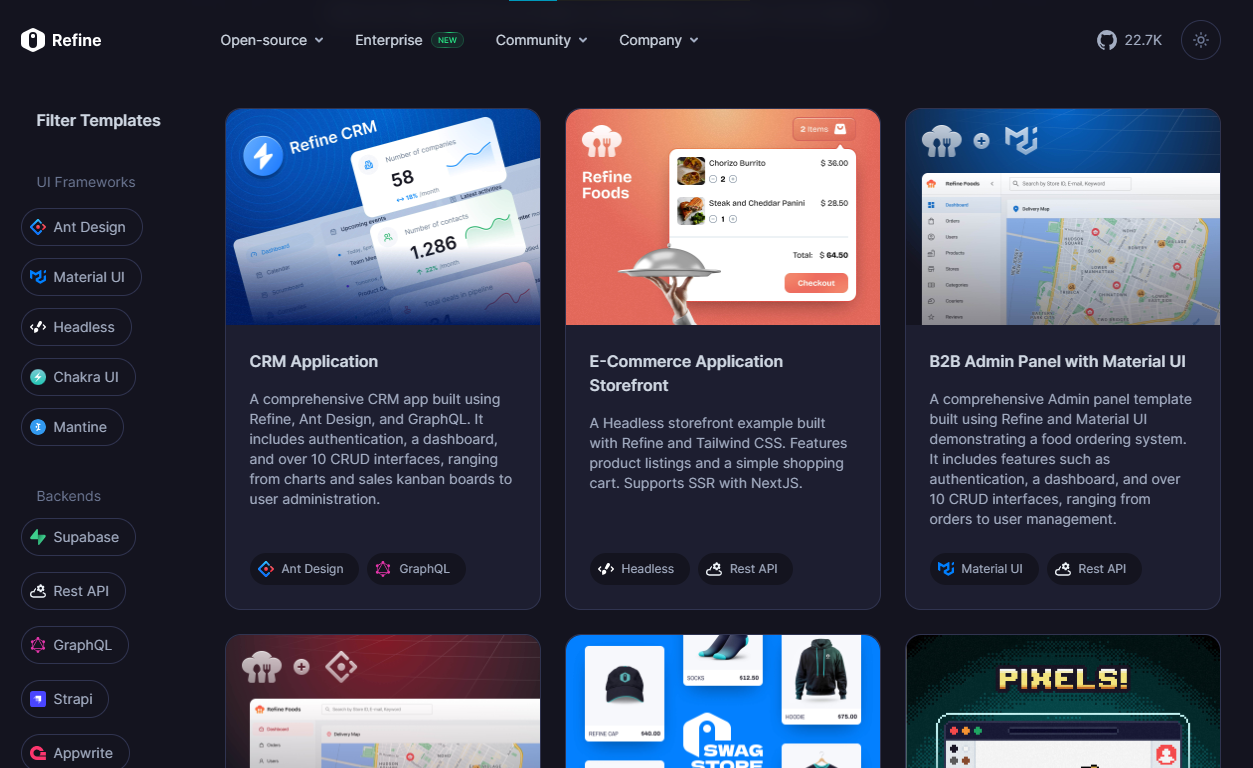
他們甚至提供模板,這就是為什麼這麼多用戶喜歡Refine。
你可以看到模板。
他們在 GitHub 上擁有大約 22k+ 顆星。
https://github.com/refinedev/refine 星際精煉 ⭐️
-
Tremor - React 元件來建立圖表和儀表板。

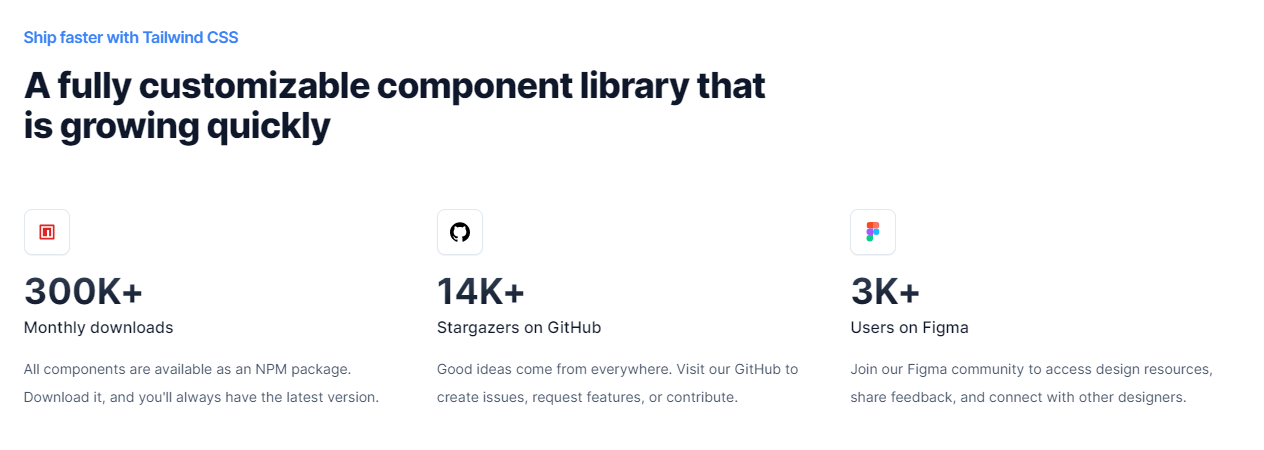
Tremor 提供了 20 多個開源 React 元件,用於建立基於 Tailwind CSS 的圖表和儀表板,使資料視覺化再次變得簡單。
開始使用以下 npm 指令。
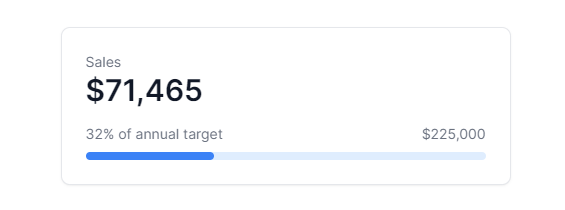
npm i @tremor/react這就是您如何使用 Tremor 快速建立東西。
import { Card, ProgressBar } from '@tremor/react';

export default function Example() {
  return (
    <Card className="mx-auto max-w-md">
      <h4 className="text-tremor-default text-tremor-content dark:text-dark-tremor-content">
        Sales
      </h4>
      <p className="text-tremor-metric font-semibold text-tremor-content-strong dark:text-dark-tremor-content-strong">
        $71,465
      </p>
      <p className="mt-4 flex items-center justify-between text-tremor-default text-tremor-content dark:text-dark-tremor-content">
        <span>32% of annual target</span>
        <span>$225,000</span>
      </p>
      <ProgressBar value={32} className="mt-2" />
    </Card>
  );
}
這就是基於此生成的內容。
您可以閱讀文件。其間,他們在引擎蓋下使用混音圖標。
從我見過的各種元件來看,這是一個很好的起點。相信我!
Tremor 還提供了一個乾淨的 UI 工具包。多麼酷啊!

Tremor 在 GitHub 上擁有超過 14k 顆星,並有超過 280 個版本,這意味著它正在不斷改進。
https://github.com/tremorlabs/tremor 星震 ⭐️
-
Watermelon DB - 用於 React 和 React Native 的反應式和非同步資料庫。
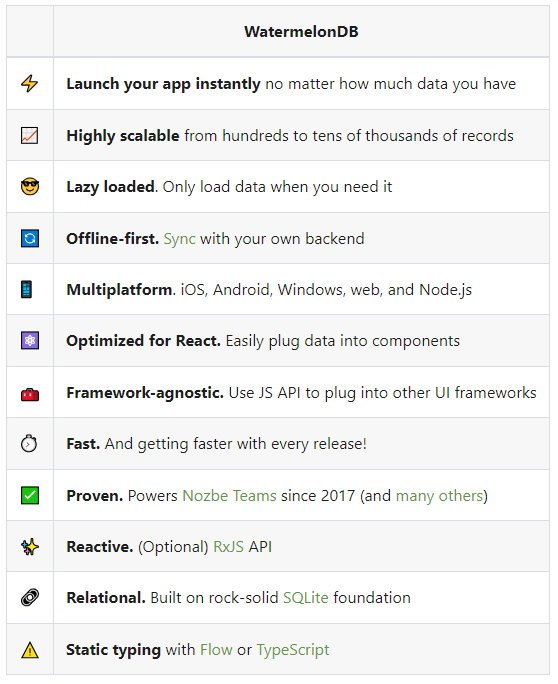
我不知道為什麼資料庫有這麼多選項;甚至很難全部數清。但如果我們使用 React,Watermelon DB 是一個不錯的選擇。即使在 4k+ 提交之後,它們仍然處於v0.28版本,這是一個相當大的問題。
Rocket.chat 使用 Watermelon DB,這給了他們巨大的可信度。
開始使用以下 npm 指令。
npm install @nozbe/watermelondb您需要做的第一件事是建立模型和後續遷移(閱讀文件)。
import { appSchema, tableSchema } from '@nozbe/watermelondb'

export default appSchema({
  version: 1,
  tables: [
    // We'll add to tableSchemas here
  ]
})
根據文件,使用 WatermelonDB 時,您正在處理模型和集合。然而,在 Watermelon 之下有一個底層資料庫(SQLite 或 LokiJS),它使用不同的語言:表格和欄位。這些一起稱為資料庫模式。
https://github.com/Nozbe/WatermelonDB 明星 WatermelonDB ⭐️
-
Evergreen UI - 按 Segment 劃分的 React UI 框架。

沒有 UI 框架的清單幾乎是不可能的。有許多受歡迎的選項,例如 Material、Ant Design、Next UI 等等。
但我們正在報道 Evergreen,它本身就非常好。
開始使用以下 npm 指令。
$ npm install evergreen-uiEvergreen Segment 網站上顯示了任何使用者介面的基礎以及詳細的選項。
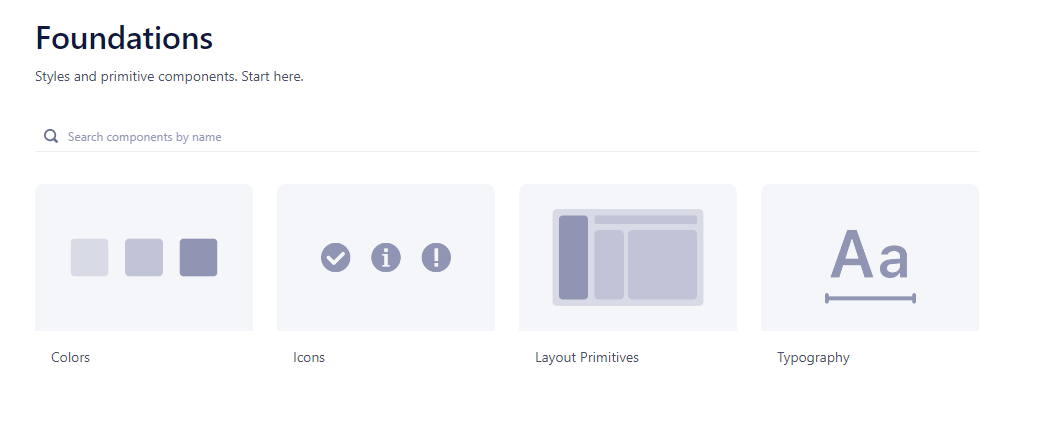
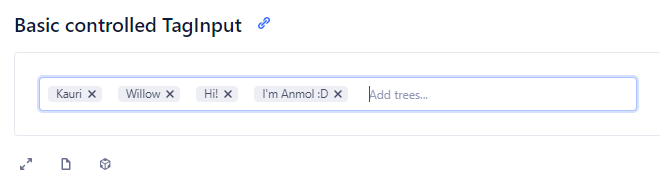
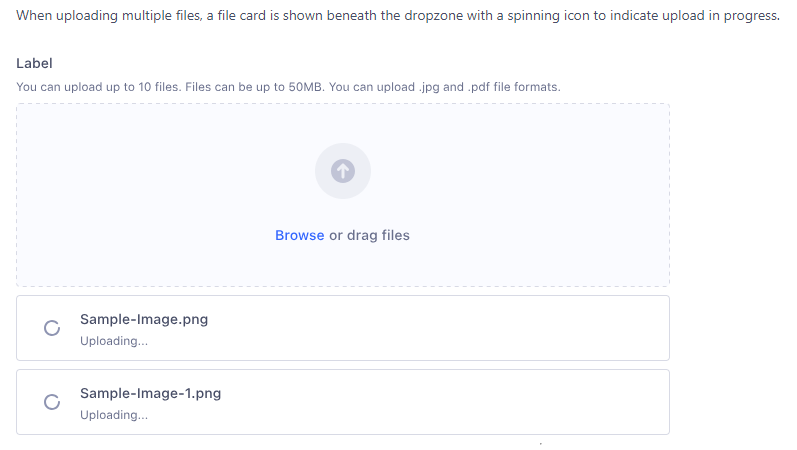
它提供了很多元件,其中一些非常好,例如Tag Input或File uploader 。
您可以看到 Evergreen UI 提供的所有元件。
https://github.com/segmentio/evergreen Star Evergreen UI ⭐️
-
React Spring - 流暢的動畫來提升 UI 和互動。
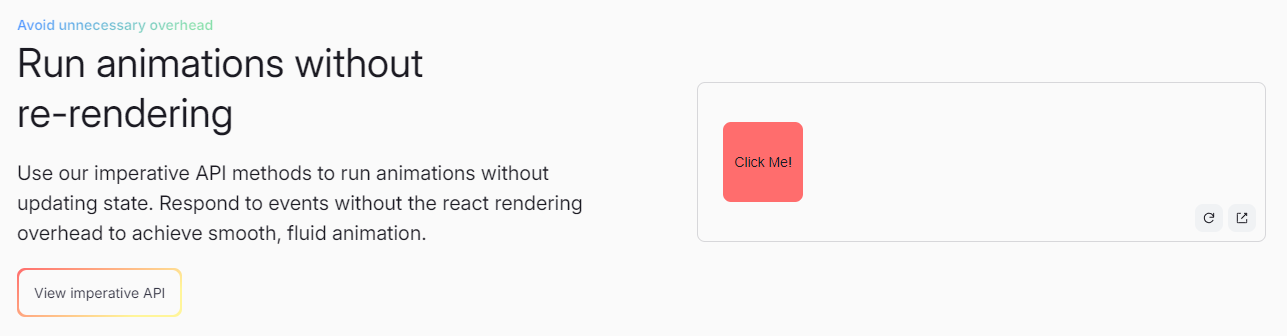
如果您喜歡 React-Motion 但感覺過渡不流暢,那是因為它專門使用 React 渲染。
如果你喜歡 Popmotion,但感覺自己的能力受到限制,那是因為它完全跳過了 React 渲染。
react-spring提供了兩種選擇,試試看!
開始使用以下 npm 指令。
npm i @react-spring/web這就是導入高階元件來包裝動畫的方法。
import { animated } from '@react-spring/web'
// use it.
export default function MyComponent() {
return (
<animated.div
style={{
width: 80,
height: 80,
background: '#ff6d6d',
borderRadius: 8,
}}
/>
)
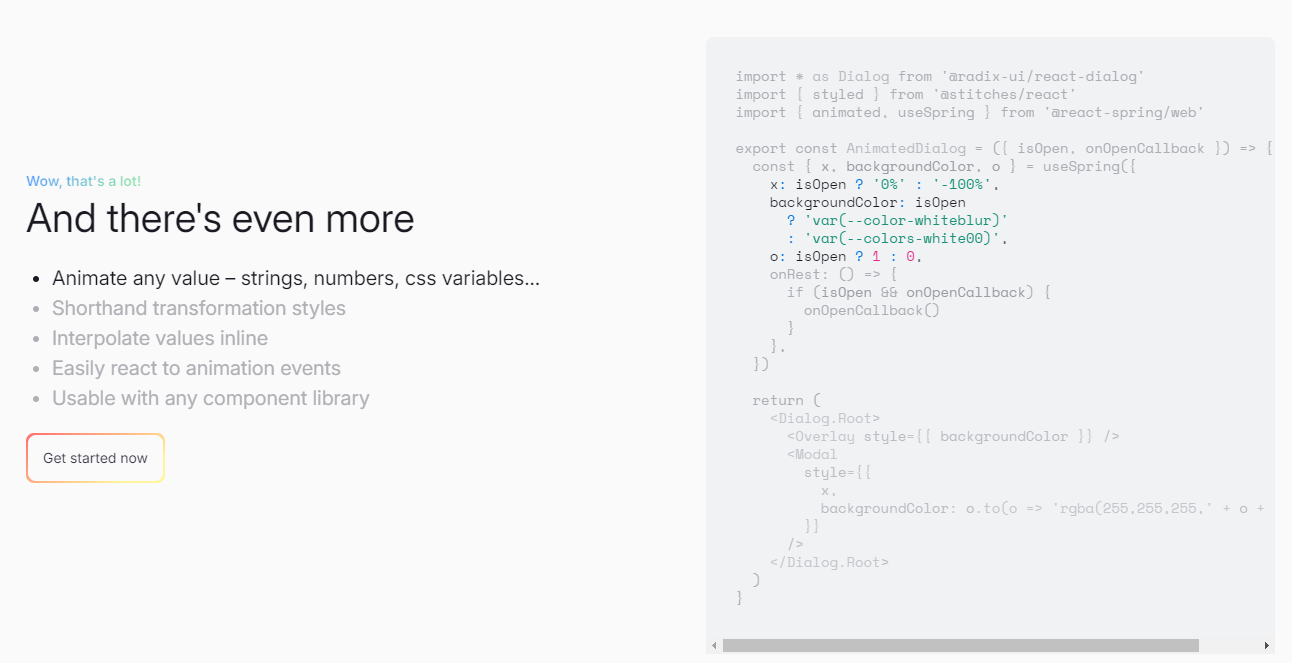
}由於以下程式碼和框,我決定嘗試 React Spring。令人驚訝的是,我們可以使用 React Spring 做很多事情。
您可以閱讀文件。
他們還提供了很多您可以學習的範例。

它提供了大量的選項,例如useScroll ,它允許您建立滾動連結動畫。
例如,這個codesandbox告訴了useScroll的用法。
React Spring 在 GitHub 上有大約 27k+ Stars。
https://github.com/pmndrs/react-spring Star React Spring ⭐️
-
React Tweet - 將推文嵌入到你的 React 應用程式中。
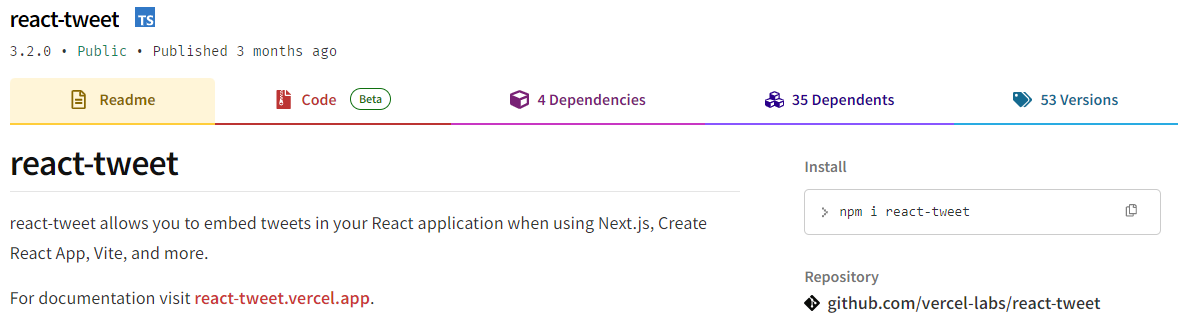
React Tweet可讓您在使用 Next.js、Create React App、Vite 等時將推文嵌入到 React 應用程式中。
該函式庫不需要使用 Twitter API。推文可以靜態呈現,從而無需包含 iframe 和額外的客戶端 JavaScript。
它是 Vercel 的開源專案。
開始使用以下 npm 指令。
npm i react-tweet為了顯示推文,我們需要從 Twitter 的 API 請求資料。透過此 API 進行速率限制具有挑戰性,但如果您僅依賴我們提供的 SWR 端點 ( react-tweet.vercel.app/api/tweet/:id ),這是可能的,因為伺服器的IP 位址向Twitter 發出了許多請求API。這也適用於 RSC,其中 API 端點不是必需的,但伺服器仍然從相同 IP 位址發送請求。
為了避免 API 限制,您可以使用 Redis 或 Vercel KV 等資料庫快取推文。例如,您可以使用 Vercel KV。
import { Suspense } from 'react'
import { TweetSkeleton, EmbeddedTweet, TweetNotFound } from 'react-tweet'
import { fetchTweet, Tweet } from 'react-tweet/api'
import { kv } from '@vercel/kv'

async function getTweet(
  id: string,
  fetchOptions?: RequestInit
): Promise<Tweet | undefined> {
  try {
    const { data, tombstone, notFound } = await fetchTweet(id, fetchOptions)

    if (data) {
      await kv.set(`tweet:${id}`, data)
      return data
    } else if (tombstone || notFound) {
      // remove the tweet from the cache if it has been made private by the author (tombstone)
      // or if it no longer exists.
      await kv.del(`tweet:${id}`)
    }
  } catch (error) {
    console.error('fetching the tweet failed with:', error)
  }

  const cachedTweet = await kv.get<Tweet>(`tweet:${id}`)
  return cachedTweet ?? undefined
}

const TweetPage = async ({ id }: { id: string }) => {
  try {
    const tweet = await getTweet(id)
    return tweet ? <EmbeddedTweet tweet={tweet} /> : <TweetNotFound />
  } catch (error) {
    console.error(error)
    return <TweetNotFound error={error} />
  }
}

const Page = ({ params }: { params: { tweet: string } }) => (
  <Suspense fallback={<TweetSkeleton />}>
    <TweetPage id={params.tweet} />
  </Suspense>
)

export default Page
您可以直接使用它,方法非常簡單。
<div className="dark">
  <Tweet id="1629307668568633344" />
</div>
如果您不喜歡使用 Twitter 主題,您也可以使用多個選項建立自己的自訂主題。
例如,您可以建立自己的推文元件,但沒有回覆按鈕,如下所示:
import type { Tweet } from 'react-tweet/api'
import {
  type TwitterComponents,
  TweetContainer,
  TweetHeader,
  TweetInReplyTo,
  TweetBody,
  TweetMedia,
  TweetInfo,
  TweetActions,
  QuotedTweet,
  enrichTweet,
} from 'react-tweet'

type Props = {
  tweet: Tweet
  components?: TwitterComponents
}

export const MyTweet = ({ tweet: t, components }: Props) => {
  const tweet = enrichTweet(t)
  return (
    <TweetContainer>
      <TweetHeader tweet={tweet} components={components} />
      {tweet.in_reply_to_status_id_str && <TweetInReplyTo tweet={tweet} />}
      <TweetBody tweet={tweet} />
      {tweet.mediaDetails?.length ? (
        <TweetMedia tweet={tweet} components={components} />
      ) : null}
      {tweet.quoted_tweet && <QuotedTweet tweet={tweet.quoted_tweet} />}
      <TweetInfo tweet={tweet} />
      <TweetActions tweet={tweet} />
      {/* We're not including the `TweetReplies` component that adds the reply button */}
    </TweetContainer>
  )
}您可以閱讀文件。
您可以查看React Tweet 的演示,以了解它如何在頁面上呈現。
它們已發布v3.2版本,這表明它們正在不斷改進,並且每週下載量超過 46k+ 。
https://github.com/vercel/react-tweet Star React 推文 ⭐️
-
React 360 - 使用 React 建立令人驚嘆的 360 度和 VR 內容。
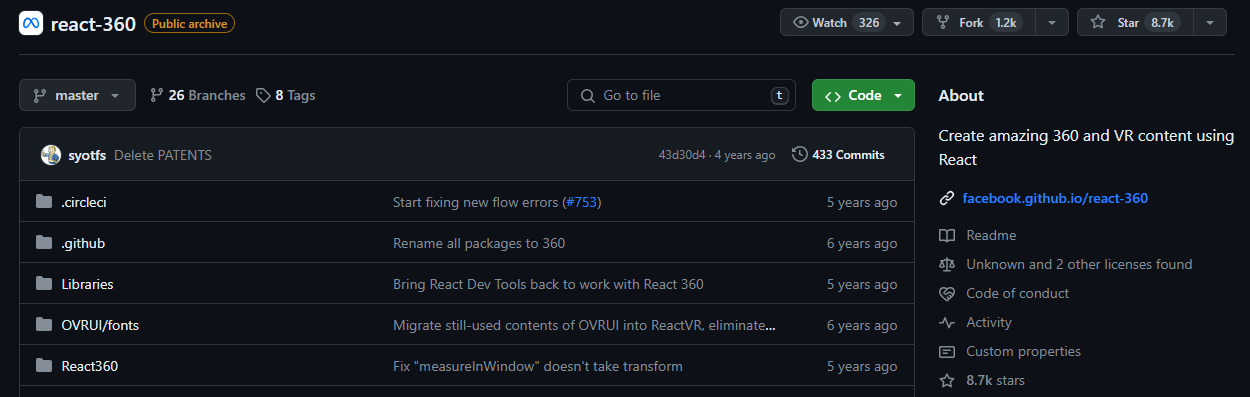
儘管 Facebook 已將其存檔,但許多開發人員仍然發現它足夠有用,因此繼續使用。
React 360 是一個函式庫,它利用大量 React Native 功能來建立在 Web 瀏覽器中執行的虛擬實境應用程式。
它使用 Three.js 進行渲染,並作為 npm 套件提供。透過將 WebGL 和 WebVR 等現代 API 與 React 的聲明性功能結合,React 360 有助於簡化建立跨平台 VR 體驗的過程。
開始使用以下 npm 指令。
npm install -g react-360-cli涉及的事情有很多,但您可以使用 VrButton 加入重要的互動功能到您的 React VR 應用程式。
import {
  AppRegistry,
  StyleSheet,
  Text,
  View,
  VrButton
} from 'react-360';

state = {
  count: 0
};

_incrementCount = () => {
  this.setState({
    count: this.state.count + 1
  })
}

<View style={styles.panel}>
        <VrButton
          onClick={this._incrementCount}
          style={styles.greetingBox}>
          <Text style={styles.greeting}>
            {`You have visited Simmes ${this.state.count} times`}
          </Text>
        </VrButton>
</View>除了許多令人驚奇的東西之外,您還可以加入聲音。請參閱使用 React 360 的 React Resources範例。
您也可以閱讀 Log Rocket 撰寫的關於使用 React 360 建立 VR 應用程式的部落格。
這個codesandbox代表了我們可以使用React 360做什麼的一個常見範例。
https://github.com/facebookarchive/react-360 Star React 360 ⭐️
-
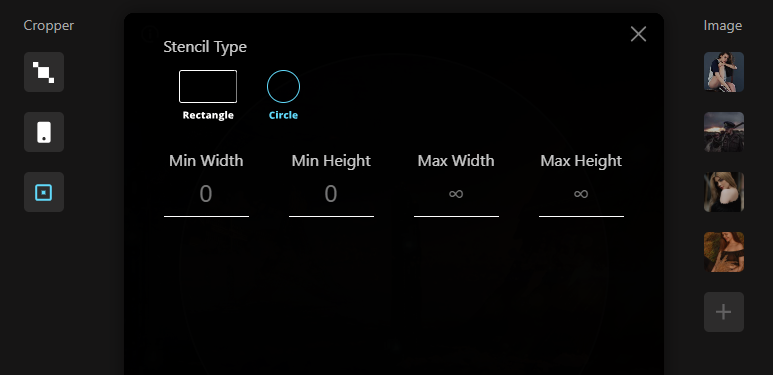
React Advanced Cropper - 建立適合您網站的裁剪器。
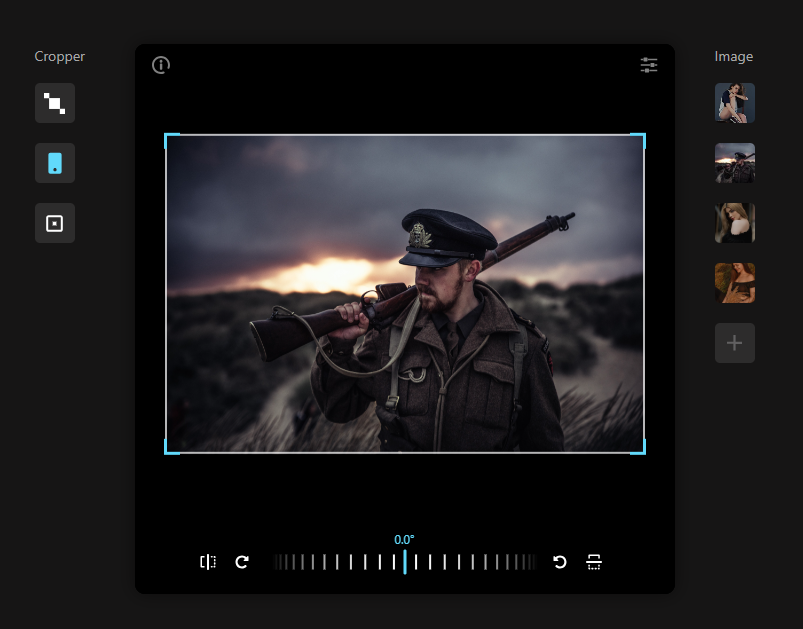

React Advanced Cropper 是一個高級庫,可讓您建立適合任何網站設計的裁剪器。這意味著您不僅可以更改裁剪器的外觀,還可以自訂其行為。
它們仍處於測試版本,這意味著 API 可能會在未來版本中發生變化。
簡單的用例是設計軟體和裁剪圖像表面以獲得進一步的見解。
他們有很多選擇,因此值得。

開始使用以下 npm 指令。
npm install --save react-advanced-cropper您可以這樣使用它。
import React, { useState } from 'react';
import { CropperRef, Cropper } from 'react-advanced-cropper';
import 'react-advanced-cropper/dist/style.css'

export const GettingStartedExample = () => {
    const [image, setImage] = useState(
        'https://images.unsplash.com/photo-1599140849279-1014532882fe?ixlib=rb-1.2.1&ixid=eyJhcHBfaWQiOjEyMDd9&auto=format&fit=crop&w=1300&q=80',
    );

    const onChange = (cropper: CropperRef) => {
        console.log(cropper.getCoordinates(), cropper.getCanvas());
    };

    return (
        <Cropper
            src={image}
            onChange={onChange}
            className={'cropper'}
        />
    )
};他們主要提供三種類型的裁剪器選項:固定、經典和混合以及範例和程式碼。
您可以使用 React Advanced Cropper 製作一些令人興奮的東西來向世界展示:)
https://github.com/advanced-cropper/react-advanced-cropper Star React 進階裁剪器 ⭐️
-
Mobx - 簡單、可擴展的狀態管理。
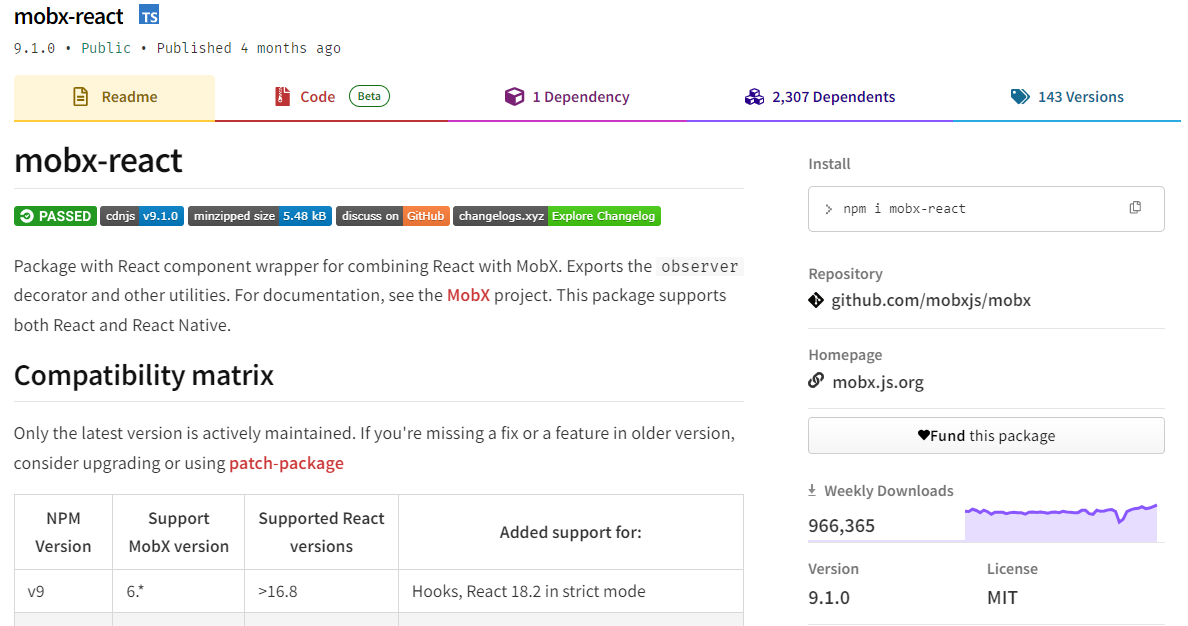
MobX 是一個經過驗證的基於訊號的函式庫,可透過函數反應式程式設計簡化和擴展狀態管理。它提供了靈活性,使您能夠獨立於任何 UI 框架來管理應用程式狀態。
這種方法會產生解耦、可移植且易於測試的程式碼。
以下是使用 MobX 的任何應用程式中處理事件的方式。
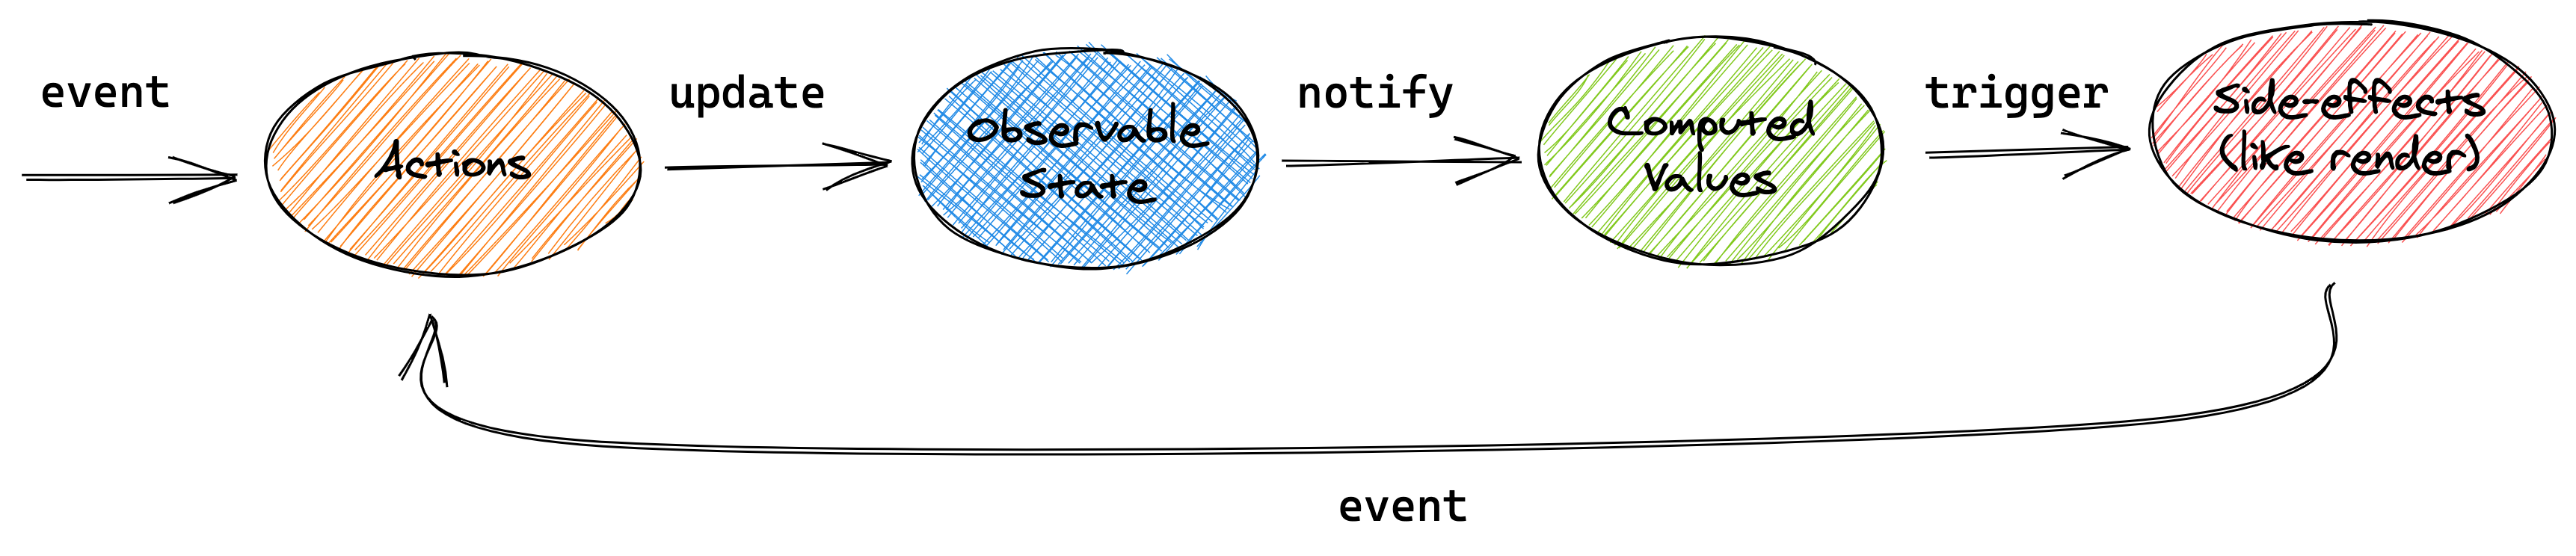
圖片來自文件
開始使用以下 npm 指令。
npm install mobx-react --save
// CDN is also available
這就是它的樣子。
import { observer } from "mobx-react"

// ---- ES6 syntax ----
const TodoView = observer(
    class TodoView extends React.Component {
        render() {
            return <div>{this.props.todo.title}</div>
        }
    }
)

// ---- ESNext syntax with decorator syntax enabled ----
@observer
class TodoView extends React.Component {
    render() {
        return <div>{this.props.todo.title}</div>
    }
}

// ---- or just use function components: ----
const TodoView = observer(({ todo }) => <div>{todo.title}</div>)
您可以使用 props、全域變數或使用 React Context 在觀察者中使用外部狀態。
您可以閱讀有關 React Integration和npm docs的文件。
您也可以閱讀MobX 和 React 的 10 分鐘互動介紹。
MobX 在 GitHub 上擁有超過 27k 顆星,並在 GitHub 上被超過 140K 開發者使用。
https://github.com/mobxjs/mobx 明星 Mobx ⭐️
-
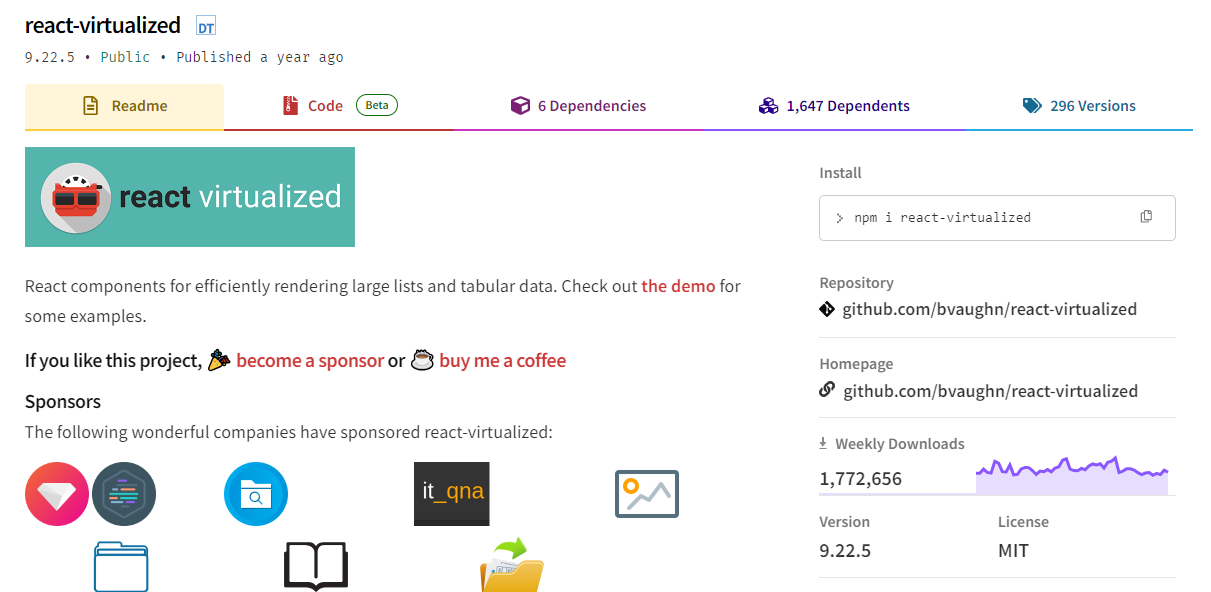
React Virtualized - 渲染大型清單和表格資料。
開始使用以下 npm 指令。
npm install react-virtualized --save以下是如何在網格中使用 ColumnSizer 元件。探索演示(文件)以詳細了解可用選項。
import React from 'react';
import ReactDOM from 'react-dom';
import {ColumnSizer, Grid} from 'react-virtualized';
import 'react-virtualized/styles.css'; // only needs to be imported once

// numColumns, numRows, someCalculatedHeight, and someCalculatedWidth determined here...

// Render your list
ReactDOM.render(
  <ColumnSizer
    columnMaxWidth={100}
    columnMinWidth={50}
    columnCount={numColumns}
    width={someCalculatedWidth}>
    {({adjustedWidth, getColumnWidth, registerChild}) => (
      <Grid
        ref={registerChild}
        columnWidth={getColumnWidth}
        columnCount={numColumns}
        height={someCalculatedHeight}
        cellRenderer={someCellRenderer}
        rowHeight={50}
        rowCount={numRows}
        width={adjustedWidth}
      />
    )}
  </ColumnSizer>,
  document.getElementById('example'),
);他們提供了 React-window 作為輕量級的替代方案,但這個在發布和明星方面更受歡迎,所以我介紹了這個選項。您可以閱讀哪個選項更適合您: React-Window 與 React-Virtualized 有何不同? 。
它被超過 85,000 名開發人員使用,並在 GitHub 上擁有超過 25,000 顆星。它還擁有令人印象深刻的170 萬+ 每週下載量。
https://github.com/bvaughn/react-virtualized Star React 虛擬化 ⭐️
16.React Google Analytics - React Google Analytics 模組。
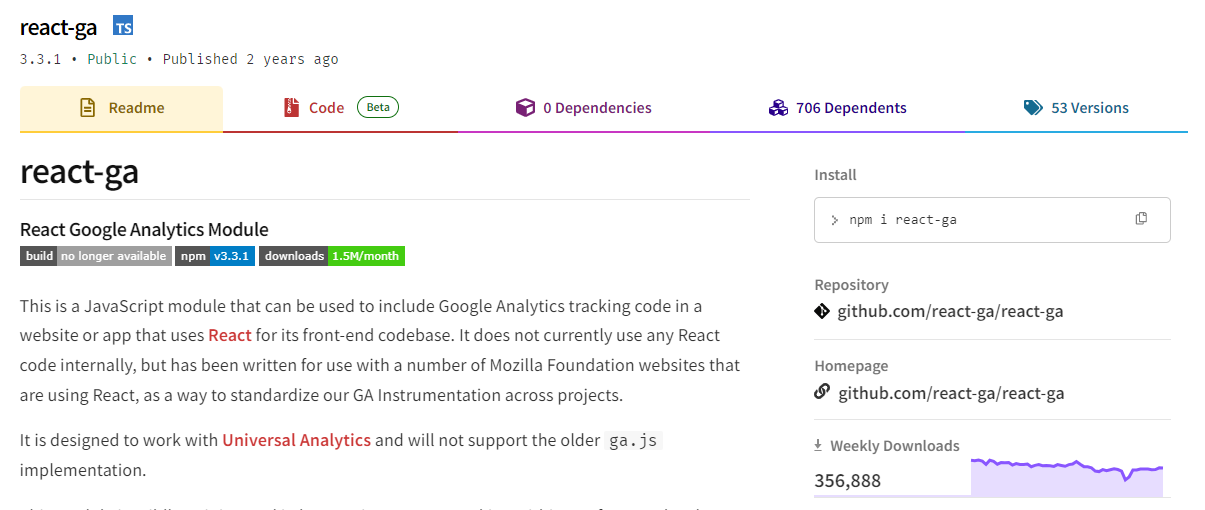
這是一個 JavaScript 模組,可用於在使用 React 作為前端程式碼庫的網站或應用程式中包含 Google Analytics 追蹤程式碼。
該模組對我們如何在前端程式碼中進行追蹤有一定的看法。我們的 API 比核心 Google Analytics 庫稍微詳細一些,以使程式碼更易於閱讀。
開始使用以下 npm 指令。
npm install react-ga --save您可以這樣使用它。
import ReactGA from 'react-ga';
ReactGA.initialize('UA-000000-01');
ReactGA.pageview(window.location.pathname + window.location.search);

<!-- The core React library -->
<script src="https://unpkg.com/[email protected]/dist/react.min.js"></script>
<!-- The ReactDOM Library -->
<script src="https://unpkg.com/[email protected]/dist/react-dom.min.js"></script>
<!-- ReactGA library -->
<script src="/path/to/bower_components/react-ga/dist/react-ga.min.js"></script>

<script>
  ReactGA.initialize('UA-000000-01', { debug: true });
</script>執行npm install npm start並前往port 8000 on localhost後,您可以閱讀文件並查看演示。
它每週的下載量超過 35 萬次,在 GitHub 上擁有超過 5,000 顆星(已存檔)。
https://github.com/react-ga/react-ga Star React Google Analytics ⭐️
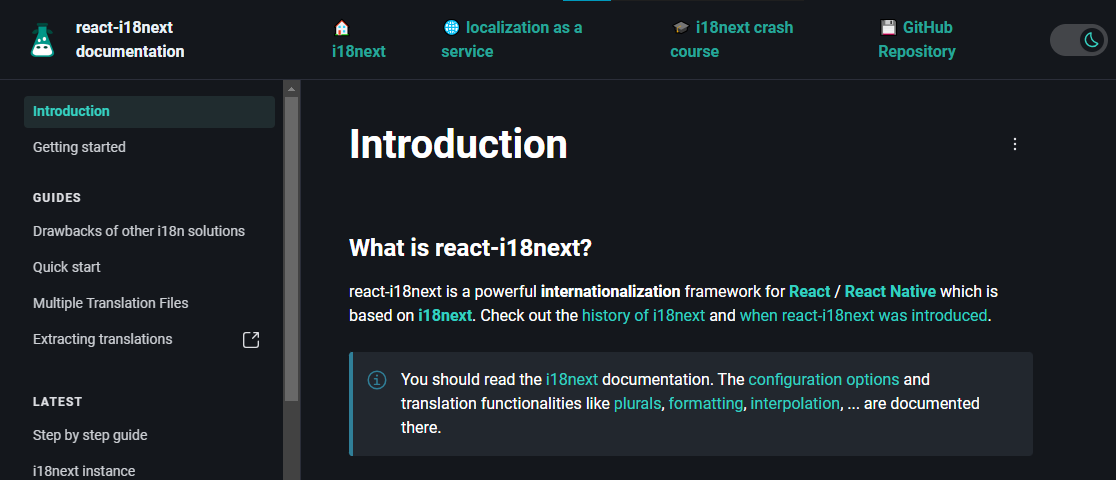
17.react -i18next - React 的國際化做得很好。
無需更改 webpack 配置或加入額外的 babel 轉譯器。
開始使用以下 npm 指令。
npm i react-i18next我們來比較一下程式碼結構。
在使用react-i18next之前。
...
<div>Just simple content</div>
<div>
  Hello <strong title="this is your name">{name}</strong>, you have {count} unread message(s). <Link to="/msgs">Go to messages</Link>.
</div>
...
使用react-i18next後。
...
<div>{t('simpleContent')}</div>
<Trans i18nKey="userMessagesUnread" count={count}>
  Hello <strong title={t('nameTitle')}>{{name}}</strong>, you have {{count}} unread message. <Link to="/msgs">Go to messages</Link>.
</Trans>
...您可以閱讀文件並前往Codesandbox 的互動式遊樂場。
該工具已被超過 182,000 名開發人員使用,在 GitHub 上擁有超過 8,000 顆星。軟體包中令人印象深刻的 3400k+ 下載量進一步鞏固了它的可信度,使其成為您下一個 React 專案的絕佳選擇。
您也可以閱讀 Locize 關於React Localization - Internationalize with i18next的部落格。
https://github.com/i18next/react-i18next 明星react-i18next ⭐️
哇!如此長的有用專案清單。
我知道您有更多想法,分享它們,讓我們一起建造:D
現在就這些了!
在開展新專案時,開發人員經驗至關重要,這就是為什麼有些專案擁有龐大的社區,而有些則沒有。
React 社群非常龐大,所以成為這些社群的一部分,並使用這些開源專案將您的專案提升到一個新的水平。
祝你有美好的一天!直到下一次。
在 GitHub 上關注我。
https://github.com/Anmol-Baranwal
請關注 CopilotKit 以了解更多此類內容。
原文出處:https://dev.to/copilotkit/libraries-you-should-know-if-you-build-with-react-1807
1) --- 會變成分隔線(上一行必須是空白)
2) # 會變成一級標題
3) ## 會變成二級標題
4) ### 會變成三級標題
5) **粗體文字**會顯示粗體文字
6) ```當第一行與最後一行會顯示程式碼
7) 請搜尋 Markdown 語法,了解各種格式