🔧 阿川の電商水電行

長話短說
在本文中,您將學習如何建立一個人工智慧驅動的部落格平台,該平台可以搜尋網路並研究部落格文章的任何主題。
我們將涵蓋:
-
用於應用程式框架的 Next.js 🖥️
-
法學碩士 OpenAI 🧠
-
LangChain 和 Tavily 的網路搜尋人工智慧代理🤖
-
使用 CopilotKit 將 AI 整合到您的應用程式中 🪁
-
Supabase 用於儲存和檢索部落格平台文章資料。
CopilotKit:開源 Copilot 框架
CopilotKit 是開源 AI 副駕駛框架和平台。我們可以輕鬆地將強大的人工智慧整合到您的 React 應用程式中。
建造:
-
ChatBots💬:上下文感知的應用內聊天機器人,可以在應用程式內執行操作
-
CopilotTextArea📝:人工智慧驅動的文字字段,具有上下文感知自動完成和插入功能
-
聯合代理🤖:應用程式內人工智慧代理,可以與您的應用程式和使用者互動。由浪鏈提供技術支援。

{% cta https://github.com/CopilotKit/CopilotKit %} Star CopilotKit ⭐️ {% endcta %}
(原諒人工智慧的拼字錯誤並給一顆星:)
現在回到文章。
先決條件
在開始建立應用程式之前,讓我們先查看建置應用程式所需的依賴項或套件
-
copilotkit/react-core:CopilotKit 前端包,帶有 React hooks,用於向副駕駛提供應用程式狀態和操作(AI 功能) -
copilotkit/react-ui:聊天機器人側邊欄 UI 的 CopilotKit 前端包 -
copilotkit/react-textarea:CopilotKit 前端包,用於在演講者筆記中進行人工智慧輔助文字編輯。 -
LangChainJS:用於開發由語言模型支援的應用程式的框架。 -
Tavily Search API:幫助將法學碩士和人工智慧應用程式連接到可信賴的即時知識的 API。
安裝所有專案包和依賴項
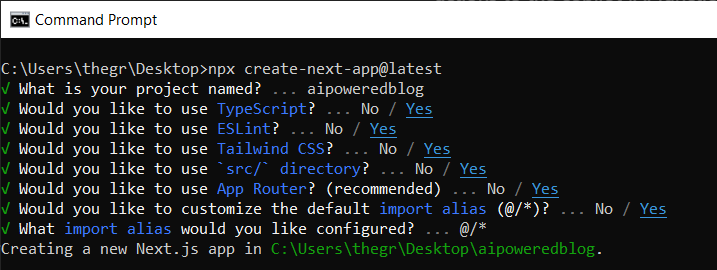
在安裝所有專案包和依賴項之前,我們首先在終端機上執行以下命令來建立 Nextjs 專案。
npx create-next-app@latest然後系統會提示您選擇一些選項。請隨意標記它們,如下所示。
之後,使用您選擇的文字編輯器開啟新建立的 Nextjs 專案。然後在命令列中執行以下命令來安裝所有專案包和依賴項。
npm i @copilotkit/backend @copilotkit/shared @langchain/langgraph @copilotkit/react-core @copilotkit/react-ui @copilotkit/react-textarea @supabase/ssr @supabase/auth-helpers-nextjs建立部落格平台前端
在本節中,我將引導您完成使用靜態內容建立部落格平台前端的過程,以定義平台的使用者介面。
首先,前往/[root]/src/app並建立一個名為components的資料夾。在 Components 資料夾中,建立一個名為Article.tsx的檔案。
之後,將以下程式碼新增至定義名為Article功能元件的檔案中,該元件將用於呈現文章建立表單。
"use client";

import { useRef, useState } from "react";

export function Article() {
  // Define state variables for article outline, copilot text, and article title
  const [articleOutline, setArticleOutline] = useState("");
  const [copilotText, setCopilotText] = useState("");
  const [articleTitle, setArticleTitle] = useState("");

  return (
    // Form element for article input
    <form
      action={""}
      className="w-full h-full gap-10 flex flex-col items-center p-10">
      {/* Input field for article title */}
      <div className="flex w-full items-start gap-3">
        <textarea
          className="p-2 w-full h-12 rounded-lg flex-grow overflow-x-auto overflow-y-hidden whitespace-nowrap"
          id="title"
          name="title"
          value={articleTitle}
          placeholder="Article Title"
          onChange={(event) => setArticleTitle(event.target.value)}
        />
      </div>

      {/* Textarea for article content */}
      <textarea
        className="p-4 w-full aspect-square font-bold text-xl bg-slate-800 text-white rounded-lg resize-none"
        id="content"
        name="content"
        value={copilotText}
        placeholder="Write your article content here"
        onChange={(event) => setCopilotText(event.target.value)}
      />

      {/* Publish button */}
      <button
        type="submit"
        className="p-4 w-full !bg-slate-800 text-white rounded-lg">Publish</button>
    </form>
  );
}
接下來,將另一個檔案新增到元件資料夾中,並將其命名為Header.tsx 。然後將以下程式碼新增至定義名為Header的功能元件的檔案中,該元件將呈現部落格平台的導覽列。
import Link from "next/link";

export default function Header() {
  return (
    <>
      <header className="flex flex-wrap sm:justify-start sm:flex-nowrap z-50 w-full bg-white border-b border-gray-200 text-sm py-3 sm:py-0 ">
        <nav
          className="relative max-w-7xl w-full mx-auto px-4 sm:flex sm:items-center sm:justify-between sm:px-6 lg:px-8"
          aria-label="Global">
          <div className="flex items-center justify-between">
            <Link
              className="flex-none text-xl font-semibold "
              href="/"
              aria-label="Brand">
              AIBlogging
            </Link>
          </div>
          <div id="navbar-collapse-with-animation" className="">
            <div className="flex flex-col gap-y-4 gap-x-0 mt-5 sm:flex-row sm:items-center sm:justify-end sm:gap-y-0 sm:gap-x-7 sm:mt-0 sm:ps-7">
              <Link
                className="flex items-center font-medium text-gray-500 border-2 border-indigo-600 text-center p-2 rounded-md hover:text-blue-600 sm:border-s sm:my-6 "
                href="/writearticle">
                Create Post
              </Link>
            </div>
          </div>
        </nav>
      </header>
    </>
  );
}之後,轉到/[root]/src/app並建立一個名為writearticle的資料夾。在writearticle資料夾中,建立一個名為page.tsx檔案。然後將以下程式碼加入匯入Article和Header元件的檔案中。然後,程式碼定義了一個名為WriteArticle的功能元件,它將呈現導覽列和文章建立表單。
import { Article } from "../components/Article";
import Header from "../components/Header";

export default function WriteArticle() {
  return (
    <>
      <Header />
      <Article />
    </>
  );
}
接下來,前往/[root]/src/page.tsx文件,並新增以下程式碼,該程式碼定義一個名為Home功能元件,該元件呈現將顯示已發佈文章清單的部落格平台主頁。
import Image from "next/image";
import Link from "next/link";
import Header from "./components/Header";

const Home = async () => {
  return (
    <>
      <Header />
      <div className="max-w-[85rem] h-full px-4 py-10 sm:px-6 lg:px-8 lg:py-14 mx-auto">
        <div className="grid sm:grid-cols-2 lg:grid-cols-3 gap-6">
          <Link
            key={""}
            className="group flex flex-col h-full bg-white border border-gray-200 hover:border-transparent hover:shadow-lg transition-all duration-300 rounded-xl p-5 "
            href={""}>
            <div className="aspect-w-16 aspect-h-11">
              <Image
                className="object-cover h-48 w-96 rounded-xl"
                src={`https://source.unsplash.com/featured/?${encodeURIComponent(
                  "hello world"
                )}`}
                width={500}
                height={500}
                alt="Image Description"
              />
            </div>
            <div className="my-6">
              <h3 className="text-xl font-semibold text-gray-800 ">
                Hello World
              </h3>
            </div>
          </Link>
        </div>
      </div>
    </>
  );
};

export default Home;之後,請轉到next.config.js檔案並加入以下程式碼,該程式碼允許您使用 Unsplash 中的圖像作為已發布文章的封面圖像。
module.exports = {
  images: {
    remotePatterns: [
      {
        protocol: "https",
        hostname: "source.unsplash.com",
      },
    ],
  },
};
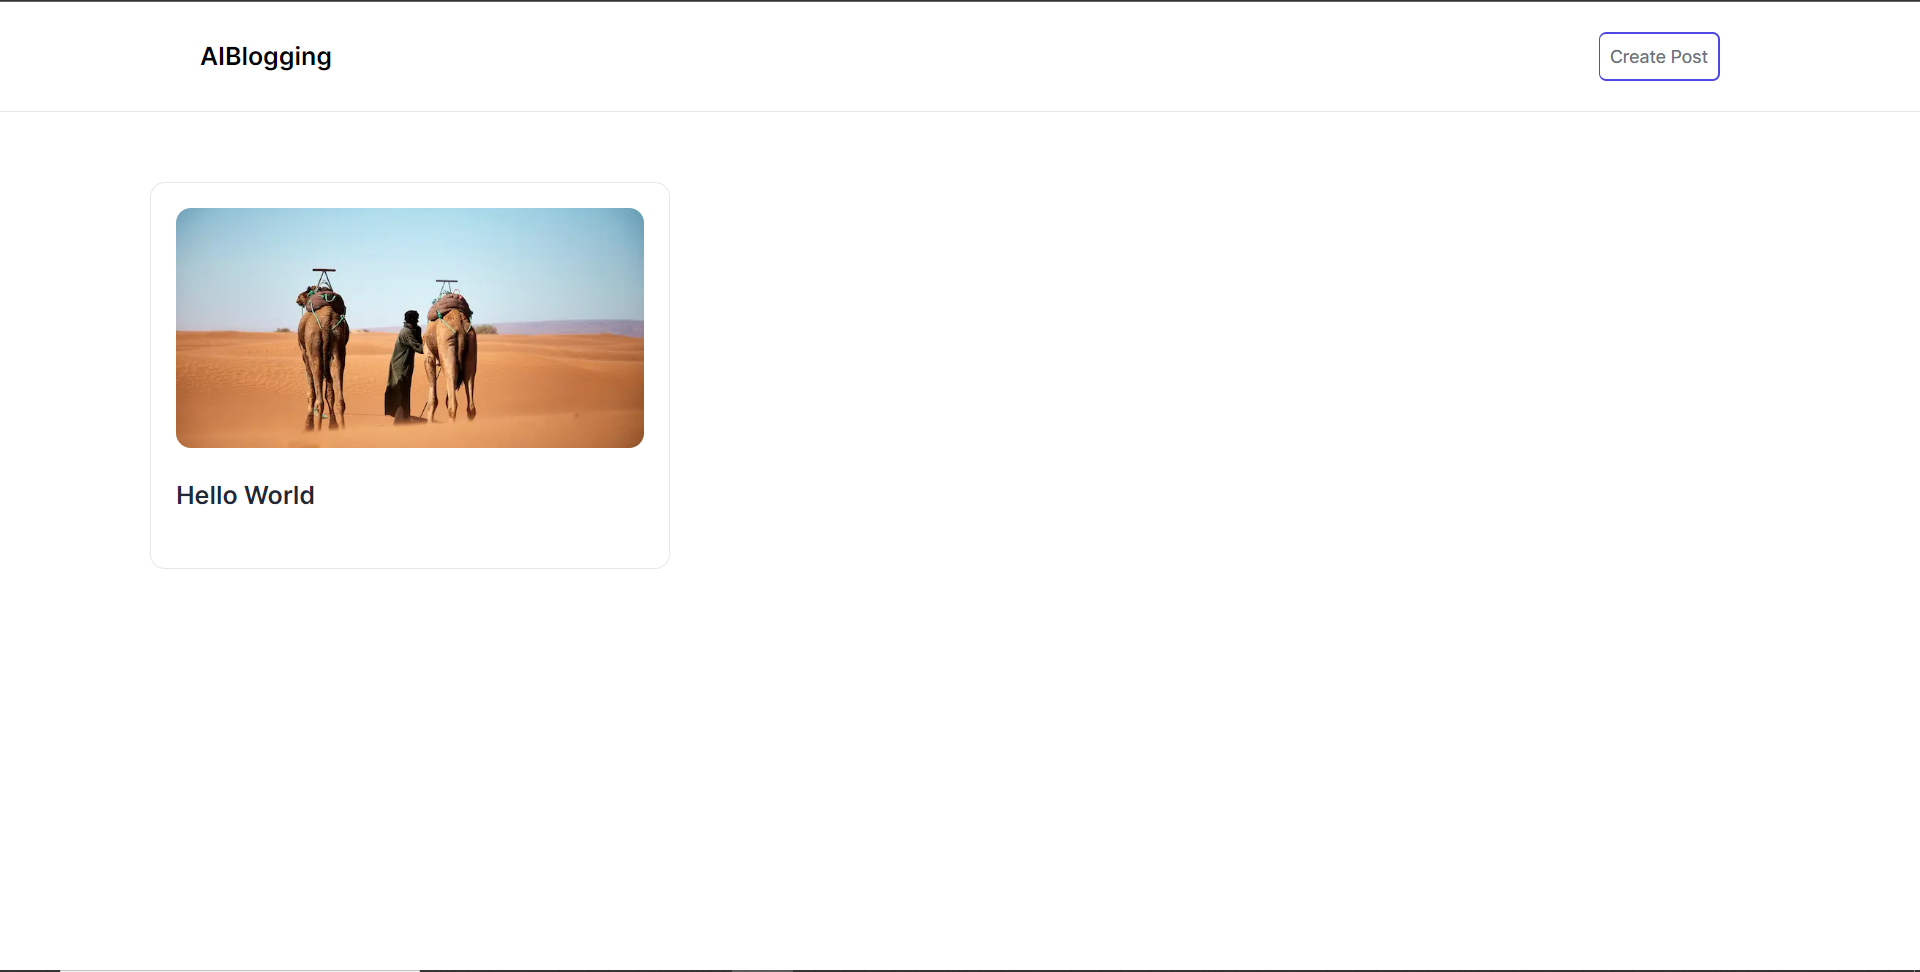
最後,在命令列上執行命令npm run dev ,然後導航到 http://localhost:3000/。現在您應該在瀏覽器上查看部落格平台前端,如下所示。
將部落格平台與 CopilotKit 後端集成
在本節中,我將引導您完成將部落格平台與 CopilotKit 後端整合的過程,CopilotKit 後端處理來自前端的請求,提供函數呼叫和各種 LLM 後端(例如 GPT)。此外,我們將整合一個名為 Tavily 的人工智慧代理,它可以研究網路上的任何主題。
首先,在根目錄中建立一個名為.env.local的檔案。然後在保存ChatGPT和Tavily Search API 金鑰的檔案中加入下面的環境變數。
OPENAI_API_KEY="Your ChatGPT API key"
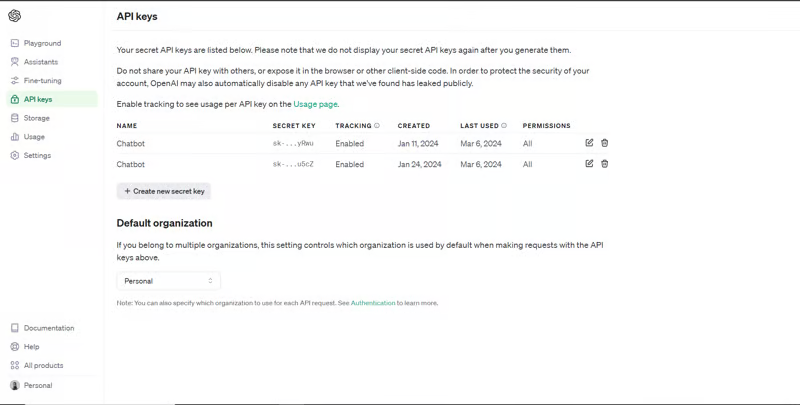
TAVILY_API_KEY="Your Tavily Search API key"若要取得 ChatGPT API 金鑰,請導覽至 https://platform.openai.com/api-keys。
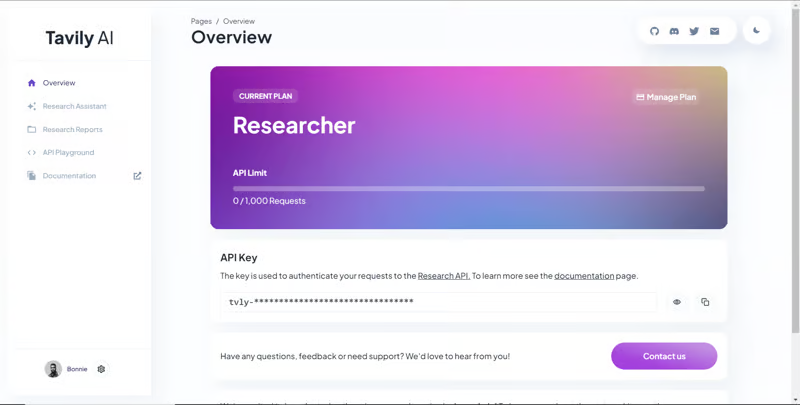
若要取得 Tavilly Search API 金鑰,請導覽至 https://app.tavily.com/home
之後,轉到/[root]/src/app並建立一個名為api的資料夾。在api資料夾中,建立一個名為copilotkit的資料夾。在copilotkit資料夾中,建立一個名為research.ts的檔案。然後導航到該 Research.ts gist 文件,複製程式碼,並將其新增至research.ts檔案中
接下來,在/[root]/src/app/api/copilotkit資料夾中建立一個名為route.ts的檔案。該文件將包含設定後端功能來處理 POST 請求的程式碼。它有條件地包括對給定主題進行研究的“研究”操作。
現在在文件頂部導入以下模組。
import { CopilotBackend, OpenAIAdapter } from "@copilotkit/backend"; // For backend functionality with CopilotKit.
import { researchWithLangGraph } from "./research"; // Import a custom function for conducting research.
import { AnnotatedFunction } from "@copilotkit/shared"; // For annotating functions with metadata.
在上面的程式碼下面,定義一個執行時間環境變數和一個名為researchAction的函數,該函數使用下面的程式碼對某個主題進行研究。
// Define a runtime environment variable, indicating the environment where the code is expected to run.
export const runtime = "edge";

// Define an annotated function for research. This object includes metadata and an implementation for the function.
const researchAction: AnnotatedFunction<any> = {
  name: "research", // Function name.
  description: "Call this function to conduct research on a certain topic. Respect other notes about when to call this function", // Function description.
  argumentAnnotations: [ // Annotations for arguments that the function accepts.
    {
      name: "topic", // Argument name.
      type: "string", // Argument type.
      description: "The topic to research. 5 characters or longer.", // Argument description.
      required: true, // Indicates that the argument is required.
    },
  ],
  implementation: async (topic) => { // The actual function implementation.
    console.log("Researching topic: ", topic); // Log the research topic.
    return await researchWithLangGraph(topic); // Call the research function and return its result.
  },
};
然後在上面的程式碼下加入下面的程式碼來定義處理POST請求的非同步函數。
// Define an asynchronous function that handles POST requests.
export async function POST(req: Request): Promise<Response> {
  const actions: AnnotatedFunction<any>[] = []; // Initialize an array to hold actions.

  // Check if a specific environment variable is set, indicating access to certain functionality.
  if (process.env["TAVILY_API_KEY"]) {
    actions.push(researchAction); // Add the research action to the actions array if the condition is true.
  }

  // Instantiate CopilotBackend with the actions defined above.
  const copilotKit = new CopilotBackend({
    actions: actions,
  });

  // Use the CopilotBackend instance to generate a response for the incoming request using an OpenAIAdapter.
  return copilotKit.response(req, new OpenAIAdapter());
}
將部落格平台與 CopilotKit 前端集成
在本節中,我將引導您完成將部落格平台與 CopilotKit 前端整合的過程,以促進部落格文章研究和文章大綱生成。我們將使用聊天機器人側欄元件、copilot 文字區域元件、用於向 Copilot 提供應用程式狀態和其他資訊的 useMakeCopilotReadable 掛鉤,以及用於提供 Copilot 可以呼叫的操作的 useCopilotAction 掛鉤
首先,導入/[root]/src/app/components/Article.tsx檔案頂部的useMakeCopilotReadable 、 useCopilotAction 、 CopilotTextarea和HTMLCopilotTextAreaElement掛鉤。
import {
  useMakeCopilotReadable,
  useCopilotAction,
} from "@copilotkit/react-core";
import {
  CopilotTextarea,
  HTMLCopilotTextAreaElement,
} from "@copilotkit/react-textarea";
在 Article 函數內的狀態變數下方,新增以下程式碼,該程式碼使用useMakeCopilotReadable掛鉤來新增將作為應用程式內聊天機器人的上下文產生的文章大綱。鉤子使副駕駛可以閱讀文章大綱。
useMakeCopilotReadable("Blog article outline: " + JSON.stringify(articleOutline));
在useMakeCopilotReadable掛鉤下方,使用以下程式碼建立一個名為copilotTextareaRef的引用,該引用指向名為HTMLCopilotTextAreaElement的文字區域元素。
const copilotTextareaRef = useRef<HTMLCopilotTextAreaElement>(null);在上面的程式碼下方,加入以下程式碼,該程式碼使用useCopilotAction掛鉤來設定名為researchBlogArticleTopic的操作,該操作將啟用對部落格文章的給定主題的研究。此操作採用兩個參數,稱為articleTitle和articleOutline ,這兩個參數可以產生文章標題和大綱。
該操作包含一個處理程序函數,該函數根據給定主題生成文章標題和大綱。在處理函數內部, articleOutline狀態會使用新產生的大綱進行更新,而articleTitle狀態會使用新產生的標題進行更新,如下所示。
useCopilotAction(
    {
      name: "researchBlogArticleTopic",
      description: "Research a given topic for a blog article.",
      parameters: [
        {
          name: "articleTitle",
          type: "string",
          description: "Title for a blog article.",
          required: true,
        },
        {
          name: "articleOutline",
          type: "string",
          description:"Outline for a blog article that shows what the article covers.",
          required: true,
        },
      ],
      handler: async ({ articleOutline, articleTitle }) => {
        setArticleOutline(articleOutline);

        setArticleTitle(articleTitle);
      },
    },
    []
);在上面的程式碼下方,前往表單元件並新增以下CopilotTextarea元素,該元素將使您能夠為文章內容新增補全、插入和編輯。
<CopilotTextarea
        value={copilotText}
        ref={copilotTextareaRef}
        placeholder="Write your article content here"
        onChange={(event) => setCopilotText(event.target.value)}
        className="p-4 w-full aspect-square font-bold text-xl bg-slate-800 text-white rounded-lg resize-none"
        placeholderStyle={{
          color: "white",
          opacity: 0.5,
        }}
        autosuggestionsConfig={{
          textareaPurpose: articleTitle,
          chatApiConfigs: {
            suggestionsApiConfig: {
              forwardedParams: {
                max_tokens: 5,
                stop: ["\n", ".", ","],
              },
            },
            insertionApiConfig: {},
          },
          debounceTime: 250,
        }}
      />
然後將Tailwindcss隱藏類別加入文章內容的Textarea中,如下所示。文字區域將保存文章的內容,並在文章發布後將其插入資料庫。
{/* Textarea for article content */}
      <textarea
        className="p-4 w-full aspect-square font-bold text-xl bg-slate-800 text-white rounded-lg resize-none hidden"
        id="content"
        name="content"
        value={copilotText}
        placeholder="Write your article content here"
        onChange={(event) => setCopilotText(event.target.value)}
/>之後,請前往/[root]/src/app/writearticle/page.tsx檔案並使用下面的程式碼匯入頂部的 CopilotKit 前端套件和樣式。
import { CopilotKit } from "@copilotkit/react-core";
import { CopilotSidebar } from "@copilotkit/react-ui";
import "@copilotkit/react-ui/styles.css";
import "@copilotkit/react-textarea/styles.css";然後使用CopilotKit和CopilotSidebar包裹Article元件,如下所示。 CopilotKit元件指定 CopilotKit 後端端點 ( /api/copilotkit/openai/ ) 的 URL,而CopilotSidebar則呈現應用程式內聊天機器人,您可以提示您研究文章的任何主題。
export default function WriteArticle() {
return (
<>
<Header />
<CopilotKit url="/api/copilotkit">
<CopilotSidebar
instructions="Help the user research a blog article topic."
defaultOpen={true}
labels={{
title: "Blog Article Copilot",
initial:
"Hi you! 👋 I can help you research any topic for a blog article.",
}}
clickOutsideToClose={false}>
<Article />
</CopilotSidebar>
</CopilotKit>
</>
);
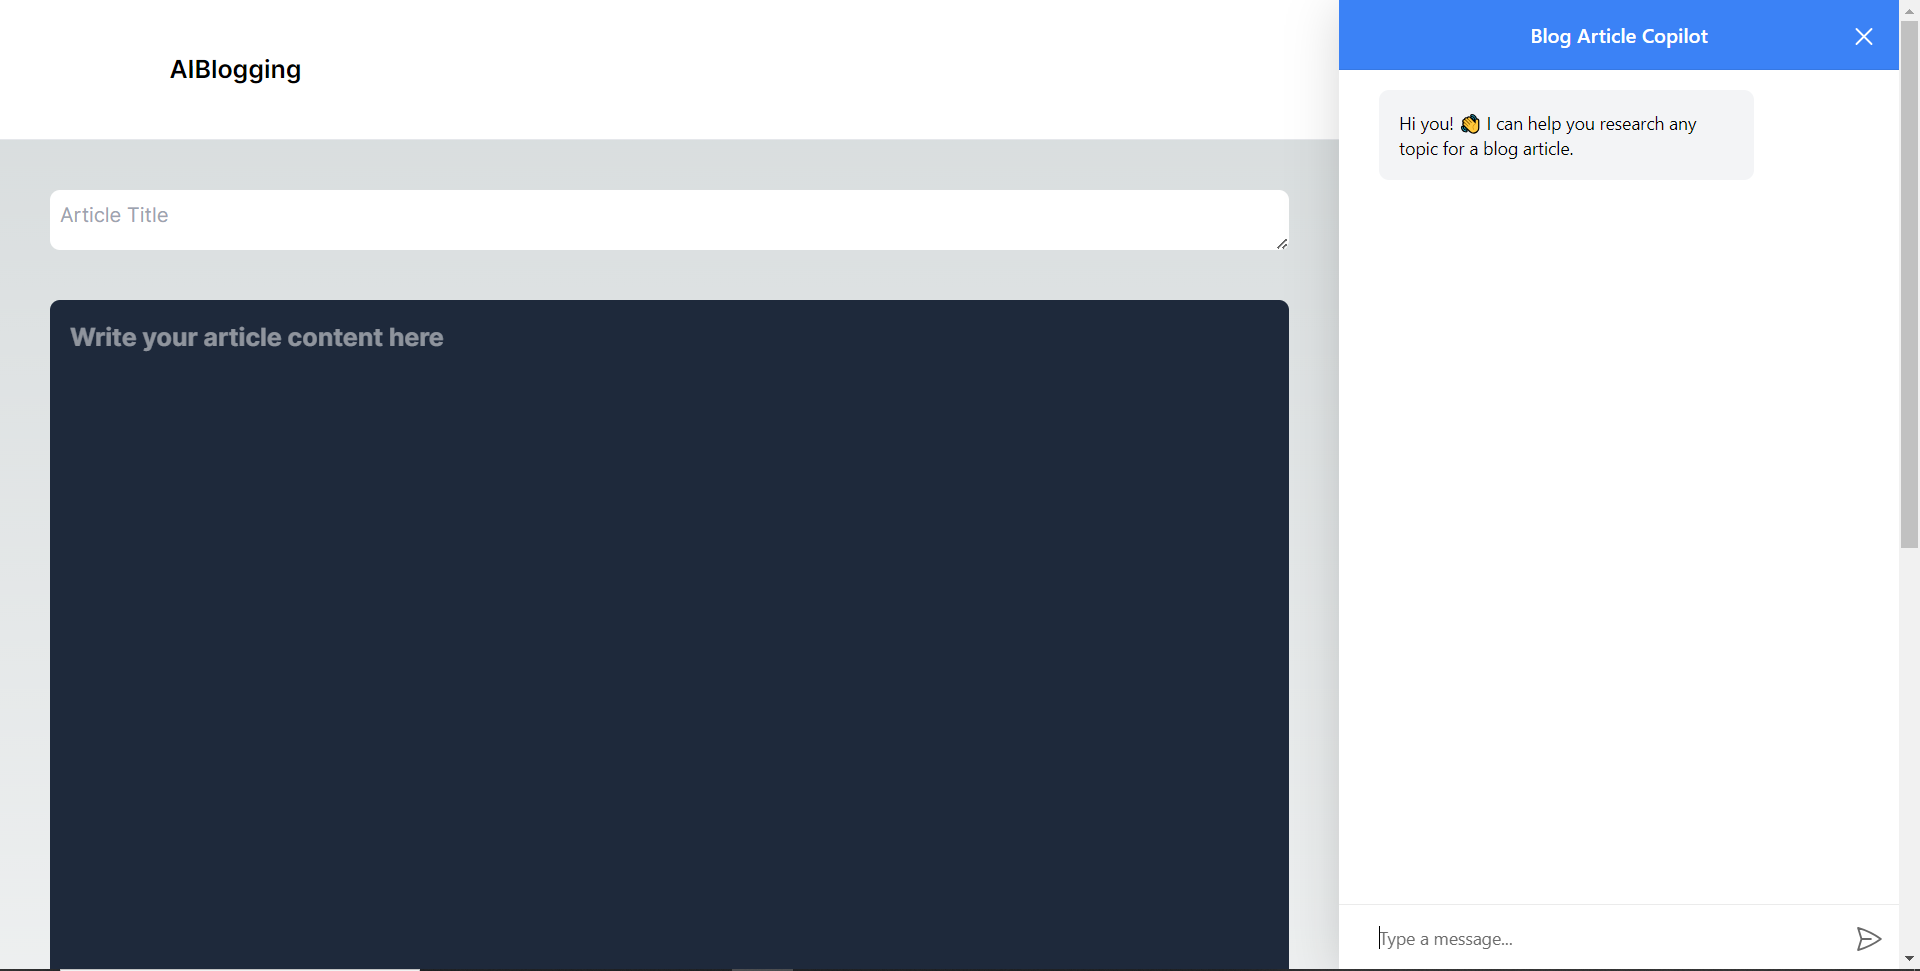
}之後,執行開發伺服器並導航到 http://localhost:3000/writearticle。您應該會看到應用程式內聊天機器人已整合到部落格平台中。
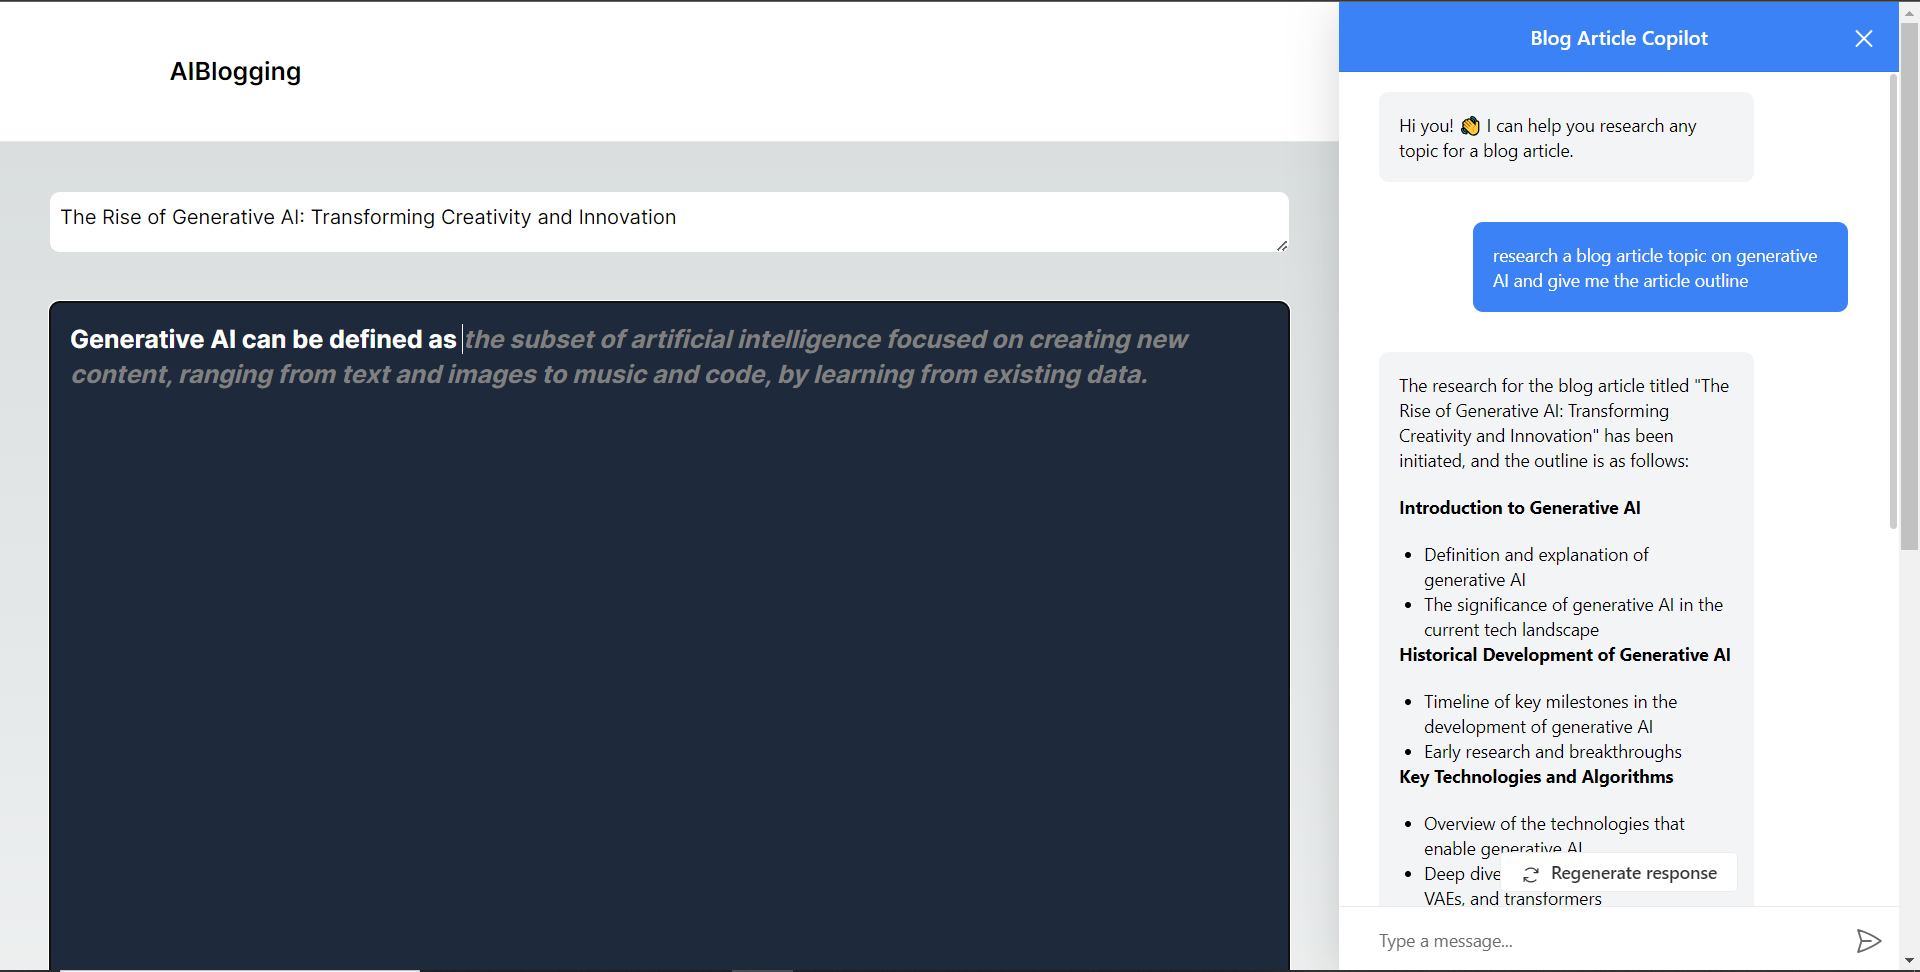
給右側的聊天機器人一個提示,例如“研究一篇關於生成人工智慧的部落格文章主題,然後給我文章大綱。”聊天機器人將開始研究該主題,然後產生部落格標題。
當您開始在編輯器上寫作時,您應該會看到內容自動建議,如下所示。
將部落格平台與 Supabase 資料庫集成
在本節中,我將引導您完成將部落格平台與 Supabase 資料庫整合以插入和獲取部落格文章資料的過程。
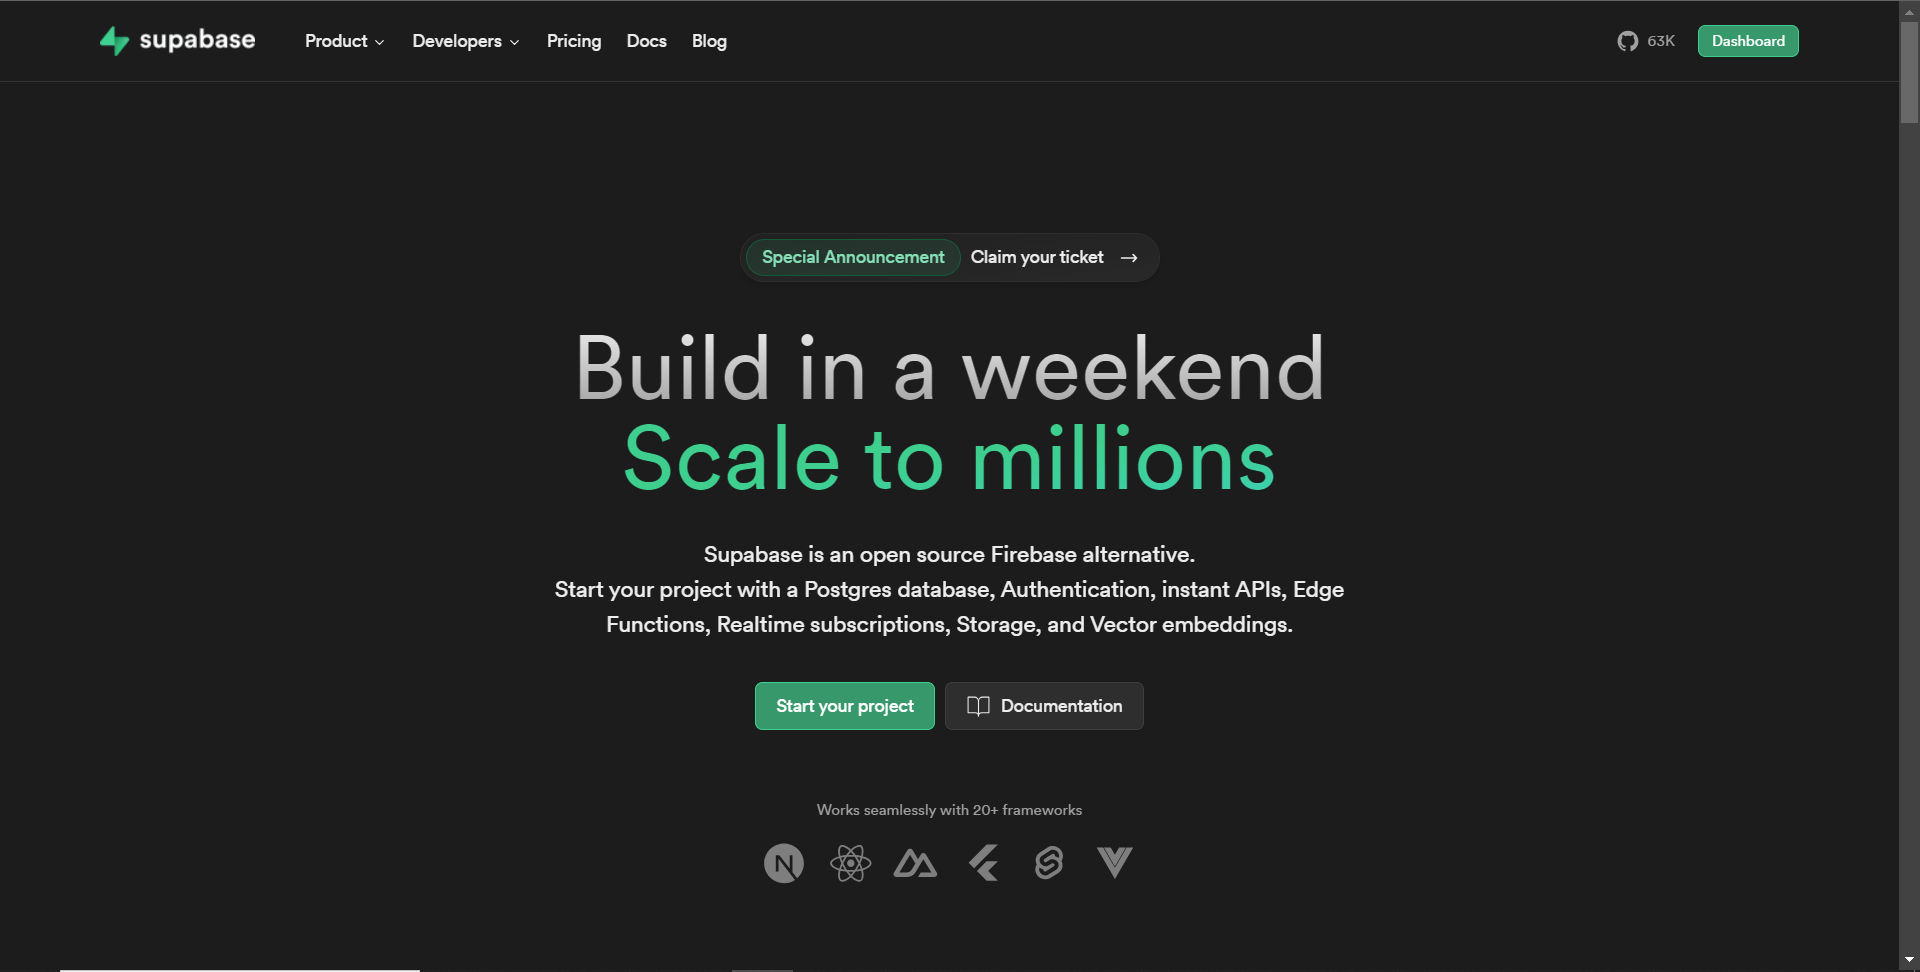
首先,導覽至supabase.com並點擊主頁上的「啟動您的專案」按鈕。
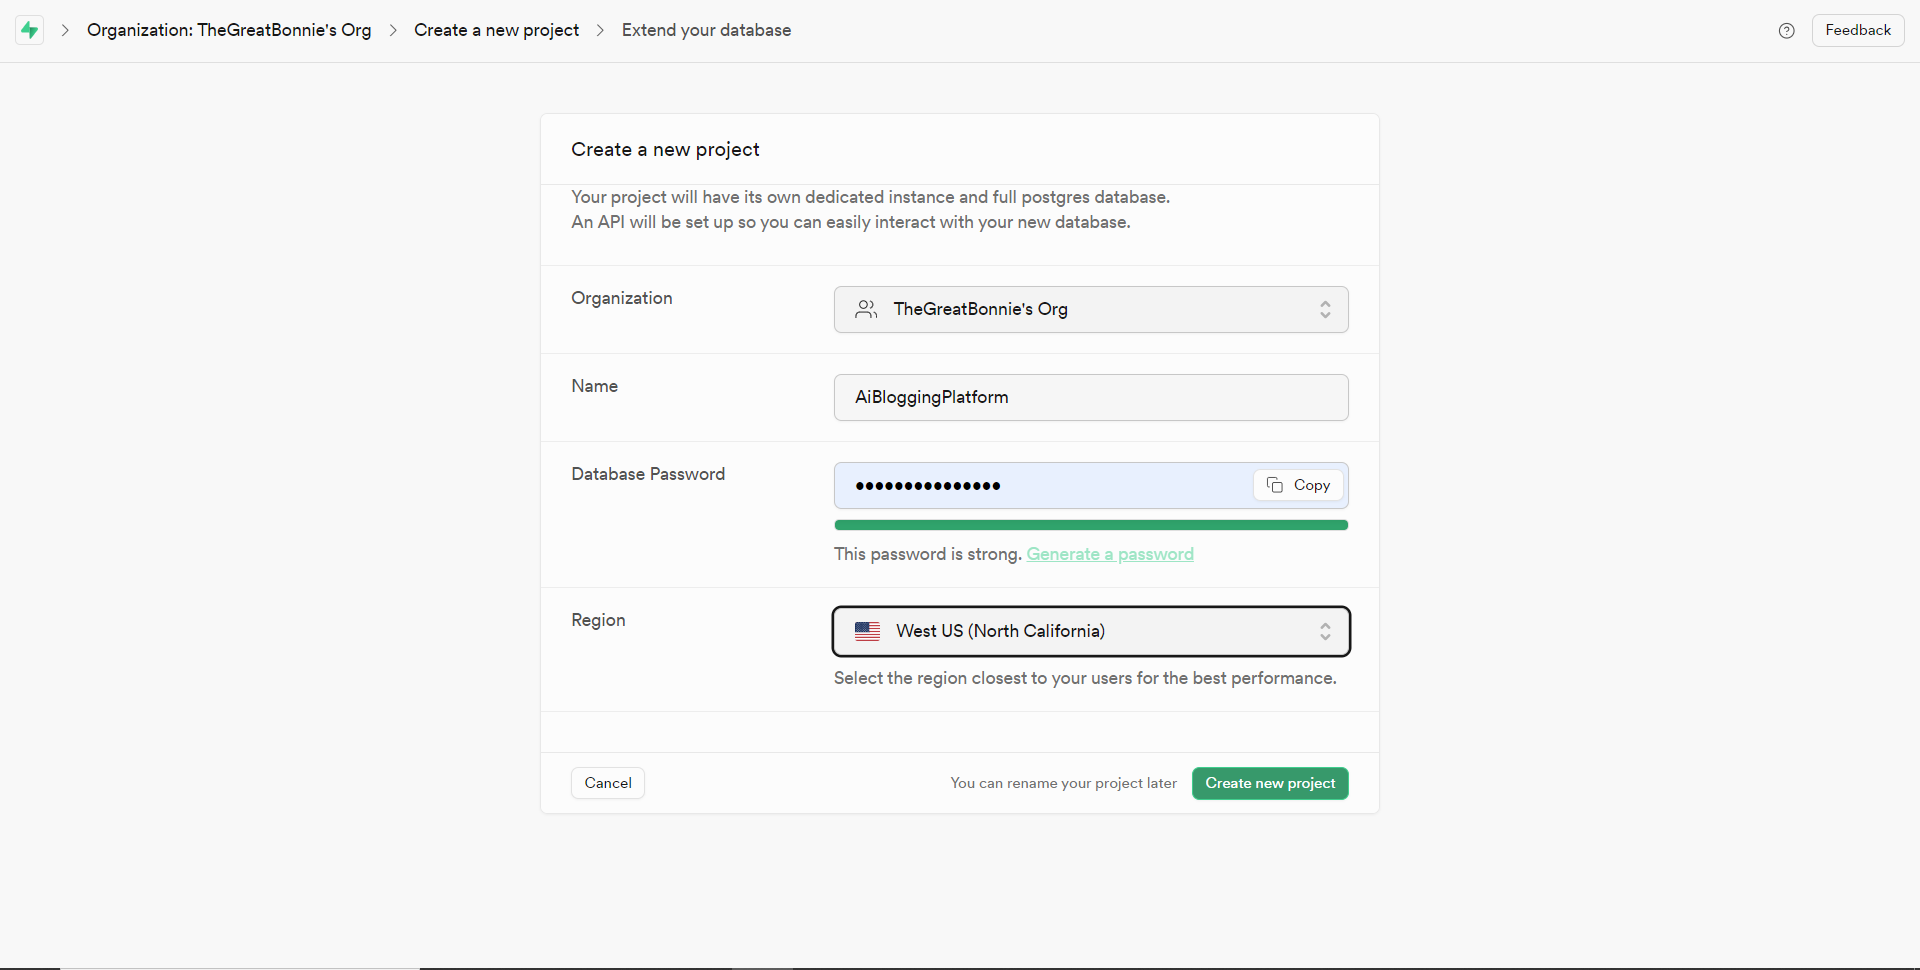
然後新建一個專案,名為AiBloggingPlatform,如下圖所示。
建立專案後,將 Supabase URL 和 API 金鑰新增至 env.local 檔案中的環境變數中,如下所示。
NEXT_PUBLIC_SUPABASE_URL=”Your Supabase URL”
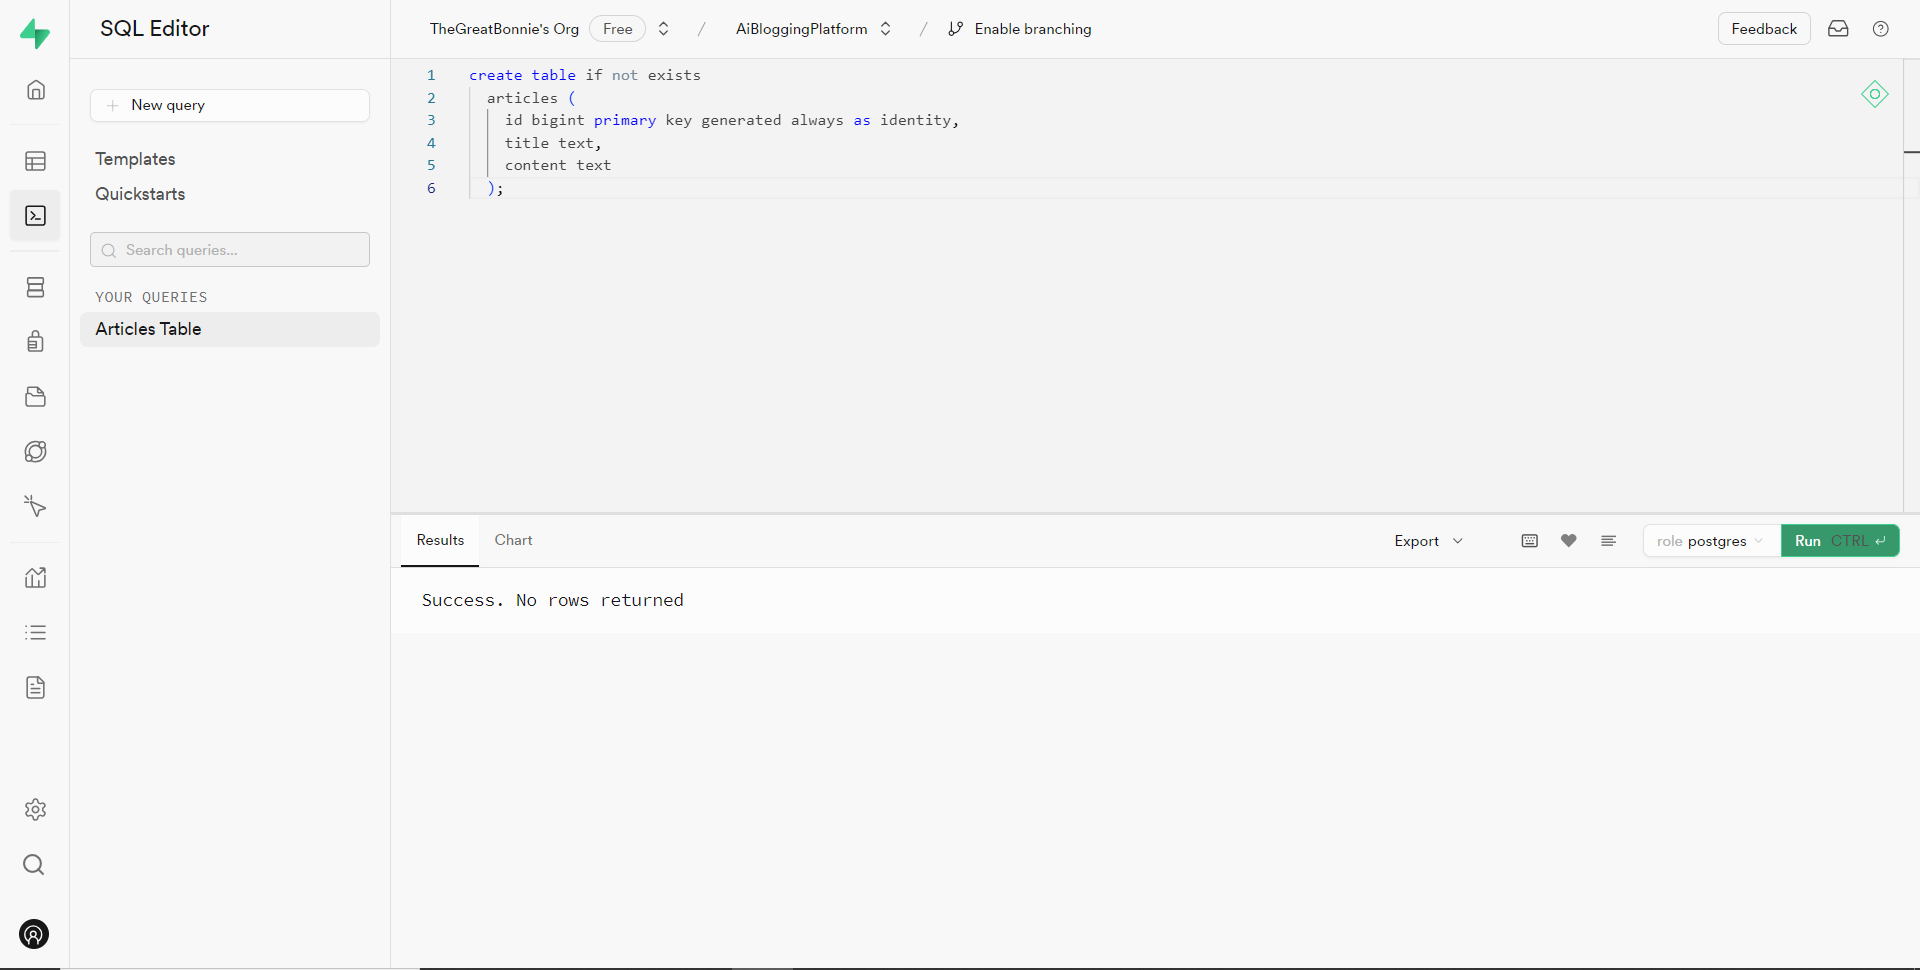
NEXT_PUBLIC_SUPABASE_ANON_KEY=”Your Supabase API Key”之後,請前往 Supabase 上專案的儀表板並開啟 SQL 編輯器部分。然後將下列 SQL 程式碼新增至編輯器中,然後按一下 CTRL + Enter 鍵建立一個名為articles 的表。文章表包含 id、標題和內容行。
create table if not exists
  articles (
    id bigint primary key generated always as identity,
    title text,
    content text
  );
建立表格後,您應該會收到一條成功訊息,如下所示。
之後,轉到/[root]/src/資料夾並建立一個名為utils的資料夾。在utils資料夾內,建立一個名為supabase.ts文件,並新增以下用於建立並傳回 Supabase 用戶端的程式碼。
// Importing necessary functions and types from the Supabase SSR package
import { createServerClient, type CookieOptions } from '@supabase/ssr'

// Define a function named 'supabase' that takes a 'CookieOptions' object as input
export const supabase = (cookies: CookieOptions) => {
    // Retrieve cookies from the provided 'CookieOptions' object
    const cookieStore = cookies()

    // Create and return a Supabase client configured with environment variables and cookie handling
    return createServerClient(
        // Retrieve Supabase URL from environment variables
        process.env.NEXT_PUBLIC_SUPABASE_URL!,
        // Retrieve Supabase anonymous key from environment variables
        process.env.NEXT_PUBLIC_SUPABASE_ANON_KEY!,
        {
            cookies: {
                // Define a custom 'get' function to retrieve cookies by name from the cookie store
                get(name: string) {
                    return cookieStore.get(name)?.value
                },
            },
        }
    )
}
然後轉到/[root]/src/app資料夾並建立一個名為serveractions的資料夾。在serveractions資料夾中,建立一個名為AddArticle.ts的文件,並新增以下程式碼,將部落格文章資料插入到 Supabase 資料庫中。
// Importing necessary functions and modules for server-side operations
"use server";
import { createServerComponentClient } from "@supabase/auth-helpers-nextjs";
import { cookies } from "next/headers";
import { redirect } from "next/navigation";

// Define an asynchronous function named 'addArticle' that takes form data as input
export async function addArticle(formData: any) {
  // Extract title and content from the provided form data
  const title = formData.get("title");
  const content = formData.get("content");

  // Retrieve cookies from the HTTP headers
  const cookieStore = cookies();

  // Create a Supabase client configured with the provided cookies
  const supabase = createServerComponentClient({ cookies: () => cookieStore });

  // Insert the article data into the 'articles' table on Supabase
  const { data, error } = await supabase.from("articles").insert([
    {
      title,
      content,
    },
  ]);

  // Check for errors during the insertion process
  if (error) {
    console.error("Error inserting data", error);
    return;
  }

  // Redirect the user to the home page after successfully adding the article
  redirect("/");

  // Return a success message
  return { message: "Success" };
}之後,轉到/[root]/src/app/components/Article.tsx檔案並導入addArticle函數。
import { addArticle } from "../serveractions/AddArticle";然後加入addArticle函數作為表單動作參數,如下所示。
// Form element for article input
<form
action={addArticle}
className="w-full h-full gap-10 flex flex-col items-center p-10">
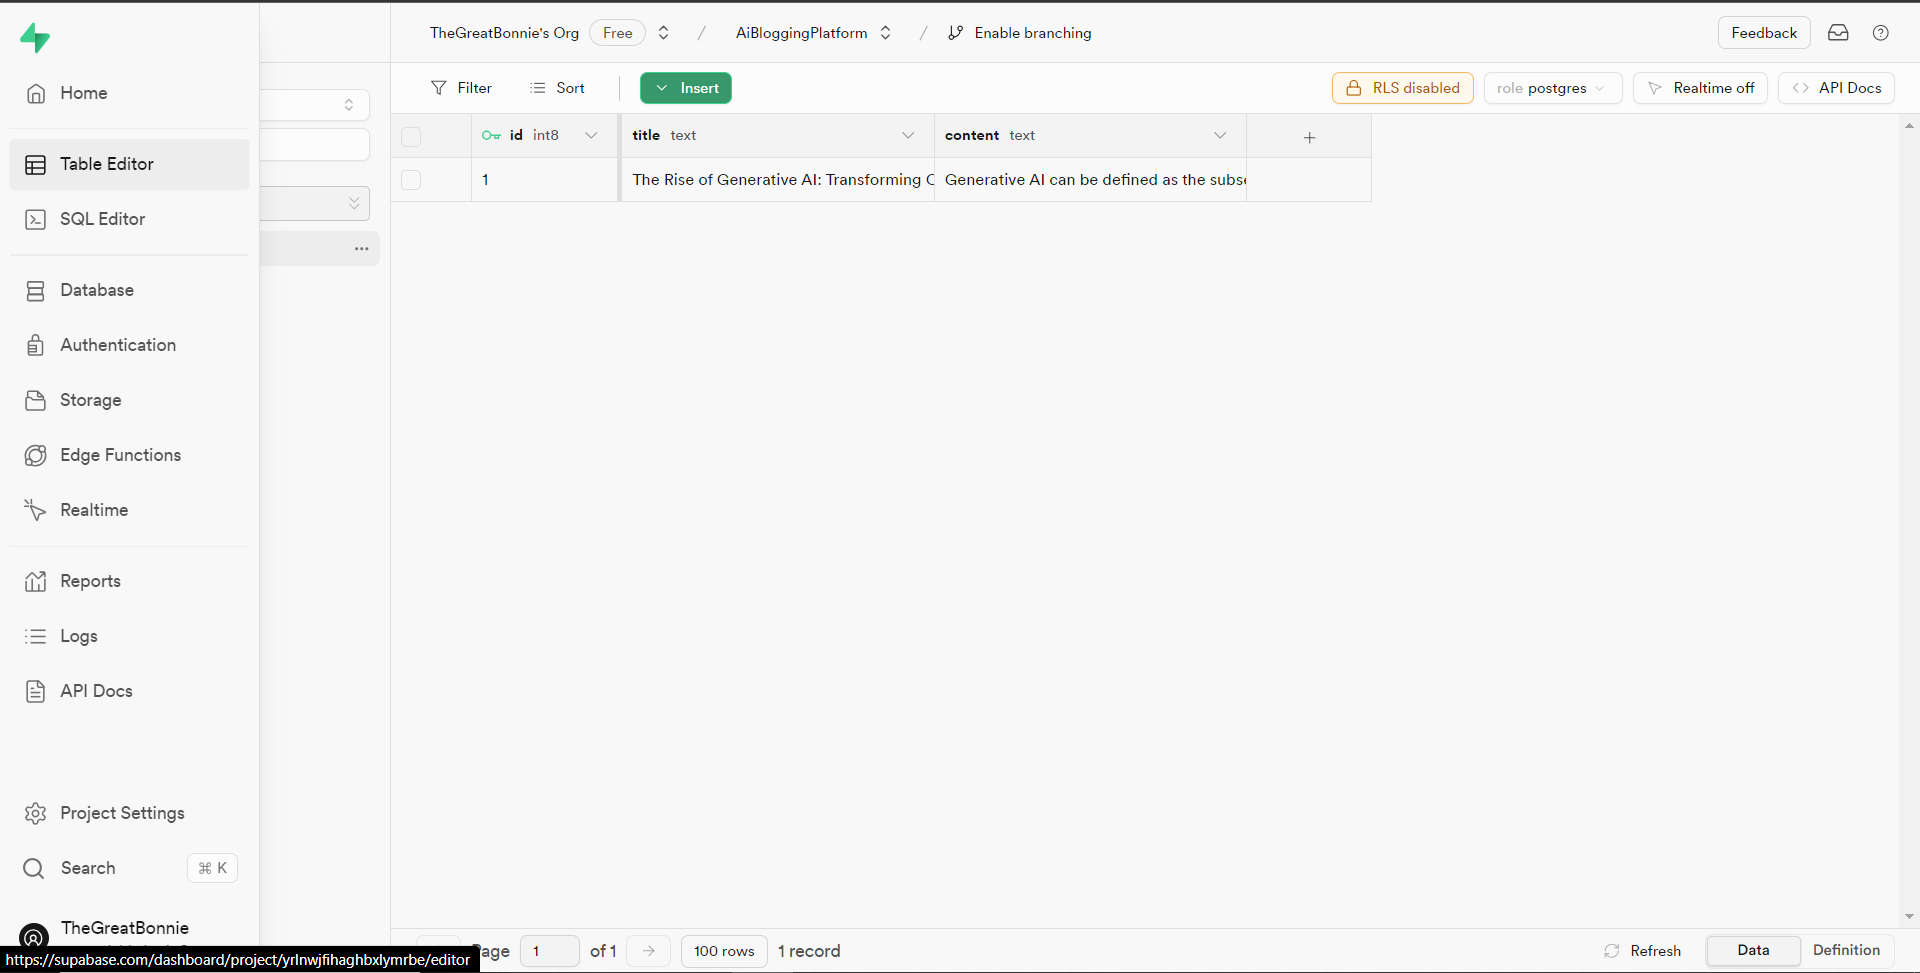
</form>之後,導覽至http://localhost:3000/writearticle,研究您選擇的主題,新增文章內容,然後點擊底部的發布按鈕來發布文章。
然後轉到 Supabase 上專案的儀表板並導航到表編輯器部分。您應該會看到您的文章資料已插入 Supabase 資料庫,如下所示。
接下來,前往/[root]/src/app/page.tsx檔案並在頂部導入 cookie 和 supabase 套件。
import { cookies } from "next/headers";
import { supabase } from "@/utils/supabase";
然後在 Home 函數中加入以下程式碼,從 Supabase 資料庫中取得文章資料。
const { data: articles, error } = await supabase(cookies).from('articles').select('*')之後,更新如下所示的元素程式碼,以將已發佈的文章呈現在部落格平台主頁上。
return (
    <>
      <Header />
      <div className="max-w-[85rem] h-full px-4 py-10 sm:px-6 lg:px-8 lg:py-14 mx-auto">
        <div className="grid sm:grid-cols-2 lg:grid-cols-3 gap-6">
          {articles?.map((post: any) => (
            <Link
              key={post.id}
              className="group flex flex-col h-full bg-white border border-gray-200 hover:border-transparent hover:shadow-lg transition-all duration-300 rounded-xl p-5 "
              href={`/posts/${post.id}`}>
              <div className="aspect-w-16 aspect-h-11">
                <Image
                  className="object-cover h-48 w-96 rounded-xl"
                  src={`https://source.unsplash.com/featured/?${encodeURIComponent(
                    post.title
                  )}`}
                  width={500}
                  height={500}
                  alt="Image Description"
                />
              </div>
              <div className="my-6">
                <h3 className="text-xl font-semibold text-gray-800 ">
                  {post.title}
                </h3>
              </div>
            </Link>
          ))}
        </div>
      </div>
    </>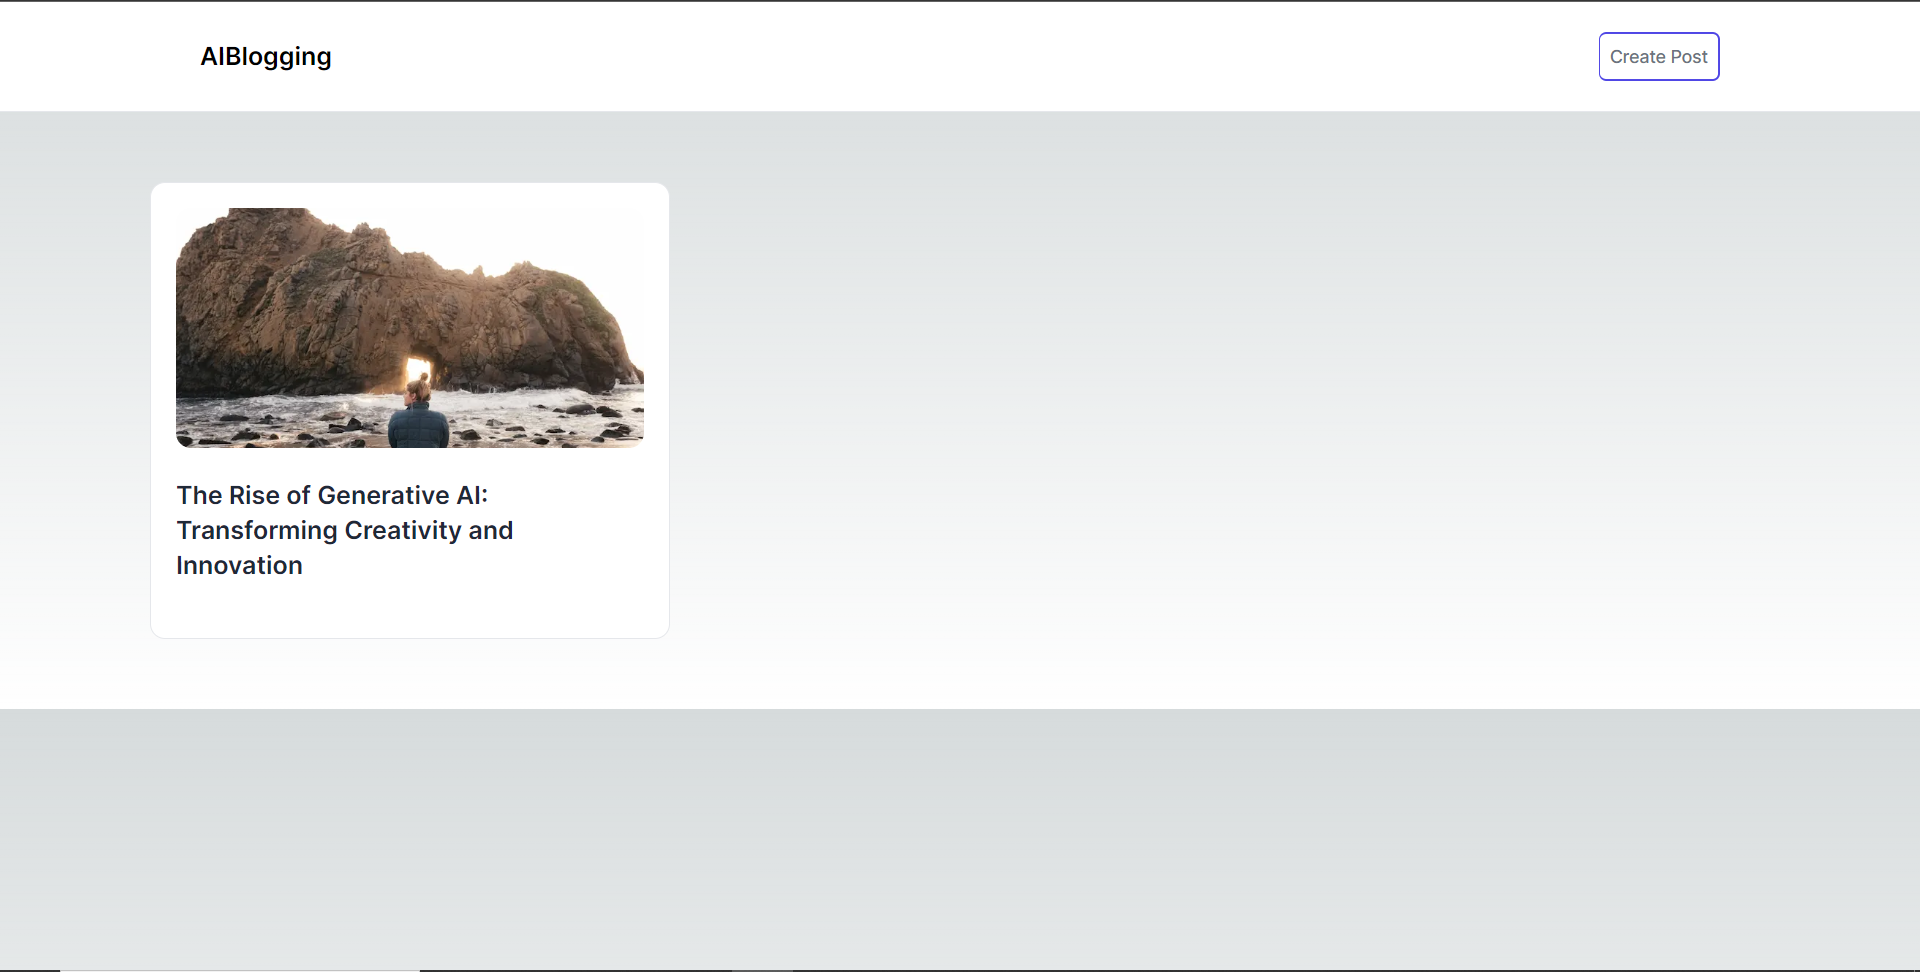
);然後導航到http://localhost:3000 ,您應該會看到您發布的文章,如下所示。
之後,轉到/[root]/src/app資料夾並建立一個名為[id].在[id]資料夾中,建立一個名為page.tsx的文件,並在頂部匯入以下套件和元件。
import { supabase } from '@/utils/supabase';
import { cookies } from "next/headers";
import Header from '@/app/components/Header';
在導入下面,定義一個名為「getArticles」的非同步函數,該函數根據 id 參數從 supabase 資料庫檢索文章資料,如下所示。
// Define an asynchronous function named 'getArticles' that retrieves article data based on the provided parameters
async function getArticles(params: any) {
    // Extract the 'id' parameter from the provided 'params' object
    const { id } = params

    // Retrieve article data from Supabase database where the 'id' matches the provided value
    const { data, error } = await supabase(cookies)
        .from('articles')
        .select('*')
        .eq('id', id)
        .single();

    // Return the retrieved data
    return data
  }
在上面的程式碼下面,定義一個名為“Post”的函數,它將“params”作為 props,如下所示。
// Define a default asynchronous function named 'Post' that takes 'params' as props
export default async function Post({ params }: { params: any }) {
  // Retrieve the post data asynchronously based on the provided 'params'
  const post = await getArticles(params);

  // Return JSX to render the post details
  return (
    <>
      {/* Render the header component */}
      <Header />
      {/* Main content wrapper */}
      <div className="max-w-3xl px-4 pt-6 lg:pt-10 pb-12 sm:px-6 lg:px-8 mx-auto">
        <div className="max-w-2xl">
          <div className="space-y-5 md:space-y-8">
            <div className="space-y-3">
              {/* Render the post title */}
              <h2 className="text-2xl font-bold md:text-3xl dark:text-white">
                {/* Render the post title only if 'post' is truthy */}
                {post && post.title}
              </h2>
              {/* Render the post content */}
              <p className="text-lg text-gray-800 dark:text-gray-200">
                {/* Render the post content only if 'post' is truthy */}
                {post && post.content}
              </p>
            </div>
          </div>
        </div>
      </div>
    </>
  );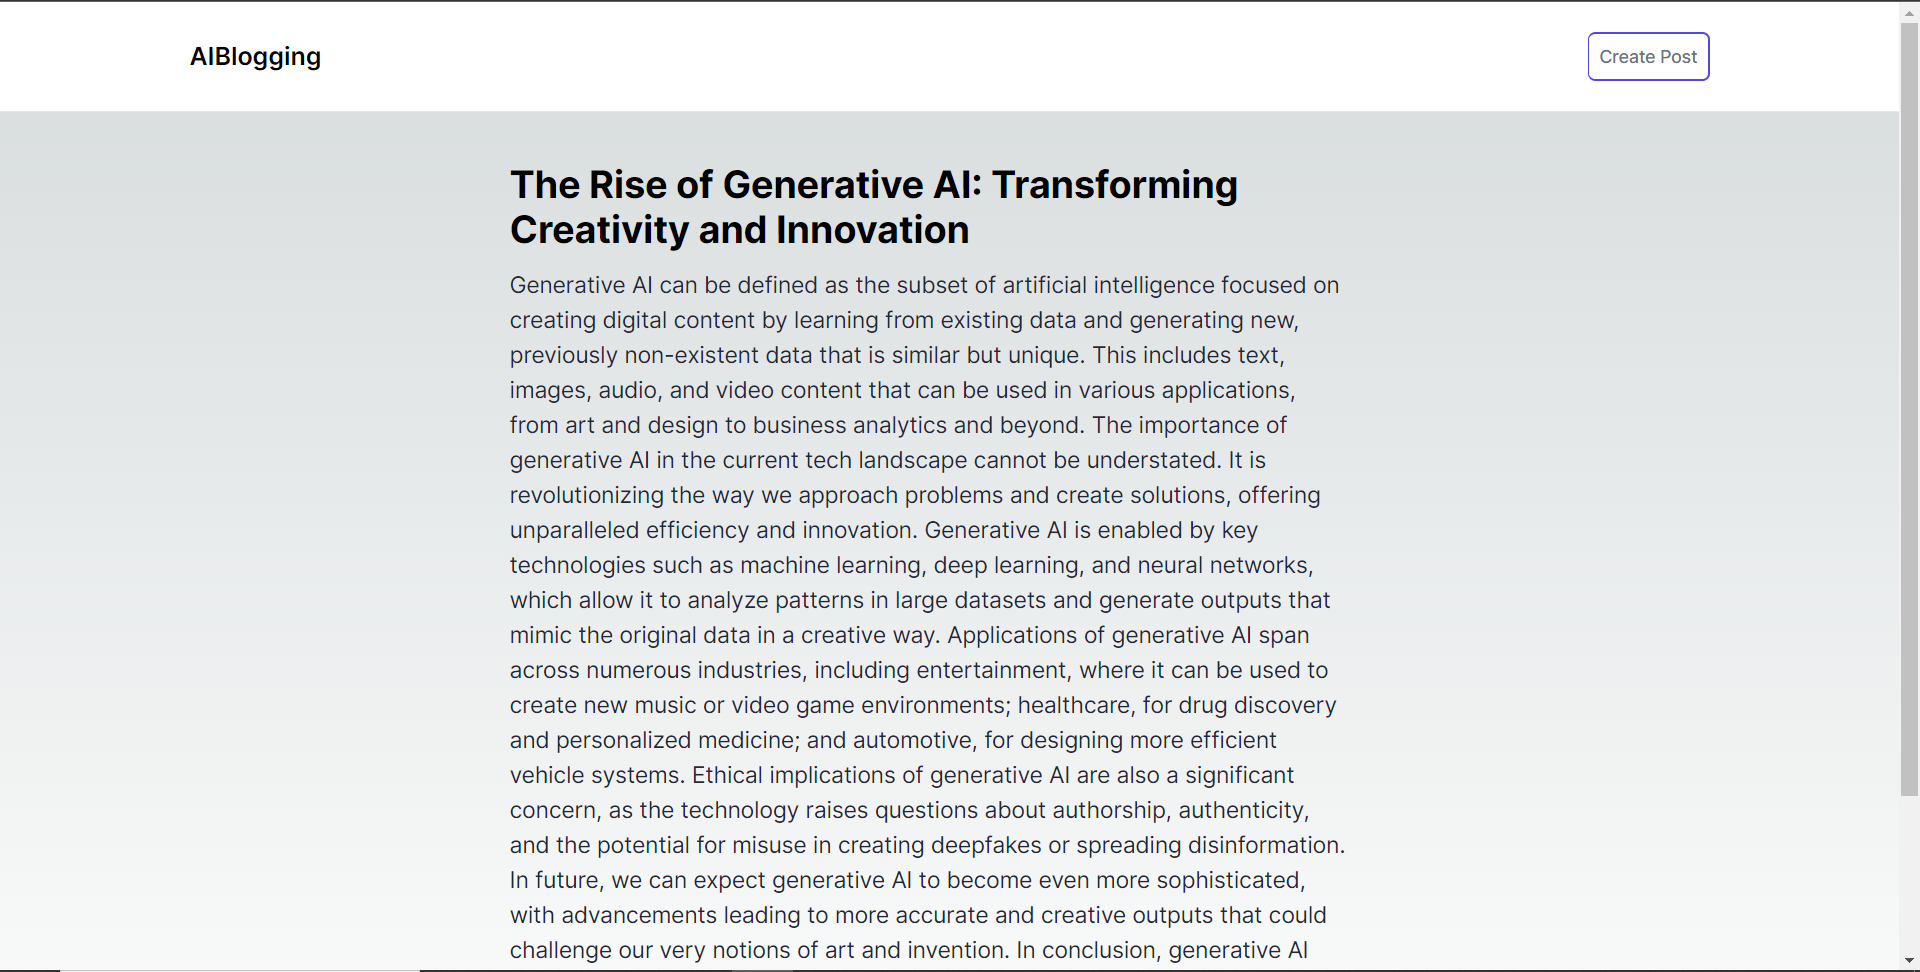
}之後,導覽至http://localhost:3000並點擊部落格平台主頁上顯示的文章。
然後您應該被重定向到文章的內容,如下所示。
結論
總而言之,您可以使用 CopilotKit 建立應用內 AI 聊天機器人,該機器人可以查看當前應用程式狀態並在應用程式內執行操作。 AI 聊天機器人可以與您的應用程式前端、後端和第三方服務對話。
完整的原始碼:https://github.com/TheGreatBonnie/aipoweredblog
1) --- 會變成分隔線(上一行必須是空白)
2) # 會變成一級標題
3) ## 會變成二級標題
4) ### 會變成三級標題
5) **粗體文字**會顯示粗體文字
6) ```當第一行與最後一行會顯示程式碼
7) 請搜尋 Markdown 語法,了解各種格式