

您是否曾希望您的 AI 助理能夠存取即時資料?模型上下文協定 (MCP) 伺服器讓這一切成為可能,而且它們的建置和使用極為簡單!
你可能已經看過我的影片和帖子,了解如何使用 Playwright MCP 存取網站並產生測試想法,然後在首次與網站互動後產生實際的 Playwright 測試。或我如何使用它來幫我購物。這就是 MCP 的強大之處。它為 AI 代理提供了工具,使其能夠執行諸如連接到瀏覽器或像在 GitHub MCP 中一樣建立拉取請求等操作。
在本教程中,您將建立一個天氣伺服器,將 GitHub Copilot 等 AI 代理程式連接到即時天氣資料。本示範將使用 TypeScript,但您也可以使用其他語言建立 MCP 伺服器,連結請參閱文章末尾。最終,您將能夠向 AI 請求任何城市的天氣訊息,並獲得即時更新的回應。
您將學到的內容:
-
如何使用 TypeScript SDK 從頭開始建立 MCP 伺服器
-
將其連接到真實天氣 API
-
將其與 VS Code 和 GitHub Copilot 集成
-
測試和除錯您的伺服器
您需要:
-
基本的 TypeScript/JavaScript 知識
-
您的機器上安裝了 Node.js
-
VS Code(可選,但建議)
讓我們開始吧!
什麼是 MCP 伺服器?
模型上下文協定 (MCP) 伺服器是連接 AI 代理程式與外部工具和資料來源的橋樑。您可以將其視為幫助 AI 理解並與現實世界應用程式互動的翻譯器。
問題:當您在 VS Code 中向 GitHub Copilot 詢問天氣資訊時,您會得到以下回應:
“我無法透過此編碼環境中可用的工具存取即時天氣資料或天氣 API。”
解決方案: MCP 伺服器提供缺少的環節,為 AI 代理提供存取即時資料和執行實際操作所需的工具。
我們的天氣伺服器將作為一種工具,任何與 MCP 相容的 AI 都可以呼叫它來獲取全球任何城市的最新天氣資訊。
步驟 1:專案設定
讓我們建立一個新專案並設定我們的開發環境。
1.初始化專案
建立一個新目錄並使用 npm 初始化它:
mkdir mcp-weather-server
cd mcp-weather-server
npm init -y
2.建立主文件
建立我們的主要 TypeScript 檔案:
touch main.ts3.配置Package.json
在 VS Code(或您喜歡的編輯器)中開啟專案並修改package.json以透過新增type欄位來啟用 ES 模組:
{
  "name": "mcp-weather-server",
  "version": "1.0.0",
  "type": "module",
  "scripts": {
    "test": "echo \"Error: no test specified\" && exit 1"
  }
}
為什麼要使用 ES 模組? MCP SDK 使用的是現代 JavaScript 模組,因此我們需要在專案中啟用它們。
第 2 步:安裝依賴項
我們的 MCP 伺服器需要兩個關鍵庫:
1. 安裝 MCP SDK
模型上下文協定 SDK 提供了建置 MCP 伺服器所需的一切:
npm install @modelcontextprotocol/sdk2. 安裝 Zod 進行資料驗證
Zod 確保我們的伺服器從 AI 代理接收有效資料:
npm install zod您的package.json依賴項現在應如下所示:
"dependencies": {
  "@modelcontextprotocol/sdk": "^1.13.1",
  "zod": "^3.25.67"
}
步驟3:建立基本伺服器
現在讓我們建立 MCP 伺服器。打開main.ts ,讓我們一步一步來建立它。
1.新增所需的導入
import { McpServer } from "@modelcontextprotocol/sdk/server/mcp.js";
import { StdioServerTransport } from '@modelcontextprotocol/sdk/server/stdio.js';
import { z } from "zod";
2.建立伺服器實例
const server = new McpServer({
  name: "Weather Server",
  version: "1.0.0"
});
伺服器使用 MCP 協定管理客戶端(如 VS Code)和您的工具之間的所有通訊。
3. 定義你的第一個工具
工具是 AI 代理可以呼叫的函數。讓我們創造一個get-weather工具:
server.tool(
  'get-weather',
  'Tool to get the weather of a city',
  {
    city: z.string().describe("The name of the city to get the weather for")
  },
  async({ city }) => {
    // For now, return a simple static response
    return {
      content: [
        {
          type: "text",
          text: `The weather in ${city} is sunny`
        }
      ]
    };
  }
);
分解工具定義:
-
工具 ID:
'get-weather'- 唯一辨識符 -
描述:幫助 AI 代理程式了解此工具的功能
-
模式:定義參數(城市必須是字串)
-
函數:呼叫時執行的實際程式碼
工作原理:
-
AI代理商看到:“獲取城市天氣的工具”
-
AI 代理程式這樣呼叫它:
{ city: "Paris" } -
Zod 驗證輸入
-
函數返回:“巴黎天氣晴朗”
4.建立溝通
最後,我們需要設定伺服器與 AI 用戶端的通訊方式:
const transport = new StdioServerTransport();
server.connect(transport);
這裡發生了什麼事:
-
StdioServerTransport使用終端的輸入/輸出進行通信 -
非常適合本地發展
-
伺服器從
stdin讀取請求並將回應寫入stdout -
MCP 協定自動處理所有訊息格式
5. 完整的基本伺服器範例
你的完整main.ts現在應該如下所示:
import { McpServer } from "@modelcontextprotocol/sdk/server/mcp.js";
import { StdioServerTransport } from '@modelcontextprotocol/sdk/server/stdio.js';
import { z } from "zod";

const server = new McpServer({
  name: "Weather Server",
  version: "1.0.0"
});

server.tool(
  'get-weather',
  'Tool to get the weather of a city',
  {
    city: z.string().describe("The name of the city to get the weather for")
  },
  async({ city }) => {
    return {
      content: [
        {
          type: "text",
          text: `The weather in ${city} is sunny`
        }
      ]
    };
  }
);

const transport = new StdioServerTransport();
server.connect(transport);🎉恭喜!您已經搭建了第一個 MCP 伺服器。快來測試一下吧!
步驟 4:使用 MCP Inspector 進行測試
在新增真實天氣資料之前,讓我們使用 MCP Inspector(一個基於 Web 的 MCP 伺服器偵錯工具)測試我們的伺服器。
啟動檢查器
執行此命令以開啟伺服器的 MCP 檢查器:
npx -y @modelcontextprotocol/inspector npx -y tsx main.ts 執行該命令後,您將看到終端輸出:
-
本機 URL(例如
http://127.0.0.1:6274) -
唯一的會話令牌
-
預先填充令牌的直接連結
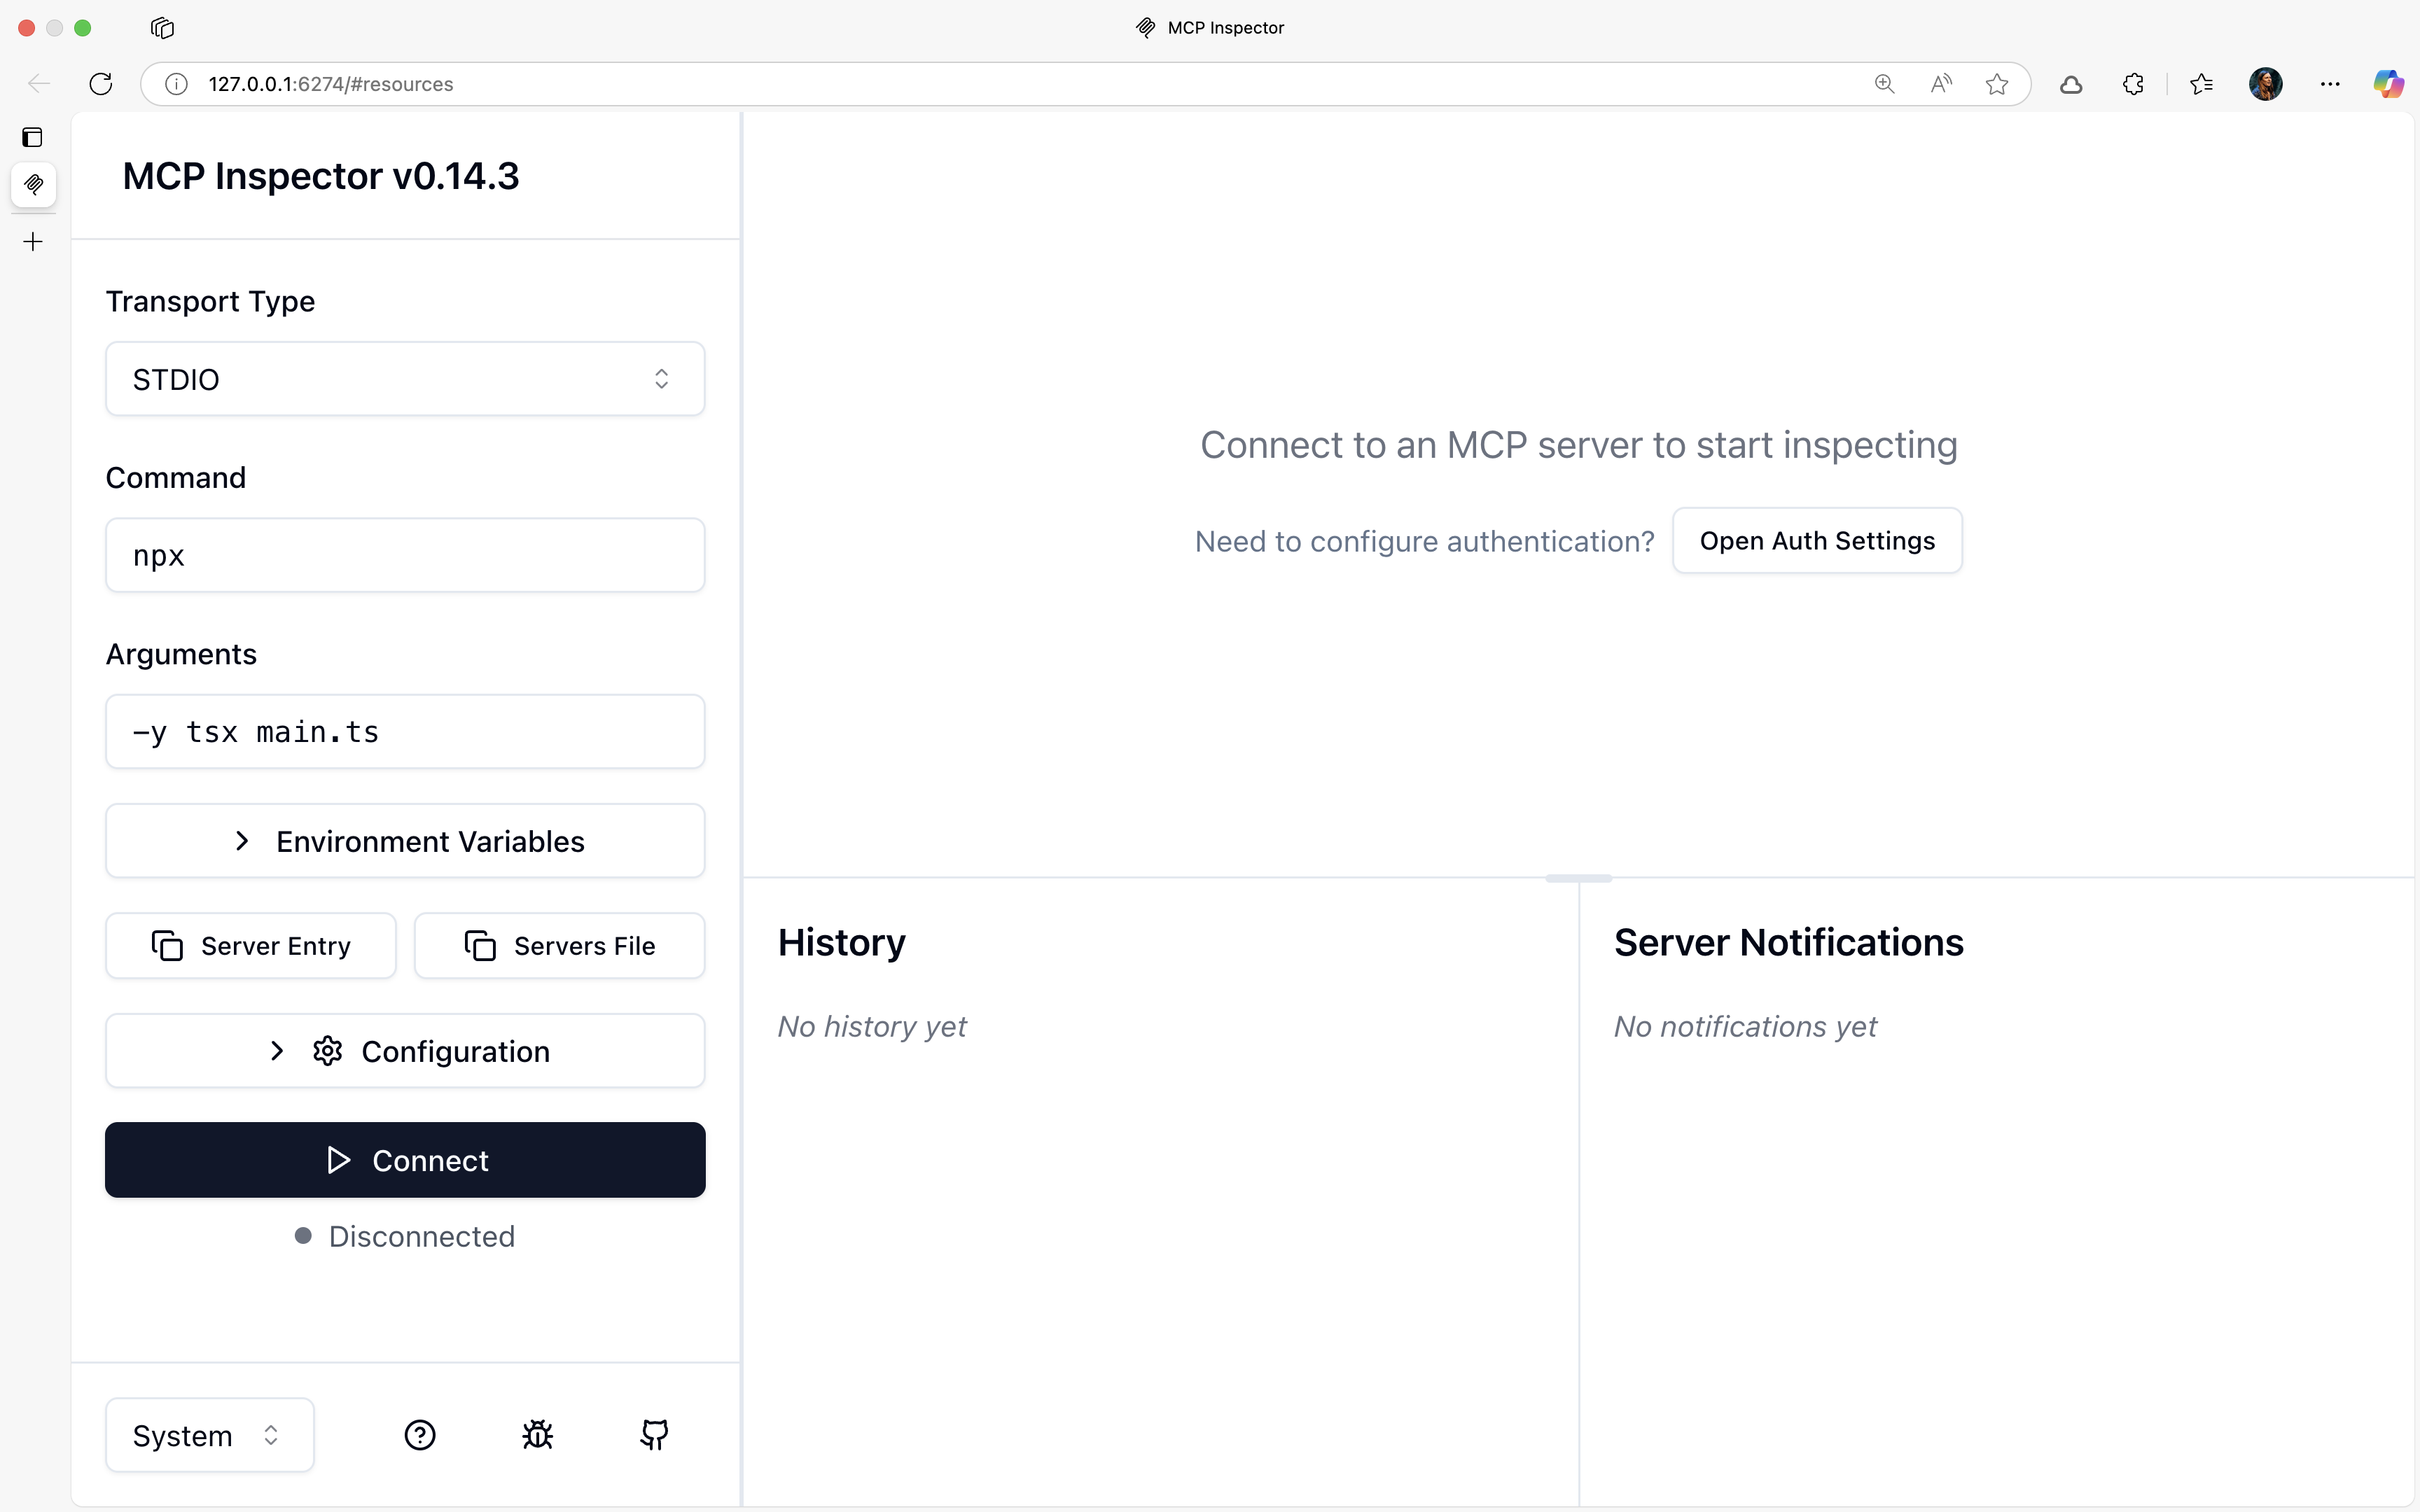
💡提示:點擊已包含令牌的連結以避免手動輸入。
連接並測試
-
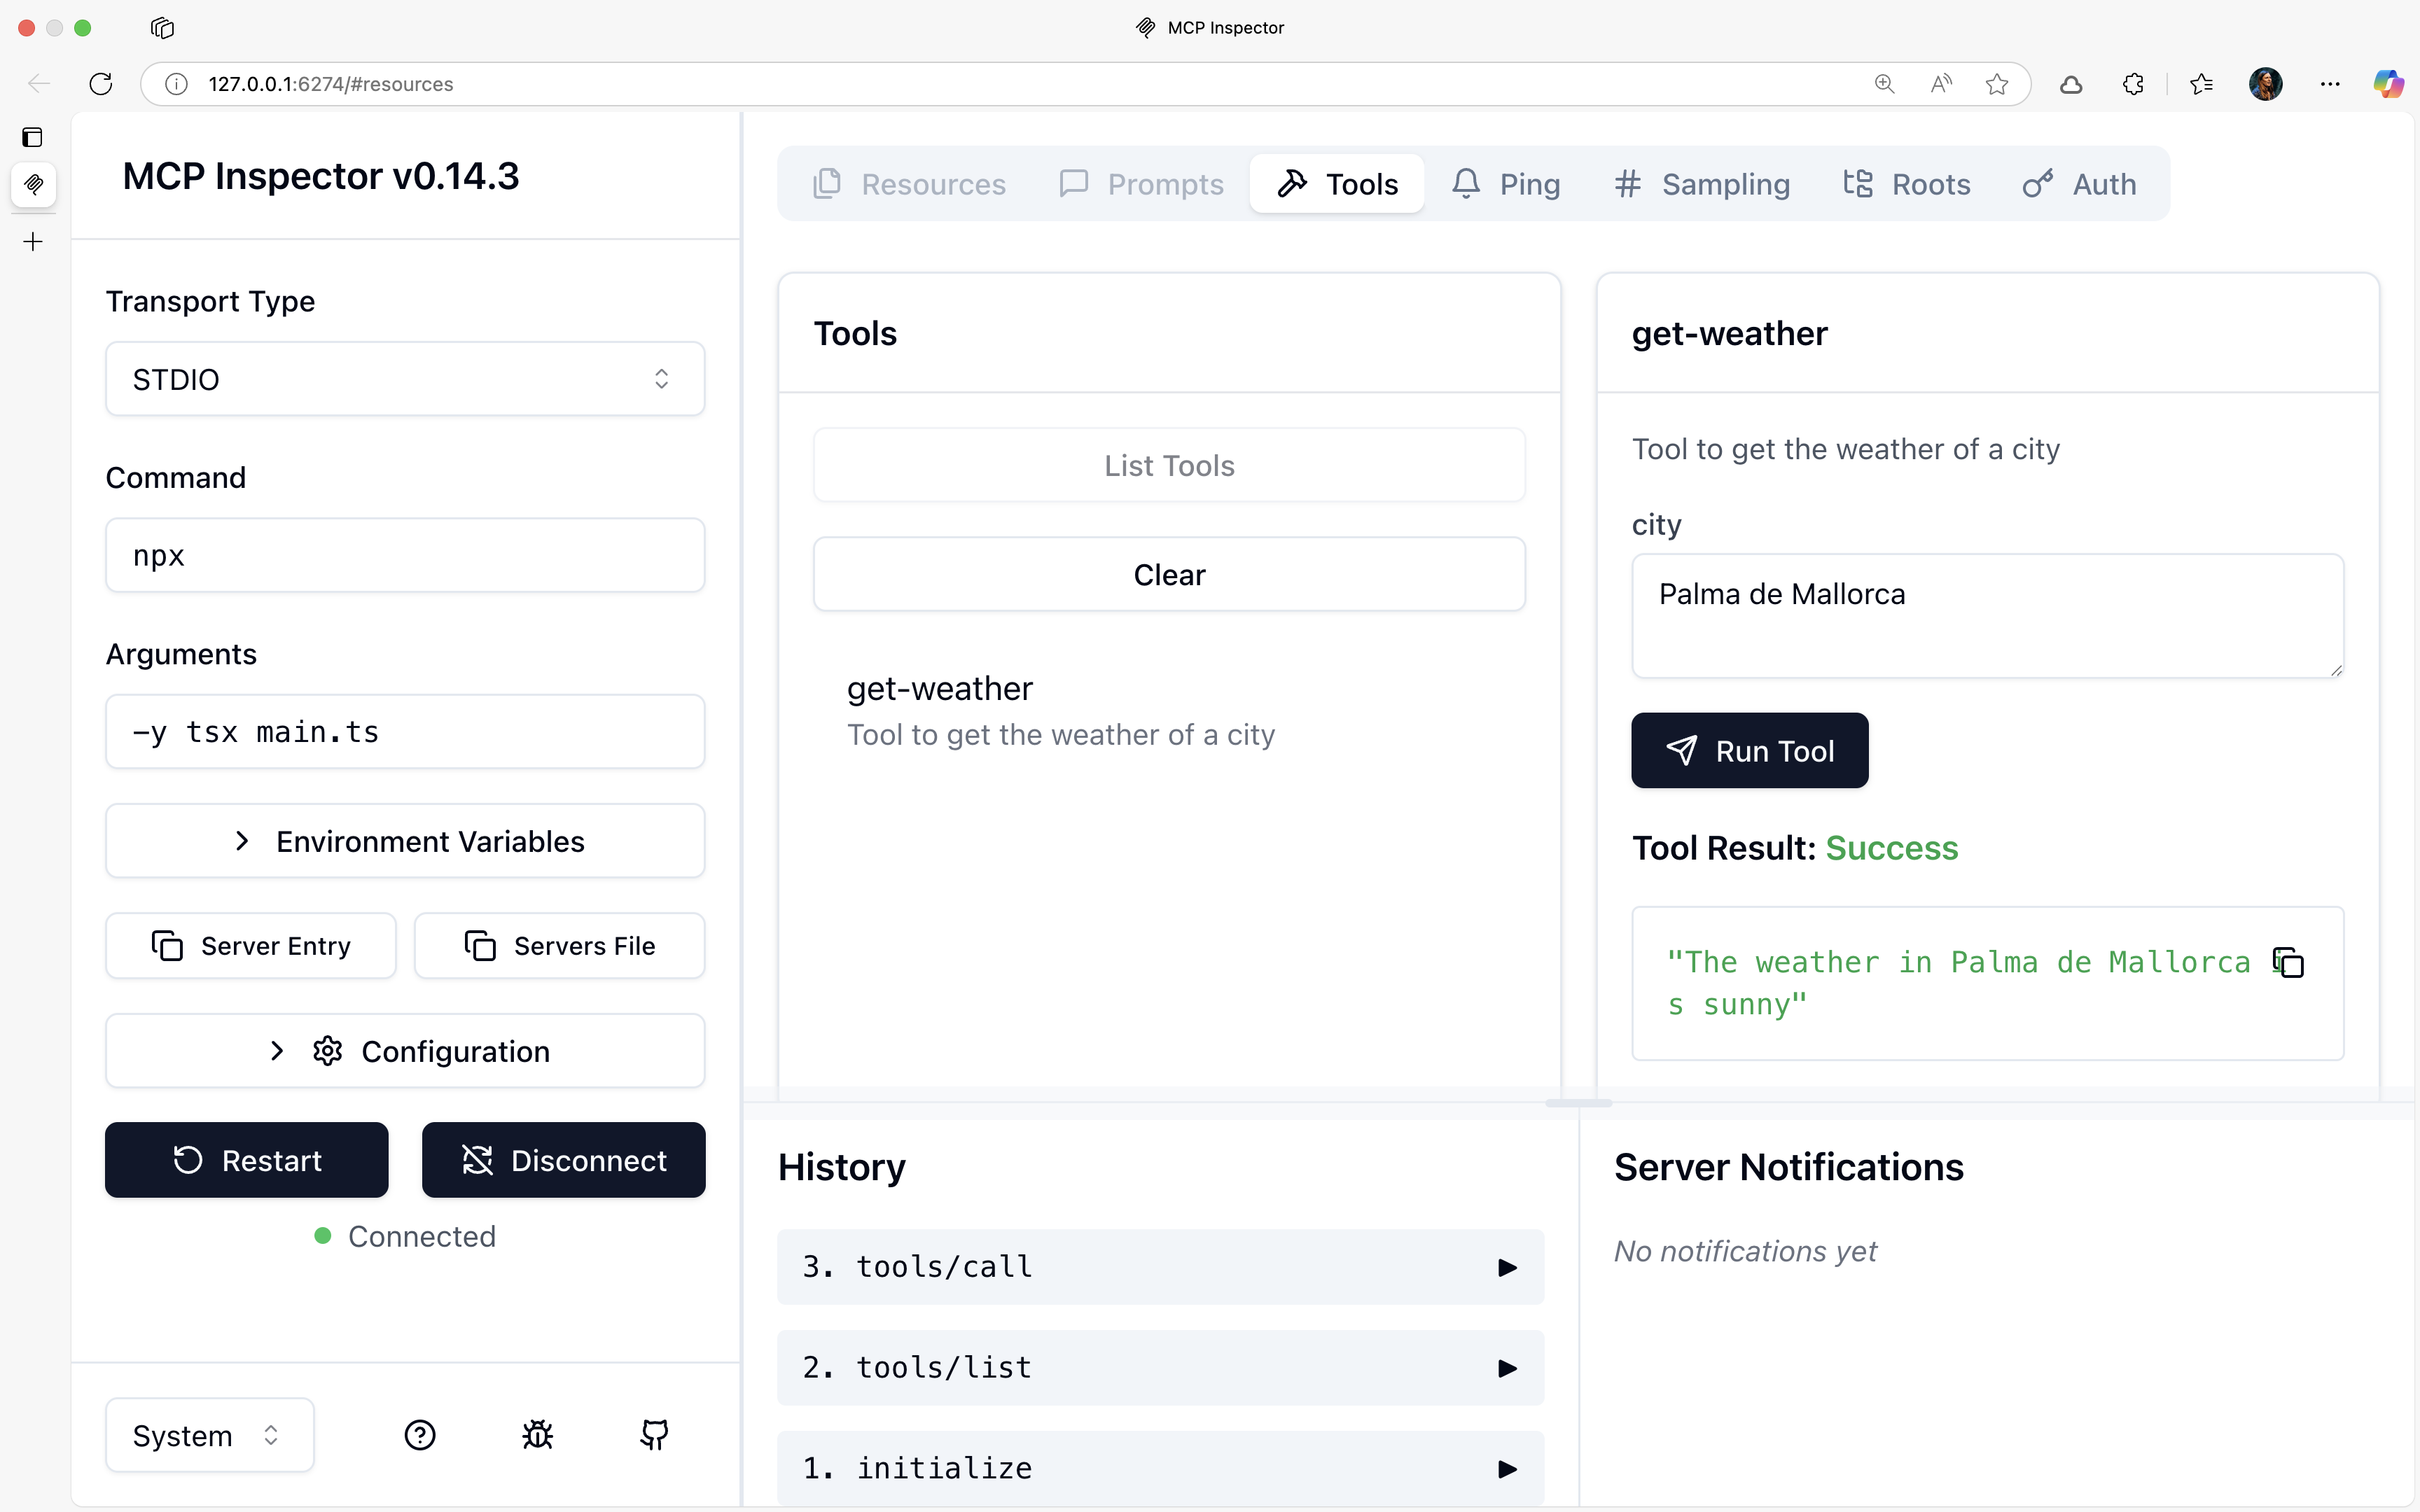
連接:點擊檢查器中的“連接”按鈕
-
導航:點擊頂部導航中的“工具”
-
選擇:選擇您的
get-weather工具 -
測試:輸入城市名稱(例如“帕爾馬”),然後按一下“執行工具”
您應該會看到以下回應: "The weather in Palma de Mallorca is sunny"
故障排除:
- 連接錯誤?請確保您使用的連結已預先填入令牌
太棒了!你的 MCP 伺服器已經正常運作了。現在,讓我們讓它真正發揮作用。
步驟5:新增真實天氣資料
是時候讓我們的伺服器真正發揮作用了!我們將與Open-Meteo集成,這是一個免費的天氣 API,無需 API 金鑰。
天氣 API 的工作原理
要取得天氣資料,我們需要一個兩步驟過程:
-
轉換城市名稱→座標(使用地理編碼 API)
-
使用坐標獲取天氣(使用天氣 API)
更新您的工具功能
用此增強版本取代您現有的工具功能:
server.tool(
'get-weather',
'Tool to get the weather of a city',
{
city: z.string().describe("The name of the city to get the weather for")
},
async({ city }) => {
try {
// Step 1: Get coordinates for the city
const geoResponse = await fetch(
`https://geocoding-api.open-meteo.com/v1/search?name=${city}&count=1&language=en&format=json`
);
const geoData = await geoResponse.json();
// Handle city not found
if (!geoData.results || geoData.results.length === 0) {
return {
content: [
{
type: "text",
text: `Sorry, I couldn't find a city named "${city}". Please check the spelling and try again.`
}
]
};
}
// Step 2: Get weather data using coordinates
const { latitude, longitude } = geoData.results[0];
const weatherResponse = await fetch(
`https://api.open-meteo.com/v1/forecast?latitude=${latitude}&longitude=${longitude}¤t=temperature_2m,relative_humidity_2m,apparent_temperature,precipitation,weather_code&hourly=temperature_2m,precipitation&forecast_days=1`
);
const weatherData = await weatherResponse.json();
// Return the complete weather data as JSON
return {
content: [
{
type: "text",
text: JSON.stringify(weatherData, null, 2)
}
]
};
} catch (error) {
return {
content: [
{
type: "text",
text: `Error fetching weather data: ${error.message}`
}
]
};
}
}
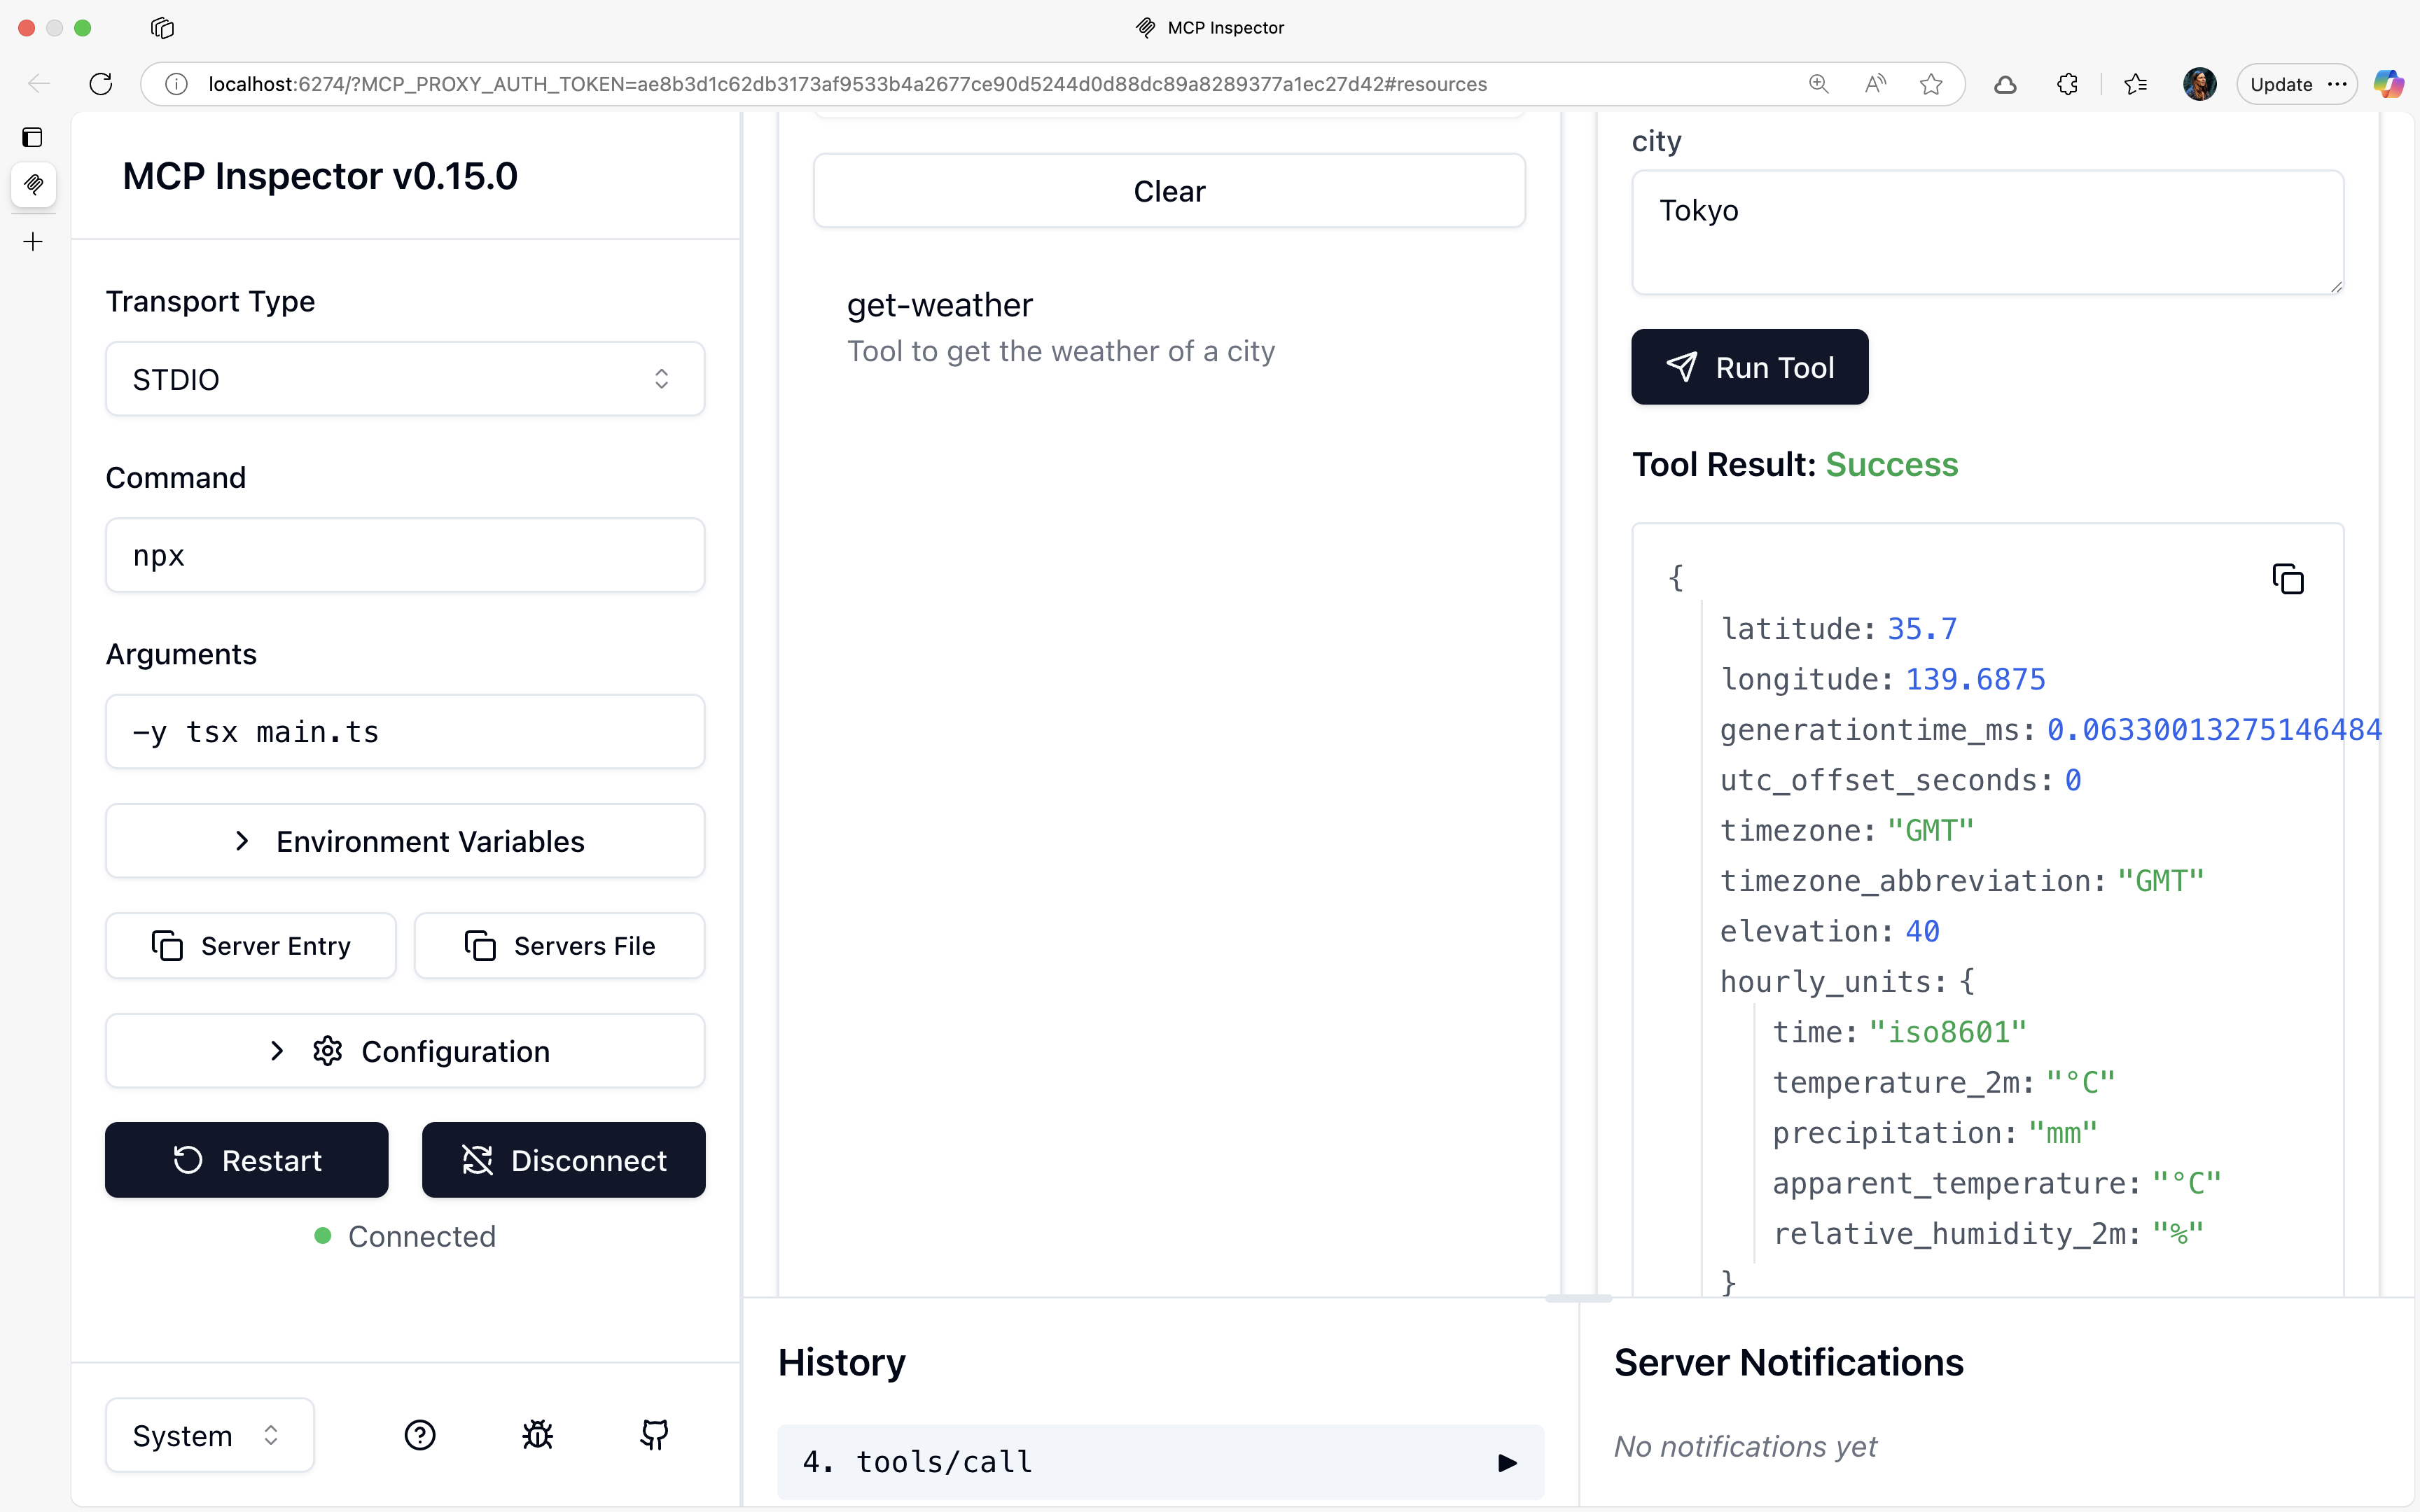
);測試真實資料
-
重新啟動MCP Inspector(Ctrl+C,然後重新執行指令)
-
在 Web 介面重新連接
-
使用“東京”或“紐約”等真實城市進行測試
現在你應該可以看到真實的天氣資料,而不是「晴天」了! 🌤️
步驟 6:與 VS Code 和 GitHub Copilot 集成
現在讓我們將您的天氣伺服器連接到 VS Code,以便您可以將它與 GitHub Copilot 一起使用!
註冊伺服器
-
開啟指令面板:
Cmd/Ctrl + Shift + P -
類型:
MCP: Add Server -
選擇: “使用 stdio 的本機伺服器”
-
輸入指令:
npx -y tsx main.ts -
名稱:
my-weather-server -
安裝類型:本機設定
這會在你的專案中建立一個.vscode/mcp.json檔案:
{
  "inputs": [],
  "servers": {
    "my-weather-server": {
      "type": "stdio",
      "command": "npx",
      "args": [
        "-y",
        "tsx",
        "/Users/your-username/path/to/main.ts"
      ]
    }
  }
}
開始並測試
-
啟動伺服器:點選 MCP 面板中伺服器名稱旁的「啟動」按鈕
-
驗證:您應該看到“正在執行”狀態
-
切換到代理模式:點選 Copilot 側邊欄 → “代理模式”
-
Q: “東京的天氣怎麼樣?”
GitHub Copilot 將要求使用您的天氣工具的權限,按一下「繼續」繼續。
預期結果:您將獲得一份格式精美的天氣報告,而不是原始的 JSON,如下所示:
> **Weather in Tokyo Today**
> **Temperature:** 28°C (feels like 32°C)
> **Humidity:** 75%
> **Conditions:** Partly cloudy with light rain expected in the evening
太棒了! AI 會自動將原始天氣資料轉換成美觀易讀的格式。
為什麼它如此強大
您的天氣伺服器展示了 MCP 的真正威力:
🤖 AI 承擔重任
-
你提供原始資料,AI 建立精美的演示文稿
-
無需格式化回應,AI 負責使用者體驗
🔗 通用相容性
-
可與任何 MCP 相容工具(VS Code、Claude 等)搭配使用
-
一次編寫,隨處使用
⚡ 即時集成
-
始終保持最新資料,無快取問題
-
與您的開發環境無縫協作
📈 易於擴展
-
新增天氣警報、預報或空氣品質資料
-
在同一伺服器中建立其他工具
完整程式碼參考
這是您的最終main.ts檔案:
import { McpServer } from "@modelcontextprotocol/sdk/server/mcp.js";
import { StdioServerTransport } from '@modelcontextprotocol/sdk/server/stdio.js';
import { z } from "zod";

const server = new McpServer({
  name: "Weather Server",
  version: "1.0.0"
});

server.tool(
  'get-weather',
  'Tool to get the weather of a city',
  {
    city: z.string().describe("The name of the city to get the weather for")
  },
  async({ city }) => {
    try {
      const response = await fetch(`https://geocoding-api.open-meteo.com/v1/search?name=${city}&count=10&language=en&format=json`);
      const data = await response.json();

      if (data.results.length === 0) {
        return {
          content: [
            {
              type: "text",
              text: `No results found for city: ${city}`
            }
          ]
        };
      }

      const { latitude, longitude } = data.results[0];
      const weatherResponse = await fetch(`https://api.open-meteo.com/v1/forecast?latitude=${latitude}&longitude=${longitude}&hourly=temperature_2m,precipitation,apparent_temperature,relative_humidity_2m&forecast_days=1`);

      const weatherData = await weatherResponse.json();

      return {
        content: [
          {
            type: "text",
            text: JSON.stringify(weatherData, null, 2)
          }
        ]
      };
    } catch (error) {
      return {
        content: [
          {
            type: "text",
            text: `Error fetching weather data: ${error.message}`
          }
        ]
      };
    }
  }
);

const transport = new StdioServerTransport();
server.connect(transport);
下一步:增強您的伺服器
準備好將你的天氣伺服器提升到一個新的水平了嗎?以下是一些建議:
🚀 額外的天氣工具
延伸預測
server.tool('get-forecast', 'Get 7-day weather forecast', ...)天氣警報
server.tool('get-alerts', 'Get severe weather warnings', ...)空氣品質
server.tool('get-air-quality', 'Get air pollution data', ...)📦共享您的伺服器
- 發佈到 NPM:讓其他人可以使用
結論
🎉恭喜!您已成功搭建您的第一個 MCP 天氣伺服器!
您所取得的成就:
-
✅ 從零開始建立功能齊全的 MCP 伺服器
-
✅ 整合來自外部 API 的即時天氣資料
-
✅ 將其連接到 VS Code 和 GitHub Copilot
-
✅ 學習了模型上下文協定的基礎知識
關鍵要點:
-
簡單: MCP 伺服器的建置比看起來容易得多
-
力量:真實資料使人工智慧互動更有價值
-
靈活性:同一台伺服器可跨多個 AI 平台工作
-
面向未來:您正在建立下一代人工智慧的基礎設施
下一步是什麼?可能性無窮無盡!天氣只是個開始,現在你可以將 AI 連接到資料庫、API、檔案系統以及你能想到的任何服務。
祝您搭建愉快! 🚀
📚 資源與進一步閱讀
官方文件
-
模型上下文協定文件- 完整的 MCP 參考
本教程中使用的 API
-
Open-Meteo Weather API - 免費天氣資料服務
-
Zod 文件- TypeScript 模式驗證
MCP 範例
-
MCP 範例庫- 範例伺服器
-
Playwright MCP - 使用 Playwright 提供瀏覽器自動化功能。
演示倉庫
觀看影片
感謝 Miguel Angel Duran 的精彩課程和講解。您可以觀看他的西班牙語影片,了解類似的演示:學習 MCP!面向初學者 + 從零開始建立我們的第一個 MCP。
原文出處:https://dev.to/debs_obrien/building-your-first-mcp-server-a-beginners-tutorial-5fag
1) --- 會變成分隔線(上一行必須是空白)
2) # 會變成一級標題
3) ## 會變成二級標題
4) ### 會變成三級標題
5) **粗體文字**會顯示粗體文字
6) ```當第一行與最後一行會顯示程式碼
7) 請搜尋 Markdown 語法,了解各種格式