🔧 阿川の電商水電行

標題:使用 Formik、Material-UI 和 Yup 來 React Form。
發表:真實
描述:使用 Formik、Material-ui 和 Yup 在 React 中進行表單驗證。
標籤: React, Javascript, Webdev
介紹
有時在 React 中管理表單可能會很麻煩,如果您決定使用像 redux-form 這樣的程式庫,它們會帶來巨大的效能開銷,而您在正在建置的應用程式中可能無法承受這些開銷。 Formik 可以為您提供幫助,它是一個小型庫,捆綁包大小為 12 kB,而 redux-form 壓縮後的捆綁包大小為 22.5 kB,這是最好的部分; Formik 協助完成繁瑣的表單處理任務,這些任務是
-
處理表單狀態
-
處理表單驗證和錯誤
-
處理表單提交
您可以查看Formik上的文件以獲取有關該庫的更多訊息
Formik 也與material-ui 無縫整合;它是一個實作 Google Material Design 的 React 函式庫,提供輸入、按鈕、標籤等開箱即用的元件。
您還可以查看他們的文件以獲取更多資訊Material-Ui
最後,是的。什麼是是?它是一個 JavaScript 物件模式驗證器和物件解析器。在這種情況下,是的,只是幫助處理驗證。這並不意味著您不能為 Formik 編寫自己的自訂驗證器,但我發現我使用 Yup 的經驗很好,它提高了我的程式碼的可讀性。
有關 Yup 的更多訊息,請參見文件Yup 。
本文將說明如何使用 Formik、Yup 和 Material-UI 建立表單並處理表單驗證。
以下是我們將在本指南中執行的操作的快速概述:
-
使用 create-react-app 建立一個 React 應用程式。
-
使用 Material-UI 和 Formik 建立一個簡單的表單。
-
使用 Yup 編寫驗證規則/驗證模式。
-
將 Yup 與 Formik 一起使用。
本教學假設您了解 React。
我們將在這裡建立一個程式碼沙箱演示:
安裝:
- 使用 CRA Create React App建立 React 應用程式
After running this our project structure should look like this:
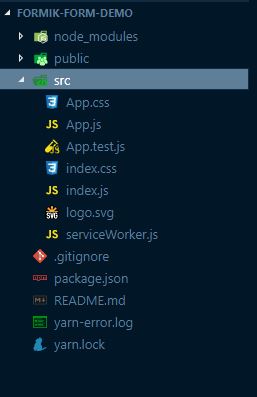
Now open the `App.js` file in the `src` folder and then delete the contents of the parent `div` that has a className of App.

In your terminal run Yarn add 或 npm install formik yup @material-ui/core
This command adds formik, Yup and material-UI to our dependencies. Now that our dependencies have been installed, create a new folder called `InputForm` in the `src` folder then create `index.js` and `form.js` files in the `InputForm` folder.
This is what your src folder should look like now:
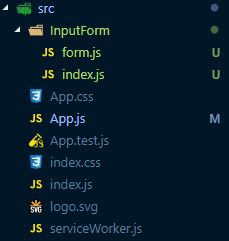
The `form.js` file is going to contain the presentation while the `index.js` is going to contain most of the logic.
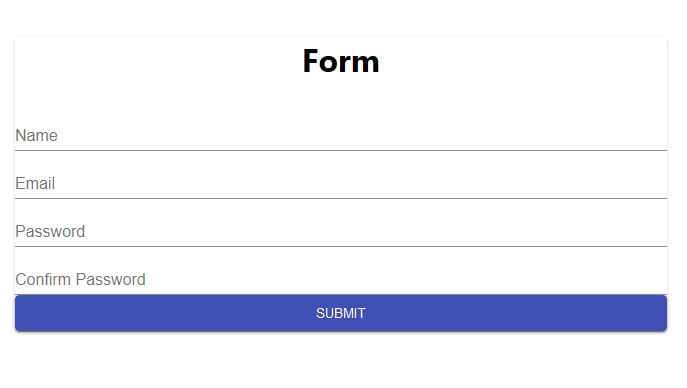
Currently your application should be displaying a blank page, so right now let's just get our form displaying.
In your `form.js` file add the following code
從“反應”導入反應;
從“@material-ui/core/Button”導入按鈕;
從“@material-ui/core/TextField”導入文字欄位;
匯出 const Form = (props) => {
返回 (
<
表單 onSubmit={() => {}}>
<TextField
id="name"
name="name"
label="Name"
fullWidth
/>
<TextField
id="email"
name="email"
label="Email"
fullWidth
/>
<TextField
id="password"
name="password"
label="Password"
fullWidth
type="password"
/>
<TextField
id="confirmPassword"
name="confirmPassword"
label="Confirm Password"
fullWidth
type="password"
/>
<Button
type="submit"
fullWidth
variant="raised"
color="primary"
>
Submit
</Button>
);
};
What we have done here is create a simple form with four fields (Name, Email, Password and Confirm password) and a Button with material-UI.

In `index.js` file in the `InputForm` folder add the following code:
從「react」導入 React, { Component };
從「表單」匯入{表單};
從“@material-ui/core/styles/withStyles”導入 withStyles;
從“./form”導入{表單};
從“@material-ui/core/Paper”導入紙張;
const 樣式 = 主題 => ({
紙: {
marginTop: 主題.spacing.unit * 8,
顯示:“彎曲”,
flexDirection: "列",
對齊專案:“居中”,
填充:`${theme.spacing.unit * 5}px ${theme.spacing.unit * 5}px ${theme
.spacing.unit * 5}px`
},
容器: {
最大寬度:“200px”
}
});
類別InputForm擴充元件{
構造函數(道具){
超級(道具);
this.state = {};
}
使成為() {
const 類別 = this.props;
返回 (
<React.Fragment>
<div className={classes.container}>
<Paper elevation={1} className={classes.paper}>
<h1>Form</h1>
<Formik
render={props => <Form {...props} />}
/>
</Paper>
</div>
</React.Fragment>
);
}
}
導出預設 withStyles(styles)(InputForm);
Here we have created a class component called `InputForm`. At the top we imported the form component we just created. And then passed it as a `render prop` to the `Formik` component.

There are three ways to render things with Formik
- `<Formik component />`
- `<Formik render />`
- `<Formik children />`

We used the `render props` in the above. All three render methods will be passed some props which include:

- errors
- handleChange
- handle
- isValid
- touched
- setFieldTouched

There are a couple more props passed to your component, check the docs for all of them [Formik Docs](https://github.com/jaredpalmer/formik)

Next go to the `App.js` file in the `src` folder, import the `InputForm` component then add it as a child of the `div`. This our `App.js` now and the form should be rendered.
從 'react' 導入 React, { Component };
從“./logo.svg”導入徽標;
導入'./App.css';
從'./InputForm'導入InputForm
類別應用程式擴充元件{
使成為() {
返回 (
<div className="App">
<InputForm/>
</div>
);
}
}
導出預設應用程式;
Now We have our form rendered, Let’s start with the form validation. This is where Yup is needed, Basically Yup provides functions that helps us write intuitive validation rules.
First we import Yup into the `Index.js` file in the `InputForm` folder then we use its APIs to write our validation rules.
Import statement
`import * as Yup from "yup"`
**Note: importing all the functions/APIs of a library into your codebase is not a good practice.**
Now add this following code to the `Index.js` file in the `InputForm` folder, This is our validation rules or Validation scheme.
const validSchema = Yup.object({
name: Yup.string("請輸入名字")
.required("姓名為必填項"),
電子郵件:Yup.string(「輸入您的電子郵件」)
.email("請輸入有效的電子郵件")
.required("電子郵件為必填項"),
密碼:是的.string("")
.min(8, "密碼必須至少包含8個字元")
.required("請輸入您的密碼"),
informPassword: Yup.string("請輸入您的密碼")
.required("確認您的密碼")
.oneOf([Yup.ref("密碼")], "密碼不符")
I don’t know about you but at first glance this looks very intuitive. Yup provides several APIs which makes Object validation easy. Some of them are listed below.

##### APIs

`Yup.object()` : Is used to define the keys of the object and the schema for those key. In this examples it is used to define the fields we are validating (name, email, password, confirmPassword) and also define validation rules for those fields.

`Yup.string()`: Defines a string schema. This specifies that field should be a string, it also accepts an optional argument which is used to set the error message. All four fields we defined are strings. Also, we can chain functions or methods so that it is possible have more than one validation rule for each field.

`Yup.required()`: This specifies that field is required and must not be empty. It also takes an optional argument to define the error message.

`Yup.email()`: Defines a email schema and also takes an optional argument.

`Yup.min()`:  Sets the minimum length for the value. It accept two arguments, the length and the error message.

`Yup.ref()`:  It creates a reference to another sibling field or sibling descendant field. It accepts a compulsory argument which is the field we are referencing.

`Yup.oneOf()`:  Whitelist a set of values. It accepts an array of the whitelisted value/values and an optional argument that sets the error message.

Check the Docs for a full list of the APIs.

Now that we have defined our validation schema/rules, how do we integrate it into our application?

Remember I earlier said that Yup seamlessly  integrates with Formik, well Formik provides a special prop for Yup called `validationSchema` which will automatically transform Yup's validation errors into a pretty object. So we pass our validation rules to the `validationSchema` prop. Formik also allows you to set initial value for your fields using the `initialValues` prop.

So the render function of our `InputForm` component should look like this when we add the `validationSchema` and `initialValues` prop to the Formik component.
使成為() {
const 類別 = this.props;
const value = { 姓名:“”,電子郵件:“”,確認密碼:“”,密碼:“” };
返回 (
<反應.Fragment>
<div className={classes.container}>
<Paper elevation={1} className={classes.paper}>
<h1>Form</h1>
<Formik
render={props => <Form {...props} />}
initialValues={values}
validationSchema={validationSchema}
/>
</Paper>
</div>
</React.Fragment>
);
}
We have defined the validation rules and initial values, Now let's use the props passed to the Form component to handle validate the inputs.

In our Form component in the `InputForm` folder, we destructure the props and create a change function which handles our input changes
常量{
值:{ 姓名、電子郵件、密碼、確認密碼 },
錯誤,
感動,
處理提交,
處理變化,
有效,
設定觸控字段
} = 道具;
const 更改 = (名稱, e) => {
e.persist();
處理更改(e);
setFieldTouched(名稱, true, false);
};
There are a couple of props passed to the Form component by `Formik` but I won’t be using all of them in this demo.
Props used are:

- values : An object that contains the initial values of the form fields.

- errors : An object containing error messages of the field.

- touched : An object containing fields that have been touched/visited, fields              that have been touched are set to true otherwise they are set to false.

- handleChange : General Input handler, This will update the values[key] where key is the event-emitting input's name attribute. If the name attribute is not present, handleChange will look for an input's id attribute.

- isValid: Returns true if there are no errors i.e (no errors in the errors object).

- setFieldTouched: is a function used to set the touched state of a field. The first argument is the name of the field, the second argument is the value you want to set the touched state to which is true and the last argument is a boolean used to prevent validation.

Now let's make changes to Form component so that we can see the error messages when there’s an error.
Material-UI `TextField` component provides two props which can help us display our error message in an elegant way, these props are `helperText` and `error` for displaying the error.

The Form component should look like this when we add these props to our `TextField` component.
匯出 const Form = props => {
常量{
值:{ 姓名、電子郵件、密碼、確認密碼 },
錯誤,
感動,
處理變化,
有效,
設定觸控字段
} = 道具;
const 更改 = (名稱, e) => {
e.persist();
處理更改(e);
setFieldTouched(名稱, true, false);
};
返回 (
<表格
onSubmit={() => {
alert("submitted");
}}
>
<TextField
id="name"
name="name"
helperText={touched.name ? errors.name : ""}
error={touched.name && Boolean(errors.name)}
label="Name"
value={name}
onChange={change.bind(null, "name")}
fullWidth
/>
<TextField
id="email"
name="email"
helperText={touched.email ? errors.email : ""}
error={touched.email && Boolean(errors.email)}
label="Email"
fullWidth
value={email}
onChange={change.bind(null, "email")}
/>
<TextField
id="password"
name="password"
helperText={touched.password ? errors.password : ""}
error={touched.password && Boolean(errors.password)}
label="Password"
fullWidth
type="password"
value={password}
onChange={change.bind(null, "password")}
/>
<TextField
id="confirmPassword"
name="confirmPassword"
helperText={touched.confirmPassword ? errors.confirmPassword : ""}
error={touched.confirmPassword && Boolean(errors.confirmPassword)}
label="Confirm Password"
fullWidth
type="password"
value={confirmPassword}
onChange={change.bind(null, "confirmPassword")}
/>
<Button
type="submit"
fullWidth
variant="raised"
color="primary"
disabled={!isValid}
>
Submit
</Button>
);
};
You should notice that I added three props to the `Textfield` component, `helperText`, `error` and `onChange`.
`onChange` is set to the change function we wrote above for handling changes to the input field.
The `helperText` prop is set to a ternary operator (If statement) that states if the field is touched, set the `helperText` prop to the error message of that field else set it to an empty string. The `error` prop is set to a boolean to indicate an error in validation.
And finally the `Button` component has a prop called `disabled` which disables the button, we set it to not `!isValid` so if there is any error in the errors object the button remains disabled, I mean we don’t want to be submitting invalid values.

Creating forms with Formik,Material-UI and Yup is awesome.
This is my first technical article/post so I am open to any suggestion that can help improve my writing.
If you have any question or suggestion comment below.
_Special thanks to my friend [YJTheRuler](https://twitter.com/YJTheRuler) for editing this article, He writes for [@radronline](https://t.co/kiG4o0nHFY) about Afro-beat music and African culture._
原文出處:https://dev.to/finallynero/react-form-using-formik-material-ui-and-yup-2e8h
1) --- 會變成分隔線(上一行必須是空白)
2) # 會變成一級標題
3) ## 會變成二級標題
4) ### 會變成三級標題
5) **粗體文字**會顯示粗體文字
6) ```當第一行與最後一行會顯示程式碼
7) 請搜尋 Markdown 語法,了解各種格式