長話短說 ---- 在本文中,您將了解如何建立基於 AI 的行銷活動管理應用程式,該應用程式可讓您建立和分析廣告活動,從而使您能夠為您的業務做出正確的決策。 我們將介紹如何: - 使用 Next.js 建立 Web 應用程式, - 使用 CopilotKit 將 AI 助理整合到軟體應用程式中,以及 - 建立特定於操作的人工智慧副駕駛來處理應用程式中的各種任務。 - 建立一名競選經理  --- CopilotKit:建構應用內人工智慧副駕駛的框架 -------------------------- CopilotKit是一個[開源的AI副駕駛平台](https://github.com/CopilotKit/CopilotKit)。我們可以輕鬆地將強大的人工智慧整合到您的 React 應用程式中。 建造: - ChatBot:上下文感知的應用內聊天機器人,可以在應用程式內執行操作 💬 - CopilotTextArea:人工智慧驅動的文字字段,具有上下文感知自動完成和插入功能📝 - 聯合代理:應用程式內人工智慧代理,可以與您的應用程式和使用者互動🤖  {% cta https://git.new/devtoarticle1 %} Star CopilotKit ⭐️ {% endcta %} --- 先決條件 ---- 要完全理解本教程,您需要對 React 或 Next.js 有基本的了解。 我們還將利用以下內容: - [Radix UI](https://www.radix-ui.com/) - 用於為應用程式建立可存取的 UI 元件。 - [OpenAI API 金鑰](https://platform.openai.com/api-keys)- 使我們能夠使用 GPT 模型執行各種任務。 - [CopilotKit](https://github.com/CopilotKit/CopilotKit) - 一個開源副駕駛框架,用於建立自訂 AI 聊天機器人、應用程式內 AI 代理程式和文字區域。 --- 專案設定和套件安裝 --------- 首先,透過在終端機中執行以下程式碼片段來建立 Next.js 應用程式: ``` npx create-next-app campaign-manager ``` 選擇您首選的配置設定。在本教學中,我們將使用 TypeScript 和 Next.js App Router。  接下來,將[Heroicons](https://www.npmjs.com/package/@heroicons/react) 、 [Radix UI](https://www.radix-ui.com/)及其原始元件安裝到專案中。 ``` npm install @heroicons/react @radix-ui/react-avatar @radix-ui/react-dialog @radix-ui/react-dropdown-menu @radix-ui/react-icons @radix-ui/react-label @radix-ui/react-popover @radix-ui/react-select @radix-ui/react-slot @radix-ui/react-tabs ``` 另外,安裝[Recharts 程式庫](https://recharts.org/en-US)(一個用於建立互動式圖表的 React 程式庫)以及以下實用程式套件: ``` npm install recharts class-variance-authority clsx cmdk date-fns lodash react-day-picker tailwind-merge tailwindcss-animate ``` 最後,安裝[CopilotKit 軟體套件](https://docs.copilotkit.ai/getting-started/quickstart-chatbot)。這些套件使 AI copilot 能夠從 React 狀態檢索資料並在應用程式中做出決策。 ``` npm install @copilotkit/react-ui @copilotkit/react-textarea @copilotkit/react-core @copilotkit/backend ``` 恭喜!您現在已準備好建立應用程式。 --- 使用 Next.js 建立 Campaign Manager 應用程式 ----------------------------------- 在本節中,我將引導您建立活動管理器應用程式的使用者介面。 首先,讓我們進行一些初始設定。 在`src`資料夾中建立一個`components`和`lib`資料夾。 ``` cd src mkdir components lib ``` 在**`lib`**資料夾中,我們將聲明應用程式的靜態類型和預設活動。因此,在**`lib`**資料夾中建立**`data.ts`**和**`types.ts`**檔案。 ``` cd lib touch data.ts type.ts ``` 將下面的程式碼片段複製到`type.ts`檔中。它聲明了活動屬性及其資料類型。 ``` export interface Campaign { id: string; objective?: | "brand-awareness" | "lead-generation" | "sales-conversion" | "website-traffic" | "engagement"; title: string; keywords: string; url: string; headline: string; description: string; budget: number; bidStrategy?: "manual-cpc" | "cpa" | "cpm"; bidAmount?: number; segment?: string; } ``` 為應用程式建立預設的行銷活動清單並將其複製到`data.ts`檔案中。 ``` import { Campaign } from "./types"; export let DEFAULT_CAMPAIGNS: Campaign[] = [ { id: "1", title: "CopilotKit", url: "https://www.copilotkit.ai", headline: "Copilot Kit - The Open-Source Copilot Framework", description: "Build, deploy, and operate fully custom AI Copilots. In-app AI chatbots, AI agents, AI Textareas and more.", budget: 10000, keywords: "AI, chatbot, open-source, copilot, framework", }, { id: "2", title: "EcoHome Essentials", url: "https://www.ecohomeessentials.com", headline: "Sustainable Living Made Easy", description: "Discover our eco-friendly products that make sustainable living effortless. Shop now for green alternatives!", budget: 7500, keywords: "eco-friendly, sustainable, green products, home essentials", }, { id: "3", title: "TechGear Solutions", url: "https://www.techgearsolutions.com", headline: "Innovative Tech for the Modern World", description: "Find the latest gadgets and tech solutions. Upgrade your life with smart technology today!", budget: 12000, keywords: "tech, gadgets, innovative, modern, electronics", }, { id: "4", title: "Global Travels", url: "https://www.globaltravels.com", headline: "Travel the World with Confidence", description: "Experience bespoke travel packages tailored to your dreams. Luxury, adventure, relaxation—your journey starts here.", budget: 20000, keywords: "travel, luxury, adventure, tours, global", }, { id: "5", title: "FreshFit Meals", url: "https://www.freshfitmeals.com", headline: "Healthy Eating, Simplified", description: "Nutritious, delicious meals delivered to your door. Eating well has never been easier or tastier.", budget: 5000, keywords: "healthy, meals, nutrition, delivery, fit", }, ]; ``` 由於我們使用 Radix UI 建立可以使用 TailwindCSS 輕鬆自訂的基本 UI 元件,因此請在**`lib`**資料夾中建立一個**`utils.ts`**文件,並將以下程式碼片段複製到該文件中。 ``` //👉🏻 The lib folder now contains 3 files - data.ts, type.ts, util.ts //👇🏻 Copy the code below into the "lib/util.ts" file. import { type ClassValue, clsx } from "clsx"; import { twMerge } from "tailwind-merge"; export function cn(...inputs: ClassValue[]) { return twMerge(clsx(inputs)); } export function randomId() { return Math.random().toString(36).substring(2, 15); } ``` 導航到`components`資料夾並在其中建立其他三個資料夾。 ``` cd components mkdir app dashboard ui ``` `components/app`資料夾將包含應用程式中使用的各種元件,而儀表板資料夾包含某些元素的 UI 元件。 `ui`資料夾包含使用 Radix UI 建立的多個 UI 元素。將[專案儲存庫中的這些元素](https://github.com/CopilotKit/campaign-manager-demo/tree/main/src/components/ui)複製到該資料夾中。 恭喜! `ui`資料夾應包含必要的 UI 元素。現在,我們可以使用它們來建立應用程式中所需的各種元件。 ### 建立應用程式 UI 元件 在這裡,我將引導您完成為應用程式建立使用者介面的過程。  首先,導航至**`app/page.tsx`**檔案並將以下程式碼片段貼到其中。該文件呈現在**`components/app`**資料夾中聲明的 App 元件。 ``` "use client"; import { App } from "@/components/app/App"; export default function DashboardPage() { return <App />; } ``` 在`components/app`資料夾中建立`App.tsx` 、 `CampaignForm.tsx` 、 `MainNav.tsx`和`UserNav.tsx`檔案。 ``` cd components/app touch App.tsx CampaignForm.tsx MainNav.tsx UserNav.tsx ``` 將下面的程式碼片段複製到`App.tsx`檔案中。 ``` "use client"; import { DEFAULT_CAMPAIGNS } from "@/lib/data"; import { Campaign } from "@/lib/types"; import { randomId } from "@/lib/utils"; import { Dashboard } from "../dashboard/Dashboard"; import { CampaignForm } from "./CampaignForm"; import { useState } from "react"; import _ from "lodash"; export function App() { //👇🏻 default segments const [segments, setSegments] = useState<string[]>([ "Millennials/Female/Urban", "Parents/30s/Suburbs", "Seniors/Female/Rural", "Professionals/40s/Midwest", "Gamers/Male", ]); const [campaigns, setCampaigns] = useState<Campaign[]>( _.cloneDeep(DEFAULT_CAMPAIGNS) ); //👇🏻 updates campaign list function saveCampaign(campaign: Campaign) { //👇🏻 newly created campaign if (campaign.id === "") { campaign.id = randomId(); setCampaigns([campaign, ...campaigns]); } else { //👇🏻 existing campaign - search for the campaign and updates the campaign list const index = campaigns.findIndex((c) => c.id === campaign.id); if (index === -1) { setCampaigns([...campaigns, campaign]); } else { campaigns[index] = campaign; setCampaigns([...campaigns]); } } } const [currentCampaign, setCurrentCampaign] = useState<Campaign | undefined>( undefined ); return ( <div className='relative'> <CampaignForm segments={segments} currentCampaign={currentCampaign} setCurrentCampaign={setCurrentCampaign} saveCampaign={(campaign) => { if (campaign) { saveCampaign(campaign); } setCurrentCampaign(undefined); }} /> <Dashboard campaigns={campaigns} setCurrentCampaign={setCurrentCampaign} segments={segments} setSegments={setSegments} /> </div> ); } ``` - 從上面的程式碼片段來看, - 我為行銷活動建立了預設細分列表,並對已定義的行銷活動列表進行了深層複製。 - `saveCampaign`函數接受行銷活動作為參數。如果行銷活動沒有 ID,則表示它是新建立的,因此會將其新增至行銷活動清單。否則,它會找到該活動並更新其屬性。 - `Dashboard`和`CampaignForm`元件接受細分和行銷活動作為 props。 [Dashboard 元件](https://github.com/CopilotKit/campaign-manager-demo/blob/main/src/components/dashboard/Dashboard.tsx)在儀表板上顯示各種 UI 元素,而[CampaignForm 元件](https://github.com/CopilotKit/campaign-manager-demo/blob/main/src/components/app/CampaignForm.tsx)使用戶能夠在應用程式中建立和保存新的行銷活動。 您也可以使用[GitHub 儲存庫](https://github.com/CopilotKit/campaign-manager-demo/tree/main/src/components)中的程式碼片段來更新儀表板和應用程式元件。 恭喜!您應該有一個有效的 Web 應用程式,可讓使用者查看和建立新的行銷活動。 在接下來的部分中,您將了解如何將 CopilotKit 加入到應用程式中,以根據每個行銷活動的目標和預算進行分析和決策。  --- 使用 CopilotKit 透過 AI 分析廣告活動 -------------------------- 在這裡,您將學習如何將人工智慧加入到應用程式中,以幫助您分析行銷活動並做出最佳決策。 在繼續之前,請造訪[OpenAI 開發者平台](https://platform.openai.com/api-keys)並建立一個新的金鑰。 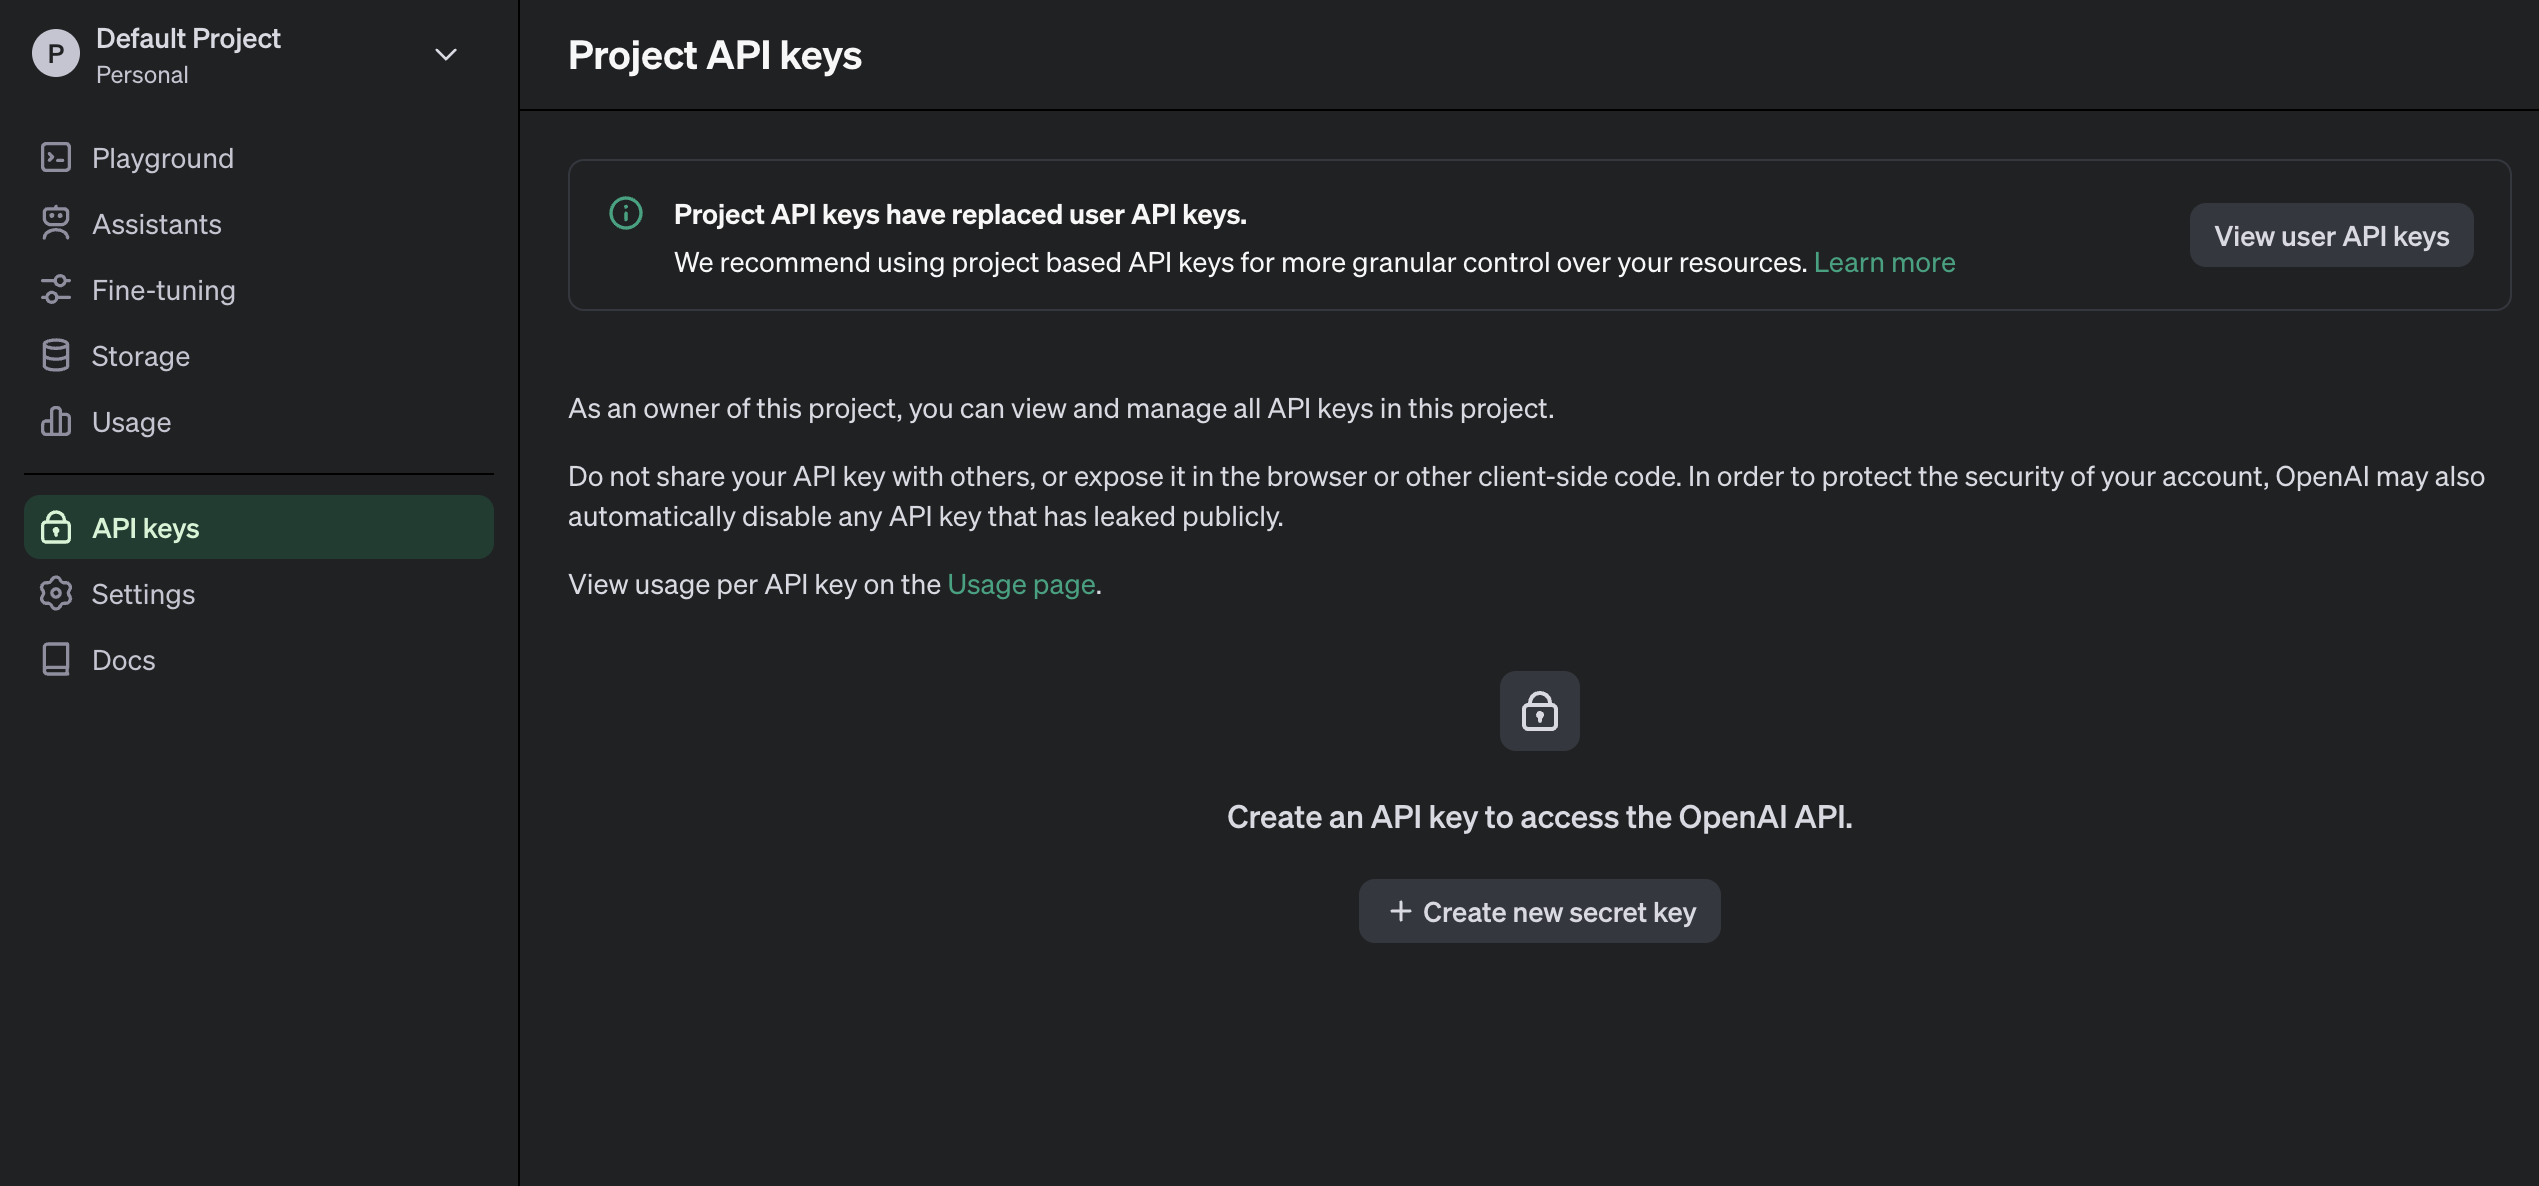 建立一個`.env.local`檔案並將新建立的金鑰複製到該檔案中。 ``` OPENAI_API_KEY=<YOUR_OPENAI_SECRET_KEY> OPENAI_MODEL=gpt-4-1106-preview ``` 接下來,您需要為 CopilotKit 建立 API 端點。在 Next.js 應用程式資料夾中,建立一個包含`route.ts`檔案的`api/copilotkit`資料夾。 ``` cd app mkdir api && cd api mkdir copilotkit && cd copilotkit touch route.ts ``` 將下面的程式碼片段複製到`route.ts`檔中。 [CopilotKit 後端](https://docs.copilotkit.ai/reference/CopilotBackend)接受使用者的請求並使用 OpenAI 模型做出決策。 ``` import { CopilotBackend, OpenAIAdapter } from "@copilotkit/backend"; export const runtime = "edge"; export async function POST(req: Request): Promise<Response> { const copilotKit = new CopilotBackend({}); const openaiModel = process.env["OPENAI_MODEL"]; return copilotKit.response(req, new OpenAIAdapter({ model: openaiModel })); } ``` 若要將您的應用程式連接到此 API 端點,請更新`app/page.tsx`文件,如下所示: ``` "use client"; import { App } from "@/components/app/App"; import { CopilotKit } from "@copilotkit/react-core"; import { CopilotSidebar } from "@copilotkit/react-ui"; export default function DashboardPage() { return ( <CopilotKit url='/api/copilotkit/'> <CopilotSidebar instructions='Help the user create and manage ad campaigns.' defaultOpen={true} labels={{ title: "Campaign Manager Copilot", initial: "Hello there! I can help you manage your ad campaigns. What campaign would you like to work on?", }} clickOutsideToClose={false} > <App /> </CopilotSidebar> </CopilotKit> ); } ``` `CopilotKit`元件包裝整個應用程式並接受包含 API 端點連結的`url`屬性。 `CopilotSidebar`元件為應用程式加入了一個聊天機器人側邊欄面板,使我們能夠向 CopilotKit 提供各種指令。  ### 如何讓AI副駕駛執行各種動作 CopilotKit 提供了兩個鉤子,使我們能夠處理使用者的請求並插入應用程式狀態: [useCopilotAction](https://docs.copilotkit.ai/reference/useCopilotAction)和[useMakeCopilotReadable](https://docs.copilotkit.ai/reference/useMakeCopilotReadable) 。 `useCopilotAction`掛鉤可讓您定義 CopilotKit 執行的動作。它接受包含以下參數的物件: - name - 操作的名稱。 - 描述 - 操作的描述。 - 參數 - 包含所需參數清單的陣列。 - render - 預設的自訂函數或字串。 - handler - 由操作觸發的可執行函數。 ``` useCopilotAction({ name: "sayHello", description: "Say hello to someone.", parameters: [ { name: "name", type: "string", description: "name of the person to say greet", }, ], render: "Process greeting message...", handler: async ({ name }) => { alert(`Hello, ${name}!`); }, }); ``` `useMakeCopilotReadable`掛鉤向 CopilotKit 提供應用程式狀態。 ``` import { useMakeCopilotReadable } from "@copilotkit/react-core"; const appState = ...; useMakeCopilotReadable(JSON.stringify(appState)); ``` CopilotKit 還允許您為使用者提示提供上下文,使其能夠做出充分且準確的決策。 將`guidance.ts`和`script.ts`加入到專案內的`lib`資料夾中,並將此[指導](https://github.com/CopilotKit/campaign-manager-demo/blob/main/src/lib/guideline.ts)和[腳本建議](https://github.com/CopilotKit/campaign-manager-demo/blob/main/src/lib/script.ts)複製到檔案中,以便 CopilotKit 做出決策。 在應用程式元件中,將當前日期、腳本建議和指導傳遞到 CopilotKit。 ``` import { GUIDELINE } from "@/lib/guideline"; import { SCRIPT_SUGGESTION } from "@/lib/script"; import { useCopilotAction, useMakeCopilotReadable, } from "@copilotkit/react-core"; export function App() { //-- 👉🏻 ...other component functions //👇🏻 Ground the Copilot with domain-specific knowledge for this use-case: marketing campaigns. useMakeCopilotReadable(GUIDELINE); useMakeCopilotReadable(SCRIPT_SUGGESTION); //👇🏻 Provide the Copilot with the current date. useMakeCopilotReadable("Today's date is " + new Date().toDateString()); return ( <div className='relative'> <CampaignForm segments={segments} currentCampaign={currentCampaign} setCurrentCampaign={setCurrentCampaign} saveCampaign={(campaign) => { if (campaign) { saveCampaign(campaign); } setCurrentCampaign(undefined); }} /> <Dashboard campaigns={campaigns} setCurrentCampaign={setCurrentCampaign} segments={segments} setSegments={setSegments} /> </div> ); } ``` 在`App`元件中建立一個 CopilotKit 操作,該操作可在使用者提供此類指令時建立新的活動或編輯現有的活動。 ``` useCopilotAction({ name: "updateCurrentCampaign", description: "Edit an existing campaign or create a new one. To update only a part of a campaign, provide the id of the campaign to edit and the new values only.", parameters: [ { name: "id", description: "The id of the campaign to edit. If empty, a new campaign will be created", type: "string", }, { name: "title", description: "The title of the campaign", type: "string", required: false, }, { name: "keywords", description: "Search keywords for the campaign", type: "string", required: false, }, { name: "url", description: "The URL to link the ad to. Most of the time, the user will provide this value, leave it empty unless asked by the user.", type: "string", required: false, }, { name: "headline", description: "The headline displayed in the ad. This should be a 5-10 words", type: "string", required: false, }, { name: "description", description: "The description displayed in the ad. This should be a short text", type: "string", required: false, }, { name: "budget", description: "The budget of the campaign", type: "number", required: false, }, { name: "objective", description: "The objective of the campaign", type: "string", enum: [ "brand-awareness", "lead-generation", "sales-conversion", "website-traffic", "engagement", ], }, { name: "bidStrategy", description: "The bid strategy of the campaign", type: "string", enum: ["manual-cpc", "cpa", "cpm"], required: false, }, { name: "bidAmount", description: "The bid amount of the campaign", type: "number", required: false, }, { name: "segment", description: "The segment of the campaign", type: "string", required: false, enum: segments, }, ], handler: (campaign) => { const newValue = _.assign( _.cloneDeep(currentCampaign), _.omitBy(campaign, _.isUndefined) ) as Campaign; setCurrentCampaign(newValue); }, render: (props) => { if (props.status === "complete") { return "Campaign updated successfully"; } else { return "Updating campaign"; } }, }); ``` {% 嵌入 https://www.youtube.com/watch?v=gCJpH6Tnj5g %} 新增另一個模擬 API 呼叫的操作,以允許 CopilotKit 從先前建立的活動中檢索歷史資料。 ``` // Provide this component's Copilot with the ability to retrieve historical cost data for certain keywords. // Will be called automatically when needed by the Copilot. useCopilotAction({ name: "retrieveHistoricalData", description: "Retrieve historical data for certain keywords", parameters: [ { name: "keywords", description: "The keywords to retrieve data for", type: "string", }, { name: "type", description: "The type of data to retrieve for the keywords.", type: "string", enum: ["CPM", "CPA", "CPC"], }, ], handler: async ({ type }) => { // fake an API call that retrieves historical data for cost for certain keywords based on campaign type (CPM, CPA, CPC) await new Promise((resolve) => setTimeout(resolve, 2000)); function getRandomValue(min: number, max: number) { return (Math.random() * (max - min) + min).toFixed(2); } if (type == "CPM") { return getRandomValue(0.5, 10); } else if (type == "CPA") { return getRandomValue(5, 100); } else if (type == "CPC") { return getRandomValue(0.2, 2); } }, render: (props) => { // Custom in-chat component rendering. Different components can be rendered based on the status of the action. let label = "Retrieving historical data ..."; if (props.args.type) { label = `Retrieving ${props.args.type} for keywords ...`; } if (props.status === "complete") { label = `Done retrieving ${props.args.type} for keywords.`; } const done = props.status === "complete"; return ( <div className=''> <div className=' w-full relative max-w-xs'> <div className='absolute inset-0 h-full w-full bg-gradient-to-r from-blue-500 to-teal-500 transform scale-[0.80] bg-red-500 rounded-full blur-3xl' /> <div className='relative shadow-xl bg-gray-900 border border-gray-800 px-4 py-8 h-full overflow-hidden rounded-2xl flex flex-col justify-end items-start'> <h1 className='font-bold text-sm text-white mb-4 relative z-50'> {label} </h1> <p className='font-normal text-base text-teal-200 mb-2 relative z-50 whitespace-pre'> {props.args.type && `Historical ${props.args.type}: ${props.result || "..."}`} </p> </div> </div> </div> ); }, }); ```  恭喜!您已完成本教學的專案。 結論 -- [CopilotKit](https://copilotkit.ai/)是一款令人難以置信的工具,可讓您在幾分鐘內將 AI Copilot 加入到您的產品中。無論您是對人工智慧聊天機器人和助理感興趣,還是對複雜任務的自動化感興趣,CopilotKit 都能讓您輕鬆實現。 如果您需要建立 AI 產品或將 AI 工具整合到您的軟體應用程式中,您應該考慮 CopilotKit。 您可以在 GitHub 上找到本教學的源程式碼: <https://github.com/CopilotKit/campaign-manager-demo> 感謝您的閱讀! --- 原文出處:https://dev.to/copilotkit/build-an-ai-powered-campaign-manager-nextjs-openai-copilotkit-59ii
今天,我們將學習如何使用 Wing 作為後端建立全端應用程式。  我們將使用 React 和 Vite 作為前端。 我知道還有其他框架,如 Vue、Angular 和 Next,但 React 仍然是最常見的,並且迄今為止有大量值得信賴的新創公司使用它。 如果您不知道, [React](https://github.com/facebook/react)是 Facebook 建立的開源程式庫,用於建立 Web 和本機使用者介面。正如您從儲存庫中看到的,它被超過 2040 萬開發人員使用。所以,這是值得的。 讓我們看看如何使用 Wing 作為後端。  --- [Wing](https://git.new/wing-repo) - 一種雲端程式語言。 ---------------------------------------------  Winglang 是一種專為雲端(又稱「面向雲端」)設計的新型開源程式語言。它允許您在雲端中建立應用程式,並且具有相當簡單的語法。 Wing 程式可以使用功能齊全的模擬器在本地執行(是的,不需要網路),也可以部署到任何雲端供應商。  Wing 需要 Node `v20 or higher` 。 建立一個父目錄(我們使用的`shared-counter` )並使用 Vite 使用新的 React 應用程式設定前端。您可以使用這個 npm 指令。 ``` npm create -y vite frontend -- --template react-ts // once installed, you can check if it's running properly. cd frontend npm install npm run dev ``` 您可以使用此 npm 命令安裝 Wing。 ``` npm install -g winglang ``` 您可以使用`wing -V`驗證安裝。 Wing 還提供官方[VSCode 擴充功能](https://marketplace.visualstudio.com/items?itemName=Monada.vscode-wing)和[IntelliJ](https://plugins.jetbrains.com/plugin/22353-wing) ,後者提供語法突出顯示、補全、轉到定義和嵌入式 Wing 控制台支援。您可以在建立應用程式之前安裝它! 建立後端目錄。 ``` mkdir ~/shared-counter/backend cd ~/shared-counter/backend ``` 建立一個新的空 Wing 專案。 ``` wing new empty // This will generate three files: package.json, package-lock.json and main.w file with a simple "hello world" program wing it // to run it in the Wing simulator // The Wing Simulator will be opened in your browser and will show a map of your app with a single function. //You can invoke the function from the interaction panel and check out the result. ``` 使用指令`wing new empty`後的結構如下。 ``` bring cloud; // define a queue, a bucket, and a counter let bucket = new cloud.Bucket(); let counter = new cloud.Counter(initial: 1); let queue = new cloud.Queue(); // When a message is received in the queue -> it should be consumed // by the following closure queue.setConsumer(inflight (message: str) => { // Increment the distributed counter, the index variable will // store the value before the increment let index = counter.inc(); // Once two messages are pushed to the queue, e.g. "Wing" and "Queue". // Two files will be created: // - wing-1.txt with "Hello Wing" // - wing-2.txt with "Hello Queue" bucket.put("wing-{index}.txt", "Hello, {message}"); log("file wing-{index}.txt created"); }); ``` 您可以安裝`@winglibs/vite`來啟動開發伺服器,而不是使用`npm run dev`來啟動本機 Web 伺服器。 ``` // in the backend directory npm i @winglibs/vite ``` 您可以使用`backend/main.w`中提供的 publicEnv 將資料傳送到前端。 讓我們來看一個小例子。 ``` // backend/main.w bring vite; new vite.Vite( root: "../frontend", publicEnv: { TITLE: "Wing + Vite + React" } ); // import it in frontend // frontend/src/App.tsx import "../.winglibs/wing-env.d.ts" //You can access that value like this. <h1>{window.wing.env.TITLE}</h1> ``` 你還可以做更多: - 讀取/更新 API 路線並使用 Wing Simulator 檢查它。 - 使用後端獲取值。 - 使用`@winglibs/websockets`同步瀏覽器,它在後端部署一個 WebSocket 伺服器,您可以連接此 WebSocket 來接收即時通知。 您可以閱讀完整的逐步指南,以了解[如何使用 React 作為前端和 Wing 作為後端建立簡單的 Web 應用程式](https://www.winglang.io/docs/guides/react-vite-websockets)。測試是使用 Wing Simulator 完成的,並使用 Terraform 部署到 AWS。 部署後的AWS架構是這樣的。 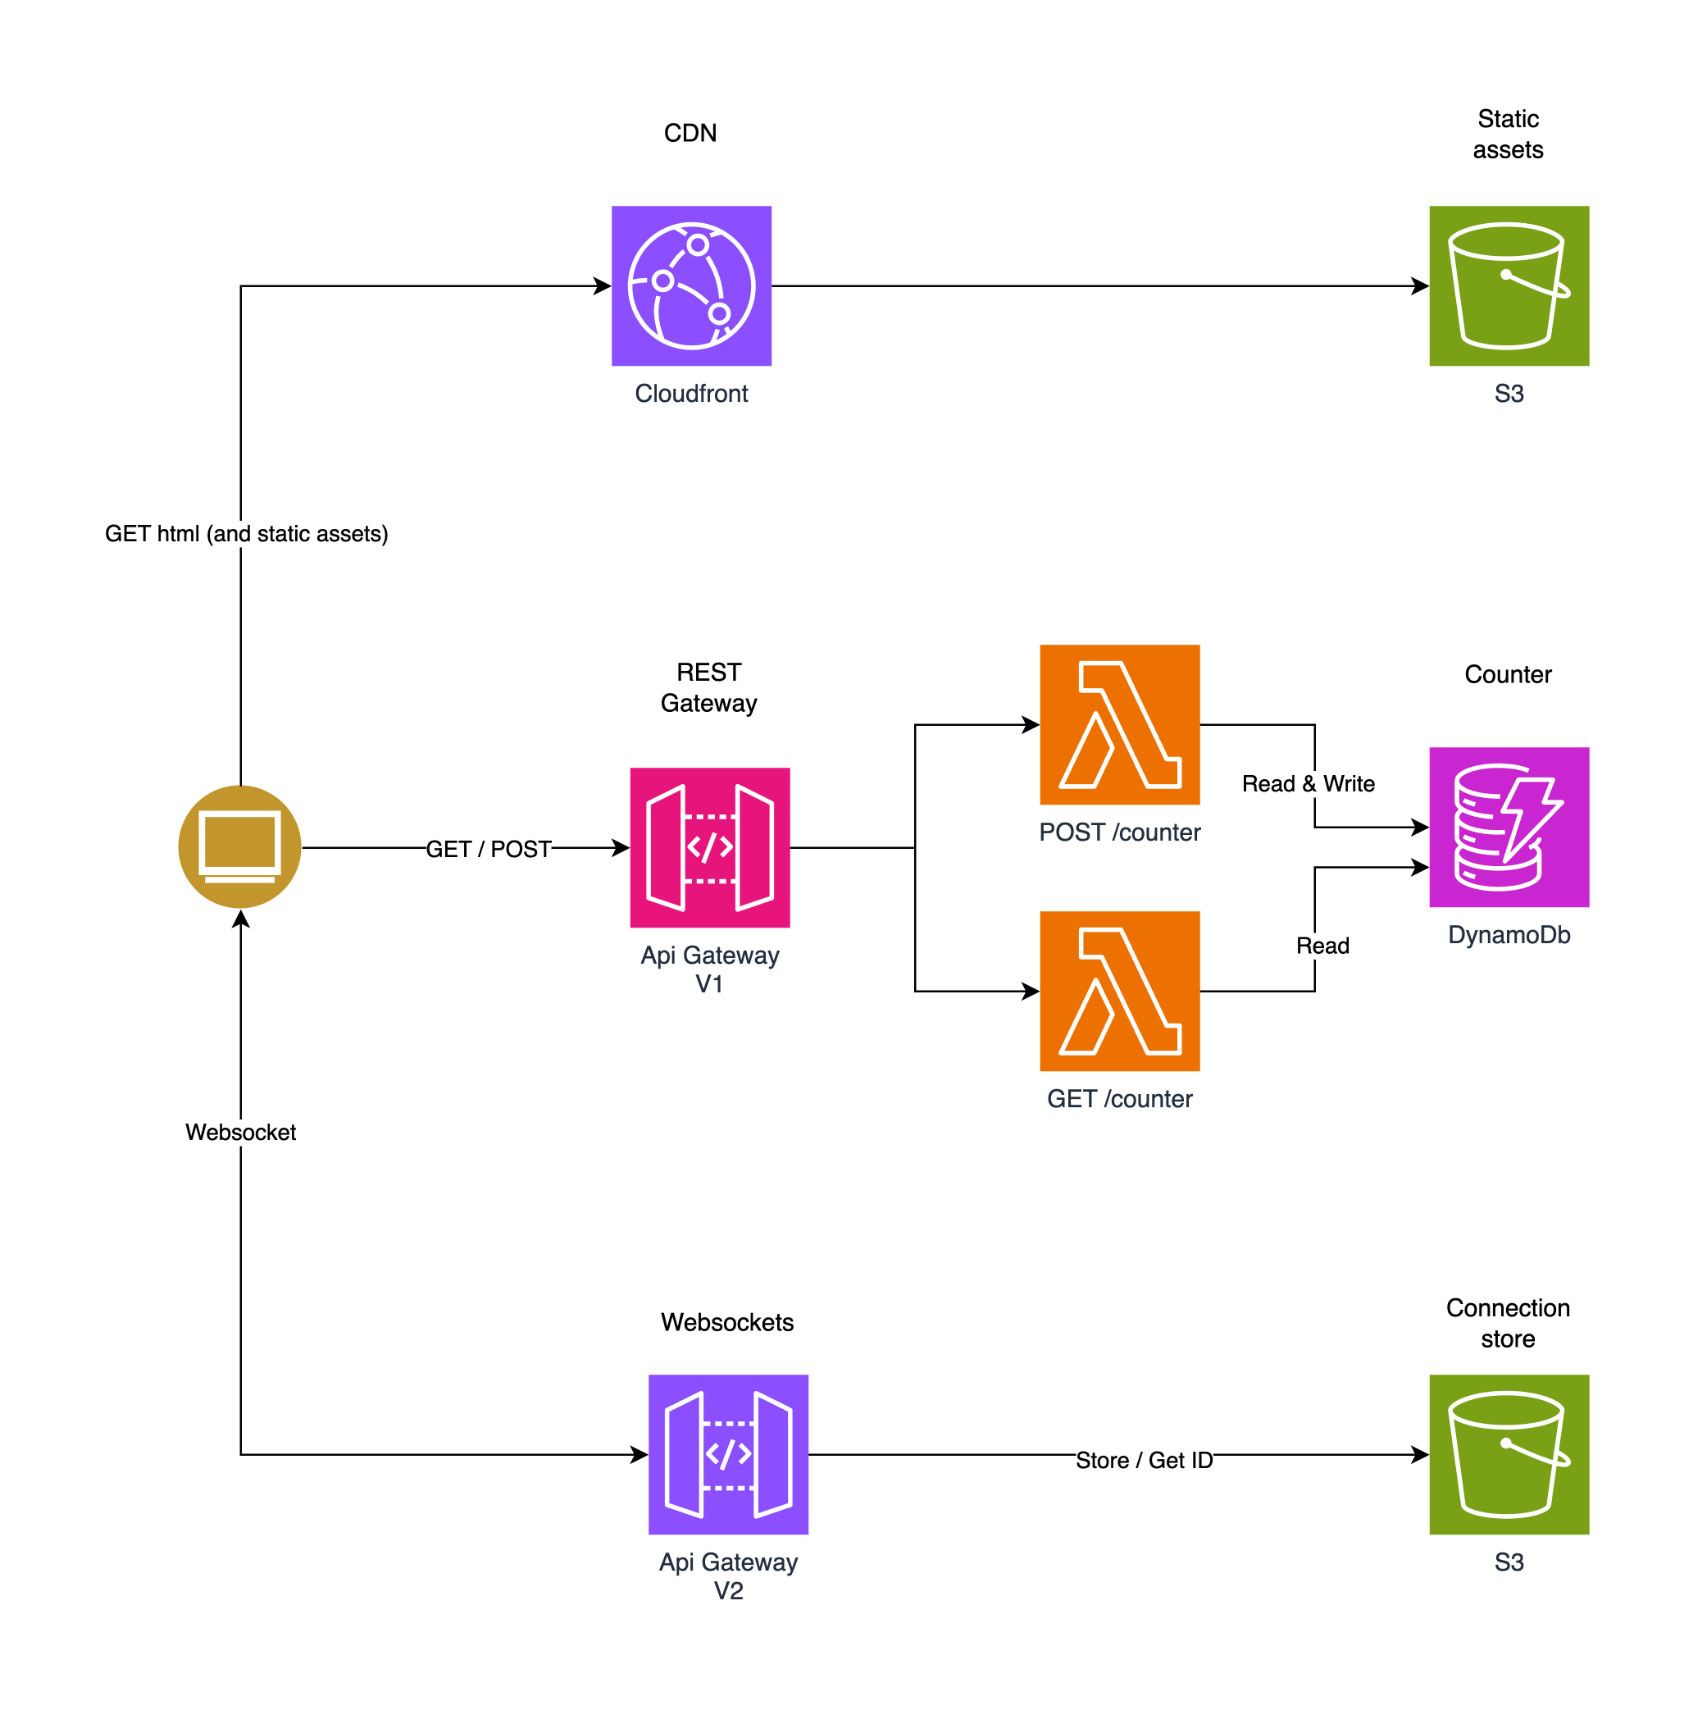 為了提供開發者選擇和更好的體驗,Wing 推出了對[TypeScript (Wing)](https://www.winglang.io/docs/typescript/)等其他語言的全面支援。唯一強制性的事情是您必須安裝 Wing SDK。 這也將使控制台完全可用於本地偵錯和測試,而無需學習 Wing 語言。 Wing 甚至還有其他[指南](https://www.winglang.io/docs/category/guides),因此更容易遵循。 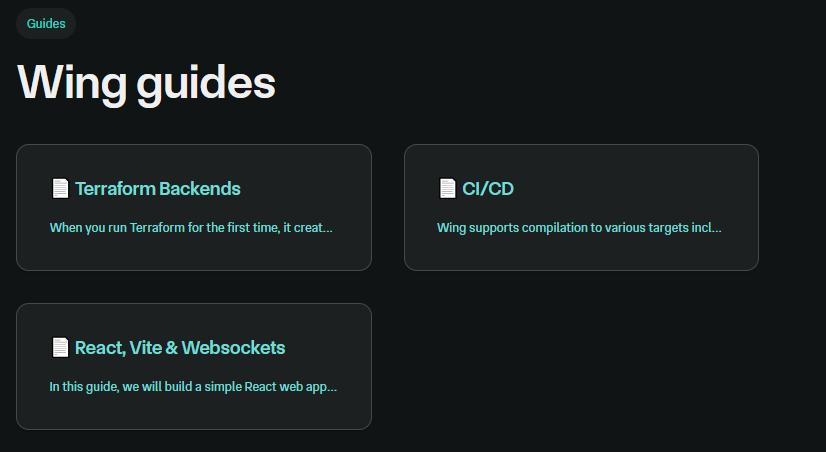 您可以閱讀[文件](https://www.winglang.io/docs)並查看[範例](https://www.winglang.io/docs/category/examples)。 您也可以在[Playground](https://www.winglang.io/play/?code=LwAvACAAVABoAGkAcwAgAGkAcwAgAHQAaABlACAAaQBtAHAAbwByAHQAIABzAHQAYQB0AGUAbQBlAG4AdAAgAGkAbgAgAFcAaQBuAGcALgAKAC8ALwAgAEgAZQByAGUAIAB3AGUAIABiAHIAaQBuAGcAIAB0AGgAZQAgAFcAaQBuAGcAIABzAHQAYQBuAGQAYQByAGQAIABsAGkAYgByAGEAcgB5ACAAdABoAGEAdAAgAAoALwAvACAAYwBvAG4AdABhAGkAbgBzACAAYQBiAHMAdAByAGEAYwB0AGkAbwBuAHMAIABvAGYAIABwAG8AcAB1AGwAYQByACAAYwBsAG8AdQBkACAAcwBlAHIAdgBpAGMAZQBzAC4ACgBiAHIAaQBuAGcAIABjAGwAbwB1AGQAOwAKAAoALwAvACAAVABoAGkAcwAgAGMAbwBkAGUAIABkAGUAZgBpAG4AZQBzACAAYQAgAGIAdQBjAGsAZQB0ACAAYQBzACAAcABhAHIAdAAgAG8AZgAgAHkAbwB1AHIAIABhAHAAcAAuAAoALwAvACAAVwBoAGUAbgAgAGMAbwBtAHAAaQBsAGkAbgBnACAAdABvACAAYQAgAHMAcABlAGMAaQBmAGkAYwAgAGMAbABvAHUAZAAgAHAAcgBvAHYAaQBkAGUAcgAKAC8ALwAgAGkAdAAgAHcAaQBsAGwAIABiAGUAIABzAHUAYgBzAHQAaQB0AHUAdABlAGQAIABiAHkAIABhAG4AIABpAG0AcABsAGUAbQBlAG4AdABhAHQAaQBvAG4AIABmAG8AcgAKAC8ALwAgAHQAaABhAHQAIABjAGwAbwB1AGQALgAgAEkALgBlACwAIABmAG8AcgAgAEEAVwBTACAAaQB0ACAAdwBpAGwAbAAgAGIAZQAgAGEAbgAgAFMAMwAgAEIAdQBjAGsAZQB0AC4ACgBsAGUAdAAgAGIAdQBjAGsAZQB0ACAAPQAgAG4AZQB3ACAAYwBsAG8AdQBkAC4AQgB1AGMAawBlAHQAKAApADsACgAKAC8ALwAgACEAIQAhACEAIQAhACEAIQAhACEAIQAhACEAIQAhACEAIQAhACEAIQAhACEAIQAhACEAIQAhACEAIQAhACEAIQAhACEAIQAhACEAIQAhACEAIQAhACEAIQAhACEAIQAhACEAIQAKAC8ALwAgAFkAbwB1ACAAYwBhAG4AIABpAG4AdABlAHIAYQBjAHQAIAB3AGkAdABoACAAdABoAGUAIABhAHAAcAAgAGkAbgAgAHQAaABlACAAYwBvAG4AcwBvAGwAZQAgAC0ALQA%2BAAoALwAvACAACgAvAC8AIABDAGwAaQBjAGsAIABvAG4AIAB0AGgAZQAgAEYAdQBuAGMAdABpAG8AbgAsACAAYQBuAGQAIAB0AGgAZQBuACAAaQBuAHYAbwBrAGUAIABpAHQAIABpAG4AIAB0AGgAZQAKAC8ALwAgAGwAbwB3AGUAcgAgAHIAaQBnAGgAdAAgAHAAYQBuAGUAbAAsACAAbwByACAAYwBsAGkAYwBrACAAbwBuACAAdABoAGUAIABCAHUAYwBrAGUAdAAKAC8ALwAgAHQAbwAgAHMAZQBlACAAaQB0AHMAIABjAG8AbgB0AGUAbgB0AHMAIABpAG4AIAB0AGgAZQAgAHAAYQBuAGUAbAAsACAAZQB0AGMALgAKAC8ALwAgACEAIQAhACEAIQAhACEAIQAhACEAIQAhACEAIQAhACEAIQAhACEAIQAhACEAIQAhACEAIQAhACEAIQAhACEAIQAhACEAIQAhACEAIQAhACEAIQAhACEAIQAhACEAIQAhACEAIQAKAAoALwAvACAAYABpAG4AZgBsAGkAZwBoAHQAcwBgACAAcgBlAHAAcgBlAHMAZQBuAHQAIABjAG8AZABlACAAdABoAGEAdAAgAHIAdQBuAHMAIABsAGEAdABlAHIALAAgAG8AbgAKAC8ALwAgAG8AdABoAGUAcgAgAG0AYQBjAGgAaQBuAGUAcwAsACAAaQBuAHQAZQByAGEAYwB0AGkAbgBnACAAdwBpAHQAaAAgAGMAYQBwAHQAdQByAGUAZAAgAGQAYQB0AGEAIABhAG4AZAAKAC8ALwAgAHIAZQBzAG8AdQByAGMAZQBzACAAZgByAG8AbQAgAHQAaABlACAAcAByAGUALQBmAGwAaQBnAGgAdAAgAHAAaABhAHMAZQAuAAoAbABlAHQAIABoAGUAbABsAG8AXwB3AG8AcgBsAGQAIAA9ACAAaQBuAGYAbABpAGcAaAB0ACAAKAApACAAPQA%2BACAAewAKACAAIABiAHUAYwBrAGUAdAAuAHAAdQB0ACgAIgBoAGUAbABsAG8ALgB0AHgAdAAiACwAIAAiAEgAZQBsAGwAbwAsACAAVwBvAHIAbABkACEAIgApADsACgB9ADsACgAKAC8ALwAgAEkAbgBmAGwAaQBnAGgAdABzACAAYwBhAG4AIABiAGUAIABkAGUAcABsAG8AeQBlAGQAIABhAHMAIABzAGUAcgB2AGUAcgBsAGUAcwBzACAAZgB1AG4AYwB0AGkAbwBuAHMACgBuAGUAdwAgAGMAbABvAHUAZAAuAEYAdQBuAGMAdABpAG8AbgAoAGgAZQBsAGwAbwBfAHcAbwByAGwAZAApADsACgAgACAAIAAgACAAIAAgACAAIAAgACAAIAAgACAAIAAgACAAIAAgACAAIAAgACAAIAAgACAAIAAgACAAIAAgACAAIAAgACAAIAAgACAACgAvAC8AIACRISAAUwB3AGkAdABjAGgAIABmAGkAbABlAHMAIABhAG4AZAAgAHMAZQBlACAAbwB0AGgAZQByACAAZQB4AGEAbQBwAGwAZQBzACAAdwBpAHQAaAAgAG0AbwByAGUACgAvAC8AIABlAHgAcABsAGUAbgBhAHQAaQBvAG4AcwAgAGEAYgBvAHYAZQAuAA%3D%3D)中使用 Wing 查看結構和範例。 如果你比較像輔導員。看這個! https://www.youtube.com/watch?v=wzqCXrsKWbo Wing 在 GitHub 上擁有超過 3500 個 Star,發布了 1500 多個版本,但仍未進入 v1 版本,這意味著意義重大。 去嘗試一下,做一些很酷的事情吧! https://git.new/wing-repo 星翼 ⭐️ --- 開發者生態系統不斷發展,許多開發者圍繞 React 建置了一些獨特的東西。 我不會介紹如何使用 React,因為這是一個非常廣泛的主題,我在最後貼了一些資源來幫助您學習 React。 但為了幫助您建立出色的 React 專案,我們介紹了 25 個開源專案,您可以使用它們來使您的工作更輕鬆。 這將有大量的資源、想法和概念。 我甚至會給你一些學習資源,以及一些產品的專案範例來學習 React。 一切都是免費的,而且只有 React。 讓我們涵蓋這一切! --- 1. [Mantine Hooks](https://www.npmjs.com/package/@mantine/hooks) - 用於狀態和 UI 管理的 React hooks。 -------------------------------------------------------------------------------------------- 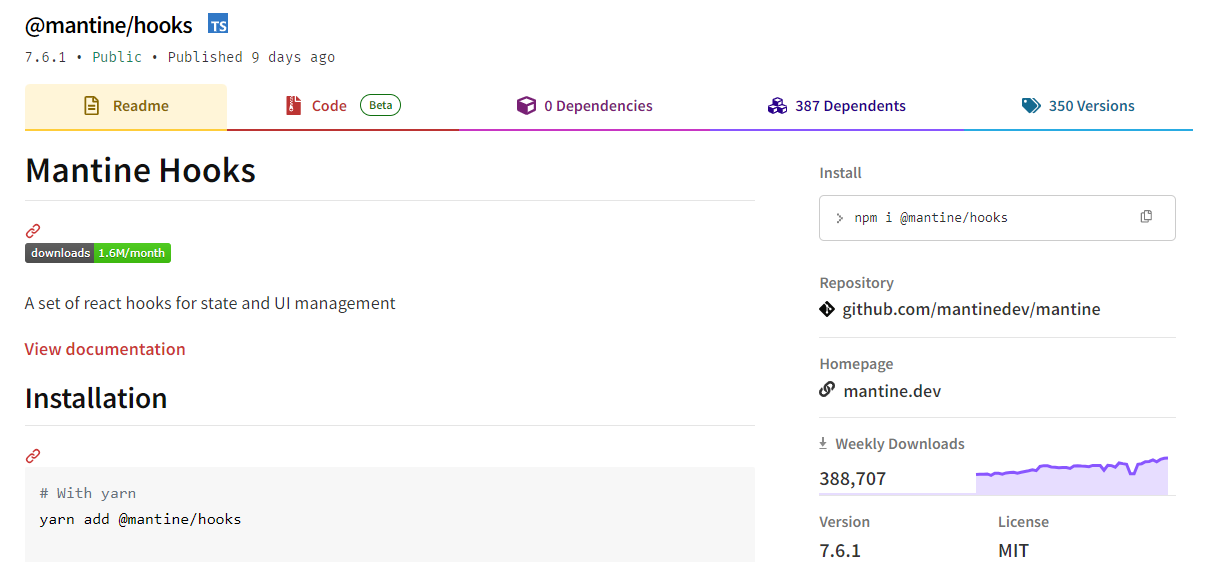 這可能不是專門針對 React 的,但是您可以使用這些鉤子來使您的工作更輕鬆。這些鉤子隨時可用,每個鉤子都有許多選項。 如果我必須評價的話,這將是每個人都可以使用的最有用的專案,而不是從頭開始編寫程式碼。 相信我,獲得 60 多個 Hooks 是一件大事,因為他們有一個簡單的方法讓您可以透過簡單的文件查看每個 Hooks 的演示。 開始使用以下 npm 指令。 ``` npm install @mantine/hooks ``` 這就是如何使用`useScrollIntoView`作為 mantine 掛鉤的一部分。 ``` import { useScrollIntoView } from '@mantine/hooks'; import { Button, Text, Group, Box } from '@mantine/core'; function Demo() { const { scrollIntoView, targetRef } = useScrollIntoView<HTMLDivElement>({ offset: 60, }); return ( <Group justify="center"> <Button onClick={() => scrollIntoView({ alignment: 'center', }) } > Scroll to target </Button> <Box style={{ width: '100%', height: '50vh', backgroundColor: 'var(--mantine-color-blue-light)', }} /> <Text ref={targetRef}>Hello there</Text> </Group> ); } ``` 它們幾乎擁有從本地儲存到分頁、滾動視圖、交叉點,甚至一些非常酷的實用程式(例如滴管和文字選擇)的所有功能。這實在太有幫助了! 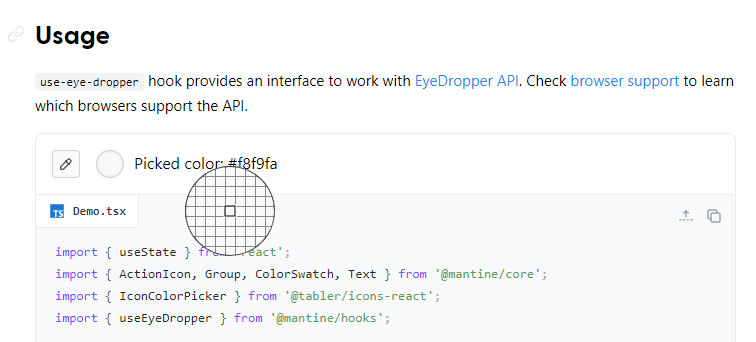 您可以閱讀[文件](https://mantine.dev/hooks/use-click-outside/)。 如果您正在尋找更多選項,您也可以使用[替代庫](https://antonioru.github.io/beautiful-react-hooks/)。 他們在 GitHub 上擁有超過 23k star,但這不僅僅是為了 hooks,因為他們是 React 的元件庫。 隨著`v7`版本的發布,它的每週下載量已超過 38 萬次,這表明它們正在不斷改進且值得信賴。 https://github.com/mantinedev/mantine Star Mantine Hooks ⭐️ --- 2. [React Grid Layout](https://github.com/react-grid-layout/react-grid-layout) - 可拖曳且可調整大小的網格佈局,具有響應式斷點。 -------------------------------------------------------------------------------------------------------- 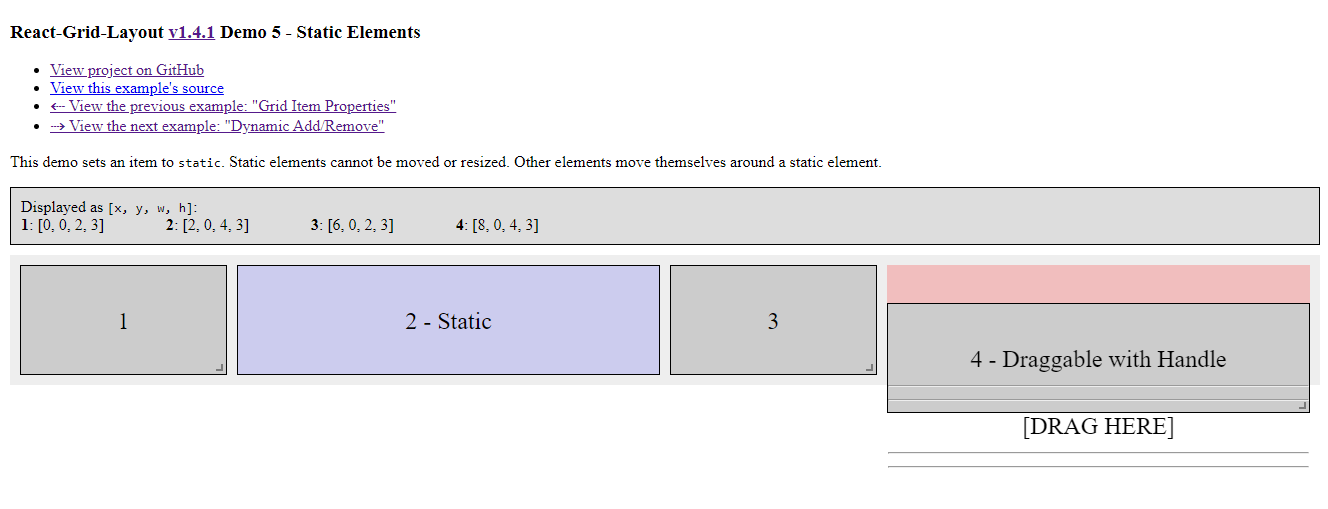 React-Grid-Layout 是專為 React 應用程式建構的響應式網格佈局系統。 透過支援可拖曳、可調整大小和靜態小部件,它提供了使用網格的簡單解決方案。 與 Packery 或 Gridster 等類似系統不同,React-Grid-Layout 不含 jQuery,確保輕量級且高效的實作。 它與伺服器渲染應用程式的無縫整合以及序列化和恢復佈局的能力使其成為開發人員在 React 專案中使用網格佈局的寶貴工具。 開始使用以下 npm 指令。 ``` npm install react-grid-layout ``` 這就是如何使用響應式網格佈局。 ``` import { Responsive as ResponsiveGridLayout } from "react-grid-layout"; class MyResponsiveGrid extends React.Component { render() { // {lg: layout1, md: layout2, ...} const layouts = getLayoutsFromSomewhere(); return ( <ResponsiveGridLayout className="layout" layouts={layouts} breakpoints={{ lg: 1200, md: 996, sm: 768, xs: 480, xxs: 0 }} cols={{ lg: 12, md: 10, sm: 6, xs: 4, xxs: 2 }} > <div key="1">1</div> <div key="2">2</div> <div key="3">3</div> </ResponsiveGridLayout> ); } } ``` 您可以閱讀[文件](https://github.com/react-grid-layout/react-grid-layout?tab=readme-ov-file#installation)並查看[演示](https://react-grid-layout.github.io/react-grid-layout/examples/0-showcase.html)。有一系列[演示](https://github.com/react-grid-layout/react-grid-layout?tab=readme-ov-file#demos),甚至可以透過點擊“查看下一個範例”來獲得。 您也可以嘗試[codesandbox](https://codesandbox.io/p/devbox/github/gilbarbara/react-joyride-demo/tree/main/?embed=1)上的東西。 該專案在 GitHub 上有超過 19k+ 的星星,有超過 16k+ 的開發者使用,並且[npm 套件](https://www.npmjs.com/package/react-grid-layout)的每週下載量超過 600k+。 https://github.com/react-grid-layout/react-grid-layout 明星 React 網格佈局 ⭐️ --- 3. [React Spectrum](https://github.com/adobe/react-spectrum) - 提供出色使用者體驗的程式庫和工具的集合。 -----------------------------------------------------------------------------------  React Spectrum 是一個庫和工具的集合,可幫助您建立自適應、可存取且強大的使用者體驗。 它們提供了太多的東西,以至於很難在一篇文章中涵蓋所有內容。 總的來說,他們提供了這四個庫。 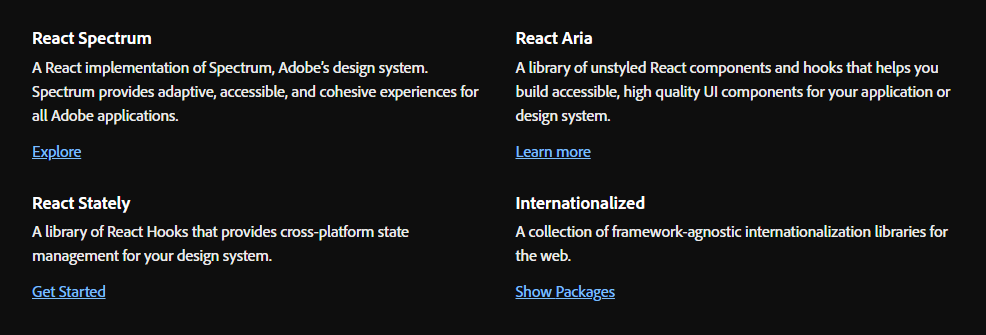 - [反應譜](https://react-spectrum.adobe.com/react-spectrum/index.html) - [React Stately](https://react-spectrum.adobe.com/react-stately/index.html) - 一組龐大的 React Hooks,為您的設計系統提供跨平台狀態管理。 - [反應詠嘆調](https://react-spectrum.adobe.com/react-aria/index.html) - [國際化](https://react-spectrum.adobe.com/internationalized/index.html) 我們將了解一些有關 React Aria 的內容,它是一個無樣式 React 元件和鉤子庫,可幫助您為應用程式建立可存取的、高品質的 UI 元件。 它經過了各種設備、互動方式和輔助技術的精心測試,以確保為所有用戶提供最佳體驗。 開始使用以下 npm 指令。 ``` npm i react-aria-components ``` 這就是建立自訂`select`的方法。 ``` import {Button, Label, ListBox, ListBoxItem, Popover, Select, SelectValue} from 'react-aria-components'; <Select> <Label>Favorite Animal</Label> <Button> <SelectValue /> <span aria-hidden="true">▼</span> </Button> <Popover> <ListBox> <ListBoxItem>Cat</ListBoxItem> <ListBoxItem>Dog</ListBoxItem> <ListBoxItem>Kangaroo</ListBoxItem> </ListBox> </Popover> </Select> ``` 相信我,出於學習目的,這是一座金礦。 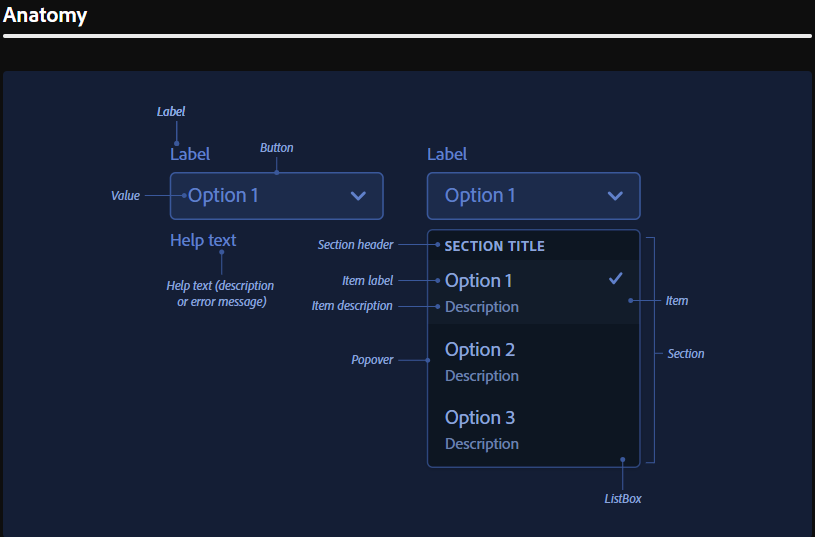 他們使用自己強大的[40 多個樣式元件](https://opensource.adobe.com/spectrum-css/),這比通常提供的要多得多。他們也有自己的一套[設計系統,](https://spectrum.adobe.com/)例如字體、UI、版面、動作等等。 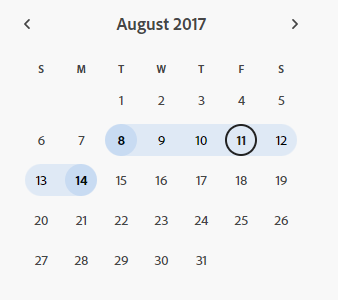  您可以詳細了解[Spectrum](https://react-spectrum.adobe.com/index.html)及其[架構](https://react-spectrum.adobe.com/architecture.html)。 他們在 GitHub 上擁有超過 11,000 顆星,這表明了他們的質量,儘管他們並不廣為人知。研究它們可以為您建立圖書館提供寶貴的見解。 https://github.com/adobe/react-spectrum Star React Spectrum ⭐️ --- 4.[保留 React](https://github.com/StaticMania/keep-react) - Tailwind CSS 和 React.js 的 UI 元件庫。 -------------------------------------------------------------------------------------------  Keep React 是一個基於 Tailwind CSS 和 React.js 建立的開源元件庫。它提供了一組多功能的預先設計的 UI 元件,使開發人員能夠簡化現代、響應式且具有視覺吸引力的 Web 應用程式的建立。 開始使用以下 npm 指令。 ``` npm i keep-react ``` 這就是使用時間軸的方法。 ``` "use client"; import { Timeline } from "keep-react"; import { CalendarBlank } from "phosphor-react"; export const TimelineComponent = () => { return ( <Timeline horizontal={true}> <Timeline.Item> <Timeline.Point icon={<CalendarBlank size={16} />} /> <Timeline.Content> <Timeline.Title>Keep Library v1.0.0</Timeline.Title> <Timeline.Time>Released on December 2, 2021</Timeline.Time> <Timeline.Body> Get started with dozens of web components and interactive elements. </Timeline.Body> </Timeline.Content> </Timeline.Item> <Timeline.Item> <Timeline.Point icon={<CalendarBlank size={16} />} /> <Timeline.Content> <Timeline.Title>Keep Library v1.1.0</Timeline.Title> <Timeline.Time>Released on December 23, 2021</Timeline.Time> <Timeline.Body> Get started with dozens of web components and interactive elements. </Timeline.Body> </Timeline.Content> </Timeline.Item> <Timeline.Item> <Timeline.Point icon={<CalendarBlank size={16} />} /> <Timeline.Content> <Timeline.Title>Keep Library v1.3.0</Timeline.Title> <Timeline.Time>Released on January 5, 2022</Timeline.Time> <Timeline.Body> Get started with dozens of web components and interactive elements. </Timeline.Body> </Timeline.Content> </Timeline.Item> </Timeline> ); } ``` 輸出如下。 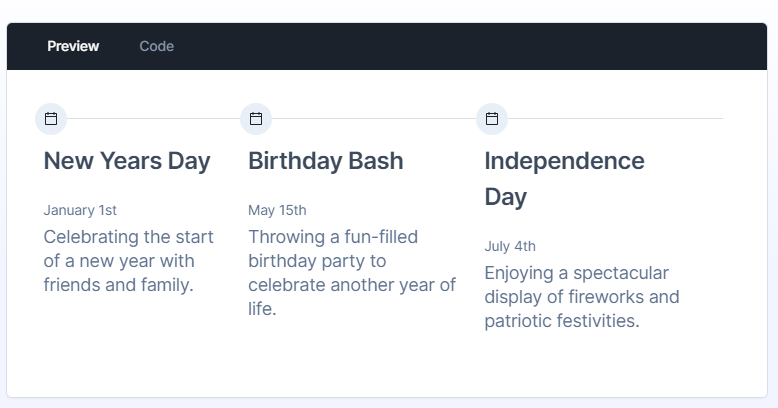 流暢的小動畫讓這一切都是值得的,如果你想快速建立一個 UI,沒有任何麻煩,你可以使用它。 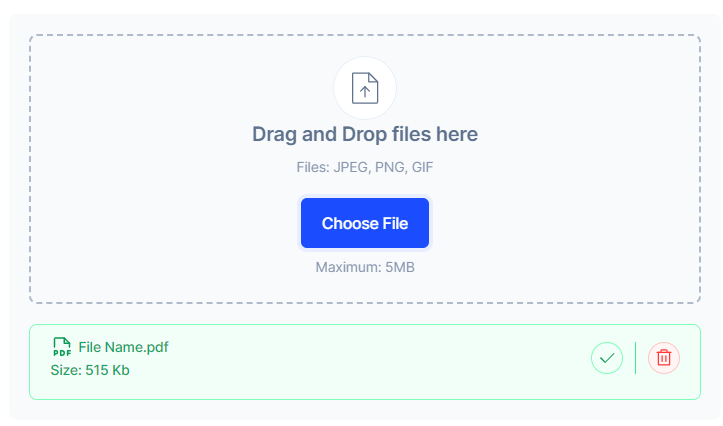  您可以閱讀[文件](https://react.keepdesign.io/docs/getting-started/Introduction)並查看[故事書](https://react-storybook.keepdesign.io/?path=/docs/components-accordion--docs)以進行詳細的使用測驗。 該專案在 GitHub 上有超過 1000 顆星,而且它的一些元件使用起來非常方便。 https://github.com/StaticMania/keep-react Star Keep React ⭐️ --- 5. [React Content Loader](https://github.com/danilowoz/react-content-loader) - SVG 支援的元件,可輕鬆建立骨架載入。 ---------------------------------------------------------------------------------------------------  該專案為您提供了一個由 SVG 驅動的元件,可以輕鬆建立佔位符載入(如 Facebook 的卡片載入)。 在載入狀態期間使用骨架來向使用者指示內容仍在載入。 總的來說,這是一個非常方便的專案,可以增強整體使用者體驗。 開始使用以下 npm 指令。 ``` npm i react-content-loader --save ``` 您可以這樣使用它。 ``` import React from "react" import ContentLoader from "react-content-loader" const MyLoader = (props) => ( <ContentLoader speed={2} width={400} height={160} viewBox="0 0 400 160" backgroundColor="#f3f3f3" foregroundColor="#ecebeb" {...props} > <rect x="48" y="8" rx="3" ry="3" width="88" height="6" /> <rect x="48" y="26" rx="3" ry="3" width="52" height="6" /> <rect x="0" y="56" rx="3" ry="3" width="410" height="6" /> <rect x="0" y="72" rx="3" ry="3" width="380" height="6" /> <rect x="0" y="88" rx="3" ry="3" width="178" height="6" /> <circle cx="20" cy="20" r="20" /> </ContentLoader> ) export default MyLoader ``` 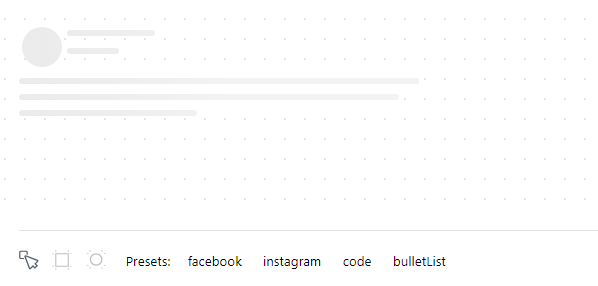 您甚至可以拖曳單一骨架或使用為 Facebook 和 Instagram 等不同社群媒體預先定義的骨架。 您可以閱讀[文件](https://github.com/danilowoz/react-content-loader?tab=readme-ov-file#gettingstarted)並查看[演示](https://skeletonreact.com/)。 該專案在 GitHub 上擁有 13k+ Stars,並在 GitHub 上有 45k+ 開發人員使用。 https://github.com/danilowoz/react-content-loader Star React 內容載入器 ⭐️ --- 6. [React PDF](https://github.com/diegomura/react-pdf) - 使用 React 建立 PDF 檔案。 ----------------------------------------------------------------------------  該套件用於使用 React 建立 PDF。 開始使用以下 npm 指令。 ``` npm install @react-pdf/renderer --save ``` 您可以這樣使用它。 ``` import React from 'react'; import { Document, Page, Text, View, StyleSheet } from '@react-pdf/renderer'; // Create styles const styles = StyleSheet.create({ page: { flexDirection: 'row', backgroundColor: '#E4E4E4', }, section: { margin: 10, padding: 10, flexGrow: 1, }, }); // Create Document Component const MyDocument = () => ( <Document> <Page size="A4" style={styles.page}> <View style={styles.section}> <Text>Section #1</Text> </View> <View style={styles.section}> <Text>Section #2</Text> </View> </Page> </Document> ); ```   您可以閱讀[文件](https://react-pdf.org/)並查看[演示](https://react-pdf.org/repl)。 React-pdf 現在提供了一個名為`usePDF`的鉤子,可以透過 React hook API 存取所有 PDF 建立功能。如果您需要更多控製文件的呈現方式或更新頻率,這非常有用。 ``` const [instance, update] = usePDF({ document }); ``` 該專案在 GitHub 上有 13k+ Stars,有超過 270 個版本,[每週下載量超過 400k](https://www.npmjs.com/package/@react-pdf/renderer) ,這是一個好兆頭。 https://github.com/diegomura/react-pdf Star React PDF ⭐️ --- 7. [Recharts](https://github.com/recharts/recharts) - 使用 React 和 D3 建立的重新定義的圖表庫。 -------------------------------------------------------------------------------- 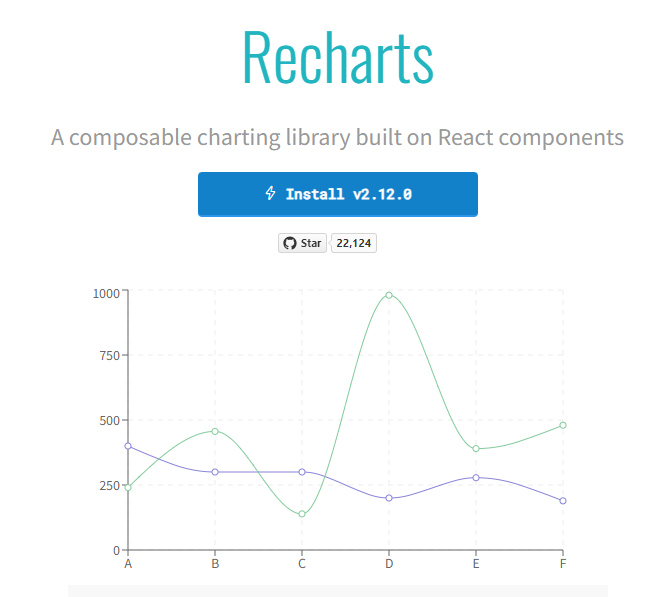 該庫的主要目的是幫助您輕鬆地在 React 應用程式中編寫圖表。 Recharts 的主要原則是。 1. 只需使用 React 元件進行部署即可。 2. 原生 SVG 支持,輕量級,僅依賴一些 D3 子模組。 3. 聲明性元件、圖表元件純粹是表示性的。 開始使用以下 npm 指令。 ``` npm install recharts ``` 您可以這樣使用它。 ``` <LineChart width={500} height={300} data={data} accessibilityLayer> <XAxis dataKey="name"/> <YAxis/> <CartesianGrid stroke="#eee" strokeDasharray="5 5"/> <Line type="monotone" dataKey="uv" stroke="#8884d8" /> <Line type="monotone" dataKey="pv" stroke="#82ca9d" /> <Tooltip/> </LineChart> ``` 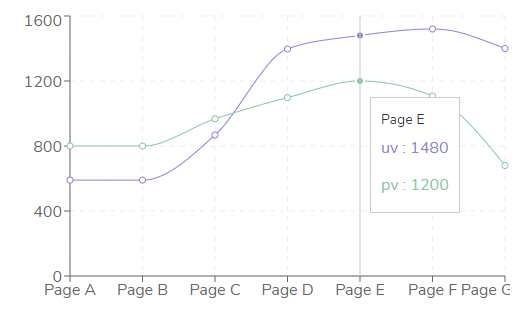 您可以閱讀[文件](https://recharts.org/en-US/guide)並查看有關[Storybook](https://recharts.org/en-US/storybook)的更多資訊。 他們提供了大量的選項來自訂它,這就是開發人員喜歡它的原因。他們也提供一般常見問題的[wiki](https://github.com/recharts/recharts/wiki)頁面。 您也可以在此處的codesandbox 上嘗試。 https://codesandbox.io/embed/kec3v?view=Editor+%2B+Preview&module=%2Fsrc%2Findex.tsx 該專案在 GitHub 上有 22k+ Stars,有 200k+ 開發人員使用。 https://github.com/recharts/recharts 明星 Recharts ⭐️ --- 8. [React Joyride](https://github.com/gilbarbara/react-joyride) - 在您的應用程式中建立導遊。 -------------------------------------------------------------------------------  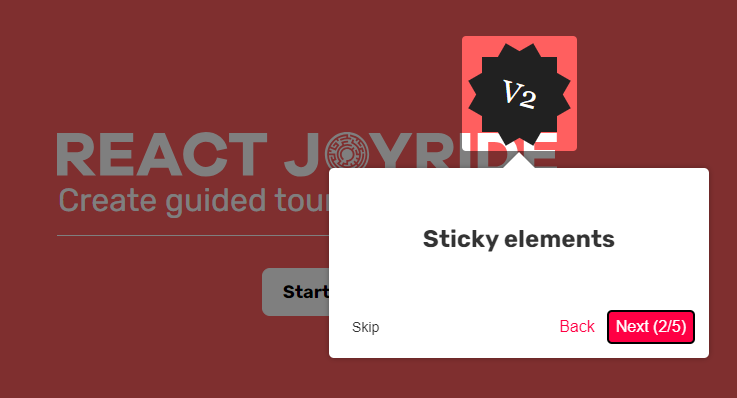 導覽是向新用戶展示您的應用程式或解釋新功能的絕佳方式。它改善了用戶體驗並可以創造個人化的觸感。 開始使用以下 npm 指令。 ``` npm i react-joyride ``` 您可以這樣使用它。 ``` import React, { useState } from 'react'; import Joyride from 'react-joyride'; /* * If your steps are not dynamic you can use a simple array. * Otherwise you can set it as a state inside your component. */ const steps = [ { target: '.my-first-step', content: 'This is my awesome feature!', }, { target: '.my-other-step', content: 'This another awesome feature!', }, ]; export default function App() { // If you want to delay the tour initialization you can use the `run` prop return ( <div> <Joyride steps={steps} /> ... </div> ); } ``` 它們還提供[元件列表](https://docs.react-joyride.com/custom-components)以及自訂預設用戶介面的簡單方法。 您可以閱讀[文件](https://docs.react-joyride.com/)並查看[演示](https://react-joyride.com/)。 您也可以嘗試[codesandbox](https://codesandbox.io/p/devbox/github/gilbarbara/react-joyride-demo/tree/main/?embed=1)上的東西。 他們在 GitHub 上有超過 6k 顆星,npm 套件每週下載量超過 25 萬次。 https://github.com/gilbarbara/react-joyride Star React Joyride ⭐️ --- 9. [SVGR](https://github.com/gregberge/svgr) - 將 SVG 轉換為 React 元件。 ------------------------------------------------------------------  SVGR 是一個將 SVG 轉換為 React 元件的通用工具。 它需要一個原始的 SVG 並將其轉換為隨時可用的 React 元件。 開始使用以下 npm 指令。 ``` npm install @svgr/core ``` 例如,您採用這個 SVG。 ``` <?xml version="1.0" encoding="UTF-8"?> <svg width="48px" height="1px" viewBox="0 0 48 1" version="1.1" xmlns="http://www.w3.org/2000/svg" xmlns:xlink="http://www.w3.org/1999/xlink" > <!-- Generator: Sketch 46.2 (44496) - http://www.bohemiancoding.com/sketch --> <title>Rectangle 5</title> <desc>Created with Sketch.</desc> <defs></defs> <g id="Page-1" stroke="none" stroke-width="1" fill="none" fill-rule="evenodd"> <g id="19-Separator" transform="translate(-129.000000, -156.000000)" fill="#063855" > <g id="Controls/Settings" transform="translate(80.000000, 0.000000)"> <g id="Content" transform="translate(0.000000, 64.000000)"> <g id="Group" transform="translate(24.000000, 56.000000)"> <g id="Group-2"> <rect id="Rectangle-5" x="25" y="36" width="48" height="1"></rect> </g> </g> </g> </g> </g> </g> </svg> ``` 執行SVGR後,將轉換為. ``` import * as React from 'react' const SvgComponent = (props) => ( <svg width="1em" height="1em" viewBox="0 0 48 1" {...props}> <path d="M0 0h48v1H0z" fill="currentColor" fillRule="evenodd" /> </svg> ) export default SvgComponent ``` 它使用[SVGO](https://github.com/svg/svgo)優化 SVG,並使用 Prettier 格式化程式碼。 將 HTML 轉換為 JSX 需要幾個步驟: 1. 將 SVG 轉換為 HAST (HTML AST) 2. 將 HAST 轉換為 Babel AST (JSX AST) 3. 使用 Babel 轉換 AST(重新命名屬性、更改屬性值…) 您可以在[Playground](https://react-svgr.com/playground/)閱讀[文件](https://react-svgr.com/docs/getting-started)並檢查內容。 該專案在 GitHub 上擁有 10k+ Stars,有超過 800 萬開發者使用,npm 上每週下載量超過 800k。 https://github.com/gregberge/svgr 明星 SVGR ⭐️ --- 10. [React Sortable Tree](https://github.com/frontend-collective/react-sortable-tree) - 用於巢狀資料和層次結構的拖放可排序元件。 ------------------------------------------------------------------------------------------------------------ 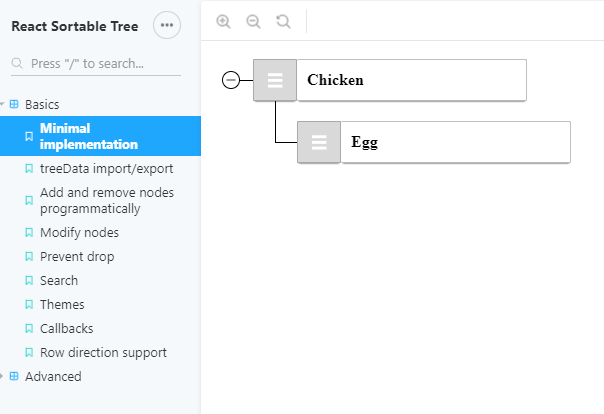 一個 React 元件,支援對分層資料進行拖放排序。 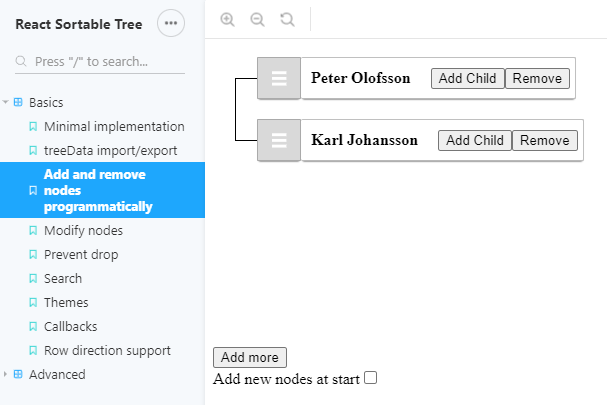 開始使用以下 npm 指令。 ``` npm install react-sortable-tree --save ``` 您可以這樣使用它。 ``` import React, { Component } from 'react'; import SortableTree from 'react-sortable-tree'; import 'react-sortable-tree/style.css'; // This only needs to be imported once in your app export default class Tree extends Component { constructor(props) { super(props); this.state = { treeData: [ { title: 'Chicken', children: [{ title: 'Egg' }] }, { title: 'Fish', children: [{ title: 'fingerline' }] }, ], }; } render() { return ( <div style={{ height: 400 }}> <SortableTree treeData={this.state.treeData} onChange={treeData => this.setState({ treeData })} /> </div> ); } } ``` 檢查由此獲得的各種[道具選項](https://github.com/frontend-collective/react-sortable-tree?tab=readme-ov-file#props)和[主題](https://github.com/frontend-collective/react-sortable-tree?tab=readme-ov-file#featured-themes)。 您可以閱讀[文件](https://github.com/frontend-collective/react-sortable-tree?tab=readme-ov-file#getting-started)並查看[Storybook](https://frontend-collective.github.io/react-sortable-tree/?path=/story/basics--minimal-implementation) ,以獲取一些基本和高級功能的演示。 它可能不會被積極維護(仍然沒有存檔),因此您也可以使用[維護的 fork 版本](https://github.com/nosferatu500/react-sortable-tree)。 該專案在 GitHub 上擁有超過 4,500 個 Star,並被超過 5,000 名開發人員使用。 https://github.com/frontend-collective/react-sortable-tree Star React 可排序樹 ⭐️ --- 11. [React Hot Toast](https://github.com/timolins/react-hot-toast) - 冒煙的 Hot React 通知。 -------------------------------------------------------------------------------------- 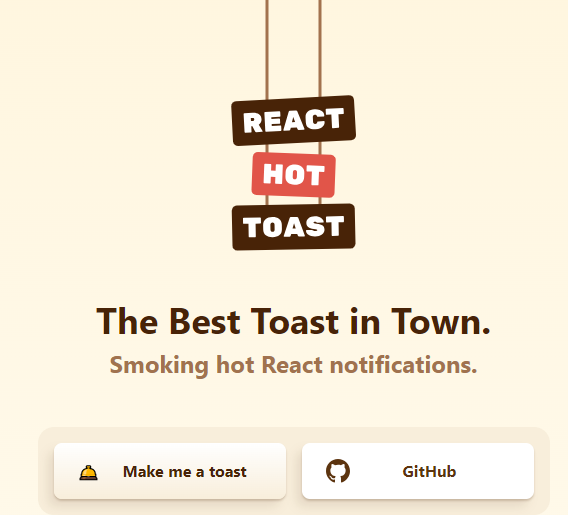 React Hot Toast 透過簡單的自訂選項提供了驚人的 🔥 預設體驗。它利用 Promise API 進行自動加載,確保平穩過渡。 它重量輕,不到 5kb,但仍然可以存取,同時為開發人員提供了像`useToaster()`這樣的無頭鉤子。 首先將 Toaster 加入到您的應用程式中。它將負責渲染發出的所有通知。現在您可以從任何地方觸發 toast() ! 開始使用以下 npm 指令。 ``` npm install react-hot-toast ``` 這就是它的易用性。 ``` import toast, { Toaster } from 'react-hot-toast'; const notify = () => toast('Here is your toast.'); const App = () => { return ( <div> <button onClick={notify}>Make me a toast</button> <Toaster /> </div> ); }; ``` 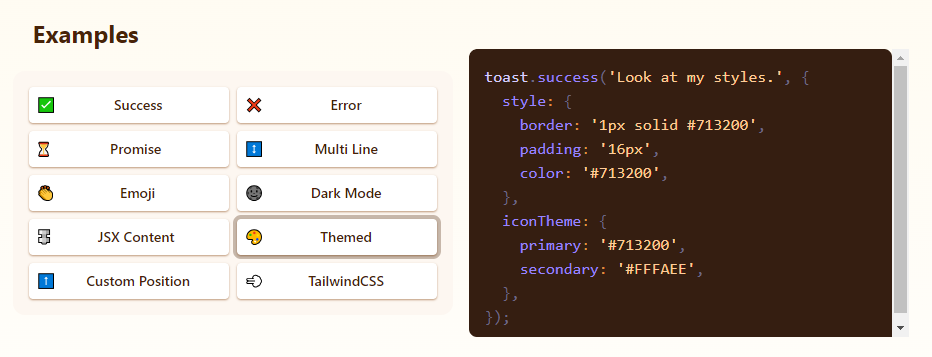  他們有很多自訂選項,但`useToaster()`掛鉤為您提供了一個無頭系統,可以為您管理通知狀態。這使得建立您的通知系統變得更加容易。 您可以閱讀[文件](https://react-hot-toast.com/docs)、[樣式指南](https://react-hot-toast.com/docs/styling)並查看[示範](https://react-hot-toast.com/)。 該專案在 GitHub 上有 8k+ Stars,有 230k+ 開發者使用。 https://github.com/timolins/react-hot-toast Star React Hot Toast ⭐️ --- 12. [Payload](https://github.com/payloadcms/payload) - 建立現代後端+管理 UI 的最佳方式。 --------------------------------------------------------------------------  Payload 是一個無頭 CMS 和應用程式框架。它旨在促進您的開發過程,但重要的是,當您的應用程式變得更加複雜時,不要妨礙您。 Payload 沒有黑魔法,完全開源,它既是一個應用程式框架,也是一個無頭 CMS。它確實是適用於 TypeScript 的 Rails,並且您會獲得一個管理面板。您可以使用此[YouTube 影片](https://www.youtube.com/watch?v=In_lFhzmbME)了解有關 Payload 的更多資訊。 https://www.youtube.com/watch?v=In\_lFhzmbME 您可以透過使用Payload來了解[其中涉及的概念](https://payloadcms.com/docs/getting-started/concepts)。 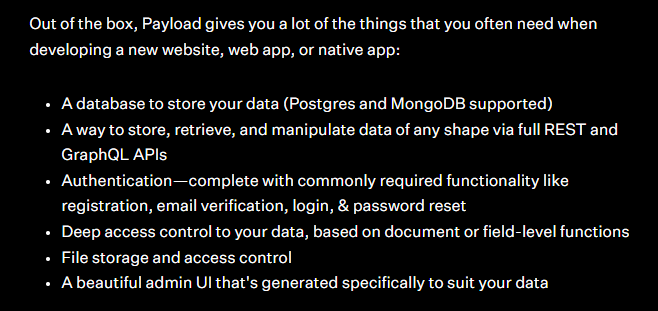 有效負載透過您選擇的資料庫適配器與您的資料庫進行互動。目前,Payload 正式支援兩種資料庫適配器: 1. MongoDB 與 Mongoose 2. Postgres 帶毛毛雨 開始使用以下命令。 ``` npx create-payload-app@latest ``` 您必須產生 Payload 金鑰並更新`server.ts`以初始化 Payload。 ``` import express from 'express' import payload from 'payload' require('dotenv').config() const app = express() const start = async () => { await payload.init({ secret: process.env.PAYLOAD_SECRET, express: app, }) app.listen(3000, async () => { console.log( "Express is now listening for incoming connections on port 3000." ) }) } start() ``` 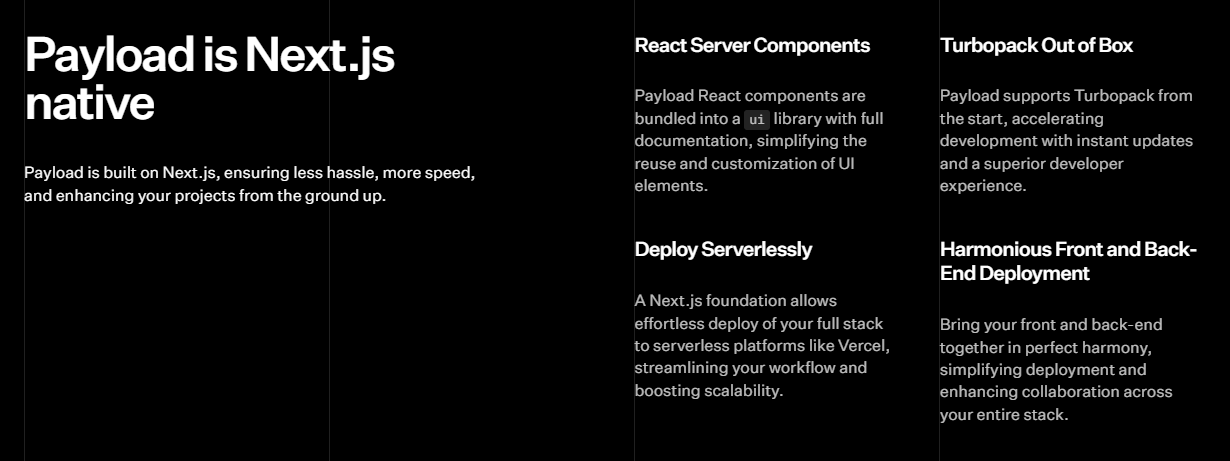 您可以閱讀[文件](https://payloadcms.com/docs/getting-started/what-is-payload)並查看[演示](https://demo.payloadcms.com/?_gl=1*9x0za3*_ga*NzEzMzkwNzIuMTcxMDE2NDk1MA..*_ga_FLQ5THRMZQ*MTcxMDE2NDk1MC4xLjEuMTcxMDE2NDk1MS4wLjAuMA..)。 他們還提供與 Payload + Stripe 無縫整合的[電子商務模板](https://github.com/payloadcms/payload/tree/main/templates/ecommerce)。此範本具有令人驚嘆的、功能齊全的前端,包括購物車、結帳流程、訂單管理等元件。 Payload 在 GitHub 上擁有 18k+ Stars,並且有超過 290 個版本,因此它們不斷改進,尤其是在資料庫支援方面。 https://github.com/payloadcms/payload 明星有效負載 ⭐️ --- 13. [React Player](https://github.com/cookpete/react-player) - 用於播放各種 URL 的 React 元件。 ------------------------------------------------------------------------------------- 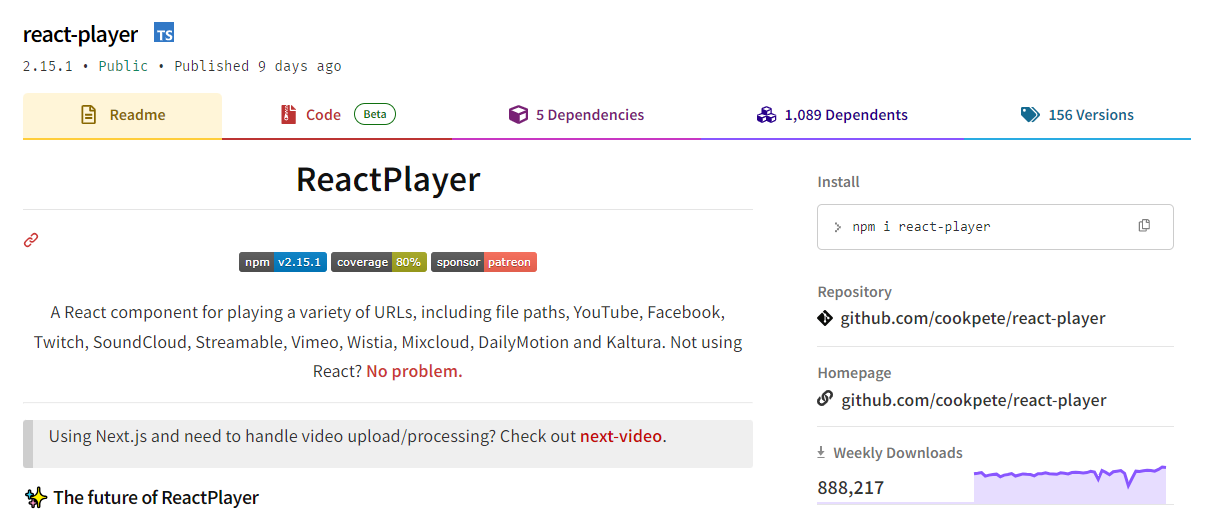 用於播放各種 URL 的 React 元件,包括檔案路徑、YouTube、Facebook、Twitch、SoundCloud、Streamable、Vimeo、Wistia、Mixcloud、DailyMotion 和 Kaltura。您可以看到[支援的媒體](https://github.com/cookpete/react-player?tab=readme-ov-file#supported-media)清單。 ReactPlayer 的維護工作由 Mux 接管,這使它們成為一個不錯的選擇。 開始使用以下 npm 指令。 ``` npm install react-player ``` 您可以這樣使用它。 ``` import React from 'react' import ReactPlayer from 'react-player' // Render a YouTube video player <ReactPlayer url='https://www.youtube.com/watch?v=LXb3EKWsInQ' /> // If you only ever use one type, use imports such as react-player/youtube to reduce your bundle size. // like this: import ReactPlayer from 'react-player/youtube' ``` 您也可以使用`react-player/lazy`為您傳入的URL 延遲載入適當的播放器。這會為您的輸出加入幾個reactPlayer 區塊,但會減少主包的大小。 ``` import React from 'react' import ReactPlayer from 'react-player/lazy' // Lazy load the YouTube player <ReactPlayer url='https://www.youtube.com/watch?v=ysz5S6PUM-U' /> ``` 您可以閱讀[文件](https://github.com/cookpete/react-player?tab=readme-ov-file#props)並查看[演示](https://cookpete.github.io/react-player/)。他們提供了大量的選項,包括加入字幕並以簡單的方式使其響應。 它們在 GitHub 上擁有超過 8000 顆星,被超過 135,000 名開發人員使用,並且 npm 軟體包[每週的下載量超過 800k](https://www.npmjs.com/package/react-player) 。 https://github.com/cookpete/react-player 明星 React 播放器 ⭐️ --- 14. [Victory](https://github.com/FormidableLabs/victory) - 用於建立互動式資料視覺化的 React 元件。 ----------------------------------------------------------------------------------  Victory 是一個可組合 React 元件的生態系統,用於建立互動式資料視覺化。  開始使用以下 npm 指令。 ``` npm i --save victory ``` 您可以這樣使用它。 ``` <VictoryChart domainPadding={{ x: 20 }} > <VictoryHistogram style={{ data: { fill: "#c43a31" } }} data={sampleHistogramDateData} bins={[ new Date(2020, 1, 1), new Date(2020, 4, 1), new Date(2020, 8, 1), new Date(2020, 11, 1) ]} /> </VictoryChart> ``` 這就是它的渲染方式。他們還提供通常有用的動畫和主題選項。  您可以閱讀[文件](https://commerce.nearform.com/open-source/victory/docs)並按照[教學](https://commerce.nearform.com/open-source/victory/docs/native)開始。他們提供大約 15 種不同的圖表選項。 它也可用於[React Native(文件)](https://commerce.nearform.com/open-source/victory/docs/native) ,所以這是一個優點。我還建議您查看他們的常見[問題解答](https://commerce.nearform.com/open-source/victory/docs/faq#frequently-asked-questions-faq),其中描述了常見問題的程式碼解決方案和解釋,例如樣式、註釋(標籤)、處理軸。 該專案在 GitHub 上擁有 10k+ Stars,並在 GitHub 上有 23k+ 開發人員使用。 https://github.com/FormidableLabs/victory 勝利之星 ⭐️ --- 15. [React Slick](https://github.com/akiran/react-slick) - React 輪播元件。 ----------------------------------------------------------------------  React Slick 是一個使用 React 建構的輪播元件。它是一個光滑的旋轉木馬的反應端口 開始使用以下 npm 指令。 ``` npm install react-slick --save ``` 這是使用自訂分頁的方法。 ``` import React, { Component } from "react"; import Slider from "react-slick"; import { baseUrl } from "./config"; function CustomPaging() { const settings = { customPaging: function(i) { return ( <a> <img src={`${baseUrl}/abstract0${i + 1}.jpg`} /> </a> ); }, dots: true, dotsClass: "slick-dots slick-thumb", infinite: true, speed: 500, slidesToShow: 1, slidesToScroll: 1 }; return ( <div className="slider-container"> <Slider {...settings}> <div> <img src={baseUrl + "/abstract01.jpg"} /> </div> <div> <img src={baseUrl + "/abstract02.jpg"} /> </div> <div> <img src={baseUrl + "/abstract03.jpg"} /> </div> <div> <img src={baseUrl + "/abstract04.jpg"} /> </div> </Slider> </div> ); } export default CustomPaging; ```  您可以閱讀有關可用的[prop 選項](https://react-slick.neostack.com/docs/api)和[方法](https://react-slick.neostack.com/docs/api#methods)的資訊。 您可以閱讀[文件](https://react-slick.neostack.com/docs/get-started)和所有帶有程式碼和輸出[的範例集](https://react-slick.neostack.com/docs/example/)。 他們在 GitHub 上有超過 11k 顆星,並且有超過 36 萬開發者在 GitHub 上使用它。 https://github.com/akiran/react-slick Star React Slick ⭐️ --- 16. [Medusa](https://github.com/medusajs/medusa) - 數位商務的建構模組。 -------------------------------------------------------------  Medusa 是一組商務模組和工具,可讓您建立豐富、可靠且高效能的商務應用程式,而無需重新發明核心商務邏輯。 這些模組可以客製化並用於建立高級電子商務商店、市場或任何需要基礎商務原語的產品。所有模組都是開源的,可以在 npm 上免費取得。 開始使用以下 npm 指令。 ``` npm install medusa-react @tanstack/[email protected] @medusajs/medusa ``` 將其包含在`app.ts`中。 只有 MedusaProvider 的子級才能從其鉤子中受益。因此,Storefront 元件及其子元件現在可以使用 Medusa React 公開的鉤子。 ``` import { MedusaProvider } from "medusa-react" import Storefront from "./Storefront" import { QueryClient } from "@tanstack/react-query" import React from "react" const queryClient = new QueryClient() const App = () => { return ( <MedusaProvider queryClientProviderProps={{ client: queryClient }} baseUrl="http://localhost:9000" > <Storefront /> </MedusaProvider> ) } export default App ``` 例如,這就是您如何使用突變來建立購物車。 ``` import { useCreateCart } from "medusa-react" const Cart = () => { const createCart = useCreateCart() const handleClick = () => { createCart.mutate({}) // create an empty cart } return ( <div> {createCart.isLoading && <div>Loading...</div>} {!createCart.data?.cart && ( <button onClick={handleClick}> Create cart </button> )} {createCart.data?.cart?.id && ( <div>Cart ID: {createCart.data?.cart.id}</div> )} </div> ) } export default Cart ``` 他們提供了一套電子商務模組(大量選項),例如折扣、價目表、禮品卡等。  它們還提供了一種簡單的管理員和客戶身份驗證方法,您可以在[文件](https://docs.medusajs.com/)中閱讀。 他們提供了[nextjs 入門模板](https://docs.medusajs.com/starters/nextjs-medusa-starter)和[Medusa React](https://docs.medusajs.com/medusa-react/overview)作為 SDK。 該專案在 GitHub 上有 22k+ Stars,有 4k+ 開發者使用。 https://github.com/medusajs/medusa 明星美杜莎 ⭐️ --- 17. [React Markdown](https://github.com/remarkjs/react-markdown) - React 的 Markdown 元件. ---------------------------------------------------------------------------------------  Markdown 至關重要,使用 React 渲染它對於各種場景都非常有用。 它提供了一個 React 元件,能夠安全地將一串 Markdown 渲染到 React 元素中。您可以透過傳遞外掛程式並指定要使用的元件而不是標準 HTML 元素來自訂 Markdown 的轉換。 開始使用以下 npm 指令。 ``` npm i react-markdown ``` 您可以這樣使用它。 ``` import React from 'react' import {createRoot} from 'react-dom/client' import Markdown from 'react-markdown' import remarkGfm from 'remark-gfm' const markdown = `Just a link: www.nasa.gov.` createRoot(document.body).render( <Markdown remarkPlugins={[remarkGfm]}>{markdown}</Markdown> ) ``` 等效的 JSX 是。 ``` <p> Just a link: <a href="http://www.nasa.gov">www.nasa.gov</a>. </p> ``` 他們還提供了一份[備忘錄](https://commonmark.org/help/)和一個十分鐘的逐步[教學](https://commonmark.org/help/tutorial/)。 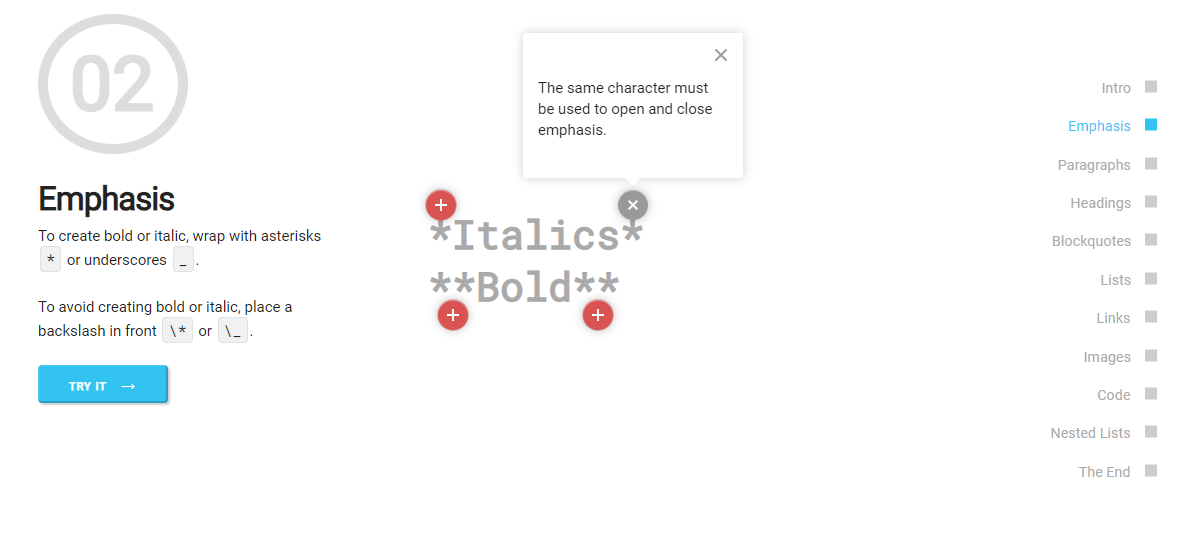 您可以閱讀[文件](https://github.com/remarkjs/react-markdown?tab=readme-ov-file#install)並查看[演示](https://remarkjs.github.io/react-markdown/)。 該專案在 GitHub 上有 12k+ Stars,[每週下載量超過 2700k](https://www.npmjs.com/package/react-markdown) ,並被 200k+ 開發人員使用,證明了它的真正有用性。 https://github.com/remarkjs/react-markdown Star React Markdown ⭐️ --- 18. [React JSONSchema Form](https://github.com/rjsf-team/react-jsonschema-form) - 用於從 JSON Schema 建立 Web 表單。 ------------------------------------------------------------------------------------------------------------ 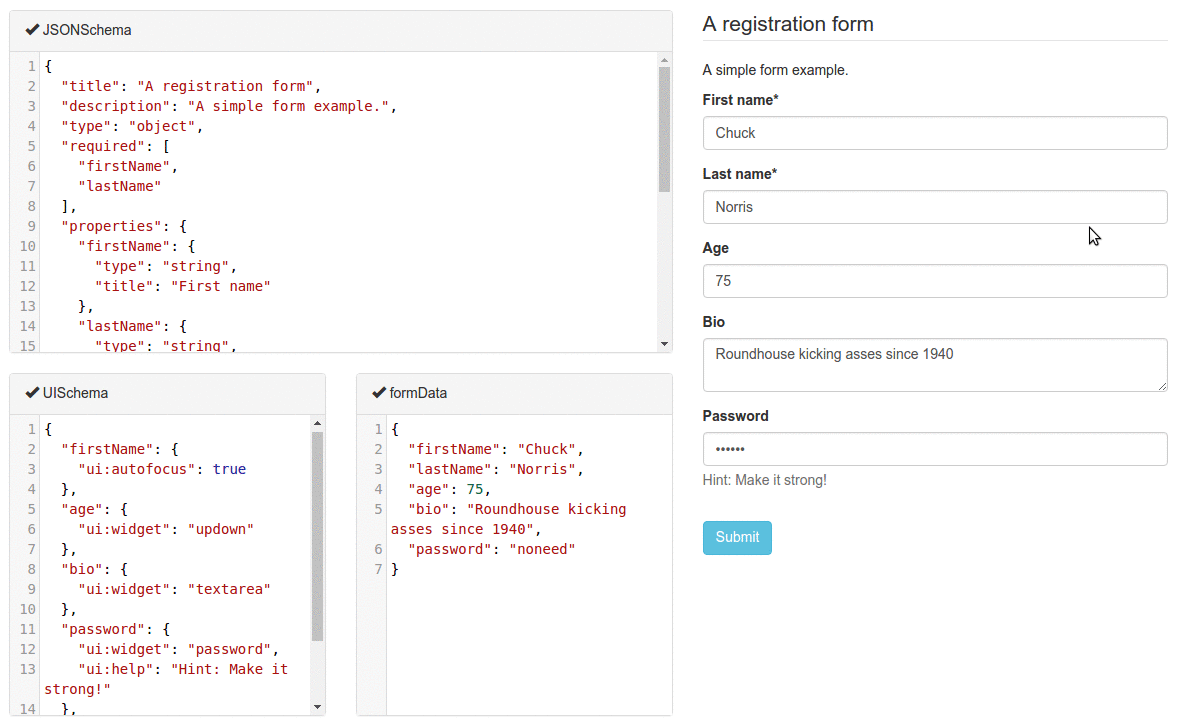 `react-jsonschema-form`會自動從 JSON Schema 產生 React 表單,使其非常適合僅使用 JSON schema 為任何資料產生表單。它提供了像 uiSchema 這樣的自訂選項來自訂預設主題之外的表單外觀。 開始使用以下 npm 指令。 ``` npm install @rjsf/core @rjsf/utils @rjsf/validator-ajv8 --save ``` 您可以這樣使用它。 ``` import { RJSFSchema } from '@rjsf/utils'; import validator from '@rjsf/validator-ajv8'; const schema: RJSFSchema = { title: 'Todo', type: 'object', required: ['title'], properties: { title: { type: 'string', title: 'Title', default: 'A new task' }, done: { type: 'boolean', title: 'Done?', default: false }, }, }; const log = (type) => console.log.bind(console, type); render( <Form schema={schema} validator={validator} onChange={log('changed')} onSubmit={log('submitted')} onError={log('errors')} />, document.getElementById('app') ); ``` 他們提供[高級定制](https://rjsf-team.github.io/react-jsonschema-form/docs/advanced-customization/)選項,包括定制小部件。 您可以閱讀[文件](https://rjsf-team.github.io/react-jsonschema-form/docs/)並查看[即時遊樂場](https://rjsf-team.github.io/react-jsonschema-form/)。 它在 GitHub 上擁有超過 13k 個 Star,並被 5k+ 開發人員使用。他們在`v5`上發布了 190 多個版本,因此他們正在不斷改進。 https://github.com/rjsf-team/react-jsonschema-form Star React JSONSchema 表單 ⭐️ --- 19. [Craft.js](https://github.com/prevwong/craft.js) - 建立可擴充的拖放頁面編輯器。 --------------------------------------------------------------------- 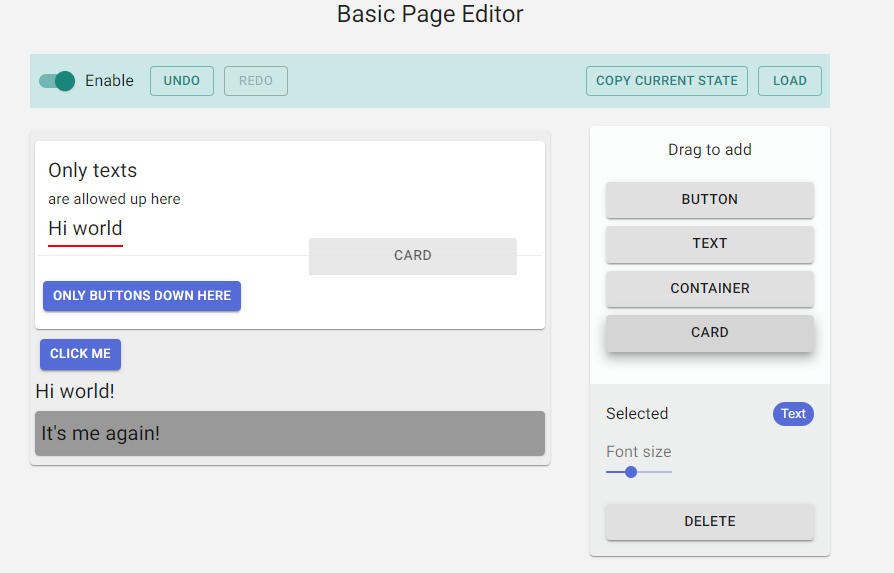 頁面編輯器可以增強使用者體驗,但從頭開始建立頁面編輯器可能會令人望而生畏。現有庫提供具有可編輯元件的預先建置編輯器,但自訂通常需要修改庫本身。 Craft.js 透過模組化頁面編輯器元件、透過拖放功能簡化自訂以及渲染管理來解決這個問題。在 React 中設計你的編輯器,無需複雜的插件系統,專注於你的特定需求和規格。 開始使用以下 npm 指令。 ``` npm install --save @craftjs/core ``` 他們還提供了有關如何入門的[簡短教程](https://craft.js.org/docs/guides/basic-tutorial)。我不會介紹它,因為它非常簡單且詳細。 您可以閱讀[文件](https://craft.js.org/docs/overview)並查看[即時演示](https://craft.js.org/)以及另一個[即時範例](https://craft.js.org/examples/basic)。 它在 GitHub 上有大約 6k+ Stars,但考慮到它們正在改進,仍然很有用。 https://github.com/prevwong/craft.js Star Craft.js ⭐️ --- 20. [Gatsby](https://github.com/gatsbyjs/gatsby) - 最好的基於 React 的框架,具有內建的效能、可擴展性和安全性。 ------------------------------------------------------------------------------------  Gatsby 是一個基於 React 的框架,使開發人員能夠建立閃電般快速的網站和應用程式,將動態渲染的靈活性與靜態網站生成的速度融為一體。 憑藉可自訂的 UI 和對各種資料來源的支援等功能,Gatsby 提供了無與倫比的控制和可擴展性。此外,它還可以自動進行效能最佳化,使其成為靜態網站的首選。 開始使用以下 npm 指令。 ``` npm init gatsby ``` 這就是如何在 Gatsby(反應元件)中使用`Link` 。 ``` import React from "react" import { Link } from "gatsby" const Page = () => ( <div> <p> Check out my <Link to="/blog">blog</Link>! </p> <p> {/* Note that external links still use `a` tags. */} Follow me on <a href="https://twitter.com/gatsbyjs">Twitter</a>! </p> </div> ) ``` 他們提供了一組[入門模板,](https://www.gatsbyjs.com/starters/)其中包含如何使用它、涉及的依賴項以及每個模板的演示。  您可以閱讀有關 Gatsby 的一些[常見概念,](https://www.gatsbyjs.com/docs/conceptual/gatsby-concepts/)例如 React Hydration、Gatsby 建置流程等。 您可以閱讀[文件](https://www.gatsbyjs.com/docs/)並查看入門[教學課程](https://www.gatsbyjs.com/docs/tutorial/)。 Gatsby 在 GitHub 上擁有超過 55,000 顆星,並被超過 240,000 名開發者使用 https://github.com/gatsbyjs/gatsby 明星蓋茲比 ⭐️ --- 21. [Chat UI Kit React](https://github.com/chatscope/chat-ui-kit-react) - 在幾分鐘內使用 React 建立您的聊天 UI。 --------------------------------------------------------------------------------------------------  Chatscope 的聊天 UI 工具包是一個用於開發網頁聊天應用程式的開源 UI 工具包。 儘管該專案並未廣泛使用,但這些功能對於剛剛查看該專案的初學者來說還是很有用的。  開始使用以下 npm 指令。 ``` npm install @chatscope/chat-ui-kit-react ``` 這就是建立 GUI 的方法。 ``` import styles from '@chatscope/chat-ui-kit-styles/dist/default/styles.min.css'; import { MainContainer, ChatContainer, MessageList, Message, MessageInput } from '@chatscope/chat-ui-kit-react'; <div style={{ position:"relative", height: "500px" }}> <MainContainer> <ChatContainer> <MessageList> <Message model={{ message: "Hello my friend", sentTime: "just now", sender: "Joe" }} /> </MessageList> <MessageInput placeholder="Type message here" /> </ChatContainer> </MainContainer> </div> ``` 您可以閱讀[文件](https://chatscope.io/docs/)。 故事書中有更[詳細的文件](https://chatscope.io/storybook/react/?path=/docs/documentation-introduction--docs)。 它提供了一些方便的元件,例如[`TypingIndicator`](https://chatscope.io/storybook/react/?path=/docs/components-typingindicator--docs) 、 [`Multiline Incoming`](https://chatscope.io/storybook/react/?path=/story/components-message--multiline-incoming)等等。 我知道你們中的一些人更喜歡透過部落格來了解整個結構,因此你可以閱讀使用 Chat UI Kit React 的 Rollbar 的[如何將 ChatGPT 與 React 整合](https://rollbar.com/blog/how-to-integrate-chatgpt-with-react/)。 您可以看到的一些演示: - [聊天機器人使用者介面](https://mars.chatscope.io/) - [與朋友聊天](https://chatscope.io/demo/chat-friends/)- 看看這個!  https://github.com/chatscope/chat-ui-kit-react Star Chat UI Kit React ⭐️ --- 22. [Botonic](https://github.com/hubtype/botonic) - 用於建立會話應用程式的 React 框架。 -------------------------------------------------------------------------  Botonic 是一個全端 Javascript 框架,用於建立在多個平台上執行的聊天機器人和現代對話應用程式:Web、行動和訊息應用程式(Messenger、WhatsApp、Telegram 等)。它建構在 ⚛️ React、Serverless 和 Tensorflow.js 之上。 如果您不了解對話應用程式的概念,可以在[官方部落格](https://www.hubtype.com/blog/what-are-conversational-apps)上閱讀它們。 使用 Botonic,您可以建立包含最佳文字外介面(簡單性、自然語言互動)和圖形介面(多媒體、視覺上下文、豐富互動)的會話應用程式。 這是一個強大的組合,可以提供比僅依賴文字和 NLP 的傳統聊天機器人更好的用戶體驗。 這就是 Botonic 的簡單方式。 ``` export default class extends React.Component { static async botonicInit({ input, session, params, lastRoutePath }) { await humanHandOff(session)) } render() { return ( <Text> Thanks for contacting us! One of our agents will attend you as soon as possible. </Text> ) } } ``` 它們也支援 TypeScript,所以這是一個優點。 您可以看到一些使用 Botonic 建置的[範例](https://botonic.io/examples/)及其原始程式碼。 您可以閱讀[文件](https://botonic.io/docs/welcome)以及如何[從頭開始建立會話應用程式](https://botonic.io/docs/create-convapp)。 https://github.com/hubtype/botonic Star Botonic ⭐️ --- 23. [React Flowbite](https://github.com/themesberg/flowbite-react) - 為 Flowbite 和 Tailwind CSS 建構的 React 元件. ------------------------------------------------------------------------------------------------------------  每個人對他們想要用來建立網站的使用者介面都有不同的偏好。 Flowbite React 是 UI 元件的開源集合,在 React 中建置,具有來自 Tailwind CSS 的實用程式類,您可以將其用作使用者介面和網站的起點。 開始使用以下 npm 指令。 ``` npm i flowbite-react ``` 這是一起使用表格和鍵盤元件的方法。 ``` 'use client'; import { Kbd, Table } from 'flowbite-react'; import { MdKeyboardArrowDown, MdKeyboardArrowLeft, MdKeyboardArrowRight, MdKeyboardArrowUp } from 'react-icons/md'; function Component() { return ( <Table> <Table.Head> <Table.HeadCell>Key</Table.HeadCell> <Table.HeadCell>Description</Table.HeadCell> </Table.Head> <Table.Body className="divide-y"> <Table.Row className="bg-white dark:border-gray-700 dark:bg-gray-800"> <Table.Cell className="whitespace-nowrap font-medium text-gray-900 dark:text-white"> <Kbd>Shift</Kbd> <span>or</span> <Kbd>Tab</Kbd> </Table.Cell> <Table.Cell>Navigate to interactive elements</Table.Cell> </Table.Row> <Table.Row className="bg-white dark:border-gray-700 dark:bg-gray-800"> <Table.Cell className="whitespace-nowrap font-medium text-gray-900 dark:text-white"> <Kbd>Enter</Kbd> or <Kbd>Spacebar</Kbd> </Table.Cell> <Table.Cell>Ensure elements with ARIA role="button" can be activated with both key commands.</Table.Cell> </Table.Row> <Table.Row className="bg-white dark:border-gray-700 dark:bg-gray-800"> <Table.Cell className="whitespace-nowrap font-medium text-gray-900 dark:text-white"> <span className="inline-flex gap-1"> <Kbd icon={MdKeyboardArrowUp} /> <Kbd icon={MdKeyboardArrowDown} /> </span> <span> or </span> <span className="inline-flex gap-1"> <Kbd icon={MdKeyboardArrowLeft} /> <Kbd icon={MdKeyboardArrowRight} /> </span> </Table.Cell> <Table.Cell>Choose and activate previous/next tab.</Table.Cell> </Table.Row> </Table.Body> </Table> ); } ```  您可以閱讀[文件](https://www.flowbite-react.com/docs/getting-started/introduction)並查看[Storybook](https://storybook.flowbite-react.com/?path=/story/components-accordion--always-open)中的功能。您也可以查看[元件](https://www.flowbite-react.com/docs/components/accordion)清單。 在我看來,如果您想快速設定 UI,但又不想最終為高品質的開源專案使用預先定義的庫元件,那麼這很好。 該專案在 GitHub 上擁有超過 1,500 顆星,擁有超過 37,000 名開發者的用戶群,並受到社群的廣泛認可和信任,使其成為一個可靠的選擇。 https://github.com/themesberg/flowbite-react Star React Flowbite ⭐️ --- 24. [DND 套件](https://github.com/clauderic/dnd-kit)- 輕量級、高效能、可存取且可擴展的拖放功能。 ------------------------------------------------------------------------- 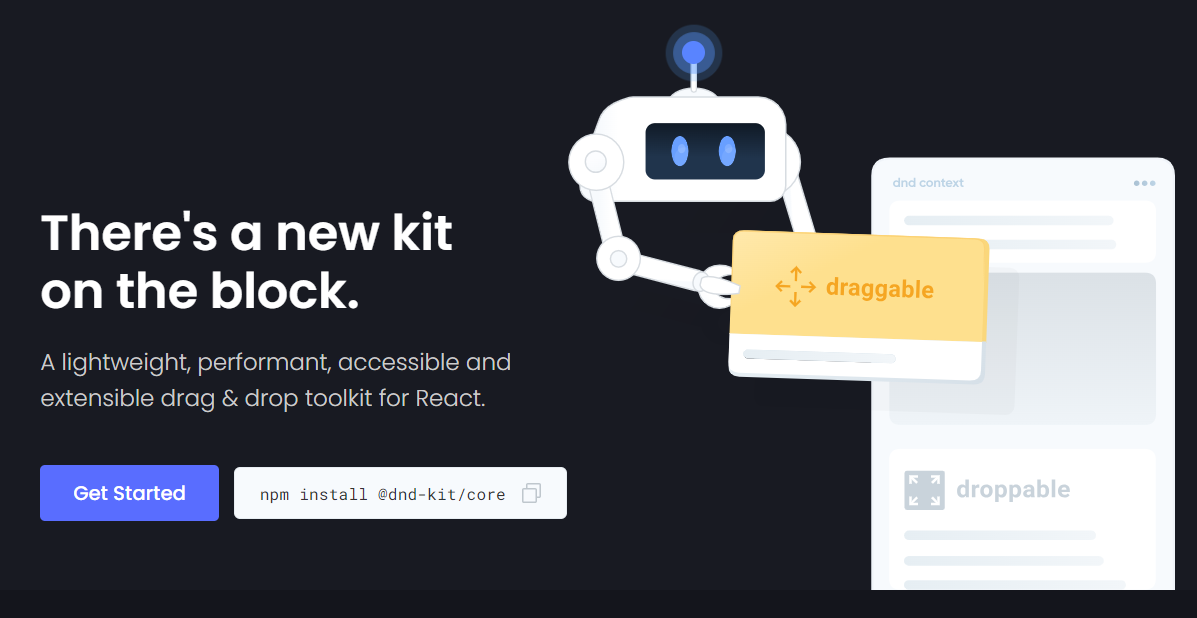 這是一個強大的 React 拖放工具包,擁有可自訂的碰撞檢測、多個啟動器和自動滾動等功能。 它的設計考慮到了 React,提供了方便集成的鉤子,無需進行重大的架構更改。支援從清單到網格和虛擬化清單的各種用例,它既是動態的又是輕量級的,沒有外部相依性。 開始使用以下 npm 指令。 ``` npm install @dnd-kit/core ``` 這就是建立可拖放元件的方法。 `Example.jsx` ``` import React, {useState} from 'react'; import {DndContext} from '@dnd-kit/core'; import {Draggable} from './Draggable'; import {Droppable} from './Droppable'; function Example() { const [parent, setParent] = useState(null); const draggable = ( <Draggable id="draggable"> Go ahead, drag me. </Draggable> ); return ( <DndContext onDragEnd={handleDragEnd}> {!parent ? draggable : null} <Droppable id="droppable"> {parent === "droppable" ? draggable : 'Drop here'} </Droppable> </DndContext> ); function handleDragEnd({over}) { setParent(over ? over.id : null); } } ``` `Droppable.jsx` ``` import React from 'react'; import {useDroppable} from '@dnd-kit/core'; export function Droppable(props) { const {isOver, setNodeRef} = useDroppable({ id: props.id, }); const style = { opacity: isOver ? 1 : 0.5, }; return ( <div ref={setNodeRef} style={style}> {props.children} </div> ); } ``` `Draggable.jsx` ``` import React from 'react'; import {useDraggable} from '@dnd-kit/core'; import {CSS} from '@dnd-kit/utilities'; function Draggable(props) { const {attributes, listeners, setNodeRef, transform} = useDraggable({ id: props.id, }); const style = { // Outputs `translate3d(x, y, 0)` transform: CSS.Translate.toString(transform), }; return ( <button ref={setNodeRef} style={style} {...listeners} {...attributes}> {props.children} </button> ); } ``` 我將可拖曳元件放在可放置元件上。 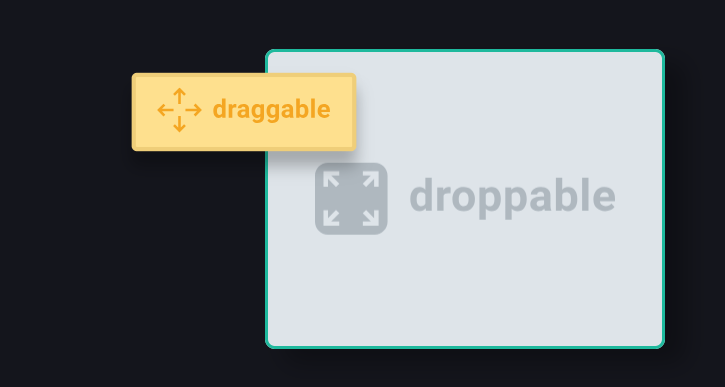 您可以閱讀[文件](https://docs.dndkit.com/)以及滑鼠和指標等[感測器的選項](https://docs.dndkit.com/introduction/installation#core-library)。 它在 GitHub 上擁有 10k+ Stars,並被 GitHub 上 47k+ 開發人員使用。 https://github.com/clauderic/dnd-kit 明星免打擾套件 ⭐️
長話短說 ==== 我收集了您應該了解的 React 庫,以建立許多不同類型的專案並成為 React 奇才🧙♂️。 其中每一項都是獨一無二的,並且都有自己的用例。 別忘了給他們加星號🌟 讓我們開始吧!  --- 1. [CopilotKit](https://github.com/CopilotKit/CopilotKit) - 建立應用內人工智慧聊天機器人、代理程式和文字區域 ------------------------------------------------------------------------------------  將 AI 功能整合到 React 中是很困難的,這就是 Copilot 的用武之地。一個簡單快速的解決方案,可將可投入生產的 Copilot 整合到任何產品中! 您可以使用兩個 React 元件將關鍵 AI 功能整合到 React 應用程式中。它們還提供內建(完全可自訂)Copilot 原生 UX 元件,例如`<CopilotKit />` 、 `<CopilotPopup />` 、 `<CopilotSidebar />` 、 `<CopilotTextarea />` 。 開始使用以下 npm 指令。 ``` npm i @copilotkit/react-core @copilotkit/react-ui ``` Copilot Portal 是 CopilotKit 提供的元件之一,CopilotKit 是一個應用程式內人工智慧聊天機器人,可查看目前應用狀態並在應用程式內採取操作。它透過插件與應用程式前端和後端以及第三方服務進行通訊。 這就是整合聊天機器人的方法。 `CopilotKit`必須包裝與 CopilotKit 互動的所有元件。建議您也開始使用`CopilotSidebar` (您可以稍後切換到不同的 UI 提供者)。 ``` "use client"; import { CopilotKit } from "@copilotkit/react-core"; import { CopilotSidebar } from "@copilotkit/react-ui"; import "@copilotkit/react-ui/styles.css"; export default function RootLayout({children}) { return ( <CopilotKit url="/path_to_copilotkit_endpoint/see_below"> <CopilotSidebar> {children} </CopilotSidebar> </CopilotKit> ); } ``` 您可以使用此[快速入門指南](https://docs.copilotkit.ai/getting-started/quickstart-backend)設定 Copilot 後端端點。 之後,您可以讓 Copilot 採取行動。您可以閱讀如何提供[外部上下文](https://docs.copilotkit.ai/getting-started/quickstart-chatbot#provide-context)。您可以使用`useMakeCopilotReadable`和`useMakeCopilotDocumentReadable`反應掛鉤來執行此操作。 ``` "use client"; import { useMakeCopilotActionable } from '@copilotkit/react-core'; // Let the copilot take action on behalf of the user. useMakeCopilotActionable( { name: "setEmployeesAsSelected", // no spaces allowed in the function name description: "Set the given employees as 'selected'", argumentAnnotations: [ { name: "employeeIds", type: "array", items: { type: "string" } description: "The IDs of employees to set as selected", required: true } ], implementation: async (employeeIds) => setEmployeesAsSelected(employeeIds), }, [] ); ``` 您可以閱讀[文件](https://docs.copilotkit.ai/getting-started/quickstart-textarea)並查看[演示影片](https://github.com/CopilotKit/CopilotKit?tab=readme-ov-file#demo)。 您可以輕鬆整合 Vercel AI SDK、OpenAI API、Langchain 和其他 LLM 供應商。您可以按照本[指南](https://docs.copilotkit.ai/getting-started/quickstart-chatbot)將聊天機器人整合到您的應用程式中。 基本概念是在幾分鐘內建立可用於基於 LLM 的應用程式的 AI 聊天機器人。 用例是巨大的,作為開發人員,我們絕對應該在下一個專案中嘗試使用 CopilotKit。 https://github.com/CopilotKit/CopilotKit Star CopilotKit ⭐️ --- 2. [xyflow](https://github.com/xyflow/xyflow) - 使用 React 建立基於節點的 UI。 --------------------------------------------------------------------  XYFlow 是一個功能強大的開源程式庫,用於使用 React 或 Svelte 建立基於節點的 UI。它是一個 monorepo,提供[React Flow](https://reactflow.dev)和[Svelte Flow](https://svelteflow.dev) 。讓我們更多地了解可以使用 React flow 做什麼。  您可以觀看此影片,在 60 秒內了解 React Flow。 https://www.youtube.com/watch?v=aUBWE41a900 有些功能在專業模式下可用,但免費層中的功能足以形成一個非常互動的流程。 React 流程以 TypeScript 編寫並使用 Cypress 進行測試。 開始使用以下 npm 指令。 ``` npm install reactflow ``` 以下介紹如何建立兩個節點( `Hello`和`World` ,並透過邊連接。節點具有預先定義的初始位置以防止重疊,並且我們還應用樣式來確保有足夠的空間來渲染圖形。 ``` import ReactFlow, { Controls, Background } from 'reactflow'; import 'reactflow/dist/style.css'; const edges = [{ id: '1-2', source: '1', target: '2' }]; const nodes = [ { id: '1', data: { label: 'Hello' }, position: { x: 0, y: 0 }, type: 'input', }, { id: '2', data: { label: 'World' }, position: { x: 100, y: 100 }, }, ]; function Flow() { return ( <div style={{ height: '100%' }}> <ReactFlow nodes={nodes} edges={edges}> <Background /> <Controls /> </ReactFlow> </div> ); } export default Flow; ``` 這就是它的樣子。您還可以新增標籤、更改類型並使其具有互動性。 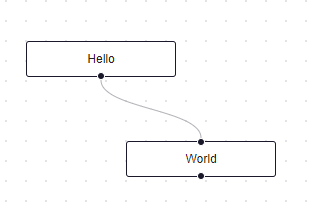 您可以在 React Flow 的 API 參考中查看[完整的選項清單](https://reactflow.dev/api-reference/react-flow)以及元件、鉤子和實用程式。 最好的部分是您還可以加入[自訂節點](https://reactflow.dev/learn/customization/custom-nodes)。在您的自訂節點中,您可以渲染您想要的一切。您可以定義多個來源和目標句柄並呈現表單輸入或圖表。您可以查看此[codesandbox](https://codesandbox.io/p/sandbox/pensive-field-z4kv3w?file=%2FApp.js&utm_medium=sandpack)作為範例。 您可以閱讀[文件](https://reactflow.dev/learn)並查看 Create React App、Next.js 和 Remix 的[範例 React Flow 應用程式](https://github.com/xyflow/react-flow-example-apps)。 React Flow 附帶了幾個額外的[插件](https://reactflow.dev/learn/concepts/plugin-components)元件,可以幫助您使用 Background、Minimap、Controls、Panel、NodeToolbar 和 NodeResizer 元件製作更高級的應用程式。 例如,您可能已經注意到許多網站的背景中有圓點,增強了美觀性。要實現此模式,您可以簡單地使用 React Flow 中的後台元件。 ``` import { Background } from 'reactflow'; <Background color="#ccc" variant={'dots'} /> // this will be under React Flow component. Just an example. ``` 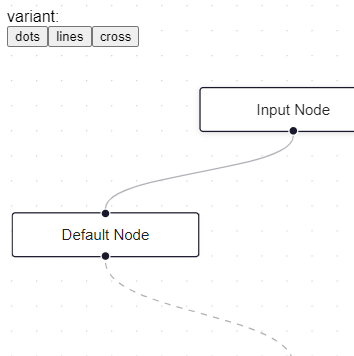 如果您正在尋找一篇快速文章,我建議您查看 Webkid 的[React Flow - A Library for Rendering Interactive Graphs](https://webkid.io/blog/react-flow-node-based-graph-library/) 。 React Flow 由 Webkid 開發和維護。 它在 GitHub 上有超過 19k 顆星,並且在`v11.10.4`上顯示它們正在不斷改進,npm 套件每週下載量超過 40 萬次。您可以輕鬆使用的最佳專案之一。  https://github.com/xyflow/xyflow 星 xyflow ⭐️ --- 3. [Zod](https://github.com/colinhacks/zod) + [React Hook Form](https://github.com/react-hook-form) - 致命的驗證組合。 --------------------------------------------------------------------------------------------------------------  第一個問題是:為什麼我在同一個選項中包含 Zod 和 React Hook 表單?好吧,請閱讀它來找出答案。 Zod 的目標是透過最大限度地減少重複的類型聲明來對開發人員友好。使用 Zod,您聲明一次驗證器,Zod 將自動推斷靜態 TypeScript 類型。將更簡單的類型組合成複雜的資料結構很容易。 開始使用以下 npm 指令。 ``` npm install zod ``` 這是您在建立字串架構時自訂一些常見錯誤訊息的方法。 ``` const name = z.string({ required_error: "Name is required", invalid_type_error: "Name must be a string", }); ``` ``` // It does provide lots of options // validations z.string().min(5, { message: "Must be 5 or more characters long" }); z.string().max(5, { message: "Must be 5 or fewer characters long" }); z.string().length(5, { message: "Must be exactly 5 characters long" }); z.string().email({ message: "Invalid email address" }); z.string().url({ message: "Invalid url" }); z.string().emoji({ message: "Contains non-emoji characters" }); z.string().uuid({ message: "Invalid UUID" }); z.string().includes("tuna", { message: "Must include tuna" }); z.string().startsWith("https://", { message: "Must provide secure URL" }); z.string().endsWith(".com", { message: "Only .com domains allowed" }); z.string().datetime({ message: "Invalid datetime string! Must be UTC." }); z.string().ip({ message: "Invalid IP address" }); ``` 請閱讀[文件](https://zod.dev/)以了解有關 Zod 的更多資訊。 它適用於 Node.js 和所有現代瀏覽器。 現在,第二部分來了。 有很多可用的表單整合。  雖然 Zod 可以驗證物件,但如果沒有自訂邏輯,它不會影響您的用戶端和後端。 React-hook-form 是用於客戶端驗證的優秀專案。例如,它可以顯示輸入錯誤。  開始使用以下 npm 指令。 ``` npm install react-hook-form ``` 這就是如何使用`React Hook Form` 。 ``` import { useForm, SubmitHandler } from "react-hook-form" type Inputs = { example: string exampleRequired: string } export default function App() { const { register, handleSubmit, watch, formState: { errors }, } = useForm<Inputs>() const onSubmit: SubmitHandler<Inputs> = (data) => console.log(data) console.log(watch("example")) // watch input value by passing the name of it return ( /* "handleSubmit" will validate your inputs before invoking "onSubmit" */ <form onSubmit={handleSubmit(onSubmit)}> {/* register your input into the hook by invoking the "register" function */} <input defaultValue="test" {...register("example")} /> {/* include validation with required or other standard HTML validation rules */} <input {...register("exampleRequired", { required: true })} /> {/* errors will return when field validation fails */} {errors.exampleRequired && <span>This field is required</span>} <input type="submit" /> </form> ) } ``` 您甚至可以隔離重新渲染,從而提高整體效能。 您可以閱讀[文件](https://react-hook-form.com/get-started)。 兩者結合起來就是一個很好的組合。嘗試一下! 我透過 Shadcn 發現了它,它使用它作為表單元件的預設值。我自己在幾個專案中使用過它,效果非常好。它提供了很大的靈活性,這確實很有幫助。 https://github.com/colinhacks/zod Star Zod ⭐️ https://github.com/react-hook-form Star React Hook Form ⭐️ --- 4. [React DND](https://github.com/react-dnd/react-dnd) - 用於 React 的拖放。 ----------------------------------------------------------------------  我還沒有完全實現拖放功能,而且我經常發現自己對選擇哪個選項感到困惑。我遇到的另一個選擇是[interactjs.io](https://interactjs.io/) ,根據我讀過的文件,它似乎非常有用。由於他們提供了詳細的範例,這非常容易。 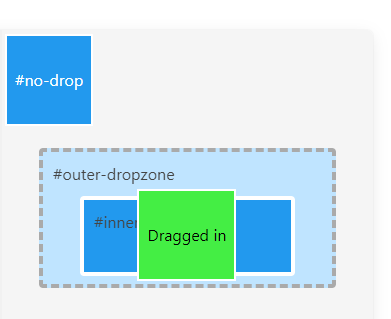 但我現在只介紹 React DND。 開始使用以下 npm 指令。 ``` npm install react-dnd react-dnd-html5-backend ``` 除非您正在編寫自訂後端,否則您可能想要使用 React DnD 隨附的 HTML5 後端。 這是安裝`react-dnd-html5-backend`方法。閱讀[文件](https://react-dnd.github.io/react-dnd/docs/backends/html5)。 這是起點。 ``` import { HTML5Backend } from 'react-dnd-html5-backend' import { DndProvider } from 'react-dnd' export default class YourApp { render() { return ( <DndProvider backend={HTML5Backend}> /* Your Drag-and-Drop Application */ </DndProvider> ) } } ``` 透過這種方式,您可以非常輕鬆地實現卡片的拖放操作。 ``` // Let's make <Card text='Write the docs' /> draggable! import React from 'react' import { useDrag } from 'react-dnd' import { ItemTypes } from './Constants' export default function Card({ isDragging, text }) { const [{ opacity }, dragRef] = useDrag( () => ({ type: ItemTypes.CARD, item: { text }, collect: (monitor) => ({ opacity: monitor.isDragging() ? 0.5 : 1 }) }), [] ) return ( <div ref={dragRef} style={{ opacity }}> {text} </div> ) } ``` 請注意,HTML5 後端不支援觸控事件。因此它不適用於平板電腦和行動裝置。您可以將`react-dnd-touch-backend`用於觸控裝置。閱讀[文件](https://react-dnd.github.io/react-dnd/docs/backends/touch)。 ``` import { TouchBackend } from 'react-dnd-touch-backend' import { DndProvider } from 'react-dnd' class YourApp { <DndProvider backend={TouchBackend} options={opts}> {/* Your application */} </DndProvider> } ``` 這個codesandbox規定了我們如何正確使用React DND。 https://codesandbox.io/embed/3y5nkyw381?view=Editor+%2B+Preview&module=%2Fsrc%2Findex.tsx&hidenavigation=1 你可以看看React DND的[例子](https://react-dnd.github.io/react-dnd/examples)。 它們甚至有一個乾淨的功能,您可以使用 Redux 檢查內部發生的情況。 您可以透過為提供者新增 debugModeprop 來啟用[Redux DevTools](https://github.com/reduxjs/redux-devtools) ,其值為 true。 ``` <DndProvider debugMode={true} backend={HTML5Backend}> ``` 它提供了多種元件選項,我需要親自測試一下。總的來說,這看起來相當不錯,特別是如果你剛開始的話。 React DND 已獲得`MIT`許可,並在 GitHub 上擁有超過 20k Stars,這使其具有令人難以置信的可信度。 https://github.com/react-dnd/react-dnd Star React DND ⭐️ --- 5. [Cypress](https://github.com/cypress-io/cypress) - 快速測試瀏覽器中執行的內容。 --------------------------------------------------------------------  近年來已經證明了測試的重要性,而 Jest 和 Cypress 等選項使其變得異常簡單。 但我們只會介紹 Cypress,因為它本身就很方便。 只需一張圖片就能證明 Cypress 值得付出努力。  開始使用以下 npm 指令。 ``` npm install cypress -D ``` 如果您在專案中沒有使用 Node 或套件管理器,或者您想快速試用 Cypress,您始終可以[直接從 CDN 下載 Cypress](https://download.cypress.io/desktop) 。 一旦安裝並打開它。您必須使用`.cy.js`建立一個規範檔案。  現在,您可以編寫並測試您的應用程式(範例程式碼)。 ``` describe('My First Test', () => { it('Does not do much!', () => { expect(true).to.equal(true) }) }) ``` Cypress 提供了多種選項,例如`cy.visit()`或`cy.contains()` 。由於我沒有廣泛使用 Cypress,因此您需要在其[文件](https://docs.cypress.io/guides/end-to-end-testing/writing-your-first-end-to-end-test)中進一步探索它。 如果它看起來很可怕,那麼請前往這個[為初學者解釋 Cypress 的](https://www.youtube.com/watch?v=u8vMu7viCm8&pp=ygUQY3lwcmVzcyB0dXRvcmlhbA%3D%3D)freeCodeCamp 教程。 Freecodecamp 影片確實是金礦 :D Cypress 在 GitHub 上擁有超過 45,000 顆星,並且在目前的 v13 版本中,它正在不斷改進。 https://github.com/cypress-io/cypress 星柏 ⭐️ --- [6.Refine](https://github.com/refinedev/refine) - 面向企業的開源 Retool。 ----------------------------------------------------------------- 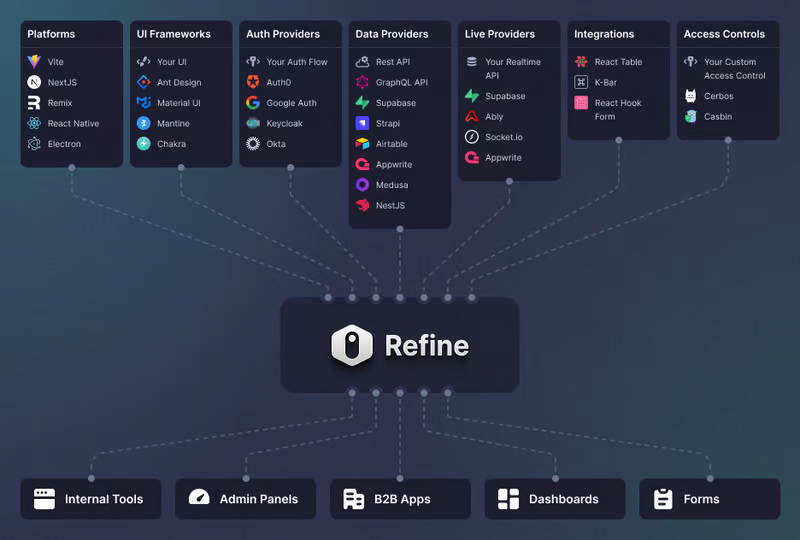 Refine 是一個元 React 框架,可以快速開發各種 Web 應用程式。 從內部工具到管理面板、B2B 應用程式和儀表板,它可作為建立任何類型的 CRUD 應用程式(例如 DevOps 儀表板、電子商務平台或 CRM 解決方案)的全面解決方案。 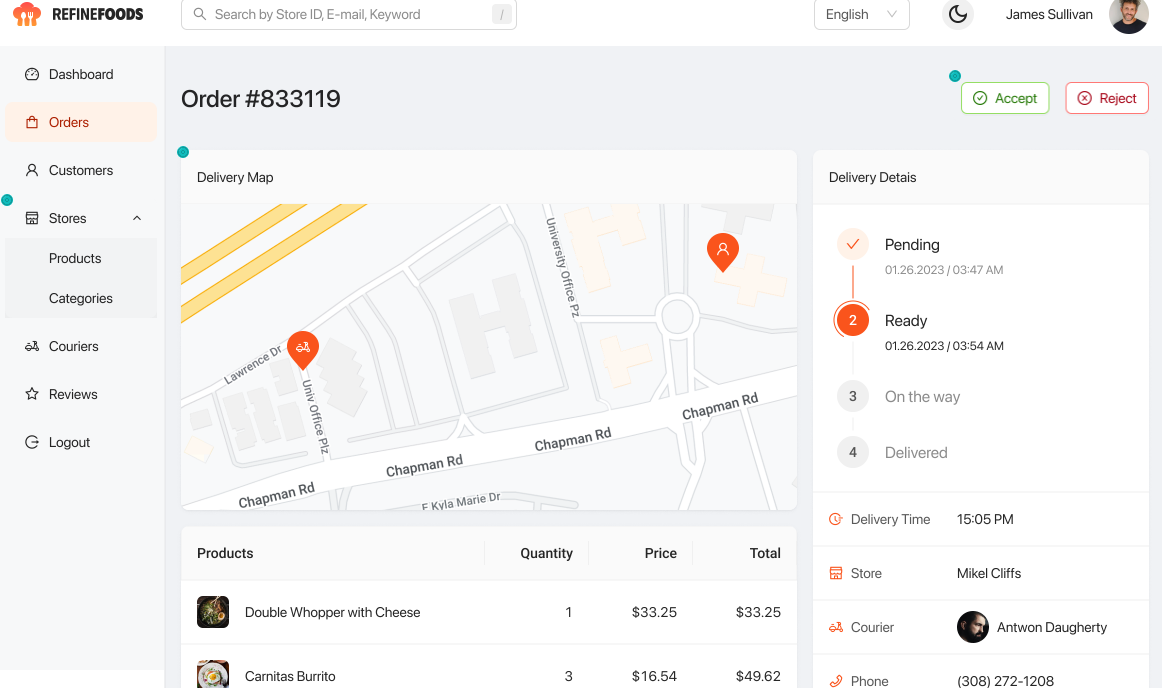 您可以在一分鐘內使用單一 CLI 命令進行設定。 它具有適用於 15 多個後端服務的連接器,包括 Hasura、Appwrite 等。 您可以查看可用的[整合清單](https://refine.dev/integrations/)。 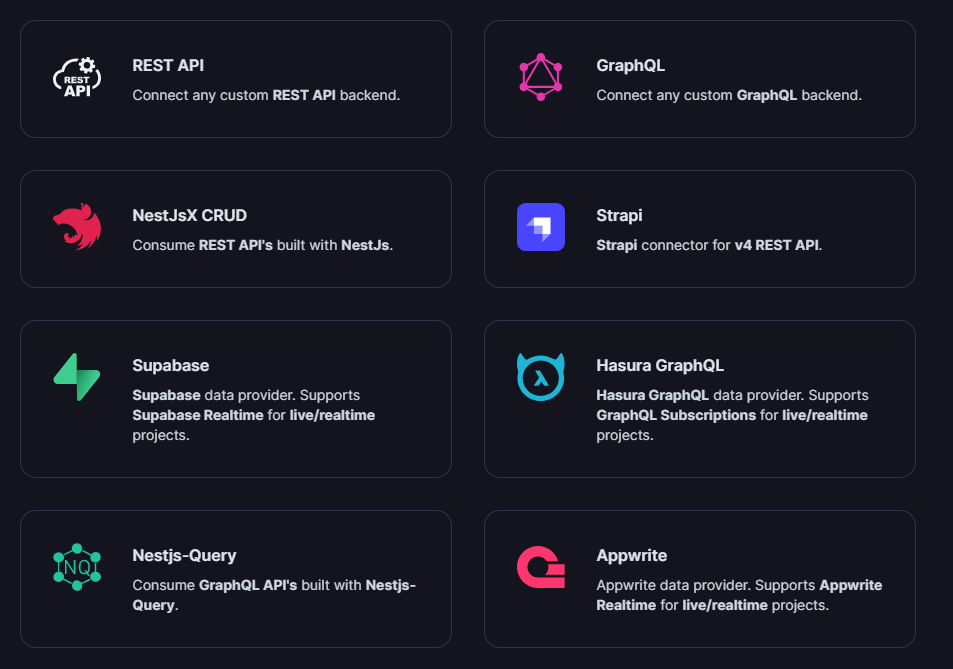 但最好的部分是,Refine `headless by design` ,從而提供無限的樣式和自訂選項。 由於該架構,您可以使用流行的 CSS 框架(如 TailwindCSS)或從頭開始建立樣式。 這是最好的部分,因為我們不希望最終受到與特定庫的兼容性的樣式限制,因為每個人都有自己的風格並使用不同的 UI。 開始使用以下 npm 指令。 ``` npm create refine-app@latest ``` 這就是使用 Refine 新增登入資訊的簡單方法。 ``` import { useLogin } from "@refinedev/core"; const { login } = useLogin(); ``` 使用 Refine 概述程式碼庫的結構。 ``` const App = () => ( <Refine dataProvider={dataProvider} resources={[ { name: "blog_posts", list: "/blog-posts", show: "/blog-posts/show/:id", create: "/blog-posts/create", edit: "/blog-posts/edit/:id", }, ]} > /* ... */ </Refine> ); ``` 您可以閱讀[文件](https://refine.dev/docs/)。 您可以看到一些使用 Refine 建立的範例應用程式: - [全功能管理面板](https://example.admin.refine.dev/) - [優化不同的用例場景](https://github.com/refinedev/refine/tree/master/examples)。 他們甚至提供模板,這就是為什麼這麼多用戶喜歡Refine。 你可以看到[模板](https://refine.dev/templates/)。 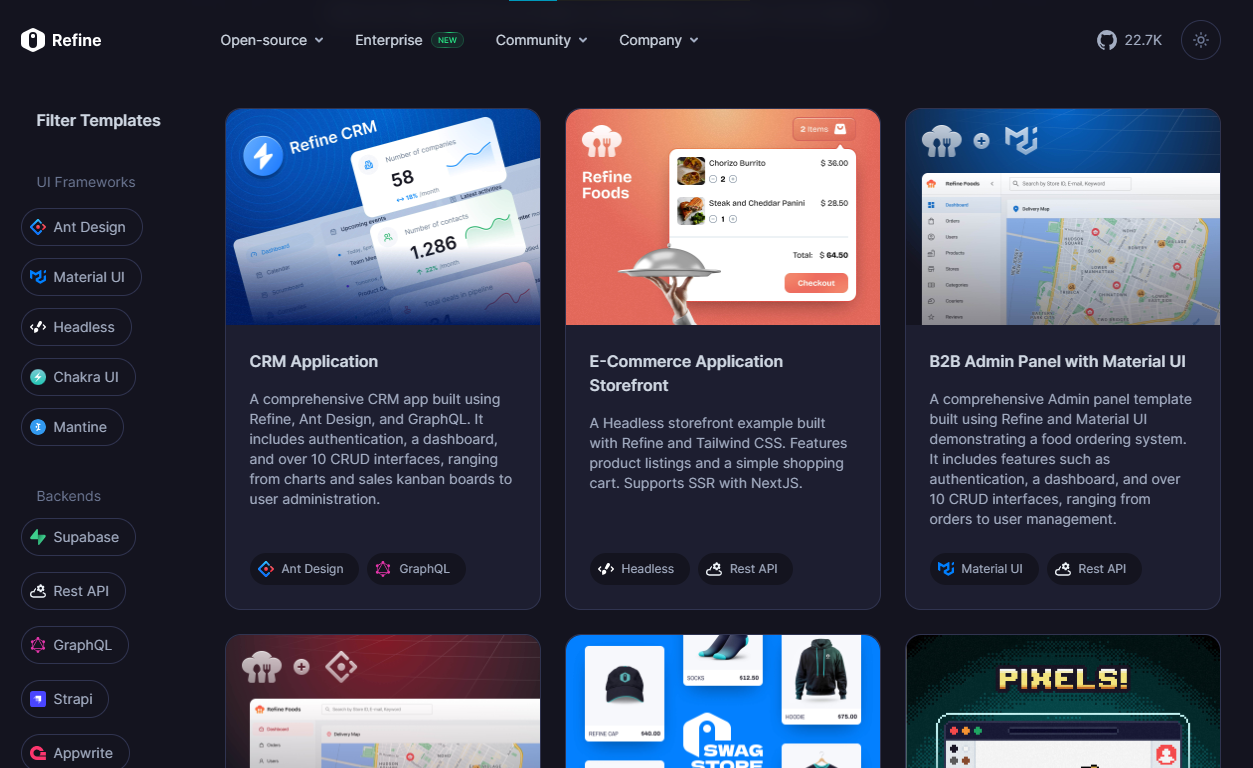 他們在 GitHub 上擁有大約 22k+ 顆星。 https://github.com/refinedev/refine 星際精煉 ⭐️ --- 7. [Tremor](https://github.com/tremorlabs/tremor) - React 元件來建立圖表和儀表板。 ----------------------------------------------------------------------  Tremor 提供了 20 多個開源 React 元件,用於建立基於 Tailwind CSS 的圖表和儀表板,使資料視覺化再次變得簡單。 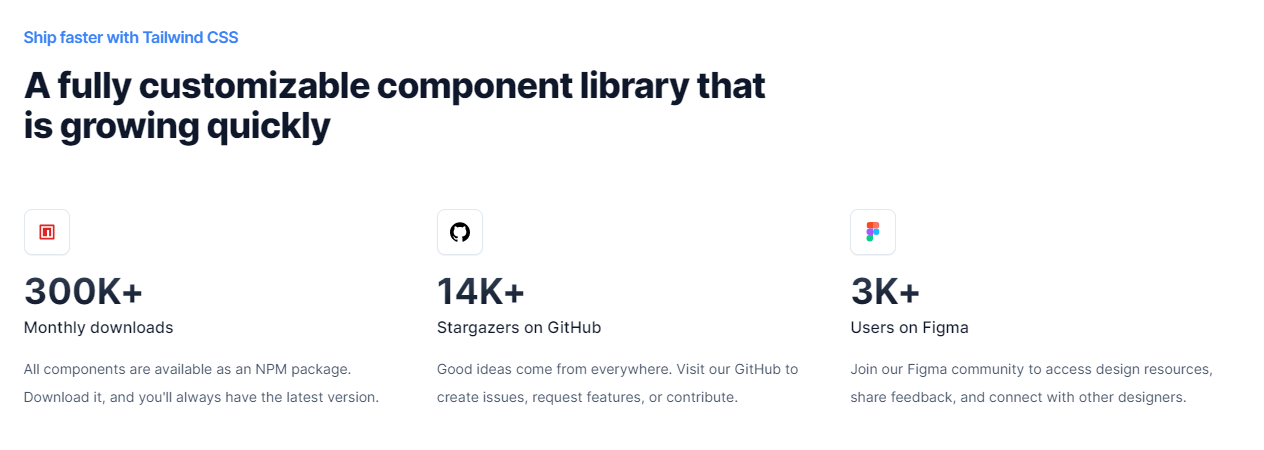 開始使用以下 npm 指令。 ``` npm i @tremor/react ``` 這就是您如何使用 Tremor 快速建立東西。 ``` import { Card, ProgressBar } from '@tremor/react'; export default function Example() { return ( <Card className="mx-auto max-w-md"> <h4 className="text-tremor-default text-tremor-content dark:text-dark-tremor-content"> Sales </h4> <p className="text-tremor-metric font-semibold text-tremor-content-strong dark:text-dark-tremor-content-strong"> $71,465 </p> <p className="mt-4 flex items-center justify-between text-tremor-default text-tremor-content dark:text-dark-tremor-content"> <span>32% of annual target</span> <span>$225,000</span> </p> <ProgressBar value={32} className="mt-2" /> </Card> ); } ``` 這就是基於此生成的內容。 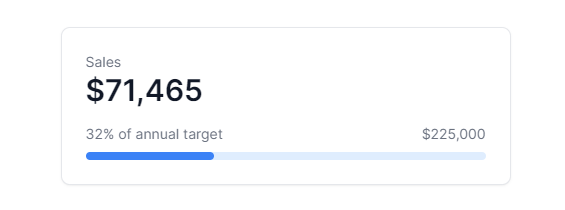 您可以閱讀[文件](https://www.tremor.so/docs/getting-started/installation)。其間,他們在引擎蓋下使用混音圖標。 從我見過的各種元件來看,這是一個很好的起點。相信我! Tremor 還提供了一個[乾淨的 UI 工具包](https://www.figma.com/community/file/1233953507961010067)。多麼酷啊!  Tremor 在 GitHub 上擁有超過 14k 顆星,並有超過 280 個版本,這意味著它正在不斷改進。 https://github.com/tremorlabs/tremor 星震 ⭐️ --- 8. [Watermelon DB](https://github.com/Nozbe/WatermelonDB) - 用於 React 和 React Native 的反應式和非同步資料庫。 ------------------------------------------------------------------------------------------------ 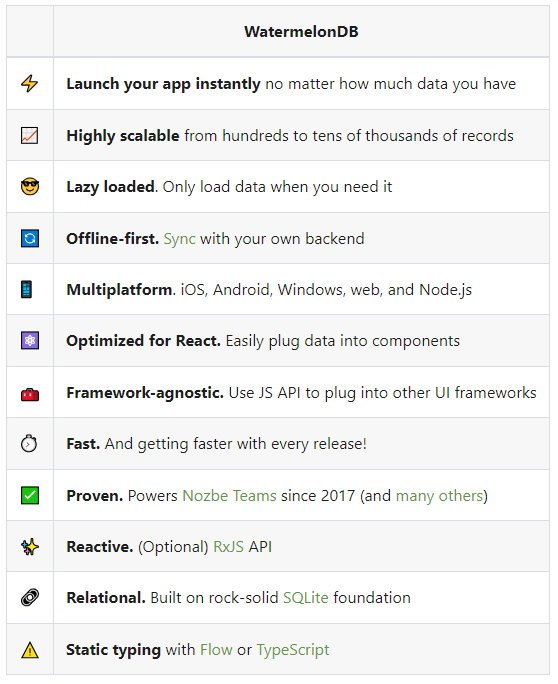 我不知道為什麼資料庫有這麼多選項;甚至很難全部數清。但如果我們使用 React,Watermelon DB 是一個不錯的選擇。即使在 4k+ 提交之後,它們仍然處於`v0.28`版本,這是一個相當大的問題。 Rocket.chat 使用 Watermelon DB,這給了他們巨大的可信度。 開始使用以下 npm 指令。 ``` npm install @nozbe/watermelondb ``` 您需要做的第一件事是建立模型和後續遷移(閱讀文件)。 ``` import { appSchema, tableSchema } from '@nozbe/watermelondb' export default appSchema({ version: 1, tables: [ // We'll add to tableSchemas here ] }) ``` 根據文件,使用 WatermelonDB 時,您正在處理模型和集合。然而,在 Watermelon 之下有一個底層資料庫(SQLite 或 LokiJS),它使用不同的語言:表格和欄位。這些一起稱為資料庫模式。 您可以閱讀有關[CRUD 操作的](https://watermelondb.dev/docs/CRUD)[文件](https://watermelondb.dev/docs/Installation)和更多內容。 https://github.com/Nozbe/WatermelonDB 明星 WatermelonDB ⭐️ --- 9. [Evergreen UI](https://github.com/segmentio/evergreen) - 按 Segment 劃分的 React UI 框架。 --------------------------------------------------------------------------------------  沒有 UI 框架的清單幾乎是不可能的。有許多受歡迎的選項,例如 Material、Ant Design、Next UI 等等。 但我們正在報道 Evergreen,它本身就非常好。 開始使用以下 npm 指令。 ``` $ npm install evergreen-ui ``` [Evergreen Segment 網站](https://evergreen.segment.com/foundations)上顯示了任何使用者介面的基礎以及詳細的選項。  它提供了很多元件,其中一些非常好,例如`Tag Input`或`File uploader` 。   您可以看到 Evergreen UI 提供的所有[元件](https://evergreen.segment.com/components)。 https://github.com/segmentio/evergreen Star Evergreen UI ⭐️ --- 10. [React Spring](https://www.react-spring.dev/) - 流暢的動畫來提升 UI 和互動。 --------------------------------------------------------------------   如果您喜歡 React-Motion 但感覺過渡不流暢,那是因為它專門使用 React 渲染。 如果你喜歡 Popmotion,但感覺自己的能力受到限制,那是因為它完全跳過了 React 渲染。 `react-spring`提供了兩種選擇,試試看! 開始使用以下 npm 指令。 ``` npm i @react-spring/web ``` 這就是導入高階元件來包裝動畫的方法。 ``` import { animated } from '@react-spring/web' // use it. export default function MyComponent() { return ( <animated.div style={{ width: 80, height: 80, background: '#ff6d6d', borderRadius: 8, }} /> ) } ``` 由於以下程式碼和框,我決定嘗試 React Spring。令人驚訝的是,我們可以使用 React Spring 做很多事情。 https://codesandbox.io/embed/mdovb?view=Editor+%2B+Preview&module=%2Fsrc%2Findex.tsx&hidenavigation=1 您可以閱讀[文件](https://www.react-spring.dev/docs/getting-started)。 他們還提供了很多您可以學習的[範例](https://www.react-spring.dev/examples)。  它提供了大量的選項,例如`useScroll` ,它允許您建立滾動連結動畫。 例如,這個codesandbox告訴了`useScroll`的用法。 https://codesandbox.io/embed/b07dmz?view=Editor+%2B+Preview&module=%2Fsrc%2Findex.tsx&hidenavigation=1 React Spring 在 GitHub 上有大約 27k+ Stars。 https://github.com/pmndrs/react-spring Star React Spring ⭐️ --- 11. [React Tweet](https://github.com/vercel/react-tweet) - 將推文嵌入到你的 React 應用程式中。 --------------------------------------------------------------------------------  `React Tweet`可讓您在使用 Next.js、Create React App、Vite 等時將推文嵌入到 React 應用程式中。 該函式庫不需要使用 Twitter API。推文可以靜態呈現,從而無需包含 iframe 和額外的客戶端 JavaScript。 它是 Vercel 的開源專案。 開始使用以下 npm 指令。 ``` npm i react-tweet ``` 為了顯示推文,我們需要從 Twitter 的 API 請求資料。透過此 API 進行速率限制具有挑戰性,但如果您僅依賴我們提供的 SWR 端點 ( `react-tweet.vercel.app/api/tweet/:id` ),這是可能的,因為伺服器的IP 位址向Twitter 發出了許多請求API。這也適用於 RSC,其中 API 端點不是必需的,但伺服器仍然從相同 IP 位址發送請求。 為了避免 API 限制,您可以使用 Redis 或 Vercel KV 等資料庫快取推文。例如,您可以使用 Vercel KV。 ``` import { Suspense } from 'react' import { TweetSkeleton, EmbeddedTweet, TweetNotFound } from 'react-tweet' import { fetchTweet, Tweet } from 'react-tweet/api' import { kv } from '@vercel/kv' async function getTweet( id: string, fetchOptions?: RequestInit ): Promise<Tweet | undefined> { try { const { data, tombstone, notFound } = await fetchTweet(id, fetchOptions) if (data) { await kv.set(`tweet:${id}`, data) return data } else if (tombstone || notFound) { // remove the tweet from the cache if it has been made private by the author (tombstone) // or if it no longer exists. await kv.del(`tweet:${id}`) } } catch (error) { console.error('fetching the tweet failed with:', error) } const cachedTweet = await kv.get<Tweet>(`tweet:${id}`) return cachedTweet ?? undefined } const TweetPage = async ({ id }: { id: string }) => { try { const tweet = await getTweet(id) return tweet ? <EmbeddedTweet tweet={tweet} /> : <TweetNotFound /> } catch (error) { console.error(error) return <TweetNotFound error={error} /> } } const Page = ({ params }: { params: { tweet: string } }) => ( <Suspense fallback={<TweetSkeleton />}> <TweetPage id={params.tweet} /> </Suspense> ) export default Page ``` 您可以直接使用它,方法非常簡單。 ``` <div className="dark"> <Tweet id="1629307668568633344" /> </div> ``` 如果您不喜歡使用 Twitter 主題,您也可以使用多個選項建立自己的[自訂主題](https://react-tweet.vercel.app/custom-theme)。 例如,您可以建立自己的推文元件,但沒有回覆按鈕,如下所示: ``` import type { Tweet } from 'react-tweet/api' import { type TwitterComponents, TweetContainer, TweetHeader, TweetInReplyTo, TweetBody, TweetMedia, TweetInfo, TweetActions, QuotedTweet, enrichTweet, } from 'react-tweet' type Props = { tweet: Tweet components?: TwitterComponents } export const MyTweet = ({ tweet: t, components }: Props) => { const tweet = enrichTweet(t) return ( <TweetContainer> <TweetHeader tweet={tweet} components={components} /> {tweet.in_reply_to_status_id_str && <TweetInReplyTo tweet={tweet} />} <TweetBody tweet={tweet} /> {tweet.mediaDetails?.length ? ( <TweetMedia tweet={tweet} components={components} /> ) : null} {tweet.quoted_tweet && <QuotedTweet tweet={tweet.quoted_tweet} />} <TweetInfo tweet={tweet} /> <TweetActions tweet={tweet} /> {/* We're not including the `TweetReplies` component that adds the reply button */} </TweetContainer> ) } ``` 您可以閱讀[文件](https://react-tweet.vercel.app/#installation)。 您可以查看[React Tweet 的演示,](https://react-tweet-next.vercel.app/light/1761133168772489698)以了解它如何在頁面上呈現。 它們已發布`v3.2`版本,這表明它們正在不斷改進,並且[每週下載量超過 46k+](https://www.npmjs.com/package/react-tweet) 。 https://github.com/vercel/react-tweet Star React 推文 ⭐️ --- 12. [React 360](https://github.com/facebookarchive/react-360) - 使用 React 建立令人驚嘆的 360 度和 VR 內容。 ----------------------------------------------------------------------------------------------  儘管 Facebook 已將其存檔,但許多開發人員仍然發現它足夠有用,因此繼續使用。 React 360 是一個函式庫,它利用大量 React Native 功能來建立在 Web 瀏覽器中執行的虛擬實境應用程式。 它使用 Three.js 進行渲染,並作為 npm 套件提供。透過將 WebGL 和 WebVR 等現代 API 與 React 的聲明性功能結合,React 360 有助於簡化建立跨平台 VR 體驗的過程。 開始使用以下 npm 指令。 ``` npm install -g react-360-cli ``` 涉及的事情有很多,但您可以使用 VrButton 加入重要的互動功能到您的 React VR 應用程式。 ``` import { AppRegistry, StyleSheet, Text, View, VrButton } from 'react-360'; state = { count: 0 }; _incrementCount = () => { this.setState({ count: this.state.count + 1 }) } <View style={styles.panel}> <VrButton onClick={this._incrementCount} style={styles.greetingBox}> <Text style={styles.greeting}> {`You have visited Simmes ${this.state.count} times`} </Text> </VrButton> </View> ``` 除了許多令人驚奇的東西之外,您還可以加入聲音。請參閱[使用 React 360 的 React Resources](https://reactresources.com/topics/react-360)範例。 您也可以閱讀 Log Rocket 撰寫的關於[使用 React 360 建立 VR 應用](https://blog.logrocket.com/building-a-vr-app-with-react-360/)程式的部落格。 這個codesandbox代表了我們可以使用React 360做什麼的一個常見範例。 https://codesandbox.io/embed/2bye27?view=Editor+%2B+Preview&module=%2Fsrc%2Findex.js&hidenavigation=1 https://github.com/facebookarchive/react-360 Star React 360 ⭐️ --- 13. [React Advanced Cropper](https://github.com/advanced-cropper/react-advanced-cropper) - 建立適合您網站的裁剪器。 -------------------------------------------------------------------------------------------------------   React Advanced Cropper 是一個高級庫,可讓您建立適合任何網站設計的裁剪器。這意味著您不僅可以更改裁剪器的外觀,還可以自訂其行為。 它們仍處於測試版本,這意味著 API 可能會在未來版本中發生變化。 簡單的用例是設計軟體和裁剪圖像表面以獲得進一步的見解。 他們有很多選擇,因此值得。  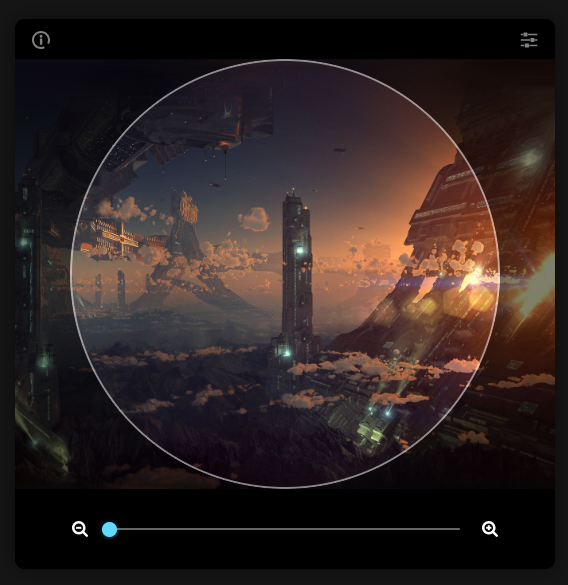 開始使用以下 npm 指令。 ``` npm install --save react-advanced-cropper ``` 您可以這樣使用它。 ``` import React, { useState } from 'react'; import { CropperRef, Cropper } from 'react-advanced-cropper'; import 'react-advanced-cropper/dist/style.css' export const GettingStartedExample = () => { const [image, setImage] = useState( 'https://images.unsplash.com/photo-1599140849279-1014532882fe?ixlib=rb-1.2.1&ixid=eyJhcHBfaWQiOjEyMDd9&auto=format&fit=crop&w=1300&q=80', ); const onChange = (cropper: CropperRef) => { console.log(cropper.getCoordinates(), cropper.getCanvas()); }; return ( <Cropper src={image} onChange={onChange} className={'cropper'} /> ) }; ``` 您可以閱讀[文件](https://advanced-cropper.github.io/react-advanced-cropper/docs/intro),它們提供了[20 多個自訂選項](https://github.com/advanced-cropper/react-advanced-cropper?tab=readme-ov-file#cropper)。 他們主要提供三種類型的[裁剪器選項](https://advanced-cropper.github.io/react-advanced-cropper/docs/guides/cropper-types/):固定、經典和混合以及範例和程式碼。 您可以使用 React Advanced Cropper 製作一些令人興奮的東西來向世界展示:) https://github.com/advanced-cropper/react-advanced-cropper Star React 進階裁剪器 ⭐️ --- 14. [Mobx](https://github.com/mobxjs/mobx) - 簡單、可擴展的狀態管理。 ---------------------------------------------------------  MobX 是一個經過驗證的基於訊號的函式庫,可透過函數反應式程式設計簡化和擴展狀態管理。它提供了靈活性,使您能夠獨立於任何 UI 框架來管理應用程式狀態。 這種方法會產生解耦、可移植且易於測試的程式碼。 以下是使用 MobX 的任何應用程式中處理事件的方式。  圖片來自文件 開始使用以下 npm 指令。 ``` npm install mobx-react --save // CDN is also available ``` 這就是它的樣子。 ``` import { observer } from "mobx-react" // ---- ES6 syntax ---- const TodoView = observer( class TodoView extends React.Component { render() { return <div>{this.props.todo.title}</div> } } ) // ---- ESNext syntax with decorator syntax enabled ---- @observer class TodoView extends React.Component { render() { return <div>{this.props.todo.title}</div> } } // ---- or just use function components: ---- const TodoView = observer(({ todo }) => <div>{todo.title}</div>) ``` 您可以使用 props、全域變數或使用 React Context 在觀察者中使用外部狀態。 您可以閱讀[有關 React Integration](https://mobx.js.org/react-integration.html)和[npm docs](https://www.npmjs.com/package/mobx-react#api-documentation)的文件。 您也可以閱讀[MobX 和 React 的 10 分鐘互動介紹](https://mobx.js.org/getting-started)。 MobX 在 GitHub 上擁有超過 27k 顆星,並在 GitHub 上被超過 140K 開發者使用。 https://github.com/mobxjs/mobx 明星 Mobx ⭐️ --- 15. [React Virtualized](https://github.com/bvaughn/react-virtualized) - 渲染大型清單和表格資料。 ------------------------------------------------------------------------------------  開始使用以下 npm 指令。 ``` npm install react-virtualized --save ``` 以下是如何在網格中使用 ColumnSizer 元件。探索演示(文件)以詳細了解可用選項。 ``` import React from 'react'; import ReactDOM from 'react-dom'; import {ColumnSizer, Grid} from 'react-virtualized'; import 'react-virtualized/styles.css'; // only needs to be imported once // numColumns, numRows, someCalculatedHeight, and someCalculatedWidth determined here... // Render your list ReactDOM.render( <ColumnSizer columnMaxWidth={100} columnMinWidth={50} columnCount={numColumns} width={someCalculatedWidth}> {({adjustedWidth, getColumnWidth, registerChild}) => ( <Grid ref={registerChild} columnWidth={getColumnWidth} columnCount={numColumns} height={someCalculatedHeight} cellRenderer={someCellRenderer} rowHeight={50} rowCount={numRows} width={adjustedWidth} /> )} </ColumnSizer>, document.getElementById('example'), ); ``` 您可以閱讀[文件](https://github.com/bvaughn/react-virtualized/tree/master/docs#documentation)和[演示](https://bvaughn.github.io/react-virtualized/#/components/List)。 他們提供了 React-window 作為輕量級的替代方案,但這個在發布和明星方面更受歡迎,所以我介紹了這個選項。您可以閱讀哪個選項更適合您: [React-Window 與 React-Virtualized 有何不同?](https://github.com/bvaughn/react-window?tab=readme-ov-file#how-is-react-window-different-from-react-virtualized) 。 它被超過 85,000 名開發人員使用,並在 GitHub 上擁有超過 25,000 顆星。它還擁有令人印象深刻的[170 萬+ 每週下載量](https://www.npmjs.com/package/react-virtualized)。 https://github.com/bvaughn/react-virtualized Star React 虛擬化 ⭐️ --- 16.React [Google Analytics](https://github.com/react-ga/react-ga) - React Google Analytics 模組。 ----------------------------------------------------------------------------------------------  這是一個 JavaScript 模組,可用於在使用 React 作為前端程式碼庫的網站或應用程式中包含 Google Analytics 追蹤程式碼。 該模組對我們如何在前端程式碼中進行追蹤有一定的看法。我們的 API 比核心 Google Analytics 庫稍微詳細一些,以使程式碼更易於閱讀。 開始使用以下 npm 指令。 ``` npm install react-ga --save ``` 您可以這樣使用它。 ``` import ReactGA from 'react-ga'; ReactGA.initialize('UA-000000-01'); ReactGA.pageview(window.location.pathname + window.location.search); <!-- The core React library --> <script src="https://unpkg.com/[email protected]/dist/react.min.js"></script> <!-- The ReactDOM Library --> <script src="https://unpkg.com/[email protected]/dist/react-dom.min.js"></script> <!-- ReactGA library --> <script src="/path/to/bower_components/react-ga/dist/react-ga.min.js"></script> <script> ReactGA.initialize('UA-000000-01', { debug: true }); </script> ``` 執行`npm install` `npm start`並前往`port 8000 on localhost`後,您可以閱讀[文件](https://github.com/react-ga/react-ga?tab=readme-ov-file#installation)並查看[演示](https://github.com/react-ga/react-ga/tree/master/demo)。 它每週的下載量超過 35 萬次,在 GitHub 上擁有超過 5,000 顆星(已存檔)。 https://github.com/react-ga/react-ga Star React Google Analytics ⭐️ --- 17.react [-i18next](https://github.com/i18next/react-i18next) - React 的國際化做得很好。 -------------------------------------------------------------------------------  無需更改 webpack 配置或加入額外的 babel 轉譯器。 開始使用以下 npm 指令。 ``` npm i react-i18next ``` 我們來比較一下程式碼結構。 > 在使用react-i18next之前。 ``` ... <div>Just simple content</div> <div> Hello <strong title="this is your name">{name}</strong>, you have {count} unread message(s). <Link to="/msgs">Go to messages</Link>. </div> ... ``` > 使用react-i18next後。 ``` ... <div>{t('simpleContent')}</div> <Trans i18nKey="userMessagesUnread" count={count}> Hello <strong title={t('nameTitle')}>{{name}}</strong>, you have {{count}} unread message. <Link to="/msgs">Go to messages</Link>. </Trans> ... ``` 您可以閱讀[文件](https://react.i18next.com/)並前往[Codesandbox 的互動式遊樂場](https://codesandbox.io/s/1zxox032q)。 該工具已被超過 182,000 名開發人員使用,在 GitHub 上擁有超過 8,000 顆星。軟體包中令人印象深刻的 3400k+ 下載量進一步鞏固了它的可信度,使其成為您下一個 React 專案的絕佳選擇。 您也可以閱讀 Locize 關於[React Localization - Internationalize with i18next](https://locize.com/blog/react-i18next/)的部落格。 https://github.com/i18next/react-i18next 明星react-i18next ⭐️ --- 哇!如此長的有用專案清單。 我知道您有更多想法,分享它們,讓我們一起建造:D 現在就這些了! 在開展新專案時,開發人員經驗至關重要,這就是為什麼有些專案擁有龐大的社區,而有些則沒有。 React 社群非常龐大,所以成為這些社群的一部分,並使用這些開源專案將您的專案提升到一個新的水平。 祝你有美好的一天!直到下一次。 在 GitHub 上關注我。 https://github.com/Anmol-Baranwal 請關注 CopilotKit 以了解更多此類內容。 https://dev.to/copilotkit --- 原文出處:https://dev.to/copilotkit/libraries-you-should-know-if-you-build-with-react-1807
--- 標題:為什麼事件溯源是一種微服務通訊反模式 發表:真實 描述:這篇文章描述了合理的事件溯源用例,並提供了微服務之間通訊的替代方案。 封面圖片:https://github.com/OLibutzki/blog/raw/master/water-4230596\_1920.jpg 標籤: 事件溯源, 領域驅動設計, 領域事件 --- 一般而言,事件驅動架構,特別是事件溯源,在過去幾年中獲得了廣泛關注。這種趨勢是由於我們努力建構具有彈性和可擴展性的模組化系統而引起的。*微服務*是在這種情況下經常使用的術語。在我看來,微服務只是實現有界脈絡的一種方法。模組化系統的核心是模組的邊界,而如何辨識這些邊界最有前途的想法是 Eric Evans 的領域驅動設計中引入的[戰略設計](https://en.wikipedia.org/wiki/Domain-driven_design#Strategic_domain-driven_design)。它可以幫助您辨識/發現模組及其邊界([有界上下文](https://martinfowler.com/bliki/BoundedContext.html)),並描述這些有界上下文相互關聯的方式(上下文映射)。 *注意:我會預設某些術語的一些預知,因為我不想第一千次解釋它們。我決定連結到[microservices.io](https://microservices.io/) 、[維基百科](https://en.wikipedia.org)或[Martin Fowler 的 Bliki](https://martinfowler.com/bliki/)的解釋,因此,如果您對自己的知識感到不舒服,則可以更深入地研究某個主題。* 領域事件作為通用語言的核心 ============= 儘管在 Eric 的書中沒有明確提及,但領域事件很好地促進了 DDD 概念的發展。像 Alberto Brandolini 的[事件風暴](https://en.wikipedia.org/wiki/Event_storming)這樣的技術將事件的焦點從技術層面轉移到組織/業務層面。我們不討論一些 UI 層事件,例如*ButtonClickedEvent* ,而是討論領域事件,它們是業務領域的一部分,並由業務專家說出和理解。這些領域事件是一流的概念,並提供了一種形成所有參與者(領域專家、開發人員…)都同意的[通用語言的](https://martinfowler.com/bliki/UbiquitousLanguage.html)好方法。 用於跨界通訊的領域事件 =========== 領域事件可用於促進有界上下文之間的溝通。假設我們有一家具有三個限界上下文的線上商店:訂單、交貨、發票。 訂單上下文的網域事件是*訂單已接受*。發票和交付上下文對此事件的發生感興趣,因為它會導致一些內部流程啟動。 脫鉤神話 ==== 使用領域事件可以幫助您開發解耦的模組。模組可能會暫時離線。領域事件不關心不可用的模組,它們描述過去發生的事情。這取決於其他模組處理事件的速度。您得到的是一個設計上具有彈性的系統。 除了時間解耦之外,領域事件還具有另一個優勢,至少乍看之下是這樣: Order 上下文不必知道 Invoice 和 Delivery 上下文會偵聽其事件。實際上它甚至不需要知道這些上下文的存在。 這很酷,但具有挑戰性的部分是事件負載。哪些資料放入事件中? 簡單的答案:事件溯源! =========== 事件很有用,所以為什麼不賦予它們盡可能多的權力(和責任)。這就是[事件溯源](https://microservices.io/patterns/data/event-sourcing.html)的基本思想。您不會透過更新資料 (CRUD) 而是透過套用事件流來儲存聚合的狀態。 除了您可以重播事件以重建應用程式狀態之外,事件來源的一個重要功能是您可以免費獲得完整且可靠的審核日誌。因此,當需要這樣的稽核日誌時,在評估持久性策略時一定要考慮事件溯源。 事件溯源只是一種持久性策略嗎? =============== 您可能想知道為什麼我從領域事件直接轉向持久化策略,因為這些概念顯然適用於不同的層/抽象層級。 ……這就是我的觀點:事件溯源是由單一限界上下文做出的本地決策!這些事件不該向外界曝光!其他限界上下文則不知道彼此的持久化策略,因此它們不知道也不關心另一個限界上下文是否使用事件溯源。 如果您在全球範圍內使用事件溯源,則會暴露您的持久層。 您的持久性將成為您的公共 API。每次限界上下文調整其持久性資料時,我們都必須處理公共 API 變更。 我很確定每個人都同意,由於開發和執行時耦合,不同的限界上下文[共享(關係)資料庫中的資料](https://microservices.io/patterns/data/shared-database.html)是一個壞主意。但差別在哪裡呢? 空無一人。我們是否共享事件或資料庫表並不重要。在這兩種情況下,我們都會分享持久性詳細資訊。 有出路 === 我仍然認為領域事件非常適合限界上下文之間的通信,但這些事件不應與用於事件溯源的事件相對應。 我提出的解決方案是合乎邏輯的結果:無論您使用 CRUD 還是事件溯源方法來實現持久性,您都可以將領域事件發佈到全域事件儲存。這些領域事件是有界上下文的公共 API。如果您喜歡在限界上下文中使用事件溯源,則可以將這些事件儲存在本機事件儲存中,該儲存只能從此限界上下文存取 選擇的自由 ===== 在公共 API 中擁有專用領域事件可讓您決定如何對這些事件建模。您不受事件來源事件預先定義的佈局的限制。 對於每次發生的“現實世界事件”,您有兩個選擇: 使用已發布語言的開放主機服務 -------------- 準確發布一個網域事件,其中包含其他限界上下文可能需要的所有資料。在 DDD 術語中,我們將其稱為具有已發布語言的開放主機服務。 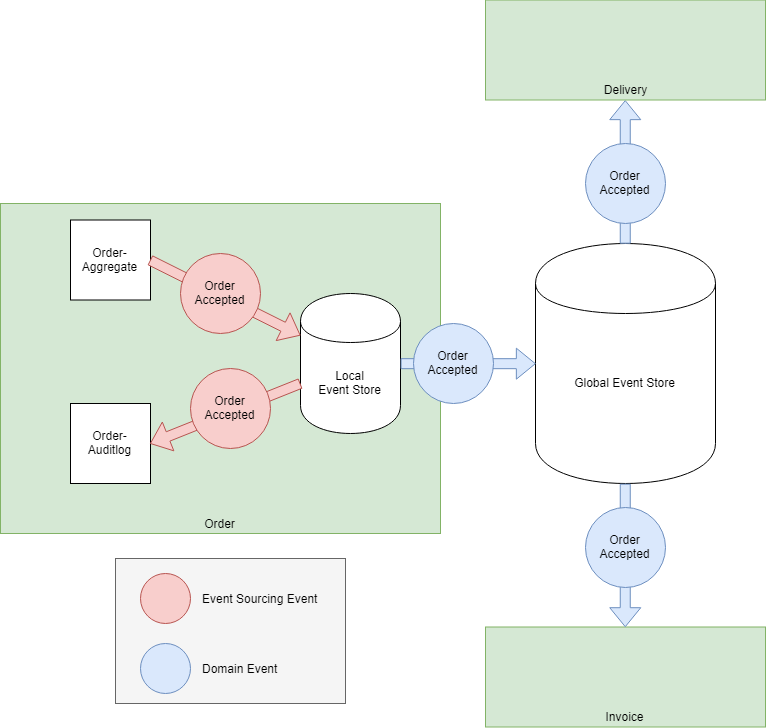 現實世界事件*Order Accepted*的發生會導致發布一個網域事件*OrderAccepted* 。此事件的有效負載包含 Order 期望其他限界上下文感興趣的所有資料...因此希望 Invoice 和 Delivery 上下文找到它們所需的所有資訊。 客戶/供應商 ------ 發布多個專用領域事件,每個事件使用者一個。您必須與另一方(消費者)討論每個特定的領域事件,而不必定義共享模型。 DDD 將這種關係稱為客戶/供應商。  現實世界事件*Order Accepted*的發生會導致每個消費限界上下文發布一個網域事件: *InvoiceOrderAccepted*和*DeliveryOrderAccepted* 。每個領域事件都包含消費上下文所請求的資料。 我不想討論這兩種選擇的優缺點。我只是想強調一下,您可以自由選擇領域事件的數量及其有效負載。 這是您不應低估的巨大優勢,因為您可以決定如何發展有界上下文的 API,而不必致力於事件溯源所需的事件。 結論 == 向外界公開持久性細節是一種眾所周知的反模式。在談論持久性時,我們首先想到的是資料庫表,但我解釋了為什麼用於事件來源的事件只是持久性資料的另一種方式。因此,暴露這些事件也是一種反模式。 {% 推特 784691906005635072 %} 如果以適當的(本地)方式使用事件溯源,它會非常強大。乍一看,它似乎是事件驅動架構的靈丹妙藥,但如果您深入研究,您會意識到它可能會引導您進入緊密耦合(分散式)系統……當然,這不是您的目標。 參考 == 除了我的個人經驗之外,我還從不同的摘要和會議演講中獲得了許多靈感。我想重點介紹 Eberhard Wolff 的演講《*基於事件的架構以及使用 Kafka 和 Atom 的實現》* 。特別是[事件溯源](https://youtu.be/Ecg7lvvm8aU?t=1178)和[事件中有什麼?](https://youtu.be/Ecg7lvvm8aU?t=655)與本博文的上下文高度相關。我選擇的線上商店範例是受到這次演講的啟發。 如果您想獲取更多訊息,還可以查閱其他一些資源: - [領域事件與事件溯源,](https://www.innoq.com/en/blog/domain-events-versus-event-sourcing/)作者:Christian Stettler,部落格文章 - [關於事件溯源,他們沒有告訴您的事情](https://medium.com/@hugo.oliveira.rocha/what-they-dont-tell-you-about-event-sourcing-6afc23c69e9a)由 Hugo Rocha 撰寫,部落格文章 - [DDD、CQRS、事件溯源的十年(CQRS/ES 不是頂級架構),](https://youtu.be/LDW0QWie21s?t=1259)作者:Greg Young,會議演講 --- 原文出處:https://dev.to/olibutzki/why-event-sourcing-is-a-microservice-anti-pattern-3mcj
[本·羅戈揚](https://www.linkedin.com/in/benjaminrogojan/) 軟體工程面試與其他技術面試一樣,需要充分的準備。有許多主題需要涵蓋,以確保您準備好應對有關演算法、資料結構、設計、最佳化以及不斷增長的主題的連續問題。 因此,我在最後一輪面試中建立了一個清單,涵蓋了許多熱門話題。 為了幫助您追蹤進度,我們針對下面列出的相同問題編制了一份全面的清單; [該列表可以在這裡找到](https://docs.google.com/spreadsheets/d/19hSRrL4l3gRiJ5ucH9q4iwFo2QHgic9gGMNUrcn1mm0/edit?usp=sharing)。 ### **聆聽經典熱身** 1. [fizzbuzz](https://www.hackerrank.com/challenges/fizzbuzz/problem) 2. [子陣列和等於 K](https://leetcode.com/problems/subarray-sum-equals-k/) 3. [陣列:左旋轉](https://www.hackerrank.com/challenges/ctci-array-left-rotation/problem?h_l=interview&playlist_slugs%5B%5D=interview-preparation-kit&playlist_slugs%5B%5D=arrays) 4. [字串:製作字謎詞](https://www.hackerrank.com/challenges/ctci-making-anagrams/problem?h_l=interview&playlist_slugs%5B%5D=interview-preparation-kit&playlist_slugs%5B%5D=strings) 5. [第 N 次斐波那契數](https://www.algoexpert.io/questions/Nth%20Fibonacci) 你怎麼做的?花點時間對這些經典作品進行評價。我們在面試過程中的某個時刻被問到了其中大部分問題,而且通常是在早期就被問到的淘汰式問題。它們通常與演算法和資料結構關係不大,但仍然需要對循環和陣列有很好的理解(是的,陣列是一種資料結構)。 ### **演算法和資料結構** #### **預習問題** 在觀看有關資料結構和演算法的影片內容之前,請考慮嘗試以下這些問題。看看你能否回答他們。這將幫助您知道要關注什麼。 1. [985. 查詢後偶數之和](https://leetcode.com/problems/sum-of-even-numbers-after-queries/) 2. [657. 機器人回歸原點](https://leetcode.com/problems/robot-return-to-origin/) 3. [961. 2N 陣列中的 N 重複元素](https://leetcode.com/problems/n-repeated-element-in-size-2n-array/) 4. [110.平衡二元樹](https://leetcode.com/problems/balanced-binary-tree/) 5. [3. 最長無重複字元的子字串](https://leetcode.com/problems/longest-substring-without-repeating-characters/) 6. [19. 從清單結尾刪除第 N 個節點](https://leetcode.com/problems/remove-nth-node-from-end-of-list/) 7. [23. 合併 k 個排序列表](https://leetcode.com/problems/merge-k-sorted-lists/) 8. [31. 下一個排列](https://leetcode.com/problems/next-permutation/) ### 演算法和資料結構影片 #### 資料結構  1. [資料結構與演算法 #1 --- 什麼是資料結構?](https://www.youtube.com/watch?v=bum_19loj9A) --- 影片 2. [多調光](https://archive.org/details/0102WhatYouShouldKnow/02_05-multidimensionalArrays.mp4)--- 影片 3. [動態陣列](https://www.coursera.org/learn/data-structures/lecture/EwbnV/dynamic-arrays)[ ](https://archive.org/details/0102WhatYouShouldKnow/03_01-resizableArrays.mp4)--- 影片 4. [調整陣列大小](https://archive.org/details/0102WhatYouShouldKnow/03_01-resizableArrays.mp4)--- 影片 5. [資料結構:鍊錶](https://youtu.be/njTh_OwMljA)--- 影片 6. [核心鍊錶與陣列](https://www.coursera.org/learn/data-structures-optimizing-performance/lecture/rjBs9/core-linked-lists-vs-arrays)--- 影片 7. [指針到指針](https://www.eskimo.com/~scs/cclass/int/sx8.html)[ ](https://archive.org/details/0102WhatYouShouldKnow/03_01-resizableArrays.mp4)--- 影片 8. [資料結構:樹](https://youtu.be/oSWTXtMglKE)[ ](https://archive.org/details/0102WhatYouShouldKnow/03_01-resizableArrays.mp4)--- 影片 9. [資料結構:堆](https://youtu.be/t0Cq6tVNRBA)[ ](https://archive.org/details/0102WhatYouShouldKnow/03_01-resizableArrays.mp4)--- 影片 10. [資料結構:哈希表](https://youtu.be/shs0KM3wKv8)[ ](https://archive.org/details/0102WhatYouShouldKnow/03_01-resizableArrays.mp4)--- 影片 11. [電話簿問題](https://www.coursera.org/learn/data-structures/lecture/NYZZP/phone-book-problem)---影片 12. [資料結構:堆疊和佇列](https://youtu.be/wjI1WNcIntg)[ ](https://archive.org/details/0102WhatYouShouldKnow/03_01-resizableArrays.mp4)--- 影片 13. [使用堆疊後進先出](https://archive.org/details/0102WhatYouShouldKnow/05_01-usingStacksForLast-inFirst-out.mp4)--- 影片 14. [資料結構:計算機科學速成課程#14](https://youtu.be/DuDz6B4cqVc)[ ](https://archive.org/details/0102WhatYouShouldKnow/03_01-resizableArrays.mp4)--- 影片 15. [資料結構:嘗試](https://www.youtube.com/watch?v=zIjfhVPRZCg)[ ](https://archive.org/details/0102WhatYouShouldKnow/03_01-resizableArrays.mp4)--- 影片 #### 演算法  1. [演算法:圖搜尋、DFS 和 BFS](https://www.youtube.com/watch?v=zaBhtODEL0w&list=PLX6IKgS15Ue02WDPRCmYKuZicQHit9kFt)[ ](https://archive.org/details/0102WhatYouShouldKnow/03_01-resizableArrays.mp4)--- 影片 2. [BFS(廣度優先搜尋)和DFS(深度優先搜尋)](https://www.youtube.com/watch?v=uWL6FJhq5fM) --- 影片 3. [演算法:二分查找](https://youtu.be/P3YID7liBug)---影片 4. [二元搜尋樹回顧](https://www.youtube.com/watch?v=x6At0nzX92o&index=1&list=PLA5Lqm4uh9Bbq-E0ZnqTIa8LRaL77ica6)--- 影片 5. [用於面試的 Python 演算法](https://www.youtube.com/watch?v=p65AHm9MX80)[ ](https://archive.org/details/0102WhatYouShouldKnow/03_01-resizableArrays.mp4)--- 影片 6. [演算法:遞歸](https://youtu.be/KEEKn7Me-ms)---影片 7. [演算法:冒泡排序](https://youtu.be/6Gv8vg0kcHc)--- 影片 8. [演算法:歸併排序](https://youtu.be/KF2j-9iSf4Q)--- 影片 9. [演算法:快速排序](https://youtu.be/SLauY6PpjW4)---影片 ### **大 O 表示法** 1. [大 O 表示法與時間複雜度簡介(資料結構與演算法 #7)](https://www.youtube.com/watch?v=D6xkbGLQesk) --- 影片 2. [哈佛 CS50 --- 漸近符號](https://www.youtube.com/watch?v=iOq5kSKqeR4)--- 影片 3. [演算法複雜度分析的簡單介紹](http://discrete.gr/complexity/)--- Post 4. [備忘錄](http://bigocheatsheet.com/)--- 帖子 ### **動態規劃** 1. [動態規劃(像程式設計師一樣思考)---影片](https://www.youtube.com/watch?v=iv_yHjmkv4I) 2. [演算法:記憶化與動態規劃 --- 影片](https://www.youtube.com/watch?v=P8Xa2BitN3I&t=13s) 3. 6 [.006:動態規劃 I:斐波那契、最短路徑 --- 影片](https://www.youtube.com/watch?v=OQ5jsbhAv_M&t=7s) 4. [6.006:動態規劃 II:文字對齊、二十一點 --- 影片](https://www.youtube.com/watch?v=ENyox7kNKeY&t=4s) 5. [動態規劃 --- 帖子](https://www.topcoder.com/community/competitive-programming/tutorials/dynamic-programming-from-novice-to-advanced/) ### **字串操作** 1. [編碼面試問答:最長的連續字元](https://www.youtube.com/watch?v=qRNB8CV3_LU)--- 影片 2. [Sedgewick --- 子字串搜尋](https://www.coursera.org/learn/algorithms-part2/home/week/4)--- 影片 #### 面試問題演練 1. [谷歌編碼面試 --- 普世價值樹問題](https://www.youtube.com/watch?v=7HgsS8bRvjo)--- 影片 2. [Google 編碼面試問題和答案 #1:第一個重複出現的字元](https://www.youtube.com/watch?v=GJdiM-muYqc)--- 影片 3. [在二元搜尋樹中找到最小和最大元素](https://www.youtube.com/watch?v=Ut90klNN264&index=30&list=PL2_aWCzGMAwI3W_JlcBbtYTwiQSsOTa6P)--- 影片 4. [求二元樹的高度](https://www.youtube.com/watch?v=_pnqMz5nrRs&list=PL2_aWCzGMAwI3W_JlcBbtYTwiQSsOTa6P&index=31)--- 影片 5. [檢查二元樹是否為二元搜尋樹](https://www.youtube.com/watch?v=yEwSGhSsT0U&index=35&list=PL2_aWCzGMAwI3W_JlcBbtYTwiQSsOTa6P)--- 影片 6. [什麼是尾遞歸?為什麼這麼糟?](https://www.quora.com/What-is-tail-recursion-Why-is-it-so-bad) --- 影片 ### **學後問題** 現在您已經學習了一些,並觀看了一些影片,讓我們嘗試更多問題! 1. [越大越好](https://www.hackerrank.com/challenges/bigger-is-greater/problem) 2. [6.之字折線轉換](https://leetcode.com/problems/zigzag-conversion/) 3. [7. 反轉整數](https://leetcode.com/problems/reverse-integer/) 4. [40. 組合和 II](https://leetcode.com/problems/combination-sum-ii/) 5. [43. 字串相乘](https://leetcode.com/problems/multiply-strings/) 6. [拉里的陣列](https://www.hackerrank.com/challenges/larrys-array/problem) 7. [短回文](https://www.hackerrank.com/challenges/short-palindrome/problem) 8. [65. 有效號碼](https://leetcode.com/problems/valid-number/) 9. [越大越好](https://www.hackerrank.com/challenges/bigger-is-greater/problem) 10. [完整計數排序](https://www.hackerrank.com/challenges/countingsort4/problem) 11. [莉莉的家庭作業](https://www.hackerrank.com/challenges/lilys-homework/problem) 12. [普通孩子](https://www.hackerrank.com/challenges/common-child/problem) 13. [459. 重複子字串模式](https://leetcode.com/problems/repeated-substring-pattern/) 14. [27. 刪除元素](https://leetcode.com/problems/remove-element/) 15. [450. 刪除 BST 中的節點](https://leetcode.com/problems/delete-node-in-a-bst/) 16. [659. 將陣列分割成連續的子序列](https://leetcode.com/problems/split-array-into-consecutive-subsequences/) 17. [最大值有界的子陣列數](https://leetcode.com/problems/number-of-subarrays-with-bounded-maximum) 18. [組合和 IV](https://leetcode.com/problems/combination-sum-iv) 19. [買賣股票的最佳時機(有冷卻時間)](https://leetcode.com/problems/best-time-to-buy-and-sell-stock-with-cooldown) 20. [最長重複字元替換](https://leetcode.com/problems/longest-repeating-character-replacement) 21. [成對交換節點](https://leetcode.com/problems/swap-nodes-in-pairs) 22. [二元樹右側視圖](https://leetcode.com/problems/binary-tree-right-side-view) 23. [展平嵌套列表迭代器](https://leetcode.com/problems/flatten-nested-list-iterator) 24. [二元樹層次順序遍歷](https://leetcode.com/problems/binary-tree-level-order-traversal) 25. [二元搜尋樹迭代器](https://leetcode.com/problems/binary-search-tree-iterator) 26. [對鏈最大長度](https://leetcode.com/problems/maximum-length-of-pair-chain) 27. [將鍊錶拆分為多個部分](https://leetcode.com/problems/split-linked-list-in-parts) ### **操作性程式設計問題** 有些公司不會問你演算法問題。相反,他們可能會更專注於實施和營運問題。這些通常更小眾,涉及實際問題,例如循環資料和執行某種任務。這些類型的問題通常不需要太多練習,因為更多的是了解陣列和 HashMap 等基本概念並追蹤您對它們所做的事情。 1. [袋鼠問題](https://www.hackerrank.com/challenges/kangaroo/problem) 2. [打破記錄](https://www.hackerrank.com/challenges/breaking-best-and-worst-records/problem) 3. [查找字串](https://www.hackerrank.com/challenges/find-a-string/problem)[迭代器](https://www.hackerrank.com/challenges/itertools-permutations/problem) 4. [不知道!](https://www.hackerrank.com/challenges/no-idea/problem) 5. [程式設計師的日子](https://www.hackerrank.com/challenges/day-of-the-programmer/problem) 6. [排行榜](https://www.hackerrank.com/challenges/climbing-the-leaderboard/problem) 7. [詞序](https://www.hackerrank.com/challenges/word-order/problem) 8. [夏洛克和方塊](https://www.hackerrank.com/challenges/sherlock-and-squares/problem) 9. [均衡陣列](https://www.hackerrank.com/challenges/equality-in-a-array/problem) 10. [蘋果和橘子](https://www.hackerrank.com/challenges/apple-and-orange/problem) 11. [更多操作風格問題](https://www.hackerrank.com/domains/python) ### **系統設計影片** 系統設計問題是至關重要的問題,表明您不僅僅是一名編碼員。身為工程師,您需要能夠思考大局。某些服務屬於哪裡,您需要什麼樣的伺服器,您將如何管理流量等等。所有這些想法都表明您能夠設計軟體,而不僅僅是編寫人們告訴您編寫的程式碼。 1. [停車場系統](https://youtu.be/DSGsa0pu8-k)---影片 2. [什麼是應用程式](https://www.youtube.com/watch?v=vvhC64hQZMk)--- 影片 3. [優步設計](https://youtu.be/umWABit-wbk)---影片 4. [Instagram](https://www.youtube.com/watch?v=QmX2NPkJTKg) --- 影片 5. [Tinder 服務](https://www.youtube.com/watch?v=xQnIN9bW0og)--- 影片 ### **作業系統** 作業系統問題比較少見,但是對執行緒、調度、記憶體等概念有紮實的理解是有好處的,即使只是基本的理解。當被問到進程和線程有什麼區別而不知道答案時,這是非常尷尬的。 1. [常見作業系統面試問題](https://www.geeksforgeeks.org/commonly-asked-operating-systems-interview-questions-set-1/) 2. [什麼是翻譯後備緩衝區?](https://www.geeksforgeeks.org/operating-system-translation-lookaside-buffer-tlb/) 3. [為什麼循環法可以避免優先反轉問題?](https://leetcode.com/discuss/interview-question/operating-system/220604/Why-does-Round-Robin-avoid-the-Priority-Inversion-Problem) 4. [中斷與系統呼叫---檔案系統中的「inode」是什麼?](https://leetcode.com/discuss/interview-question/operating-system/124838/Interrupt-Vs-System-Call) 5. [作業系統面試題目及答案 --- 第一部分](https://www.youtube.com/watch?v=b18X4uOKjHs) 6. [什麼是內核 --- Gary 解釋](https://www.youtube.com/watch?v=mycVSMyShk8) 7. [循環演算法教程(CPU調度)](https://www.youtube.com/watch?v=aWlQYllBZDs) 8. [LRU 快取的魔力(Google 開發 100 天)](https://www.youtube.com/watch?v=R5ON3iwx78M) --- 影片 9. [MIT 6.004 L15:記憶體層次結構](https://www.youtube.com/watch?v=vjYF_fAZI5E&list=PLrRW1w6CGAcXbMtDFj205vALOGmiRc82-&index=24)--- 影片 10. [中斷](https://www.youtube.com/watch?v=uFKi2-J-6II&list=PLCiOXwirraUCBE9i_ukL8_Kfg6XNv7Se8&index=3)---影片 11. [調度](https://www.youtube.com/watch?v=-Gu5mYdKbu4&index=4&list=PLCiOXwirraUCBE9i_ukL8_Kfg6XNv7Se8)---影片 ### **執行緒數**  1. [用戶級線程與內核級線程](https://leetcode.com/discuss/interview-question/operating-system/124631/User-Level-thread-Vs-Kernel-Level-thread) 2. [行程和線程簡介](https://www.youtube.com/watch?v=exbKr6fnoUw)--- 影片 3. [進程和線程之間的區別 --- 佐治亞理工學院 --- 高級操作系統](https://www.youtube.com/watch?v=O3EyzlZxx3g&t=11s)--- 影片 4. [分叉和多線程之間的區別](https://leetcode.com/discuss/interview-question/operating-system/125024/Difference-between-forking-and-multithreading) ### **物件導向**  與作業系統類似,並不是每次面試都會問你有關物件導向程式設計的問題,但你永遠不知道。您需要確保記住計算機 162 課程中的基礎知識。 1. [Java 程式設計教學 --- 49 --- 繼承](https://www.youtube.com/watch?v=9JpNY-XAseg)--- 影片 2. [Java 程式設計教學 --- 55 --- 多態性簡介](https://www.youtube.com/watch?v=0xw06loTm1k)--- 影片 3. [Java 程式設計教學 --- 58 --- 抽象類別與具體類別](https://www.youtube.com/watch?v=TyPNvt6Zg8c)--- 影片 4. [Java 程式設計教學 --- 57 --- 重寫規則](https://www.youtube.com/watch?v=zN9pKULyoj4&t=3s)--- 影片 5. [Java 程式設計教學 --- 59 --- 保存物件的類](https://www.youtube.com/watch?v=slY5Ag7IjM0) 6. [物件導向程式設計](https://www.youtube.com/watch?v=lbXsrHGhBAU)---影片 ### **設計模式** 如果您像我們一樣,我們不會被教導所有各種設計模式。因此,最好了解它們的工作原理以及使用它們的原因。一些面試問題可以很簡單,例如“為什麼要使用工廠類?” 1. [工廠設計模式](https://www.youtube.com/watch?v=ub0DXaeV6hA)---影片 2. [觀察者設計模式](https://youtu.be/wiQdrH2YpT4)---影片 3. [適配器設計模式](https://www.youtube.com/watch?v=qG286LQM6BU&list=PLF206E906175C7E07&index=13)---影片 4. [立面設計模式](https://www.youtube.com/watch?v=B1Y8fcYrz5o&list=PLF206E906175C7E07&index=14)---影片 5. [責任鏈設計模式](https://www.youtube.com/watch?v=jDX6x8qmjbA&list=PLF206E906175C7E07&index=22)---影片 6. [解譯器設計模式](https://www.youtube.com/watch?v=6CVymSJQuJE&list=PLF206E906175C7E07&index=23)---影片 7. [單例設計模式教學](https://www.youtube.com/watch?v=NZaXM67fxbs&list=PLF206E906175C7E07&index=7)--- 影片 8. [第 6 章(第 1 部分)--- 模式(影片)](https://youtu.be/LAP2A80Ajrg?list=PLJ9pm_Rc9HesnkwKlal_buSIHA-jTZMpO&t=3344) --- 影片 9. [Head First 設計模式](https://www.amazon.com/Head-First-Design-Patterns-Freeman/dp/0596007124)--- 影片 ### SQL 這是最後一節。你們中的許多人可能不會被問到那麼多 SQL 問題。不過,我始終認為放在後口袋是件好事。 #### SQL --- 問題 1. [262. 行程和用戶](https://leetcode.com/problems/trips-and-users/) 2. [601. 體育場人流量](https://leetcode.com/problems/human-traffic-of-stadium/) 3. [185. 部門前三薪資](https://leetcode.com/problems/department-top-three-salaries/) 4. [626.交換席位](https://leetcode.com/problems/exchange-seats/) 5. [駭客排名報告](https://www.hackerrank.com/challenges/the-report/problem) 6. [177.第N最高薪水](https://leetcode.com/problems/nth-highest-salary/) 7. [對稱對](https://www.hackerrank.com/challenges/symmetric-pairs/problem) 8. [職業](https://www.hackerrank.com/challenges/placements/problem)[安置](https://www.hackerrank.com/challenges/occupations/problem) 9. [奧利凡德的庫存](https://www.hackerrank.com/challenges/harry-potter-and-wands/problem) #### SQL --- 影片 1. [IQ15:6 個 SQL 查詢面試問題](https://www.youtube.com/watch?v=uAWWhEA57bE)--- 影片 2. [了解 ROW\_NUMBER 和分析函數](https://www.youtube.com/watch?v=QFj-hZi8MKk)--- 影片 3. [分析函數的高級實現](https://www.youtube.com/watch?v=G3kYPzLWtpo&t=4s)--- 影片 4. [分析函數的高級實現第 2 部分](https://www.youtube.com/watch?v=XecU6Ieyu-4&t=54s)--- 影片 5. [聰明的貓頭鷹 SQL 影片](https://www.youtube.com/watch?v=2-1XQHAgDsM&list=PL6EDEB03D20332309)--- 影片 #### SQL 後問題 1. [二元樹節點](https://www.hackerrank.com/challenges/binary-search-tree-1/problem) 2. [氣象觀測站 18](https://www.hackerrank.com/challenges/weather-observation-station-18/problem) 3. [挑戰](https://www.hackerrank.com/challenges/challenges/problem)[列印素數](https://www.hackerrank.com/challenges/print-prime-numbers/problem) 4. [595.大國](https://leetcode.com/problems/big-countries/) 5. [626.交換席位](https://leetcode.com/problems/exchange-seats/) 6. [SQL 面試問題:3 個技術篩選練習(針對資料分析師)](https://data36.com/sql-interview-questions-tech-screening-data-analysts/) 面試可能會很困難,因為你會覺得自己沒有任何進展。擁有本學習指南將幫助您追蹤您的進度並讓您更好地了解自己的表現! 祝你好運! 另外,如果您想閱讀/觀看更多精彩的貼文或影片: [在 SaturnCloud 上使用 Jupyter Notebook 連接到大查詢第 2 部分](https://www.youtube.com/watch?v=O1cBN5gJtdw&t=15s) [身為資料科學家你應該閱讀的三本書](https://www.coriers.com/three-books-you-must-read-if-you-want-a-career-as-a-data-scientist/) [Hadoop 與關聯式資料庫](http://www.acheronanalytics.com/acheron-blog/hadoop-vs-relational-databases) [算法如何變得不道德和有偏見](http://www.acheronanalytics.com/acheron-blog/how-do-machines-learn-bias-data-science) [如何改善資料驅動策略](http://www.acheronanalytics.com/acheron-blog/how-to-improve-your-data-driven-strategy) [如何開發穩健演算法](https://medium.com/better-programming/how-to-develop-a-robust-algorithm-c38e08f32201) [資料科學家必須具備的 4 項技能](https://www.theseattledataguy.com/4-skills-data-scientist-must-have/) [SQL 最佳實踐 - 設計 ETL 影片](http://www.acheronanalytics.com/acheron-blog/sql-best-practices-designing-an-etl-video) --- 原文出處:https://dev.to/seattledataguy/the-interview-study-guide-for-software-engineers-764
--- 標題:讓我們加密:使用 Certbot 的通配符憑證 發表:真實 說明:Let's Encrypt 使用 DNS-01 質詢透過 ACMEv2 支援通配符憑證,該質詢於 2018 年 3 月 13 日開始。其用戶端 Certbot 提供 --manual 選項來執行此操作。我寫瞭如何使用 Certbot 產生通配符憑證。 標籤: LetsEncrypt、 certbot、 憑證、 安全 封面圖片:https://thepracticaldev.s3.amazonaws.com/i/wxi7s3zr664nv3u5d2ig.jpg 系列:OpenBSD TLS 連接 --- *\* 封面圖片最初由 [OpenClipart-Vectors](https://pixabay.com/users/OpenClipart-Vectors-30363/) 製作並經過精心編輯。* --- ## 介紹 [Let's Encrypt](https://letsencrypt.org/) 透過 ACMEv2 支援[通配符憑證](https://letsencrypt.org/docs/faq/#does-let-s-encrypt-issue-wildcard-certificates) [ DNS-01 挑戰](https://letsencrypt.org/docs/challenge-types/#dns-01-challenge),[於2018 年3 月13 日開始](https://letsencrypt.org/2017/ 07 /06/wildcard-certificates-coming-jan-2018.html)。 [Certbot](https://certbot.eff.org/),其客戶端,提供「--manual」選項來[執行](https://certbot.eff.org/faq/#does-let- s -加密-頒發-通配符-憑證)。 我真誠地感謝他們。 我寫瞭如何使用 Certbot 產生通配符憑證。 這是一個非常簡單的任務:) 此外,所需要做的就是將 Certbot 指定的 TXT 記錄新增至 DNS 伺服器。 \* 注意:[有必要每 90 天更新一次 Let's Encrypt 的憑證](https://letsencrypt.org/docs/faq/#what-is-the-lifetime-for-let-s-encrypt-certificates- for -how-long-are-they-valid),[每次續約時都需要新的TXT 記錄](https://community.letsencrypt.org/t/how-to-renew-wildcard-cert-with- cert -機器人自動/60723)。 ## 身體 #### 環境 - [OpenBSD](https://www.openbsd.org/): [6.5](https://www.openbsd.org/65.html) - 憑證機器人:0.32.0 #### 教程 命令是這樣的: ``` # certbot certonly --manual --preferred-challenges dns --server https://acme-v02.api.letsencrypt.org/directory --manual-public-ip-logging-ok -d '*.<your.domain>' -d <your.domain> ``` 確保引用 `*.<your.domain>` 以避免錯誤「未找到符合專案:*.\<your.domain\>」。 *\* 注意:`-d *.<your.domain>` 和 `-d <your.domain>` 的順序似乎不重要。* 以下是「certonly」選項與單一憑證的比較: ``` - --webroot -w <dir-path> + --manual --preferred-challenges dns --server https://acme-v02.api.letsencrypt.org/directory --manual-public-ip-logging-ok ``` 此外,其命令列選項的詳細資訊請參閱[此處](https://certbot.eff.org/docs/using.html#certbot-command-line-options)。 然後,命令回覆: ``` Saving debug log to /var/log/letsencrypt/letsencrypt.log Plugins selected: Authenticator manual, Installer None Obtaining a new certificate Performing the following challenges: dns-01 challenge for <your.domain> - - - - - - - - - - - - - - - - - - - - - - - - - - - - - - - - - - - - - - - - Please deploy a DNS TXT record under the name _acme-challenge.<your.domain> with the following value: <acme-challenge-value> Before continuing, verify the record is deployed. - - - - - - - - - - - - - - - - - - - - - - - - - - - - - - - - - - - - - - - - Press Enter to Continue ``` 配置 DNS 伺服器以將記錄新增至您的網域。 記錄是這樣的: |哪裡 |什麼 | | -----| --- | |類型 |文字 | |名稱 | `_acme-挑戰` | |價值| \<acme-challenge-value\> 指令顯示如上 | *\* 注意:您可能會在這裡等待一段時間以進行 DNS 傳播。* 然後按 Enter 鍵。 ``` Waiting for verification... Cleaning up challenges IMPORTANT NOTES: - Congratulations! Your certificate and chain have been saved at: /etc/letsencrypt/live/<your.domain>/fullchain.pem Your key file has been saved at: /etc/letsencrypt/live/<your.domain>/privkey.pem Your cert will expire on 2019-08-01. To obtain a new or tweaked version of this certificate in the future, simply run certbot again. To non-interactively renew *all* of your certificates, run "certbot renew" - If you like Certbot, please consider supporting our work by: Donating to ISRG / Let's Encrypt: https://letsencrypt.org/donate Donating to EFF: https://eff.org/donate-le ``` 完畢 : ) ## 結論 因此,我獲得了通配符憑證並應用於我的幾台伺服器。 今天它運作良好,我的工作量減少了,安全性幾乎相同。 如果您正在尋找如何將 Let's Encrypt 的憑證應用到 OpenBSD httpd 伺服器,我在這裡寫道: {% 連結 nabbisen/lets-encrypt-certbot-for-openbsds-httpd-3ofd %} 感謝您的閱讀。 快樂安全。 --- 原文出處:https://dev.to/nabbisen/let-s-encrypt-wildcard-certificate-with-certbot-plo
> 本文主要讲解脚本文件加载失败时的处理,对于其他类型的文件加载错误时,解决方向大致一样 ## 背景 在我们开发网站应用时,我们可能会遇到脚本加载失败的情况,导致脚本加载失败的原因有很多,比如用户的网络问题、终端设备问题、用户浏览器版本等诸多因素。 ## 解决方案 在 JavaScript 中,我们可以创建一个监听来监听脚本加载失败的情况,然后针对加载失败的脚本进行重新加载。 重新加载的方案,一般是通过更换域名来解决。我们给每个脚本添加一个映射关系表,用来在加载失败时匹配新的域名进行重试。 具体的解决方案,下面我一步一步讲解,另外希望大家可以仔细阅读注释中的内容 ```html <!DOCTYPE html> <html lang="en"> <head> <meta charset="UTF-8" /> <meta name="viewport" content="width=device-width, initial-scale=1.0" /> <title>脚本加载失败如何重试</title> <script> window.addEventListener( "error", // 监听全局错误 function (e) { console.log(e); }, true // 由于脚本加载失败不会冒泡,所以我们要在捕获阶段进行监听 ); </script> </head> <body> <script src="https://www.zowlsat.com/api/1.js"></script> <script src="https://www.qqqqqqq.com/api/2.js"></script> <script src="https://www.zowlsat.com/api/3.js"></script> </body> </html> ``` 此时我们可以在浏览器控制台看到以下效果  但是这个监听方法会监听到很多其他的错误,我们只需要监听脚本加载失败的错误,所以我们要通过这个监听事件的参数 e 来判断了  根据上图我们可以发现,普通错误的类型是 ErrorEvent,而脚本加载失败的类型是 Event,并且他的 target 会指向 script 标签,所以我们根据这个区别过滤掉其他的错误,这样剩下的情况才是我们需要处理的。 ```js window.addEventListener( "error", function (e) { if (e.target.tagName !== "SCRIPT" || e instanceof ErrorEvent) return; console.log(e); }, true ); ``` 接下来就是如何来实现重新加载,我们先给需要重新加载的域名建立一个映射关系,用于替换映射关系表中的域名。然后就是挨个匹配,当还是加载失败时继续匹配下一个,直到成功为止。 ```js const domainList = ["www.aaaaa.com", "www.bbbbb.com", "www.zowlsat.com"]; const retry = {}; window.addEventListener( "error", function (e) { if (e.target.tagName !== "SCRIPT" || e instanceof ErrorEvent) return; // 创建一个URL对象 const url = new URL(e.target.src); // 获取文件路径 const key = url.pathname; // 假如映射表中没有这个文件路径,那么就初始化一个映射键 if (!(key in retry)) { retry[key] = 0; } // 假如匹配完整个映射表都没重新加载成功,则放弃 const index = retry[key]; if (index >= domainList.length) { return; } // 获取新的完整路径 const domain = domainList[index]; // 替换域名 url.host = domain; // 创建新的script标签 const script = document.createElement("script"); script.src = url.toString(); // 将新的script标签追加到加载失败的script标签之前 document.body.insertBefore(script, e.target); retry[key]++; }, true // 由于脚本加载失败不会冒泡,所以我们要在捕获阶段进行监听 ); ``` 到此为止,我们功能已经基本实现,效果如下图  但是有一个很关键的问题,就是假如我 2.js 这个文件中的内容,在 3.js 中要使用,那这样的话,2.js 就必须加载到 3.js 之前,否则就会报错。此时,我们就需要在 2.js 加载失败时,阻塞浏览器的解析,知道重新加载完成或者放弃重新加载时,再继续渲染之后的内容。 那这样的话我们该怎么做呢?🤔 其实很简单,在我们入门 js 时就学到过一个知识点,就是使用`document.write` `document.write`这个方法在解析期间使用的话,会阻塞浏览器的解析,而我们现在就是需要阻塞浏览器解析,那此时我们只需要将创建 script 标签的方法更换为`document.write`方法即可。 修改之后的代码如下: ```js const domainList = ["www.aaaaa.com", "www.bbbbb.com", "www.zowlsat.com"]; const retry = {}; window.addEventListener( "error", function (e) { if (e.target.tagName !== "SCRIPT" || e instanceof ErrorEvent) return; const url = new URL(e.target.src); const key = url.pathname; if (!(key in retry)) { retry[key] = 0; } const index = retry[key]; if (index >= domainList.length) { return; } const domain = domainList[index]; url.host = domain; // 此处加上转译是因为防止编译器识别script标签为结束标签报错 document.write(`\<script src="${url.toString()}">\<\/script>`); // const script = document.createElement("script"); // script.src = url.toString(); // document.body.insertBefore(script, e.target); retry[key]++; }, true ); ``` 现在我们再打开控制台查看,现在js文件按它原来的顺序执行了,这样既不会改变原有的代码逻辑,又可以在可控范围内进行重新加载。 效果如下图:  以上是简单实现了一个js文件重新加载错误的方案,其实这个方案也可以运用到其他很多类型的文件,不限于js文件。 然后我们还需要更加细化这个方法的话,我们可能还需要考虑到这个script标签是否带有`async`、`defer`等属性,还有诸多需要考虑的点,但是沿着这个方向解决的话,大体是没有问题的。
本文轉自:https://ithelp.ithome.com.tw/articles/10338948 ## 前情提要 資訊大爆炸。 有時候我們瀏覽技術文章,不一定真的是想學深奧的高級技術。 然而劣質低端的文章充斥著,則會降低我們學習的效率、甚至變成噪音與雜訊,干擾我們的思緒。 因此針對某些洗文或是質量很低的作者,我們必須列為思想犯, 否則會降低閱讀質量,平白浪費自己的時間、平台的版面、上網的電力、看到垃圾資訊的副作用等等.... ## 構思來源 如果有個思想審查警衛可以:**去除那些垃圾低端,稱不上技術文章的雜訊。** 以確保未來瀏覽文章的時候,不會再被洗文打擾, 也可以針對不喜歡的主題去封鎖,讓時間與精神更能專注於自己想要學的資訊。 阻止一些垃圾就是喜歡把自己尚未整理的白痴內容一直丟上來, 什麼都還不懂,把技術文章當成個人日記簿,寫一堆自我囈語、無病呻吟, 每天大量狂發文章,昭告天下以為這就是努力,欺騙自己也浪費別人的人生。 ## 「思想審查警衛」出動! ## 功能 1. 把頭像屏蔽 2. 加上思想通緝犯、紅字與刪除線 3. 新增封殺按鈕 4. 版面通知封殺名單與文章數 5. 透過ajax確認某id的最新ID ## 效果截圖  此截圖僅是腳本示範,跟其使用者無關, 本人沒有任何覺得此使用者發的文章是差勁的意味,我認為非常上進、值得學習。  此圖也只是隨機挑user使用,純粹作為範例用途,不代表我個人意見。 ## 腳本下載 https://greasyfork.org/zh-TW/scripts/477283-%E6%80%9D%E6%83%B3%E7%8A%AF%E5%B0%81%E6%AE%BA ## 原理說明 鄭重聲明,這個示範真的毫無任何私人意味,此腳本也只是針對不同的主題去隱藏, 例如我想學python就不想看到JS的文章,因此使用此工具幫忙隱藏罷了。 取名做思想警察、比喻成清除垃圾等都只是文學上的趣味。 請勿當真Ꮚ・ꈊ・Ꮚ 這次的技術可說比較難,認真難很多!但是趣味性以及功能性是無比的超越! 可以說幾乎是我寫系列文以來,最頂、最派的一篇! 不過很多觀念已經出現過,在【前端小試身手】系列裡面,每次的腳本都是主打實用, 因此cookie或localstorage這種技術當然都會運用到。 ## JS原始碼 ``` // ==UserScript== // @license MIT // @name 👮思想犯封殺 // @namespace http://tampermonkey.net/ // @version 0.1 // @description 把廢文製造機轟出去 // @author You // @match https://ithelp.ithome.com.tw/articles* // @match https://ithelp.ithome.com.tw/users/* // @icon https://www.google.com/s2/favicons?sz=64&domain=ithome.com.tw // @grant none // @run-at document-end // ==/UserScript== let URL = window.location.href; let ArticleSite = "https://ithelp.ithome.com.tw/articles?tab=tech" let UserSite = "https://ithelp.ithome.com.tw/users/" // 判斷URL的開頭部分 if (URL.startsWith(ArticleSite)) { //文章頁執行清理垃圾程序 CleanGarbage(); } else if (URL.startsWith(UserSite)) { UserCheck(); } else { console.log("這邊不執行腳本"); } // 餅乾儲存的機制函數------------------------------------------------- function setListInCookie(list) { document.cookie = 'myList=' + JSON.stringify(list) + '; expires=Wed, 31 Dec 2099 23:59:59 GMT;'; } // 從 Cookie 中獲取 list function getListFromCookie() { var cookieValue = document.cookie.replace(/(?:(?:^|.*;\s*)myList\s*\=\s*([^;]*).*$)|^.*$/, "$1"); return JSON.parse(cookieValue) || []; } function CleanGarbage(){ // 從本地存儲中獲取數據 var myListData = localStorage.getItem("myList"); // 解析數據到變量 list var list = myListData ? JSON.parse(myListData) : []; //list = getListFromCookie()||[]; // 儲存要刪除的字符串名單 // 找到所有CLASS是"qa-list__info-link"的<a>元素 var linkElements = document.querySelectorAll('.qa-list__info-link'); var removedCount = 0; // 初始化已清除的垃圾數量 for (var j = 0; j < list.length; j++) { // 遍歷這些<a>元素,確保文本內容包含"伍貳捌",然後刪除其父元素 for (var i = 0; i < linkElements.length; i++) { if (linkElements[i].textContent.includes(list[j])) { // 開始向上查找父元素 var parentElement = linkElements[i].parentElement; while (parentElement) { // 如果找到具有"classname"為"qa-list"的<div>元素,則刪除它 if (parentElement.classList.contains('qa-list')) { parentElement.remove(); removedCount++; // 增加清除的數量 console.warn('抓到"'+list[j]+'"這位思想犯'); break; // 找到並刪除後,結束循環 } parentElement = parentElement.parentElement; } } } if (removedCount>0){ // 顯示已清除的垃圾數量 console.log('已清除他的 ' + removedCount + ' 篇垃圾');} removedCount=0; } } //------------------------------------------------------- // 為了防止五百八改名,我們針對他的ID去ajax得到他最新的名稱 function FindBitch() { // 使用 Fetch API 獲取指定 URL 的內容 return fetch("https://ithelp.ithome.com.tw/users/20163468") .then(response => response.text()) .then(data => { // 創建一個臨時 div 元素以容納頁面內容 var tempDiv = document.createElement("div"); tempDiv.innerHTML = data; // 查找 class 為 "profile-header__name" 的元素 var profileNameElement = tempDiv.querySelector(".profile-header__name"); if (profileNameElement) { // 刪除元素內的所有 <span> 元素 var spanElements = profileNameElement.querySelectorAll("span"); spanElements.forEach(function(span) { span.remove(); }); // 讀取元素的文本內容,去掉前導和尾隨空格 var text = profileNameElement.textContent.trim(); // 返回處理後的文本內容 return text; } else { return "未找到元素"; } }) .catch(error => { console.error("發生錯誤: " + error); return "發生錯誤"; }); } //------------------------------------------------------- function UserCheck(){ //轉換資料從餅乾到localstorage var currentCookieValue = getCookie("myList"); // 2. 存儲數據到本地存儲 if (currentCookieValue) { var list = JSON.parse(currentCookieValue); // 存儲到本地存儲 localStorage.setItem("myList", JSON.stringify(list)); }else{ FindBitch() .then(text => { let FirstKill = [text]; setListInCookie(FirstKill); }) .catch(error => { console.error("找不到五百八:", error); }); } // 刪除不需要的ID document.querySelector('.profile-header__account').remove(); //封殺按鈕------------------------------------------------- // 找到具有class為"profile-header__right"的元素 var profileRightElement = document.querySelector('.profile-header__right'); var pullRightElement = profileRightElement.querySelector('.pull-right'); // 創建一個新按鈕元素 var BlockBtn = document.createElement('button'); BlockBtn.textContent = '封殺'; // 添加樣式和類名到按鈕 BlockBtn.style.marginTop = '10px'; BlockBtn.style.width = '100%'; BlockBtn.className = 'btn btn-trace trace_btn_border BlockBtn'; // 將按鈕元素添加到"pull-right"元素內部 pullRightElement.appendChild(BlockBtn); // 通緝犯名單的cookie------------------------------------------------ // 從 Cookie 中加載 list(例如,頁面加載時) list = getListFromCookie()||[]; let UserBlock = document.querySelector('.profile-header__name'); let text = UserBlock.textContent.trim(); // 如果使用者已經在封殺名單內的判斷,已存在或不存在 if (list.includes(text)) { BlockStart(BlockBtn); } else { // 針對封殺按鈕進行監聽事件 BlockBtn.addEventListener('click', function() { list.push(text); setListInCookie(list); //先加入到名單內,然後再執行封殺事件 BlockStart(); // 輸出到控制台 console.log('黑名單新增:' + text); //本地儲存機制----------------------------- let currentCookieValue = getCookie("myList"); let list2 = JSON.parse(currentCookieValue); // 存儲到本地存儲 localStorage.setItem("myList", JSON.stringify(list2)); }); } } // ------------------------------------------------ //封殺事件的函數 function BlockStart(){ let BlockBtn = document.querySelector('.BlockBtn'); BlockBtn.textContent = '已封殺'; BlockBtn.disabled = true; BadText(); BadImg(); } //封殺事件函數裡面的細項函數 function BadText(){ // 標記這傢夥是垃圾------------------------------------------------- let UserBlock = document.querySelector('.profile-header__name'); let newHeading = document.createElement('h1'); newHeading.textContent = '思想通緝犯'; // 把思想通緝犯這幾個大字加上去 UserBlock.parentElement.insertBefore(newHeading, UserBlock); UserBlock.style.textDecoration = "line-through"; UserBlock.style.color = "red"; } function BadImg(){ //圖片進行網點作業XD------------------------------------------------- var originalImage = document.querySelector('.profile-header__avatar'); // 創建一個包含交叉紅線的覆蓋層 <div> 元素 var overlayDiv = document.createElement('div'); overlayDiv.style.position = 'absolute'; overlayDiv.style.width = '150px'; overlayDiv.style.height = '150px'; overlayDiv.style.background = 'linear-gradient(45deg, black 50%, transparent 50%), linear-gradient(-45deg, black 50%, transparent 50%)'; overlayDiv.style.backgroundSize = '5px 5px, 5px 5px'; overlayDiv.style.backgroundPosition = '0 0, 0 2px'; // 將覆蓋層疊加到圖片上 originalImage.parentNode.appendChild(overlayDiv); // 設置覆蓋層的位置,以與原始圖像對齊 overlayDiv.style.top = originalImage.offsetTop + 'px'; overlayDiv.style.left = originalImage.offsetLeft + 'px'; // 設置覆蓋層的z-index,以確保它在圖片上方 overlayDiv.style.zIndex = '2'; } ``` ## 觀念筆記 這個腳本開發足足花了我一整個晚上,將近八小時之久。 有趣的是,其中為了進行測試才選某些user當作隱藏對象,否則腳本執行上會出錯。 細心的人若觀察原始碼,也會發現裡面有個firstKill, 那是必須要的段落,先設置好cookie的首要內容物,才有辦法繼續操作下去( ิ◕㉨◕ ิ) 也就是初始化的概念XD 另一個有趣的點是,為了防止使用者改名導致腳本出錯,我甚至不惜再寫一段ajax, 去更新一下ID,這樣不管人家怎麼改,都逃不了, 要改成「別抓我」也沒用,這個腳本都還是可以run。 ## 心得後記 我只能說這篇是自從「備份IT幫發文、一眼全覽」最強的JS教學文章! 超派,真的不騙( メ∀・) 有些人喜歡看前端小試身手,有些人喜歡前端動手玩創意; 其實這兩個系列的本質都是JS的教學,是可以互相連接的,但也有很多不同的重心。 這個系列就是以腳本為主,重點在於創意與發想,打到使用者痛點。 【前端動手玩創意】則是以建構網站為起點, 任何元素與概念都會變成網頁上的一部分,算是比較基礎工的建立。 如果對JS的強大感興趣,那麼可以把這兩個系列交互看,反覆的閱讀、實際動手操作, 這樣一來的學習非常踏實,甚至比YT學習都來的高效率、實際。 尤其此系列都是原創發想的腳本,當然超強! 喜歡記得關注,未來還有更多超酷的前端內容可以玩,下課⧸⎩⎠⎞͏(・∀・)⎛͏⎝⎭⧹
本文轉載自:https://ithelp.ithome.com.tw/articles/10338469 ## 前情提要 有時候,夜深人靜,總是會想要沉思人生的意義。 於是打開某個網站, 開始看一些只有長大了才能看的大人動作愛情學,必須好好鑽研, 此刻電影裡的聲響徹雲霄,你感覺無比尷尬..... 這時候就需要靜音神隊友。 可以自己加入網頁名單,讓小電影們先保持靜音,自己再手動開啟。 如此一來非常保險,絕對不讓你不小心爆音。 非常的有禮貌,人生的哲理更奧妙了。 ## 腳本下載  https://greasyfork.org/zh-TW/scripts/477196-%E9%9D%9C%E9%9F%B3%E5%B0%8F%E5%8A%A9%E6%89%8B ## JS程式碼 ``` // ==UserScript== // @name 靜音小助手 // @namespace http://tampermonkey.net/ // @version 0.1 // @description try to take over the world! // @author You // @match https://*/* // @icon https://www.google.com/s2/favicons?sz=64&domain=xvideos.com // @grant none // ==/UserScript== // 定義 JSON 資料,包含網址開頭 var jsonUrls = [ "https://www.xvideos.com/", "https://example.com/json2", // 添加更多的網址開頭 ]; // 取得當前網址 var currentUrl = window.location.href; // 檢查當前網址是否以 JSON 中的某些開頭開始 var isJsonUrl = jsonUrls.some(function(jsonUrl) { return currentUrl.startsWith(jsonUrl); }); // 如果當前網址符合 JSON 的某些開頭,執行程式碼 if (isJsonUrl) { // 在這裡放置你想要執行的程式碼 console.log("當前網址符合 JSON 開頭"); Mute(); } else { console.log("當前網址不符合 JSON 開頭"); } function Mute(){ // 取得網頁上所有的 <video> 元素 var videoElements = document.getElementsByTagName('video'); // 迭代所有的 <video> 元素並將其靜音 for (var i = 0; i < videoElements.length; i++) { videoElements[i].muted = true; } } ``` ## 觀念筆記 只能說,前端的東西往往越簡單,越強。 這次只是使用三個小觀念,都是超級基本的小小觀念,幼稚園等級。 ### 第一部分:使用陣列儲存網址 ``` // 定義 JSON 資料,包含網址開頭 var jsonUrls = [ "https://www.xvideos.com/", "https://example.com/json2", // 添加更多的網址開頭 ]; ``` 這部分就是把我們的資料儲存起來,可以自己新增訂義哪些網址要被匹配。 ### 第二部分:location的API 使用網址要確認網址,就是用location,這已經屢見不鮮。 另外字串的搜查,startsWith非常老舊卻也很無敵。 ### 第三部分:影片靜音API 很簡單,針對video元素muted就可以了,非常輕鬆! 簡直就像早餐吃鬆餅一樣,鬆。 ## 心得 很多人常常說前端,好難,JS好基八 我是覺得,關你屁事?/ᐠ。ꞈ。ᐟ\ 你會罵蛋餅為什麼要這麼蛋餅嗎,蛋餅之所以好吃就是因為它是蛋餅,不好吃也因為它是蛋餅。 JS的奇怪或是難懂,只是它的本質,在那邊靠北靠母的風氣真的很無聊。 要玩梗也可以多一點新的梗,而不是表面嘴皮耍耍。 它很機八,但也很強,這就是JS的厲害之處。 因此這個簡單實用的小腳本,又再次被我們秒殺了! 喜歡可以關注,未來還會有更多JS的小試身手、前端動手玩創意也還有一堆素材呢⁽⁽٩(๑˃̶͈̀ ᗨ ˂̶͈́)۶⁾⁾
下列 ChatGPT-4 咒語,對開發者很有幫助。附上原文與中文指令,供您參考。 原文出處:https://dev.to/hackertab_org/50-chat-gpt-prompts-every-software-developer-should-know-tested-9al ### **程式碼生成** - Generate a boilerplate `[language]` code for a `[class/module/component]` named [name] with the following functionality: `[functionality description].` - 為名為 [name] 的 `[class/module/component]` 生成樣板 `[language]` 程式碼,具有以下功能:`[functionality description]。 - Create a [language] function to perform `[operation]` on `[data structure]` with the following inputs: [input variables] and expected output: `[output description]`. - 建立一個 [語言] 函數以使用以下輸入對 `[資料結構]` 執行 `[操作]`:[輸入變數] 和預期輸出:`[輸出描述]`。 - Generate a `[language]` class for a `[domain]` application that includes methods for `[methods list]` and properties `[properties list]`. - 為包含“[方法列表]”的方法和屬性“[屬性列表]”的“[域]”應用程式生成一個“[語言]”類。 - Based on the [design pattern], create a code snippet in [language] that demonstrates its implementation for a [use case]. - 基於[設計模式],用[語言]建立一個程式碼片段,演示其對[用例]的實現。 **例子:** ``` Generate a boilerplate Python code for a shopping cart module named "ShoppingCart" with the following functionality: - A constructor that initializes an empty list to store cart items. - A method called "add_item" that takes in an item object and adds it to the cart. - A method called "remove_item" that takes in an item object and removes it from the cart if it exists. - A method called "get_items" that returns the list of items in the cart. - A method called "get_total" that calculates and returns the total price of all items in the cart. ``` ### **程式碼完成** - In `[language]`, complete the following code snippet that initializes a [data structure] with `[values]`: `[code snippet]`. - 在“[語言]”中,完成以下使用“[值]”初始化[資料結構]的程式碼片段:“[程式碼片段]”。 - Finish the `[language]` function that calculates [desired output] given the following input parameters: `[function signature]`. - 在給定以下輸入參數的情況下完成計算[期望輸出]的[語言]函數:[函數簽名]。 - Complete the `[language]` code to make an API call to `[API endpoint]` with [parameters] and process the response: `[code snippet]`. - 完成“[語言]”程式碼以使用[參數]對“[API 端點]”進行 API 呼叫並處理響應:“[程式碼片段]”。 **Example** : Finish the Python function that calculates the average of a list of numbers given the following input parameters: **示例**:完成計算給定以下輸入參數的數字列表的平均值的 Python 函數: ``` def calculate_average(num_list) ``` ### **錯誤檢測** - Identify any potential bugs in the following [language] code snippet: `[code snippet]`. - 確定以下 [語言] 程式碼片段中的任何潛在錯誤:`[程式碼片段]`。 - Analyze the given [language] code and suggest improvements to prevent [error type]: `[code snippet]`. - 分析給定的[語言]程式碼並提出改進建議以防止[錯誤類型]:`[程式碼片段]`。 - Find any memory leaks in the following [language] code and suggest fixes: `[code snippet]`. - 在以下 [語言] 程式碼中查找任何內存洩漏並提出修復建議:`[程式碼片段]`。 **Example** : Identify any potential bugs in the following Python code snippet: **示例**:辨識以下 Python 程式碼片段中的任何潛在錯誤: ``` def calculate_sum(num_list): sum = 0 for i in range(len(num_list)): sum += num_list[i] return sum ``` ### **程式碼審查** - Review the following `[language]` code for best practices and suggest improvements: `[code snippet]`. - 查看以下“[語言]”程式碼以獲得最佳實踐並提出改進建議:“[程式碼片段]”。 - Analyze the given `[language]` code for adherence to `[coding style guidelines]`: `[code snippet]`. - 分析給定的“[語言]”程式碼是否符合“[編碼風格指南]”:“[程式碼片段]”。 - Check the following [language] code for proper error handling and suggest enhancements: `[code snippet]`. - 檢查以下 [語言] 程式碼以正確處理錯誤並提出改進建議:`[程式碼片段]`。 - Evaluate the modularity and maintainability of the given `[language]` code: `[code snippet]`. - 評估給定“[語言]”程式碼的模塊化和可維護性:“[程式碼片段]”。 **Example** : Review the following Python code for best practices and suggest improvements: **示例**:查看以下 Python 程式碼以獲得最佳實踐並提出改進建議: ``` def multiply_list(lst): result = 1 for num in lst: result *= num return result ``` ### **API 文件生成** - Generate API documentation for the following `[language]` code: `[code snippet]`. - 為以下“[語言]”程式碼生成 API 文件:“[程式碼片段]”。 - Create a concise API reference for the given `[language]` class: `[code snippet]`. - 為給定的“[語言]”類建立簡明的 API 參考:“[程式碼片段]”。 - Generate usage examples for the following `[language]` API: `[code snippet]`. - 為以下“[語言]”API 生成用法示例:“[程式碼片段]”。 **Example** : Generate API documentation for the following JavaScript code: **示例**:為以下 JavaScript 程式碼生成 API 文件: ``` /** * Returns the sum of two numbers. * @param {number} a - The first number to add. * @param {number} b - The second number to add. * @returns {number} The sum of a and b. */ function sum(a, b) { return a + b; } ``` ### **查詢優化** - Optimize the following SQL query for better performance: `[SQL query]`. - 優化以下 SQL 查詢以獲得更好的性能:`[SQL 查詢]`。 - Analyze the given SQL query for any potential bottlenecks: `[SQL query]`. - 分析給定的 SQL 查詢是否存在任何潛在瓶頸:`[SQL 查詢]`。 - Suggest indexing strategies for the following SQL query: `[SQL query]`. - 為以下 SQL 查詢建議索引策略:`[SQL 查詢]`。 - Optimize the following NoSQL query for better performance and resource usage: `[NoSQL query]`. - 優化以下 NoSQL 查詢以獲得更好的性能和資源使用:`[NoSQL 查詢]`。 **Example** : Optimize the following SQL query for better performance: **示例**:優化以下 SQL 查詢以獲得更好的性能: ``` SELECT * FROM orders WHERE order_date BETWEEN '2022-01-01' AND '2022-12-31' ORDER BY order_date DESC LIMIT 100; ``` ### **用戶界面設計** - Generate a UI mockup for a `[web/mobile]` application that focuses on [`user goal or task]`. - 為專注於 [`用戶目標或任務]` 的`[web/mobile]` 應用程式生成 UI 模型。 - Suggest improvements to the existing user interface of `[app or website]` to enhance `[usability, accessibility, or aesthetics]`. - 建議改進“[應用程式或網站]”的現有用戶界面,以增強“[可用性、可存取性或美學]”。 - Design a responsive user interface for a `[web/mobile]` app that adapts to different screen sizes and orientations. - 為適應不同螢幕尺寸和方向的“[web/mobile]”應用程式設計響應式用戶界面。 **Example** : Generate a UI mockup for a mobile application that focuses on managing personal finances. **示例**:為專注於管理個人財務的移動應用程式生成 UI 模型。 ### **自動化測試** - Generate test cases for the following [language] function based on the input parameters and expected output: `[function signature]`. - 根據輸入參數和預期輸出為以下 [語言] 函數生成測試用例:`[函數簽名]`。 - Create a test script for the given [language] code that covers [unit/integration/system] testing: `[code snippet]`. - 為涵蓋[單元/集成/系統]測試的給定[語言]程式碼建立測試腳本:`[程式碼片段]`。 - Generate test data for the following [language] function that tests various edge cases: `[function signature]`. - 為以下測試各種邊緣情況的[語言]函數生成測試資料:`[函數簽名]`。 - Design a testing strategy for a [web/mobile] app that includes [unit, integration, system, and/or performance] testing. - 為 [網絡/移動] 應用程式設計測試策略,包括 [單元、集成、系統和/或性能] 測試。 **Example:** Generate test cases for the following Python function based on the input parameters and expected output: **示例:** 根據輸入參數和預期輸出為以下 Python 函數生成測試用例: ``` def divide(a: float, b: float) -> float: if b == 0: raise ZeroDivisionError('division by zero') return a / b ``` ### **程式碼重構** - Suggest refactoring improvements for the following [language] code to enhance readability and maintainability: `[code snippet]`. - 建議對以下 [語言] 程式碼進行重構改進,以增強可讀性和可維護性:`[程式碼片段]`。 - Identify opportunities to apply [design pattern] in the given [language] code: `[code snippet]`. - 確定在給定的[語言]程式碼中應用[設計模式]的機會:`[程式碼片段]`。 - Optimize the following [language] code for better performance: `[code snippet]`. - 優化以下 [語言] 程式碼以獲得更好的性能:`[程式碼片段]`。 **Example** : Optimize the following Python code for better performance: **示例**:優化以下 Python 程式碼以獲得更好的性能: ``` def find_max(numbers): max_num = numbers[0] for num in numbers: if num > max_num: max_num = num return max_num ``` ### **設計模式建議** - Based on the given [language] code, recommend a suitable design pattern to improve its structure: `[code snippet]`. - 根據給定的[語言]程式碼,推薦合適的設計模式來改進其結構:`[程式碼片段]`。 - Identify opportunities to apply the [design pattern] in the following [language] codebase: `[repository URL or codebase description]`. - 確定在以下 [語言] 程式碼庫中應用 [設計模式] 的機會:`[存儲庫 URL 或程式碼庫描述]`。 - Suggest an alternative design pattern for the given [language] code that may provide additional benefits: `[code snippet]`. - 為可能提供額外好處的給定 [語言] 程式碼建議替代設計模式:`[程式碼片段]`。 **Example:** Based on the given Python code, recommend a suitable design pattern to improve its structure: **例子:** 根據給定的Python程式碼,推薦合適的設計模式來改進其結構: ``` class TotalPriceCalculator: def calculate_total(self, items): pass class NormalTotalPriceCalculator(TotalPriceCalculator): def calculate_total(self, items): total = 0 for item in items: total += item.price * item.quantity return total class DiscountedTotalPriceCalculator(TotalPriceCalculator): def calculate_total(self, items): total = 0 for item in items: total += item.price * item.quantity * 0.9 # apply 10% discount return total class Order: def __init__ (self, items, total_price_calculator): self.items = items self.total_price_calculator = total_price_calculator def calculate_total(self): return self.total_price_calculator.calculate_total(self.items) class Item: def __init__ (self, name, price, quantity): self.name = name self.price = price self.quantity = quantity ``` ### **算法開發** - Suggest an optimal algorithm to solve the following problem: `[problem description]`. - 建議解決以下問題的最佳算法:`[問題描述]`。 - Improve the efficiency of the given algorithm for `[specific use case]`: `[algorithm or pseudocode]`. - 為“[特定用例]”提高給定算法的效率:“[算法或偽程式碼]”。 - Design an algorithm that can handle `[large-scale data or high-throughput]` for `[specific task or operation]`. - 為“[特定任務或操作]”設計一種可以處理“[大規模資料或高吞吐量]”的算法。 - Propose a parallel or distributed version of the following algorithm to improve performance: `[algorithm or pseudocode]`. - 提出以下算法的並行或分佈式版本以提高性能:`[算法或偽程式碼]`。 ### **程式碼翻譯** - Translate the following `[source language]` code to `[target language]`: `[code snippet]`. - 將以下“[源語言]”程式碼翻譯成“[目標語言]”:“[程式碼片段]”。 - Convert the given `[source language]` class or module to `[target language]` while preserving its functionality and structure: `[code snippet]`. - 將給定的“[源語言]”類或模塊轉換為“[目標語言]”,同時保留其功能和結構:“[程式碼片段]”。 - Migrate the following `[source language]` code that uses `[library or framework]` to [target language] with a similar library or framework: `[code snippet]`. - 將以下使用“[庫或框架]”的“[源語言]”程式碼遷移到具有類似庫或框架的“目標語言”:“[程式碼片段]”。 **Example:** Translate the following Python code to JavaScript: **示例:**將以下 Python 程式碼轉換為 JavaScript: ``` def factorial(n): if n == 0: return 1 else: return n * factorial(n-1) ``` ### **個性化學習** - Curate a list of resources to learn `[programming language or technology]` based on my current skill level: `[beginner/intermediate/advanced]`. - 根據我目前的技能水平,策劃學習`[編程語言或技術]`的資源列表:`[初學者/中級/高級]`。 - Recommend a learning path to become proficient in `[specific programming domain or technology]` considering my background in `[existing skills or experience]`. - 考慮到我在“[現有技能或經驗]”方面的背景,推薦精通“[特定編程領域或技術]”的學習路徑。 - Suggest project ideas or coding exercises to practice and improve my skills in `[programming language or technology]`. - 建議專案想法或編碼練習,以練習和提高我在“[編程語言或技術]”方面的技能。 ### **程式碼可視化** - Generate a UML diagram for the following `[language]` code: `[code snippet]`. - 為以下“[語言]”程式碼生成一個 UML 圖:“[程式碼片段]”。 - Create a flowchart or visual representation of the given `[language]` algorithm: `[algorithm or pseudocode]`. - 建立給定“[語言]”算法的流程圖或可視化表示:“[算法或偽程式碼]”。 - Visualize the call graph or dependencies of the following `[language]` code: `[code snippet]`. - 可視化以下“[語言]”程式碼的呼叫圖或依賴關係:“[程式碼片段]”。 **Example** : Generate a UML diagram for the following Java code: **示例**:為以下 Java 程式碼生成 UML 圖: ``` public abstract class Vehicle { private String model; public Vehicle(String model) { this.model = model; } public String getModel() { return model; } public abstract void start(); public abstract void stop(); } public class Car extends Vehicle { public Car(String model) { super(model); } @Override public void start() { System.out.println("Starting car engine"); } @Override public void stop() { System.out.println("Stopping car engine"); } } public class Motorcycle extends Vehicle { public Motorcycle(String model) { super(model); } @Override public void start() { System.out.println("Starting motorcycle engine"); } @Override public void stop() { System.out.println("Stopping motorcycle engine"); } } ``` ### **資料可視化** - Generate a bar chart that represents the following data: `[data or dataset description]`. - 生成代表以下資料的條形圖:`[資料或資料集描述]`。 - Create a line chart that visualizes the trend in the following time series data: `[data or dataset description]`. - 建立一個折線圖,將以下時間序列資料的趨勢可視化:`[資料或資料集描述]`。 - Design a heatmap that represents the correlation between the following variables: `[variable list]`. - 設計一個表示以下變數之間相關性的熱圖:`[變數列表]`。 --- 以上,簡單分享,希望對您有幫助!
你的轉職路上,還缺少一份自學作業包!寫完這幾包,直接拿作品去面試上班!
本論壇另有附設一個 LINE 新手發問&交流群組!歡迎加入討論!