--- 標題:使用 NextJS 和 Wing 建立您自己的 ChatGPT 圖形客戶端 🤯 描述:使用 Winglang 和 NextJS 建立的 ChatGPT 客戶端應用程式 canonical\_url:https://www.winglang.io/blog/2024/05/16/chatgpt-client-with-nextjs-and-wing 發表:真實 --- 長話短說 ---- 在本文結束時,您將使用 Wing 和 Next.js 建置並部署 ChatGPT 用戶端。 該應用程式可以在本地執行(在本地雲端模擬器中)或將其部署到您自己的雲端提供者。  --- 介紹 -- 建置 ChatGPT 用戶端並將其部署到您自己的雲端基礎架構是確保對資料進行控制的好方法。 將 LLM 部署到您自己的雲端基礎架構可為您的專案提供隱私和安全性。 有時,在使用 OpenAI 的 ChatGPT 等專有 LLM 平台時,您可能會擔心資料在遠端伺服器上儲存或處理,這可能是由於輸入平台的資料的敏感度或其他隱私原因。 在這種情況下,將 LLM 自託管到您的雲端基礎架構或在您的電腦上本地執行可以讓您更好地控制資料的隱私和安全性。 > [Wing](https://git.new/wing-repo)是一種面向雲端的程式語言,可讓您建置和部署基於雲端的應用程式,而無需擔心底層基礎架構。 它允許您使用相同的語言定義和管理雲端基礎架構和應用程式程式碼,從而簡化了您在雲端上建置的方式。 Wing 與雲端無關——用它建置的應用程式可以編譯並部署到各種雲端平台。 > {% cta https://git.new/wing-repo %} 看 ⭐ Wing {% endcta %} [](https://git.new/wing-repo) --- 讓我們開始吧! ------- 要繼續操作,您需要: - 對 Next.js 有一定了解 - 在您的機器上[安裝 Wing](https://www.winglang.io/docs/) 。如果您不知道如何操作,請不要擔心。我們將在這個專案中一起討論它。 - 取得您的 OpenAI API 金鑰。 建立您的專案 ------ 首先,您需要在電腦上安裝 Wing。執行以下命令: ``` npm install -g winglang ``` 透過檢查版本確認安裝: ``` wing -V ``` ### 建立您的 Next.js 和 Wing 應用程式。 ``` mkdir assistant cd assistant npx create-next-app@latest frontend mkdir backend && cd backend wing new empty ``` 我們已在 Assistant 目錄中成功建立了 Wing 和 Next.js 專案。我們的 ChatGPT 用戶端的名稱是 Assistant。聽起來很酷,對吧? 前端和後端目錄分別包含我們的 Next 和 Wing 應用程式。 `wing new empty`建立三個檔案: `package.json` 、 `package-lock.json`和`main.w` 。後者是應用程式的入口點。 ### 在 Wing 模擬器中本地執行您的應用程式 Wing 模擬器可讓您在本機電腦內執行程式碼、編寫單元測試和偵錯程式碼,而無需部署到實際的雲端供應商,從而幫助您更快地進行迭代。 使用以下命令在本機上執行您的 Wing 應用程式: ``` wing it ``` 您的 Wing 應用程式將在`localhost:3000`上執行。 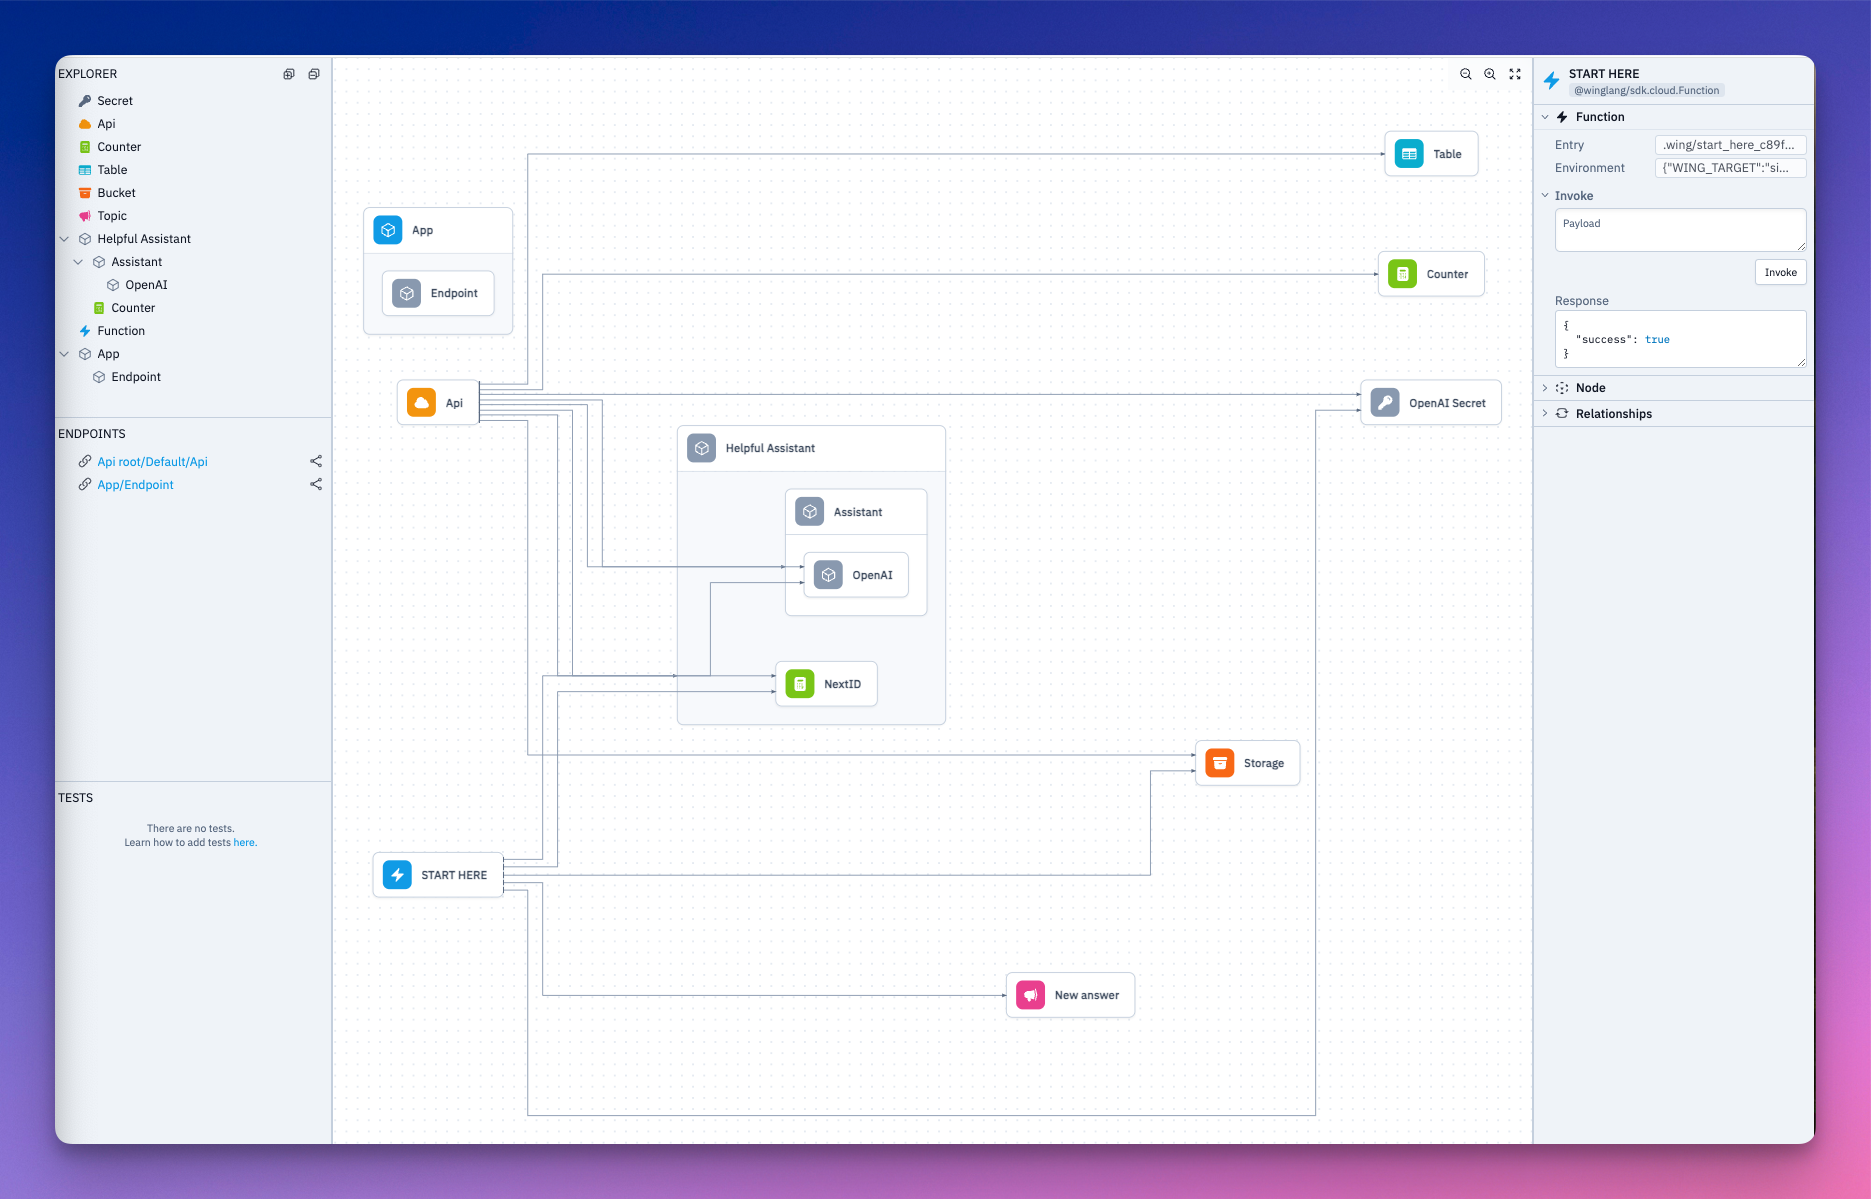 設定您的後端 ------ - 讓我們安裝 Wing 的 OpenAI 和 React 函式庫。 OpenAI 庫提供了與 LLM 互動的標準介面。 React 程式庫可讓您將 Wing 後端連接到 Next 應用程式。 ``` npm i @winglibs/openai @winglibs/react ``` - 將這些套件匯入到`main.w`檔案中。我們還導入需要的所有其他庫。 ``` bring openai bring react bring cloud bring ex bring http ``` `bring`是 Wing 中的導入語句。這樣想,Wing 使用`bring`來實現與 JavaScript 中`import`相同的功能。 `cloud`是 Wing 的雲端庫。它公開了雲端 API、儲存桶、計數器、網域、端點、函數和更多雲端資源的標準介面。 `ex`是用於與表格和雲端 Redis 資料庫介面的標準庫, `http`用於呼叫不同的 HTTP 方法 - 從遠端資源發送和檢索資訊。 取得您的 OpenAI API 金鑰 ------------------ 我們將在我們的應用程式中使用`gpt-4-turbo`但您可以使用任何 OpenAI 模型。 - 如果您還沒有[OpenAI](https://platform.openai.com/signup)帳戶,請建立一個。若要建立新的 API 金鑰,請前往[platform.openai.com/api-keys](http://platform.openai.com/api-keys)並選擇**建立新金鑰。** 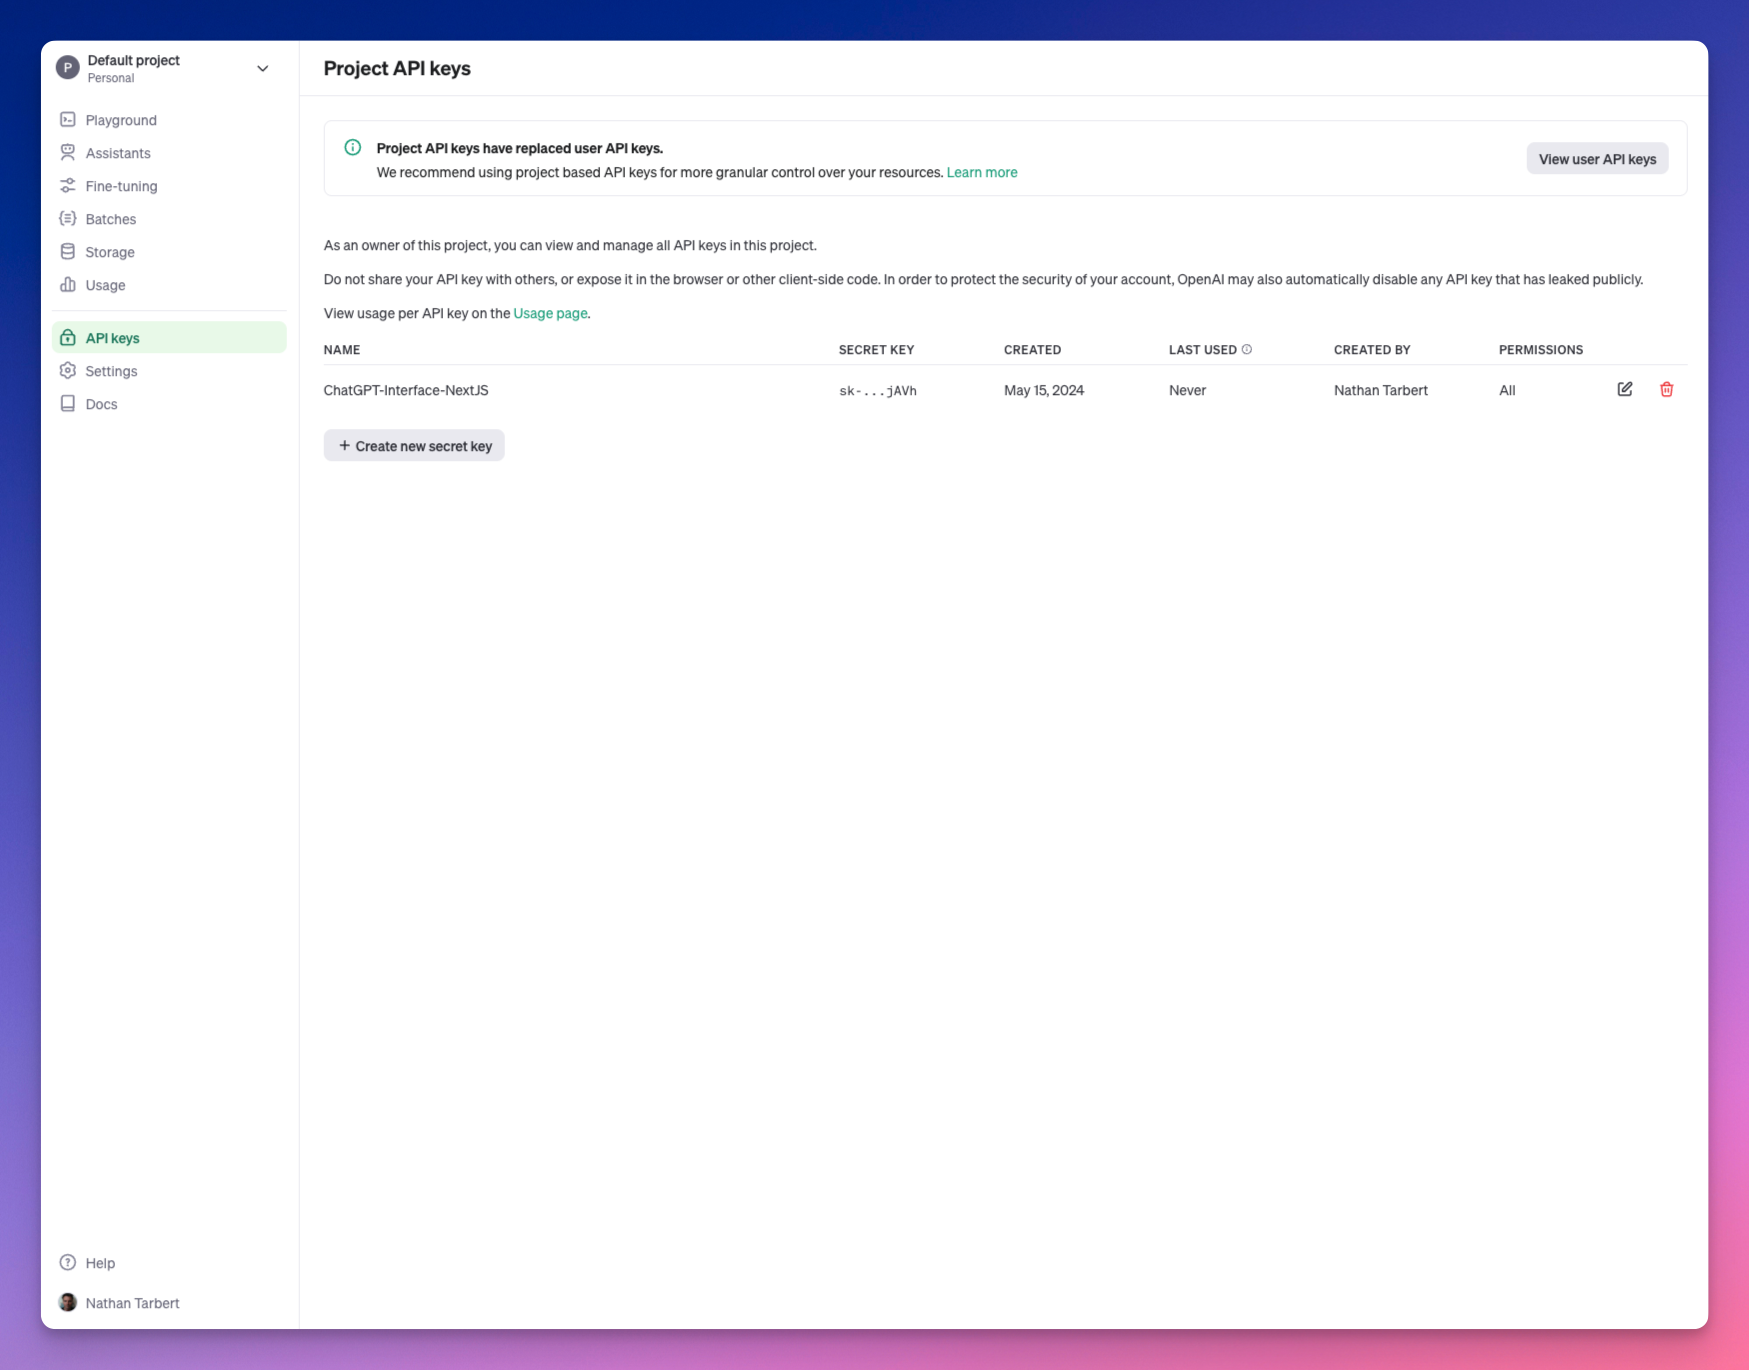 - 設定**名稱**、**專案**和**權限,**然後按一下**建立金鑰。** 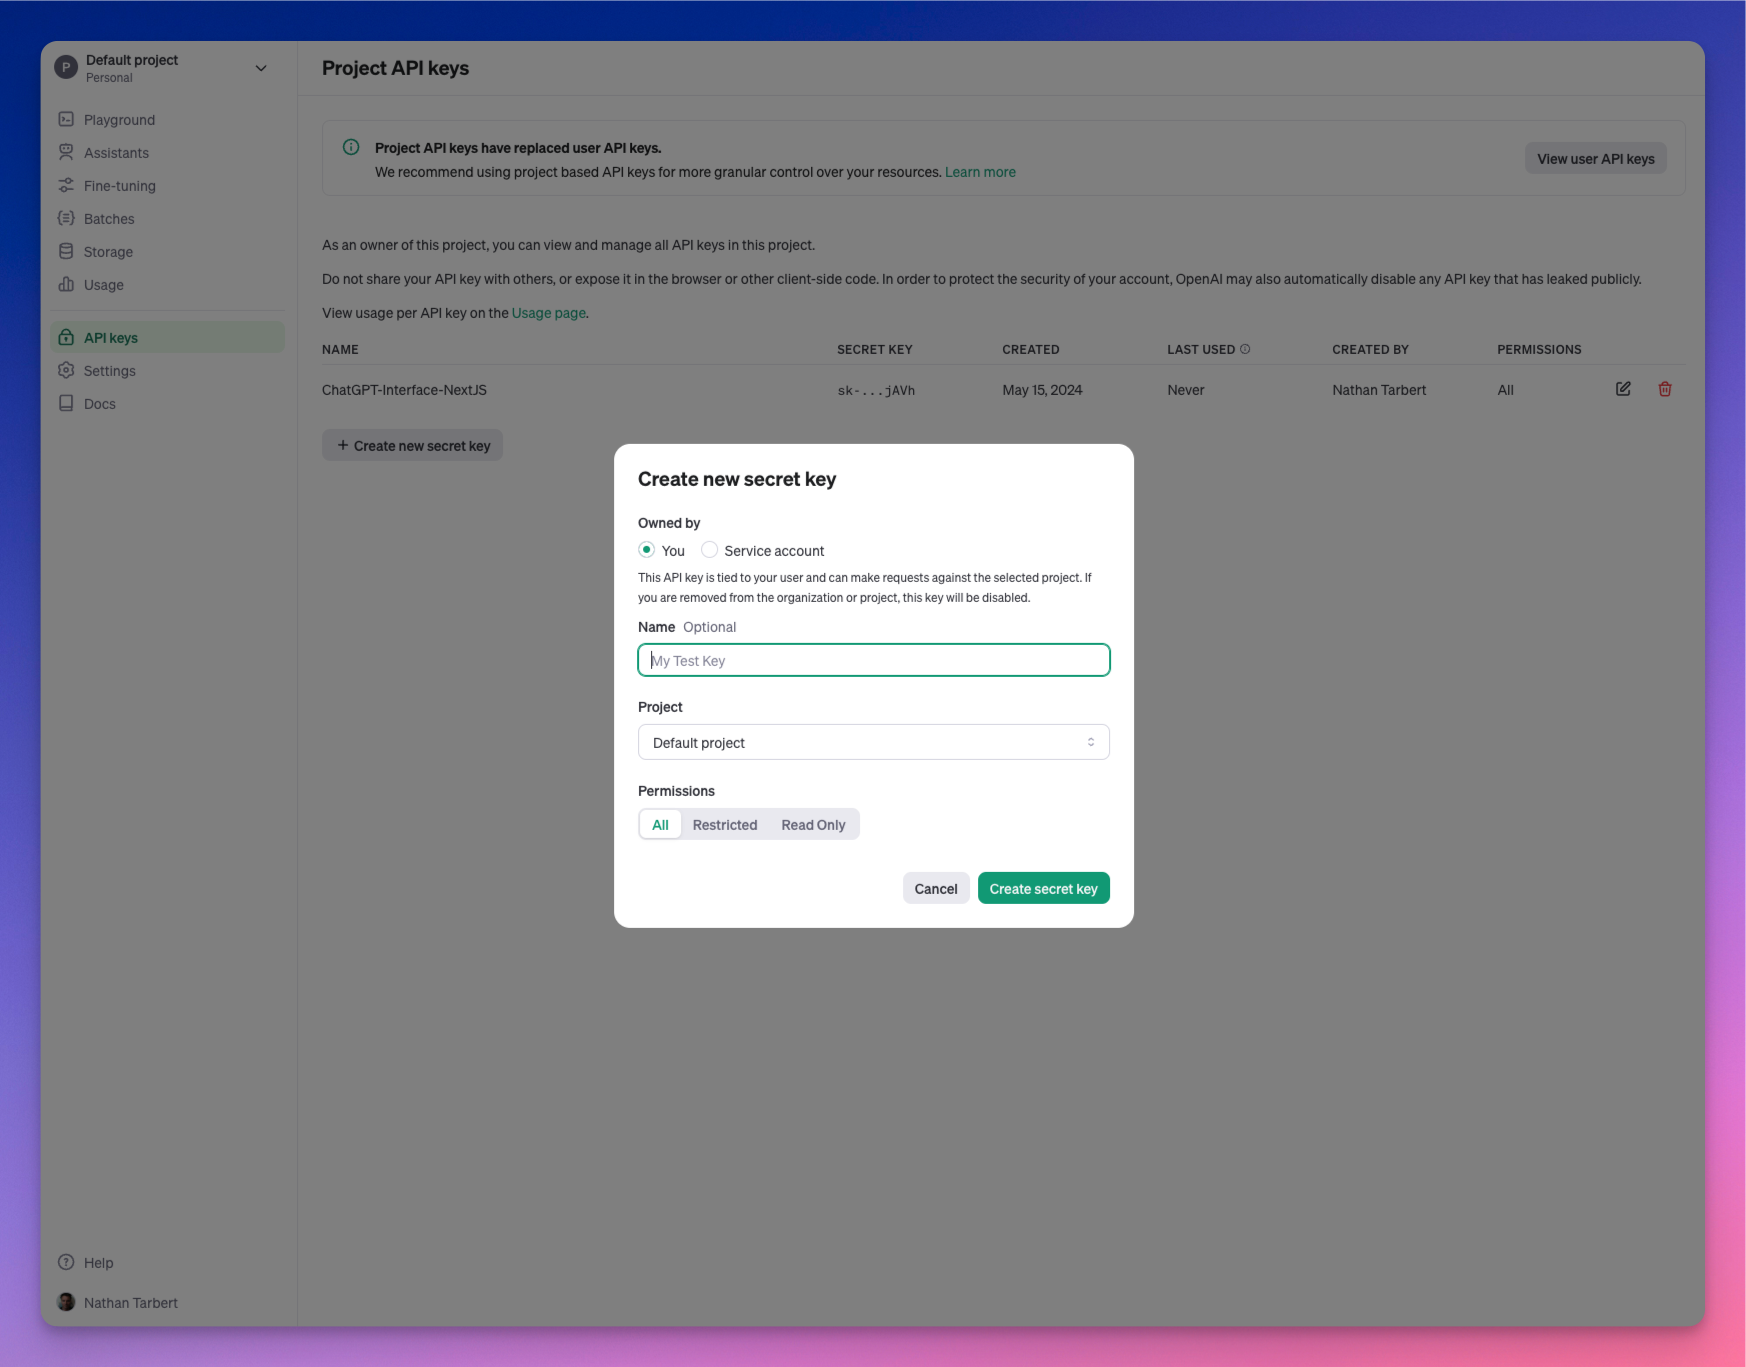 初始化 OpenAI ---------- 建立一個`Class`來初始化您的 OpenAI API。我們希望它可以重複使用。 我們將向`Assistant`類別加入`personality` ,以便在向 AI 助手傳遞提示時可以指定 AI 助手的個性。 ``` let apiKeySecret = new cloud.Secret(name: "OAIAPIKey") as "OpenAI Secret"; class Assistant { personality: str; openai: openai.OpenAI; new(personality: str) { this.openai = new openai.OpenAI(apiKeySecret: apiKeySecret); this.personality = personality; } pub inflight ask(question: str): str { let prompt = `you are an assistant with the following personality: ${this.personality}. ${question}`; let response = this.openai.createCompletion(prompt, model: "gpt-4-turbo"); return response.trim(); } } ``` Wing 分別使用`preflight`和`inflight`概念來統一基礎設施定義和應用程式邏輯。 **預檢**程式碼(通常是基礎設施定義)在編譯時執行一次,而執行**中**程式碼將在執行時執行以實現應用程式的行為。 雲端儲存桶、佇列和 API 端點是預檢的一些範例。定義預檢時不需要新增預檢關鍵字,Wing 預設知道這一點。但對於飛行塊,您需要在其中加入“飛行”一詞。 > 上面的程式碼中有一個飛行中的區塊。 Inflight 區塊是您編寫非同步執行時間程式碼的地方,這些程式碼可以透過其 inflight API 直接與資源互動。 > 測試和儲存雲端秘密 --------- 讓我們來看看如何保護我們的 API 金鑰,因為我們肯定要[考慮安全性](https://techhq.com/2022/09/hardcoded-api-keys-jeopardize-data-in-the-cloud/)。 讓我們在後端的根目錄中建立一個`.env`檔案並傳入我們的 API 金鑰: ``` OAIAPIKey = Your_OpenAI_API_key ``` 我們可以在本地引用 .env 檔案來測試 OpenAI API 金鑰,然後由於我們計劃部署到 AWS,因此我們將逐步設定[AWS Secrets Manager](https://docs.aws.amazon.com/secretsmanager/latest/userguide/intro.html) 。 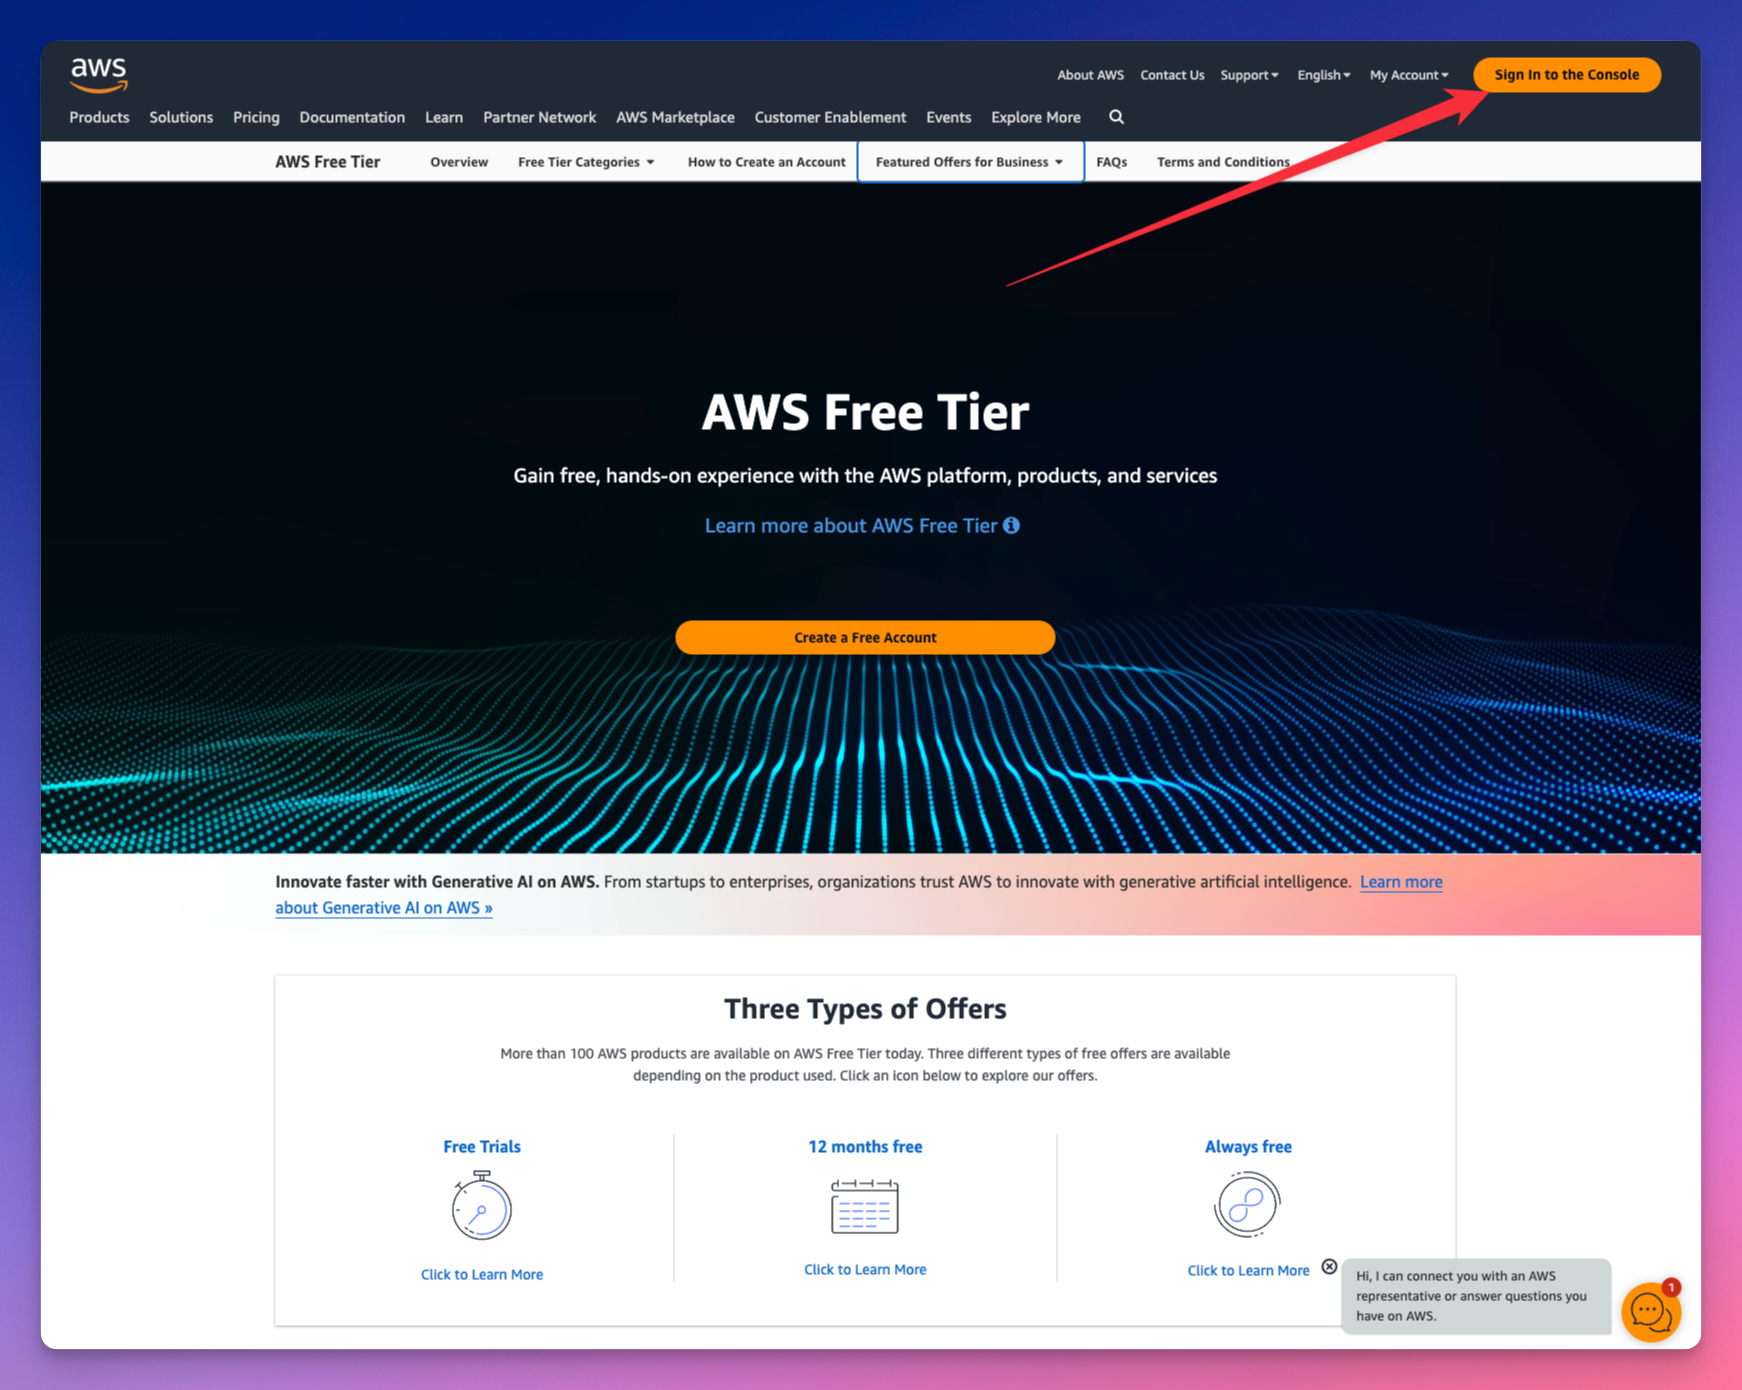 首先,我們前往 AWS 並登入控制台。如果您沒有帳戶,可以免費建立一個。 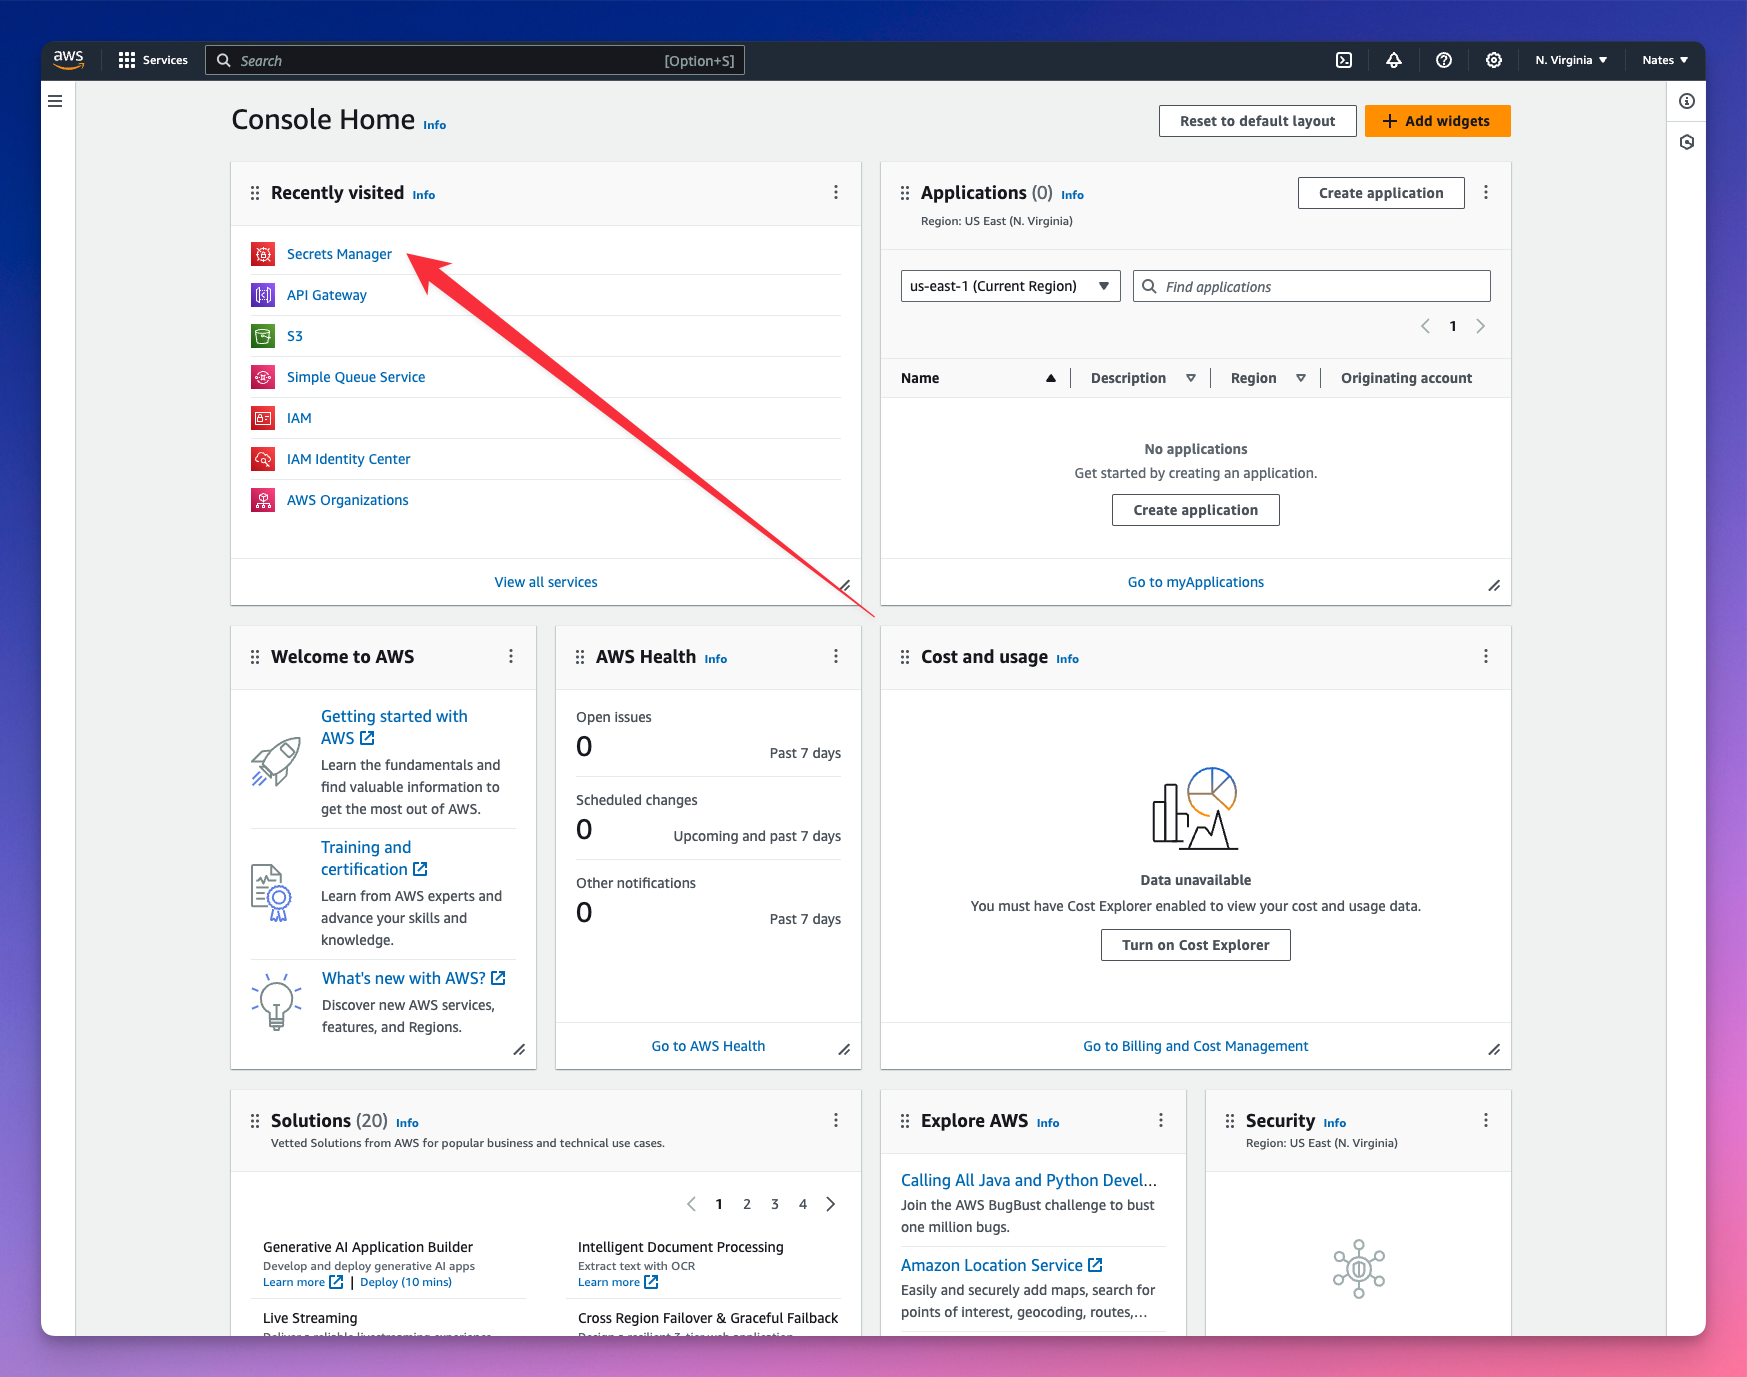 導覽至 Secrets Manager,讓我們儲存 API 金鑰值。 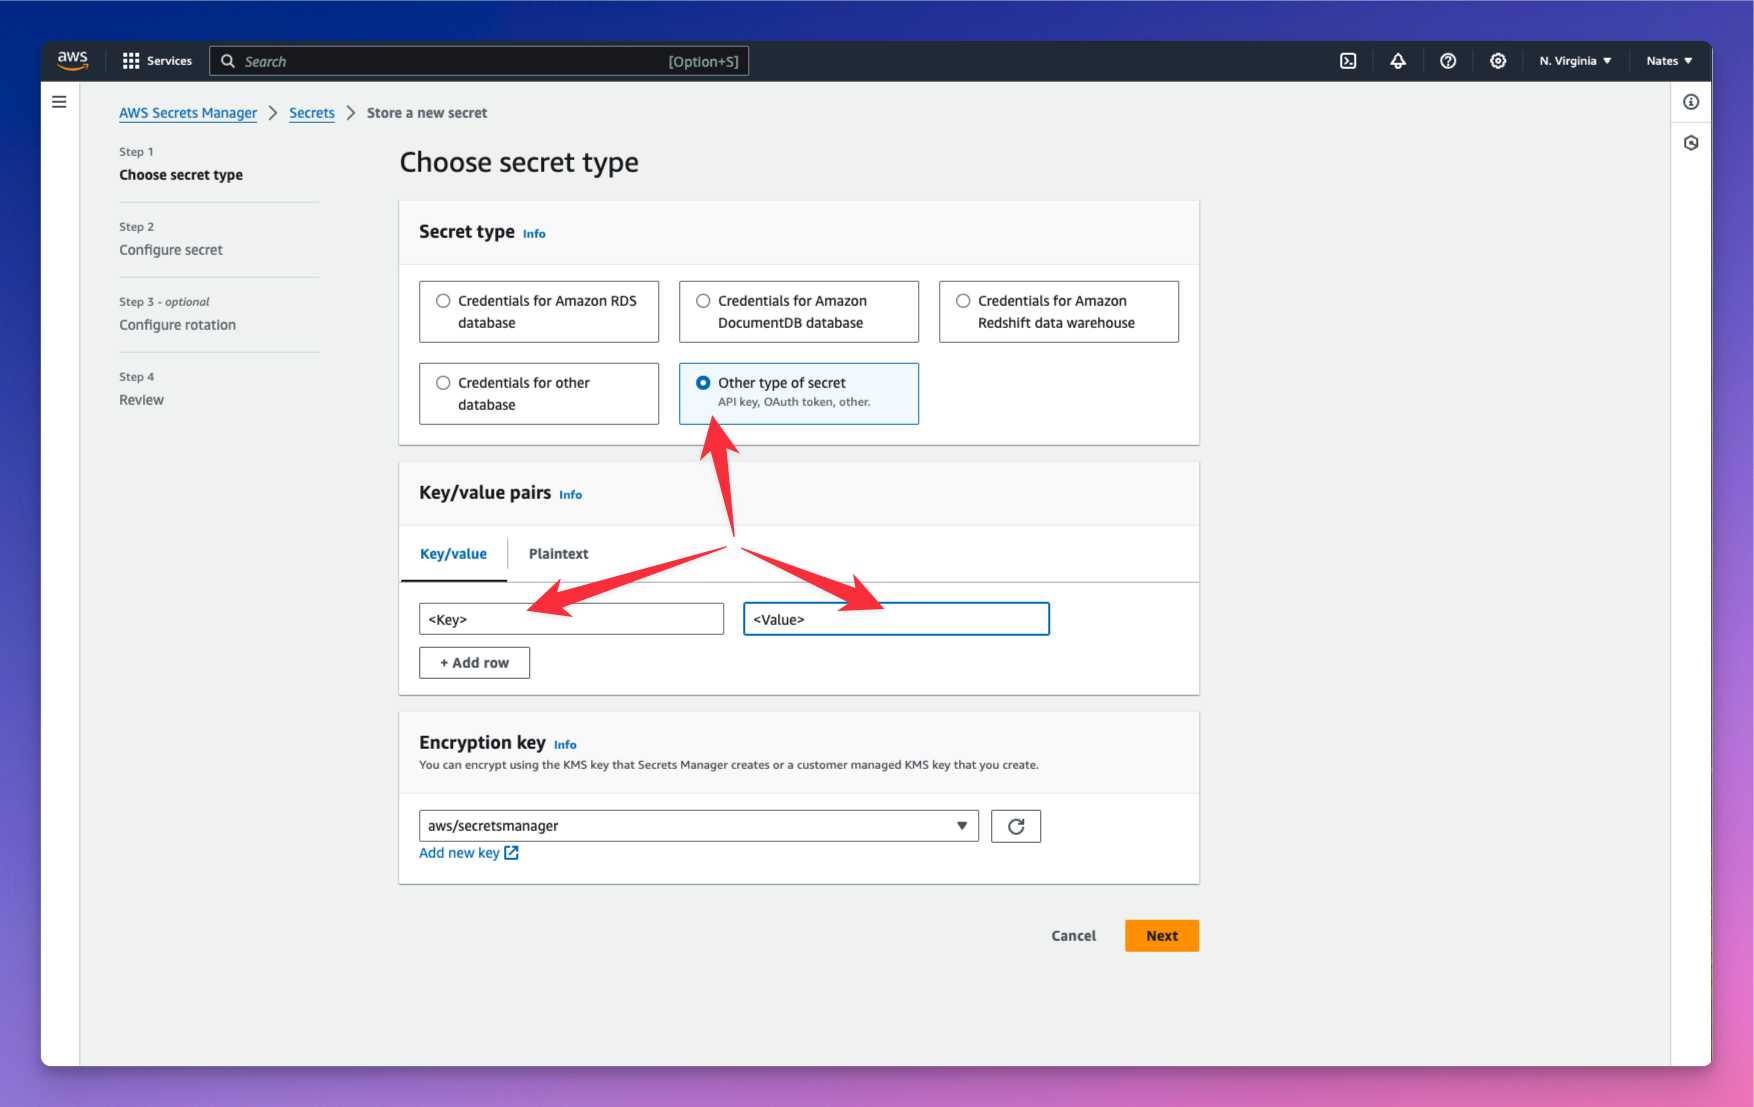 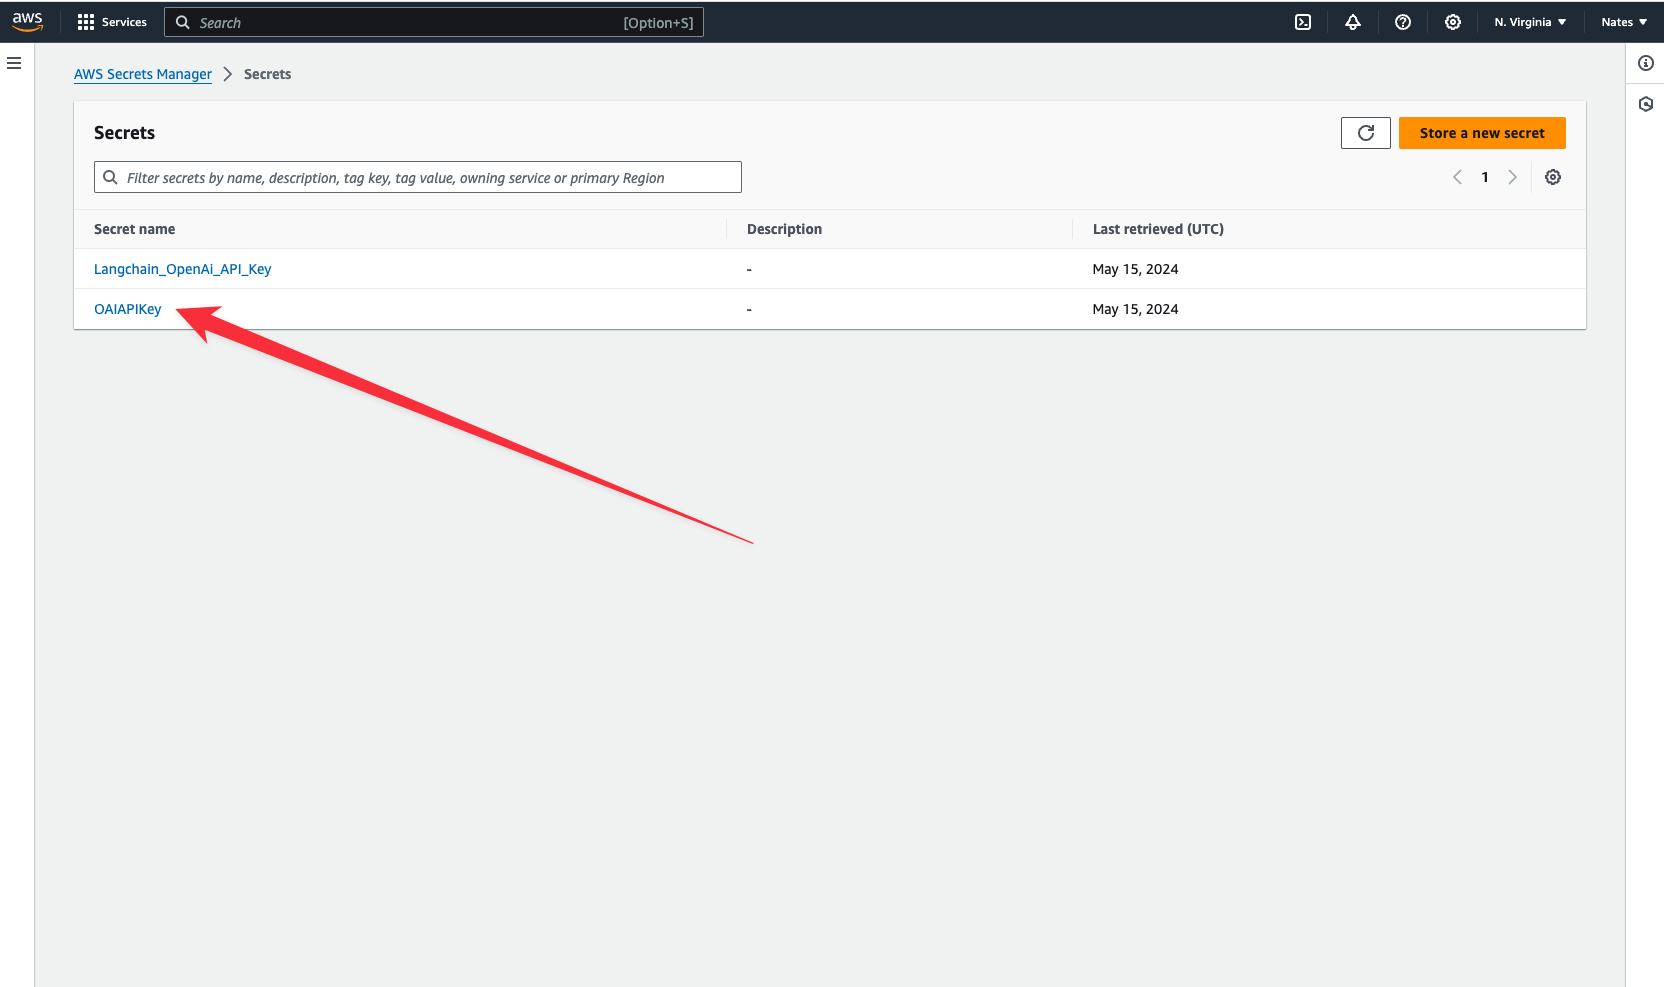 我們已將 API 金鑰儲存在名為`OAIAPIKey`的雲端機密中。複製您的金鑰,我們將跳到終端並連接到現在儲存在 AWS 平台中的金鑰。 ``` wing secrets ``` 現在將您的 API 金鑰貼上為終端中的值。您的密鑰現已正確存儲,我們可以開始與我們的應用程式互動。 --- 將人工智慧的回應儲存在雲端。 -------------- 將人工智慧的回應儲存在雲端可以讓您控制資料。它駐留在您自己的基礎設施上,與 ChatGPT 等專有平台不同,您的資料位於您無法控制的第三方伺服器上。您也可以在需要時檢索這些回應。 讓我們建立另一個類,使用 Assistant 類來傳遞 AI 的個性和提示。我們還將每個模型的回應作為`txt`檔案儲存在雲端儲存桶中。 ``` let counter = new cloud.Counter(); class RespondToQuestions { id: cloud.Counter; gpt: Assistant; store: cloud.Bucket; new(store: cloud.Bucket) { this.gpt = new Assistant("Respondent"); this.id = new cloud.Counter() as "NextID"; this.store = store; } pub inflight sendPrompt(question: str): str { let reply = this.gpt.ask("{question}"); let n = this.id.inc(); this.store.put("message-{n}.original.txt", reply); return reply; } } ``` --- 我們為我們的助理設定了「受訪者」的個性。我們希望它能夠回答問題。您也可以讓前端使用者在發送提示時指定此個性。 每次產生回應時,計數器都會遞增,並且計數器的值會傳遞到用於在雲端中儲存模型回應的`n`變數中。然而,我們真正想要的是建立一個資料庫來儲存來自前端的使用者提示和模型的回應。 讓我們定義我們的資料庫。 定義我們的資料庫 -------- Wing 內建了`ex.Table` - 一個用於儲存和查詢資料的 NoSQL 資料庫。 ``` let db = new ex.Table({ name: "assistant", primaryKey: "id", columns: { question: ex.ColumnType.STRING, answer: ex.ColumnType.STRING } }); ``` --- 我們在資料庫定義中新增了兩列 - 第一列用於儲存使用者提示,第二列用於儲存模型的回應。 建立 API 路由和邏輯 ------------ 我們希望能夠在後端發送和接收資料。讓我們建立 POST 和 GET 路由。 ``` let api = new cloud.Api({ cors: true }); api.post("/assistant", inflight((request) => { // POST request logic goes here })); api.get("/assistant", inflight(() => { // GET request logic goes here })); ``` --- ``` let myAssistant = new RespondToQuestions(store) as "Helpful Assistant"; api.post("/assistant", inflight((request) => { let prompt = request.body; let response = myAssistant.sendPrompt(JSON.stringify(prompt)); let id = counter.inc(); // Insert prompt and response in the database db.insert(id, { question: prompt, answer: response }); return cloud.ApiResponse({ status: 200 }); })); ``` 在 POST 路由中,我們希望將從前端收到的使用者提示傳遞到模型中並獲得回應。提示和回應都將儲存在資料庫中。 `cloud.ApiResponse`可讓您傳送對使用者要求的回應。 新增前端發出 GET 請求時檢索資料庫專案的邏輯。 --- 新增前端發出 GET 請求時檢索資料庫專案的邏輯。 ``` api.get("/assistant", inflight(() => { let questionsAndAnswers = db.list(); return cloud.ApiResponse({ body: JSON.stringify(questionsAndAnswers), status: 200 }); })); ``` 我們的後端已經準備好了。我們在本地雲端模擬器中測試一下。 跑`wing it` 。 讓我們轉到`localhost:3000`並向我們的助理詢問一個問題。 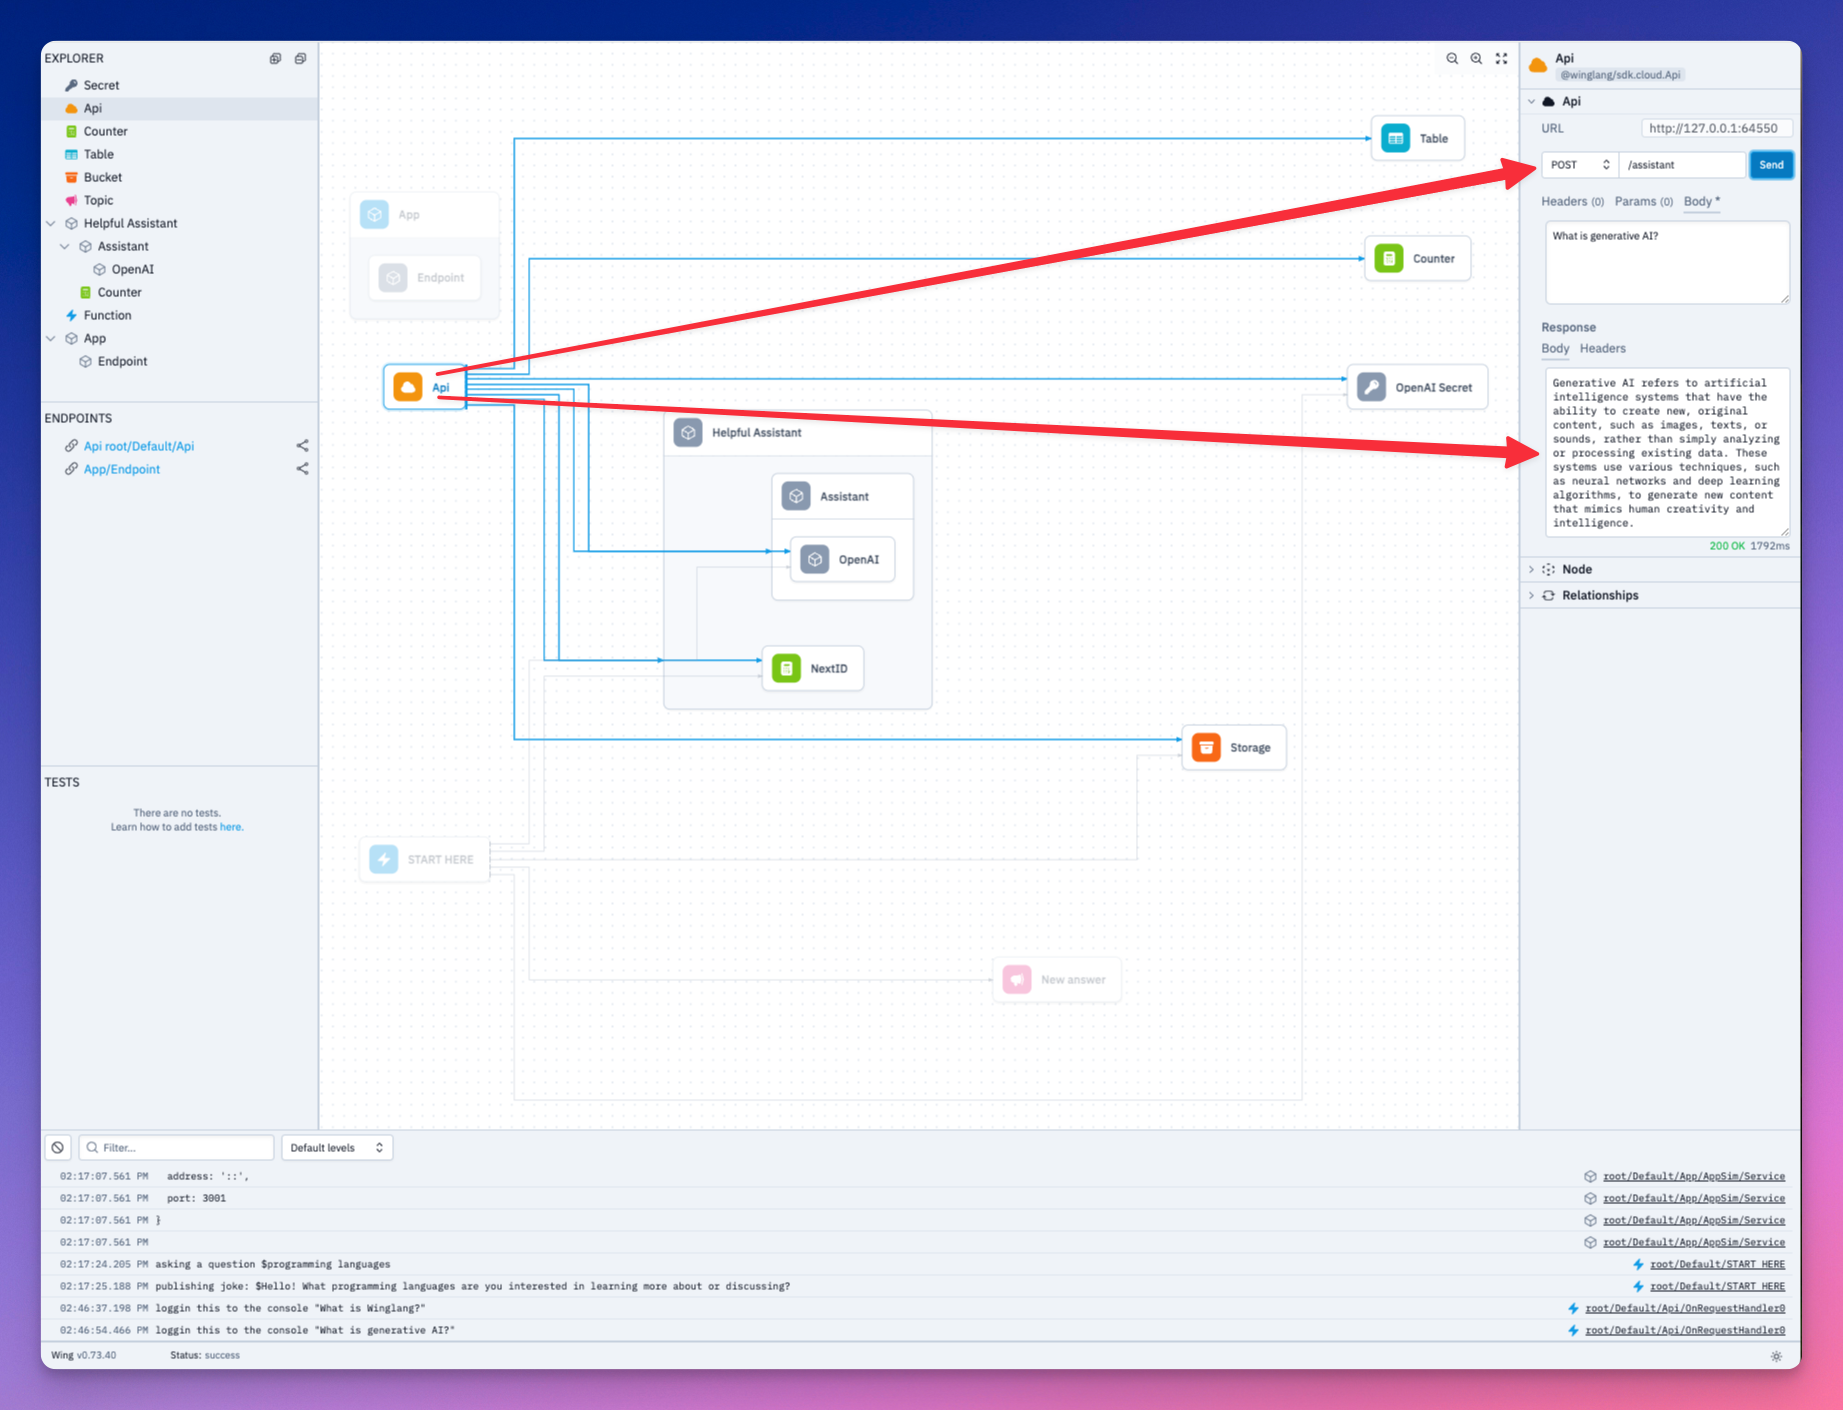 我們的問題和助理的回答都已儲存到資料庫中。看一看。 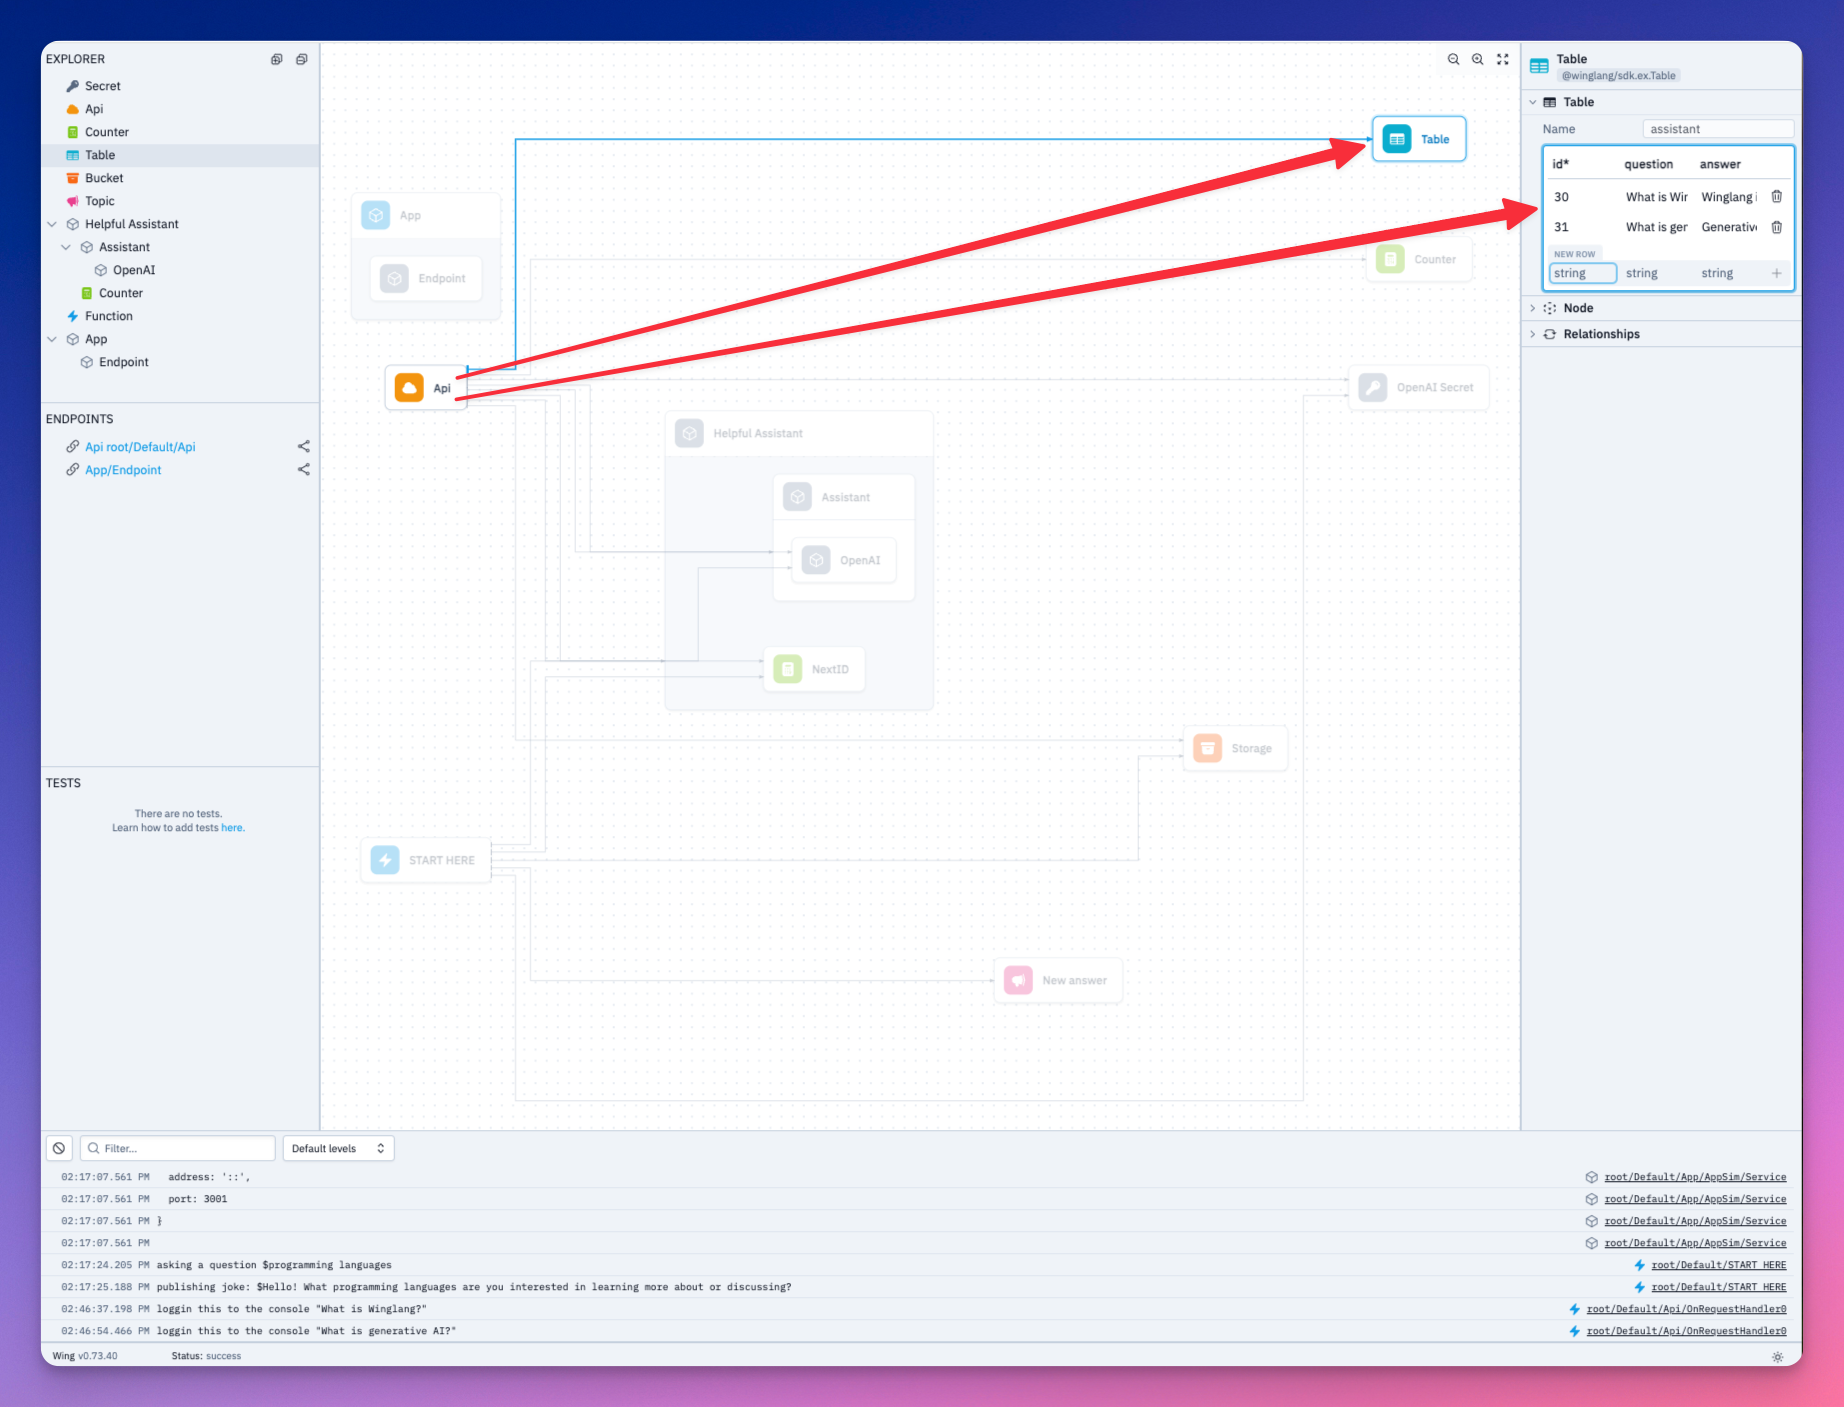 向前端公開您的 API URL --------------- 我們需要將後端的 API URL 公開給 Next 前端。這就是之前安裝的 React 函式庫派上用場的地方。 ``` let website = new react.App({ projectPath: "../frontend", localPort: 4000 }); website.addEnvironment("API_URL", api.url); ``` 將以下內容加入 Next 應用程式的`layout.js`中。 ``` import { Inter } from "next/font/google"; import "./globals.css"; const inter = Inter({ subsets: ["latin"] }); export const metadata = { title: "Create Next App", description: "Generated by create next app", }; export default function RootLayout({ children }) { return ( <html lang="en"> <head> <script src="./wing.js" defer></script> </head> <body className={inter.className}>{children}</body> </html> ); } ``` 我們現在可以在 Next 應用程式中存取`API_URL` 。 實作前端邏輯 ------ 讓我們實作前端邏輯來呼叫後端。 ``` import { useEffect, useState, useCallback } from 'react'; import axios from 'axios'; function App() { const [isThinking, setIsThinking] = useState(false); const [input, setInput] = useState(""); const [allInteractions, setAllInteractions] = useState([]); const retrieveAllInteractions = useCallback(async (api_url) => { await axios ({ method: "GET", url: `${api_url}/assistant`, }).then(res => { setAllInteractions(res.data) }) }, []) const handleSubmit = useCallback(async (e)=> { e.preventDefault() setIsThinking(!isThinking) if(input.trim() === ""){ alert("Chat cannot be empty") setIsThinking(true) } await axios({ method: "POST", url: `${window.wingEnv.API_URL}/assistant`, headers: { "Content-Type": "application/json" }, data: input }) setInput(""); setIsThinking(false); await retrieveAllInteractions(window.wingEnv.API_URL); }) useEffect(() => { if (typeof window !== "undefined") { retrieveAllInteractions(window.wingEnv.API_URL); } }, []); // Here you would return your component's JSX return ( // JSX content goes here ); } export default App; ``` `retrieveAllInteractions`函數取得後端資料庫中的所有問題和答案。 `handSubmit`函數將使用者的提示傳送到後端。 讓我們加入 JSX 實作。 ``` import { useEffect, useState } from 'react'; import axios from 'axios'; import './App.css'; function App() { // ... return ( <div className="container"> <div className="header"> <h1>My Assistant</h1> <p>Ask anything...</p> </div> <div className="chat-area"> <div className="chat-area-content"> {allInteractions.map((chat) => ( <div key={chat.id} className="user-bot-chat"> <p className='user-question'>{chat.question}</p> <p className='response'>{chat.answer}</p> </div> ))} <p className={isThinking ? "thinking" : "notThinking"}>Generating response...</p> </div> <div className="type-area"> <input type="text" placeholder="Ask me any question" value={input} onChange={(e) => setInput(e.target.value)} /> <button onClick={handleSubmit}>Send</button> </div> </div> </div> ); } export default App; ``` 在本地執行您的專案 --------- 導航到您的後端目錄並使用以下命令在本地執行您的 Wing 應用程式 ``` cd ~assistant/backend wing it ``` 也執行您的 Next.js 前端: ``` cd ~assistant/frontend npm run dev ``` 讓我們看一下我們的應用程式。 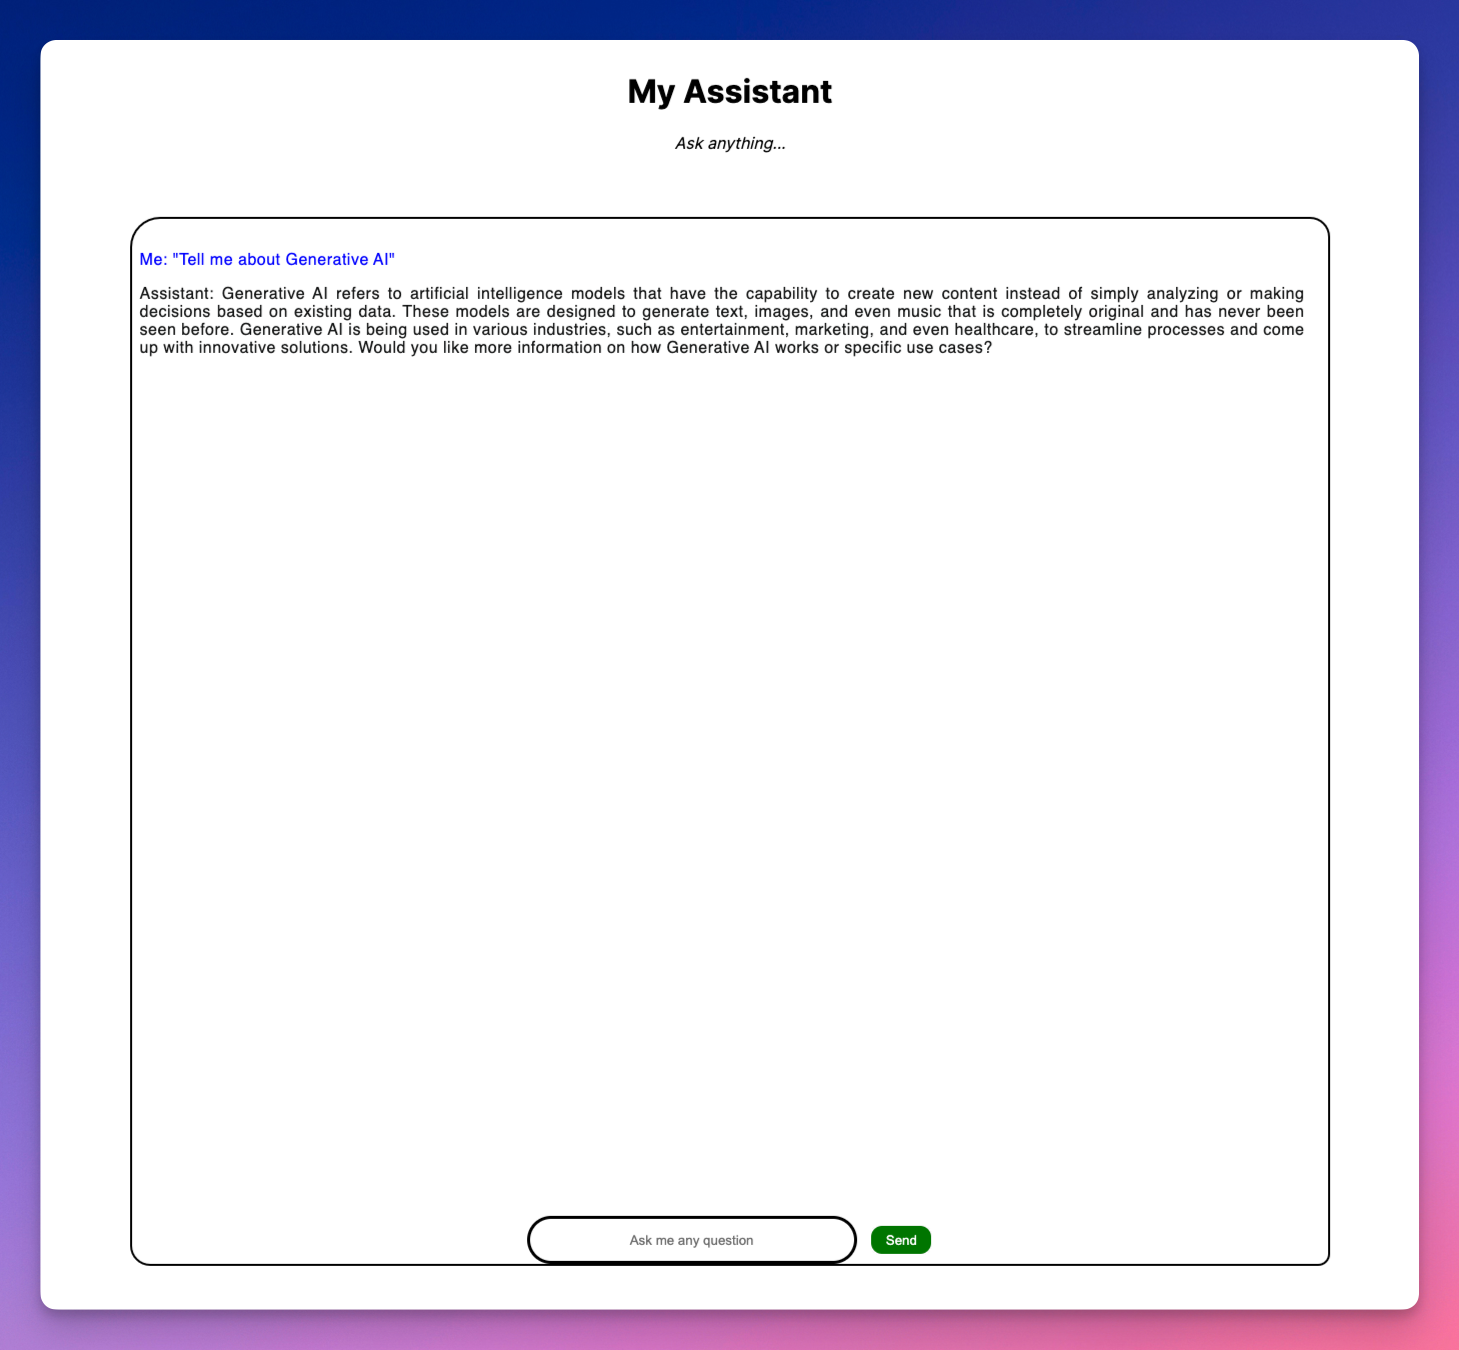 讓我們透過 Next 應用程式向 AI 助理詢問幾個開發人員問題。 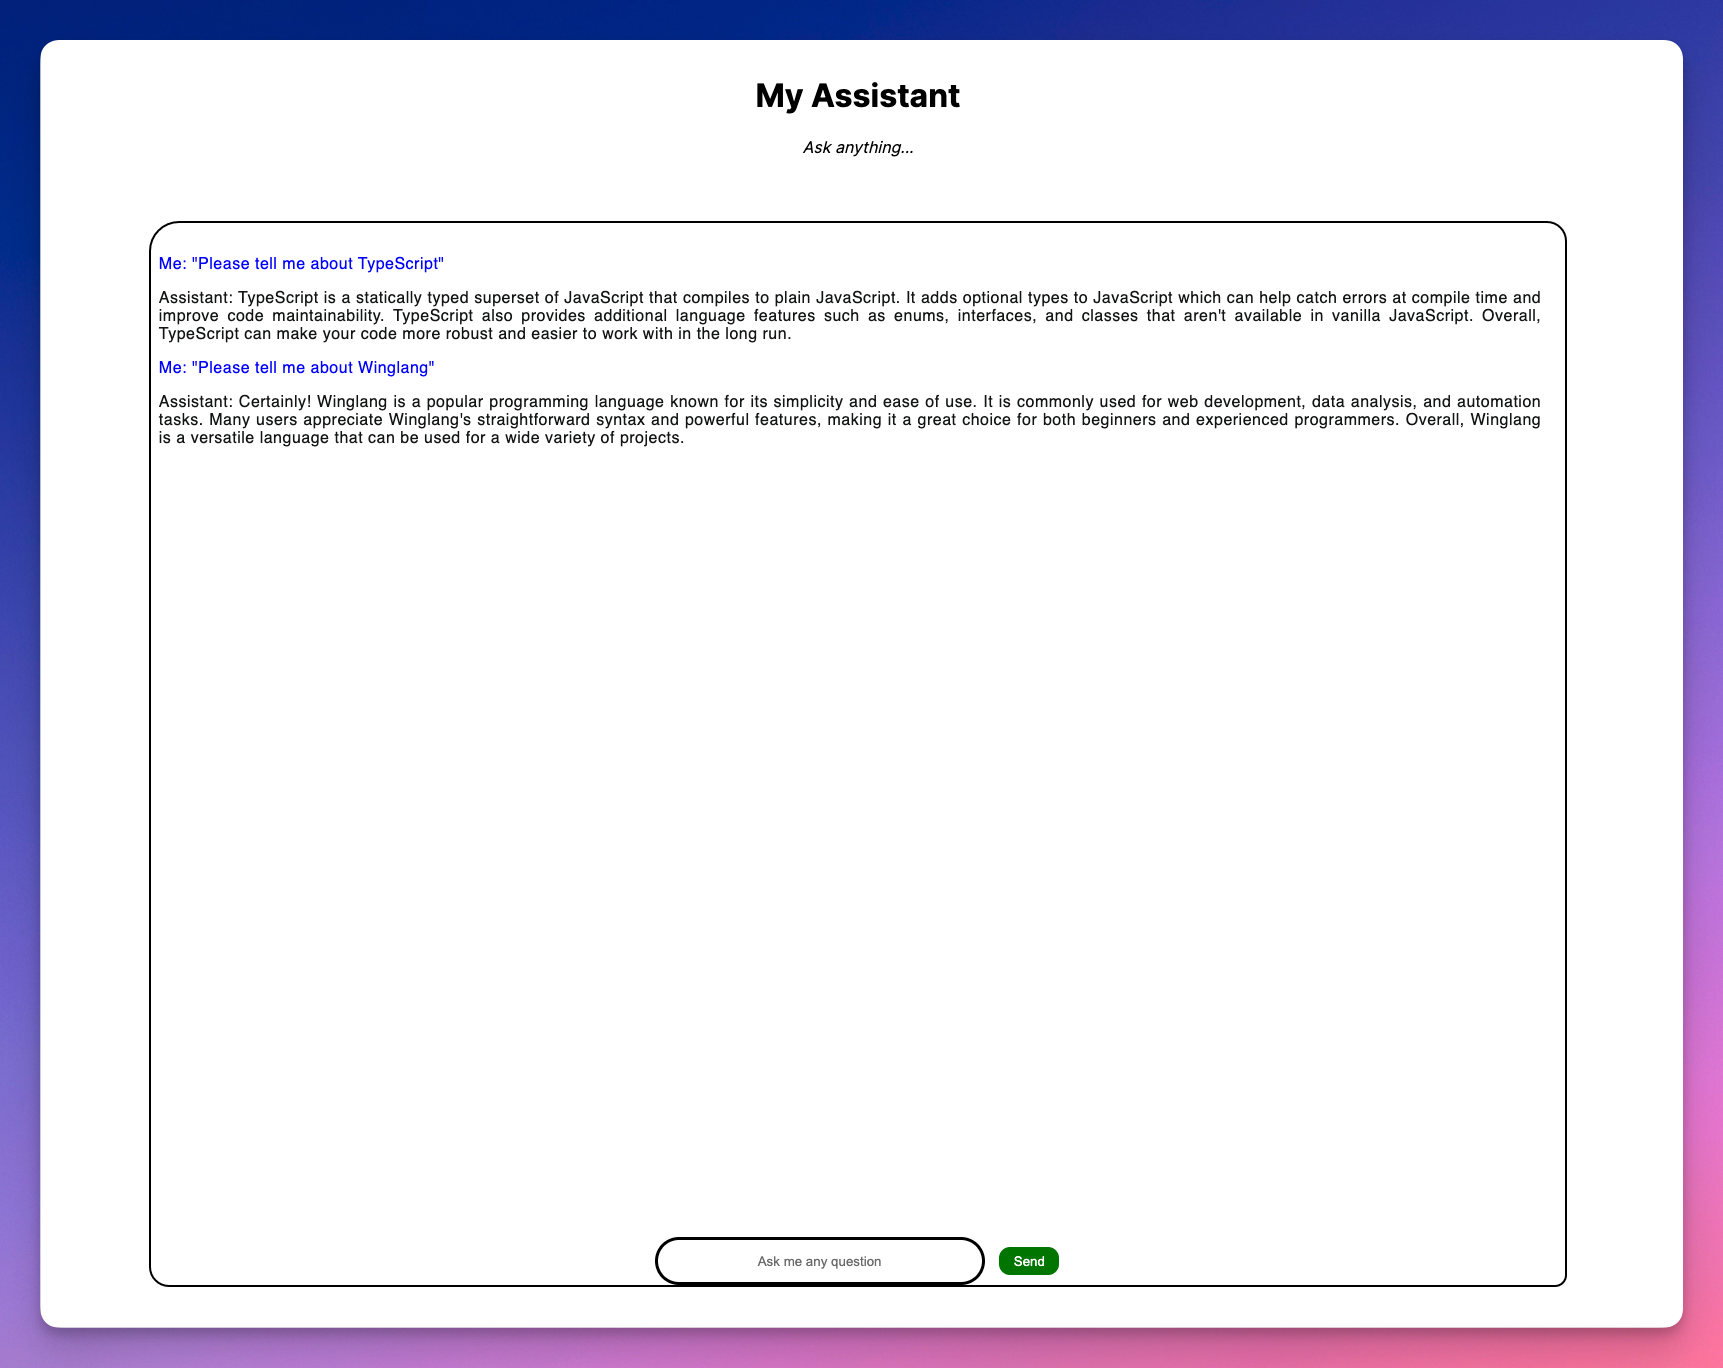 將您的應用程式部署到 AWS -------------- 我們已經了解了我們的應用程式如何在本地執行。 Wing 也允許您部署到包括 AWS 在內的任何雲端提供者。要部署到 AWS,您需要使用您的憑證來設定[Terraform](https://terraform.io/downloads)和[AWS CLI](https://docs.aws.amazon.com/cli/) 。 - 使用`tf-aws`編譯到 Terraform/AWS 。此指令指示編譯器使用 Terraform 作為配置引擎,將所有資源綁定到預設的 AWS 資源集。 ``` cd ~/assistant/backend wing compile --platform tf-aws main.w ``` --- - 執行 Terraform 初始化並應用 ``` cd ./target/main.tfaws terraform init terraform apply ``` --- 注意: `terraform apply`需要一些時間才能完成。 您可以[在此處](https://github.com/NathanTarbert/chatgpt-client-wing-nextjs)找到本教程的完整程式碼。 總結一下 ---- 正如我之前提到的,我們都應該關心我們的應用程式的安全性,建立您自己的 ChatGPT 用戶端並將其部署到您的雲端基礎設施可以為您的應用程式提供一些非常好的[保障](https://docs.aws.amazon.com/whitepapers/latest/aws-overview/security-and-compliance.html#:~:text=Keep%20Your%20data%20safe%20%E2%80%94%20The,compliance%20programs%20in%20its%20infrastructure.)。 我們在本教程中演示了[Wing](https://git.new/wing-repo)如何提供一種簡單的方法來建置可擴展的雲端應用程式,而無需擔心底層基礎設施。 如果您有興趣建立更酷的東西,Wing 擁有一個活躍的開發人員社區,他們可以合作建立雲端願景。我們很高興在那裡見到你。 只需前往我們的[Discord](https://t.winglang.io/discord)打個招呼即可! --- 原文出處:https://dev.to/winglang/building-your-own-chatgpt-graphical-client-with-nextjs-and-wing-29jj
過去幾天對於人工智慧來說是令人興奮的。 然而,作為開發人員,我們中的許多人還不了解人工智慧的易用性。 今天,我們將介紹您可以使用人工智慧輕鬆建立的精彩專案。無需成為人工智慧專家,每個工具都附帶教學或程式碼演練。 讓我們跳進去吧!  --- 1. [CopilotKit](https://github.com/CopilotKit/CopilotKit) - 在數小時內為您的產品提供 AI Copilot。 ------------------------------------------------------------------------------------ [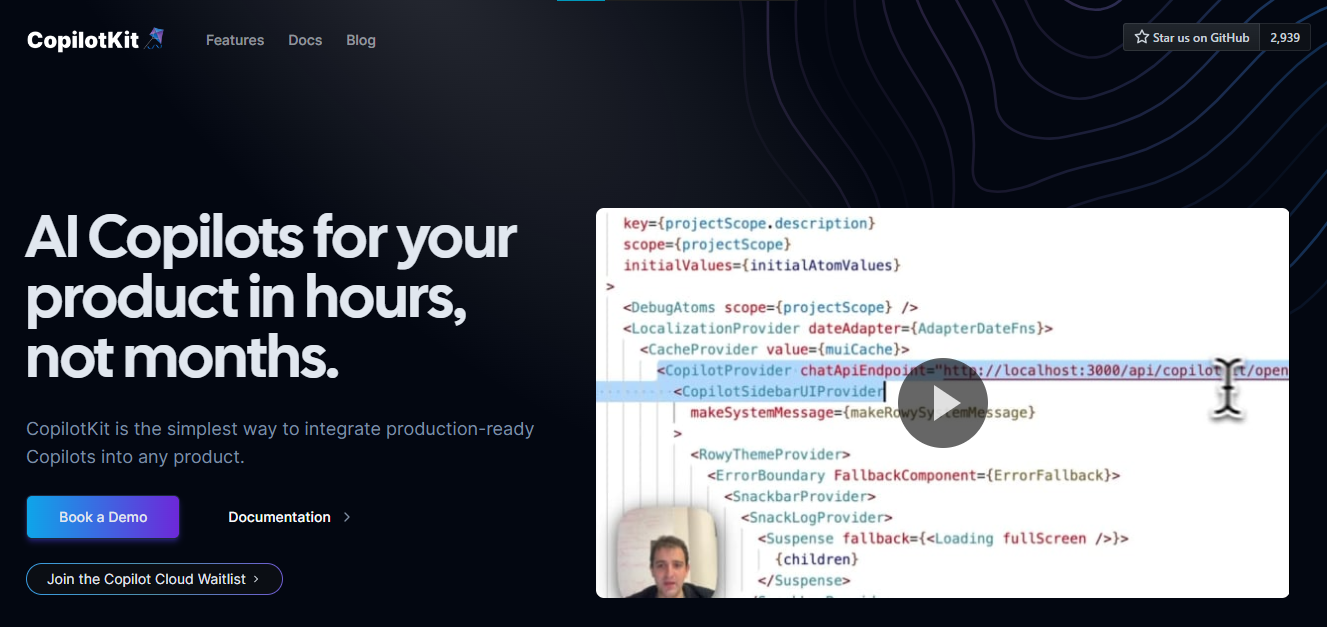](https://github.com/CopilotKit/CopilotKit) 將 AI 功能整合到 React 中是很困難的,這就是 Copilot 的用武之地。一個簡單快速的解決方案,可將可投入生產的 Copilot 整合到任何產品中! 您可以使用兩個 React 元件將關鍵 AI 功能整合到 React 應用程式中。它們還提供內建(完全可自訂)Copilot 原生 UX 元件,例如`<CopilotKit />` 、 `<CopilotPopup />` 、 `<CopilotSidebar />` 、 `<CopilotTextarea />` 。 開始使用以下 npm 指令。 ``` npm i @copilotkit/react-core @copilotkit/react-ui ``` Copilot Portal 是 CopilotKit 提供的元件之一,CopilotKit 是一個應用程式內人工智慧聊天機器人,可查看目前應用狀態並在應用程式內採取操作。它透過插件與應用程式前端和後端以及第三方服務進行通訊。 這就是整合聊天機器人的方法。 `CopilotKit`必須包裝與 CopilotKit 互動的所有元件。建議您也開始使用`CopilotSidebar` (您可以稍後切換到不同的 UI 提供者)。 ``` "use client"; import { CopilotKit } from "@copilotkit/react-core"; import { CopilotSidebar } from "@copilotkit/react-ui"; import "@copilotkit/react-ui/styles.css"; export default function RootLayout({children}) { return ( <CopilotKit url="/path_to_copilotkit_endpoint/see_below"> <CopilotSidebar> {children} </CopilotSidebar> </CopilotKit> ); } ``` 您可以使用此[快速入門指南](https://docs.copilotkit.ai/getting-started/quickstart-backend)設定 Copilot 後端端點。 之後,您可以讓 Copilot 採取行動。您可以閱讀如何提供[外部上下文](https://docs.copilotkit.ai/getting-started/quickstart-chatbot#provide-context)。您可以使用`useMakeCopilotReadable`和`useMakeCopilotDocumentReadable`反應掛鉤來執行此操作。 ``` "use client"; import { useMakeCopilotActionable } from '@copilotkit/react-core'; // Let the copilot take action on behalf of the user. useMakeCopilotActionable( { name: "setEmployeesAsSelected", // no spaces allowed in the function name description: "Set the given employees as 'selected'", argumentAnnotations: [ { name: "employeeIds", type: "array", items: { type: "string" } description: "The IDs of employees to set as selected", required: true } ], implementation: async (employeeIds) => setEmployeesAsSelected(employeeIds), }, [] ); ``` 您可以閱讀[文件](https://docs.copilotkit.ai/getting-started/quickstart-textarea)並查看[演示影片](https://github.com/CopilotKit/CopilotKit?tab=readme-ov-file#demo)。 您可以輕鬆整合 Vercel AI SDK、OpenAI API、Langchain 和其他 LLM 供應商。您可以按照本[指南](https://docs.copilotkit.ai/getting-started/quickstart-chatbot)將聊天機器人整合到您的應用程式中。 基本想法是非常快速地建立人工智慧聊天機器人,而無需在製作任何基於法學碩士的應用程式時費力。 用例是巨大的,作為開發人員,我們絕對應該在下一個專案中嘗試使用 CopilotKit。 CopilotKit 在 GitHub 上擁有超過 5800 顆星,發布了 200 多個版本,這意味著它們不斷改進。  {% cta https://go.copilotkit.ai/Anmol %} Star CopilotKit ⭐️ {% endcta %} --- ### 🎯 使用 CopilotKit 建立的熱門應用程式。 我們可以使用 CopilotKit 建立許多創新應用程式,所以讓我們探索一些脫穎而出的應用程式! ### ✅ [人工智慧驅動的部落格平台](https://dev.to/copilotkit/how-to-build-an-ai-powered-blogging-platform-nextjs-langchain-supabase-1hdp)。  您可以閱讀本文,使用`Next.js` 、 `Langchain` 、 `Supabase`和`CopilotKit`來建立這個令人驚嘆的應用程式。 LangChain&Tavily用作網路搜尋人工智慧代理,Supabase用於儲存和檢索部落格平台文章資料,CopilotKit用於將人工智慧整合到應用程式中。 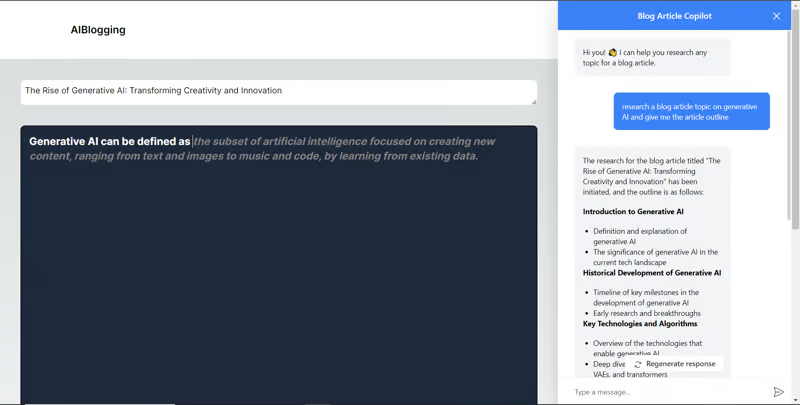 您可以檢查[GitHub 儲存庫](https://github.com/TheGreatBonnie/aipoweredblog)。 ### ✅ [V0.dev 複製](https://dev.to/copilotkit/i-created-a-v0-clone-with-nextjs-gpt4-copilotkit-3cmb)。 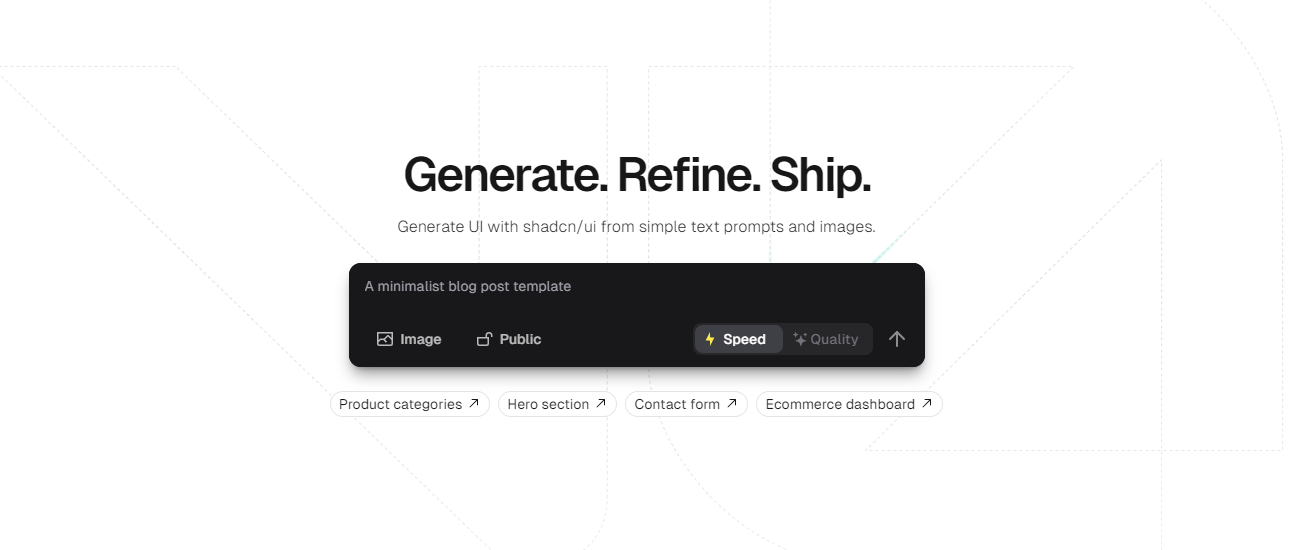 如果您不熟悉,Vercel 的 V0 是一款人工智慧驅動的工具,可讓您根據提示產生 UI,以及許多其他有用的功能。 shadcn 元件現在可以在文件本身的 v0 中進行編輯(如其網站所示)。  您可以使用`Next.js` 、 `GPT4`和`CopilotKit`建立 V0 的克隆。這個詳細的教程名列前 7 名,總的來說,這是一個值得加入到您的作品集中的偉大專案。 簽名頁的產生輸出如下所示。 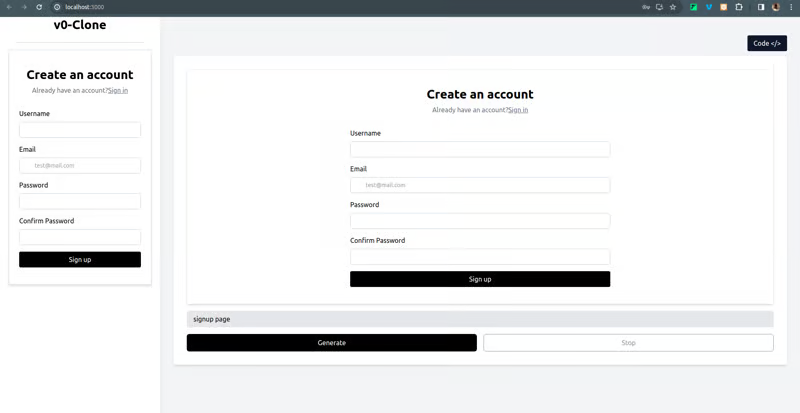 您可以透過點擊右上角的按鈕輕鬆在`React Code`和`UI`之間切換。這麼酷的概念! 您可以檢查[GitHub 儲存庫](https://github.com/Tabintel/v0-copilot-next)。 ### ✅ [人工智慧行銷經理](https://dev.to/copilotkit/build-an-ai-powered-campaign-manager-nextjs-openai-copilotkit-59ii)。  您可以使用`Next.js` 、 `OpenAI` 、 `Radix UI` (用於實現可存取性)、 `Recharts` (用於建立互動式圖表)以及`CopilotKit`來建立這個出色的專案來閱讀本文。 您可以觀看 David 的示範! {% 嵌入 https://youtu.be/gCJpH6Tnj5g %} 如果你想用更少的錢學到更多,這是我最喜歡的一個。 我喜歡它的 UI(一般教學不是這樣),這正是它成為你的編碼清單上的一個乾淨專案的原因:)  您可以查看該應用程式的[現場演示](https://campaign-manager-demo.vercel.app/)。 您可以檢查[GitHub 儲存庫](https://github.com/CopilotKit/campaign-manager-demo)。 ### ✅ [附有人工智慧副駕駛的電子表格應用程式](https://dev.to/copilotkit/build-an-ai-powered-spreadsheet-app-nextjs-langchain-copilotkit-109d)。  您可以閱讀本文,使用`Next.js` 、 `GPT-4` 、 `LangChain`和`CopilotKit`來建立這個很棒的工具。 為了使工作更輕鬆,它使用[React Spreadsheet](https://github.com/iddan/react-spreadsheet)套件為 React 和[Tavily AI](https://tavily.com/)建立簡單的可自訂電子表格作為搜尋引擎,使 AI 代理能夠進行研究並存取即時知識 你可以觀看這個演示! {% 嵌入 https://www.youtube.com/watch?v=kGQ9xl5mSoQ %} 您也可以查看[現場演示](https://spreadsheet-demo-tau.vercel.app/)。我可以肯定地說,這是一個獨特的案例,你可以得到很多啟發。 您可以檢查[GitHub 儲存庫](https://github.com/CopilotKit/spreadsheet-demo)。 ### ✅[與您的履歷聊天](https://dev.to/copilotkit/how-to-build-the-with-nextjs-openai-1mhb)。  您可以閱讀本文,使用`Next.js` 、 `OpenAI`和`CopilotKit`來建立這個很棒的用例。 您不僅可以使用 ChatGPT 產生履歷,還可以將其匯出為 PDF,甚至可以透過與其對話來進一步改進它。多酷啊,對吧:) 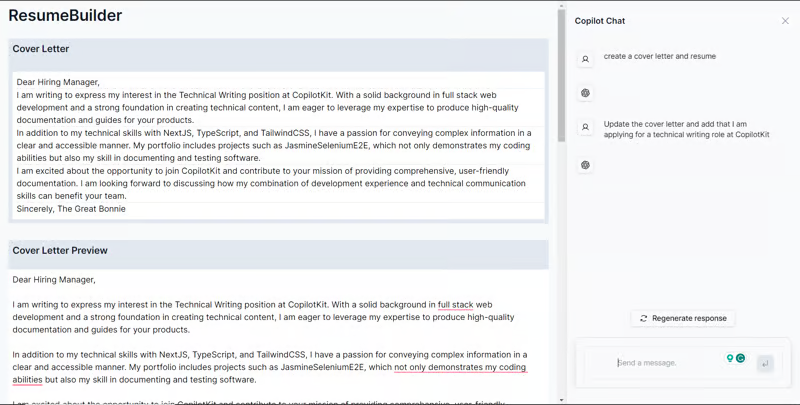 您可以檢查[GitHub 儲存庫](https://github.com/TheGreatBonnie/AIPoweredResumeBuilder)。 ### ✅ [文字到 Powerpoint 應用程式](https://dev.to/copilotkit/how-to-build-ai-powered-powerpoint-app-nextjs-openai-copilotkit-ji2)。 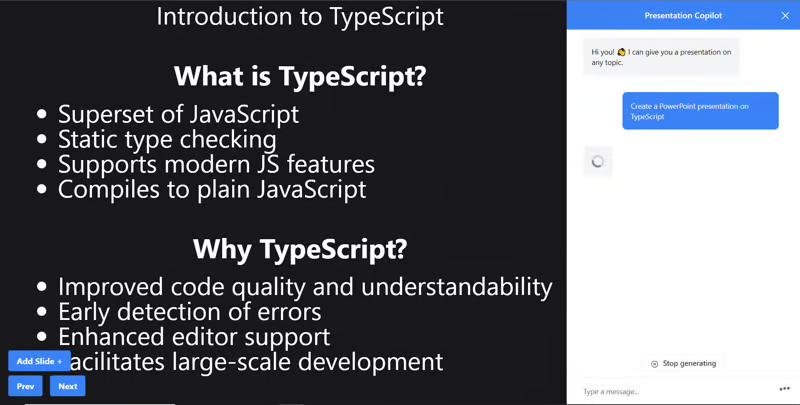 您可以閱讀本文,使用`Next.js` 、 `OpenAI`和`CopilotKit`建立 Text to Powerpoint 應用程式。 這是一個簡單但非常強大的概念,本文也清楚地說明如何在任何幻燈中加入背景圖像。 您可以檢查[GitHub 儲存庫](https://github.com/TheGreatBonnie/aipoweredpresentation)。 ### ✅ [StudyPal:您的人工智慧驅動的個人化學習伴侶](https://dev.to/rajesh-adk-137/studypal-your-ai-powered-personalized-learning-companion-59d)。  您可以從精選清單中選擇您想要的主題,為個人化的學習旅程奠定基礎。 您需要提供有關您的教育背景的詳細訊息,以便 StudyPal 能夠根據他們當前的知識水平定製材料和練習。 `Additional Details`部分可讓學生指定重點領域,確保內容與其學習目標一致。 您可以閱讀本文,使用`React` 、 `Node`和`CopilotKit`來建立這個很棒的用例。 您可以觀看該應用程式的[演示](https://github-production-user-asset-6210df.s3.amazonaws.com/89499267/328419789-a06b11c6-ffbc-44b6-96b0-648d2a38cd7c.mp4?X-Amz-Algorithm=AWS4-HMAC-SHA256&X-Amz-Credential=AKIAVCODYLSA53PQK4ZA%2F20240512%2Fus-east-1%2Fs3%2Faws4_request&X-Amz-Date=20240512T083208Z&X-Amz-Expires=300&X-Amz-Signature=f6fe016e65e167e94b8322b70743a7fb02fed91f2c87c5af7459e1fa022faac2&X-Amz-SignedHeaders=host&actor_id=74038190&key_id=0&repo_id=793889064)。 您可以檢查[GitHub 儲存庫](https://github.com/rajesh-adk-137/StudyPal)。 --- 2.什麼是郎鏈? -------- 其餘專案將與 langchain 和 AI 相關(有些使用 python)。最好稍微了解一下這一點。 LangChain 是用於開發由大型語言模型(LLM)支援的應用程式的框架。 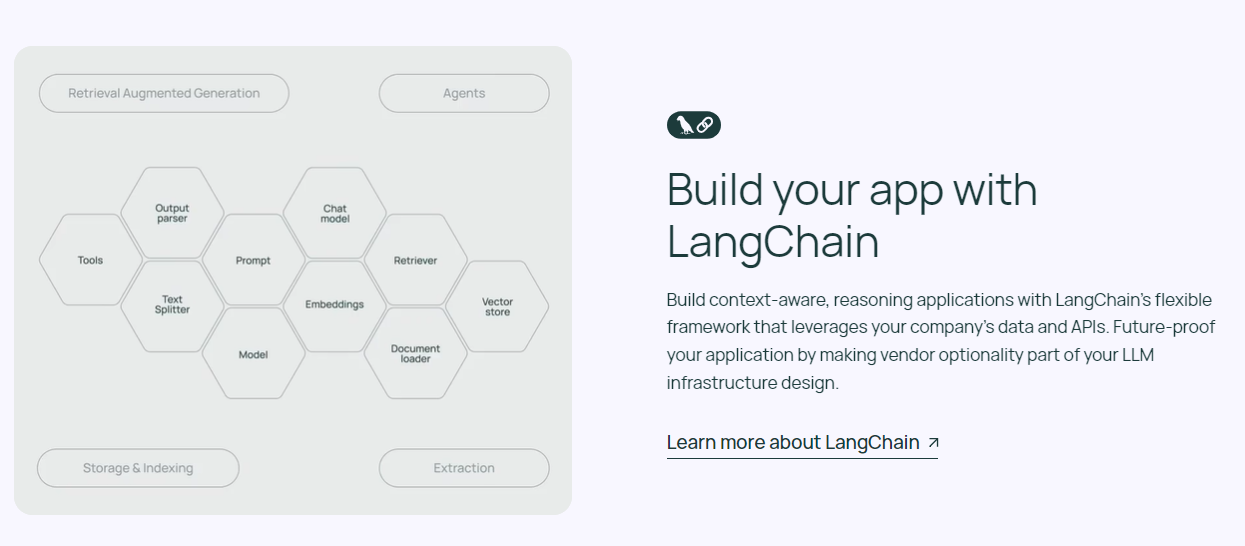 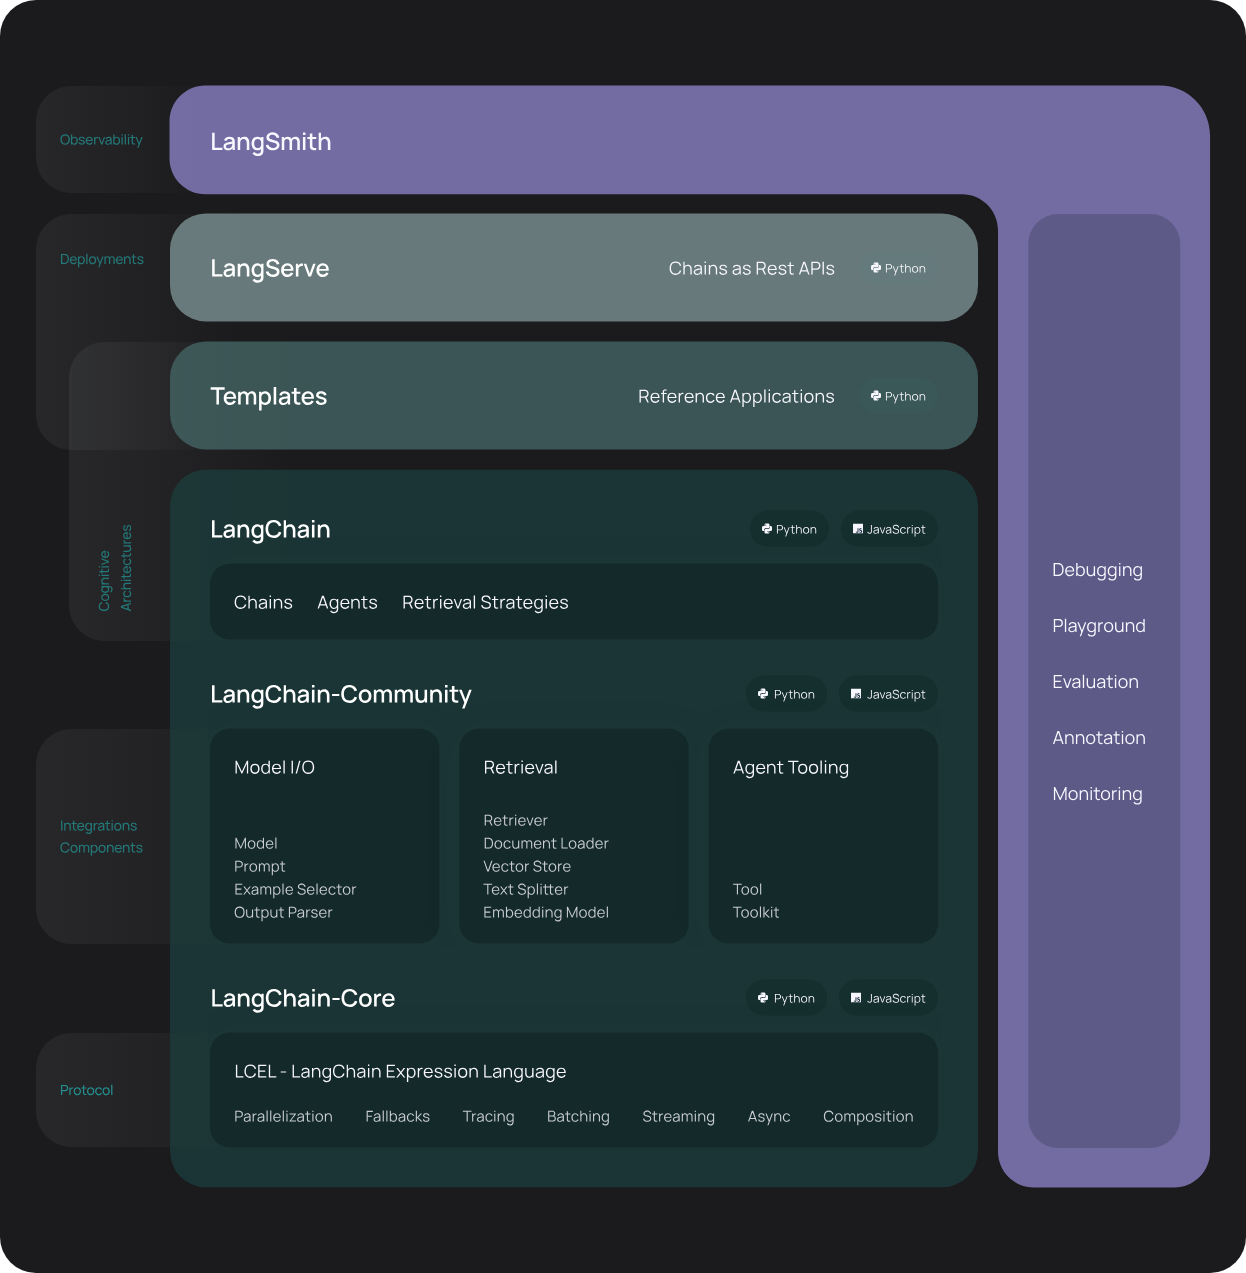 總體而言,LangChain 簡化了 LLM 申請生命週期的每個階段。您可以閱讀[官方文件](https://python.langchain.com/docs/get_started/introduction/)以了解更多內容。 如果您想了解有關 langchain 的更多訊息,我建議您觀看 freeCodeCamp 的[本教程](https://www.youtube.com/watch?v=HSZ_uaif57o)。 {% 嵌入 https://www.youtube.com/watch?v=HSZ\_uaif57o %} --- ### 🎯 使用 Langchain/AI/Python 建立的熱門應用程式。 我們可以使用 langchain 建立很多很多高級應用程式,所以讓我們探索一些脫穎而出的應用程式! ### ✅ [Mac 上的語音助理](https://github.com/chidiwilliams/GPT-Automator)- 您的語音控制 Mac 助理。 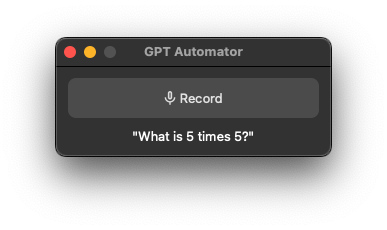 您的語音控制 Mac 助理。 GPT Automator 可讓您使用語音在 Mac 上執行任務。例如,打開應用程式、尋找餐廳、綜合資訊。太棒了:D 它是在倫敦黑客馬拉松期間建構的。 它有兩個主要部分: A。語音命令:它使用本地執行的 Whisper(Buzz 的一個分支)來產生命令。 b.命令到行動:您向配備了我們編寫的自訂工具的 LangChain 代理程式發出命令。這些工具包括使用 AppleScript 控制電腦的作業系統以及使用 JavaScript 控制活動瀏覽器。最後,就像任何優秀的人工智慧一樣,我們讓代理商使用 AppleScript 說出最終結果「{Result}」(如果您以前沒有使用過,請嘗試在 Mac 終端機中輸入「Hello World!」)。 我們製作了一個自訂工具,讓法學碩士使用 AppleScript 控制電腦。提示符是文件字串: ``` @tool def computer_applescript_action(apple_script): """ Use this when you want to execute a command on the computer. The command should be in AppleScript. Here are some examples of good AppleScript commands: Command: Create a new page in Notion AppleScript: tell application "Notion" activate delay 0.5 tell application "System Events" to keystroke "n" using {{command down}} end tell ... Write the AppleScript for the Command: Command: """ p = subprocess.Popen(['osascript', '-'], stdin=subprocess.PIPE, stdout=subprocess.PIPE, stderr=subprocess.PIPE) stdout, stderr = p.communicate(applescript.encode('utf-8')) if p.returncode != 0: raise Exception(stderr) decoded_text = stdout.decode("utf-8") return decoded_text ``` 如果您想知道它是如何運作的,GPT Automator 使用 OpenAI 的 Whisper 將您的音訊輸入轉換為文字。然後,它使用LangChain Agent 選擇一組操作,包括使用OpenAI 的GPT-3(“text-davinci-003”)從提示符號產生AppleScript(用於桌面自動化)和JavaScript(用於瀏覽器自動化)命令,然後執行產生的腳本。 請記住,這不適用於生產用途。該專案執行從自然語言產生的程式碼,可能容易受到提示注入和類似的攻擊。這項工作是作為概念驗證而進行的。 您可以閱讀[安裝指南](https://github.com/chidiwilliams/GPT-Automator?tab=readme-ov-file#instructions)。 讓我們看看一些提示及其作用: ⚡ 求計算結果。 > 提示:“2 + 2 是什麼?” 它將編寫 AppleScript 開啟計算器並輸入 5 \* 5。 ⚡ 尋找附近的餐廳。 > 提示:“查找我附近的餐廳” 它將打開 Chrome,谷歌搜尋附近的餐廳,解析頁面,然後返回最上面的結果。有時它很厚顏無恥,反而會打開谷歌地圖結果並說「最好的餐廳是谷歌地圖頁面頂部的餐廳」。其他時候,它會打開 Google 上的頂部連結 - 並卡在 Google 可存取性頁面上... 以下是執行時列印到終端的內容: ``` Command: Find a great restaurant near Manchester. > Entering new AgentExecutor chain... I need to search for a restaurant near Manchester. Action: chrome_open_url Action Input: https://www.google.com/search?q=restaurant+near+Manchester Observation: Thought: I need to read the page Action: chrome_read_the_page Action Input: Observation: Accessibility links Skip to main content ... # Shortned for brevity Dishoom Manchester 4.7 (3.3K) · £££ · Indian 32 Bridge St · Near John Rylands Library Closes soon ⋅ 11 pm Stylish eatery for modern Indian fare San Carlo 4.2 (2.8K) · £££ · Italian 42 King St W · Near John Rylands Library Closes soon ⋅ 11 pm Posh, sceney Italian restaurant Turtle Bay Manchester Northern Quarter 4.7 Thought: I now know the final answer Final Answer: The 15 best restaurants in Manchester include El Gato Negro, Albert's Schloss, The Refuge, Hawksmoor, On The Hush, Dishoom, Banyan, Zouk Tea Room & Grill, Edison Bar, MyLahore Manchester, Turtle Bay Manchester Northern Quarter, San Carlo, The Black Friar, Mana, and Tast Cuina Catalana. ``` 我不能保證這些餐廳值得,請自行承擔風險。哈哈! ⚡ 如果您要求 GPT Automator 擦除您的計算機,它會的。 是的,如果您要求的話,它會擦除您的電腦! 我內心的自我尖叫著要這麼做:) 您可以在這裡查看完整的演示! {% 嵌入 https://www.loom.com/share/7bfa82c604f3412fbbb04191ce2ae12f %} 您可以在[Chidi 的部落格](https://chidiwilliams.com/posts/gpt-automator)上閱讀更多內容。 它更像是一個業餘專案,因此他們在 GitHub 上有大約 200 個 star,但它非常酷。 您可以檢查[GitHub 儲存庫](https://github.com/chidiwilliams/GPT-Automator)。 ✅ [Instrukt](https://github.com/blob42/Instrukt) - 終端中整合人工智慧。 ------------------------------------------------------------- 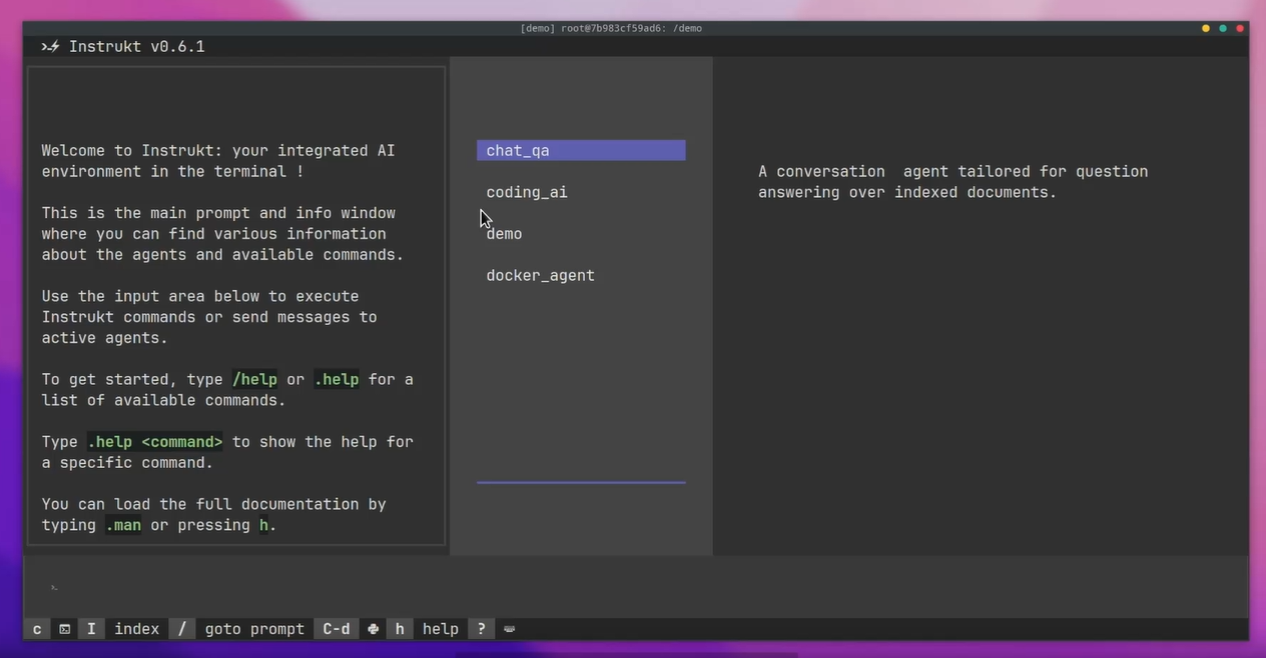 Instrukt是一個基於終端的AI整合環境。它提供了一個平台,用戶可以: - 建立並指導模組化人工智慧代理。 - 產生問答的文件索引。 - 建立工具並將其附加到任何代理程式。 用自然語言指導它們,並且為了安全起見,在安全容器(目前使用 Docker 實作)中執行它們,以在其專用的沙盒空間中執行任務。 使用`Langchain` 、 `Textual`和`Chroma`建構。 開始使用以下命令。 ``` pip install instrukt[all] ```  有許多令人興奮的功能,例如: - 基於終端的介面,讓強力鍵盤使用者無需離開鍵盤即可指示 AI 代理。 - 對您的資料建立索引並讓代理程式檢索它以進行問答。您可以使用簡單的 UI 建立和組織索引。 - 索引建立將自動偵測程式語言並相應地優化拆分/分塊策略。 - 在安全的 Docker 容器內執行代理程式以確保安全和隱私。 - 整合的 REPL-Prompt 可實現與代理程式的快速交互,以及用於開發和測試的快速回饋循環。 - 您可以使用自訂命令自動執行重複任務。它還具有內建的提示/聊天歷史記錄。 您可以閱讀有關所有[功能的](https://github.com/blob42/Instrukt?tab=readme-ov-file#features)資訊。 您可以閱讀[安裝指南](https://blob42.github.io/Instrukt/install.html)。 您還可以使用內建的 IPython 控制台來除錯和內省代理,這是一個簡潔的小功能。 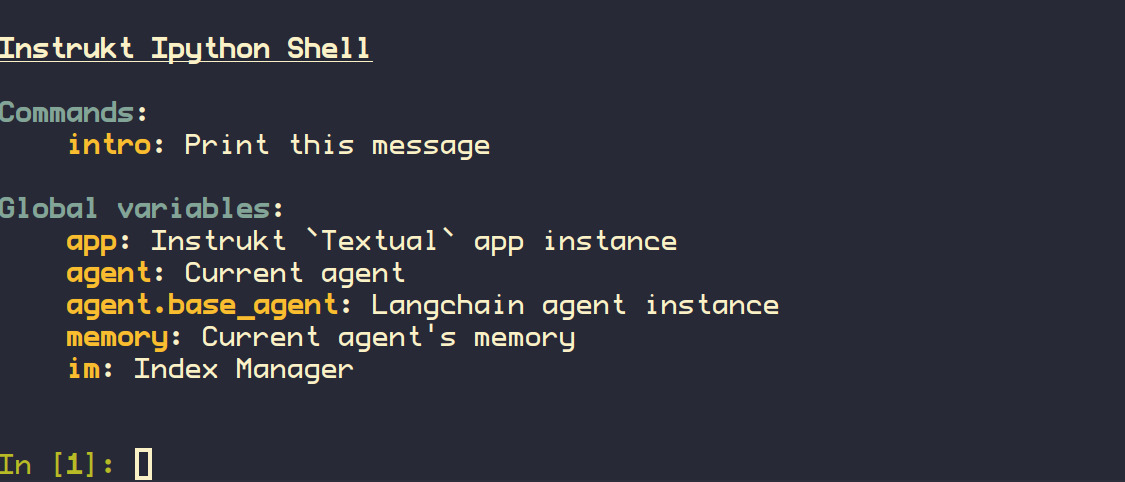 Instrukt 已獲得 AGPL 許可證,這意味著任何人都可以將其用於任何目的。 可以肯定地說,Instrukt 是您觸手可及的終端人工智慧指揮官。 這是一個新專案,因此他們在 GitHub 上有大約 200 多顆星,但用例非常好。 您可以檢查[GitHub 儲存庫](https://github.com/blob42/Instrukt)。 ✅ [ChatFiles](https://github.com/guangzhengli/ChatFiles) - 上傳您的檔案並與其對話。 ----------------------------------------------------------------------- 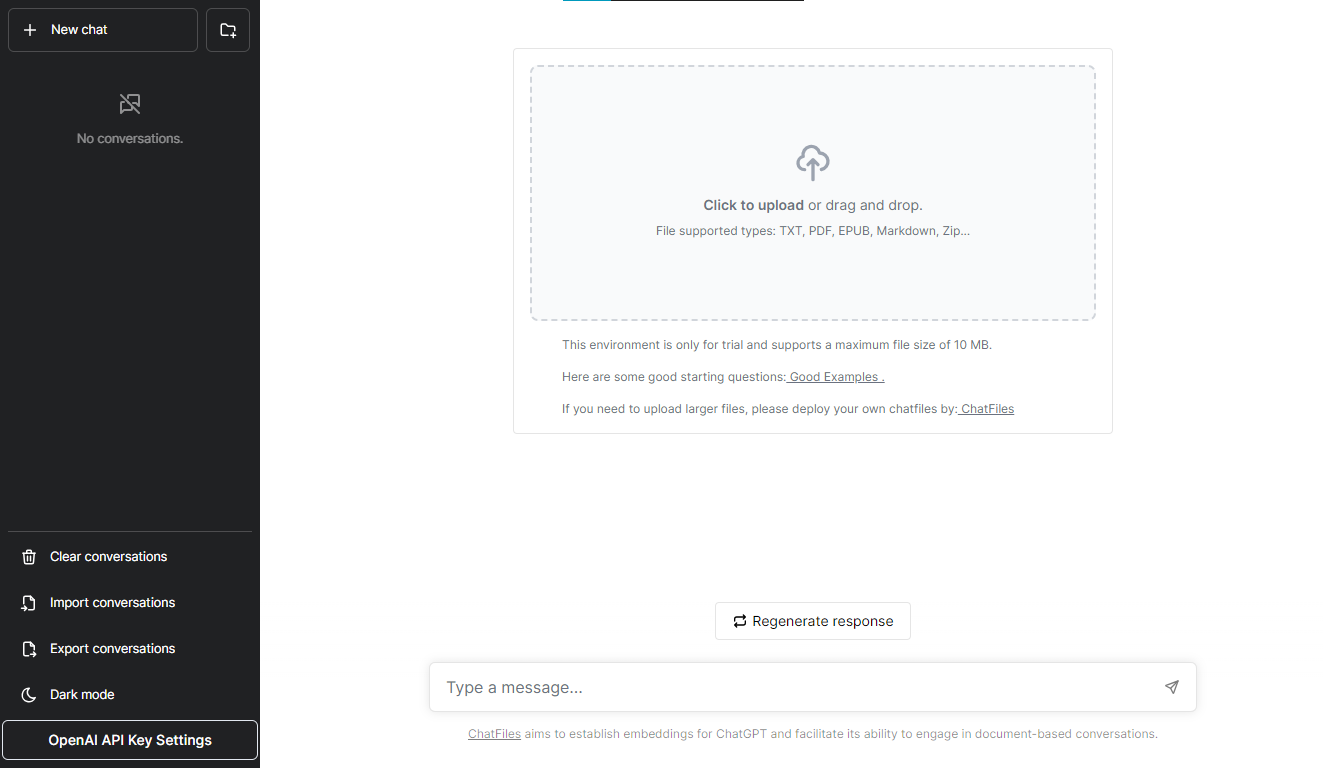 文件聊天機器人 — 多個文件,由 GPT / Embedding 提供支援。你可以上傳任何文件並與之對話,考慮到他們使用了另一個著名的開源專案,UI 非常好。 它在底層使用 Langchain 和[Chatbot-ui](https://github.com/mckaywrigley/chatbot-ui) 。使用 Nextjs、TypeScript、Tailwind 和 Supabase(向量 DB)建構。 如果您想了解該方法和技術架構,那麼就在這裡! 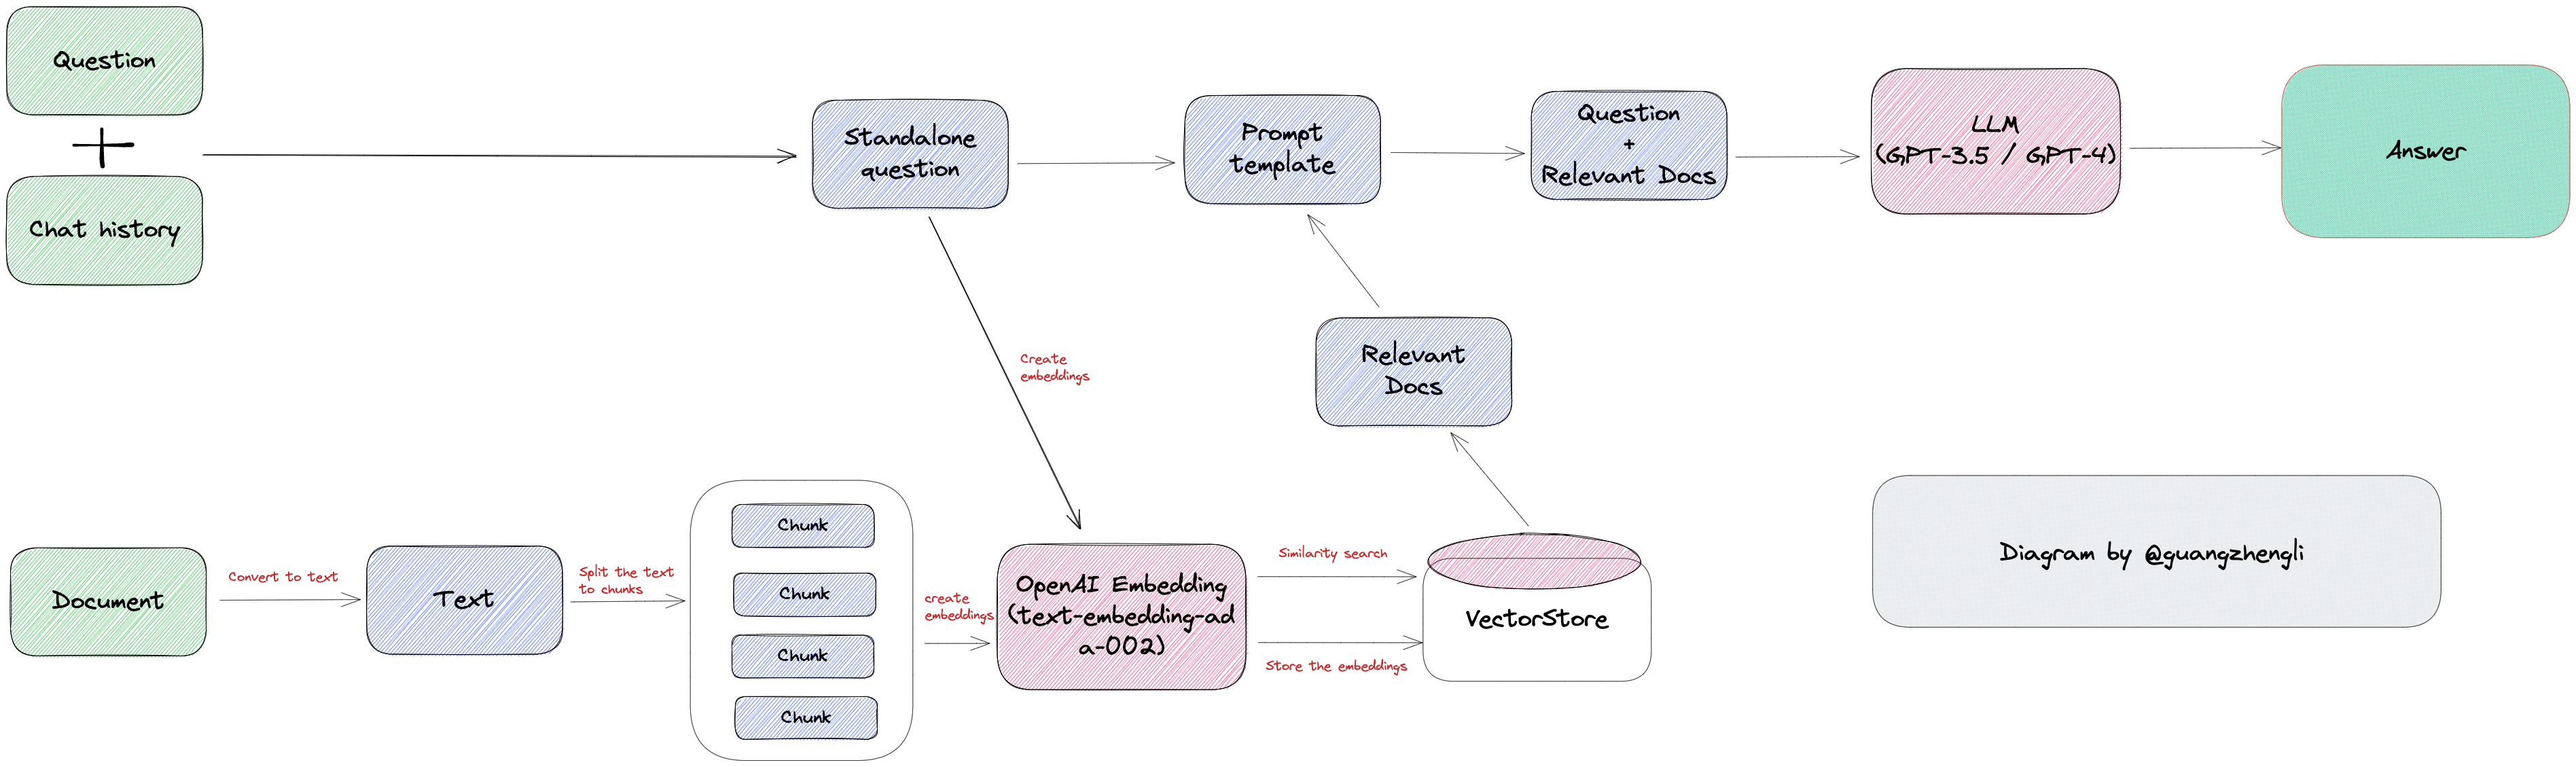 此環境僅用於試用,支援最大檔案大小為 10 MB,這是一個缺點,如果您想要更大的大小,則可以[在本機安裝](https://github.com/guangzhengli/ChatFiles?tab=readme-ov-file#how-to-run-locally)。 他們提供了您可以使用的[入門問題](https://github.com/guangzhengli/ChatFiles/blob/main/doc/Example.md)。您可以查看[現場演示](https://chatfile.vectorhub.org/)。 他們在 GitHub 上有 3k star,並且發布了`v0.3`版本。 您可以檢查[GitHub 儲存庫](https://github.com/guangzhengli/ChatFiles)。 ✅ [具有多代理協作的終極人工智慧自動化 - LangGraph + GPT 研究人員](https://blog.langchain.dev/how-to-build-the-ultimate-ai-automation-with-multi-agent-collaboration/)。 ------------------------------------------------------------------------------------------------------------------------------------------------- LangGraph 是一個使用 LLM 建立有狀態、多參與者應用程式的函式庫。此範例使用 Langgraph 自動化對任何給定主題的深入研究過程。 簡而言之,這個範例展示了人工智慧代理團隊如何協同工作,對給定主題進行從規劃到發布的研究。此範例還將利用領先的自主研究代理[GPT Researcher](https://github.com/assafelovic/gpt-researcher) ,我已在過去的一篇文章中介紹過該代理。 研究團隊由七名法學碩士代理人: ⚡ `Chief Editor` - 監督研究過程並管理團隊。這是使用 LangGraph 協調其他代理程式的「主」代理程式。該代理充當主要的 LangGraph 介面。 ⚡ `GPT Researcher` - 專門的自主代理,對給定主題進行深入研究。 ⚡ `Editor` - 負責規劃研究大綱和結構。 ⚡ `Reviewer` - 根據一組標準驗證研究結果的正確性。 ⚡ `Reviser` - 根據審查者的回饋修改研究結果。 ⚡ `Writer` - 負責編譯和撰寫最終報告。 ⚡ `Publisher` - 負責以各種格式發布最終報告。 自動化過程基於以下階段(架構),文章中清楚地顯示了這一點。 - 策劃階段。 - 資料收集和分析。 - 審查和修訂。 - 寫作並提交。 - 出版品. 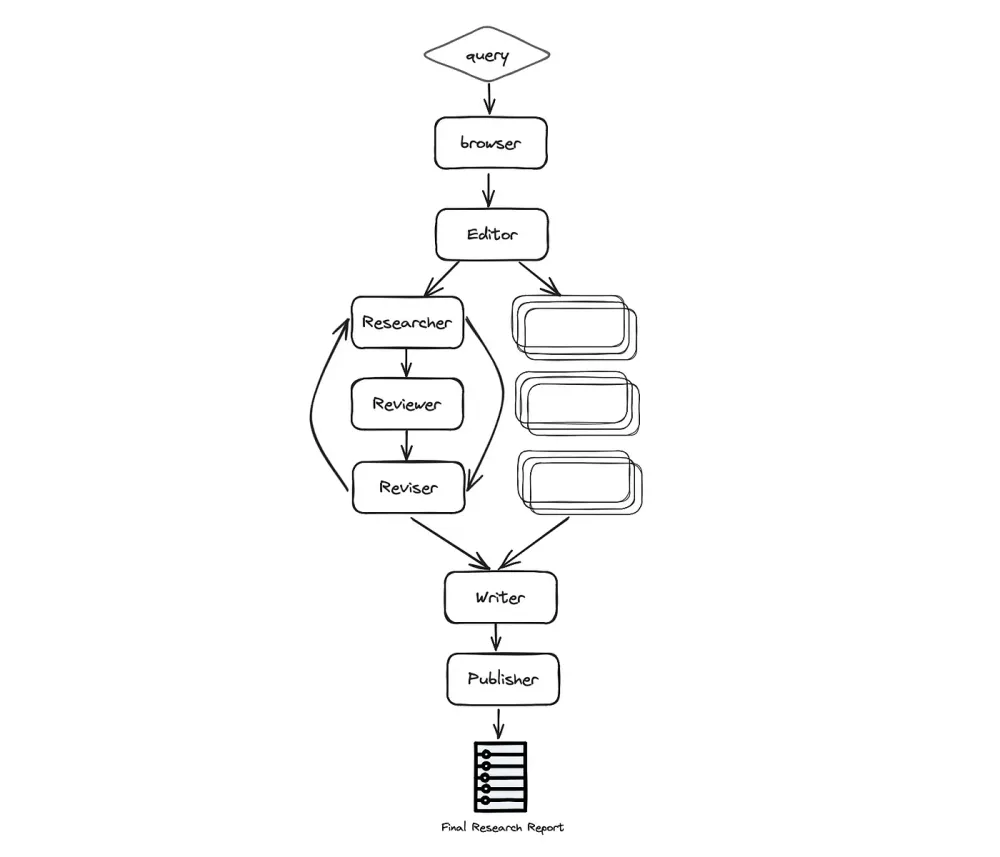 您可以閱讀有關正在發生的事情的[詳細步驟文件](https://github.com/assafelovic/gpt-researcher/tree/master/multi_agents?ref=blog.langchain.dev#steps)。 助手的最終運作將產生 Markdown、PDF 和 Docx 等格式的最終研究報告。 您可以閱讀這篇文章,其中介紹[如何透過多代理協作來建立終極人工智慧自動化](https://blog.langchain.dev/how-to-build-the-ultimate-ai-automation-with-multi-agent-collaboration/),其中 Wix 研發主管 Assaf Elovic 介紹如何使用 LangGraph 與專業代理團隊建立自主研究助理。它具有易於理解的程式碼範例,並清楚地說明正在發生的事情。開發者必讀! 最好的部分是,如果您想更改研究查詢並自訂報告,只需編輯主目錄中的`task.json`檔案。真的很棒:) 它由 GPT 研究人員負責,擁有 10k 顆星,但自從上次提交是在幾天前以來,它經常更新。 您可以檢查[GitHub 儲存庫](https://github.com/assafelovic/gpt-researcher/tree/master/multi_agents)。 ✅[僚機AI](https://github.com/e-johnstonn/wingmanAI) 。 --------------------------------------------------- 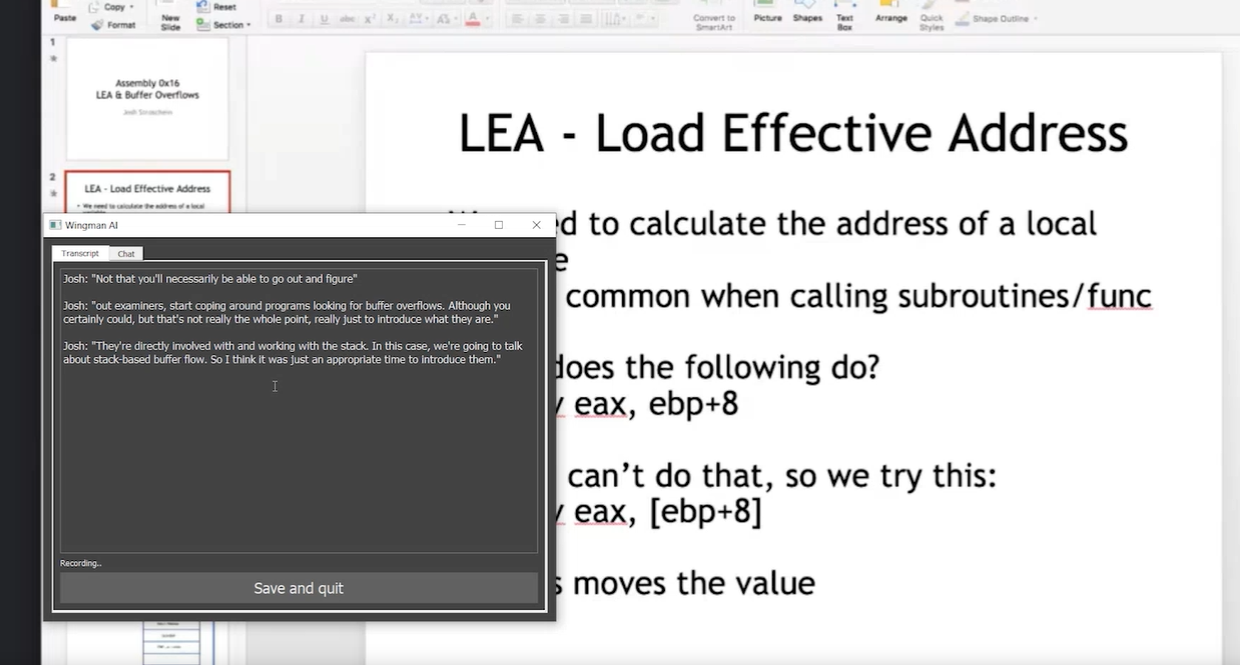 WingmanAI 是一款功能強大的工具,可與系統和麥克風音訊的即時轉錄進行互動。 它使用 ChatGPT,讓您與文字記錄即時交互,作為機器人的廣泛記憶體基礎,提供獨特的通訊平台。 當您載入指定人員的文字記錄時,機器人甚至可以回答有關過去對話的問題。 所有精彩功能的詳細介紹: ⚡ 它可以轉錄系統輸出和麥克風輸入音頻,讓您以易於閱讀的格式查看即時轉錄。 ⚡ 機器人以令牌有效的方式維護對話記錄,因為只有當前的文字區塊會傳遞給機器人。 ⚡ 您可以與 ChatGPT 支援的機器人聊天,機器人會即時讀取您的文字記錄。 ⚡ 您可以繼續附加到已儲存的記錄中,隨著時間的推移建立一個龐大的資料庫供機器人從中提取。 ⚡ 它允許您保存成績單以供將來使用。您可以稍後隨時加載它們,並且對機器人進行的任何查詢都將與保存的轉錄本的向量資料庫交叉引用,從而為機器人提供更豐富的上下文。 您可以閱讀[安裝說明](https://github.com/e-johnstonn/wingmanAI?tab=readme-ov-file#installation)。 您只需將 OpenAI API 金鑰放入`keys.env`檔案中並執行`main.py` 。 唯一的缺點是該應用程式目前僅與 Windows 相容。 Windows 用戶現在更高興了:) 您可以觀看[完整的示範影片](https://github.com/e-johnstonn/wingmanAI?tab=readme-ov-file#demo)。由於限制,下面所附的 gif 很短(86 秒中只有 30 秒)。  我對這個概念感到非常驚訝,因為我從來沒有想過它可以以這種方式實現。當開發人員用非常簡單的概念創造出一些很酷的東西時,感覺真的很棒:) 它在 GitHub 上有 420 多顆星,並且不再維護。但你可以用它來建造更好的東西。 您可以檢查[GitHub 儲存庫](https://github.com/e-johnstonn/wingmanAI)。 ✅[考試](https://github.com/codeacme17/examor)。 -------------------------------------------- 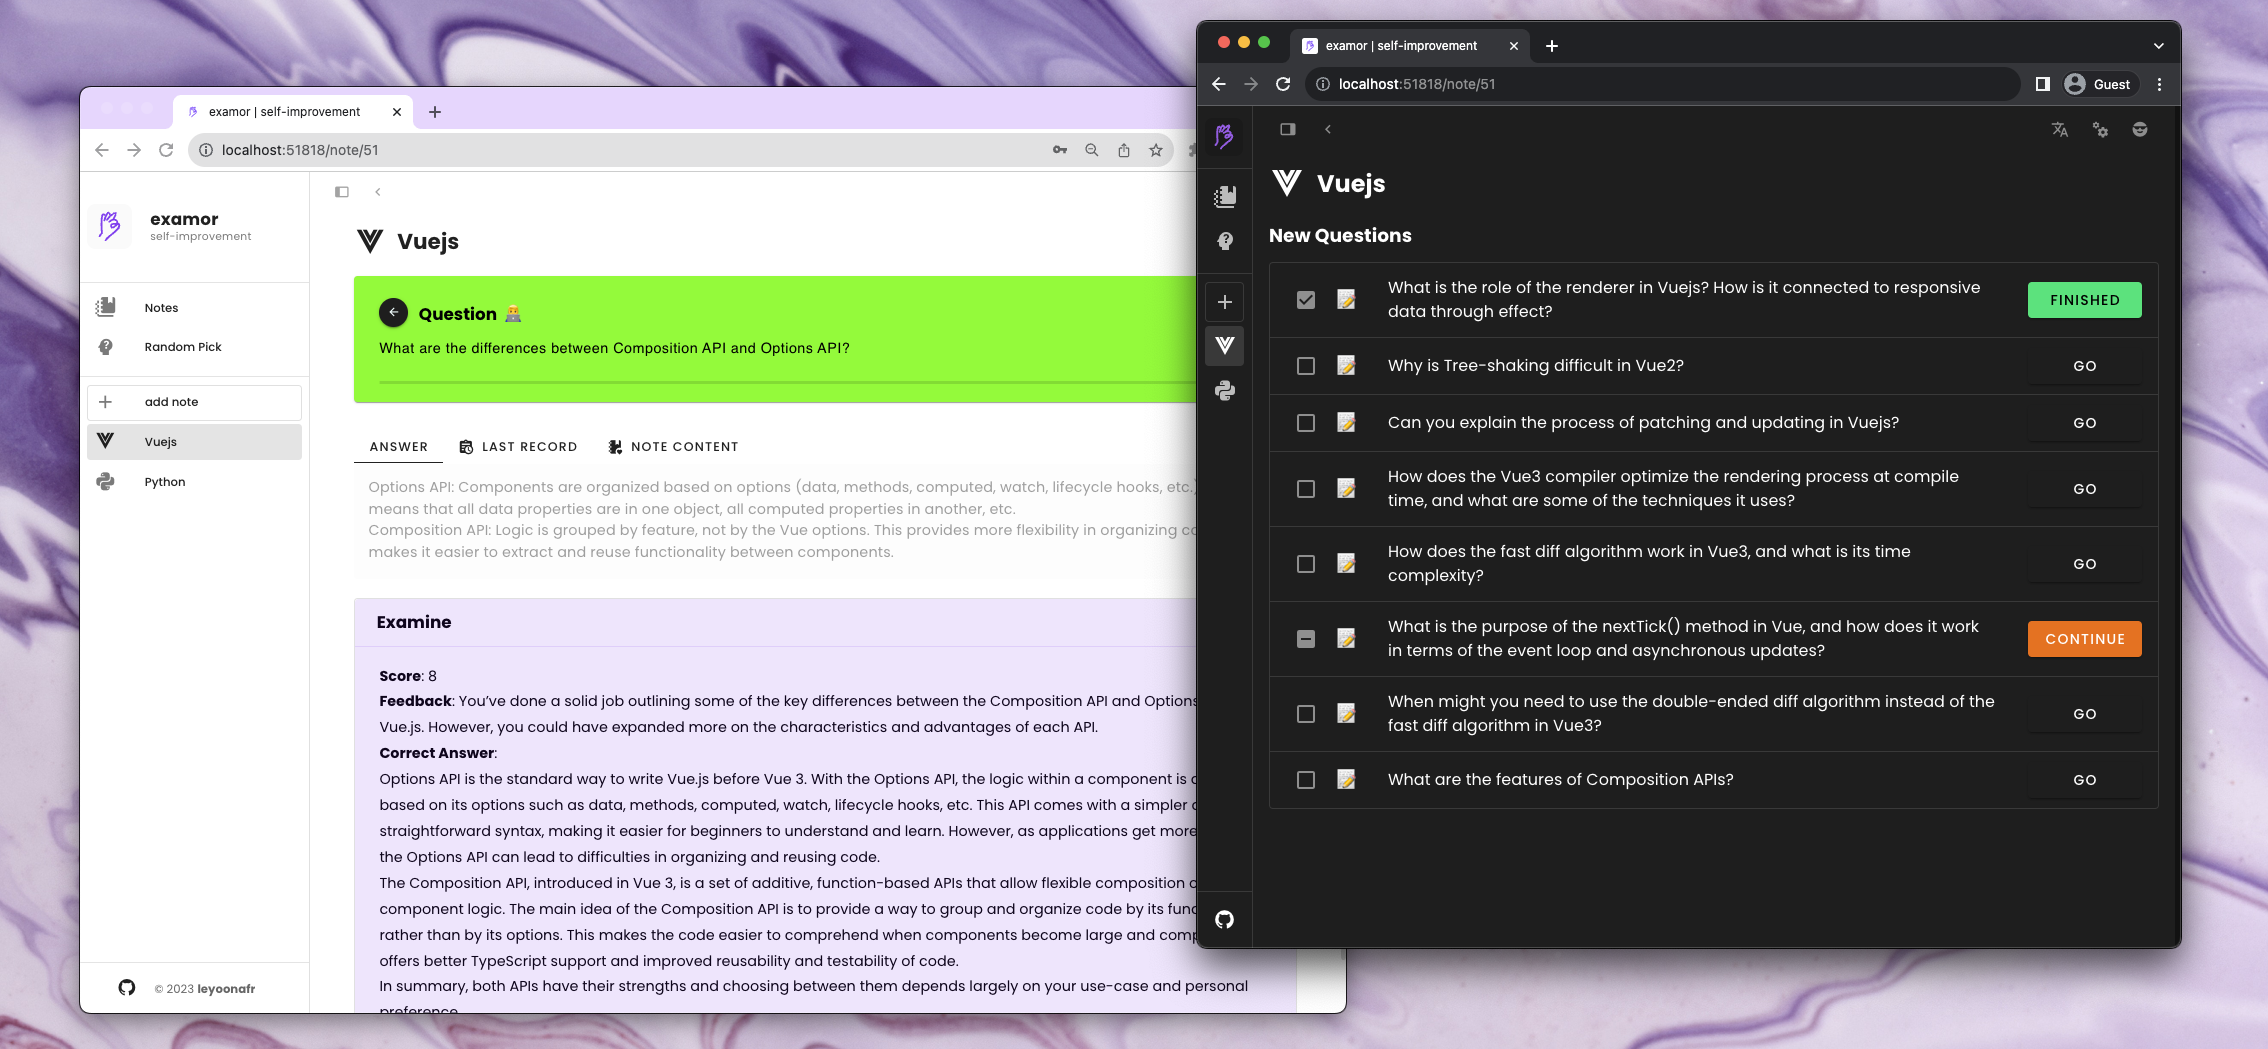 一款允許您根據知識筆記參加考試的應用程式。它可以讓您專注於您所學和所寫的內容🧠。 它不斷提示您提出問題以複習筆記內容,這對於學生、學者、受訪者和終身學習者非常有用。 專案管理員正在使用 next.js 重構專案,這對於使用`next.js`開發人員來說非常好。 讓我們來詳細分析一下一些很棒的功能: ⚡ 建立筆記時可以上傳相關文件。該應用程式根據這些文件的內容產生一組問題。這些問題將在未來呈現給大家。建立筆記時,您作為使用者還可以選擇要產生的問題類型。  ⚡ 收到每日問題後,您可以提供答案。 GPT 將評分、驗證並提供正確答案。透過評估答案和連結文件的正確性來確定分數(0 ~ 10 分)。這個分數會影響隨後的艾賓浩斯評審過程。將會在未來的發布版本中進行最佳化。 ⚡ 角色可以為問題產生和評估提供更多可能性。您可以在設定頁面上設定角色。有關各種角色的更多訊息,建議參閱詳細的[角色手冊指南](https://github.com/codeacme17/examor/blob/main/docs/en-role.md)。 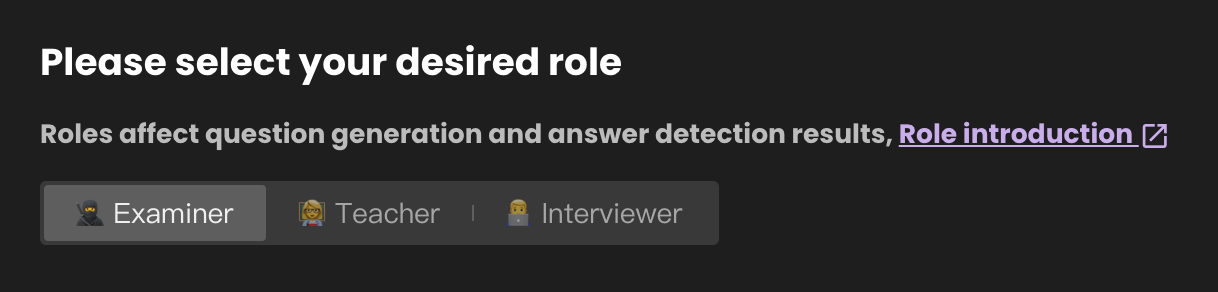 ⚡ 練習問題時,可以用不同的方法作答。下圖顯示了單選題的範例。  ⚡ 它有一個包含多個[模組](https://github.com/codeacme17/examor?tab=readme-ov-file#-modules)的列表,例如`Examine` 、 `Note` 、 `Notes Management`和`Random Question`使用這些模組您可以在筆記中導入問題,刪除或加入新文件到上傳的筆記中,等等。 我喜歡整個概念,這會引起任何曾經面臨過修改筆記問題的人的注意。 您可以閱讀包含如何正確使用它的詳細指南的[文件](https://github.com/codeacme17/examor/blob/main/README.md)。 它在 GitHub 上有 1k star,目前版本為`v0.4.2` 。 您可以檢查[GitHub 儲存庫](https://github.com/codeacme17/examor)。 ✅[語音GPT](https://github.com/hahahumble/speechgpt) 。 --------------------------------------------------- 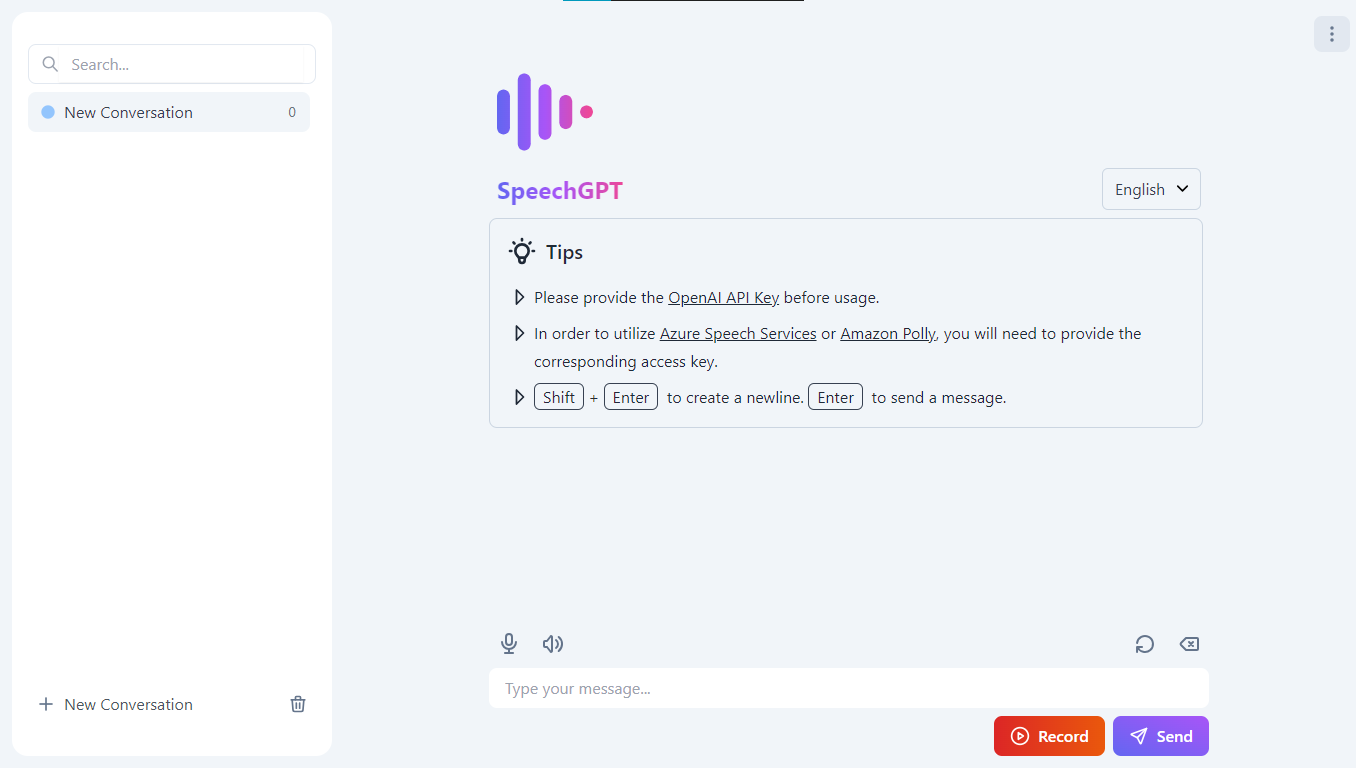 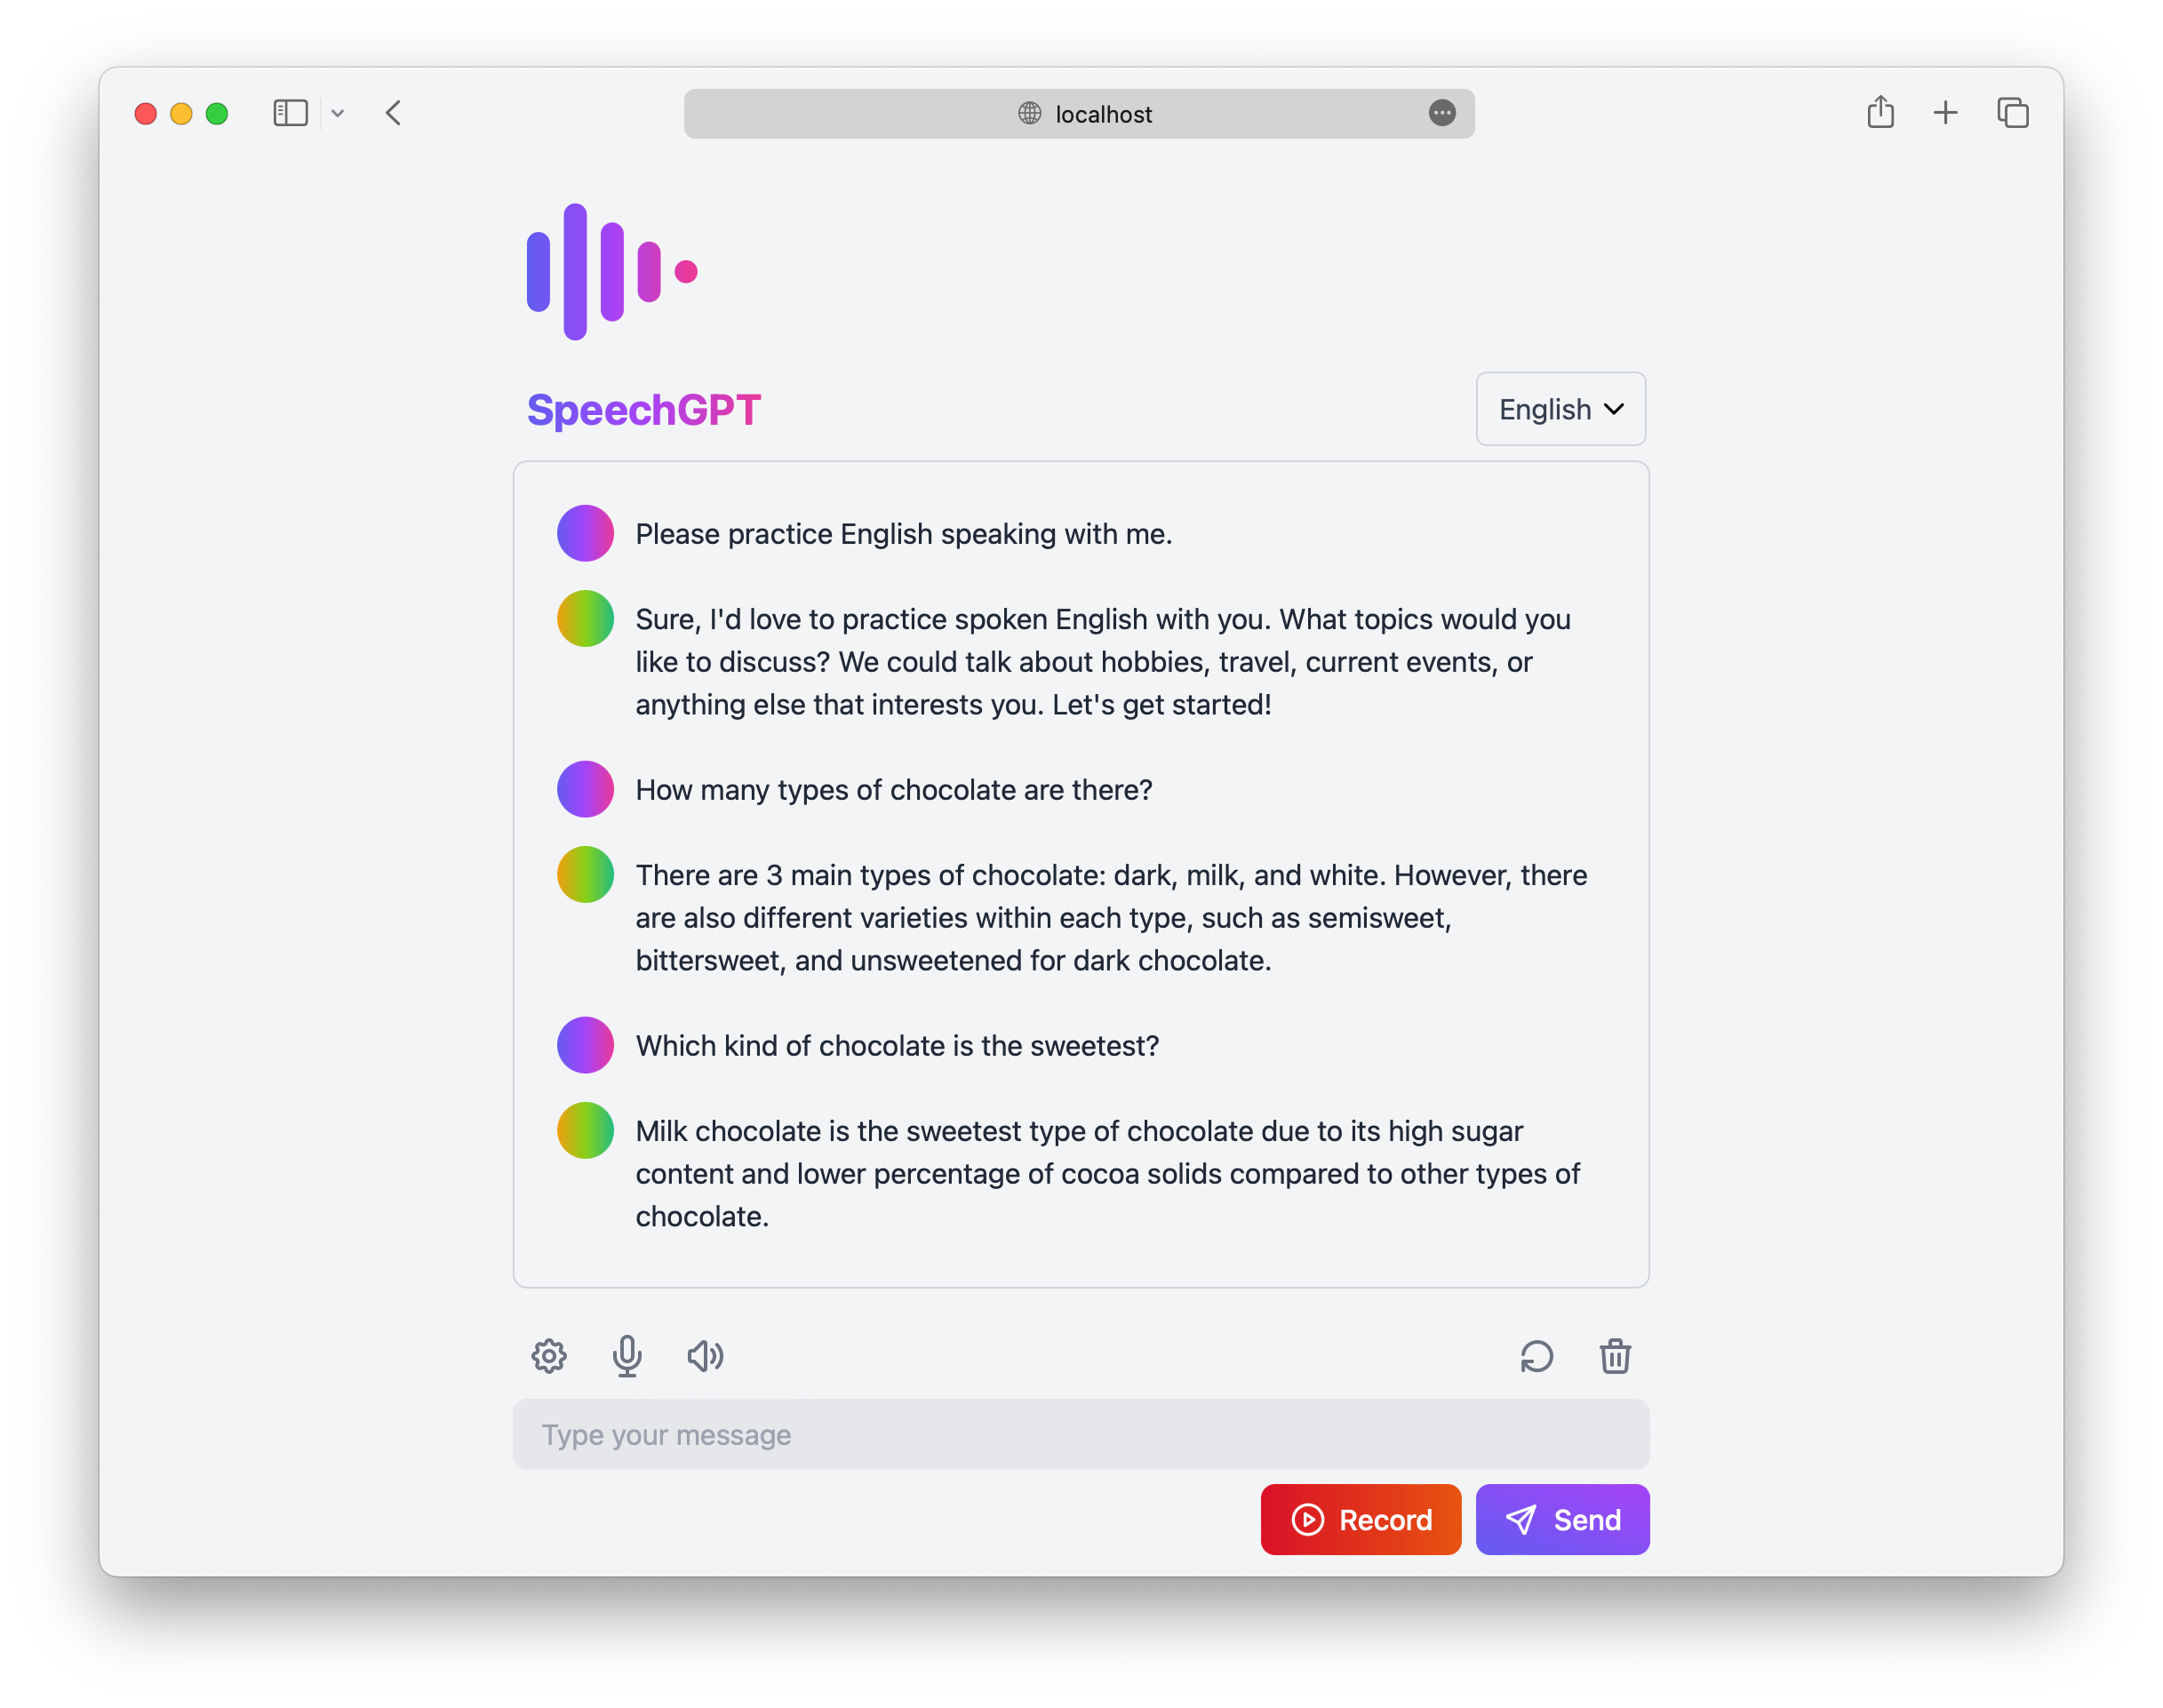 SpeechGPT 是一個 Web 應用程式,可讓您與 ChatGPT 進行對話。 您可以利用此應用程式來提高您的語言技能,或只是透過 ChatGPT 享受聊天的樂趣。 大多數人會說這有什麼獨特之處,但事實確實如此。 讓我們來打破一些很棒的功能: ⚡ 所有資料儲存在本地,隱私性更強。 ⚡ 根據文件,它支援 100 多種語言,但我在現場演示中只能看到對三種語言的支援。 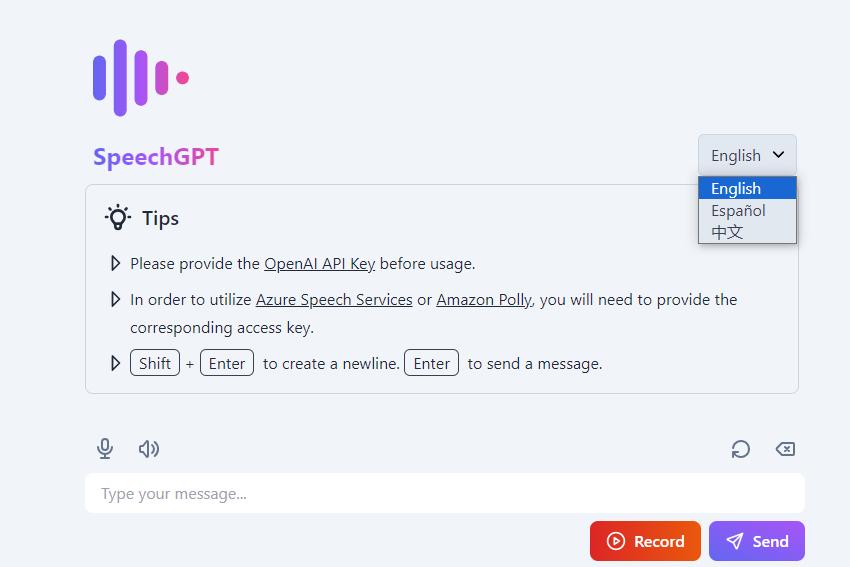 ⚡ 包含內建語音辨識以及與 Azure 語音服務的整合。  ⚡ 包含內建語音合成,以及與 Amazon Polly 和 Azure 語音服務的整合。 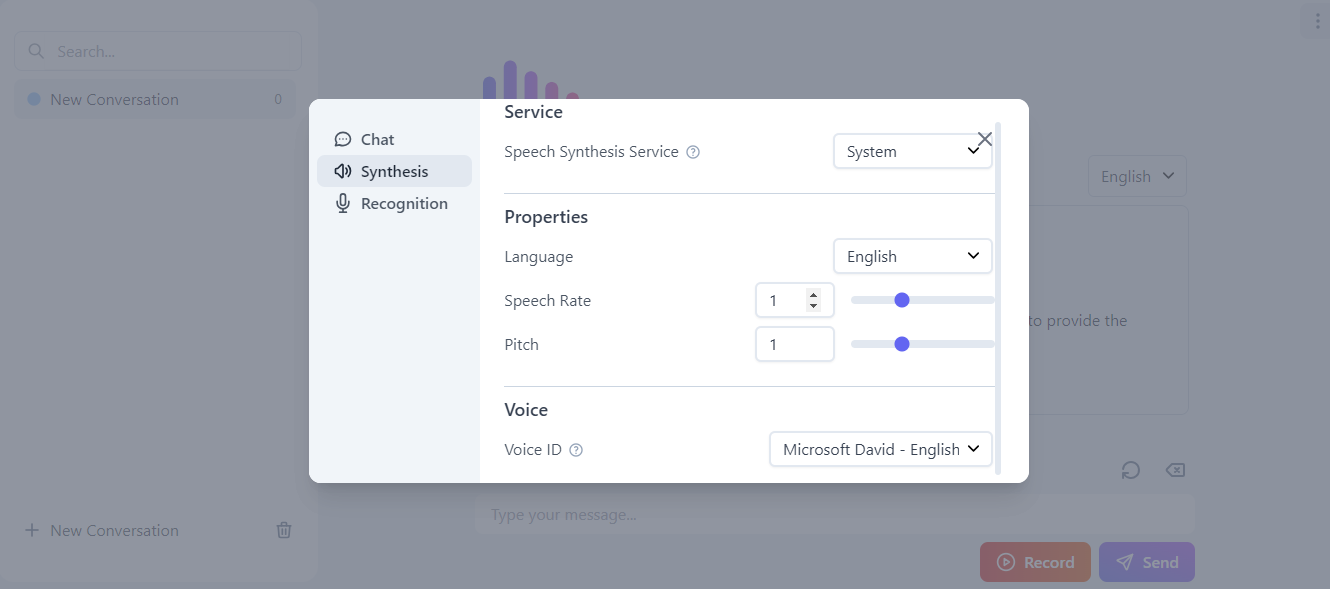 請按照[文件中的教學](https://github.com/hahahumble/speechgpt?tab=readme-ov-file#-tutorial)了解如何使用它。 您可以在[speechgpt.app](https://speechgpt.app/)上觀看現場演示。這是一個完美的例子,說明了一些額外的功能如何將您的應用程式提升到一個新的水平! SpeechGPT 在 GitHub 上有 2700 顆星,目前版本為`v0.5.1` 。 您可以檢查[GitHub 儲存庫](https://github.com/hahahumble/speechgpt)。 ✅ [myGPTReader](https://github.com/madawei2699/myGPTReader) - 閱讀並與 AI 機器人聊天。 ----------------------------------------------------------------------------  myGPTReader 是 Slack 上的機器人,可以閱讀和總結任何網頁、文件(包括電子書),甚至來自 YouTube 的影片。它可以透過語音與您交流。 一些有價值的功能是: ⚡ 使用 myGPTReader 透過對話快速閱讀和理解任何網頁內容,甚至是影片(目前僅支援帶有字幕的 YouTube 影片)。  ⚡ 使用 myGPTReader 快速閱讀任何文件的內容,支援電子書、PDF、DOCX、TXT 和 Markdown。  ⚡ 透過與 myGPTReader 語音對話來練習外語,它可以成為您的私人導師,支援中文、英語、德語和日語。  ⚡ 內建大量提示模板,使用它們可以更好地與chatGPT對話。  ⚡ myGPTReader 每天發送最新熱點新聞,並自動產生摘要,讓您快速了解今日熱點。 您可以造訪[官方網站](https://www.myreader.io/)。 您可以加入擁有超過 5000 名會員的儲存庫上的 Slack 頻道,免費體驗所有這些功能。 它們在 GitHub 上有 4.4k 顆星,並且像此列表中的其他專案一樣使用 Python 建置。 您可以檢查[GitHub 儲存庫](https://github.com/madawei2699/myGPTReader)。 ✅ [RepoChat](https://github.com/pnkvalavala/repochat) - 支援 GitHub 儲存庫互動的聊天機器人助理。 -------------------------------------------------------------------------------- 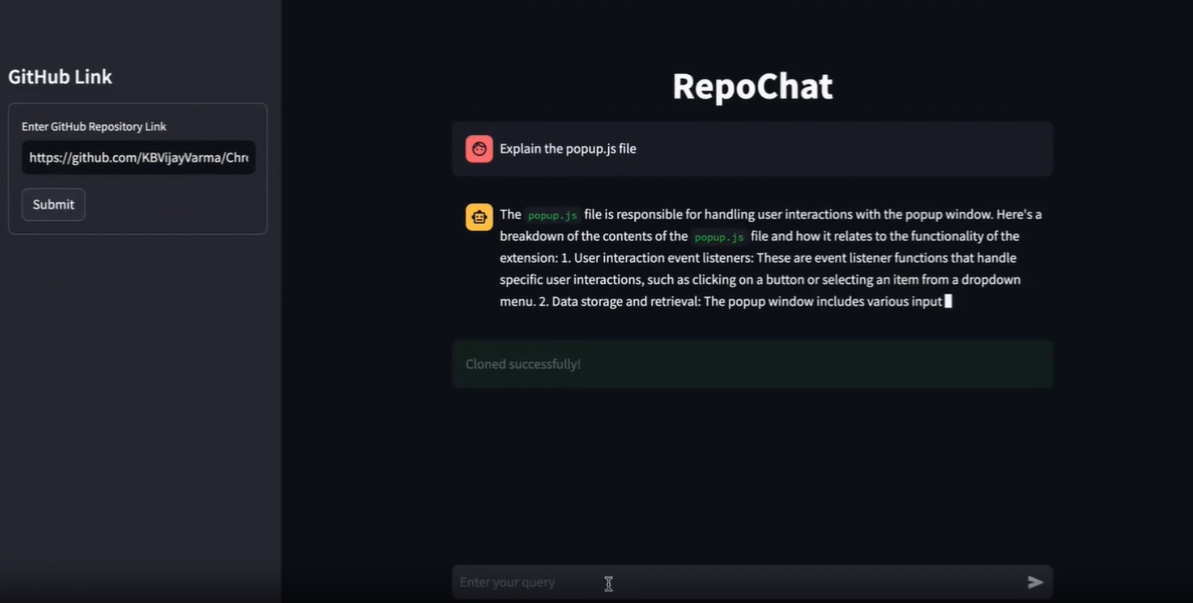 Repochat 是一個互動式聊天機器人專案,旨在使用大型語言模型 (LLM) 參與有關 GitHub 儲存庫的對話。 它允許用戶進行有意義的討論、提出問題並從 GitHub 儲存庫檢索相關資訊。本自述文件提供了在本機電腦上設定和使用 Repochat 的逐步說明。 他們建立了兩個具有不同功能的分支,這對我來說有點新鮮。 ⚡ Repochat 的主要分支被設計為完全在本機上執行。此版本的 Repochat 不依賴外部 API 呼叫,並且可以更好地控制您的資料和處理。如果您正在尋找獨立的解決方案,那麼主分支就是您的最佳選擇。 ⚡ Repochat 的雲端分支主要依賴對外部服務的 API 呼叫來進行模型推理和儲存。它非常適合那些喜歡基於雲端的解決方案並且不想設定本地環境的人。 您可以閱讀[安裝說明](https://github.com/pnkvalavala/repochat?tab=readme-ov-file#installation)。 Repochat 讓您與聊天機器人進行對話。您可以提出問題或提供輸入,聊天機器人將從向量資料庫中檢索相關文件。 然後,它將您的輸入以及檢索到的文件傳送到語言模型以產生回應。 預設情況下,我已將模型設為`codellama-7b-instruct` ,但您可以根據計算機的速度更改它,甚至可以嘗試 13b 量化模型進行回應。 聊天機器人在對話過程中保留記憶以提供上下文相關的回應。 您可以查看[即時網站](https://repochat.streamlit.app/),您可以使用 API 金鑰進行檢查。 你可以觀看這個演示!  如果您想查看的話,我找到了另一種[選擇](https://github.com/peterw/Chat-with-Github-Repo)。 Repochat 擁有 200 多顆星,並部署在 Streamlit 上。 您可以檢查[GitHub 儲存庫](https://github.com/pnkvalavala/repochat)。 ✅ [NextChat - ChatGPT Next Web](https://github.com/ChatGPTNextWeb/ChatGPT-Next-Web) 。 ------------------------------------------------------------------------------------- 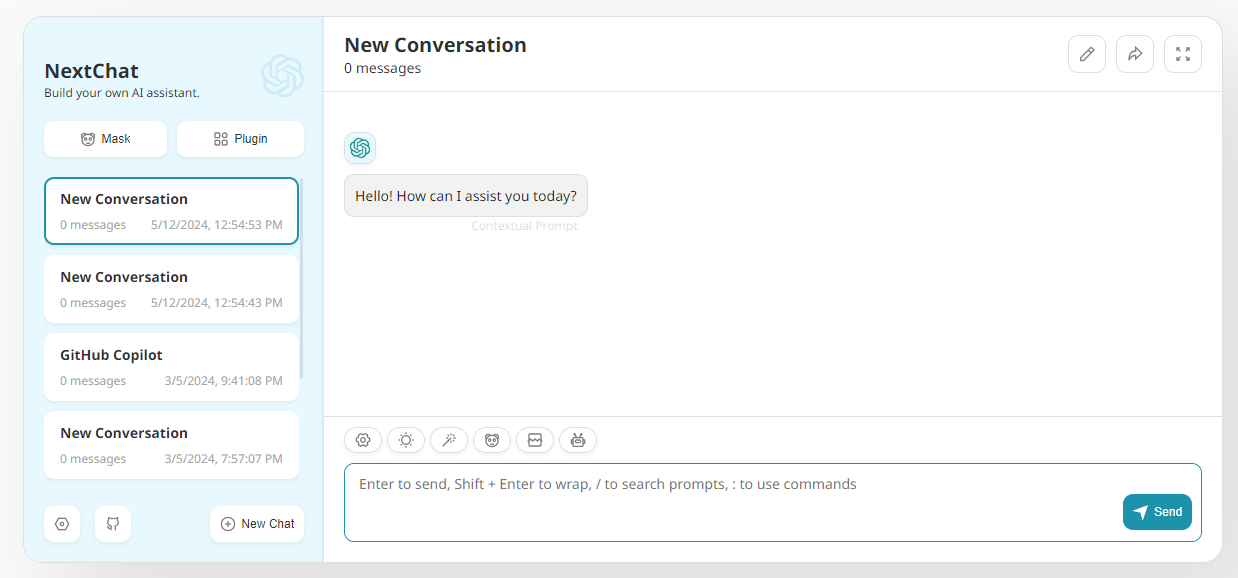 這不是一個典型的副專案,因為程式碼庫足夠大,但值得一看作為靈感。 您只需一鍵即可獲得精心設計的跨平台 ChatGPT Web UI,支援 GPT3、GPT4 和 Gemini Pro(Web / PWA / Linux / Win / MacOS)。 一些很棒的功能是: ⚡ 隱私 首先,所有資料都儲存在瀏覽器本地。 ⚡ 首屏載入速度快(~100kb),支援串流響應。 ⚡ 自動壓縮聊天歷史記錄以支援長時間對話,同時儲存您的代幣。 ⚡ Linux/Windows/MacOS 上的緊湊型用戶端 (~5MB)。 ⚡ 您只需在 Vercel 上一鍵點擊即可在 1 分鐘內免費部署。 ⚡ 與自行部署的法學碩士完全相容。 ⚡ Markdown 支援:LaTex、mermaid、程式碼高亮等。 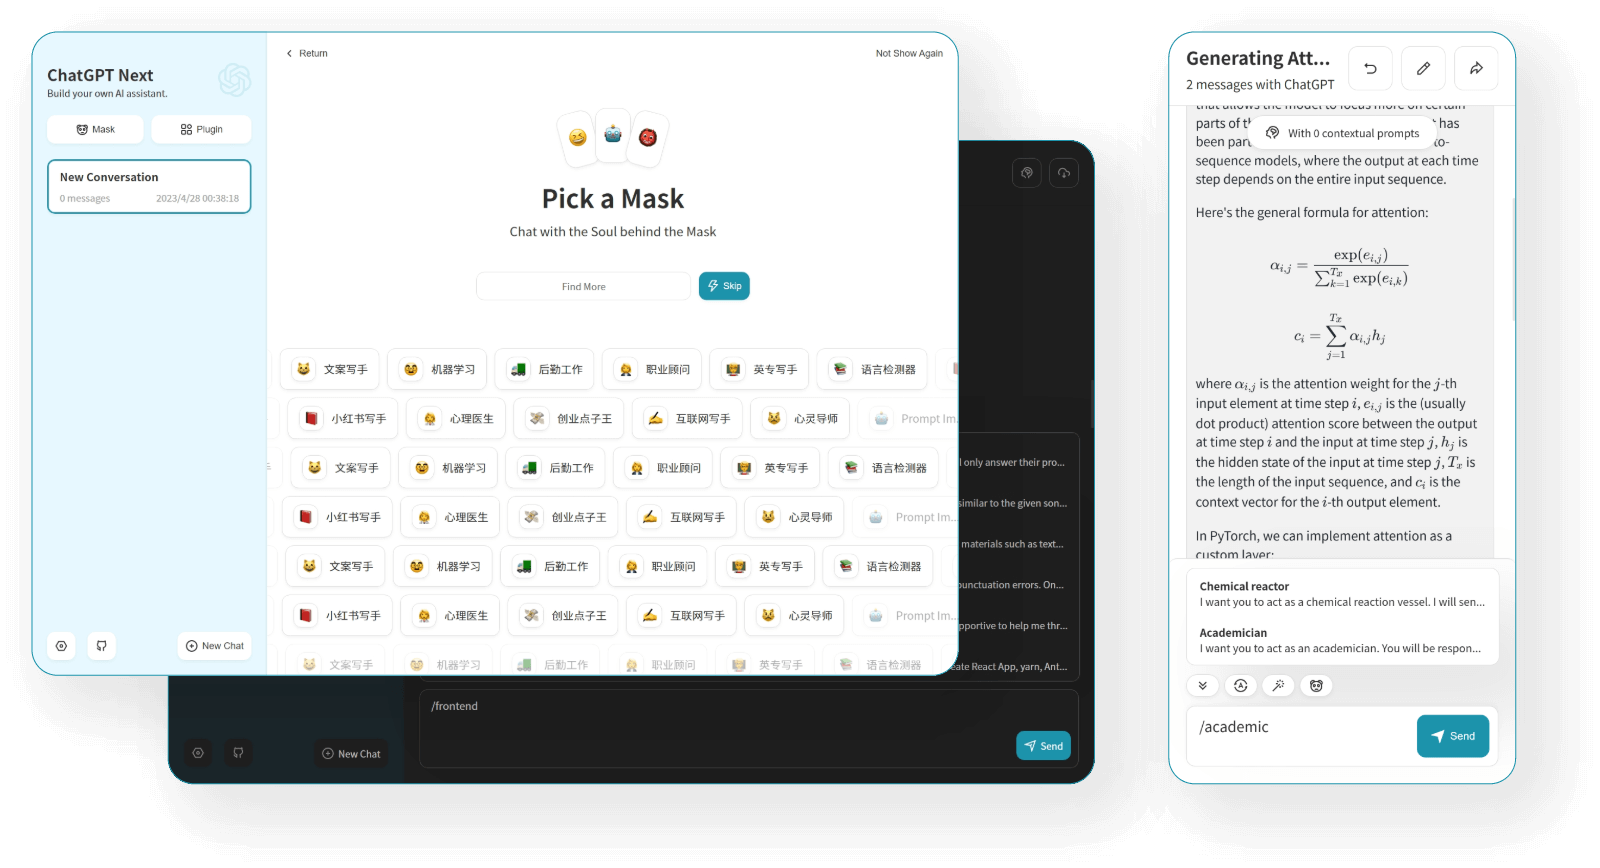 您可以查看 NextChat 的[現場演示](https://app.nextchat.dev/)和[文件,](https://github.com/ChatGPTNextWeb/ChatGPT-Next-Web?tab=readme-ov-file#roadmap)其中包括所有環境變數(主要是 API 金鑰)的清單。  在本地處理它並不難,他們還提供了 GitHub 操作工作流程,每小時都會自動更新。 NextChat 在 GitHub 上擁有 69k+ 顆星,目前已發布`v2.2`版本。 您可以檢查[GitHub 儲存庫](https://github.com/ChatGPTNextWeb/ChatGPT-Next-Web)。 --- 如果您喜歡觀看教程來建立專案,我有一些很好的建議。 🎯 [LangChain GEN AI 教學 – 使用 OpenAI、Google Gemini Pro、LLAMA2 的 6 個端到端專案](https://www.youtube.com/watch?v=x0AnCE9SE4A)– 4 小時。 本教學涵蓋的專案: ✅ LangChain 速成課程 - 打下基礎。 ✅ 使用 Langchain 和 Astradb 與 PDF 聊天。 ✅ 使用 Llama 2 LLM 模型產生部落格。 ✅ 使用 Pinecone VectorDB 的端到端法學碩士課程。 ✅ Google Gemini 專業版示範。 ✅ 多語言發票提取器 LLM 專案。 ✅ 使用 Gemini Pro API 的對話式問答聊天機器人。 {% 嵌入 https://www.youtube.com/watch?v=x0AnCE9SE4A %} 🎯 Streamlit 的 LangChain 速成課程。 本教學涵蓋的專案: ✅ 發票資料提取器。 ✅ 針對自訂資料的基本 QA。 ✅ 總結和有用的鏈類型。 ✅ WordPress 程式碼助理。 ✅ 將語音備忘錄轉換為文字。 你可以找到[速成課程](https://learnlangchain.streamlit.app/)。側邊欄中將有一個關於實踐專案的部分! --- 這麼多很棒的專案:) 但說實話,我見過很多開發人員建立相同的應用程式,您可以獲得無限的靈感。我希望你喜歡這個。 繼續,保存它,並建造每一個,以展示誰是技術老大! 讓我知道哪個專案最讓你驚訝。 祝你有美好的一天!直到下一次。 |如果你喜歡這類東西, 請關注我以了解更多:) | [](https://twitter.com/Anmol_Codes) [](https://github.com/Anmol-Baranwal) [](https://www.linkedin.com/in/Anmol-Baranwal/) | |------------|----------| 請關注 Copilotkit 以獲取更多此類內容。 {% 嵌入 https://dev.to/copilotkit %} --- 原文出處:https://dev.to/copilotkit/20-projects-you-can-build-with-ai-today-352k
**長話短說** -------- 在本文中,您將了解如何建立由 AI 驅動的前端 UI 元件產生器,該產生器使您能夠透過實作教學產生 Next.js Tailwind CSS UI 元件。 我們將介紹如何: - 使用 Next.js、TypeScript 和 Tailwind CSS 建立 UI 元件產生器 Web 應用程式。 - 使用 CopilotKit 將 AI 功能整合到 UI 元件產生器中。 - 整合嵌入式程式碼編輯器以變更產生的程式碼。 先決條件 ---- 要完全理解本教程,您需要對 React 或 Next.js 有基本的了解。 以下是建立 AI 支援的 UI 元件產生器所需的工具: - [Ace 程式碼編輯器](https://ace.c9.io/)- 用 JvaScript 編寫的嵌入式程式碼編輯器,與本機編輯器的功能和效能相符。 - [Langchain](https://www.langchain.com/) - 提供了一個框架,使人工智慧代理能夠搜尋網路並研究任何主題。 - [OpenAI API](https://platform.openai.com/api-keys) - 提供 API 金鑰,讓您能夠使用 ChatGPT 模型執行各種任務。 - [Tavily AI](https://tavily.com/) - 一個搜尋引擎,使人工智慧代理能夠在應用程式中進行研究並存取即時知識。 - [CopilotKit](https://github.com/CopilotKit) - 一個開源副駕駛框架,用於建立自訂 AI 聊天機器人、應用程式內 AI 代理程式和文字區域。 專案設定和套件安裝 --------- 首先,透過在終端機中執行以下程式碼片段來建立 Next.js 應用程式: ``` npx create-next-app@latest aiuigenerator ``` 選擇您首選的配置設定。在本教學中,我們將使用 TypeScript 和 Next.js App Router。 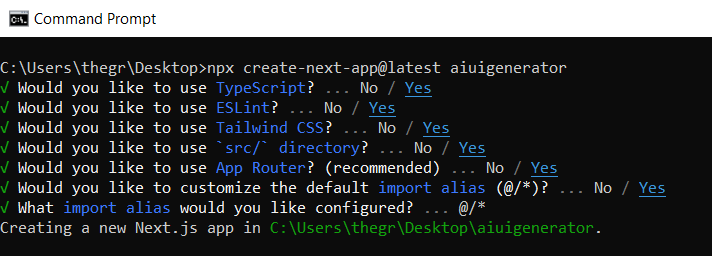 接下來,安裝 Ace 程式碼編輯器和 Langchain 軟體套件及其相依性。 ``` npm install react-ace @langchain/langgraph ``` 最後,安裝 CopilotKit 軟體套件。這些套件使我們能夠從 React 狀態檢索資料並將 AI copilot 新增至應用程式。 ``` npm install @copilotkit/react-ui @copilotkit/react-textarea @copilotkit/react-core @copilotkit/backend ``` 恭喜!您現在已準備好建立由人工智慧驅動的部落格。 **建構 UI 元件產生器前端** ----------------- 在本節中,我將引導您完成使用靜態內容建立 UI 元件產生器前端的過程,以定義生成器的使用者介面。 首先,請在程式碼編輯器中前往`/[root]/src/app`並建立一個名為`components`的資料夾。在 Components 資料夾中,建立兩個名為`Header.tsx`和`CodeTutorial.tsx`的檔案。 在`Header.tsx`檔案中,新增以下程式碼,定義一個名為`Header`的功能元件,該元件將呈現生成器的導覽列。 ``` "use client"; import Link from "next/link"; export default function Header() { return ( <> <header className="flex flex-wrap sm:justify-start sm:flex-nowrap z-50 w-full bg-gray-800 border-b border-gray-200 text-sm py-3 sm:py-0 "> <nav className="relative max-w-7xl w-full mx-auto px-4 sm:flex sm:items-center sm:justify-between sm:px-6 lg:px-8" aria-label="Global"> <div className="flex items-center justify-between"> <Link className="w-full flex-none text-xl text-white font-semibold p-6" href="/" aria-label="Brand"> AI-UI-Components-Generator </Link> </div> </nav> </header> </> ); } ``` 在`CodeTutorial.tsx`檔案中,加入以下程式碼,定義一個名為`CodeTutorial`的功能元件,該元件呈現 UI 元件產生器主頁,該首頁將顯示產生的 UI 元件、嵌入式程式碼編輯器和產生的實作教學。 ``` "use client"; import Markdown from "react-markdown"; import { useState } from "react"; import AceEditor from "react-ace"; import React from "react"; export default function CodeTutorial() { const [code, setCode] = useState<string[]>([ `<h1 class="text-red-500">Hello World</h1>`, ]); const [codeToDisplay, setCodeToDisplay] = useState<string>(code[0] || ""); const [codeTutorial, setCodeTutorial] = useState(``); function onChange(newCode: any) { setCodeToDisplay(newCode); } return ( <> <main className=" min-h-screen px-4"> <div className="w-full h-full min-h-[70vh] flex justify-between gap-x-1 "> <div className="w-2/3 min-h-[60vh] rounded-lg bg-white shadow-lg p-2 border mt-8 overflow-auto"> <div className="w-full min-h-[60vh] rounded-lg" dangerouslySetInnerHTML={{ __html: codeToDisplay }} /> </div> <AceEditor placeholder="Placeholder Text" mode="html" theme="monokai" name="blah2" className="w-[50%] min-h-[60vh] p-2 mt-8 rounded-lg" onChange={onChange} fontSize={14} lineHeight={19} showPrintMargin={true} showGutter={true} highlightActiveLine={true} value={codeToDisplay} setOptions={{ enableBasicAutocompletion: true, enableLiveAutocompletion: true, enableSnippets: false, showLineNumbers: true, tabSize: 2, }} /> </div> <div className="w-10/12 mx-auto"> <div className="mt-8"> <h1 className="text-white text-center text-xl font-semibold p-6"> Code Tutorial </h1> {codeTutorial ? ( <Markdown className="text-white">{codeTutorial}</Markdown> ) : ( <div className="text-white"> The Code Tutorial Will Appear Here </div> )} </div> </div> </main> </> ); } ``` 接下來,前往`/[root]/src/page.tsx`文件,新增以下程式碼,導入`CodeTutorial`和`Header`元件,並定義名為`Home`的功能元件。 ``` import React from "react"; import Header from "./components/Header"; import CodeTutorial from "./components/CodeTutorial"; export default function Home() { return ( <> <Header /> <CodeTutorial /> </> ); } ``` 接下來,刪除 globals.css 檔案中的 CSS 程式碼並新增以下 CSS 程式碼。 ``` @tailwind base; @tailwind components; @tailwind utilities; @tailwind base; @tailwind components; @tailwind utilities; body { height: 100vh; background-color: rgb(16, 23, 42); } pre { margin: 1rem; padding: 1rem; border-radius: 10px; background-color: black; overflow: auto; } h2, p { padding-bottom: 1rem; padding-top: 1rem; } code { margin-bottom: 2rem; } ``` 最後,在命令列上執行命令`npm run dev` ,然後導航到 http://localhost:3000/。 現在您應該在瀏覽器上查看 UI 元件產生器前端,如下所示。 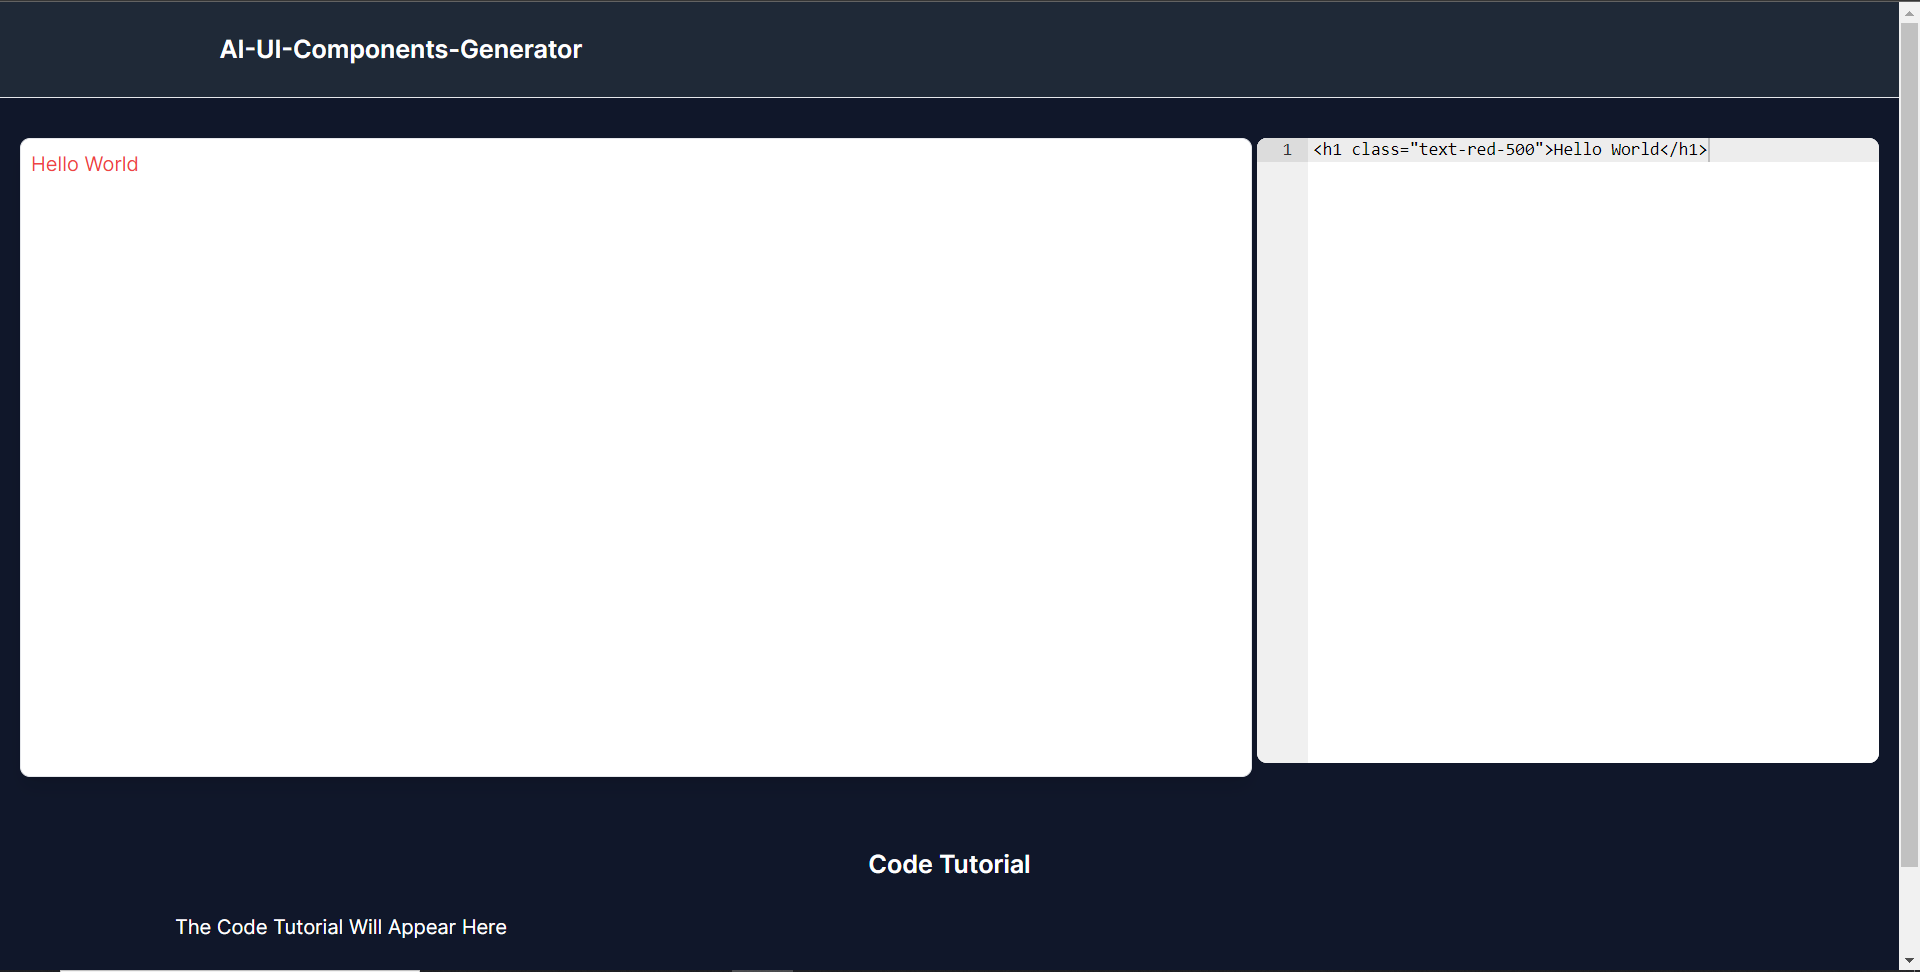 **使用 CopilotKit 將 AI 功能整合到元件產生器** --------------------------------- 在本節中,您將學習如何為 UI 元件產生器新增 AI 副駕駛以產生 UI 元件程式碼以及使用 CopilotKit 的實作教學。 CopilotKit 提供前端和[後端](https://docs.copilotkit.ai/getting-started/quickstart-backend)套件。它們使您能夠插入 React 狀態並使用 AI 代理在後端處理應用程式資料。 首先,讓我們將 CopilotKit React 元件加入到部落格前端。 ### **將 CopilotKit 新增至部落格前端** 在這裡,我將引導您完成將 UI 元件產生器與 CopilotKit 前端整合的過程,以方便產生 UI 元件程式碼和實作教學。 首先,使用下面的程式碼片段導入`/[root]/src/app/components/CodeTutorial.tsx`檔案頂部的自訂掛鉤`useMakeCopilotReadable`和`useCopilotAction` 。 ``` import { useCopilotAction, useMakeCopilotReadable, } from "@copilotkit/react-core"; ``` 在`CodeTutorial`函數內的狀態變數下方,加入以下程式碼,該程式碼使用`useMakeCopilotReadable`掛鉤來新增將作為應用程式內聊天機器人的上下文產生的程式碼。該鉤子使副駕駛可以讀取程式碼。 ``` useMakeCopilotReadable(codeToDisplay); ``` 在上面的程式碼下方,新增以下程式碼,該程式碼使用`useCopilotAction`掛鉤來設定名為`generateCodeAndImplementationTutorial`的操作,該操作將啟用 UI 元件程式碼和實作教學課程的產生。 這個操作接受兩個參數,稱為`code`和`tutorial` ,這兩個參數可以產生 UI 元件程式碼和實作教程。 該操作包含一個處理函數,該函數根據給定的提示產生 UI 元件程式碼和實作教程。 在處理函數內部, `codeToDisplay`狀態會使用新產生的程式碼進行更新,而`codeTutorial`狀態會使用新產生的教學課程進行更新,如下所示。 ``` useCopilotAction( { name: "generateCodeAndImplementationTutorial", description: "Create Code Snippet with React.js(Next.js), tailwindcss and an implementation tutorial of the code generated.", parameters: [ { name: "code", type: "string", description: "Code to be generated", required: true, }, { name: "tutorial", type: "string", description: "Markdown of step by step guide tutorial on how to use the generated code accompanied with the code. Include introduction, prerequisites and what happens at every step accompanied with code generated earlier. Don't forget to add how to render the code on browser.", required: true, }, ], handler: async ({ code, tutorial }) => { setCode((prev) => [...prev, code]); setCodeToDisplay(code); setCodeTutorial(tutorial); }, }, [codeToDisplay, codeTutorial] ); ``` 之後,請前往`/[root]/src/app/page.tsx`檔案並使用下面的程式碼匯入頂部的 CopilotKit 前端套件和樣式。 ``` import { CopilotKit } from "@copilotkit/react-core"; import { CopilotSidebar } from "@copilotkit/react-ui"; import "@copilotkit/react-ui/styles.css"; ``` 然後使用`CopilotKit`包裝`CopilotSidebar`和`CodeTutorial`元件,如下所示。 `CopilotKit`元件指定 CopilotKit 後端端點 ( `/api/copilotkit/` ) 的 URL,而`CopilotSidebar`呈現應用程式內聊天機器人,您可以提示產生 UI 元件程式碼和實作教學。 ``` export default function Home() { return ( <> <Header /> <CopilotKit url="/api/copilotkit"> <CopilotSidebar instructions="Help the user generate code. Ask the user if to generate its tutorial." defaultOpen={true} labels={{ title: "Code & Tutorial Generator", initial: "Hi! 👋 I can help you generate code and its tutorial.", }}> <CodeTutorial /> </CopilotSidebar> </CopilotKit> </> ); } ``` 之後,執行開發伺服器並導航到 http://localhost:3000。您應該會看到應用程式內聊天機器人已整合到 UI 元件產生器中。 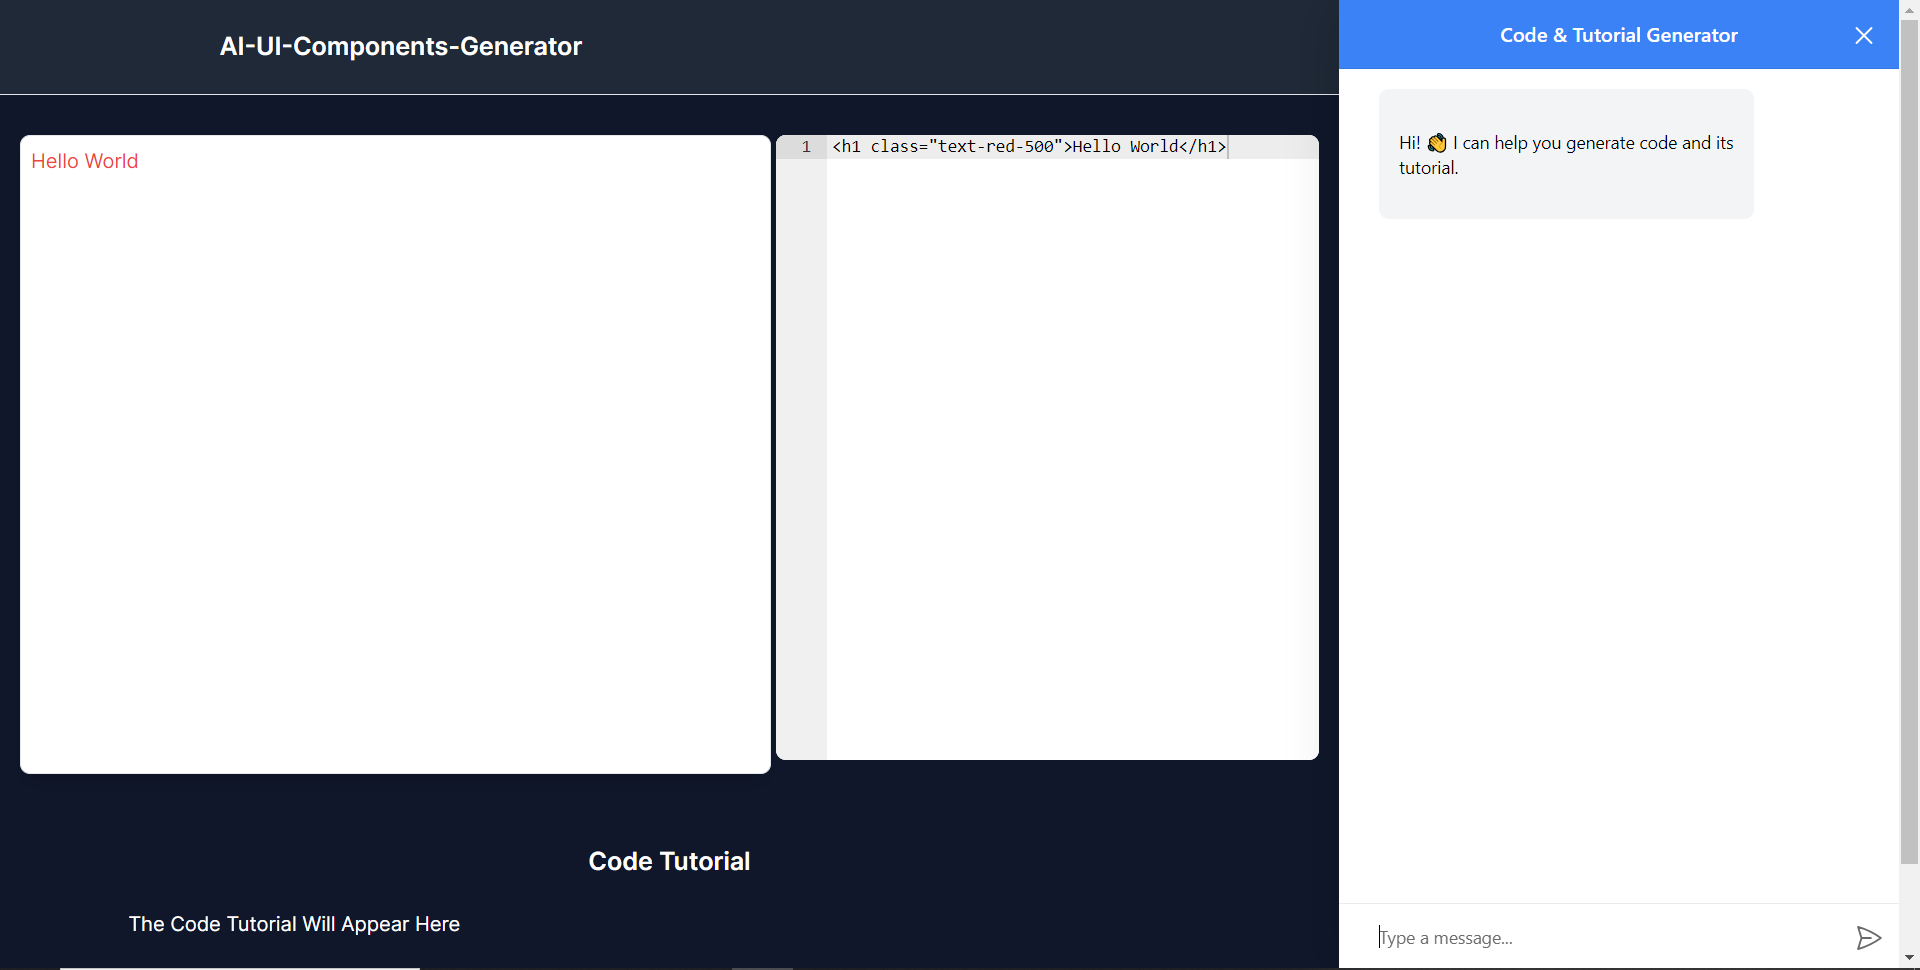 ### **將 CopilotKit 後端加入博客** 在這裡,我將引導您完成將 UI 元件產生器與 CopilotKit 後端整合的過程,該後端處理來自前端的請求,並提供函數呼叫和各種 LLM 後端(例如 GPT)。 此外,我們將整合一個名為 Tavily 的人工智慧代理,它可以研究網路上的任何主題。 首先,在根目錄中建立一個名為`.env.local`的檔案。然後在保存`ChatGPT`和`Tavily` Search API 金鑰的檔案中加入下面的環境變數。 ``` OPENAI_API_KEY="Your ChatGPT API key" TAVILY_API_KEY="Your Tavily Search API key" ``` 若要取得 ChatGPT API 金鑰,請導覽至 https://platform.openai.com/api-keys。 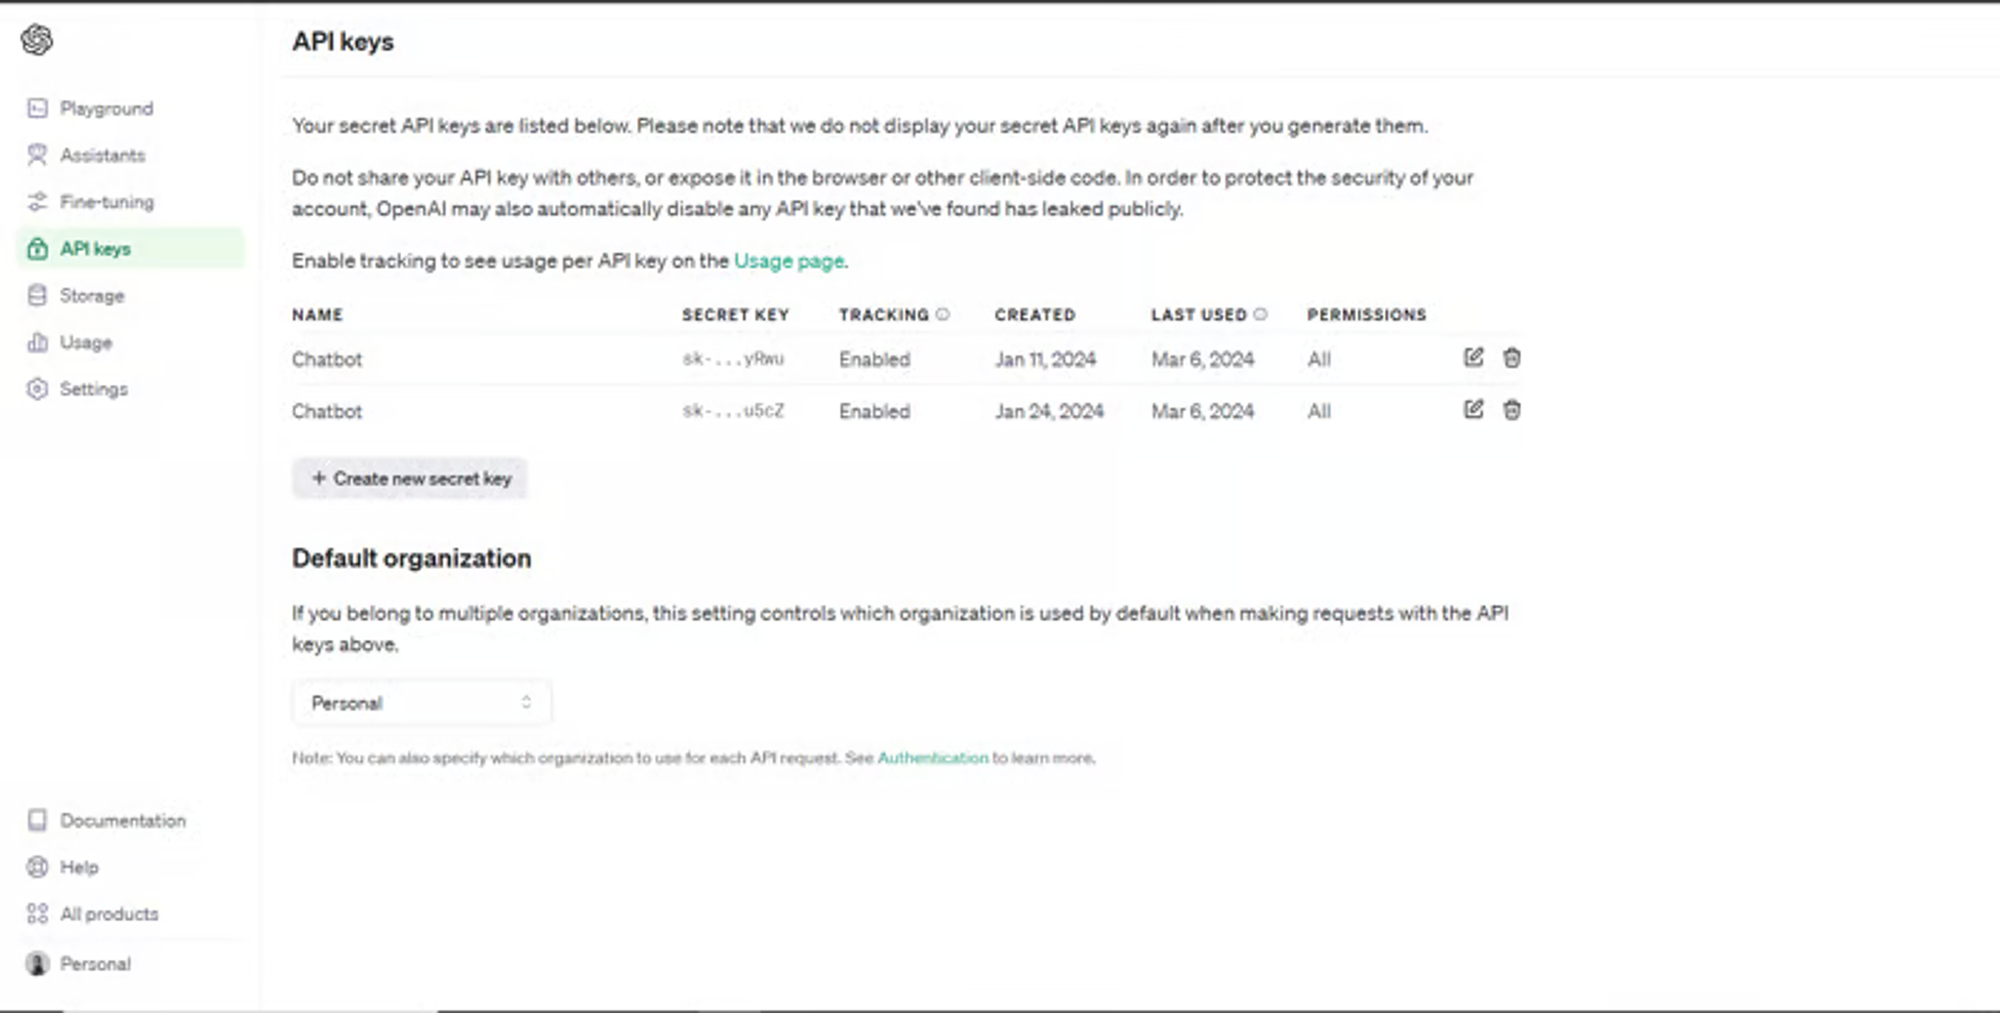 若要取得 Tavilly Search API 金鑰,請導覽至 https://app.tavily.com/home  之後,轉到`/[root]/src/app`並建立一個名為`api`的資料夾。在`api`資料夾中,建立一個名為`copilotkit`的資料夾。 在`copilotkit`資料夾中,建立一個名為`research.ts`的檔案。然後導航到[該 Research.ts gist 文件](https://gist.github.com/TheGreatBonnie/58dc21ebbeeb8cbb08df665db762738c),複製程式碼,並將其新增至**`research.ts`**檔案中 接下來,在`/[root]/src/app/api/copilotkit`資料夾中建立一個名為`route.ts`的檔案。該文件將包含設定後端功能來處理 POST 請求的程式碼。它有條件地包括對給定主題進行研究的“研究”操作。 現在在文件頂部導入以下模組。 ``` import { CopilotBackend, OpenAIAdapter } from "@copilotkit/backend"; // For backend functionality with CopilotKit. import { researchWithLangGraph } from "./research"; // Import a custom function for conducting research. import { AnnotatedFunction } from "@copilotkit/shared"; // For annotating functions with metadata. ``` 在上面的程式碼下面,定義一個執行時間環境變數和一個名為`researchAction`的函數,該函數使用下面的程式碼研究某個主題。 ``` // Define a runtime environment variable, indicating the environment where the code is expected to run. export const runtime = "edge"; // Define an annotated function for research. This object includes metadata and an implementation for the function. const researchAction: AnnotatedFunction<any> = { name: "research", // Function name. description: "Call this function to conduct research on a certain topic. Respect other notes about when to call this function", // Function description. argumentAnnotations: [ // Annotations for arguments that the function accepts. { name: "topic", // Argument name. type: "string", // Argument type. description: "The topic to research. 5 characters or longer.", // Argument description. required: true, // Indicates that the argument is required. }, ], implementation: async (topic) => { // The actual function implementation. console.log("Researching topic: ", topic); // Log the research topic. return await researchWithLangGraph(topic); // Call the research function and return its result. }, }; ``` 然後在上面的程式碼下加入下面的程式碼來定義處理POST請求的非同步函數。 ``` // Define an asynchronous function that handles POST requests. export async function POST(req: Request): Promise<Response> { const actions: AnnotatedFunction<any>[] = []; // Initialize an array to hold actions. // Check if a specific environment variable is set, indicating access to certain functionality. if (process.env.TAVILY_API_KEY) { actions.push(researchAction); // Add the research action to the actions array if the condition is true. } // Instantiate CopilotBackend with the actions defined above. const copilotKit = new CopilotBackend({ actions: actions, }); // Use the CopilotBackend instance to generate a response for the incoming request using an OpenAIAdapter. return copilotKit.response(req, new OpenAIAdapter()); } ``` 如何產生 UI 元件 ---------- 現在轉到您之前整合的應用程式內聊天機器人,並給它一個提示,例如「產生聯絡表單」。 生成完成後,您應該會看到生成的聯絡表單元件及其實作教程,如下所示。您也可以使用嵌入式程式碼編輯器修改產生的程式碼。  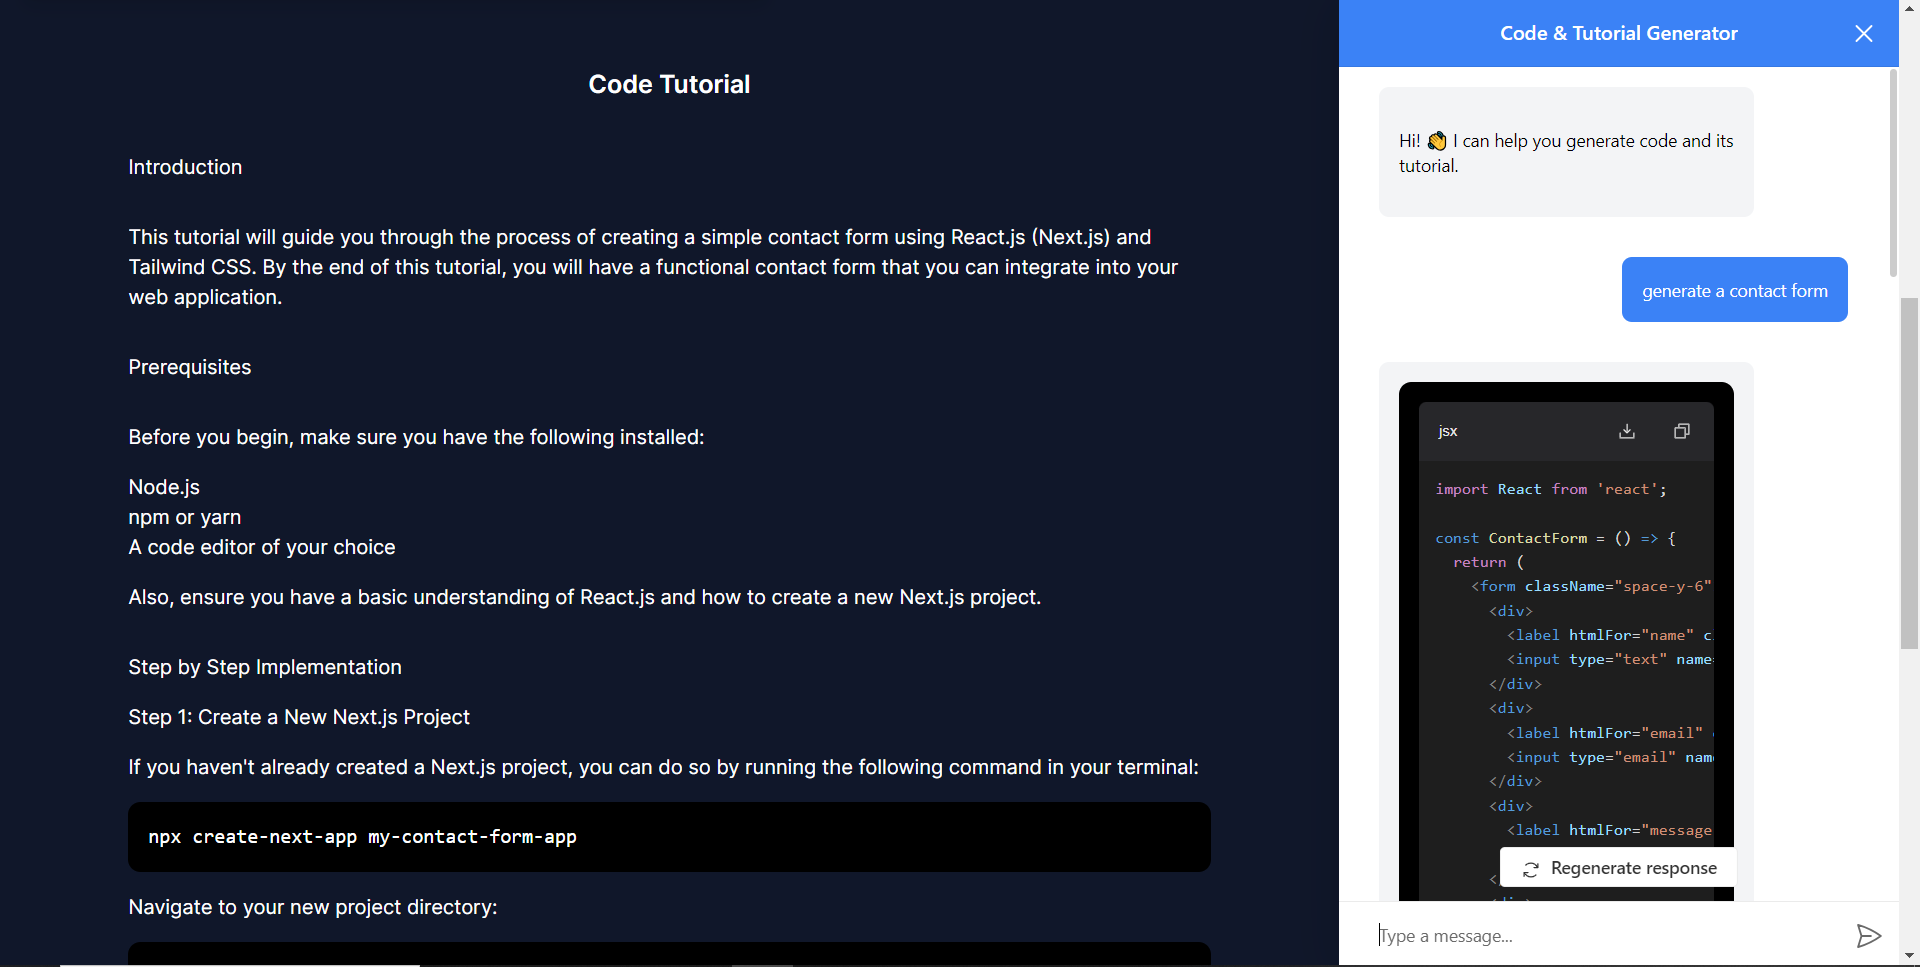 恭喜!您已完成本教學的專案。 結論 -- [CopilotKit](https://copilotkit.ai/)是一款令人難以置信的工具,可讓您在幾分鐘內將 AI Copilot 加入到您的產品中。無論您是對人工智慧聊天機器人和助理感興趣,還是對複雜任務的自動化感興趣,CopilotKit 都能讓您輕鬆實現。 如果您需要建立 AI 產品或將 AI 工具整合到您的軟體應用程式中,您應該考慮 CopilotKit。 您可以在 GitHub 上找到本教學的源程式碼: <https://github.com/TheGreatBonnie/AIPoweredUIComponentsGenerator> --- 原文出處:https://dev.to/tcms/ai-powered-frontend-ui-components-generator-nextjs-gpt4-langchain-copilotkit-1hac
**長話短說** -------- 在本文中,您將了解如何建立由 AI 驅動的前端 UI 元件產生器,該產生器使您能夠透過實作教學產生 Next.js Tailwind CSS UI 元件。 我們將介紹如何: - 使用 Next.js、TypeScript 和 Tailwind CSS 建立 UI 元件產生器 Web 應用程式。 - 使用 CopilotKit 將 AI 功能整合到 UI 元件產生器中。 - 整合嵌入式程式碼編輯器以變更產生的程式碼。 先決條件 ---- 要完全理解本教程,您需要對 React 或 Next.js 有基本的了解。 以下是建立 AI 支援的 UI 元件產生器所需的工具: - [Ace 程式碼編輯器](https://ace.c9.io/)- 用 JvaScript 編寫的嵌入式程式碼編輯器,與本機編輯器的功能和效能相符。 - [Langchain](https://www.langchain.com/) - 提供了一個框架,使人工智慧代理能夠搜尋網路並研究任何主題。 - [OpenAI API](https://platform.openai.com/api-keys) - 提供 API 金鑰,讓您能夠使用 ChatGPT 模型執行各種任務。 - [Tavily AI](https://tavily.com/) - 一個搜尋引擎,使人工智慧代理能夠在應用程式中進行研究並存取即時知識。 - [CopilotKit](https://github.com/CopilotKit) - 一個開源副駕駛框架,用於建立自訂 AI 聊天機器人、應用程式內 AI 代理程式和文字區域。 專案設定和套件安裝 --------- 首先,透過在終端機中執行以下程式碼片段來建立 Next.js 應用程式: ``` npx create-next-app@latest aiuigenerator ``` 選擇您首選的配置設定。在本教學中,我們將使用 TypeScript 和 Next.js App Router。  接下來,安裝 Ace 程式碼編輯器和 Langchain 軟體套件及其相依性。 ``` npm install react-ace @langchain/langgraph ``` 最後,安裝 CopilotKit 軟體套件。這些套件使我們能夠從 React 狀態檢索資料並將 AI copilot 新增至應用程式。 ``` npm install @copilotkit/react-ui @copilotkit/react-textarea @copilotkit/react-core @copilotkit/backend ``` 恭喜!您現在已準備好建立由人工智慧驅動的部落格。 **建構 UI 元件產生器前端** ----------------- 在本節中,我將引導您完成使用靜態內容建立 UI 元件產生器前端的過程,以定義生成器的使用者介面。 首先,請在程式碼編輯器中前往`/[root]/src/app`並建立一個名為`components`的資料夾。在 Components 資料夾中,建立兩個名為`Header.tsx`和`CodeTutorial.tsx`的檔案。 在`Header.tsx`檔案中,新增以下程式碼,定義一個名為`Header`的功能元件,該元件將呈現生成器的導覽列。 ``` "use client"; import Link from "next/link"; export default function Header() { return ( <> <header className="flex flex-wrap sm:justify-start sm:flex-nowrap z-50 w-full bg-gray-800 border-b border-gray-200 text-sm py-3 sm:py-0 "> <nav className="relative max-w-7xl w-full mx-auto px-4 sm:flex sm:items-center sm:justify-between sm:px-6 lg:px-8" aria-label="Global"> <div className="flex items-center justify-between"> <Link className="w-full flex-none text-xl text-white font-semibold p-6" href="/" aria-label="Brand"> AI-UI-Components-Generator </Link> </div> </nav> </header> </> ); } ``` 在`CodeTutorial.tsx`檔案中,加入以下程式碼,定義一個名為`CodeTutorial`的功能元件,該元件呈現 UI 元件產生器主頁,該首頁將顯示產生的 UI 元件、嵌入式程式碼編輯器和產生的實作教學。 ``` "use client"; import Markdown from "react-markdown"; import { useState } from "react"; import AceEditor from "react-ace"; import React from "react"; export default function CodeTutorial() { const [code, setCode] = useState<string[]>([ `<h1 class="text-red-500">Hello World</h1>`, ]); const [codeToDisplay, setCodeToDisplay] = useState<string>(code[0] || ""); const [codeTutorial, setCodeTutorial] = useState(``); function onChange(newCode: any) { setCodeToDisplay(newCode); } return ( <> <main className=" min-h-screen px-4"> <div className="w-full h-full min-h-[70vh] flex justify-between gap-x-1 "> <div className="w-2/3 min-h-[60vh] rounded-lg bg-white shadow-lg p-2 border mt-8 overflow-auto"> <div className="w-full min-h-[60vh] rounded-lg" dangerouslySetInnerHTML={{ __html: codeToDisplay }} /> </div> <AceEditor placeholder="Placeholder Text" mode="html" theme="monokai" name="blah2" className="w-[50%] min-h-[60vh] p-2 mt-8 rounded-lg" onChange={onChange} fontSize={14} lineHeight={19} showPrintMargin={true} showGutter={true} highlightActiveLine={true} value={codeToDisplay} setOptions={{ enableBasicAutocompletion: true, enableLiveAutocompletion: true, enableSnippets: false, showLineNumbers: true, tabSize: 2, }} /> </div> <div className="w-10/12 mx-auto"> <div className="mt-8"> <h1 className="text-white text-center text-xl font-semibold p-6"> Code Tutorial </h1> {codeTutorial ? ( <Markdown className="text-white">{codeTutorial}</Markdown> ) : ( <div className="text-white"> The Code Tutorial Will Appear Here </div> )} </div> </div> </main> </> ); } ``` 接下來,前往`/[root]/src/page.tsx`文件,新增以下程式碼,導入`CodeTutorial`和`Header`元件,並定義名為`Home`的功能元件。 ``` import React from "react"; import Header from "./components/Header"; import CodeTutorial from "./components/CodeTutorial"; export default function Home() { return ( <> <Header /> <CodeTutorial /> </> ); } ``` 接下來,刪除 globals.css 檔案中的 CSS 程式碼並新增以下 CSS 程式碼。 ``` @tailwind base; @tailwind components; @tailwind utilities; @tailwind base; @tailwind components; @tailwind utilities; body { height: 100vh; background-color: rgb(16, 23, 42); } pre { margin: 1rem; padding: 1rem; border-radius: 10px; background-color: black; overflow: auto; } h2, p { padding-bottom: 1rem; padding-top: 1rem; } code { margin-bottom: 2rem; } ``` 最後,在命令列上執行命令`npm run dev` ,然後導航到 http://localhost:3000/。 現在您應該在瀏覽器上查看 UI 元件產生器前端,如下所示。  **使用 CopilotKit 將 AI 功能整合到元件產生器** --------------------------------- 在本節中,您將學習如何為 UI 元件產生器新增 AI 副駕駛以產生 UI 元件程式碼以及使用 CopilotKit 的實作教學。 CopilotKit 提供前端和[後端](https://docs.copilotkit.ai/getting-started/quickstart-backend)套件。它們使您能夠插入 React 狀態並使用 AI 代理在後端處理應用程式資料。 首先,我們將 CopilotKit React 元件加入到部落格前端。 ### **將 CopilotKit 新增至部落格前端** 在這裡,我將引導您完成將 UI 元件產生器與 CopilotKit 前端整合的過程,以方便產生 UI 元件程式碼和實作教學。 首先,使用下面的程式碼片段導入`/[root]/src/app/components/CodeTutorial.tsx`檔案頂部的自訂掛鉤`useMakeCopilotReadable`和`useCopilotAction` 。 ``` import { useCopilotAction, useMakeCopilotReadable, } from "@copilotkit/react-core"; ``` 在`CodeTutorial`函數內的狀態變數下方,加入以下程式碼,該程式碼使用`useMakeCopilotReadable`掛鉤來新增將作為應用程式內聊天機器人的上下文產生的程式碼。該鉤子使副駕駛可以讀取程式碼。 ``` useMakeCopilotReadable(codeToDisplay); ``` 在上面的程式碼下方,新增以下程式碼,該程式碼使用`useCopilotAction`掛鉤來設定名為`generateCodeAndImplementationTutorial`的操作,該操作將啟用 UI 元件程式碼和實作教學課程的產生。 這個操作接受兩個參數,稱為`code`和`tutorial` ,這兩個參數可以產生 UI 元件程式碼和實作教程。 該操作包含一個處理函數,該函數根據給定的提示產生 UI 元件程式碼和實作教程。 在處理函數內部, `codeToDisplay`狀態會使用新產生的程式碼進行更新,而`codeTutorial`狀態會使用新產生的教學課程進行更新,如下所示。 ``` useCopilotAction( { name: "generateCodeAndImplementationTutorial", description: "Create Code Snippet with React.js(Next.js), tailwindcss and an implementation tutorial of the code generated.", parameters: [ { name: "code", type: "string", description: "Code to be generated", required: true, }, { name: "tutorial", type: "string", description: "Markdown of step by step guide tutorial on how to use the generated code accompanied with the code. Include introduction, prerequisites and what happens at every step accompanied with code generated earlier. Don't forget to add how to render the code on browser.", required: true, }, ], handler: async ({ code, tutorial }) => { setCode((prev) => [...prev, code]); setCodeToDisplay(code); setCodeTutorial(tutorial); }, }, [codeToDisplay, codeTutorial] ); ``` 之後,請前往`/[root]/src/app/page.tsx`檔案並使用下面的程式碼匯入頂部的 CopilotKit 前端套件和樣式。 ``` import { CopilotKit } from "@copilotkit/react-core"; import { CopilotSidebar } from "@copilotkit/react-ui"; import "@copilotkit/react-ui/styles.css"; ``` 然後使用`CopilotKit`包裝`CopilotSidebar`和`CodeTutorial`元件,如下所示。 `CopilotKit`元件指定 CopilotKit 後端端點 ( `/api/copilotkit/` ) 的 URL,而`CopilotSidebar`呈現應用程式內聊天機器人,您可以提示產生 UI 元件程式碼和實作教學。 ``` export default function Home() { return ( <> <Header /> <CopilotKit url="/api/copilotkit"> <CopilotSidebar instructions="Help the user generate code. Ask the user if to generate its tutorial." defaultOpen={true} labels={{ title: "Code & Tutorial Generator", initial: "Hi! 👋 I can help you generate code and its tutorial.", }}> <CodeTutorial /> </CopilotSidebar> </CopilotKit> </> ); } ``` 之後,執行開發伺服器並導航到 http://localhost:3000。您應該會看到應用程式內聊天機器人已整合到 UI 元件產生器中。  ### **將 CopilotKit 後端加入博客** 在這裡,我將引導您完成將 UI 元件產生器與 CopilotKit 後端整合的過程,該後端處理來自前端的請求,並提供函數呼叫和各種 LLM 後端(例如 GPT)。 此外,我們將整合一個名為 Tavily 的人工智慧代理,它可以研究網路上的任何主題。 首先,在根目錄中建立一個名為`.env.local`的檔案。然後在保存`ChatGPT`和`Tavily` Search API 金鑰的檔案中加入下面的環境變數。 ``` OPENAI_API_KEY="Your ChatGPT API key" TAVILY_API_KEY="Your Tavily Search API key" ``` 若要取得 ChatGPT API 金鑰,請導覽至 https://platform.openai.com/api-keys。  若要取得 Tavilly Search API 金鑰,請導覽至 https://app.tavily.com/home  之後,轉到`/[root]/src/app`並建立一個名為`api`的資料夾。在`api`資料夾中,建立一個名為`copilotkit`的資料夾。 在`copilotkit`資料夾中,建立一個名為`research.ts`的檔案。然後導航到[該 Research.ts gist 文件](https://gist.github.com/TheGreatBonnie/58dc21ebbeeb8cbb08df665db762738c),複製程式碼,並將其新增至**`research.ts`**檔案中 接下來,在`/[root]/src/app/api/copilotkit`資料夾中建立一個名為`route.ts`的檔案。該文件將包含設定後端功能來處理 POST 請求的程式碼。它有條件地包括對給定主題進行研究的“研究”操作。 現在在文件頂部導入以下模組。 ``` import { CopilotBackend, OpenAIAdapter } from "@copilotkit/backend"; // For backend functionality with CopilotKit. import { researchWithLangGraph } from "./research"; // Import a custom function for conducting research. import { AnnotatedFunction } from "@copilotkit/shared"; // For annotating functions with metadata. ``` 在上面的程式碼下面,定義一個執行時間環境變數和一個名為`researchAction`的函數,該函數使用下面的程式碼研究某個主題。 ``` // Define a runtime environment variable, indicating the environment where the code is expected to run. export const runtime = "edge"; // Define an annotated function for research. This object includes metadata and an implementation for the function. const researchAction: AnnotatedFunction<any> = { name: "research", // Function name. description: "Call this function to conduct research on a certain topic. Respect other notes about when to call this function", // Function description. argumentAnnotations: [ // Annotations for arguments that the function accepts. { name: "topic", // Argument name. type: "string", // Argument type. description: "The topic to research. 5 characters or longer.", // Argument description. required: true, // Indicates that the argument is required. }, ], implementation: async (topic) => { // The actual function implementation. console.log("Researching topic: ", topic); // Log the research topic. return await researchWithLangGraph(topic); // Call the research function and return its result. }, }; ``` 然後在上面的程式碼下加入下面的程式碼來定義處理POST請求的非同步函數。 ``` // Define an asynchronous function that handles POST requests. export async function POST(req: Request): Promise<Response> { const actions: AnnotatedFunction<any>[] = []; // Initialize an array to hold actions. // Check if a specific environment variable is set, indicating access to certain functionality. if (process.env.TAVILY_API_KEY) { actions.push(researchAction); // Add the research action to the actions array if the condition is true. } // Instantiate CopilotBackend with the actions defined above. const copilotKit = new CopilotBackend({ actions: actions, }); // Use the CopilotBackend instance to generate a response for the incoming request using an OpenAIAdapter. return copilotKit.response(req, new OpenAIAdapter()); } ``` 如何產生 UI 元件 ---------- 現在轉到您之前整合的應用程式內聊天機器人,並給它一個提示,例如「產生聯絡表單」。 生成完成後,您應該會看到生成的聯絡表單元件及其實作教程,如下所示。您也可以使用嵌入式程式碼編輯器修改產生的程式碼。   恭喜!您已完成本教學的專案。 結論 -- [CopilotKit](https://copilotkit.ai/)是一款令人難以置信的工具,可讓您在幾分鐘內將 AI Copilot 加入到您的產品中。無論您是對人工智慧聊天機器人和助理感興趣,還是對複雜任務的自動化感興趣,CopilotKit 都能讓您輕鬆實現。 如果您需要建立 AI 產品或將 AI 工具整合到您的軟體應用程式中,您應該考慮 CopilotKit。 您可以在 GitHub 上找到本教學的源程式碼: <https://github.com/TheGreatBonnie/AIPoweredUIComponentsGenerator> --- 原文出處:https://dev.to/the_greatbonnie/ai-powered-frontend-ui-components-generator-nextjs-gpt4-langchain-copilotkit-1hac
今天,我們將介紹 30 個或更多可以使用 AI 建置的專案。 所有專案都是開源的,因此您可以做出貢獻以使其變得更好。 有些專案可能擁有龐大的程式碼庫,但您可以從中獲得靈感並建立一個很酷的副專案。 相信我,如果這個清單沒有讓你感到驚訝,那麼沒有什麼會讓你感到驚訝:) 讓我們開始吧!  --- 1. [CopilotKit](https://go.copilotkit.ai/Anmol) - 在數小時內為您的產品提供 AI Copilot。 -------------------------------------------------------------------------- [](https://github.com/CopilotKit/CopilotKit) 將 AI 功能整合到 React 中是很困難的,這就是 Copilot 的用武之地。一個簡單快速的解決方案,可將可投入生產的 Copilot 整合到任何產品中! 您可以使用兩個 React 元件將關鍵 AI 功能整合到 React 應用程式中。它們還提供內建(完全可自訂)Copilot 原生 UX 元件,例如`<CopilotKit />` 、 `<CopilotPopup />` 、 `<CopilotSidebar />` 、 `<CopilotTextarea />` 。 開始使用以下 npm 指令。 ``` npm i @copilotkit/react-core @copilotkit/react-ui ``` Copilot Portal 是 CopilotKit 提供的元件之一,CopilotKit 是一個應用程式內人工智慧聊天機器人,可查看目前應用狀態並在應用程式內採取操作。它透過插件與應用程式前端和後端以及第三方服務進行通訊。 這就是整合聊天機器人的方法。 `CopilotKit`必須包裝與 CopilotKit 互動的所有元件。建議您也開始使用`CopilotSidebar` (您可以稍後切換到不同的 UI 提供者)。 ``` "use client"; import { CopilotKit } from "@copilotkit/react-core"; import { CopilotSidebar } from "@copilotkit/react-ui"; import "@copilotkit/react-ui/styles.css"; export default function RootLayout({children}) { return ( <CopilotKit url="/path_to_copilotkit_endpoint/see_below"> <CopilotSidebar> {children} </CopilotSidebar> </CopilotKit> ); } ``` 您可以使用此[快速入門指南](https://docs.copilotkit.ai/getting-started/quickstart-backend)設定 Copilot 後端端點。 之後,您可以讓 Copilot 採取行動。您可以閱讀如何提供[外部上下文](https://docs.copilotkit.ai/getting-started/quickstart-chatbot#provide-context)。您可以使用`useMakeCopilotReadable`和`useMakeCopilotDocumentReadable`反應掛鉤來執行此操作。 ``` "use client"; import { useMakeCopilotActionable } from '@copilotkit/react-core'; // Let the copilot take action on behalf of the user. useMakeCopilotActionable( { name: "setEmployeesAsSelected", // no spaces allowed in the function name description: "Set the given employees as 'selected'", argumentAnnotations: [ { name: "employeeIds", type: "array", items: { type: "string" } description: "The IDs of employees to set as selected", required: true } ], implementation: async (employeeIds) => setEmployeesAsSelected(employeeIds), }, [] ); ``` 您可以閱讀[文件](https://docs.copilotkit.ai/getting-started/quickstart-textarea)並查看[演示影片](https://github.com/CopilotKit/CopilotKit?tab=readme-ov-file#demo)。 您可以輕鬆整合 Vercel AI SDK、OpenAI API、Langchain 和其他 LLM 供應商。您可以按照本[指南](https://docs.copilotkit.ai/getting-started/quickstart-chatbot)將聊天機器人整合到您的應用程式中。 基本概念是在幾分鐘內建立可用於基於 LLM 的應用程式的 AI 聊天機器人。 用例是巨大的,作為開發人員,我們絕對應該在下一個專案中嘗試使用 CopilotKit。 CopilotKit 在 GitHub 上擁有超過 5700 顆星,發布了 200 多個版本,這意味著它們不斷改進。 https://go.copilotkit.ai/Anmol Star CopilotKit ⭐️ --- 2. [AgentGPT](https://github.com/reworkd/AgentGPT) - 組裝、配置和部署自主 AI 代理程式。 ------------------------------------------------------------------------ 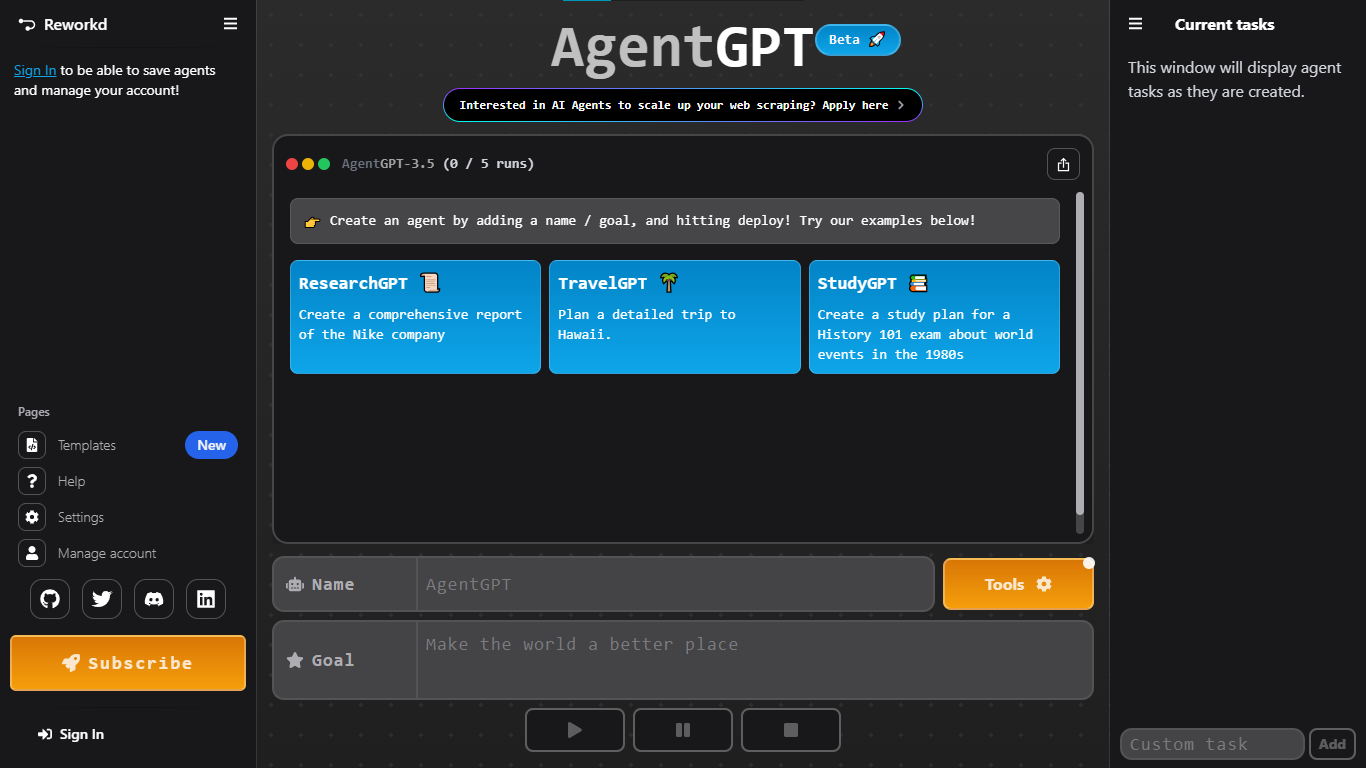 AgentGPT 可讓您設定和部署自主 AI 代理程式。 它將嘗試透過思考要完成的任務、執行任務並從結果中學習來實現目標:) 它是使用以下方式建構的: - 引導:create-t3-app + FastAPI-模板。 - 框架:Nextjs 13 + Typescript + FastAPI - 驗證:Next-Auth.js - ORM:Prisma 和 SQLModel。 - 資料庫:Planetscale。 - 樣式:TailwindCSS + HeadlessUI。 - 架構驗證:Zod + Pydantic。 - 法學碩士工具:Langchain。 開始使用本[指南](https://github.com/reworkd/AgentGPT?tab=readme-ov-file#getting-started-rocket)在本地安裝它。 您可以查看該應用程式的[演示](https://github.com/reworkd/AgentGPT?tab=readme-ov-file#-demo)並查看[即時網站](https://agentgpt.reworkd.ai/)。  他們在 GitHub 上擁有 29k+ 顆星,並且正在發布`v1`版本。 https://github.com/reworkd/AgentGPT 明星 AgentGPT ⭐️ --- 3.[私人 GPT](https://github.com/zylon-ai/private-gpt) - 無需網路即可詢問有關您文件的問題。 ------------------------------------------------------------------------ 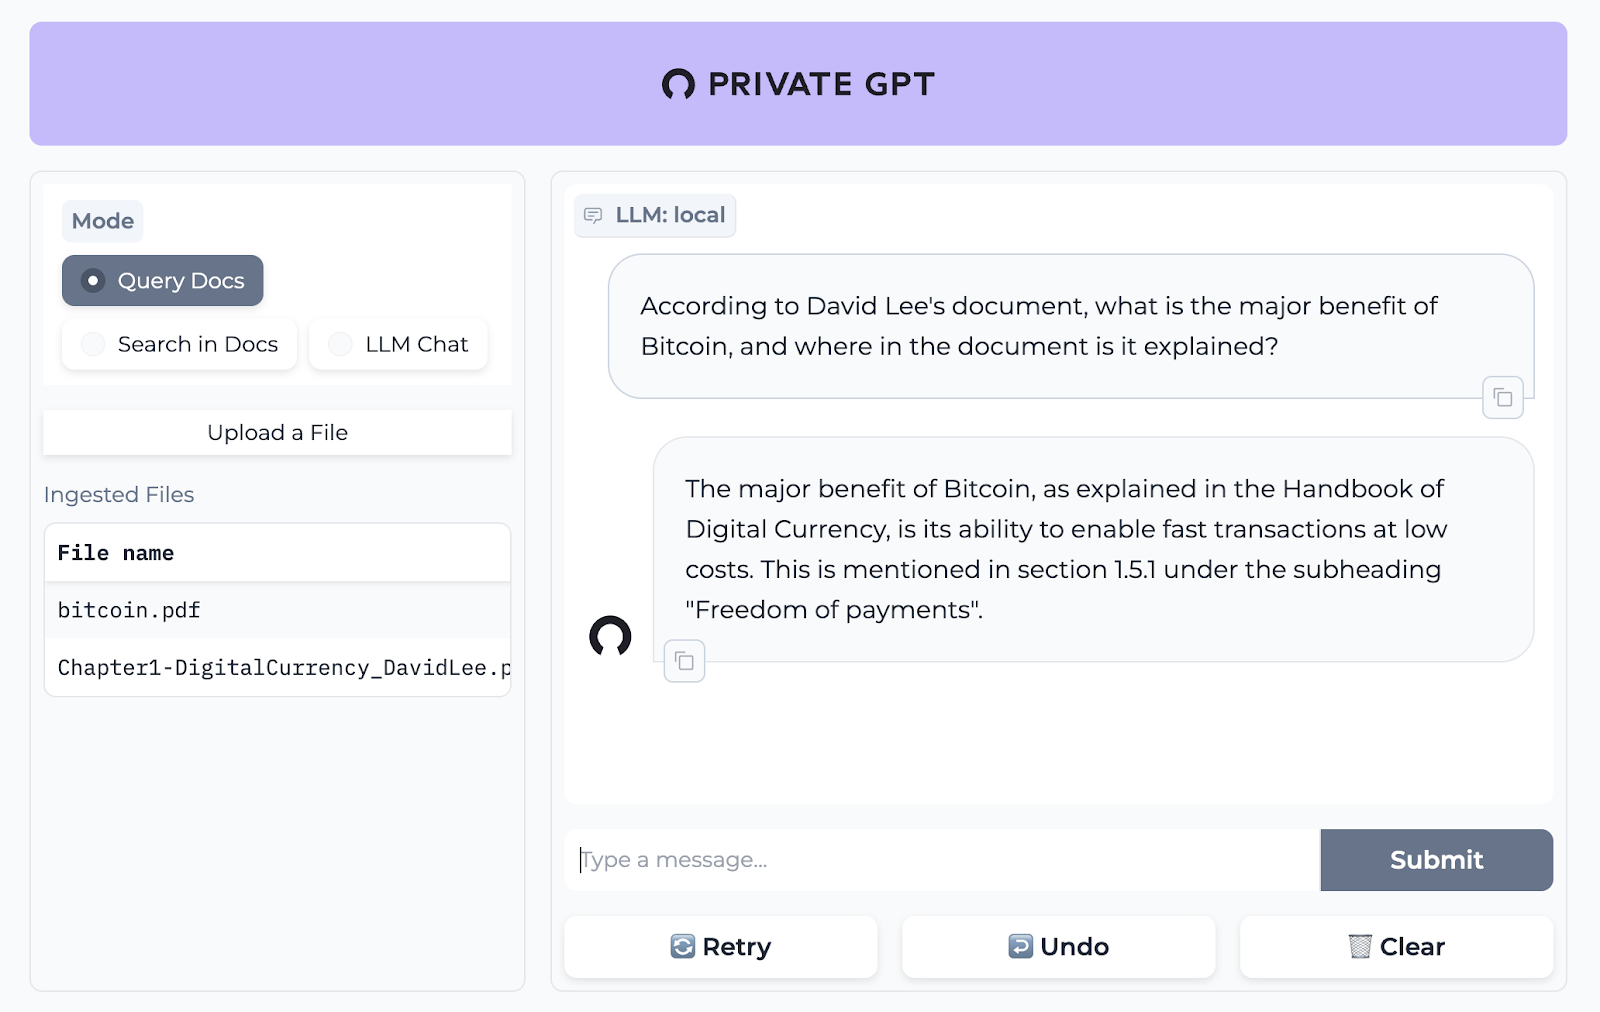 PrivateGPT 是一個可立即投入生產的 AI 專案,即使在沒有網路連線的情況下,您也可以使用大型語言模型 (LLM) 的功能來詢問有關文件的問題。 100% 私有意味著任何時候都沒有資料離開您的執行環境。 API 分為兩個邏輯區塊: A。高級 API,抽象化了 RAG(檢索增強生成)管道實現的所有複雜性: - 文件攝取:內部管理文件解析、分割、元資料擷取、嵌入產生和儲存。 - 使用所攝取文件中的上下文進行聊天和完成:抽像上下文檢索、提示工程和回應產生。 b.低階 API,允許高階用戶實現複雜的管道: - 嵌入生成:基於一段文字。 - 上下文區塊檢索:給定查詢,從攝取的文件中傳回最相關的文字區塊。 您可以閱讀[安裝指南](https://docs.privategpt.dev/installation/getting-started/installation)來開始。 您可以閱讀[文件](https://docs.privategpt.dev/overview/welcome/introduction)以及所涉及的[詳細架構](https://github.com/zylon-ai/private-gpt?tab=readme-ov-file#-architecture)。 PrivateGPT 現在正在發展成為產生 AI 模型和原語的網關,包括補全、文件攝取、RAG 管道和其他低階建置塊。 他們在 GitHub 上擁有超過 51,000 顆星,並且發展迅速。 https://github.com/zylon-ai/private-gpt 明星私人 GPT ⭐️ --- 4. [Instrukt](https://github.com/blob42/Instrukt) - 終端機中整合人工智慧。 ---------------------------------------------------------------  Instrukt是一個基於終端的AI整合環境。它提供了一個平台,用戶可以: - 建立並指導模組化人工智慧代理。 - 產生問答的文件索引。 - 建立工具並將其附加到任何代理程式。 用自然語言指導它們,並且為了安全起見,在安全容器(目前使用 Docker 實作)中執行它們,以在其專用的沙盒空間中執行任務。 使用`Langchain` 、 `Textual`和`Chroma`建構。 開始使用以下命令。 ``` pip install instrukt[all] ```  有許多令人興奮的功能,例如: - 基於終端的介面,讓強力鍵盤使用者無需離開鍵盤即可指示 AI 代理。 - 對您的資料建立索引並讓代理程式檢索它以進行問答。您可以使用簡單的 UI 建立和組織索引。 - 索引建立將自動偵測程式語言並相應地優化拆分/分塊策略。 - 在安全的 Docker 容器內執行代理程式以確保安全和隱私。 - 整合的 REPL-Prompt 可實現與代理程式的快速交互,以及用於開發和測試的快速回饋循環。 - 您可以使用自訂命令自動執行重複任務。它還具有內建的提示/聊天歷史記錄。 您可以閱讀有關所有[功能的](https://github.com/blob42/Instrukt?tab=readme-ov-file#features)資訊。 您可以閱讀[安裝指南](https://blob42.github.io/Instrukt/install.html)。 您還可以使用內建的 IPython 控制台來除錯和內省代理,這是一個簡潔的小功能。  Instrukt 已獲得 AGPL 許可證,這意味著任何人都可以將其用於任何目的。 可以肯定地說,Instrukt 是您觸手可及的終端人工智慧指揮官。 這是一個新專案,因此他們在 GitHub 上有大約 200 多顆星,但用例非常好。 https://github.com/blob42/Instrukt 舊指令 ⭐️ --- 5. [Mac 上的語音助理](https://github.com/chidiwilliams/GPT-Automator)- 您的語音控制 Mac 助理。 -------------------------------------------------------------------------------  您的語音控制 Mac 助理。 GPT Automator 可讓您使用語音在 Mac 上執行任務。例如,打開應用程式、尋找餐廳、綜合資訊。太棒了:D 它是在倫敦黑客馬拉松期間建構的。 它有兩個主要部分: A。語音命令:它使用本地執行的 Whisper(Buzz 的一個分支)來產生命令。 b.命令到行動:您向配備了我們編寫的自訂工具的 LangChain 代理程式發出命令。這些工具包括使用 AppleScript 控制電腦的作業系統以及使用 JavaScript 控制活動瀏覽器。最後,就像任何優秀的人工智慧一樣,我們讓代理商使用 AppleScript 說出最終結果「{Result}」(如果您以前沒有使用過,請嘗試在 Mac 終端機中輸入「Hello World!」)。 我們製作了一個自訂工具,讓法學碩士使用 AppleScript 控制電腦。提示符是文件字串: ``` @tool def computer_applescript_action(apple_script): """ Use this when you want to execute a command on the computer. The command should be in AppleScript. Here are some examples of good AppleScript commands: Command: Create a new page in Notion AppleScript: tell application "Notion" activate delay 0.5 tell application "System Events" to keystroke "n" using {{command down}} end tell ... Write the AppleScript for the Command: Command: """ p = subprocess.Popen(['osascript', '-'], stdin=subprocess.PIPE, stdout=subprocess.PIPE, stderr=subprocess.PIPE) stdout, stderr = p.communicate(applescript.encode('utf-8')) if p.returncode != 0: raise Exception(stderr) decoded_text = stdout.decode("utf-8") return decoded_text ``` 如果您想知道它是如何運作的,GPT Automator 使用 OpenAI 的 Whisper 將您的音訊輸入轉換為文字。然後,它使用LangChain Agent 選擇一組操作,包括使用OpenAI 的GPT-3(“text-davinci-003”)從提示符號產生AppleScript(用於桌面自動化)和JavaScript(用於瀏覽器自動化)命令,然後執行產生的腳本。 請記住,這不適用於生產用途。該專案執行從自然語言產生的程式碼,可能容易受到提示注入和類似的攻擊。這項工作是作為概念驗證而進行的。 您可以閱讀[安裝指南](https://github.com/chidiwilliams/GPT-Automator?tab=readme-ov-file#instructions)。 讓我們看看一些提示及其作用: ✅ 求計算結果。 > 提示:“2 + 2 是什麼?” 它將編寫 AppleScript 開啟計算器並輸入 5 \* 5。 ✅ 尋找附近的餐廳。 > 提示:“查找我附近的餐廳” 它將打開 Chrome,谷歌搜尋附近的餐廳,解析頁面,然後返回最上面的結果。有時它很厚顏無恥,反而會打開谷歌地圖結果並說「最好的餐廳是谷歌地圖頁面頂部的餐廳」。其他時候,它會打開 Google 上的頂部連結 - 並卡在 Google 可存取性頁面上... 以下是執行時列印到終端的內容: ``` Command: Find a great restaurant near Manchester. > Entering new AgentExecutor chain... I need to search for a restaurant near Manchester. Action: chrome_open_url Action Input: https://www.google.com/search?q=restaurant+near+Manchester Observation: Thought: I need to read the page Action: chrome_read_the_page Action Input: Observation: Accessibility links Skip to main content ... # Shortned for brevity Dishoom Manchester 4.7 (3.3K) · £££ · Indian 32 Bridge St · Near John Rylands Library Closes soon ⋅ 11 pm Stylish eatery for modern Indian fare San Carlo 4.2 (2.8K) · £££ · Italian 42 King St W · Near John Rylands Library Closes soon ⋅ 11 pm Posh, sceney Italian restaurant Turtle Bay Manchester Northern Quarter 4.7 Thought: I now know the final answer Final Answer: The 15 best restaurants in Manchester include El Gato Negro, Albert's Schloss, The Refuge, Hawksmoor, On The Hush, Dishoom, Banyan, Zouk Tea Room & Grill, Edison Bar, MyLahore Manchester, Turtle Bay Manchester Northern Quarter, San Carlo, The Black Friar, Mana, and Tast Cuina Catalana. ``` 我不能保證這些餐廳值得,請自行承擔風險。哈哈! ✅ 如果您要求 GPT Automator 擦除您的計算機,它會的。 是的,如果您要求的話,它會擦除您的電腦! 我內心的自我尖叫著要這麼做:) 您可以在這裡查看完整的演示! https://www.loom.com/share/7bfa82c604f3412fbbb04191ce2ae12f 您可以在[Chidi 的部落格](https://chidiwilliams.com/posts/gpt-automator)上閱讀更多內容。 它更像是一個業餘專案,因此他們在 GitHub 上有大約 200 個 star,但它非常酷。 https://github.com/chidiwilliams/GPT-Automator 明星 GPT Automator ⭐️ --- 6. [Flowise](https://github.com/FlowiseAI/Flowise) - 拖放 UI 來建立您的客製化 LLM 流程。 --------------------------------------------------------------------------- 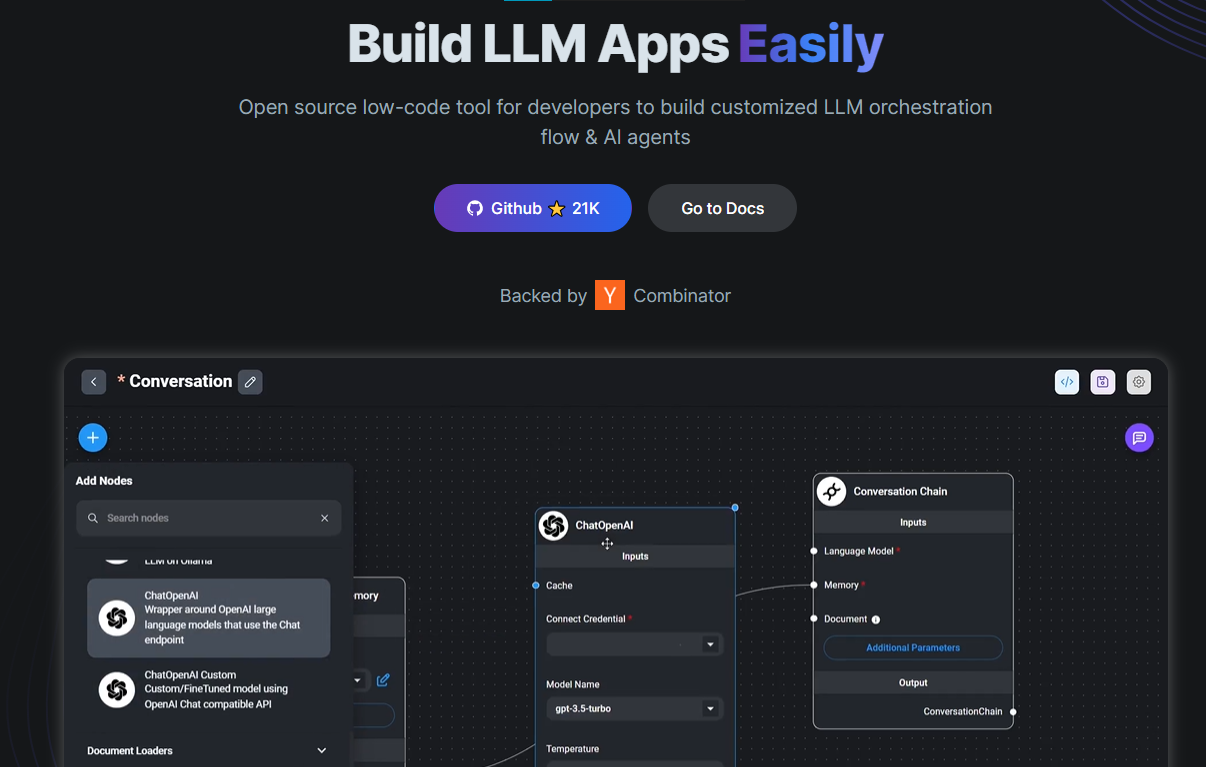 Flowise 是一款開源 UI 視覺化工具,用於建立客製化的 LLM 編排流程和 AI 代理程式。 開始使用以下 npm 指令。 ``` npm install -g flowise npx flowise start OR npx flowise start --FLOWISE_USERNAME=user --FLOWISE_PASSWORD=1234 ``` 這就是整合 API 的方式。 ``` import requests url = "/api/v1/prediction/:id" def query(payload): response = requests.post( url, json = payload ) return response.json() output = query({ question: "hello!" )} ``` 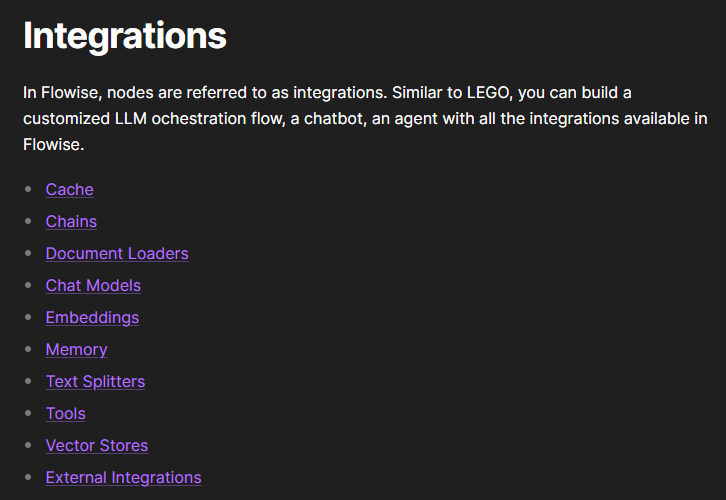 您可以閱讀[文件](https://docs.flowiseai.com/)。 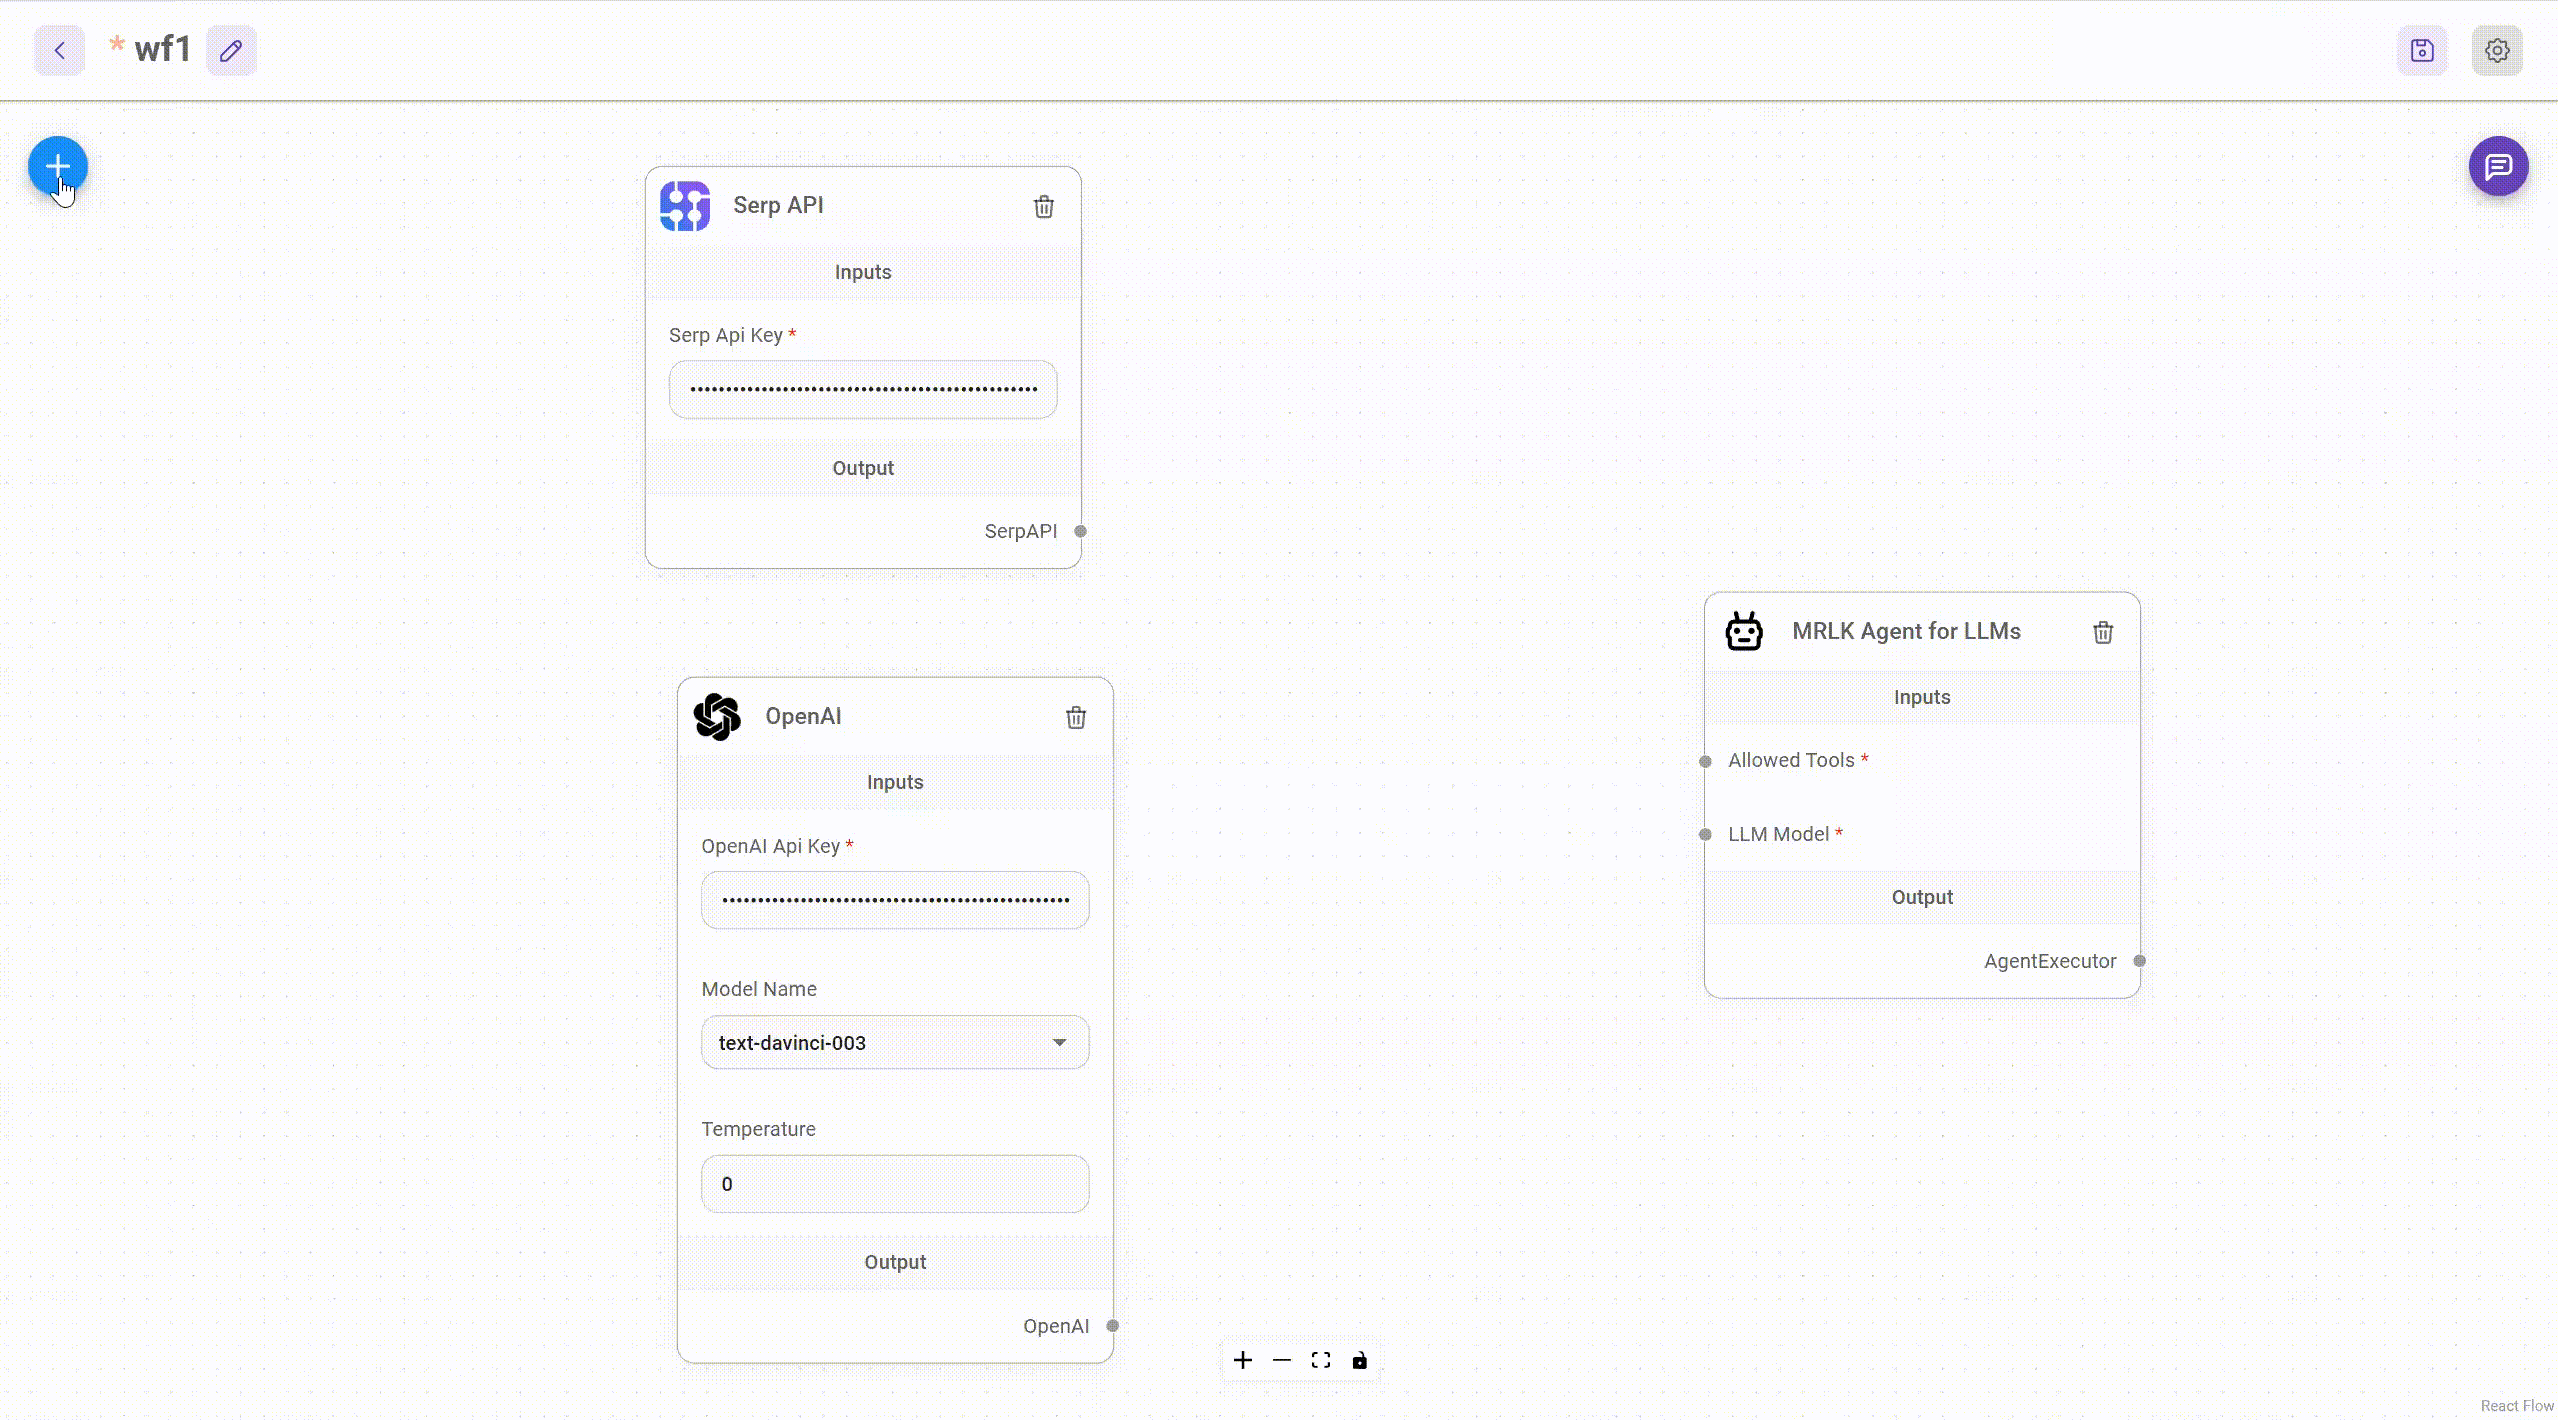 雲端主機不可用,因此您必須使用這些[說明](https://github.com/FlowiseAI/Flowise?tab=readme-ov-file#-self-host)自行託管。 讓我們探討一些用例: - 假設您有一個網站(可以是商店、電子商務網站或部落格),並且您希望廢棄該網站的所有相關連結,並讓法學碩士回答您網站上的任何問題。您可以按照此[逐步教學](https://docs.flowiseai.com/use-cases/web-scrape-qna)來了解如何實現相同的目標。 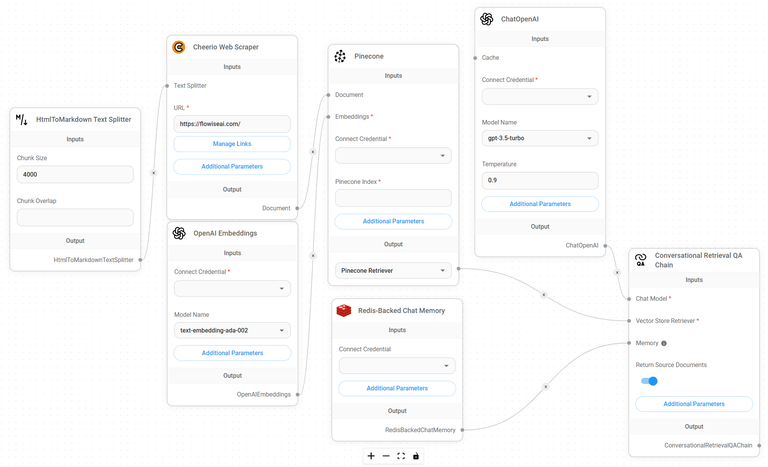 - 您還可以建立一個自訂工具,該工具將能夠呼叫 Webhook 端點並將必要的參數傳遞到 Webhook 主體中。請依照本[指南](https://docs.flowiseai.com/use-cases/webhook-tool)使用 Make.com 建立 Webhook 工作流程。 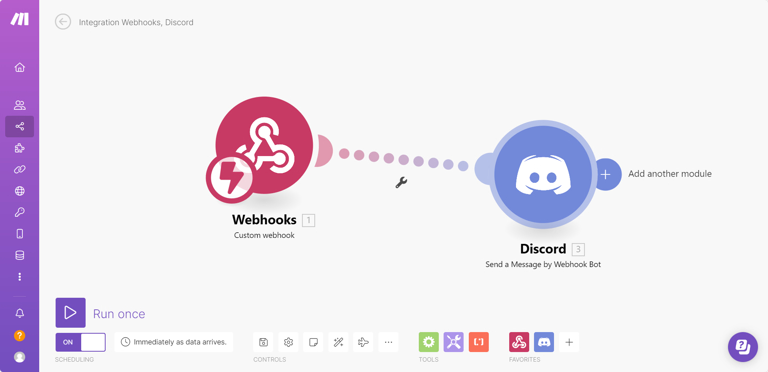 還有許多其他用例,例如建立 SQL QnA 或與 API 互動。 FlowiseAI 在 GitHub 上擁有超過 27,500 個 Star,並擁有超過 10,000 個分叉,因此具有良好的整體比率。 https://github.com/FlowiseAI/Flowise 明星 Flowise ⭐️ --- 7. [Twitter Agent](https://github.com/ahmedbesbes/media-agent) - 從社群媒體抓取資料並使用 Langchain 與其聊天。 --------------------------------------------------------------------------------------------- 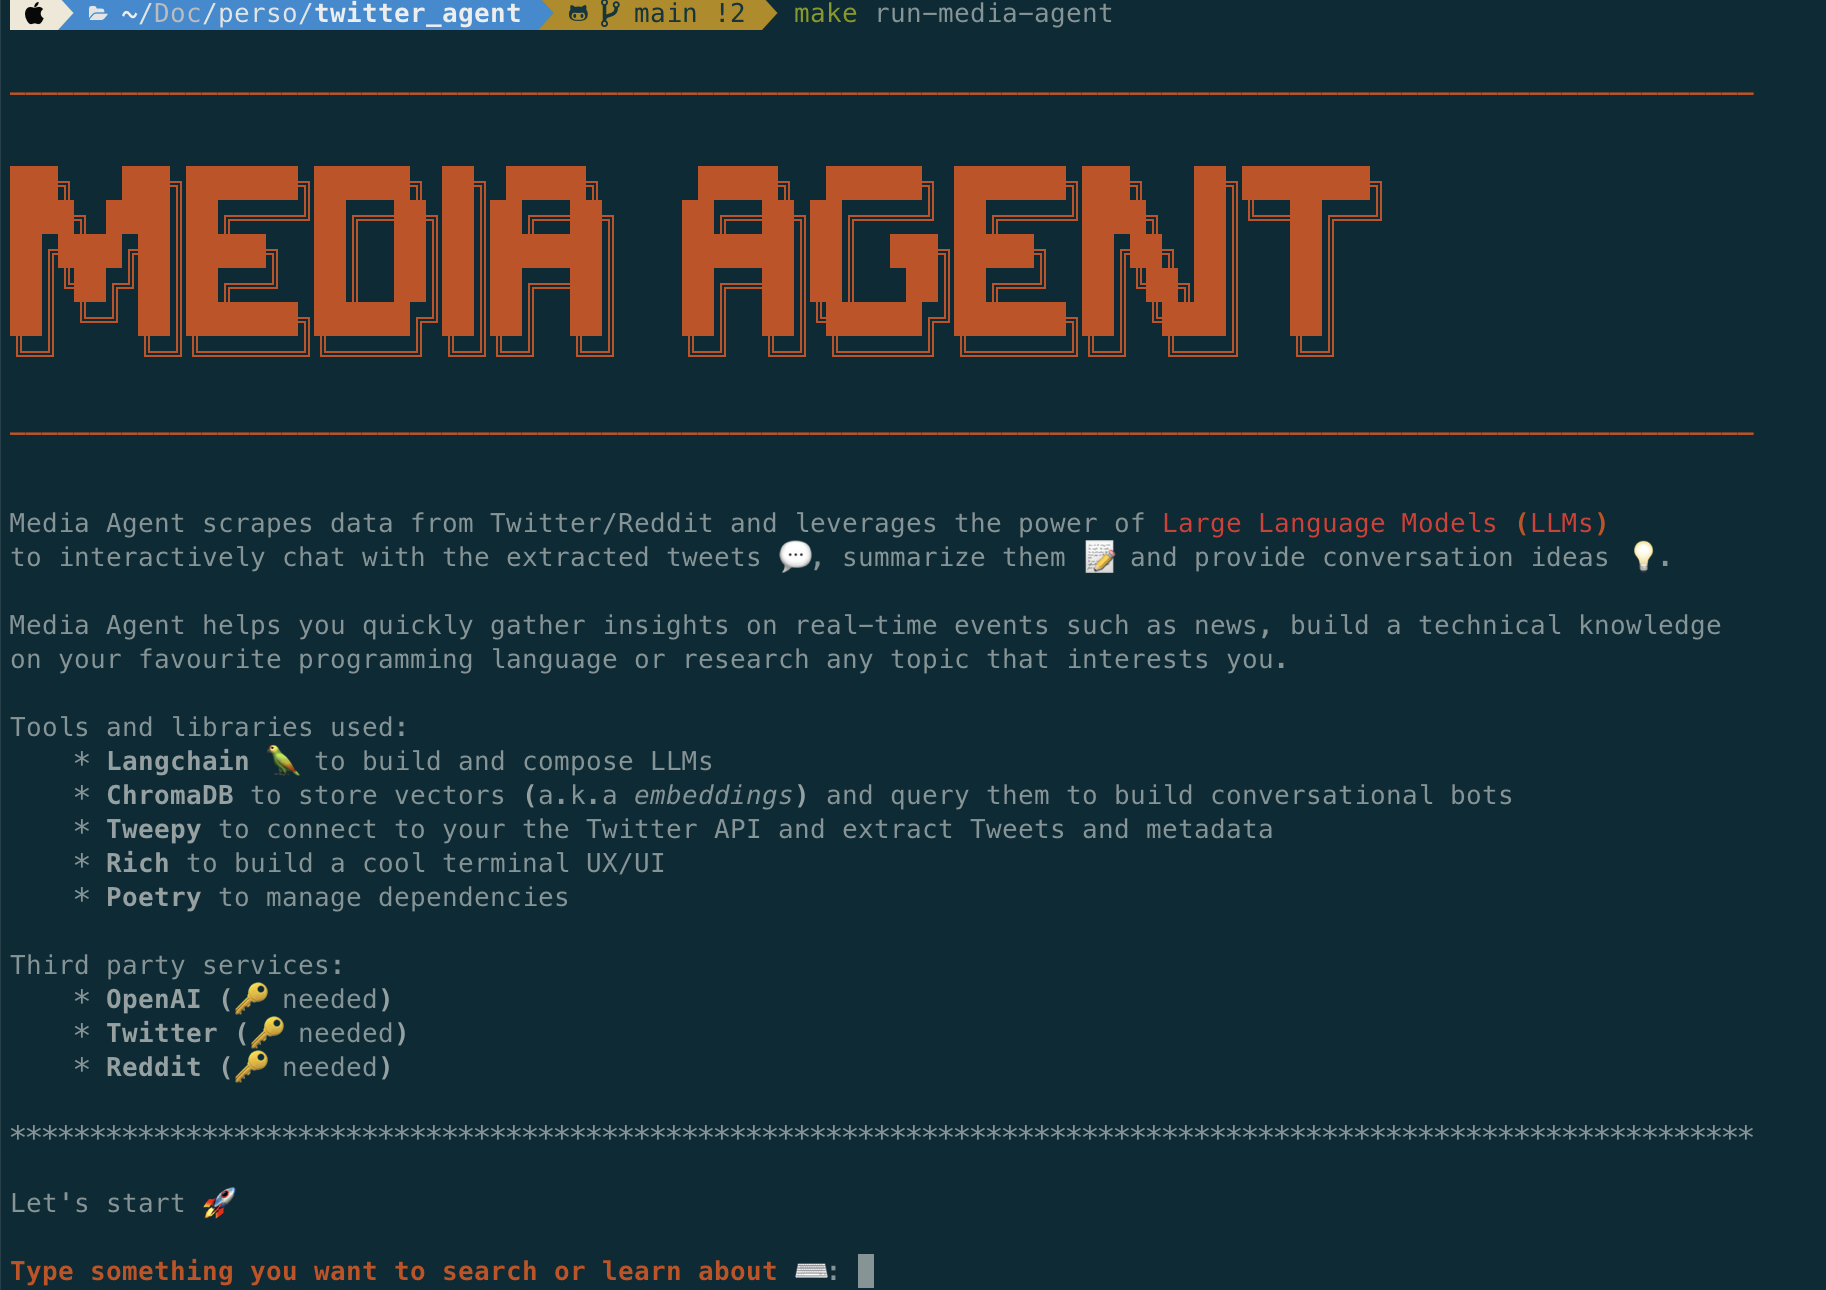 Media Agent 抓取 Twitter 和 Reddit 提交的內容,對其進行總結,並在互動式終端中與它們聊天。這麼酷的概念! 您可以閱讀[說明](https://github.com/ahmedbesbes/media-agent?tab=readme-ov-file#run-the-app-locally)以在本地安裝它。 它是使用以下方式建構的: - Langchain 🦜 用於建構和撰寫法學碩士。 - ChromaDB 用於儲存向量(也稱為嵌入)並查詢它們以建立對話機器人。 - Tweepy 連接到您的 Twitter API 並提取推文和元資料。 - Praw 連接到 Reddit API。 - Rich 建造了一個很酷的終端 UX/UI。 - 管理依賴關係的詩。 一些很棒的功能: - 代表您從使用者帳戶清單或關鍵字清單中抓取推文/提交內容。 - 使用 OpenAI 嵌入推文/提交內容。 - 建立推文/提交內容的摘要並提供需要回答的潛在問題。 - 在推文之上打開聊天會話。 - 儲存對話及其元資料。 - 豐富的終端使用者介面和日誌記錄功能。 您可以觀看演示! https://www.loom.com/share/f4954e7d34ef4b7b8491e2bf910e8521 它在 GitHub 上有近 100 顆星,並且不再維護。您可以用它來建造更好的東西。 https://github.com/ahmedbesbes/media-agent 明星 Twitter 代理商 ⭐️ --- 8. [GPT 遷移](https://github.com/joshpxyne/gpt-migrate)- 輕鬆將程式碼庫從一種框架或語言遷移到另一種框架或語言。 ----------------------------------------------------------------------------------  如果您曾經面臨將程式碼庫遷移到新框架或語言的痛苦,那麼這個專案適合您。 我想我們都同意我們在某個時候需要這個。您也可以使用工作流程來完成此操作,據我所知,Stripe 曾經將其整個 JS 程式碼庫轉換為 TS。 遷移是一個成本高、乏味且重要的問題。 不要盲目相信當前版本,請負責任地使用它。另請注意,成本可能會迅速增加,因為 GPT-Migrate 旨在編寫(並可能重寫)整個程式碼庫。 您可以使用 Poetry[安裝](https://github.com/joshpxyne/gpt-migrate?tab=readme-ov-file#-installation-using-poetry)它並了解[它的工作原理](https://github.com/joshpxyne/gpt-migrate?tab=readme-ov-file#-how-it-works)。 > 請注意。 GPT-Migrate 目前處於開發 alpha 階段,尚未準備好投入生產使用。例如,在相對簡單的基準測試中,它在約 50% 的時間內順利通過 Python 或 JavaScript 等「簡單」語言,並且在沒有人工幫助的情況下無法通過 C++ 或 Rust 等更複雜的語言。 您可以在這裡觀看演示!  他們在 GitHub 上有 6500+ 顆星,最後一次提交是 6 個月前,所以我認為它不再被維護了! https://github.com/joshpxyne/gpt-migrate 明星 GPT 遷移 ⭐️ --- 9. [Plandex](https://github.com/plandex-ai/plandex) - 用於使用法學碩士建置複雜的真實世界軟體的人工智慧編碼引擎。 -----------------------------------------------------------------------------------  Plandex 使用長時間執行的代理程式來完成跨多個檔案且需要多個步驟的任務。它將大任務分解為更小的子任務,然後實現每個子任務,一直持續到完成工作為止。 它可以幫助您處理積壓的工作,使用不熟悉的技術,擺脫困境,並花更少的時間在無聊的事情上。 您可以在這裡查看演示! https://vimeo.com/926634577 變更會累積在受保護的沙箱中,以便您可以在自動將它們套用到專案文件之前查看它們。內建版本控制可讓您輕鬆返回並嘗試不同的方法。分支允許您嘗試多種方法並比較結果。 您可以在終端機中有效地管理上下文。輕鬆將檔案或整個目錄新增至上下文中,並在工作時自動更新它們,以便模型始終具有專案的最新狀態。 Plandex 依賴 OpenAI API,並且需要`OPENAI_API_KEY`環境變數。 Plandex 支援 Mac、Linux、FreeBSD 和 Windows。它從沒有依賴關係的單一二進位檔案執行。 您甚至可以嘗試不同的模型和模型設置,然後比較結果。 您可以閱讀[安裝說明](https://github.com/plandex-ai/plandex?tab=readme-ov-file#install)。 Plandex Cloud 是使用 Plandex 最簡單、最可靠的方式。當您使用 plandex new 建立第一個計劃時,系統會提示您開始匿名試用(無需電子郵件)。試用帳戶僅限 10 個計劃,每個計劃有 10 個 AI 模型回复。 Plandex Cloud 帳戶目前是免費的,這是一件好事。 Plandex 在 GitHub 上擁有 8k+ 顆星,並使用 Go 建造。 https://github.com/plandex-ai/plandex 明星PLandex ⭐️ --- 10. [SQL Translator](https://github.com/whoiskatrin/sql-translator) - 使用人工智慧將自然語言查詢轉換為 SQL 程式碼的工具。 -------------------------------------------------------------------------------------------------- 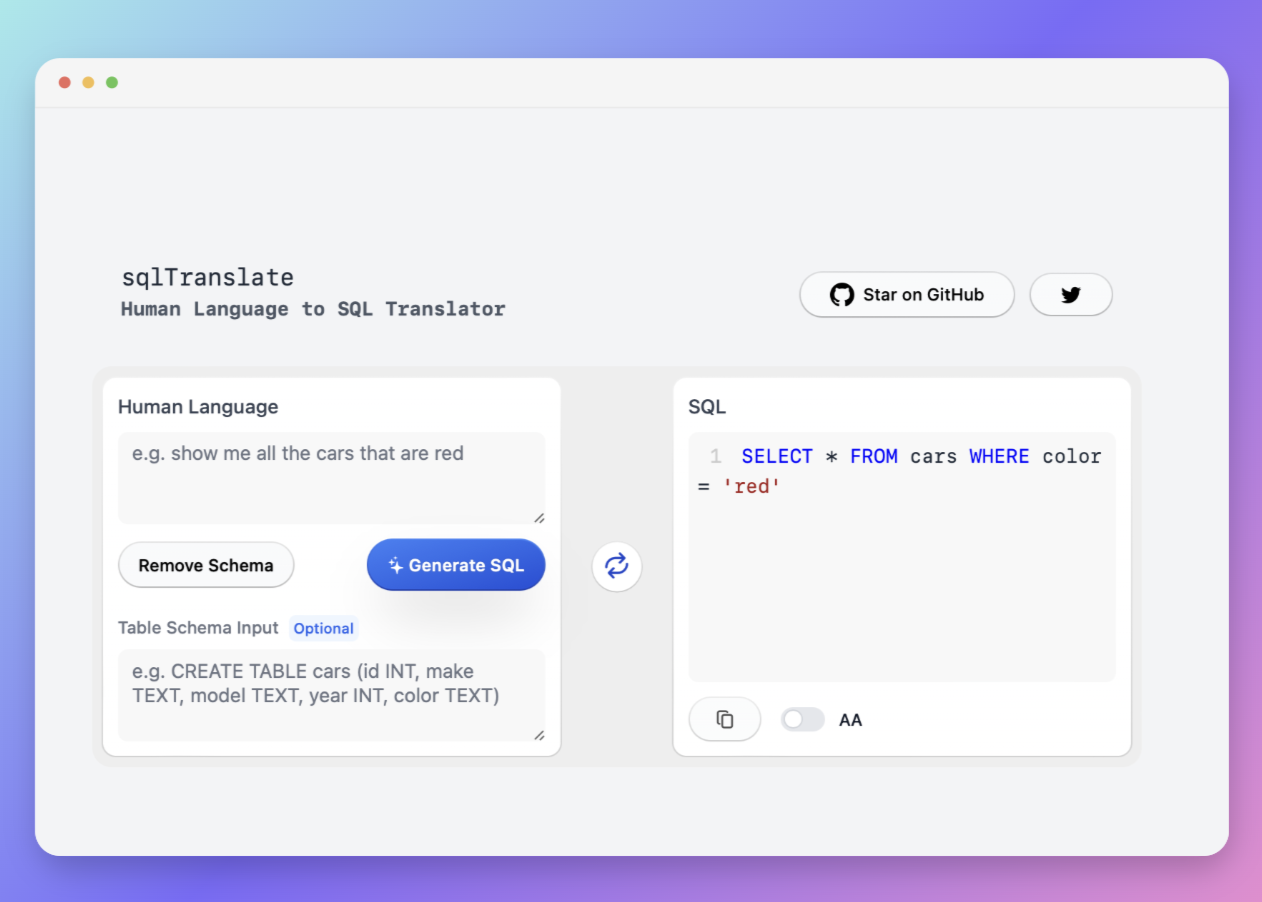 我試圖建立一個類似的專案,發現它已經存在。 該工具旨在讓任何人都可以輕鬆地將 SQL(結構化查詢語言)命令轉換為自然語言,反之亦然。 SQL 是一種用於管理和操作關聯式資料庫中的資料的程式語言,雖然它是一個強大的工具,但它也可能非常複雜且難以理解。 另一方面,自然語言是我們在日常生活中說和寫的語言,對於不熟悉技術術語的人來說,它通常是首選的溝通方式。 透過 SQL 和自然語言翻譯器,您無需成為 SQL 專家即可了解資料庫中發生的情況或編寫 SQL 查詢。您只需用自然語言輸入查詢即可取得對應的 SQL 程式碼,反之亦然。 其中一些功能是: - 深色模式。 - 小寫/大寫切換。 - 複製到剪貼簿。 - SQL 語法高亮。 - 模式意識(測試版)。 - 查詢歷史記錄。 你可以閱讀 [安裝說明](https://github.com/whoiskatrin/sql-translator?tab=readme-ov-file#%EF%B8%8F-installation),它非常簡單,因為它使用 Nextjs。 此查詢適合您。哈哈! 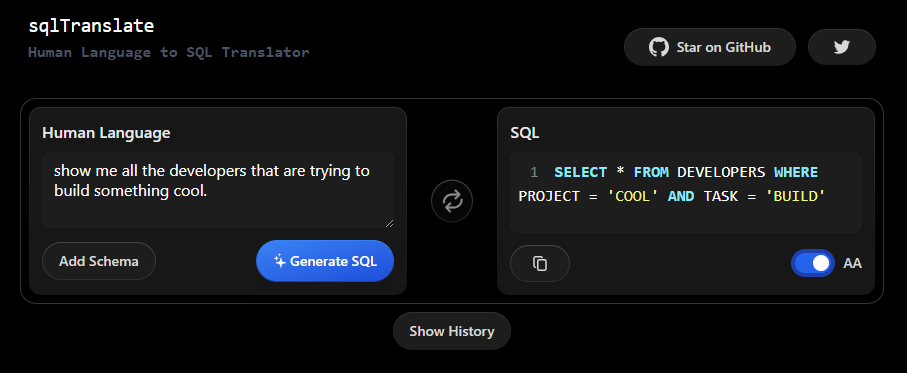 SQL Translator 在 GitHub 上有 4k star,是使用 TypeScript 建構的。 https://github.com/whoiskatrin/sql-translator 明星 SQL 翻譯機 ⭐️ --- 11. [WingmanAI](https://github.com/e-johnstonn/wingmanAI) - 音訊即時轉錄,與 ChatGPT 整合。 --------------------------------------------------------------------------------  WingmanAI 是一款功能強大的工具,可與系統和麥克風音訊的即時轉錄進行互動。該工具由 ChatGPT 提供支援,可讓您與腳本即時交互,作為機器人的廣泛記憶體基礎,提供獨特的通訊平台。 當您載入指定人員的記錄時,機器人可以回答有關過去對話的問題。 您可以閱讀[安裝說明](https://github.com/e-johnstonn/wingmanAI?tab=readme-ov-file#installation)。 您可以在這裡觀看演示!  一些簡潔的功能是: - WingmanAI 可以轉錄系統輸出和麥克風輸入音頻,讓您以易於閱讀的格式查看即時轉錄。 - 您可以與 ChatGPT 支援的機器人聊天,該機器人會即時讀取您的文字記錄。 - 機器人以令牌有效的方式維護對話記錄,因為只有當前的文字區塊會傳遞給機器人。 - WingmanAI 讓您可以保存成績單以供將來使用。您可以稍後隨時加載它們,並且對機器人進行的任何查詢都將與保存的轉錄本的向量資料庫交叉引用,從而為機器人提供更豐富的上下文。 - 您可以繼續附加到已儲存的記錄中,隨著時間的推移建立一個龐大的資料庫供機器人從中提取。 它在 GitHub 上有 420 個星,並且不再維護。 https://github.com/e-johnstonn/wingmanAI 明星 WingmanAI ⭐️ --- 12. [Lively](https://github.com/rocksdanister/lively) - 允許使用者設定動畫桌面桌布和螢幕保護程式。 -----------------------------------------------------------------------------  這只是為了好玩,我們可以使用程式碼學到很多關於它是如何完成的。 你可以看看這個[影片](https://www.pexels.com/video/blue-texture-abstract-leaves-7710243/),看看它看起來有多瘋狂。  他們提供[三種類型的壁紙,](https://github.com/rocksdanister/lively?tab=readme-ov-file#types-of-wallpapers)包括影片/GIF、網頁和應用程式/遊戲。 它基於 C# 和 live 支援的一些很酷的功能建置: 1. Lively 可以透過終端機的[命令列參數](https://github.com/rocksdanister/lively/wiki/Command-Line-Controls)進行控制。您可以將其與其他語言(例如 Python 或腳本軟體 AutoHotKey)整合。 2. 一組強大的[API](https://github.com/rocksdanister/lively/wiki/API) ,供開發人員建立互動式壁紙。取得硬體讀數、音訊圖表、音樂資訊等。 3. 當電腦上執行全螢幕應用程式/遊戲時(~0% CPU、GPU 使用率),桌布播放會暫停。 4. 您還可以利用[機器學習推理](https://github.com/rocksdanister/lively/wiki/Machine-Learning)來建立動態壁紙。您可以預測任何 2D 影像與相機的距離並產生類似 3D 的視差效果。酷:D 我見過很多人使用它,其中許多人甚至不知道它是開源的。 您可以使用[安裝程式](https://github.com/rocksdanister/lively/releases/download/v2.0.7.4/lively_setup_x86_full_v2074.exe)或透過[Microsoft Store](https://www.microsoft.com/store/productId/9NTM2QC6QWS7?ocid=pdpshare)下載它。 它是 2023 年 Microsoft Store 的獲勝者。 它在 GitHub 上擁有 13k+ Stars,有 60 個版本。 https://github.com/rocksdanister/lively 明星活潑 ⭐️ --- 13. [RestGPT](https://github.com/Yifan-Song793/RestGPT) - 基於 LM 的自主代理透過 RESTful API 控制應用程式。 -------------------------------------------------------------------------------------------  這項工作旨在建立一個基於大型語言模型的自主代理 RestGPT,以控制現實世界的應用程式,例如電影資料庫和音樂播放器。為了實現這一目標,我們將法學碩士與 RESTful API 連接起來,並解決規劃、API 呼叫和回應解析的實際挑戰。為了全面評估 RestGPT 的效能,我們提出了 RestBench,這是一個高品質的基準測試,由兩個真實場景和具有黃金解決方案路徑的人工註釋指示組成。 RestGPT採用迭代式從粗到精的線上規劃框架,並使用執行器呼叫RESTful API。以下是 RestGPT 的概述。 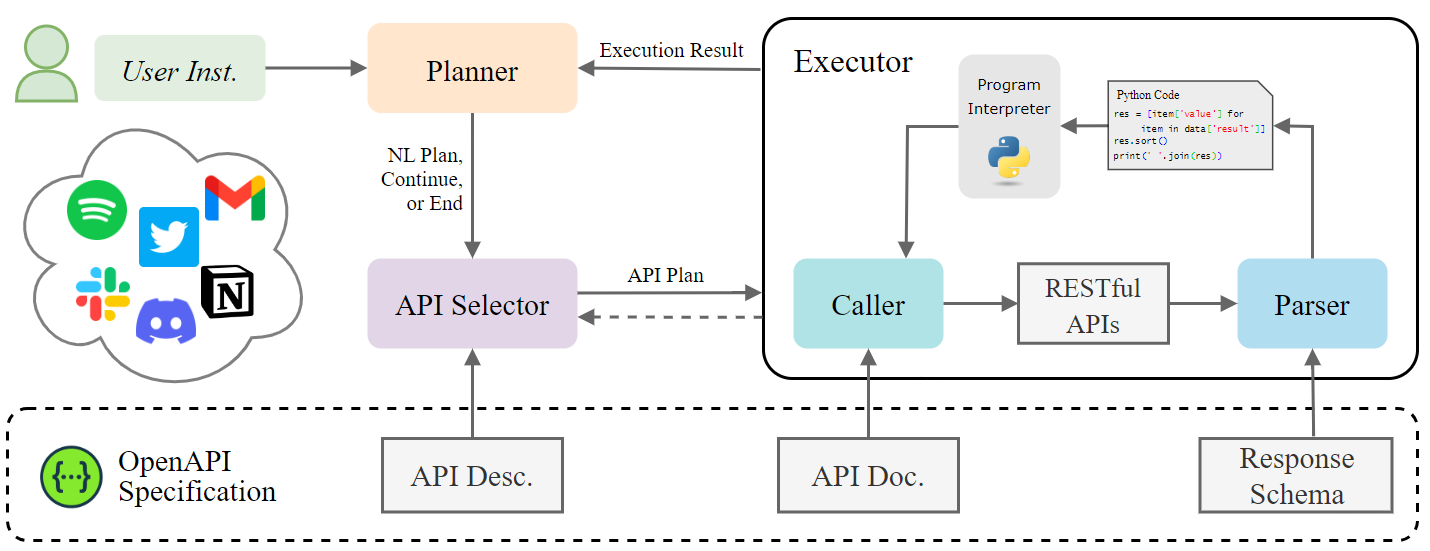 您可以閱讀[文件](https://github.com/Yifan-Song793/RestGPT?tab=readme-ov-file#data)以使用 RestBench 評估 RestGPT 的效能。 使用 TMDB 電影資料庫搜尋 Sofia Coppola 執導的電影數量的範例。  您可以閱讀康乃爾大學發表的程式碼研究論文: [RestGPT - Connecting Large Language Models with Real-World RESTful APIs](https://arxiv.org/abs/2306.06624) 。 他們在 GitHub 上有 1.2k Stars,雖然不是很大,但涵蓋了一個很好的用例。 https://github.com/Yifan-Song793/RestGPT 明星 RestGPT ⭐️ --- 14. [ChatFiles](https://github.com/guangzhengli/ChatFiles) - 上傳您的檔案並與其對話。 -------------------------------------------------------------------------  文件聊天機器人 — 多個文件,由 GPT / Embedding 提供支援。你可以上傳任何文件並與之對話,考慮到他們使用了另一個著名的開源專案,UI 非常好。 它在底層使用 Langchain 和[Chatbot-ui](https://github.com/mckaywrigley/chatbot-ui) 。使用 Nextjs、TypeScript、Tailwind 和 Supabase(向量 DB)建構。 如果您想了解該方法和技術架構,那麼就在這裡!  此環境僅用於試用,支援最大檔案大小為 10 MB,這是一個缺點,如果您想要更大的大小,則可以[在本機安裝](https://github.com/guangzhengli/ChatFiles?tab=readme-ov-file#how-to-run-locally)。 他們提供了您可以使用的[入門問題](https://github.com/guangzhengli/ChatFiles/blob/main/doc/Example.md)。您可以查看[現場演示](https://chatfile.vectorhub.org/)。 他們在 GitHub 上有 3k star,並且發布了`v0.3`版本。 https://github.com/guangzhengli/ChatFiles 明星 ChatFiles ⭐️ --- 15. [MindsDB](https://github.com/mindsdb/mindsdb) - 從企業資料客製化人工智慧的平台。 -------------------------------------------------------------------- 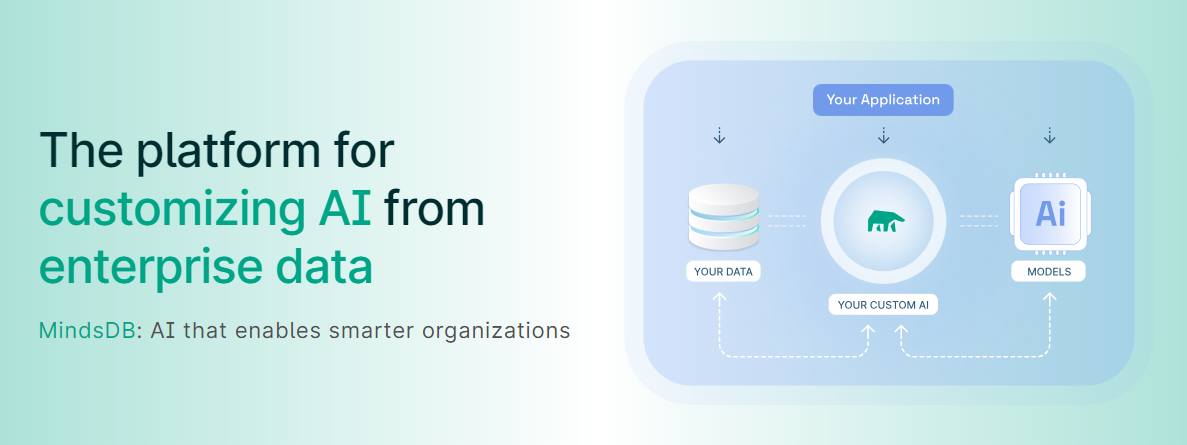 MindsDB 是一個利用企業資料客製化人工智慧的平台。 透過 MindsDB,您可以利用資料庫、向量儲存或應用程式中的資料即時部署、服務和微調模型,以建立人工智慧驅動的應用程式 - 使用開發人員已知的通用工具。 借助 MindsDB 及其與資料來源和 AI/ML 框架的近[200 個集成](https://docs.mindsdb.com/integrations/data-overview),任何開發人員都可以使用其企業資料更快、更安全地自訂符合其目的的 AI。 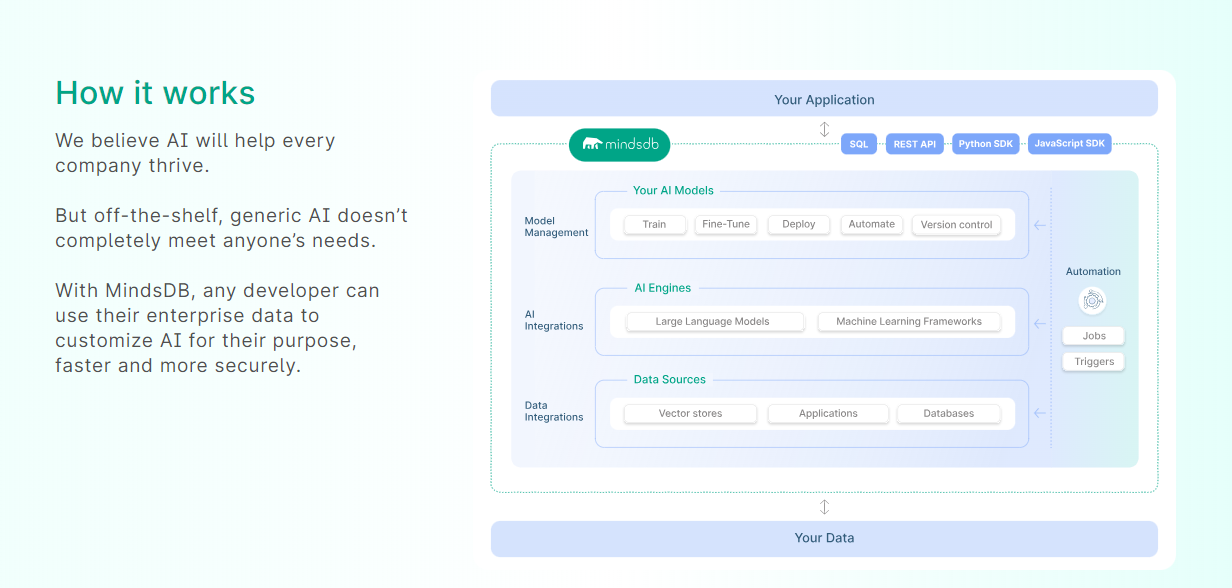 您可以閱讀[文件](https://docs.mindsdb.com/)和[快速入門指南](https://docs.mindsdb.com/quickstart-tutorial)來開始使用。 目前,他們總共支援[3 個使用 Mongo-QL、Python 和 JavaScript 的 SDK](https://docs.mindsdb.com/sdks/overview) 。 MindsDB 有多種應用程式,例如與眾多資料來源和 AI 框架集成,因此您可以輕鬆地將資料和 AI 結合在一起以建立和自動化自訂工作流程。 其他常見用例包括微調模型、聊天機器人、警報系統、內容生成、自然語言處理、分類、回歸和預測。閱讀有關[用例的](https://docs.mindsdb.com/use-cases/)更多訊息,每個用例都有一個包含一些資訊的架構圖。 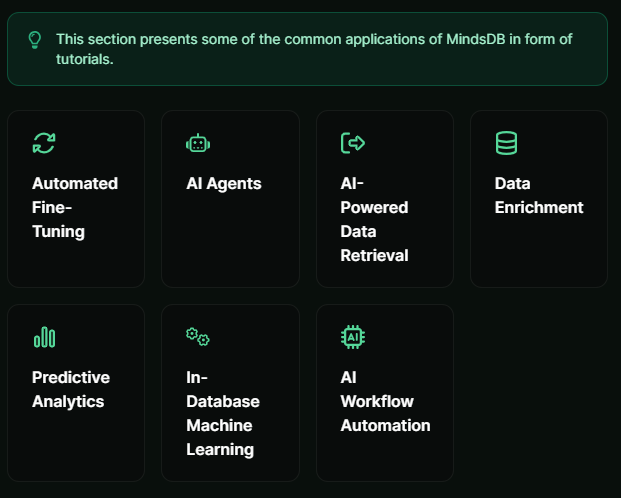 例如,MindsDB 的聊天機器人架構圖。您可以閱讀提供的所有[解決方案](https://github.com/mindsdb/mindsdb?tab=readme-ov-file#-get-started)及其 SQL 查詢範例。 ``` // SQL Query Example for Chatbot CREATE CHATBOT slack_bot USING database='slack',agent='customer_support'; ``` 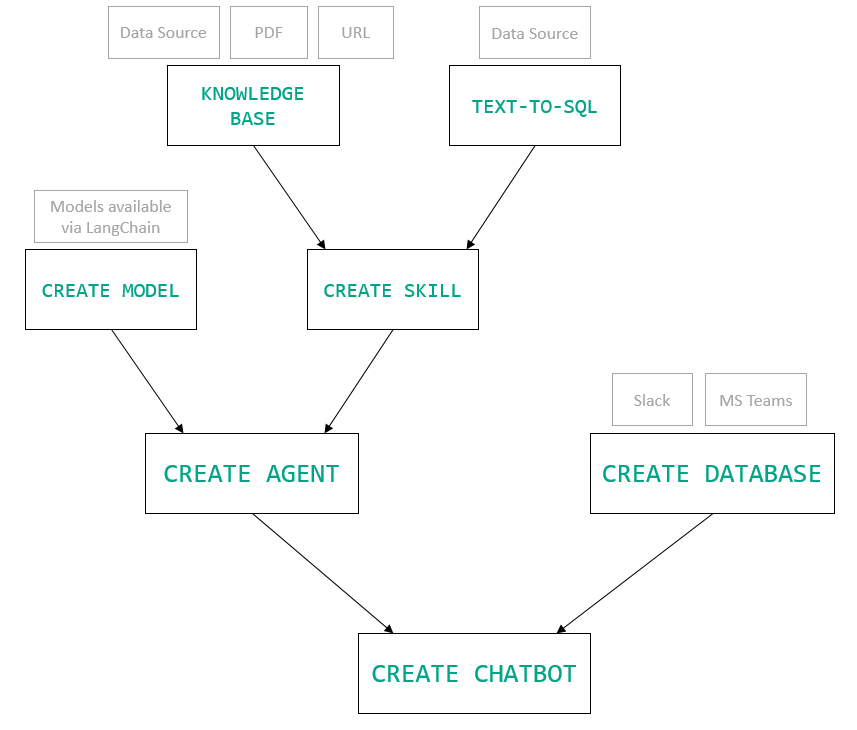 只是為了告訴您總體的可能性,您可以查看[如何使用 AI + IoT 感測器資料預測氣溫](https://mindsdb.com/blog/how-to-forecast-air-temperatures-with-ai-iot-sensor-data)。令人興奮的權利:)  他們在 GitHub 上擁有超過 21k 個 star,並且在`v24.4.3.0`上有超過 200 個版本。順便說一句,這是我第一次在任何版本中看到 4 個部分,因為我一直遵循語義版本。 https://github.com/mindsdb/mindsdb 明星 MindsDB ⭐️ --- 16. [Quivr](https://github.com/QuivrHQ/quivr) - 你的 GenAI 第二腦。 ------------------------------------------------------------- 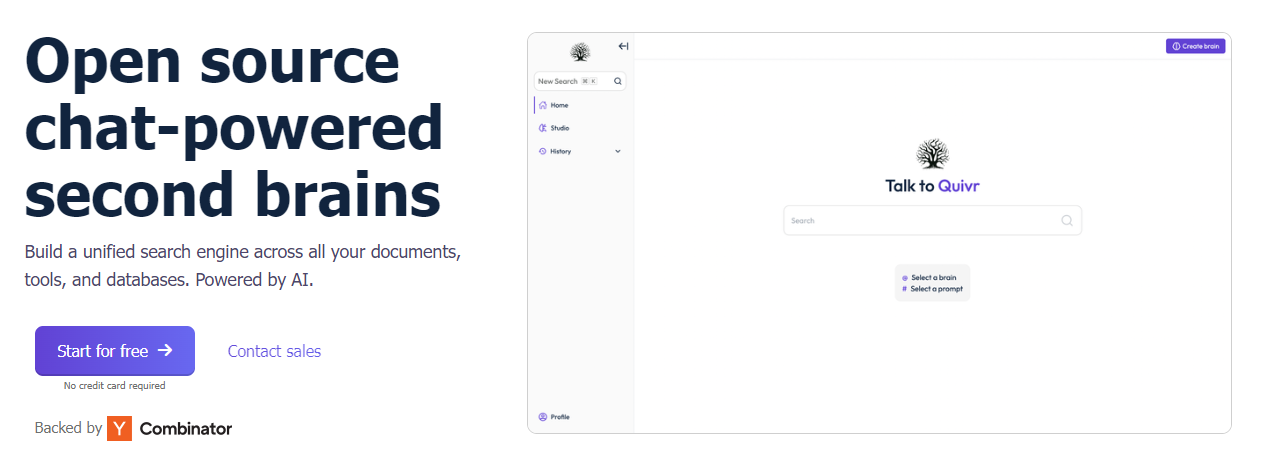 Quivr,您的第二個大腦,利用 GenerativeAI 的力量成為您的私人助理!可以將其視為黑曜石,但增強了人工智慧功能。 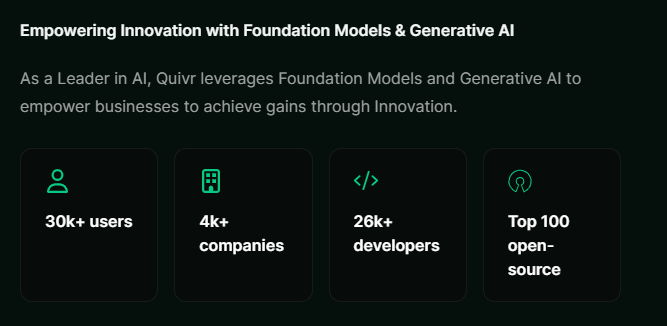 您可以閱讀[安裝指南](https://github.com/QuivrHQ/quivr?tab=readme-ov-file#getting-started-)。 您可以閱讀[文件](https://docs.quivr.app/home/intro)並觀看[示範影片](https://github.com/QuivrHQ/quivr?tab=readme-ov-file#demo-highlights-)。 他們可以提供更好的免費套餐,但這足以在您端進行測試。 它在 GitHub 上擁有超過 30k 顆星,發布了 220 多個版本,這意味著它們正在不斷改進。 https://github.com/QuivrHQ/quivr 明星 Quivr ⭐️ --- 17.[動畫繪畫](https://github.com/facebookresearch/AnimatedDrawings)- 一種將兒童人物繪畫動畫化的方法。 ---------------------------------------------------------------------------------  我的意思是哇!這麼酷的概念。我不知道你怎麼想,但我真的很興奮。 這是 Facebook 的一個開源專案,主要用於研究目的,包含論文《 [A Method for Animating Children's Drawings of the Human Figure》](https://dl.acm.org/doi/10.1145/3592788)中描述的演算法的實作。 該專案已在 macOS Ventura 13.2.1 和 Ubuntu 18.04 上進行了測試。如果您在其他作業系統上安裝,則可能會遇到問題。 他們強烈建議在安裝 Animated Drawings 之前啟動 Python 虛擬環境。 閱讀有關[安裝說明](https://github.com/facebookresearch/AnimatedDrawings?tab=readme-ov-file#installation)以及如何快速入門的更多資訊。 您可以按照這個完整的指南來為[您的繪圖製作動畫](https://github.com/facebookresearch/AnimatedDrawings?tab=readme-ov-file#animating-your-own-drawing),包括如何在場景中加入多個角色、加入背景圖像以及更多令人興奮的事情。 他們在 GitHub 上擁有超過 10k 顆星,並且僅用於具有 MIT 許可的研究目的。 https://github.com/facebookresearch/AnimatedDrawings 明星動畫繪圖 ⭐️ --- 18.[背景移除器](https://github.com/nadermx/backgroundremover)- 讓您可以透過簡單的 CLI 使用 AI 從影像和影片中移除背景。 ------------------------------------------------------------------------------------------  這是一個使用 AI 從圖像和影片中刪除背景的命令列工具。 首先從 pypi 安裝 backgroundremover。 ``` pip install --upgrade pip pip install backgroundremover ``` 也可以在不透過 pip 安裝的情況下執行它,只需克隆 git 以在本地啟動虛擬環境安裝要求並執行。 您可以使用的一些命令: - 從本機檔案圖像中刪除背景 ``` backgroundremover -i "/path/to/image.jpeg" -o "output.png" ``` - 從本地影片中刪除背景並將其覆蓋在圖像上 ``` backgroundremover -i "/path/to/video.mp4" -toi "/path/to/videtobeoverlayed.mp4" -o "output.mov" ``` 您可以檢查可透過 CLI 使用的所有[命令](https://github.com/nadermx/backgroundremover?tab=readme-ov-file#usage-as-a-cli)。 您甚至可以將它用作圖書館。 ``` from backgroundremover.bg import remove def remove_bg(src_img_path, out_img_path): model_choices = ["u2net", "u2net_human_seg", "u2netp"] f = open(src_img_path, "rb") data = f.read() img = remove(data, model_name=model_choices[0], alpha_matting=True, alpha_matting_foreground_threshold=240, alpha_matting_background_threshold=10, alpha_matting_erode_structure_size=10, alpha_matting_base_size=1000) f.close() f = open(out_img_path, "wb") f.write(img) f.close() ``` 您可以閱讀[安裝說明](https://github.com/nadermx/backgroundremover?tab=readme-ov-file#installation)並觀看[現場演示](https://www.backgroundremoverai.com/)。 > 輸入與輸出。  他們在 GitHub 上有 6k star,我們絕對可以用它來學習一些重要的概念。 https://github.com/nadermx/backgroundremover 明星背景去除器 ⭐️ --- 19. [Lobe Chat](https://github.com/lobehub/lobe-chat) - 現代設計的法學碩士/人工智慧聊天框架。 --------------------------------------------------------------------------- 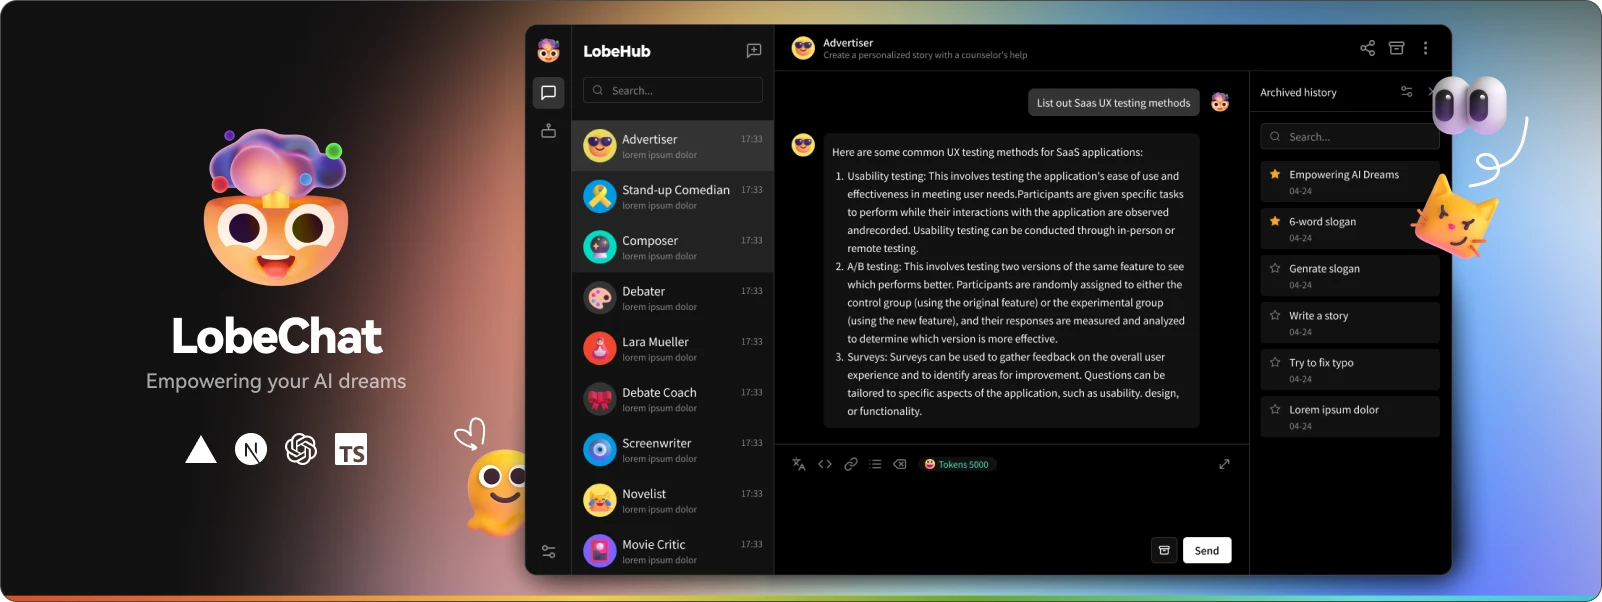 一個開源、現代設計的 ChatGPT/LLM UI/框架。 支援語音合成、多模式和可擴展(函數呼叫)插件系統。您可以一鍵部署您的私有 OpenAI。 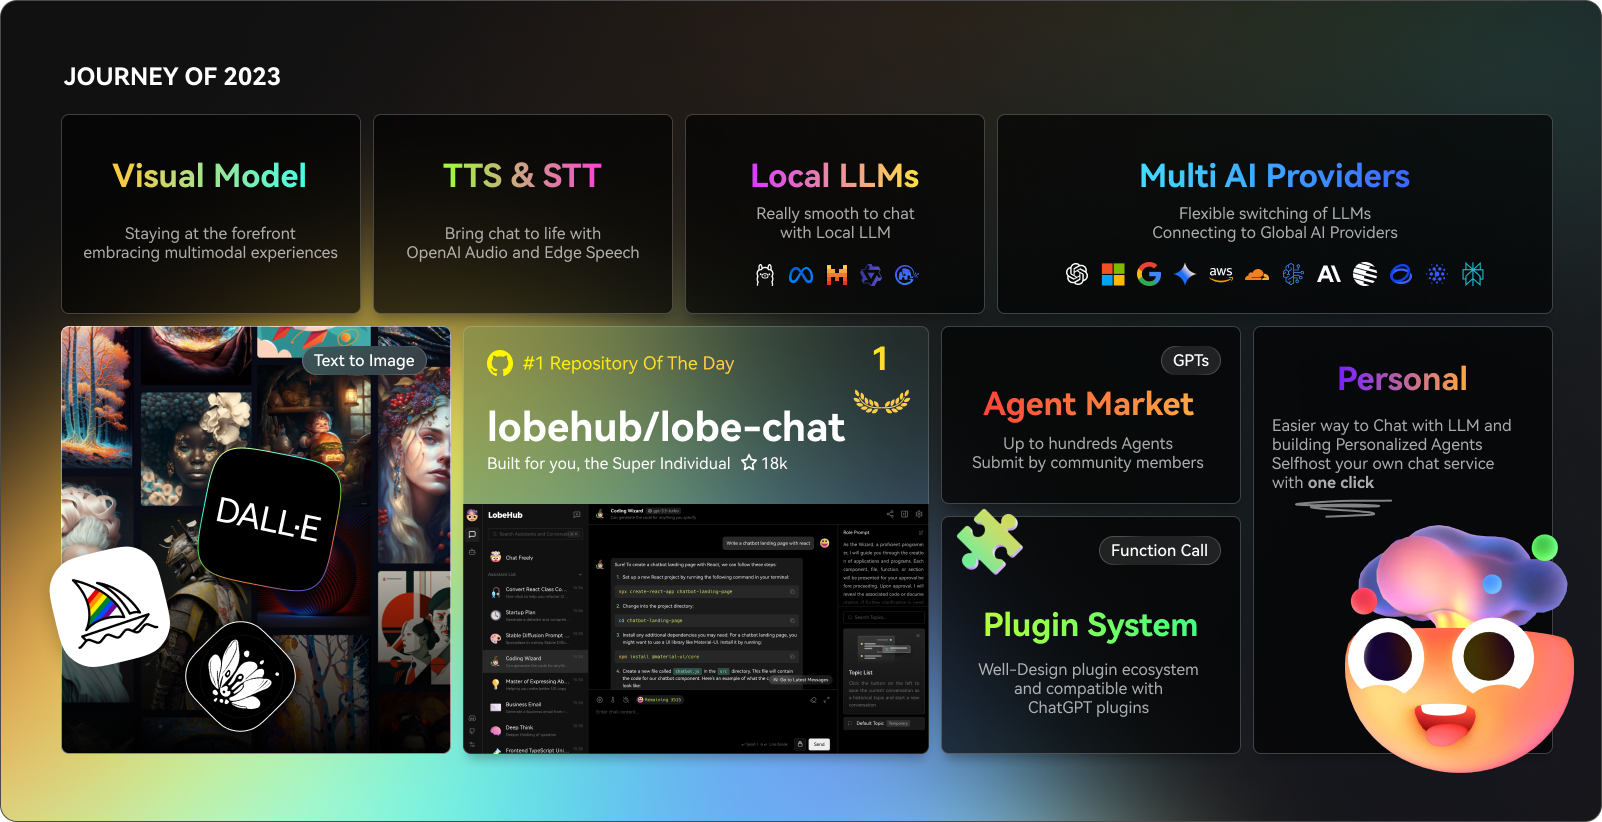 讓我們來看看 LobeChat 的一些令人興奮的功能: ✅ 多模式服務提供者支援。  他們將我們的支援擴展到多個模型服務提供者,而不是局限於單一服務提供者,為用戶提供更多樣化和豐富的對話選擇。 尋找他們支援的[10 多個模型服務提供者](https://lobehub.com/docs/usage/features/multi-ai-providers)的完整清單。 ✅ 市場助理。 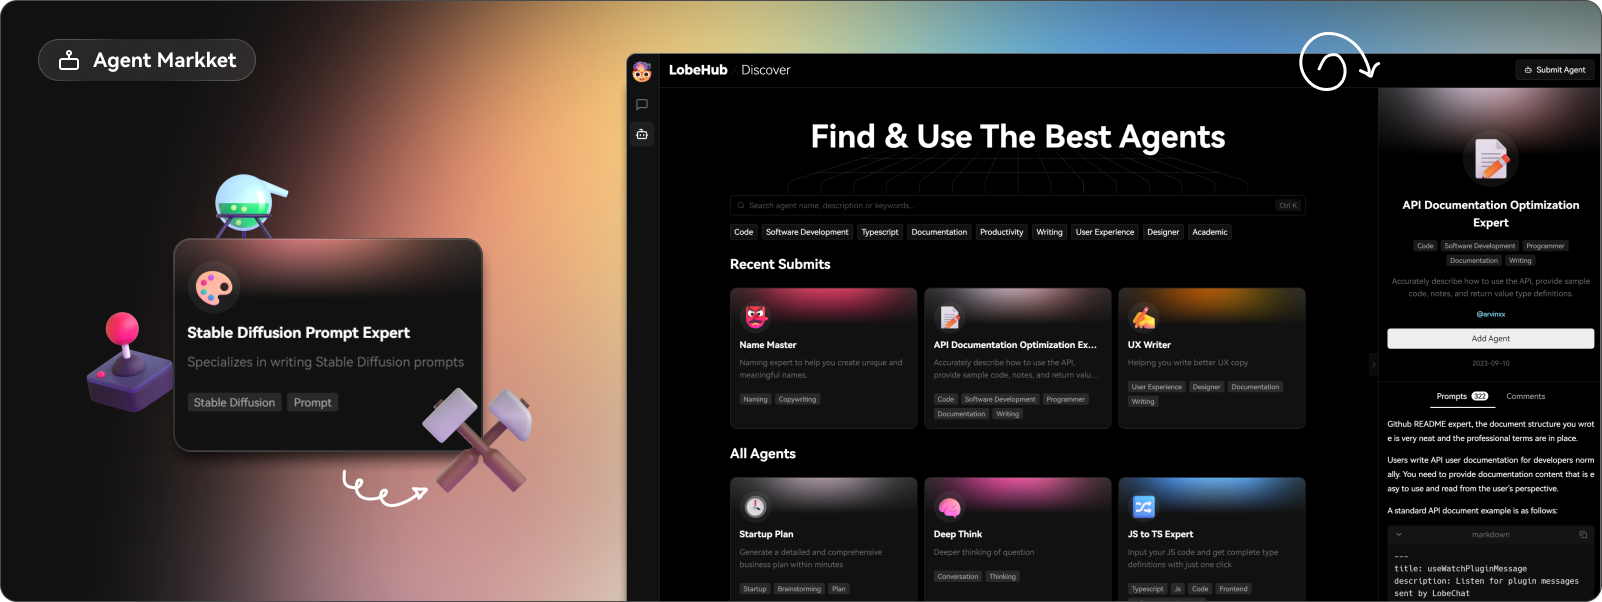 在LobeChat的[助手市場](https://lobehub.com/assistants)中,創作者可以發現一個充滿活力和創新的社區,匯集了許多精心設計的助手。這些助手不僅在工作場景中發揮著至關重要的作用,而且在學習過程中也提供了極大的便利。在這裡,每個人都可以貢獻自己的智慧,分享自己開發的助手。 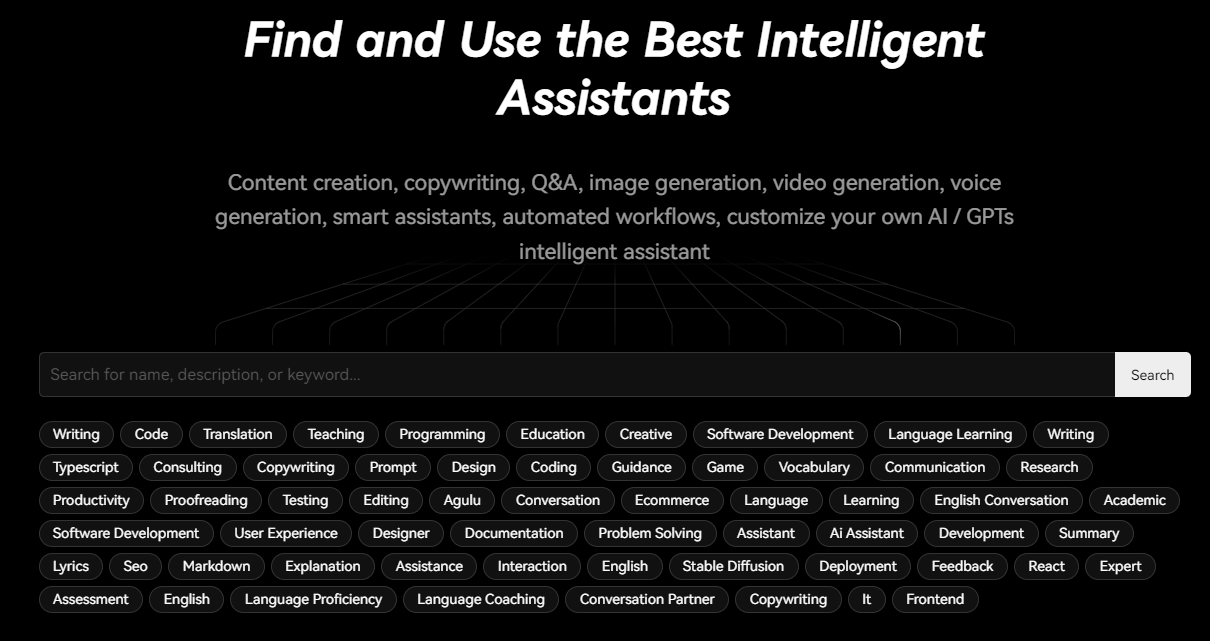 那裡有很多很棒的應用程式。哇! ✅ 模型視覺辨識。 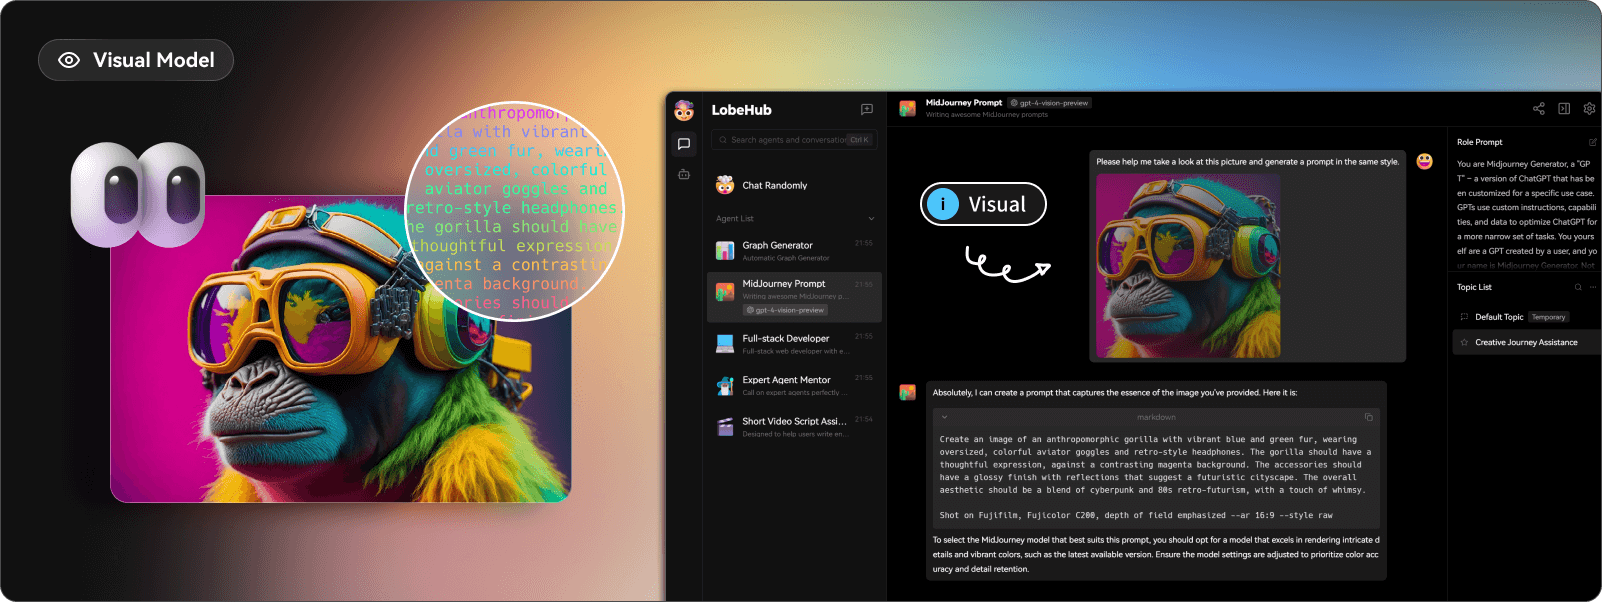 LobeChat現在支援OpenAI的gpt-4-vision、Google Gemini Pro Vision、Zhipu GLM-4 Vision等具有視覺辨識能力的大型語言模型,使LobeChat具備多模態互動能力。用戶可以輕鬆地將圖片上傳或拖放到聊天框中,助理將能夠辨識圖片內容並據此進行智慧對話,打造更聰明、更多樣化的聊天場景。 ✅ 文字到圖像生成。 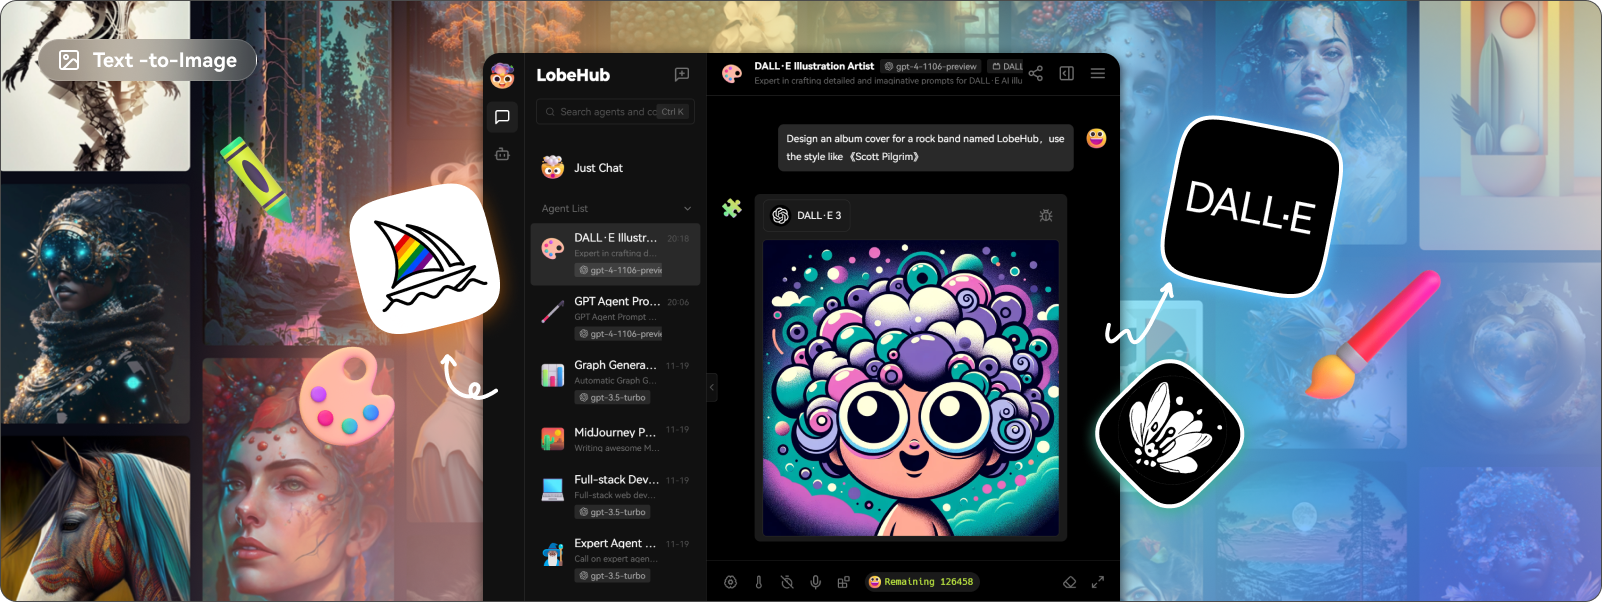 LobeChat 支援最新的文字到圖像生成技術,現在允許使用者在與助手對話時直接使用文字到圖像工具。透過利用 DALL-E 3、MidJourney 和 Pollinations 等 AI 工具的功能,助手現在可以將您的想法轉化為圖像。 ✅ 本地大語言模型 (LLM) 支援。 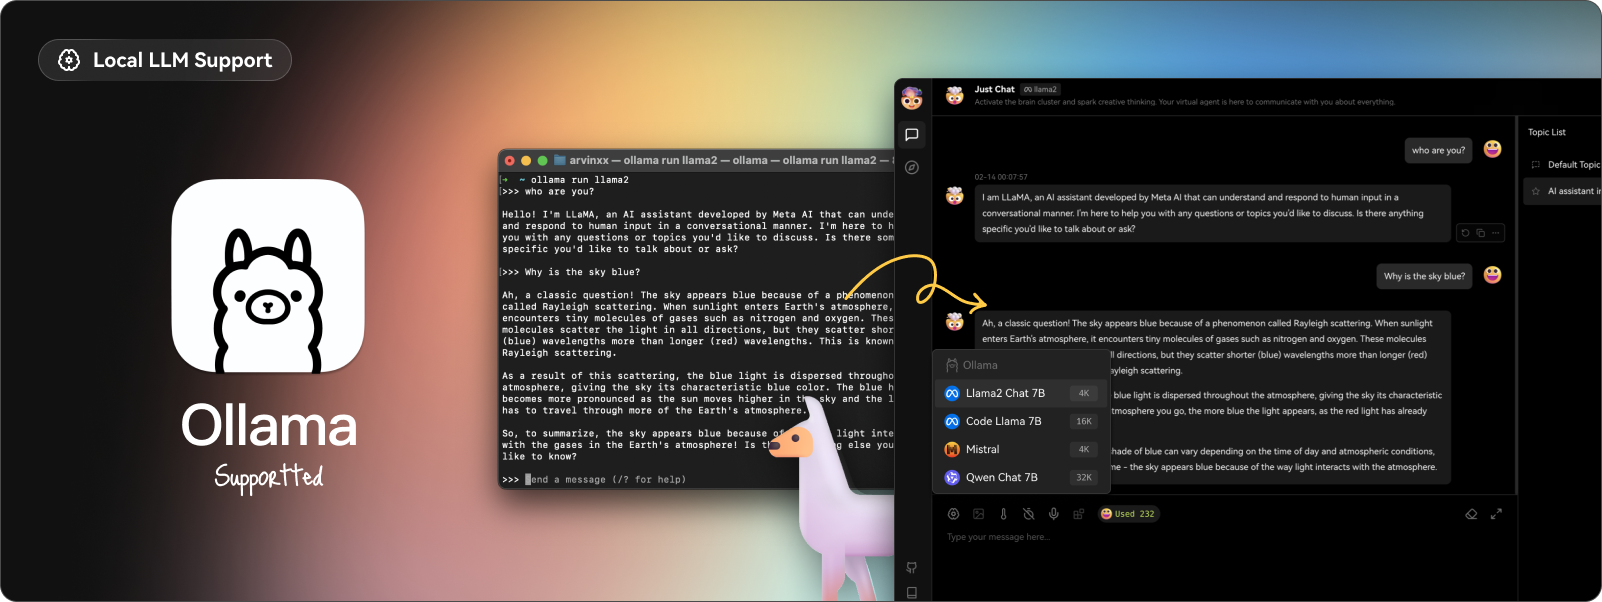 借助 Ollama AI 強大的基礎設施和社區的協作努力,現在您可以在 LobeChat 中與本地 LLM(大型語言模型)進行對話! 透過執行以下 Docker 指令,您可以在 LobeChat 中體驗與本機 LLM 的對話。 ``` docker run -d -p 3210:3210 -e OLLAMA_PROXY_URL=http://host.docker.internal:11434/v1 lobehub/lobe-chat ``` ✅ 漸進式網頁應用程式 (PWA)。 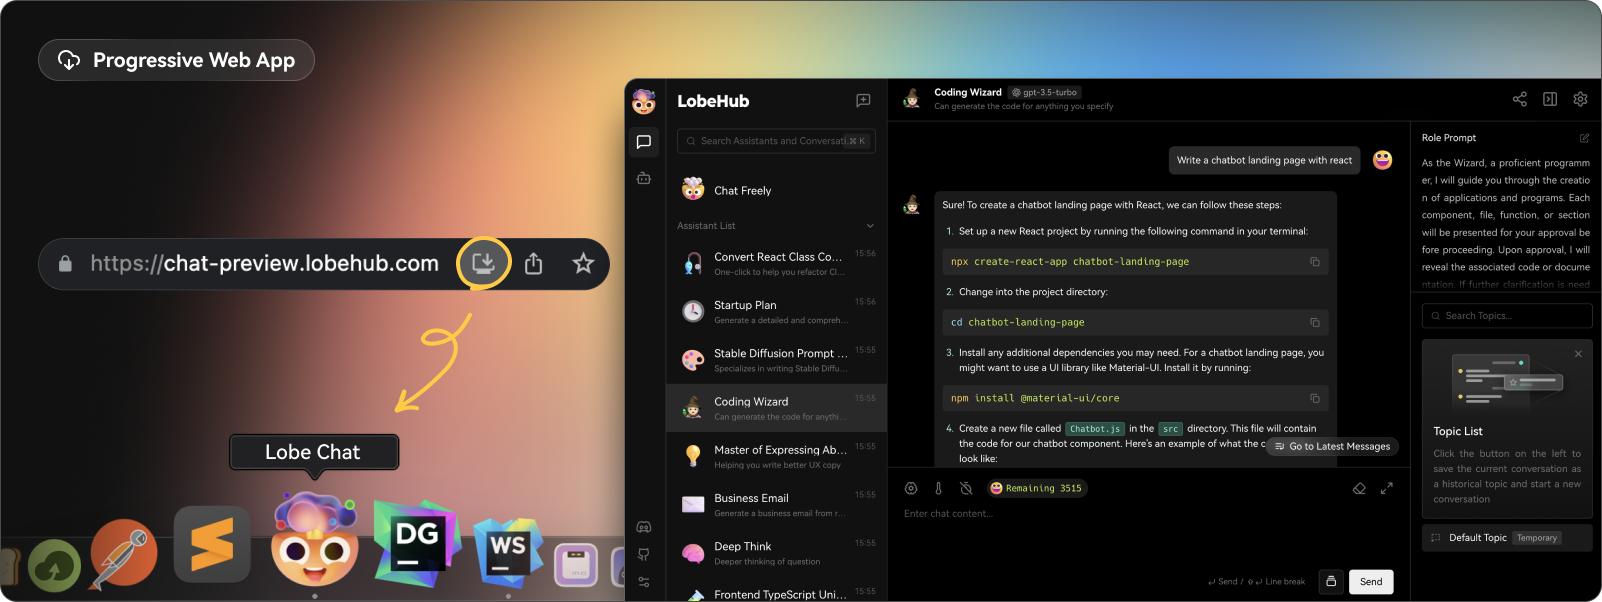 他們採用了漸進式 Web 應用程式 PWA 技術,這是一種現代 Web 技術,可將 Web 應用程式提升到接近本機應用程式的體驗。透過 PWA,LobeChat 可以在桌面和行動裝置上提供高度優化的使用者體驗,同時保持輕量級和高效能的功能。 ✅ 自訂主題。 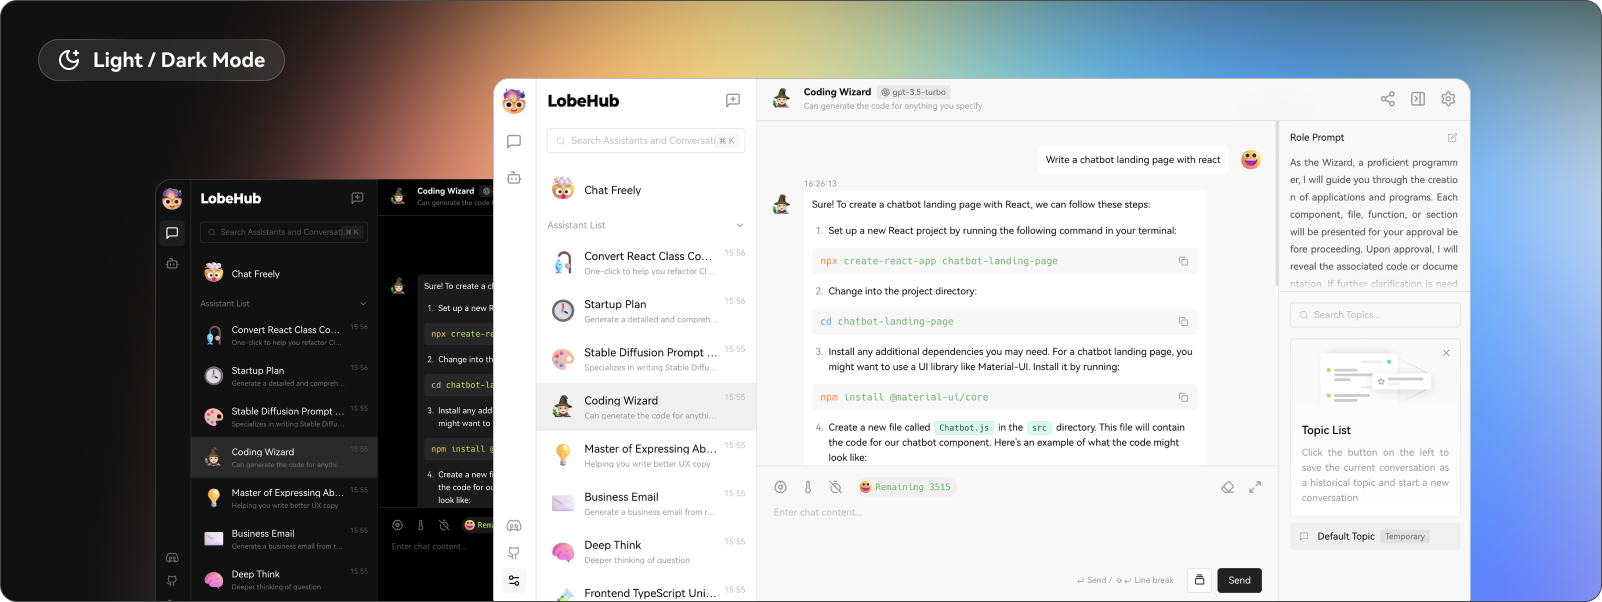 LobeChat在介面設計上非常注重個人化的使用者體驗,因此引入了靈活多樣的主題模式,包括白天的淺色模式和夜間的深色模式。 除了主題模式切換之外,我們還提供了一系列顏色自訂選項,讓使用者可以根據自己的喜好調整應用程式的主題顏色。 了解所有[功能和用例](https://lobehub.com/docs/usage/start)。 您可以自行託管或使用 docker 部署它。 lobe chat 的[生態系統](https://github.com/lobehub/lobe-chat/tree/main?tab=readme-ov-file#-ecosystem)提供了 4 個軟體包: `lobehub/ui` 、 `lobehub/icons` 、 `lobehub/tts`和`lobehub/lint` 。 他們還提供[插件市場](https://lobehub.com/plugins),您可以在其中找到許多有用的插件,這些插件可用於引入新的函數呼叫,甚至是呈現訊息結果的新方法。如果你想開發自己的插件,請參考 wiki 中的[📘插件開髮指南](https://lobehub.com/docs/usage/plugins/development)。 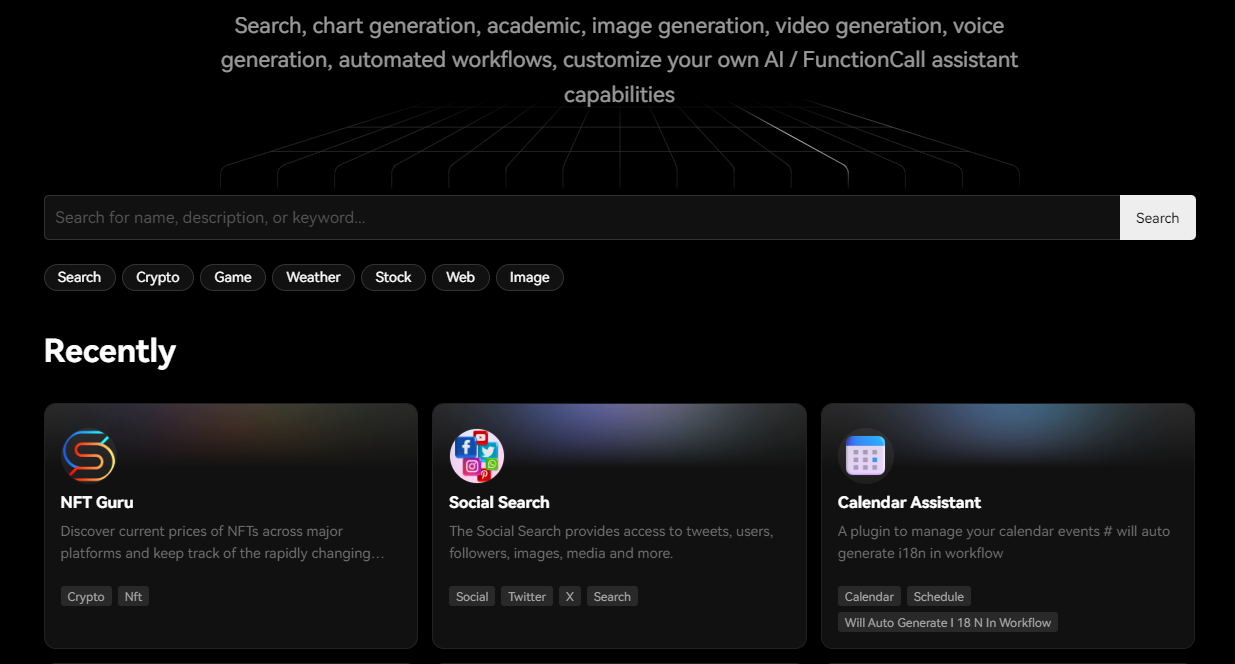 您可以閱讀[文件](https://lobehub.com/docs/usage/start)。 您可以查看[現場演示](https://chat-preview.lobehub.com/chat)。它太酷了! 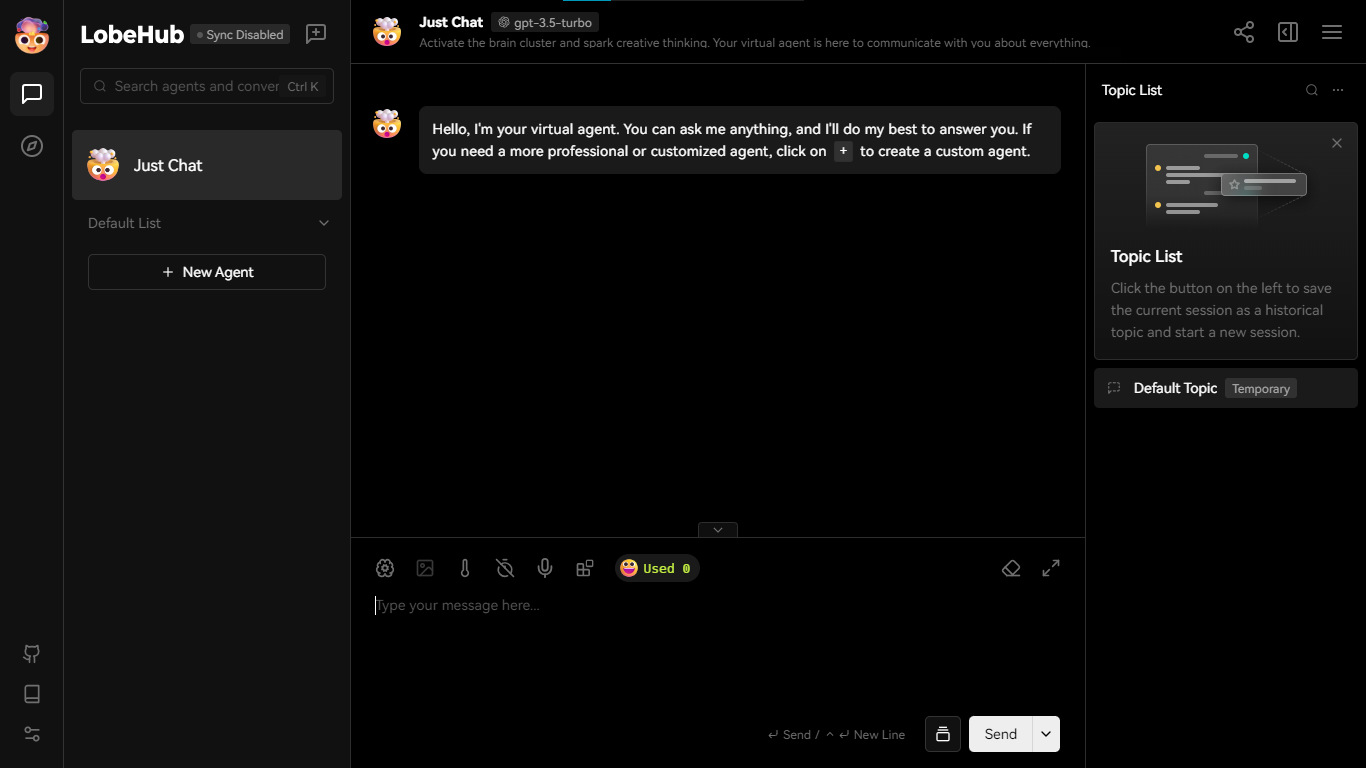 他們在 GitHub 上擁有超過 28k 顆星,發布了 500 多個版本。 https://github.com/lobehub/lobe-chat 星瓣聊天 ⭐️ --- 20.[微代理](https://github.com/aymenfurter/microagents)- 能夠自我編輯提示的代理。 ------------------------------------------------------------------ 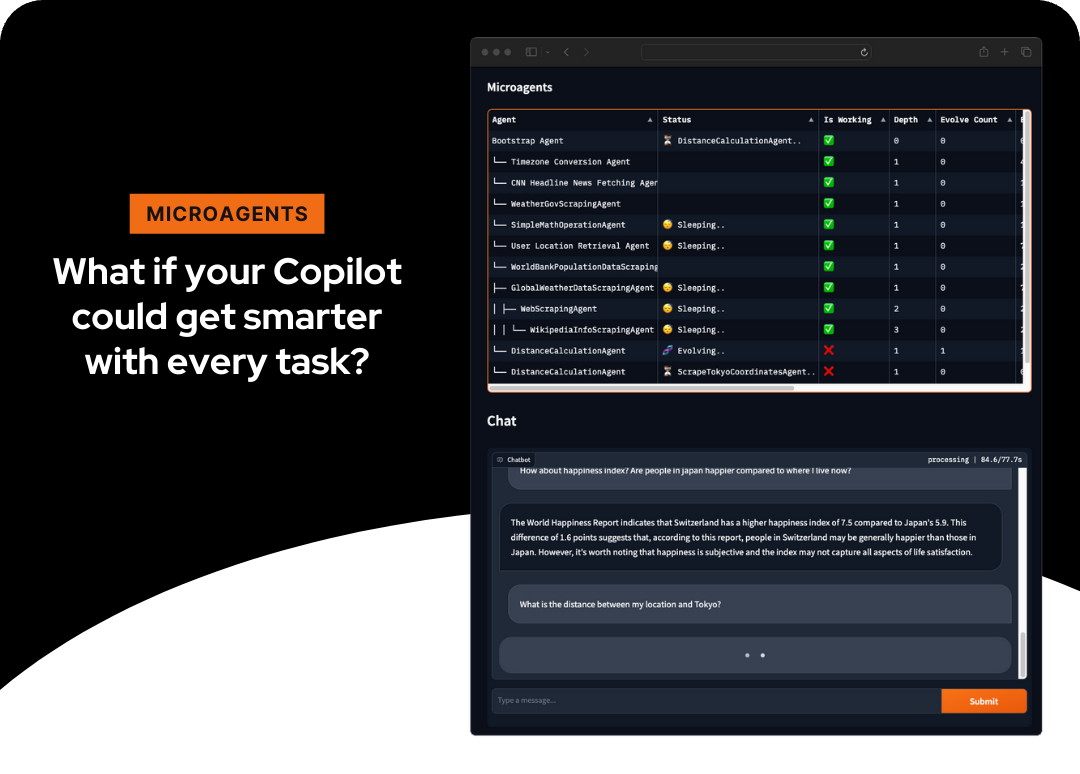 它是一個實驗框架,用於動態建立自我改進的代理來回應任務。 微代理代表了一種建立自我改進代理的新方法。小型的微服務大小(因此稱為微代理)代理是根據用戶分配給助手的任務動態生成的,評估其功能,並在成功驗證後存儲以供將來重用。 這使得跨聊天會話的學習成為可能,使系統能夠獨立推斷任務執行的方法。 這是使用`Python` 、 `OpenAI's GPT-4 Turbo`和`Text-Embedding-Ada-002`建構的。 您可以閱讀[安裝說明](https://github.com/aymenfurter/microagents?tab=readme-ov-file#installation)。他們提到您應該擁有一個可以存取 gpt-4-turbo 和 text-embedding-ada-002 的 OpenAI 帳戶。 讓我們看一個獲取天氣預報代理的範例。 ``` You are an adept weather informant. Fetch the weather forecast by accessing public API data using this Python code snippet: ``python import requests import json def fetch_weather_forecast(location, date): response = requests.get(f"https://api.met.no/weatherapi/locationforecast/2.0/compact?lat={location[0]}&lon={location[1]}") weather_data = response.json() for day_data in weather_data['properties']['timeseries']: if date in day_data['time']: print(day_data['data']['instant']['details']) break `` # Example usage: fetch_weather_forecast((47.3769, 8.5417), '2024-01-22T12:00:00Z') Note: Replace the (47.3769, 8.5417) with the actual latitude and longitude of the location and the date string accordingly. ``` 如果您想知道如何建立代理,那麼此架構圖將對此進行解釋。  您可以看到[工作演示](https://github.com/aymenfurter/microagents?tab=readme-ov-file#demo)。 他們在 GitHub 上有大約 700 顆星,值得一看。 https://github.com/aymenfurter/microagents 明星微代理 ⭐️ --- 21. [GPT-4 & LangChain](https://github.com/mayooear/gpt4-pdf-chatbot-langchain) - 用於大型 PDF 文件的 GPT4 和 LangChain 聊天機器人。 --------------------------------------------------------------------------------------------------------------------------  這可用於新的 GPT-4 API 來為多個大型 PDF 檔案建立 chatGPT 聊天機器人。 該系統是使用 LangChain、Pinecone、Typescript、OpenAI 和 Next.js 建構的。 LangChain 是一個簡化可擴展 AI/LLM 應用程式和聊天機器人開發的框架。 Pinecone 用作向量存儲,用於以文字格式儲存嵌入和 PDF,以便以後檢索類似文件。 您可以閱讀涉及複製、安裝依賴項和設定環境 API 金鑰的[開發指南](https://github.com/mayooear/gpt4-pdf-chatbot-langchain?tab=readme-ov-file#development)。 您可以觀看[YouTube 影片](https://www.youtube.com/watch?v=ih9PBGVVOO4),了解如何遵循和使用它。 他們在 GitHub 上擁有 14k+ Stars,僅提交了 34 次。在您的下一個人工智慧應用程式中嘗試! https://github.com/mayooear/gpt4-pdf-chatbot-langchain 明星 GPT-4 和 Langchain ⭐️ --- 22. [Buzz](https://github.com/chidiwilliams/buzz) - 在您的個人電腦上離線轉錄和翻譯音訊。 ---------------------------------------------------------------------- 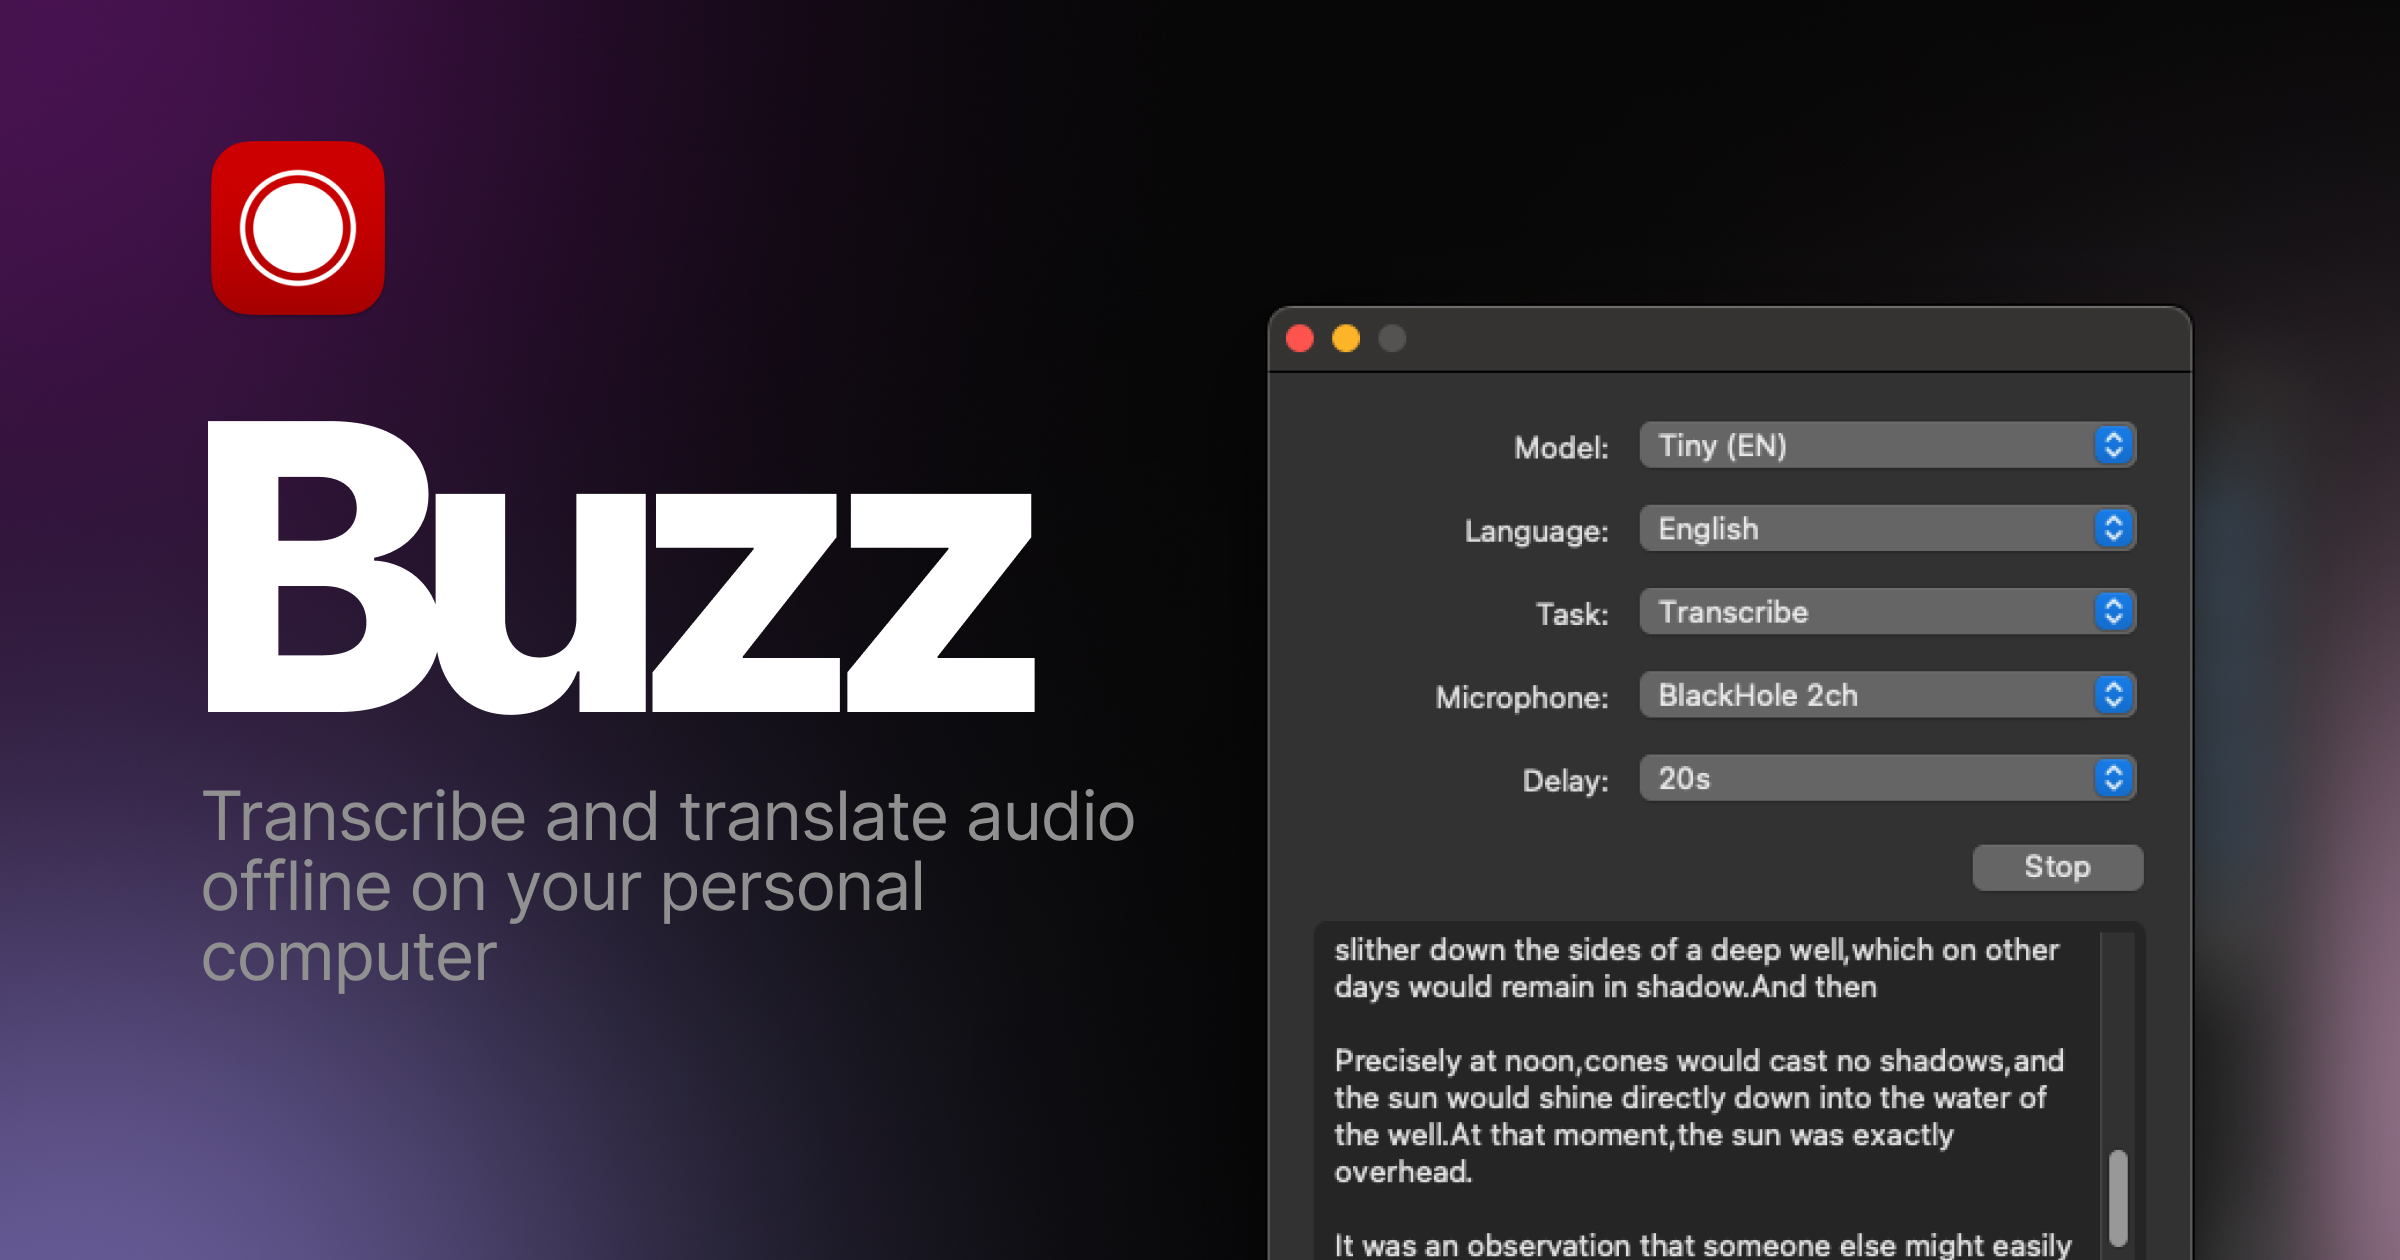 使用 OpenAI 的 Whisper 的強大功能在您的個人電腦上離線轉錄和翻譯音訊。 Buzz 甚至出現在[App Store](https://apps.apple.com/us/app/buzz-captions/id6446018936?mt=12&itsct=apps_box_badge&itscg=30200) 。取得 Buzz 的 Mac 原生版本,具有更簡潔的外觀、音訊播放、拖放匯入、文字記錄編輯、搜尋等功能。 您可以閱讀[安裝說明](https://chidiwilliams.github.io/buzz/docs/installation)。 令人興奮的功能: - 匯入音訊和視訊檔案並將文字記錄匯出為 TXT、SRT 和 VTT(演示)。 - 從電腦麥克風轉錄和翻譯為文字(資源密集且可能不是即時的。 - 它可在 Mac、Windows 和 Linux 上使用。 - 還有一個[CLI](https://chidiwilliams.github.io/buzz/docs/cli)選項。 在這裡查看演示! https://www.loom.com/share/564b753eb4d44b55b985b8abd26b55f7 您可以閱讀[文件](https://chidiwilliams.github.io/buzz/docs)。 它們在 GitHub 上擁有近 10k star,並且自兩週前上次提交以來仍在維護中。 https://github.com/chidiwilliams/buzz 明星嗡嗡聲 ⭐️ --- 23. [Deepgram](https://github.com/deepgram) - 將語音 AI 建置到您的應用程式中。 ---------------------------------------------------------------- 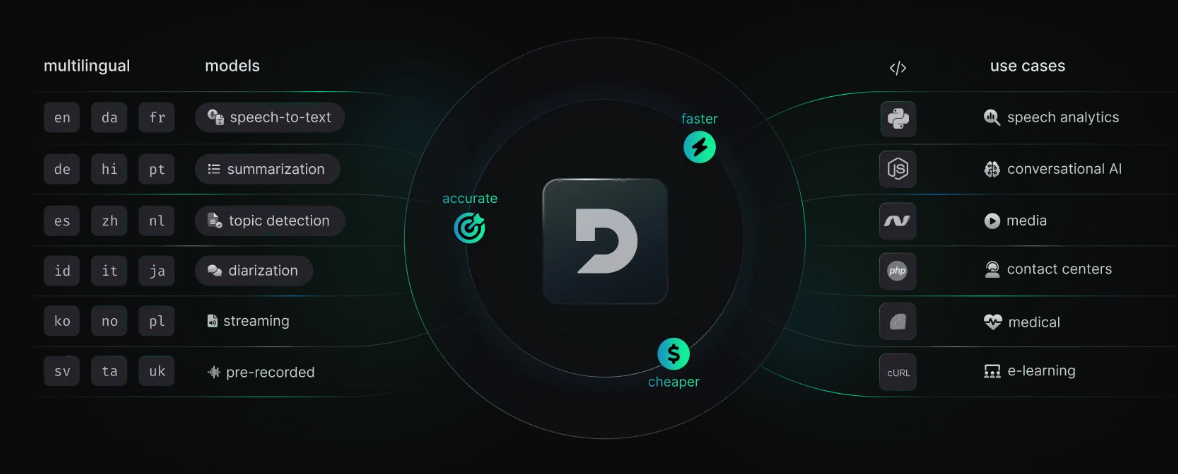 從新創公司到 NASA,Deepgram API 每天都用於轉錄和理解數百萬分鐘的音訊。快速、準確、可擴展且經濟高效。 它為開發人員提供語音到文字和音訊智慧模型。 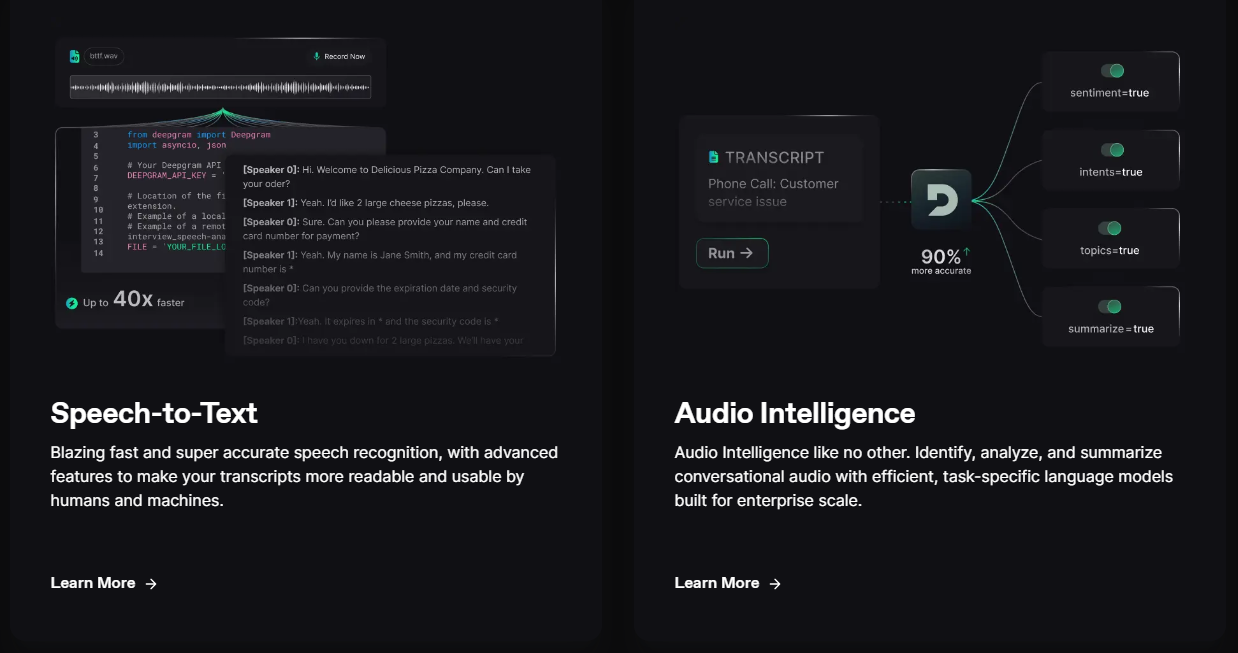 儘管他們有免費增值模式,但免費套餐的限制足以讓您入門。 可視化效果更上一層樓。您可以檢查即時串流媒體回應或音訊檔案並比較音訊的智慧程度。 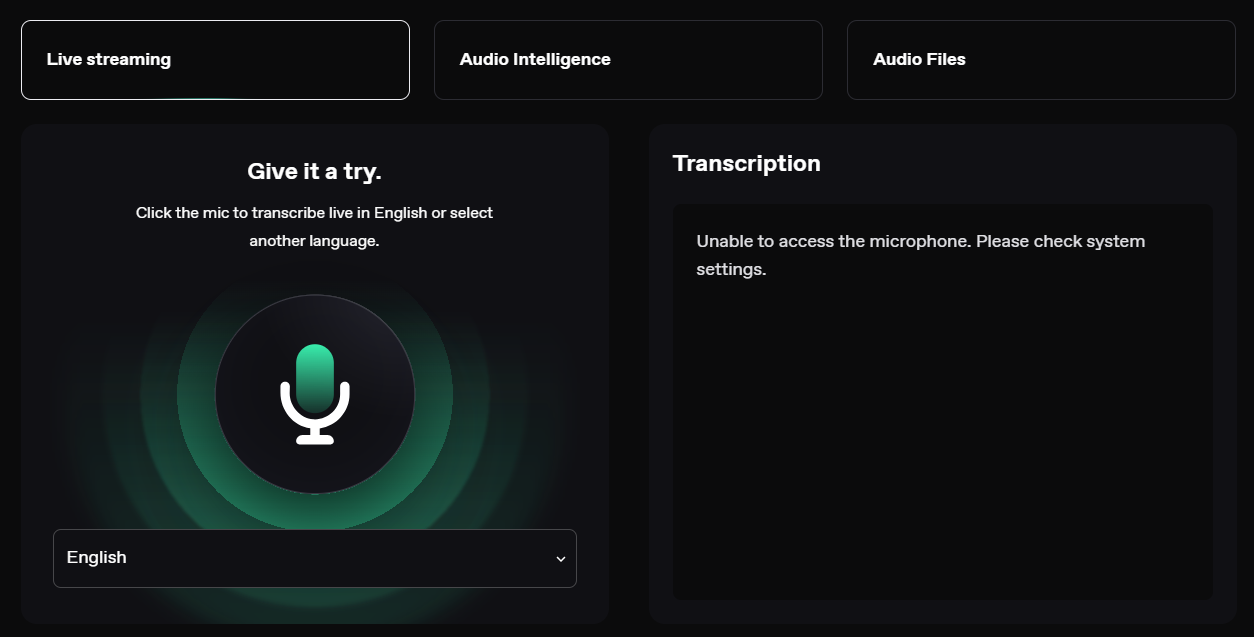 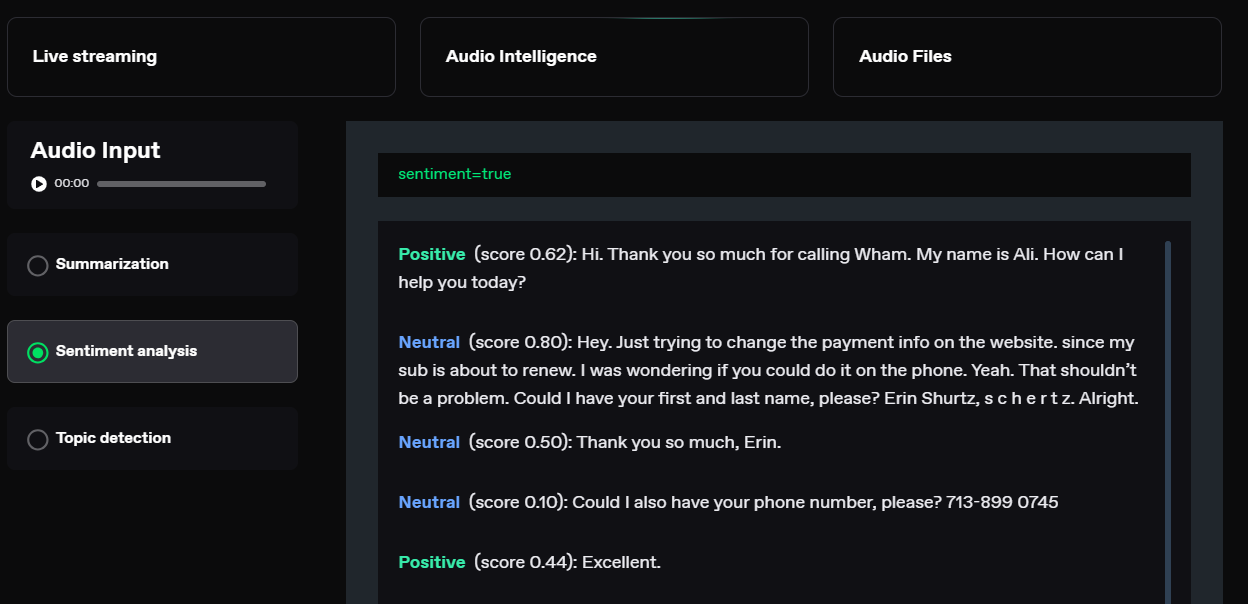 您可以閱讀[文件](https://developers.deepgram.com/docs/introduction)。 您也可以閱讀 Deepgram 撰寫的關於[如何將語音辨識新增至您的 React 和 Node.js 專案的範例部落格](https://deepgram.com/learn/how-to-add-speech-recognition-to-your-react-project)。 如果您想嘗試 API 來親自了解模型的靈活性,請查看他們的[API Playground](https://playground.deepgram.com/?smart_format=true&language=en&model=nova-2) 。 https://github.com/deepgram 明星 Deepgram ⭐️ --- 24. [OpenDevin](https://github.com/OpenDevin/OpenDevin) - 更少的程式碼,更多的內容。 ----------------------------------------------------------------------- 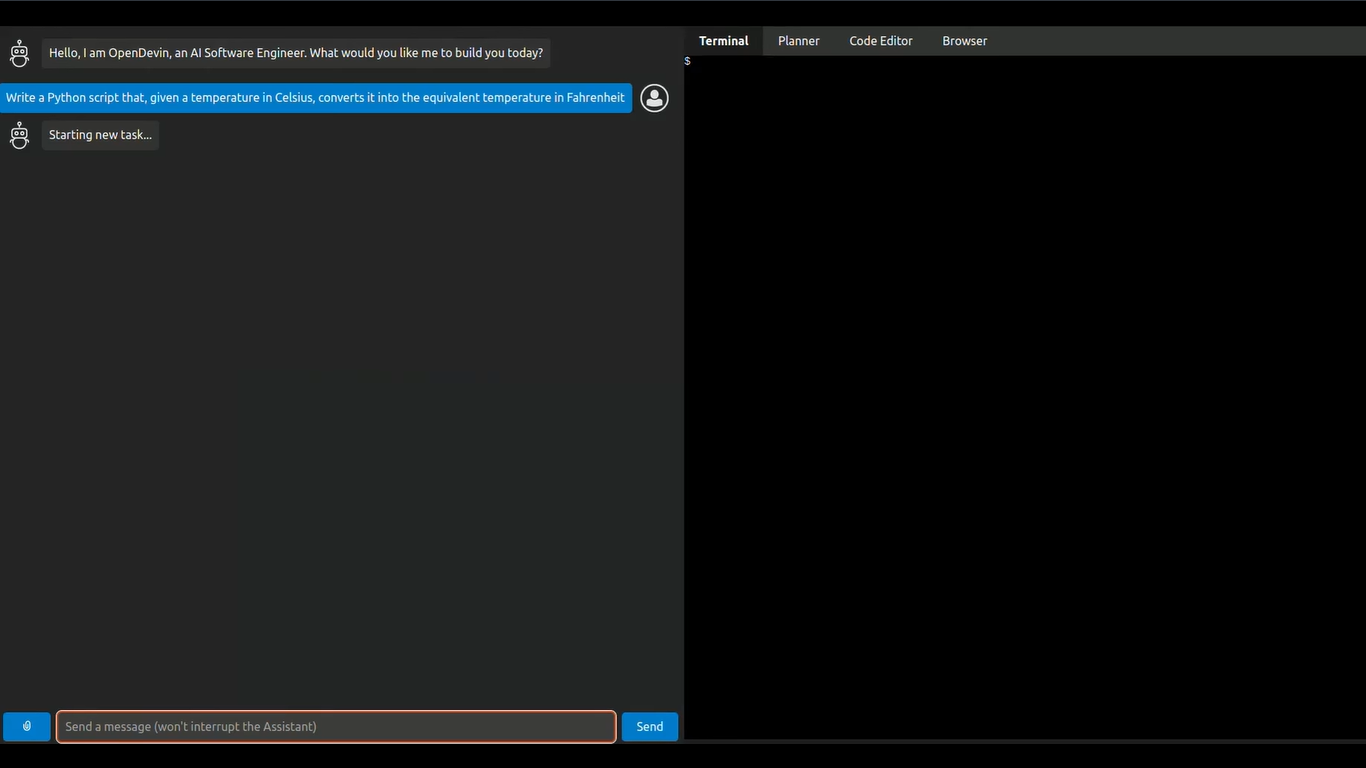 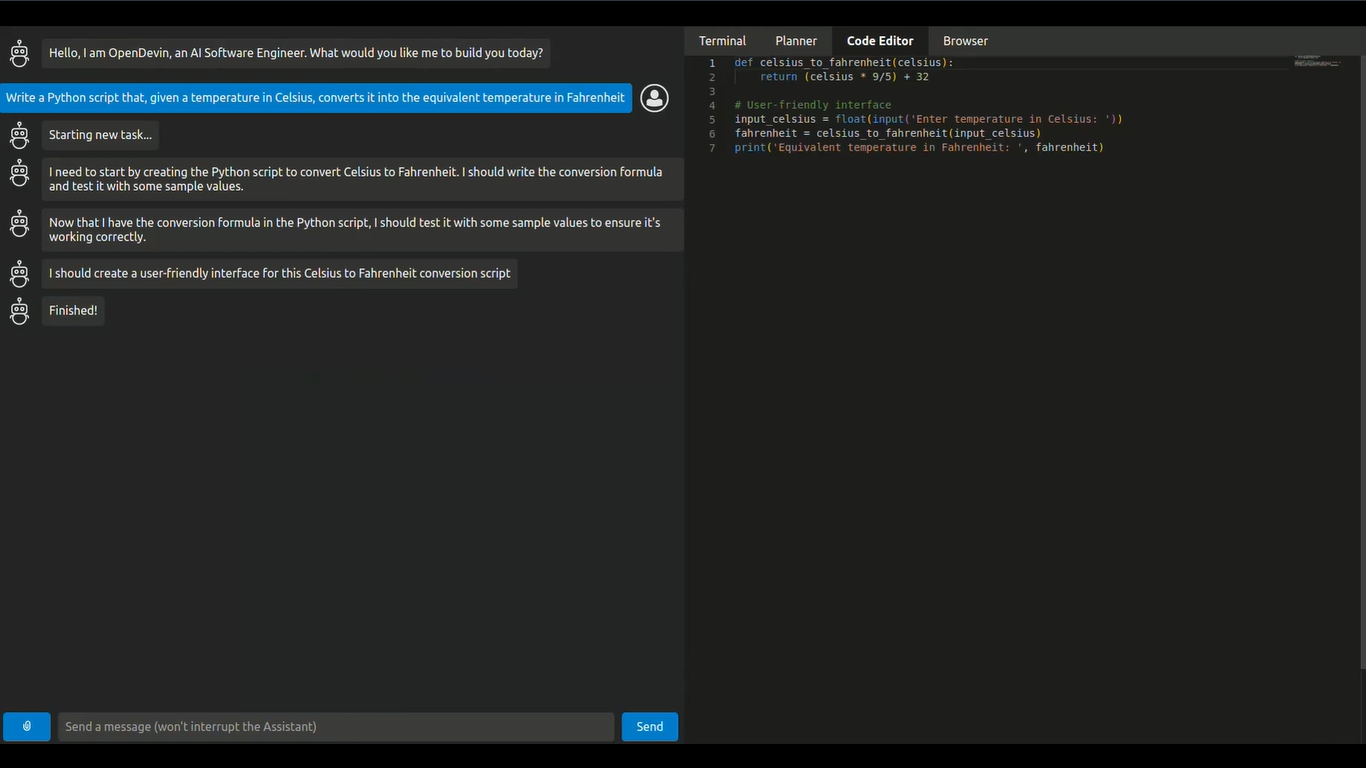 這是一個開源專案,旨在複製 Devin,一名自主人工智慧軟體工程師,能夠執行複雜的工程任務並在軟體開發專案上與用戶積極協作。該計畫致力於透過開源社群的力量複製、增強和創新 Devin。 只是想讓你知道,這是在德文被介紹之前。 您可以閱讀帶有要求的[安裝說明](https://github.com/OpenDevin/OpenDevin?tab=readme-ov-file#installation)。 他們使用 LiteLLM,因此您可以使用任何基礎模型來執行 OpenDevin,包括 OpenAI、Claude 和 Gemini。 如果您想為 OpenDevin 做出貢獻,您可以查看 [演示](https://github.com/OpenDevin/OpenDevin/blob/main/README.md#opendevin-code-less-make-more)和[貢獻指南](https://github.com/OpenDevin/OpenDevin/blob/main/CONTRIBUTING.md)。 它在 GitHub 上擁有超過 10,700 個 Star,並且正在快速成長。 https://github.com/OpenDevin/OpenDevin 明星 OpenDevin ⭐️ --- 25. [NPM Copilot](https://github.com/whoiskatrin/npm-copilot) - Next.js 的 CLI 工具,可以即時分析日誌。 ------------------------------------------------------------------------------------------  npm/yarn/pnpm copilot 是一個命令列工具,它使用 OpenAI 的 GPT-3 語言模型來提供修復程式碼中錯誤的建議。 CLI 工具可偵測目前目錄中正在使用的專案類型和套件管理器。 然後,它執行適當的開發伺服器命令(例如,npm run dev、yarn run dev、pnpm run dev)並偵聽正在執行的應用程式產生的日誌。 當遇到錯誤時,CLI 工具會即時提供錯誤修復建議。 首先使用以下 npm 指令安裝 npm-copilot 套件。 ``` npm install -g npm-copilot ``` CLI 工具將開始監視 Next.js 應用程式產生的日誌,並即時提供錯誤修復建議。 您可以透過該命令在專案中使用它。 ``` npm-copilot ``` 他們在 GitHub 上有 338 顆星,支援`Next,js` 、 `React` 、 `Angular`和`Vue.js` https://github.com/whoiskatrin/npm-copilot 明星 NPM Copilot ⭐️ --- 26. [Mentat](https://github.com/AbanteAI/mentat) - 人工智慧編碼助理。 ------------------------------------------------------------ 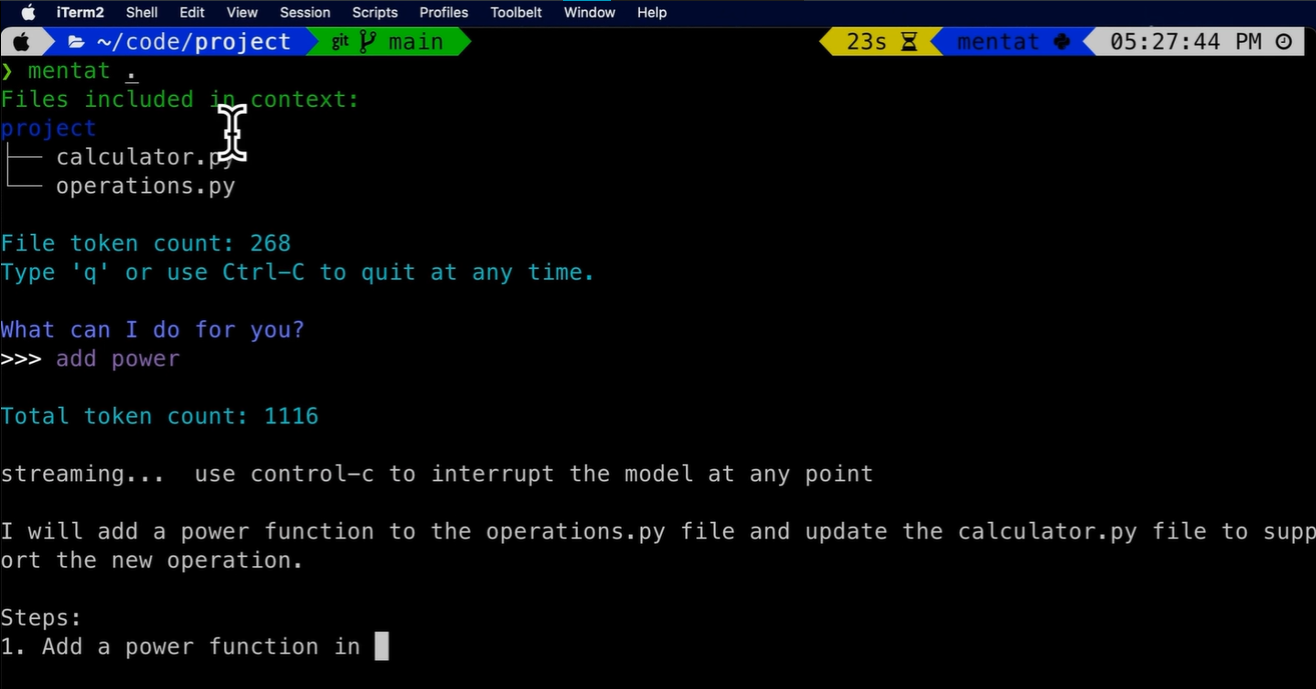 Mentat 是一款人工智慧工具,可直接從命令列幫助您完成任何編碼任務。 與 Copilot 不同,Mentat 協調多個位置和文件的編輯。與 ChatGPT 不同的是,Mentat 已經擁有您專案的上下文 - 無需複製和貼上! 您可以觀看此演示以了解基本概述。 https://www.youtube.com/watch?v=lODjaWclwpY 如果需要協助,您可以閱讀[安裝說明](https://github.com/AbanteAI/mentat?tab=readme-ov-file#install)或觀看安裝[教學](https://www.youtube.com/watch?v=bVJP8hY8uRM)。 您可以閱讀[文件](https://github.com/AbanteAI/mentat?tab=readme-ov-file#-usage)。 他們在 GitHub 上有 2.3k 顆星,並且正在發布`v1`版本。 https://github.com/AbanteAI/mentat Star Mentat ⭐️ --- 27. [FlowGPT](https://github.com/nilooy/flowgpt) - 使用 AI 產生流程圖。 --------------------------------------------------------------- 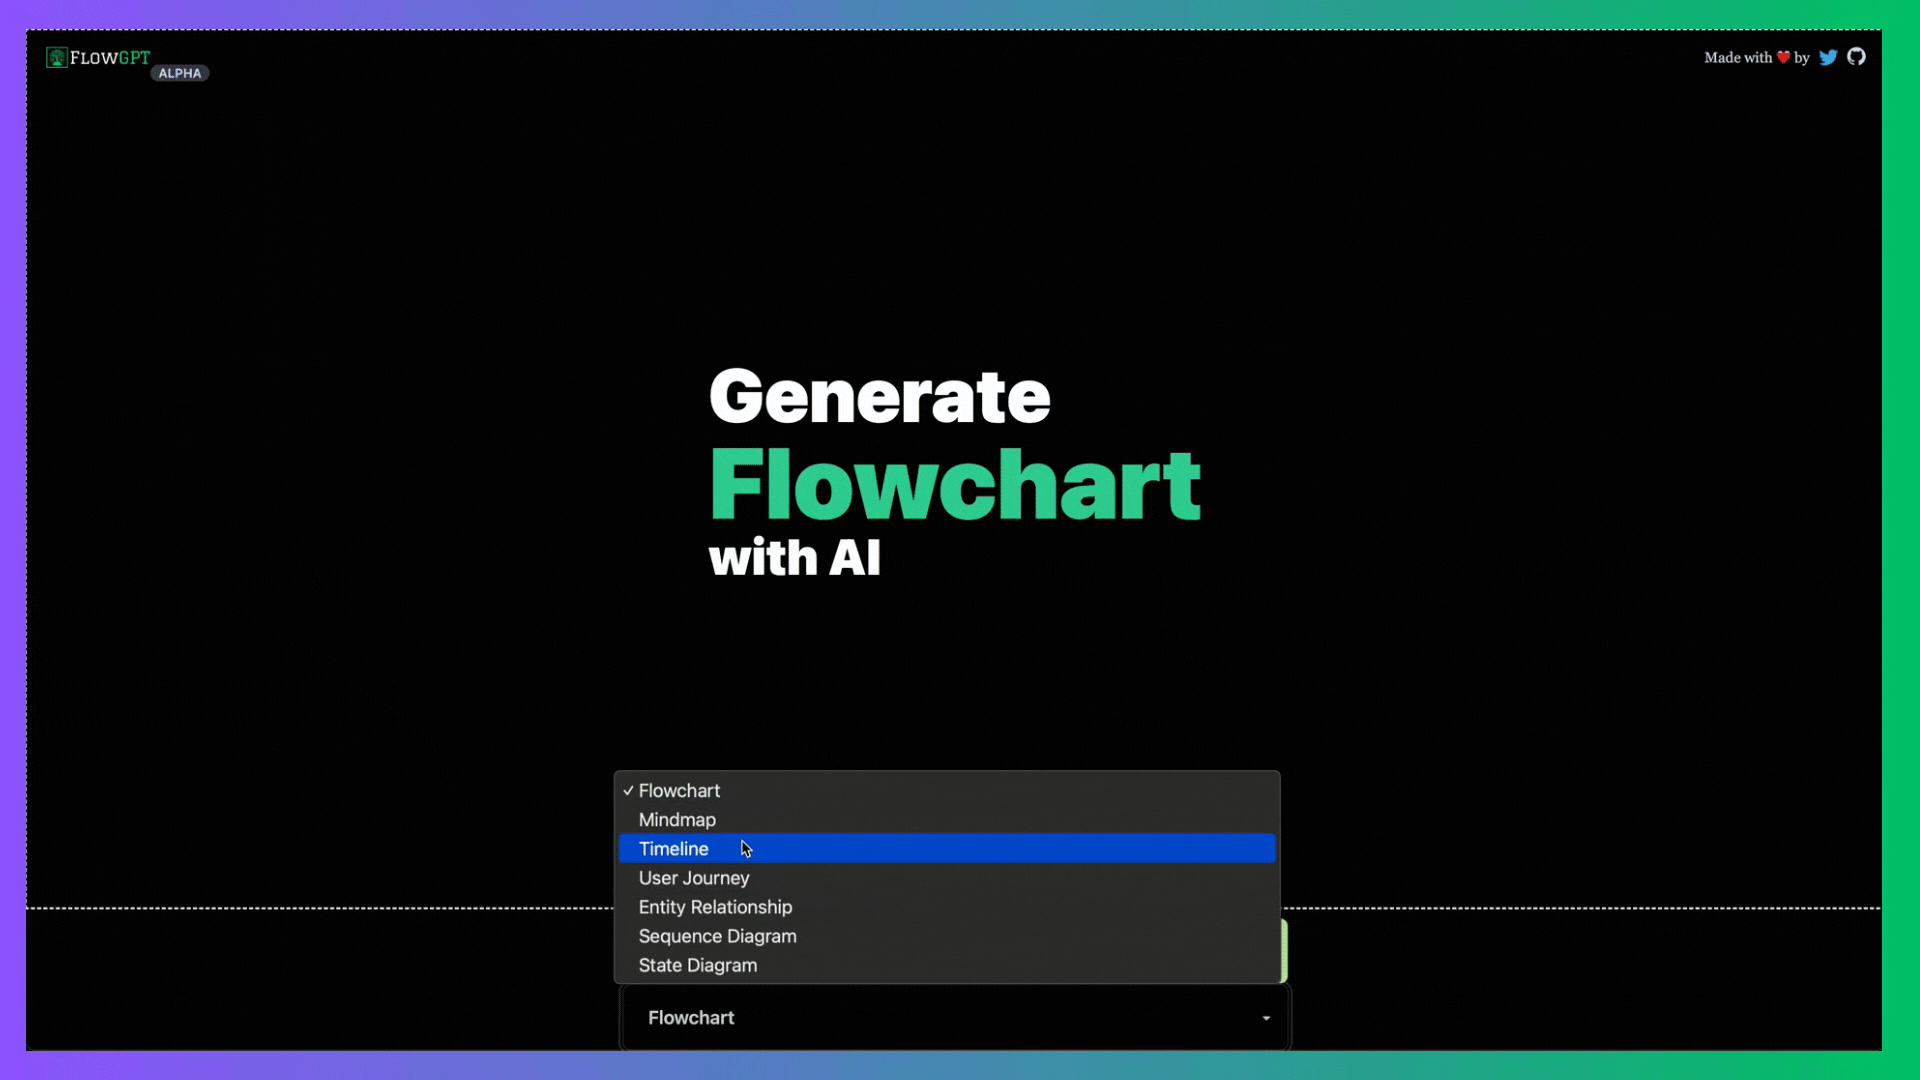 FlowGPT是一個用ai(gpt-3.5)產生流程圖的工具。 它是使用 Next.js、Langchain、Mermaid 和 DaisyUI 建構的。 您可以閱讀[安裝說明](https://github.com/nilooy/flowgpt?tab=readme-ov-file#installation)。 你可以查看[gif 示範](https://github.com/nilooy/flowgpt?tab=readme-ov-file#flowgpt-is-a-tool-to-generate-flowchart-with-ai-gpt-35)。 它只有 11 次提交,但在 GitHub 上有 238 顆星,並且是使用 TypeScript 建置的。作為一個小專案值得一試。 https://github.com/nilooy/flowgpt Star FlowGPT ⭐️ --- 28. [reor](https://github.com/reorproject/reor) - 自組織人工智慧筆記應用程式。 ----------------------------------------------------------------  迄今為止我見過的最令人興奮的專案之一,特別是因為它在本地執行模型。 Reor 是一款基於人工智慧的桌面筆記應用程式:它會自動連結相關筆記、回答筆記上的問題並提供語義搜尋。 所有內容都儲存在本地,您可以使用類似黑曜石的 Markdown 編輯器來編輯筆記。該專案假設人工智慧思維工具預設應該在本地執行模型。 Reor 站在 Ollama、Transformers.js 和 LanceDB 等巨頭的肩膀上,使 LLM 和嵌入模型都可以在本地執行。也支援連接到 OpenAI 或 OpenAI 相容 API(例如 Oobabooga)。 > 我知道你想知道它怎麼可能是`self-organizing` ? A。您寫的每個筆記都會被分塊並嵌入到內部向量資料庫中。 b.相關筆記透過向量相似度自動連接。 C。 LLM 支援的問答對筆記語料庫進行 RAG。 d.一切都可以進行語義搜尋。 您可以在這裡觀看演示!  將 Reor 視為一個帶有兩個生成器的 RAG 應用程式:LLM 和人類。在問答模式下,法學碩士會從語料庫中取得檢索到的上下文來幫助回答查詢。 類似地,在編輯器模式下,人們可以切換側邊欄以顯示從語料庫「檢索」的相關註釋。這是透過將當前筆記中的想法與語料庫中的相關想法交叉引用來「增強」您的想法的一種非常有效的方法。 您可以閱讀[文件](https://www.reorproject.org/docs)並從網站[下載](https://www.reorproject.org/)。 Mac、Linux 和 Windows 皆支援。 他們還提供了入門指南,以便幫助您入門。 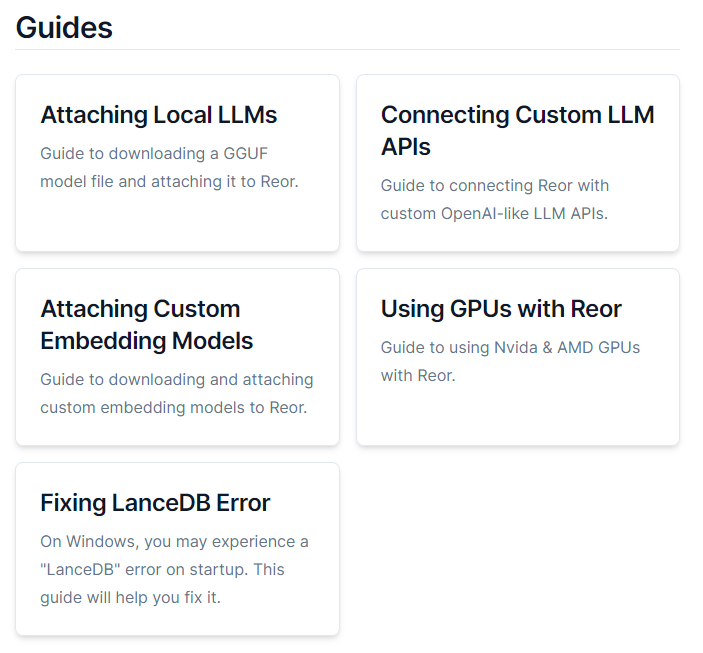 它們在 GitHub 上有 4.2k 顆星,並使用 TypeScript 建置。 https://github.com/reorproject/reor 星標 reor ⭐️ --- 29. [Amica](https://github.com/semperai/amica) - 讓您在瀏覽器中輕鬆地與 3D 角色聊天。 --------------------------------------------------------------------- 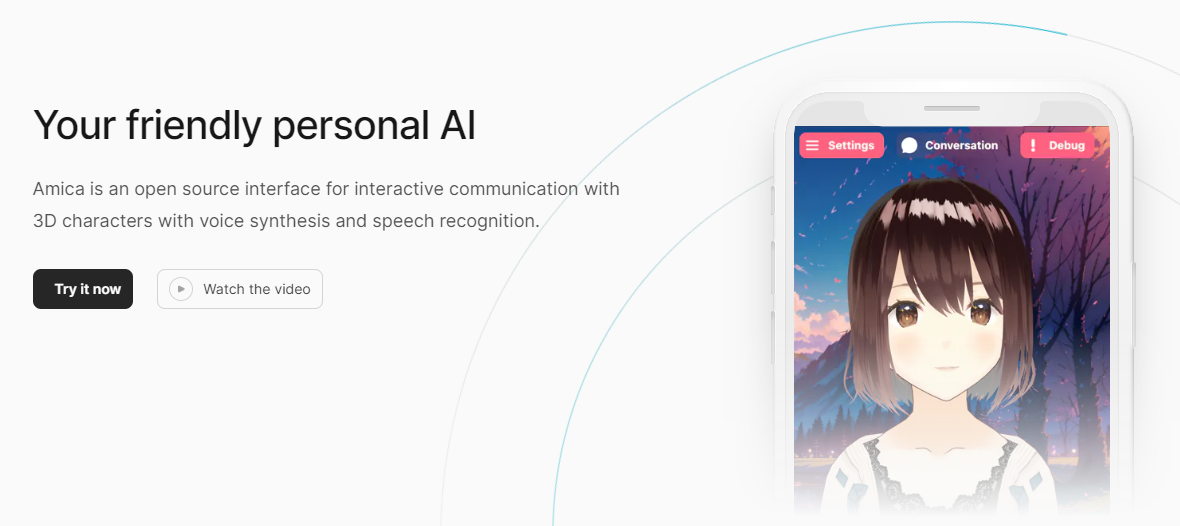 Amica 是一個開源接口,用於透過語音合成和語音辨識與 3D 角色進行互動式通訊。 您可以匯入 VRM 文件,調整聲音以適合角色,並產生包含情緒表達的回應文字。 他們使用 Three.js、OpenAI、Whisper、Bakllava 等進行視覺處理。您可以閱讀[Amica 的工作原理](https://docs.heyamica.com/overview/how-amica-works)及其所涉及的[核心概念](https://docs.heyamica.com/overview/core-concepts)。 您可以克隆該存儲庫並使用它來[開始](https://docs.heyamica.com/getting-started/installation)。 ``` npm i npm run dev ``` 您可以閱讀[文件](https://docs.heyamica.com/)並查看[演示](https://amica.arbius.ai/),這真是太棒了:D 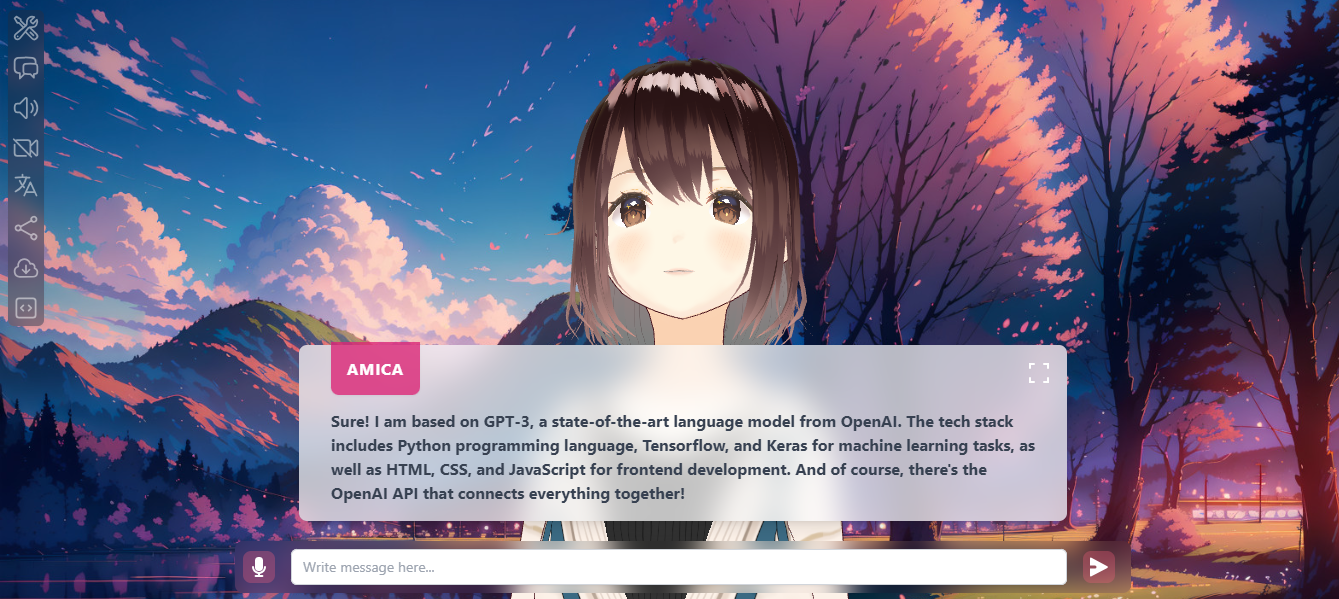 您可以觀看這段簡短的影片,了解它的功能。 https://www.youtube.com/watch?v=hUxAEnFiXH8 Amica 使用 Tauri 建立桌面應用程式。 他們在 GitHub 上有 400+ Stars,而且看起來非常容易使用。 https://github.com/semperai/amica Star Amica ⭐️ --- 30.[繼續](https://github.com/continuedev/continue)- 使您能夠建立人工智慧軟體開發系統。 -------------------------------------------------------------------  繼續讓開發人員保持流動。我們的開源 VS Code 和 JetBrains 擴充功能可讓您輕鬆建立自己的模組化 AI 軟體開發系統並進行改進。 它們有很多很棒的功能,讓我們看看其中的一些: > 輕鬆理解程式碼部分。  > 選項卡可自動完成程式碼建議。  > 詢問有關您的程式碼庫的問題。  > 快速使用文件作為上下文。  > 立即了解終端錯誤。  > 使用斜槓指令開始操作。 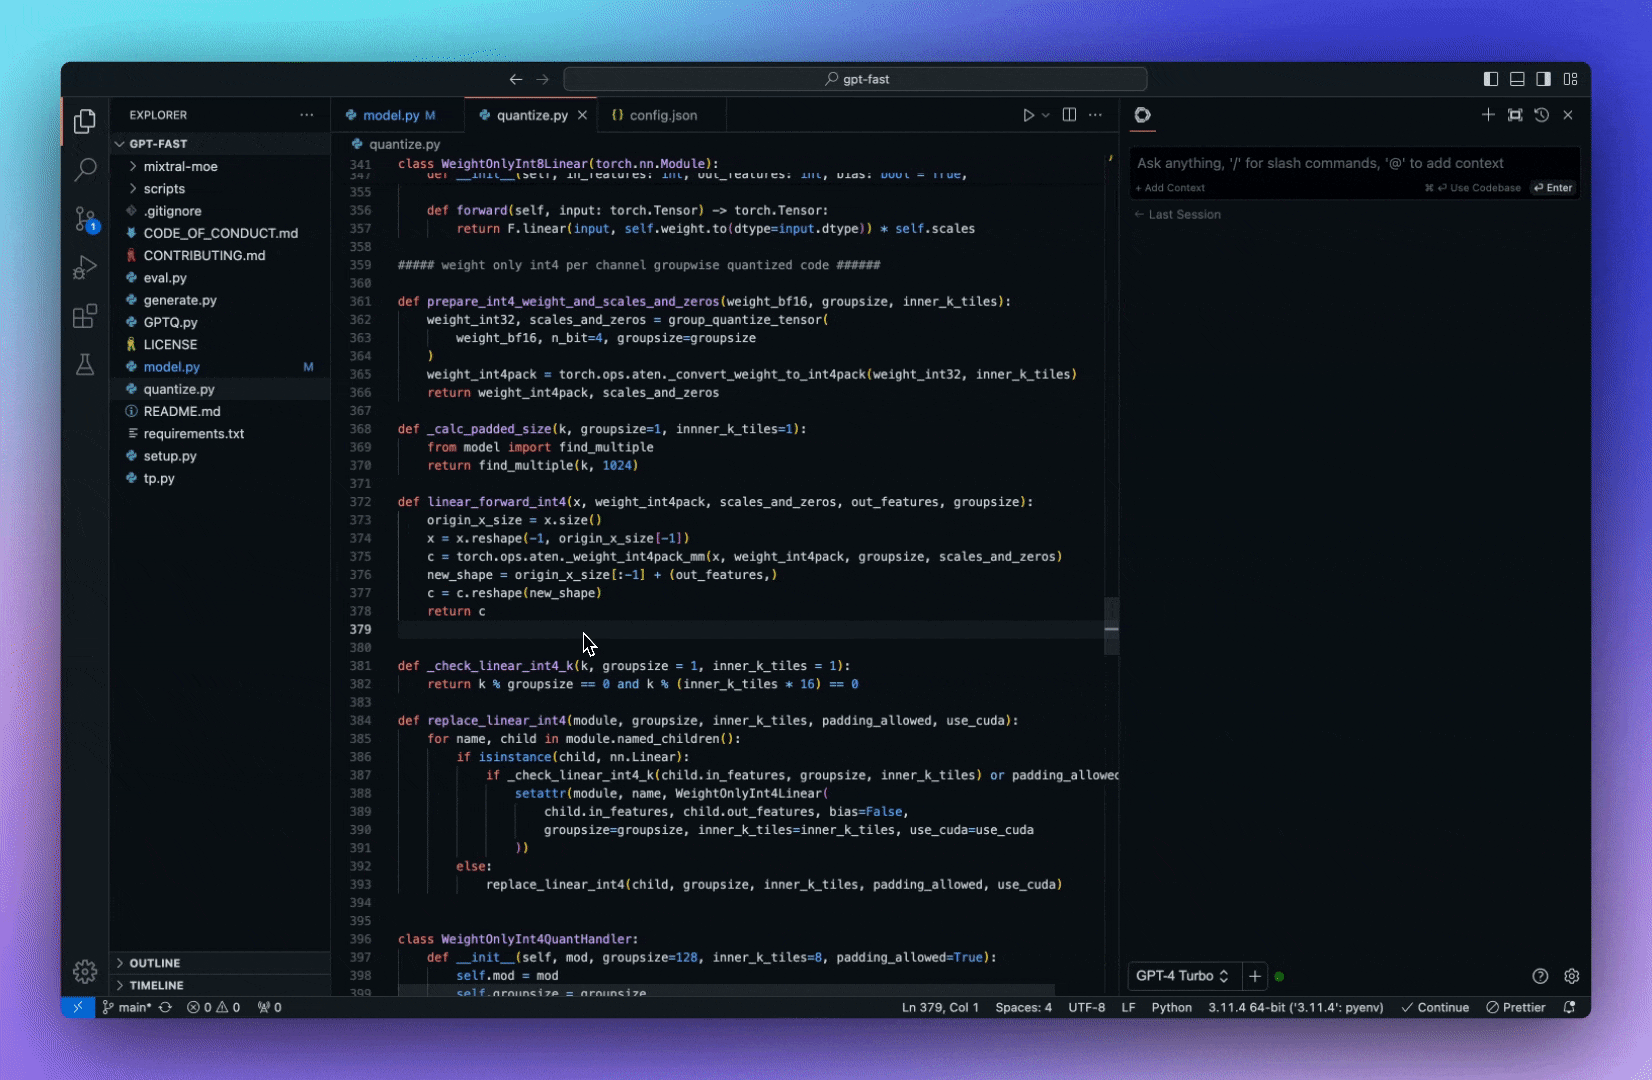 > 重構您正在編碼的函數。 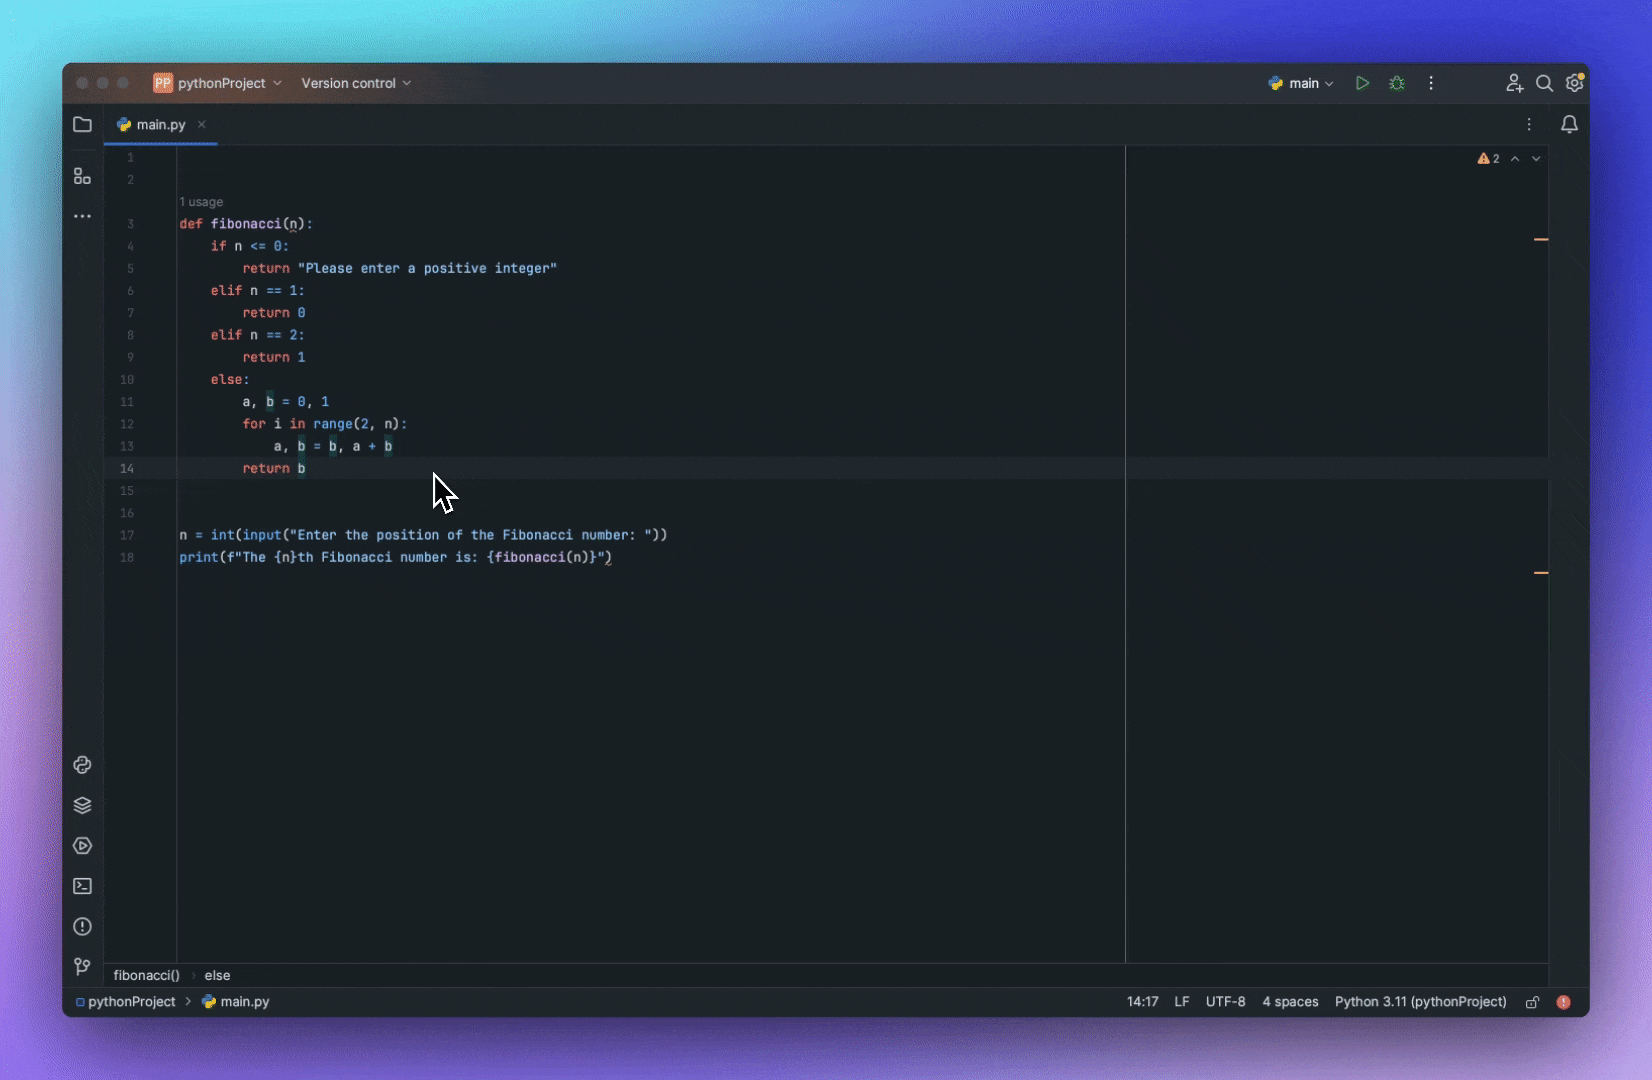 了解所有[功能](https://docs.continue.dev/how-to-use-continue)。 您必須從市場安裝[VSCode 擴展](https://marketplace.visualstudio.com/items?itemName=Continue.continue),然後閱讀[快速入門指南](https://docs.continue.dev/quickstart)。 您可以閱讀[文件](https://docs.continue.dev/intro)。 它們在 GitHub 上擁有超過 10k 顆星,並使用 TypeScript 建置。 https://github.com/continuedev/continue 星繼續 ⭐️ --- 我從來沒有如此詳細地介紹過這麼多專案! 我希望這能幫助您創造一些鼓舞人心的東西。 請分享更多專案或任何您想要其他人可以學習的內容! 請關注 Copilotkit 以獲取更多此類內容。 https://dev.to/copilotkit --- 原文出處:https://dev.to/copilotkit/30-ai-libraries-you-can-use-for-your-next-project-ideas-5ded
我來自世界各地的 DevOps 領域,在加入我現在的公司 SingleStore 之前,AI/ML 世界對我來說是全新的。我加入已經 8 個月了,一切進展得非常順利。從各種部落格、教程、工具等中學習AI/ML 中所有新的很酷的東西。這些要求的工具。順便說一句,我們有很多內容和材料可以開始,但我想看看行業之外還發生了什麼,並做我自己的研究。 正如我所說,已經過去 8 個月了。在我在這裡的整個旅程中,從舉辦網路研討會、在會議上發言,到撰寫有關新興技術趨勢的博客,我偶然發現了一系列不可或缺的工具。在本文中,我將分享這些工具,從新興程式語言到 AI 框架,再到向量資料庫,再到簡化 AI/ML 應用程式建立的開發工具。***讓我們開始吧。*** 1. 程式語言 ------- ### [翅膀](https://git.new/winglang)  我嘗試使用多種語言,但發現大多數語言都被誇大了。是的,就在那時,我遇到了一個正在討論這種為雲端和人工智慧應用程式設計的新語言的社群。那是我第一次嘗試 Wing 程式語言,發現它令人印象深刻。 你可能會問 - 為什麼是 Wing? Wing 提供了一個統一的程式設計模型,將基礎架構和應用程式程式碼整合到一個有凝聚力的框架內。這種獨特的方法使開發人員能夠簡化他們的工作流程,消除不斷切換情境的需要,並顯著提高生產力和創造力。 這正是您在建立 AI/ML 應用程式時所需要的,更專注於核心功能而不是底層基礎設施。我遇到了他們的 Open AI Joker 應用程式,它可以產生笑話並將其翻譯成不同的語言。整個框架的流暢程度令人驚嘆。請注意,Wing 仍在積極開發中。 您可以使用最少的程式碼建立任何 AI/ML 應用程式。讓我們看看 Joker 應用程式是如何運作的。該應用程式使用 OpenAI 生成笑話並將其翻譯成不同的語言。有一個喜劇演員,一個開放人工智慧助手,可以產生笑話,每當它生成笑話時,笑話就會被放入/儲存在一個桶中。有兩個譯者,西班牙語和希伯來語。這些譯者訂閱一個主題。每當有笑話產生時,他們都會收到並翻譯。而且,他們也把翻譯好的笑話丟進桶裡了。很簡單。 以下是此範例的技術概述圖,展示如何將[OpenAI 的 API 與 Wing](https://github.com/winglang/examples/tree/main/examples/openai-joker)結合使用。  如果您還沒有嘗試過 Winglang,您可以透過簡單的命令輕鬆嘗試 ``` npm install -g winglang ``` 使用 git clone 指令將程式碼複製到本機 ``` git clone https://github.com/winglang/wing.git ``` 轉到範例資料夾,然後在終端機中執行以下命令: ``` npm install wing it ``` 呼叫“START HERE”函數,並在“Joke Store”中查看結果。 2.向量資料儲存與分析工具 ------------- ### SingleStore 和筆記本  對於 AI/ML 應用程式,您需要一個資料庫來儲存非結構化資料。我大約 8 個月前加入 SingleStore,當時我對 AI/ML 和向量資料庫還是個新手。隨著圍繞向量資料庫的大肆宣傳,我開始了解向量資料庫,並發現 SingleStore 作為向量資料庫如何為行業帶來驚人的補充。它不僅用於儲存向量資料,而且該公司還使用 SingleStore 進行即時分析。現在,看看支援即時分析的向量資料儲存的力量,這是一種超級力量。 下面我要來跟大家介紹一下SingleStore;它是一個基於雲端的資料庫管理系統(RDBMS),專為資料密集型應用程式而設計。它以其資料攝取、事務處理和查詢處理的速度而聞名。 SingleStore 早在 2017 年就開始支援向量儲存。 SingleStore 的 Notebook 功能基於流行的 Jupyter Notebook,廣泛應用於資料科學和機器學習社群。 SingleStore Notebook 擴展了 Jupyter Notebook 的功能,使資料專業人員能夠輕鬆使用 SingleStore 的分散式 SQL 資料庫,同時在語言和資料來源方面提供出色的可擴充性。 [試試 SingleStore 並獲得價值 600 美元的免費積分](https://www.singlestore.com/cloud-trial/?utm_medium=referral&utm_source=pavan&utm_term=devto&utm_content=aimltools)。 3. 資料操作與分析工具 ------------ 我只是喜歡處理資料並使用公開的資料集(例如葡萄酒資料集、泰坦尼克號資料集等)進行不同的實驗。我著迷地看到 NumPy 和 Pandas 在資料探索和提出不同解決方案方面的能力。 Pandas 和 NumPy 是 Python 生態系統中用於資料分析和科學計算的兩個最受歡迎的函式庫。 ### 熊貓和 NumPy  任何 AI/ML 應用程式的核心都是資料。 Pandas 和 NumPy 等工具是 Python 中資料操作和分析的基礎。 Pandas 提供了用於操作數值表和時間序列的高級資料結構和操作,使其成為在用於訓練模型之前預處理和清理資料的理想選擇。 NumPy 增加了對大型多維陣列和矩陣的支持,以及對這些陣列進行操作的大量數學函數的支持,這對於資料預處理和模型訓練中的效能密集型操作至關重要。 4. 人工智慧與機器學習框架 -------------- 我使用過 TensorFlow、PyTorch,最近接觸過 LangChain 和 LlamaIndex,對它們幫助 AI/ML 工程師使用 API、向量儲存功能、邏輯、推理等建立強大應用程式所需的所有工具包的能力印象深刻。讓我們一一來看看他們的超能力。 ### TensorFlow 和 PyTorch  由 Google 開發的[TensorFlow](https://www.tensorflow.org/)和由 Facebook 開發的[PyTorch](https://pytorch.org/)是用於建立和訓練複雜機器學習模型的兩個最受歡迎的框架。 TensorFlow 以其靈活性和強大的可擴展性而聞名,使其適用於研究原型和生產部署。 PyTorch 因其易用性、簡單性和動態計算圖而受到讚譽,可以更直觀地編碼複雜的 AI 模型。這兩個框架都支援廣泛的人工智慧模型,從簡單的線性回歸到複雜的深度神經網路。 ### 浪鏈  [LangChain](https://www.langchain.com/)由 Harrison Chase 開發,於 2022 年 10 月首次亮相,它是一個開源平台,旨在建立由大型語言模型支援的強大應用程式,例如 ChatGPT 等聊天機器人和各種客製化應用程式。 Langchain 致力於為資料工程師提供一個包羅萬象的工具包,以便在聊天機器人、自動問答、文字摘要等各種用例中利用法學碩士。 ### 駱駝指數  [LlamaIndex](https://www.llamaindex.ai/)是一種先進的編排框架,旨在增強 GPT-4 等 LLM 的功能。雖然法學碩士本質上很強大,並且接受過大量公共資料集的培訓,但他們通常缺乏與私有或特定領域資料互動的方法。 LlamaIndex 彌補了這一差距,提供了一種結構化的方式來攝取、組織和利用各種資料來源——包括 API、資料庫和 PDF。透過將這些資料索引為針對法學碩士最佳化的格式,LlamaIndex 促進了自然語言查詢,使用戶能夠無縫地與其私有資料進行對話,而無需重新訓練模型。 5.深度學習模型 -------- 作為初學者,我一直在尋找簡單而靈活的東西來開發深度學習模型,就在那時我發現了 Keras。許多 AI/ML 專業人士欣賞[Keras](https://keras.io/)在原型設計和開發深度學習模型方面的簡單性和高效性,使其成為首選,特別是對於初學者和需要快速開發的專案。 ### 難的  對於尋求高級神經網路 API 的開發人員來說,現在已整合到 TensorFlow 中的 Keras 提供了更簡單的介面來建立和訓練深度學習模型。 Keras 抽象化了建構神經網路的大部分複雜性,使其易於初學者使用,同時仍足夠強大以進行研究。 6. 開發和版本控制平台 ------------ ### GitHub 和 DVC  由於模型開發的迭代性質和對可重複性的需求,協作和版本控制在 AI/ML 開發專案中至關重要。 [GitHub](https://github.com/)是領先的原始碼管理平台,允許團隊協作處理程式碼、追蹤問題和管理專案里程碑。 [DVC(資料版本控制)](https://dvc.org/)透過處理 Git 無法有效管理的大型資料檔案、資料集和機器學習模型來補充 Git,從而實現對 AI 專案中使用的資料和模型檔案的版本控制。 7. AI模型部署與監控 ------------ 我建立了一些 AI/ML 應用程式,但是如何以及在哪裡部署它們?這就是我的想法跳到這個類別中的兩個主要工具:Docker 和 Kubernetes。正如我之前所說,我來自世界各地的 DevOps 地區,我已經使用過這些工具,並且知道它們是如何運作的。 Docker 將您的應用程式容器化,而 Kubernetes 用於大規模部署您的應用程式。 ### Docker 和 Kubernetes  將人工智慧模型部署到生產中需要能夠打包應用程式並大規模管理它們的工具。 [Docker](https://www.docker.com/)透過容器化AI應用程式來簡化其部署,確保應用程式在任何環境中順利執行。 [Kubernetes](https://kubernetes.io/)是 Docker 容器的編排系統,可以自動部署、擴展和管理容器化應用程式,這對於需要跨多個伺服器或雲端環境進行擴展的 AI 應用程式至關重要。 8.人工智慧雲端平台 ---------- 如果沒有 AWS、Google 和 Azure 等雲端平台,您就無法擴展任何東西。雖然 AWS 是我最喜歡的,但我也探索了其他選項,並在此提到了所有三個主要雲端供應商。 ### AWS、Google雲端和 Azure  Amazon Web Services (AWS)、Google Cloud Platform (GCP) 和 Microsoft Azure 等雲端平台提供了一系列 AI 和機器學習服務,這些服務抽象化了訓練和部署 AI 模型所需的大部分基礎架構。這些平台為機器學習模型訓練、部署和監控提供託管服務,以及可擴展以滿足任何人工智慧專案需求的大量運算資源。 9. 專門的人工智慧開發工具 -------------- 雖然我仍然更喜歡使用 SingleStore Notebook 功能,但我知道大多數人已經在使用 Jupyter Notebook 進行資料探索和分析。我有時會使用 Jupyter Notebooks,另一個更有趣的工具是 MLflow,它將幫助您完成端到端的 ML 工作流程。 ### Jupyter 筆記本  對於探索性資料分析、模型開發和文件編制,Jupyter Notebooks 是不可或缺的工具。它們允許開發人員建立和共享包含即時程式碼、方程式、視覺化和敘述文字的文件,使其成為協作人工智慧研究和開發的絕佳工具。 ### ML流  [MLflow](https://mlflow.org/)是一個用於管理端對端機器學習生命週期的開源平台。它包括實驗追蹤、模型版本控制和部署等功能,使開發人員能夠追蹤和比較實驗、將模型打包成可重複的執行,以及管理跨多個環境的模型部署。 ### 最後的一些想法 人工智慧/機器學習領域正在像海洋一樣不斷發展。每天我們都會看到一種或另一種語言模型帶著許多期望首次亮相。有許多令人驚嘆的開發工具仍然可以包含在這個清單中,但從我個人的經驗來看,我相信這些工具是每個 AI/ML 工程師開始建立他們的 AI/ML 應用程式的良好開端。 讓我知道您目前在 AI/ML 領域最喜歡的工具是什麼。 --- 原文出處:https://dev.to/pavanbelagatti/my-favorite-devtools-to-build-aiml-applications-3c0c
長話短說 ---- 在本文中,您將了解如何建立基於 AI 的行銷活動管理應用程式,該應用程式可讓您建立和分析廣告活動,從而使您能夠為您的業務做出正確的決策。 我們將介紹如何: - 使用 Next.js 建立 Web 應用程式, - 使用 CopilotKit 將 AI 助理整合到軟體應用程式中,以及 - 建立特定於操作的人工智慧副駕駛來處理應用程式中的各種任務。 - 建立一名競選經理  --- CopilotKit:建構應用內人工智慧副駕駛的框架 -------------------------- CopilotKit是一個[開源的AI副駕駛平台](https://github.com/CopilotKit/CopilotKit)。我們可以輕鬆地將強大的人工智慧整合到您的 React 應用程式中。 建造: - ChatBot:上下文感知的應用內聊天機器人,可以在應用程式內執行操作 💬 - CopilotTextArea:人工智慧驅動的文字字段,具有上下文感知自動完成和插入功能📝 - 聯合代理:應用程式內人工智慧代理,可以與您的應用程式和使用者互動🤖  {% cta https://git.new/devtoarticle1 %} Star CopilotKit ⭐️ {% endcta %} --- 先決條件 ---- 要完全理解本教程,您需要對 React 或 Next.js 有基本的了解。 我們還將利用以下內容: - [Radix UI](https://www.radix-ui.com/) - 用於為應用程式建立可存取的 UI 元件。 - [OpenAI API 金鑰](https://platform.openai.com/api-keys)- 使我們能夠使用 GPT 模型執行各種任務。 - [CopilotKit](https://github.com/CopilotKit/CopilotKit) - 一個開源副駕駛框架,用於建立自訂 AI 聊天機器人、應用程式內 AI 代理程式和文字區域。 --- 專案設定和套件安裝 --------- 首先,透過在終端機中執行以下程式碼片段來建立 Next.js 應用程式: ``` npx create-next-app campaign-manager ``` 選擇您首選的配置設定。在本教學中,我們將使用 TypeScript 和 Next.js App Router。 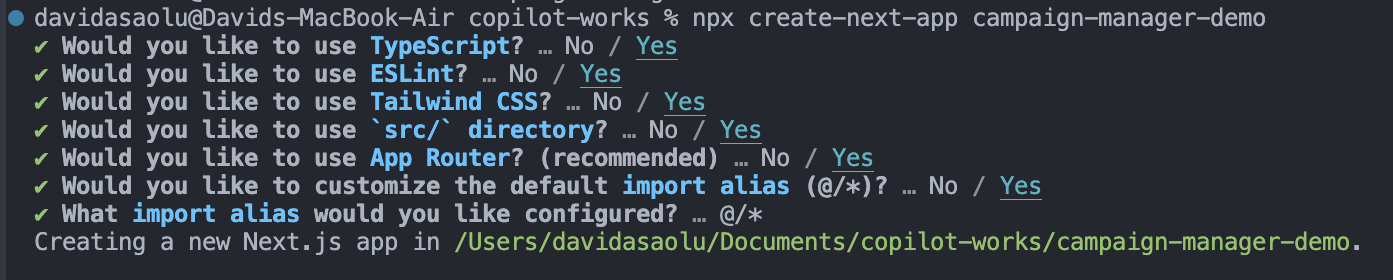 接下來,將[Heroicons](https://www.npmjs.com/package/@heroicons/react) 、 [Radix UI](https://www.radix-ui.com/)及其原始元件安裝到專案中。 ``` npm install @heroicons/react @radix-ui/react-avatar @radix-ui/react-dialog @radix-ui/react-dropdown-menu @radix-ui/react-icons @radix-ui/react-label @radix-ui/react-popover @radix-ui/react-select @radix-ui/react-slot @radix-ui/react-tabs ``` 另外,安裝[Recharts 程式庫](https://recharts.org/en-US)(一個用於建立互動式圖表的 React 程式庫)以及以下實用程式套件: ``` npm install recharts class-variance-authority clsx cmdk date-fns lodash react-day-picker tailwind-merge tailwindcss-animate ``` 最後,安裝[CopilotKit 軟體套件](https://docs.copilotkit.ai/getting-started/quickstart-chatbot)。這些套件使 AI copilot 能夠從 React 狀態檢索資料並在應用程式中做出決策。 ``` npm install @copilotkit/react-ui @copilotkit/react-textarea @copilotkit/react-core @copilotkit/backend ``` 恭喜!您現在已準備好建立應用程式。 --- 使用 Next.js 建立 Campaign Manager 應用程式 ----------------------------------- 在本節中,我將引導您建立活動管理器應用程式的使用者介面。 首先,讓我們進行一些初始設定。 在`src`資料夾中建立一個`components`和`lib`資料夾。 ``` cd src mkdir components lib ``` 在**`lib`**資料夾中,我們將聲明應用程式的靜態類型和預設活動。因此,在**`lib`**資料夾中建立**`data.ts`**和**`types.ts`**檔案。 ``` cd lib touch data.ts type.ts ``` 將下面的程式碼片段複製到`type.ts`檔中。它聲明了活動屬性及其資料類型。 ``` export interface Campaign { id: string; objective?: | "brand-awareness" | "lead-generation" | "sales-conversion" | "website-traffic" | "engagement"; title: string; keywords: string; url: string; headline: string; description: string; budget: number; bidStrategy?: "manual-cpc" | "cpa" | "cpm"; bidAmount?: number; segment?: string; } ``` 為應用程式建立預設的行銷活動清單並將其複製到`data.ts`檔案中。 ``` import { Campaign } from "./types"; export let DEFAULT_CAMPAIGNS: Campaign[] = [ { id: "1", title: "CopilotKit", url: "https://www.copilotkit.ai", headline: "Copilot Kit - The Open-Source Copilot Framework", description: "Build, deploy, and operate fully custom AI Copilots. In-app AI chatbots, AI agents, AI Textareas and more.", budget: 10000, keywords: "AI, chatbot, open-source, copilot, framework", }, { id: "2", title: "EcoHome Essentials", url: "https://www.ecohomeessentials.com", headline: "Sustainable Living Made Easy", description: "Discover our eco-friendly products that make sustainable living effortless. Shop now for green alternatives!", budget: 7500, keywords: "eco-friendly, sustainable, green products, home essentials", }, { id: "3", title: "TechGear Solutions", url: "https://www.techgearsolutions.com", headline: "Innovative Tech for the Modern World", description: "Find the latest gadgets and tech solutions. Upgrade your life with smart technology today!", budget: 12000, keywords: "tech, gadgets, innovative, modern, electronics", }, { id: "4", title: "Global Travels", url: "https://www.globaltravels.com", headline: "Travel the World with Confidence", description: "Experience bespoke travel packages tailored to your dreams. Luxury, adventure, relaxation—your journey starts here.", budget: 20000, keywords: "travel, luxury, adventure, tours, global", }, { id: "5", title: "FreshFit Meals", url: "https://www.freshfitmeals.com", headline: "Healthy Eating, Simplified", description: "Nutritious, delicious meals delivered to your door. Eating well has never been easier or tastier.", budget: 5000, keywords: "healthy, meals, nutrition, delivery, fit", }, ]; ``` 由於我們使用 Radix UI 建立可以使用 TailwindCSS 輕鬆自訂的基本 UI 元件,因此請在**`lib`**資料夾中建立一個**`utils.ts`**文件,並將以下程式碼片段複製到該文件中。 ``` //👉🏻 The lib folder now contains 3 files - data.ts, type.ts, util.ts //👇🏻 Copy the code below into the "lib/util.ts" file. import { type ClassValue, clsx } from "clsx"; import { twMerge } from "tailwind-merge"; export function cn(...inputs: ClassValue[]) { return twMerge(clsx(inputs)); } export function randomId() { return Math.random().toString(36).substring(2, 15); } ``` 導航到`components`資料夾並在其中建立其他三個資料夾。 ``` cd components mkdir app dashboard ui ``` `components/app`資料夾將包含應用程式中使用的各種元件,而儀表板資料夾包含某些元素的 UI 元件。 `ui`資料夾包含使用 Radix UI 建立的多個 UI 元素。將[專案儲存庫中的這些元素](https://github.com/CopilotKit/campaign-manager-demo/tree/main/src/components/ui)複製到該資料夾中。 恭喜! `ui`資料夾應包含必要的 UI 元素。現在,我們可以使用它們來建立應用程式中所需的各種元件。 ### 建立應用程式 UI 元件 在這裡,我將引導您完成為應用程式建立使用者介面的過程。 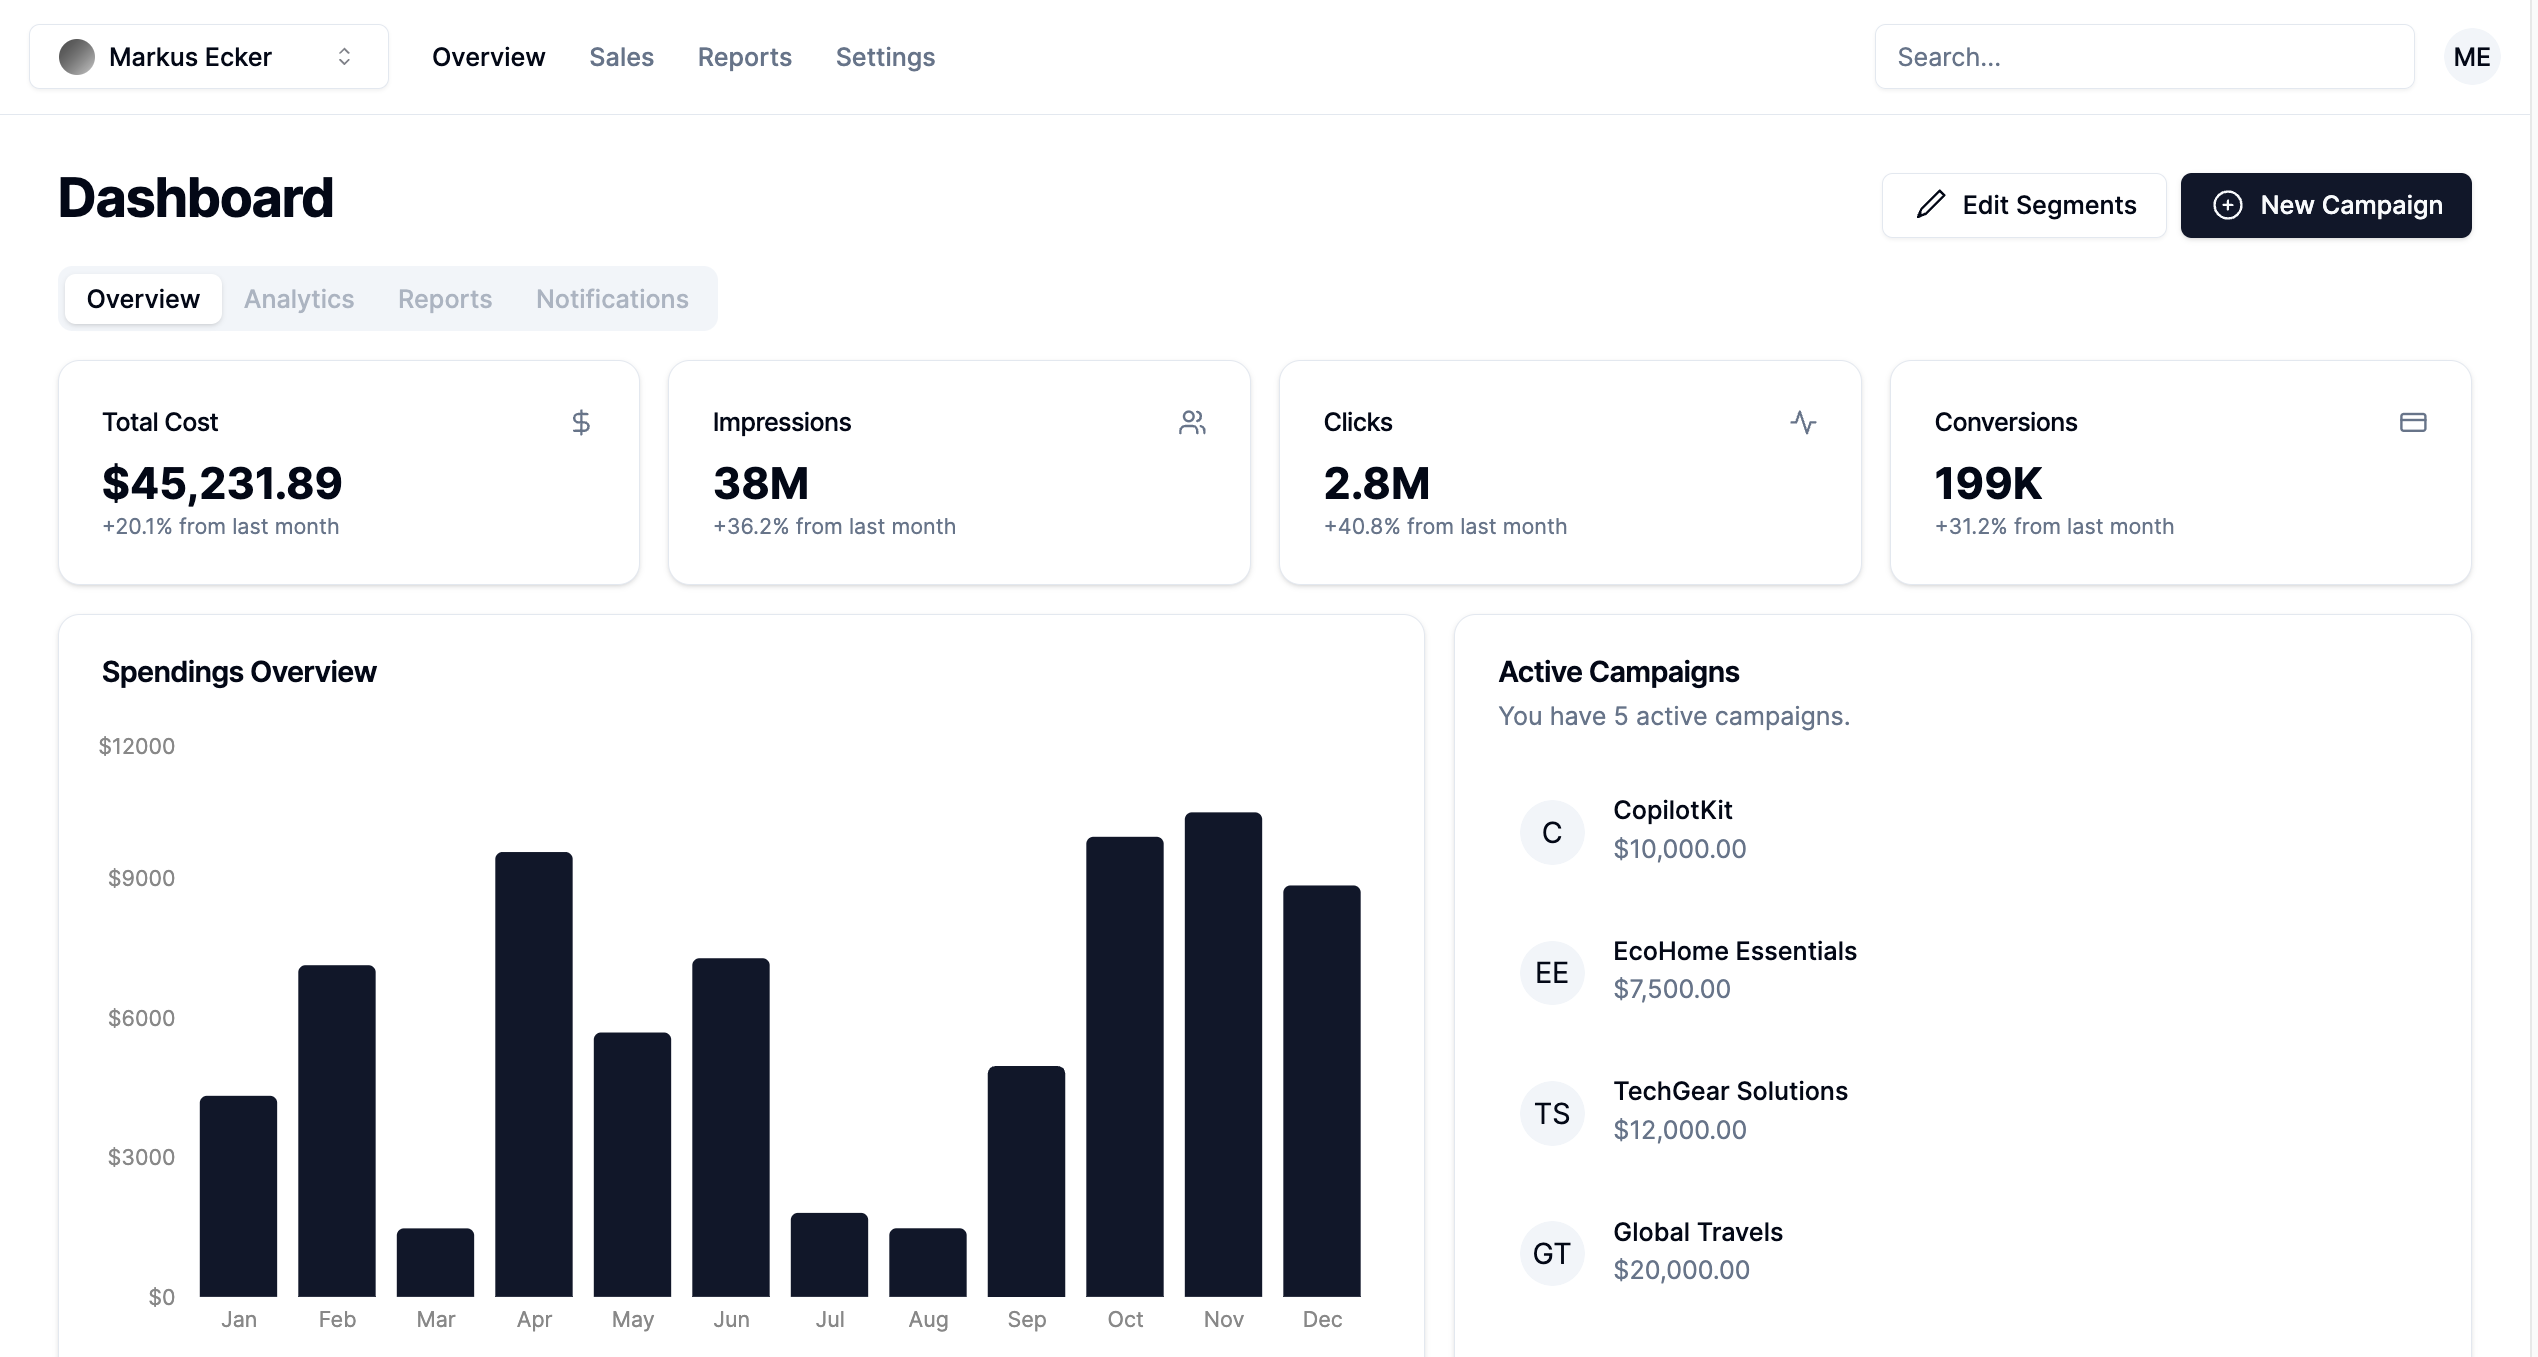 首先,導航至**`app/page.tsx`**檔案並將以下程式碼片段貼到其中。該文件呈現在**`components/app`**資料夾中聲明的 App 元件。 ``` "use client"; import { App } from "@/components/app/App"; export default function DashboardPage() { return <App />; } ``` 在`components/app`資料夾中建立`App.tsx` 、 `CampaignForm.tsx` 、 `MainNav.tsx`和`UserNav.tsx`檔案。 ``` cd components/app touch App.tsx CampaignForm.tsx MainNav.tsx UserNav.tsx ``` 將下面的程式碼片段複製到`App.tsx`檔案中。 ``` "use client"; import { DEFAULT_CAMPAIGNS } from "@/lib/data"; import { Campaign } from "@/lib/types"; import { randomId } from "@/lib/utils"; import { Dashboard } from "../dashboard/Dashboard"; import { CampaignForm } from "./CampaignForm"; import { useState } from "react"; import _ from "lodash"; export function App() { //👇🏻 default segments const [segments, setSegments] = useState<string[]>([ "Millennials/Female/Urban", "Parents/30s/Suburbs", "Seniors/Female/Rural", "Professionals/40s/Midwest", "Gamers/Male", ]); const [campaigns, setCampaigns] = useState<Campaign[]>( _.cloneDeep(DEFAULT_CAMPAIGNS) ); //👇🏻 updates campaign list function saveCampaign(campaign: Campaign) { //👇🏻 newly created campaign if (campaign.id === "") { campaign.id = randomId(); setCampaigns([campaign, ...campaigns]); } else { //👇🏻 existing campaign - search for the campaign and updates the campaign list const index = campaigns.findIndex((c) => c.id === campaign.id); if (index === -1) { setCampaigns([...campaigns, campaign]); } else { campaigns[index] = campaign; setCampaigns([...campaigns]); } } } const [currentCampaign, setCurrentCampaign] = useState<Campaign | undefined>( undefined ); return ( <div className='relative'> <CampaignForm segments={segments} currentCampaign={currentCampaign} setCurrentCampaign={setCurrentCampaign} saveCampaign={(campaign) => { if (campaign) { saveCampaign(campaign); } setCurrentCampaign(undefined); }} /> <Dashboard campaigns={campaigns} setCurrentCampaign={setCurrentCampaign} segments={segments} setSegments={setSegments} /> </div> ); } ``` - 從上面的程式碼片段來看, - 我為行銷活動建立了預設細分列表,並對已定義的行銷活動列表進行了深層複製。 - `saveCampaign`函數接受行銷活動作為參數。如果行銷活動沒有 ID,則表示它是新建立的,因此會將其新增至行銷活動清單。否則,它會找到該活動並更新其屬性。 - `Dashboard`和`CampaignForm`元件接受細分和行銷活動作為 props。 [Dashboard 元件](https://github.com/CopilotKit/campaign-manager-demo/blob/main/src/components/dashboard/Dashboard.tsx)在儀表板上顯示各種 UI 元素,而[CampaignForm 元件](https://github.com/CopilotKit/campaign-manager-demo/blob/main/src/components/app/CampaignForm.tsx)使用戶能夠在應用程式中建立和保存新的行銷活動。 您也可以使用[GitHub 儲存庫](https://github.com/CopilotKit/campaign-manager-demo/tree/main/src/components)中的程式碼片段來更新儀表板和應用程式元件。 恭喜!您應該有一個有效的 Web 應用程式,可讓使用者查看和建立新的行銷活動。 在接下來的部分中,您將了解如何將 CopilotKit 加入到應用程式中,以根據每個行銷活動的目標和預算進行分析和決策。  --- 使用 CopilotKit 透過 AI 分析廣告活動 -------------------------- 在這裡,您將學習如何將人工智慧加入到應用程式中,以幫助您分析行銷活動並做出最佳決策。 在繼續之前,請造訪[OpenAI 開發者平台](https://platform.openai.com/api-keys)並建立一個新的金鑰。 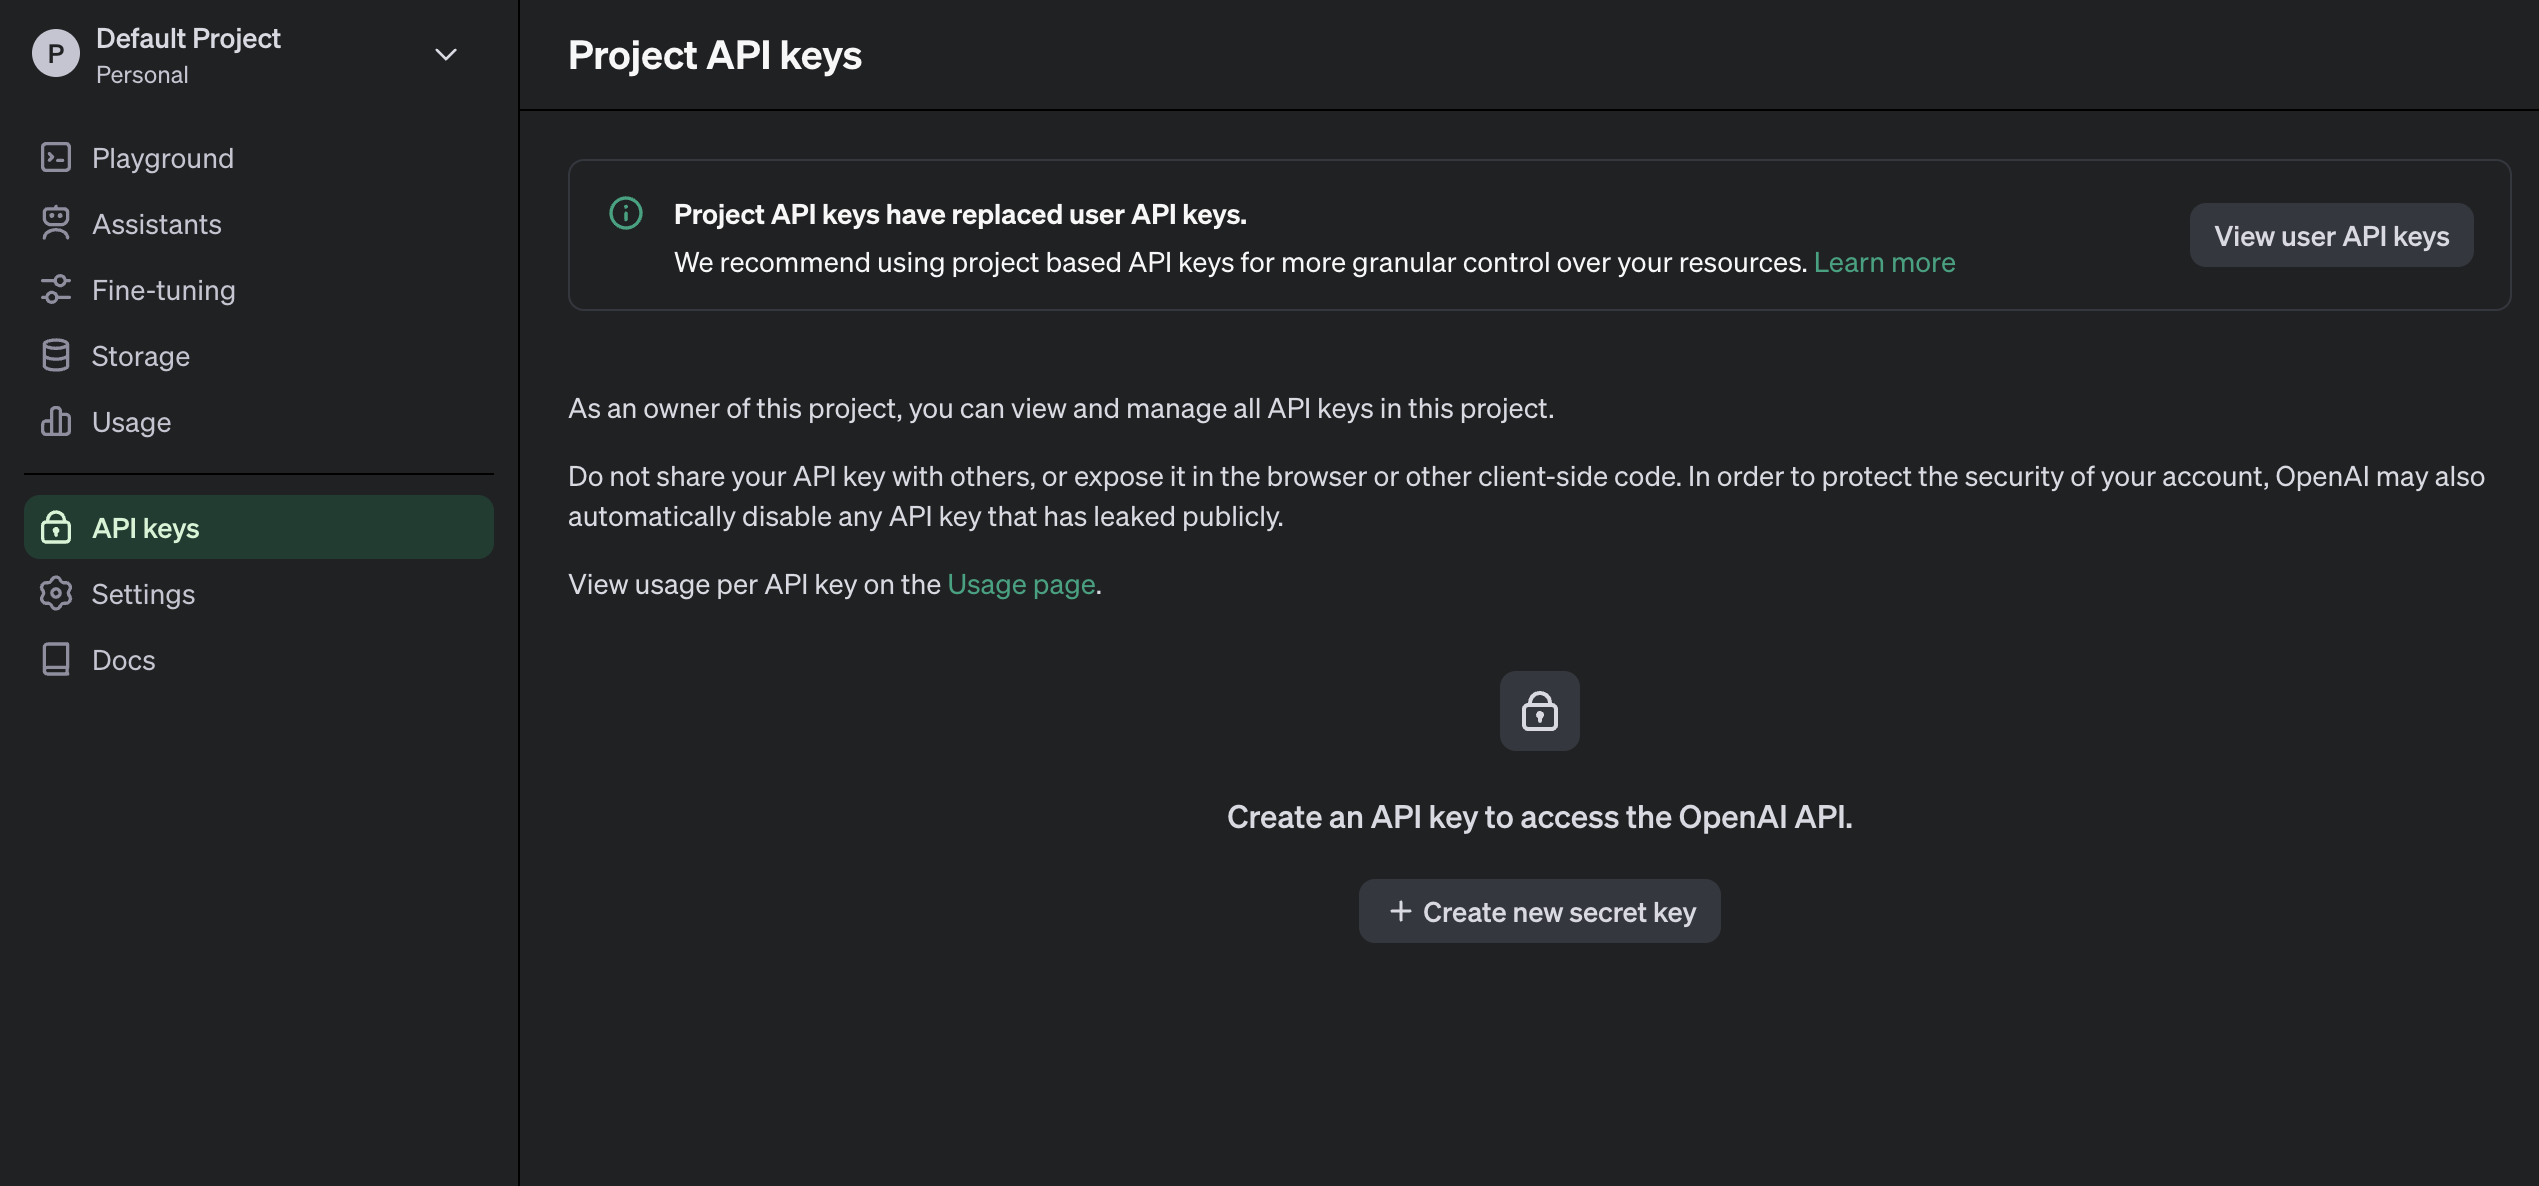 建立一個`.env.local`檔案並將新建立的金鑰複製到該檔案中。 ``` OPENAI_API_KEY=<YOUR_OPENAI_SECRET_KEY> OPENAI_MODEL=gpt-4-1106-preview ``` 接下來,您需要為 CopilotKit 建立 API 端點。在 Next.js 應用程式資料夾中,建立一個包含`route.ts`檔案的`api/copilotkit`資料夾。 ``` cd app mkdir api && cd api mkdir copilotkit && cd copilotkit touch route.ts ``` 將下面的程式碼片段複製到`route.ts`檔中。 [CopilotKit 後端](https://docs.copilotkit.ai/reference/CopilotBackend)接受使用者的請求並使用 OpenAI 模型做出決策。 ``` import { CopilotBackend, OpenAIAdapter } from "@copilotkit/backend"; export const runtime = "edge"; export async function POST(req: Request): Promise<Response> { const copilotKit = new CopilotBackend({}); const openaiModel = process.env["OPENAI_MODEL"]; return copilotKit.response(req, new OpenAIAdapter({ model: openaiModel })); } ``` 若要將您的應用程式連接到此 API 端點,請更新`app/page.tsx`文件,如下所示: ``` "use client"; import { App } from "@/components/app/App"; import { CopilotKit } from "@copilotkit/react-core"; import { CopilotSidebar } from "@copilotkit/react-ui"; export default function DashboardPage() { return ( <CopilotKit url='/api/copilotkit/'> <CopilotSidebar instructions='Help the user create and manage ad campaigns.' defaultOpen={true} labels={{ title: "Campaign Manager Copilot", initial: "Hello there! I can help you manage your ad campaigns. What campaign would you like to work on?", }} clickOutsideToClose={false} > <App /> </CopilotSidebar> </CopilotKit> ); } ``` `CopilotKit`元件包裝整個應用程式並接受包含 API 端點連結的`url`屬性。 `CopilotSidebar`元件為應用程式加入了一個聊天機器人側邊欄面板,使我們能夠向 CopilotKit 提供各種指令。  ### 如何讓AI副駕駛執行各種動作 CopilotKit 提供了兩個鉤子,使我們能夠處理使用者的請求並插入應用程式狀態: [useCopilotAction](https://docs.copilotkit.ai/reference/useCopilotAction)和[useMakeCopilotReadable](https://docs.copilotkit.ai/reference/useMakeCopilotReadable) 。 `useCopilotAction`掛鉤可讓您定義 CopilotKit 執行的動作。它接受包含以下參數的物件: - name - 操作的名稱。 - 描述 - 操作的描述。 - 參數 - 包含所需參數清單的陣列。 - render - 預設的自訂函數或字串。 - handler - 由操作觸發的可執行函數。 ``` useCopilotAction({ name: "sayHello", description: "Say hello to someone.", parameters: [ { name: "name", type: "string", description: "name of the person to say greet", }, ], render: "Process greeting message...", handler: async ({ name }) => { alert(`Hello, ${name}!`); }, }); ``` `useMakeCopilotReadable`掛鉤向 CopilotKit 提供應用程式狀態。 ``` import { useMakeCopilotReadable } from "@copilotkit/react-core"; const appState = ...; useMakeCopilotReadable(JSON.stringify(appState)); ``` CopilotKit 還允許您為使用者提示提供上下文,使其能夠做出充分且準確的決策。 將`guidance.ts`和`script.ts`加入到專案內的`lib`資料夾中,並將此[指導](https://github.com/CopilotKit/campaign-manager-demo/blob/main/src/lib/guideline.ts)和[腳本建議](https://github.com/CopilotKit/campaign-manager-demo/blob/main/src/lib/script.ts)複製到檔案中,以便 CopilotKit 做出決策。 在應用程式元件中,將當前日期、腳本建議和指導傳遞到 CopilotKit。 ``` import { GUIDELINE } from "@/lib/guideline"; import { SCRIPT_SUGGESTION } from "@/lib/script"; import { useCopilotAction, useMakeCopilotReadable, } from "@copilotkit/react-core"; export function App() { //-- 👉🏻 ...other component functions //👇🏻 Ground the Copilot with domain-specific knowledge for this use-case: marketing campaigns. useMakeCopilotReadable(GUIDELINE); useMakeCopilotReadable(SCRIPT_SUGGESTION); //👇🏻 Provide the Copilot with the current date. useMakeCopilotReadable("Today's date is " + new Date().toDateString()); return ( <div className='relative'> <CampaignForm segments={segments} currentCampaign={currentCampaign} setCurrentCampaign={setCurrentCampaign} saveCampaign={(campaign) => { if (campaign) { saveCampaign(campaign); } setCurrentCampaign(undefined); }} /> <Dashboard campaigns={campaigns} setCurrentCampaign={setCurrentCampaign} segments={segments} setSegments={setSegments} /> </div> ); } ``` 在`App`元件中建立一個 CopilotKit 操作,該操作可在使用者提供此類指令時建立新的活動或編輯現有的活動。 ``` useCopilotAction({ name: "updateCurrentCampaign", description: "Edit an existing campaign or create a new one. To update only a part of a campaign, provide the id of the campaign to edit and the new values only.", parameters: [ { name: "id", description: "The id of the campaign to edit. If empty, a new campaign will be created", type: "string", }, { name: "title", description: "The title of the campaign", type: "string", required: false, }, { name: "keywords", description: "Search keywords for the campaign", type: "string", required: false, }, { name: "url", description: "The URL to link the ad to. Most of the time, the user will provide this value, leave it empty unless asked by the user.", type: "string", required: false, }, { name: "headline", description: "The headline displayed in the ad. This should be a 5-10 words", type: "string", required: false, }, { name: "description", description: "The description displayed in the ad. This should be a short text", type: "string", required: false, }, { name: "budget", description: "The budget of the campaign", type: "number", required: false, }, { name: "objective", description: "The objective of the campaign", type: "string", enum: [ "brand-awareness", "lead-generation", "sales-conversion", "website-traffic", "engagement", ], }, { name: "bidStrategy", description: "The bid strategy of the campaign", type: "string", enum: ["manual-cpc", "cpa", "cpm"], required: false, }, { name: "bidAmount", description: "The bid amount of the campaign", type: "number", required: false, }, { name: "segment", description: "The segment of the campaign", type: "string", required: false, enum: segments, }, ], handler: (campaign) => { const newValue = _.assign( _.cloneDeep(currentCampaign), _.omitBy(campaign, _.isUndefined) ) as Campaign; setCurrentCampaign(newValue); }, render: (props) => { if (props.status === "complete") { return "Campaign updated successfully"; } else { return "Updating campaign"; } }, }); ``` {% 嵌入 https://www.youtube.com/watch?v=gCJpH6Tnj5g %} 新增另一個模擬 API 呼叫的操作,以允許 CopilotKit 從先前建立的活動中檢索歷史資料。 ``` // Provide this component's Copilot with the ability to retrieve historical cost data for certain keywords. // Will be called automatically when needed by the Copilot. useCopilotAction({ name: "retrieveHistoricalData", description: "Retrieve historical data for certain keywords", parameters: [ { name: "keywords", description: "The keywords to retrieve data for", type: "string", }, { name: "type", description: "The type of data to retrieve for the keywords.", type: "string", enum: ["CPM", "CPA", "CPC"], }, ], handler: async ({ type }) => { // fake an API call that retrieves historical data for cost for certain keywords based on campaign type (CPM, CPA, CPC) await new Promise((resolve) => setTimeout(resolve, 2000)); function getRandomValue(min: number, max: number) { return (Math.random() * (max - min) + min).toFixed(2); } if (type == "CPM") { return getRandomValue(0.5, 10); } else if (type == "CPA") { return getRandomValue(5, 100); } else if (type == "CPC") { return getRandomValue(0.2, 2); } }, render: (props) => { // Custom in-chat component rendering. Different components can be rendered based on the status of the action. let label = "Retrieving historical data ..."; if (props.args.type) { label = `Retrieving ${props.args.type} for keywords ...`; } if (props.status === "complete") { label = `Done retrieving ${props.args.type} for keywords.`; } const done = props.status === "complete"; return ( <div className=''> <div className=' w-full relative max-w-xs'> <div className='absolute inset-0 h-full w-full bg-gradient-to-r from-blue-500 to-teal-500 transform scale-[0.80] bg-red-500 rounded-full blur-3xl' /> <div className='relative shadow-xl bg-gray-900 border border-gray-800 px-4 py-8 h-full overflow-hidden rounded-2xl flex flex-col justify-end items-start'> <h1 className='font-bold text-sm text-white mb-4 relative z-50'> {label} </h1> <p className='font-normal text-base text-teal-200 mb-2 relative z-50 whitespace-pre'> {props.args.type && `Historical ${props.args.type}: ${props.result || "..."}`} </p> </div> </div> </div> ); }, }); ```  恭喜!您已完成本教學的專案。 結論 -- [CopilotKit](https://copilotkit.ai/)是一款令人難以置信的工具,可讓您在幾分鐘內將 AI Copilot 加入到您的產品中。無論您是對人工智慧聊天機器人和助理感興趣,還是對複雜任務的自動化感興趣,CopilotKit 都能讓您輕鬆實現。 如果您需要建立 AI 產品或將 AI 工具整合到您的軟體應用程式中,您應該考慮 CopilotKit。 您可以在 GitHub 上找到本教學的源程式碼: <https://github.com/CopilotKit/campaign-manager-demo> 感謝您的閱讀! --- 原文出處:https://dev.to/copilotkit/build-an-ai-powered-campaign-manager-nextjs-openai-copilotkit-59ii
我使用 OpenAI ChatGPT-4 一段時間了。 對此我沒什麼好說的。 但有時,這還不夠。 在[Winglang](https://github.com/winglang/wing)中,我們希望使用 OpenAI 和 ChatGPT-4 根據我們的文件回答人們的問題。 您的選擇是: - 使用[OpenAI 助理](https://platform.openai.com/docs/assistants/overview?context=with-streaming)或任何其他基於向量的資料庫 (RAG)。由於 Wing 看起來像 JS,所以效果很好,但仍然有很多錯誤。 - 將整個文件傳遞到上下文視窗的成本非常高。 很快,我們意識到這是行不通的。 是時候舉辦我們自己的法學碩士課程了。  --- 您的 LLM 資料集 ========== 在訓練模型之前,我們需要建立用於訓練模型的資料。在我們的例子中,是 Winglang 文件。我會做一些非常簡單的事情。 1. 從網站地圖中提取所有 URL,設定 GET 請求並收集內容。 2. 解析它;我們希望將所有 HTML 轉換為可讀內容。 3. 使用 ChatGPT 4 執行它,將內容轉換為 CSV 作為資料集。 它應該是這樣的:  完成後,儲存包含一列名為`text`的 CSV 並新增問題和答案。我們稍後會用到它。它應該看起來像這樣: ``` text <s>[INST]How to define a variable in Winglang[/INST] let a = 'Hello';</s> <s>[INST]How to create a new lambda[/INST] bring cloud; let func = new cloud.Function(inflight () => { log('Hello from the cloud!'); });</s> ``` 將其保存在電腦上名為`data`新資料夾中。 --- Autotrain,您的模型 ============== 我的電腦很弱,所以我決定使用更小的模型 - 7b 參數: `mistralai/Mistral-7B-v0.1` 訓練模型的方法有數百萬種。我們將使用 Huggingface Autotrain。我們將使用他們的 CLI,而不執行任何 Python 程式碼🚀 當您使用 Huggingface 的 Autotrain 時,您可以在電腦上訓練它(這裡是我的方法)或在他們的伺服器上訓練它(付費)並訓練更大的模型。 我的舊 Macbook Pro M1 2021 沒有 GPU。 讓我們安裝自動訓練。 ``` pip install -U autotrain-advanced autotrain setup > setup_logs.txt ``` 然後,我們需要做的就是執行 autotrain 指令: ``` autotrain llm \ --train \ --model "mistralai/Mistral-7B-Instruct-v0.2" \ --project-name "autotrain-wing" \ --data-path data/ \ --text-column text \ --lr "0.0002" \ --batch-size "1" \ --epochs "3" \ --block-size "1024" \ --warmup-ratio "0.1" \ --lora-r "16" \ --lora-alpha "32" \ --lora-dropout "0.05" \ --weight-decay "0.01" \ --gradient-accumulation "4" \ --quantization "int4" \ --mixed-precision "fp16" \ --peft ``` 完成後,您將擁有一個名為“autotrain-wing”的新目錄,其中包含新的微調模型🚀 --- 玩模型 --- 要使用模型,請先執行: ``` pip install transformers torch ``` 完成後,使用以下程式碼建立一個名為 invoke.py 的新 Python 檔案: ``` from transformers import pipeline # Path to your local model directory model_path = "./autotrain-wing" # Load the model and tokenizer from the local directory classifier = pipeline("text-classification", model=model_path, tokenizer=model_path) # Example text to classify text = "Example text to classify" result = classifier(text) print(result) ``` 然後您可以透過執行 CLI 命令來執行它: ``` python invoke.py ``` 你就完成了🚀 --- 繼續攻讀法學碩士 -------- 我仍在學習法學碩士。 我意識到的一件事是追蹤模型的變化並不容易。 你不能真正將它與 Git 一起使用,因為模型可以達到非常大的大小 > 100 GB;這沒有多大意義——git 不能很好地處理它。 更好的方法是使用名為[KitOps 的](https://github.com/jozu-ai/kitops/)工具。 我認為它很快就會成為法學碩士世界的標準,所以請確保你給這個庫加註星標,以便以後可以使用它。 1. 下載最新的[KitOps 版本](https://github.com/jozu-ai/kitops/releases/tag/v0.1.3)並[安裝它](https://kitops.ml/docs/cli/installation.html)。 2. 轉到模型資料夾並執行命令來打包您的 LLM: ``` kit pack . ``` 3. 您也可以透過執行將其推送到 Docker hub ``` kit pack . -t [your registry address]/[your repository name]/mymodelkit:latest ``` > 💡 要了解如何使用 DockerHub,[請檢查此](https://kitops.ml/docs/quick-start.html) {% cta https://github.com/jozu-ai/kitops %}⭐️ Star KitOps,以便您稍後可以再次找到它⭐️{% endcta %} [](https://github.com/jozu-ai/kitops) --- 我建立了一個新的 YouTube 頻道,主要是關於開源行銷:) (例如如何獲得星星、叉子和客戶端) 如果您對此感興趣,請隨時在這裡訂閱: https://www.youtube.com/@nevo-david?sub\_confirmation=1 --- 原文出處:https://dev.to/github20k/i-fine-tuned-my-model-on-a-new-programming-language-you-can-do-it-too-449
我見過數百種人工智慧工具,其中許多正在改變世界。 作為開發人員,總是有很多事情需要學習,因此專注於節省時間來處理重要的事情非常重要。 我將介紹 21 個供開發人員使用的工具,它們可以讓您的生活更輕鬆,特別是在開發人員體驗方面。 相信我,這份清單會讓你大吃一驚! 我們開始做吧。 --- 1. [Taipy](https://github.com/Avaiga/taipy) - 將資料和人工智慧演算法整合到生產就緒的 Web 應用程式中。 ---------------------------------------------------------------------------- 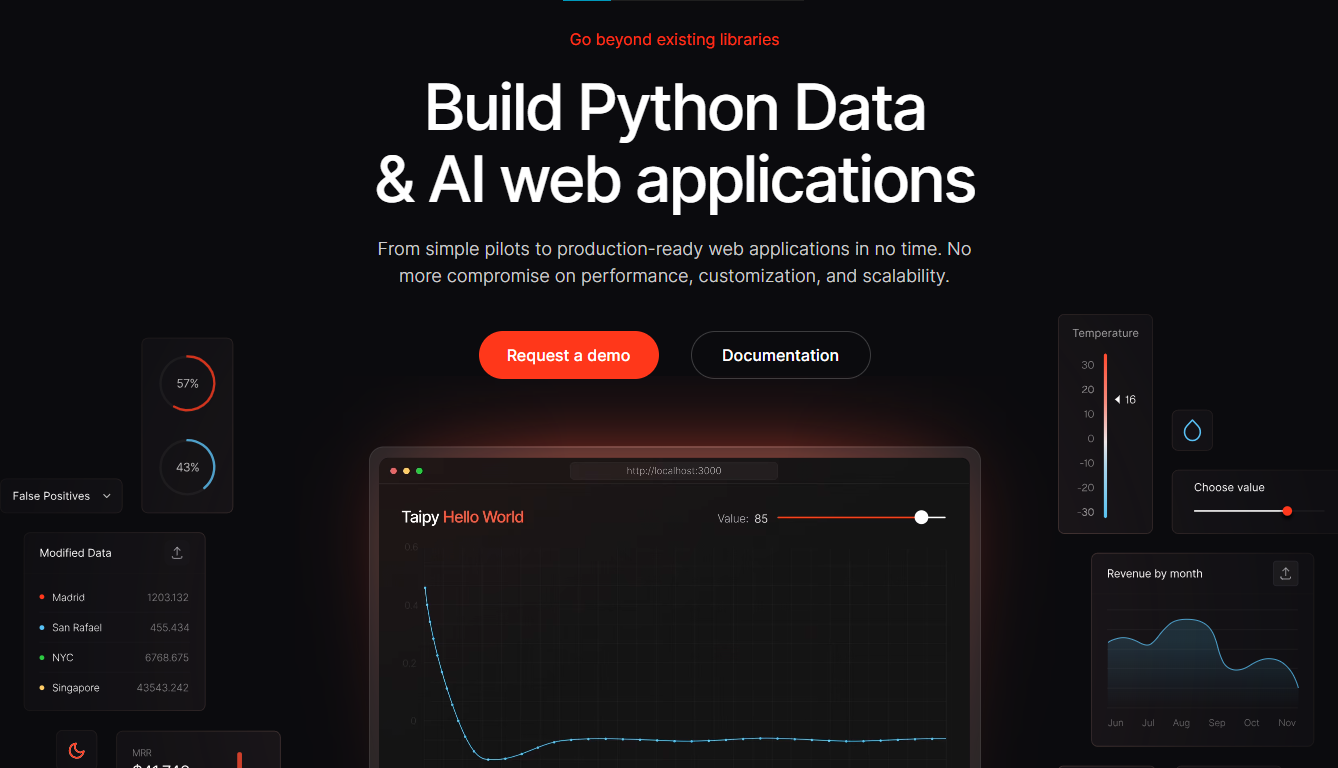 Taipy 是一個開源 Python 庫,可用於輕鬆的端到端應用程式開發,具有假設分析、智慧管道執行、內建調度和部署工具。 我相信你們大多數人都不明白 Taipy 用於為基於 Python 的應用程式建立 GUI 介面並改進資料流管理。 關鍵是性能,而 Taipy 是最佳選擇。 雖然 Streamlit 是一種流行的工具,但在處理大型資料集時,其效能可能會顯著下降,這使得它在生產級使用上不切實際。 另一方面,Taipy 在不犧牲性能的情況下提供了簡單性和易用性。透過嘗試 Taipy,您將親身體驗其用戶友好的介面和高效的資料處理。  Taipy 有許多整合選項,可以輕鬆地與領先的資料平台連接。  開始使用以下命令。 ``` pip install taipy ``` 我們來談談最新的[Taipy v3.1 版本](https://docs.taipy.io/en/latest/relnotes/)。 最新版本使得在 Taipy 的多功能零件物件中可視化任何 HTML 或 Python 物件成為可能。 這意味著[Folium](https://python-visualization.github.io/folium/latest/) 、 [Bokeh](https://bokeh.org/) 、 [Vega-Altair](https://altair-viz.github.io/)和[Matplotlib](https://matplotlib.org/)等程式庫現在可用於視覺化。 這也帶來了對[Plotly python](https://plotly.com/python/)的原生支持,使繪製圖表變得更加容易。 他們還使用分散式運算提高了效能,但最好的部分是 Taipy,它的所有依賴項現在都與 Python 3.12 完全相容,因此您可以在使用 Taipy 進行專案的同時使用最新的工具和程式庫。 您可以閱讀[文件](https://docs.taipy.io/en/latest/)。  另一個有用的事情是,Taipy 團隊提供了一個名為[Taipy Studio](https://docs.taipy.io/en/latest/manuals/studio/)的 VSCode 擴充功能來加速 Taipy 應用程式的建置。 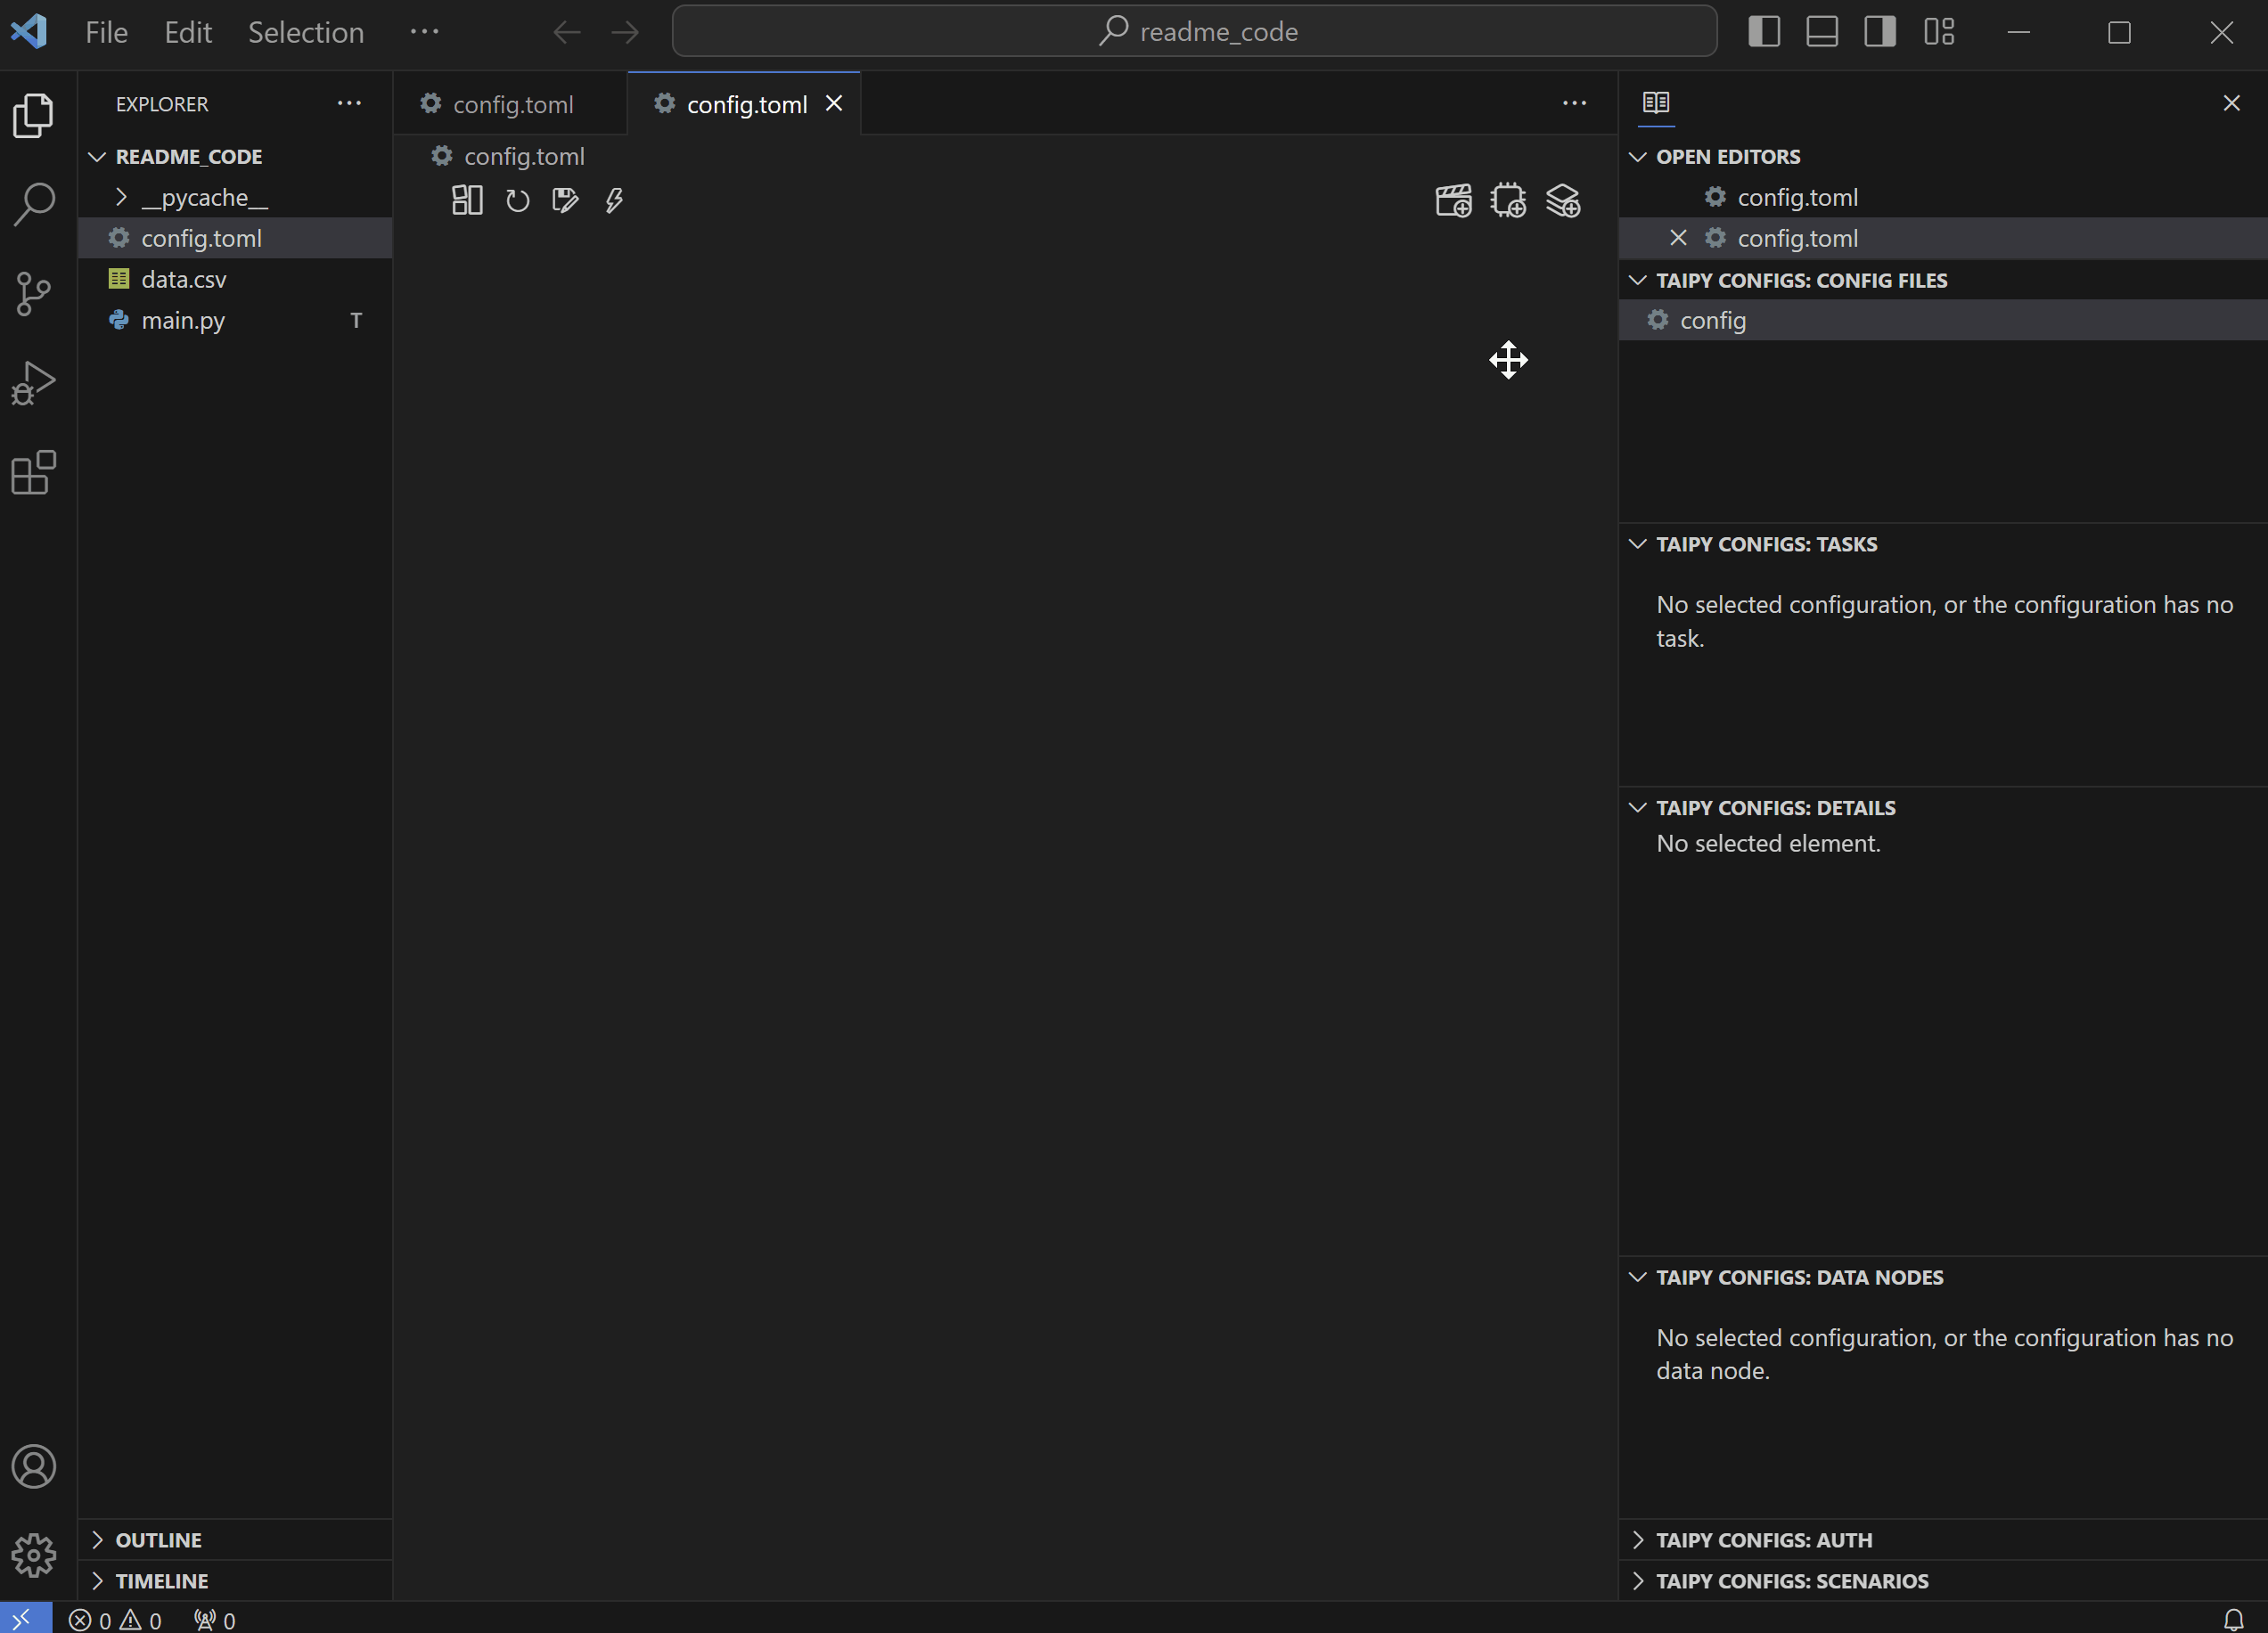 您也可以使用 Taipy 雲端部署應用程式。 如果您想閱讀部落格來了解程式碼庫結構,您可以閱讀 HuggingFace[的使用 Taipy 在 Python 中為您的 LLM 建立 Web 介面](https://huggingface.co/blog/Alex1337/create-a-web-interface-for-your-llm-in-python)。 嘗試新技術通常很困難,但 Taipy 提供了[10 多個演示教程,](https://docs.taipy.io/en/release-3.1/gallery/)其中包含程式碼和適當的文件供您遵循。 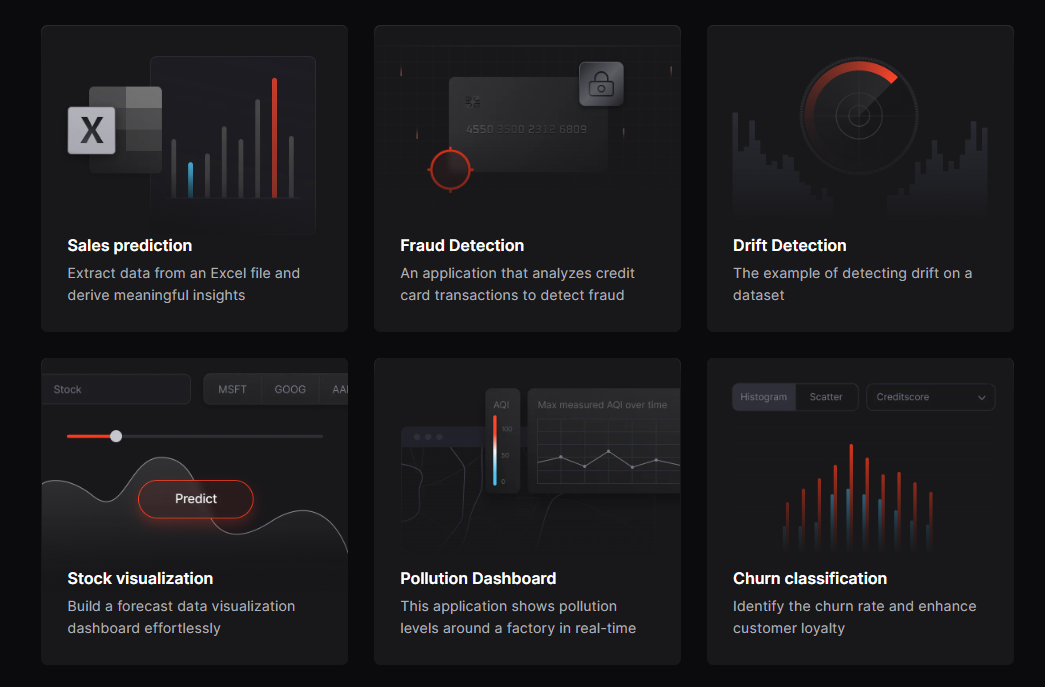 例如,一些演示範例和專案想法: - [即時污染儀表板](https://docs.taipy.io/en/release-3.0/knowledge_base/demos/pollution_sensors/) 使用工廠周圍的感測器測量空氣品質的用例,展示 Taipy 儀表板流資料的能力。檢查[GitHub 儲存庫](https://github.com/Avaiga/demo-realtime-pollution)。 - [詐欺辨識](https://docs.taipy.io/en/release-3.0/knowledge_base/demos/fraud_detection/) Taipy 應用程式可分析信用卡交易以偵測詐欺行為。檢查[GitHub 儲存庫](https://github.com/Avaiga/demo-fraud-detection)。 - [新冠儀表板](https://docs.taipy.io/en/release-3.0/knowledge_base/demos/covid_dashboard/) 這使用 2020 年的 Covid 資料集。還有一個預測頁面來預測傷亡人數。檢查[GitHub 儲存庫](https://github.com/Avaiga/demo-covid-dashboard)。 - [建立 LLM 聊天機器人](https://docs.taipy.io/en/release-3.0/knowledge_base/demos/chatbot/) 該演示展示了 Taipy 使最終用戶能夠使用 LLM 執行推理的能力。在這裡,我們使用 GPT-3 建立一個聊天機器人,並將對話顯示在互動式聊天介面中。您可以輕鬆更改程式碼以使用任何其他 API 或模型。檢查[GitHub 儲存庫](https://github.com/Avaiga/demo-chatbot)。 - [即時人臉辨識](https://docs.taipy.io/en/release-3.0/knowledge_base/demos/face_recognition/) 該演示將人臉辨識無縫整合到我們的平台中,使用網路攝影機提供使用者友好的即時人臉偵測體驗。檢查[GitHub 儲存庫](https://github.com/Avaiga/demo-face-recognition)。 這些用例非常驚人,所以一定要檢查一下。 Taipy 在 GitHub 上有 8.2k+ Stars,並且處於`v3.1`版本,因此它們正在不斷改進。 {% cta https://github.com/Avaiga/taipy %} Star Taipy ⭐️ {% endcta %} --- 2. [DevToys](https://github.com/DevToys-app/DevToys) - 開發者的瑞士軍刀。 ----------------------------------------------------------------  DevToys 協助完成日常開發任務,例如格式化 JSON、比較文字和測試 RegExp。 這樣,就無需使用不可信的網站來處理您的資料執行簡單的任務。透過智慧型偵測,DevToys 可以偵測用於複製到 Windows 剪貼簿的資料的最佳工具。 緊湊的覆蓋範圍讓您可以保持應用程式較小並位於其他視窗之上。最好的部分是可以同時使用應用程式的多個實例。 我可以肯定地說,開發人員甚至不知道這個很棒的專案。 最後是一款專為 Windows 生態系統設計的軟體。哈哈! 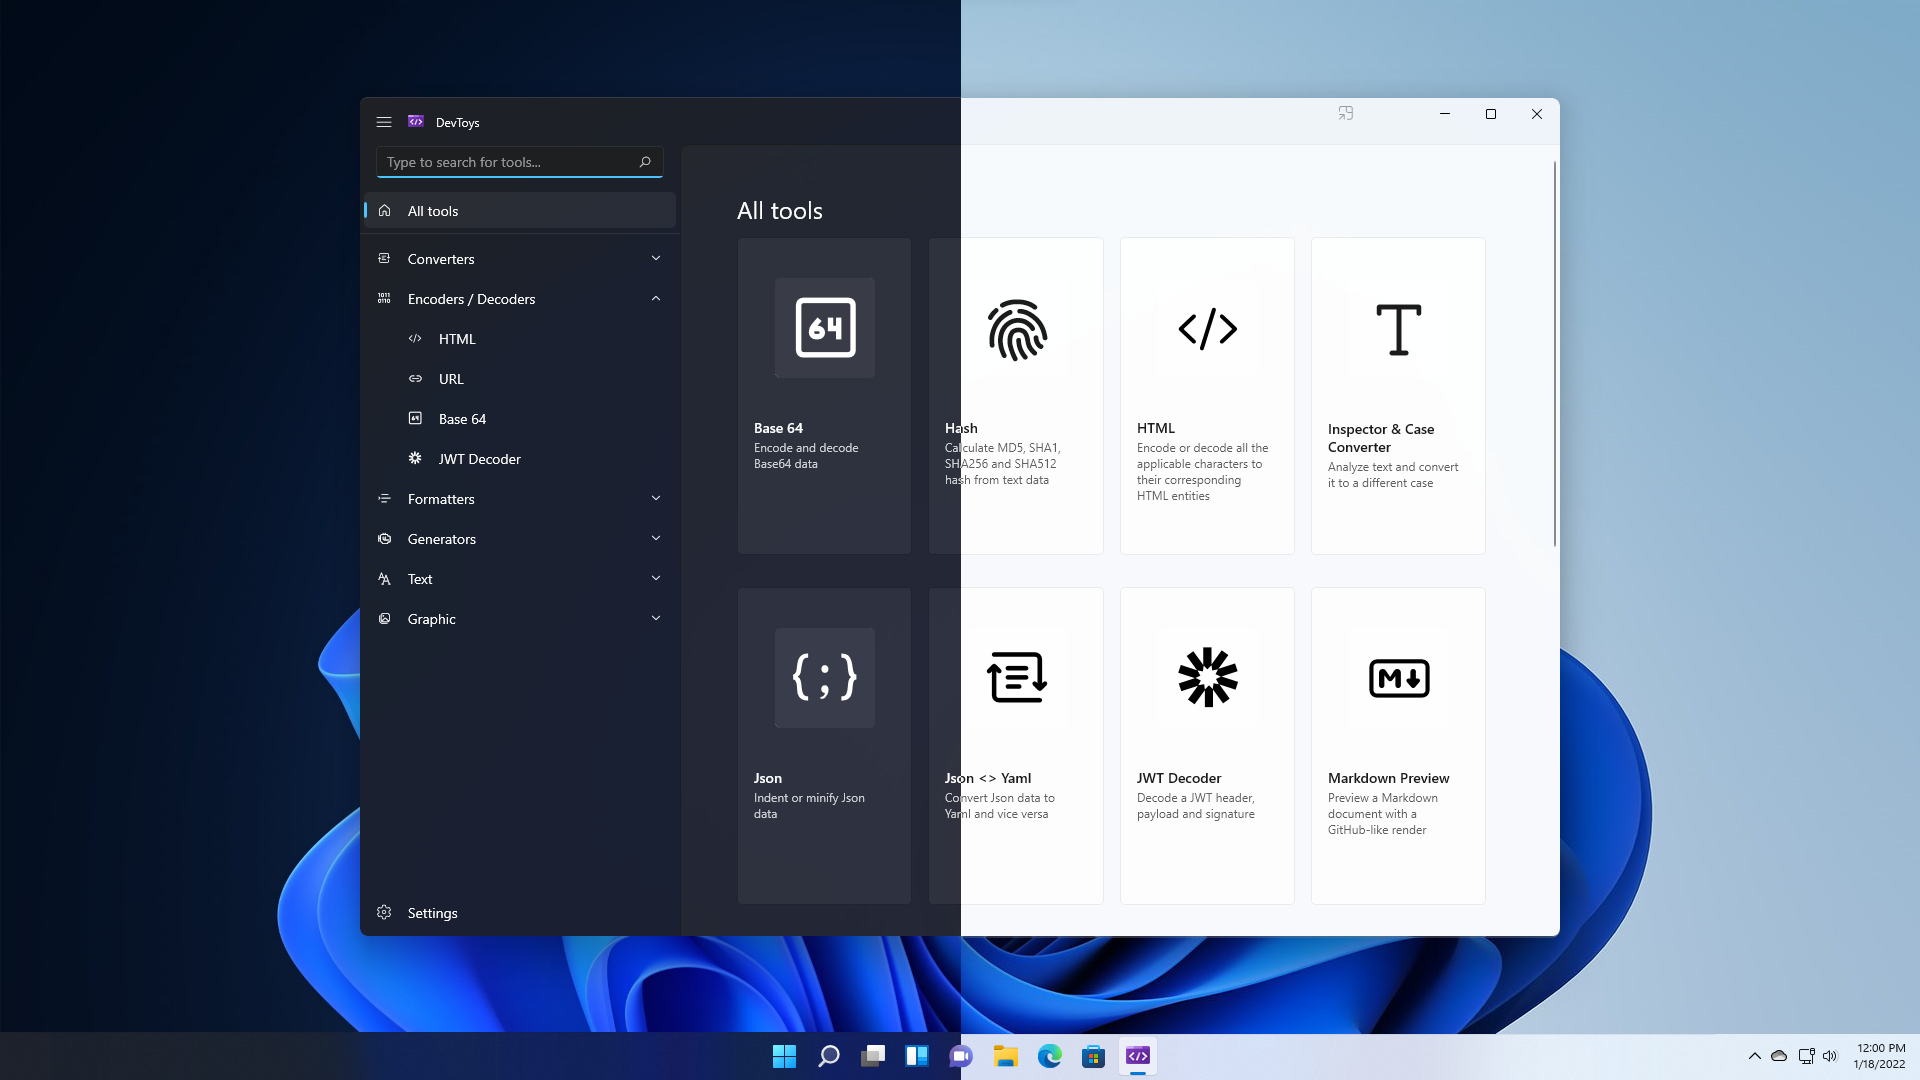 他們提供的一些工具是: > 轉換器 - JSON <> YAML - 時間戳 - 數基數 - 規劃任務解析器 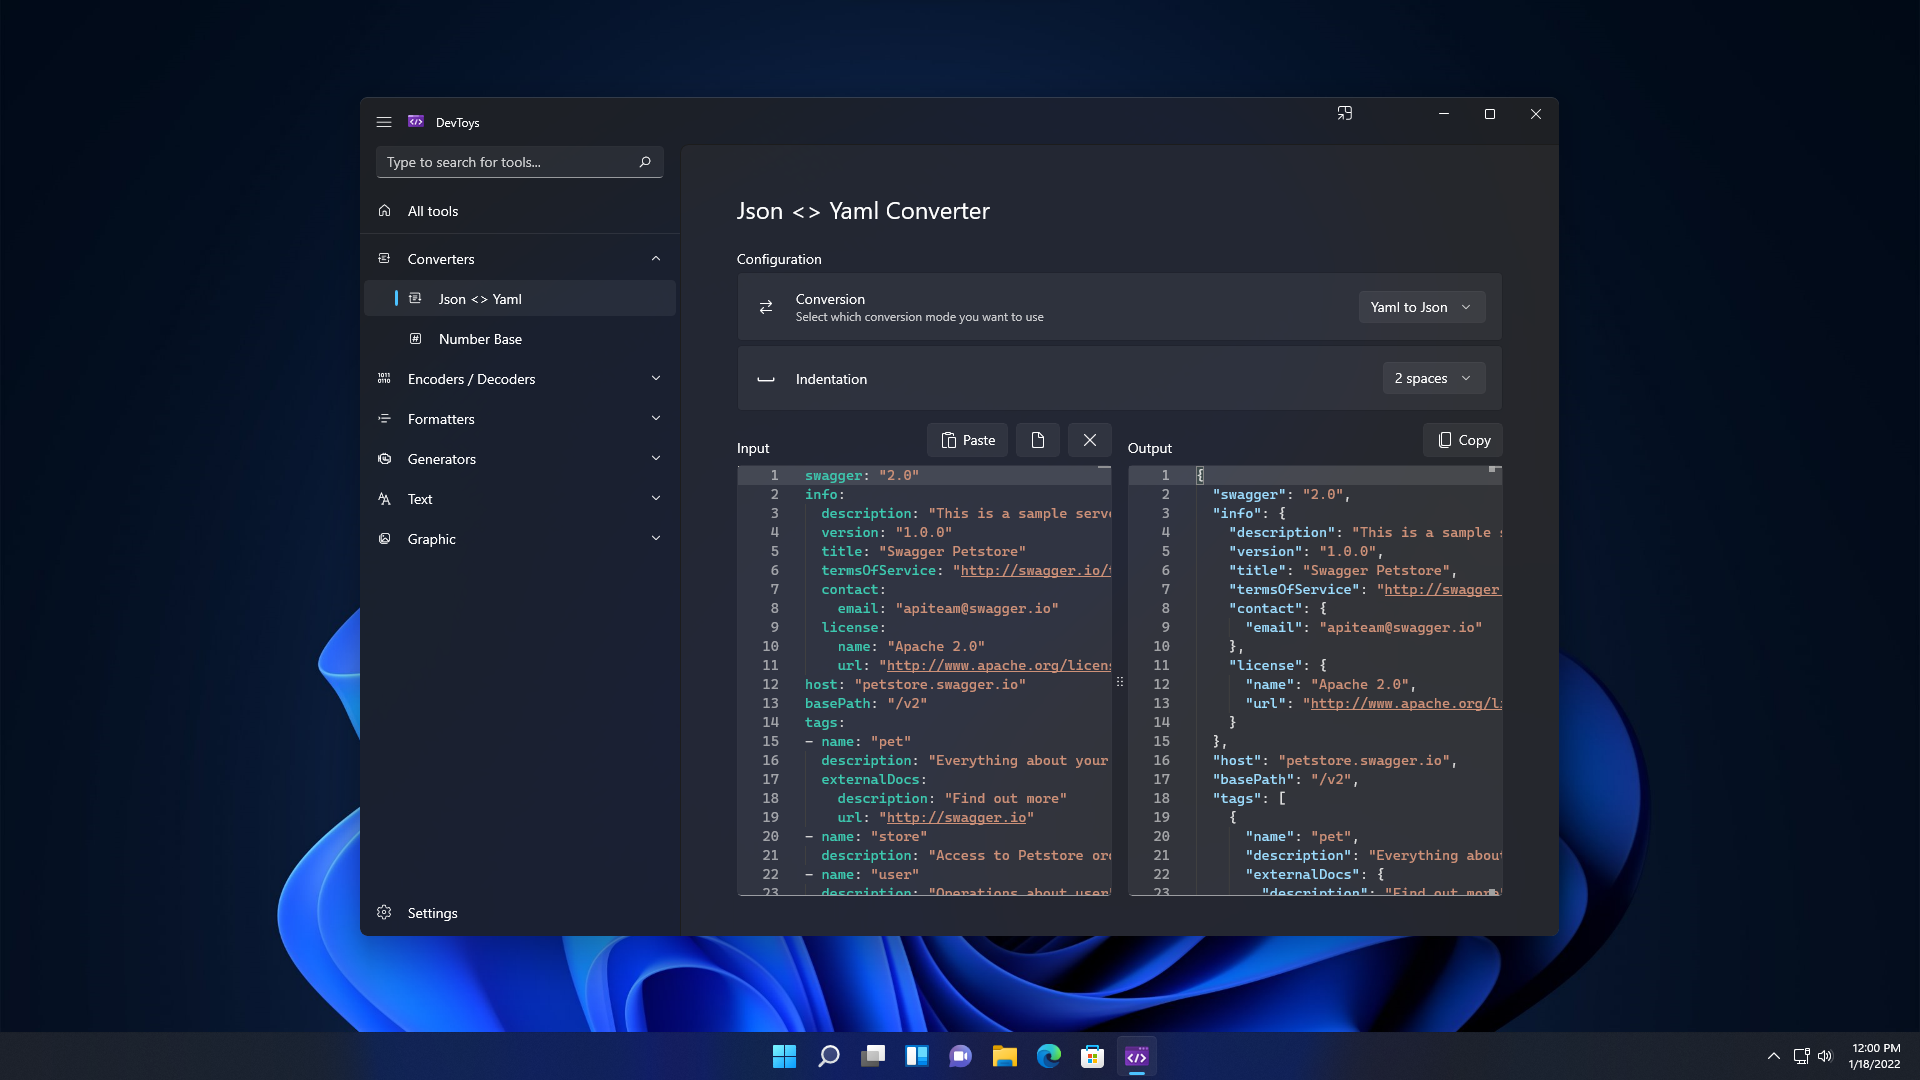 > 編碼器/解碼器 - 超文本標記語言 - 網址 - Base64 文字與圖片 - 壓縮包 - 智威湯遜解碼器  > 格式化程式 - JSON - SQL - XML  > 發電機 - 哈希(MD5、SHA1、SHA256、SHA512) - UUID 1 和 4 - 洛雷姆·伊普蘇姆 - 校驗和  > 文字 - 逃脫/逃脫 - 檢驗員和箱子轉換器 - 正規表示式測試器 - 文字比較 - XML驗證器 - 降價預覽  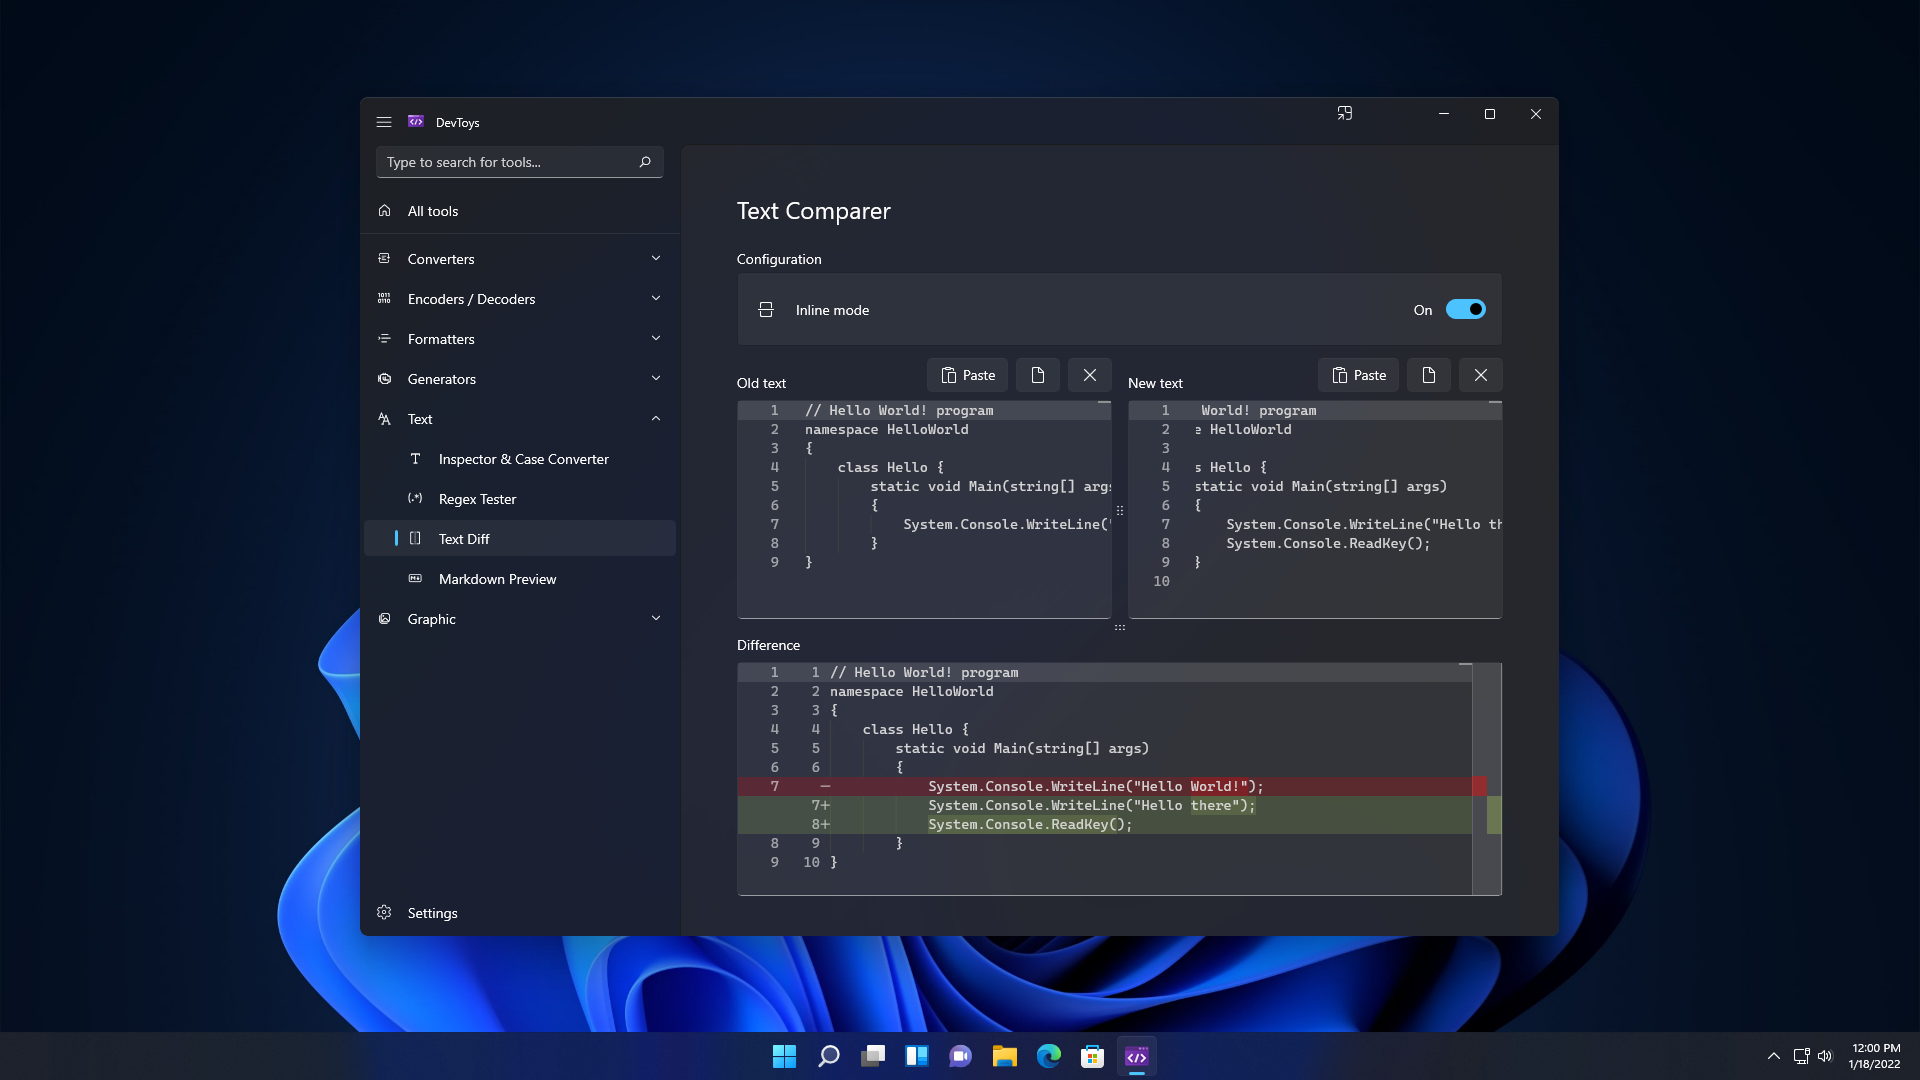 > 形象的 - 色盲模擬器 - 顏色選擇器和對比度 - PNG / JPEG 壓縮器 - 影像轉換器 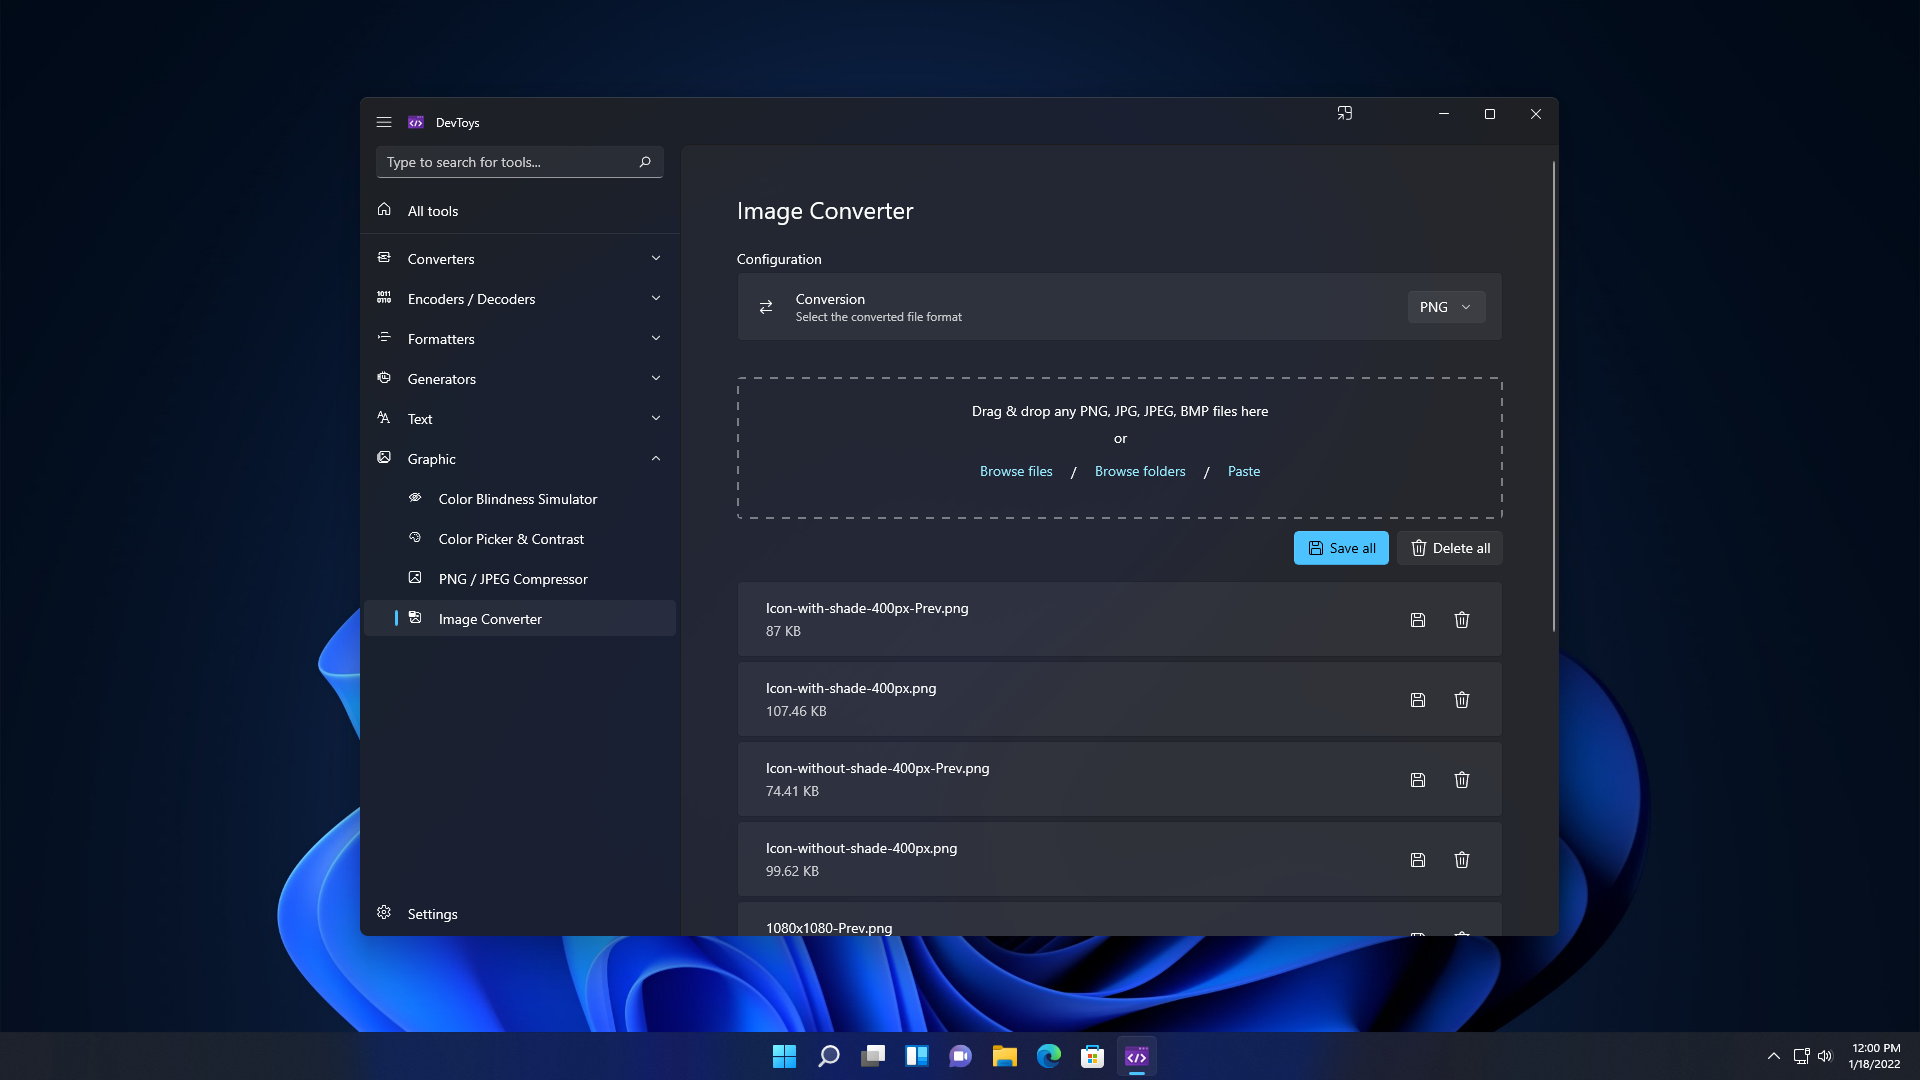 我不了解你,但我不會錯過這個! 您可以閱讀[如何執行 DevToys](https://github.com/DevToys-app/DevToys?tab=readme-ov-file#how-to-run-devtoys) 。 關於許可證的註解。 DevToys 使用的授權允許將應用程式作為試用軟體或共享軟體重新分發而無需進行任何更改。然而,作者 Etienne BAUDOUX 和 BenjaminT 不希望你這樣做。如果您認為自己有充分的理由這樣做,請先與我們聯絡討論。 他們在 GitHub 上有 23k Stars,並且使用 C#。 {% cta https://github.com/DevToys-app/DevToys %} 明星 DevToys ⭐️ {% endcta %} --- 3. [Pieces](https://github.com/pieces-app) - 您的工作流程副駕駛。 ------------------------------------------------------- 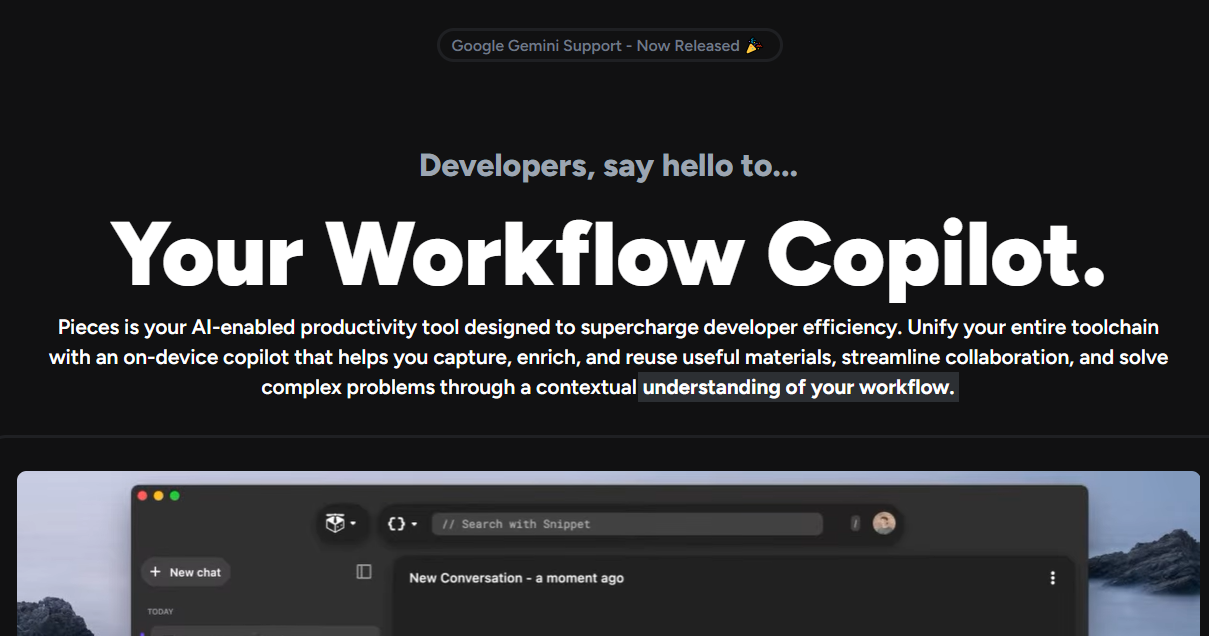 Pieces 是一款支援人工智慧的生產力工具,旨在透過智慧程式碼片段管理、情境化副駕駛互動和主動呈現有用材料來幫助開發人員管理混亂的工作流程。 它最大限度地減少了上下文切換、簡化了工作流程並提升了整體開發體驗,同時透過完全離線的 AI 方法維護了工作的隱私和安全性。太棒了:D 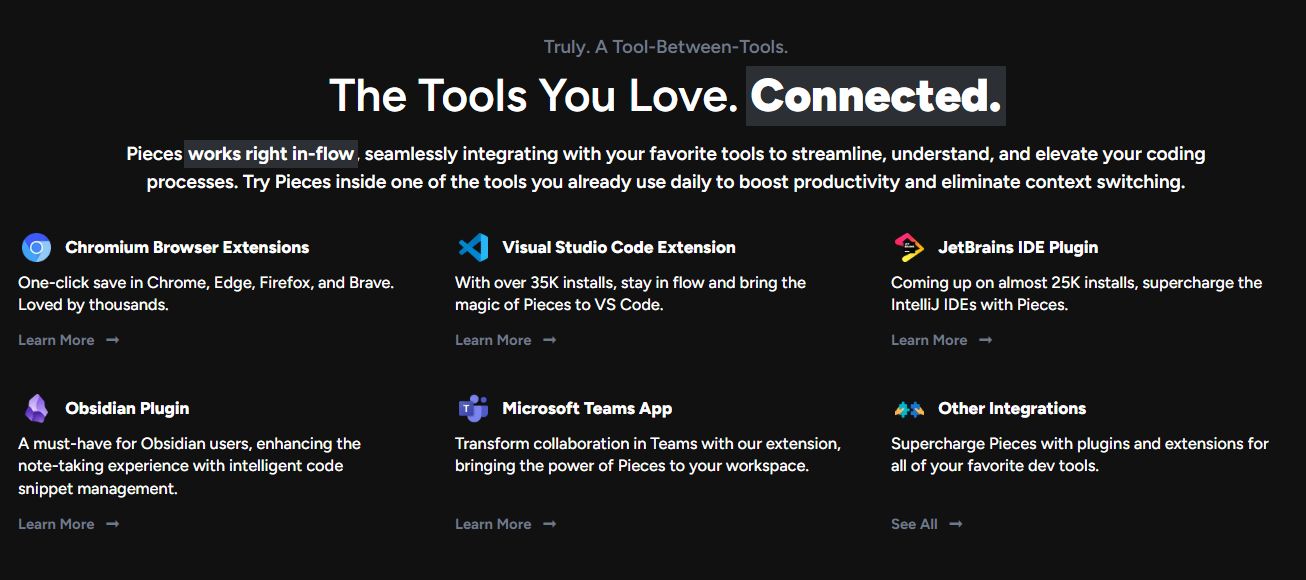 它與您最喜歡的工具無縫集成,以簡化、理解和提升您的編碼流程。 它具有比表面上看到的更令人興奮的功能。 - 它可以透過閃電般快速的搜尋體驗找到您需要的材料,讓您根據您的喜好透過自然語言、程式碼、標籤和其他語義進行查詢。可以放心地說“您的個人離線谷歌”。 - Pieces 使用 OCR 和 Edge-ML 升級螢幕截圖,以提取程式碼並修復無效字元。因此,您可以獲得極其準確的程式碼提取和深度元資料豐富。 您可以查看 Pieces 可用[功能的完整清單](https://pieces.app/features)。 您可以閱讀[文件](https://docs.pieces.app/)並存取[網站](https://pieces.app/)。 他們為 Pieces OS 用戶端提供了一系列 SDK 選項,包括[TypeScript](https://github.com/pieces-app/pieces-os-client-sdk-for-typescript) 、 [Kotlin](https://github.com/pieces-app/pieces-os-client-sdk-for-kotlin) 、 [Python](https://github.com/pieces-app/pieces-os-client-sdk-for-python)和[Dart](https://github.com/pieces-app/pieces-os-client-sdk-for-dart) 。 就開源流行度而言,他們仍然是新的,但他們的社群是迄今為止我見過的最好的社群之一。加入他們,成為 Pieces 的一部分! {% cta https://github.com/pieces-app/ %} 星星碎片 ⭐️ {% endcta %} --- 4. [Infisical-](https://github.com/Infisical/infisical)秘密管理平台。 --------------------------------------------------------------  Infisical 是一個開源秘密管理平台,團隊可以用它來集中 API 金鑰、資料庫憑證和設定等秘密。 他們讓每個人(而不僅僅是安全團隊)都可以更輕鬆地進行秘密管理,這意味著從頭開始重新設計整個開發人員體驗。 就我個人而言,我不介意使用 .env 文件,因為我並不特別謹慎。不過,您可以閱讀[立即停止使用 .env 檔案!](https://dev.to/gregorygaines/stop-using-env-files-now-kp0)由格雷戈里來理解。 他們提供了四種 SDK,分別用於<a href="">Node.js</a> 、 <a href="">Python</a> 、 <a href="">Java</a>和<a href="">.Net</a> 。您可以自行託管或使用他們的雲端。 開始使用以下 npm 指令。 ``` npm install @infisical/sdk ``` 這是使用入門 (Node.js SDK) 的方法。 ``` import { InfisicalClient, LogLevel } from "@infisical/sdk"; const client = new InfisicalClient({ clientId: "YOUR_CLIENT_ID", clientSecret: "YOUR_CLIENT_SECRET", logLevel: LogLevel.Error }); const secrets = await client.listSecrets({ environment: "dev", projectId: "PROJECT_ID", path: "/foo/bar/", includeImports: false }); ``` 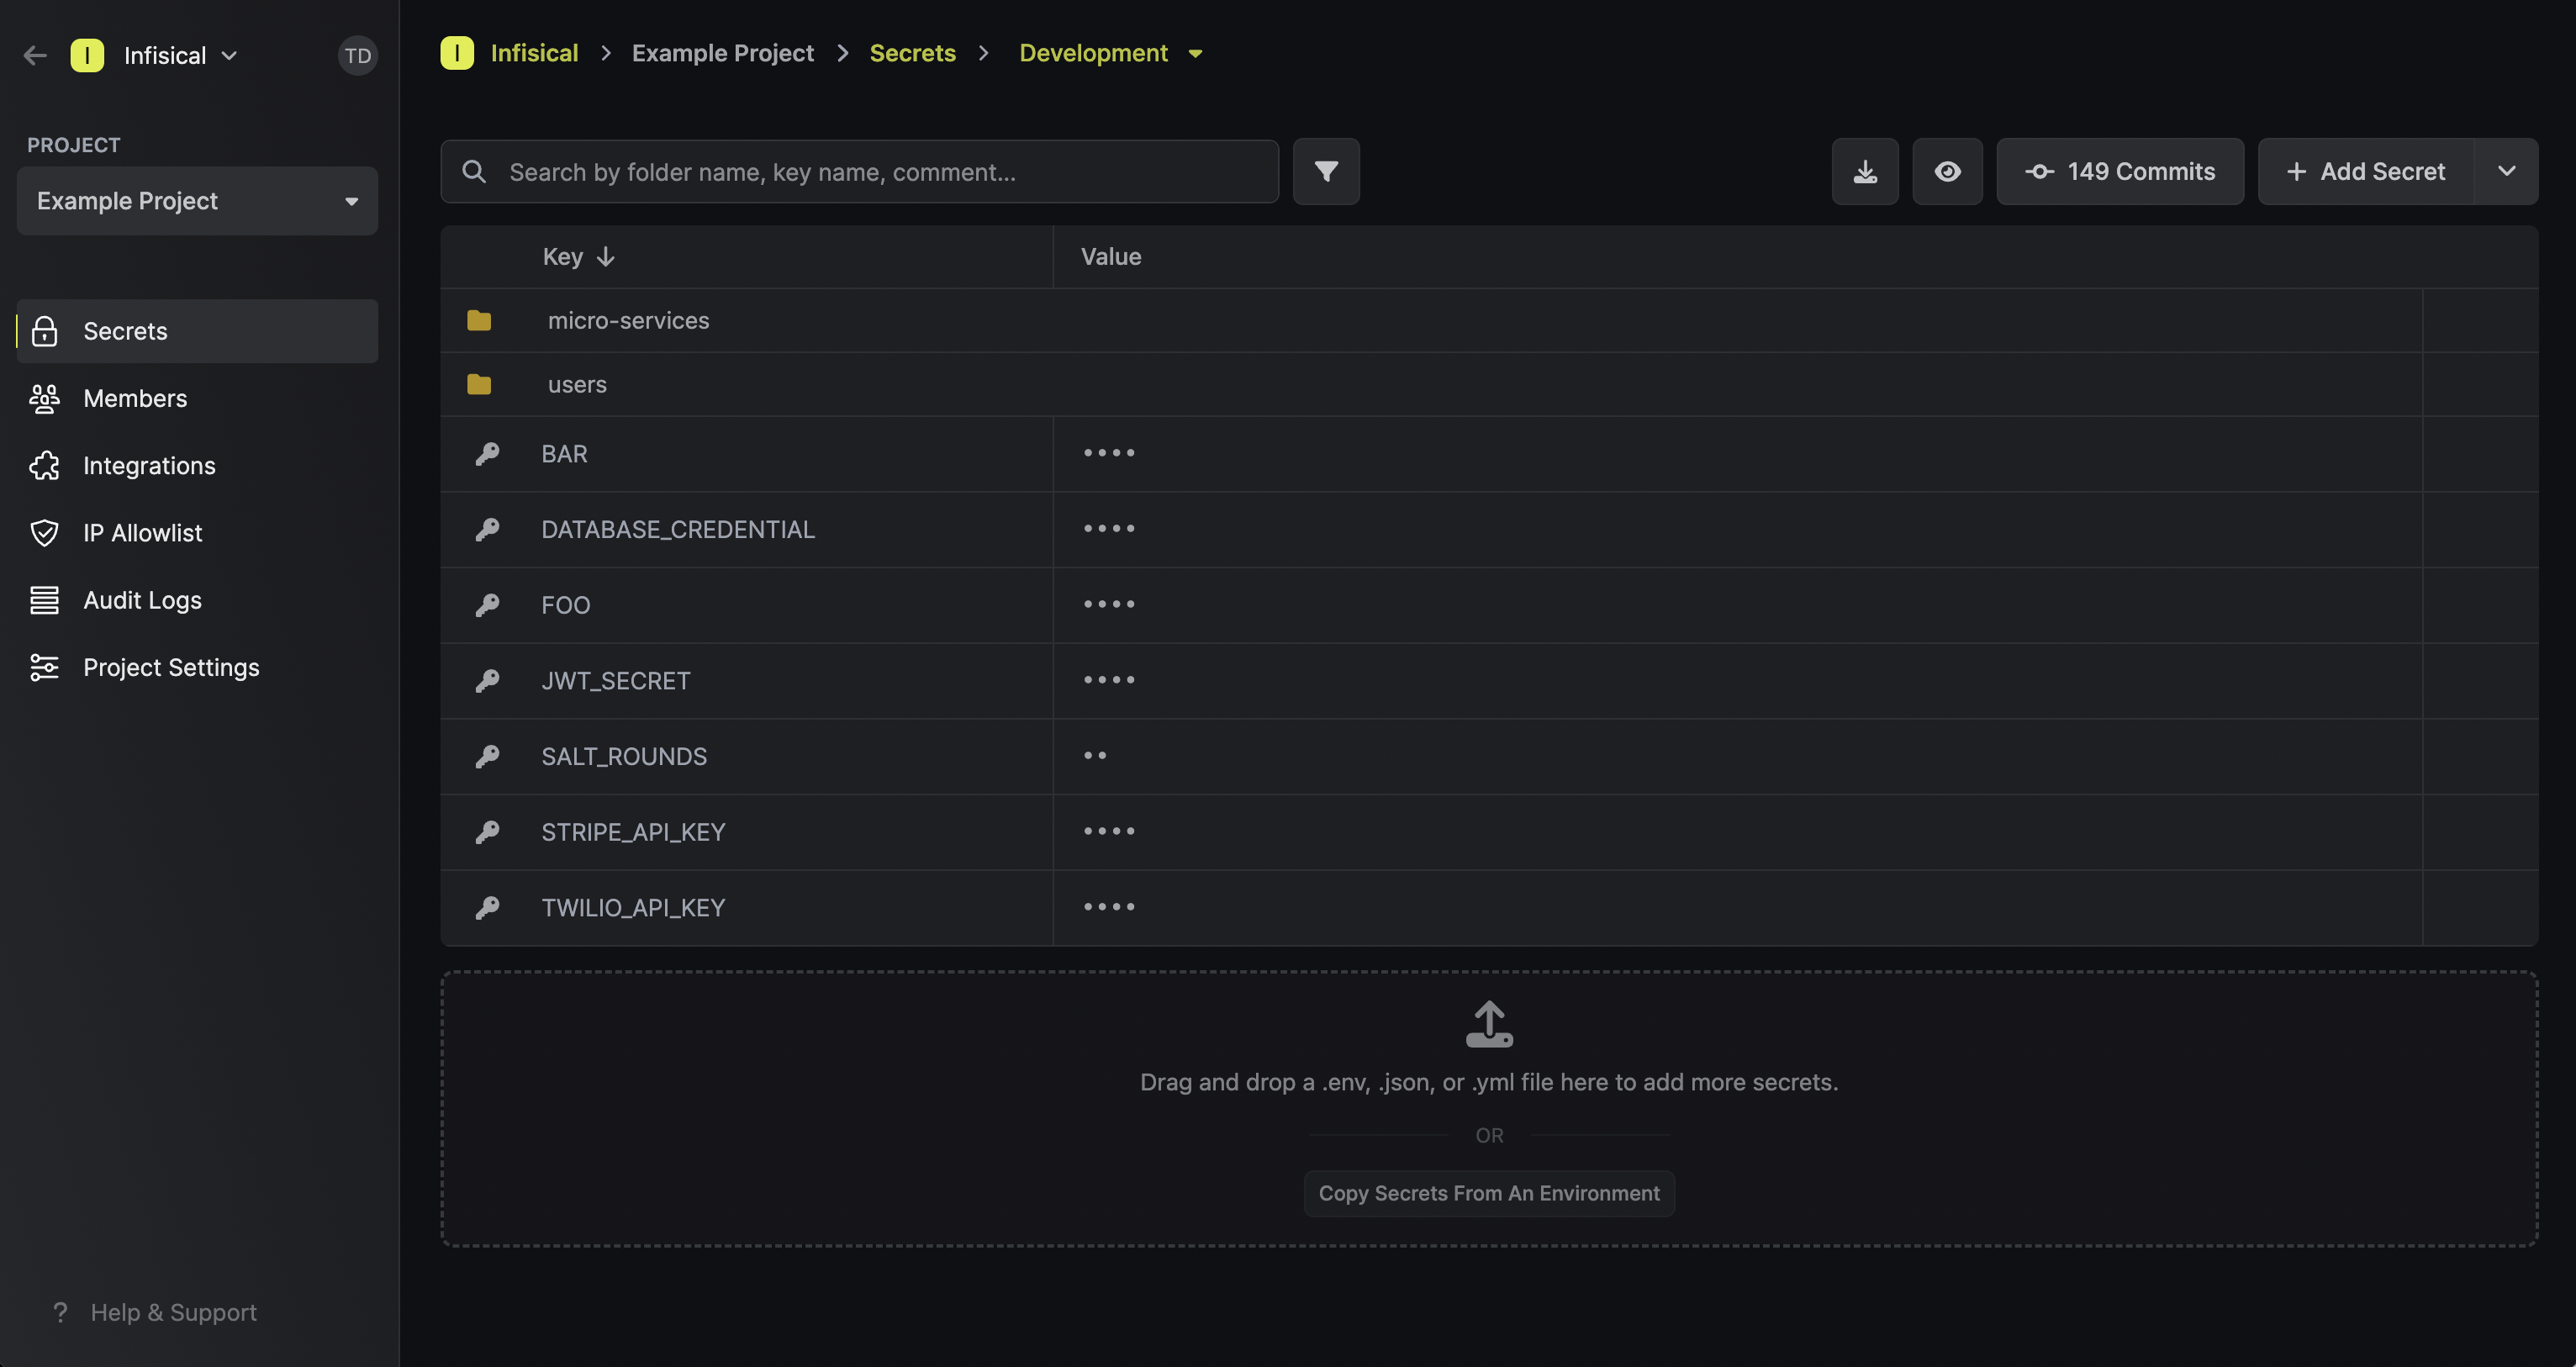 Infisical 還提供了一組工具來自動防止 git 歷史記錄的秘密洩露。可以使用預提交掛鉤或透過與 GitHub 等平台直接整合在 Infisical CLI 層級上設定此功能。 您可以閱讀[文件](https://infisical.com/docs/documentation/getting-started/introduction)並檢查如何[安裝 CLI](https://infisical.com/docs/cli/overview) ,這是使用它的最佳方式。 Infisical 還可用於將機密注入 Kubernetes 叢集和自動部署,以便應用程式使用最新的機密。有很多整合選項可用。  在使用整個原始程式碼之前一定要檢查他們的[許可證](https://github.com/Infisical/infisical/blob/main/LICENSE),因為他們有一些受 MIT Expat 保護的企業級程式碼,但不用擔心,大部分程式碼都是免費使用的。 他們在 GitHub 上擁有超過 11k 顆星星,並且發布了超過 125 個版本,因此他們正在不斷發展。另外,Infiscial CLI 的安裝次數超過 540 萬次,因此非常值得信賴。 {% cta https://github.com/Infisical/infisical %} 明星 Infisical ⭐️ {% endcta %} --- 5. [Mintlify](https://github.com/mintlify/writer) - 在建置時出現的文件。 -------------------------------------------------------------- 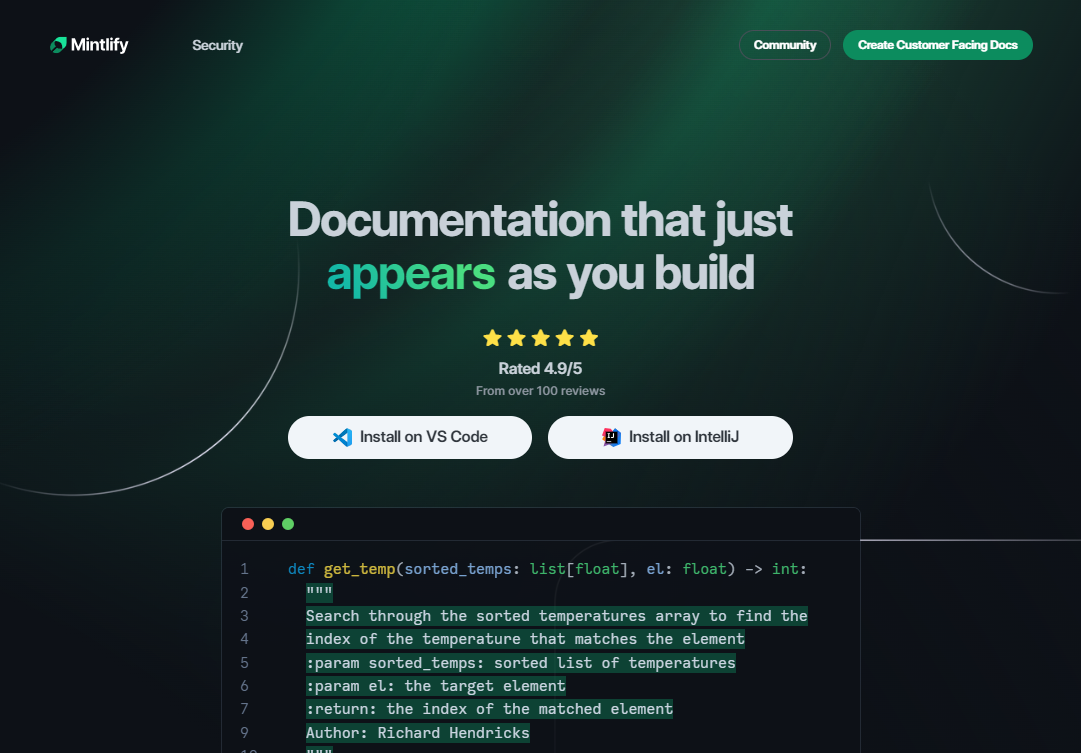 Mintlify 是一款由人工智慧驅動的文件編寫器,您只需 1 秒鐘即可編寫程式碼文件 :D 幾個月前我發現了 Mintlify,從那時起我就一直是它的粉絲。我見過很多公司使用它,甚至我使用我的商務電子郵件產生了完整的文件,結果證明這是非常簡單和體面的。如果您需要詳細的文件,Mintlify 就是解決方案。 主要用例是根據我們將在此處討論的程式碼產生文件。當您編寫程式碼時,它會自動記錄程式碼,以便其他人更容易跟上。 您可以安裝[VSCode 擴充功能](https://marketplace.visualstudio.com/items?itemName=mintlify.document)或將其安裝在[IntelliJ](https://plugins.jetbrains.com/plugin/18606-mintlify-doc-writer)上。 您只需突出顯示程式碼或將遊標放在要記錄的行上。然後點選「編寫文件」按鈕(或按 ⌘ + 。) 您可以閱讀[文件](https://github.com/mintlify/writer?tab=readme-ov-file#%EF%B8%8F-mintlify-writer)和[安全指南](https://writer.mintlify.com/security)。 如果您更喜歡教程,那麼您可以觀看[Mintlify 的工作原理](https://www.loom.com/embed/3dbfcd7e0e1b47519d957746e05bf0f4)。它支援 10 多種程式語言,並支援許多文件字串格式,例如 JSDoc、reST、NumPy 等。 順便說一句,他們的網站連結是[writer.mintlify.com](https://writer.mintlify.com/) ;回購協議中目前的似乎是錯誤的。 Mintlify 是一個方便的工具,用於記錄程式碼,這是每個開發人員都應該做的事情。它使其他人更容易有效地理解您的程式碼。 它在 GitHub 上有大約 2.5k 顆星,基於 TypeScript 建置,受到許多開發人員的喜愛。 {% cta https://github.com/mintlify/writer %} Star Mintlify ⭐️ {% endcta %} --- 6. [Replexica](https://github.com/replexica/replexica) - 用於 React 的 AI 支援的 i18n 工具包。 ------------------------------------------------------------------------------------  在地化方面的困難是真實存在的,因此人工智慧的幫助絕對是一個很酷的概念。 Replexica 是 React 的 i18n 工具包,可快速發布多語言應用程式。它不需要將文字提取到 JSON 檔案中,並使用 AI 支援的 API 進行內容處理。 它有以下兩個部分: 1. Replexica Compiler - React 的開源編譯器插件。 2. Replexica API - 雲端中的 i18n API,使用 LLM 執行翻譯。 (基於使用情況,它有免費套餐) 支援的一些 i18n 格式包括: 1. 無 JSON 的 Replexica 編譯器格式。 2. Markdown 內容的 .md 檔案。 3. 基於舊版 JSON 和 YAML 的格式。 當他們達到 500 星時,他們也在 DEV 上發布了官方公告。我是第一批讀者之一(少於 3 個反應)。 它們涵蓋了很多內容,因此您應該閱讀 Max 的[《We Got 500 Stars What Next》](https://dev.to/maxprilutskiy/we-got-500-github-stars-whats-next-2njc) 。 為了給出 Replexica 背後的總體思路,這是基本 Next.js 應用程式所需的唯一更改,以使其支援多語言。 開始使用以下 npm 指令。 ``` // install pnpm add replexica @replexica/react @replexica/compiler // login to Replexica API. pnpm replexica auth --login ``` 您可以這樣使用它。 ``` // next.config.mjs // Import Replexica Compiler import replexica from '@replexica/compiler'; /** @type {import('next').NextConfig} */ const nextConfig = {}; // Define Replexica configuration /** @type {import('@replexica/compiler').ReplexicaConfig} */ const replexicaConfig = { locale: { source: 'en', targets: ['es'], }, }; // Wrap Next.js config with Replexica Compiler export default replexica.next( replexicaConfig, nextConfig, ); ``` 您可以閱讀如何[開始使用](https://github.com/replexica/replexica/blob/main/getting-started.md)以及清楚記錄的有關[幕後使用內容的](https://github.com/replexica/replexica?tab=readme-ov-file#whats-under-the-hood)內容。 Replexica 編譯器支援 Next.js App Router,Replexica API 支援英文🇺🇸和西班牙文🇪🇸。他們計劃接下來發布 Next.js Pages Router + 法語🇫🇷語言支援! 他們在 GitHub 上擁有 740 多個 Star,並且基於 TypeScript 建置。您應該密切關注該專案以獲得進一步進展! {% cta https://github.com/replexica/replexica %} Star Replexica ⭐️ {% endcta %} --- 7. [Flowise](https://github.com/FlowiseAI/Flowise) - 拖放 UI 來建立您的客製化 LLM 流程。 ---------------------------------------------------------------------------  Flowise 是一款開源 UI 視覺化工具,用於建立客製化的 LLM 編排流程和 AI 代理程式。 開始使用以下 npm 指令。 ``` npm install -g flowise npx flowise start OR npx flowise start --FLOWISE_USERNAME=user --FLOWISE_PASSWORD=1234 ``` 這就是整合 API 的方式。 ``` import requests url = "/api/v1/prediction/:id" def query(payload): response = requests.post( url, json = payload ) return response.json() output = query({ question: "hello!" )} ```  您可以閱讀[文件](https://docs.flowiseai.com/)。  雲端主機不可用,因此您必須使用這些[說明](https://github.com/FlowiseAI/Flowise?tab=readme-ov-file#-self-host)自行託管。 讓我們探討一些用例: - 假設您有一個網站(可以是商店、電子商務網站或部落格),並且您希望廢棄該網站的所有相關連結,並讓法學碩士回答您網站上的任何問題。您可以按照此[逐步教學](https://docs.flowiseai.com/use-cases/web-scrape-qna)來了解如何實現相同的目標。  - 您還可以建立一個自訂工具,該工具將能夠呼叫 Webhook 端點並將必要的參數傳遞到 Webhook 主體中。請依照本[指南](https://docs.flowiseai.com/use-cases/webhook-tool)使用 Make.com 建立 Webhook 工作流程。  還有許多其他用例,例如建立 SQL QnA 或與 API 互動。 FlowiseAI 在 GitHub 上擁有超過 27,500 個 Star,並擁有超過 10,000 個分叉,因此具有良好的整體比率。 {% cta https://github.com/FlowiseAI/Flowise %} 明星 Flowise ⭐️ {% endcta %} --- 8. [Hexo](https://github.com/hexojs/hexo) - 一個快速、簡單且功能強大的部落格框架。 --------------------------------------------------------------- 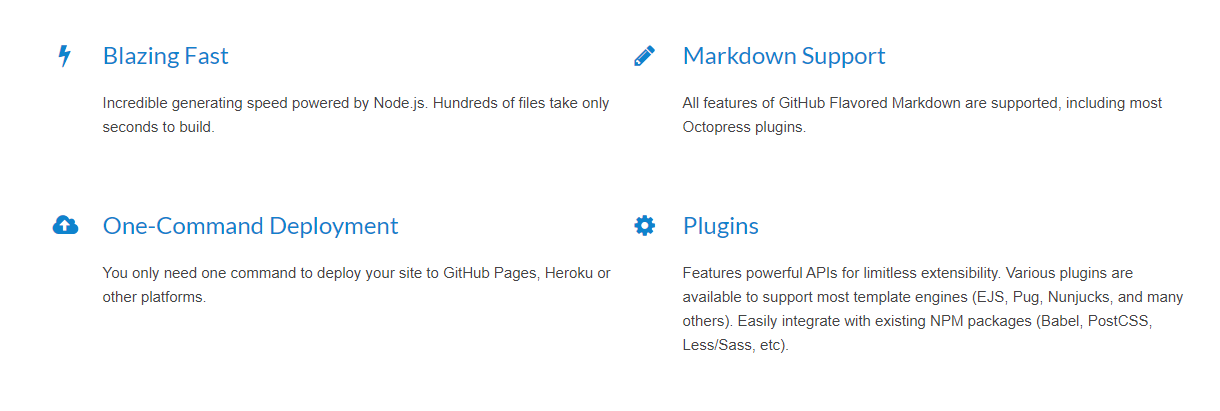 大多數開發人員更喜歡自己的博客,如果您也是如此。 Hexo 可能是你不知道的工具。 Hexo 支援許多功能,例如超快的生成速度,支援 GitHub Flavored Markdown 和大多數 Octopress 插件,提供對 GitHub Pages、Heroku 等的一命令部署,以及可實現無限擴展性的強大 API 和數百個主題和插件。 這意味著您可以用 Markdown(或其他標記語言)編寫帖子,Hexo 在幾秒鐘內生成具有漂亮主題的靜態檔案。 開始使用以下 npm 指令。 ``` npm install hexo-cli -g ``` 您可以這樣使用它。 ``` // Setup your blog hexo init blog // Start the server hexo server // Create a new post hexo new "Hello Hexo" ``` 您可以閱讀[文件](https://hexo.io/docs/),查看 Hexo 提供的所有[400 多個外掛程式](https://hexo.io/plugins/)和[主題集](https://hexo.io/themes/)。據我所知,這些外掛程式支援廣泛的用例,例如 Hexo 的 Ansible 部署器外掛程式。 您可以查看有關在[Hexo 上編寫和組織內容的](https://www.youtube.com/watch?v=AIqBubK6ZLc&t=6s)YouTube 教學。 Hexo 在 GitHub 上擁有超過 38,000 顆星,並被 GitHub 上超過 125,000 名開發者使用。它們位於`v7`版本中,解壓縮後大小為`629 kB` 。 {% cta https://github.com/hexojs/hexo %} Star Hexo ⭐️ {% endcta %} --- 9.[螢幕截圖到程式碼](https://github.com/abi/screenshot-to-code)- 放入螢幕截圖並將其轉換為乾淨的程式碼。 --------------------------------------------------------------------------- 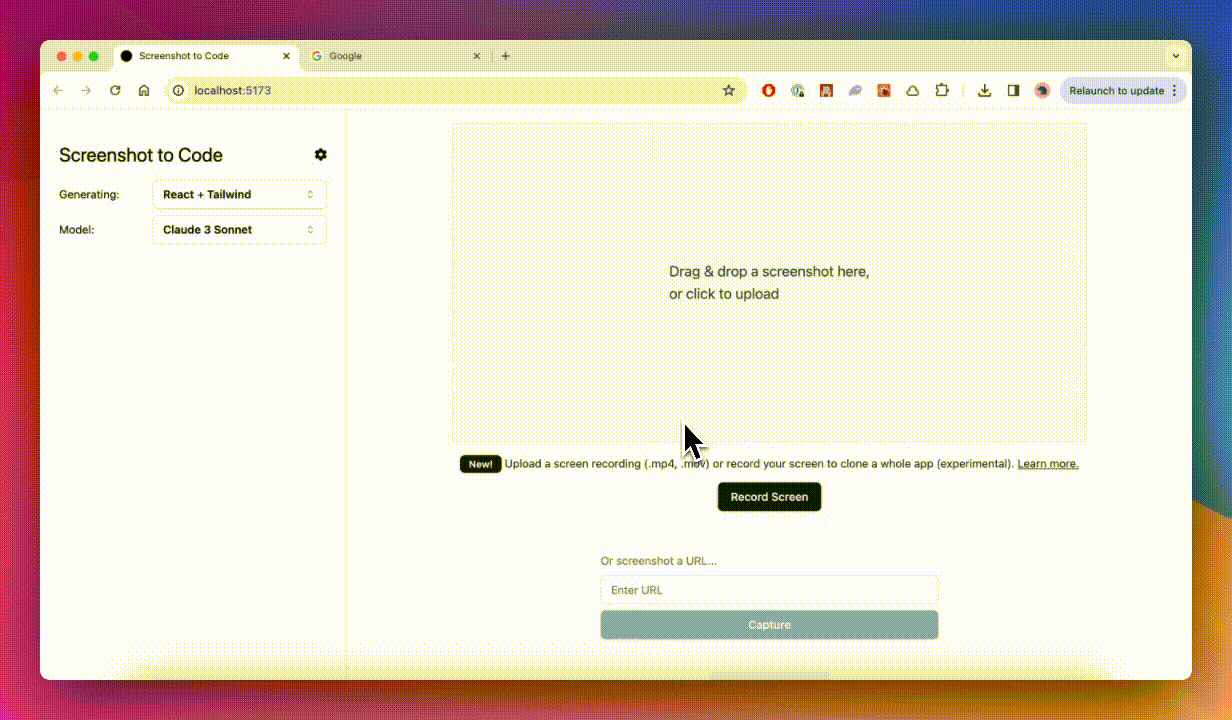 這個開源專案廣泛流行,但許多開發人員仍然不了解它。它可以幫助您以 10 倍的速度建立使用者介面。 這是一個簡單的工具,可以使用 AI 將螢幕截圖、模型和 Figma 設計轉換為乾淨、實用的程式碼。 該應用程式有一個 React/Vite 前端和一個 FastAPI 後端。如果您想使用 Claude Sonnet 或獲得實驗視訊支持,您將需要一個能夠存取 GPT-4 Vision API 的 OpenAI API 金鑰或一個 Anthropic 金鑰。您可以閱讀[指南](https://github.com/abi/screenshot-to-code?tab=readme-ov-file#-getting-started)來開始。 您可以在託管版本上[即時試用](https://screenshottocode.com/),並觀看 wiki 上提供的[一系列演示影片](https://github.com/abi/screenshot-to-code/wiki/Screen-Recording-to-Code)。 他們在 GitHub 上擁有超過 47k 顆星星,並支援許多技術堆疊,例如 React 和 Vue,以及不錯的 AI 模型,例如 GPT-4 Vision、Claude 3 Sonnet 和 DALL-E 3。 {% cta https://github.com/abi/screenshot-to-code %} 將螢幕截圖轉為程式碼 ⭐️ {% endcta %} --- 10. [Appsmith](https://github.com/appsmithorg/appsmith) - 建立管理面板、內部工具和儀表板的平台。 ----------------------------------------------------------------------------- 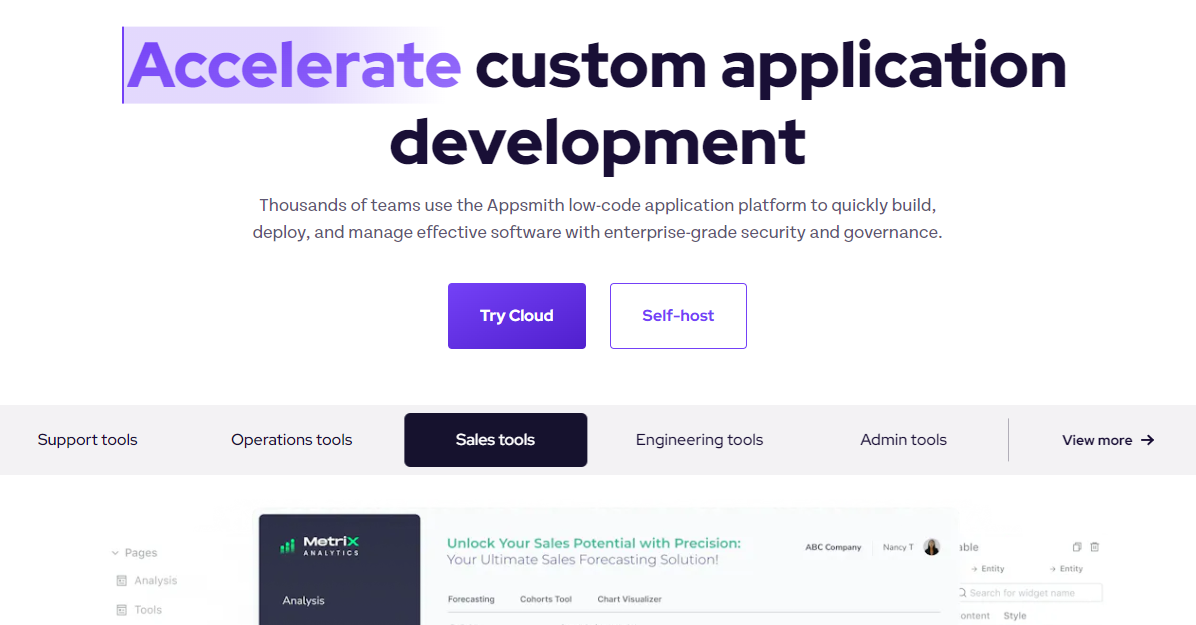 管理面板和儀表板是任何軟體創意(在大多數情況下)的一些常見部分,我嘗試從頭開始建立它,這會帶來很多痛苦和不必要的辛苦工作。 您可能已經看到組織建立了內部應用程式,例如儀表板、資料庫 GUI、管理面板、批准應用程式、客戶支援儀表板等,以幫助其團隊執行日常操作。正如我所說,Appsmith 是一個開源工具,可以實現這些內部應用程式的快速開發。 首先,請觀看這個[YouTube 影片](https://www.youtube.com/watch?v=NnaJdA1A11s),該影片在 100 秒內解釋了 Appsmith。 {% 嵌入 https://www.youtube.com/watch?v=NnaJdA1A11s %} 他們提供拖放小部件來建立 UI。 您可以使用 45 多個可自訂的小工具在幾分鐘內建立漂亮的響應式 UI,而無需編寫一行 HTML/CSS。尋找[小部件的完整清單](https://www.appsmith.com/widgets)。 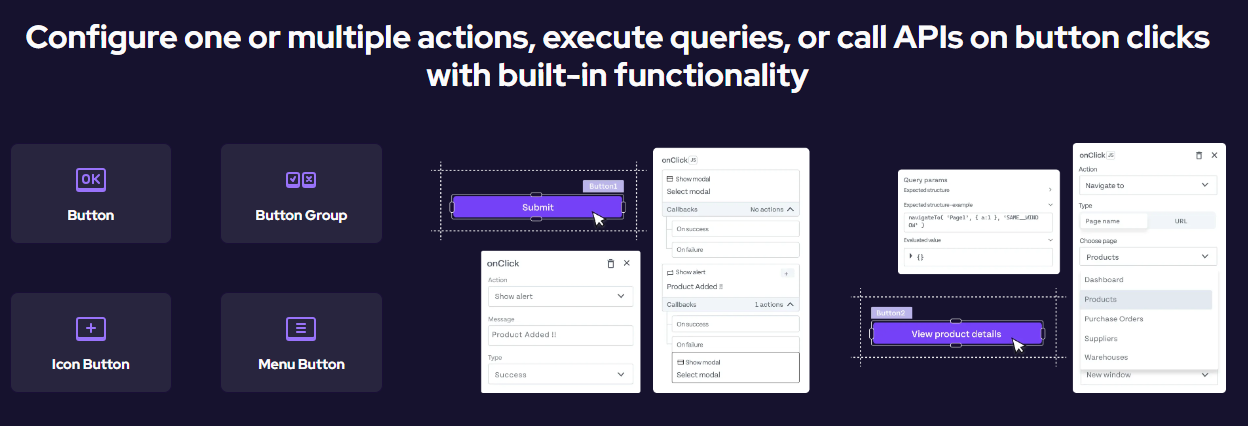 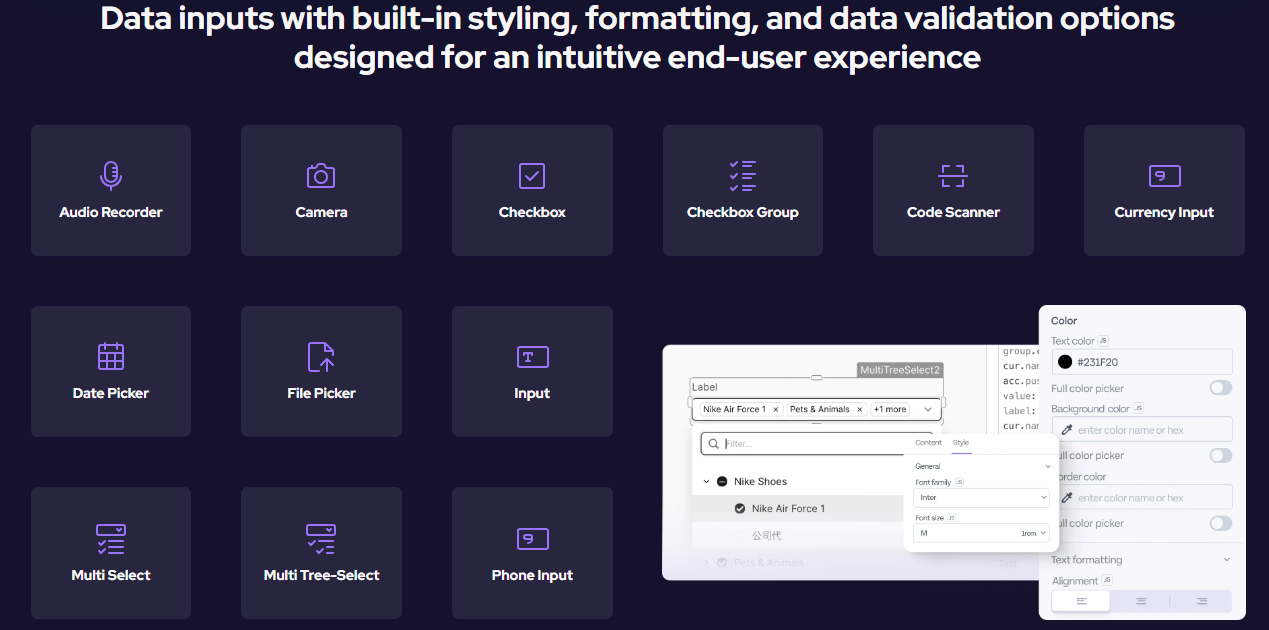 Appsmith 幾乎可以在 GUI 上的小部件屬性、事件偵聽器、查詢和其他設定內的任何位置編寫 JavaScript 程式碼。 Appsmith 支援在`{{ }}`內編寫單行程式碼,並將括號之間編寫的任何內容解釋為 JavaScript 表達式。 ``` /*Filter the data array received from a query*/ {{ QueryName.data.filter((row) => row.id > 5 ) }} or {{ storeValue("userID", 42); console.log(appsmith.store.userID); showAlert("userID saved"); }} ``` 您需要使用立即呼叫函數表達式(IIFE)來編寫多行。 例如,無效程式碼和有效程式碼。 ``` // invalid code /*Call a query to fetch the results and filter the data*/ {{ const array = QueryName.data; const filterArray = array.filter((row) => row.id > 5); return filterArray; }} /* Check the selected option and return the value*/ {{ if (Dropdown.selectedOptionValue === "1") { return "Option 1"; } else { return "Option 2"; } }} // valid code /* Call a query and then manipulate its result */ {{ (function() { const array = QueryName.data; const filterArray = array.filter((row) => row.id > 5); return filterArray; })() }} /* Verify the selected option and return the value*/ {{ (function() { if (Dropdown.selectedOptionValue === "1") { return "Option 1"; } else { return "Option 2"; } })() }} ``` 您可以透過幾個簡單的步驟建立從簡單的 CRUD 應用程式到複雜的多步驟工作流程的任何內容: 1. 與資料庫或 API 整合。 Appsmith 支援最受歡迎的資料庫和 REST API。 2. 使用內建小工具建立您的應用程式佈局。 3. 在編輯器中的任何位置使用查詢和 JavaScript 來表達您的業務邏輯。 4. Appsmith 支援使用 Git 進行版本控制,以使用分支來協作建立應用程式來追蹤和回滾變更。部署應用程式並分享:)  您可以閱讀[文件](https://docs.appsmith.com/)和[操作指南](https://docs.appsmith.com/connect-data/how-to-guides),例如如何將其連接到本機資料來源或\[如何與第三方工具整合\](與第三方工具整合)。 您可以自行託管或使用雲端。他們還提供[20 多個模板](https://www.appsmith.com/templates),以便您可以快速入門。一些有用的是: - [維修訂單管理](https://www.appsmith.com/template/Maintenance-Order-Management) - [加密即時追蹤器](https://www.appsmith.com/template/crypto-live-tracker) - [內容管理系統](https://www.appsmith.com/template/content-management-system) - [WhatsApp 信使](https://www.appsmith.com/template/whatsapp-messenger) Appsmith 在 GitHub 上擁有超過 31,000 顆星,發布了 200 多個版本。 {% cta https://github.com/appsmithorg/appsmith %} Star Appsmith ⭐️ {% endcta %} --- 11. [BlockNote](https://github.com/TypeCellOS/BlockNote) - 基於區塊(Notion 樣式)且可擴充的富文本編輯器。 -------------------------------------------------------------------------------------- 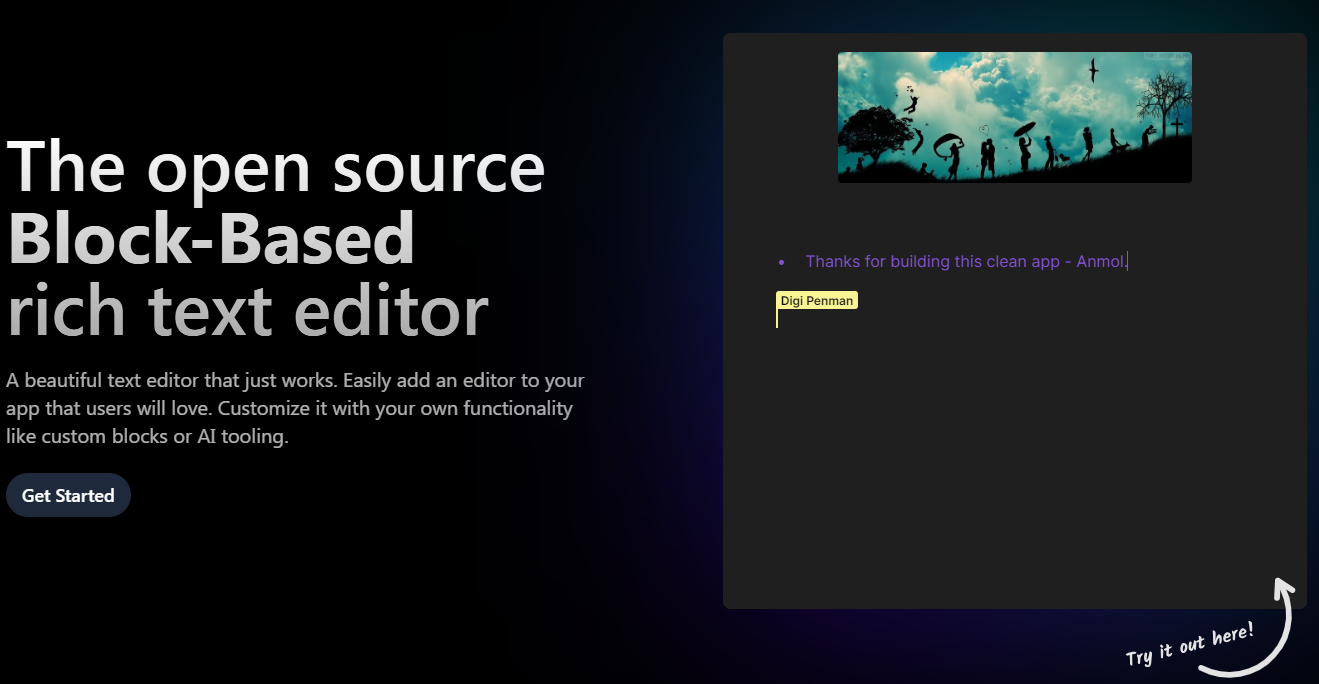 人們常說,除非您正在學習新東西,否則不要重新發明輪子。 Blocknote 是開源的 Block 為基礎的 React 富文本編輯器。您可以輕鬆地將現代文字編輯體驗加入到您的應用程式中。 Blocknote 建構在 Prosemirror 和 Tiptap 之上。 它們有很多功能,如下所示。 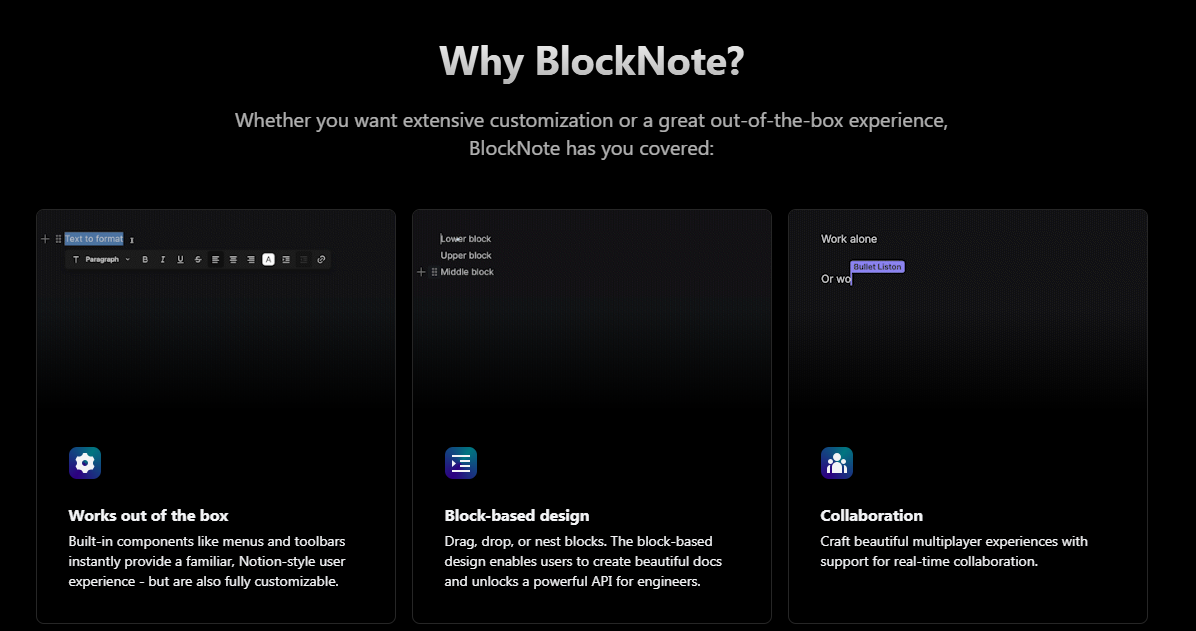 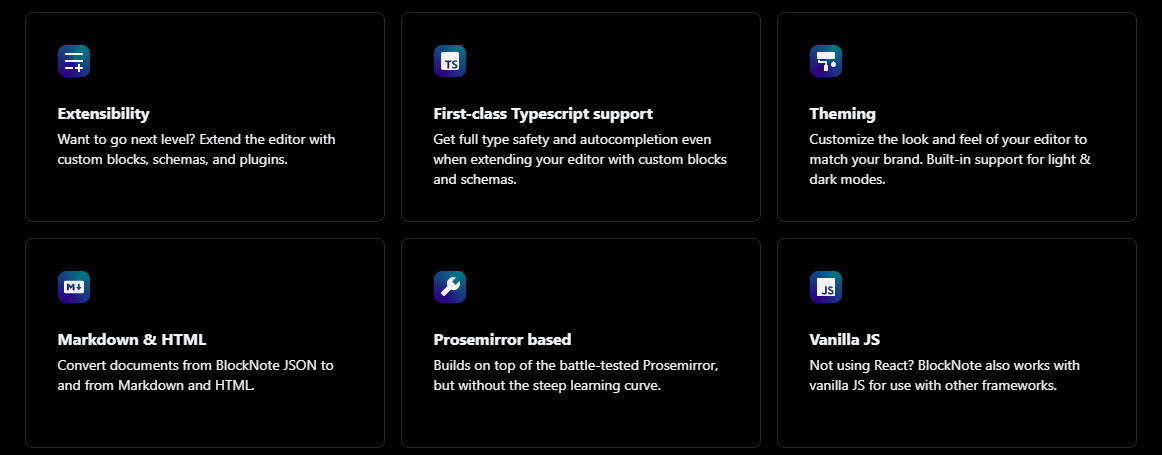 您可以輕鬆自訂內建 UI 元件,或建立自訂區塊、內聯內容和樣式。如果您想更進一步,您可以使用額外的 Prosemirror 或 TipTap 外掛程式來擴充核心編輯器。 其他庫雖然功能強大,但通常具有相當陡峭的學習曲線,並且要求您自訂編輯器的每個細節。這可能需要數月的專門工作。 相反,BlockNote 只需最少的設定即可提供出色的體驗,包括現成的動畫 UI。 開始使用以下 npm 指令。 ``` npm install @blocknote/core @blocknote/react ``` 您可以這樣使用它。透過`useCreateBlockNote`鉤子,我們可以建立一個新的編輯器實例,然後使用`theBlockNoteView`元件來渲染它。 `@blocknote/react/style.css`也被匯入來新增編輯器的預設樣式和 BlockNote 匯出的 Inter 字體(可選)。 ``` import "@blocknote/core/fonts/inter.css"; import { BlockNoteView, useCreateBlockNote } from "@blocknote/react"; import "@blocknote/react/style.css"; export default function App() { // Creates a new editor instance. const editor = useCreateBlockNote(); // Renders the editor instance using a React component. return <BlockNoteView editor={editor} />; } ``` 您可以閱讀可用的[文件](https://www.blocknotejs.org/docs)和[ui 元件](https://www.blocknotejs.org/docs/ui-components)。 您應該嘗試一下,特別是因為它包含廣泛的功能,例如「斜線」選單、流暢的動畫以及建立即時協作應用程式的潛力。 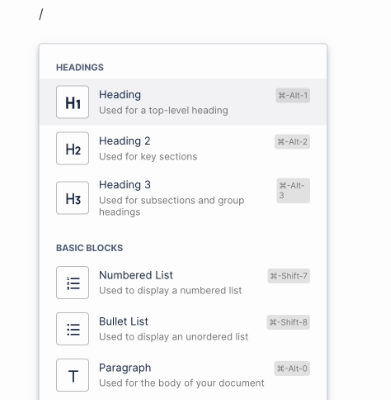 斜線選單 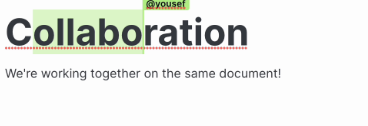 即時協作  格式選單 他們還提供了[20 多個範例](https://www.blocknotejs.org/examples)以及預覽和程式碼,您可以使用它們來快速跟進。 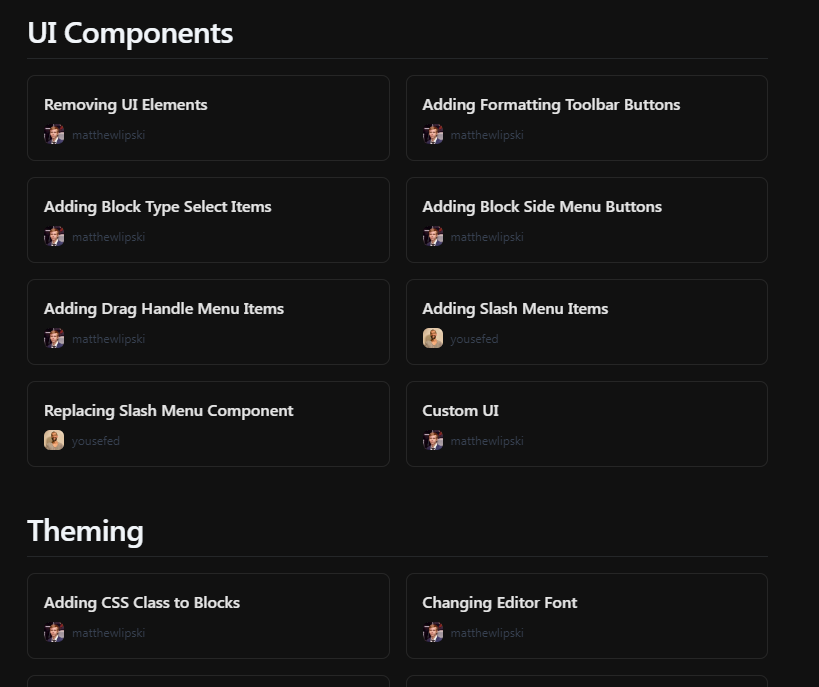 Blocknote 在 GitHub 上擁有超過 5,000 顆星,並有超過 1,500 名開發者在使用。 {% cta https://github.com/TypeCellOS/BlockNote %} 星 BlockNote ⭐️ {% endcta %} --- 12. [CopilotKit](https://github.com/CopilotKit/CopilotKit) - 在數小時內為您的產品提供 AI Copilot。 -------------------------------------------------------------------------------------  將 AI 功能整合到 React 中是很困難的,這就是 Copilot 的用武之地。一個簡單快速的解決方案,可將可投入生產的 Copilot 整合到任何產品中! 您可以使用兩個 React 元件將關鍵 AI 功能整合到 React 應用程式中。它們還提供內建(完全可自訂)Copilot 原生 UX 元件,例如`<CopilotKit />` 、 `<CopilotPopup />` 、 `<CopilotSidebar />` 、 `<CopilotTextarea />` 。 開始使用以下 npm 指令。 ``` npm i @copilotkit/react-core @copilotkit/react-ui ``` Copilot Portal 是 CopilotKit 提供的元件之一,CopilotKit 是一個應用程式內人工智慧聊天機器人,可查看目前應用狀態並在應用程式內採取操作。它透過插件與應用程式前端和後端以及第三方服務進行通訊。 這就是整合聊天機器人的方法。 `CopilotKit`必須包裝與 CopilotKit 互動的所有元件。建議您也開始使用`CopilotSidebar` (您可以稍後切換到不同的 UI 提供者)。 ``` "use client"; import { CopilotKit } from "@copilotkit/react-core"; import { CopilotSidebar } from "@copilotkit/react-ui"; import "@copilotkit/react-ui/styles.css"; export default function RootLayout({children}) { return ( <CopilotKit url="/path_to_copilotkit_endpoint/see_below"> <CopilotSidebar> {children} </CopilotSidebar> </CopilotKit> ); } ``` 您可以使用此[快速入門指南](https://docs.copilotkit.ai/getting-started/quickstart-backend)設定 Copilot 後端端點。 之後,您可以讓 Copilot 採取行動。您可以閱讀如何提供[外部上下文](https://docs.copilotkit.ai/getting-started/quickstart-chatbot#provide-context)。您可以使用`useMakeCopilotReadable`和`useMakeCopilotDocumentReadable`反應掛鉤來執行此操作。 ``` "use client"; import { useMakeCopilotActionable } from '@copilotkit/react-core'; // Let the copilot take action on behalf of the user. useMakeCopilotActionable( { name: "setEmployeesAsSelected", // no spaces allowed in the function name description: "Set the given employees as 'selected'", argumentAnnotations: [ { name: "employeeIds", type: "array", items: { type: "string" } description: "The IDs of employees to set as selected", required: true } ], implementation: async (employeeIds) => setEmployeesAsSelected(employeeIds), }, [] ); ``` 您可以閱讀[文件](https://docs.copilotkit.ai/getting-started/quickstart-textarea)並查看[演示影片](https://github.com/CopilotKit/CopilotKit?tab=readme-ov-file#demo)。 您可以輕鬆整合 Vercel AI SDK、OpenAI API、Langchain 和其他 LLM 供應商。您可以按照本[指南](https://docs.copilotkit.ai/getting-started/quickstart-chatbot)將聊天機器人整合到您的應用程式中。 基本概念是在幾分鐘內建立可用於基於 LLM 的應用程式的 AI 聊天機器人。 用例是巨大的,作為開發人員,我們絕對應該在下一個專案中嘗試使用 CopilotKit。 CopilotKit 在 GitHub 上擁有超過 4,200 個星星,發布了 200 多個版本,這意味著它們正在不斷改進。 {% cta https://github.com/CopilotKit/CopilotKit %} Star CopilotKit ⭐️ {% endcta %} --- 13.[自動完成](https://github.com/withfig/autocomplete)- IDE 風格的自動完成功能適用於您現有的終端和 shell。 ----------------------------------------------------------------------------------  [Fig](https://fig.io/?ref=github_autocomplete)讓命令列對個人來說更容易,對團隊來說更具協作性。 他們最受歡迎的產品是自動完成。當您鍵入時,Fig 會在現有終端機中彈出子命令、選項和上下文相關的參數。 最好的部分是您也可以將 Fig 的自動完成功能用於您自己的工具。以下是建立私人完成的方法: ``` import { ai } from "@fig/autocomplete-generators" ... generators: [ ai({ // the prompt prompt: "Generate a git commit message", // Send any relevant local context. message: async ({ executeShellCommand }) => { return executeShellCommand("git diff") }, //Turn each newline into a suggestion (can specify instead a `postProcess1 function if more flexibility is required) splitOn: "\n", }) ] ``` 您可以閱讀[Fig.io/docs](https://fig.io/docs/getting-started)了解如何開始。 他們在 GitHub 上有 24k+ Stars,這對於經常使用 shell 或終端機的開發人員來說非常有用。 {% cta https://github.com/withfig/autocomplete %} 星狀自動完成 ⭐️ {% endcta %} --- 14. [Tooljet](https://github.com/ToolJet/ToolJet) - 用於建立業務應用程式的低程式碼平台。 ---------------------------------------------------------------------- 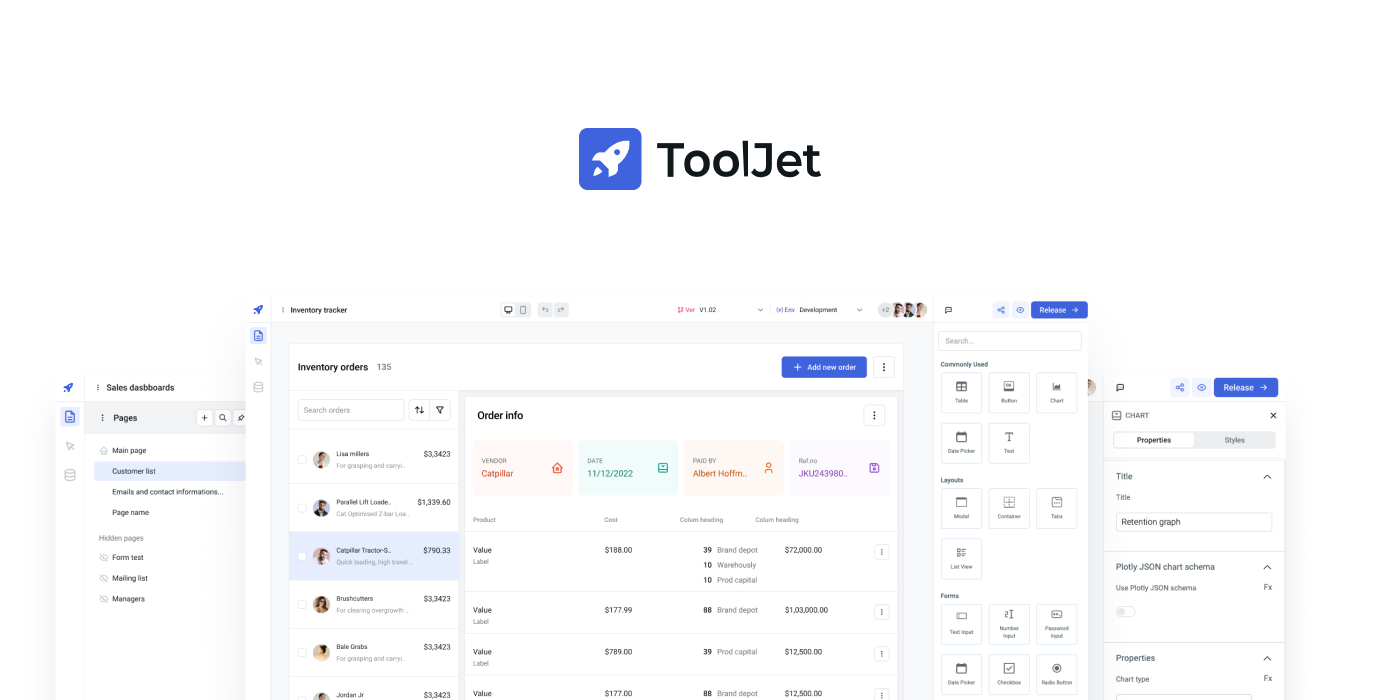 我們都建立前端,但它通常非常複雜並且涉及很多因素。這樣可以省去很多麻煩。 ToolJet 是一個開源低程式碼框架,可以用最少的工程工作來建置和部署內部工具。 ToolJet 的拖放式前端建構器可讓您在幾分鐘內建立複雜的響應式前端。 您可以整合各種資料來源,包括PostgreSQL、MongoDB、Elasticsearch等資料庫;具有 OpenAPI 規範和 OAuth2 支援的 API 端點; SaaS 工具,例如 Stripe、Slack、Google Sheets、Airtable 和 Notion;以及 S3、GCS 和 Minio 等物件儲存服務來取得和寫入資料。一切 :) 這就是 Tooljet 的工作原理。 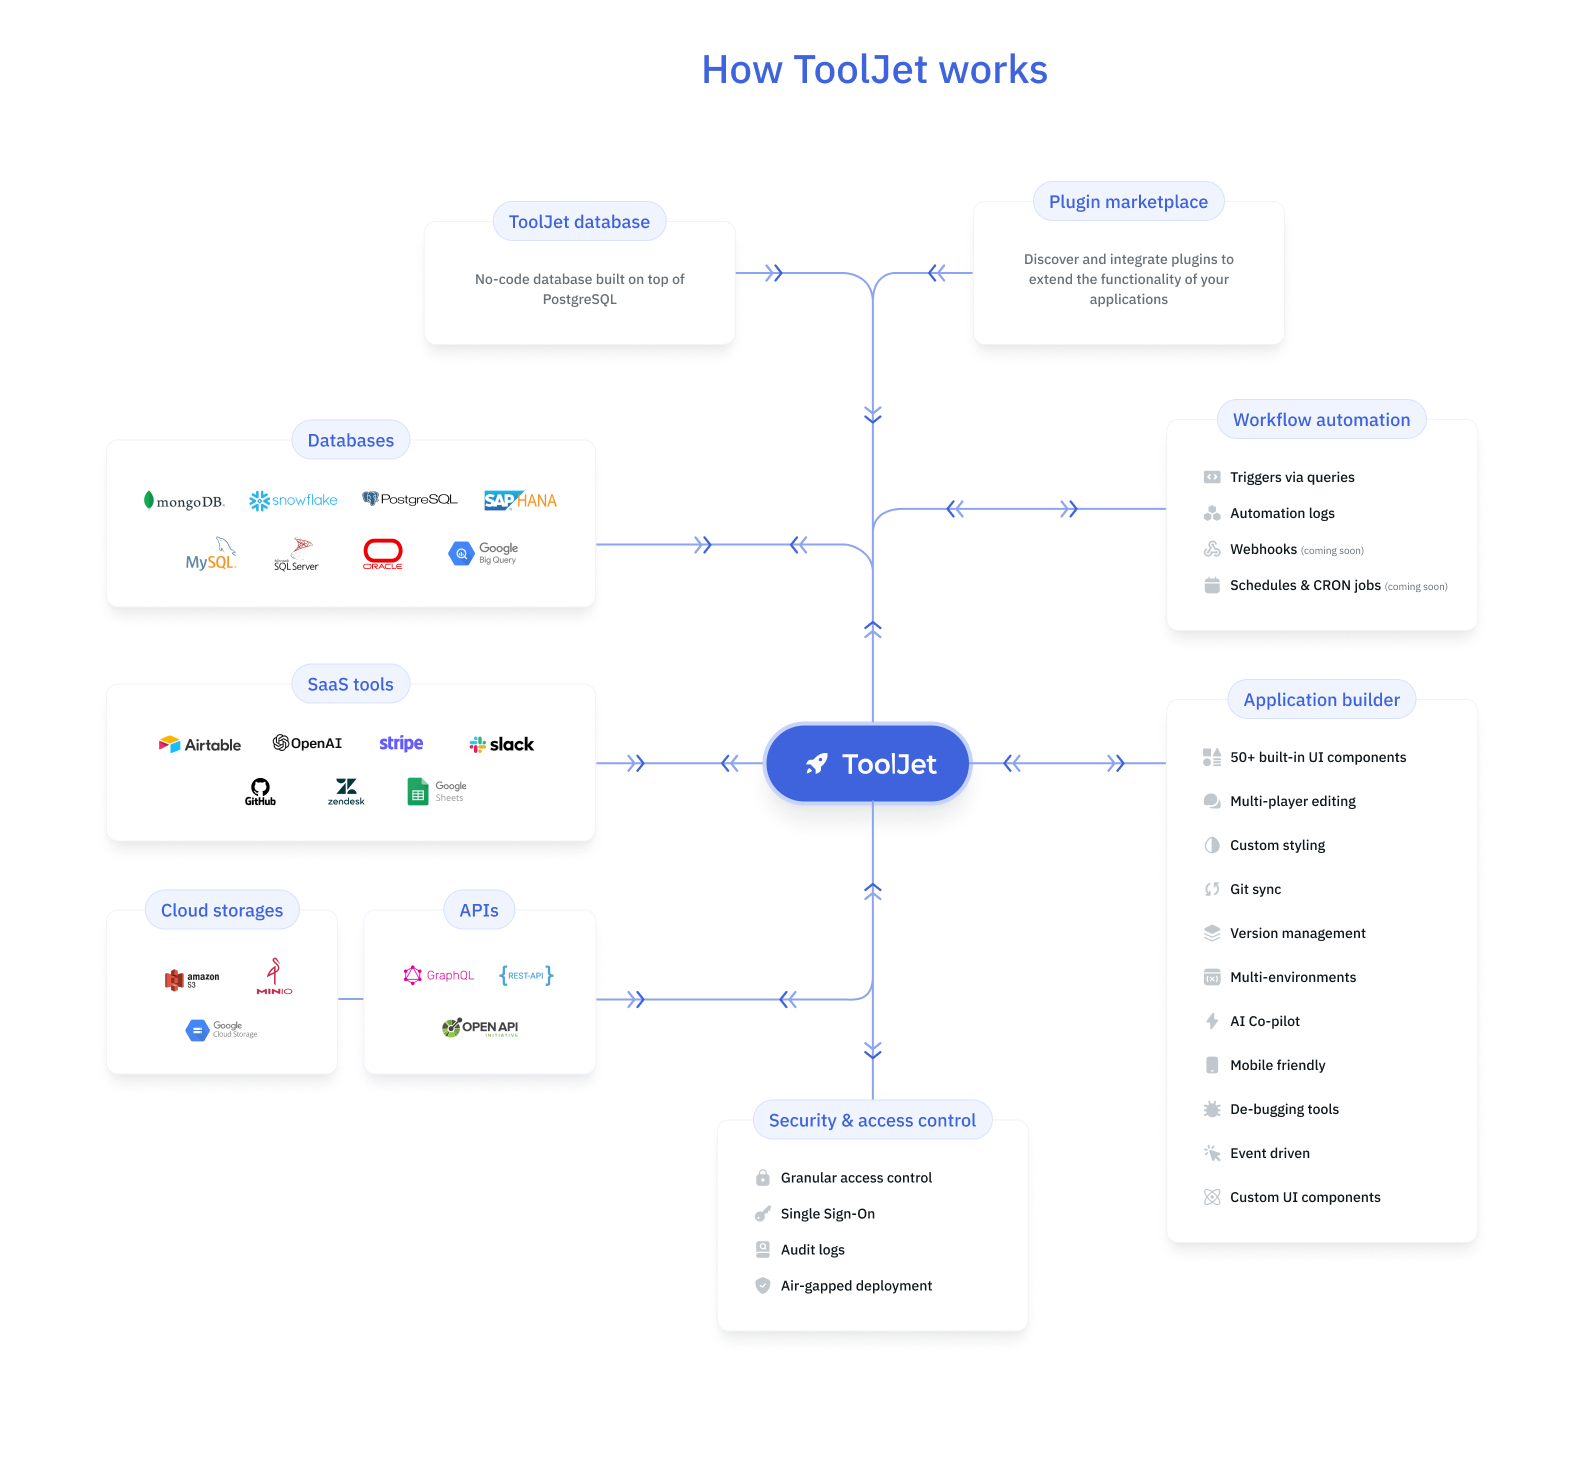 您可以在 ToolJet 中開發多步驟工作流程以自動化業務流程。除了建置和自動化工作流程之外,ToolJet 還可以在您的應用程式中輕鬆整合這些工作流程。 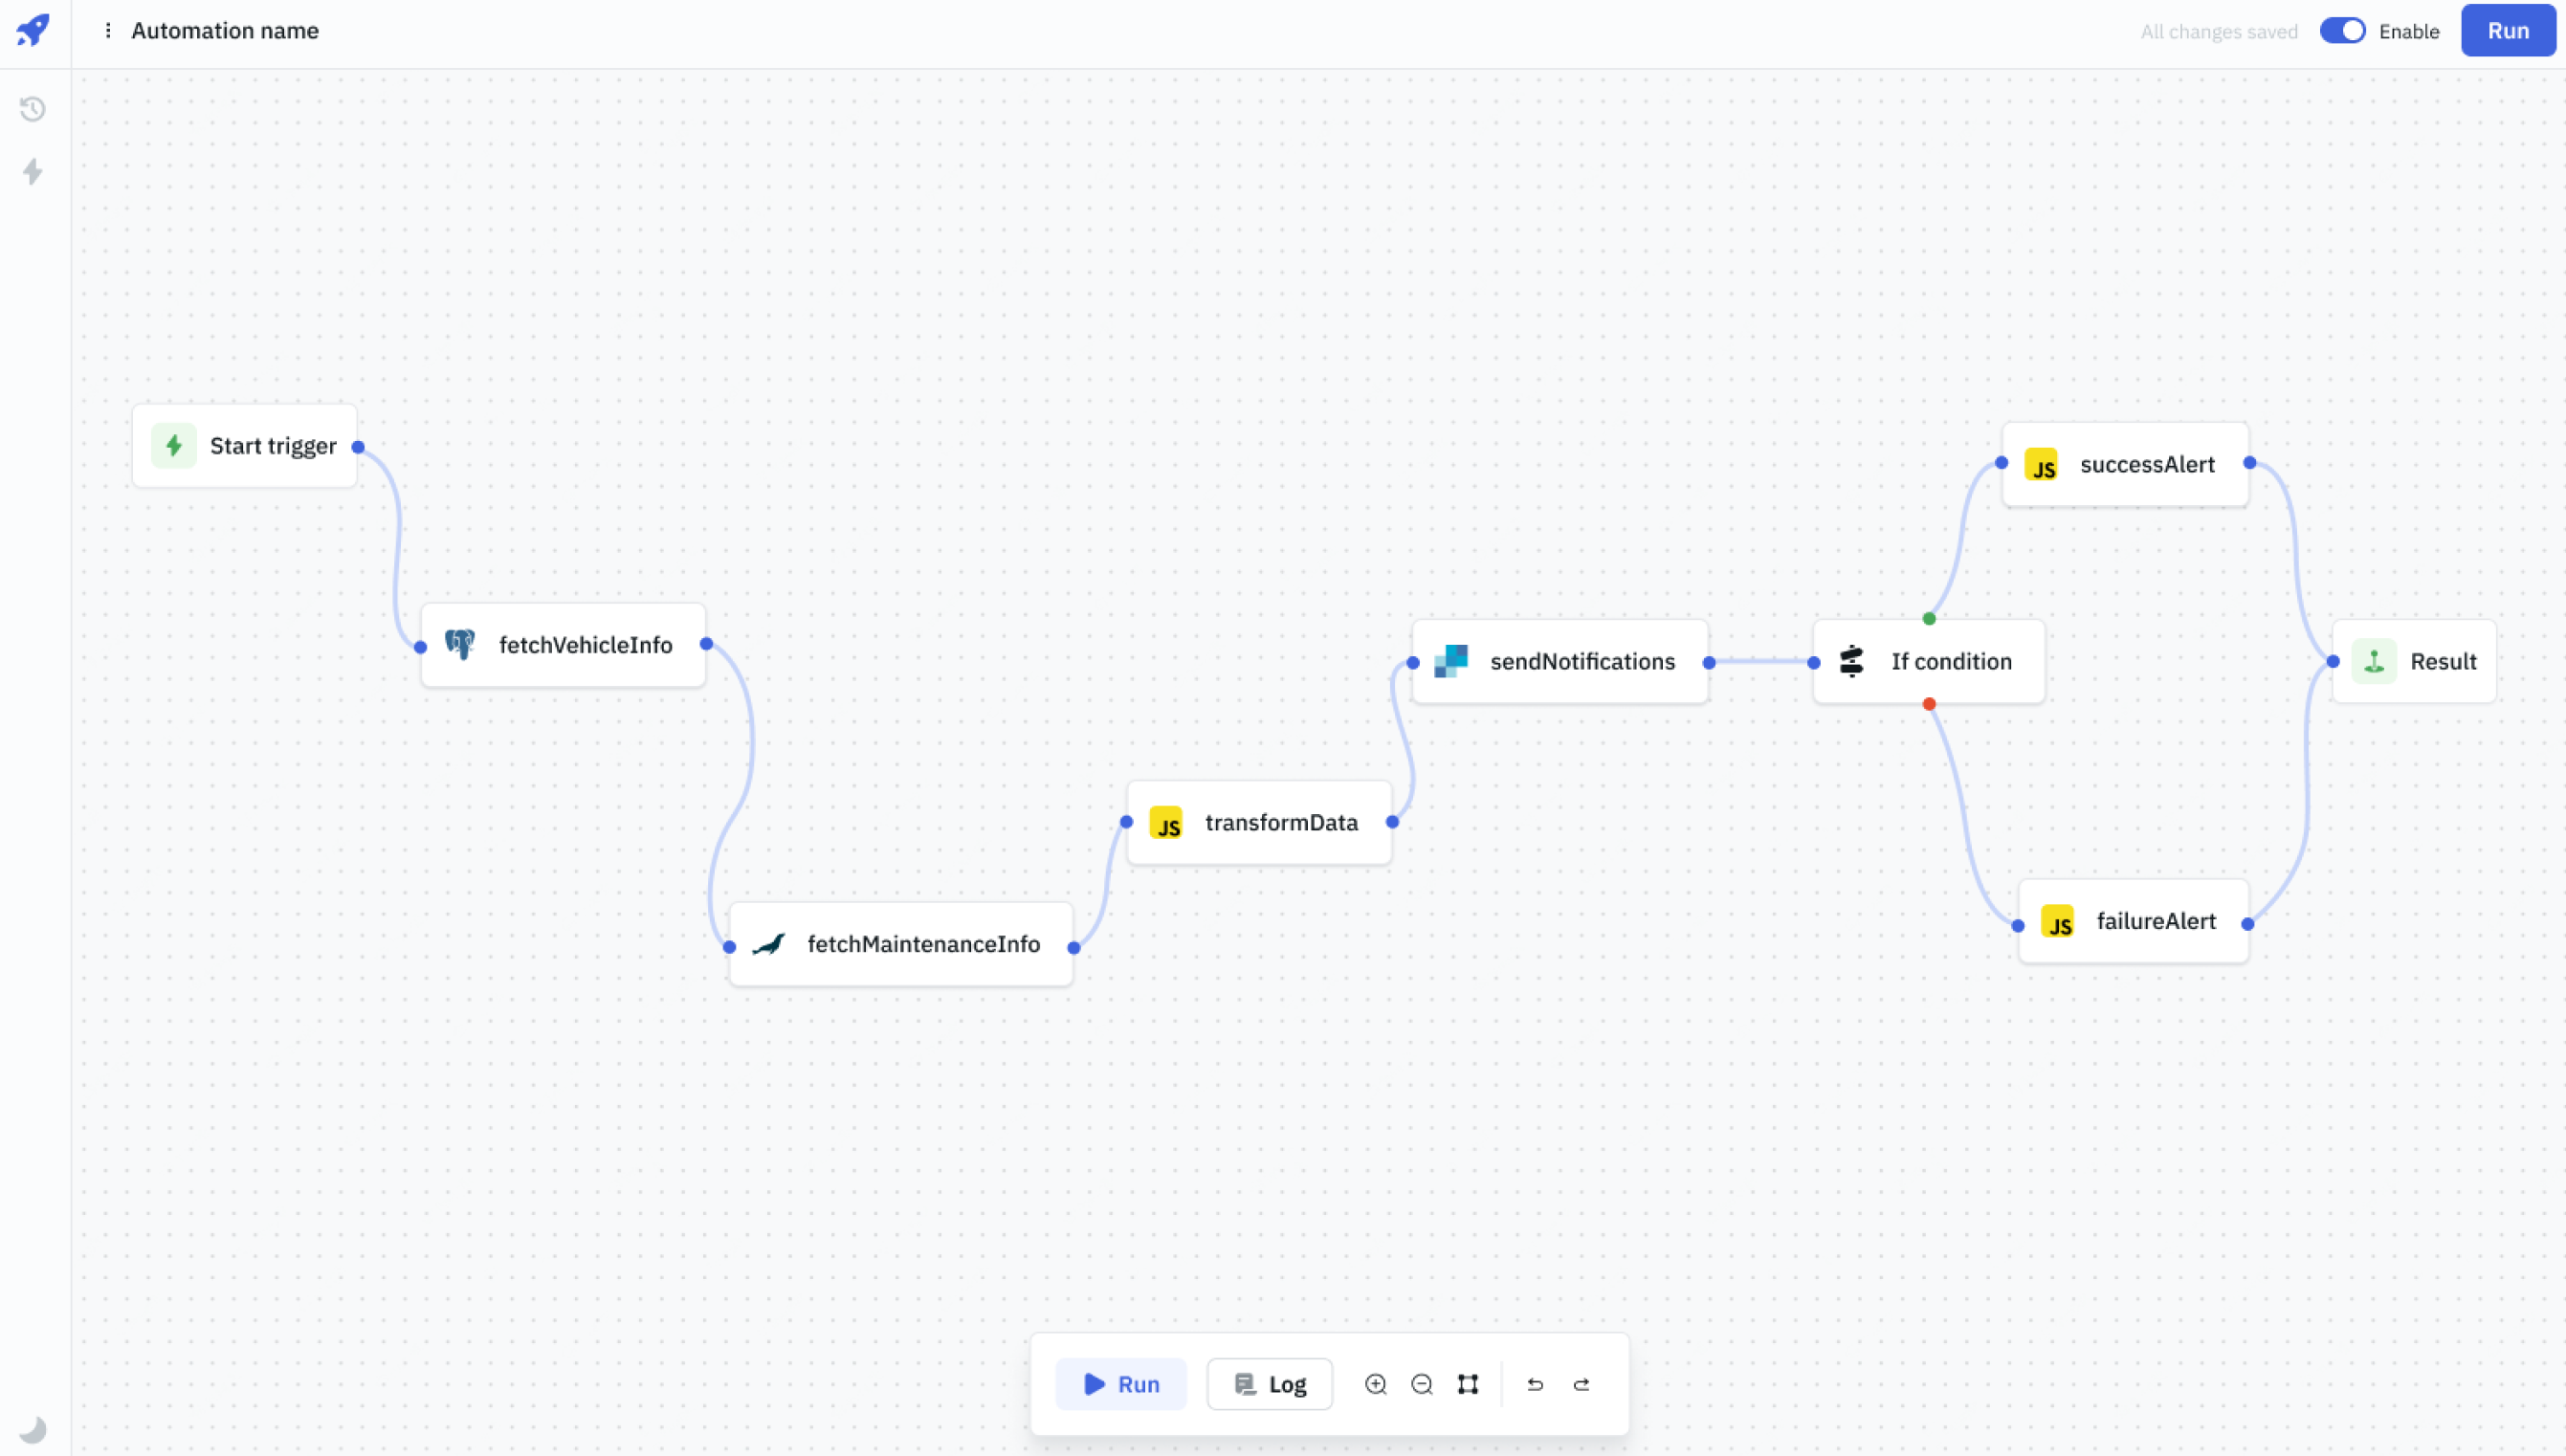 您可以閱讀此[快速入門指南](https://docs.tooljet.com/docs/getting-started/quickstart-guide),該指南向您展示如何使用 ToolJet 在幾分鐘內建立員工目錄應用程式。該應用程式將讓您透過漂亮的用戶介面追蹤和更新員工資訊。 查看可用[功能列表](https://github.com/ToolJet/ToolJet?tab=readme-ov-file#all-features),包括 45 多個內建響應式元件、50 多個資料來源等等。 您可以閱讀[文件](https://docs.tooljet.com/docs/)並查看[操作指南](https://docs.tooljet.com/docs/how-to/use-url-params-on-load)。 它們在 GitHub 上有 26k+ Stars,並且基於 JavaScript 建置。他們也獲得了 GitHub 的資助,從而建立了巨大的信任。 {% cta https://github.com/ToolJet/ToolJet %} Star ToolJet ⭐️ {% endcta %} --- 15. [Apitable](https://github.com/apitable/apitable) - 用於建立協作應用程式的 API 導向的低程式碼平台。 ---------------------------------------------------------------------------------  APITable 是一個面向 API 的低程式碼平台,用於建立協作應用程式,並表示它比所有其他 Airtable 開源替代品都要好。 有很多很酷的功能,例如: - 即時協作。  - 您可以產生自動表單。  - 無限的跨錶連結。  - API 第一個面板。  - 強大的行/列功能。  您可以閱讀完整的[功能清單](https://github.com/apitable/apitable?tab=readme-ov-file#-features)。 您可以嘗試[apitable](https://aitable.ai/)並在 apitable 的[live Gitpod demo](https://gitpod.io/#https://github.com/apitable/apitable)中查看該專案的演示。 您也可以閱讀[安裝指南](https://github.com/apitable/apitable?tab=readme-ov-file#installation),在本機或雲端運算環境中安裝 APITable。 {% cta https://github.com/apitable/apitable %} Star Apitable ⭐️ {% endcta %} --- 16. [n8n](https://github.com/n8n-io/n8n) - 工作流程自動化工具。 -----------------------------------------------------  n8n 是一個可擴展的工作流程自動化工具。透過公平程式碼分發模型,n8n 將始終擁有可見的原始程式碼,可用於自託管,並允許您加入自訂函數、邏輯和應用程式。 每個開發人員都想使用的工具。自動化是生產力和簡單性的關鍵。  n8n 基於節點的方法使其具有高度通用性,使您能夠將任何事物連接到任何事物。 有[400 多個集成選項](https://n8n.io/integrations),這幾乎是瘋狂的! 您可以看到所有[安裝](https://docs.n8n.io/choose-n8n/)選項,包括 Docker、npm 和自架。 開始使用以下命令。 ``` npx n8n ``` 此命令將下載啟動 n8n 所需的所有內容。然後,您可以透過開啟`http://localhost:5678`來存取 n8n 並開始建置工作流程。 在 YouTube 上觀看此[快速入門影片](https://www.youtube.com/watch?v=1MwSoB0gnM4)! {% 嵌入 https://www.youtube.com/watch?v=1MwSoB0gnM4 %} 您可以閱讀[文件](https://docs.n8n.io/)並閱讀本[指南](https://docs.n8n.io/try-it-out/),以便根據您的需求快速開始。 他們還提供初學者和中級[課程,](https://docs.n8n.io/courses/)以便輕鬆學習。 他們在 GitHub 上有 39k+ Stars,並提供兩個包供整體使用。 {% cta https://github.com/n8n-io/n8n %} 明星 n8n ⭐️ {% endcta %} --- 17. [DOMPurify](https://github.com/cure53/DOMPurify) - 一個僅限 DOM、超快、超級容忍 XSS 的 HTML 清理程式。 ----------------------------------------------------------------------------------------  DOMPurify 是一款僅限 DOM、超快、超級容忍 XSS 的 HTML、MathML 和 SVG 清理工具。作為開發人員,我們的應用程式需要它來確保它們足夠安全。 DOMPurify 可以淨化 HTML 並防止 XSS 攻擊。 您可以向 DOMPurify 提供一個充滿髒 HTML 的字串,它將傳回一個包含乾淨 HTML 的字串(除非另有配置)。 DOMPurify 將刪除所有包含危險 HTML 的內容,從而防止 XSS 攻擊和其他惡意行為。這也太快了。 他們使用瀏覽器提供的技術並將其轉變為 XSS 過濾器。您的瀏覽器速度越快,DOMPurify 的速度就越快。 DOMPurify 使用 JavaScript 編寫,適用於所有現代瀏覽器(Safari (10+)、Opera (15+)、Edge、Firefox 和 Chrome - 以及幾乎所有使用 Blink、Gecko 或 WebKit 的其他瀏覽器)。它不會在 MSIE 或其他舊版瀏覽器上中斷。它根本什麼都不做。 開始使用以下 npm 指令。 ``` npm install dompurify npm install jsdom // or use the unminified development version <script type="text/javascript" src="src/purify.js"></script> ``` 您可以這樣使用它。 ``` const createDOMPurify = require('dompurify'); const { JSDOM } = require('jsdom'); const window = new JSDOM('').window; const DOMPurify = createDOMPurify(window); const clean = DOMPurify.sanitize('<b>hello there</b>'); ``` 如果您遇到問題,請參閱[文件](https://github.com/cure53/DOMPurify?tab=readme-ov-file#how-do-i-use-it)。他們已經記錄了使用腳本或在伺服器端執行它。 您可以看到一些 [純化樣品](https://github.com/cure53/DOMPurify?tab=readme-ov-file#some-purification-samples-please)並觀看[現場演示](https://cure53.de/purify)。 使用起來也非常簡單。 DOMPurify 於 2014 年 2 月啟動,同時版本已達 v3.1.0。 其中涉及到很多概念,我渴望探索它們。如果您有任何與此相關的令人興奮的事情,請告訴我。 我發現的另一個有用的替代方案是[validator.js](https://github.com/validatorjs/validator.js) 。 他們在 GitHub 上擁有超過 12,000 顆星,被超過 30 萬開發者使用,每週下載量超過 5,475,000 次,這使得他們非常可信。 {% cta https://github.com/cure53/DOMPurify %} 明星 DOMPurify ⭐️ {% endcta %} --- 18. [OpenDevin](https://github.com/OpenDevin/OpenDevin) - 更少的程式碼,更多的內容。 -----------------------------------------------------------------------   這是一個開源專案,旨在複製 Devin,一名自主人工智慧軟體工程師,能夠執行複雜的工程任務並在軟體開發專案上與用戶積極協作。該計畫致力於透過開源社群的力量複製、增強和創新 Devin。 只是想讓你知道,這是在德文被介紹之前。 您可以閱讀帶有要求的[安裝說明](https://github.com/OpenDevin/OpenDevin?tab=readme-ov-file#installation)。 他們使用 LiteLLM,因此您可以使用任何基礎模型來執行 OpenDevin,包括 OpenAI、Claude 和 Gemini。 如果您想為 OpenDevin 做出貢獻,您可以查看 [演示](https://github.com/OpenDevin/OpenDevin/blob/main/README.md#opendevin-code-less-make-more)和[貢獻指南](https://github.com/OpenDevin/OpenDevin/blob/main/CONTRIBUTING.md)。 它在 GitHub 上擁有超過 10,700 個 Star,並且正在快速成長。 {% cta https://github.com/OpenDevin/OpenDevin %} 明星 OpenDevin ⭐️ {% endcta %} --- 19. [Amplification-](https://github.com/amplication/amplication)後端開發平台。 -----------------------------------------------------------------------  我想我們都同意,如果我們要達到標準,設定後端並從頭開始是很困難的。 我知道 Appwrite 和 Supabase 在功能方面要好得多,但每種情況都是獨特的,這可能會點擊而不是那些。  Amplication 旨在徹底改變可擴展且安全的 Node.js 應用程式的建立。 他們消除了重複的編碼任務,並提供可立即投入生產的基礎設施程式碼,這些程式碼根據您的規範精心定制,並遵循行業最佳實踐。 其用戶友好的介面促進了 API、資料模型、資料庫、身份驗證和授權的無縫整合。 Amplication 建立在靈活的、基於插件的架構之上,允許輕鬆定製程式碼並提供大量整合選項。 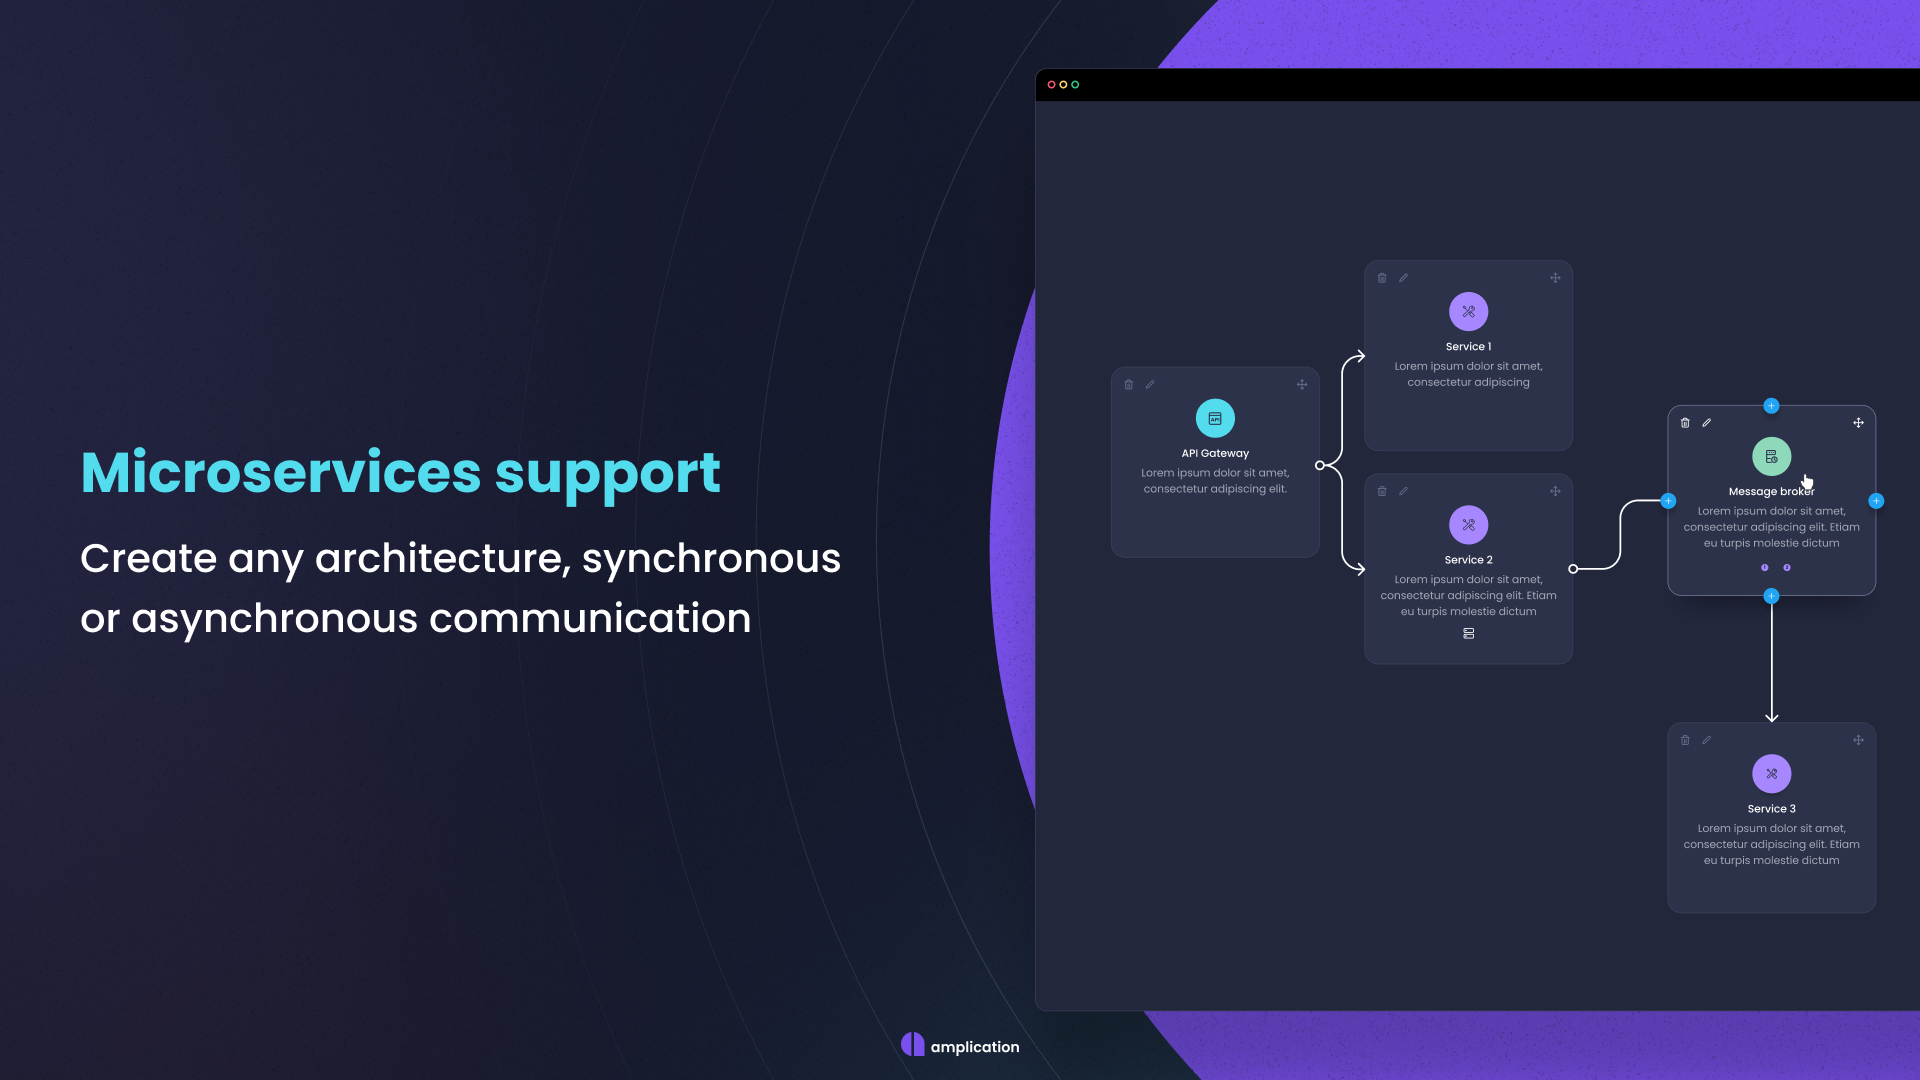 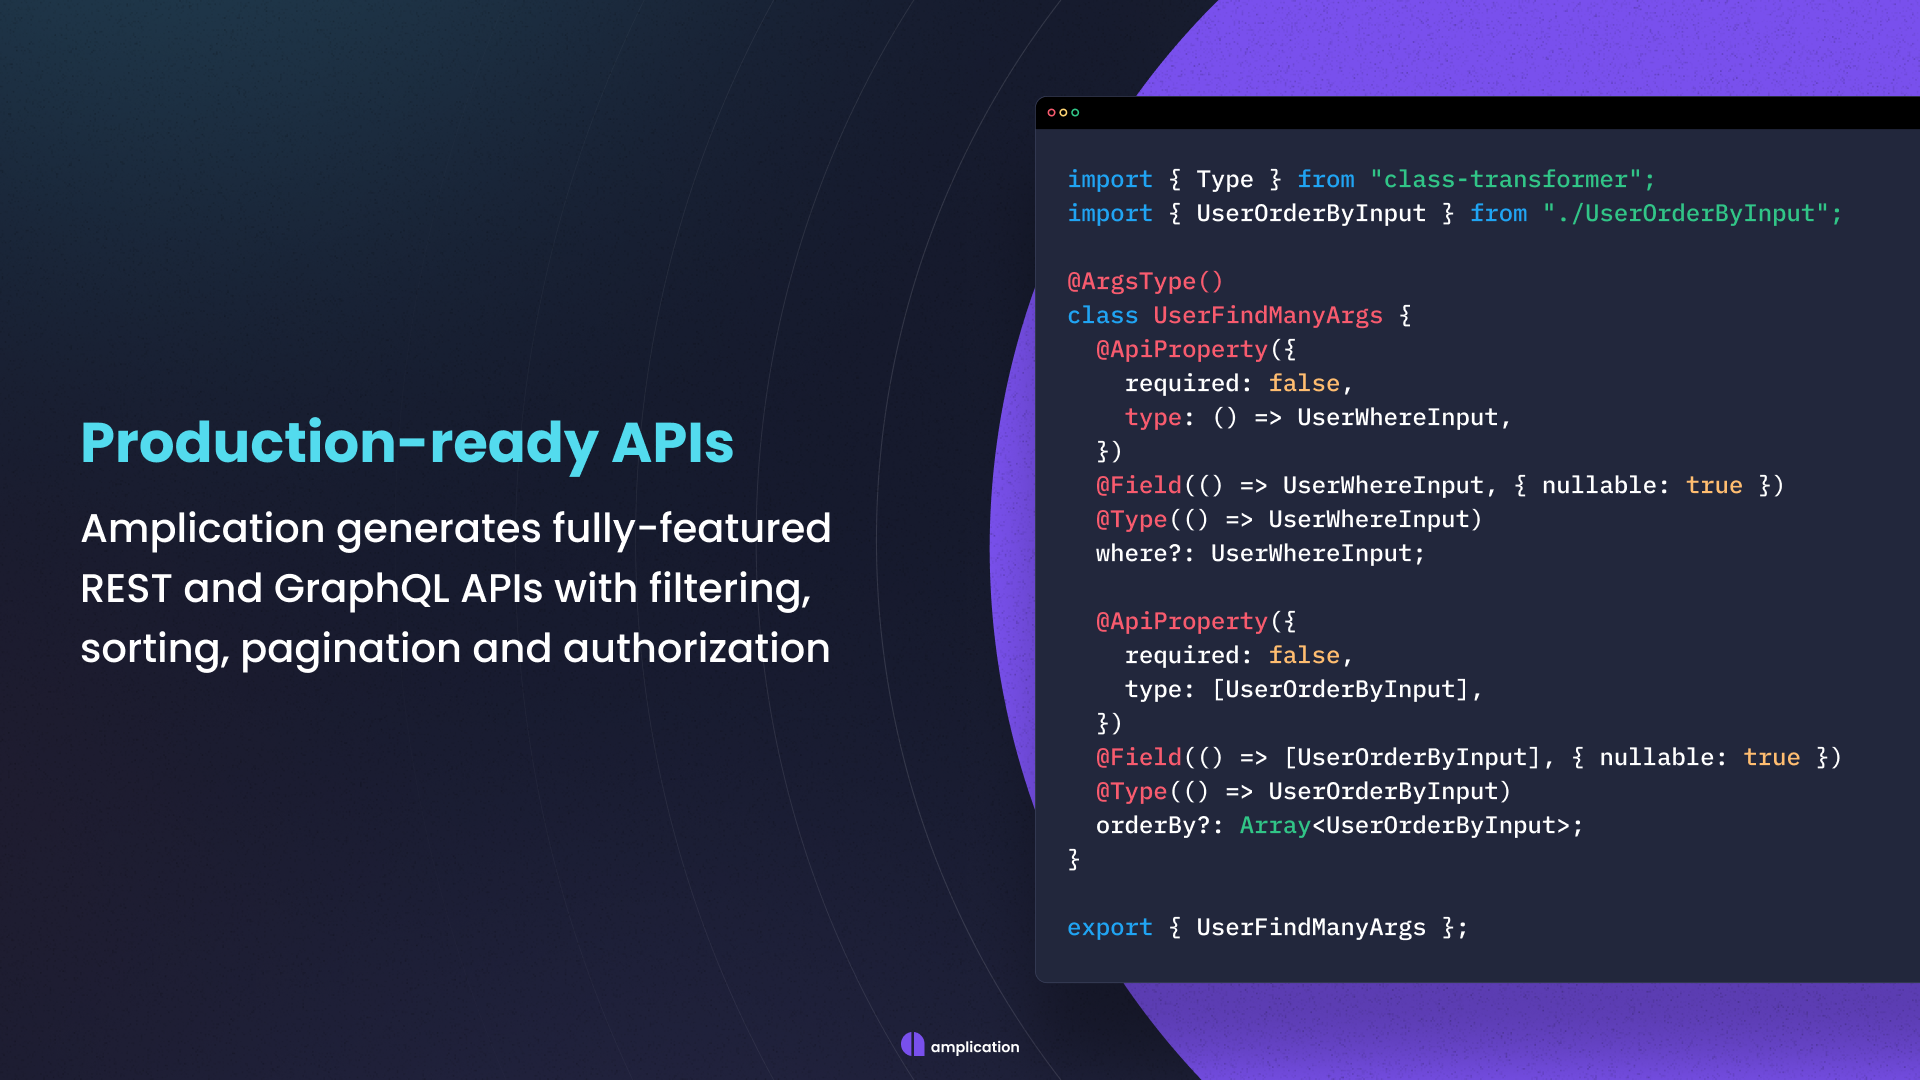 您可以閱讀[文件](https://docs.amplication.com/)並查看可用的[社群插件](https://docs.amplication.com/plugins-list/)清單。 他們還提供了[逐步教程](https://docs.amplication.com/tutorials/#step-by-step-tutorials),以幫助您使用 Angular 或 React 建立應用程式。 Amplification 在 GitHub 上擁有超過 13k 顆星,發布了 170 多個版本,因此它們不斷發展。 {% cta https://github.com/amplication/amplication %} 星狀放大 ⭐️ {% endcta %} --- 20. [Embla 旋轉木馬](https://github.com/davidjerleke/embla-carousel)-。 ------------------------------------------------------------------  我們都在應用程式中使用輪播,有時會切換到網格佈局,因為輪播並不總是好看,但這會改變您對輪播的看法。 我之所以了解 Embla Carousel,是因為 Shadcn/ui 在他們的 UI 系統中使用了它。 Embla Carousel 是一個簡單的輪播庫,具有出色的流暢運動和出色的滑動精度。它與庫無關、無依賴性且 100% 開源。 如果您不確定,我建議您查看[基本的實例](https://www.embla-carousel.com/examples/predefined/)。   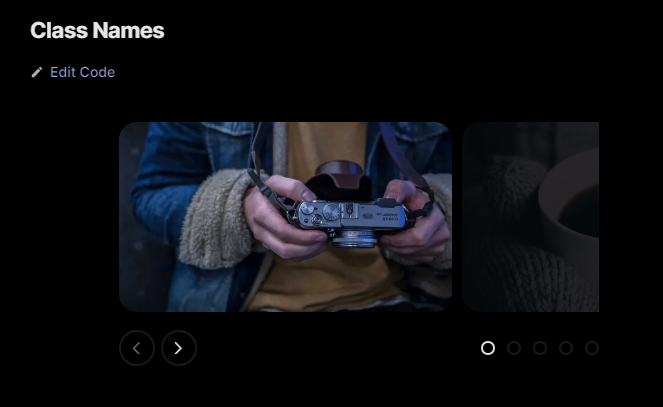 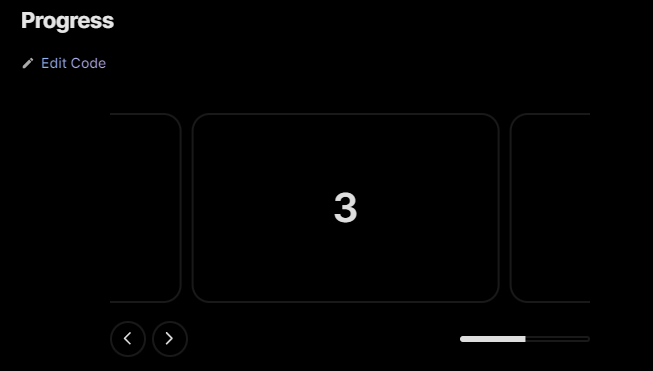 我最喜歡的是視差,它可以提供非常酷且平滑的過渡。 它們支援 CDN、react、Vue、Svelte 和 Solid。 開始使用以下 npm 指令 (react)。 ``` npm install embla-carousel-react --save ``` 您可以這樣使用它。 Embla Carousel 提供了方便的 useEmblaCarousel 鉤子,用於與 React 無縫整合。最小的設定需要一個溢出包裝器和一個滾動容器。 `useEmblaCarousel`掛鉤將 Embla Carousel 選項作為第一個參數。您還需要使用 useEffect 存取 API ``` import React, { useEffect } from 'react' import useEmblaCarousel from 'embla-carousel-react' export function EmblaCarousel() { const [emblaRef, emblaApi] = useEmblaCarousel({ loop: false }) useEffect(() => { if (emblaApi) { console.log(emblaApi.slideNodes()) // Access API } }, [emblaApi]) return ( <div className="embla" ref={emblaRef}> <div className="embla__container"> <div className="embla__slide">Slide 1</div> <div className="embla__slide">Slide 2</div> <div className="embla__slide">Slide 3</div> </div> </div> ) } ``` 他們還提供了一組插件,您可以加入它們以實現自動播放等額外功能。 ``` npm install embla-carousel-autoplay --save ``` ``` import React, { useEffect } from 'react' import useEmblaCarousel from 'embla-carousel-react' import Autoplay from 'embla-carousel-autoplay' export function EmblaCarousel() { const [emblaRef] = useEmblaCarousel({ loop: false }, [Autoplay()]) return ( <div className="embla" ref={emblaRef}> <div className="embla__container"> <div className="embla__slide">Slide 1</div> <div className="embla__slide">Slide 2</div> <div className="embla__slide">Slide 3</div> </div> </div> ) } ``` 尋找[插件的完整列表](https://www.embla-carousel.com/plugins/),包括自動滾動和滾輪手勢。 您可以閱讀有關如何實現不同部分(例如斷點或上一個/下一個按鈕)的[文件](https://www.embla-carousel.com/get-started/)和[指南](https://www.embla-carousel.com/guides/)。 最讓我驚訝的部分是,您可以使用他們的[生成器](https://www.embla-carousel.com/examples/generator/)使用您自己的一組選項來產生自訂輪播。 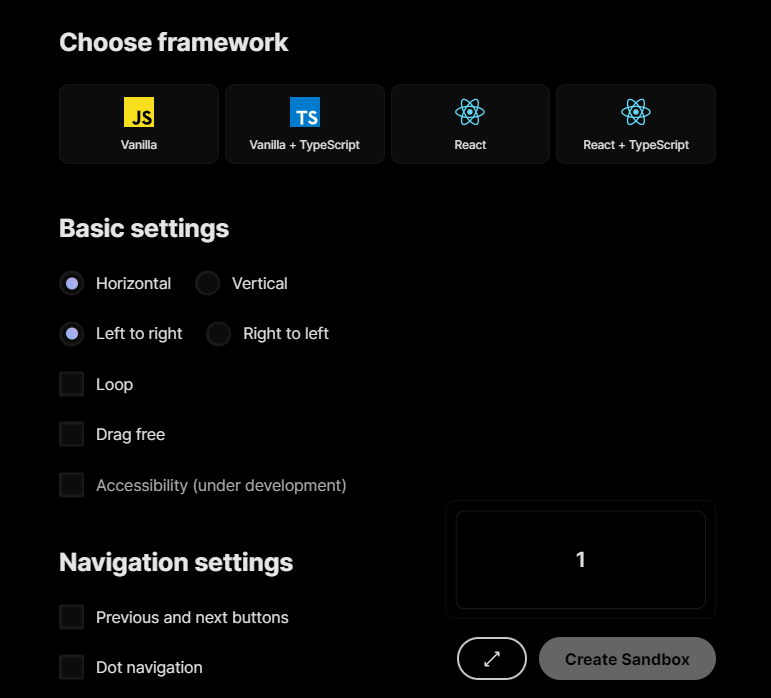  它們在 GitHub 上擁有 4.9K 顆星,並被超過 26000 名開發人員使用。如果我必須使用一個,我肯定會使用這個。 {% cta repo %} 明星名稱 ⭐️ {% endcta %} --- [21.Documenso](https://github.com/documenso/documenso) - 開源 DocuSign 替代方案。 --------------------------------------------------------------------------  如果您從事自由職業並需要簽署協議,這是最佳選擇。我們不應該浪費時間,而應該專注於重要的事情。 以數位方式簽署文件應該既快速又簡單,並且應該成為全球簽署的每個文件的最佳實踐。 如今,這在技術上相當簡單,但它也為每個簽名引入了一個新方:簽名工具提供者。 此專案的技術堆疊包括 TypeScript、Next.js、Prisma、Tailwind CSS、shadcn/ui、NextAuth.js、react-email、tRPC、@documenso/pdf-sign、React-PDF、PDF-Lib、Stripe 和韋爾塞爾。 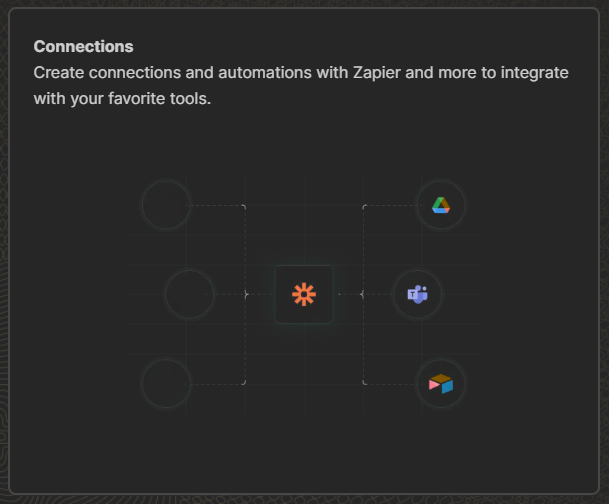 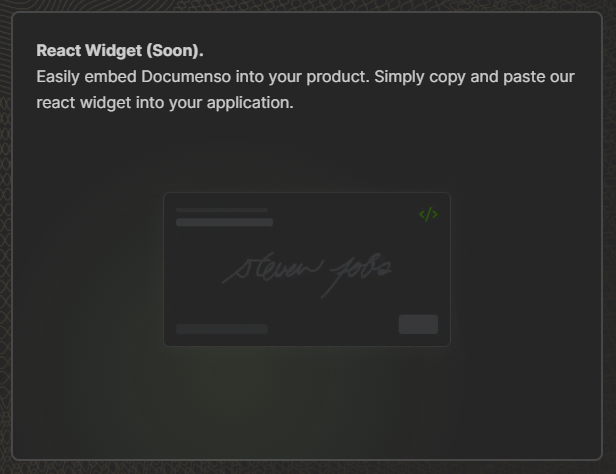 免費套餐可讓您每月簽署 10 份文件,這已經足夠了。 您可以閱讀本文以了解如何[設定專案](https://github.com/documenso/documenso?tab=readme-ov-file#developer-setup)。 您可以閱讀[文件](https://github.com/documenso/documenso?tab=readme-ov-file#developer-quickstart)。 我知道這不是一個非常廣泛的用例,但您仍然可以從程式碼中學習,因此這始終是一個優點。 他們在 GitHub 上擁有超過 5800 顆星,並且發布了`v1.5`版本。 不是很流行但非常有用。 {% cta https://github.com/documenso/documenso %} 明星 documenso ⭐️ {% endcta %} --- 哇! 這花了我很長很長的時間來寫。我希望你喜歡它。 我知道人工智慧工具有時太多了,但我們應該使用它們來讓我們的工作更輕鬆。我的意思是,這就是我們所做的正確的事情,讓生活變得更輕鬆。 我嘗試涵蓋廣泛的工具。 不管怎樣,請讓我們知道您的想法以及您計劃在您的工作流程中使用這些工具嗎? 祝你有美好的一天!直到下一次。 我建立了很多技術內容,因此如果您能在 Twitter 上關注我來支持我,我將不勝感激。 |如果你喜歡這類東西, 請關注我以了解更多:) | [](https://twitter.com/Anmol_Codes) [](https://github.com/Anmol-Baranwal) [](https://www.linkedin.com/in/Anmol-Baranwal/) | |------------|----------| 關注 Taipy 以了解更多此類內容。 {% 嵌入 https://dev.to/taipy %} --- 原文出處:https://dev.to/taipy/21-tools-to-take-your-dev-skills-to-the-moon-53mf
上週我發現了一些很棒的圖書館! 檢查它們、使用它們、幫助它們加星⭐️ > 「我永遠不會停止學習。 我不會只做分配給我的事情。 我知道不存在所謂的現狀。 我將透過充滿熱情和忠誠的客戶來永續地發展我們的業務。 我永遠不會放棄幫助同事的機會,我會記得我知道一切之前的日子。 影響力比金錢更能激勵我,而且我知道**開源是我們這一代最強大的想法之一**。 我會盡可能多溝通,因為這是分散式公司的氧氣。我參加的是一場馬拉松,而不是短跑,無論目標有多遠,到達目標的唯一方法就是每天把一隻腳放在另一隻腳前面。只要有時間,沒有什麼問題是解決不了的。 馬特·穆倫韋格 Automattic 首席執行官   --- Coolify -- 隆重介紹 Coolify,它是[Heroku](https://www.heroku.com/) 、 [Netlify](https://www.netlify.com/)和[Vercel](https://vercel.com/)的開源和自架替代品 這個創新平台由[Andras Bacsai](https://twitter.com/heyandras)開發,使用戶能夠輕鬆部署和管理其 Web 應用程式,同時保持對其基礎設施的完全控制。  ### 主要特徵: - **自託管**:借助 Coolify,您可以自由地將 Web 應用程式託管在自己的伺服器上,從而完全控制您的部署環境。 - **輕鬆部署**:該平台簡化了部署過程,讓您只需單擊幾下或命令即可部署應用程式。 - **可擴展性**:Coolify 旨在輕鬆擴展,在不影響效能的情況下滿足不斷增長的流量和工作負載需求。 - **客製化**:您可以自訂和配置部署環境以滿足您的特定要求,確保最佳效能和安全性。 - **整合**:Coolify 與流行的開發工具和工作流程無縫集成,使其可以輕鬆合併到您現有的專案中。 - **社區支持**:受益於充滿活力的開發者和貢獻者社區,他們提供支援、共享資源並協作改進平台。  在 GitHub 上查看 Coolify 並給它一顆星: [Coolify Repository](https://github.com/coollabsio/coolify) --- Glasskube ----- [Glasskube](https://glasskube.dev/)是一個開源 Kubernetes 套件管理器,可簡化 Kubernetes 部署的套件管理。它提供了一個用戶友好的介面,降低了管理您最喜歡的 Kubernetes 套件的複雜性並提高了透明度。  ### 主要特徵: - **使用者友善的 UI** :Glasskube 提供直覺的使用者介面,使 Kubernetes 套件管理對於使用者來說更容易存取和理解。 - **Brew-Inspired CLI** :對於熟悉命令列介面的高級用戶,Glasskube 提供了 Brew-inspired CLI,允許高效的套件管理操作。 - **依賴感知**:Glasskube 套件具有依賴關係感知能力,確保 Kubernetes 套件的順利管理和安裝並考慮依賴關係。 - **雲端原生應用程式**:Glasskube 設計為雲端原生應用程式,符合 GitOps 原則,有助於無縫整合到 Kubernetes 環境和工作流程中。 Glasskube 作為簡化 Kubernetes 套件管理的寶貴工具而脫穎而出。無論您是 Kubernetes 新手還是經驗豐富的 DevOps 工程師,Glasskube 都能提供使用者友善的解決方案,幫助您輕鬆有效地管理 Kubernetes 套件。 [看看 GitHub 上的 Glasskube 並給它一顆星](https://github.com/glasskube/glasskube) --- AgentCloud --- [AgentCloud](https://www.agentcloud.dev)是您建立自己的 AI 應用程式遊樂場的首選平台!想像一下,它就像擁有您自己的個人 GPT(生成式預訓練變壓器)建構器平台,但具有一些很棒的額外功能。  借助 Agent Cloud,公司可以靈活地為其員工建立和部署兩種不同類型的應用程式: 1. **對話式聊天應用程式**:這些應用程式的運作方式與 OpenAI 的 GPT 類似,允許使用者開發單代理聊天應用程式。然而,它們還具有利用任何大型語言模型 (LLM)、存取豐富的工具庫以及利用來自眾多資料來源的龐大知識庫的額外優勢。 2. **流程應用程式**:向自動化天堂問好!這些應用程式透過為代理設定要處理的目標和任務來幫助您簡化流程。這一切都是為了讓工作變得更輕鬆、更快捷、更有協作性。 因此,無論您是希望透過漂亮的聊天機器人來提高工作效率,還是像專業人士一樣自動執行任務,Agent Cloud 都能滿足您的需求。這一切都是為了為您的團隊提供他們需要的工具,讓他們更聰明地工作,而不是更辛苦地工作! 最好的部分是什麼?它是開源的!如果您喜歡使用 Agent Cloud,為什麼不在 GitHub 上表達一些喜愛並給它一顆星呢?您的支持對開源社群來說意味著世界。 🌟 看看 GitHub 上的 Agent Cloud 並給它一顆星: [Agent Cloud Repository](https://github.com/rnadigital/agentcloud)  我還發現了一個很酷的演示,可以讓您先睹為快了解 Agent Cloud 的全部內容。請觀看此處的介紹影片,以及創始人本人在 YouTube 上對[RAG Google Bigquery](https://youtu.be/POLdnrjsy9c?si=y5MFXNSs-o5TJMMH)的一些精彩見解。  --- CrewAI ------ [CrewAI](https://www.crewai.com/)是一個突破性的框架,旨在協調角色扮演和自主人工智慧代理。這個開源專案由 João Moura 開發,使代理商能夠智慧協作,使他們能夠無縫地協作完成複雜的任務。  ### 主要特徵: - **協作智能**:CrewAI 促進人工智慧代理之間的協作智能,使他們能夠匯集資源和專業知識,更有效地完成任務。 - **自主代理**:此框架支援自主人工智慧代理的開發,能夠根據其環境和目標做出獨立決策並採取行動。 - **任務編排**:CrewAI 提供用於編排任務和協調多個代理程式的操作的工具,確保順暢的協作和同步。 - **可擴展性**:借助 CrewAI,開發人員可以擴展其 AI 系統以容納大量代理,使其適用於從小規模模擬到大規模環境的應用程式。 - **靈活性**:該框架在設計代理行為和互動方面提供了靈活性,允許開發人員自訂系統以適應特定的用例和場景。 - **社群支援**:CrewAI 受益於充滿活力的開發人員和研究人員社區,促進自主代理和人工智慧領域的協作和創新。 在 GitHub 上查看 CrewAI 並給它一顆星: [CrewAI Repository](https://github.com/joaomdmoura/crewAI) > 了解[Agent Cloud 和 CrewAI](https://www.agentcloud.dev/blog/agent-cloud-vs-crewai-a-comparison)之間的差異。 --- SuperAGI ----- [SuperAGI](https://superagi.com/)是一個尖端平台,旨在突破對話式 AI 的界限,整合通用人工智慧 (AGI) 原理,建立高度智慧且適應性強的聊天機器人。  ### 主要特徵: - **通用人工智慧(AGI)** :SuperAGI 利用 AGI 原理開發具有類人理解和推理能力的聊天機器人。 - **深度學習模型**:該平台利用最先進的深度學習模型(例如變壓器和神經網路)來處理和產生自然語言響應。 - **知識圖**:SuperAGI 結合知識圖來表示和組織訊息,使聊天機器人能夠存取龐大的結構化知識儲存庫。 - **元學習**:SuperAGI 採用元學習技術,使聊天機器人能夠根據過去的互動和回饋不斷改進和調整其行為。 - **多輪對話**:SuperAGI 支援多輪對話,允許聊天機器人維護上下文並與用戶進行更自然、更流暢的互動。 - **可擴展性**:該平台具有高度可擴展性,使開發人員能夠整合自訂模組並根據需要擴展聊天機器人功能。 在 GitHub 上探索 SuperAGI: [SuperAGI 儲存庫](https://github.com/TransformerOptimus/SuperAGI) --- Gitroom ---- [Gitroom](https://gitroom.com/)提供工具並協助您擴展開源儲存庫。獲得更多知名度、明星、貢獻和客戶。  ### 主要特徵: - **統一協作**:Gitroom 將團隊協作直接引入到您的 Git 儲存庫中,從而實現無縫溝通和協調。 - **即時更新**:隨時了解儲存庫活動的即時更新,讓團隊能夠輕鬆追蹤變更和進度。 - **互動式討論**:直接在 Git 儲存庫中參與互動式討論,從而輕鬆分享想法並提供回饋。 - **任務管理**:使用內建任務管理功能追蹤任務和問題,簡化專案工作流程並提高生產力。 - **整合**:Gitroom 與 GitHub 順利集成,為已經習慣該平台的使用者提供熟悉且直覺的介面。 - **客製化**:透過可自訂的設定和首選項自訂 Gitroom,以滿足您團隊的特定需求。 在 GitHub 上探索 Gitroom:[Gitroom 儲存庫](https://github.com/gitroomhq/gitroom) 總之,這些儲存庫 - AgentCloud、Gitroom、Glasskube CrewAI、Coolify 和 SuperAGI - 都包含用於建立更聰明應用程式的令人驚嘆的工具。無論您喜歡聊天機器人、人工智慧代理還是 Web 部署,每個人都能找到適合自己的東西。 如果您喜歡所看到的內容,請在 GitHub 上給他們一顆星 ⭐️,為什麼不使用他們的工具來創造一些很棒的東西呢? 很快會在另一篇部落格文章中見到您。  感謝您閱讀,如果您喜歡這個部落格並且想更深入地了解開發人員工具、React 等,請查看我[網站](https://theankurtyagi.com/)上的其他文章。 - [如何使用 React 和 Appwrite 建立安全的任務管理應用程式](https://theankurtyagi.com/appwrite/) - [如何使用 Hygraph 和 React 建立評論應用程式](https://theankurtyagi.com/build-review-app-hygraph-react/) - [如何使用 React 和 Supabase 建立全端 Notes 應用程式](https://theankurtyagi.com/notes-app-react-supabase/) --- 原文出處:https://dev.to/tyaga001/6-open-source-libraries-you-must-know-in-2024-5dgb
**長話短說** -------- 在本文中,您將學習如何建立人工智慧驅動的電子表格應用程式,該應用程式允許您使用簡單的英語命令執行各種會計功能並輕鬆與資料互動。 我們將介紹如何: - 使用 Next.js 建立 Web 應用程式, - 使用 React Spreadsheet 建立電子表格應用程式,以及 - 使用 CopilotKit 將 AI 整合到軟體應用程式中。 - 讓電子表格更容易使用、更有趣  --- CopilotKit:建構應用內人工智慧副駕駛的框架 ========================== CopilotKit是一個[開源的AI副駕駛平台](https://github.com/CopilotKit/CopilotKit)。我們可以輕鬆地將強大的人工智慧整合到您的 React 應用程式中。 建造: - ChatBot:上下文感知的應用內聊天機器人,可以在應用程式內執行操作 💬 - CopilotTextArea:人工智慧驅動的文字字段,具有上下文感知自動完成和插入功能📝 - 聯合代理:應用程式內人工智慧代理,可以與您的應用程式和使用者互動🤖  {% cta https://github.com/CopilotKit/CopilotKit %} Star CopilotKit ⭐️ {% endcta %} (請原諒 AI 的拼字錯誤並給 CopilotKit 加上星號:) 現在回到文章! --- 先決條件 ---- 要完全理解本教程,您需要對 React 或 Next.js 有基本的了解。 以下是建立人工智慧驅動的電子表格應用程式所需的工具: - [React Spreadsheet](https://github.com/iddan/react-spreadsheet) - 一個簡單的包,使我們能夠在 React 應用程式中加入電子表格。 - [OpenAI API](https://platform.openai.com/api-keys) - 提供 API 金鑰,使我們能夠使用 ChatGPT 模型執行各種任務。 - [Tavily AI](https://tavily.com/) - 一個搜尋引擎,使人工智慧代理能夠在應用程式中進行研究並存取即時知識。 - [CopilotKit](https://github.com/CopilotKit) - 一個開源副駕駛框架,用於建立自訂 AI 聊天機器人、應用程式內 AI 代理程式和文字區域。 專案設定和套件安裝 --------- 首先,透過在終端機中執行以下程式碼片段來建立 Next.js 應用程式: ``` npx create-next-app spreadsheet-app ``` 選擇您首選的配置設定。在本教學中,我們將使用 TypeScript 和 Next.js App Router。 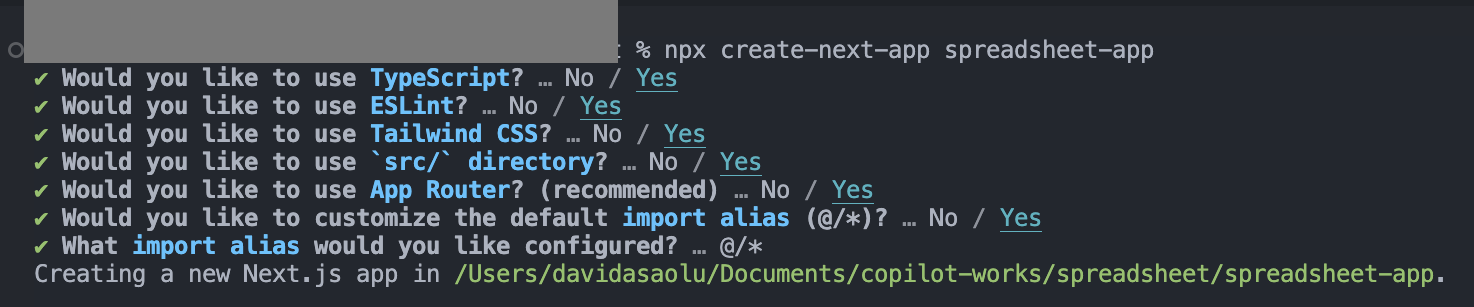 接下來,安裝[OpenAI 函式庫](https://platform.openai.com/docs/introduction)、 [Heroicons](https://www.npmjs.com/package/@heroicons/react)和[React Spreadsheet](https://github.com/iddan/react-spreadsheet)套件及其相依性: ``` npm install openai react-spreadsheet scheduler @heroicons/react ``` 最後,安裝 CopilotKit 軟體套件。這些套件使我們能夠從 React 狀態檢索資料並將 AI copilot 新增至應用程式。 ``` npm install @copilotkit/react-ui @copilotkit/react-textarea @copilotkit/react-core @copilotkit/backend ``` 恭喜!您現在已準備好建立應用程式。 --- 建立電子表格應用程式 ---------- 在本節中,我將引導您使用 React Spreadsheet 建立電子表格應用程式。 該應用程式分為兩個元件: `Sidebar`和`SingleSpreadsheet` 。 要設定這些元件,請導航至 Next.js 應用程式資料夾並建立一個包含以下檔案的`components`資料夾: ``` cd app mkdir components && cd components touch Sidebar.tsx SingleSpreadsheet.tsx ``` 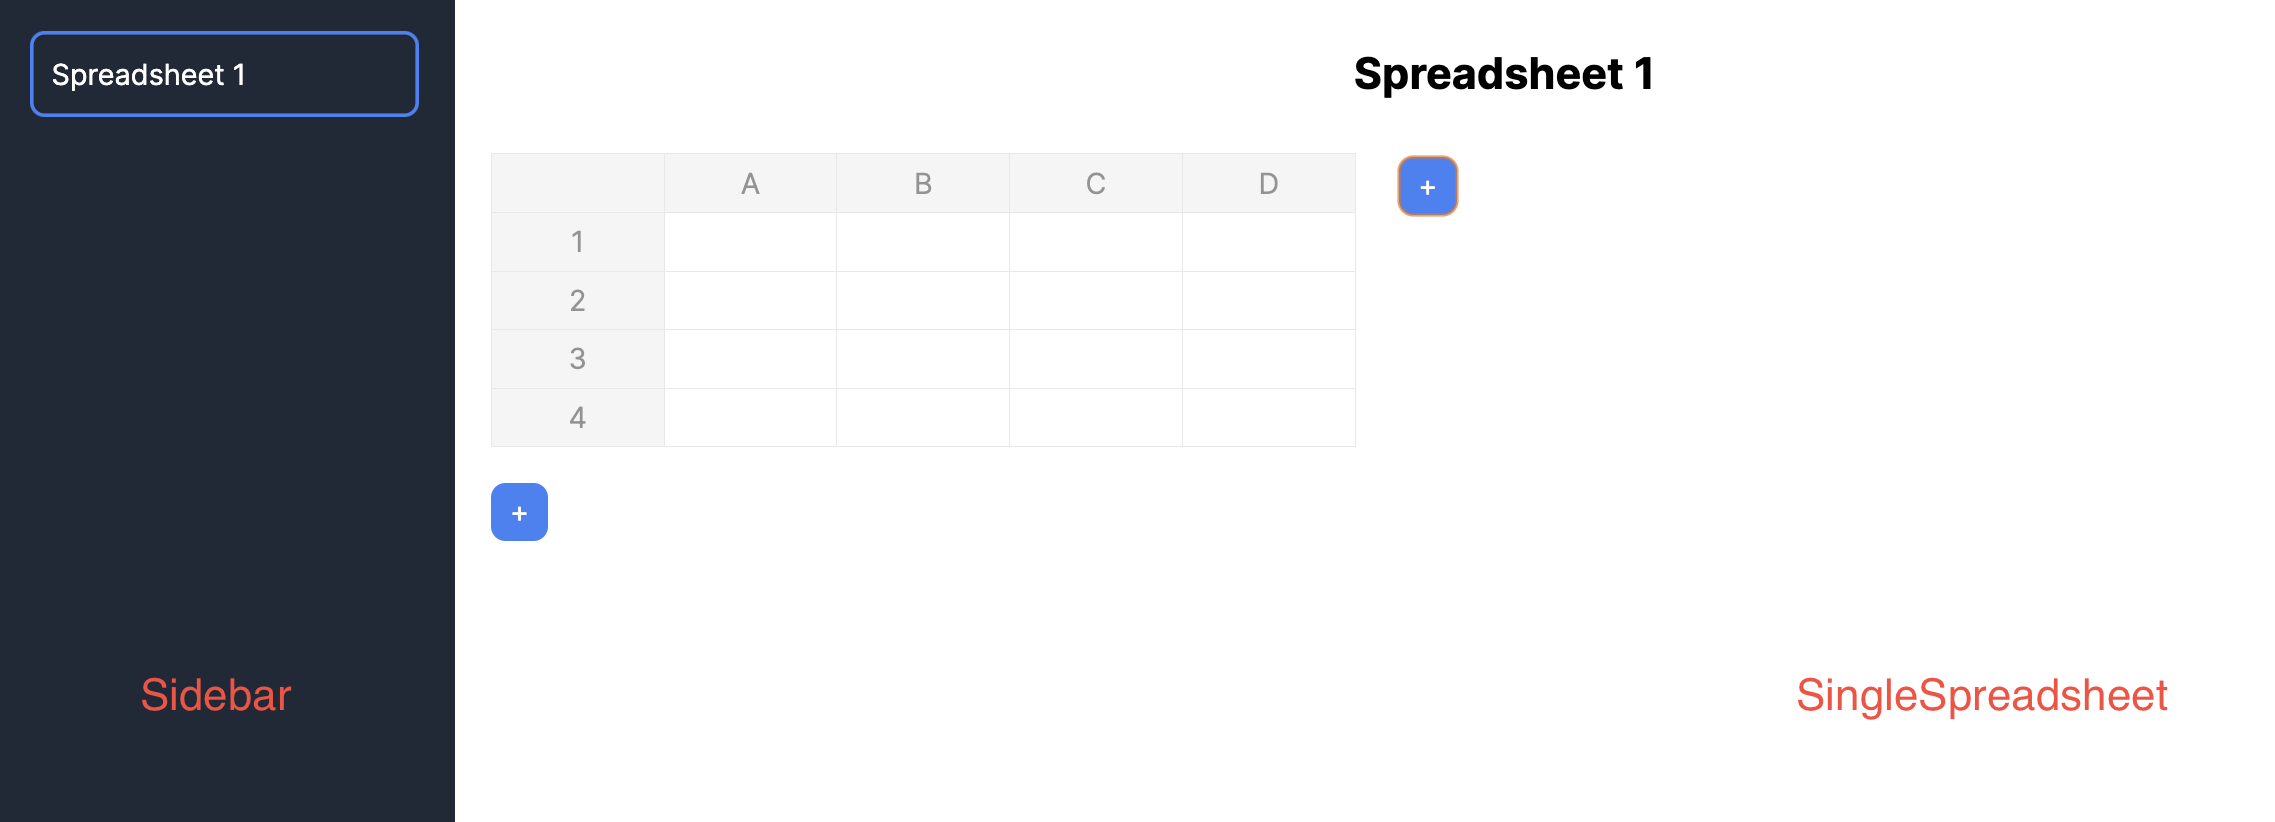 將新建立的元件匯入到**`app/page.tsx`**檔案中。 ``` "use client"; import React, { useState } from "react"; //👇🏻 import the components import { SpreadsheetData } from "./types"; import Sidebar from "./components/Sidebar"; import SingleSpreadsheet from "./components/SingleSpreadsheet"; const Main = () => { return ( <div className='flex'> <p>Hello world</p> </div> ); }; export default Main; ``` 接下來,建立將包含電子表格資料的 React 狀態,並將它們作為 props 傳遞到元件中。 ``` const Main = () => { //👇🏻 holds the title and data within a spreadsheet const [spreadsheets, setSpreadsheets] = React.useState<SpreadsheetData[]>([ { title: "Spreadsheet 1", data: [ [{ value: "" }, { value: "" }, { value: "" }], [{ value: "" }, { value: "" }, { value: "" }], [{ value: "" }, { value: "" }, { value: "" }], ], }, ]); //👇🏻 represents the index of a spreadsheet const [selectedSpreadsheetIndex, setSelectedSpreadsheetIndex] = useState(0); return ( <div className='flex'> <Sidebar spreadsheets={spreadsheets} selectedSpreadsheetIndex={selectedSpreadsheetIndex} setSelectedSpreadsheetIndex={setSelectedSpreadsheetIndex} /> <SingleSpreadsheet spreadsheet={spreadsheets[selectedSpreadsheetIndex]} setSpreadsheet={(spreadsheet) => { setSpreadsheets((prev) => { console.log("setSpreadsheet", spreadsheet); const newSpreadsheets = [...prev]; newSpreadsheets[selectedSpreadsheetIndex] = spreadsheet; return newSpreadsheets; }); }} /> </div> ); }; ``` 此程式碼片段建立了 React 狀態,用於保存電子表格資料及其索引,並將它們作為 props 傳遞到元件中。 `Sidebar`元件接受所有可用的電子表格, `SingleSpreadsheet`元件接收所有電子表格,包括更新電子表格資料的`setSpreadsheet`函數。 將下面的程式碼片段複製到`Sidebar.tsx`檔案中。它顯示應用程式中的所有電子表格,並允許使用者在它們之間進行切換。 ``` import React from "react"; import { SpreadsheetData } from "../types"; interface SidebarProps { spreadsheets: SpreadsheetData[]; selectedSpreadsheetIndex: number; setSelectedSpreadsheetIndex: (index: number) => void; } const Sidebar = ({ spreadsheets, selectedSpreadsheetIndex, setSelectedSpreadsheetIndex, }: SidebarProps) => { return ( <div className='w-64 h-screen bg-gray-800 text-white overflow-auto p-5'> <ul> {spreadsheets.map((spreadsheet, index) => ( <li key={index} className={`mb-4 cursor-pointer ${ index === selectedSpreadsheetIndex ? "ring-2 ring-blue-500 ring-inset p-3 rounded-lg" : "p-3" }`} onClick={() => setSelectedSpreadsheetIndex(index)} > {spreadsheet.title} </li> ))} </ul> </div> ); }; export default Sidebar; ```  更新`SingleSpreadsheet.tsx`文件,如下所示: ``` import React from "react"; import Spreadsheet from "react-spreadsheet"; import { SpreadsheetData, SpreadsheetRow } from "../types"; interface MainAreaProps { spreadsheet: SpreadsheetData; setSpreadsheet: (spreadsheet: SpreadsheetData) => void; } //👇🏻 adds a new row to the spreadsheet const addRow = () => { const numberOfColumns = spreadsheet.rows[0].length; const newRow: SpreadsheetRow = []; for (let i = 0; i < numberOfColumns; i++) { newRow.push({ value: "" }); } setSpreadsheet({ ...spreadsheet, rows: [...spreadsheet.rows, newRow], }); }; //👇🏻 adds a new column to the spreadsheet const addColumn = () => { const spreadsheetData = [...spreadsheet.data]; for (let i = 0; i < spreadsheet.data.length; i++) { spreadsheet.data[i].push({ value: "" }); } setSpreadsheet({ ...spreadsheet, data: spreadsheetData, }); }; const SingleSpreadsheet = ({ spreadsheet, setSpreadsheet }: MainAreaProps) => { return ( <div className='flex-1 overflow-auto p-5'> {/** -- Spreadsheet title ---*/} <div className='flex items-start'> {/** -- Spreadsheet rows and columns---*/} {/** -- Add column button ---*/} </div> {/** -- Add row button ---*/} </div> ); }; export default SingleSpreadsheet; ``` - 從上面的程式碼片段來看, ``` - The `SingleSpreadsheet.tsx` file includes the addRow and addColumn functions. ``` ``` - The `addRow` function calculates the current number of rows, adds a new row, and updates the spreadsheet accordingly. ``` ``` - Similarly, the `addColumn` function adds a new column to the spreadsheet. ``` ``` - The `SingleSpreadsheet` component renders placeholders for the user interface elements. ``` 更新`SingleSpreadsheet`元件以呈現電子表格標題、其資料以及新增行和列按鈕。 ``` return ( <div className='flex-1 overflow-auto p-5'> {/** -- Spreadsheet title ---*/} <input type='text' value={spreadsheet.title} className='w-full p-2 mb-5 text-center text-2xl font-bold outline-none bg-transparent' onChange={(e) => setSpreadsheet({ ...spreadsheet, title: e.target.value }) } /> {/** -- Spreadsheet rows and columns---*/} <div className='flex items-start'> <Spreadsheet data={spreadsheet.data} onChange={(data) => { console.log("data", data); setSpreadsheet({ ...spreadsheet, data: data as any }); }} /> {/** -- Add column button ---*/} <button className='bg-blue-500 text-white rounded-lg ml-6 w-8 h-8 mt-0.5' onClick={addColumn} > + </button> </div> {/** -- Add row button ---*/} <button className='bg-blue-500 text-white rounded-lg w-8 h-8 mt-5 ' onClick={addRow} > + </button> </div> ); ``` 為了確保一切按預期工作,請在`app`資料夾中建立一個`types.ts`文件,其中包含應用程式中聲明的所有靜態類型。 ``` export interface Cell { value: string; } export type SpreadsheetRow = Cell[]; export interface SpreadsheetData { title: string; rows: SpreadsheetRow[]; } ``` 恭喜! 🎉 您的電子表格應用程式應該可以完美執行。在接下來的部分中,您將了解如何新增 AI 副駕駛,以使用 CopilotKit 自動執行各種任務。 --- 使用 CopilotKit 改進應用程式功能 ---------------------- 在這裡,您將學習如何將 AI 副駕駛加入到電子表格應用程式,以使用 CopilotKit 自動執行複雜的操作。 CopilotKit 提供前端和[後端](https://docs.copilotkit.ai/getting-started/quickstart-backend)套件。它們使您能夠插入 React 狀態並使用 AI 代理在後端處理應用程式資料。 首先,我們將 CopilotKit React 元件新增到應用程式前端。 ### 將 CopilotKit 加入前端 在`app/page.tsx`中,將以下程式碼片段加入`Main`元件的頂部。 ``` import "@copilotkit/react-ui/styles.css"; import { CopilotKit } from "@copilotkit/react-core"; import { CopilotSidebar } from "@copilotkit/react-ui"; import { INSTRUCTIONS } from "./instructions"; const HomePage = () => { return ( <CopilotKit url='/api/copilotkit'> <CopilotSidebar instructions={INSTRUCTIONS} labels={{ initial: "Welcome to the spreadsheet app! How can I help you?", }} defaultOpen={true} clickOutsideToClose={false} > <Main /> </CopilotSidebar> </CopilotKit> ); }; const Main = () => { //--- Main component // }; export default HomePage; ``` - 從上面的程式碼片段來看, ``` - I imported the CopilotKit, its sidebar component, and CSS file to use its frontend components within the application. ``` ``` - The [CopilotKit component](https://docs.copilotkit.ai/reference/CopilotKit) accepts a `url` prop that represents the API server route where CopilotKit will be configured. ``` ``` - The Copilot component also renders the [CopilotSidebar component](https://docs.copilotkit.ai/reference/CopilotSidebar) , allowing users to provide custom instructions to the AI copilot within the application. ``` ``` - Lastly, you can export the `HomePage` component containing the `CopilotSidebar` and the `Main` components. ``` 從上面的程式碼片段中,您會注意到`CopilotSidebar`元件有一個`instructions`屬性。此屬性使您能夠為 CopilotKit 提供額外的上下文或指導。 因此,在`app`資料夾中建立`instructions.ts`檔案並將這些[命令](https://github.com/CopilotKit/spreadsheet-demo/blob/main/src/app/instructions.ts)複製到該檔案中。 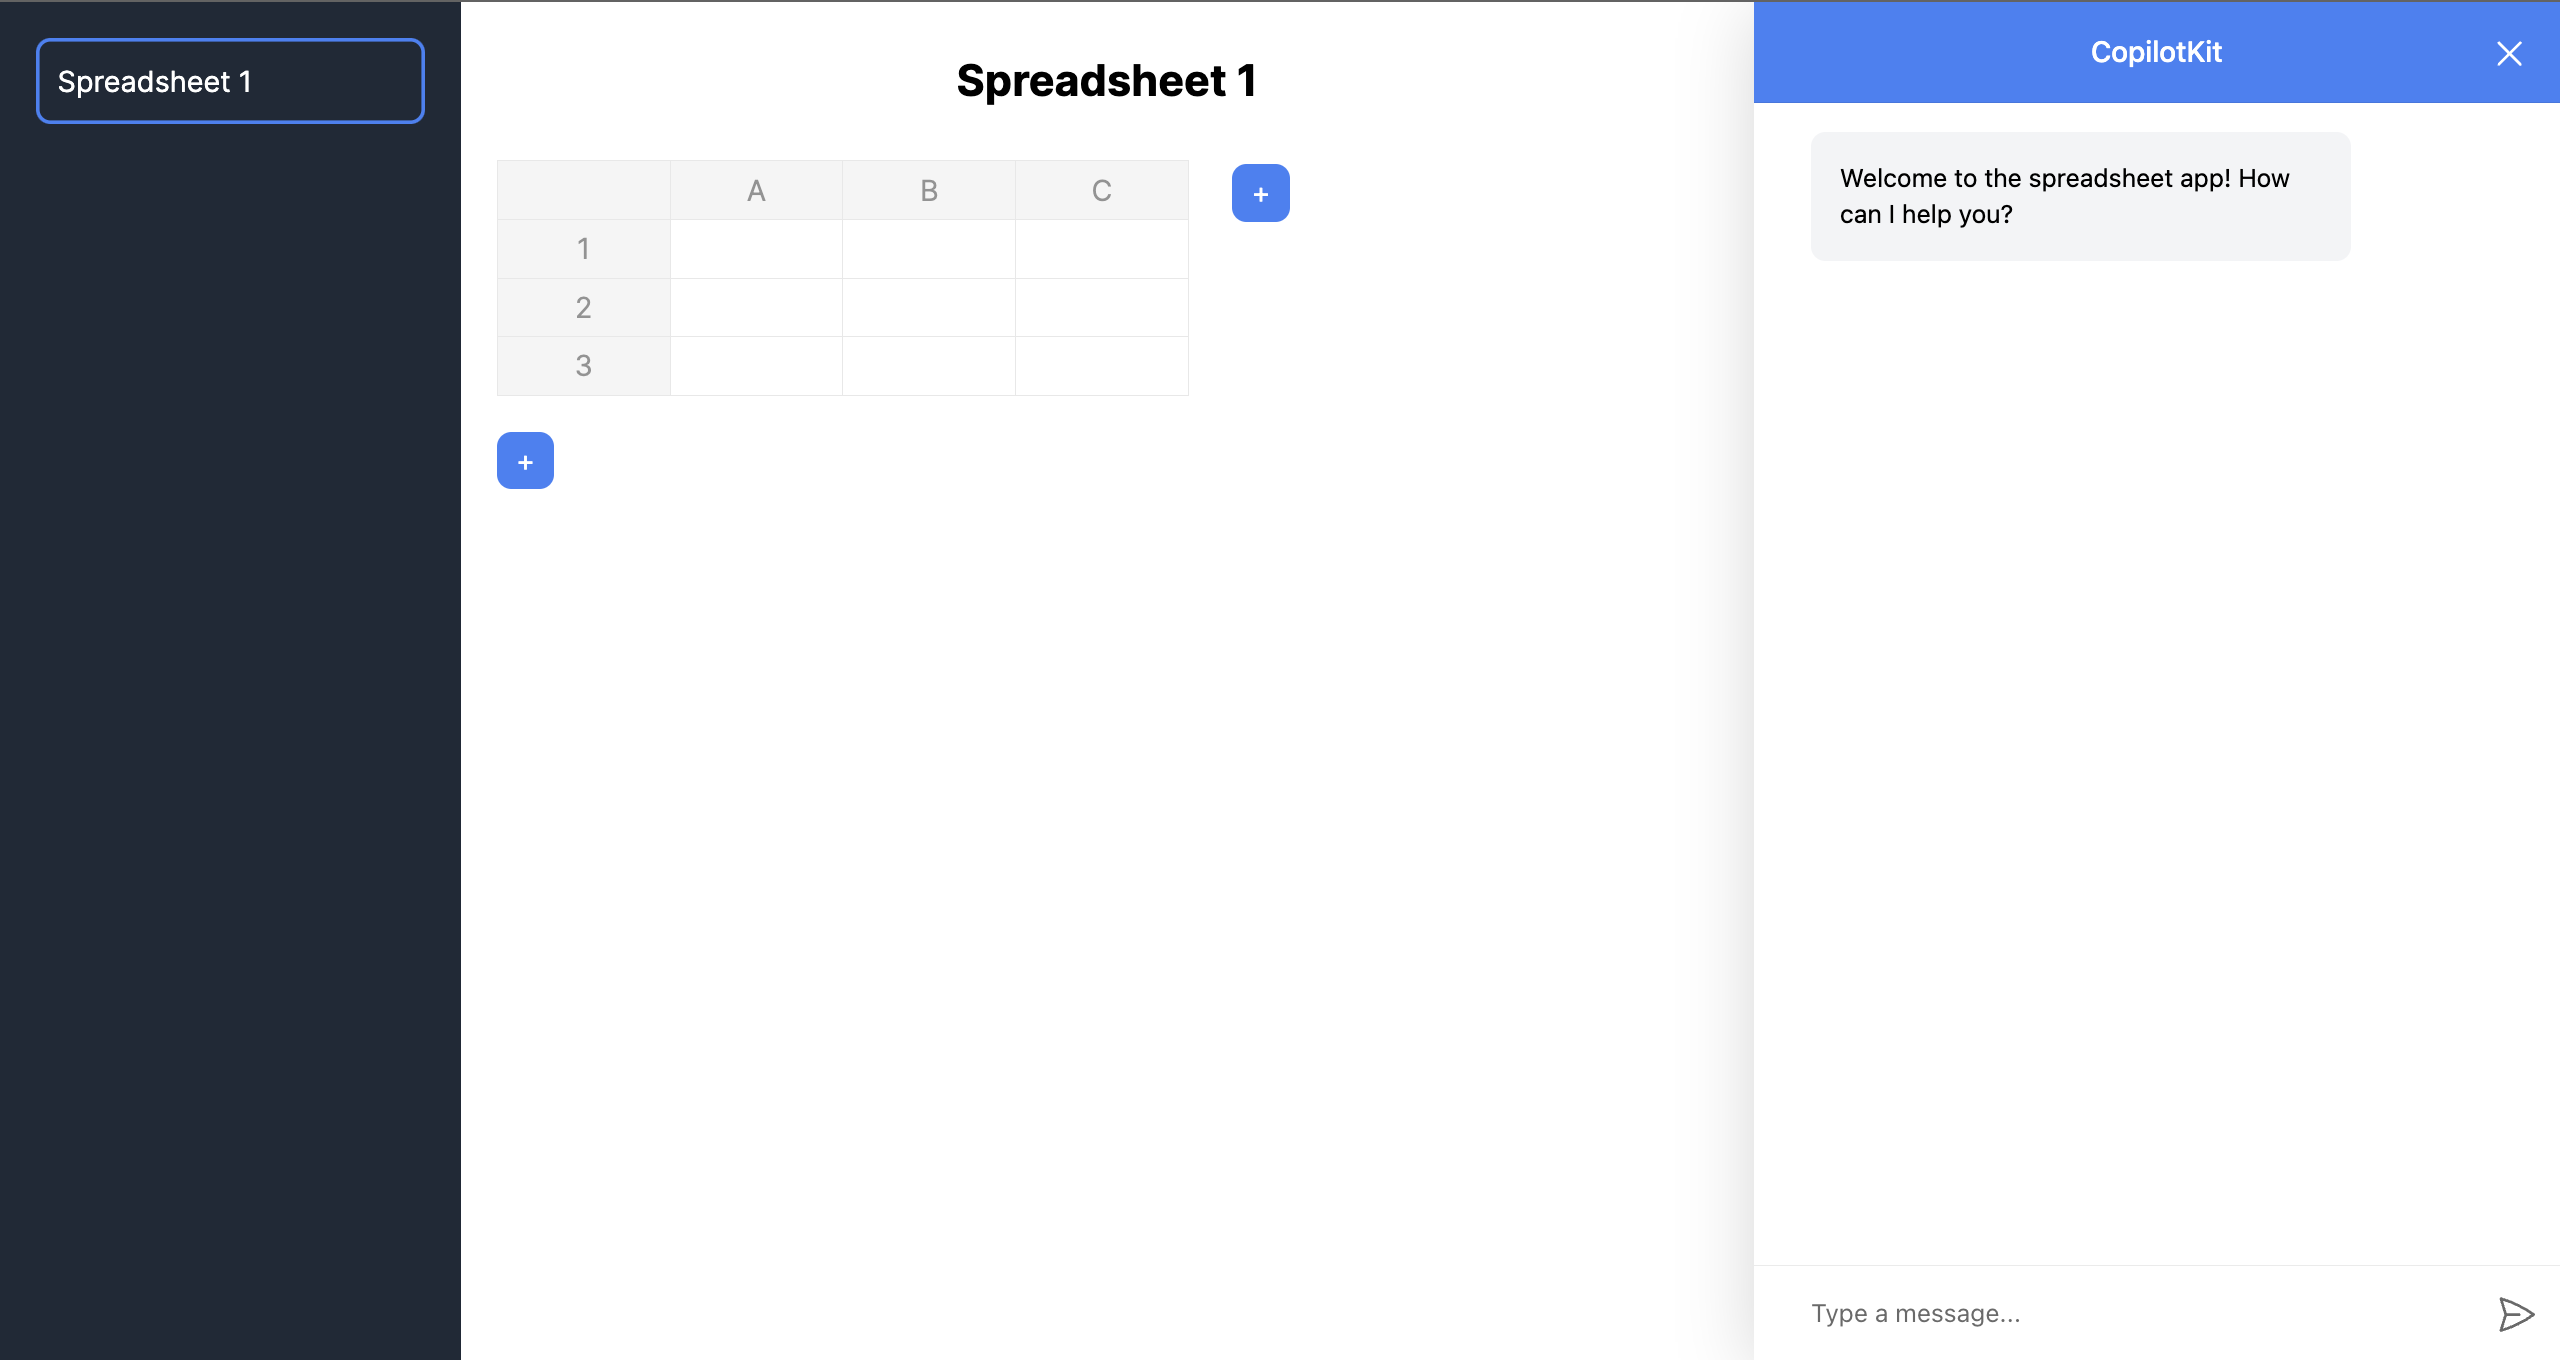 接下來,您需要將 CopilotKit 插入應用程式的狀態以存取應用程式的資料。為了實現這一點,CopilotKit 提供了兩個鉤子: [useCopilotAction](https://docs.copilotkit.ai/reference/useCopilotAction)和[useMakeCopilotReadable](https://docs.copilotkit.ai/reference/useMakeCopilotReadable) 。 [useCopilotAction](https://docs.copilotkit.ai/reference/useCopilotAction)掛鉤可讓您定義 CopilotKit 執行的動作。它接受包含以下參數的物件: - `name` - 操作的名稱。 - `description` - 操作的描述。 - `parameters` - 包含所需參數清單的陣列。 - `render` - 預設的自訂函數或字串。 - `handler` - 由操作觸發的可執行函數。 ``` useCopilotAction({ name: "sayHello", description: "Say hello to someone.", parameters: [ { name: "name", type: "string", description: "name of the person to say greet", }, ], render: "Process greeting message...", handler: async ({ name }) => { alert(`Hello, ${name}!`); }, }); ``` [useMakeCopilotReadable](https://docs.copilotkit.ai/reference/useMakeCopilotReadable)掛鉤向 CopilotKit 提供應用程式狀態。 ``` import { useMakeCopilotReadable } from "@copilotkit/react-core"; const appState = ...; useMakeCopilotReadable(JSON.stringify(appState)); ``` 現在,讓我們回到電子表格應用程式。在`SingleSpreadsheet`元件中,將應用程式狀態傳遞到 CopilotKit 中,如下所示。 ``` import { useCopilotAction, useMakeCopilotReadable, } from "@copilotkit/react-core"; const SingleSpreadsheet = ({ spreadsheet, setSpreadsheet }: MainAreaProps) => { //👇🏻 hook for providing the application state useMakeCopilotReadable( "This is the current spreadsheet: " + JSON.stringify(spreadsheet) ); // --- other lines of code }; ``` 接下來,您需要在`SingleSpreadsheet`元件中新增兩個操作,該元件在使用者更新電子表格資料並使用 CopilotKit 新增資料行時執行。 在繼續之前,請在`app`資料夾中建立一個包含`canonicalSpreadsheetData.ts`檔案的`utils`資料夾。 ``` cd app mkdir utils && cd utils touch canonicalSpreadsheetData.ts ``` 將下面的程式碼片段複製到檔案中。它接受對電子表格所做的更新,並將其轉換為電子表格中資料行所需的格式。 ``` import { SpreadsheetRow } from "../types" export interface RowLike { cells: CellLike[] | undefined; } export interface CellLike { value: string; } export function canonicalSpreadsheetData( rows: RowLike[] | undefined ): SpreadsheetRow[] { const canonicalRows: SpreadsheetRow[] = []; for (const row of rows || []) { const canonicalRow: SpreadsheetRow = []; for (const cell of row.cells || []) { canonicalRow.push({value: cell.value}); } canonicalRows.push(canonicalRow); } return canonicalRows; } ``` 現在,讓我們使用`SingleSpreadsheet`元件中的`useCopilotAction`掛鉤建立操作。複製下面的第一個操作: ``` import { canonicalSpreadsheetData } from "../utils/canonicalSpreadsheetData"; import { PreviewSpreadsheetChanges } from "./PreviewSpreadsheetChanges"; import { SpreadsheetData, SpreadsheetRow } from "../types"; import { useCopilotAction } from "@copilotkit/react-core"; useCopilotAction({ name: "suggestSpreadsheetOverride", description: "Suggest an override of the current spreadsheet", parameters: [ { name: "rows", type: "object[]", description: "The rows of the spreadsheet", attributes: [ { name: "cells", type: "object[]", description: "The cells of the row", attributes: [ { name: "value", type: "string", description: "The value of the cell", }, ], }, ], }, { name: "title", type: "string", description: "The title of the spreadsheet", required: false, }, ], render: (props) => { const { rows } = props.args const newRows = canonicalSpreadsheetData(rows); return ( <PreviewSpreadsheetChanges preCommitTitle="Replace contents" postCommitTitle="Changes committed" newRows={newRows} commit={(rows) => { const updatedSpreadsheet: SpreadsheetData = { title: spreadsheet.title, rows: rows, }; setSpreadsheet(updatedSpreadsheet); }} /> ) }, handler: ({ rows, title }) => { // Do nothing. // The preview component will optionally handle committing the changes. }, }); ``` 上面的程式碼片段執行使用者的任務並使用 CopilotKit 產生 UI 功能顯示結果預覽。 `suggestSpreadsheetOverride`操作傳回一個自訂元件 ( `PreviewSpreadsheetChanges` ),該元件接受以下內容為 props: - 要新增到電子表格的新資料行, - 一些文字 - `preCommitTitle`和`postCommitTitle` ,以及 - 更新電子表格的`commit`函數。 您很快就會學會如何使用它們。 在元件資料夾中建立`PreviewSpreadsheetChanges`元件,並將下列程式碼片段複製到檔案中: ``` import { CheckCircleIcon } from '@heroicons/react/20/solid' import { SpreadsheetRow } from '../types'; import { useState } from 'react'; import Spreadsheet from 'react-spreadsheet'; export interface PreviewSpreadsheetChanges { preCommitTitle: string; postCommitTitle: string; newRows: SpreadsheetRow[]; commit: (rows: SpreadsheetRow[]) => void; } export function PreviewSpreadsheetChanges(props: PreviewSpreadsheetChanges) { const [changesCommitted, setChangesCommitted] = useState(false); const commitChangesButton = () => { return ( <button className="inline-flex items-center gap-x-2 rounded-md bg-indigo-600 px-3.5 py-2.5 text-sm font-semibold text-white shadow-sm hover:bg-indigo-500 focus-visible:outline focus-visible:outline-2 focus-visible:outline-offset-2 focus-visible:outline-indigo-600" onClick={() => { props.commit(props.newRows); setChangesCommitted(true); }} > {props.preCommitTitle} </button> ); } const changesCommittedButtonPlaceholder = () => { return ( <button className=" inline-flex items-center gap-x-2 rounded-md bg-gray-100 px-3.5 py-2.5 text-sm font-semibold text-green-600 shadow-sm cursor-not-allowed" disabled > {props.postCommitTitle} <CheckCircleIcon className="-mr-0.5 h-5 w-5" aria-hidden="true" /> </button> ); } return ( <div className="flex flex-col"> <Spreadsheet data={props.newRows} /> <div className="mt-5"> {changesCommitted ? changesCommittedButtonPlaceholder() : commitChangesButton() } </div> </div> ); } ``` `PreviewSpreadsheetChanges`元件傳回一個電子表格,其中包含從請求產生的資料和一個按鈕(帶有`preCommitTitle`文字),該按鈕允許您將這些變更提交到主電子表格表(透過觸發`commit`函數)。這可確保您在將結果新增至電子表格之前對結果感到滿意。 將下面的第二個操作加入到`SingleSpreadsheet`元件。 ``` useCopilotAction({ name: "appendToSpreadsheet", description: "Append rows to the current spreadsheet", parameters: [ { name: "rows", type: "object[]", description: "The new rows of the spreadsheet", attributes: [ { name: "cells", type: "object[]", description: "The cells of the row", attributes: [ { name: "value", type: "string", description: "The value of the cell", }, ], }, ], }, ], render: (props) => { const status = props.status; const { rows } = props.args const newRows = canonicalSpreadsheetData(rows); return ( <div> <p>Status: {status}</p> <Spreadsheet data={newRows} /> </div> ) }, handler: ({ rows }) => { const canonicalRows = canonicalSpreadsheetData(rows); const updatedSpreadsheet: SpreadsheetData = { title: spreadsheet.title, rows: [...spreadsheet.rows, ...canonicalRows], }; setSpreadsheet(updatedSpreadsheet); }, }); ``` `appendToSpreadsheet`操作透過在電子表格中新增資料行來更新電子表格。 以下是操作的簡短示範: \[https://www.youtube.com/watch?v=kGQ9xl5mSoQ\] 最後,在`Main`元件中新增一個操作,以便在使用者提供指令時建立一個新的電子表格。 ``` useCopilotAction({ name: "createSpreadsheet", description: "Create a new spreadsheet", parameters: [ { name: "rows", type: "object[]", description: "The rows of the spreadsheet", attributes: [ { name: "cells", type: "object[]", description: "The cells of the row", attributes: [ { name: "value", type: "string", description: "The value of the cell", }, ], }, ], }, { name: "title", type: "string", description: "The title of the spreadsheet", }, ], render: (props) => { const { rows, title } = props.args; const newRows = canonicalSpreadsheetData(rows); return ( <PreviewSpreadsheetChanges preCommitTitle="Create spreadsheet" postCommitTitle="Spreadsheet created" newRows={newRows} commit={ (rows) => { const newSpreadsheet: SpreadsheetData = { title: title || "Untitled Spreadsheet", rows: rows, }; setSpreadsheets((prev) => [...prev, newSpreadsheet]); setSelectedSpreadsheetIndex(spreadsheets.length); }} /> ); }, handler: ({ rows, title }) => { // Do nothing. // The preview component will optionally handle committing the changes. }, }); ``` 恭喜!您已成功為此應用程式建立所需的操作。現在,讓我們將應用程式連接到 Copilotkit 後端。 ### 將 Tavily AI 和 OpenAI 加入到 CopilotKit 在本教程的開頭,我向您介紹了[Tavily AI](https://tavily.com/) (一個為 AI 代理提供知識的搜尋引擎)和 OpenAI(一個使我們能夠存取[GPT-4 AI 模型的](https://openai.com/gpt-4)庫)。 在本部分中,您將了解如何取得 Tavily 和 OpenAI API 金鑰並將它們整合到 CopilotKit 中以建立高級智慧應用程式。 造訪[Tavily AI 網站](https://app.tavily.com/sign-in),建立一個帳戶,然後將您的 API 金鑰複製到您專案的`.env.local`檔案中。 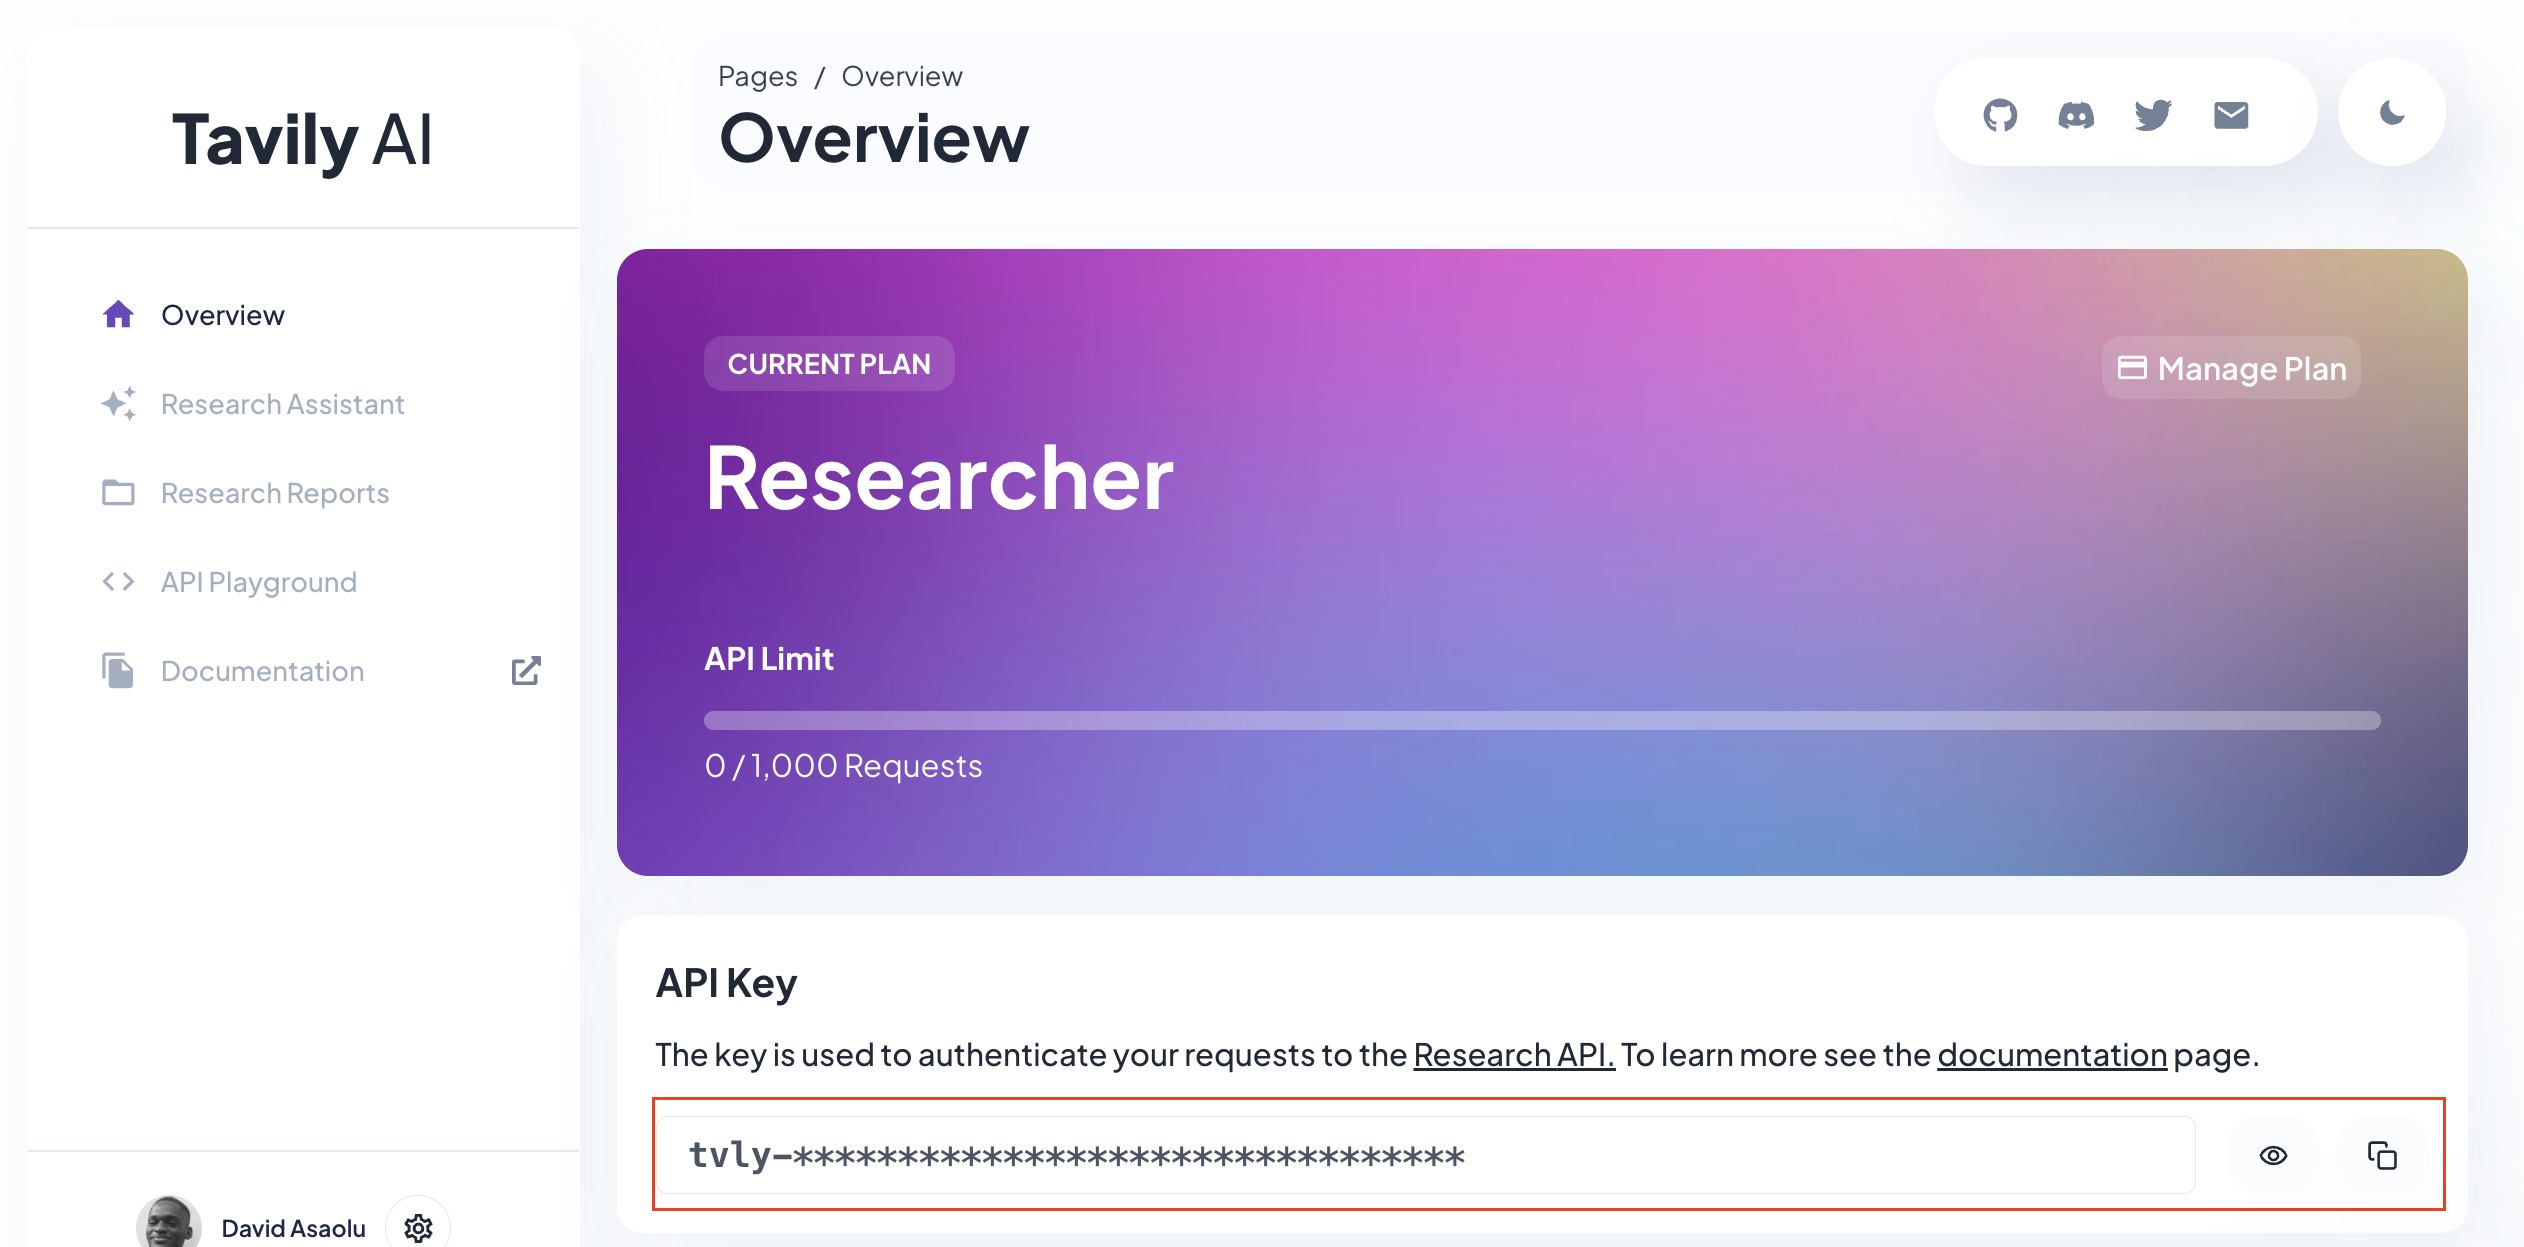 接下來,導覽至[OpenAI 開發者平台](https://platform.openai.com/api-keys),建立 API 金鑰,並將其複製到`.env.local`檔案中。 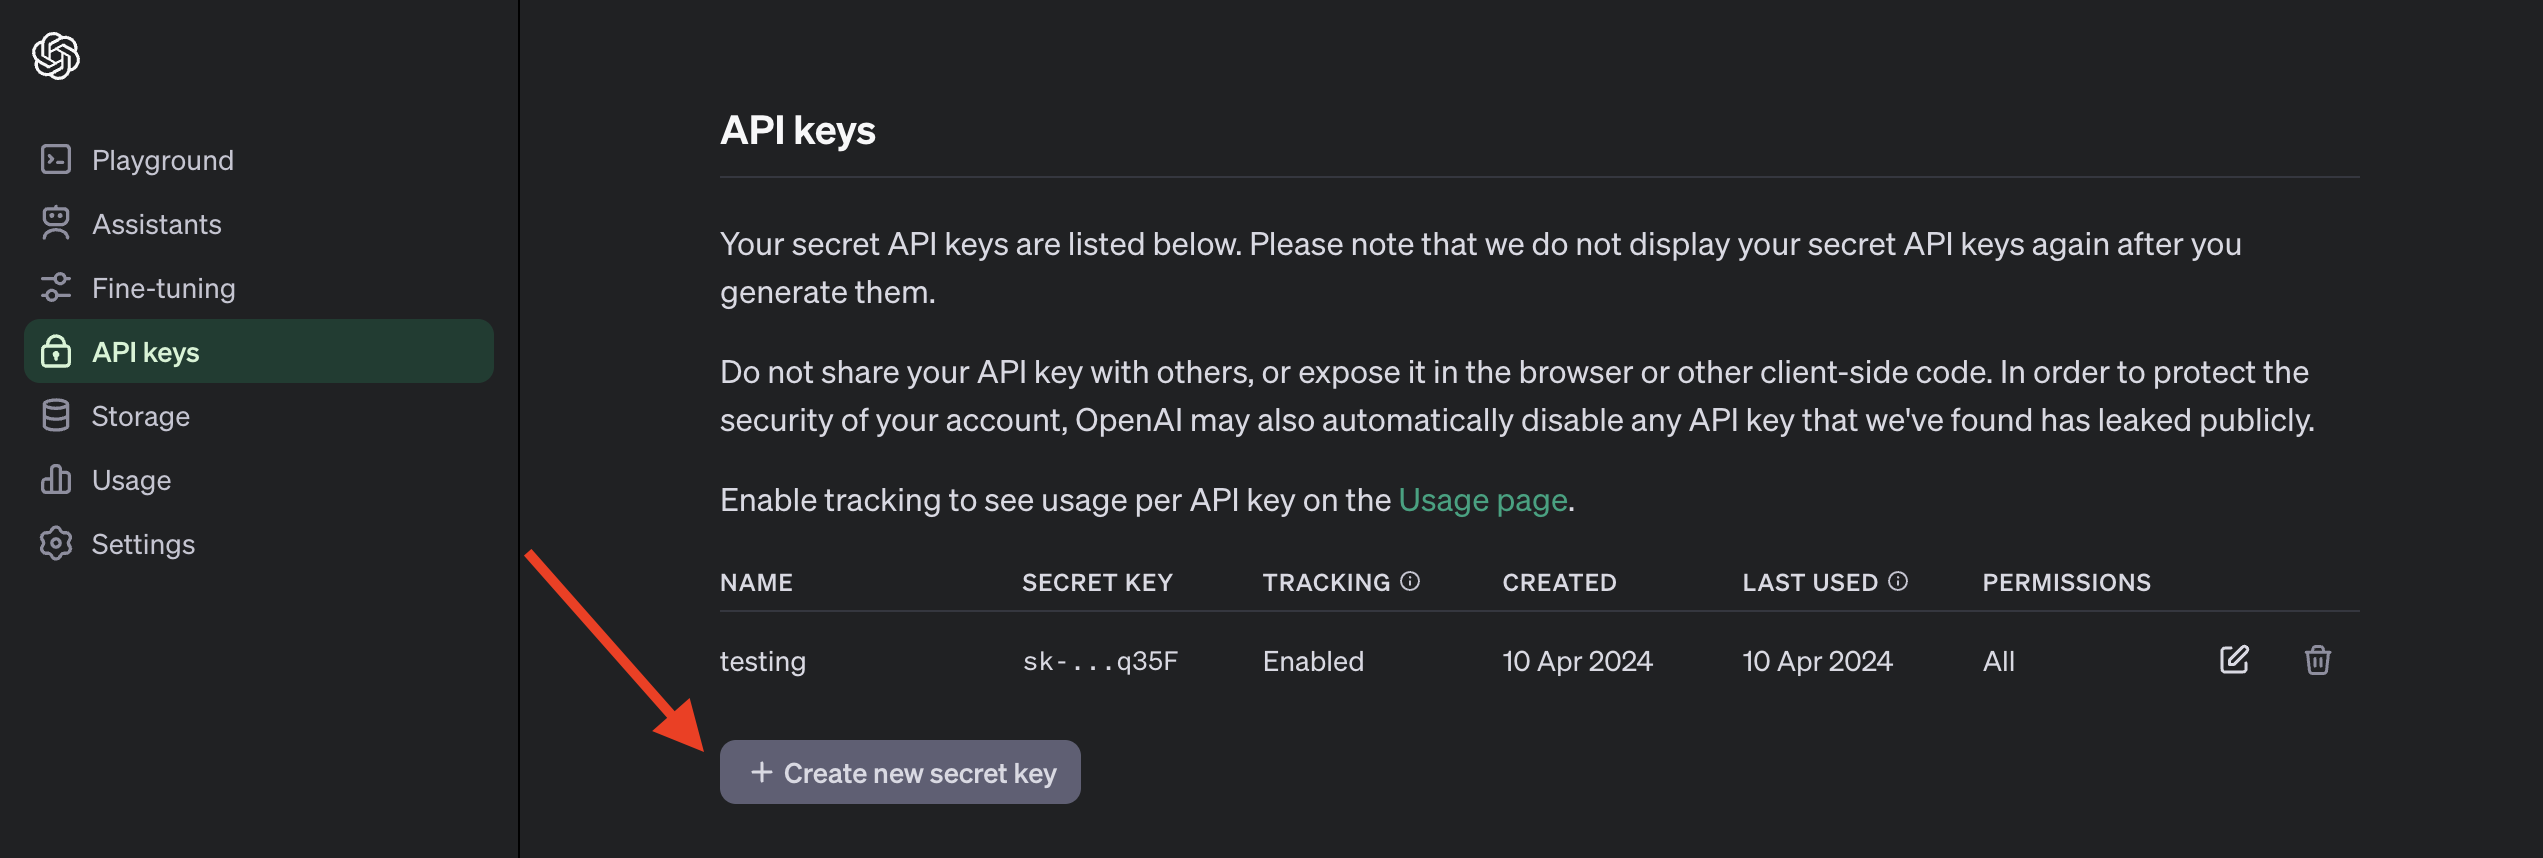 以下是`.env.local`檔案的預覽,其中包括 API 金鑰並指定要使用的 OpenAI 模型。請注意,存取 GPT-4 模型需要[訂閱 ChatGPT Plus](https://openai.com/chatgpt/pricing) 。 ``` TAVILY_API_KEY=<your_API_key> OPENAI_MODEL=gpt-4-1106-preview OPENAI_API_KEY=<your_API_key> ``` 回到我們的應用程式,您需要為 Copilot 建立 API 路由。因此,建立一個包含`route.ts`的`api/copilotkit`資料夾並新增一個`tavily.ts`檔案。 ``` cd app mkdir api && cd api mkdir copilotkit && cd copilotkit touch route.ts tavily.ts ``` 在`tavily.ts`檔案中建立一個函數,該函數接受使用者的查詢,使用 Tavily Search API 對查詢進行研究,並使用[OpenAI GPT-4 模型](https://openai.com/gpt-4)總結結果。 ``` import OpenAI from "openai"; export async function research(query: string) { //👇🏻 sends the request to the Tavily Search API const response = await fetch("https://api.tavily.com/search", { method: "POST", headers: { "Content-Type": "application/json", }, body: JSON.stringify({ api_key: process.env.TAVILY_API_KEY, query, search_depth: "basic", include_answer: true, include_images: false, include_raw_content: false, max_results: 20, }), }); //👇🏻 the response const responseJson = await response.json(); const openai = new OpenAI({ apiKey: process.env.OPENAI_API_KEY! }); //👇🏻 passes the response into the OpenAI GPT-4 model const completion = await openai.chat.completions.create({ messages: [ { role: "system", content: `Summarize the following JSON to answer the research query \`"${query}"\`: ${JSON.stringify( responseJson )} in plain English.`, }, ], model: process.env.OPENAI_MODEL, }); //👇🏻 returns the result return completion.choices[0].message.content; } ``` 最後,您可以透過將使用者的查詢傳遞到函數中並向 CopilotKit 提供其回應來執行`route.ts`檔案中的`research`函數。 ``` import { CopilotBackend, OpenAIAdapter } from "@copilotkit/backend"; import { Action } from "@copilotkit/shared"; import { research } from "./tavily"; //👇🏻 carries out a research on the user's query const researchAction: Action<any> = { name: "research", description: "Call this function to conduct research on a certain query.", parameters: [ { name: "query", type: "string", description: "The query for doing research. 5 characters or longer. Might be multiple words", }, ], handler: async ({ query }) => { console.log("Research query: ", query); const result = await research(query); console.log("Research result: ", result); return result; }, }; export async function POST(req: Request): Promise<Response> { const actions: Action<any>[] = []; if (process.env.TAVILY_API_KEY!) { actions.push(researchAction); } const copilotKit = new CopilotBackend({ actions: actions, }); const openaiModel = process.env.OPENAI_MODEL; return copilotKit.response(req, new OpenAIAdapter({ model: openaiModel })); } ``` 恭喜!您已完成本教學的專案。 結論 -- [CopilotKit](https://copilotkit.ai/)是一款令人難以置信的工具,可讓您在幾分鐘內將 AI Copilot 加入到您的產品中。無論您是對人工智慧聊天機器人和助理感興趣,還是對複雜任務的自動化感興趣,CopilotKit 都能讓您輕鬆實現。 如果您需要建立 AI 產品或將 AI 工具整合到您的軟體應用程式中,您應該考慮 CopilotKit。 您可以在 GitHub 上找到本教學的源程式碼: https://github.com/CopilotKit/spreadsheet-demo 感謝您的閱讀! --- 原文出處:https://dev.to/copilotkit/build-an-ai-powered-spreadsheet-app-nextjs-langchain-copilotkit-109d
這是科技進步的令人興奮的時刻。 作為開發人員,我們所有人都需要從事可以產生收入或幫助建立我們聲譽的副業專案。 今天,我們將介紹 10 個令人興奮的專案,並發現使用每個專案建立的 3-4 個流行應用程式。總共有 30 多個專案,提供程式碼存取供您學習。 這些將讓您編碼一段時間,所以讓我們開始吧!  --- 1. [CopilotKit](https://github.com/CopilotKit/CopilotKit) - 在數小時內為您的產品提供 AI Copilot。 ------------------------------------------------------------------------------------ 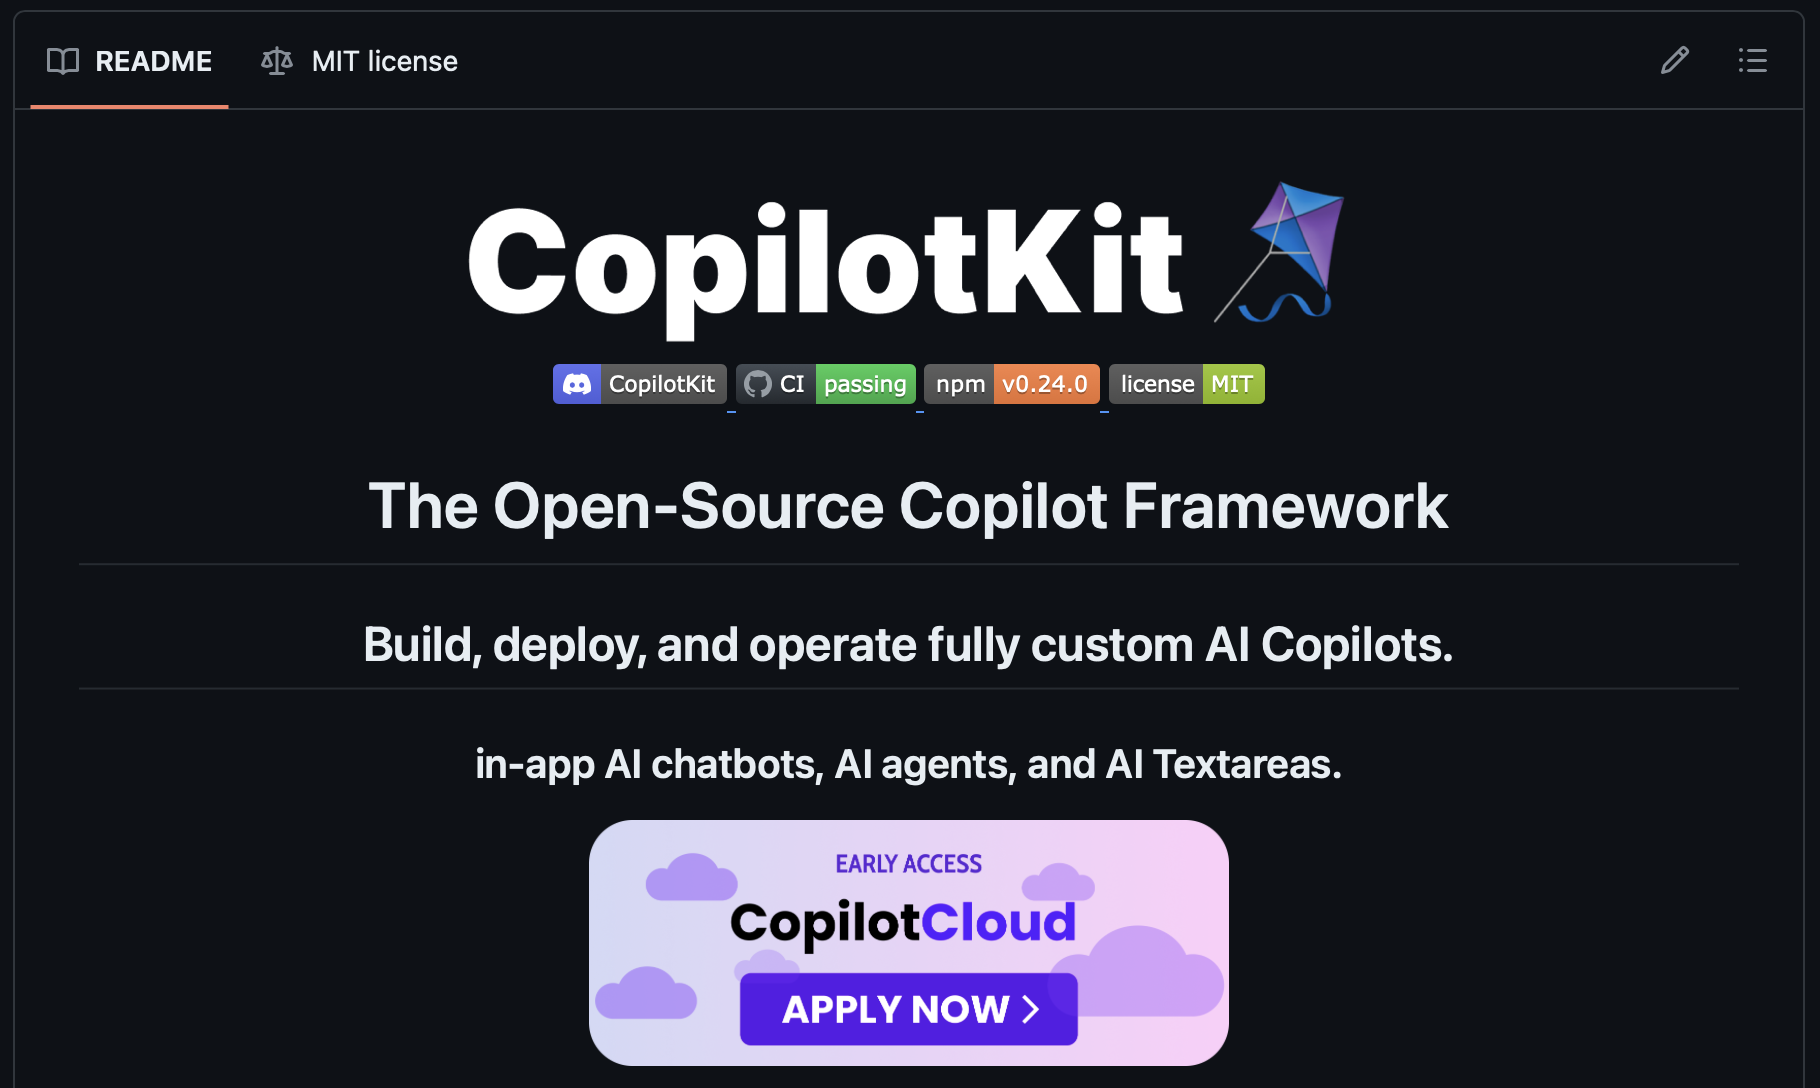 將 AI 功能整合到 React 中是很困難的,這就是 Copilot 的用武之地。一個簡單快速的解決方案,可將可投入生產的 Copilot 整合到任何產品中! 您可以使用兩個 React 元件將關鍵 AI 功能整合到 React 應用程式中。它們還提供內建(完全可自訂)Copilot 原生 UX 元件,例如`<CopilotKit />` 、 `<CopilotPopup />` 、 `<CopilotSidebar />` 、 `<CopilotTextarea />` 。 開始使用以下 npm 指令。 ``` npm i @copilotkit/react-core @copilotkit/react-ui ``` Copilot Portal 是 CopilotKit 提供的元件之一,CopilotKit 是一個應用程式內人工智慧聊天機器人,可查看目前應用狀態並在應用程式內採取操作。它透過插件與應用程式前端和後端以及第三方服務進行通訊。 這就是整合聊天機器人的方法。 `CopilotKit`必須包裝與 CopilotKit 互動的所有元件。建議您也開始使用`CopilotSidebar` (您可以稍後切換到不同的 UI 提供者)。 ``` "use client"; import { CopilotKit } from "@copilotkit/react-core"; import { CopilotSidebar } from "@copilotkit/react-ui"; import "@copilotkit/react-ui/styles.css"; export default function RootLayout({children}) { return ( <CopilotKit url="/path_to_copilotkit_endpoint/see_below"> <CopilotSidebar> {children} </CopilotSidebar> </CopilotKit> ); } ``` 您可以使用此[快速入門指南](https://docs.copilotkit.ai/getting-started/quickstart-backend)設定 Copilot 後端端點。 之後,您可以讓 Copilot 採取行動。您可以閱讀如何提供[外部上下文](https://docs.copilotkit.ai/getting-started/quickstart-chatbot#provide-context)。您可以使用`useMakeCopilotReadable`和`useMakeCopilotDocumentReadable`反應掛鉤來執行此操作。 ``` "use client"; import { useMakeCopilotActionable } from '@copilotkit/react-core'; // Let the copilot take action on behalf of the user. useMakeCopilotActionable( { name: "setEmployeesAsSelected", // no spaces allowed in the function name description: "Set the given employees as 'selected'", argumentAnnotations: [ { name: "employeeIds", type: "array", items: { type: "string" } description: "The IDs of employees to set as selected", required: true } ], implementation: async (employeeIds) => setEmployeesAsSelected(employeeIds), }, [] ); ``` 您可以閱讀[文件](https://docs.copilotkit.ai/getting-started/quickstart-textarea)並查看[演示影片](https://github.com/CopilotKit/CopilotKit?tab=readme-ov-file#demo)。 您可以輕鬆整合 Vercel AI SDK、OpenAI API、Langchain 和其他 LLM 供應商。您可以按照本[指南](https://docs.copilotkit.ai/getting-started/quickstart-chatbot)將聊天機器人整合到您的應用程式中。 基本概念是在幾分鐘內建立可用於基於 LLM 的應用程式的 AI 聊天機器人。 用例是巨大的,作為開發人員,我們絕對應該在下一個專案中嘗試使用 CopilotKit。 CopilotKit 在 GitHub 上擁有超過 4,200 個星星,發布了 200 多個版本,這意味著它們正在不斷改進。  {% cta https://github.com/CopilotKit/CopilotKit %} Star CopilotKit ⭐️ {% endcta %} --- ### 🎯 使用 CopilotKit 建立的熱門應用程式。 我們可以使用 CopilotKit 建立許多創新應用程式,所以讓我們探索一些脫穎而出的應用程式! ### ✅ [人工智慧驅動的部落格平台](https://dev.to/copilotkit/how-to-build-an-ai-powered-blogging-platform-nextjs-langchain-supabase-1hdp)。  您可以閱讀本文,使用`Next.js` 、 `Langchain` 、 `Supabase`和`CopilotKit`來建立這個令人驚嘆的應用程式。 LangChain & Tavily 用於網路搜尋人工智慧代理,Supabase 用於儲存和檢索部落格平台文章資料,而 CopilotKit 用於將人工智慧整合到應用程式中。 您可以檢查[GitHub 儲存庫](https://github.com/TheGreatBonnie/aipoweredblog)。 ### ✅ [文字到 Powerpoint 應用程式](https://dev.to/copilotkit/how-to-build-ai-powered-powerpoint-app-nextjs-openai-copilotkit-ji2)。 您可以閱讀本文,使用`Next.js` 、 `OpenAI`和`CopilotKit`建立 Text to Powerpoint 應用程式。 您可以檢查[GitHub 儲存庫](https://github.com/TheGreatBonnie/aipoweredpresentation)。 ### ✅ [V0.dev 複製](https://dev.to/copilotkit/i-created-a-v0-clone-with-nextjs-gpt4-copilotkit-3cmb)。  如果您不熟悉,Vercel 的 V0 是一款人工智慧驅動的工具,可讓您根據提示產生 UI,以及許多其他有用的功能。 您可以使用`Next.js` 、 `GPT4`和`CopilotKit`建立 V0 的克隆。這篇文章名列前 7 名,總的來說,這是一個值得加入到您的作品集中的偉大專案。 您可以檢查[GitHub 儲存庫](https://github.com/Tabintel/v0-copilot-next)。 ### ✅[與您的履歷聊天](https://dev.to/copilotkit/how-to-build-the-with-nextjs-openai-1mhb)。 您可以閱讀本文,使用`Next.js` 、 `OpenAI`和`CopilotKit`來建立這個很棒的工具。 您不僅可以使用 ChatGPT 產生履歷,還可以將其匯出為 PDF,甚至可以透過與其對話來進一步改進它。多酷啊,對吧:) 您可以檢查[GitHub 儲存庫](https://github.com/TheGreatBonnie/AIPoweredResumeBuilder)。 --- 2. [Appwrite](https://github.com/appwrite/appwrite) - 減少後端的麻煩。 --------------------------------------------------------------   Appwrite 的開源平台可讓您將身份驗證、資料庫、函數和儲存體新增至您的產品中,並建立任何規模的任何應用程式、擁有您的資料並使用您喜歡的編碼語言和工具。 類似的選項是supabase,但儘管它們有相似之處,但它們在幾個方面有很大不同。 Restack 非常漂亮地涵蓋了[Appwrite 與 Supabase](https://www.restack.io/docs/supabase-knowledge-supabase-vs-appwrite) 。一探究竟! 他們有很好的貢獻指南,甚至不厭其煩地詳細解釋架構。 開始使用以下 npm 指令。 ``` npm install appwrite ``` 您可以像這樣建立一個登入元件。 ``` "use client"; import { useState } from "react"; import { account, ID } from "./appwrite"; const LoginPage = () => { const [loggedInUser, setLoggedInUser] = useState(null); const [email, setEmail] = useState(""); const [password, setPassword] = useState(""); const [name, setName] = useState(""); const login = async (email, password) => { const session = await account.createEmailSession(email, password); setLoggedInUser(await account.get()); }; const register = async () => { await account.create(ID.unique(), email, password, name); login(email, password); }; const logout = async () => { await account.deleteSession("current"); setLoggedInUser(null); }; if (loggedInUser) { return ( <div> <p>Logged in as {loggedInUser.name}</p> <button type="button" onClick={logout}> Logout </button> </div> ); } return ( <div> <p>Not logged in</p> <form> <input type="email" placeholder="Email" value={email} onChange={(e) => setEmail(e.target.value)} /> <input type="password" placeholder="Password" value={password} onChange={(e) => setPassword(e.target.value)} /> <input type="text" placeholder="Name" value={name} onChange={(e) => setName(e.target.value)} /> <button type="button" onClick={() => login(email, password)}> Login </button> <button type="button" onClick={register}> Register </button> </form> </div> ); }; export default LoginPage; ``` 您可以閱讀[文件](https://appwrite.io/docs)。 Appwrite 可以非常輕鬆地建立具有開箱即用的擴充功能的可擴展後端應用程式。 Appwrite 最近推出的「Init」發布了一些令人興奮的功能。對於我們可以用 init 做什麼,我並沒有達到 100% 的標準,所以請發表評論讓我們了解更多資訊。 它有一些很酷的功能,對於將我們的應用程式提升到一個新的水平非常有用。好奇心超載:D  我很高興它可以連接到 Twilio、Vonage 和 Mailgun。更多選擇意味著更好的產品。 Appwrite 在 GitHub 上擁有 40k+ Stars,並且發布了`v1.5`版本。 {% cta https://github.com/appwrite/appwrite %} Star Appwrite ⭐️ {% endcta %} ### 🎯 使用 Appwrite 建立的熱門應用程式。 Appwrite 非常受歡迎,尤其是因為它的易用性。這些是一些很酷的專案,您可以從中獲得靈感。 ### ✅ [FoodMagic](https://github.com/Sameerkash/FoodMagic) - 擴增實境食品應用程式。  FoodMagic 是使用擴增實境和令人驚嘆的使用者介面的獨特食品配送服務。 它是使用`Appwrite`和 Flutter 建立的。 涉及 Appwrite 函數、資料庫、儲存和更多概念,因此您可以使用它學到很多東西。 您可以檢查[GitHub 儲存庫](https://github.com/TheGreatBonnie/aipoweredpresentation)。 ### ✅[回購評級員](https://github.com/EddieHubCommunity/RepoRater)。 此專案可讓您從開發者體驗 (DX) 的角度對 GitHub 儲存庫進行評分。 它是使用`Appwrite` 、 `Headless UI (React)` 、 `Next.js`和`Tailwind CSS`建立的。 您可以檢查[GitHub 儲存庫](https://github.com/TheGreatBonnie/aipoweredpresentation)並查看[即時執行情況](https://repo-rater.eddiehub.io/)。 ### ✅ [Twitter 克隆](https://www.youtube.com/watch?v=njLEDvoDjtk)- FreeCodeCamp (YouTube)。 它具有各種功能,例如使用電子郵件和密碼註冊和登入、發送文字、圖像和連結、辨識和儲存主題標籤、顯示推文、喜歡推文、轉發、評論/回應、關注用戶、搜尋用戶、顯示追蹤者、追蹤和最近的推文、編輯用戶個人資料、顯示帶有特定主題標籤的推文以及名為「Twitter Blue」的高級功能。 講師還實現了一個通知選項卡,當有人回覆您、追蹤您、喜歡您的推文或轉發時,該選項卡將顯示通知。在本教程結束時,您將擁有一個功能齊全的 Twitter 克隆,您可以對其進行進一步自訂和改進。意味著一切:) 他使用過`Flutter` 、 `Appwrite`和`Riverpod` ,並且教學超過 9 個小時,所以這是一個很長的教學。 ### ✅ [Dart 線上編譯器](https://github.com/aadarshadhakalg/Dart-Playground) 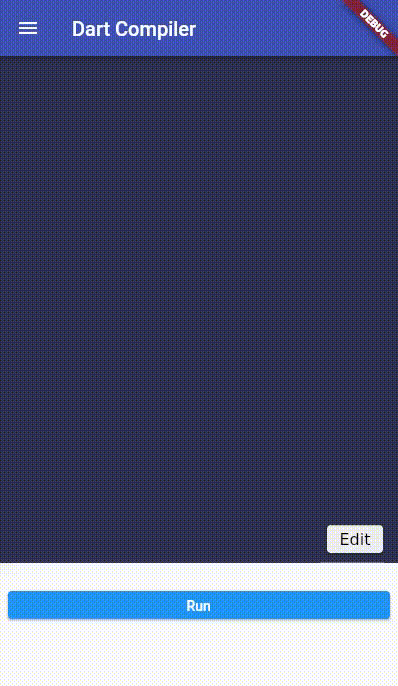 一個應用程式,用戶可以編寫和執行小型 dart 程序,而無需在系統中安裝 dart SDK。該應用程式使用 Appwrite 函數來執行 dart 程式碼。 它是使用`Appwrite`和`Flutter`建構的。 這使用了 Appwrite Auth、函數和資料庫來進行工作。 您可以檢查[GitHub 儲存庫](https://github.com/aadarshadhakalg/Dart-Playground)。 --- 3.[重新發送](https://github.com/resend)- 為開發人員提供的電子郵件 API。 ------------------------------------------------------  您可以使用 React 建立和傳送電子郵件。 2023 年最受炒作的產品之一。 他們提供了大量的 SDK 選項,因此您不必從您首選的技術堆疊進行切換。  Resend 非常值得信賴,許多公司(例如 Payload 和 Dub)都使用它。您可以看到[客戶](https://resend.com/customers)清單。 開始使用以下 npm 指令。 ``` npm install @react-email/components -E ``` 這是將其與 next.js 專案整合的方法。 ``` import { EmailTemplate } from '@/components/email-template'; import { Resend } from 'resend'; const resend = new Resend(process.env.RESEND_API_KEY); export async function POST() { const { data, error } = await resend.emails.send({ from: '[email protected]', to: '[email protected]', subject: 'Hello world', react: EmailTemplate({ firstName: 'John' }), }); if (error) { return Response.json({ error }); } return Response.json(data); } ``` 您可以閱讀[文件](https://resend.com/docs/introduction)。 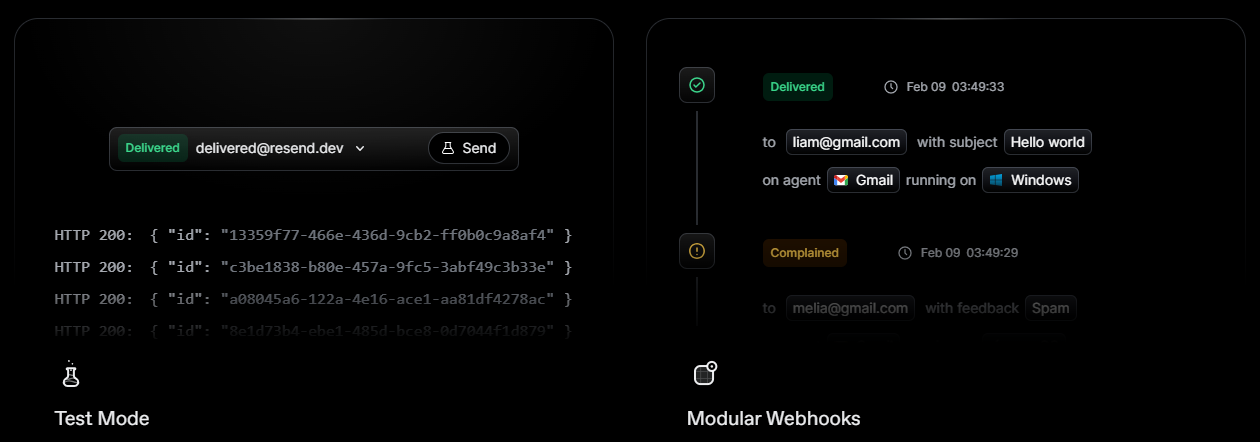 如果您是教學人員,我推薦 YouTube 上的這個[播放清單系列](https://www.youtube.com/playlist?list=PL8HkCX2C5h0VVXsgSXtj2KXpoPATnMFeF),它涵蓋了大部分內容並且易於理解。 基本理念是一個簡單、優雅的介面,使您能夠在幾分鐘內開始發送電子郵件。它可以透過適用於您最喜歡的程式語言的 SDK 直接融入您的程式碼中。 出於顯而易見的原因,React email 在 GitHub 上擁有最高的星數(12k+),並且超過 5000 名開發人員在他們的應用程式中使用它。 {% cta https://github.com/resend %} 星標重新發送 ⭐️ {% endcta %} ### 🎯 使用重新發送發送電子郵件的熱門應用程式。 讓我們看看一些使用重新發送來發送電子郵件的應用程式。 ### ✅ [gitroom](https://github.com/gitroomhq/gitroom) 。 提前安排所有社群媒體貼文和文章。您也可以與其他團隊成員合作交換或購買貼文。 它是使用`NX (Monorepo)` 、 `NextJS (React)` 、 `NestJS` 、 `Prisma (Default to PostgreSQL)` 、 `Redis`和`Resend`建構的。 您可以檢查[GitHub 儲存庫](https://github.com/gitroomhq/gitroom)和[網站](https://gitroom.com/)。 Gitroom 在 GitHub 上有 3k+ Stars。 ### ✅[任何郵件](https://github.com/anymail/django-anymail)。 Anymail 可讓您使用您選擇的交易電子郵件服務提供者 (ESP) 在 Django 中傳送和接收電子郵件。 您可以檢查[GitHub 儲存庫](https://github.com/anymail/django-anymail)和[網站](https://anymail.dev/en/stable/)。他們在 GitHub 上有超過 1,500 個 Stars,並且正在發布 v10 版本。 ### ✅[徽章](https://github.com/projectx-codehagen/Badget)。 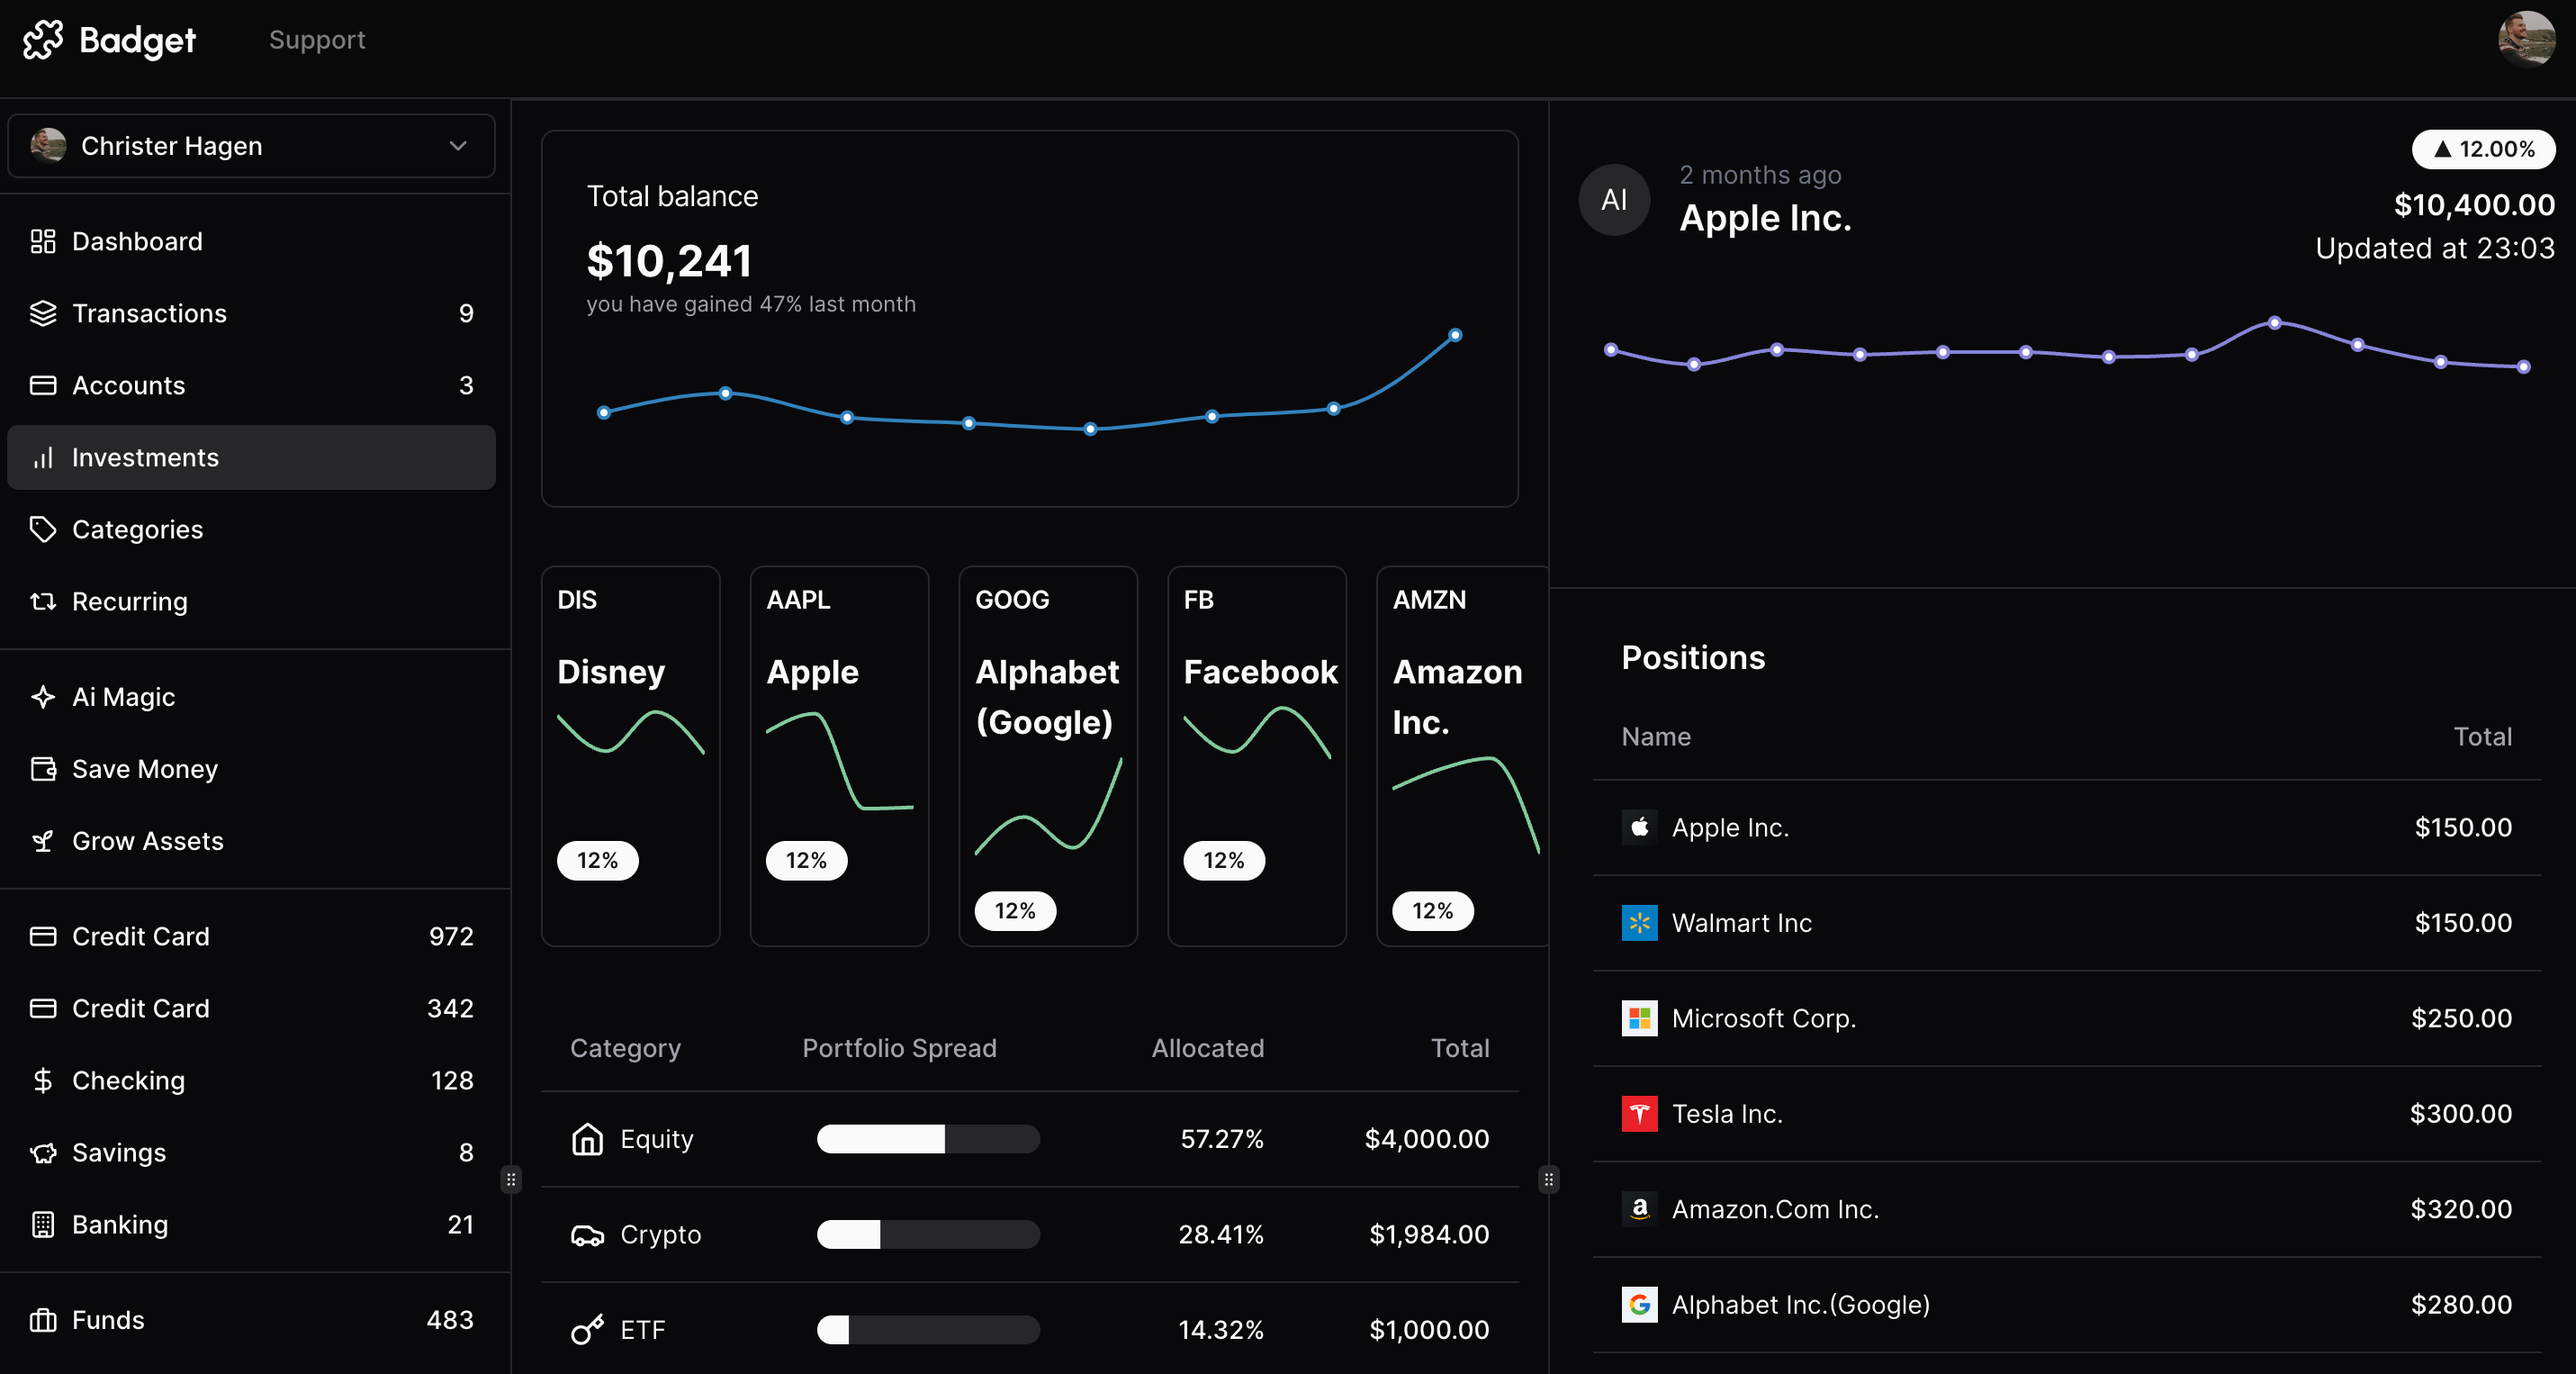 Badget 旨在透過使用者友善的介面和強大的後端來簡化財務管理。 它是使用`Next.js 14` 、 `Turborepo` 、 `Drizzle ORM` 、 `Planetscale` 、 `Clerk` 、 `Resend` 、 `React Email` 、 `Shadcn/ui`和`Stripe`建置的。 您可以檢查[GitHub 儲存庫](https://github.com/projectx-codehagen/Badget)。 這個專案很快就會在 GitHub 上達到 2k Stars。 --- 4. [Shadcn UI](https://ui.shadcn.com/docs) - 您可以將其複製並貼上到應用程式中的元件。 ----------------------------------------------------------------- 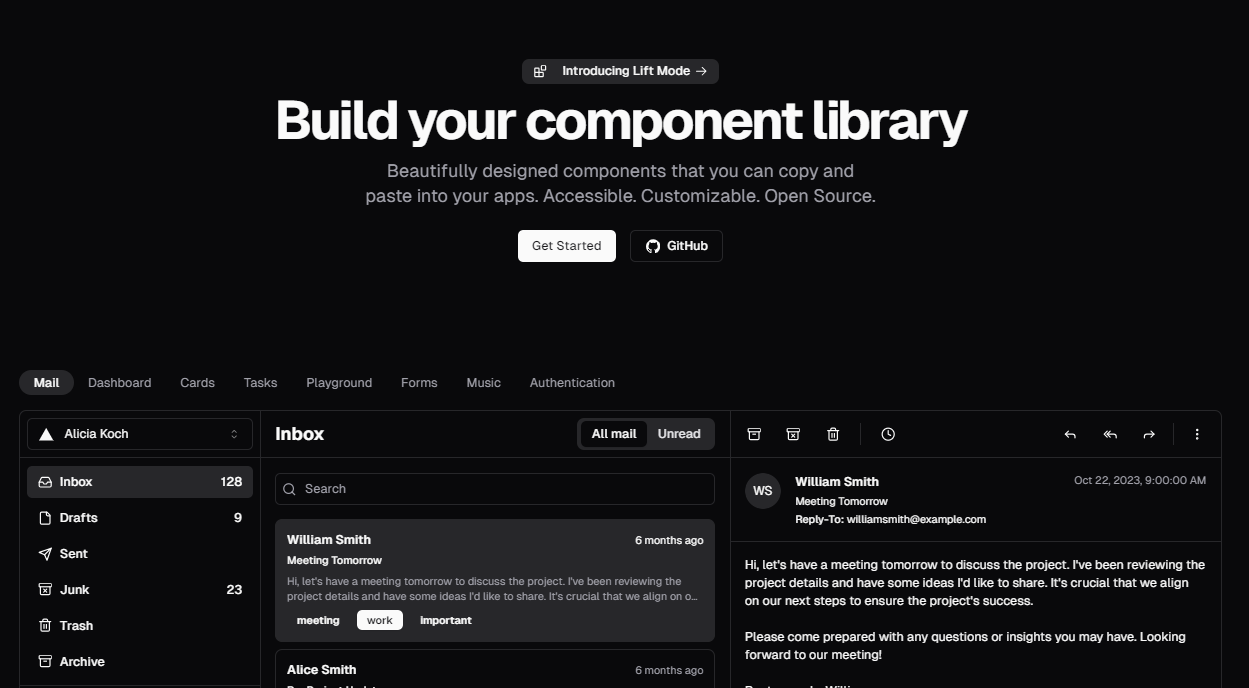 這個開源專案無需介紹。 由於其簡單性、自訂選項和靈活性,它一推出就受到了熱烈歡迎。 然而,我確實同意它並不像看起來那麼簡單,特別是如果您不熟悉它的語法和結構。 開始使用以下命令(Next.js 應用程式)。 ``` npx shadcn-ui@latest init ``` 其餘的將自動完成,您可以匯入[元件](https://ui.shadcn.com/docs/components/accordion)並相應地使用它們。 您可以根據您使用的框架閱讀[文件](https://ui.shadcn.com/docs)和[安裝指南](https://ui.shadcn.com/docs/installation)。 Shadcn UI 在 GitHub 上擁有超過 55,000 顆星,並被超過 3,000 名開發者使用。 {% cta https://ui.shadcn.com/docs %} Star Shadcn UI ⭐️ {% endcta %} ### 🎯 使用 Shadcn UI 建立的熱門應用程式。 我不會介紹非常簡單的專案,所以不用擔心。 ### ✅ [10000+ shadcn/ui 主題](https://github.com/jln13x/ui.jln.dev/)。 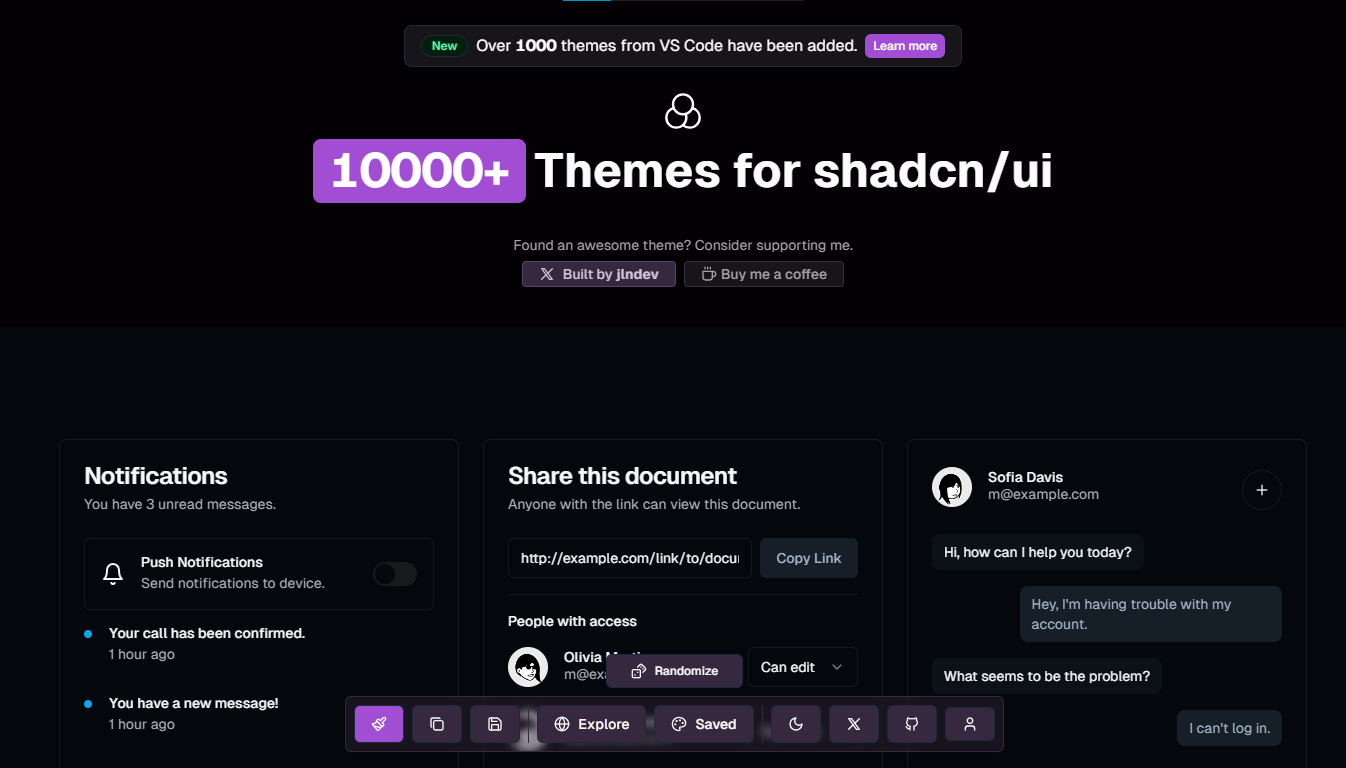 有了這個,您可以探索、保存、產生新主題,甚至對隨機主題進行投票。您可以使用的好專案之一。 使用者介面也很糟糕。 它是使用很多套件建構的,例如`react-query` 、 `Framer` 、 `Zod` ,當然還有`shadcn ui` 。 您可以查看[GitHub 儲存庫](https://github.com/jln13x/ui.jln.dev/)和[現場演示](https://ui.jln.dev/)。 它在 GitHub 上有 600 多個 Star。 ### ✅[開啟 v0](https://github.com/raidendotai/openv0) 。 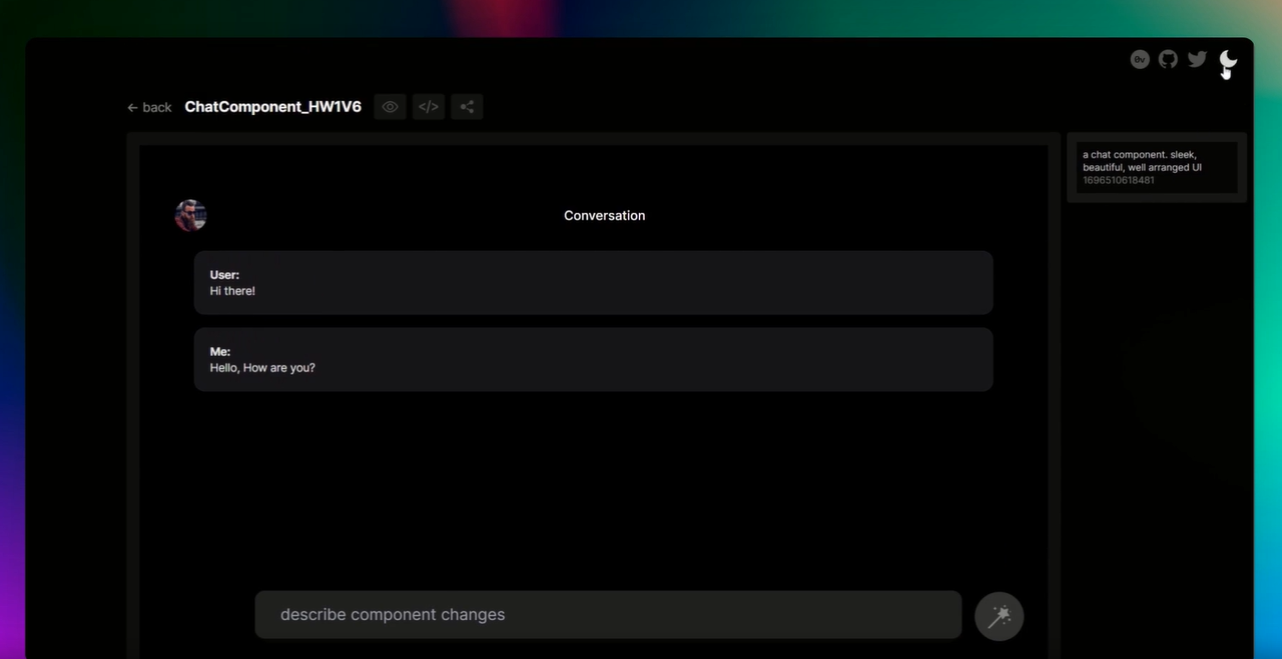 我正在報道 v0.dev 但意識到它不是開源的。 我不會放棄這個想法。 Openv0 是另一個使用 AI 產生 UI 元件的專案。元件產生是一個多通道管道 - 每個通道都是一個完全獨立的插件。 它支援 React、Next.js 和 Svelte 等前端框架。使用 Flowbite、NextUI 和 Shadcn 建置。 檢查[GitHub 儲存庫](https://github.com/raidendotai/openv0)並閱讀[安裝指南](https://github.com/raidendotai/openv0?tab=readme-ov-file#install)。 您也可以在[Replit](https://replit.com/@n-raidenai/openv0-react)上執行它。它在 GitHub 上有 3k+ Stars。 很多專案都使用Shadcn,請自行探索。 --- 5. [Buildship](https://buildship.com/) - 低程式碼視覺化後端建構器。 ------------------------------------------------------ 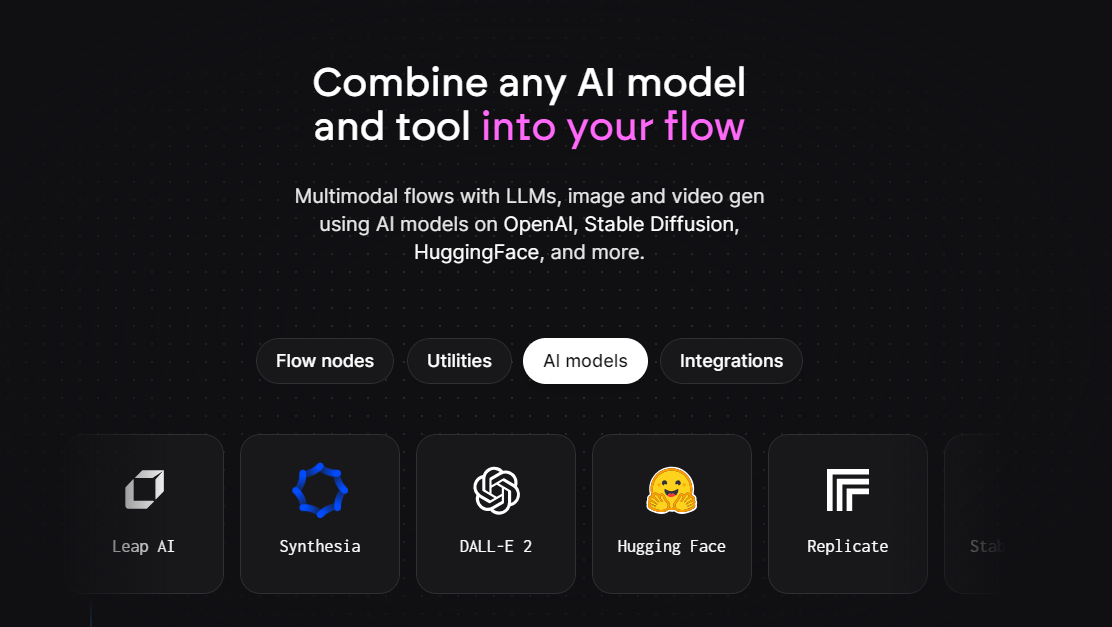 對於您正在使用無程式碼應用程式建構器(FlutterFlow、Webflow、Framer、Adalo、Bubble、BravoStudio...)或前端框架(Next.js、React、Vue...)建立的應用程式,您需要一個後端來支援可擴展的 API、安全工作流程、自動化等。 BuildShip 為您提供了一種完全視覺化的方式,可以在易於使用的完全託管體驗中可擴展地建立這些後端任務。 這意味著您無需在雲端平台上爭論或部署事物或執行 DevOps。只需立即建造和發貨 🚀 他們甚至與 TypeSense 合作並且發展得非常快!  我嘗試過Buildship,它很強大。 {% cta https://github.com/rowyio/buildship %} 明星建造 ⭐️ {% endcta %} ### 🎯 使用 Buildship 建立的熱門應用程式。 大多數資源都是影片,但值得一看。 YouTube 官方頻道上有很多教程,但以下是一些有趣的教程。 ### ✅[使用低程式碼和 AI 建立旅遊 WebApp](https://www.youtube.com/watch?v=Pj08uTOzNPQ) 。 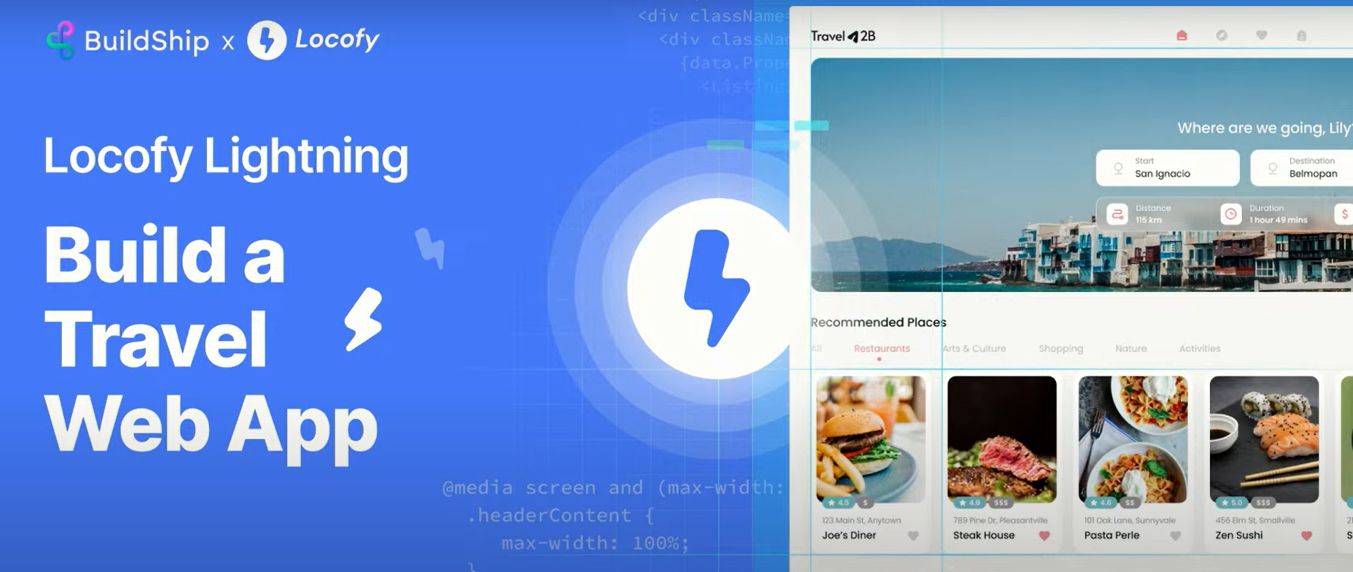 它是使用`Buildship`和`Locofy`建構的。 Locofy.ai 用於從設計到應用程式前端的過渡,而 BuildShip.com 用於應用程式的後端。 它還計算實時距離和旅程成本。他們使用 Figma 來源進行設計。 ### ✅ [Telegram 上的人工智慧助理](https://www.youtube.com/watch?v=Pz1t1KCnrbs)。 您可以使用 OpenAI Assistant 和 BuildShip 建立智慧型 Telegram 機器人,而無需編碼。這將幫助您與資料聊天。看起來很令人興奮,對吧:) ### ✅ [AI YouTube 時間戳產生器](https://www.youtube.com/watch?v=7DkLUY6kfTg)。 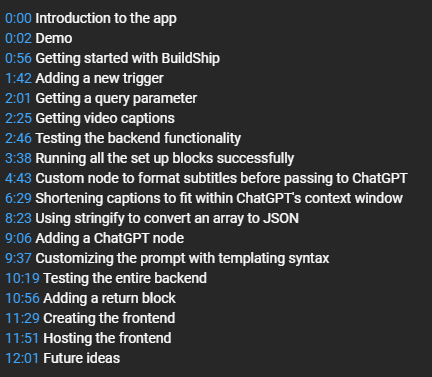 相信我,使用本教程您會學到很多東西。您可以查看開發人員上[未發布的有關自訂提示的帖子](https://dev.to/jamesmurdza/building-a-fcg-temp-slug-4578922?preview=4210cdff8fea25a8cd4d81363155c451b20e6484504a41fa0f0d992a272c21a3a707c0cb6ddac2f740234c032a02af5ce442841ad4033efc46424c84)。 您可以檢查[前端程式碼](https://github.com/jamesmurdza/timestamp-generator-app/)。 --- 6. [Taipy](https://github.com/Avaiga/taipy) - 將資料和人工智慧演算法整合到生產就緒的 Web 應用程式中。 ----------------------------------------------------------------------------  Taipy 是一個開源 Python 庫,可用於輕鬆的端到端應用程式開發,具有假設分析、智慧管道執行、內建調度和部署工具。 我相信你們大多數人都不明白 Taipy 用於為基於 Python 的應用程式建立 GUI 介面並改進資料流管理。 因此,您可以繪製資料集的圖表,並使用類似 GUI 的滑桿來提供使用其他實用功能來處理資料的選項。 雖然 Streamlit 是一種流行的工具,但在處理大型資料集時,其效能可能會顯著下降,這使得它在生產級使用上不切實際。 另一方面,Taipy 在不犧牲性能的情況下提供了簡單性和易用性。透過嘗試 Taipy,您將親身體驗其用戶友好的介面和高效的資料處理。 在底層,Taipy 利用各種函式庫來簡化開發並增強功能。  開始使用以下命令。 ``` pip install taipy ``` 他們還使用分散式運算提高了效能,但最好的部分是 Taipy,它的所有依賴項現在都與 Python 3.12 完全相容,因此您可以在使用 Taipy 進行專案的同時使用最新的工具和程式庫。 您可以閱讀[文件](https://docs.taipy.io/en/latest/)。 另一個有用的事情是,Taipy 團隊提供了一個名為[Taipy Studio](https://docs.taipy.io/en/latest/manuals/studio/)的 VSCode 擴充功能來加速 Taipy 應用程式的建置。  如果您想閱讀部落格來了解程式碼庫結構,您可以閱讀 HuggingFace[的使用 Taipy 在 Python 中為您的 LLM 建立 Web 介面](https://huggingface.co/blog/Alex1337/create-a-web-interface-for-your-llm-in-python)。 Taipy 在 GitHub 上有 8k+ Stars,並且處於`v3`版本,因此它們正在不斷改進。 {% cta https://github.com/Avaiga/taipy %} Star Taipy ⭐️ {% endcta %} ### 🎯 使用 Taipy 建立的熱門應用程式。 嘗試新技術通常很困難,但 Taipy 提供了 10 多個演示教程,其中包含程式碼和適當的文件供您遵循。我們將看到開發人員建構的其他一些專案。 ### ✅[錢包方面](https://github.com/Ujj1225/from_Taipy-walletWISE)。  WalletWise 就像是我們財務的友善幫手,幫助我們追蹤收入和支出。它使用 Gemini 進行交易,使用 Taipy 來了解支出。 對使用者的收入和支出進行分析,以數學方式顯示,並顯示 7 個做出更好、更明智的財務決策的提示。 它還具有視覺化工具,您可以在其中查看不同的標題,以了解有關您的支出的更多資訊。 就創造力而言,這是下面提到的所有內容中最好的。 ### ✅[人口普查](https://github.com/SusheelThapa/from_taipy_census)。 透過由 Taipy 提供支持的「人口普查」專案,將資料編織到動態視覺化中,揭開 2021 年尼泊爾的住房和人口故事。 這有很多選擇,所以如果您想用更少的錢學到更多,這是最好的選擇! ### ✅[太皮象棋](https://github.com/KorieDrakeChaney/taipy-chess)。 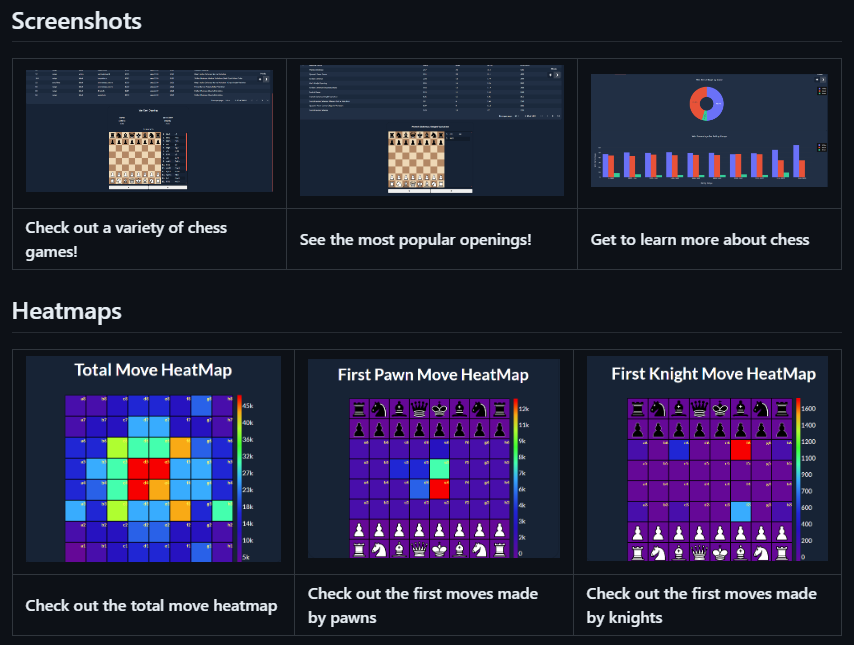 所有應用程式中我最喜歡的一個,因為我喜歡國際象棋。哈哈! 這是一個基於20,000盤棋的國際象棋視覺化工具。您可以查看所有比賽、他們參加的開局、對手、表現最好的開局以及最成功的開局。您可以查看資料的熱圖和圖表。 您還可以查看[Olympic Medals Taipy 應用程式](https://github.com/enarroied/Olympic-Medals-Taipy-App),該應用程式提供了一個儀表板,其中包含有關奧運獎牌、 [Covid 儀表板](https://covid-dashboard.taipy.cloud/Country)和[資料視覺化的](https://production-planning.taipy.cloud/Data-Visualization)訊息。 --- 7. [xyflow](https://github.com/xyflow/xyflow) - 使用 React 建立基於節點的 UI。 --------------------------------------------------------------------  XYFlow 是一個強大的開源程式庫,用於使用 React 或 Svelte 建立基於節點的 UI。它是一個單一的倉庫,提供[React Flow](https://reactflow.dev)和[Svelte Flow](https://svelteflow.dev) 。讓我們更多地了解可以使用 React flow 做什麼。  您可以觀看此影片,在 60 秒內了解 React Flow。 {% 嵌入 https://www.youtube.com/watch?v=aUBWE41a900 %} 有些功能在專業模式下可用,但免費層中的功能足以形成一個非常互動的流程。 React 流程以 TypeScript 編寫並使用 Cypress 進行測試。 開始使用以下 npm 指令。 ``` npm install reactflow ``` 以下介紹如何建立兩個節點( `Hello`和`World` ,並透過邊連接。節點具有預先定義的初始位置以防止重疊,並且我們還應用樣式來確保有足夠的空間來渲染圖形。 ``` import ReactFlow, { Controls, Background } from 'reactflow'; import 'reactflow/dist/style.css'; const edges = [{ id: '1-2', source: '1', target: '2' }]; const nodes = [ { id: '1', data: { label: 'Hello' }, position: { x: 0, y: 0 }, type: 'input', }, { id: '2', data: { label: 'World' }, position: { x: 100, y: 100 }, }, ]; function Flow() { return ( <div style={{ height: '100%' }}> <ReactFlow nodes={nodes} edges={edges}> <Background /> <Controls /> </ReactFlow> </div> ); } export default Flow; ``` 這就是它的樣子。您還可以新增標籤、更改類型並使其具有互動性。  您可以在 React Flow 的 API 參考中查看[完整的選項清單](https://reactflow.dev/api-reference/react-flow)以及元件、鉤子和實用程式。 最好的部分是您還可以加入[自訂節點](https://reactflow.dev/learn/customization/custom-nodes)。在您的自訂節點中,您可以渲染您想要的一切。您可以定義多個來源和目標句柄並呈現表單輸入或圖表。您可以查看此[codesandbox](https://codesandbox.io/p/sandbox/pensive-field-z4kv3w?file=%2FApp.js&utm_medium=sandpack)作為範例。 您可以閱讀[文件](https://reactflow.dev/learn)並查看 Create React App、Next.js 和 Remix 的[範例 React Flow 應用程式](https://github.com/xyflow/react-flow-example-apps)。 React Flow 附帶了幾個額外的[插件](https://reactflow.dev/learn/concepts/plugin-components)元件,可以幫助您使用 Background、Minimap、Controls、Panel、NodeToolbar 和 NodeResizer 元件製作更高級的應用程式。 例如,您可能已經注意到許多網站的背景中有圓點,增強了美觀性。要實現此模式,您可以簡單地使用 React Flow 中的後台元件。 ``` import { Background } from 'reactflow'; <Background color="#ccc" variant={'dots'} /> // this will be under React Flow component. Just an example. ```  如果您正在尋找一篇快速文章,我建議您查看 Webkid 的[React Flow - A Library for Rendering Interactive Graphs](https://webkid.io/blog/react-flow-node-based-graph-library/) 。 React Flow 由 Webkid 開發和維護。 它在 GitHub 上有超過 19k 顆星星,並且在`v11.10.4`上顯示它們正在不斷改進,npm 套件每週下載量超過 40 萬次。您可以輕鬆使用的最佳專案之一。  {% cta https://github.com/xyflow/xyflow %} 星 xyflow ⭐️ {% endcta %} ### 🎯 使用 React Flow 建立的熱門應用程式。 很多公司都使用 React flow,例如 Zapier 和 Stripe。夠可信,可以使用。我不會介紹使用 Svelte Flow 製作的應用程式,因為 React 更受歡迎。 ### ✅[條紋文件](https://docs.stripe.com/payments/checkout/how-checkout-works#lifecycle)。 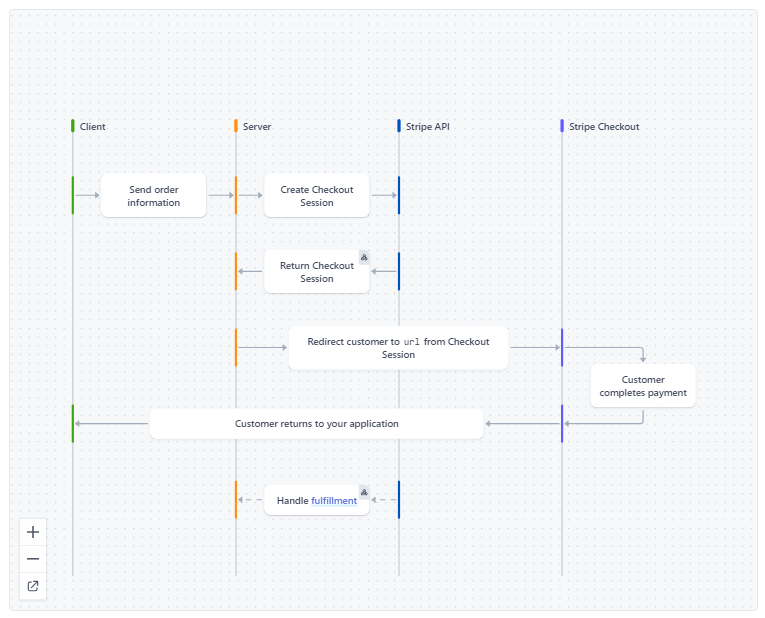 Stripe 使用它,特別是在展示結帳的工作原理時。 您可以閱讀[完整的文件](https://stripe.com/docs)。 ### ✅[著色蛙](https://shaderfrog.com/2/editor/cln84z4950000pan66v5fcunv)。 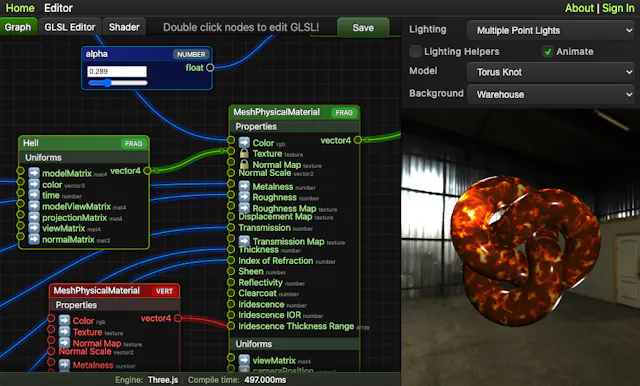 我選擇這個是因為這個專案很酷。 ### ✅ [類型](https://www.typeform.com/help/a/use-the-logic-map-to-add-logic-to-your-forms-5514792640916/)。 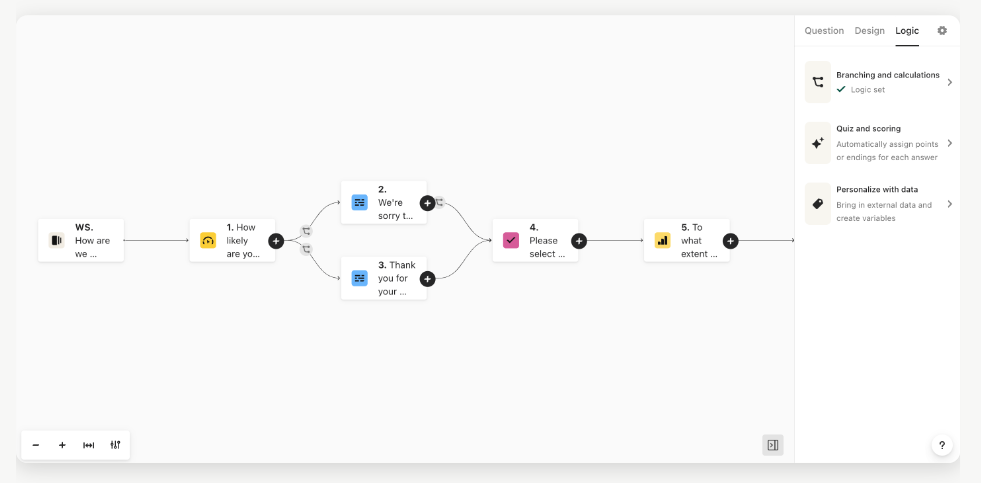 Typeform 使用它來展示如何使用邏輯圖為表單新增邏輯。 您也可以發現它被用於[FlowwiseAI](https://flowiseai.com/)和[Doubleloop](https://app.doubleloop.app/strategy/2236/map) 。想讓您知道,Supabase 是 GitHub 上 XYflow 的贊助商之一。 --- 8. [Pieces](https://github.com/pieces-app) - 您的工作流程副駕駛。 -------------------------------------------------------  Pieces 是一款支援人工智慧的生產力工具,旨在透過智慧程式碼片段管理、情境化副駕駛互動和主動呈現有用材料來幫助開發人員管理混亂的工作流程。 它最大限度地減少了上下文切換、簡化了工作流程並提升了整體開發體驗,同時透過完全離線的 AI 方法維護了工作的隱私和安全性。太棒了:D  它與您最喜歡的工具無縫集成,以簡化、理解和提升您的編碼流程。 它具有比表面上看到的更令人興奮的功能。 - 它可以透過閃電般快速的搜尋體驗找到您需要的材料,讓您根據您的喜好透過自然語言、程式碼、標籤和其他語義進行查詢。可以放心地說“您的個人離線谷歌”。 - Pieces 使用 OCR 和 Edge-ML 升級螢幕截圖,以提取程式碼並修復無效字元。因此,您可以獲得極其準確的程式碼提取和深度元資料豐富。 您可以查看 Pieces 可用[功能的完整清單](https://pieces.app/features)。 您可以閱讀[文件](https://docs.pieces.app/)並存取[網站](https://pieces.app/)。 他們為 Pieces OS 用戶端提供了一系列 SDK 選項,包括[TypeScript](https://github.com/pieces-app/pieces-os-client-sdk-for-typescript) 、 [Kotlin](https://github.com/pieces-app/pieces-os-client-sdk-for-kotlin) 、 [Python](https://github.com/pieces-app/pieces-os-client-sdk-for-python)和[Dart](https://github.com/pieces-app/pieces-os-client-sdk-for-dart) 。 {% cta https://github.com/pieces-app/ %} 星星碎片 ⭐️ {% endcta %} ### 🎯 用 Pieces 建置的熱門應用程式。 由於它更像是一個工具,因此不會有那麼多專案,但開發人員仍然使用它來建立很棒的專案。 ### ✅[辦公桌夥伴](https://github.com/ayothekingg/deskbuddy)。 一個社區專案,可透過分析和 Copilot Conversation 幫助您了解、評估和改善您的編碼習慣。 使用的主要語言是 TypeScript。 您可以檢查[GitHub 儲存庫](https://github.com/ayothekingg/deskbuddy)。 ### ✅ [CLI 代理](https://github.com/pieces-app/cli-agent)。 一個全面的命令列介面 (CLI) 工具,旨在與 Pieces OS 無縫互動。它提供了一系列功能,例如資產管理、應用程式互動以及與各種 Pieces OS 功能的整合。 使用的主要語言是Python。 您可以檢查[GitHub 儲存庫](https://github.com/pieces-app/cli-agent)。 ### ✅ [Streamlit 和碎片](https://github.com/pieces-app/pieces-copilot-streamlit-example)。 Pieces Copilot Streamlit Bot 是一款使用 Streamlit 建立的互動式聊天機器人應用程式,旨在為用戶提供無縫介面來即時提問和接收答案。 使用的主要語言是Python。 您可以檢查[GitHub 儲存庫](https://github.com/pieces-app/pieces-copilot-streamlit-example)。 --- 9. [Typesense](https://github.com/typesense/typesense) - 快速、容錯、記憶體中模糊搜尋引擎。 -------------------------------------------------------------------------- 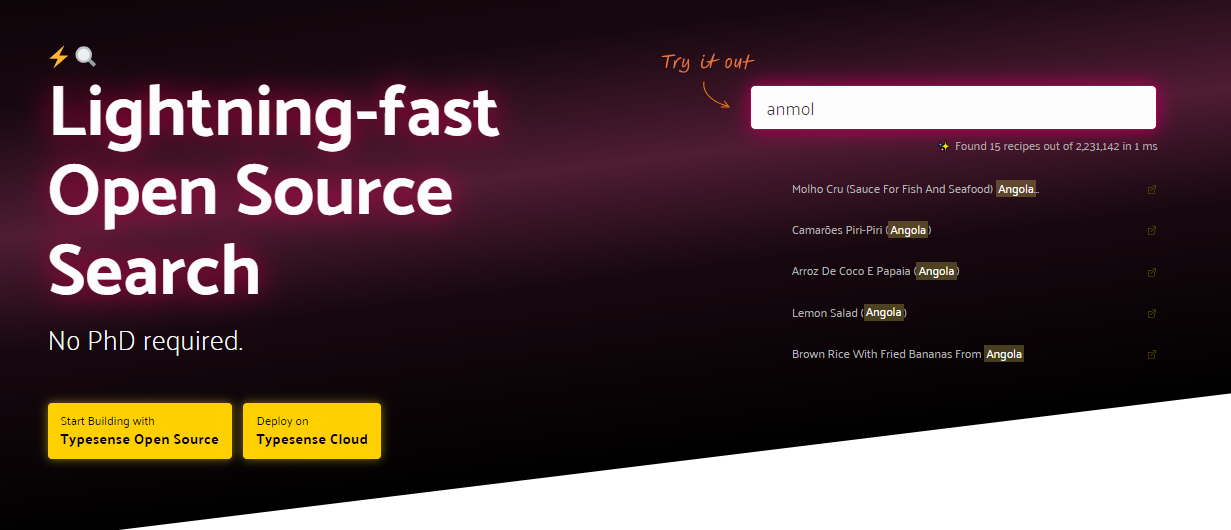 Typesense 是一款開源、容錯的搜尋引擎,針對即時(通常低於 50 毫秒)的即輸入即搜尋體驗和開發人員工作效率進行了最佳化。 如果您聽說過 ElasticSearch 或 Algolia,那麼考慮 Typesense 的一個好方法是,它是 Algolia 的開源替代品,解決了一些關鍵問題,並且是 ElasticSearch 的更易於使用、包含電池的替代品。 您可以在[Algolia vs ElasticSearch vs Meilsearch vs Typesense](https://typesense.org/typesense-vs-algolia-vs-elasticsearch-vs-meilisearch/)中對它們進行比較。 它是一個快速、容錯、內存中模糊搜尋引擎,用於建置令人愉快的搜尋體驗  您可以使用此指令安裝 Typesense 的 python 用戶端。 ``` pip install typesense ``` 根據文件,在這些情況下不應使用 Typesense。 A。 Typesense 不應用作主資料存儲,它存儲資料的唯一副本。 b. Typesense 通常不太適合搜尋應用程式日誌。 您可以閱讀[文件](https://typesense.org/docs/)和[安裝指南](https://github.com/typesense/typesense?tab=readme-ov-file#install)。  我建議您閱讀快速入門[指南](https://typesense.org/docs/guide/#quick-start),該指南將逐步指導您如何安裝和建立搜尋 UI。他們還提供了高達 28M 的資料集的明確[基準測試](https://typesense.org/docs/overview/benchmarks.html#typesense-benchmarks),以便您可以檢查將獲得的效能。 如果您更喜歡教程,那麼我建議您觀看這個[YouTube 影片](https://www.youtube.com/watch?v=kwtHOkf7Jdg)。您將獲得 Typesense 的概述,作者將向您展示端到端演示。 TypeSense 在 GitHub 上有 17k+ Stars,而且版本為 26,這真是太瘋狂了。它是使用 C++ 建構的。 {% cta https://github.com/typesense/typesense?tab=readme-ov-file %} 明星 Typesense ⭐️ {% endcta %} ### 🎯 使用 Typesense 建立的熱門應用程式。 一些使用 Typesense 的現場演示和應用程式。 ### ✅ 現場示範。 他們還提供現場演示,展示 Typesense 在大型資料集上的實際應用,例如: - [從 Linux 核心搜尋 1M Git 提交訊息](linux-commits-search.typesense.org)- [GitHub Repo](https://github.com/typesense/showcase-linux-commits-search) - [從 MusicBrainz 搜尋 3200 萬首歌曲資料集](songs-search.typesense.org)- [GitHub Repo](https://github.com/typesense/showcase-songs-search) - [具有預先輸入功能的拼字檢查器,包含 333K 英文單字](spellcheck.typesense.org)- [GitHub Repo](https://github.com/typesense/showcase-spellcheck) - [從 OpenLibrary 搜尋 28M 圖書資料集](books-search.typesense.org)- [GitHub Repo](https://github.com/typesense/showcase-books-search) - [GeoSearch / 瀏覽體驗](airbnb-geosearch.typesense.org)- [GitHub Repo](https://github.com/typesense/showcase-airbnb-geosearch) - [電子商務瀏覽與搜尋體驗](https://ecommerce-store.typesense.org/)- [GitHub Repo](https://github.com/typesense/showcase-ecommerce-store) - [搜尋 2M 烹飪食譜](https://recipe-search.typesense.org/)- [GitHub Repo](https://github.com/typesense/showcase-recipe-search) 其他一些公司使用 Typesense 雲端來完成整個工作。  這些公司包括 Codecademy、Logitech、Buildship、n8n 和 Storipress CMS。 --- 10. [Payload](https://github.com/payloadcms/payload) - 建立未來網路的最快方式。 -------------------------------------------------------------------  建立現代後端 + 管理 UI 的最佳方式。 Payload 沒有黑魔法,全是 TypeScript,並且完全開源,它既是一個應用程式框架,也是一個無頭 CMS。我全心全意欽佩的少數專案之一。 他們的網站擁有最乾淨的使用者介面之一,我看過 1000 多個網站,其中包括非常瘋狂的網站。快去看看吧!  您可以觀看這段 YouTube 影片,其中 James(聯合創始人)談論了 Payload CMS 簡介以及它如何縮小 Headless CMS 和應用程式框架之間的差距。 {% 嵌入 https://www.youtube.com/watch?v=In\_lFhzmbME %} 簡而言之,Payload 是一個無頭 CMS 和應用程式框架。它旨在為您的開發過程提供巨大的推動力,但重要的是,當您的應用程式變得更加複雜時,請不要妨礙您。 開始使用以下命令。 ``` npx create-payload-app@latest ``` 您可以閱讀 Payload 與普通 CMS 不同的完整[功能清單](https://github.com/payloadcms/payload?tab=readme-ov-file#-features)。 如果您是 next.js 的粉絲,我建議您閱讀[The Ultimate Guide To Use Next.js with Payload](https://payloadcms.com/blog/the-ultimate-guide-to-using-nextjs-with-payload) 。 您可以閱讀[文件](https://payloadcms.com/docs)和[安裝指南](https://payloadcms.com/docs/getting-started/installation)。 v3 beta 版本的有效負載也變得很困難,所以請密切注意。 Payload 在 GitHub 上擁有 19k+ Stars,並被 8k+ 開發者使用。 {% cta https://github.com/payloadcms/payload %} 明星有效負載 ⭐️ {% endcta %} ### 🎯 使用 Payload 的熱門應用程式 + 模板。 我們將看到可協助您將 Payload 用於特定用例的範本和應用程式。 ### ✅[混音和有效負載](https://github.com/payloadcms/remix-server) 帶有 Remix 和 Payload 的單聲道儲存庫範本。 這可以幫助您設定 Payload CMS 與 Remix 一起進行內容管理,從而將每個應用程式分為其套件(包括 Express 伺服器應用程式)。 ### ✅ [Astro 和有效負載](https://github.com/mooxl/astroad) 這是 Astro 和 Payloadcms 的預先配置設置,旨在讓您輕鬆開始建立網站。借助 Astroad,您將擁有一個可以使用 Docker 在本地執行的完整開發環境。此設定簡化了將網站部署到生產環境之前的測試和開發。 ### ✅[電子商務範本](https://github.com/payloadcms/payload/tree/main/templates/ecommerce)。 他們還提供了一個電子商務模板,可幫助您更專注於業務策略而不是技術。您的 API 是您自己的,您的資料也屬於您。您無需依賴第三方服務,這些服務可能會在每月費用之外向您收取 API 超額費用,並可能限制您對資料庫的存取。經營線上商店的成本永遠不會超過伺服器的成本(加上支付處理費)。 開始做一些我們不喜歡的事情總是感覺很奇怪,因此您可以閱讀[如何使用使用此範本的 Next.js 建立電子商務網站](https://payloadcms.com/blog/how-to-build-an-e-commerce-site-with-nextjs)。 使用 Payload 的一些流行公司包括[Speechify](https://speechify.com/) 、 [Bizee](https://bizee.com/)等。 閱讀以下案例研究。他們將告訴您 Payload 的功能以及它如何奠定堅實的基礎。 ### ✅[快速犁](https://miquikplow.com/)  Quikplow 是一個創新的隨選服務平台,通常被稱為「掃雪機的 Uber」。 Quikplow 為其應用程式開發和部署功能齊全的後端的速度不僅是無與倫比的,而且幾乎是聞所未聞的。整個應用程式涵蓋身份驗證、基於位置的搜尋、電子商務功能等,開發時間不到 120 天。 前所未有的速度歸功於 Payload 的身份驗證、CRUD 操作和管理面板生成功能,為 Quikplow 節省了寶貴的開發時間和預算資源。 ### ✅[紙三角形](https://www.papertriangles.com/)  Paper Triangles 需要在線展示,以反映其著名的沉浸式體驗,但發現自己受到過時且緩慢的內容管理系統的限制。 與他們的代理商合作夥伴 Old Friends 合作,面臨的挑戰是建立一個能夠反映他們尖端工作的網站 - 需要自動播放影片、動態動畫、整合式相機庫等,而不犧牲內容更新的速度或便利性。 有效負載成為完美的選擇。它的開源特性以及 TypeScript 和 React 的強大基礎使其成為開發高度客製化的互動式前端的理想選擇。 對於像 Old Friends 這樣的代理商來說,Payload 是向 Paper Triangles 這樣的客戶兌現承諾的最佳選擇。 「Payload 為我們的客戶提供了易於使用的介面,並為我們提供了執行客製化設計所需的開發自由度,」Old Friends 的設計工程師 James Clements 說。 ### ✅[比茲](https://bizee.com/)  他們需要在短短三個月內遷移和檢修 2,500 個頁面,同時重新建立新的 CMS 平台,並在全面品牌重塑下實施全面的網站重新設計。 為了兌現對 Bizee 的承諾,Ritters(代理商)依靠 Payload 乾淨的、TypeScript 驅動的架構,事實證明該架構具有變革性,簡化了設計整合並確保了無錯誤、可維護的程式碼。這加速了內容遷移並保留了 SEO 和用戶體驗。 它甚至促進了從設計到開發的過程,幫助 Riotters 將 Figma 概念轉化為實際實施。 至關重要的是,Payload 與 Next.js 的天然協同作用促進了開發人員、設計師、UX 專業人員、QA 團隊和行銷人員之間的跨職能協作。 有許多公司決定使用 Payload,這是他們做出的最佳決定之一。不管怎樣,去探索你能用它做什麼。 --- 哇! 這花了我很長很長的時間來寫。我希望你喜歡它。 我得到它! 建立良好的長期副專案可能很困難,但即使是一個簡單的用例也可以帶來顯著的成果。誰知道?從長遠來看,您甚至可能會獲得對您有幫助的直接機會。 我試圖涵蓋每個專案製作的最好和最有用的應用程式。 不管怎樣,請讓我們知道您的想法以及您計劃在未來建立任何可擴展的副專案嗎? 祝你有美好的一天!直到下一次。 請在 Twitter 上關注我,我將非常感激。 |如果你喜歡這類東西, 請關注我以了解更多:) | [](https://twitter.com/Anmol_Codes) [](https://github.com/Anmol-Baranwal) [](https://www.linkedin.com/in/Anmol-Baranwal/) | |------------|----------| 請關注 CopilotKit 以了解更多此類內容。 {% 嵌入 https://dev.to/copilotkit %} --- 原文出處:https://dev.to/copilotkit/30-app-ideas-with-complete-source-code-5f76
自學簡介 ---- 首先,讓我為您描繪一下場景。您在新聞中或透過朋友聽說過「程式設計師的就業市場非常棒」。 你發現自己有一些隨機的 YouTube 影片或奇怪的付費課程,它們可以教你一些東西,你會想*啊哈!這就是所缺少的!* 只需幾天(如果不是幾個小時)你就會很快意識到**程式設計是困難的**,遵循你在網路上找到的一些隨機課程大多只會讓你擅長複製東西,所以當你嘗試時,你最終只是盯著那個巨大的空白螢幕稍後自己思考。  ### 首先,你要怎麼學到東西? 讓我們來聽聽著名程式設計師[GeoHotz](https://wikipedia.org/wiki/George_Hotz)的說法: {% youtube 8RtGlWmXGhA %} 學習是一個複雜的過程,每個人的情況可能會有所不同。對我來說,**最簡單的學習方法就是找到能激勵你去做的事情。** 由於學習是一個艱難且有時乏味的過程,因此擁有明確的目標可以讓您走得更遠,並且可以讓您感覺自己取得了更大的成就,或者正如 GeoHotz 所說: > *你永遠不會透過觀看名為「學習程式設計」的影片來學習程式設計*。 對於我和我認識的其他程式設計師來說,我們喜歡建立副專案,而這種透過做專案來學習東西的方法(在學院中稱為[基於專案的學習](https://www.bu.edu/ctl/ctl_resource/project-based-learning-teaching-guide/))由於其功效、作品集、腦海中浮現的隨機想法變得越來越流行,甚至那些可以幫助我們實現興趣愛好的東西也成為你學習的靈感來源的絕佳例子。 所以繼續吧!首先,選擇您的學習**靈感/專案**。如果您是完全的初學者,請從**小事**開始。例如,考慮一個可以在螢幕上顯示您的名字以及所選短語的程式! 還在問自己如何對一個好的專案創意進行分類?由於這對於初學者來說尤其困難,因此我們將在下面的部分中幫助您回答這個問題。 ### 什麼是好主意?  我正在尋找這些東西來檢查目前是否是一個好主意: - **實用性**:這個想法應該是解決實際問題的東西/你感興趣的東西。這將為您提供將專案進行到底的動力。 - **複雜性**:想法的複雜性應該與您目前的技能水平相符。如果您是初學者,請從簡單的專案開始,隨著您的技能提升逐漸解決更複雜的專案。 - **興趣**:選擇一個您真正感興趣的專案。這將使學習過程變得更加愉快,減少苦差事。 對於初學者來說,一些好主意可以是建立一個基本計算器、一個簡單的部落格或一個互動式待辦事項清單。對於更高級的學習者,可以考慮建立一個從 API 獲取資料的天氣應用程式、即時應用程式,甚至是井字棋或貪吃蛇等簡單遊戲。  事實上,如果您對即時主題感興趣,我們已經編寫了[完整的分步教程](https://wasp-lang.dev/blog/2023/08/09/build-real-time-voting-app-websockets-react-typescript),向您展示如何使用 WebSocket 建立即時投票應用程式。它將教你如何與朋友即時投票,同時建立一個完全全端的 React + NodeJS Web 應用程式——一個很棒的投資組合專案! 厭倦了千篇一律的舊想法,或者在尋找新想法時完全迷失了方向?檢查這個[很棒的儲存庫](https://github.com/practical-tutorials/project-based-learning),其中包含許多指向其他想法清單的不同連結! ### 為工作/您的學習主題選擇正確的工具  好的第二步是為您的專案選擇正確的語言/工具。 如果您是完全的初學者:**一切正常,**因為大多數程式語言的主要程式設計概念都是相同的。不要擔心任何關於「更好的語言」、「更好的作業系統」或類似的東西的意見,記住,我們正在嘗試在這裡創造一些東西。 還不知道嗎?只要使用[JavaScript](https://developer.mozilla.org/en-US/docs/Web/JavaScript) !它很簡單,有大量[教程](https://dev.to/llxd/javascript-cheatsheet-and-snippets-for-beginners-hd6),基本上可以製作所有東西。 :) 如果您已經具備某種程式設計基礎,請使用人工智慧和一些出色的抽象/框架來更快地完成工作。例如,您可以使用[Wasp](https://wasp-lang.dev/)來跳過大量重複操作,而不是從頭開始建立所有內容(並且可能會在過程中遭受一些小事情的困擾),Wasp 是一個很棒的 React/Node 全端框架,可以處理為您管理程式設計的樣板部分。 🤯 此外,[他們的 CLI](https://wasp-lang.dev/docs/quick-start)也可以幫助您更快地啟動。透過執行`wasp new` ,您可以獲得適合您需求的自訂範本。例如,如果您正在建立新的 SaaS,您可能會發現[OpenSaaS](https://opensaas.sh/)適合您,或者如果您正在建立更具體的解決方案,如果沒有其他合適的解決方案, [AI 程式碼產生器](https://usemage.ai/)可以幫助您快速啟動。  --- 順便說一句,如果您還沒有,請給我們的儲存庫一些關愛!像[Wasp](https://wasp-lang.dev)這樣的開源專案可以節省我們大量的時間,讓我們能夠專注於建立 Web 應用程式的有趣部分! 透過[在 GitHub 上為該儲存庫加註星標,](https://www.github.com/wasp-lang/wasp)您將幫助我們繼續讓所有開發人員更快、更輕鬆地進行 Web 開發!  {% cta https://www.github.com/wasp-lang/wasp %} ⭐️ 給黃蜂一顆星! ⭐️ {% endcta %} --- ### 試著去做(並犯一些錯誤)  現在,是時候讓我們動手了! 身為程式設計師,你必須具備的一項基本技能是**搜尋**。內容無所不在,我們只需要找到它。首先將手邊的任務分解成更小的問題: 讓我們使用*一個簡單的應用程式範例,該應用程式允許用戶輸入其姓名,以便其顯示在螢幕/客戶端上:* - 如何在 Python 上顯示我的名字? - 如何在程式碼中儲存文字? 您搜尋和尋找內容的每個問題都會產生更多問題,這些問題有望更準確地解決問題。您可能會親眼看到,像「在螢幕上顯示使用者名稱」這樣簡單的任務可以變得任何複雜程度。 我們如何在應用程式上輸入和保存資料?我們如何正確顯示這些資料?您將嘗試回答這些問題,但有時可能**會失敗**。作為工程師,除了解決專案可能引起的任何不確定性之外,我們還必須確定這些問題是否與我們正在開發的解決方案相關。  在尋求答案和辨識主題是否不相關之間找到平衡非常重要。這個過程有助於我們的專業成長。哦,我們不要忘記我們的朋友 AI,例如[Chat-GPT](https://chat.openai.com/chat) ,它可以為我們解釋甚至編碼。 請記住,與一般的工程一樣,編碼的一部分涉及嘗試和錯誤。我們每天都會嘗試、除錯並尋找解決方案。我們嘗試的越多,我們就越接近所需的解決方案。對於每個工程師/程式設計師來說,快速適應這個過程是朝著正確方向邁出的一大步。 但是,請注意,如果您是一個完全的初學者,請先嘗試自己搜尋。人工智慧很棒,可以幫助你很多,但它可能不精確,只有自己學習才能讓你有能力發現缺陷。 ### 反思你的進步  定期反思迄今為止所學到的知識非常重要。這可以很簡單,例如在每天結束時寫下您所學到的新概念的摘要,甚至建立有關它的部落格文章或教程,或者只是一條簡單的推文。這不僅可以加深您的理解,還可以為將來的使用提供參考(您可以[在這裡](https://buildinpublic.xyz/what-is-build-in-public)了解更多有關**公共建築**概念的訊息,這對公司很有好處,對您的旅程也很有好處!)。 反思您的進步也讓您有機會評估自己的優勢和劣勢,使您能夠專注於需要改進的領域。它就像個人回饋循環,讓您更了解自己的學習方式以及如何提高學習效率。 這也是自我推銷和透過作品集向他人展示的好時機,例如,您的創作內容和方式! 自學程式設計的挑戰 --------- 自學程式設計有其挑戰。它需要紀律、耐心以及排除故障和從錯誤中學習的能力。此外,如果沒有結構化的課程,很容易感到不知所措或迷失。 然而,同樣重要的是要記住,自學並不意味著孤立學習。與其他學習者互動、分享您的程式碼並尋求回饋(例如,您可以查看[Wasp 的 Discord](https://discord.com/invite/rzdnErX)或其他社群來開始參與)。這可以極大地幫助您增強理解並提高編碼技能。 對於課程部分,你也不必盲目地搜尋所有內容。您可以使用[開發人員路線圖](https://roadmap.sh/)來了解您在每一步中應該學習哪些內容! 自學程式設計的好處 ---------  儘管面臨挑戰,自學程式還是有許多好處。它允許靈活性,培養創造力,並且可以帶來難以置信的回報。但沒有什麼比你能做任何事的感覺,或者換句話說,**你將獲得的信心**更令人驚奇的了。 當你最終創造出你喜歡創造的東西並意識到你在這個過程中學到了多少東西時,這很棒,但是,如果有足夠的時間,你可以學習並創造任何想到的想法,那就更棒了。此外,您可以按照自己的步調並專注於您最感興趣的領域。建立讓您興奮的專案並與他人分享您的進度。繼續學習,繼續編碼,最重要的是,享受這趟旅程。 結論 --  總之,自學程式設計是一次賦能之旅,可以釋放無數機會。有時可能會充滿挑戰,但您獲得的可能性是無限的。 哦,萬一您還沒有為[Wasp 的存儲庫](https://www.github.com/wasp-lang/wasp)加註星標,我建議您這樣做!對於任何希望更快、更輕鬆地完成專案的人來說,這是一個很棒的全端框架! {% cta https://www.github.com/wasp-lang/wasp %} ⭐️ 給黃蜂一顆星! ⭐️ {% endcta %} 最後,成功的自學之旅的關鍵是一致性、耐心和適量的好奇心。將挑戰視為成長的機會,不要害怕尋求協助。在這段旅程中,您並不孤單,每個程式設計師,無論經驗如何,都是從您現在的位置開始的。 --- 原文出處:https://dev.to/wasp/the-art-of-self-learning-how-to-teach-yourself-any-programming-concept-5de4
1億個 Repo ======= GitHub 儲存庫數量龐大,實際上超過 1 億個。  那你怎麼知道哪些值得一看呢? 嗯,就像我們好奇的任何事情一樣,我們通常會向同行詢問他們看重什麼。 *你好朋友,* - *最近有聽什麼好聽的新音樂嗎?* - *您最喜歡城裡哪些餐廳?我需要嘗試一些新的地方。* - *我很快就要去健行,我需要一些好的鞋子推薦!* 因此,當嘗試對成長最快的 GitHub 儲存庫進行排名時,了解開發人員最感興趣的儲存庫是有意義的。這正是[ROSS 指數](https://runacap.com/ross-index/)。這是過去一年成長最快的開源新創公司的綜合清單! 下面讓我們深入探討一下。 誰上榜了? =====  ROSS Index 在將儲存庫新增至其喜歡的清單時使用一些標準: - 今年年初就有超過 1000 顆星 - 它不是 10 年前建立的 - 它背後的公司仍然是一家新創公司(不是微軟或其他大公司)  制定此標準的原因是因為他們正在開發者世界中尋找令人興奮的新發展和趨勢以及投資機會。 很酷的是,這也讓我們的開發人員能夠很好地了解我們的環境和工具正在如何變化,以及哪些新趨勢開始真正獲得動力。 我們已經繼續瀏覽了列表並挑選了頂級 JavaScript/TypeScript 存儲庫,並了解了一些關於它們是什麼以及它們如何工作的訊息,因此您不必這樣做。 順便說一句,根據 GitHub Star 計數,下面所有這些 JS/TS 儲存庫去年**增長了至少 400%** 。這是巨大的,這意味著開發人員真的很喜歡它們! 1. [LangChain](https://langchain.com) — 建構強大的人工智慧聊天機器人 ======================================================  去年榜單上的大贏家是[浪鏈](https://js.langchain.com/)。您可能已經嘗試過使用OpenAI 的API 在自己的應用程式中獲取ChatGPT 的答案,但如果您想開始在像ChatGPT 這樣的LLM(大型語言模型)之上建立真正複雜的應用程式,那麼您應該查看LangChain ! LangChain 是一個完整的庫和框架,可以更有效地與法學碩士合作。假設您想要授予 ChatGPT 存取維基百科文章、當前天氣和您的 Gmail 帳戶的權限,以便您可以讓它根據所有這些資訊為您編寫和發送電子郵件。嗯,LangChain 擁有建造這個所需的所有元件! --- 順便提一句。如果您對學習如何在自己的應用程式中使用 LLM 感到好奇,請查看[CoverLetterGPT,這是一個很棒的開源儲存庫](https://github.com/vincanger/coverlettergpt),它向您展示如何將工作描述和簡歷的PDF 轉換為可立即自訂的求職信!  2. [Wasp](https://github.com/wasp-lang/wasp) — 使用 React 和 Node.js 建立全端 Web 應用程式的最快方法 ====================================================================================  [Wasp](https://github.com/wasp-lang/wasp) (嘿,這就是我們!)一直致力於讓全端 Web 應用程式開發變得更簡單、更快速、更有趣,讓大量開發人員受益。  Wasp 允許開發人員只在設定檔中定義某些功能,從而使他們免於編寫大量樣板檔案。一旦完成,Wasp 就會處理剩下的事情。 這意味著 Wasp 用戶可以免費獲得所有這些以及更多內容: - 🔐 電子郵件驗證、Google 或 GitHub Auth 以及 UI 元件 - 🧷 全端式安全, - 📧 電子郵件發送, - ⛏ 非同步(cron)作業, - 📝 React Query 支援資料獲取, - 🚨 安全最佳實踐, - 🧭 客戶端和伺服器路由  如果您正在尋找一種很酷的方式來開始使用 Wasp,請查看[Open SaaS](https://github.com/wasp-lang/open-saas) ,這是一個使用 Wasp 建置的完全免費、開源的 SaaS 入門工具。或者,您可以嘗試[MAGE](https://usemage.ai) ,這是一個 AI 應用程式生成器,它利用 Wasp 的強大功能,透過簡單的提示即可建立全端 Web 應用程式程式碼庫! 3.[重新發送](https://resend.com)-重新思考開發者電子郵件發送 ==========================================  Resend 是一個非常靈活的開發人員電子郵件API 和儀表板,允許用戶管理交易和行銷電子郵件,這意味著他們可以做很酷的事情,例如檢查他們發送的電子郵件是否已被收件人打開,或移至垃圾郵件! Resend 也是非常流行的[React Email 儲存庫的](https://github.com/resend/react-email)幕後黑手,該儲存庫擁有超過 12k 顆星,並且是一個客戶端元件庫,可以使樣式設計和發送漂亮的電子郵件變得更加容易。 現在,您不必從您的應用程式發送看起來像是 1995 年編碼的電子郵件!  4. [Nebuly](https://www.nebuly.com/) — AI 聊天機器人的使用者體驗訊息 =======================================================  隨著法學碩士和人工智慧聊天機器人的興起,出現了一系列與它們相關的有趣工具。 [Nebuly](https://www.nebuly.com/)就是這樣一種工具,它允許開發人員和團隊監控使用者如何與聊天機器人互動。 作為一個開源專案,它可以自行部署並整合到您的應用程式(可能是您使用 LangChain 建立的)中,以便您可以看到: - 您的用戶問得最多的是什麼 - 深入探討對話主題 - 建立實驗和 A/B 測試 - 查看哪些內容不適合您的用戶 這種工具幫助企業和 SaaS 應用程式深入了解客戶需求的潛力是巨大的,因此難怪這是另一個成長最快的儲存庫! ### 5. [Formbricks](https://formbricks.com/) — 輕鬆獲得使用者的回饋  [Formbricks](https://formbricks.com/)將自己定位為開源 Typeform 替代品,它允許您輕鬆建立表單並將其嵌入到您的應用程式中。 作為一個開源產品,您可以獲得慷慨的免費套餐,允許您建立與您的應用程式風格相匹配的專業表單,允許您監控您的調查資料,甚至將其整合到您可能使用的其他工具中,例如Notion、 Zapier,或Google表格。 如果您想收集使用者體驗資訊並正在尋找開源解決方案,這非常有用! 成長快、成長強 ======= 開源新創公司和解決方案的世界正在快速發展,隨著人們對開源解決方案的興趣越來越大,生態系統也變得越來越強大。  我們希望您喜歡這篇對 2023 年以來增長最快的 5 個開源 JavaScript/TypeScript 存儲庫的總結。如果有您了解並喜愛但此處未提及的開源解決方案,請告訴我們!誰知道呢,也許開發者也會喜歡它,並且它會出現在明年的清單中 🙂 --- 原文出處:https://dev.to/wasp/top-5-fastest-growing-javascript-repos-92n
**長話短說** -------- 在本文中,您將學習如何建立一個人工智慧驅動的部落格平台,該平台可以搜尋網路並研究部落格文章的任何主題。 我們將涵蓋: - 用於應用程式框架的 Next.js 🖥️ - 法學碩士 OpenAI 🧠 - LangChain 和 Tavily 的網路搜尋人工智慧代理🤖 - 使用 CopilotKit 將 AI 整合到您的應用程式中 🪁 - Supabase 用於儲存和檢索部落格平台文章資料。 --- CopilotKit:開源 Copilot 框架 ======================== CopilotKit 是[開源 AI 副駕駛框架和平台。](https://github.com/CopilotKit/CopilotKit)我們可以輕鬆地將強大的人工智慧整合到您的 React 應用程式中。 建造: - ChatBots💬:上下文感知的應用內聊天機器人,可以在應用程式內執行操作 - CopilotTextArea📝:人工智慧驅動的文字字段,具有上下文感知自動完成和插入功能 - 聯合代理🤖:應用程式內人工智慧代理,可以與您的應用程式和使用者互動。由浪鏈提供技術支援。  {% cta https://github.com/CopilotKit/CopilotKit %} Star CopilotKit ⭐️ {% endcta %} (原諒人工智慧的拼字錯誤並給一顆星:) 現在回到文章。 --- **先決條件** -------- 在開始建立應用程式之前,讓我們先查看建置應用程式所需的依賴項或套件 - `copilotkit/react-core` :CopilotKit 前端包,帶有 React hooks,用於向副駕駛提供應用程式狀態和操作(AI 功能) - `copilotkit/react-ui:`聊天機器人側邊欄 UI 的 CopilotKit 前端包 - `copilotkit/react-textarea:` CopilotKit 前端包,用於在演講者筆記中進行人工智慧輔助文字編輯。 - `LangChainJS:`用於開發由語言模型支援的應用程式的框架。 - `Tavily Search API:`幫助將法學碩士和人工智慧應用程式連接到可信賴的即時知識的 API。 安裝所有專案包和依賴項 ----------- 在安裝所有專案包和依賴項之前,我們首先在終端機上執行以下命令來建立 Nextjs 專案。 ``` npx create-next-app@latest ``` 然後系統會提示您選擇一些選項。請隨意標記它們,如下所示。 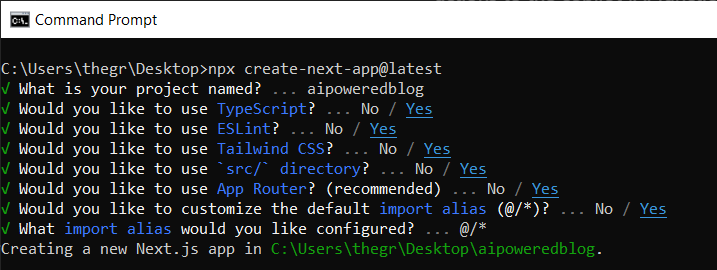 之後,使用您選擇的文字編輯器開啟新建立的 Nextjs 專案。然後在命令列中執行以下命令來安裝所有專案包和依賴項。 ``` npm i @copilotkit/backend @copilotkit/shared @langchain/langgraph @copilotkit/react-core @copilotkit/react-ui @copilotkit/react-textarea @supabase/ssr @supabase/auth-helpers-nextjs ``` **建立部落格平台前端** ------------- 在本節中,我將引導您完成使用靜態內容建立部落格平台前端的過程,以定義平台的使用者介面。 首先,前往`/[root]/src/app`並建立一個名為`components`的資料夾。在 Components 資料夾中,建立一個名為`Article.tsx`的檔案。 之後,將以下程式碼新增至定義名為`Article`功能元件的檔案中,該元件將用於呈現文章建立表單。 ``` "use client"; import { useRef, useState } from "react"; export function Article() { // Define state variables for article outline, copilot text, and article title const [articleOutline, setArticleOutline] = useState(""); const [copilotText, setCopilotText] = useState(""); const [articleTitle, setArticleTitle] = useState(""); return ( // Form element for article input <form action={""} className="w-full h-full gap-10 flex flex-col items-center p-10"> {/* Input field for article title */} <div className="flex w-full items-start gap-3"> <textarea className="p-2 w-full h-12 rounded-lg flex-grow overflow-x-auto overflow-y-hidden whitespace-nowrap" id="title" name="title" value={articleTitle} placeholder="Article Title" onChange={(event) => setArticleTitle(event.target.value)} /> </div> {/* Textarea for article content */} <textarea className="p-4 w-full aspect-square font-bold text-xl bg-slate-800 text-white rounded-lg resize-none" id="content" name="content" value={copilotText} placeholder="Write your article content here" onChange={(event) => setCopilotText(event.target.value)} /> {/* Publish button */} <button type="submit" className="p-4 w-full !bg-slate-800 text-white rounded-lg">Publish</button> </form> ); } ``` 接下來,將另一個檔案新增到元件資料夾中,並將其命名為`Header.tsx` 。然後將以下程式碼新增至定義名為`Header`的功能元件的檔案中,該元件將呈現部落格平台的導覽列。 ``` import Link from "next/link"; export default function Header() { return ( <> <header className="flex flex-wrap sm:justify-start sm:flex-nowrap z-50 w-full bg-white border-b border-gray-200 text-sm py-3 sm:py-0 "> <nav className="relative max-w-7xl w-full mx-auto px-4 sm:flex sm:items-center sm:justify-between sm:px-6 lg:px-8" aria-label="Global"> <div className="flex items-center justify-between"> <Link className="flex-none text-xl font-semibold " href="/" aria-label="Brand"> AIBlogging </Link> </div> <div id="navbar-collapse-with-animation" className=""> <div className="flex flex-col gap-y-4 gap-x-0 mt-5 sm:flex-row sm:items-center sm:justify-end sm:gap-y-0 sm:gap-x-7 sm:mt-0 sm:ps-7"> <Link className="flex items-center font-medium text-gray-500 border-2 border-indigo-600 text-center p-2 rounded-md hover:text-blue-600 sm:border-s sm:my-6 " href="/writearticle"> Create Post </Link> </div> </div> </nav> </header> </> ); } ``` 之後,轉到`/[root]/src/app`並建立一個名為`writearticle`的資料夾。在`writearticle`資料夾中,建立一個名為`page.tsx`檔案。然後將以下程式碼加入匯入`Article`和`Header`元件的檔案中。然後,程式碼定義了一個名為`WriteArticle`的功能元件,它將呈現導覽列和文章建立表單。 ``` import { Article } from "../components/Article"; import Header from "../components/Header"; export default function WriteArticle() { return ( <> <Header /> <Article /> </> ); } ``` 接下來,前往`/[root]/src/page.tsx`文件,並新增以下程式碼,該程式碼定義一個名為`Home`功能元件,該元件呈現將顯示已發佈文章清單的部落格平台主頁。 ``` import Image from "next/image"; import Link from "next/link"; import Header from "./components/Header"; const Home = async () => { return ( <> <Header /> <div className="max-w-[85rem] h-full px-4 py-10 sm:px-6 lg:px-8 lg:py-14 mx-auto"> <div className="grid sm:grid-cols-2 lg:grid-cols-3 gap-6"> <Link key={""} className="group flex flex-col h-full bg-white border border-gray-200 hover:border-transparent hover:shadow-lg transition-all duration-300 rounded-xl p-5 " href={""}> <div className="aspect-w-16 aspect-h-11"> <Image className="object-cover h-48 w-96 rounded-xl" src={`https://source.unsplash.com/featured/?${encodeURIComponent( "hello world" )}`} width={500} height={500} alt="Image Description" /> </div> <div className="my-6"> <h3 className="text-xl font-semibold text-gray-800 "> Hello World </h3> </div> </Link> </div> </div> </> ); }; export default Home; ``` 之後,請轉到`next.config.js`檔案並加入以下程式碼,該程式碼允許您使用 Unsplash 中的圖像作為已發布文章的封面圖像。 ``` module.exports = { images: { remotePatterns: [ { protocol: "https", hostname: "source.unsplash.com", }, ], }, }; ``` 最後,在命令列上執行命令`npm run dev` ,然後導航到 http://localhost:3000/。現在您應該在瀏覽器上查看部落格平台前端,如下所示。 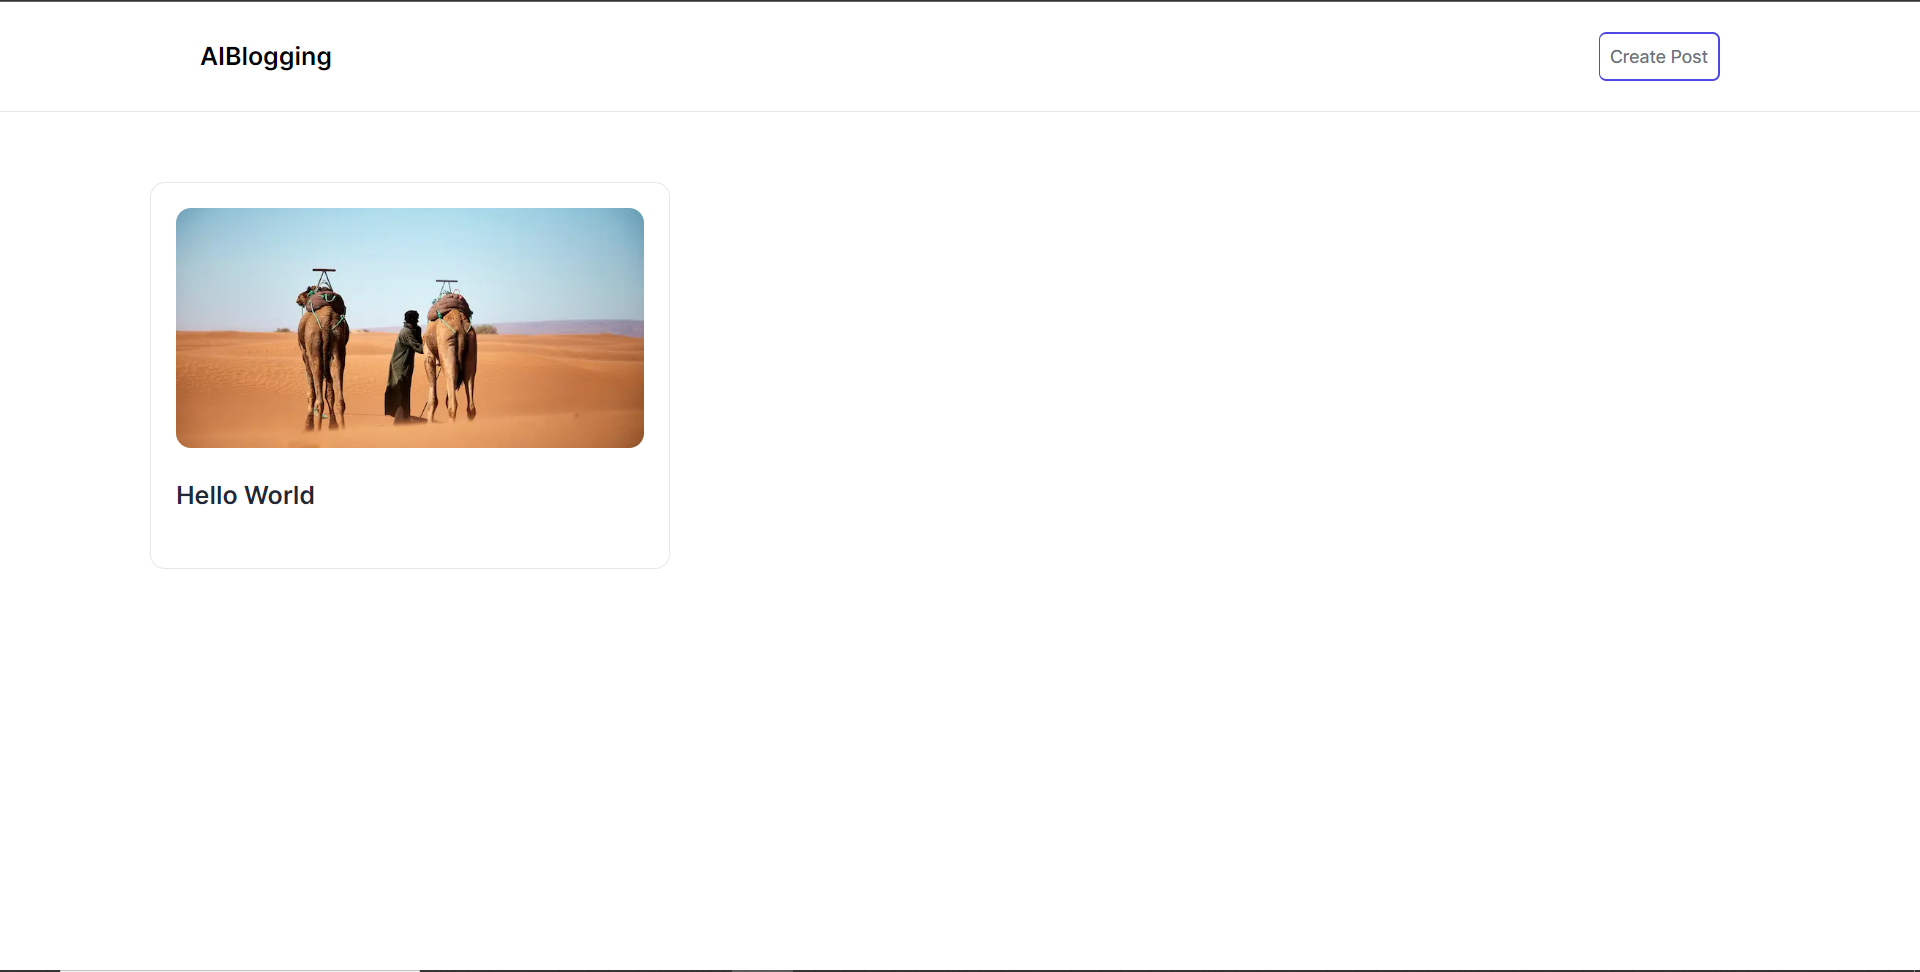 **將部落格平台與 CopilotKit 後端集成** --------------------------- 在本節中,我將引導您完成將部落格平台與 CopilotKit 後端整合的過程,CopilotKit 後端處理來自前端的請求,提供函數呼叫和各種 LLM 後端(例如 GPT)。此外,我們將整合一個名為 Tavily 的人工智慧代理,它可以研究網路上的任何主題。 首先,在根目錄中建立一個名為`.env.local`的檔案。然後在保存`ChatGPT`和`Tavily` Search API 金鑰的檔案中加入下面的環境變數。 ``` OPENAI_API_KEY="Your ChatGPT API key" TAVILY_API_KEY="Your Tavily Search API key" ``` 若要取得 ChatGPT API 金鑰,請導覽至 https://platform.openai.com/api-keys。 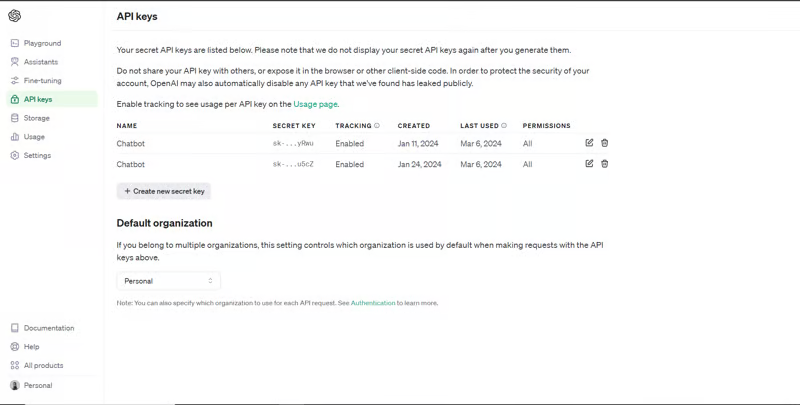 若要取得 Tavilly Search API 金鑰,請導覽至 https://app.tavily.com/home 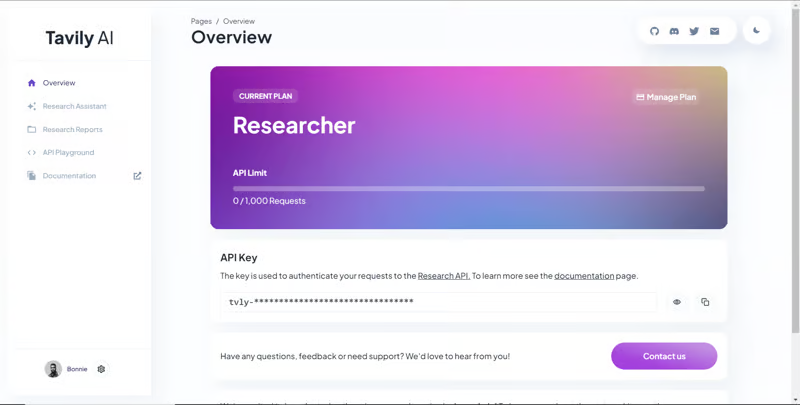 之後,轉到`/[root]/src/app`並建立一個名為`api`的資料夾。在`api`資料夾中,建立一個名為`copilotkit`的資料夾。在`copilotkit`資料夾中,建立一個名為`research.ts`的檔案。然後導航到[該 Research.ts gist 文件](https://gist.github.com/TheGreatBonnie/58dc21ebbeeb8cbb08df665db762738c),複製程式碼,並將其新增至**`research.ts`**檔案中 接下來,在`/[root]/src/app/api/copilotkit`資料夾中建立一個名為`route.ts`的檔案。該文件將包含設定後端功能來處理 POST 請求的程式碼。它有條件地包括對給定主題進行研究的“研究”操作。 現在在文件頂部導入以下模組。 ``` import { CopilotBackend, OpenAIAdapter } from "@copilotkit/backend"; // For backend functionality with CopilotKit. import { researchWithLangGraph } from "./research"; // Import a custom function for conducting research. import { AnnotatedFunction } from "@copilotkit/shared"; // For annotating functions with metadata. ``` 在上面的程式碼下面,定義一個執行時間環境變數和一個名為`researchAction`的函數,該函數使用下面的程式碼對某個主題進行研究。 ``` // Define a runtime environment variable, indicating the environment where the code is expected to run. export const runtime = "edge"; // Define an annotated function for research. This object includes metadata and an implementation for the function. const researchAction: AnnotatedFunction<any> = { name: "research", // Function name. description: "Call this function to conduct research on a certain topic. Respect other notes about when to call this function", // Function description. argumentAnnotations: [ // Annotations for arguments that the function accepts. { name: "topic", // Argument name. type: "string", // Argument type. description: "The topic to research. 5 characters or longer.", // Argument description. required: true, // Indicates that the argument is required. }, ], implementation: async (topic) => { // The actual function implementation. console.log("Researching topic: ", topic); // Log the research topic. return await researchWithLangGraph(topic); // Call the research function and return its result. }, }; ``` 然後在上面的程式碼下加入下面的程式碼來定義處理POST請求的非同步函數。 ``` // Define an asynchronous function that handles POST requests. export async function POST(req: Request): Promise<Response> { const actions: AnnotatedFunction<any>[] = []; // Initialize an array to hold actions. // Check if a specific environment variable is set, indicating access to certain functionality. if (process.env["TAVILY_API_KEY"]) { actions.push(researchAction); // Add the research action to the actions array if the condition is true. } // Instantiate CopilotBackend with the actions defined above. const copilotKit = new CopilotBackend({ actions: actions, }); // Use the CopilotBackend instance to generate a response for the incoming request using an OpenAIAdapter. return copilotKit.response(req, new OpenAIAdapter()); } ``` **將部落格平台與 CopilotKit 前端集成** --------------------------- 在本節中,我將引導您完成將部落格平台與 CopilotKit 前端整合的過程,以促進部落格文章研究和文章大綱生成。我們將使用聊天機器人側欄元件、copilot 文字區域元件、用於向 Copilot 提供應用程式狀態和其他資訊的 useMakeCopilotReadable 掛鉤,以及用於提供 Copilot 可以呼叫的操作的 useCopilotAction 掛鉤 首先,導入`/[root]/src/app/components/Article.tsx`檔案頂部的`useMakeCopilotReadable` 、 `useCopilotAction` 、 `CopilotTextarea`和`HTMLCopilotTextAreaElement`掛鉤。 ``` import { useMakeCopilotReadable, useCopilotAction, } from "@copilotkit/react-core"; import { CopilotTextarea, HTMLCopilotTextAreaElement, } from "@copilotkit/react-textarea"; ``` 在 Article 函數內的狀態變數下方,新增以下程式碼,該程式碼使用`useMakeCopilotReadable`掛鉤來新增將作為應用程式內聊天機器人的上下文產生的文章大綱。鉤子使副駕駛可以閱讀文章大綱。 ``` useMakeCopilotReadable("Blog article outline: " + JSON.stringify(articleOutline)); ``` 在`useMakeCopilotReadable`掛鉤下方,使用以下程式碼建立一個名為`copilotTextareaRef`的引用,該引用指向名為`HTMLCopilotTextAreaElement`的文字區域元素。 ``` const copilotTextareaRef = useRef<HTMLCopilotTextAreaElement>(null); ``` 在上面的程式碼下方,加入以下程式碼,該程式碼使用`useCopilotAction`掛鉤來設定名為`researchBlogArticleTopic`的操作,該操作將啟用對部落格文章的給定主題的研究。此操作採用兩個參數,稱為`articleTitle`和`articleOutline` ,這兩個參數可以產生文章標題和大綱。 該操作包含一個處理程序函數,該函數根據給定主題生成文章標題和大綱。在處理函數內部, `articleOutline`狀態會使用新產生的大綱進行更新,而`articleTitle`狀態會使用新產生的標題進行更新,如下所示。 ``` useCopilotAction( { name: "researchBlogArticleTopic", description: "Research a given topic for a blog article.", parameters: [ { name: "articleTitle", type: "string", description: "Title for a blog article.", required: true, }, { name: "articleOutline", type: "string", description:"Outline for a blog article that shows what the article covers.", required: true, }, ], handler: async ({ articleOutline, articleTitle }) => { setArticleOutline(articleOutline); setArticleTitle(articleTitle); }, }, [] ); ``` 在上面的程式碼下方,前往表單元件並新增以下`CopilotTextarea`元素,該元素將使您能夠為文章內容新增補全、插入和編輯。 ``` <CopilotTextarea value={copilotText} ref={copilotTextareaRef} placeholder="Write your article content here" onChange={(event) => setCopilotText(event.target.value)} className="p-4 w-full aspect-square font-bold text-xl bg-slate-800 text-white rounded-lg resize-none" placeholderStyle={{ color: "white", opacity: 0.5, }} autosuggestionsConfig={{ textareaPurpose: articleTitle, chatApiConfigs: { suggestionsApiConfig: { forwardedParams: { max_tokens: 5, stop: ["\n", ".", ","], }, }, insertionApiConfig: {}, }, debounceTime: 250, }} /> ``` 然後將Tailwindcss隱藏類別加入文章內容的Textarea中,如下所示。文字區域將保存文章的內容,並在文章發布後將其插入資料庫。 ``` {/* Textarea for article content */} <textarea className="p-4 w-full aspect-square font-bold text-xl bg-slate-800 text-white rounded-lg resize-none hidden" id="content" name="content" value={copilotText} placeholder="Write your article content here" onChange={(event) => setCopilotText(event.target.value)} /> ``` 之後,請前往`/[root]/src/app/writearticle/page.tsx`檔案並使用下面的程式碼匯入頂部的 CopilotKit 前端套件和樣式。 ``` import { CopilotKit } from "@copilotkit/react-core"; import { CopilotSidebar } from "@copilotkit/react-ui"; import "@copilotkit/react-ui/styles.css"; import "@copilotkit/react-textarea/styles.css"; ``` 然後使用`CopilotKit`和`CopilotSidebar`包裹Article元件,如下所示。 `CopilotKit`元件指定 CopilotKit 後端端點 ( `/api/copilotkit/openai/` ) 的 URL,而`CopilotSidebar`則呈現應用程式內聊天機器人,您可以提示您研究文章的任何主題。 ``` export default function WriteArticle() { return ( <> <Header /> <CopilotKit url="/api/copilotkit"> <CopilotSidebar instructions="Help the user research a blog article topic." defaultOpen={true} labels={{ title: "Blog Article Copilot", initial: "Hi you! 👋 I can help you research any topic for a blog article.", }} clickOutsideToClose={false}> <Article /> </CopilotSidebar> </CopilotKit> </> ); } ``` 之後,執行開發伺服器並導航到 http://localhost:3000/writearticle。您應該會看到應用程式內聊天機器人已整合到部落格平台中。 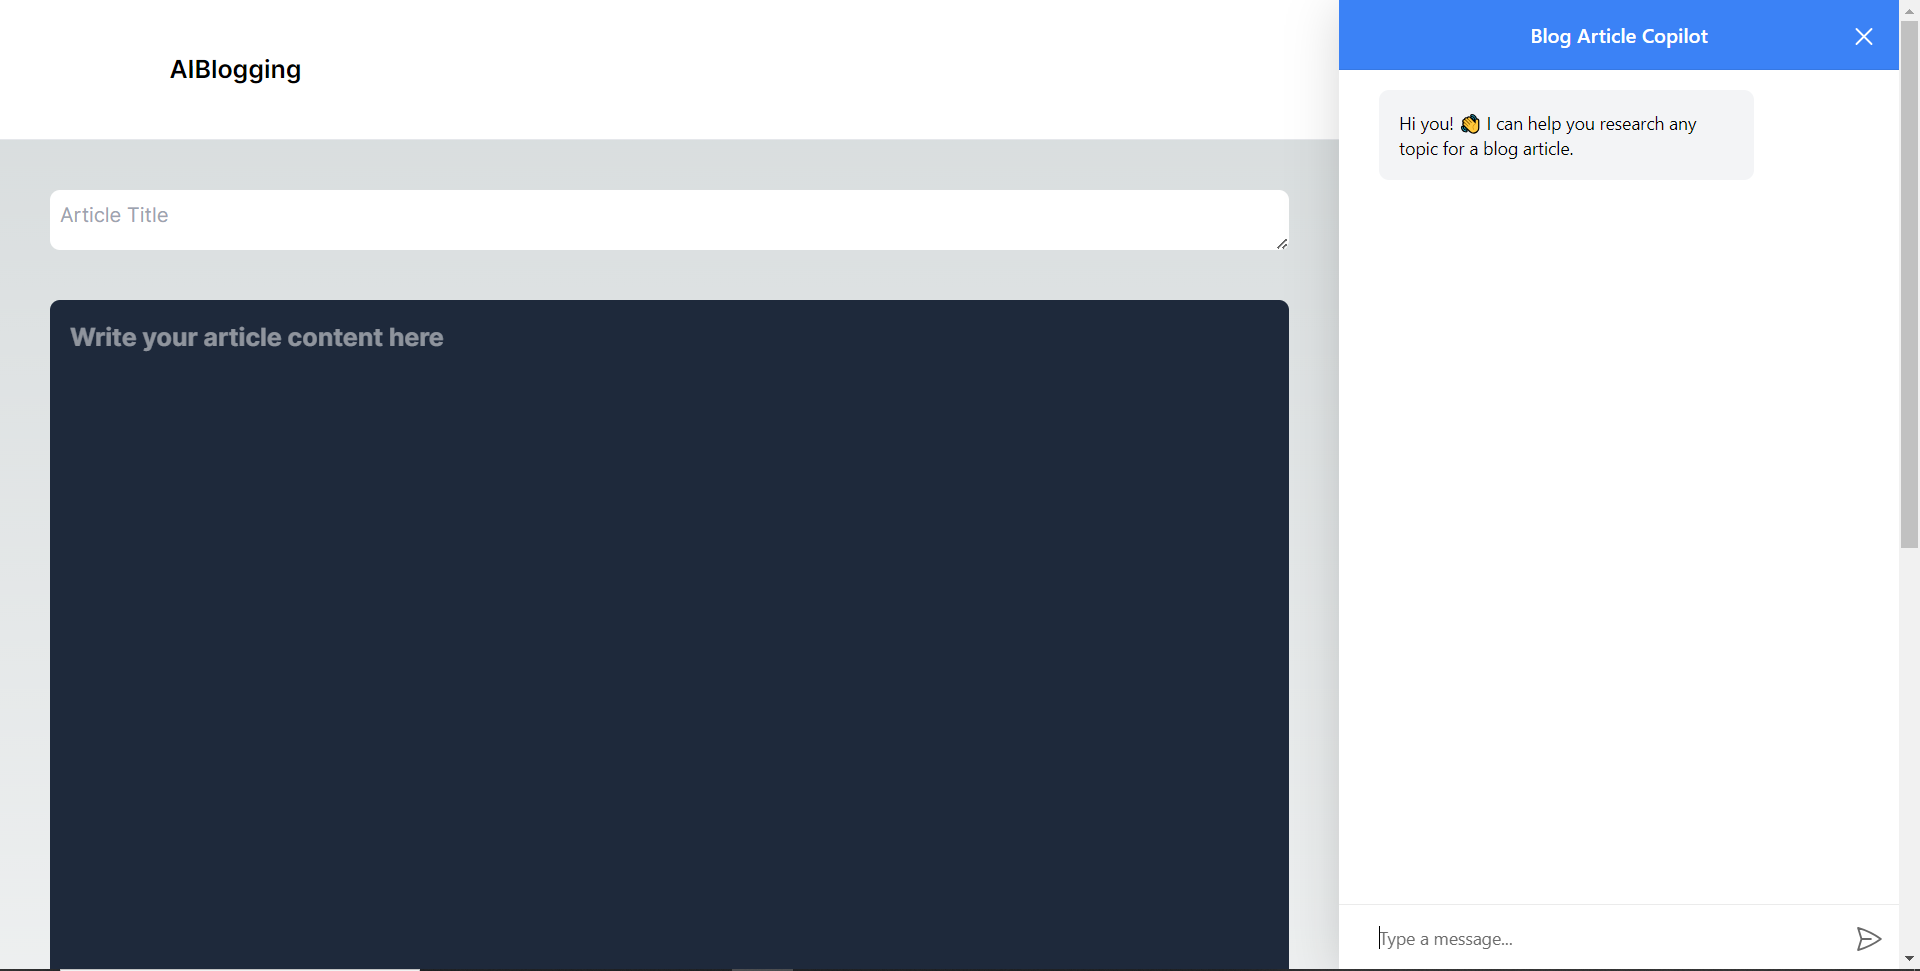 給右側的聊天機器人一個提示,例如“研究一篇關於生成人工智慧的部落格文章主題,然後給我文章大綱。”聊天機器人將開始研究該主題,然後產生部落格標題。 當您開始在編輯器上寫作時,您應該會看到內容自動建議,如下所示。 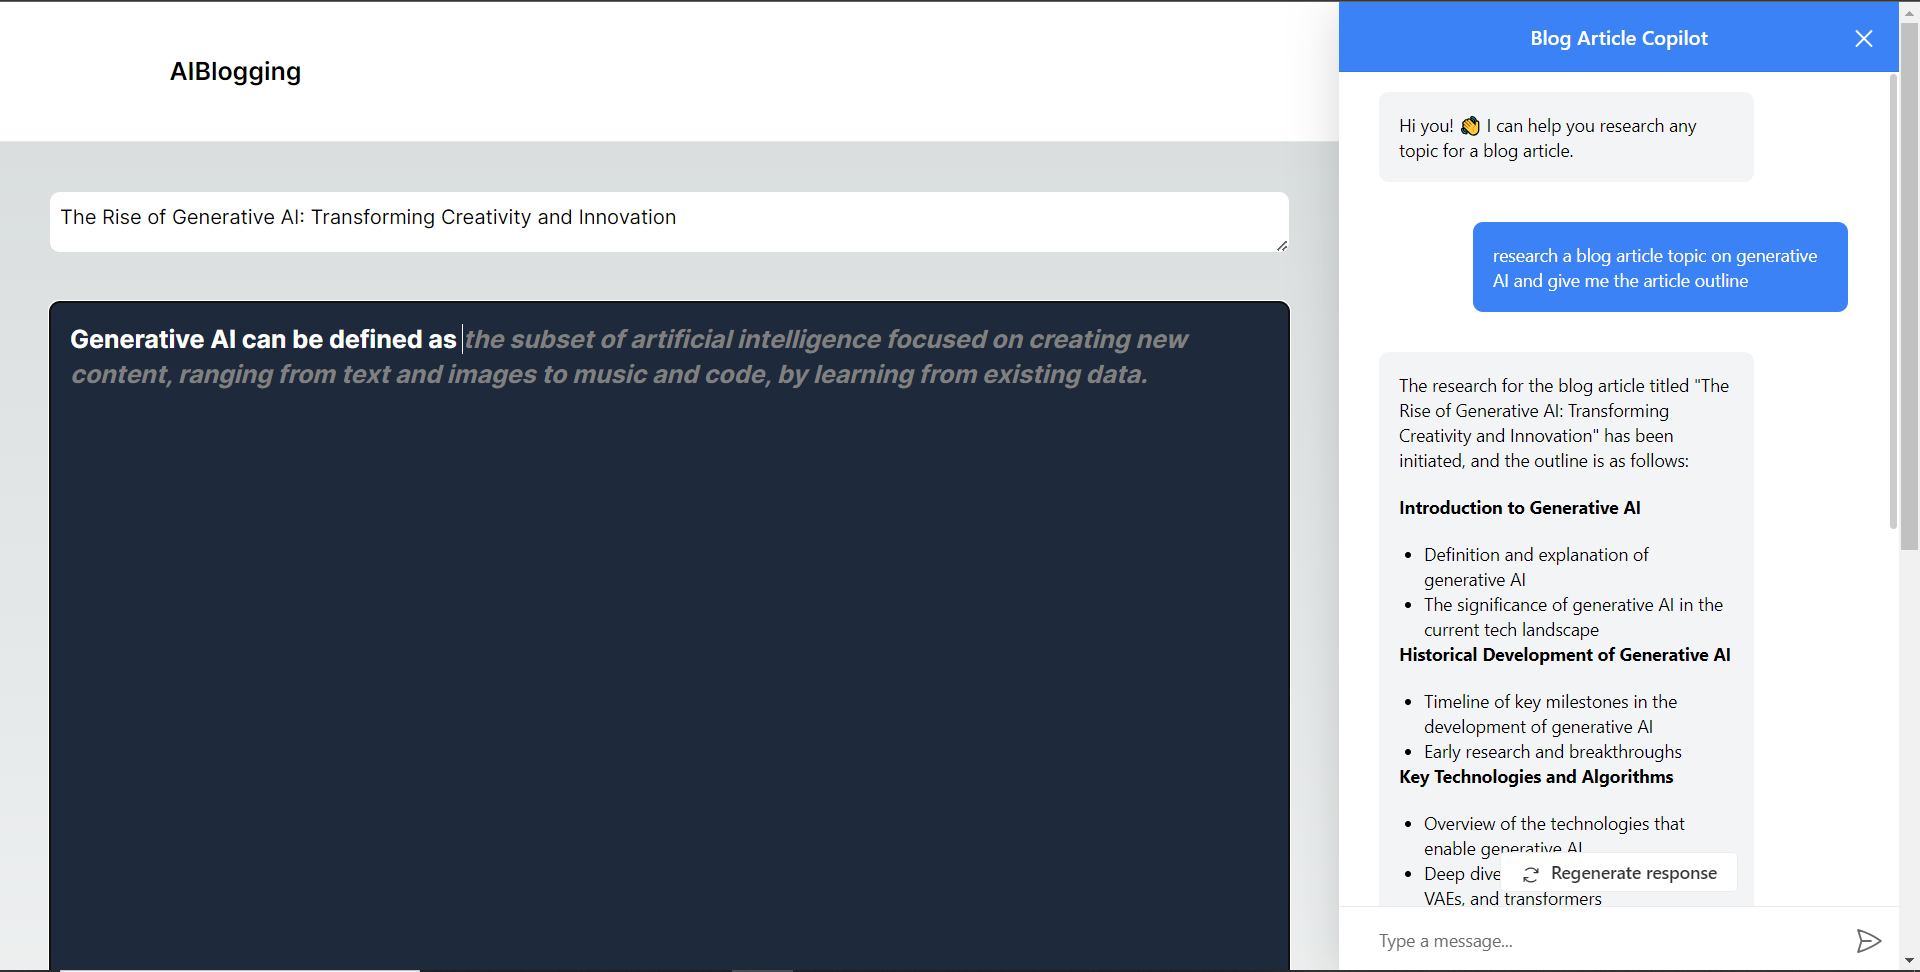 **將部落格平台與 Supabase 資料庫集成** -------------------------- 在本節中,我將引導您完成將部落格平台與 Supabase 資料庫整合以插入和獲取部落格文章資料的過程。 首先,導覽至[supabase.com](http://supabase.com)並點擊主頁上的「啟動您的專案」按鈕。  然後新建一個專案,名為AiBloggingPlatform,如下圖所示。 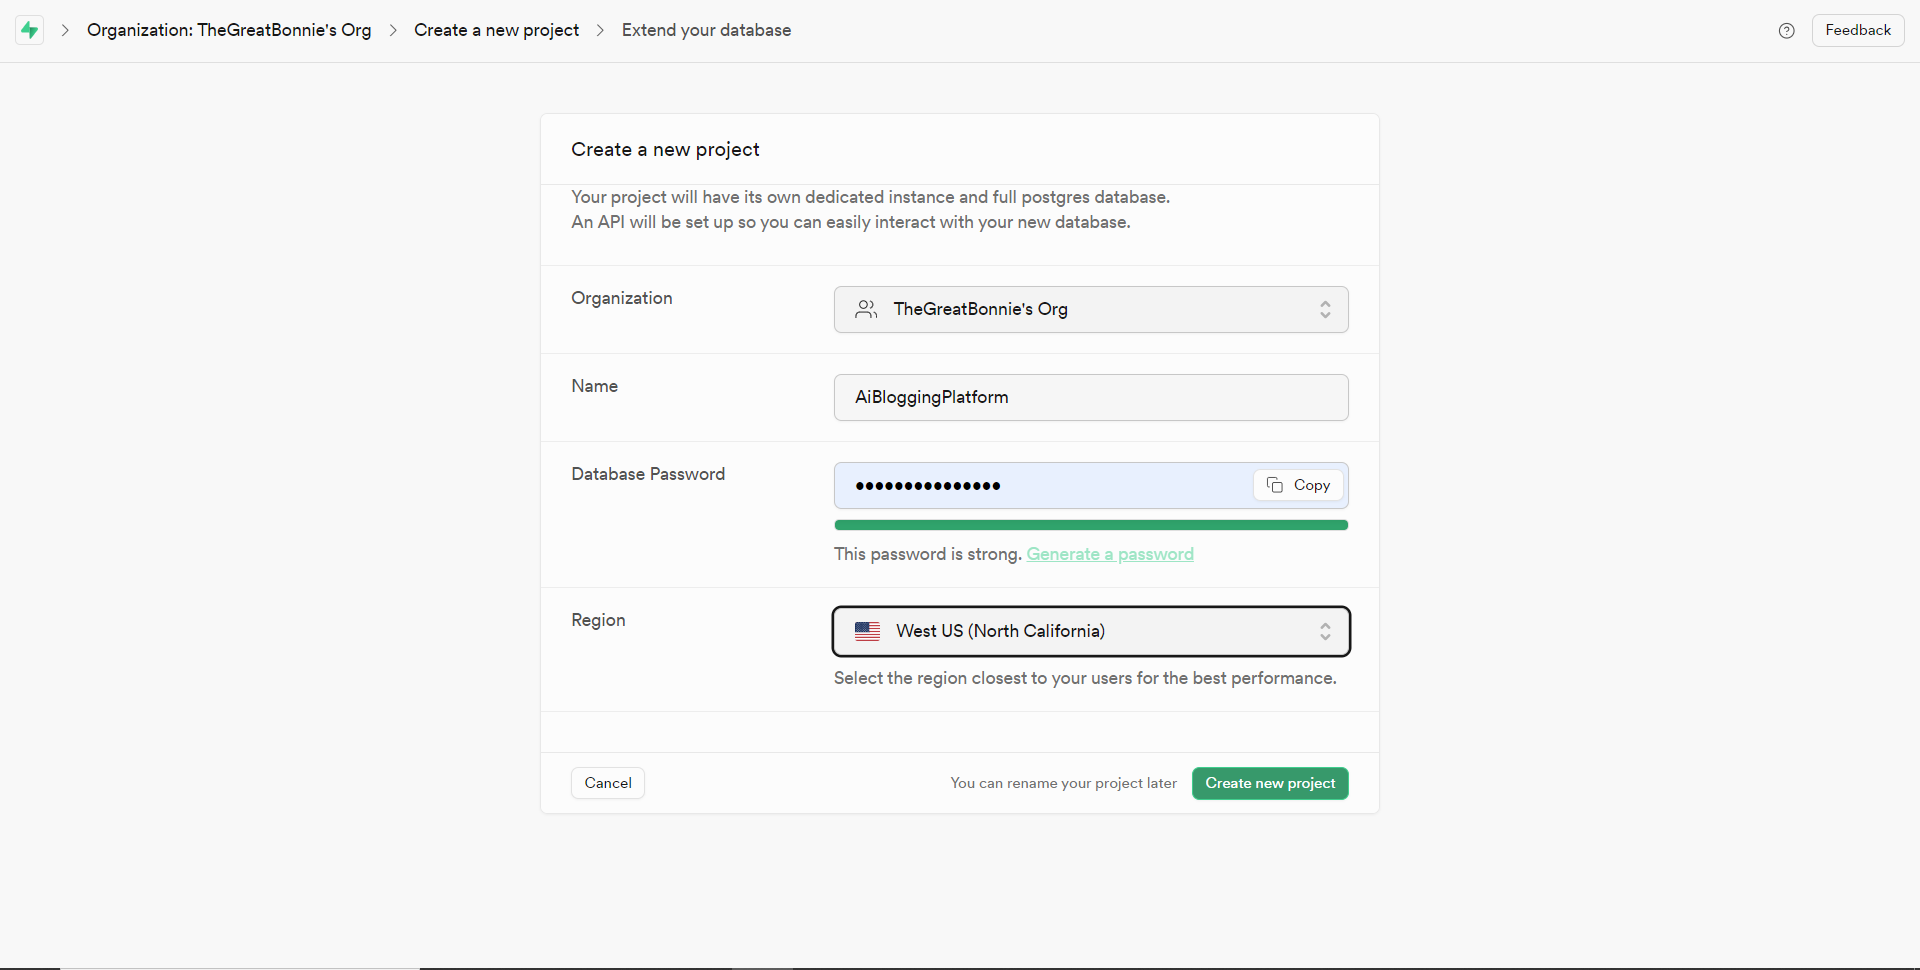 建立專案後,將 Supabase URL 和 API 金鑰新增至 env.local 檔案中的環境變數中,如下所示。 ``` NEXT_PUBLIC_SUPABASE_URL=”Your Supabase URL” NEXT_PUBLIC_SUPABASE_ANON_KEY=”Your Supabase API Key” ``` 之後,請前往 Supabase 上專案的儀表板並開啟 SQL 編輯器部分。然後將下列 SQL 程式碼新增至編輯器中,然後按一下 CTRL + Enter 鍵建立一個名為articles 的表。文章表包含 id、標題和內容行。 ``` create table if not exists articles ( id bigint primary key generated always as identity, title text, content text ); ``` 建立表格後,您應該會收到一條成功訊息,如下所示。 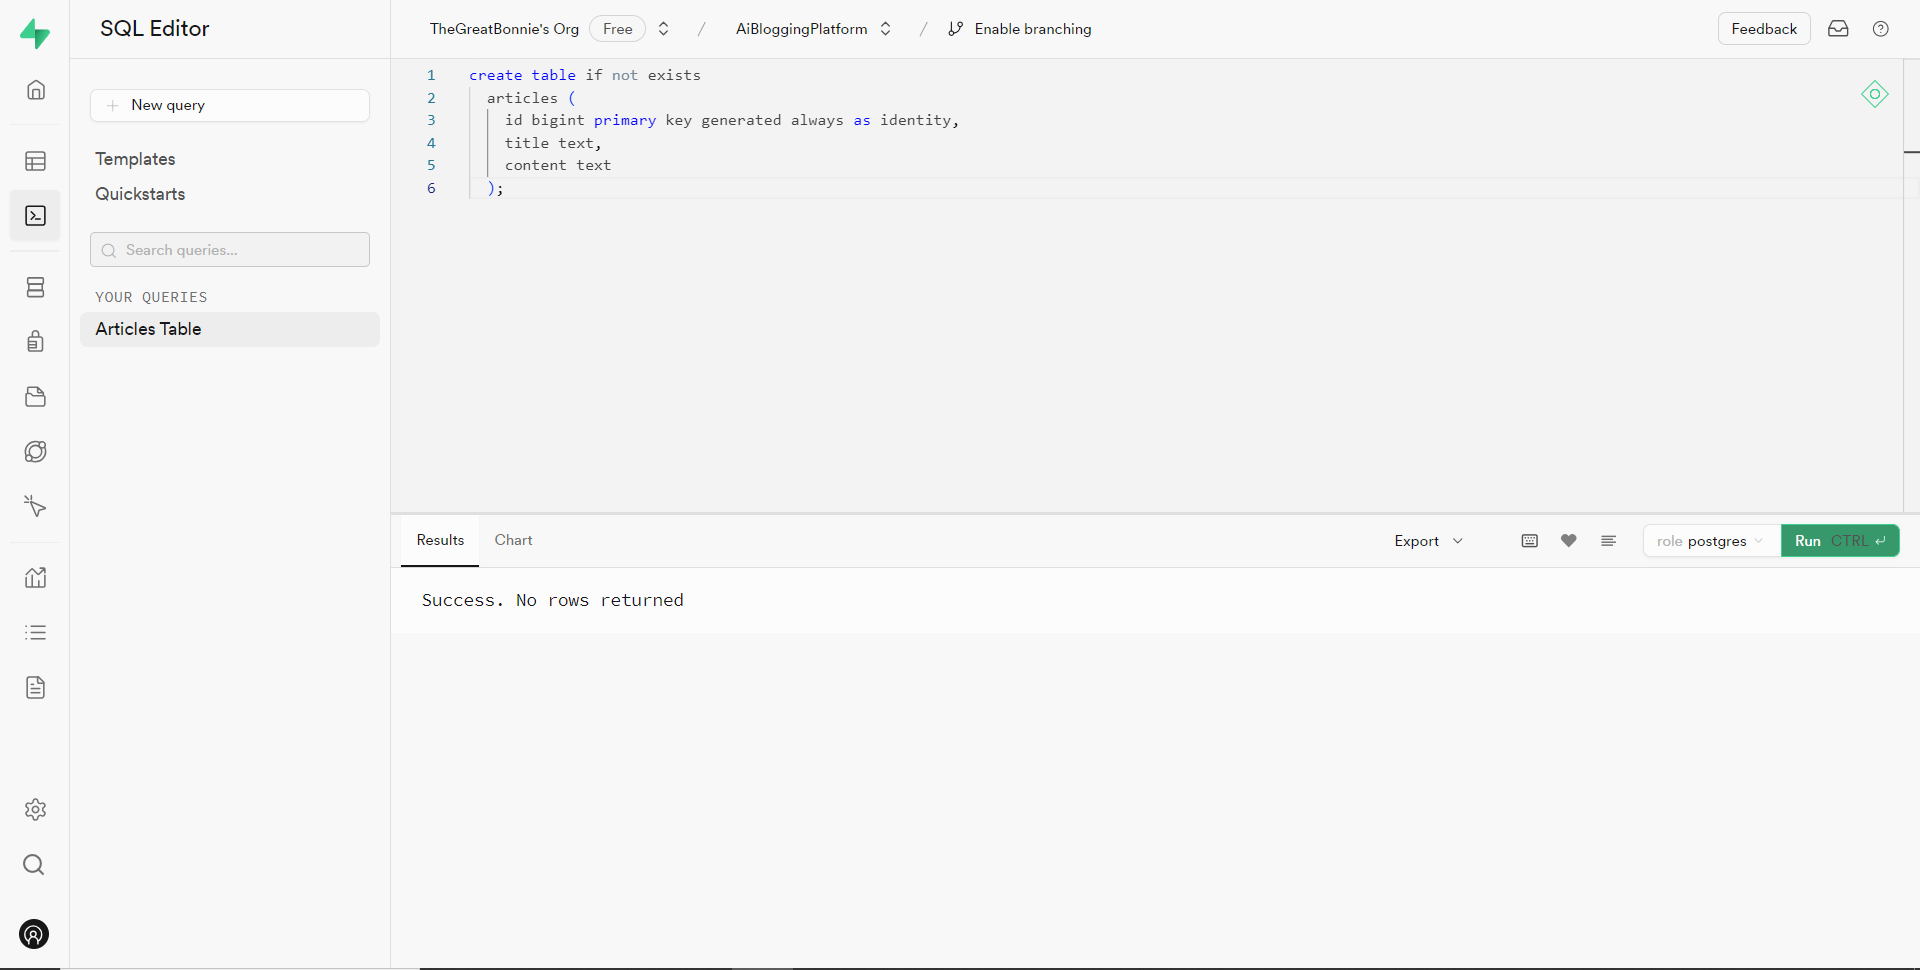 之後,轉到`/[root]/src/`資料夾並建立一個名為`utils`的資料夾。在`utils`資料夾內,建立一個名為`supabase.ts`文件,並新增以下用於建立並傳回 Supabase 用戶端的程式碼。 ``` // Importing necessary functions and types from the Supabase SSR package import { createServerClient, type CookieOptions } from '@supabase/ssr' // Define a function named 'supabase' that takes a 'CookieOptions' object as input export const supabase = (cookies: CookieOptions) => { // Retrieve cookies from the provided 'CookieOptions' object const cookieStore = cookies() // Create and return a Supabase client configured with environment variables and cookie handling return createServerClient( // Retrieve Supabase URL from environment variables process.env.NEXT_PUBLIC_SUPABASE_URL!, // Retrieve Supabase anonymous key from environment variables process.env.NEXT_PUBLIC_SUPABASE_ANON_KEY!, { cookies: { // Define a custom 'get' function to retrieve cookies by name from the cookie store get(name: string) { return cookieStore.get(name)?.value }, }, } ) } ``` 然後轉到`/[root]/src/app`資料夾並建立一個名為`serveractions`的資料夾。在`serveractions`資料夾中,建立一個名為`AddArticle.ts`的文件,並新增以下程式碼,將部落格文章資料插入到 Supabase 資料庫中。 ``` // Importing necessary functions and modules for server-side operations "use server"; import { createServerComponentClient } from "@supabase/auth-helpers-nextjs"; import { cookies } from "next/headers"; import { redirect } from "next/navigation"; // Define an asynchronous function named 'addArticle' that takes form data as input export async function addArticle(formData: any) { // Extract title and content from the provided form data const title = formData.get("title"); const content = formData.get("content"); // Retrieve cookies from the HTTP headers const cookieStore = cookies(); // Create a Supabase client configured with the provided cookies const supabase = createServerComponentClient({ cookies: () => cookieStore }); // Insert the article data into the 'articles' table on Supabase const { data, error } = await supabase.from("articles").insert([ { title, content, }, ]); // Check for errors during the insertion process if (error) { console.error("Error inserting data", error); return; } // Redirect the user to the home page after successfully adding the article redirect("/"); // Return a success message return { message: "Success" }; } ``` 之後,轉到`/[root]/src/app/components/Article.tsx`檔案並導入`addArticle`函數。 ``` import { addArticle } from "../serveractions/AddArticle"; ``` 然後加入`addArticle`函數作為表單動作參數,如下所示。 ``` // Form element for article input <form action={addArticle} className="w-full h-full gap-10 flex flex-col items-center p-10"> </form> ``` 之後,導覽至http://localhost:3000/writearticle,研究您選擇的主題,新增文章內容,然後點擊底部的發布按鈕來發布文章。 然後轉到 Supabase 上專案的儀表板並導航到表編輯器部分。您應該會看到您的文章資料已插入 Supabase 資料庫,如下所示。 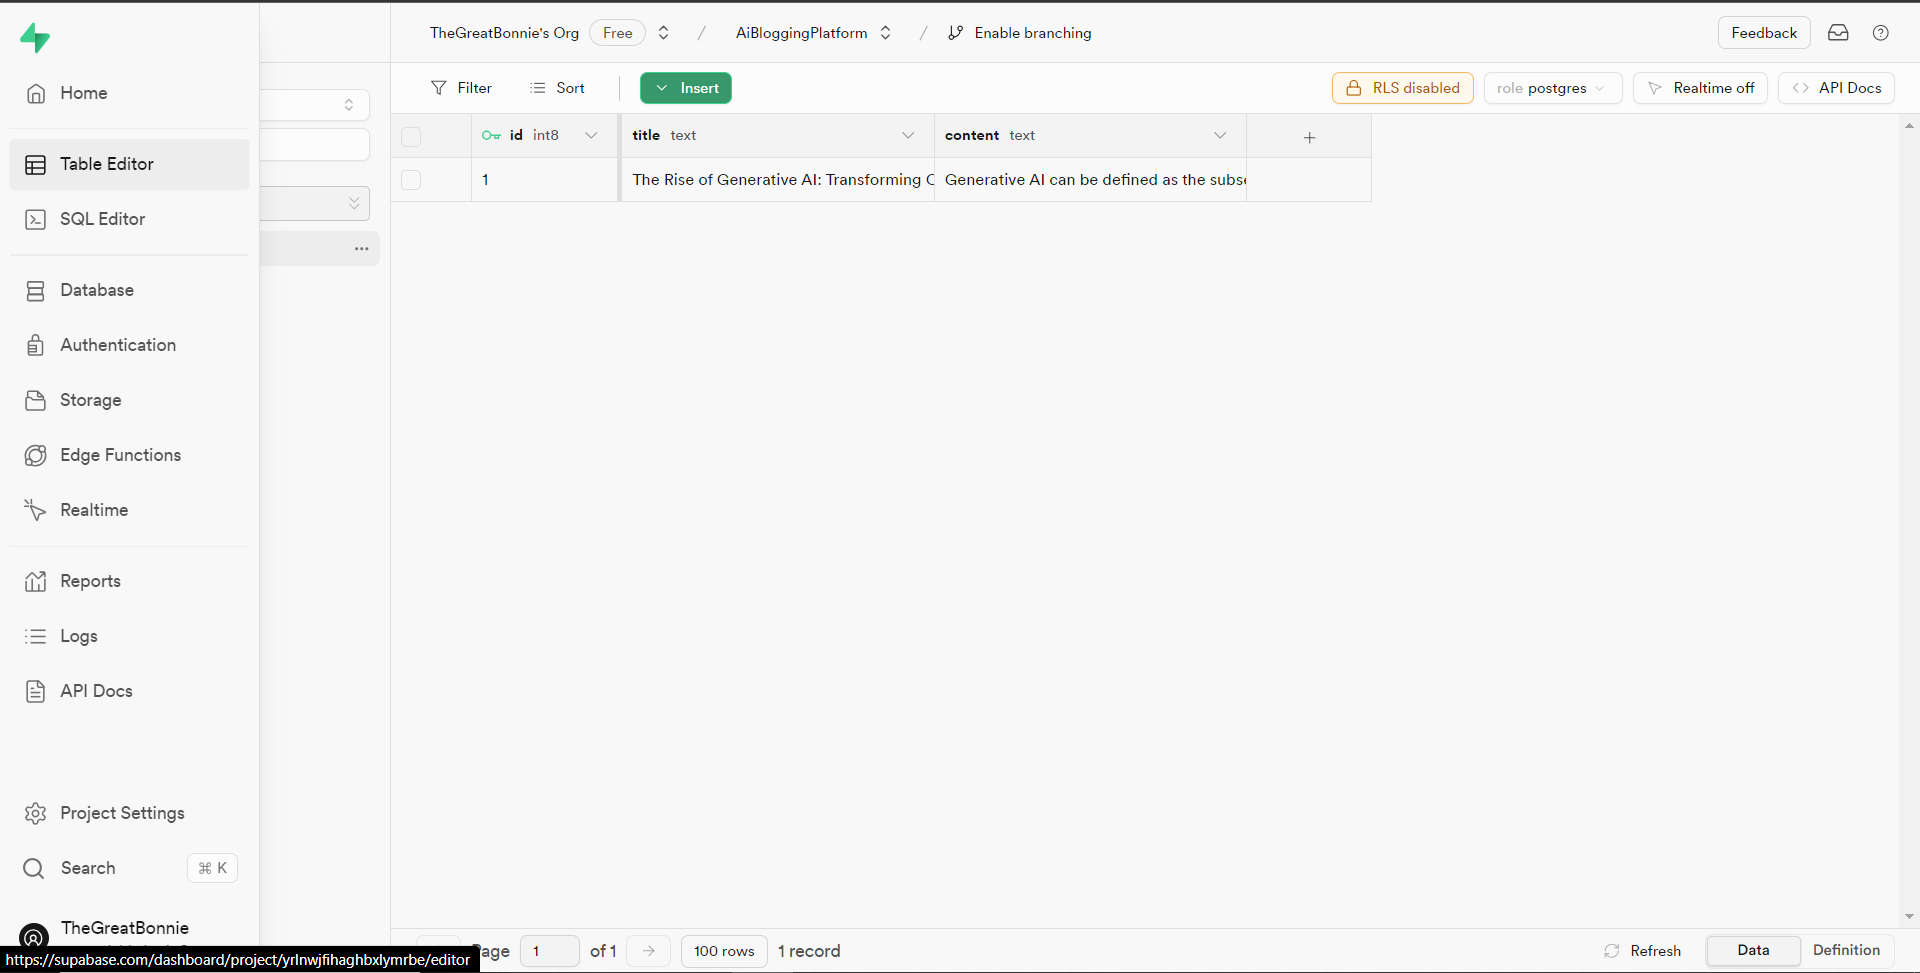 接下來,前往`/[root]/src/app/page.tsx`檔案並在頂部導入 cookie 和 supabase 套件。 ``` import { cookies } from "next/headers"; import { supabase } from "@/utils/supabase"; ``` 然後在 Home 函數中加入以下程式碼,從 Supabase 資料庫中取得文章資料。 ``` const { data: articles, error } = await supabase(cookies).from('articles').select('*') ``` 之後,更新如下所示的元素程式碼,以將已發佈的文章呈現在部落格平台主頁上。 ``` return ( <> <Header /> <div className="max-w-[85rem] h-full px-4 py-10 sm:px-6 lg:px-8 lg:py-14 mx-auto"> <div className="grid sm:grid-cols-2 lg:grid-cols-3 gap-6"> {articles?.map((post: any) => ( <Link key={post.id} className="group flex flex-col h-full bg-white border border-gray-200 hover:border-transparent hover:shadow-lg transition-all duration-300 rounded-xl p-5 " href={`/posts/${post.id}`}> <div className="aspect-w-16 aspect-h-11"> <Image className="object-cover h-48 w-96 rounded-xl" src={`https://source.unsplash.com/featured/?${encodeURIComponent( post.title )}`} width={500} height={500} alt="Image Description" /> </div> <div className="my-6"> <h3 className="text-xl font-semibold text-gray-800 "> {post.title} </h3> </div> </Link> ))} </div> </div> </> ); ``` 然後導航到[http://localhost:3000](http://localhost:3000/writearticle) ,您應該會看到您發布的文章,如下所示。 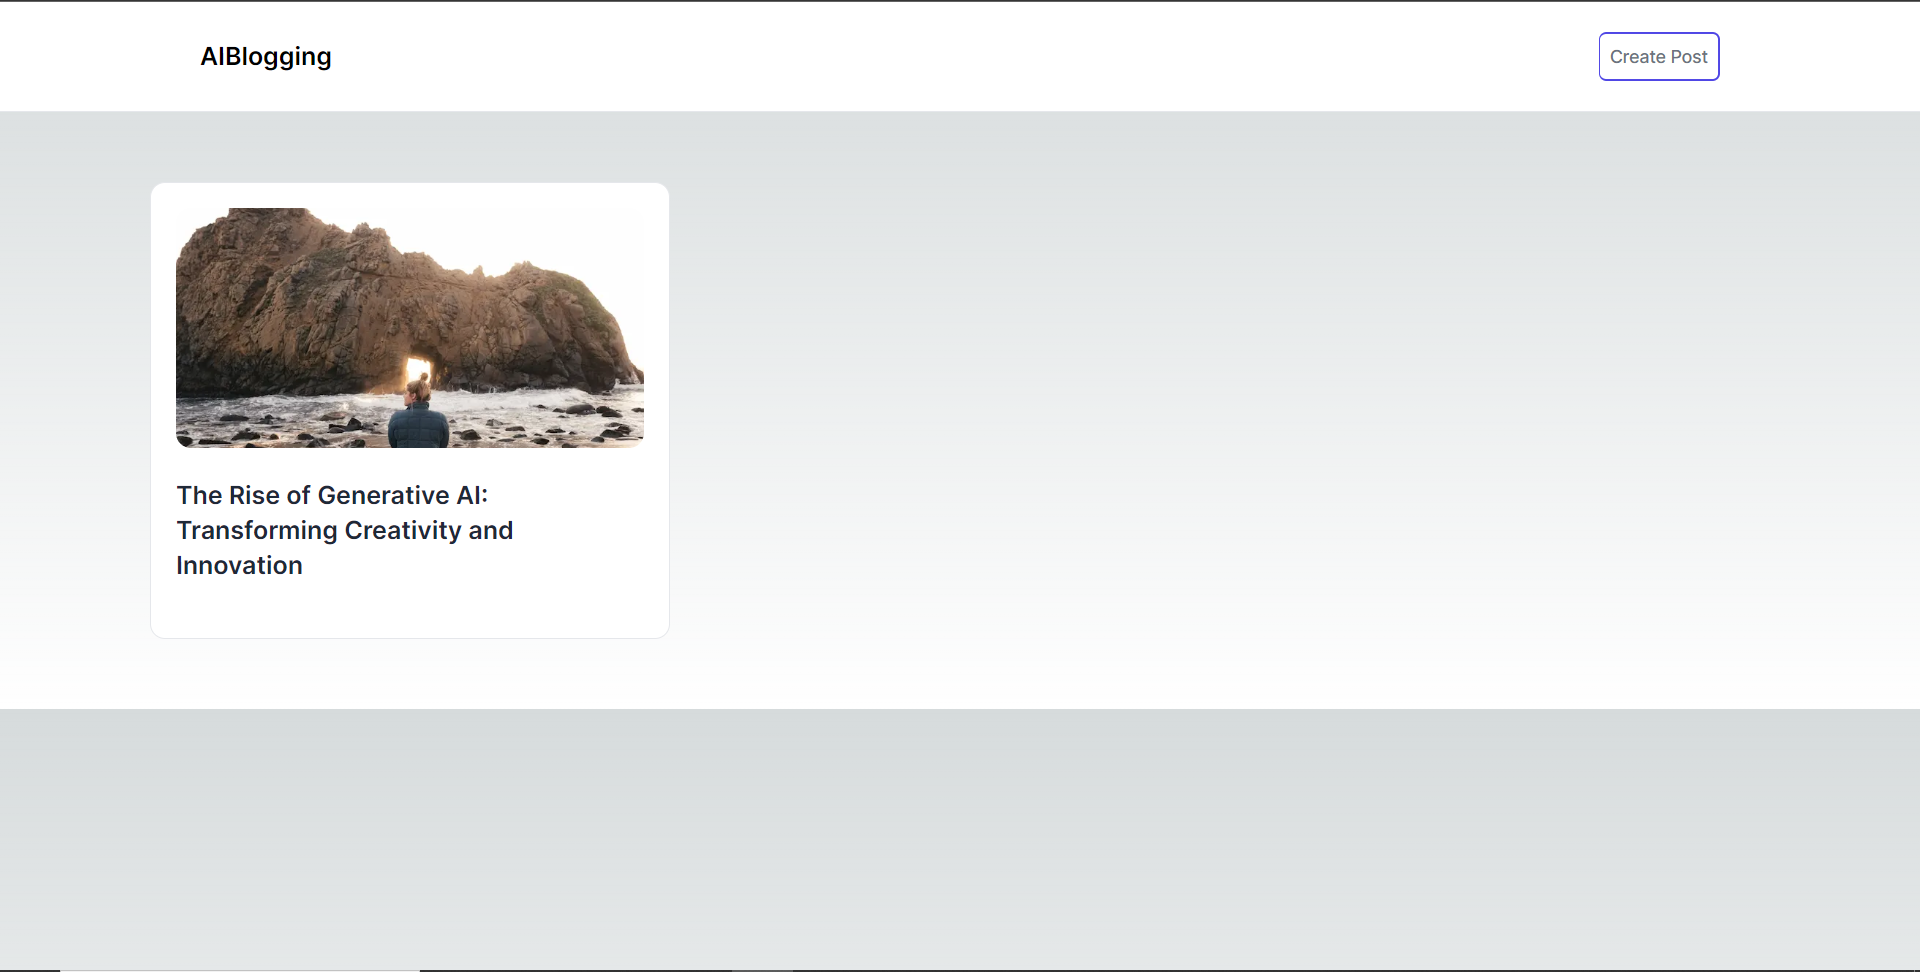 之後,轉到`/[root]/src/app`資料夾並建立一個名為`[id].`在`[id]`資料夾中,建立一個名為`page.tsx`的文件,並在頂部匯入以下套件和元件。 ``` import { supabase } from '@/utils/supabase'; import { cookies } from "next/headers"; import Header from '@/app/components/Header'; ``` 在導入下面,定義一個名為「getArticles」的非同步函數,該函數根據 id 參數從 supabase 資料庫檢索文章資料,如下所示。 ``` // Define an asynchronous function named 'getArticles' that retrieves article data based on the provided parameters async function getArticles(params: any) { // Extract the 'id' parameter from the provided 'params' object const { id } = params // Retrieve article data from Supabase database where the 'id' matches the provided value const { data, error } = await supabase(cookies) .from('articles') .select('*') .eq('id', id) .single(); // Return the retrieved data return data } ``` 在上面的程式碼下面,定義一個名為“Post”的函數,它將“params”作為 props,如下所示。 ``` // Define a default asynchronous function named 'Post' that takes 'params' as props export default async function Post({ params }: { params: any }) { // Retrieve the post data asynchronously based on the provided 'params' const post = await getArticles(params); // Return JSX to render the post details return ( <> {/* Render the header component */} <Header /> {/* Main content wrapper */} <div className="max-w-3xl px-4 pt-6 lg:pt-10 pb-12 sm:px-6 lg:px-8 mx-auto"> <div className="max-w-2xl"> <div className="space-y-5 md:space-y-8"> <div className="space-y-3"> {/* Render the post title */} <h2 className="text-2xl font-bold md:text-3xl dark:text-white"> {/* Render the post title only if 'post' is truthy */} {post && post.title} </h2> {/* Render the post content */} <p className="text-lg text-gray-800 dark:text-gray-200"> {/* Render the post content only if 'post' is truthy */} {post && post.content} </p> </div> </div> </div> </div> </> ); } ``` 之後,導覽至[http://localhost:3000](http://localhost:3000/writearticle)並點擊部落格平台主頁上顯示的文章。 然後您應該被重定向到文章的內容,如下所示。 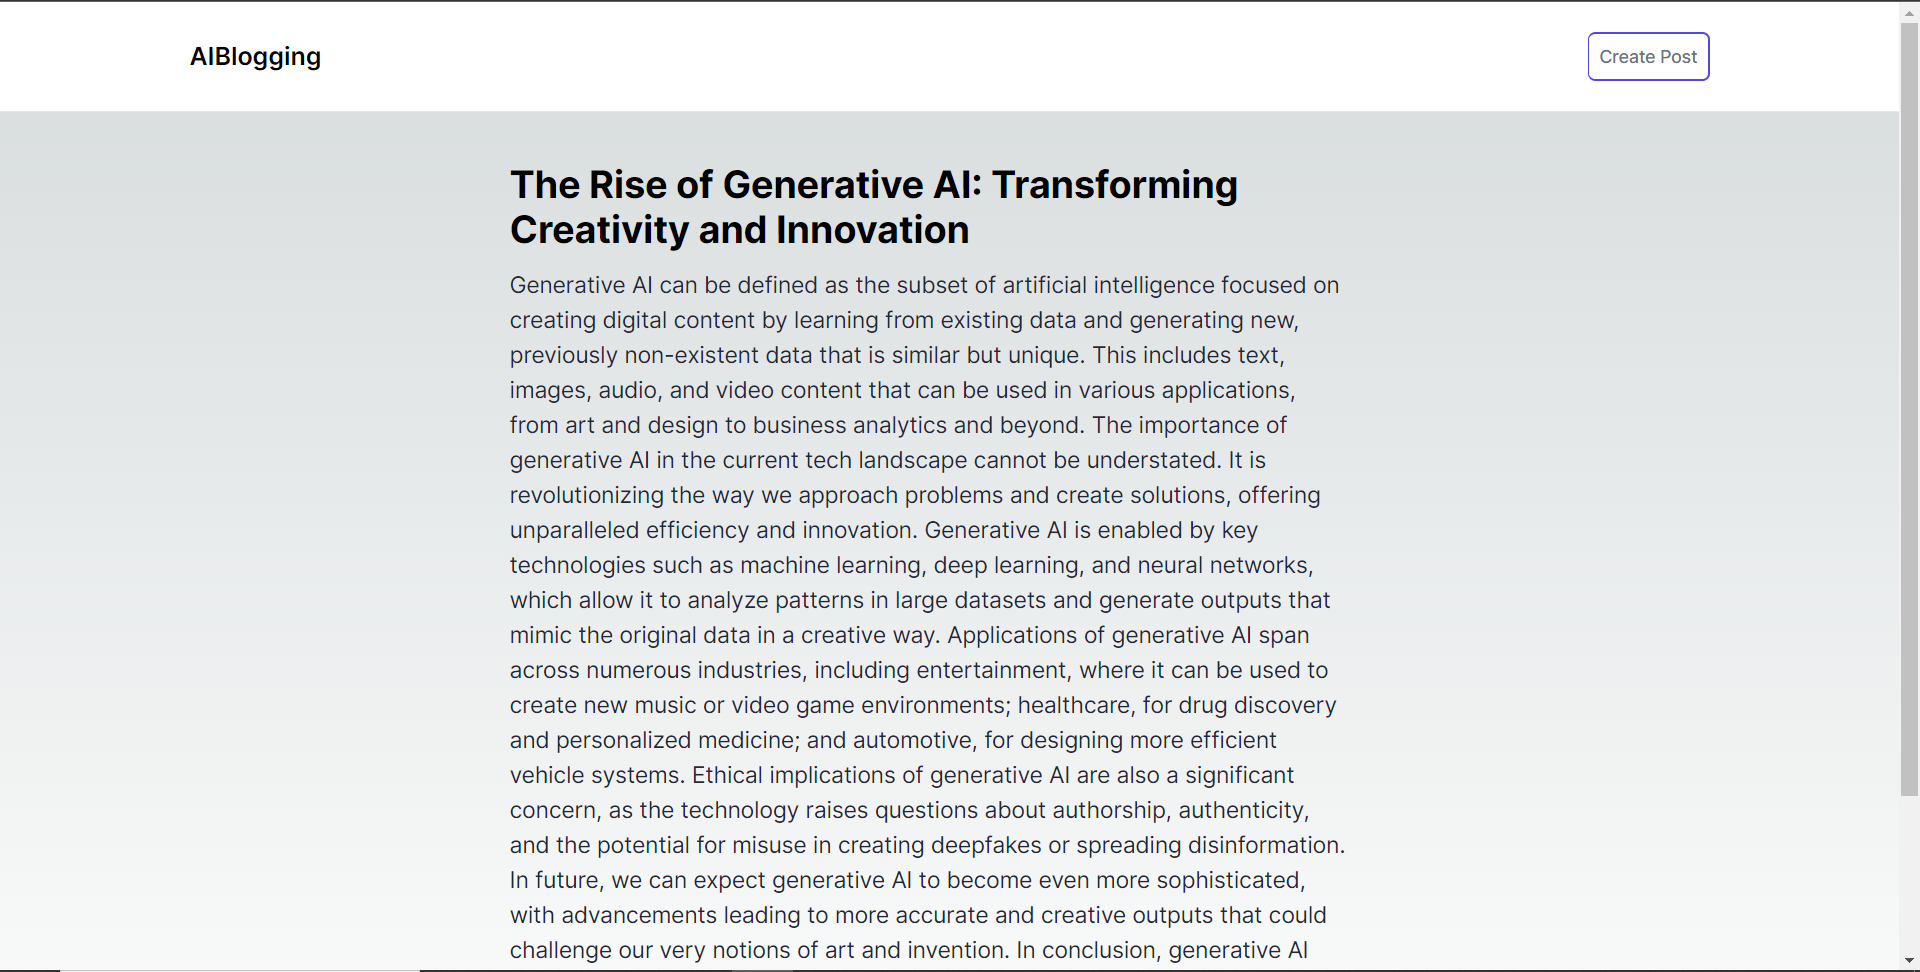 結論 -- 總而言之,您可以使用 CopilotKit 建立應用內 AI 聊天機器人,該機器人可以查看當前應用程式狀態並在應用程式內執行操作。 AI 聊天機器人可以與您的應用程式前端、後端和第三方服務對話。 完整的原始碼:https://github.com/TheGreatBonnie/aipoweredblog --- 原文出處:https://dev.to/copilotkit/how-to-build-an-ai-powered-blogging-platform-nextjs-langchain-supabase-1hdp
世界上充滿了有前景的人工智慧工具,如 Sora、ChatGPT 以及更多即將推出的工具。 我收集了一些你必須使用的令人興奮的人工智慧工具。 該清單包括 Devin AI 的開源替代品、Notion、5 秒內的語音克隆、電子郵件自動化軟體以及您從未聽說過的工具。好奇心超載! 別忘了給他們加星號🌟 讓我們涵蓋這一切! --- 1. [Taipy](https://github.com/Avaiga/taipy) - 將資料和人工智慧演算法整合到生產就緒的 Web 應用程式中。 ----------------------------------------------------------------------------  Taipy 是一個開源 Python 庫,可用於輕鬆的端到端應用程式開發,具有假設分析、智慧管道執行、內建調度和部署工具。 我相信你們大多數人都不明白 Taipy 用於為基於 Python 的應用程式建立 GUI 介面並改進資料流管理。 因此,您可以繪製資料集的圖表,並使用類似 GUI 的滑桿來提供使用其他實用功能來處理資料的選項。 雖然 Streamlit 是一種流行的工具,但在處理大型資料集時,其效能可能會顯著下降,這使得它在生產級使用上不切實際。 另一方面,Taipy 在不犧牲性能的情況下提供了簡單性和易用性。透過嘗試 Taipy,您將親身體驗其用戶友好的介面和高效的資料處理。 在底層,Taipy 利用各種函式庫來簡化開發並增強功能。  開始使用以下命令。 ``` pip install taipy ``` 我們來談談最新的[Taipy v3.1 版本](https://docs.taipy.io/en/latest/relnotes/)。 最新版本使得在 Taipy 的多功能零件物件中可視化任何 HTML 或 Python 物件成為可能。 這意味著[Folium](https://python-visualization.github.io/folium/latest/) 、 [Bokeh](https://bokeh.org/) 、 [Vega-Altair](https://altair-viz.github.io/)和[Matplotlib](https://matplotlib.org/)等程式庫現在可用於視覺化。 這也帶來了對[Plotly python](https://plotly.com/python/)的原生支持,使繪製圖表變得更加容易。  他們還使用分散式運算提高了效能,但最好的部分是 Taipy,它的所有依賴項現在都與 Python 3.12 完全相容,因此您可以在使用 Taipy 進行專案的同時使用最新的工具和程式庫。 您可以閱讀[文件](https://docs.taipy.io/en/latest/)。 例如,您可以看到[聊天演示](https://docs.taipy.io/en/release-3.1/gallery/llm/5_chatbot/),它使用 OpenAI 的 GPT-4 API 來產生對您的訊息的回應。您可以輕鬆更改程式碼以使用任何其他 API 或模型。 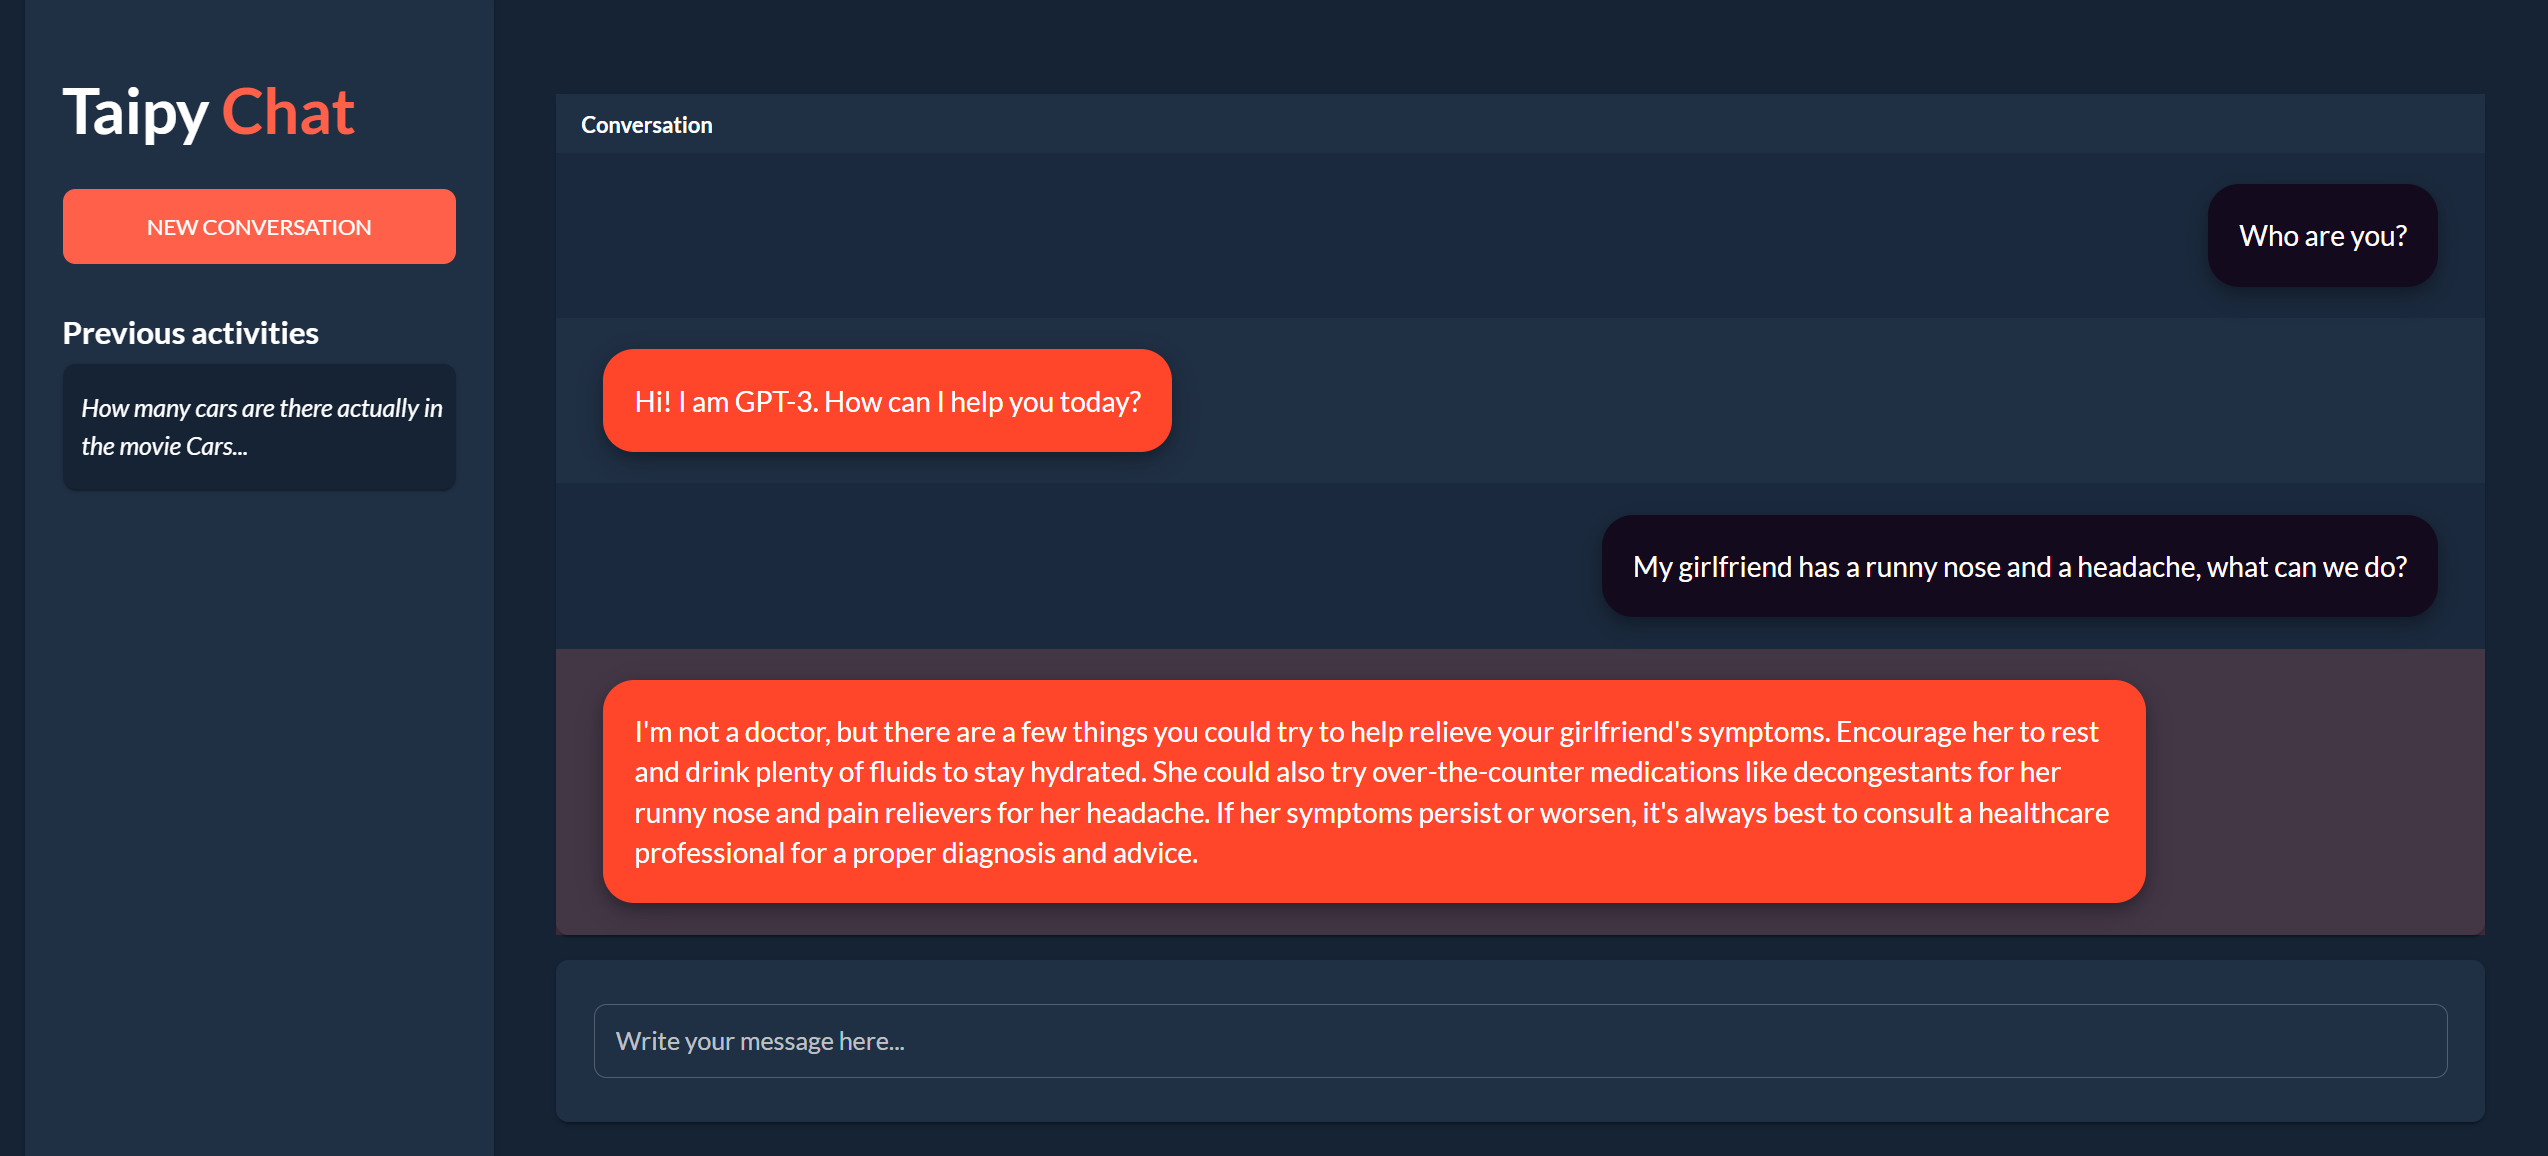 另一個有用的事情是,Taipy 團隊提供了一個名為[Taipy Studio](https://docs.taipy.io/en/latest/manuals/studio/)的 VSCode 擴充功能來加速 Taipy 應用程式的建置。  您也可以使用 Taipy 雲端部署應用程式。 如果您想閱讀部落格來了解程式碼庫結構,您可以閱讀 HuggingFace[的使用 Taipy 在 Python 中為您的 LLM 建立 Web 介面](https://huggingface.co/blog/Alex1337/create-a-web-interface-for-your-llm-in-python)。 嘗試新技術通常很困難,但 Taipy 提供了[10 多個演示教程,](https://docs.taipy.io/en/release-3.1/gallery/)其中包含程式碼和適當的文件供您遵循。 例如,一些現場演示範例和專案想法: - [新冠儀表板](https://covid-dashboard.taipy.cloud/Country) - [推文生成](https://tweet-generation.taipy.cloud/) - [資料視覺化](https://production-planning.taipy.cloud/Data-Visualization) - [即時人臉辨識](https://face-recognition.taipy.cloud/) - [國際象棋大師](https://github.com/KorieDrakeChaney/taipy-chess) Taipy 在 GitHub 上有 7k+ Stars,並且處於`v3`版本,因此它們正在不斷改進。 https://github.com/Avaiga/taipy Star Taipy ⭐️ --- 2. [PR Agent](https://github.com/Codium-ai/pr-agent) - 自動拉取請求分析、回饋、建議的工具。 -------------------------------------------------------------------------  這是一個開源工具,可幫助有效地審查和處理拉取請求。它有許多獨特的選項,並提供跨各種 git 提供者的廣泛的拉取請求功能。 每天有數百萬個開源專案和數百個 Pull 請求,因此有一個可以幫助您的朋友是非常好的事情。 我是開源維護者,所以我知道有時會變得多麼困難,特別是每天都要審查這麼多的 Pull 請求。 無論如何,這就是公關代理商的幕後工作方式。 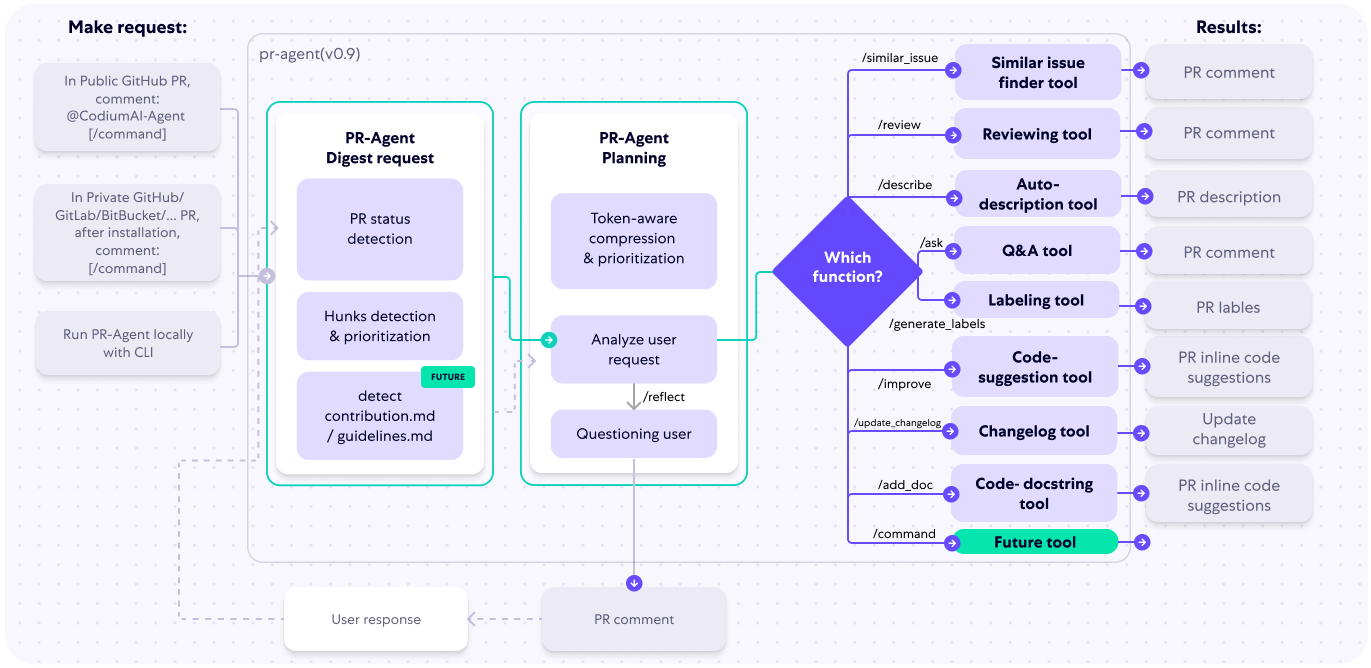 您必須使用`@CodiumAI-Agent /review`對拉取請求發表評論,代理商將透過對 PR 的審查進行回應。有很多可用的選項,例如`describe`和`improve` 。 他們也提供了 [PR-Agent 工具](https://pr-agent-docs.codium.ai/tools/),每個頁面都有一個專門的頁面來解釋如何使用它。 您可以閱讀[文件](https://pr-agent-docs.codium.ai/installation/)並查看[範例結果](https://github.com/Codium-ai/pr-agent?tab=readme-ov-file#example-results)。 最好的部分是您甚至可以將其作為[GitHub Action](https://pr-agent-docs.codium.ai/installation/github/#run-as-a-github-action)執行。他們還提供了一個專業版本,有更多的選擇,但免費套餐足以開始使用。 如果您正在尋找好的文章,我推薦[使用 CodiumAI PR-Agent 自動進行拉取請求審查和](https://rnemet.dev/posts/ai/codium-pragent/)[CodiumAI PR-Agent 讓開發人員的生活更輕鬆的 5 個原因](https://medium.com/@mengineer/5-reasons-why-codiumai-pr-agent-is-making-developers-lives-easier-e040be0f6a36)。這些提供了有關 PR Agent 的大量概述。 它們在 GitHub 上有大約 3800 個 Star,被 300 多名開發人員使用,並且是使用 Python 建構的。雖然它們可能不是非常受歡迎,但它們的用例非常好。 https://github.com/Codium-ai/pr-agent 明星公關代理人 ⭐️ --- 3. [Mintlify](https://github.com/mintlify/writer) - 在建置時出現的文件。 --------------------------------------------------------------  Mintlify 是一款由人工智慧驅動的文件編寫器,您只需 1 秒鐘即可編寫程式碼文件 :D 幾個月前我發現了 Mintlify,從那時起我就一直是它的粉絲。我見過很多公司使用它,甚至我使用我的商務電子郵件產生了完整的文件,結果證明這是非常簡單和體面的。如果您需要詳細的文件,Mintlify 就是解決方案。 另一個用例是根據我們將在這裡討論的程式碼產生文件。 您可以安裝[VSCode 擴充功能](https://marketplace.visualstudio.com/items?itemName=mintlify.document)或將其安裝在[IntelliJ](https://plugins.jetbrains.com/plugin/18606-mintlify-doc-writer)上。 您只需突出顯示程式碼或將遊標放在要記錄的行上。然後點選「編寫文件」按鈕(或按 ⌘ + 。) 您可以閱讀[文件](https://github.com/mintlify/writer?tab=readme-ov-file#%EF%B8%8F-mintlify-writer)和[安全指南](https://writer.mintlify.com/security)。 如果您更喜歡教程,那麼您可以觀看[Mintlify 的工作原理](https://www.loom.com/embed/3dbfcd7e0e1b47519d957746e05bf0f4)。它支援 10 多種程式語言,並支援許多文件字串格式,例如 JSDoc、reST、NumPy 等。 順便說一句,他們的網站連結是[writer.mintlify.com](https://writer.mintlify.com/) ;回購協議中目前的似乎是錯誤的。 它在 GitHub 上有大約 2.4k 顆星,受到許多開發人員的喜愛,並且是使用 TypeScript 建構的。 https://github.com/mintlify/writer Star Mintlify ⭐️ --- 4.[螢幕截圖到程式碼](https://github.com/abi/screenshot-to-code)- 放入螢幕截圖並將其轉換為乾淨的程式碼。 ---------------------------------------------------------------------------  這是一個非常受歡迎的開源專案,但我可以肯定地說,很多開發人員仍然沒有意識到這一點。使用此功能,您可以將使用者介面的建置速度提高 10 倍。 這是一個簡單的工具,可以使用 AI 將螢幕截圖、模型和 Figma 設計轉換為乾淨、實用的程式碼。 該應用程式有一個 React/Vite 前端和一個 FastAPI 後端。如果您想使用 Claude Sonnet 或實驗性視訊支持,您將需要一個能夠存取 GPT-4 Vision API 的 OpenAI API 金鑰或一個 Anthropic 金鑰。您可以閱讀[指南](https://github.com/abi/screenshot-to-code?tab=readme-ov-file#-getting-started)來開始。 您可以在託管版本上[即時試用](https://screenshottocode.com/),並觀看 wiki 上提供的[一系列演示影片](https://github.com/abi/screenshot-to-code/wiki/Screen-Recording-to-Code)。 他們在 GitHub 上擁有超過 47k 顆星星,並支援許多技術堆疊,例如 React 和 Vue,以及不錯的 AI 模型,例如 GPT-4 Vision、Claude 3 Sonnet 和 DALL-E 3。 https://github.com/abi/screenshot-to-code 將螢幕截圖轉為程式碼 ⭐️ --- 5. [FaceSwap](https://github.com/deepfakes/faceswap) - 適合所有人的 Deepfakes 軟體。 ---------------------------------------------------------------------------  我總是對 Deepfakes 著迷,因為這就是某些人工智慧的工作原理,尤其是使用影片的人工智慧。 相信我!我們中的許多人甚至不使用它來建立影片,我們只是修改程式碼來看看它的作用,不道德的使用並不能代表它的建立原因、我們現在如何使用它,或者我們對它的未來的看法。 您應該觀看此影片以了解電腦如何辨識臉!觀看[此影片](https://www.youtube.com/watch?v=aircAruvnKk)以了解神經網路的基本功能。 https://www.youtube.com/watch?v=R9OHn5ZF4Uo 您可以閱讀[INSTALL.md](https://github.com/deepfakes/faceswap/blob/master/INSTALL.md)以取得詳細的安裝指南。根據文件,您需要具有 CUDA 支援的現代 GPU 才能獲得最佳效能。許多 AMD GPU 透過 DirectML (Windows) 和 ROCm (Linux) 支援。 您可以閱讀<a href="">文件</a>、觀看[演示影片](https://www.dailymotion.com/video/x810mot)並存取他們的[部落格](https://faceswap.dev/blog/)以觀看具有其他用例的會議影片。 我最喜歡的事實是,他們有一個非常簡單的部分,介紹任何人如何為該專案做出貢獻,包括對生成模型感興趣的人、開發人員、非開發高級用戶、最終用戶,當然還有討厭者:) 他們在 GitHub 上有 48k+ Stars,這使得他們足夠可信。 https://github.com/deepfakes/faceswap 明星 FaceSwap ⭐️ --- 6. [Amica](https://github.com/semperai/amica) - 讓您可以在瀏覽器中輕鬆地與 3D 角色聊天。 ----------------------------------------------------------------------  Amica 是一個開源接口,用於透過語音合成和語音辨識與 3D 角色進行互動式通訊。 您可以匯入 VRM 文件,調整聲音以適合角色,並產生包含情緒表達的回應文字。 他們使用 Three.js、OpenAI、Whisper、Bakllava 等進行視覺處理。您可以閱讀[Amica 的工作原理](https://docs.heyamica.com/overview/how-amica-works)及其所涉及的[核心概念](https://docs.heyamica.com/overview/core-concepts)。 您可以克隆該存儲庫並使用它來[開始](https://docs.heyamica.com/getting-started/installation)。 ``` npm i npm run dev ``` 您可以閱讀[文件](https://docs.heyamica.com/)並查看[演示](https://amica.arbius.ai/),這真是太棒了:D  您可以觀看這段簡短的影片,了解它的功能。 https://www.youtube.com/watch?v=hUxAEnFiXH8 Amica 使用 Tauri 建立桌面應用程式。 他們在 GitHub 上有 400+ Stars,而且看起來非常容易使用。 https://github.com/semperai/amica Star Amica ⭐️ --- 7. [Bark](https://github.com/suno-ai/bark) - 文字提示的生成音訊模型。 --------------------------------------------------------- 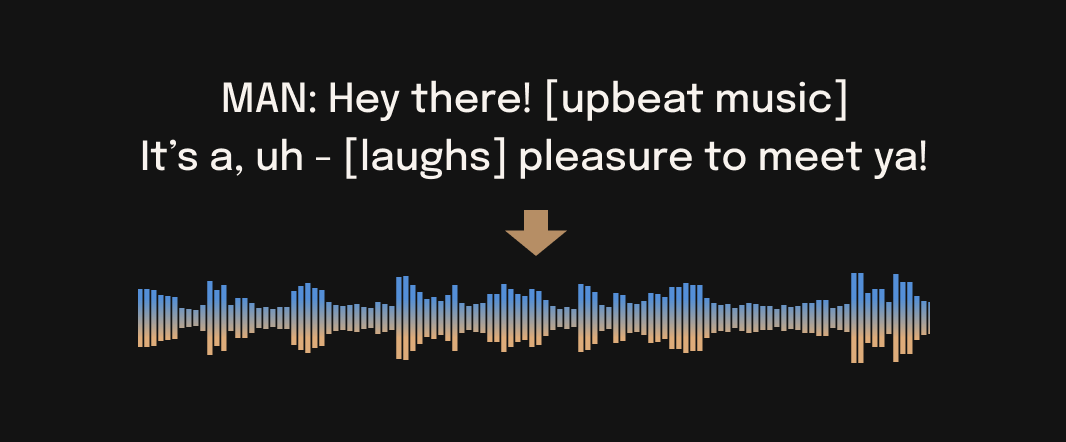 Bark 是 Suno 建立的基於轉換器的文本到音訊模型。 Bark 可以產生高度逼真的多語言語音以及其他音訊 - 包括音樂、背景噪音和簡單的音效。 該模型還可以產生非語言交流,如笑、嘆息和哭泣。哇! 它擁有 MIT 許可證,這意味著它現在可用於商業用途。 Bark 支援超過 100 種語言的揚聲器預設。您可以[在此處](https://suno-ai.notion.site/8b8e8749ed514b0cbf3f699013548683?v=bc67cff786b04b50b3ceb756fd05f68c)查看支援的語音預設庫。 根據文件,Bark 嘗試匹配給定預設的語氣、音高、情緒和韻律,但目前不支援自訂語音複製。該模型還嘗試保留音樂、環境噪音等。這超出了任何人的需要。 您可以這樣使用它。如果您想將其與 Transformers 庫一起使用,請閱讀[本文](https://github.com/suno-ai/bark?tab=readme-ov-file#-transformers-usage)。 ``` from bark import SAMPLE_RATE, generate_audio, preload_models from scipy.io.wavfile import write as write_wav from IPython.display import Audio # download and load all models preload_models() # generate audio from text text_prompt = """ Hello, my name is Suno. And, uh — and I like pizza. [laughs] But I also have other interests such as playing tic tac toe. """ audio_array = generate_audio(text_prompt) # save audio to disk write_wav("bark_generation.wav", SAMPLE_RATE, audio_array) # play text in notebook Audio(audio_array, rate=SAMPLE_RATE) ``` Bark 開箱即用支援各種語言,並自動根據輸入文字確定語言。當提示使用程式碼轉換文字時,Bark 將嘗試使用相應語言的本地口音。 您可以在[Google Colab](https://colab.research.google.com/drive/1eJfA2XUa-mXwdMy7DoYKVYHI1iTd9Vkt?usp=sharing) & [Replicate](https://replicate.com/suno-ai/bark)閱讀<a href="">文件</a>並查看演示。 您也可以在筆記本部分閱讀有關語音一致性增強和其他形式的[範例](https://github.com/suno-ai/bark/tree/main/notebooks)。 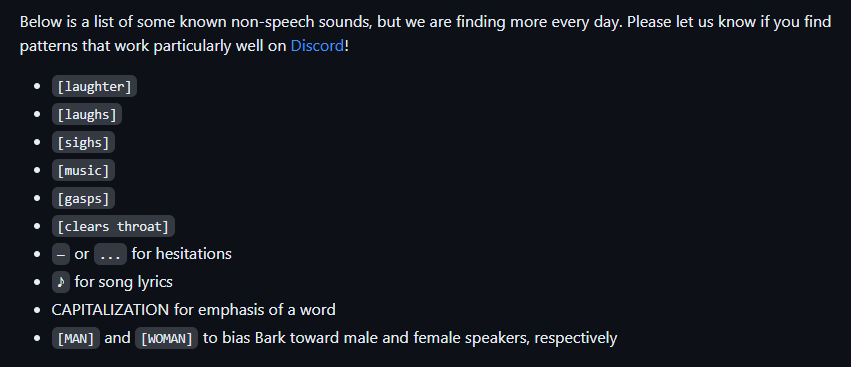 它們支援多種語言,如英語、印地語、德語、法語等。 他們在 GitHub 上擁有 30k+ Stars,並且經營超過 300,000 人的社區,這使他們成為值得選擇的選擇。 https://github.com/suno-ai/bark 星樹 ⭐️ --- 8. [GPTDiscord](https://github.com/Kav-K/GPTDiscord) - Discord 的一體化 GPT 介面。 --------------------------------------------------------------------------- 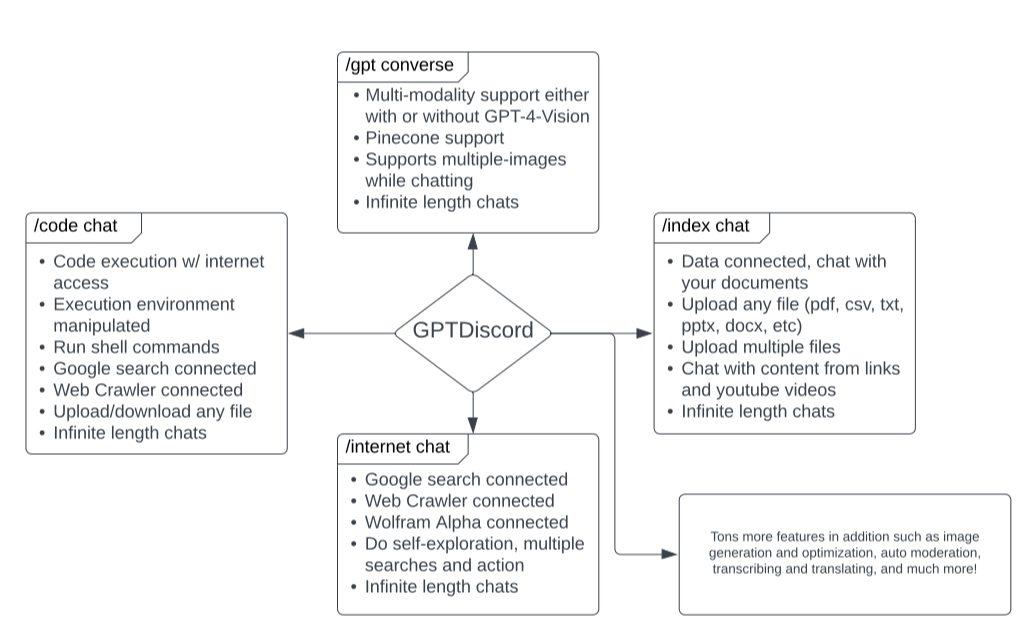 我是 Discord 上多個社群的成員,具有出色用例的機器人可以改善整體最終用戶體驗。 這個機器人的功能與 ChatGPT 網路相當,甚至在某些事情上做得更好! 它們支援一切,從多模態圖像理解、程式碼解釋、高級資料分析、文件問答、與 Wolfram Alpha 的網路連接聊天和 Google 存取、AI 審核、使用 DALL-E 生成圖像等等! 您可以閱讀 GPTDiscord 的所有高效[功能](https://github.com/Kav-K/GPTDiscord?tab=readme-ov-file#features)。 您可以閱讀[安裝指南](https://github.com/Kav-K/GPTDiscord/blob/main/detailed_guides/INSTALLATION.md)。 您可以查看[螢幕截圖](https://github.com/Kav-K/GPTDiscord?tab=readme-ov-file#screenshots)並查看不同目的的[詳細指南](https://github.com/Kav-K/GPTDiscord/tree/main/detailed_guides)清單。 他們在 GitHub 上有大約 1.8k+ Stars,而且肯定在進步。 https://github.com/Kav-K/GPTDiscord 星 GPTDiscord ⭐️ --- 9. [Upscayl](https://github.com/upscayl/upscayl) - 開源 AI 影像擴大機。 ---------------------------------------------------------------  適用於 Linux、MacOS 和 Windows 的免費開源 AI Image Upscaler 採用 Linux 優先概念建構。 它可能與全端無關,但它對於升級圖像很有用。 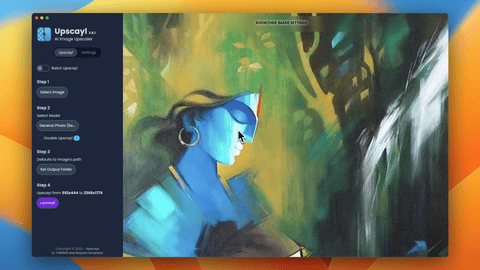 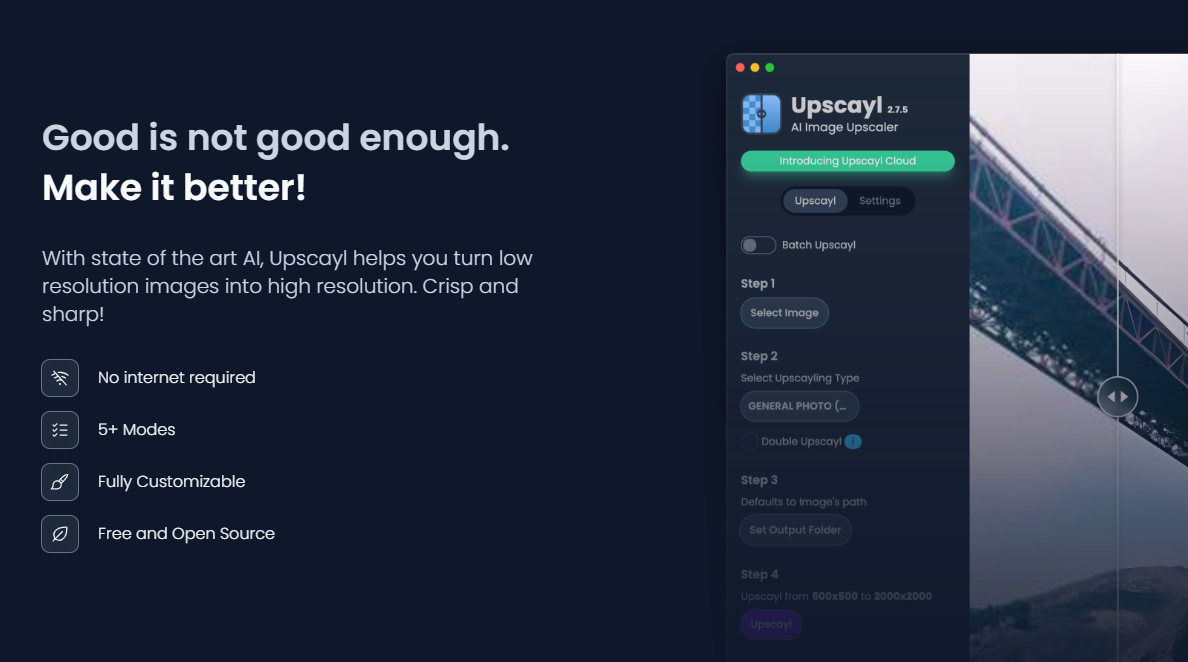 透過最先進的人工智慧,Upscayl 可以幫助您將低解析度影像變成高解析度。清脆又鋒利! 您可以閱讀[安裝指南](https://github.com/upscayl/upscayl?tab=readme-ov-file#-installation),並查看 Upscayl 之前/之後的[比較](https://github.com/upscayl/upscayl/blob/main/COMPARISONS.MD)。 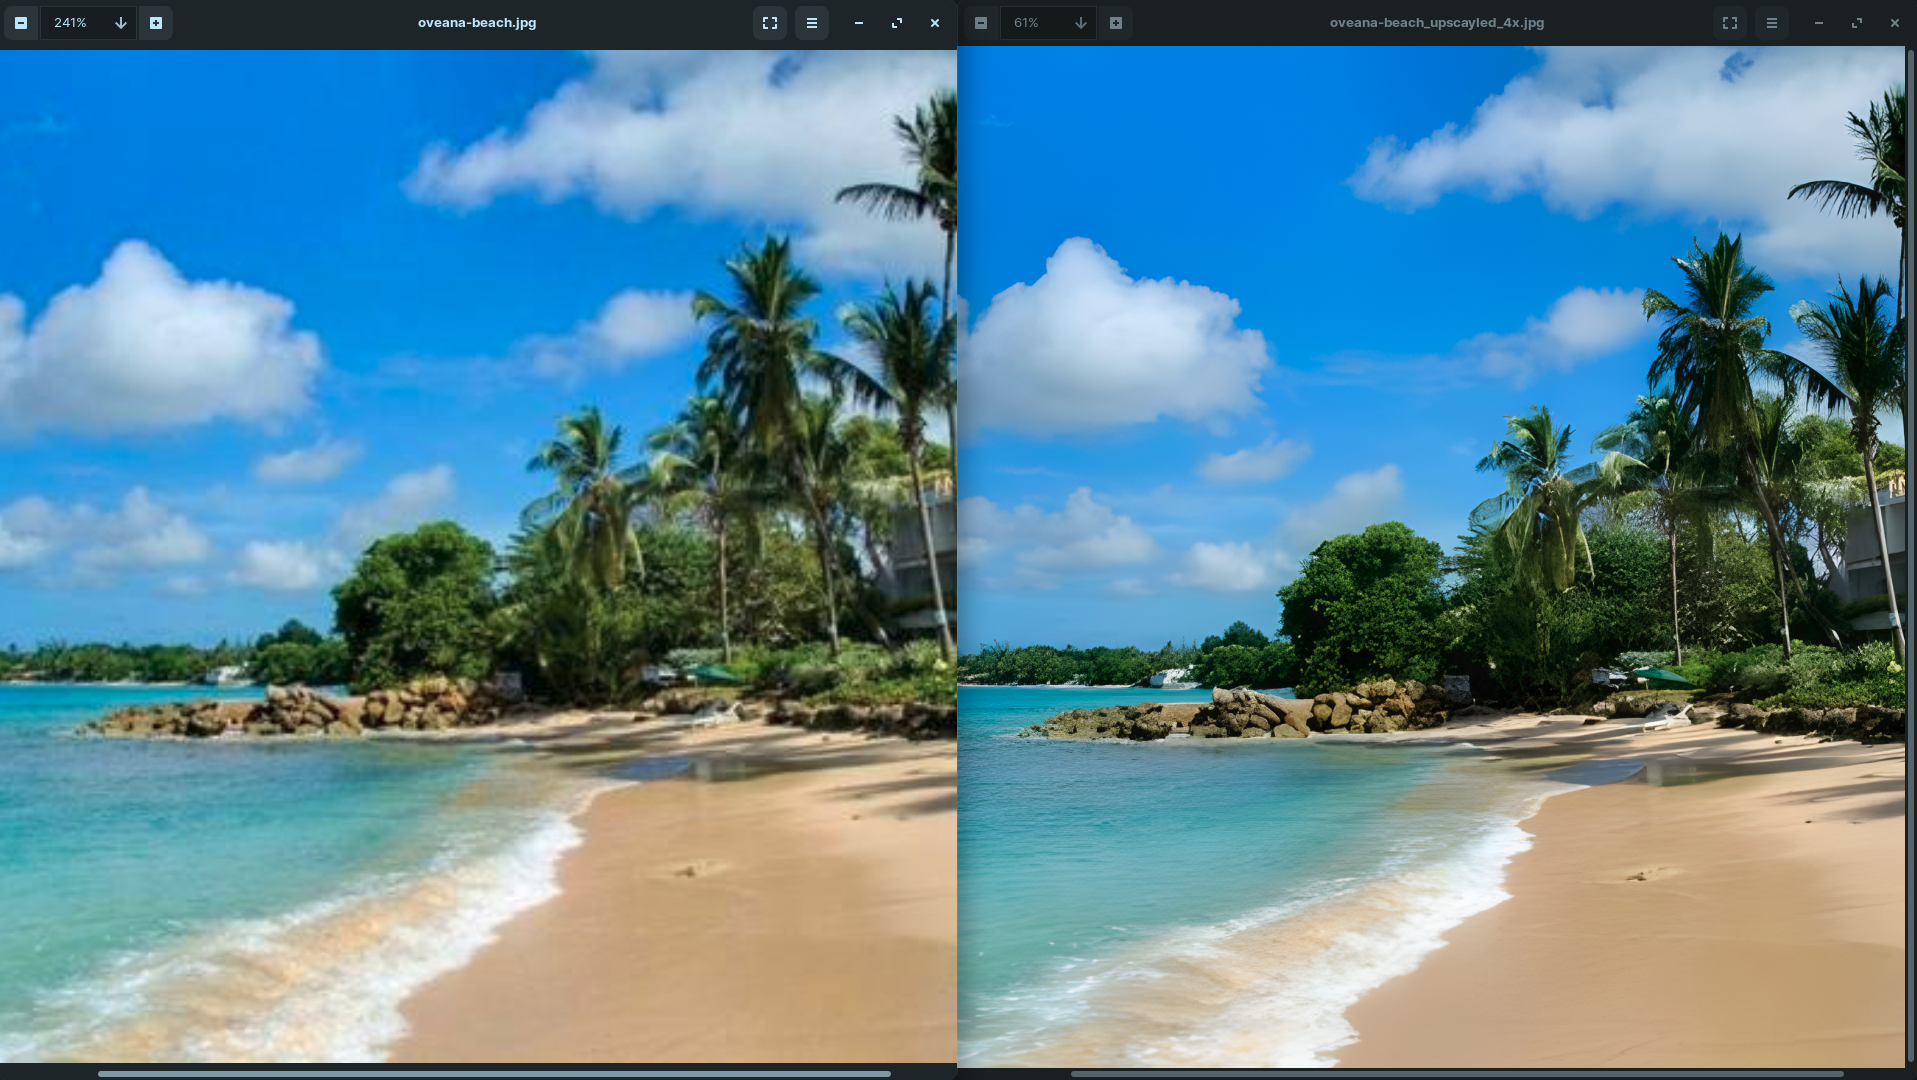 它在 GitHub 上有 23k+ Stars,並且基於 TypeScript 建置。 https://github.com/upscayl/upscayl 明星 Upscayl ⭐️ --- 10. [AppFlowy](https://github.com/AppFlowy-IO/AppFlowy) - Notion 的開源替代品。 ------------------------------------------------------------------------  AppFlowy 是一個由人工智慧驅動的安全工作空間,類似於您在不失去資料控制的情況下實現更多目標的概念。 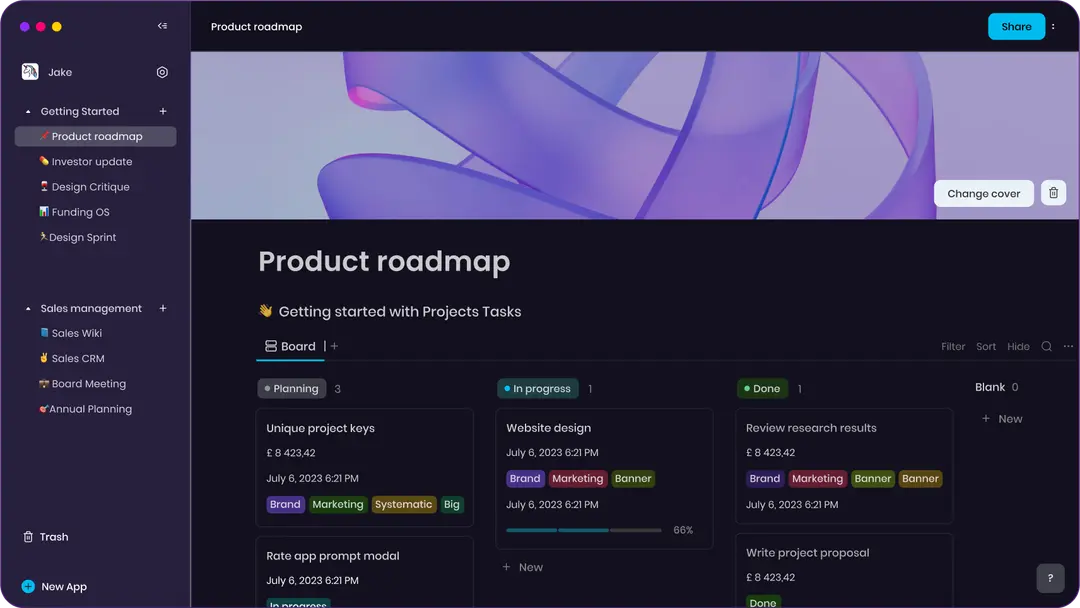 他們還提供行動應用程式,這是一個優點。 您可以閱讀[文件](https://docs.appflowy.io/docs)並了解[安裝方法](https://docs.appflowy.io/docs/appflowy/install-appflowy/installation-methods)。 他們還支援[使用 Supabase 自託管 AppFlowy](https://docs.appflowy.io/docs/guides/appflowy) 。對於喜歡 Supabase 功能或使用 Supabase 作為其基礎設施的用戶來說,這是理想的選擇。 您還應該檢查[此內容](https://docs.appflowy.io/docs/appflowy/product/data-storage)以了解有關資料儲存、Markdown、捷徑、主題、涉及的人工智慧和插件的更多資訊。 AppFlowy 在 GitHub 上擁有超過 47,000 顆星,發布了 64 個以上版本。 https://github.com/AppFlowy-IO/AppFlowy 明星 AppFlowy ⭐️ --- 11. [Leon](https://github.com/leon-ai/leon) - 您的開源個人助理。 ------------------------------------------------------- 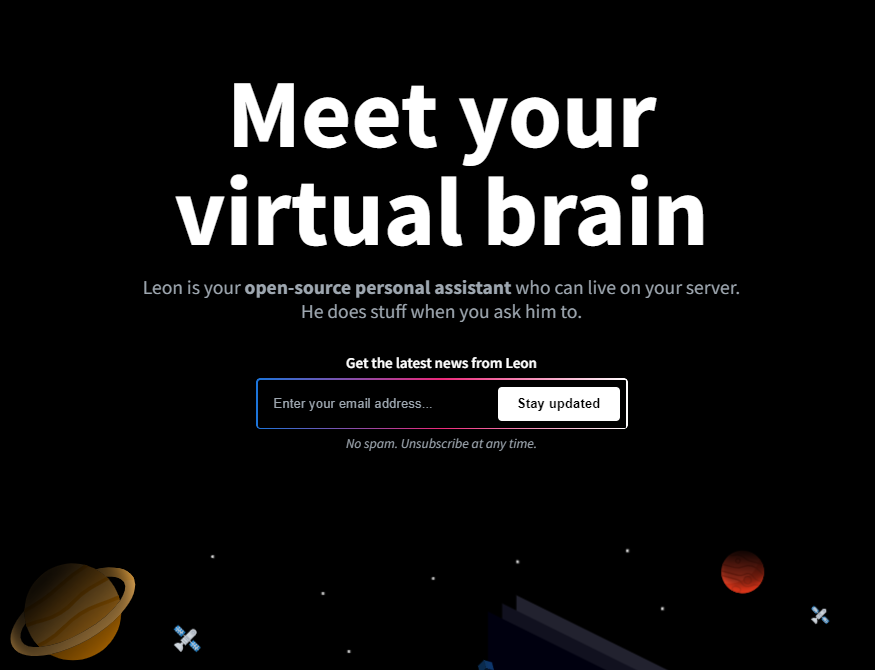 Leon 是一個開源個人助理,可以駐留在您的伺服器上。 當你要求他做事時,他就會做事。 你可以跟他說話,他也可以跟你說話。你也可以給他發短信,他也可以傳簡訊給你。如果您願意,Leon 可以透過離線方式與您溝通,以保護您的隱私。這是萊昂目前可以做的[技能](https://github.com/leon-ai/leon/tree/develop/skills)清單。 你應該讀一下[萊昂背後的故事](https://blog.getleon.ai/the-story-behind-leon/)。您還可以觀看此演示以了解有關 Leon 的更多資訊。 https://www.youtube.com/watch?v=p7GRGiicO1c 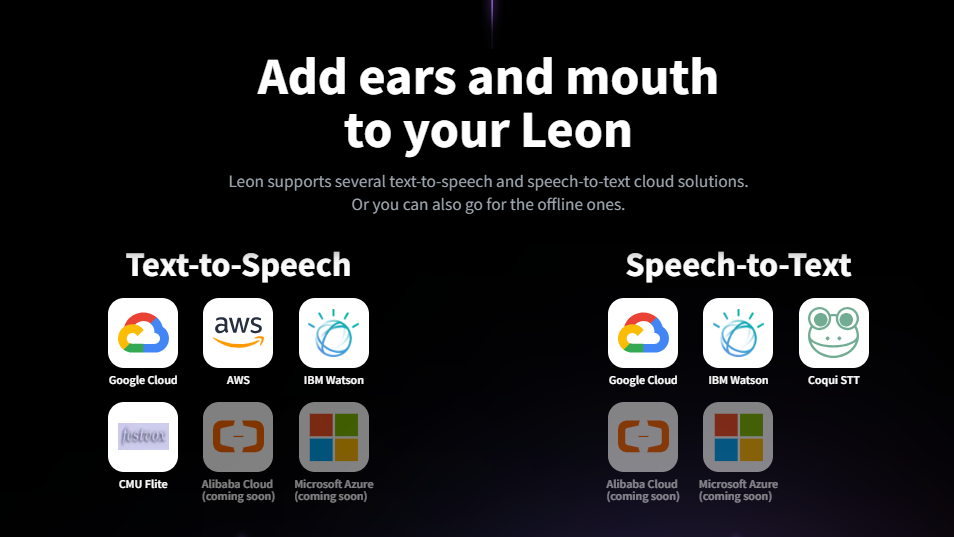 這是Leon的高層架構模式。 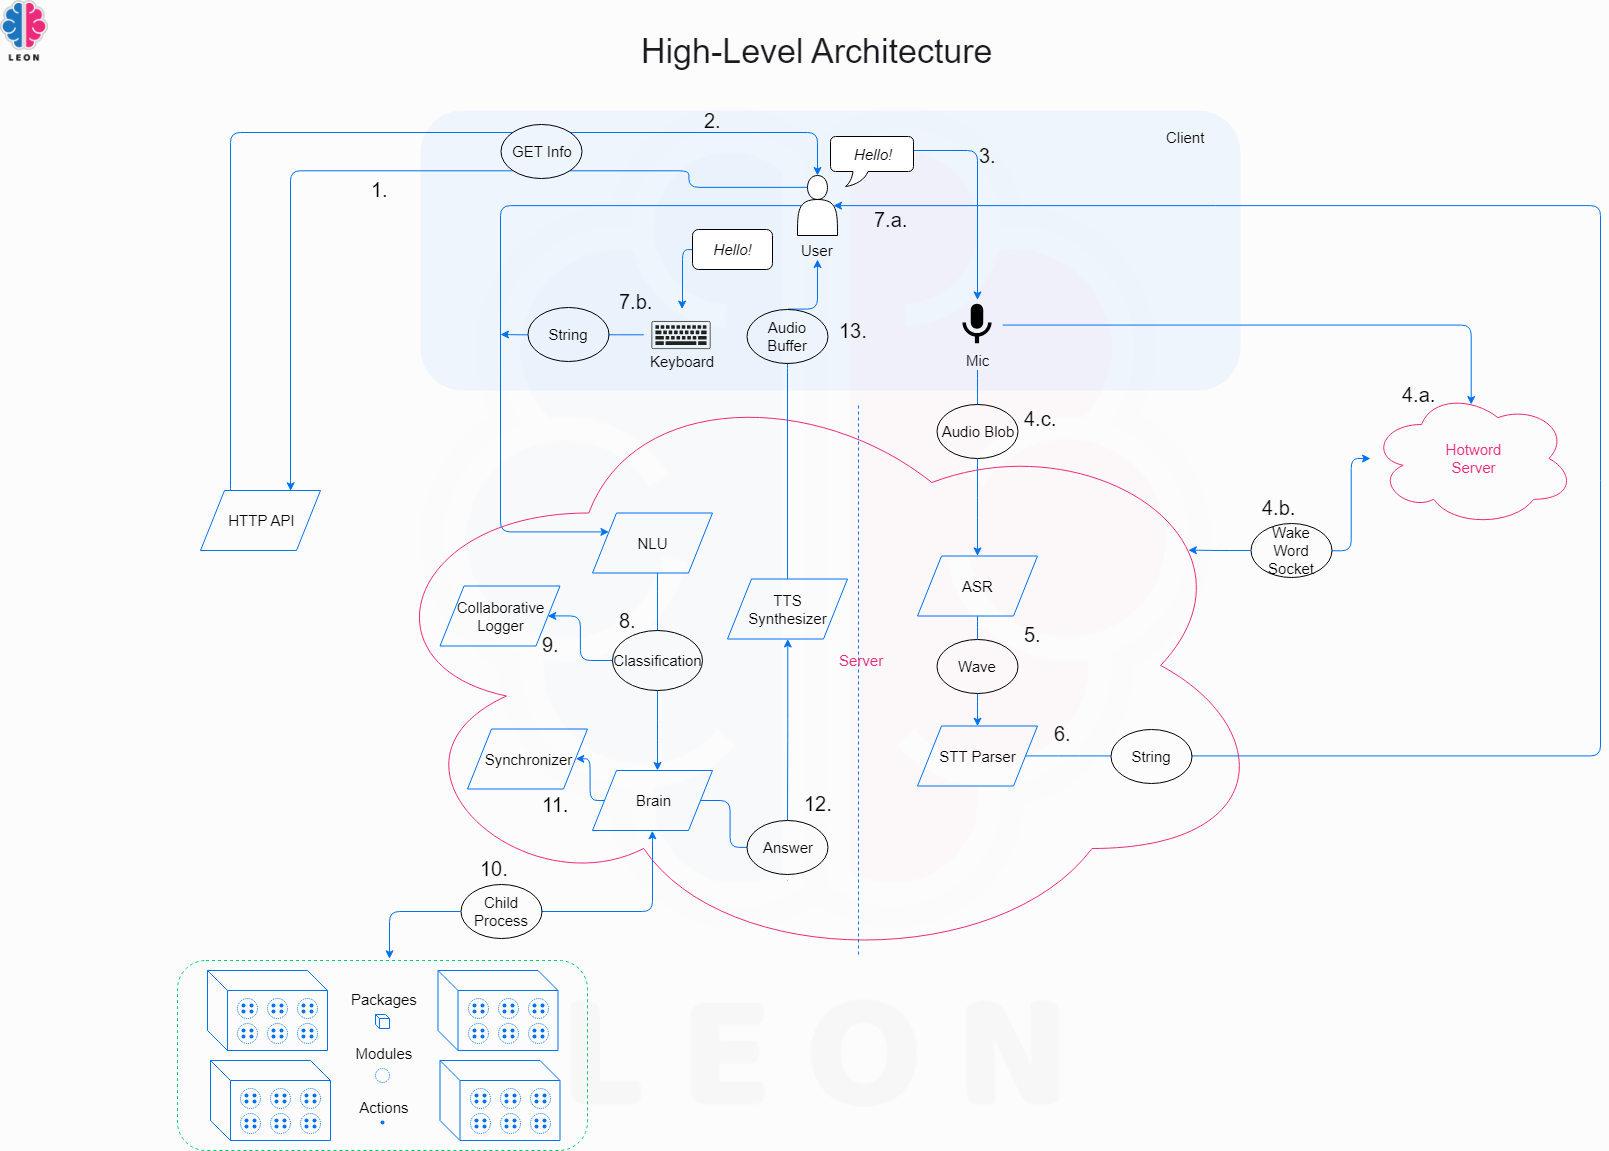 這是開始使用 npm 指令的方法。 ``` # install leon global cli npm install --global @leon-ai/cli # install leon leon create birth ``` 您可以閱讀[文件](https://docs.getleon.ai/)。 它在 GitHub 上擁有超過 14k 顆星,並且還在不斷增長。 https://github.com/leon-ai/leon 明星萊昂 ⭐️ --- 12. [n8n](https://github.com/n8n-io/n8n) - 工作流程自動化工具。 -----------------------------------------------------  n8n 是一個可擴展的工作流程自動化工具。透過公平程式碼分發模型,n8n 將始終擁有可見的原始程式碼,可用於自託管,並允許您加入自訂函數、邏輯和應用程式。  n8n 基於節點的方法使其具有高度通用性,使您能夠將任何事物連接到任何事物。 有[400 多個集成選項](https://n8n.io/integrations),這幾乎是瘋狂的! 您可以看到所有[安裝](https://docs.n8n.io/choose-n8n/)選項,包括 Docker、npm 和自架。 開始使用以下命令。 ``` npx n8n ``` 此命令將下載啟動 n8n 所需的所有內容。然後,您可以透過開啟`http://localhost:5678`來存取 n8n 並開始建置工作流程。 在 YouTube 上觀看此[快速入門影片](https://www.youtube.com/watch?v=1MwSoB0gnM4)! https://www.youtube.com/watch?v=1MwSoB0gnM4 您可以閱讀[文件](https://docs.n8n.io/)並閱讀本[指南](https://docs.n8n.io/try-it-out/),以便根據您的需求快速開始。 他們還提供初學者和中級[課程,](https://docs.n8n.io/courses/)以便輕鬆學習。 他們在 GitHub 上有 39k+ Stars,並提供兩個包供整體使用。 https://github.com/n8n-io/n8n 明星 n8n ⭐️ --- 13. [Quivr](https://github.com/QuivrHQ/quivr) - 你的 GenAI 第二腦。 -------------------------------------------------------------  Quivr,您的第二個大腦,利用 GenerativeAI 的力量成為您的私人助理!可以將其視為黑曜石,但增強了人工智慧功能。  您可以閱讀[安裝指南](https://github.com/QuivrHQ/quivr?tab=readme-ov-file#getting-started-)。 您可以閱讀[文件](https://docs.quivr.app/home/intro)並觀看[示範影片](https://github.com/QuivrHQ/quivr?tab=readme-ov-file#demo-highlights-)。 他們可以提供更好的免費套餐,但這足以在您端進行測試。 它在 GitHub 上擁有超過 30k 顆星,發布了 220 多個版本,這意味著它們正在不斷改進。 https://github.com/QuivrHQ/quivr Star Quivr ⭐️ --- 14. [meilisearch](https://github.com/meilisearch/meilisearch) - 適合您的應用程式、網站和工作流程的搜尋 API。 ---------------------------------------------------------------------------------------- 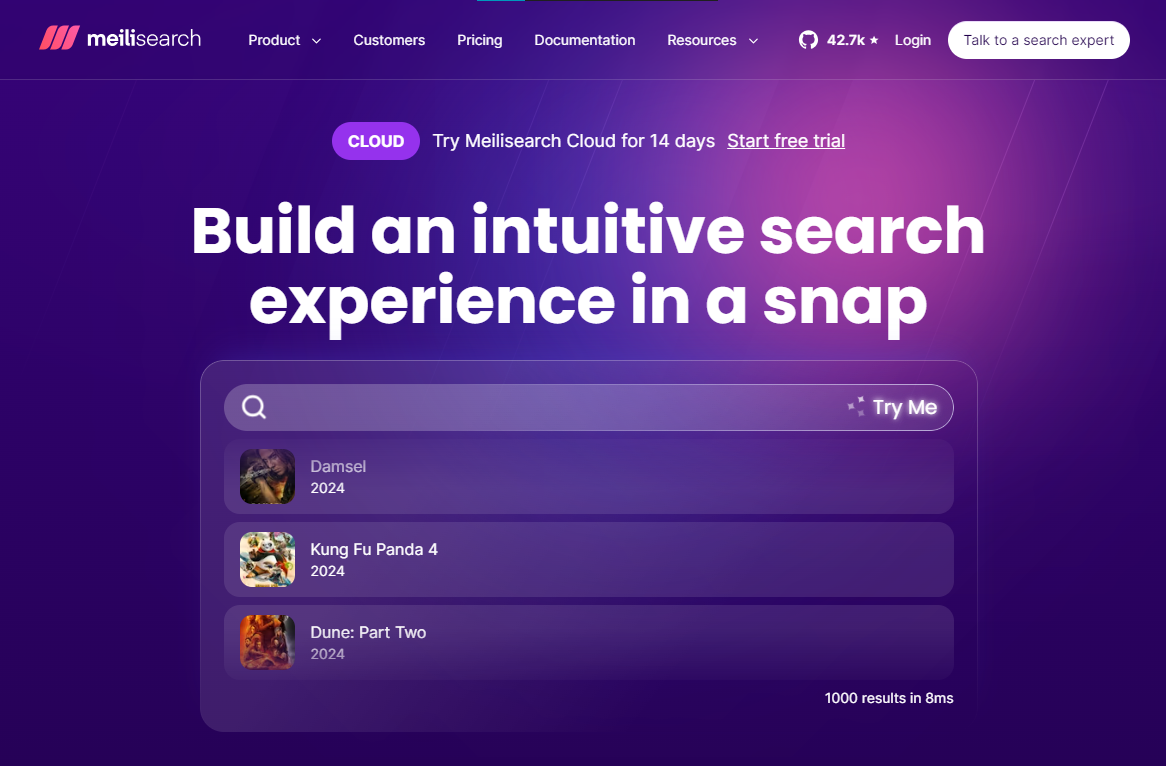 Meilisearch 可協助您快速打造令人愉悅的搜尋體驗,提供開箱即用的功能來加快您的工作流程。 您一定看過可以使用`Ctrl + k`搜尋文件的軟體網站,例如 GitHub 或 Appwrite。那麼,meilisearch 可以幫助您實現相同的功能。 與 Algolia、Typesense 和 Elasticsearch 相比,這是唯一基於 Rust 建構的。您可以閱讀有關可用替代選項的[比較](https://www.meilisearch.com/docs/learn/what_is_meilisearch/comparison_to_alternatives):) Meilisearch 不應該是您的主要資料儲存。它是一個搜尋引擎,而不是一個資料庫。 Meilisearch 應僅包含您希望使用者搜尋的資料。如果您必須加入與搜尋無關的資料,請務必使這些字段不可搜尋,以提高相關性並縮短響應時間。 無論您是在開發網站還是應用程式,Meilisearch 都能提供直覺的即輸入即搜尋體驗,回應時間低於 50 毫秒。 他們提供[SDK 和庫,](https://www.meilisearch.com/docs/learn/what_is_meilisearch/sdks?utm_campaign=oss&utm_source=github&utm_medium=meilisearch&utm_content=sdks-link)用於 Meilsearch 和您喜歡的語言或框架之間的無縫整合。相信我,選擇的數量是瘋狂的。 他們還提供了一個[抓取工具](https://github.com/meilisearch/docs-scraper)來自動讀取文件內容並將其儲存到Meilisearch。 他們展示了許多[有用的功能](https://www.meilisearch.com/docs/learn/what_is_meilisearch/overview#features),例如即使查詢包含拼寫錯誤和拼寫錯誤(他們將其稱為`typo tolerance` ,您也可以獲得相關匹配。 有很多可用的選項,但讓我們看看如何使用 React 來做到這一點。 開始使用以下命令。 ``` yarn add react-instantsearch @meilisearch/instant-meilisearch # or npm install react-instantsearch @meilisearch/instant-meilisearch # or pnpm add react-instantsearch @meilisearch/instant-meilisearch ``` 您可以這樣使用它。 ``` import React from 'react'; import { InstantSearch, SearchBox, Hits, Highlight } from 'react-instantsearch'; import { instantMeiliSearch } from '@meilisearch/instant-meilisearch'; const { searchClient } = instantMeiliSearch( 'https://ms-adf78ae33284-106.lon.meilisearch.io', 'a63da4928426f12639e19d62886f621130f3fa9ff3c7534c5d179f0f51c4f303' ); const App = () => ( <InstantSearch indexName="steam-video-games" searchClient={searchClient} > <SearchBox /> <Hits hitComponent={Hit} /> </InstantSearch> ); const Hit = ({ hit }) => <Highlight attribute="name" hit={hit} />; export default App ``` 您可以查看此[codesandbox](https://codesandbox.io/p/sandbox/eager-dust-f98w2w)以取得詳細的範例以開始使用。 正如我所說,他們在幕後提供了很多東西。例如,您可以使用這些。 ``` npm install @meilisearch/autocomplete-client npm install @meilisearch/instant-meilisearch npm install meilisearch-docsearch ``` `meilisearch docsearch`的靈感來自 Algolia 搜尋文件元件。另外,非常詳細的文件以及每個 sdk 的範例和選項使它們成為人們的最愛。 您可以閱讀[文件](https://www.meilisearch.com/docs)並觀看[現場演示](https://where2watch.meilisearch.com/?utm_campaign=oss&utm_source=github&utm_medium=meilisearch&utm_content=demo-link)。 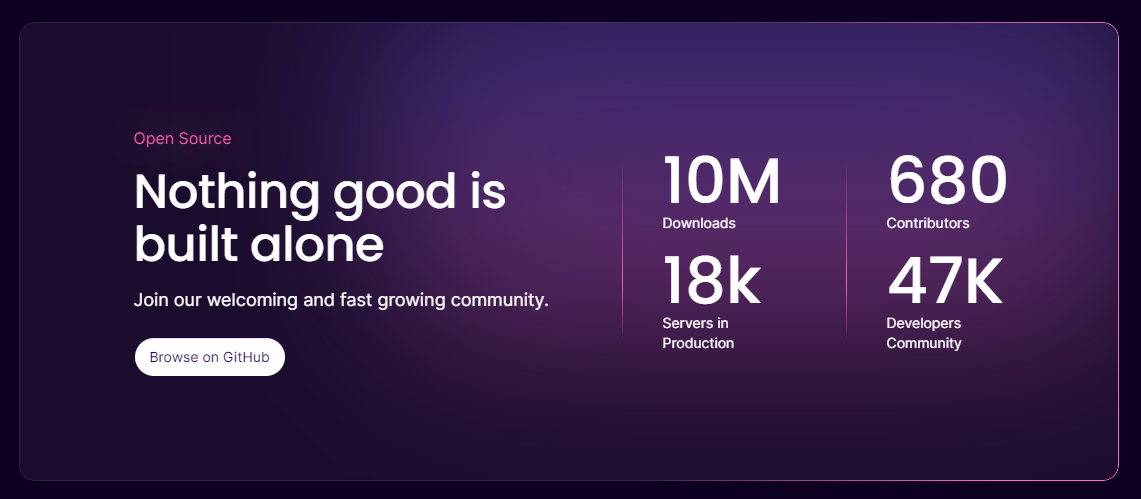 他們在 GitHub 上有超過 42k 顆星,並且`v1.7`版本有 180 多個版本。 https://github.com/meilisearch/meilisearch 星 meilisearch ⭐️ --- 15.[收件匣清除](https://github.com/elie222/inbox-zero)- 幾分鐘內清理您的收件匣。 ---------------------------------------------------------------  收件匣歸零是一款開源電子郵件應用程式,其目標是透過 AI 協助幫助您快速實現收件匣歸零。 它們得到了谷歌的批准,因此這是關注隱私的一個很好的部分。  它們使用 Postgres 作為資料庫,並基於 TypeScript 建置。 它們有一些瘋狂的功能,例如: > 您的電子郵件人工智慧助理 1. 人工智慧代理將讓您根據您提供的規則自動回覆、轉發或存檔電子郵件。 2. 他們的人工智慧計畫可以幫助你點擊接受或拒絕。一旦您確信人工智慧可以獨立工作,就可以開啟完全自動化。 3. 您可以用簡單的英語進行指導。就像與助手交談或向 ChatGPT 發送提示一樣簡單。 > 您可以自動封鎖冷電子郵件 您可以告訴「收件匣零」什麼對您來說構成冷郵件。它將根據您的指示阻止它們。 > 分析 了解收件匣是處理它的第一步。了解您的收件匣裡裝滿了什麼。它們還為您提供了立即採取行動的方法。 您可以閱讀核心[功能](https://github.com/elie222/inbox-zero?tab=readme-ov-file#key-features)並觀看[演示影片](https://github.com/elie222/inbox-zero?tab=readme-ov-file#demo-video)。您還可以查看他們的[看板](https://github.com/users/elie222/projects/1/views/1)以了解計劃內容。 他們在 GitHub 上擁有超過 1,500 個 Star,並且絕對值得更多。 https://github.com/elie222/inbox-zero 星收件匣零 ⭐️ --- 16. [Lively](https://github.com/rocksdanister/lively) - 允許使用者設定動畫桌面桌布和螢幕保護程式。 -----------------------------------------------------------------------------  這只是為了好玩,我們可以使用程式碼學到很多關於它是如何完成的。 你可以看看這個[影片](https://www.pexels.com/video/blue-texture-abstract-leaves-7710243/),看看它看起來有多瘋狂。  他們提供[三種類型的壁紙,](https://github.com/rocksdanister/lively?tab=readme-ov-file#types-of-wallpapers)包括影片/GIF、網頁和應用程式/遊戲。 它基於 C# 和 live 支援的一些很酷的功能建置: 1. Lively 可以透過終端機的[命令列參數](https://github.com/rocksdanister/lively/wiki/Command-Line-Controls)進行控制。您可以將其與其他語言(例如 Python 或腳本軟體 AutoHotKey)整合。 2. 一組強大的[API](https://github.com/rocksdanister/lively/wiki/API) ,供開發人員建立互動式壁紙。取得硬體讀數、音訊圖表、音樂資訊等。 3. 當電腦上執行全螢幕應用程式/遊戲時(~0% CPU、GPU 使用率),桌布播放會暫停。 4. 您還可以利用[機器學習推理](https://github.com/rocksdanister/lively/wiki/Machine-Learning)來建立動態壁紙。您可以預測任何 2D 影像與相機的距離並產生類似 3D 的視差效果。酷:D 我見過很多人使用它,其中許多人甚至不知道它是開源的。 您可以使用[安裝程式](https://github.com/rocksdanister/lively/releases/download/v2.0.7.4/lively_setup_x86_full_v2074.exe)或透過[Microsoft Store](https://www.microsoft.com/store/productId/9NTM2QC6QWS7?ocid=pdpshare)下載它。 它是 2023 年 Microsoft Store 的獲勝者。 它在 GitHub 上擁有 13k+ Stars,有 60 個版本。 https://github.com/rocksdanister/lively 明星活潑 ⭐️ --- 17. [Netron](https://github.com/lutzroeder/netron) - 神經網路、深度學習和機器學習模型的視覺化工具。 ----------------------------------------------------------------------------  Netron 是神經網路、深度學習和機器學習模型的檢視器。 Netron 支援 ONNX、TensorFlow Lite、Core ML、Keras、Caffe、Darknet、MXNet、PaddlePaddle、ncnn、MNN 和 TensorFlow.js。 Netron 對 PyTorch、TorchScript、TensorFlow、OpenVINO、RKNN、MediaPipe、ML.NET 和 scikit-learn 提供實驗性支援。 您可以閱讀有關[安裝說明](https://github.com/lutzroeder/netron?tab=readme-ov-file#install)。 您可以存取該[網站](https://netron.app/)並打開這些[範例模型文件](https://github.com/lutzroeder/netron?tab=readme-ov-file#models)以使用它來打開。例如,您可以看到這個[演示](https://netron.app/?url=https://github.com/onnx/models/raw/main/validated/vision/classification/squeezenet/model/squeezenet1.0-3.onnx)。 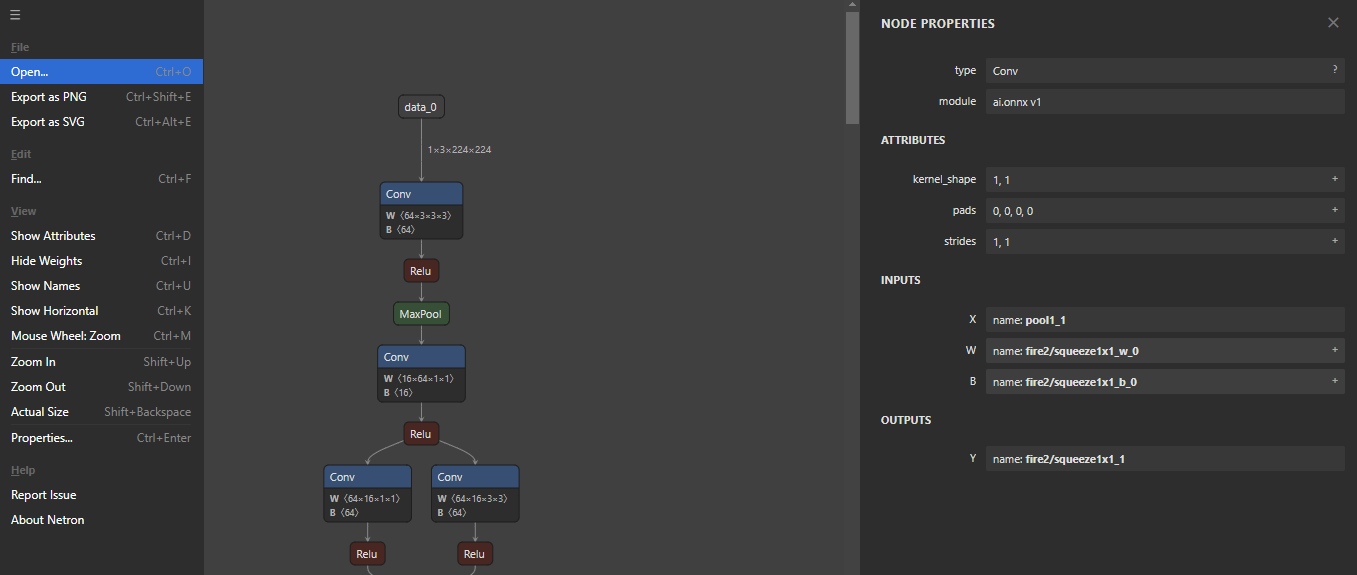 他們在 GitHub 上有 25k+ Stars,並且是基於 JavaScript 建構的。它們在`v7.5`上只有三個版本,考慮到我只使用了語義版本,這對我來說似乎很困惑。我們都同意這個用例非常出色。 https://github.com/lutzroeder/netron 明星 Netron ⭐️ --- 18. [Cursor](https://github.com/getcursor/cursor) - 以 VSCode 為基礎的人工智慧程式碼編輯器。 ----------------------------------------------------------------------------  Cursor 是一款專為與 AI 結對程式設計而設計的程式碼編輯器。遊標適用於 Windows、Mac 和 Linux。 Cursor 不僅僅是 Visual Studio Code (VSC) 擴充功能。這是它自己的應用程式。但別擔心!這是VSC前叉。這意味著它擁有 VSC 所擁有的一切,但在此基礎上也建立了更多人工智慧功能。 https://github.com/anysphere/primpt 他們之前開源了[基於 Codemirror 的編輯器](https://github.com/getcursor/old)。 基於 VSCodium 的 Cursor 版本不是開源的,只有它們的[提示庫](https://github.com/anysphere/priompt)是開源的。 選項數量龐大,您可以查看[功能列表](https://docs.cursor.sh/features/chat),例如選擇用於聊天的 AI 模型、程式碼庫索引和自動終端偵錯。聽起來很酷,對吧:D 您應該檢查的一些功能是: - 允許您透過編輯程式碼庫的「偽程式碼」版本來進行編碼。 - 一旦錯誤出現在您的終端機中,就會自動修復錯誤。 - 要求 AI 更改程式碼區塊,查看編輯的內聯差異。 您也可以閱讀他們官方網站的[變更日誌](https://changelog.cursor.sh/?)。 您可以閱讀有關如何從[VSCode 遷移到 Cursor 的](https://docs.cursor.sh/get-started/moving-from-vsc-to-cursor)資訊。 他們也有定價模型,但免費套餐足以讓您進行測試! 他們在 GitHub 上擁有超過 19k+ 的 Star,並將繼續成長。正如我所說,這不是開源的,但將來可能會改變。 https://github.com/getcursor/cursor 星形遊標 ⭐️ --- 19. [VSCode 除錯視覺化工具](https://github.com/hediet/vscode-debug-visualizer)- VS Code 的擴展,可在偵錯期間可視化資料。 ------------------------------------------------------------------------------------------------- 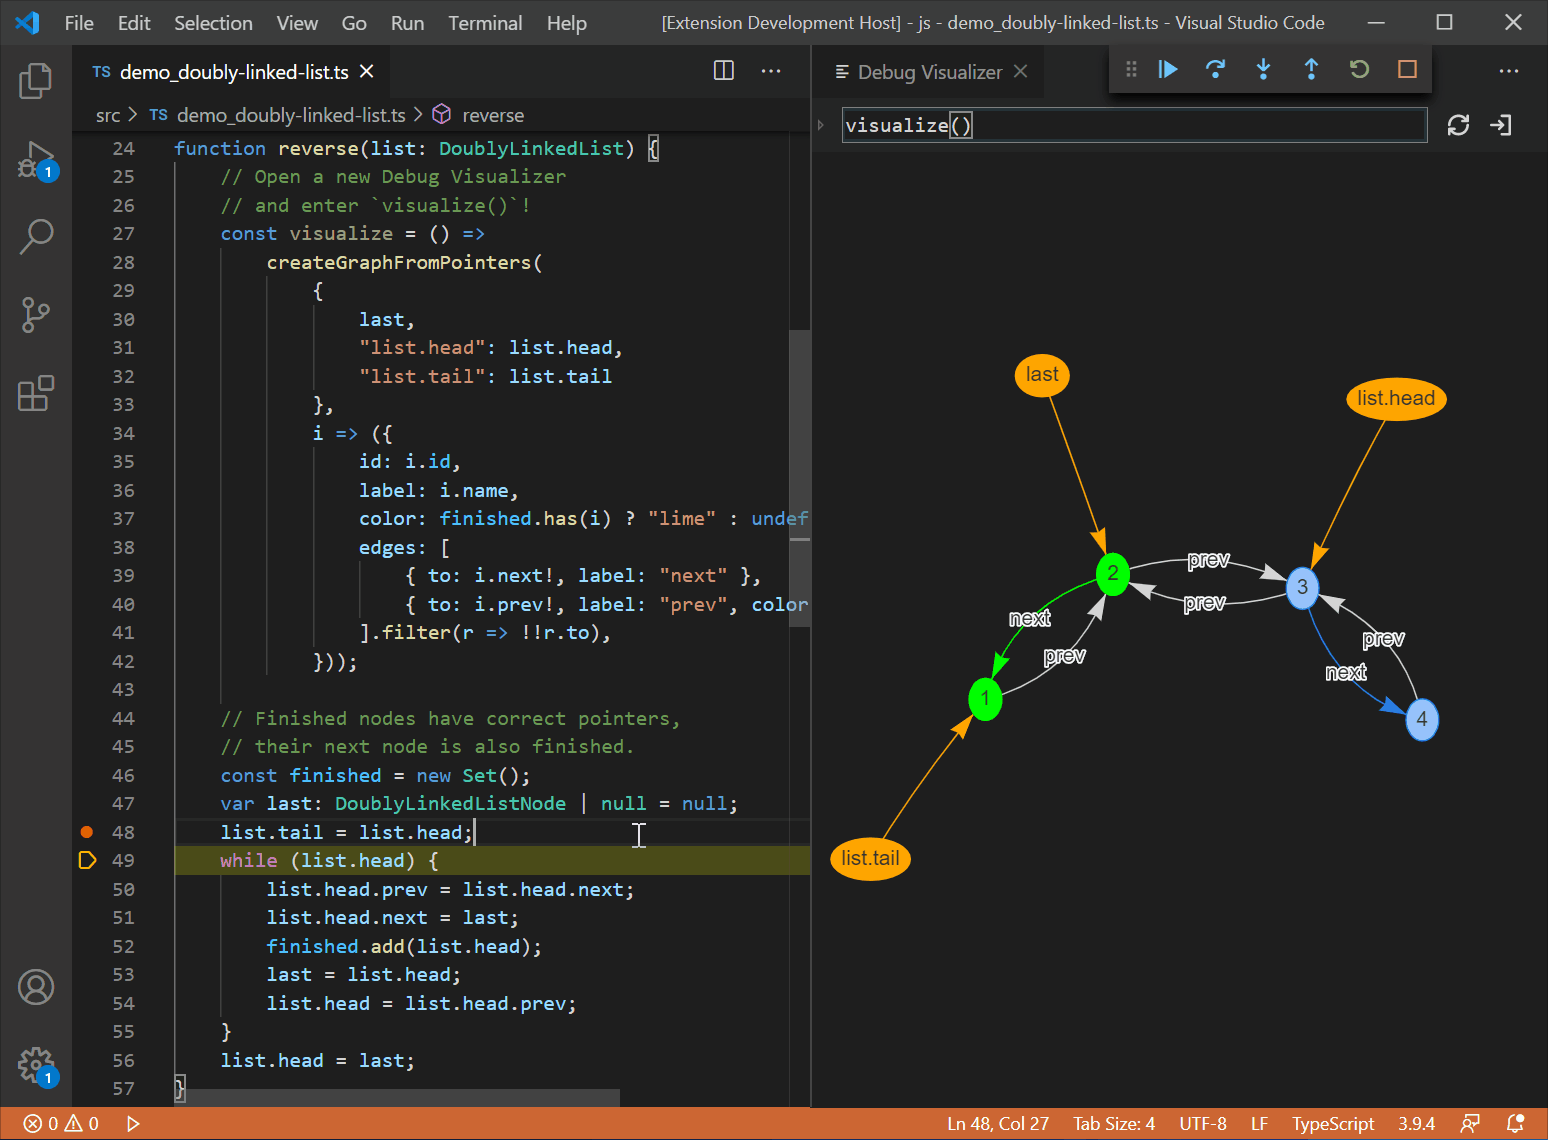 這個專案相當令人印象深刻。它不僅有助於高效除錯,還有助於透過視覺化學習基本概念,從長遠來看,這是無價的。 這是一個 VS Code 擴展,用於在偵錯時可視化資料結構。與 VS Code 的監視視圖類似,但具有豐富的監視值視覺化效果。 他們支援許多語言,如 Dart/Flutter、JS/TS、Go、Python、C#、Java、C++、Ruby、Rust 和 Swift,儘管它很基礎,所以這是一個優點。 其他語言和除錯器也可能有效。對於有基本支援的語言,只能視覺化 JSON 字串。您需要實作邏輯來為您的資料結建置立此 JSON。完全支援的語言提供資料提取器,可將一些眾所周知的資料結構轉換為 JSON。 安裝擴充功能後,您可以使用命令`Debug Visualizer: New View`開啟新的視覺化工具視圖。 您可以[在 market 上](https://marketplace.visualstudio.com/items?itemName=hediet.debug-visualizer)查看所有可用的[演示](https://github.com/hediet/vscode-debug-visualizer/blob/master/extension/README.md#selected-demos)並查看擴展。 您還可以查看他們的[視覺化遊樂場](https://hediet.github.io/visualization/?darkTheme=1),其中包含眾多選項。 他們在 GitHub 上擁有超過 7800 顆星,而且還在不斷增長。 https://github.com/hediet/vscode-debug-visualizer 明星 VSCode 除錯視覺化工具 ⭐️ --- 20. [OpenDevin](https://github.com/OpenDevin/OpenDevin) - 更少的程式碼,更多的內容。 -----------------------------------------------------------------------   這是一個開源專案,旨在複製 Devin,一名自主人工智慧軟體工程師,能夠執行複雜的工程任務並在軟體開發專案上與用戶積極協作。該計畫致力於透過開源社群的力量複製、增強和創新 Devin。 只是想讓你知道,這是在德文被介紹之前。 您可以閱讀帶有要求的[安裝說明](https://github.com/OpenDevin/OpenDevin?tab=readme-ov-file#installation)。 他們使用 LiteLLM,因此您可以使用任何基礎模型來執行 OpenDevin,包括 OpenAI、Claude 和 Gemini。 如果您想為 OpenDevin 做出貢獻,您可以查看 [演示](https://github.com/OpenDevin/OpenDevin/blob/main/README.md#opendevin-code-less-make-more)和[貢獻指南](https://github.com/OpenDevin/OpenDevin/blob/main/CONTRIBUTING.md)。 它在 GitHub 上擁有超過 10,700 個 Star,並且正在快速成長。 https://github.com/OpenDevin/OpenDevin 明星 OpenDevin ⭐️ --- 21.[即時語音克隆](https://github.com/CorentinJ/Real-Time-Voice-Cloning)-5秒克隆語音,即時產生任意語音。 ----------------------------------------------------------------------------------  該專案是透過即時工作的聲碼器實現從說話者驗證到多說話者文字到語音合成 (SV2TTS) 的遷移學習。 SV2TTS是一個分為三個階段的深度學習架構。 在第一階段,人們從幾秒鐘的音訊中建立聲音的數位表示。 在第二和第三階段,該表示被用作參考來產生給定任意文字的語音。 您可以閱讀[如何設定](https://github.com/CorentinJ/Real-Time-Voice-Cloning?tab=readme-ov-file#setup)專案,其中包括安裝要求、下載預訓練模型、測試配置、下載資料集和啟動工具箱。 觀看下面所示的影片示範! https://www.youtube.com/watch?v=-O\_hYhToKoA 我一直喜歡開源專案的最好的部分是,他們甚至非常清楚地提到了替代方案,並且像往常一樣,他們推薦了一些[專案](https://github.com/CorentinJ/Real-Time-Voice-Cloning?tab=readme-ov-file#heads-up),這些專案將為您克隆的聲音提供更好的保真度及其表現力。 他們在 GitHub 上擁有 50k+ Stars,並且僅基於 Python 建置。到目前為止使用起來還是非常可信的。 https://github.com/CorentinJ/Real-Time-Voice-Cloning Star 即時語音克隆 ⭐️ --- 請在評論中告訴我您在此列表中發現了哪些有用的人工智慧工具:D 人工智慧正在改變世界,最好讓人工智慧成為你的朋友,而不是簡單地忽略它。 使用這些工具來提高工作效率並抓住機會創造非凡的東西。 祝你有美好的一天!直到下一次。 在 GitHub 和[Twitter](https://twitter.com/Anmol_Codes)上關注我。 https://github.com/Anmol-Baranwal 關注 Taipy 以了解更多此類內容。 https://dev.to/taipy --- 原文出處:https://dev.to/taipy/21-ai-tools-that-are-changing-the-world-1o54
長話短說 ---- 在本文中,您將了解如何建立 Vercel 的 V0.dev 的克隆。這是一個很棒的專案,可以加入到您的投資組合中並磨練您的人工智慧能力。 我們將介紹使用: - 用於應用程式框架的 Next.js 🖥️ - 法學碩士 OpenAI 🧠 - v0 👾 的應用程式邏輯 - 使用 CopilotKit 將 AI 整合到您的應用程式中 🪁  --- CopilotKit:應用內人工智慧的作業系統框架 ========================= CopilotKit 是[開源人工智慧副駕駛平台。](https://github.com/CopilotKit/CopilotKit)我們可以輕鬆地將強大的人工智慧整合到您的 React 應用程式中。 建造: - ChatBot:上下文感知的應用內聊天機器人,可以在應用程式內執行操作 💬 - CopilotTextArea:人工智慧驅動的文字字段,具有上下文感知自動完成和插入功能📝 - 聯合代理:應用程式內人工智慧代理,可以與您的應用程式和使用者互動🤖  {% cta https://github.com/CopilotKit/CopilotKit %} Star CopilotKit ⭐️ {% endcta %} (原諒人工智慧的拼字錯誤並給一顆星:) 現在回到文章。 --- 先決條件 ---- 要開始學習本教程,您需要具備以下條件: - 文字編輯器(VS Code、遊標) - React、Next.js、Typescript 和 Tailwind CSS 的基本知識。 - Node.js 安裝在您的 PC/Mac 上 - 套件管理器 (npm) - [OpenAI](https://platform.openai.com/docs/overview) API 金鑰 - [CopilotKit](https://docs.copilotkit.ai/getting-started/quickstart-textarea)安裝在您的 React 專案中 v0是什麼? ------ **v0**是[Vercel 開發的](https://vercel.com/blog/announcing-v0-generative-ui)生成式使用者介面 (UI) 工具,允許使用者給予提示並描述他們的想法,然後將其轉換為用於建立 Web 介面的 UI 程式碼。它利用[生成式 AI](https://medium.com/data-science-at-microsoft/generative-ai-openai-and-chatgpt-what-are-they-3c80397062c4)以及[React](https://developer.mozilla.org/en-US/docs/Learn/Tools_and_testing/Client-side_JavaScript_frameworks/React_getting_started) 、 [Tailwind CSS](https://tailwindcss.com/)和[Shadcn UI](https://ui.shadcn.com/)等開源工具,根據使用者提供的描述產生程式碼。 *這是使用 v0 產生的 Web 應用程式 UI 的範例* https://v0.dev/t/nxGnMd1uVGc 了解專案要求 ------ 在本逐步教程結束時,克隆將具有以下專案要求: 1. **使用者輸入:**使用者輸入文字作為提示,描述他們想要產生的 UI。這將使用 CopilotKit 聊天機器人來完成,該聊天機器人由[CopilotSidebar](https://docs.copilotkit.ai/reference/CopilotSidebar)提供。 2. **CopilotKit 整合:** CopilotKit 將用於為 Web 應用程式提供 AI 功能以產生 UI。 3. **渲染 UI:**在 UI React/JSX 程式碼和渲染 UI 之間切換的切換開關。 使用 CopilotKit 建立 v0 克隆 ---------------------- **第 1 步:建立一個新的 Next.JS 應用程式** 在終端機中開啟工作區資料夾並執行以下命令建立新的 Next.js 應用程式: ``` npx create-next-app@latest copilotkit-v0-clone ``` 這將建立一個名為`copilotkit-v0-clone`新目錄,其中包含 Next.JS 專案結構,並安裝了所需的依賴項。它將在您的終端中顯示這一點,並對除最後一個之外的所有選項都選擇**“是”** ,因為建議使用預設`import alias` 。其他提示安裝我們將在專案中使用的 Typescript 和 TailwindCSS。  使用`cd`指令導航到專案目錄,如下所示: ``` cd copilotkit-v0-clone ``` **步驟 2:設定 CopilotKit 後端端點。閱讀[文件](https://docs.copilotkit.ai/getting-started/quickstart-backend)以了解更多資訊。** 執行以下命令來安裝 CopilotKit 後端軟體包: ``` npm i @copilotkit/backend ``` 然後造訪 https://platform.openai.com/api-keys 以取得您的**GPT 4** OpenAI API 金鑰。  取得 API 金鑰後,在根目錄中建立一個`.env.local`檔案。 `.env.local`檔案應該是這樣的: ``` OPENAI_API_KEY=Your OpenAI API key ``` 在**app**目錄下建立該目錄; `api/copilot/openai`並建立一個名為`route.ts`的檔案。該檔案用作 CopilotKit 請求和 OpenAI 互動的**後端**端點。它處理傳入的請求,使用 CopilotKit 處理它們,並傳回適當的回應。 我們將在`route.ts`檔案中建立一個POST請求函數,在post請求內部建立一個`CopilotBackend`類別的新實例,該類別提供了處理CopilotKit請求的方法。 然後,我們呼叫`CopilotBackend`實例的`response`方法,並傳遞請求物件 ( `req` ) 和`OpenAIAdapter`類別的新實例作為參數。此方法使用 CopilotKit 和 OpenAI API 處理請求並回傳回應。 如下面的程式碼所示,我們從`@copilotkit/backend`套件導入`CopilotBackend`和`OpenAIAdapter`類別。這些類別對於與 CopilotKit 和 OpenAI API 互動是必需的。 ``` import { CopilotBackend, OpenAIAdapter } from "@copilotkit/backend"; export const runtime = "edge"; export async function POST(req: Request): Promise<Response> { const copilotKit = new CopilotBackend(); return copilotKit.response(req, new OpenAIAdapter()); } ``` **步驟 3:為 v0 克隆建立元件** 我們將使用 Shadcn UI 庫中的元件。要處理這個問題,讓我們透過執行`shadcn-ui init`命令來設定 Shadcn UI 庫來設定您的專案 ``` npx shadcn-ui@latest init ``` 然後我們將用這個問題來配置components.json ``` Which style would you like to use? › Default Which color would you like to use as base color? › Slate Do you want to use CSS variables for colors? › no / yes ``` 我們在 Shadcn UI 中使用的元件是**按鈕**和**對話框**。那麼讓我們來安裝它們吧! 對於[按鈕](https://ui.shadcn.com/docs/components/button),執行此命令 ``` npx shadcn-ui@latest add button ``` 若要安裝[對話](https://ui.shadcn.com/docs/components/dialog)方塊元件,請執行以下命令 ``` npx shadcn-ui@latest add dialog ``` **第 4 步:設定 CopilotKit 前端。閱讀[文件](https://docs.copilotkit.ai/getting-started/quickstart-textarea)以了解更多資訊。** 若要安裝 CopilotKit 前端軟體包,請執行以下命令: ``` npm i @copilotkit/react-core @copilotkit/react-ui ``` 根據[CopilotKit 文件](https://docs.copilotkit.ai/getting-started/quickstart-textarea),要使用 CopilotKit,我們必須設定前端包裝器以透過 Copilot 傳遞任何 React 應用程式。當提示傳遞到 CopilotKit 時,它會透過 URL 將其傳送到 OpenAI,後者會回傳回應。 在**應用程式**目錄中,讓我們更新`layout.tsx`檔案。該文件將定義我們應用程式的佈局結構並將 CopilotKit 整合到前端。 輸入以下程式碼: ``` "use client"; import { CopilotKit } from "@copilotkit/react-core"; import "@copilotkit/react-textarea/styles.css"; // also import this if you want to use the CopilotTextarea component import "@copilotkit/react-ui/styles.css"; import { Inter } from "next/font/google"; import "./globals.css"; import { CopilotSidebar, } from "@copilotkit/react-ui"; const inter = Inter({ subsets: ["latin"] }); export default function RootLayout({ children, }: Readonly<{ children: React.ReactNode; }>) { return ( <html lang="en"> <body className={inter.className}> <CopilotKit url="/api/copilotkit/openai/"> <CopilotSidebar defaultOpen>{children}</CopilotSidebar> </CopilotKit> </body> </html> ); } ``` 該元件代表我們應用程式的根佈局。它使用 CopilotKit 包裝整個應用程式,根據我們在**步驟 2**中為後端建立的內容指定 CopilotKit 後端端點的 URL ( `/api/copilotkit/openai/` )。此外,它還包括一個 CopilotSidebar 元件,可作為 CopilotKit 的側邊欄,並將 Children 屬性作為其內容傳遞。 **第 5 步:設定主應用程式** 讓我們建立應用程式的結構。它將有一個標題、側邊欄和預覽畫面。 對於**Header** ,導航到**元件**目錄,如下所示, `src/components`然後建立一個`header.tsx`檔案並輸入以下程式碼: ``` import { CodeXmlIcon } from "lucide-react"; import { Button } from "./ui/button"; const Header = (props: { openCode: () => void }) => { return ( <div className="w-full h-20 bg-white flex justify-between items-center px-4"> <h1 className="text-xl font-bold">Copilot Kit</h1> <div className="flex gap-x-2"> <Button className=" px-6 py-1 rounded-md space-x-1" variant={"default"} onClick={props.openCode} > <span>Code</span> <CodeXmlIcon size={20} /> </Button> </div> </div> ); }; export default Header; ``` 對於**側欄,**建立一個`sidebar.tsx`檔案並輸入以下程式碼: ``` import { ReactNode } from "react"; const Sidebar = ({ children }: { children: ReactNode }) => { return ( <div className="w-[12%] min-h-full bg-white rounded-md p-4"> <h1 className="text-sm mb-1">History</h1> {children} </div> ); }; export default Sidebar; ``` 然後對於**預覽**螢幕,建立一個`preview-screen.tsx`檔案並輸入程式碼: ``` const PreviewScreen = ({ html_code }: { html_code: string }) => { return ( <div className="w-full h-full bg-white rounded-lg shadow-lg p-2 border"> <div dangerouslySetInnerHTML={{ __html: html_code }} /> </div> ); }; export default PreviewScreen; ``` 現在讓我們將它們放在一起,打開`page.tsx`檔案並貼上以下程式碼: ``` "use client"; import { useState } from "react"; import { Dialog, DialogContent, DialogDescription, DialogHeader, DialogTitle, } from "@/components/ui/dialog"; import Header from "@/components/header"; import Sidebar from "@/components/sidebar"; import PreviewScreen from "@/components/preview-screen"; import { Input } from "@/components/ui/input"; export default function Home() { const [code, setCode] = useState<string[]>([ `<h1 class="text-red-500">Hello World</h1>`, ]); const [codeToDisplay, setCodeToDisplay] = useState<string>(code[0] || ""); const [showDialog, setShowDialog] = useState<boolean>(false); const [codeCommand, setCodeCommand] = useState<string>(""); return ( <> <main className="bg-white min-h-screen px-4"> <Header openCode={() => setShowDialog(true)} /> <div className="w-full h-full min-h-[70vh] flex justify-between gap-x-1 "> <Sidebar> <div className="space-y-2"> {code.map((c, i) => ( <div key={i} className="w-full h-20 p-1 rounded-md bg-white border border-blue-600" onClick={() => setCodeToDisplay(c)} > v{i} </div> ))} </div> </Sidebar> <div className="w-10/12"> <PreviewScreen html_code={readableCode || ""} /> </div> </div> <div className="w-8/12 mx-auto p-1 rounded-full bg-primary flex my-4 outline-0"> <Input type="text" placeholder="Enter your code command" className="w-10/12 p-6 rounded-l-full outline-0 bg-primary text-white" value={codeCommand} onChange={(e) => setCodeCommand(e.target.value)} /> <button className="w-2/12 bg-white text-primary rounded-r-full" onClick={() => generateCode.run(context)} > Generate </button> </div> </main> <Dialog open={showDialog} onOpenChange={setShowDialog}> <DialogContent> <DialogHeader> <DialogTitle>View Code.</DialogTitle> <DialogDescription> You can use the following code to start integrating into your application. </DialogDescription> <div className="p-4 rounded bg-primary text-white my-2"> {readableCode} </div> </DialogHeader> </DialogContent> </Dialog> </> ); } ``` 我們來分解一下上面的程式碼: `const [code, setCode] = useState<string[]>([]);`將用於保存生成的程式碼 `const [codeToDisplay, setCodeToDisplay] = useState<string>(code[0] || "");`將用於保存預覽畫面上顯示的程式碼。 `const [showDialog, setShowDialog] = useState<boolean>(false);`這將保持對話框的狀態,該對話框顯示您可以複製的生成程式碼。 在下面的程式碼中,我們循環產生的程式碼(一串陣列)將其顯示在側邊欄上,這樣當我們選擇一個程式碼時,它就會顯示在預覽畫面上。 ``` <Sidebar> <div className="space-y-2"> {code.map((c, i) => ( <div key={i} className="w-full h-20 p-1 rounded-md bg-white border border-blue-600" onClick={() => setCodeToDisplay(c)} > v{i} </div> ))} </div> </Sidebar> ``` `<PreviewScreen html_code={codeToDisplay} />`在這裡,我們發送要在預覽畫面上顯示的程式碼。預覽畫面元件採用 CopilotKit 產生的程式碼字串,並使用`dangerouslySetInnerHTML`來呈現產生的程式碼。 下面我們有一個`Dialog`元件,它將顯示 CoplilotKit 產生的程式碼,可以將其複製並加入到您的程式碼中。 ``` <Dialog open={showDialog} onOpenChange={setShowDialog}> <DialogContent> <DialogHeader> <DialogTitle>View Code.</DialogTitle> <DialogDescription> You can use the following code to start integrating into your application. </DialogDescription> <div className="p-4 rounded bg-primary text-white my-2"> {readableCode} </div> </DialogHeader> </DialogContent> </Dialog> ``` **步驟6:實作主要應用程式邏輯** 在這一步驟中,我們將 CopilotKit 整合到我們的 v0 克隆應用程式中,以促進人工智慧驅動的 UI 生成。我們將使用 CopilotKit 的 React hook 來管理狀態,使元件可供 Copilot 讀取和操作,並與 OpenAI API 互動。 在您的`page.tsx`檔案中,匯入以下內容: ``` import { CopilotTask, useCopilotContext, useMakeCopilotReadable, } from "@copilotkit/react-core"; ``` 然後我們在`Home`元件中使用`CopilotTask`定義一個`generateCode`任務: ``` const readableCode = useMakeCopilotReadable(codeToDisplay); const generateCode = new CopilotTask({ instructions: codeCommand, actions: [ { name: "generateCode", description: "Create Code Snippet with React.js, tailwindcss.", parameters: [ { name: "code", type: "string", description: "Code to be generated", required: true, }, ], handler: async ({ code }) => { setCode((prev) => [...prev, code]); setCodeToDisplay(code); }, }, ], }); const context = useCopilotContext(); ``` 我們使用`useMakeCopilotReadable`來傳遞現有程式碼並確保可讀性。然後我們使用`CopilotTask`產生UI,並將`generateCode`任務綁定到**生成**按鈕,這樣就可以透過與按鈕元件互動來產生程式碼片段。 此操作由使用者互動觸發,並在呼叫時執行非同步`handler`函數。 `handler`將產生的程式碼新增至程式碼陣列中,更新應用程式狀態以包含新產生的程式碼片段,並將產生的程式碼傳送到預覽畫面上顯示和呈現,預覽畫面也可以複製。 此外, `instructions`屬性指定提供給 Copilot 的命令,該命令儲存在`codeCommand`狀態變數中。 有關`CopilotTask`運作方式的完整說明,請查看此處的文件:https://docs.copilotkit.ai/reference/CopilotTask **第 6 步:執行 v0 克隆應用程式** 至此,我們已經完成了 v0 克隆設置,然後可以透過執行來啟動開發伺服器 ``` npm run dev ``` 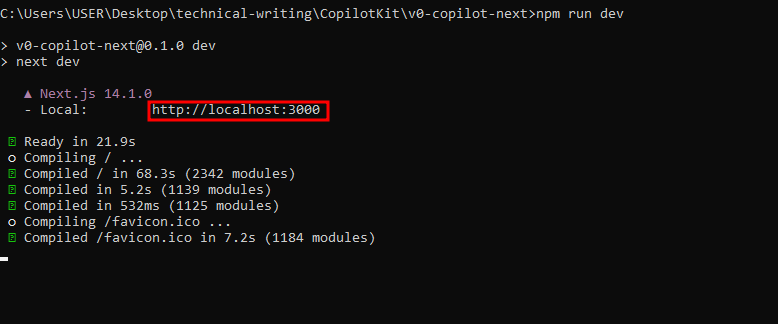 可以使用此 URL 在瀏覽器中存取該 Web 應用程式 [http://本地主機:3000](http://localhost:3000/) 然後您可以輸入提示並點擊**“生成”。**這裡有些例子: - **定價頁面:**如下所示,這是產生的UI,有一個切換按鈕可以在UI和React程式碼之間切換: 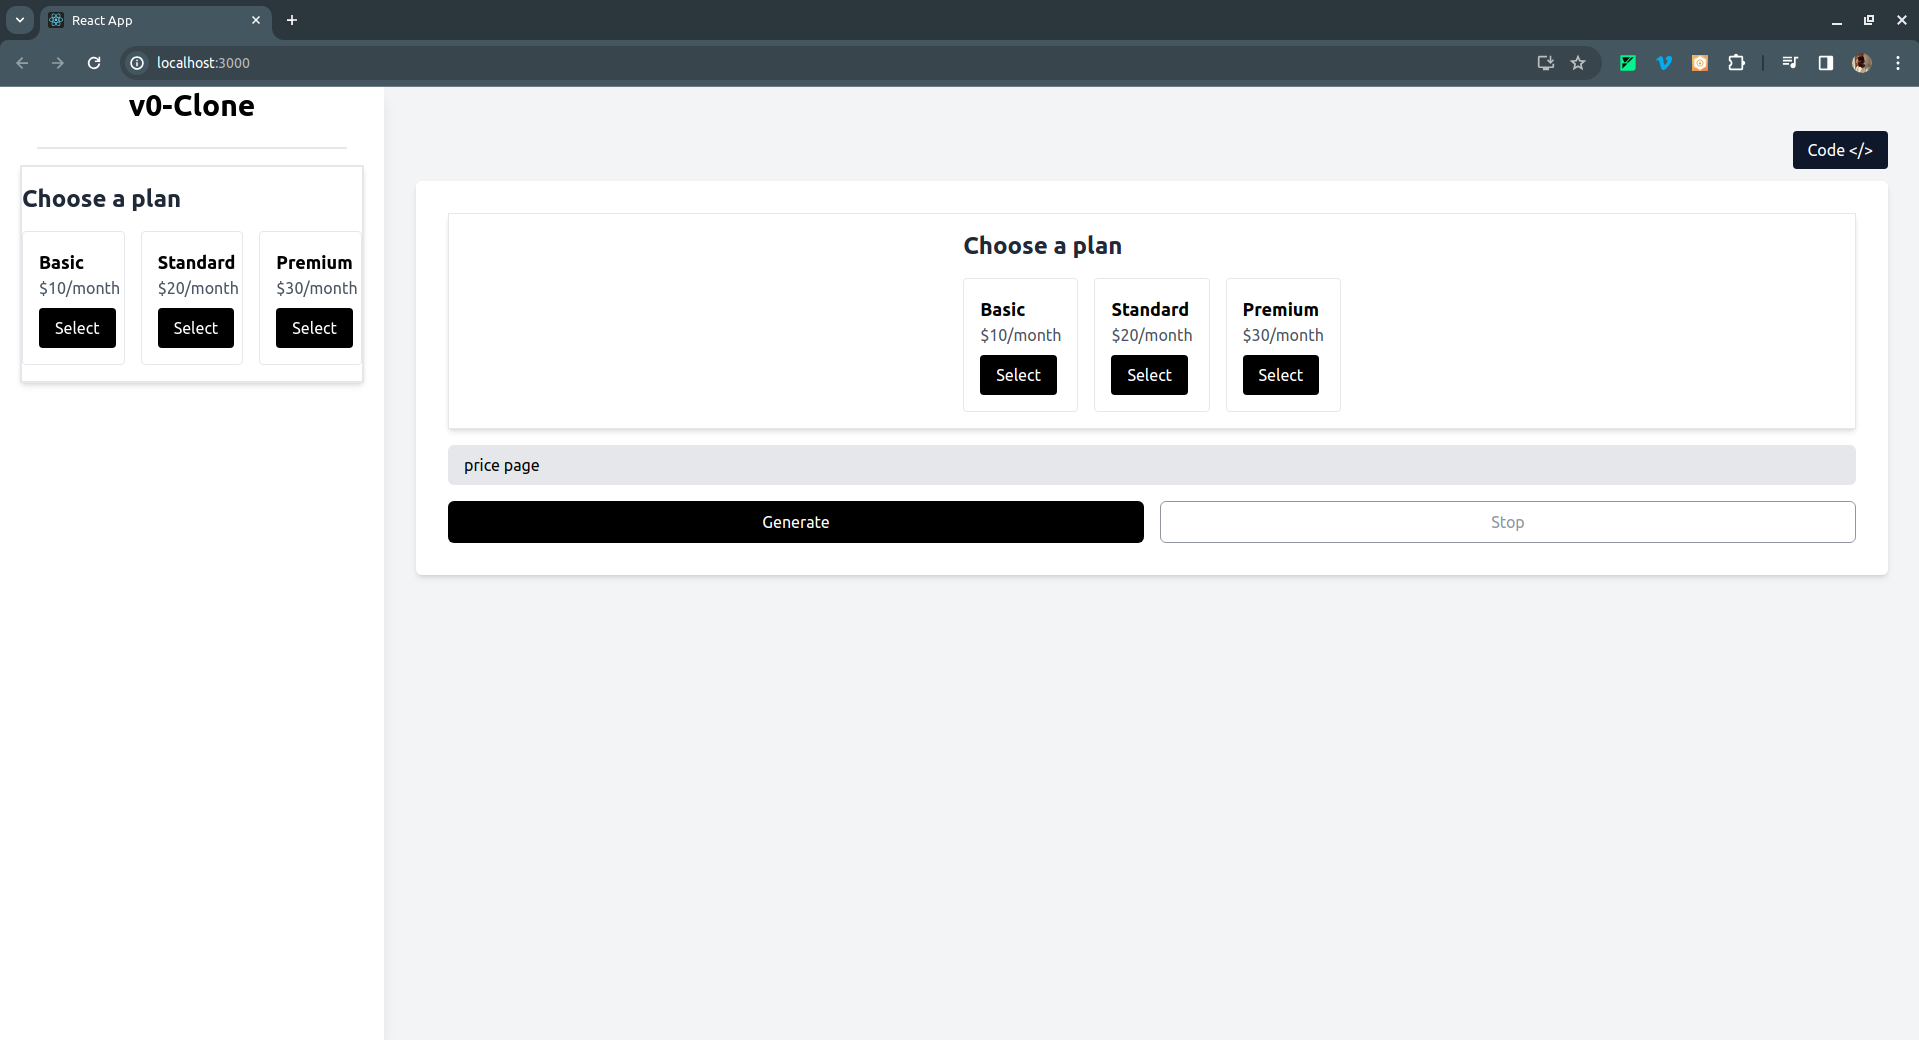 如果點擊右上角的**Code** </> 按鈕,它會切換到產生的 UI 的 React 程式碼,如下所示: 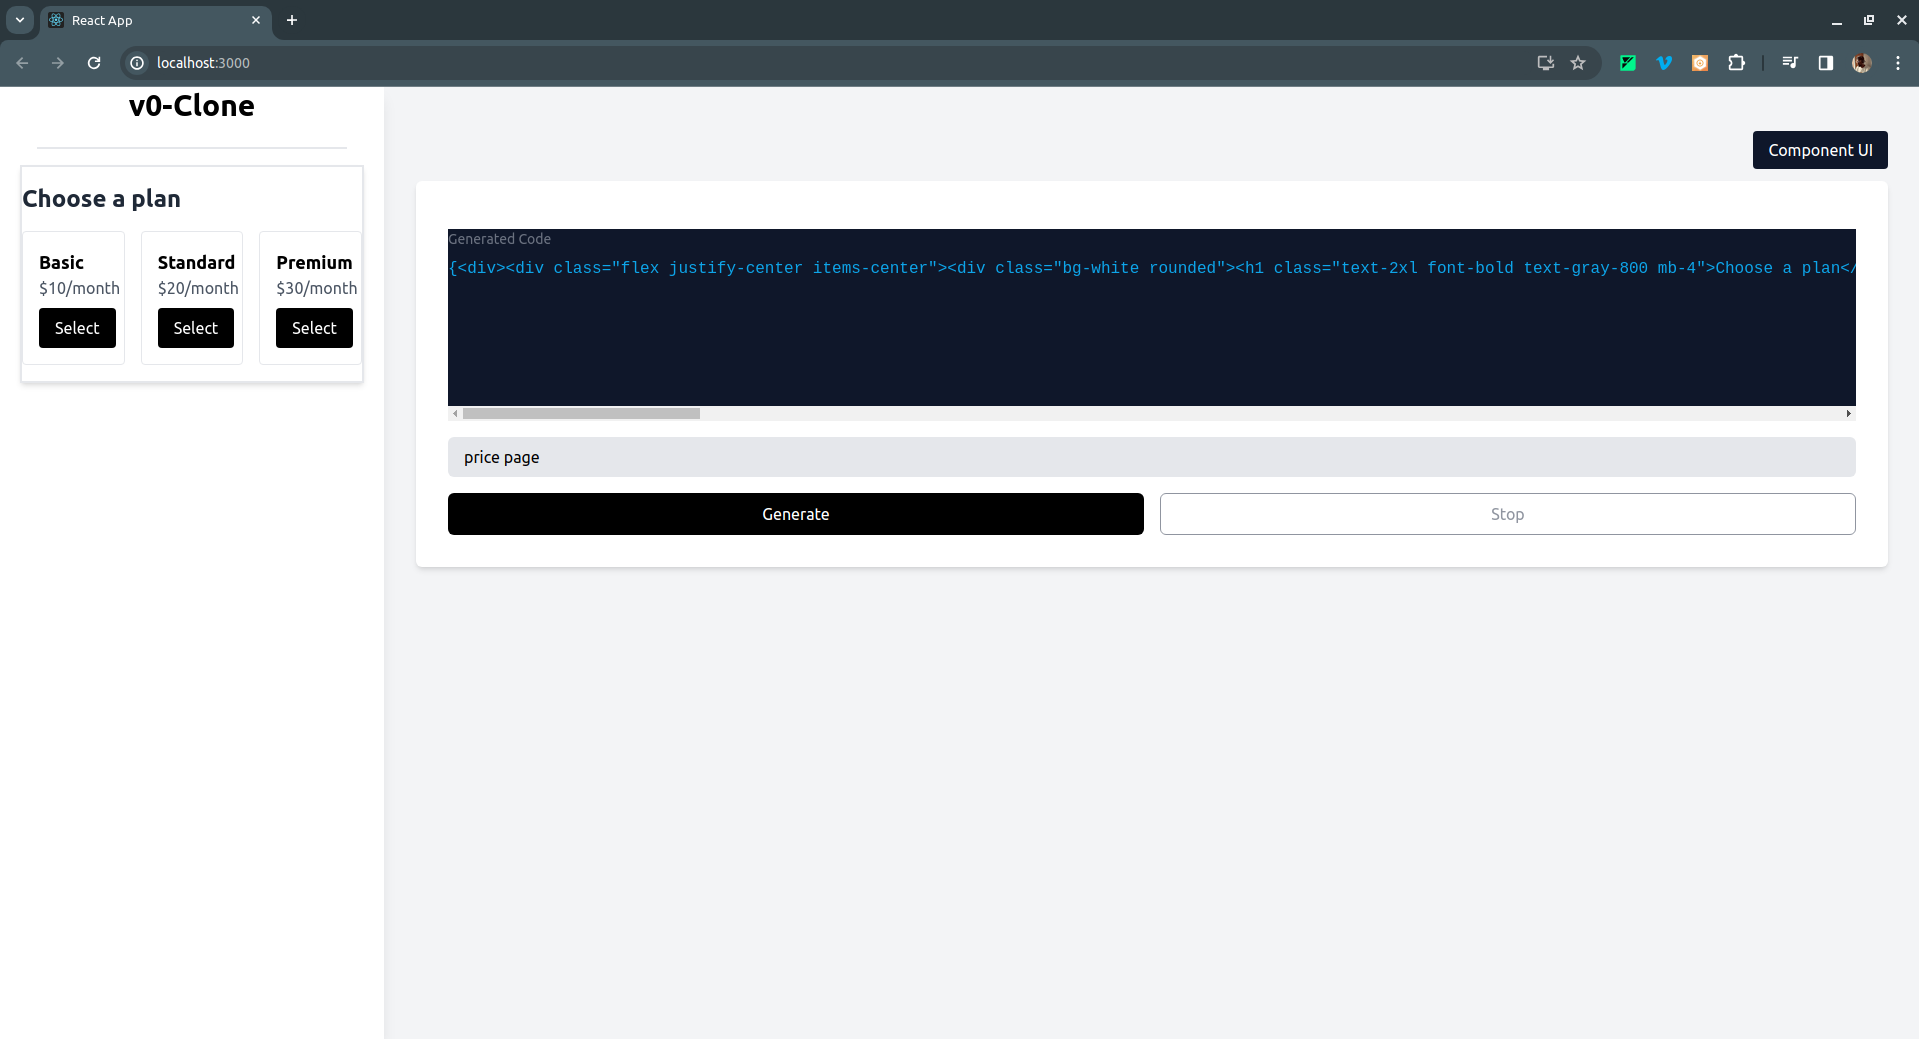 - 註冊頁面 UI 範例: 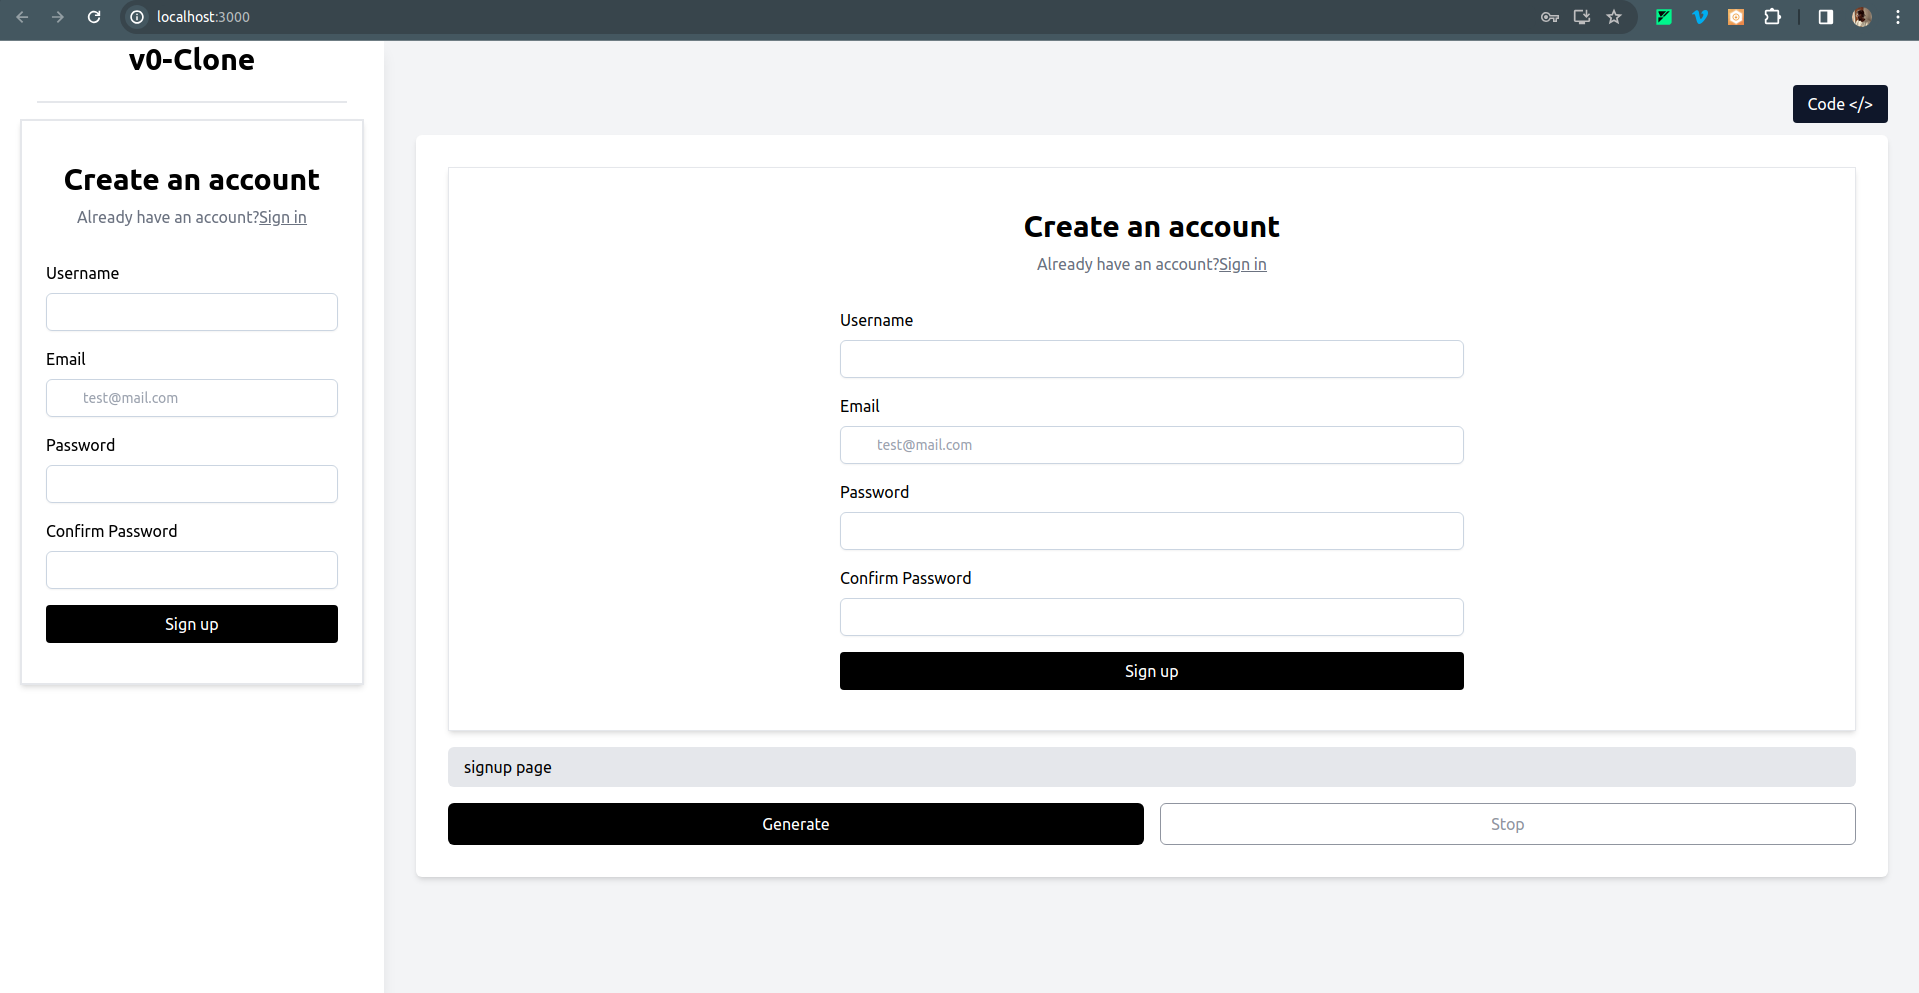 - 還有一個結帳頁面 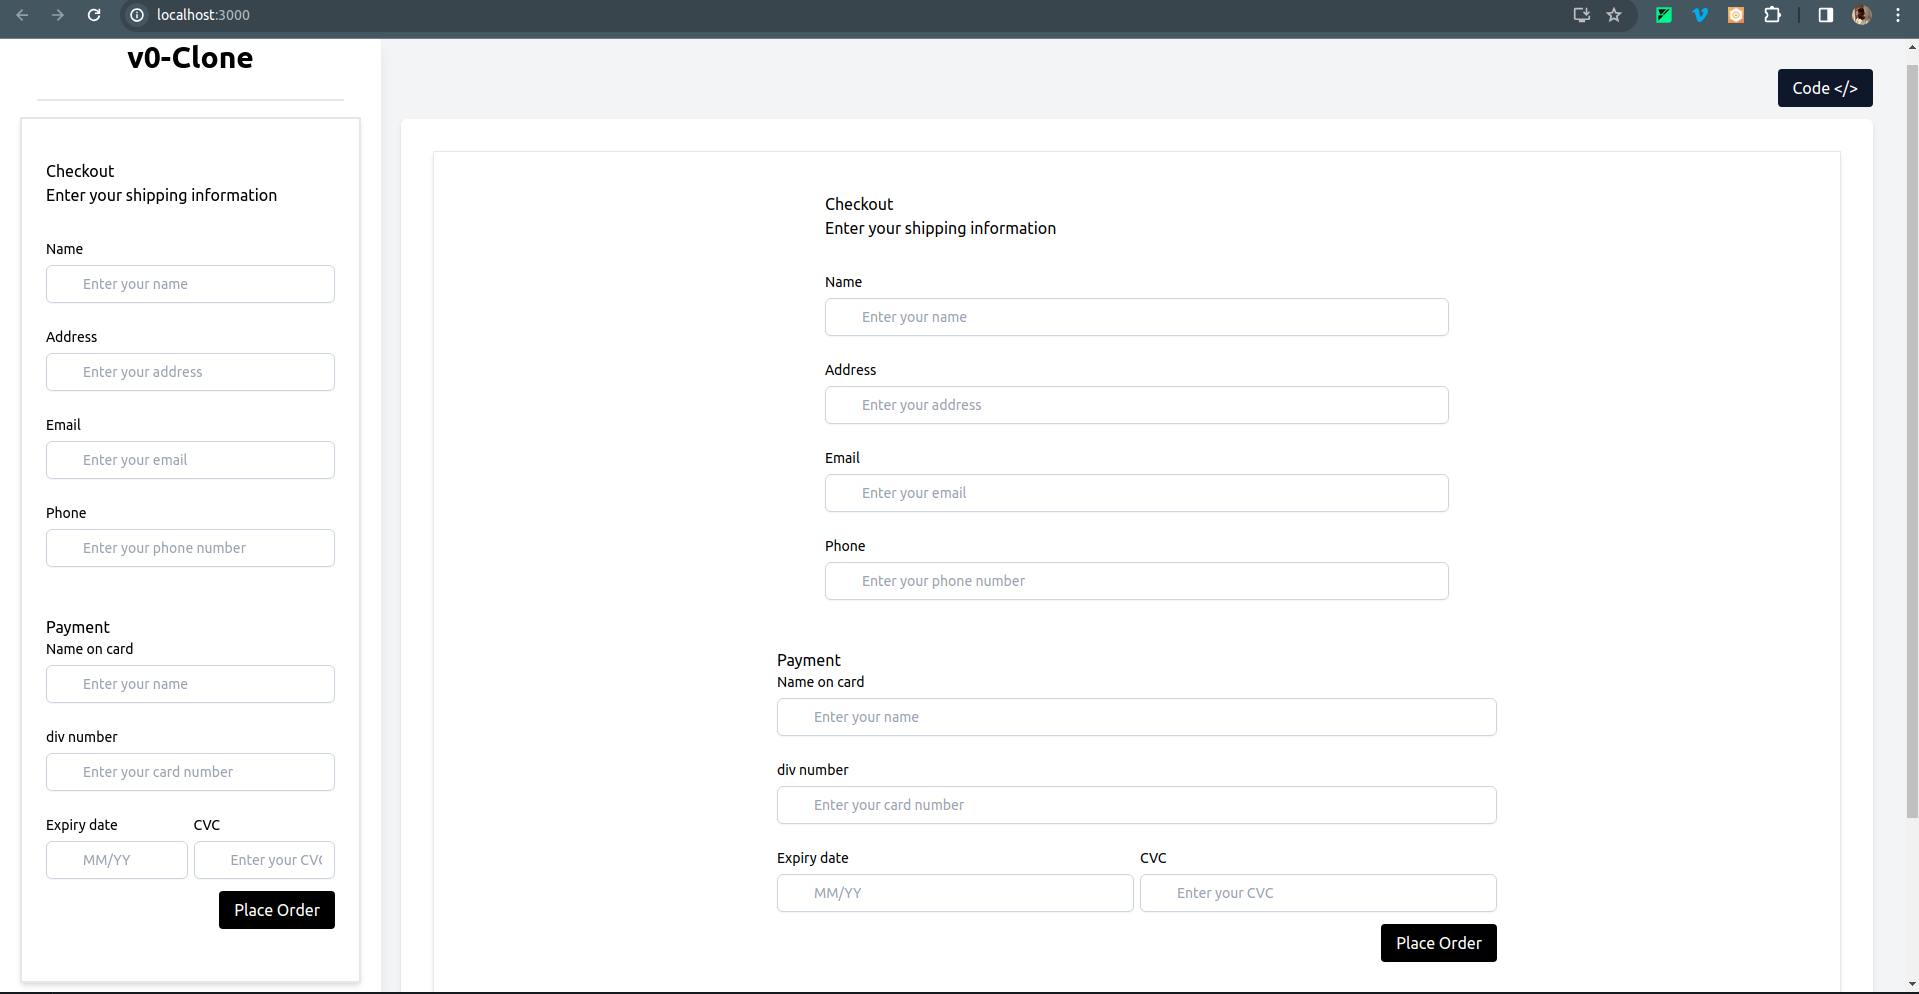 要克隆專案並在本地執行它,請打開終端並執行以下命令: ``` git clone https://github.com/Tabintel/v0-copilot-next ``` 然後執行`npm install`以安裝專案所需的所有依賴項,並`npm run dev`來執行 Web 應用程式。 結論 -- 總而言之,您可以使用[CopilotKit](https://github.com/CopilotKit/CopilotKit)建立 v0 克隆,為您的設計提供 UI 提示。 CopilotKit 不僅適用於 UI 提示,它還可以用於建立[AI 驅動的 PowerPoint 生成器](https://dev.to/copilotkit/how-to-build-ai-powered-powerpoint-app-nextjs-openai-copilotkit-ji2)、 [AI 簡歷產生器](https://dev.to/copilotkit/how-to-build-the-with-nextjs-openai-1mhb)等應用程式。 可能性是無限的,立即查看 CopilotKit,將您的 AI 想法變為現實。 在[GitHub](https://github.com/Tabintel/v0-copilot-next)上取得完整原始碼。 從[文件](https://docs.copilotkit.ai/getting-started/quickstart-textarea)中了解有關如何使用 CopilotKit 的更多資訊。 另外,別忘了[Star CopilotKit!](https://github.com/CopilotKit/CopilotKit) ⭐ --- 原文出處:https://dev.to/copilotkit/i-created-a-v0-clone-with-nextjs-gpt4-copilotkit-3cmb
嘿,我是 Vince ---------  我是一名自學成才的開發人員,在新冠疫情期間改變了職業生涯。我改變是因為我想要更好的職業,喜歡編程,同時對建立有利可圖的 SaaS 副專案有著濃厚的興趣。 我能夠透過在空閒時間學習、建立小型副專案、參加黑客馬拉松以及為開發人員建立教育內容來轉換職業。  此外,我於 2023 年 3 月推出的第一個簡單 SaaS 應用程式[CoverLetterGPT.xyz](http://coverlettergpt.xyz/)目前擁有 83 名客戶,每月收入 434 美元!沒什麼瘋狂的,但我仍然感到自豪。 (順便說一句,如果你想看看我是如何建造它的,它是[開源的](https://github.com/vincanger/coverlettergpt)!) 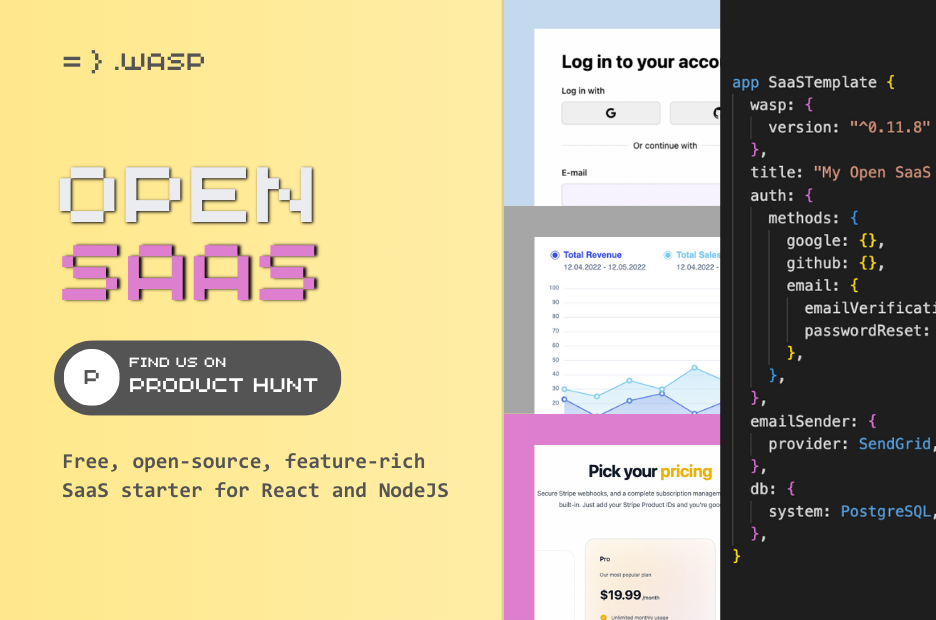 我目前還在開發[OpenSaaS.sh](http://OpenSaaS.sh) ,這是一個免費的開源 SaaS 入門模板,適用於 React 和 NodeJS,以及 Stripe、OpenAI 和 AWS S3 集成 基於這些經驗,並向其他成功的開發人員學習,我學到了一些如何尋找靈感和動力來建立東西,作為推進職業生涯或賺取額外收入的手段。 陷入 FOMO 的陷阱 ----------- 首先,如果您在社交媒體上的軟體開發人員圈子里呆了一段時間,那麼您無疑會受到副專案成功帖子和獨立黑客的每月經常性收入 (MRR) 螢幕截圖的轟炸。  這可能會導致 FOMO(“害怕錯過”)受到嚴重打擊。  對許多開發者來說,這就是夢想:建立一個有利可圖的副業專案,帶來穩定的被動收入,辭掉日常工作,環遊世界。 但這讓很多人想知道以下問題: *“開發人員如何找到在空閒時間進行開發的動力?”* *“我也是全端 Web 開發人員,為什麼我沒有任何好的 SaaS 想法?!”* 或者 *「為什麼我總是發現自己在完成最後一個專案之前就開始了一個新的副業專案?”* 嗯,我有一些建議,基本上可以歸結為這兩點: 1. 少做一點 2. 玩得更開心 讓我解釋… 找出不該做的事情 -------- 這可能看起來有悖常理,但實際上弄清楚什麼不該做將幫助你專注於你真正、真正、真正想要做的事情。 這是我從世界上最成功的投資者之一華倫巴菲特身上學到的東西。 一位粉絲向巴菲特詢問關於選擇生活中的工作的建議,他回應: - 列出 25 個人生目標 - 從最重要到最不重要的順序排列它們 - 只關注前 5 個目標 - 避免與目標 6 至 25 相關的活動。 這種方法有趣的地方在於,它鼓勵個人策略性地在優先順序較低的活動(目標 6 到 25)中取得不理想的成績。 為什麼?因為我們可以選擇將注意力集中在無數的事情上,但如果我們不專注於重要的事情,我們永遠不會有太多成就。 執行相同的過程,但使用副專案,會產生類似的結果: - 列出您擁有的所有出色的應用程式創意 - 選擇您最感興趣的前 2 個(記住,這也應該很有趣!) - 丟掉其餘的(至少現在是這樣)。 您也可以對應用程式功能執行相同的操作,並列出您的專案應具有的所有功能,但只保留前 5 個。 是時候集中註意力了。  從小事做起 ----- 到目前為止,「從小事做起」應該是顯而易見的,但人們似乎很難記住這一點。如果不是這樣,《原子習慣》這樣的書銷售不會超過 1000 萬冊 🤯  另外,想想有多少次我們低估了完成工作任務所需的時間。這是一個典型的案例,告訴您的團隊錯誤修復“應該只需要一天”,但最終花了一周的時間。 不過不用擔心,即使是最有經驗的高階工程師也會遇到這種情況。 因此,當你試圖保持動力時,你能做的最糟糕的事情就是給自己設定一個過於雄心勃勃的目標,並列出看似無窮無盡的待辦事項清單。 保持簡單可以讓你更輕鬆地實現你的目標,這會讓你充滿靈感,並讓你不斷迭代。 不用擔心競爭 ------ *“我有一個很棒的想法,但其他人搶先了我”* 這是你在開發者中經常聽到的藉口,它讓他們中的許多人甚至無法開始。**我的建議是根本不用擔心競爭**。 為什麼? 因為競爭是正常的,也是好的。您最終將不可避免地創造出一種可比較但不同的產品,該產品將與那些更像您(而不是像您的競爭對手)思考的客戶交談。 競爭對手也將不可避免地向您展示您不應在應用程式中複製或複製的內容。如果您看到他們的某個功能您不喜歡,或者發現自己在說“他們為什麼這樣做”,那麼您就放心了,您的應用程式可以找到自己的利基市場。 另外,以我的應用程式[CoverLetterGPT](https://coverlettergpt.xyz)為例,當我進行谷歌搜尋時,有大量贊助結果顯示在我的應用程式之前。  但你猜怎麼著,我的用戶數量每個月都在增加,而且我對這個應用程式幾乎沒有進行任何維護。是的,它基本上只是自行執行,即使有那麼多的競爭! --- 順便說一句,如果您正在尋找一種快速且低維護成本的方式來啟動您的下一個副專案,請查看[Open SaaS](https://opensaas.sh/) !  它是一個完全免費、開源、功能豐富的 React + NodeJS SaaS 模板,包含 Stripe、OpenAI 應用程式範例、分析、管理儀表板和完整的文件! --- 好玩一點 ---- 沒有什麼比過於認真地對待這一切並僅僅因為你認為你應該這樣做而苦惱更糟糕的了。你是為自己做這件事,所以你應該享受這個過程。 嗯是的。尋找享受過程的方法! 在工作中享受樂趣的最佳方法之一就是**做自己感興趣的事情**。我的意思是,你*真的*有興趣。不要欺騙自己,認為你會喜歡為一個想法而努力,只是因為它可能會成功,或者因為你可能會用它給別人留下深刻的印象。您可能最終會很快失去從事該專案的靈感! 但如果你的問題是你根本沒有任何想法怎麼辦? 好吧,我的建議是要有趣並進行實驗。很多偉大的想法都是二階想法。我的意思是,它們是在處理其他事情後隨機產生的想法。 例如,我對[CoverLetterGPT](https://coverlettergpt.xyz)的想法就來自對[OpenAI API 的](https://openai.com)簡單實驗。我想知道它是如何運作的,並透過試用它,使用它來產生求職信和管理工作申請的想法似乎是一個不錯的想法,所以我就這麼做了! 在我看來,你對副業專案越有一種有趣的態度,你就會越喜歡為它們工作,這將帶來更專注的工作,甚至更多的想法。這是我在一些最好的獨立黑客(例如[Peter Levels)](https://twitter.com/levelsio)中看到的模式。我的意思是,看看令人印象深刻的 SaaS 應用程式清單!  永遠不要編碼 ------ 我的最後一項建議是: 休息一下! 是的,向 dev.to 和 Twitter 上的每個人展示你有多努力的衝動很強烈,但你的身心健康會受到影響。  給自己休息一下,做點其他事情,例如嗜好。還記得那些嗎? 當你休息一下時,你的潛意識可能會想出一些創造性的、鼓舞人心的想法,你可能也會感到驚訝🙂 您如何尋找建構靈感? ---------- 因此,我上面給出的提示絕不是完整的清單。將它們視為對話的開始者。 我今天的目標是展示我學到的一些東西,可能對其他人有幫助,所以如果您有其他提示、更好的建議,甚至不同意我的觀點,請在評論中告訴我們! --- 原文出處:https://dev.to/wasp/finding-the-inspiration-to-build-3p4n
長話短說 ==== 我收集了您應該了解的 React 庫,以建立許多不同類型的專案並成為 React 奇才🧙♂️。 其中每一項都是獨一無二的,並且都有自己的用例。 別忘了給他們加星號🌟 讓我們開始吧!  --- 1. [CopilotKit](https://github.com/CopilotKit/CopilotKit) - 建立應用內人工智慧聊天機器人、代理程式和文字區域 ------------------------------------------------------------------------------------  將 AI 功能整合到 React 中是很困難的,這就是 Copilot 的用武之地。一個簡單快速的解決方案,可將可投入生產的 Copilot 整合到任何產品中! 您可以使用兩個 React 元件將關鍵 AI 功能整合到 React 應用程式中。它們還提供內建(完全可自訂)Copilot 原生 UX 元件,例如`<CopilotKit />` 、 `<CopilotPopup />` 、 `<CopilotSidebar />` 、 `<CopilotTextarea />` 。 開始使用以下 npm 指令。 ``` npm i @copilotkit/react-core @copilotkit/react-ui ``` Copilot Portal 是 CopilotKit 提供的元件之一,CopilotKit 是一個應用程式內人工智慧聊天機器人,可查看目前應用狀態並在應用程式內採取操作。它透過插件與應用程式前端和後端以及第三方服務進行通訊。 這就是整合聊天機器人的方法。 `CopilotKit`必須包裝與 CopilotKit 互動的所有元件。建議您也開始使用`CopilotSidebar` (您可以稍後切換到不同的 UI 提供者)。 ``` "use client"; import { CopilotKit } from "@copilotkit/react-core"; import { CopilotSidebar } from "@copilotkit/react-ui"; import "@copilotkit/react-ui/styles.css"; export default function RootLayout({children}) { return ( <CopilotKit url="/path_to_copilotkit_endpoint/see_below"> <CopilotSidebar> {children} </CopilotSidebar> </CopilotKit> ); } ``` 您可以使用此[快速入門指南](https://docs.copilotkit.ai/getting-started/quickstart-backend)設定 Copilot 後端端點。 之後,您可以讓 Copilot 採取行動。您可以閱讀如何提供[外部上下文](https://docs.copilotkit.ai/getting-started/quickstart-chatbot#provide-context)。您可以使用`useMakeCopilotReadable`和`useMakeCopilotDocumentReadable`反應掛鉤來執行此操作。 ``` "use client"; import { useMakeCopilotActionable } from '@copilotkit/react-core'; // Let the copilot take action on behalf of the user. useMakeCopilotActionable( { name: "setEmployeesAsSelected", // no spaces allowed in the function name description: "Set the given employees as 'selected'", argumentAnnotations: [ { name: "employeeIds", type: "array", items: { type: "string" } description: "The IDs of employees to set as selected", required: true } ], implementation: async (employeeIds) => setEmployeesAsSelected(employeeIds), }, [] ); ``` 您可以閱讀[文件](https://docs.copilotkit.ai/getting-started/quickstart-textarea)並查看[演示影片](https://github.com/CopilotKit/CopilotKit?tab=readme-ov-file#demo)。 您可以輕鬆整合 Vercel AI SDK、OpenAI API、Langchain 和其他 LLM 供應商。您可以按照本[指南](https://docs.copilotkit.ai/getting-started/quickstart-chatbot)將聊天機器人整合到您的應用程式中。 基本概念是在幾分鐘內建立可用於基於 LLM 的應用程式的 AI 聊天機器人。 用例是巨大的,作為開發人員,我們絕對應該在下一個專案中嘗試使用 CopilotKit。 https://github.com/CopilotKit/CopilotKit Star CopilotKit ⭐️ --- 2. [xyflow](https://github.com/xyflow/xyflow) - 使用 React 建立基於節點的 UI。 --------------------------------------------------------------------  XYFlow 是一個功能強大的開源程式庫,用於使用 React 或 Svelte 建立基於節點的 UI。它是一個 monorepo,提供[React Flow](https://reactflow.dev)和[Svelte Flow](https://svelteflow.dev) 。讓我們更多地了解可以使用 React flow 做什麼。  您可以觀看此影片,在 60 秒內了解 React Flow。 https://www.youtube.com/watch?v=aUBWE41a900 有些功能在專業模式下可用,但免費層中的功能足以形成一個非常互動的流程。 React 流程以 TypeScript 編寫並使用 Cypress 進行測試。 開始使用以下 npm 指令。 ``` npm install reactflow ``` 以下介紹如何建立兩個節點( `Hello`和`World` ,並透過邊連接。節點具有預先定義的初始位置以防止重疊,並且我們還應用樣式來確保有足夠的空間來渲染圖形。 ``` import ReactFlow, { Controls, Background } from 'reactflow'; import 'reactflow/dist/style.css'; const edges = [{ id: '1-2', source: '1', target: '2' }]; const nodes = [ { id: '1', data: { label: 'Hello' }, position: { x: 0, y: 0 }, type: 'input', }, { id: '2', data: { label: 'World' }, position: { x: 100, y: 100 }, }, ]; function Flow() { return ( <div style={{ height: '100%' }}> <ReactFlow nodes={nodes} edges={edges}> <Background /> <Controls /> </ReactFlow> </div> ); } export default Flow; ``` 這就是它的樣子。您還可以新增標籤、更改類型並使其具有互動性。  您可以在 React Flow 的 API 參考中查看[完整的選項清單](https://reactflow.dev/api-reference/react-flow)以及元件、鉤子和實用程式。 最好的部分是您還可以加入[自訂節點](https://reactflow.dev/learn/customization/custom-nodes)。在您的自訂節點中,您可以渲染您想要的一切。您可以定義多個來源和目標句柄並呈現表單輸入或圖表。您可以查看此[codesandbox](https://codesandbox.io/p/sandbox/pensive-field-z4kv3w?file=%2FApp.js&utm_medium=sandpack)作為範例。 您可以閱讀[文件](https://reactflow.dev/learn)並查看 Create React App、Next.js 和 Remix 的[範例 React Flow 應用程式](https://github.com/xyflow/react-flow-example-apps)。 React Flow 附帶了幾個額外的[插件](https://reactflow.dev/learn/concepts/plugin-components)元件,可以幫助您使用 Background、Minimap、Controls、Panel、NodeToolbar 和 NodeResizer 元件製作更高級的應用程式。 例如,您可能已經注意到許多網站的背景中有圓點,增強了美觀性。要實現此模式,您可以簡單地使用 React Flow 中的後台元件。 ``` import { Background } from 'reactflow'; <Background color="#ccc" variant={'dots'} /> // this will be under React Flow component. Just an example. ```  如果您正在尋找一篇快速文章,我建議您查看 Webkid 的[React Flow - A Library for Rendering Interactive Graphs](https://webkid.io/blog/react-flow-node-based-graph-library/) 。 React Flow 由 Webkid 開發和維護。 它在 GitHub 上有超過 19k 顆星,並且在`v11.10.4`上顯示它們正在不斷改進,npm 套件每週下載量超過 40 萬次。您可以輕鬆使用的最佳專案之一。  https://github.com/xyflow/xyflow 星 xyflow ⭐️ --- 3. [Zod](https://github.com/colinhacks/zod) + [React Hook Form](https://github.com/react-hook-form) - 致命的驗證組合。 -------------------------------------------------------------------------------------------------------------- 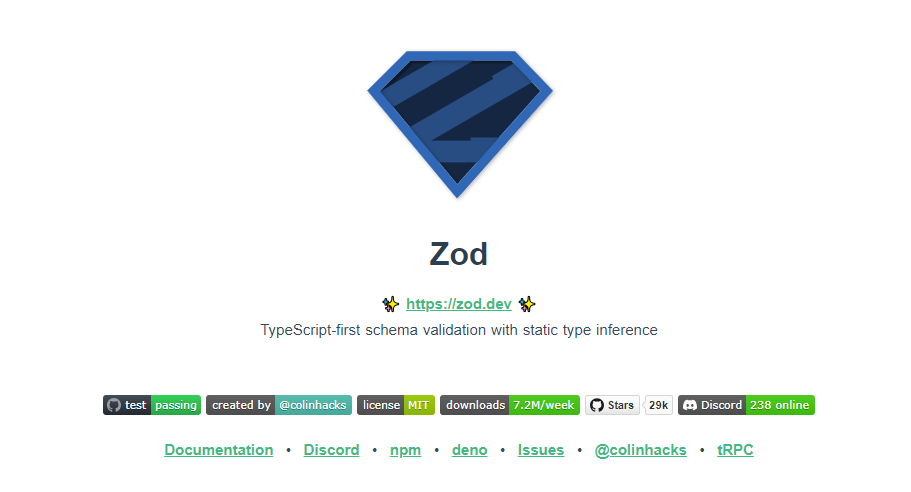 第一個問題是:為什麼我在同一個選項中包含 Zod 和 React Hook 表單?好吧,請閱讀它來找出答案。 Zod 的目標是透過最大限度地減少重複的類型聲明來對開發人員友好。使用 Zod,您聲明一次驗證器,Zod 將自動推斷靜態 TypeScript 類型。將更簡單的類型組合成複雜的資料結構很容易。 開始使用以下 npm 指令。 ``` npm install zod ``` 這是您在建立字串架構時自訂一些常見錯誤訊息的方法。 ``` const name = z.string({ required_error: "Name is required", invalid_type_error: "Name must be a string", }); ``` ``` // It does provide lots of options // validations z.string().min(5, { message: "Must be 5 or more characters long" }); z.string().max(5, { message: "Must be 5 or fewer characters long" }); z.string().length(5, { message: "Must be exactly 5 characters long" }); z.string().email({ message: "Invalid email address" }); z.string().url({ message: "Invalid url" }); z.string().emoji({ message: "Contains non-emoji characters" }); z.string().uuid({ message: "Invalid UUID" }); z.string().includes("tuna", { message: "Must include tuna" }); z.string().startsWith("https://", { message: "Must provide secure URL" }); z.string().endsWith(".com", { message: "Only .com domains allowed" }); z.string().datetime({ message: "Invalid datetime string! Must be UTC." }); z.string().ip({ message: "Invalid IP address" }); ``` 請閱讀[文件](https://zod.dev/)以了解有關 Zod 的更多資訊。 它適用於 Node.js 和所有現代瀏覽器。 現在,第二部分來了。 有很多可用的表單整合。  雖然 Zod 可以驗證物件,但如果沒有自訂邏輯,它不會影響您的用戶端和後端。 React-hook-form 是用於客戶端驗證的優秀專案。例如,它可以顯示輸入錯誤。  開始使用以下 npm 指令。 ``` npm install react-hook-form ``` 這就是如何使用`React Hook Form` 。 ``` import { useForm, SubmitHandler } from "react-hook-form" type Inputs = { example: string exampleRequired: string } export default function App() { const { register, handleSubmit, watch, formState: { errors }, } = useForm<Inputs>() const onSubmit: SubmitHandler<Inputs> = (data) => console.log(data) console.log(watch("example")) // watch input value by passing the name of it return ( /* "handleSubmit" will validate your inputs before invoking "onSubmit" */ <form onSubmit={handleSubmit(onSubmit)}> {/* register your input into the hook by invoking the "register" function */} <input defaultValue="test" {...register("example")} /> {/* include validation with required or other standard HTML validation rules */} <input {...register("exampleRequired", { required: true })} /> {/* errors will return when field validation fails */} {errors.exampleRequired && <span>This field is required</span>} <input type="submit" /> </form> ) } ``` 您甚至可以隔離重新渲染,從而提高整體效能。 您可以閱讀[文件](https://react-hook-form.com/get-started)。 兩者結合起來就是一個很好的組合。嘗試一下! 我透過 Shadcn 發現了它,它使用它作為表單元件的預設值。我自己在幾個專案中使用過它,效果非常好。它提供了很大的靈活性,這確實很有幫助。 https://github.com/colinhacks/zod Star Zod ⭐️ https://github.com/react-hook-form Star React Hook Form ⭐️ --- 4. [React DND](https://github.com/react-dnd/react-dnd) - 用於 React 的拖放。 ---------------------------------------------------------------------- 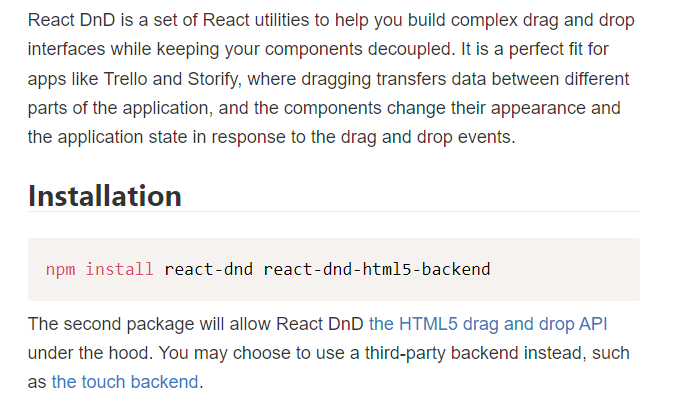 我還沒有完全實現拖放功能,而且我經常發現自己對選擇哪個選項感到困惑。我遇到的另一個選擇是[interactjs.io](https://interactjs.io/) ,根據我讀過的文件,它似乎非常有用。由於他們提供了詳細的範例,這非常容易。 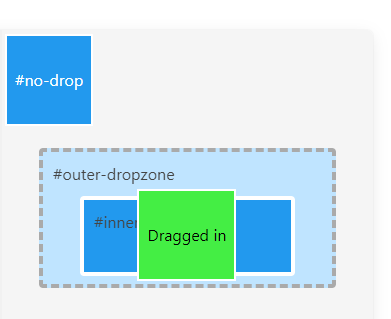 但我現在只介紹 React DND。 開始使用以下 npm 指令。 ``` npm install react-dnd react-dnd-html5-backend ``` 除非您正在編寫自訂後端,否則您可能想要使用 React DnD 隨附的 HTML5 後端。 這是安裝`react-dnd-html5-backend`方法。閱讀[文件](https://react-dnd.github.io/react-dnd/docs/backends/html5)。 這是起點。 ``` import { HTML5Backend } from 'react-dnd-html5-backend' import { DndProvider } from 'react-dnd' export default class YourApp { render() { return ( <DndProvider backend={HTML5Backend}> /* Your Drag-and-Drop Application */ </DndProvider> ) } } ``` 透過這種方式,您可以非常輕鬆地實現卡片的拖放操作。 ``` // Let's make <Card text='Write the docs' /> draggable! import React from 'react' import { useDrag } from 'react-dnd' import { ItemTypes } from './Constants' export default function Card({ isDragging, text }) { const [{ opacity }, dragRef] = useDrag( () => ({ type: ItemTypes.CARD, item: { text }, collect: (monitor) => ({ opacity: monitor.isDragging() ? 0.5 : 1 }) }), [] ) return ( <div ref={dragRef} style={{ opacity }}> {text} </div> ) } ``` 請注意,HTML5 後端不支援觸控事件。因此它不適用於平板電腦和行動裝置。您可以將`react-dnd-touch-backend`用於觸控裝置。閱讀[文件](https://react-dnd.github.io/react-dnd/docs/backends/touch)。 ``` import { TouchBackend } from 'react-dnd-touch-backend' import { DndProvider } from 'react-dnd' class YourApp { <DndProvider backend={TouchBackend} options={opts}> {/* Your application */} </DndProvider> } ``` 這個codesandbox規定了我們如何正確使用React DND。 https://codesandbox.io/embed/3y5nkyw381?view=Editor+%2B+Preview&module=%2Fsrc%2Findex.tsx&hidenavigation=1 你可以看看React DND的[例子](https://react-dnd.github.io/react-dnd/examples)。 它們甚至有一個乾淨的功能,您可以使用 Redux 檢查內部發生的情況。 您可以透過為提供者新增 debugModeprop 來啟用[Redux DevTools](https://github.com/reduxjs/redux-devtools) ,其值為 true。 ``` <DndProvider debugMode={true} backend={HTML5Backend}> ``` 它提供了多種元件選項,我需要親自測試一下。總的來說,這看起來相當不錯,特別是如果你剛開始的話。 React DND 已獲得`MIT`許可,並在 GitHub 上擁有超過 20k Stars,這使其具有令人難以置信的可信度。 https://github.com/react-dnd/react-dnd Star React DND ⭐️ --- 5. [Cypress](https://github.com/cypress-io/cypress) - 快速測試瀏覽器中執行的內容。 --------------------------------------------------------------------  近年來已經證明了測試的重要性,而 Jest 和 Cypress 等選項使其變得異常簡單。 但我們只會介紹 Cypress,因為它本身就很方便。 只需一張圖片就能證明 Cypress 值得付出努力。 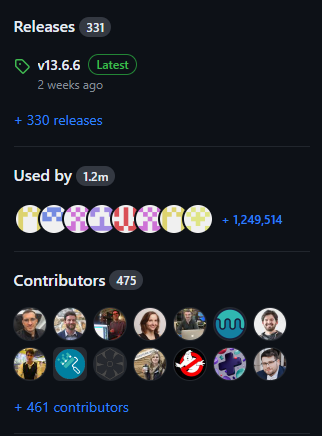 開始使用以下 npm 指令。 ``` npm install cypress -D ``` 如果您在專案中沒有使用 Node 或套件管理器,或者您想快速試用 Cypress,您始終可以[直接從 CDN 下載 Cypress](https://download.cypress.io/desktop) 。 一旦安裝並打開它。您必須使用`.cy.js`建立一個規範檔案。 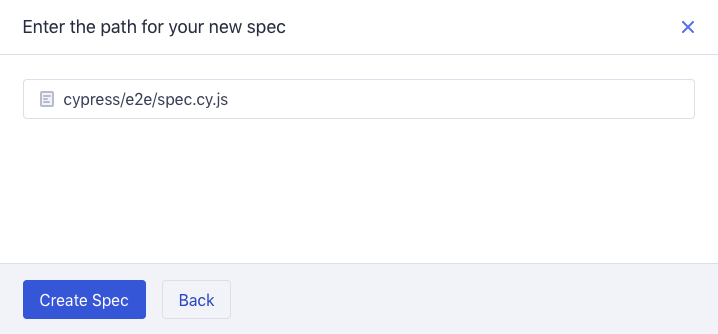 現在,您可以編寫並測試您的應用程式(範例程式碼)。 ``` describe('My First Test', () => { it('Does not do much!', () => { expect(true).to.equal(true) }) }) ``` Cypress 提供了多種選項,例如`cy.visit()`或`cy.contains()` 。由於我沒有廣泛使用 Cypress,因此您需要在其[文件](https://docs.cypress.io/guides/end-to-end-testing/writing-your-first-end-to-end-test)中進一步探索它。 如果它看起來很可怕,那麼請前往這個[為初學者解釋 Cypress 的](https://www.youtube.com/watch?v=u8vMu7viCm8&pp=ygUQY3lwcmVzcyB0dXRvcmlhbA%3D%3D)freeCodeCamp 教程。 Freecodecamp 影片確實是金礦 :D Cypress 在 GitHub 上擁有超過 45,000 顆星,並且在目前的 v13 版本中,它正在不斷改進。 https://github.com/cypress-io/cypress 星柏 ⭐️ --- [6.Refine](https://github.com/refinedev/refine) - 面向企業的開源 Retool。 ----------------------------------------------------------------- 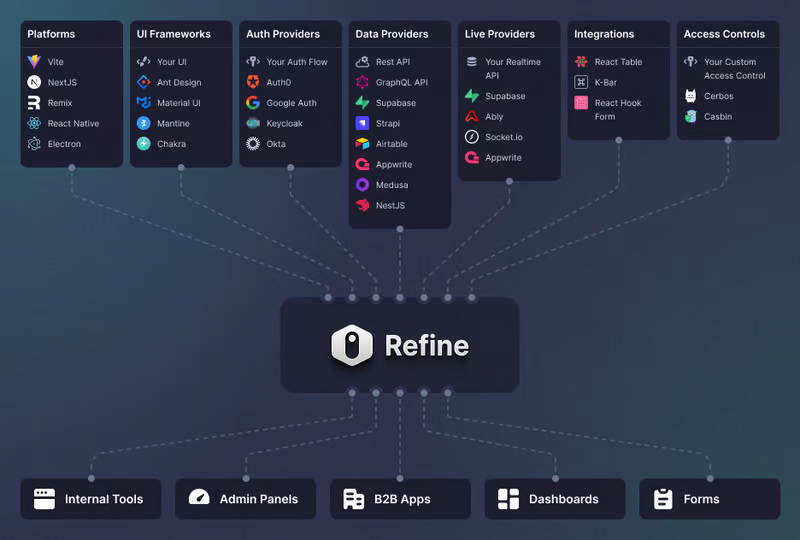 Refine 是一個元 React 框架,可以快速開發各種 Web 應用程式。 從內部工具到管理面板、B2B 應用程式和儀表板,它可作為建立任何類型的 CRUD 應用程式(例如 DevOps 儀表板、電子商務平台或 CRM 解決方案)的全面解決方案。 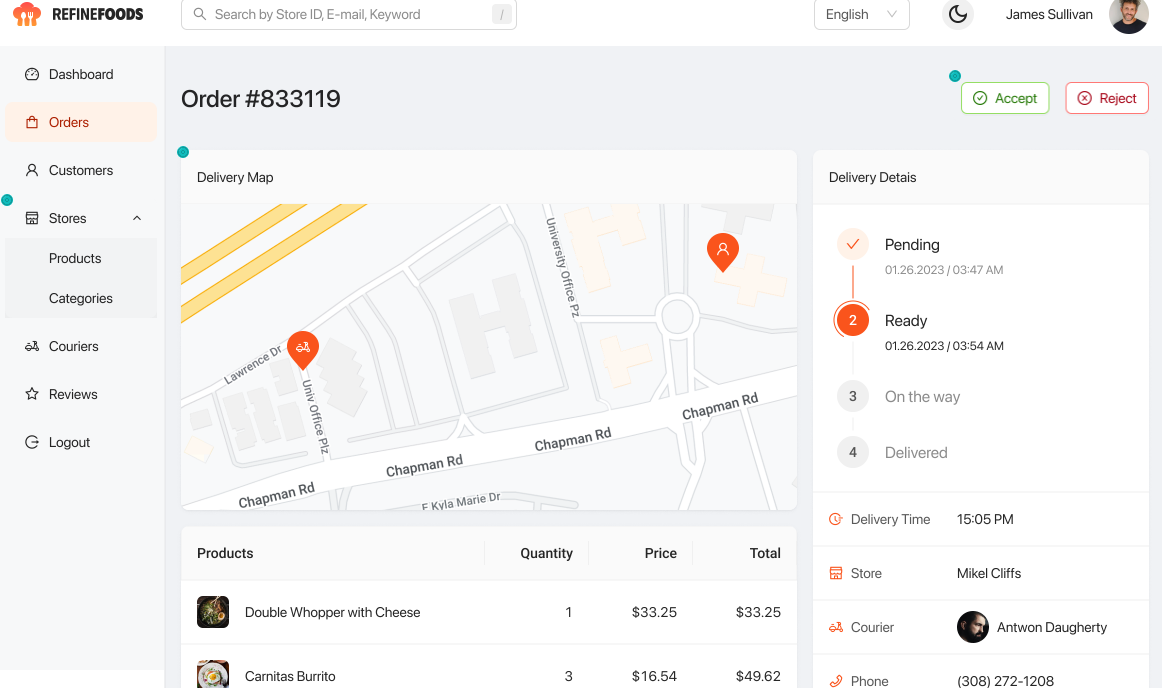 您可以在一分鐘內使用單一 CLI 命令進行設定。 它具有適用於 15 多個後端服務的連接器,包括 Hasura、Appwrite 等。 您可以查看可用的[整合清單](https://refine.dev/integrations/)。 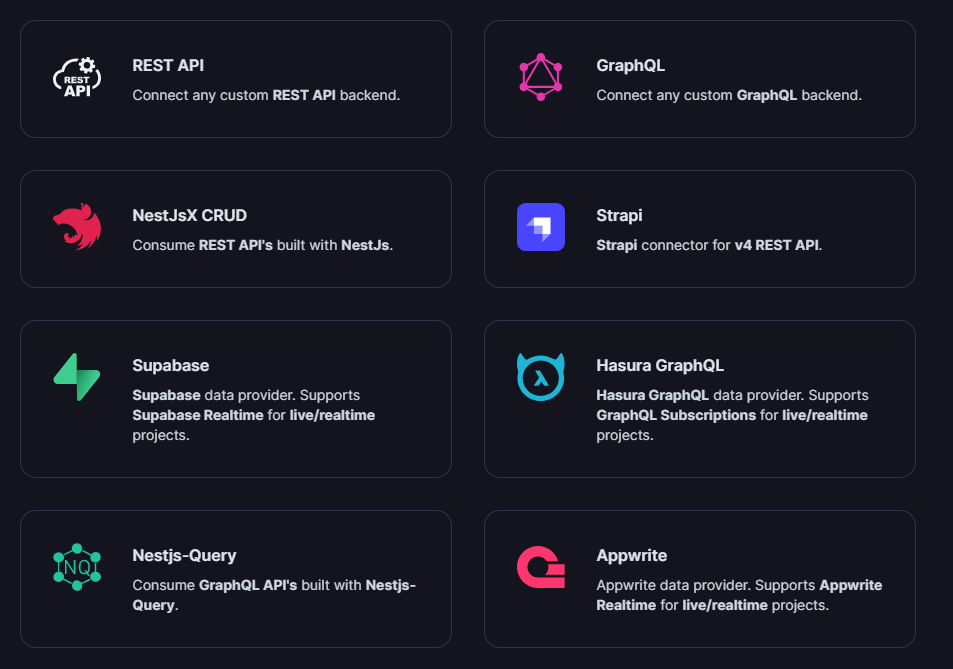 但最好的部分是,Refine `headless by design` ,從而提供無限的樣式和自訂選項。 由於該架構,您可以使用流行的 CSS 框架(如 TailwindCSS)或從頭開始建立樣式。 這是最好的部分,因為我們不希望最終受到與特定庫的兼容性的樣式限制,因為每個人都有自己的風格並使用不同的 UI。 開始使用以下 npm 指令。 ``` npm create refine-app@latest ``` 這就是使用 Refine 新增登入資訊的簡單方法。 ``` import { useLogin } from "@refinedev/core"; const { login } = useLogin(); ``` 使用 Refine 概述程式碼庫的結構。 ``` const App = () => ( <Refine dataProvider={dataProvider} resources={[ { name: "blog_posts", list: "/blog-posts", show: "/blog-posts/show/:id", create: "/blog-posts/create", edit: "/blog-posts/edit/:id", }, ]} > /* ... */ </Refine> ); ``` 您可以閱讀[文件](https://refine.dev/docs/)。 您可以看到一些使用 Refine 建立的範例應用程式: - [全功能管理面板](https://example.admin.refine.dev/) - [優化不同的用例場景](https://github.com/refinedev/refine/tree/master/examples)。 他們甚至提供模板,這就是為什麼這麼多用戶喜歡Refine。 你可以看到[模板](https://refine.dev/templates/)。 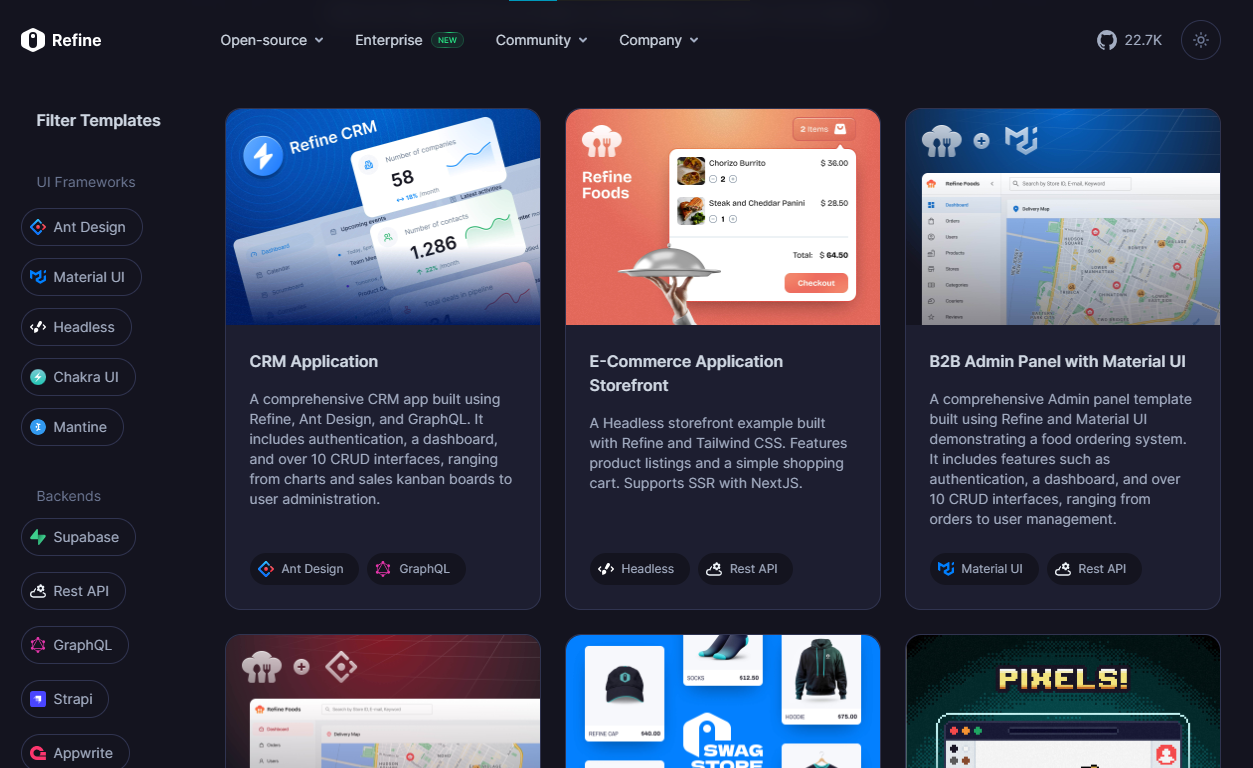 他們在 GitHub 上擁有大約 22k+ 顆星。 https://github.com/refinedev/refine 星際精煉 ⭐️ --- 7. [Tremor](https://github.com/tremorlabs/tremor) - React 元件來建立圖表和儀表板。 ----------------------------------------------------------------------  Tremor 提供了 20 多個開源 React 元件,用於建立基於 Tailwind CSS 的圖表和儀表板,使資料視覺化再次變得簡單。 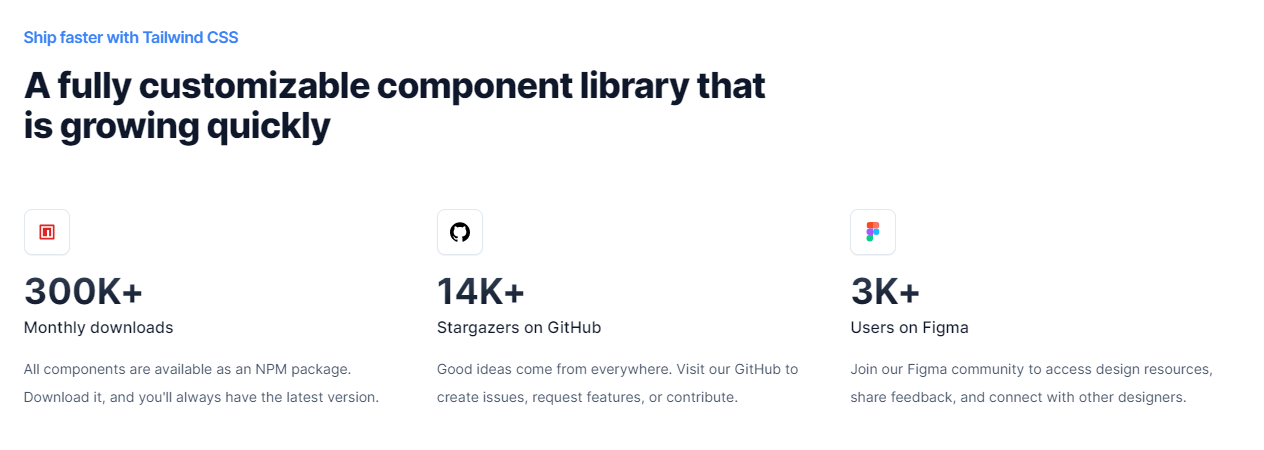 開始使用以下 npm 指令。 ``` npm i @tremor/react ``` 這就是您如何使用 Tremor 快速建立東西。 ``` import { Card, ProgressBar } from '@tremor/react'; export default function Example() { return ( <Card className="mx-auto max-w-md"> <h4 className="text-tremor-default text-tremor-content dark:text-dark-tremor-content"> Sales </h4> <p className="text-tremor-metric font-semibold text-tremor-content-strong dark:text-dark-tremor-content-strong"> $71,465 </p> <p className="mt-4 flex items-center justify-between text-tremor-default text-tremor-content dark:text-dark-tremor-content"> <span>32% of annual target</span> <span>$225,000</span> </p> <ProgressBar value={32} className="mt-2" /> </Card> ); } ``` 這就是基於此生成的內容。  您可以閱讀[文件](https://www.tremor.so/docs/getting-started/installation)。其間,他們在引擎蓋下使用混音圖標。 從我見過的各種元件來看,這是一個很好的起點。相信我! Tremor 還提供了一個[乾淨的 UI 工具包](https://www.figma.com/community/file/1233953507961010067)。多麼酷啊!  Tremor 在 GitHub 上擁有超過 14k 顆星,並有超過 280 個版本,這意味著它正在不斷改進。 https://github.com/tremorlabs/tremor 星震 ⭐️ --- 8. [Watermelon DB](https://github.com/Nozbe/WatermelonDB) - 用於 React 和 React Native 的反應式和非同步資料庫。 ------------------------------------------------------------------------------------------------ 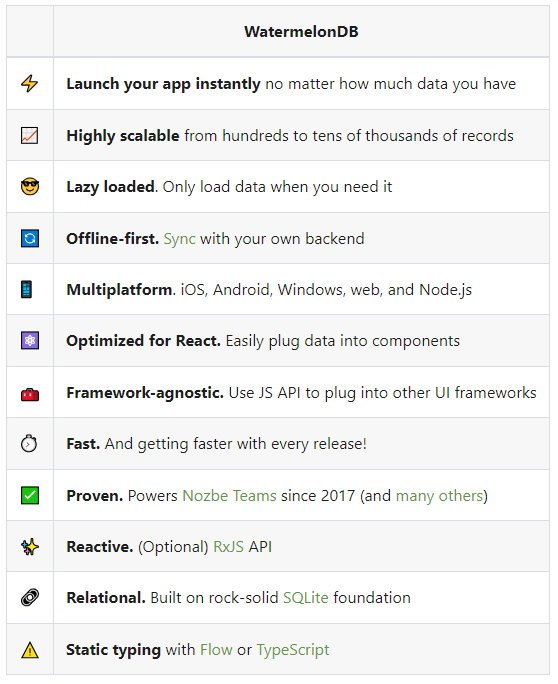 我不知道為什麼資料庫有這麼多選項;甚至很難全部數清。但如果我們使用 React,Watermelon DB 是一個不錯的選擇。即使在 4k+ 提交之後,它們仍然處於`v0.28`版本,這是一個相當大的問題。 Rocket.chat 使用 Watermelon DB,這給了他們巨大的可信度。 開始使用以下 npm 指令。 ``` npm install @nozbe/watermelondb ``` 您需要做的第一件事是建立模型和後續遷移(閱讀文件)。 ``` import { appSchema, tableSchema } from '@nozbe/watermelondb' export default appSchema({ version: 1, tables: [ // We'll add to tableSchemas here ] }) ``` 根據文件,使用 WatermelonDB 時,您正在處理模型和集合。然而,在 Watermelon 之下有一個底層資料庫(SQLite 或 LokiJS),它使用不同的語言:表格和欄位。這些一起稱為資料庫模式。 您可以閱讀有關[CRUD 操作的](https://watermelondb.dev/docs/CRUD)[文件](https://watermelondb.dev/docs/Installation)和更多內容。 https://github.com/Nozbe/WatermelonDB 明星 WatermelonDB ⭐️ --- 9. [Evergreen UI](https://github.com/segmentio/evergreen) - 按 Segment 劃分的 React UI 框架。 --------------------------------------------------------------------------------------  沒有 UI 框架的清單幾乎是不可能的。有許多受歡迎的選項,例如 Material、Ant Design、Next UI 等等。 但我們正在報道 Evergreen,它本身就非常好。 開始使用以下 npm 指令。 ``` $ npm install evergreen-ui ``` [Evergreen Segment 網站](https://evergreen.segment.com/foundations)上顯示了任何使用者介面的基礎以及詳細的選項。  它提供了很多元件,其中一些非常好,例如`Tag Input`或`File uploader` 。 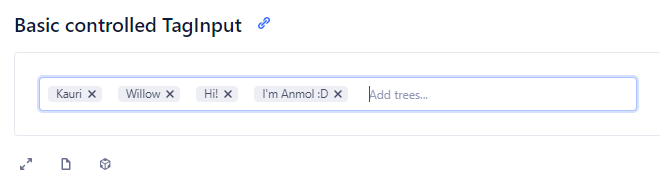 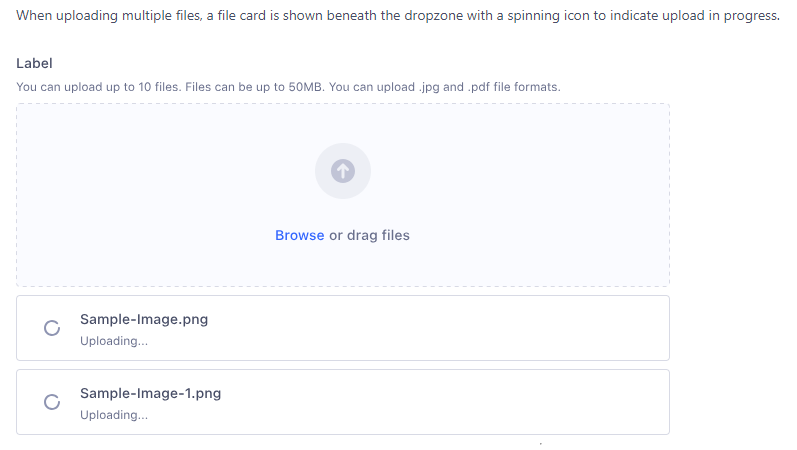 您可以看到 Evergreen UI 提供的所有[元件](https://evergreen.segment.com/components)。 https://github.com/segmentio/evergreen Star Evergreen UI ⭐️ --- 10. [React Spring](https://www.react-spring.dev/) - 流暢的動畫來提升 UI 和互動。 -------------------------------------------------------------------- 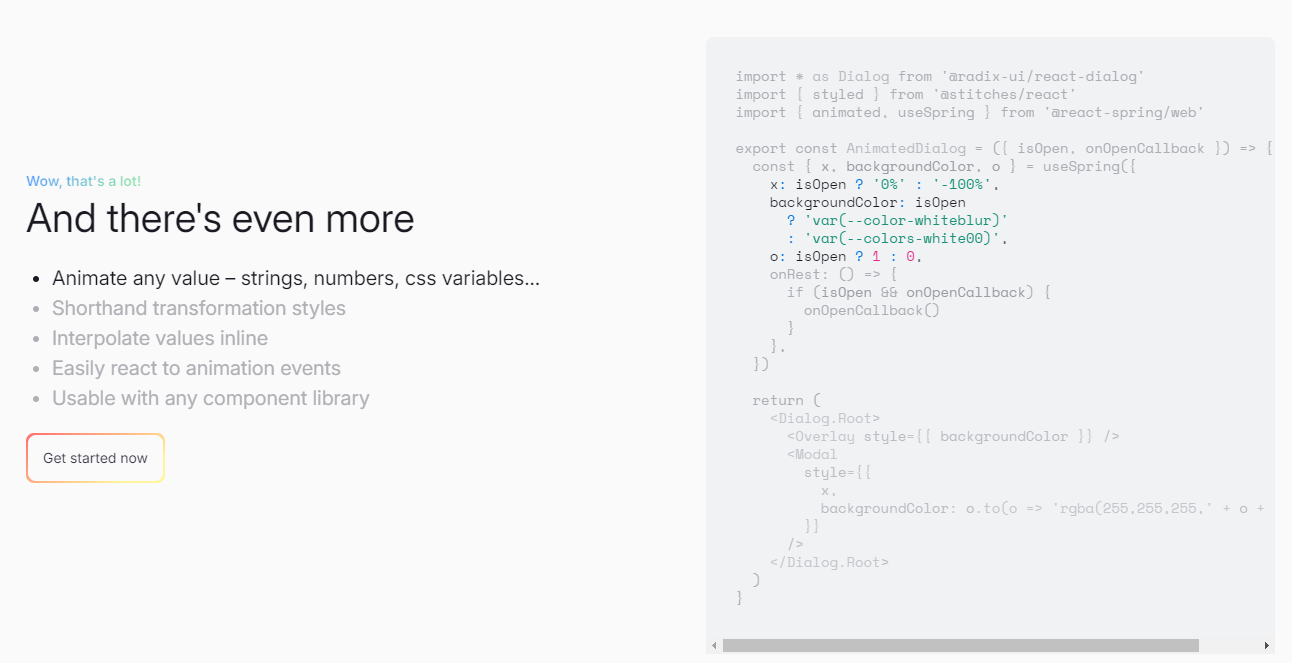 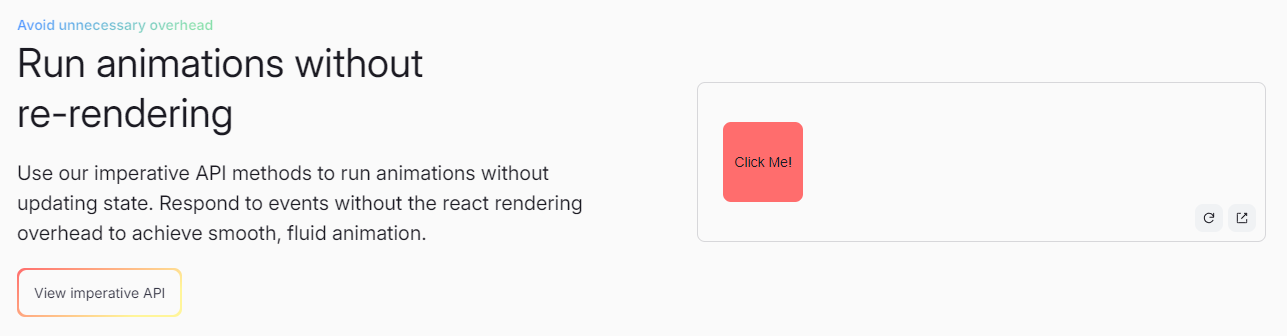 如果您喜歡 React-Motion 但感覺過渡不流暢,那是因為它專門使用 React 渲染。 如果你喜歡 Popmotion,但感覺自己的能力受到限制,那是因為它完全跳過了 React 渲染。 `react-spring`提供了兩種選擇,試試看! 開始使用以下 npm 指令。 ``` npm i @react-spring/web ``` 這就是導入高階元件來包裝動畫的方法。 ``` import { animated } from '@react-spring/web' // use it. export default function MyComponent() { return ( <animated.div style={{ width: 80, height: 80, background: '#ff6d6d', borderRadius: 8, }} /> ) } ``` 由於以下程式碼和框,我決定嘗試 React Spring。令人驚訝的是,我們可以使用 React Spring 做很多事情。 https://codesandbox.io/embed/mdovb?view=Editor+%2B+Preview&module=%2Fsrc%2Findex.tsx&hidenavigation=1 您可以閱讀[文件](https://www.react-spring.dev/docs/getting-started)。 他們還提供了很多您可以學習的[範例](https://www.react-spring.dev/examples)。  它提供了大量的選項,例如`useScroll` ,它允許您建立滾動連結動畫。 例如,這個codesandbox告訴了`useScroll`的用法。 https://codesandbox.io/embed/b07dmz?view=Editor+%2B+Preview&module=%2Fsrc%2Findex.tsx&hidenavigation=1 React Spring 在 GitHub 上有大約 27k+ Stars。 https://github.com/pmndrs/react-spring Star React Spring ⭐️ --- 11. [React Tweet](https://github.com/vercel/react-tweet) - 將推文嵌入到你的 React 應用程式中。 -------------------------------------------------------------------------------- 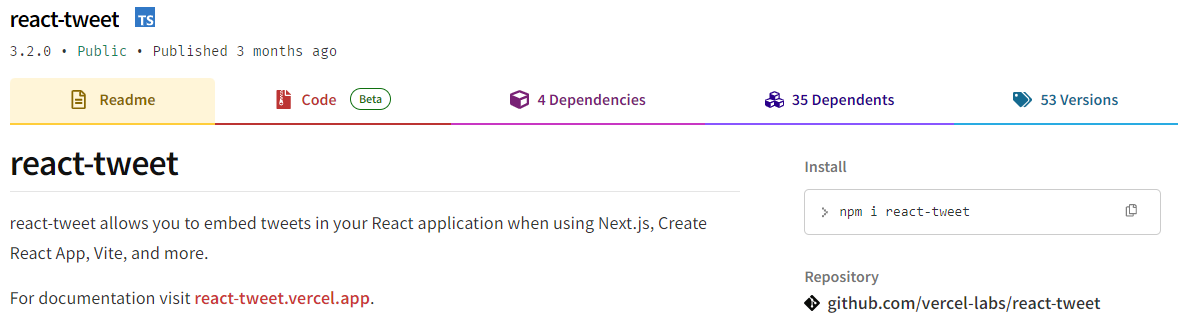 `React Tweet`可讓您在使用 Next.js、Create React App、Vite 等時將推文嵌入到 React 應用程式中。 該函式庫不需要使用 Twitter API。推文可以靜態呈現,從而無需包含 iframe 和額外的客戶端 JavaScript。 它是 Vercel 的開源專案。 開始使用以下 npm 指令。 ``` npm i react-tweet ``` 為了顯示推文,我們需要從 Twitter 的 API 請求資料。透過此 API 進行速率限制具有挑戰性,但如果您僅依賴我們提供的 SWR 端點 ( `react-tweet.vercel.app/api/tweet/:id` ),這是可能的,因為伺服器的IP 位址向Twitter 發出了許多請求API。這也適用於 RSC,其中 API 端點不是必需的,但伺服器仍然從相同 IP 位址發送請求。 為了避免 API 限制,您可以使用 Redis 或 Vercel KV 等資料庫快取推文。例如,您可以使用 Vercel KV。 ``` import { Suspense } from 'react' import { TweetSkeleton, EmbeddedTweet, TweetNotFound } from 'react-tweet' import { fetchTweet, Tweet } from 'react-tweet/api' import { kv } from '@vercel/kv' async function getTweet( id: string, fetchOptions?: RequestInit ): Promise<Tweet | undefined> { try { const { data, tombstone, notFound } = await fetchTweet(id, fetchOptions) if (data) { await kv.set(`tweet:${id}`, data) return data } else if (tombstone || notFound) { // remove the tweet from the cache if it has been made private by the author (tombstone) // or if it no longer exists. await kv.del(`tweet:${id}`) } } catch (error) { console.error('fetching the tweet failed with:', error) } const cachedTweet = await kv.get<Tweet>(`tweet:${id}`) return cachedTweet ?? undefined } const TweetPage = async ({ id }: { id: string }) => { try { const tweet = await getTweet(id) return tweet ? <EmbeddedTweet tweet={tweet} /> : <TweetNotFound /> } catch (error) { console.error(error) return <TweetNotFound error={error} /> } } const Page = ({ params }: { params: { tweet: string } }) => ( <Suspense fallback={<TweetSkeleton />}> <TweetPage id={params.tweet} /> </Suspense> ) export default Page ``` 您可以直接使用它,方法非常簡單。 ``` <div className="dark"> <Tweet id="1629307668568633344" /> </div> ``` 如果您不喜歡使用 Twitter 主題,您也可以使用多個選項建立自己的[自訂主題](https://react-tweet.vercel.app/custom-theme)。 例如,您可以建立自己的推文元件,但沒有回覆按鈕,如下所示: ``` import type { Tweet } from 'react-tweet/api' import { type TwitterComponents, TweetContainer, TweetHeader, TweetInReplyTo, TweetBody, TweetMedia, TweetInfo, TweetActions, QuotedTweet, enrichTweet, } from 'react-tweet' type Props = { tweet: Tweet components?: TwitterComponents } export const MyTweet = ({ tweet: t, components }: Props) => { const tweet = enrichTweet(t) return ( <TweetContainer> <TweetHeader tweet={tweet} components={components} /> {tweet.in_reply_to_status_id_str && <TweetInReplyTo tweet={tweet} />} <TweetBody tweet={tweet} /> {tweet.mediaDetails?.length ? ( <TweetMedia tweet={tweet} components={components} /> ) : null} {tweet.quoted_tweet && <QuotedTweet tweet={tweet.quoted_tweet} />} <TweetInfo tweet={tweet} /> <TweetActions tweet={tweet} /> {/* We're not including the `TweetReplies` component that adds the reply button */} </TweetContainer> ) } ``` 您可以閱讀[文件](https://react-tweet.vercel.app/#installation)。 您可以查看[React Tweet 的演示,](https://react-tweet-next.vercel.app/light/1761133168772489698)以了解它如何在頁面上呈現。 它們已發布`v3.2`版本,這表明它們正在不斷改進,並且[每週下載量超過 46k+](https://www.npmjs.com/package/react-tweet) 。 https://github.com/vercel/react-tweet Star React 推文 ⭐️ --- 12. [React 360](https://github.com/facebookarchive/react-360) - 使用 React 建立令人驚嘆的 360 度和 VR 內容。 ----------------------------------------------------------------------------------------------  儘管 Facebook 已將其存檔,但許多開發人員仍然發現它足夠有用,因此繼續使用。 React 360 是一個函式庫,它利用大量 React Native 功能來建立在 Web 瀏覽器中執行的虛擬實境應用程式。 它使用 Three.js 進行渲染,並作為 npm 套件提供。透過將 WebGL 和 WebVR 等現代 API 與 React 的聲明性功能結合,React 360 有助於簡化建立跨平台 VR 體驗的過程。 開始使用以下 npm 指令。 ``` npm install -g react-360-cli ``` 涉及的事情有很多,但您可以使用 VrButton 加入重要的互動功能到您的 React VR 應用程式。 ``` import { AppRegistry, StyleSheet, Text, View, VrButton } from 'react-360'; state = { count: 0 }; _incrementCount = () => { this.setState({ count: this.state.count + 1 }) } <View style={styles.panel}> <VrButton onClick={this._incrementCount} style={styles.greetingBox}> <Text style={styles.greeting}> {`You have visited Simmes ${this.state.count} times`} </Text> </VrButton> </View> ``` 除了許多令人驚奇的東西之外,您還可以加入聲音。請參閱[使用 React 360 的 React Resources](https://reactresources.com/topics/react-360)範例。 您也可以閱讀 Log Rocket 撰寫的關於[使用 React 360 建立 VR 應用](https://blog.logrocket.com/building-a-vr-app-with-react-360/)程式的部落格。 這個codesandbox代表了我們可以使用React 360做什麼的一個常見範例。 https://codesandbox.io/embed/2bye27?view=Editor+%2B+Preview&module=%2Fsrc%2Findex.js&hidenavigation=1 https://github.com/facebookarchive/react-360 Star React 360 ⭐️ --- 13. [React Advanced Cropper](https://github.com/advanced-cropper/react-advanced-cropper) - 建立適合您網站的裁剪器。 ------------------------------------------------------------------------------------------------------- 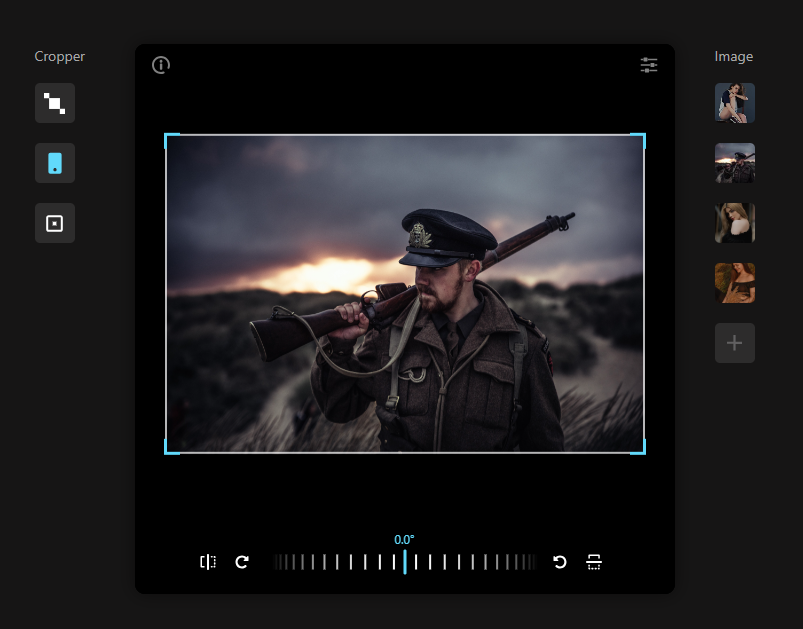  React Advanced Cropper 是一個高級庫,可讓您建立適合任何網站設計的裁剪器。這意味著您不僅可以更改裁剪器的外觀,還可以自訂其行為。 它們仍處於測試版本,這意味著 API 可能會在未來版本中發生變化。 簡單的用例是設計軟體和裁剪圖像表面以獲得進一步的見解。 他們有很多選擇,因此值得。 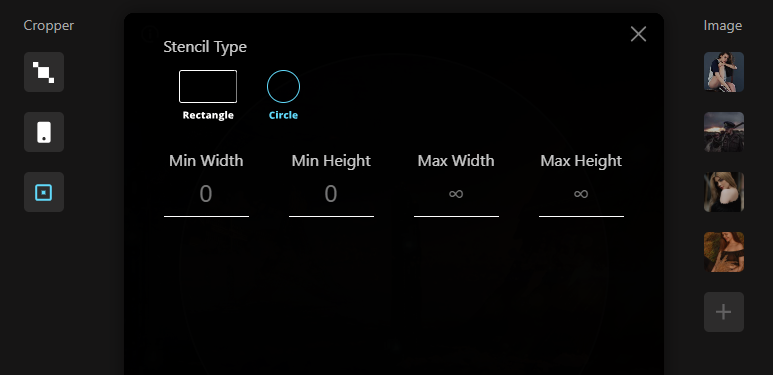  開始使用以下 npm 指令。 ``` npm install --save react-advanced-cropper ``` 您可以這樣使用它。 ``` import React, { useState } from 'react'; import { CropperRef, Cropper } from 'react-advanced-cropper'; import 'react-advanced-cropper/dist/style.css' export const GettingStartedExample = () => { const [image, setImage] = useState( 'https://images.unsplash.com/photo-1599140849279-1014532882fe?ixlib=rb-1.2.1&ixid=eyJhcHBfaWQiOjEyMDd9&auto=format&fit=crop&w=1300&q=80', ); const onChange = (cropper: CropperRef) => { console.log(cropper.getCoordinates(), cropper.getCanvas()); }; return ( <Cropper src={image} onChange={onChange} className={'cropper'} /> ) }; ``` 您可以閱讀[文件](https://advanced-cropper.github.io/react-advanced-cropper/docs/intro),它們提供了[20 多個自訂選項](https://github.com/advanced-cropper/react-advanced-cropper?tab=readme-ov-file#cropper)。 他們主要提供三種類型的[裁剪器選項](https://advanced-cropper.github.io/react-advanced-cropper/docs/guides/cropper-types/):固定、經典和混合以及範例和程式碼。 您可以使用 React Advanced Cropper 製作一些令人興奮的東西來向世界展示:) https://github.com/advanced-cropper/react-advanced-cropper Star React 進階裁剪器 ⭐️ --- 14. [Mobx](https://github.com/mobxjs/mobx) - 簡單、可擴展的狀態管理。 --------------------------------------------------------- 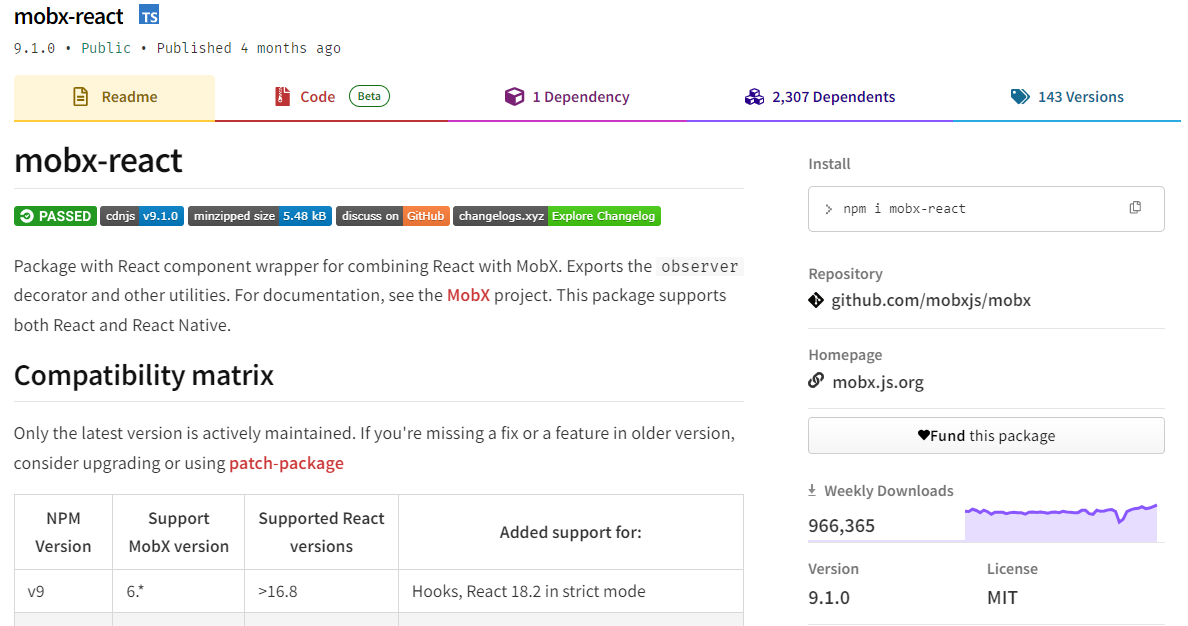 MobX 是一個經過驗證的基於訊號的函式庫,可透過函數反應式程式設計簡化和擴展狀態管理。它提供了靈活性,使您能夠獨立於任何 UI 框架來管理應用程式狀態。 這種方法會產生解耦、可移植且易於測試的程式碼。 以下是使用 MobX 的任何應用程式中處理事件的方式。 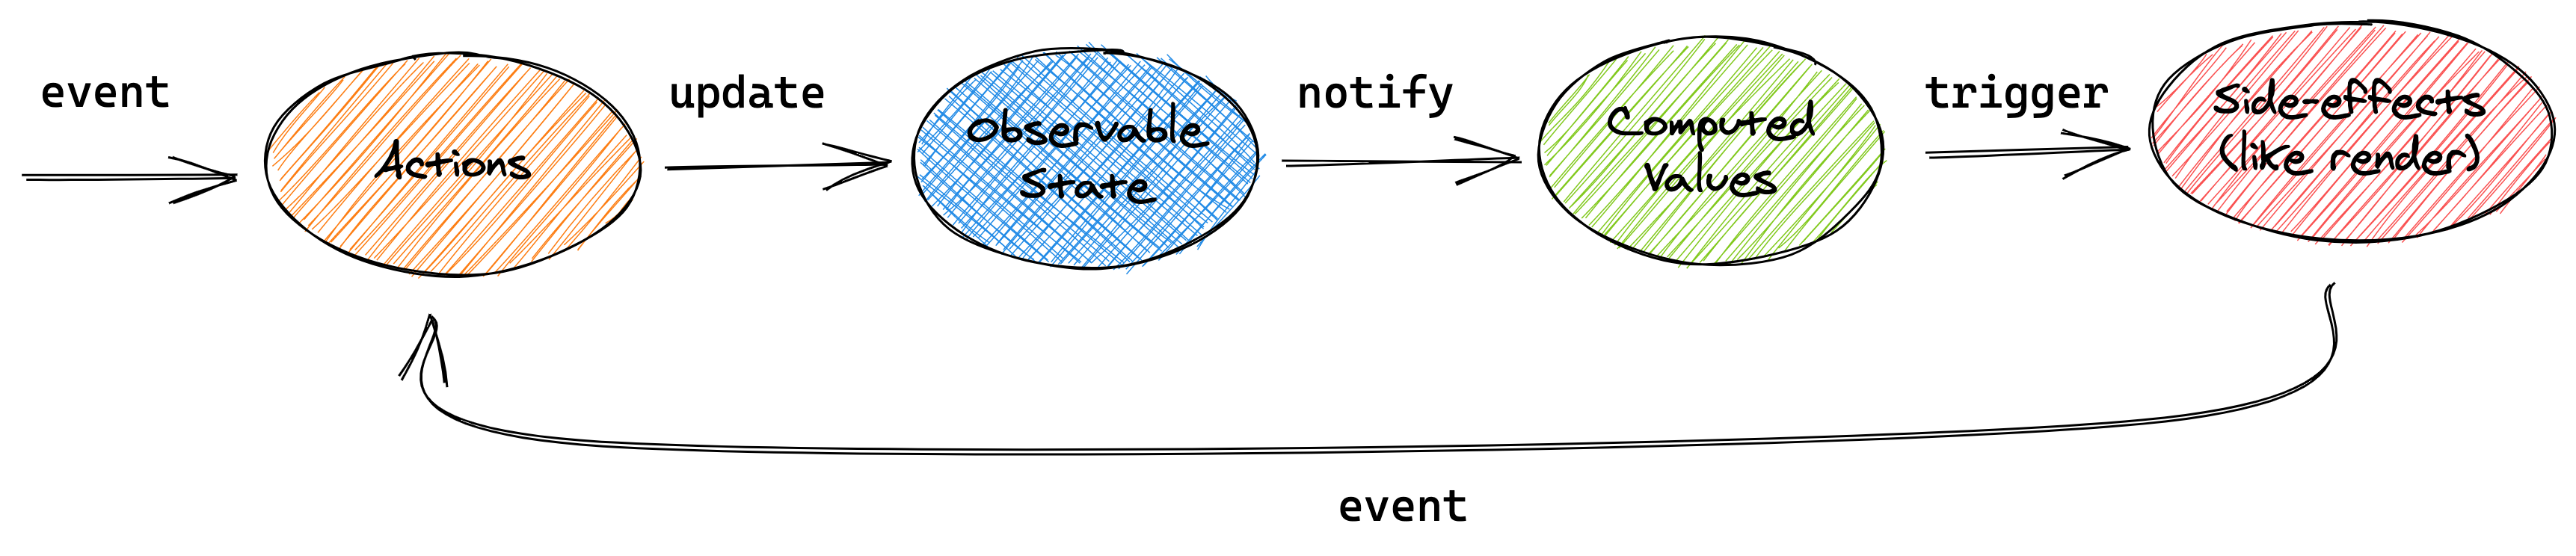 圖片來自文件 開始使用以下 npm 指令。 ``` npm install mobx-react --save // CDN is also available ``` 這就是它的樣子。 ``` import { observer } from "mobx-react" // ---- ES6 syntax ---- const TodoView = observer( class TodoView extends React.Component { render() { return <div>{this.props.todo.title}</div> } } ) // ---- ESNext syntax with decorator syntax enabled ---- @observer class TodoView extends React.Component { render() { return <div>{this.props.todo.title}</div> } } // ---- or just use function components: ---- const TodoView = observer(({ todo }) => <div>{todo.title}</div>) ``` 您可以使用 props、全域變數或使用 React Context 在觀察者中使用外部狀態。 您可以閱讀[有關 React Integration](https://mobx.js.org/react-integration.html)和[npm docs](https://www.npmjs.com/package/mobx-react#api-documentation)的文件。 您也可以閱讀[MobX 和 React 的 10 分鐘互動介紹](https://mobx.js.org/getting-started)。 MobX 在 GitHub 上擁有超過 27k 顆星,並在 GitHub 上被超過 140K 開發者使用。 https://github.com/mobxjs/mobx 明星 Mobx ⭐️ --- 15. [React Virtualized](https://github.com/bvaughn/react-virtualized) - 渲染大型清單和表格資料。 ------------------------------------------------------------------------------------  開始使用以下 npm 指令。 ``` npm install react-virtualized --save ``` 以下是如何在網格中使用 ColumnSizer 元件。探索演示(文件)以詳細了解可用選項。 ``` import React from 'react'; import ReactDOM from 'react-dom'; import {ColumnSizer, Grid} from 'react-virtualized'; import 'react-virtualized/styles.css'; // only needs to be imported once // numColumns, numRows, someCalculatedHeight, and someCalculatedWidth determined here... // Render your list ReactDOM.render( <ColumnSizer columnMaxWidth={100} columnMinWidth={50} columnCount={numColumns} width={someCalculatedWidth}> {({adjustedWidth, getColumnWidth, registerChild}) => ( <Grid ref={registerChild} columnWidth={getColumnWidth} columnCount={numColumns} height={someCalculatedHeight} cellRenderer={someCellRenderer} rowHeight={50} rowCount={numRows} width={adjustedWidth} /> )} </ColumnSizer>, document.getElementById('example'), ); ``` 您可以閱讀[文件](https://github.com/bvaughn/react-virtualized/tree/master/docs#documentation)和[演示](https://bvaughn.github.io/react-virtualized/#/components/List)。 他們提供了 React-window 作為輕量級的替代方案,但這個在發布和明星方面更受歡迎,所以我介紹了這個選項。您可以閱讀哪個選項更適合您: [React-Window 與 React-Virtualized 有何不同?](https://github.com/bvaughn/react-window?tab=readme-ov-file#how-is-react-window-different-from-react-virtualized) 。 它被超過 85,000 名開發人員使用,並在 GitHub 上擁有超過 25,000 顆星。它還擁有令人印象深刻的[170 萬+ 每週下載量](https://www.npmjs.com/package/react-virtualized)。 https://github.com/bvaughn/react-virtualized Star React 虛擬化 ⭐️ --- 16.React [Google Analytics](https://github.com/react-ga/react-ga) - React Google Analytics 模組。 ----------------------------------------------------------------------------------------------  這是一個 JavaScript 模組,可用於在使用 React 作為前端程式碼庫的網站或應用程式中包含 Google Analytics 追蹤程式碼。 該模組對我們如何在前端程式碼中進行追蹤有一定的看法。我們的 API 比核心 Google Analytics 庫稍微詳細一些,以使程式碼更易於閱讀。 開始使用以下 npm 指令。 ``` npm install react-ga --save ``` 您可以這樣使用它。 ``` import ReactGA from 'react-ga'; ReactGA.initialize('UA-000000-01'); ReactGA.pageview(window.location.pathname + window.location.search); <!-- The core React library --> <script src="https://unpkg.com/[email protected]/dist/react.min.js"></script> <!-- The ReactDOM Library --> <script src="https://unpkg.com/[email protected]/dist/react-dom.min.js"></script> <!-- ReactGA library --> <script src="/path/to/bower_components/react-ga/dist/react-ga.min.js"></script> <script> ReactGA.initialize('UA-000000-01', { debug: true }); </script> ``` 執行`npm install` `npm start`並前往`port 8000 on localhost`後,您可以閱讀[文件](https://github.com/react-ga/react-ga?tab=readme-ov-file#installation)並查看[演示](https://github.com/react-ga/react-ga/tree/master/demo)。 它每週的下載量超過 35 萬次,在 GitHub 上擁有超過 5,000 顆星(已存檔)。 https://github.com/react-ga/react-ga Star React Google Analytics ⭐️ --- 17.react [-i18next](https://github.com/i18next/react-i18next) - React 的國際化做得很好。 -------------------------------------------------------------------------------  無需更改 webpack 配置或加入額外的 babel 轉譯器。 開始使用以下 npm 指令。 ``` npm i react-i18next ``` 我們來比較一下程式碼結構。 > 在使用react-i18next之前。 ``` ... <div>Just simple content</div> <div> Hello <strong title="this is your name">{name}</strong>, you have {count} unread message(s). <Link to="/msgs">Go to messages</Link>. </div> ... ``` > 使用react-i18next後。 ``` ... <div>{t('simpleContent')}</div> <Trans i18nKey="userMessagesUnread" count={count}> Hello <strong title={t('nameTitle')}>{{name}}</strong>, you have {{count}} unread message. <Link to="/msgs">Go to messages</Link>. </Trans> ... ``` 您可以閱讀[文件](https://react.i18next.com/)並前往[Codesandbox 的互動式遊樂場](https://codesandbox.io/s/1zxox032q)。 該工具已被超過 182,000 名開發人員使用,在 GitHub 上擁有超過 8,000 顆星。軟體包中令人印象深刻的 3400k+ 下載量進一步鞏固了它的可信度,使其成為您下一個 React 專案的絕佳選擇。 您也可以閱讀 Locize 關於[React Localization - Internationalize with i18next](https://locize.com/blog/react-i18next/)的部落格。 https://github.com/i18next/react-i18next 明星react-i18next ⭐️ --- 哇!如此長的有用專案清單。 我知道您有更多想法,分享它們,讓我們一起建造:D 現在就這些了! 在開展新專案時,開發人員經驗至關重要,這就是為什麼有些專案擁有龐大的社區,而有些則沒有。 React 社群非常龐大,所以成為這些社群的一部分,並使用這些開源專案將您的專案提升到一個新的水平。 祝你有美好的一天!直到下一次。 在 GitHub 上關注我。 https://github.com/Anmol-Baranwal 請關注 CopilotKit 以了解更多此類內容。 https://dev.to/copilotkit --- 原文出處:https://dev.to/copilotkit/libraries-you-should-know-if-you-build-with-react-1807
長話短說 ---- [Devin](https://www.youtube.com/watch?v=fjHtjT7GO1c) ,這位自稱「第一個」完全自主的軟體工程師剛剛出現,並引起了很多關注。 它尚未公開,但透過幾個開源工具,您現在可以獲得類似的 Web 開發體驗,而且成本可能只是一小部分。 {% 嵌入 https://www.youtube.com/watch?v=DXunbNBpgZg %} 在其 CLI 中使用[Wasp 的 AI 功能](https://wasp.sh),您可以透過簡單的提示產生全端 Web 應用程式程式碼庫。然後,在[Aider](https://aider.chat)的幫助下透過加入功能和除錯來迭代它。 在這兩個人工智慧代理的幫助下,您可以增強全端應用程式的開發,而無需編寫一行程式碼(如果您不想)。 請繼續閱讀有關如何開始的詳細說明! ---  順便說一句,Wasp 是建立全端 Web 應用程式的最快方法,而且它也恰好內建了 AI 生成 - 而且它是免費和開源的! 您可以透過[在 GitHub 上為我們的儲存庫加註星標](https://www.github.com/wasp-lang/wasp)來支持我們。它幫助我們建立更多東西並創造更多像這樣很酷的內容🙏  {% cta https://www.github.com/wasp-lang/wasp %} 連 Ron 也會在 GitHub 上為 Wasp 加註星標 🤩 {% endcta %} --- 德文到底是誰? ------- 您可能已經看到和聽過圍繞 Devin 的炒作,他自稱是「第一個」完全自主的軟體工程師。 如果沒有,請觀看下面的宣傳影片: {% 嵌入 https://www.youtube.com/watch?v=fjHtjT7GO1c %} 儘管 Devin 絕對不是同類中的第一個人工智慧編碼助手,但它的推出仍然引起了許多人的注意。簡而言之,這就是 Devin 所做的: - 接受提示 - 制定逐步計劃 - 在具有程式碼編輯器、終端、瀏覽器和聊天介面的時尚 UI 中展示其工作 - 能夠迭代現有的程式碼庫 儘管有其他類似的人工智慧編碼代理,其中一些像 GPT-Pilot 是開源的,但 Devin 使用內建所有必要工具的流暢 UI 使其脫穎而出。此外,它能夠迭代現有程式碼庫,這使其與大多數類似工具(Aider 除外)區分開來。 那麼,德文真的那麼令人印象深刻嗎? 是和不是。正如著名 AI YouTuber [Matthew Berman](https://www.youtube.com/@matthew_berman)在他關於 Devin 的影片中指出的那樣,Devin 最令人印象深刻的事情可能是他們的發布的成功。  但伯曼也指出了一些與他們的行銷主張不一致的地方: 1. Devin 絕對不是同類中的第一個。 [Mage](https://useMage.ai) 、 [Aider](https://aider.chat)和[GPT-Pilot](https://github.com/Pythagora-io/gpt-pilot)等類似工具已經存在。 2. 他們對效能基準的比較(如上圖所示)並不能真正被認真對待,因為Devin 是一個可以迭代和執行多個任務的代理,而它所比較的 LLM,如GPT-4,只是「零樣本」 (即他們嘗試一次才能得到正確的答案)。為了公平比較,Devin 應該與其他代理人進行比較,例如 GPT-Pilot、MetaGPT、Mage 等。 另外,Devin 實際上是建立在 OpenAI 的 GPT-4 API 之上的。所以,是的,他們在其之上建置的一些工具非常令人印象深刻,並且將加快編碼工作流程,但底層模型與像您和我這樣的開發人員可以存取的東西完全相同。 這意味著,透過結合幾個可用的開源工具,您現在可以獲得與 Devin 非常相似的結果,而無需等待早期預覽存取,並且成本可能只是其一小部分。 現在就讓我們來看看吧! Wasp AI x Aider — 全端 Web 應用程式的開源「Devin」替代品 ------------------------------------------ 幾個月前,我們發布了[Mage](https://usemage.ai) ( **Magic** **App** **Generator** ),這是一個實驗平台,用於透過簡單的提示生成全端 Web 應用程式。自發布以來,Mage 已被用來產生超過 40k 個應用程式!  Mage 使用[Wasp(一個全端 React、Node 和 Prisma 框架)](https://wasp.sh)來產生比大多數編碼助理更好的全端應用程式。到底是為什麼呢?這是因為 Wasp 使用聲明性設定檔來定義應用程式的功能。 這個設定檔為Wasp 的編譯器提供了將客戶端和伺服器程式碼「黏合」在一起所需的指令,並處理一堆樣板程式碼,因此您和AI 都不必處理諸如身份驗證、路由、端點、伺服器之類的編碼配置等 ``` // wasp config file app TodoApp { wasp: { version: "^0.13.0" }, auth: { userEntity: User, methods: { usernameAndPassword: {} }, } } entity User {=psl id Int @id @default(autoincrement()) tasks Task[] psl=} // rest of the config file... ``` 查看上面的範例,了解如何使用 Wasp 編寫全端 Auth。很容易,對吧?現在想像一下,對於 Mage 或任何其他人工智慧編碼助理來說,編寫 Wasp 程式碼是多麼容易。 另外,由於 Wasp 設定檔的結構已經類似於一組指令,因此它允許 Mage 以與 Devin 類似的方式建立計劃。 這就是 Mage 真正的閃光點,它可以快速且廉價地建立功能齊全的全端 Web 應用程式原型。 Mage 的唯一缺點是它在終端中不可用,而且您無法進一步迭代生成的程式碼庫。 現在情況改變了。隨著新的 Wasp 更新,Mage 的所有功能都被打包到 CLI 中。您只需[安裝 Wasp](https://wasp-lang.dev/docs/quick-start)並執行`wasp new` ,您就可以透過命令列提示產生一個新的全端應用程式!  之後,您可以使用[Aider](https://aider.chat) ,這是一個命令列工具,可讓您與 GPT-3.5/GPT-4 進行配對編程,以迭代生成的程式碼庫並建立一系列很酷的新功能。 還不相信嗎?觀看這個很酷的宣傳影片,向您展示這一切是如何運作的: {% 嵌入 https://www.youtube.com/watch?v=DXunbNBpgZg %} 如果這看起來很酷,並且您想在這些工具的幫助下開始建立自己的全端 Web 應用程式,請按照以下說明進行操作! CLI 中的 Wasp AI -------------- [安裝 Wasp](https://wasp-lang.dev/docs/quick-start)後,前往終端並執行`wasp new` 這樣做將為您提供一個可供選擇的全端入門模板清單。你會想要: - 從選項清單中選擇`[5] ai-generated` - 輸入您的應用程式的描述 - 選擇您想要用於這一代的 GPT 模型和創造力水平  使用這些生成設定可能會產生不同的結果,因此,如果生成的應用程式不是您第一次尋找的內容,請調整它們並重試。 並且不必太擔心透過 OpenAI API 產生的成本。由於 Wasp 利用 DSL 並為我們管理大量樣板文件,因此它顯著減少了 GPT 必須產生的程式碼量。 例如,當我們混合使用 GPT4 和 GPT3.5(預設選項)時,一個具有 Wasp AI 的應用程式通常消耗大約 25k 到 60k 代幣,每個應用程式大約消耗**0.1 到 0.2 美元**!如果我們只使用 GPT4 來執行它,那麼成本是 10 倍,這意味著它將花費大約**1 到 2 美元**。這仍然比大多數其他 AI 編碼代理便宜得多,後者每代的成本通常約為 15-40 美元。 🤯 哦,「gpt-4-1106-preview」指的是 OpenAI 的新 GPT-4-turbo 模型。因此,它比完全使用 GPT-4 更快、更便宜。 Wasp AI(和[Mage](https://usemage.ai) )使用 GPT-4 進行規劃 + GPT-3.5-turbo 進行程式碼生成的組合,我們發現它對於簡單的應用程式來說效果出奇的好。如果您的目標是複雜的應用程式,我們建議完全使用 GPT-4,因為它能夠更好地處理更高的複雜性。請注意,GPT-4 將需要更長的時間。 繼續與 AI 迭代…der ------------- 在 Mage 的初始版本中,我們收到了很多問題,詢問是否有“除錯助手”,或者在初始輸出後繼續使用 AI 生成更多功能的方法。 雖然 Wasp AI 無法做到這一點,但我們開始探索其他具有除錯功能的 AI 編碼助手,最終我們非常喜歡[Aider 的](https://aider.chat/)工作流程和效能。另外,除了尚未向公眾發布的 Devin 之外,Aider 是目前唯一允許您迭代現有程式碼庫的 AI 編碼工具。 **所以,這使得 Wasp AI + Aider 成為完美的組合!** ---  順便說一句,Wasp 是免費且開源的,所以如果您喜歡我們正在做的事情,請考慮[在 Github 上給我們一顆星](https://github.com/wasp-lang/wasp)!  {% cta https://www.github.com/wasp-lang/wasp %} ⭐️ 丟黃蜂一顆星星 🙏 {% endcta %} --- 使用 Wasp AI 產生全端應用程式後,您可以透過 Aider 使用自然語言來產生新功能或偵錯目前程式碼中的問題。 就是這樣: 1. 安裝[幫助](https://aider.chat)  2. 在 Wasp 專案目錄中的命令列中執行`aider`  3. `/add`您希望 Aider 使用的文件 4. 告訴 Aider 你想要它做什麼,例如在表單中加入“小睡次數”字段  5. 然後,Aider 將規劃一個行動方案,並將這些變更作為 git 提交應用程式。如果您不喜歡更改,請執行`/undo`撤銷提交  6. 如果您在嘗試使用`wasp start`執行程式碼時遇到錯誤,請將錯誤複製並貼上到聊天中,讓 Aider 為您解決。確保您已將錯誤引用的文件新增至聊天(請參閱步驟 3)!  7. 如果您在使用 Aider 時需要更多幫助,請查看他們的[網站](https://aider.chat)或在 Aider 中執行`/help`以獲取命令列表 未來就在這裡 ------ 透過[Wasp AI](https://wasp.sh) ,我們最終將 Mage 的 AI 輔助全端應用腳手架能力加入到 Wasp 的 CLI 中。利用 GPT-4 和其他 OpenAI 模型的強大功能,用它來啟動您的下一個全端應用程式創意。 如果您想在 AI 幫助下繼續產生功能或直接從終端進行偵錯,請使用我們上面概述的 Aider 來保持流程繼續進行。 編碼的未來確實就在這裡。嘗試一下,讓我們知道您的想法! --- 原文出處:https://dev.to/wasp/a-100-ai-driven-workflow-thats-probably-as-good-as-devin-4c67
你的轉職路上,還缺少一份自學作業包!寫完這幾包,直接拿作品去面試上班!
本論壇另有附設一個 LINE 新手發問&交流群組!歡迎加入討論!