--- 標題:使用 NextJS 和 Wing 建立您自己的 ChatGPT 圖形客戶端 🤯 描述:使用 Winglang 和 NextJS 建立的 ChatGPT 客戶端應用程式 canonical\_url:https://www.winglang.io/blog/2024/05/16/chatgpt-client-with-nextjs-and-wing 發表:真實 --- 長話短說 ---- 在本文結束時,您將使用 Wing 和 Next.js 建置並部署 ChatGPT 用戶端。 該應用程式可以在本地執行(在本地雲端模擬器中)或將其部署到您自己的雲端提供者。  --- 介紹 -- 建置 ChatGPT 用戶端並將其部署到您自己的雲端基礎架構是確保對資料進行控制的好方法。 將 LLM 部署到您自己的雲端基礎架構可為您的專案提供隱私和安全性。 有時,在使用 OpenAI 的 ChatGPT 等專有 LLM 平台時,您可能會擔心資料在遠端伺服器上儲存或處理,這可能是由於輸入平台的資料的敏感度或其他隱私原因。 在這種情況下,將 LLM 自託管到您的雲端基礎架構或在您的電腦上本地執行可以讓您更好地控制資料的隱私和安全性。 > [Wing](https://git.new/wing-repo)是一種面向雲端的程式語言,可讓您建置和部署基於雲端的應用程式,而無需擔心底層基礎架構。 它允許您使用相同的語言定義和管理雲端基礎架構和應用程式程式碼,從而簡化了您在雲端上建置的方式。 Wing 與雲端無關——用它建置的應用程式可以編譯並部署到各種雲端平台。 > {% cta https://git.new/wing-repo %} 看 ⭐ Wing {% endcta %} [](https://git.new/wing-repo) --- 讓我們開始吧! ------- 要繼續操作,您需要: - 對 Next.js 有一定了解 - 在您的機器上[安裝 Wing](https://www.winglang.io/docs/) 。如果您不知道如何操作,請不要擔心。我們將在這個專案中一起討論它。 - 取得您的 OpenAI API 金鑰。 建立您的專案 ------ 首先,您需要在電腦上安裝 Wing。執行以下命令: ``` npm install -g winglang ``` 透過檢查版本確認安裝: ``` wing -V ``` ### 建立您的 Next.js 和 Wing 應用程式。 ``` mkdir assistant cd assistant npx create-next-app@latest frontend mkdir backend && cd backend wing new empty ``` 我們已在 Assistant 目錄中成功建立了 Wing 和 Next.js 專案。我們的 ChatGPT 用戶端的名稱是 Assistant。聽起來很酷,對吧? 前端和後端目錄分別包含我們的 Next 和 Wing 應用程式。 `wing new empty`建立三個檔案: `package.json` 、 `package-lock.json`和`main.w` 。後者是應用程式的入口點。 ### 在 Wing 模擬器中本地執行您的應用程式 Wing 模擬器可讓您在本機電腦內執行程式碼、編寫單元測試和偵錯程式碼,而無需部署到實際的雲端供應商,從而幫助您更快地進行迭代。 使用以下命令在本機上執行您的 Wing 應用程式: ``` wing it ``` 您的 Wing 應用程式將在`localhost:3000`上執行。 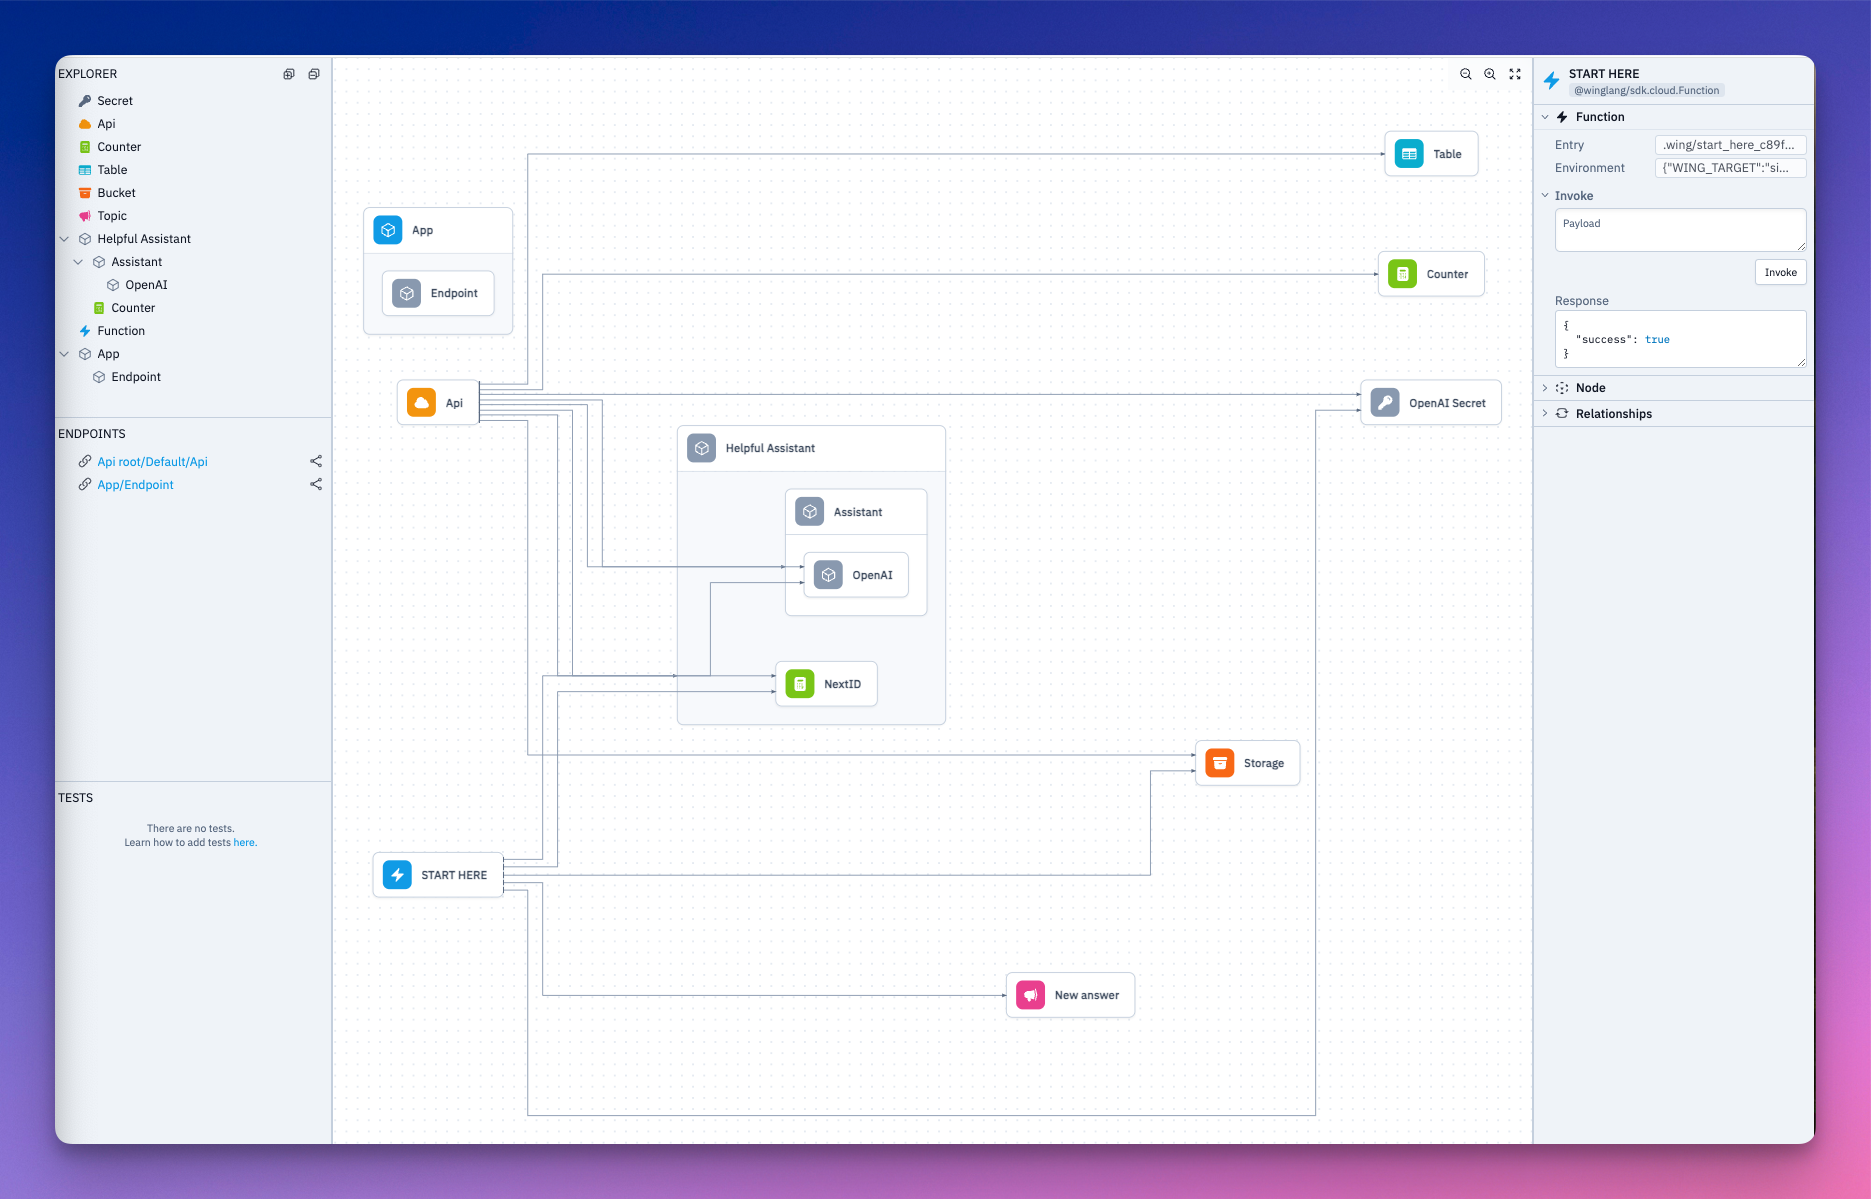 設定您的後端 ------ - 讓我們安裝 Wing 的 OpenAI 和 React 函式庫。 OpenAI 庫提供了與 LLM 互動的標準介面。 React 程式庫可讓您將 Wing 後端連接到 Next 應用程式。 ``` npm i @winglibs/openai @winglibs/react ``` - 將這些套件匯入到`main.w`檔案中。我們還導入需要的所有其他庫。 ``` bring openai bring react bring cloud bring ex bring http ``` `bring`是 Wing 中的導入語句。這樣想,Wing 使用`bring`來實現與 JavaScript 中`import`相同的功能。 `cloud`是 Wing 的雲端庫。它公開了雲端 API、儲存桶、計數器、網域、端點、函數和更多雲端資源的標準介面。 `ex`是用於與表格和雲端 Redis 資料庫介面的標準庫, `http`用於呼叫不同的 HTTP 方法 - 從遠端資源發送和檢索資訊。 取得您的 OpenAI API 金鑰 ------------------ 我們將在我們的應用程式中使用`gpt-4-turbo`但您可以使用任何 OpenAI 模型。 - 如果您還沒有[OpenAI](https://platform.openai.com/signup)帳戶,請建立一個。若要建立新的 API 金鑰,請前往[platform.openai.com/api-keys](http://platform.openai.com/api-keys)並選擇**建立新金鑰。** 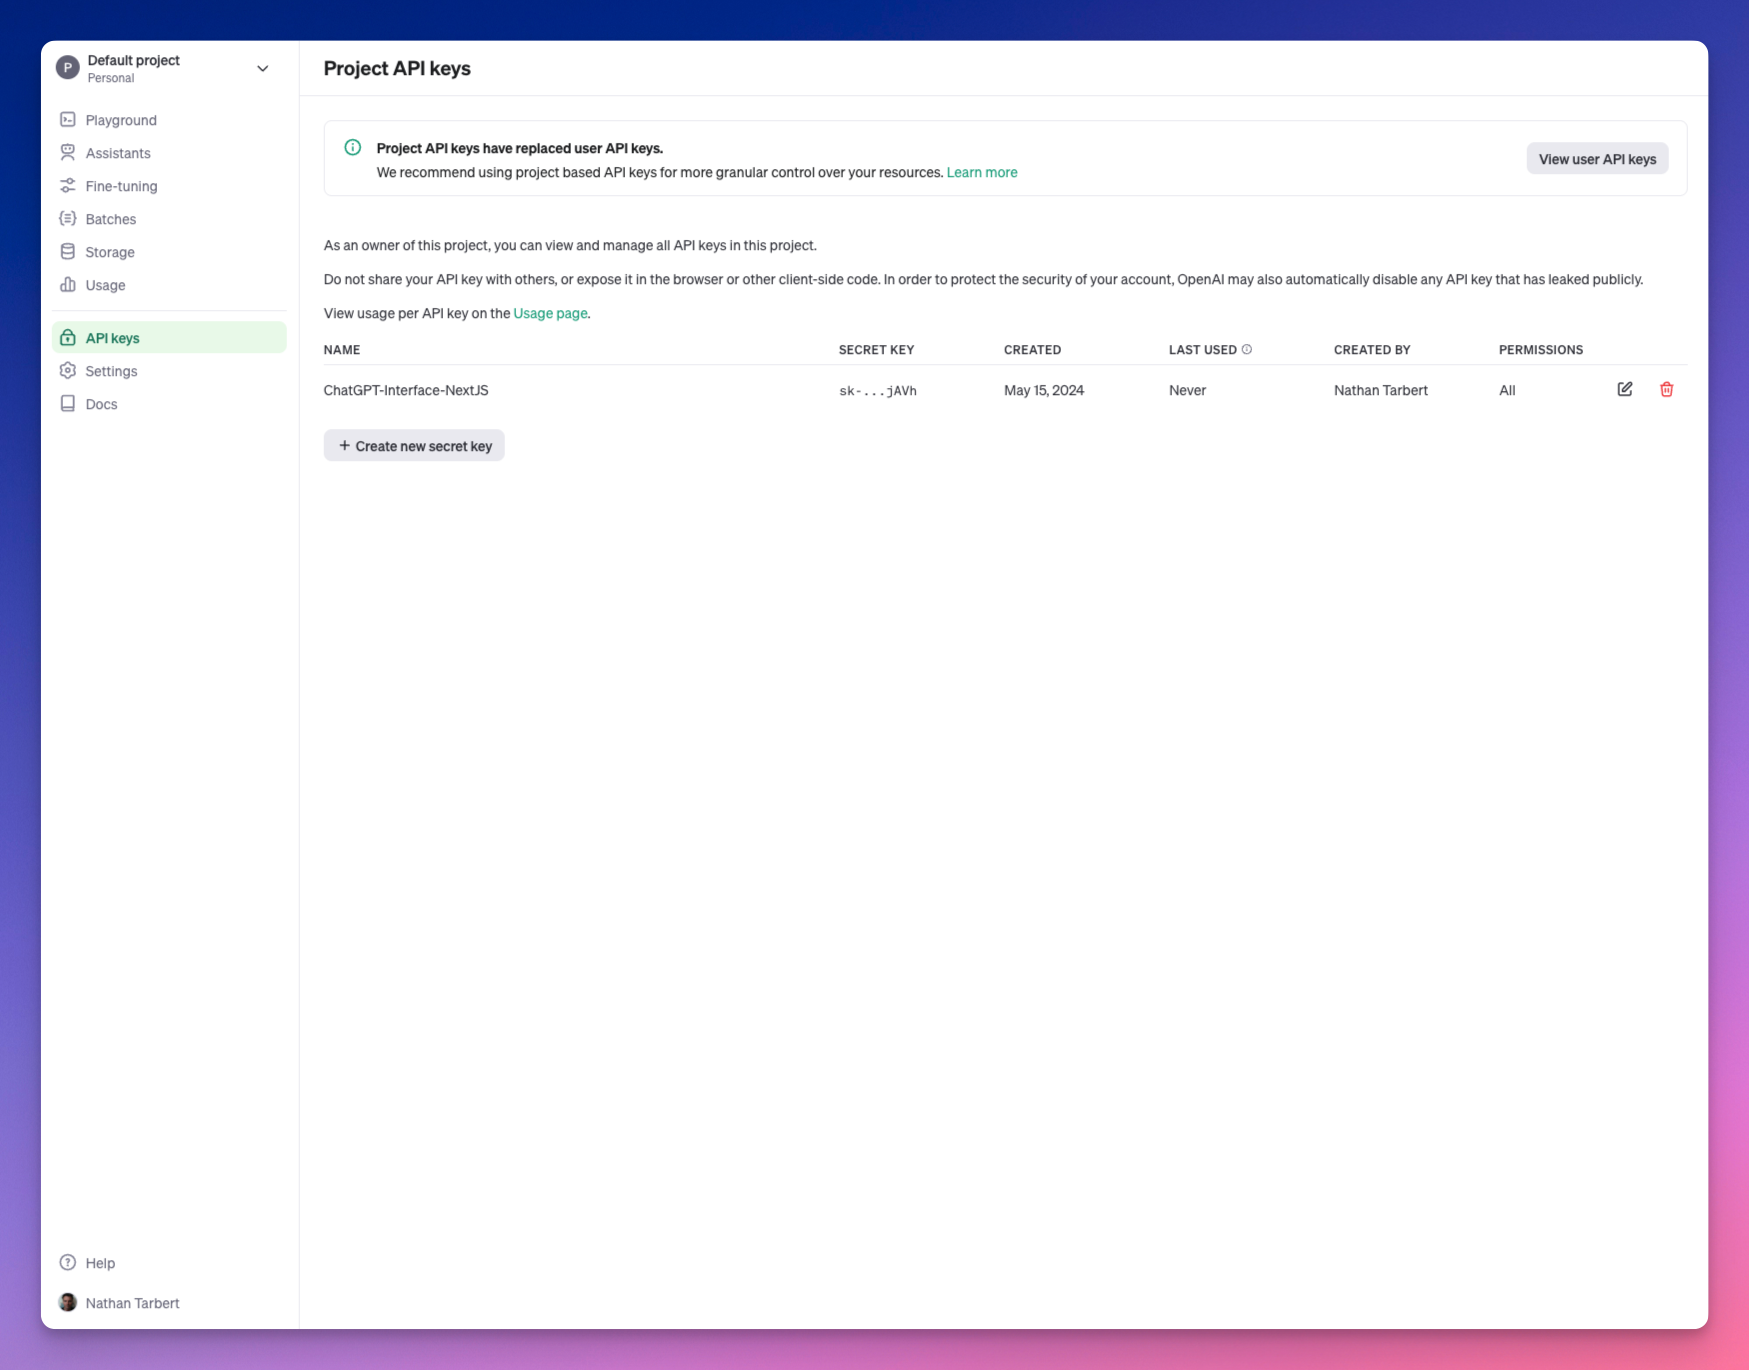 - 設定**名稱**、**專案**和**權限,**然後按一下**建立金鑰。** 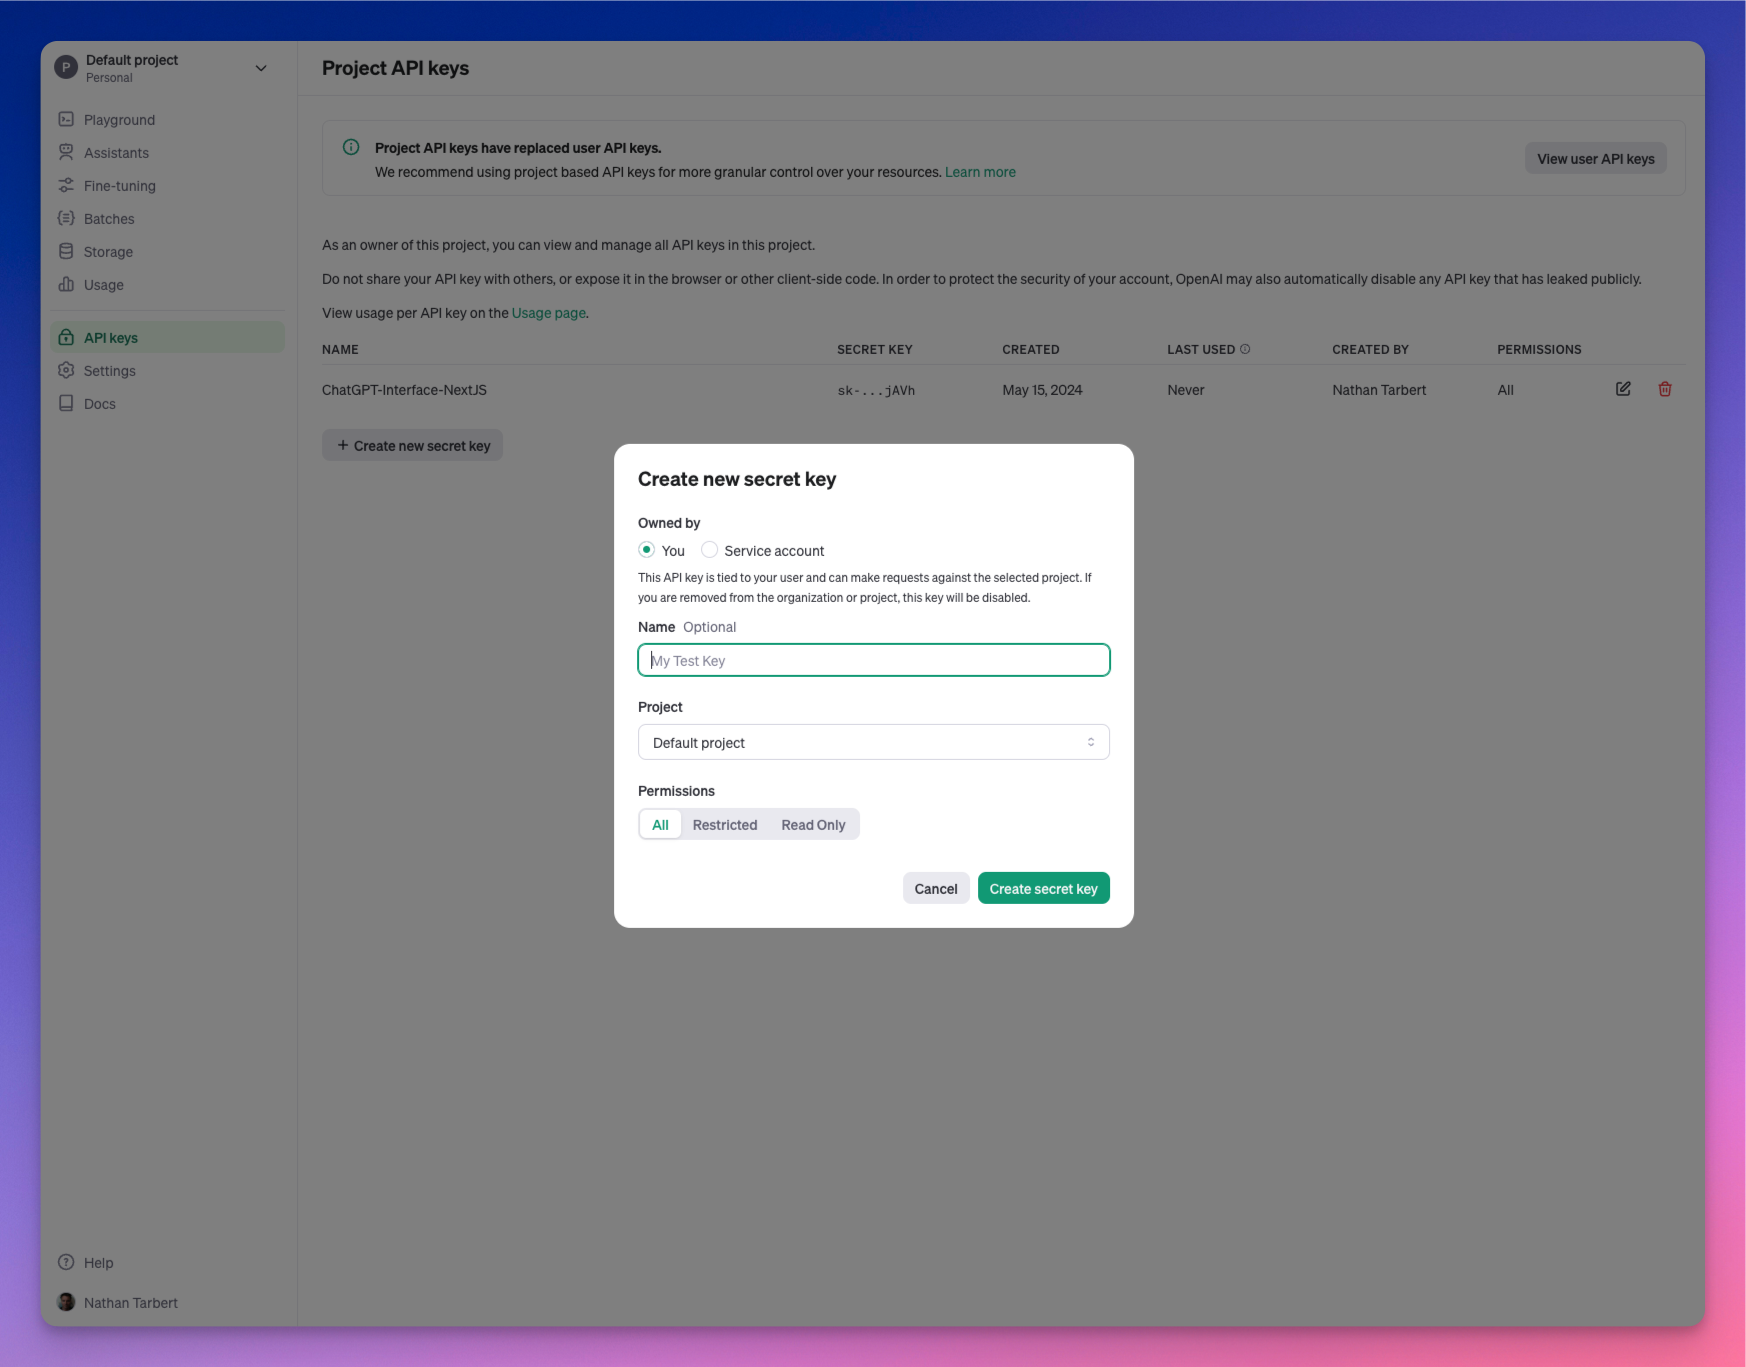 初始化 OpenAI ---------- 建立一個`Class`來初始化您的 OpenAI API。我們希望它可以重複使用。 我們將向`Assistant`類別加入`personality` ,以便在向 AI 助手傳遞提示時可以指定 AI 助手的個性。 ``` let apiKeySecret = new cloud.Secret(name: "OAIAPIKey") as "OpenAI Secret"; class Assistant { personality: str; openai: openai.OpenAI; new(personality: str) { this.openai = new openai.OpenAI(apiKeySecret: apiKeySecret); this.personality = personality; } pub inflight ask(question: str): str { let prompt = `you are an assistant with the following personality: ${this.personality}. ${question}`; let response = this.openai.createCompletion(prompt, model: "gpt-4-turbo"); return response.trim(); } } ``` Wing 分別使用`preflight`和`inflight`概念來統一基礎設施定義和應用程式邏輯。 **預檢**程式碼(通常是基礎設施定義)在編譯時執行一次,而執行**中**程式碼將在執行時執行以實現應用程式的行為。 雲端儲存桶、佇列和 API 端點是預檢的一些範例。定義預檢時不需要新增預檢關鍵字,Wing 預設知道這一點。但對於飛行塊,您需要在其中加入“飛行”一詞。 > 上面的程式碼中有一個飛行中的區塊。 Inflight 區塊是您編寫非同步執行時間程式碼的地方,這些程式碼可以透過其 inflight API 直接與資源互動。 > 測試和儲存雲端秘密 --------- 讓我們來看看如何保護我們的 API 金鑰,因為我們肯定要[考慮安全性](https://techhq.com/2022/09/hardcoded-api-keys-jeopardize-data-in-the-cloud/)。 讓我們在後端的根目錄中建立一個`.env`檔案並傳入我們的 API 金鑰: ``` OAIAPIKey = Your_OpenAI_API_key ``` 我們可以在本地引用 .env 檔案來測試 OpenAI API 金鑰,然後由於我們計劃部署到 AWS,因此我們將逐步設定[AWS Secrets Manager](https://docs.aws.amazon.com/secretsmanager/latest/userguide/intro.html) 。 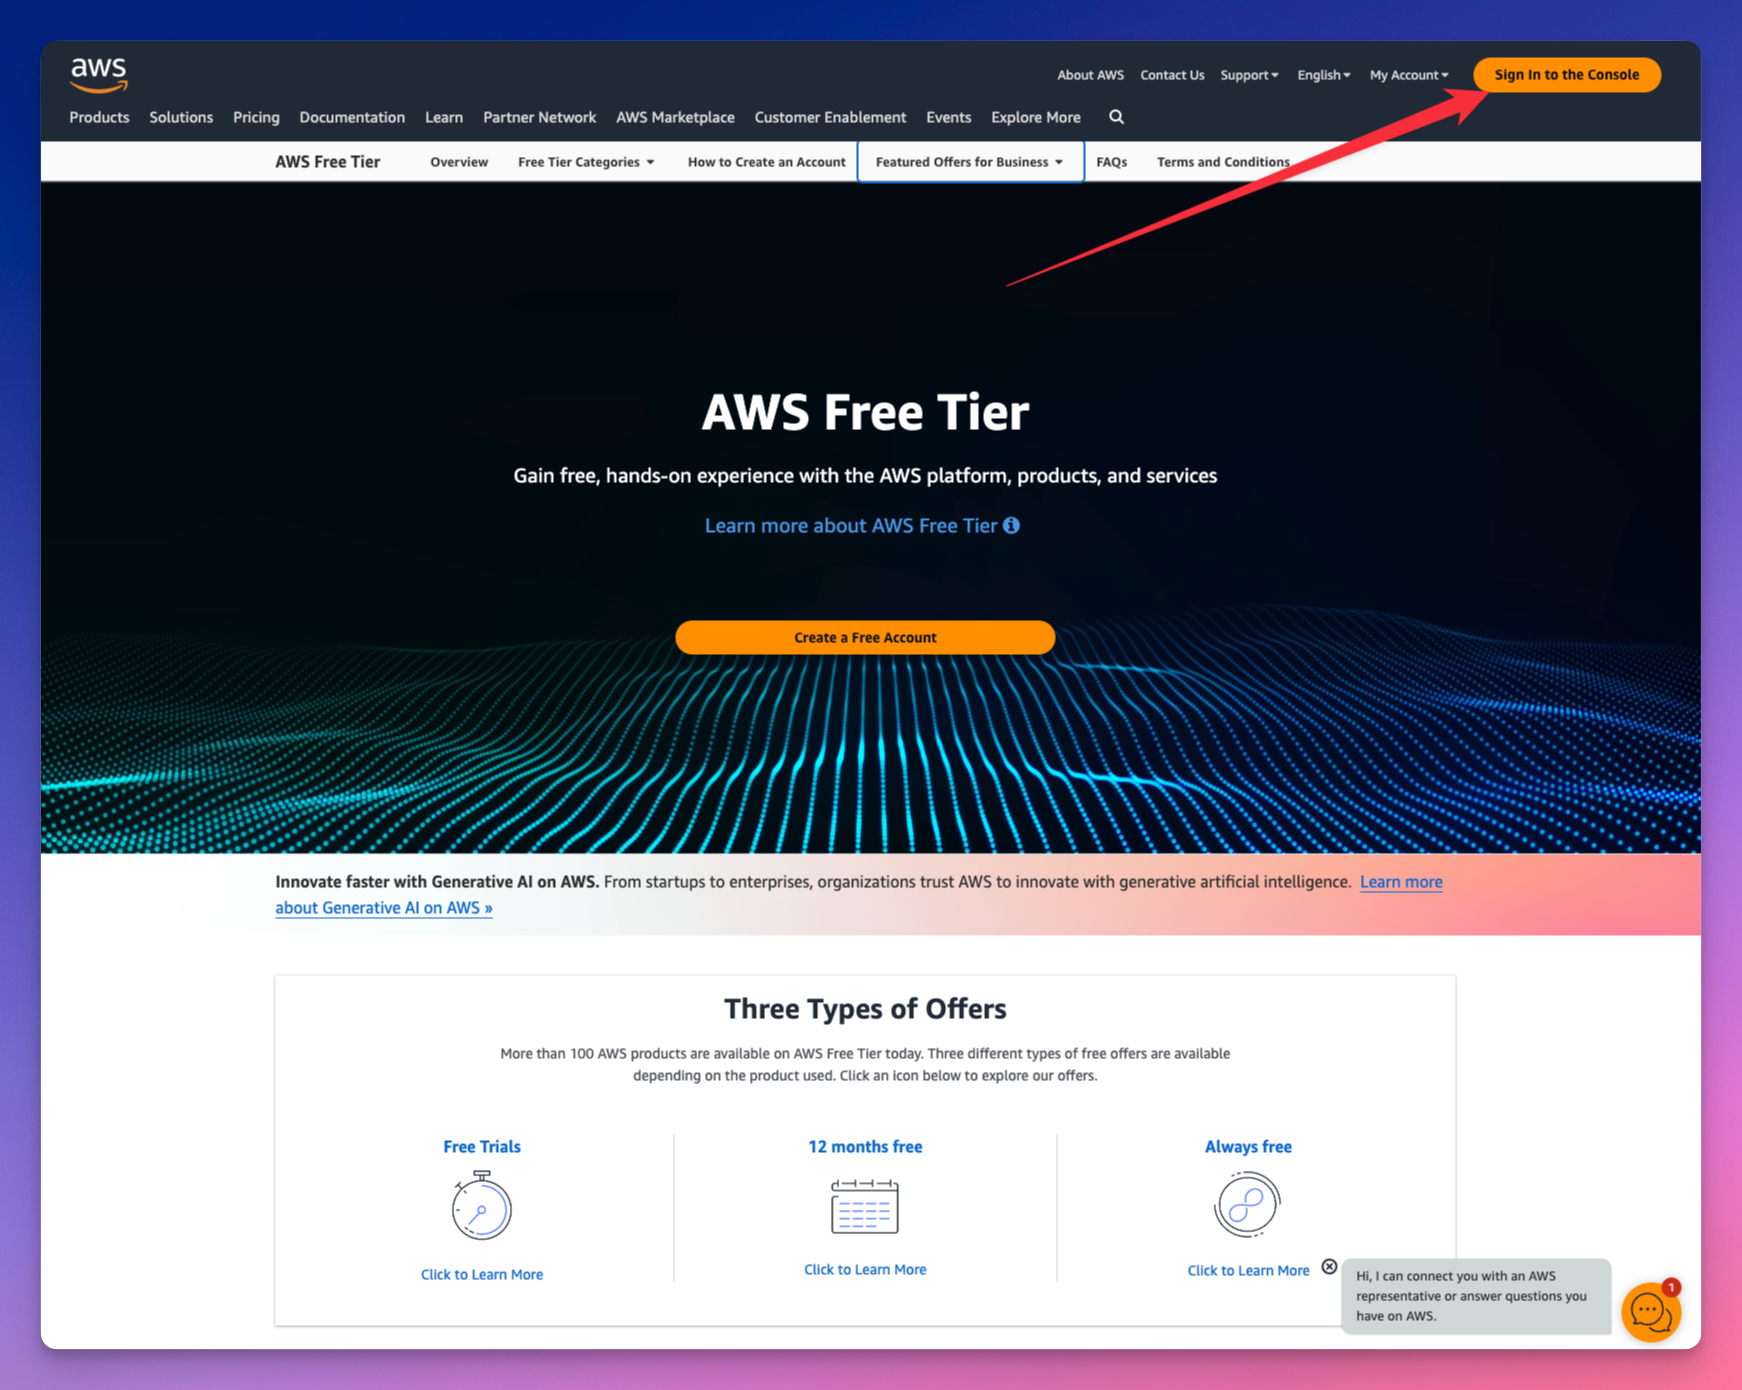 首先,我們前往 AWS 並登入控制台。如果您沒有帳戶,可以免費建立一個。 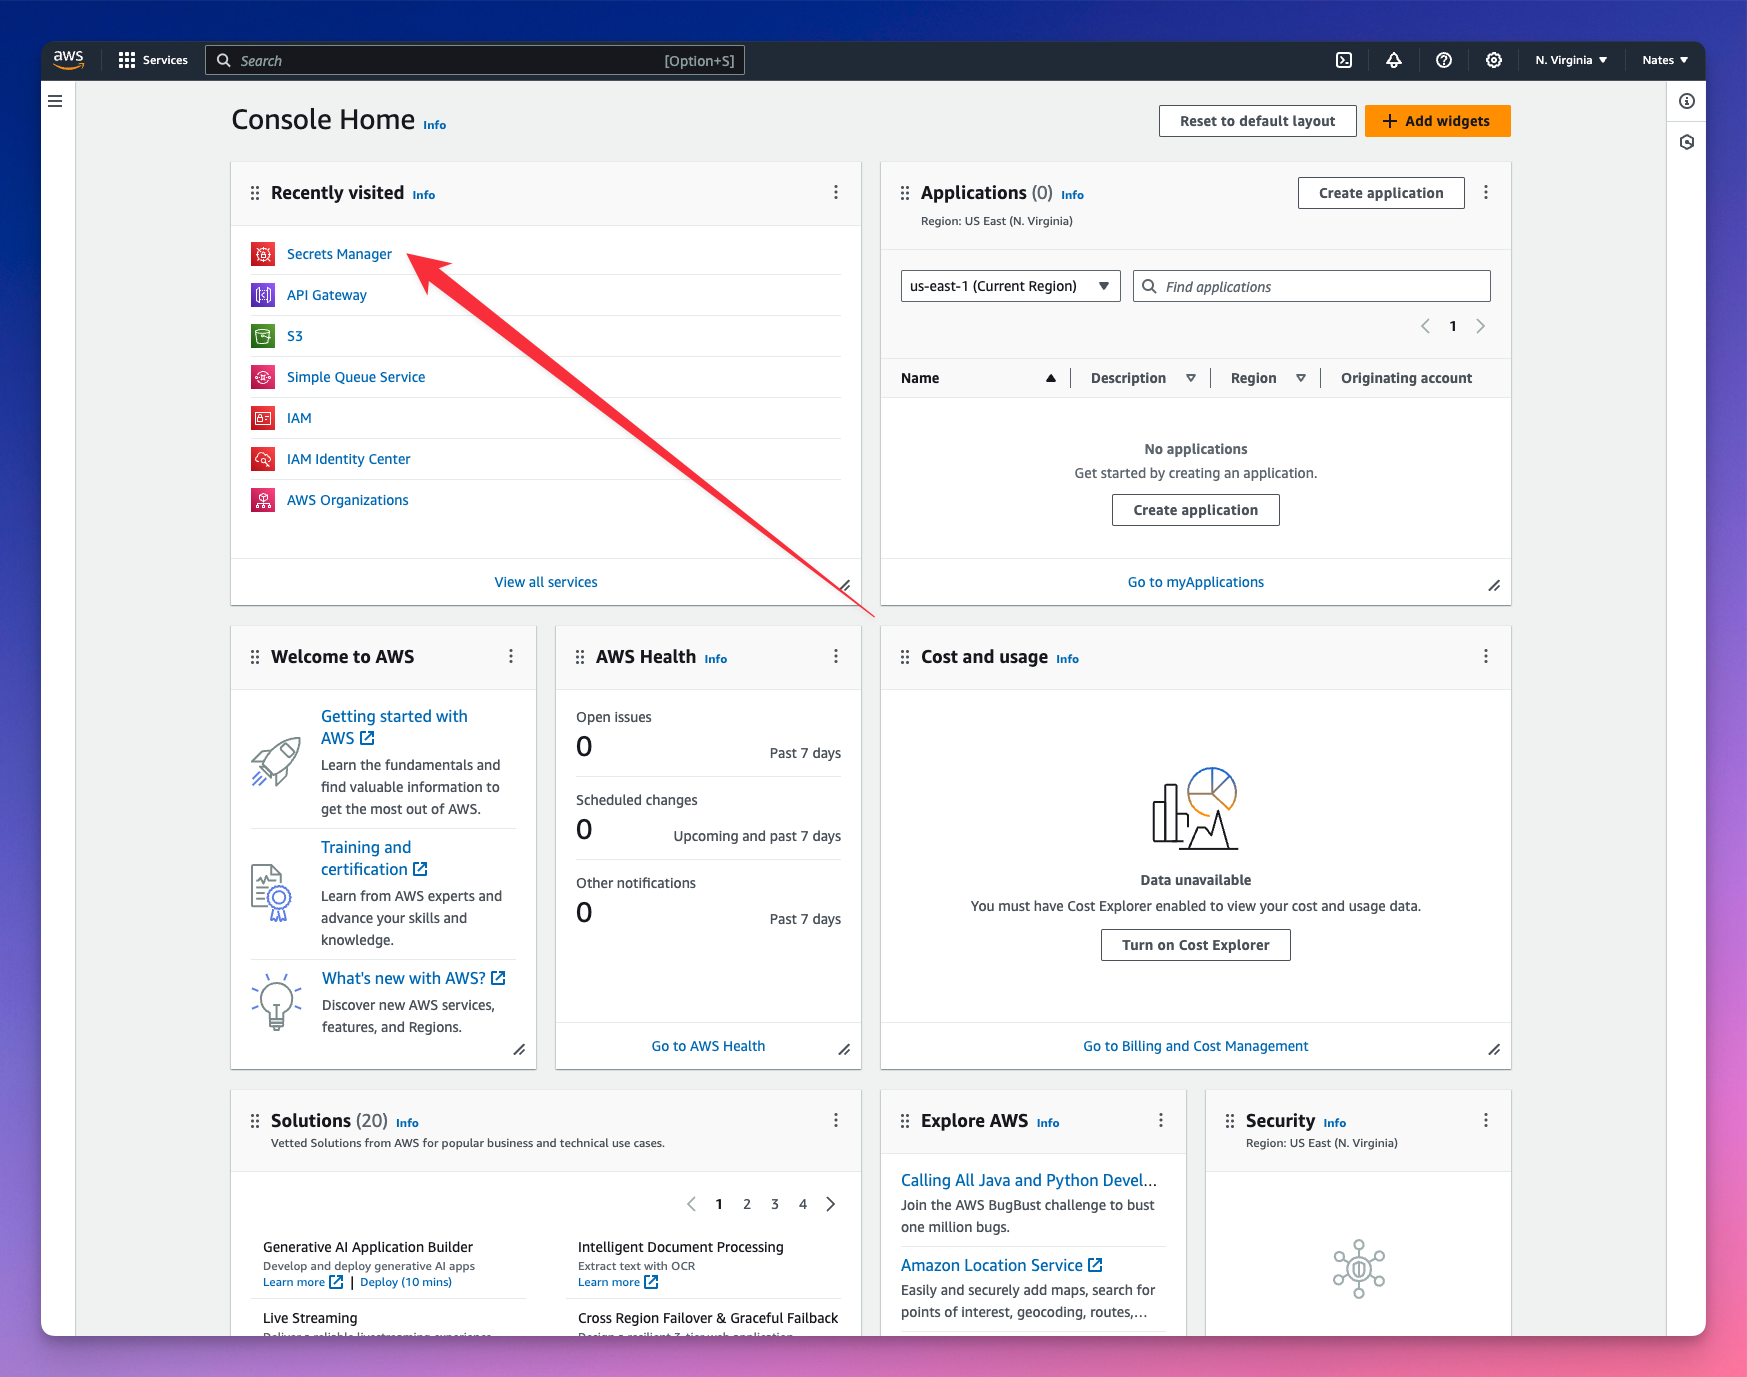 導覽至 Secrets Manager,讓我們儲存 API 金鑰值。 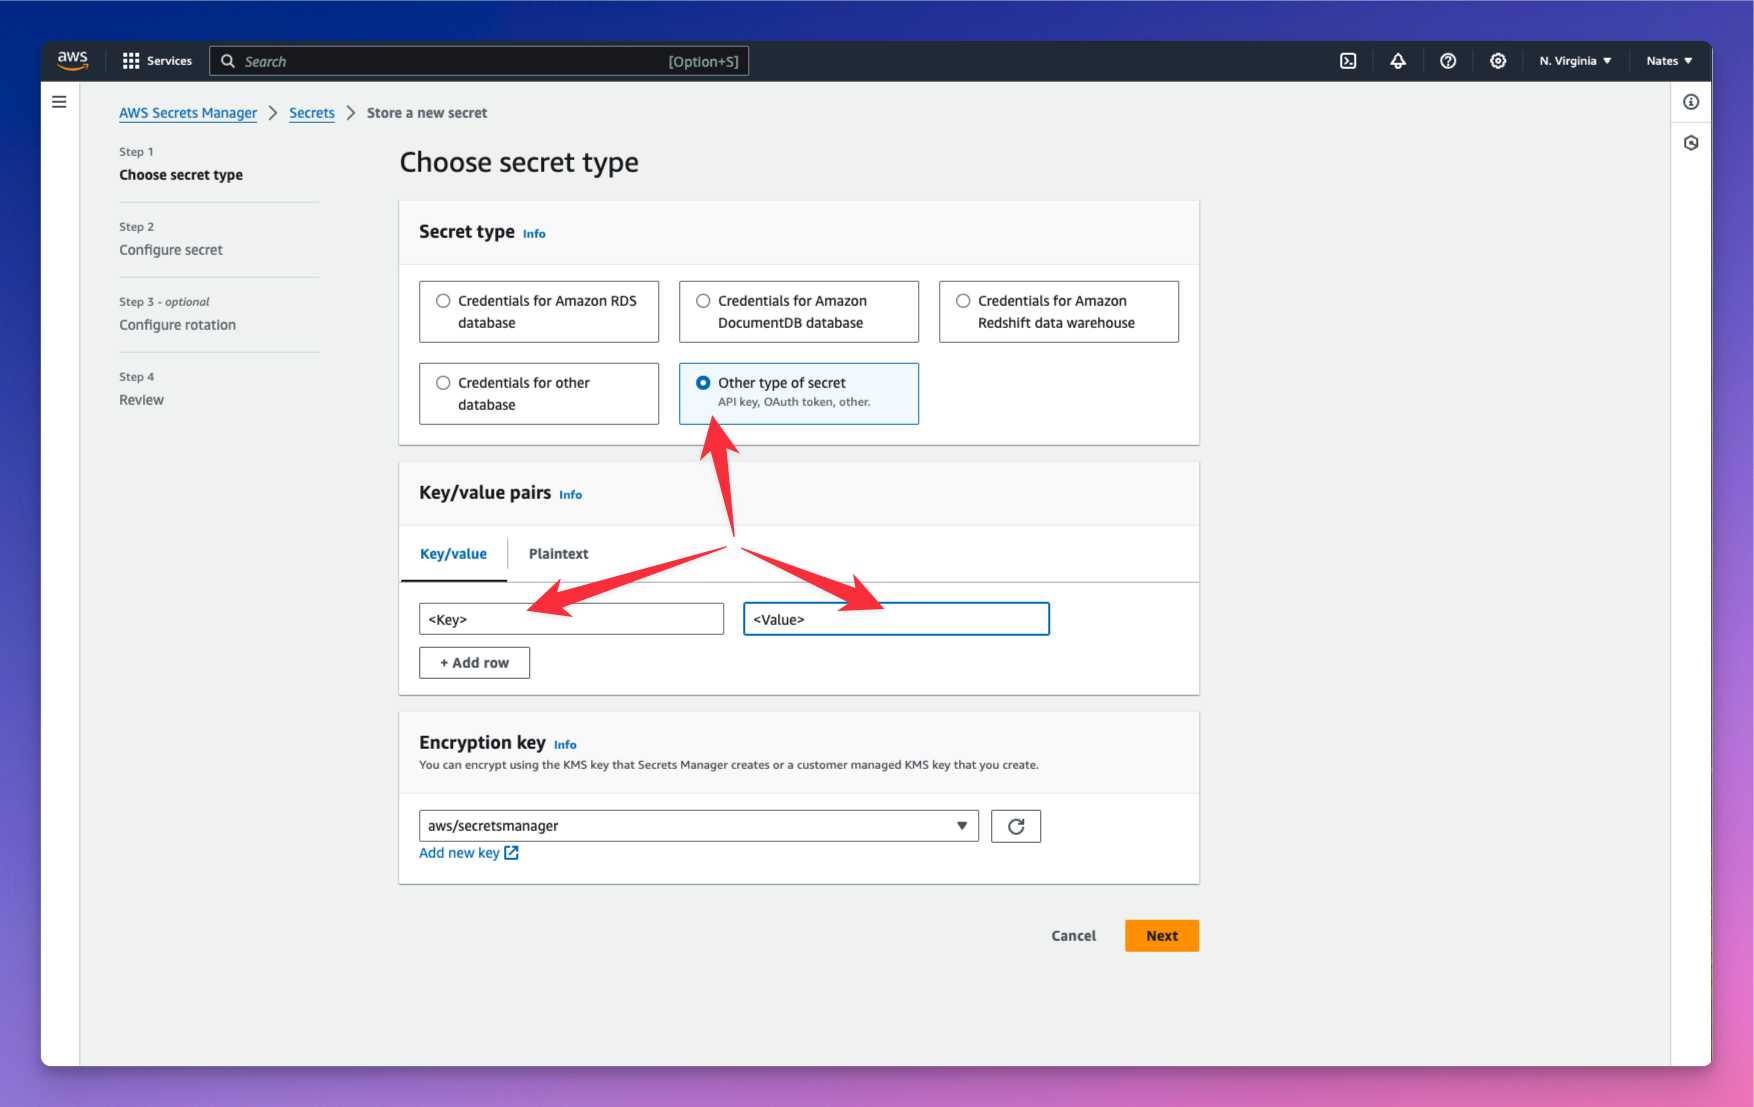 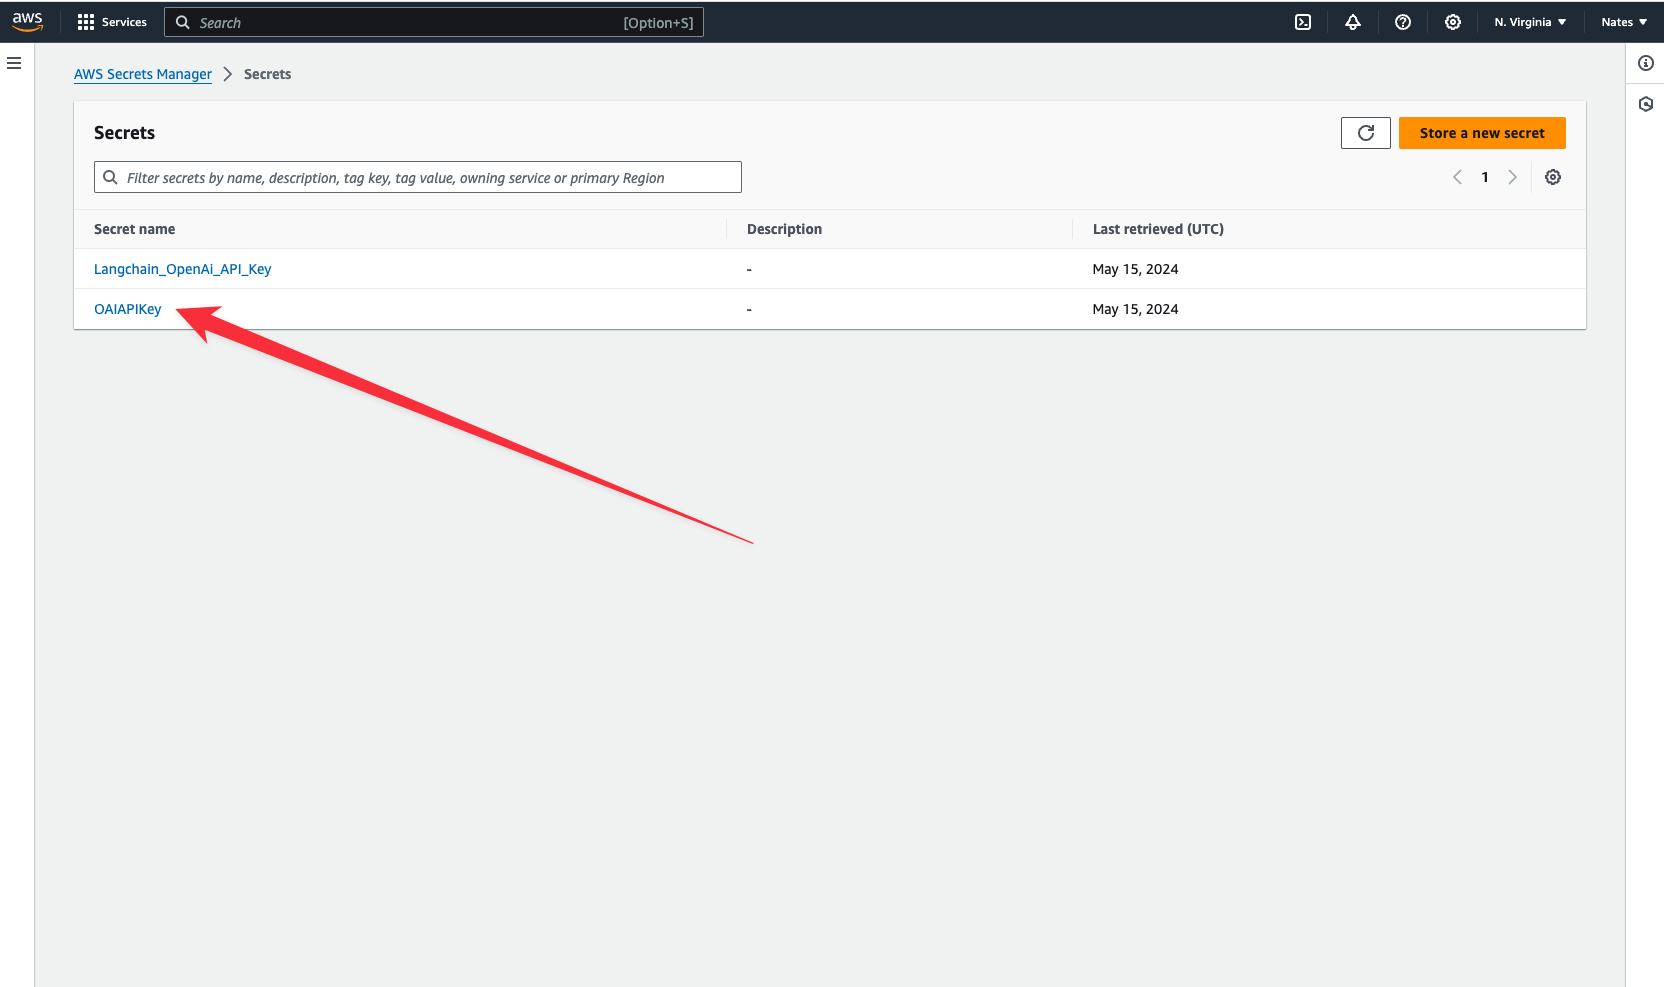 我們已將 API 金鑰儲存在名為`OAIAPIKey`的雲端機密中。複製您的金鑰,我們將跳到終端並連接到現在儲存在 AWS 平台中的金鑰。 ``` wing secrets ``` 現在將您的 API 金鑰貼上為終端中的值。您的密鑰現已正確存儲,我們可以開始與我們的應用程式互動。 --- 將人工智慧的回應儲存在雲端。 -------------- 將人工智慧的回應儲存在雲端可以讓您控制資料。它駐留在您自己的基礎設施上,與 ChatGPT 等專有平台不同,您的資料位於您無法控制的第三方伺服器上。您也可以在需要時檢索這些回應。 讓我們建立另一個類,使用 Assistant 類來傳遞 AI 的個性和提示。我們還將每個模型的回應作為`txt`檔案儲存在雲端儲存桶中。 ``` let counter = new cloud.Counter(); class RespondToQuestions { id: cloud.Counter; gpt: Assistant; store: cloud.Bucket; new(store: cloud.Bucket) { this.gpt = new Assistant("Respondent"); this.id = new cloud.Counter() as "NextID"; this.store = store; } pub inflight sendPrompt(question: str): str { let reply = this.gpt.ask("{question}"); let n = this.id.inc(); this.store.put("message-{n}.original.txt", reply); return reply; } } ``` --- 我們為我們的助理設定了「受訪者」的個性。我們希望它能夠回答問題。您也可以讓前端使用者在發送提示時指定此個性。 每次產生回應時,計數器都會遞增,並且計數器的值會傳遞到用於在雲端中儲存模型回應的`n`變數中。然而,我們真正想要的是建立一個資料庫來儲存來自前端的使用者提示和模型的回應。 讓我們定義我們的資料庫。 定義我們的資料庫 -------- Wing 內建了`ex.Table` - 一個用於儲存和查詢資料的 NoSQL 資料庫。 ``` let db = new ex.Table({ name: "assistant", primaryKey: "id", columns: { question: ex.ColumnType.STRING, answer: ex.ColumnType.STRING } }); ``` --- 我們在資料庫定義中新增了兩列 - 第一列用於儲存使用者提示,第二列用於儲存模型的回應。 建立 API 路由和邏輯 ------------ 我們希望能夠在後端發送和接收資料。讓我們建立 POST 和 GET 路由。 ``` let api = new cloud.Api({ cors: true }); api.post("/assistant", inflight((request) => { // POST request logic goes here })); api.get("/assistant", inflight(() => { // GET request logic goes here })); ``` --- ``` let myAssistant = new RespondToQuestions(store) as "Helpful Assistant"; api.post("/assistant", inflight((request) => { let prompt = request.body; let response = myAssistant.sendPrompt(JSON.stringify(prompt)); let id = counter.inc(); // Insert prompt and response in the database db.insert(id, { question: prompt, answer: response }); return cloud.ApiResponse({ status: 200 }); })); ``` 在 POST 路由中,我們希望將從前端收到的使用者提示傳遞到模型中並獲得回應。提示和回應都將儲存在資料庫中。 `cloud.ApiResponse`可讓您傳送對使用者要求的回應。 新增前端發出 GET 請求時檢索資料庫專案的邏輯。 --- 新增前端發出 GET 請求時檢索資料庫專案的邏輯。 ``` api.get("/assistant", inflight(() => { let questionsAndAnswers = db.list(); return cloud.ApiResponse({ body: JSON.stringify(questionsAndAnswers), status: 200 }); })); ``` 我們的後端已經準備好了。我們在本地雲端模擬器中測試一下。 跑`wing it` 。 讓我們轉到`localhost:3000`並向我們的助理詢問一個問題。 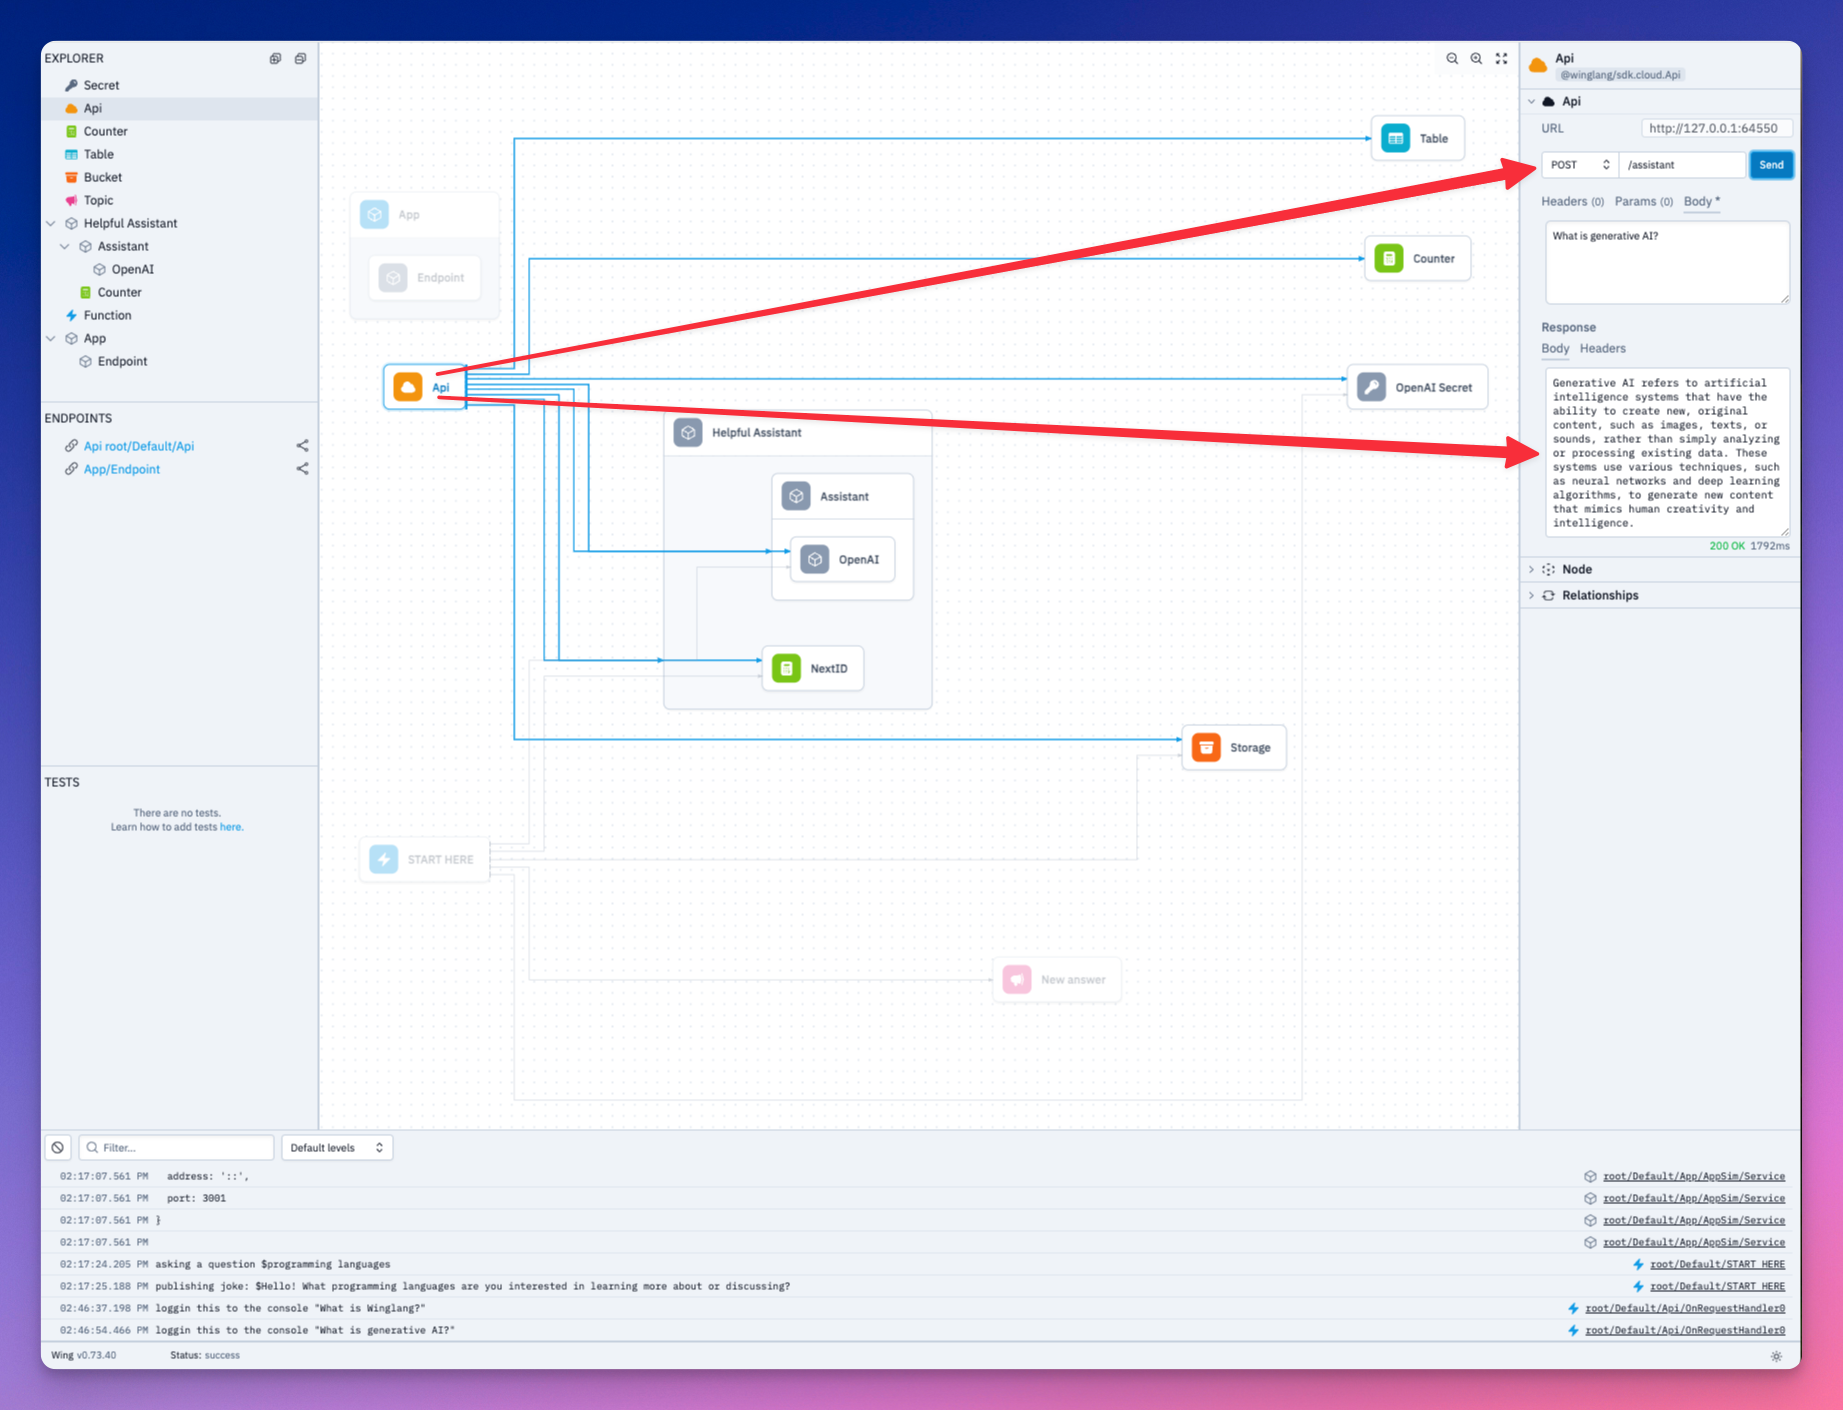 我們的問題和助理的回答都已儲存到資料庫中。看一看。 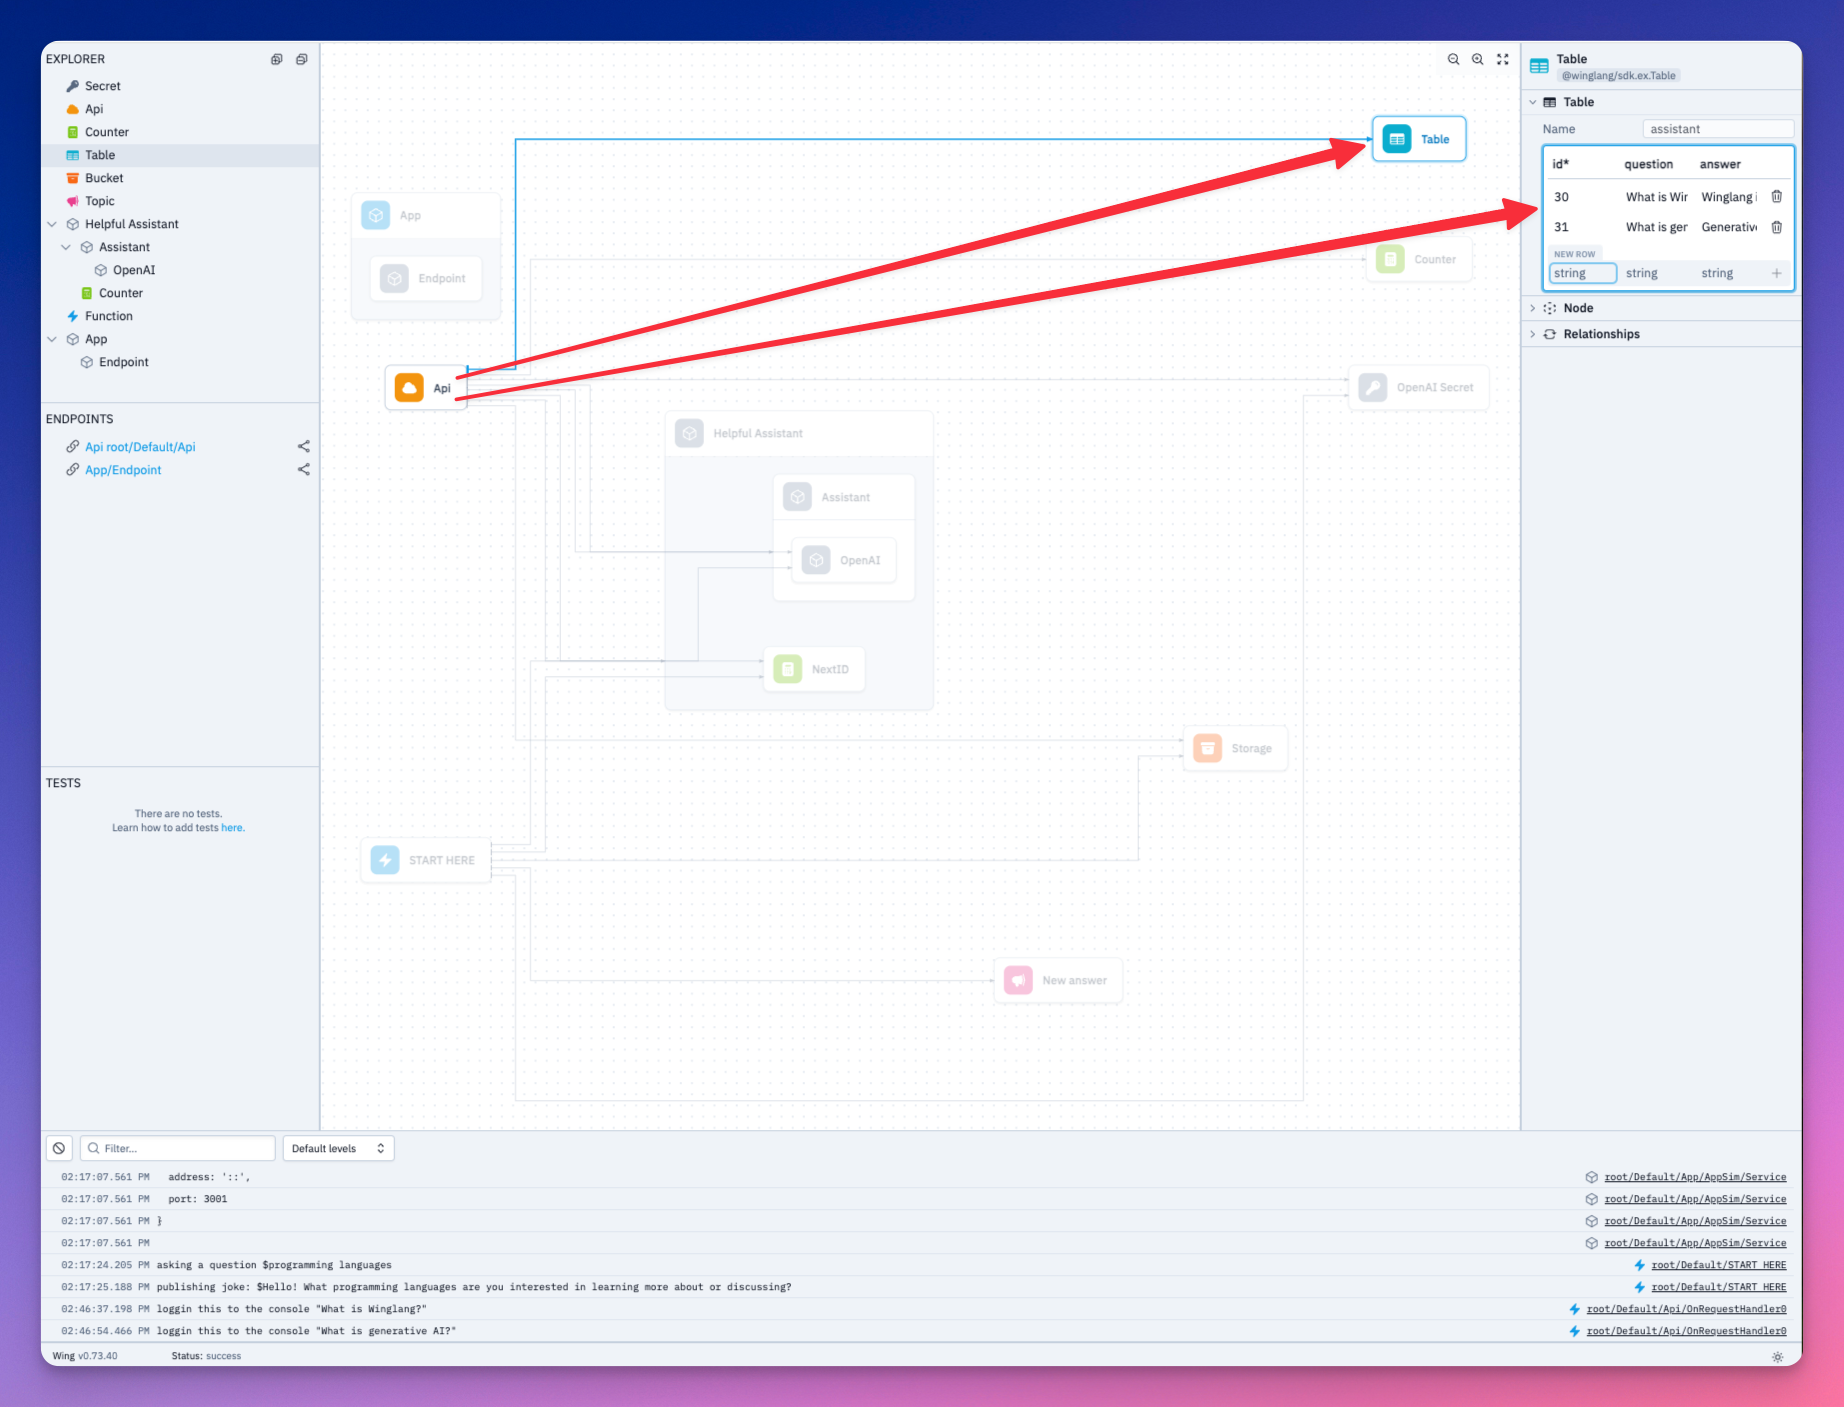 向前端公開您的 API URL --------------- 我們需要將後端的 API URL 公開給 Next 前端。這就是之前安裝的 React 函式庫派上用場的地方。 ``` let website = new react.App({ projectPath: "../frontend", localPort: 4000 }); website.addEnvironment("API_URL", api.url); ``` 將以下內容加入 Next 應用程式的`layout.js`中。 ``` import { Inter } from "next/font/google"; import "./globals.css"; const inter = Inter({ subsets: ["latin"] }); export const metadata = { title: "Create Next App", description: "Generated by create next app", }; export default function RootLayout({ children }) { return ( <html lang="en"> <head> <script src="./wing.js" defer></script> </head> <body className={inter.className}>{children}</body> </html> ); } ``` 我們現在可以在 Next 應用程式中存取`API_URL` 。 實作前端邏輯 ------ 讓我們實作前端邏輯來呼叫後端。 ``` import { useEffect, useState, useCallback } from 'react'; import axios from 'axios'; function App() { const [isThinking, setIsThinking] = useState(false); const [input, setInput] = useState(""); const [allInteractions, setAllInteractions] = useState([]); const retrieveAllInteractions = useCallback(async (api_url) => { await axios ({ method: "GET", url: `${api_url}/assistant`, }).then(res => { setAllInteractions(res.data) }) }, []) const handleSubmit = useCallback(async (e)=> { e.preventDefault() setIsThinking(!isThinking) if(input.trim() === ""){ alert("Chat cannot be empty") setIsThinking(true) } await axios({ method: "POST", url: `${window.wingEnv.API_URL}/assistant`, headers: { "Content-Type": "application/json" }, data: input }) setInput(""); setIsThinking(false); await retrieveAllInteractions(window.wingEnv.API_URL); }) useEffect(() => { if (typeof window !== "undefined") { retrieveAllInteractions(window.wingEnv.API_URL); } }, []); // Here you would return your component's JSX return ( // JSX content goes here ); } export default App; ``` `retrieveAllInteractions`函數取得後端資料庫中的所有問題和答案。 `handSubmit`函數將使用者的提示傳送到後端。 讓我們加入 JSX 實作。 ``` import { useEffect, useState } from 'react'; import axios from 'axios'; import './App.css'; function App() { // ... return ( <div className="container"> <div className="header"> <h1>My Assistant</h1> <p>Ask anything...</p> </div> <div className="chat-area"> <div className="chat-area-content"> {allInteractions.map((chat) => ( <div key={chat.id} className="user-bot-chat"> <p className='user-question'>{chat.question}</p> <p className='response'>{chat.answer}</p> </div> ))} <p className={isThinking ? "thinking" : "notThinking"}>Generating response...</p> </div> <div className="type-area"> <input type="text" placeholder="Ask me any question" value={input} onChange={(e) => setInput(e.target.value)} /> <button onClick={handleSubmit}>Send</button> </div> </div> </div> ); } export default App; ``` 在本地執行您的專案 --------- 導航到您的後端目錄並使用以下命令在本地執行您的 Wing 應用程式 ``` cd ~assistant/backend wing it ``` 也執行您的 Next.js 前端: ``` cd ~assistant/frontend npm run dev ``` 讓我們看一下我們的應用程式。 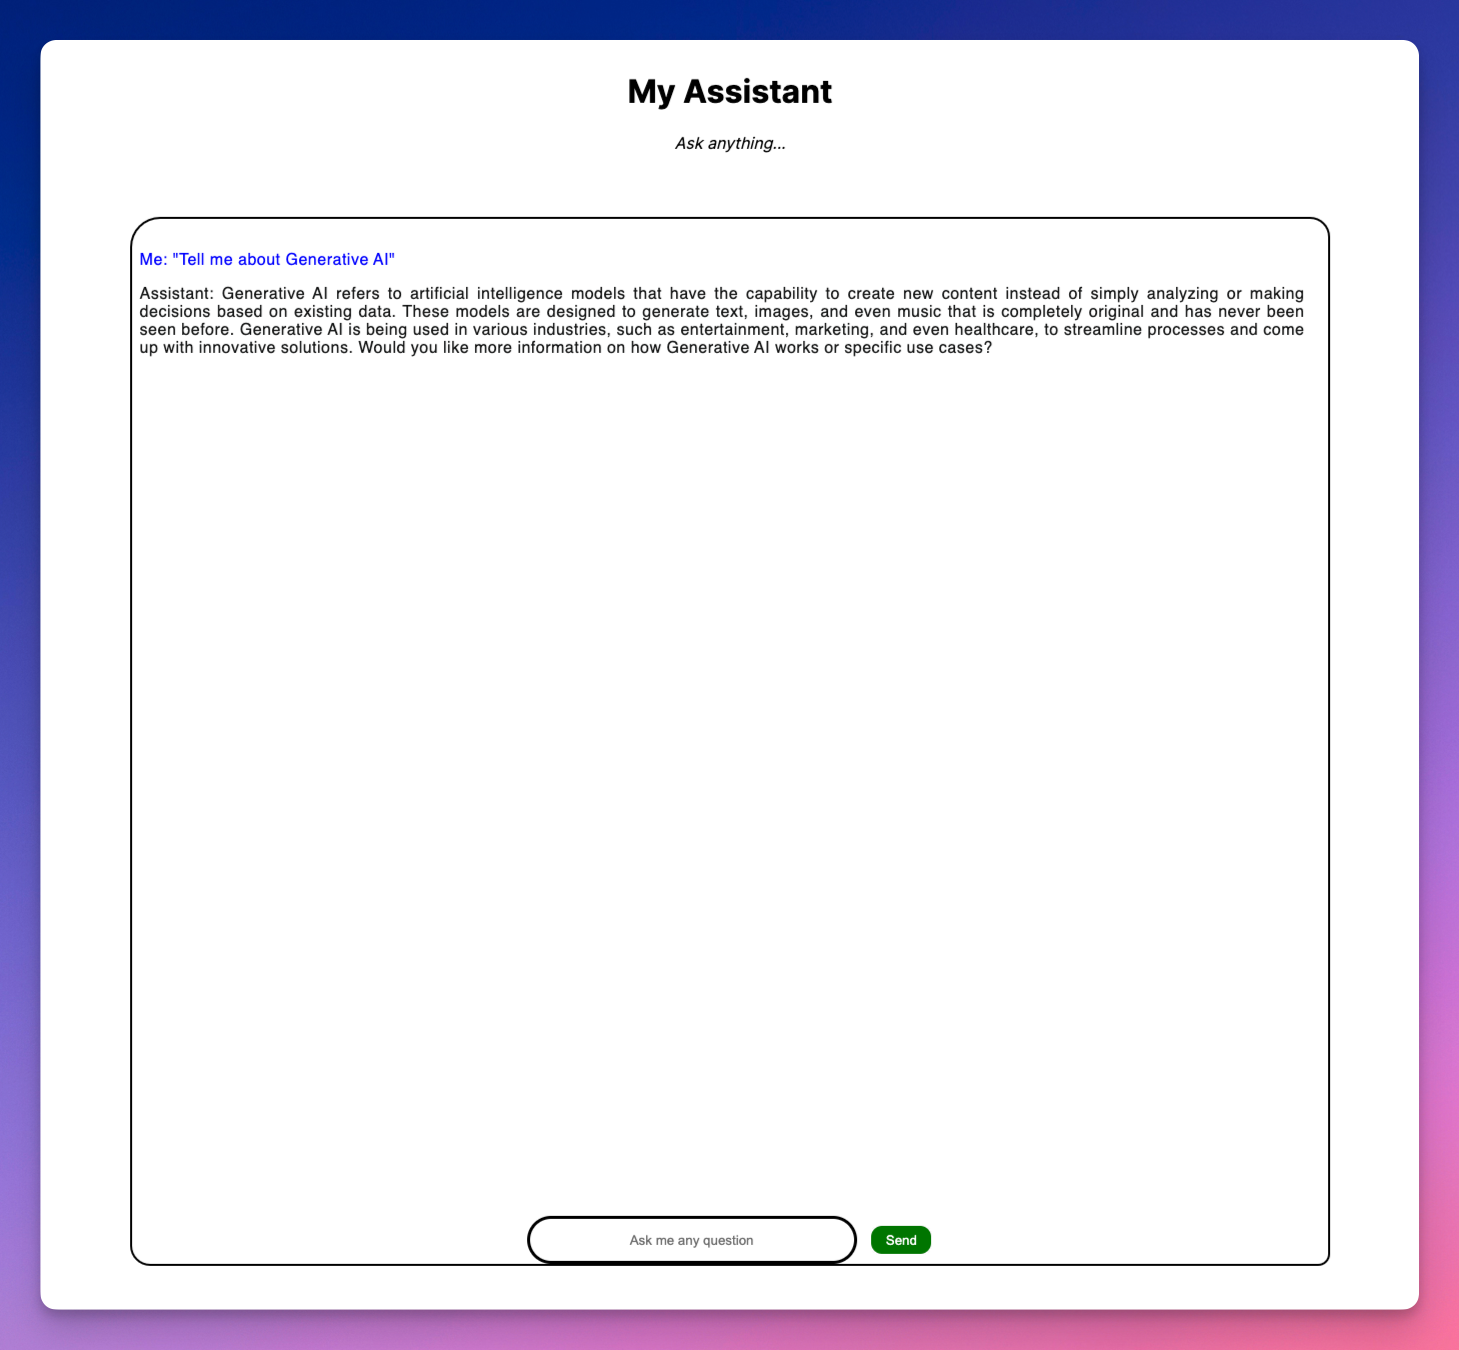 讓我們透過 Next 應用程式向 AI 助理詢問幾個開發人員問題。 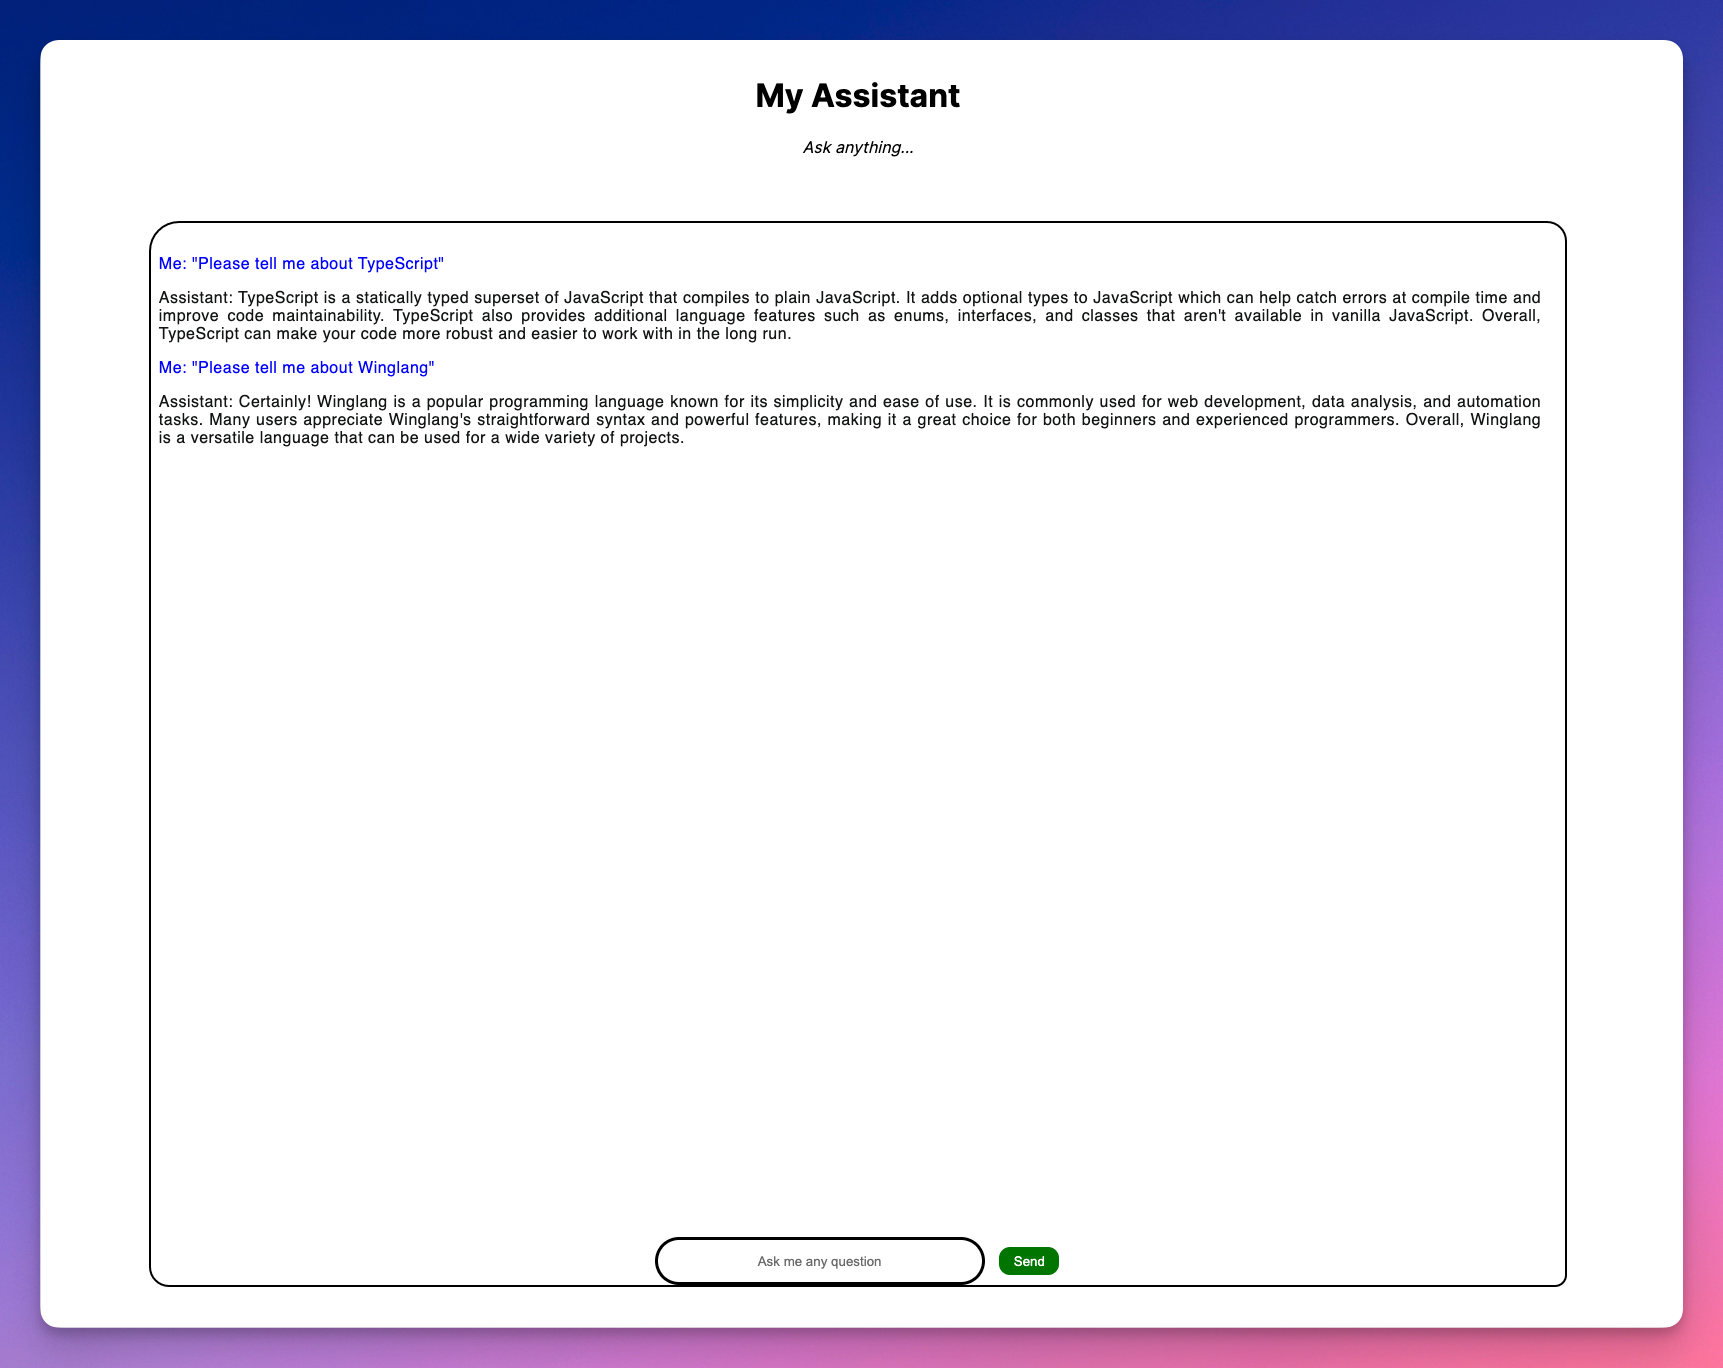 將您的應用程式部署到 AWS -------------- 我們已經了解了我們的應用程式如何在本地執行。 Wing 也允許您部署到包括 AWS 在內的任何雲端提供者。要部署到 AWS,您需要使用您的憑證來設定[Terraform](https://terraform.io/downloads)和[AWS CLI](https://docs.aws.amazon.com/cli/) 。 - 使用`tf-aws`編譯到 Terraform/AWS 。此指令指示編譯器使用 Terraform 作為配置引擎,將所有資源綁定到預設的 AWS 資源集。 ``` cd ~/assistant/backend wing compile --platform tf-aws main.w ``` --- - 執行 Terraform 初始化並應用 ``` cd ./target/main.tfaws terraform init terraform apply ``` --- 注意: `terraform apply`需要一些時間才能完成。 您可以[在此處](https://github.com/NathanTarbert/chatgpt-client-wing-nextjs)找到本教程的完整程式碼。 總結一下 ---- 正如我之前提到的,我們都應該關心我們的應用程式的安全性,建立您自己的 ChatGPT 用戶端並將其部署到您的雲端基礎設施可以為您的應用程式提供一些非常好的[保障](https://docs.aws.amazon.com/whitepapers/latest/aws-overview/security-and-compliance.html#:~:text=Keep%20Your%20data%20safe%20%E2%80%94%20The,compliance%20programs%20in%20its%20infrastructure.)。 我們在本教程中演示了[Wing](https://git.new/wing-repo)如何提供一種簡單的方法來建置可擴展的雲端應用程式,而無需擔心底層基礎設施。 如果您有興趣建立更酷的東西,Wing 擁有一個活躍的開發人員社區,他們可以合作建立雲端願景。我們很高興在那裡見到你。 只需前往我們的[Discord](https://t.winglang.io/discord)打個招呼即可! --- 原文出處:https://dev.to/winglang/building-your-own-chatgpt-graphical-client-with-nextjs-and-wing-29jj
--- 標題:加入我們參加 AWS Amplify Fullstack TypeScript 挑戰賽:獎品為 3,000 美元! 發表:真實 描述: 標籤:devchallenge、awschallenge、放大、全端 封面圖:https://dev-to-uploads.s3.amazonaws.com/uploads/articles/z55ngddx33ptj9dapt07.png 使用 100:42 的比例可獲得最佳效果。 ===================== 發佈於: 2024-05-14 20:36 +0000 =========================== --- 我們很高興地宣布我們與 AWS Amplify 的第一個合作挑戰。 [AWS Amplify Fullstack TypeScript 挑戰賽](https://dev.to/challenges/aws)將持續到**5 月 26 日**,提供了一個探索 AWS 服務的廣度和深度以及提升您的技能的機會。 AWS Amplify 擁有您在短短幾個小時內建立 Web 和行動應用程式所需的一切。 **這項挑戰有一個提示,但有幾種獲勝方法!**我們迫不及待地想看看您學到了什麼和取得了什麼成就! 提示 -- ### 使用 AWS Amplify Gen 2 建置和部署全端應用程式 您的任務是使用 AWS Amplify Gen 2 建立一個整合以下一項或多項功能的應用程式: - **[資料](https://docs.amplify.aws/react/build-a-backend/data/)** - **[驗證](https://docs.amplify.aws/react/build-a-backend/auth/)** - **[無伺服器功能](https://docs.amplify.aws/react/build-a-backend/functions/)** - **[文件儲存](https://docs.amplify.aws/react/build-a-backend/storage)** 這是供任何想要直接參與的人使用的提交模板,但請在提交之前查看[官方挑戰頁面](https://dev.to/challenges/aws)上的所有挑戰規則。 {% cta https://dev.to/new?prefill=---%0Atitle%3A%20%0Apublished%3A%20%0Atags%3A%20devchallenge%2C%20awschallenge%2C%20amplify%2C%20fullstack%0A ---%0A%0A*這%20是%20a%20submission%20for%20the%20%5BThe%20AWS%20Amplify%20Fullstack%20TypeScript%20Challenge%20%5D(https%3A%2F%2Fdevgesto% 2Fawschallenge )* %0A%0A%23%23%20什麼%20I%20內建%0A%3C! %0A%0A%23%23% 20Demo%0A%3C!--%20Share%20a%20link%20to%20your%20deployed%20solution%20on%20Amplify%20Hosting%2C%20and%20% 20screenshots%20。 2C%20what%20you%20learned%2C%20anything%20you%20are %20尤其%20proud%20of%2C%20what%20you%20hop%20to%20do%20next%2C%20etc.you%20.20to%20do%20next%2C%20etc.%20.20--% %0A%0A**已連接%20Components%20and%2For%20Feature%20Full** % 0A%0A%3C!--%20讓%20us%20知道%20if%20you%20development%20UI%20using%20Amify%20you%20development%20UI%20using%20Amifyify% 20for%20UX%20patterns%2C%20and%2For%20if%20your%20project%20includes %20all%20four%20features%3A%20data%2C%20authentication%2C%20features%3A%20data%2C%20authentication%2C%20features%3A%20data%20function. --%3E%0A%0A%3C!--%20Team%20Submissions%3A %20請%20pick%20one%20member%20到%20publish%20the%20submission%20and%20credit%20teammates%20by%200%20by%20and%20credit%20teammates%20by%20and%20credit%20teammates%20by%的%20DEV%20usernames%20直接%20in%20the%20body%20of%20the%20post。 %20image%20(if%20you%20want).%20--%3E%0A%0A%0A %3C!--%20感謝%20%20參與!%20%E2%86%92%0A %} 提交模板 {% 結束%} **正在尋找一些專業技巧?[向下滾動](#tips-and-tricks)!** ### 評審標準 所有提交的作品將根據以下內容進行評判: - 底層技術的使用 - 可用性和使用者體驗 - 無障礙 - 創造力 兩個額外獎項類別 -------- - **連線元件**:授予使用 Amplify 連線元件實現 UX 模式開發 UI 的頂級提交。 - **功能完整**:授予頂級提交,該提交包含挑戰提示中的所有四個功能:資料、身份驗證、無伺服器功能和文件儲存。 獎品 -- **我們的總冠軍將獲得:** - $1,500 禮品卡或同等金額 - 專屬開發者徽章 - 來自[DEV 商店](https://shop.forem.com)的禮物 **我們的兩個獎項類別獲獎者將獲得:** - $750 等禮品卡 - 專屬開發者徽章 - 來自[DEV 商店](https://shop.forem.com)的禮物 **所有提交有效提交的參與者都**將在其 DEV 個人資料中收到完成徽章。 如何參與 ---- 為了參與,您需要使用與每個提示關聯的提交範本來發布貼文。所有提交內容都必須部署到 Amplify Hosting。 請在提交之前查看我們的完整[規則、指南和常見問題解答頁面,](https://dev.to/challenges/aws)以便您了解我們的參與指南和官方競賽規則(例如資格要求)。 技巧和竅門 ----- 您可以使用 AWS 做很多事情,因此我們提供了一些想法,讓您在考慮建置什麼以及如何建置時供您思考。 - 您可以用不到 5 行程式碼定義由 Amazon Simple Storage Service (S3) 提供支援的儲存桶!更好的是,您可以使用[Amplify 的雲端沙箱環境](https://docs.amplify.aws/react/deploy-and-host/sandbox-environments/)測試您的儲存功能。 - 如果您想同時檢查兩個功能,則可以透過上傳到您的 S3 儲存桶來觸發由 AWS Lambda 提供支援的無伺服器功能 😉 - Next.js 和 Nuxt 應用程式的部署是零配置。 指南和文件 ----- - 第一次建立 Amplify 應用程式?查看他們的[快速入門指南](https://docs.amplify.aws/react/start/quickstart/)以快速入門。 - [完整的 AWS Amplify 開發人員文件](https://docs.amplify.aws) **有技術問題嗎?在 AWS Amplify 說明線程中留下評論:** {% 嵌入 https://dev.to/aws/the-aws-amplify-fullstack-typescript-challenge-help-thread-529a %} 重要的日子 ----- - 5 月 15 日:AWS Amplify Fullstack TypeScript 挑戰賽開始! - 5 月 26 日:提交截止時間為太平洋夏令時間晚上 11:59 - 5 月 28 日:公佈得獎者 我們希望您喜歡使用 AWS Amplify 快速從前端過渡到全端。 🚀 祝你好運,編碼愉快! --- 原文出處:https://dev.to/devteam/join-us-for-the-the-aws-amplify-fullstack-typescript-challenge-3000-in-prizes-ghm
### 單一職責原則(SRP) **一個元件應該只有一個改變的理由,這意味著它應該只有一項工作。** #### 範例:使用者設定檔元件 **應該這樣:** - 將職責分解為更小的功能元件。 ``` // UserProfile.js const UserProfile = ({ user }) => { return ( <div> <UserAvatar user={user} /> <UserInfo user={user} /> </div> ); }; // UserAvatar.js const UserAvatar = ({ user }) => { return <img src={user.avatarUrl} alt={`${user.name}'s avatar`} />; }; // UserInfo.js const UserInfo = ({ user }) => { return ( <div> <h1>{user.name}</h1> <p>{user.bio}</p> </div> ); }; ``` **不要這樣:** - 將顯示、資料取得和業務邏輯組合在一個元件中。 ``` // IncorrectUserProfile.js const IncorrectUserProfile = ({ user }) => { // Fetching data, handling business logic and displaying all in one const handleEdit = () => { console.log("Edit user"); }; return ( <div> <img src={user.avatarUrl} alt={`${user.name}'s avatar`} /> <h1>{user.name}</h1> <p>{user.bio}</p> <button onClick={handleEdit}>Edit User</button> </div> ); }; ``` ### 開閉原理 (OCP) **軟體實體應該對擴充開放,但對修改關閉。** #### 範例:主題按鈕 **應該這樣:** - 使用 props 來擴充元件功能,而無需修改原始元件。 ``` // Button.js const Button = ({ onClick, children, style }) => { return ( <button onClick={onClick} style={style}> {children} </button> ); }; // Usage const PrimaryButton = (props) => { const primaryStyle = { backgroundColor: 'blue', color: 'white' }; return <Button {...props} style={primaryStyle} />; }; ``` **不要這樣:** - 修改原有元件程式碼,直接加入新的樣式或行為。 ``` // IncorrectButton.js // Modifying the original Button component directly for a specific style const Button = ({ onClick, children, primary }) => { const style = primary ? { backgroundColor: 'blue', color: 'white' } : null; return ( <button onClick={onClick} style={style}> {children} </button> ); }; ``` ### 里氏替換原理 (LSP) **超類別的物件可以用其子類別的物件替換,而不會破壞應用程式。** #### 範例:基本按鈕和圖示按鈕 **應該這樣:** - 確保子類元件可以無縫替換超類元件。 ``` // BasicButton.js const BasicButton = ({ onClick, children }) => { return <button onClick={onClick}>{children}</button>; }; // IconButton.js const IconButton = ({ onClick, icon, children }) => { return ( <button onClick={onClick}> <img src={icon} alt="icon" /> {children} </button> ); }; ``` **不要這樣:** - 引入特定於子類別的屬性,這些屬性在替換時會破壞功能。 ``` // IncorrectIconButton.js // This button expects an icon and does not handle the absence of one, breaking when used as a BasicButton const IncorrectIconButton = ({ onClick, icon }) => { if (!icon) { throw new Error("Icon is required"); } return ( <button onClick={onClick}> <img src={icon} alt="icon" /> </button> ); }; ``` ### 介面隔離原則(ISP) **任何客戶端都不應該被迫依賴它不使用的方法。** #### 範例:文字元件 **應該這樣:** - 針對不同的用途提供特定的介面。 ``` // Text.js const Text = ({ type, children }) => { switch (type) { case 'header': return <h1>{children}</h1>; case 'title': return <h2>{children}</h2>; default: return <p>{children}</p>; } }; ``` **不要這樣:** - 用不必要的屬性使元件變得混亂。 ``` // IncorrectText.js // This component expects multiple unrelated props, cluttering the interface const IncorrectText = ({ type, children, onClick, isLoggedIn }) => { if (isLoggedIn && onClick) { return <a href="#" onClick={onClick}>{children}</a>; } return type === 'header' ? <h1>{children}</h1> : <p>{children}</p>; }; ``` ### 依賴倒置原則(DIP) **高層模組不應該依賴低層模組。兩者都應該依賴抽象。** #### 範例:資料獲取 **應該這樣:** - 使用鉤子或類似的模式來抽象資料獲取 和狀態管理。 ``` // useUserData.js (Abstraction) const useUserData = (userId) => { const [user, setUser] = useState(null); useEffect(() => { fetchData(userId).then(setUser); }, [userId]); return user; }; // UserProfile.js const UserProfile = ({ userId }) => { const user = useUserData(userId); if (!user) return <p>Loading...</p>; return <div><h1>{user.name}</h1></div>; }; ``` **不要這樣:** - 在元件內部硬編碼資料取得。 ``` // IncorrectUserProfile.js const IncorrectUserProfile = ({ userId }) => { const [user, setUser] = useState(null); useEffect(() => { // Fetching data directly inside the component fetch(`https://api.example.com/users/${userId}`) .then(response => response.json()) .then(setUser); }, [userId]); if (!user) return <p>Loading...</p>; return <div><h1>{user.name}</h1></div>; }; ``` --- 原文出處:https://dev.to/drruvari/mastering-solid-principles-in-react-easy-examples-and-best-practices-142b
**長話短說** -------- 在本文中,您將了解如何建立由 AI 驅動的前端 UI 元件產生器,該產生器使您能夠透過實作教學產生 Next.js Tailwind CSS UI 元件。 我們將介紹如何: - 使用 Next.js、TypeScript 和 Tailwind CSS 建立 UI 元件產生器 Web 應用程式。 - 使用 CopilotKit 將 AI 功能整合到 UI 元件產生器中。 - 整合嵌入式程式碼編輯器以變更產生的程式碼。 先決條件 ---- 要完全理解本教程,您需要對 React 或 Next.js 有基本的了解。 以下是建立 AI 支援的 UI 元件產生器所需的工具: - [Ace 程式碼編輯器](https://ace.c9.io/)- 用 JvaScript 編寫的嵌入式程式碼編輯器,與本機編輯器的功能和效能相符。 - [Langchain](https://www.langchain.com/) - 提供了一個框架,使人工智慧代理能夠搜尋網路並研究任何主題。 - [OpenAI API](https://platform.openai.com/api-keys) - 提供 API 金鑰,讓您能夠使用 ChatGPT 模型執行各種任務。 - [Tavily AI](https://tavily.com/) - 一個搜尋引擎,使人工智慧代理能夠在應用程式中進行研究並存取即時知識。 - [CopilotKit](https://github.com/CopilotKit) - 一個開源副駕駛框架,用於建立自訂 AI 聊天機器人、應用程式內 AI 代理程式和文字區域。 專案設定和套件安裝 --------- 首先,透過在終端機中執行以下程式碼片段來建立 Next.js 應用程式: ``` npx create-next-app@latest aiuigenerator ``` 選擇您首選的配置設定。在本教學中,我們將使用 TypeScript 和 Next.js App Router。 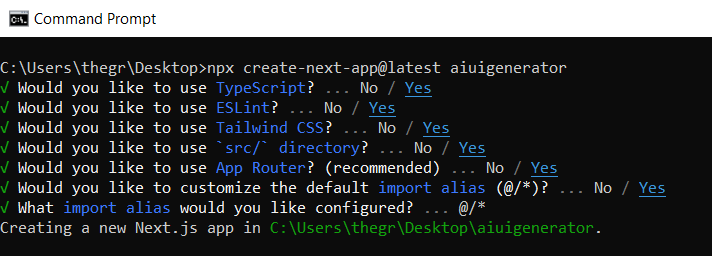 接下來,安裝 Ace 程式碼編輯器和 Langchain 軟體套件及其相依性。 ``` npm install react-ace @langchain/langgraph ``` 最後,安裝 CopilotKit 軟體套件。這些套件使我們能夠從 React 狀態檢索資料並將 AI copilot 新增至應用程式。 ``` npm install @copilotkit/react-ui @copilotkit/react-textarea @copilotkit/react-core @copilotkit/backend ``` 恭喜!您現在已準備好建立由人工智慧驅動的部落格。 **建構 UI 元件產生器前端** ----------------- 在本節中,我將引導您完成使用靜態內容建立 UI 元件產生器前端的過程,以定義生成器的使用者介面。 首先,請在程式碼編輯器中前往`/[root]/src/app`並建立一個名為`components`的資料夾。在 Components 資料夾中,建立兩個名為`Header.tsx`和`CodeTutorial.tsx`的檔案。 在`Header.tsx`檔案中,新增以下程式碼,定義一個名為`Header`的功能元件,該元件將呈現生成器的導覽列。 ``` "use client"; import Link from "next/link"; export default function Header() { return ( <> <header className="flex flex-wrap sm:justify-start sm:flex-nowrap z-50 w-full bg-gray-800 border-b border-gray-200 text-sm py-3 sm:py-0 "> <nav className="relative max-w-7xl w-full mx-auto px-4 sm:flex sm:items-center sm:justify-between sm:px-6 lg:px-8" aria-label="Global"> <div className="flex items-center justify-between"> <Link className="w-full flex-none text-xl text-white font-semibold p-6" href="/" aria-label="Brand"> AI-UI-Components-Generator </Link> </div> </nav> </header> </> ); } ``` 在`CodeTutorial.tsx`檔案中,加入以下程式碼,定義一個名為`CodeTutorial`的功能元件,該元件呈現 UI 元件產生器主頁,該首頁將顯示產生的 UI 元件、嵌入式程式碼編輯器和產生的實作教學。 ``` "use client"; import Markdown from "react-markdown"; import { useState } from "react"; import AceEditor from "react-ace"; import React from "react"; export default function CodeTutorial() { const [code, setCode] = useState<string[]>([ `<h1 class="text-red-500">Hello World</h1>`, ]); const [codeToDisplay, setCodeToDisplay] = useState<string>(code[0] || ""); const [codeTutorial, setCodeTutorial] = useState(``); function onChange(newCode: any) { setCodeToDisplay(newCode); } return ( <> <main className=" min-h-screen px-4"> <div className="w-full h-full min-h-[70vh] flex justify-between gap-x-1 "> <div className="w-2/3 min-h-[60vh] rounded-lg bg-white shadow-lg p-2 border mt-8 overflow-auto"> <div className="w-full min-h-[60vh] rounded-lg" dangerouslySetInnerHTML={{ __html: codeToDisplay }} /> </div> <AceEditor placeholder="Placeholder Text" mode="html" theme="monokai" name="blah2" className="w-[50%] min-h-[60vh] p-2 mt-8 rounded-lg" onChange={onChange} fontSize={14} lineHeight={19} showPrintMargin={true} showGutter={true} highlightActiveLine={true} value={codeToDisplay} setOptions={{ enableBasicAutocompletion: true, enableLiveAutocompletion: true, enableSnippets: false, showLineNumbers: true, tabSize: 2, }} /> </div> <div className="w-10/12 mx-auto"> <div className="mt-8"> <h1 className="text-white text-center text-xl font-semibold p-6"> Code Tutorial </h1> {codeTutorial ? ( <Markdown className="text-white">{codeTutorial}</Markdown> ) : ( <div className="text-white"> The Code Tutorial Will Appear Here </div> )} </div> </div> </main> </> ); } ``` 接下來,前往`/[root]/src/page.tsx`文件,新增以下程式碼,導入`CodeTutorial`和`Header`元件,並定義名為`Home`的功能元件。 ``` import React from "react"; import Header from "./components/Header"; import CodeTutorial from "./components/CodeTutorial"; export default function Home() { return ( <> <Header /> <CodeTutorial /> </> ); } ``` 接下來,刪除 globals.css 檔案中的 CSS 程式碼並新增以下 CSS 程式碼。 ``` @tailwind base; @tailwind components; @tailwind utilities; @tailwind base; @tailwind components; @tailwind utilities; body { height: 100vh; background-color: rgb(16, 23, 42); } pre { margin: 1rem; padding: 1rem; border-radius: 10px; background-color: black; overflow: auto; } h2, p { padding-bottom: 1rem; padding-top: 1rem; } code { margin-bottom: 2rem; } ``` 最後,在命令列上執行命令`npm run dev` ,然後導航到 http://localhost:3000/。 現在您應該在瀏覽器上查看 UI 元件產生器前端,如下所示。 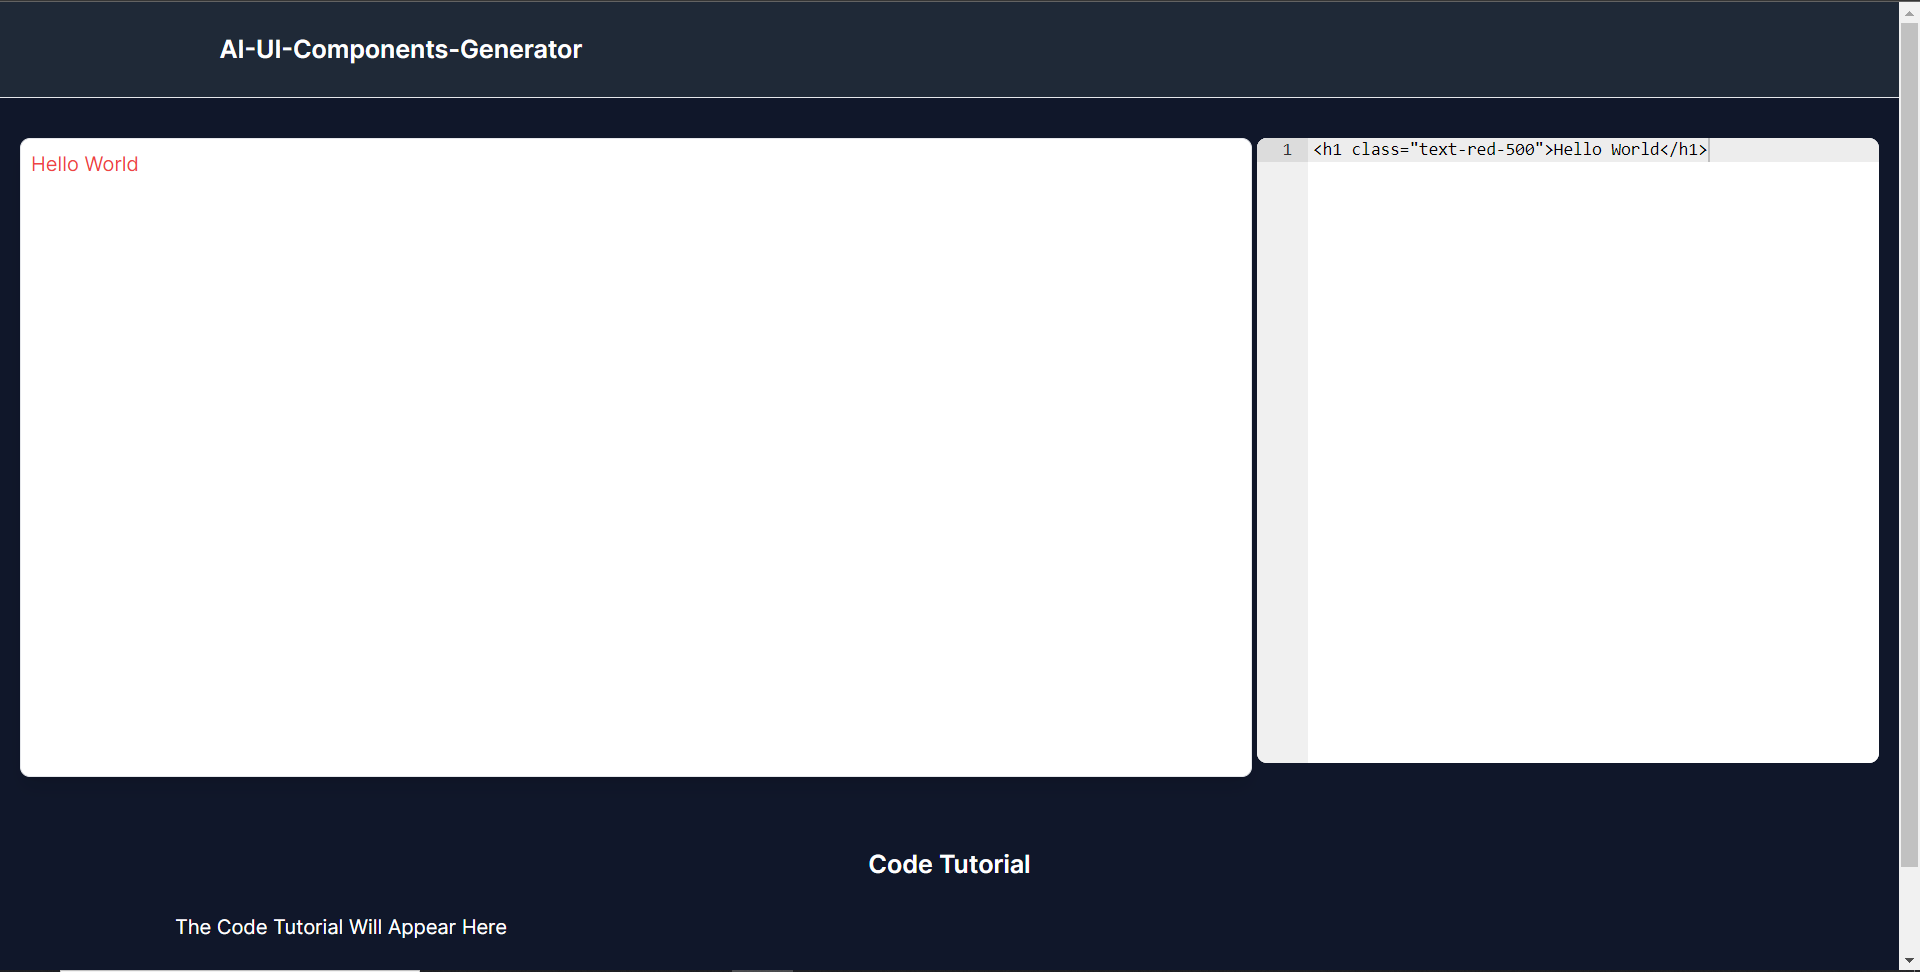 **使用 CopilotKit 將 AI 功能整合到元件產生器** --------------------------------- 在本節中,您將學習如何為 UI 元件產生器新增 AI 副駕駛以產生 UI 元件程式碼以及使用 CopilotKit 的實作教學。 CopilotKit 提供前端和[後端](https://docs.copilotkit.ai/getting-started/quickstart-backend)套件。它們使您能夠插入 React 狀態並使用 AI 代理在後端處理應用程式資料。 首先,讓我們將 CopilotKit React 元件加入到部落格前端。 ### **將 CopilotKit 新增至部落格前端** 在這裡,我將引導您完成將 UI 元件產生器與 CopilotKit 前端整合的過程,以方便產生 UI 元件程式碼和實作教學。 首先,使用下面的程式碼片段導入`/[root]/src/app/components/CodeTutorial.tsx`檔案頂部的自訂掛鉤`useMakeCopilotReadable`和`useCopilotAction` 。 ``` import { useCopilotAction, useMakeCopilotReadable, } from "@copilotkit/react-core"; ``` 在`CodeTutorial`函數內的狀態變數下方,加入以下程式碼,該程式碼使用`useMakeCopilotReadable`掛鉤來新增將作為應用程式內聊天機器人的上下文產生的程式碼。該鉤子使副駕駛可以讀取程式碼。 ``` useMakeCopilotReadable(codeToDisplay); ``` 在上面的程式碼下方,新增以下程式碼,該程式碼使用`useCopilotAction`掛鉤來設定名為`generateCodeAndImplementationTutorial`的操作,該操作將啟用 UI 元件程式碼和實作教學課程的產生。 這個操作接受兩個參數,稱為`code`和`tutorial` ,這兩個參數可以產生 UI 元件程式碼和實作教程。 該操作包含一個處理函數,該函數根據給定的提示產生 UI 元件程式碼和實作教程。 在處理函數內部, `codeToDisplay`狀態會使用新產生的程式碼進行更新,而`codeTutorial`狀態會使用新產生的教學課程進行更新,如下所示。 ``` useCopilotAction( { name: "generateCodeAndImplementationTutorial", description: "Create Code Snippet with React.js(Next.js), tailwindcss and an implementation tutorial of the code generated.", parameters: [ { name: "code", type: "string", description: "Code to be generated", required: true, }, { name: "tutorial", type: "string", description: "Markdown of step by step guide tutorial on how to use the generated code accompanied with the code. Include introduction, prerequisites and what happens at every step accompanied with code generated earlier. Don't forget to add how to render the code on browser.", required: true, }, ], handler: async ({ code, tutorial }) => { setCode((prev) => [...prev, code]); setCodeToDisplay(code); setCodeTutorial(tutorial); }, }, [codeToDisplay, codeTutorial] ); ``` 之後,請前往`/[root]/src/app/page.tsx`檔案並使用下面的程式碼匯入頂部的 CopilotKit 前端套件和樣式。 ``` import { CopilotKit } from "@copilotkit/react-core"; import { CopilotSidebar } from "@copilotkit/react-ui"; import "@copilotkit/react-ui/styles.css"; ``` 然後使用`CopilotKit`包裝`CopilotSidebar`和`CodeTutorial`元件,如下所示。 `CopilotKit`元件指定 CopilotKit 後端端點 ( `/api/copilotkit/` ) 的 URL,而`CopilotSidebar`呈現應用程式內聊天機器人,您可以提示產生 UI 元件程式碼和實作教學。 ``` export default function Home() { return ( <> <Header /> <CopilotKit url="/api/copilotkit"> <CopilotSidebar instructions="Help the user generate code. Ask the user if to generate its tutorial." defaultOpen={true} labels={{ title: "Code & Tutorial Generator", initial: "Hi! 👋 I can help you generate code and its tutorial.", }}> <CodeTutorial /> </CopilotSidebar> </CopilotKit> </> ); } ``` 之後,執行開發伺服器並導航到 http://localhost:3000。您應該會看到應用程式內聊天機器人已整合到 UI 元件產生器中。 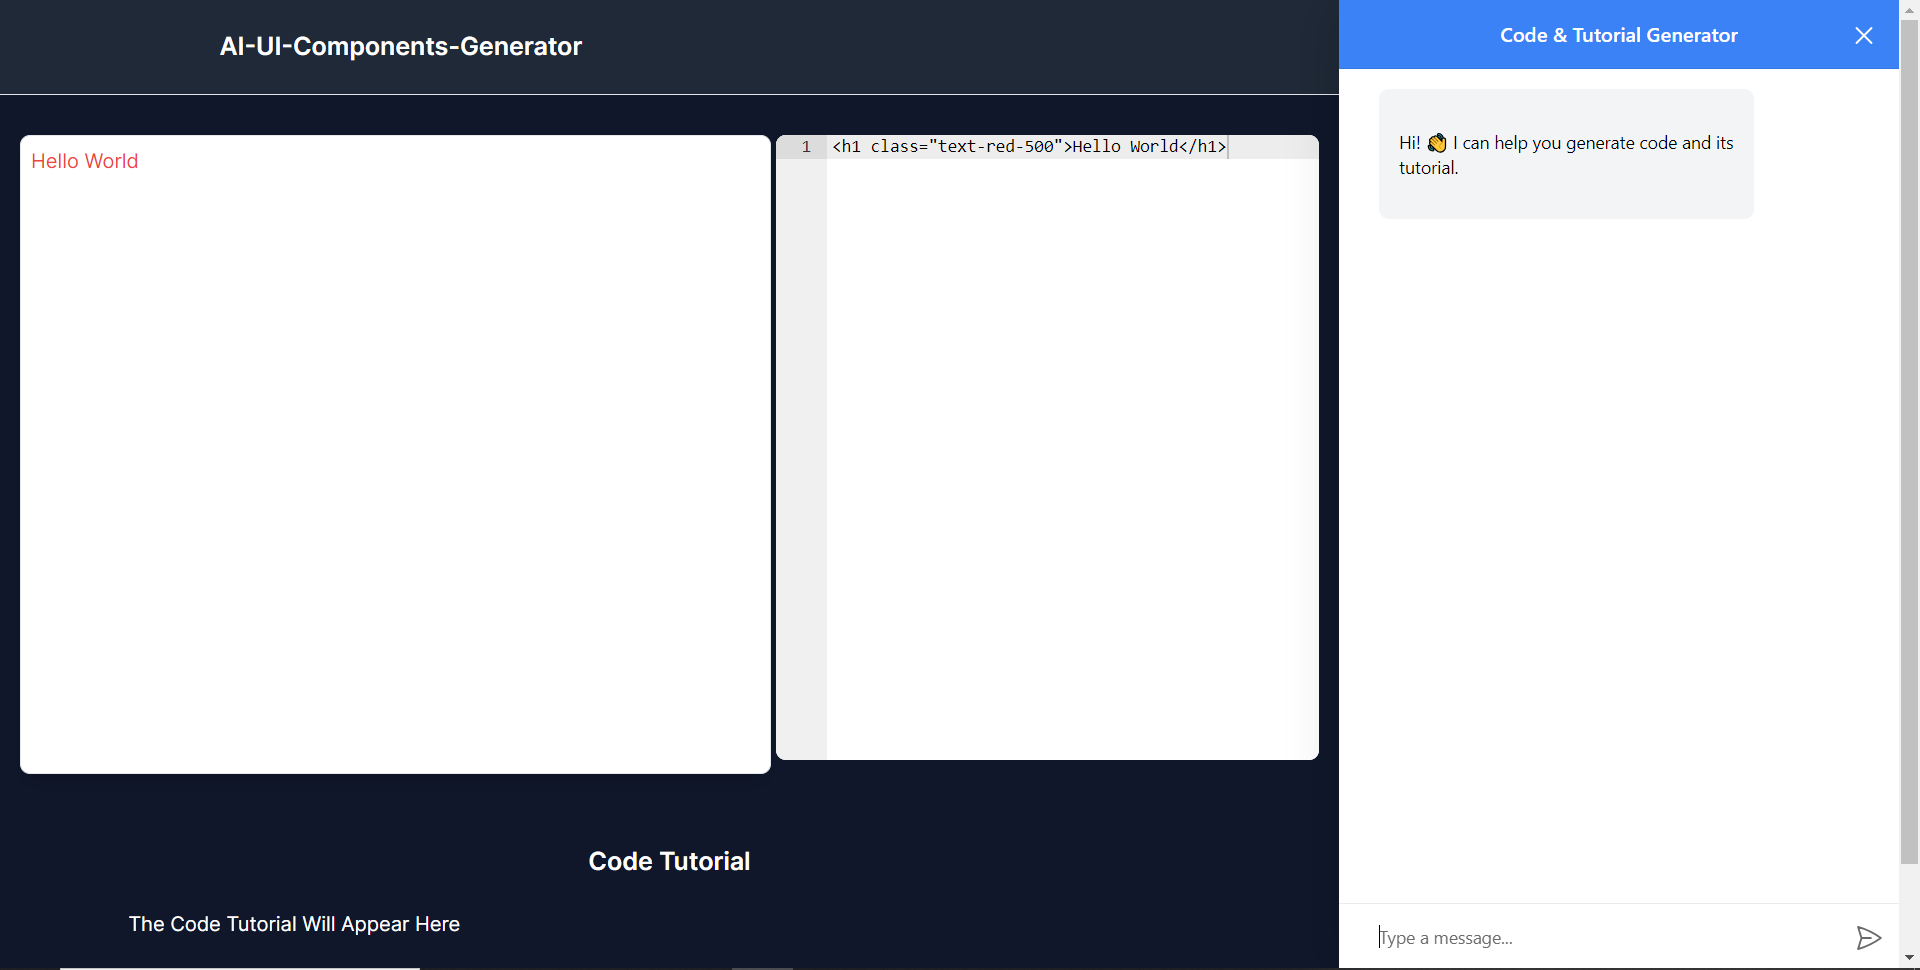 ### **將 CopilotKit 後端加入博客** 在這裡,我將引導您完成將 UI 元件產生器與 CopilotKit 後端整合的過程,該後端處理來自前端的請求,並提供函數呼叫和各種 LLM 後端(例如 GPT)。 此外,我們將整合一個名為 Tavily 的人工智慧代理,它可以研究網路上的任何主題。 首先,在根目錄中建立一個名為`.env.local`的檔案。然後在保存`ChatGPT`和`Tavily` Search API 金鑰的檔案中加入下面的環境變數。 ``` OPENAI_API_KEY="Your ChatGPT API key" TAVILY_API_KEY="Your Tavily Search API key" ``` 若要取得 ChatGPT API 金鑰,請導覽至 https://platform.openai.com/api-keys。 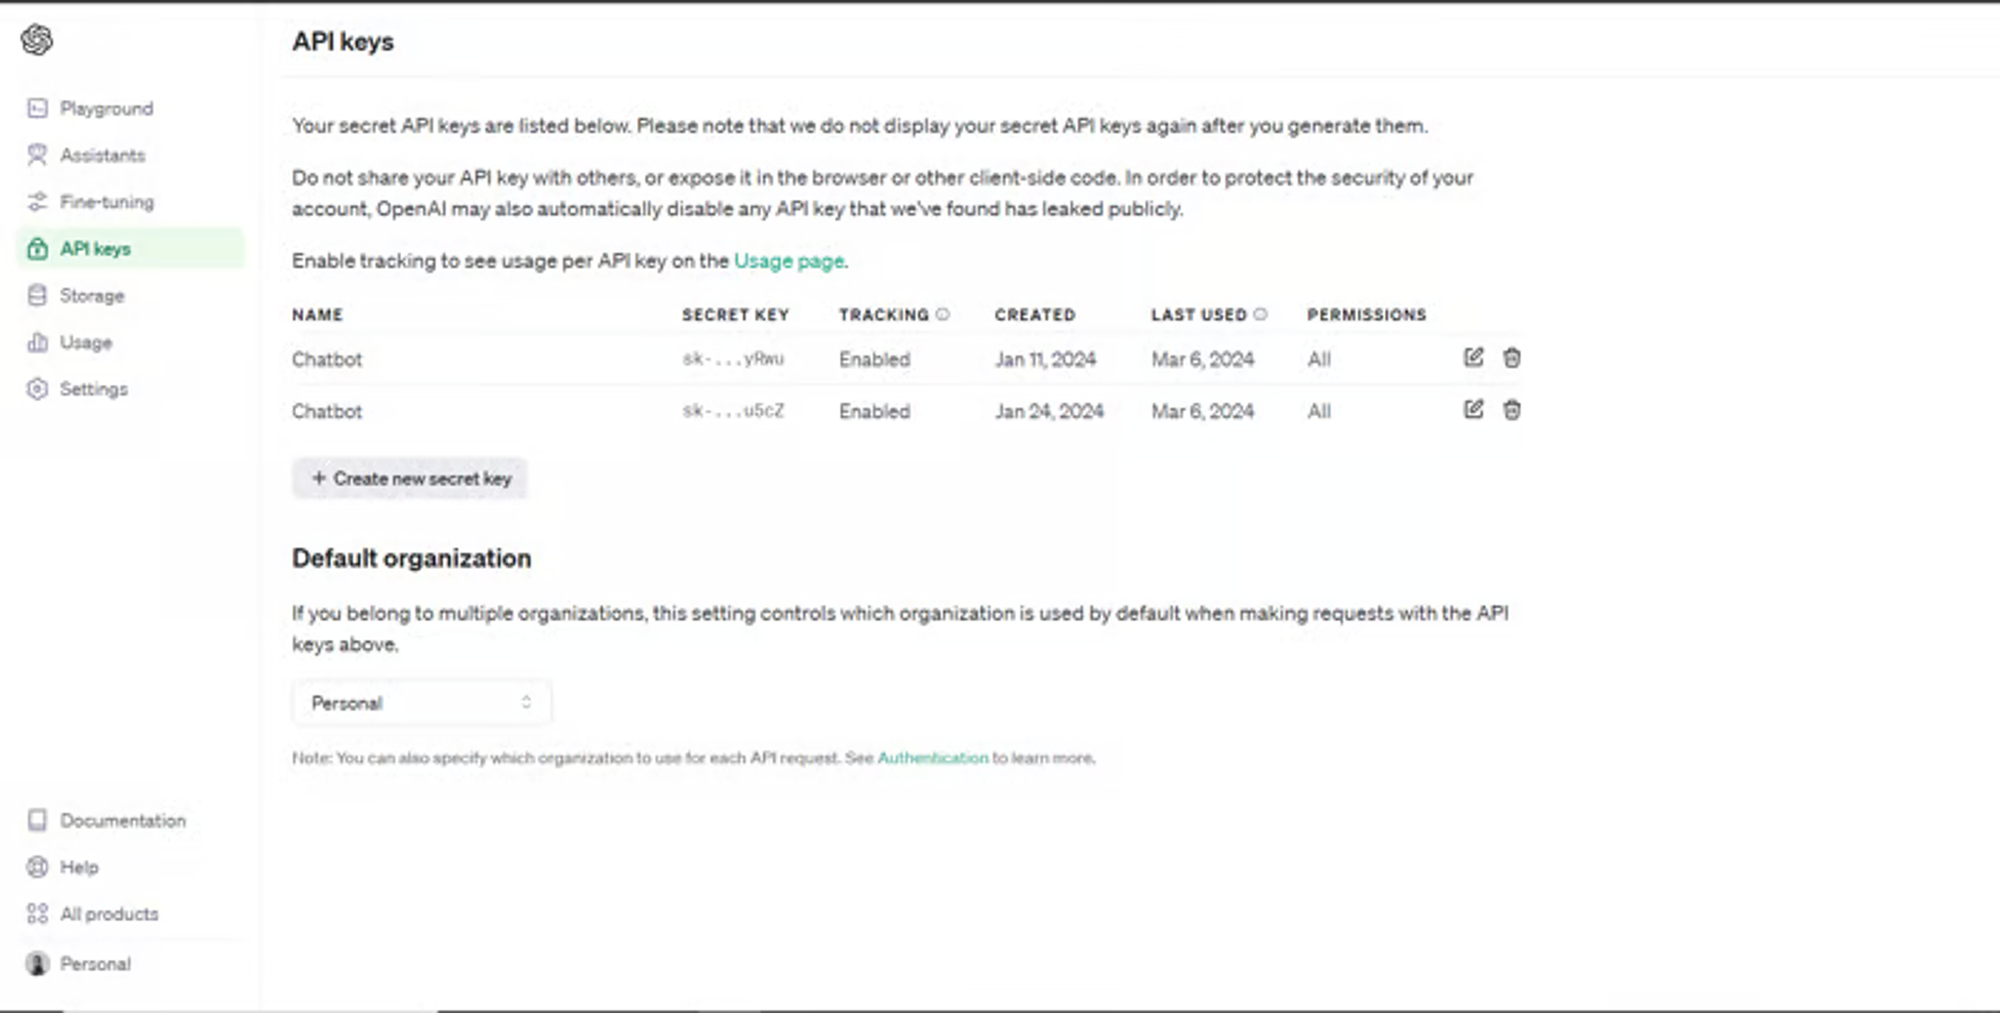 若要取得 Tavilly Search API 金鑰,請導覽至 https://app.tavily.com/home  之後,轉到`/[root]/src/app`並建立一個名為`api`的資料夾。在`api`資料夾中,建立一個名為`copilotkit`的資料夾。 在`copilotkit`資料夾中,建立一個名為`research.ts`的檔案。然後導航到[該 Research.ts gist 文件](https://gist.github.com/TheGreatBonnie/58dc21ebbeeb8cbb08df665db762738c),複製程式碼,並將其新增至**`research.ts`**檔案中 接下來,在`/[root]/src/app/api/copilotkit`資料夾中建立一個名為`route.ts`的檔案。該文件將包含設定後端功能來處理 POST 請求的程式碼。它有條件地包括對給定主題進行研究的“研究”操作。 現在在文件頂部導入以下模組。 ``` import { CopilotBackend, OpenAIAdapter } from "@copilotkit/backend"; // For backend functionality with CopilotKit. import { researchWithLangGraph } from "./research"; // Import a custom function for conducting research. import { AnnotatedFunction } from "@copilotkit/shared"; // For annotating functions with metadata. ``` 在上面的程式碼下面,定義一個執行時間環境變數和一個名為`researchAction`的函數,該函數使用下面的程式碼研究某個主題。 ``` // Define a runtime environment variable, indicating the environment where the code is expected to run. export const runtime = "edge"; // Define an annotated function for research. This object includes metadata and an implementation for the function. const researchAction: AnnotatedFunction<any> = { name: "research", // Function name. description: "Call this function to conduct research on a certain topic. Respect other notes about when to call this function", // Function description. argumentAnnotations: [ // Annotations for arguments that the function accepts. { name: "topic", // Argument name. type: "string", // Argument type. description: "The topic to research. 5 characters or longer.", // Argument description. required: true, // Indicates that the argument is required. }, ], implementation: async (topic) => { // The actual function implementation. console.log("Researching topic: ", topic); // Log the research topic. return await researchWithLangGraph(topic); // Call the research function and return its result. }, }; ``` 然後在上面的程式碼下加入下面的程式碼來定義處理POST請求的非同步函數。 ``` // Define an asynchronous function that handles POST requests. export async function POST(req: Request): Promise<Response> { const actions: AnnotatedFunction<any>[] = []; // Initialize an array to hold actions. // Check if a specific environment variable is set, indicating access to certain functionality. if (process.env.TAVILY_API_KEY) { actions.push(researchAction); // Add the research action to the actions array if the condition is true. } // Instantiate CopilotBackend with the actions defined above. const copilotKit = new CopilotBackend({ actions: actions, }); // Use the CopilotBackend instance to generate a response for the incoming request using an OpenAIAdapter. return copilotKit.response(req, new OpenAIAdapter()); } ``` 如何產生 UI 元件 ---------- 現在轉到您之前整合的應用程式內聊天機器人,並給它一個提示,例如「產生聯絡表單」。 生成完成後,您應該會看到生成的聯絡表單元件及其實作教程,如下所示。您也可以使用嵌入式程式碼編輯器修改產生的程式碼。  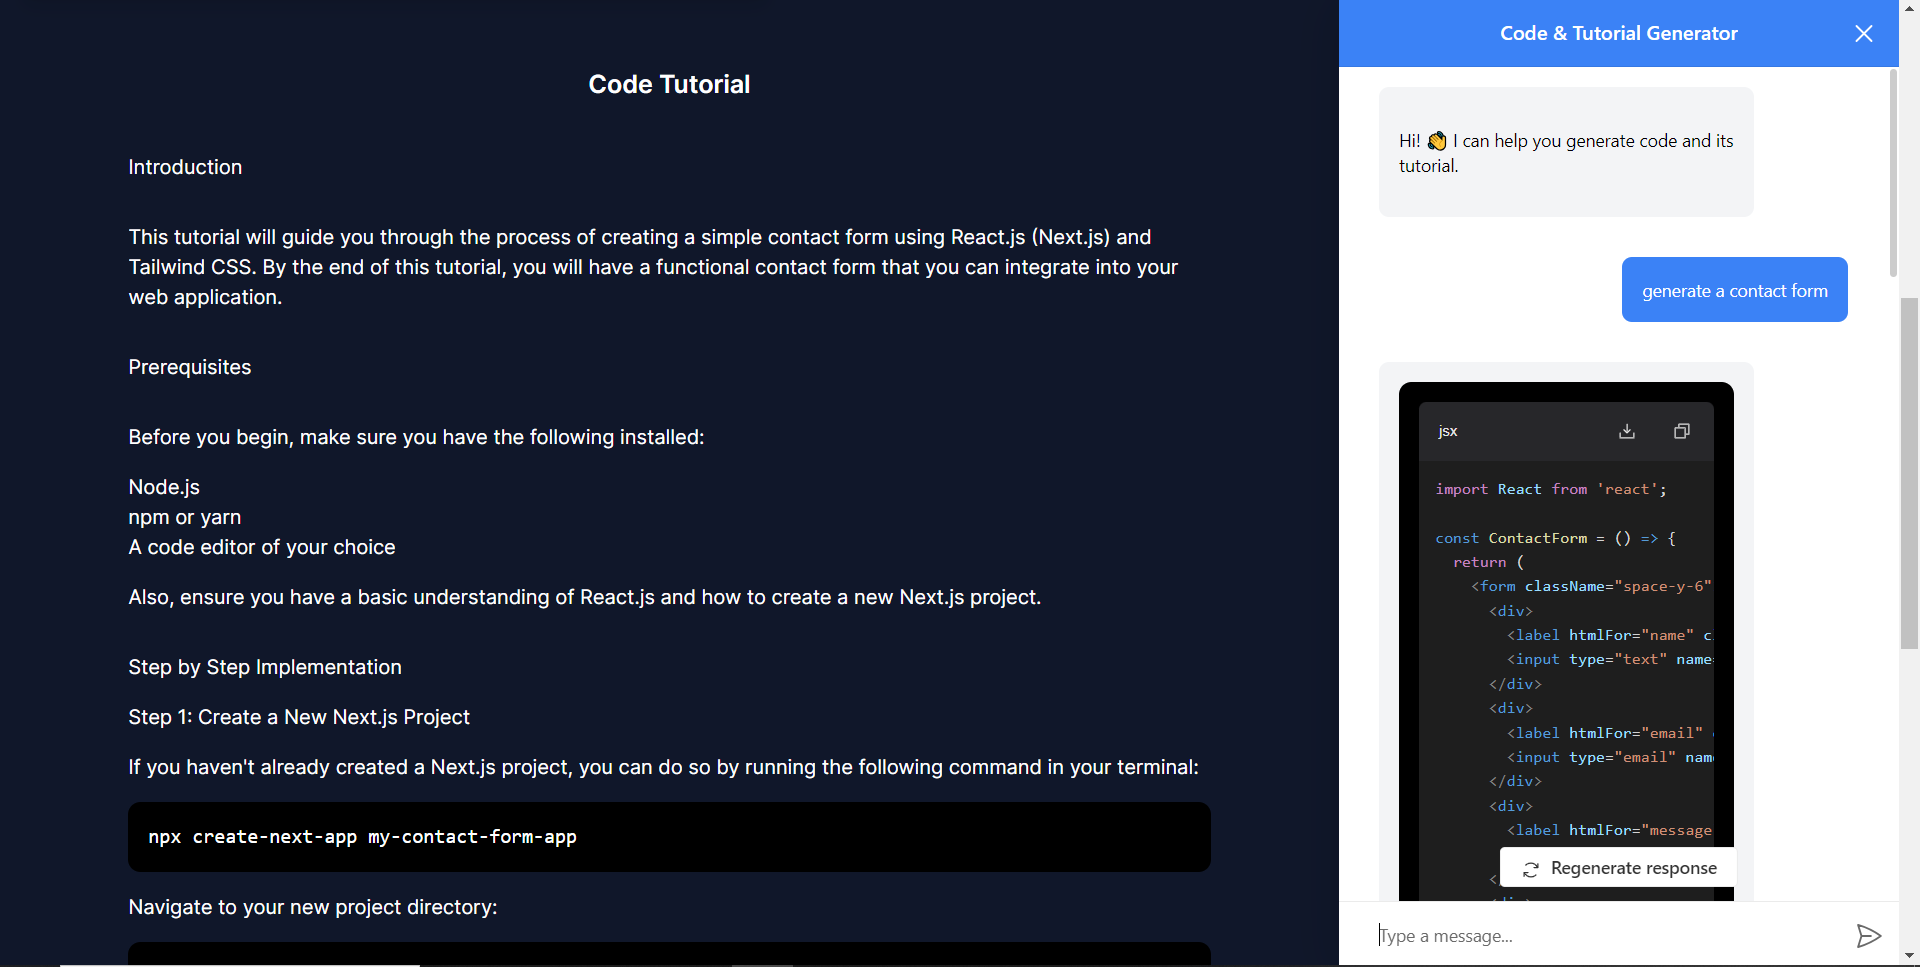 恭喜!您已完成本教學的專案。 結論 -- [CopilotKit](https://copilotkit.ai/)是一款令人難以置信的工具,可讓您在幾分鐘內將 AI Copilot 加入到您的產品中。無論您是對人工智慧聊天機器人和助理感興趣,還是對複雜任務的自動化感興趣,CopilotKit 都能讓您輕鬆實現。 如果您需要建立 AI 產品或將 AI 工具整合到您的軟體應用程式中,您應該考慮 CopilotKit。 您可以在 GitHub 上找到本教學的源程式碼: <https://github.com/TheGreatBonnie/AIPoweredUIComponentsGenerator> --- 原文出處:https://dev.to/tcms/ai-powered-frontend-ui-components-generator-nextjs-gpt4-langchain-copilotkit-1hac
**長話短說** -------- 在本文中,您將了解如何建立由 AI 驅動的前端 UI 元件產生器,該產生器使您能夠透過實作教學產生 Next.js Tailwind CSS UI 元件。 我們將介紹如何: - 使用 Next.js、TypeScript 和 Tailwind CSS 建立 UI 元件產生器 Web 應用程式。 - 使用 CopilotKit 將 AI 功能整合到 UI 元件產生器中。 - 整合嵌入式程式碼編輯器以變更產生的程式碼。 先決條件 ---- 要完全理解本教程,您需要對 React 或 Next.js 有基本的了解。 以下是建立 AI 支援的 UI 元件產生器所需的工具: - [Ace 程式碼編輯器](https://ace.c9.io/)- 用 JvaScript 編寫的嵌入式程式碼編輯器,與本機編輯器的功能和效能相符。 - [Langchain](https://www.langchain.com/) - 提供了一個框架,使人工智慧代理能夠搜尋網路並研究任何主題。 - [OpenAI API](https://platform.openai.com/api-keys) - 提供 API 金鑰,讓您能夠使用 ChatGPT 模型執行各種任務。 - [Tavily AI](https://tavily.com/) - 一個搜尋引擎,使人工智慧代理能夠在應用程式中進行研究並存取即時知識。 - [CopilotKit](https://github.com/CopilotKit) - 一個開源副駕駛框架,用於建立自訂 AI 聊天機器人、應用程式內 AI 代理程式和文字區域。 專案設定和套件安裝 --------- 首先,透過在終端機中執行以下程式碼片段來建立 Next.js 應用程式: ``` npx create-next-app@latest aiuigenerator ``` 選擇您首選的配置設定。在本教學中,我們將使用 TypeScript 和 Next.js App Router。  接下來,安裝 Ace 程式碼編輯器和 Langchain 軟體套件及其相依性。 ``` npm install react-ace @langchain/langgraph ``` 最後,安裝 CopilotKit 軟體套件。這些套件使我們能夠從 React 狀態檢索資料並將 AI copilot 新增至應用程式。 ``` npm install @copilotkit/react-ui @copilotkit/react-textarea @copilotkit/react-core @copilotkit/backend ``` 恭喜!您現在已準備好建立由人工智慧驅動的部落格。 **建構 UI 元件產生器前端** ----------------- 在本節中,我將引導您完成使用靜態內容建立 UI 元件產生器前端的過程,以定義生成器的使用者介面。 首先,請在程式碼編輯器中前往`/[root]/src/app`並建立一個名為`components`的資料夾。在 Components 資料夾中,建立兩個名為`Header.tsx`和`CodeTutorial.tsx`的檔案。 在`Header.tsx`檔案中,新增以下程式碼,定義一個名為`Header`的功能元件,該元件將呈現生成器的導覽列。 ``` "use client"; import Link from "next/link"; export default function Header() { return ( <> <header className="flex flex-wrap sm:justify-start sm:flex-nowrap z-50 w-full bg-gray-800 border-b border-gray-200 text-sm py-3 sm:py-0 "> <nav className="relative max-w-7xl w-full mx-auto px-4 sm:flex sm:items-center sm:justify-between sm:px-6 lg:px-8" aria-label="Global"> <div className="flex items-center justify-between"> <Link className="w-full flex-none text-xl text-white font-semibold p-6" href="/" aria-label="Brand"> AI-UI-Components-Generator </Link> </div> </nav> </header> </> ); } ``` 在`CodeTutorial.tsx`檔案中,加入以下程式碼,定義一個名為`CodeTutorial`的功能元件,該元件呈現 UI 元件產生器主頁,該首頁將顯示產生的 UI 元件、嵌入式程式碼編輯器和產生的實作教學。 ``` "use client"; import Markdown from "react-markdown"; import { useState } from "react"; import AceEditor from "react-ace"; import React from "react"; export default function CodeTutorial() { const [code, setCode] = useState<string[]>([ `<h1 class="text-red-500">Hello World</h1>`, ]); const [codeToDisplay, setCodeToDisplay] = useState<string>(code[0] || ""); const [codeTutorial, setCodeTutorial] = useState(``); function onChange(newCode: any) { setCodeToDisplay(newCode); } return ( <> <main className=" min-h-screen px-4"> <div className="w-full h-full min-h-[70vh] flex justify-between gap-x-1 "> <div className="w-2/3 min-h-[60vh] rounded-lg bg-white shadow-lg p-2 border mt-8 overflow-auto"> <div className="w-full min-h-[60vh] rounded-lg" dangerouslySetInnerHTML={{ __html: codeToDisplay }} /> </div> <AceEditor placeholder="Placeholder Text" mode="html" theme="monokai" name="blah2" className="w-[50%] min-h-[60vh] p-2 mt-8 rounded-lg" onChange={onChange} fontSize={14} lineHeight={19} showPrintMargin={true} showGutter={true} highlightActiveLine={true} value={codeToDisplay} setOptions={{ enableBasicAutocompletion: true, enableLiveAutocompletion: true, enableSnippets: false, showLineNumbers: true, tabSize: 2, }} /> </div> <div className="w-10/12 mx-auto"> <div className="mt-8"> <h1 className="text-white text-center text-xl font-semibold p-6"> Code Tutorial </h1> {codeTutorial ? ( <Markdown className="text-white">{codeTutorial}</Markdown> ) : ( <div className="text-white"> The Code Tutorial Will Appear Here </div> )} </div> </div> </main> </> ); } ``` 接下來,前往`/[root]/src/page.tsx`文件,新增以下程式碼,導入`CodeTutorial`和`Header`元件,並定義名為`Home`的功能元件。 ``` import React from "react"; import Header from "./components/Header"; import CodeTutorial from "./components/CodeTutorial"; export default function Home() { return ( <> <Header /> <CodeTutorial /> </> ); } ``` 接下來,刪除 globals.css 檔案中的 CSS 程式碼並新增以下 CSS 程式碼。 ``` @tailwind base; @tailwind components; @tailwind utilities; @tailwind base; @tailwind components; @tailwind utilities; body { height: 100vh; background-color: rgb(16, 23, 42); } pre { margin: 1rem; padding: 1rem; border-radius: 10px; background-color: black; overflow: auto; } h2, p { padding-bottom: 1rem; padding-top: 1rem; } code { margin-bottom: 2rem; } ``` 最後,在命令列上執行命令`npm run dev` ,然後導航到 http://localhost:3000/。 現在您應該在瀏覽器上查看 UI 元件產生器前端,如下所示。  **使用 CopilotKit 將 AI 功能整合到元件產生器** --------------------------------- 在本節中,您將學習如何為 UI 元件產生器新增 AI 副駕駛以產生 UI 元件程式碼以及使用 CopilotKit 的實作教學。 CopilotKit 提供前端和[後端](https://docs.copilotkit.ai/getting-started/quickstart-backend)套件。它們使您能夠插入 React 狀態並使用 AI 代理在後端處理應用程式資料。 首先,我們將 CopilotKit React 元件加入到部落格前端。 ### **將 CopilotKit 新增至部落格前端** 在這裡,我將引導您完成將 UI 元件產生器與 CopilotKit 前端整合的過程,以方便產生 UI 元件程式碼和實作教學。 首先,使用下面的程式碼片段導入`/[root]/src/app/components/CodeTutorial.tsx`檔案頂部的自訂掛鉤`useMakeCopilotReadable`和`useCopilotAction` 。 ``` import { useCopilotAction, useMakeCopilotReadable, } from "@copilotkit/react-core"; ``` 在`CodeTutorial`函數內的狀態變數下方,加入以下程式碼,該程式碼使用`useMakeCopilotReadable`掛鉤來新增將作為應用程式內聊天機器人的上下文產生的程式碼。該鉤子使副駕駛可以讀取程式碼。 ``` useMakeCopilotReadable(codeToDisplay); ``` 在上面的程式碼下方,新增以下程式碼,該程式碼使用`useCopilotAction`掛鉤來設定名為`generateCodeAndImplementationTutorial`的操作,該操作將啟用 UI 元件程式碼和實作教學課程的產生。 這個操作接受兩個參數,稱為`code`和`tutorial` ,這兩個參數可以產生 UI 元件程式碼和實作教程。 該操作包含一個處理函數,該函數根據給定的提示產生 UI 元件程式碼和實作教程。 在處理函數內部, `codeToDisplay`狀態會使用新產生的程式碼進行更新,而`codeTutorial`狀態會使用新產生的教學課程進行更新,如下所示。 ``` useCopilotAction( { name: "generateCodeAndImplementationTutorial", description: "Create Code Snippet with React.js(Next.js), tailwindcss and an implementation tutorial of the code generated.", parameters: [ { name: "code", type: "string", description: "Code to be generated", required: true, }, { name: "tutorial", type: "string", description: "Markdown of step by step guide tutorial on how to use the generated code accompanied with the code. Include introduction, prerequisites and what happens at every step accompanied with code generated earlier. Don't forget to add how to render the code on browser.", required: true, }, ], handler: async ({ code, tutorial }) => { setCode((prev) => [...prev, code]); setCodeToDisplay(code); setCodeTutorial(tutorial); }, }, [codeToDisplay, codeTutorial] ); ``` 之後,請前往`/[root]/src/app/page.tsx`檔案並使用下面的程式碼匯入頂部的 CopilotKit 前端套件和樣式。 ``` import { CopilotKit } from "@copilotkit/react-core"; import { CopilotSidebar } from "@copilotkit/react-ui"; import "@copilotkit/react-ui/styles.css"; ``` 然後使用`CopilotKit`包裝`CopilotSidebar`和`CodeTutorial`元件,如下所示。 `CopilotKit`元件指定 CopilotKit 後端端點 ( `/api/copilotkit/` ) 的 URL,而`CopilotSidebar`呈現應用程式內聊天機器人,您可以提示產生 UI 元件程式碼和實作教學。 ``` export default function Home() { return ( <> <Header /> <CopilotKit url="/api/copilotkit"> <CopilotSidebar instructions="Help the user generate code. Ask the user if to generate its tutorial." defaultOpen={true} labels={{ title: "Code & Tutorial Generator", initial: "Hi! 👋 I can help you generate code and its tutorial.", }}> <CodeTutorial /> </CopilotSidebar> </CopilotKit> </> ); } ``` 之後,執行開發伺服器並導航到 http://localhost:3000。您應該會看到應用程式內聊天機器人已整合到 UI 元件產生器中。  ### **將 CopilotKit 後端加入博客** 在這裡,我將引導您完成將 UI 元件產生器與 CopilotKit 後端整合的過程,該後端處理來自前端的請求,並提供函數呼叫和各種 LLM 後端(例如 GPT)。 此外,我們將整合一個名為 Tavily 的人工智慧代理,它可以研究網路上的任何主題。 首先,在根目錄中建立一個名為`.env.local`的檔案。然後在保存`ChatGPT`和`Tavily` Search API 金鑰的檔案中加入下面的環境變數。 ``` OPENAI_API_KEY="Your ChatGPT API key" TAVILY_API_KEY="Your Tavily Search API key" ``` 若要取得 ChatGPT API 金鑰,請導覽至 https://platform.openai.com/api-keys。  若要取得 Tavilly Search API 金鑰,請導覽至 https://app.tavily.com/home  之後,轉到`/[root]/src/app`並建立一個名為`api`的資料夾。在`api`資料夾中,建立一個名為`copilotkit`的資料夾。 在`copilotkit`資料夾中,建立一個名為`research.ts`的檔案。然後導航到[該 Research.ts gist 文件](https://gist.github.com/TheGreatBonnie/58dc21ebbeeb8cbb08df665db762738c),複製程式碼,並將其新增至**`research.ts`**檔案中 接下來,在`/[root]/src/app/api/copilotkit`資料夾中建立一個名為`route.ts`的檔案。該文件將包含設定後端功能來處理 POST 請求的程式碼。它有條件地包括對給定主題進行研究的“研究”操作。 現在在文件頂部導入以下模組。 ``` import { CopilotBackend, OpenAIAdapter } from "@copilotkit/backend"; // For backend functionality with CopilotKit. import { researchWithLangGraph } from "./research"; // Import a custom function for conducting research. import { AnnotatedFunction } from "@copilotkit/shared"; // For annotating functions with metadata. ``` 在上面的程式碼下面,定義一個執行時間環境變數和一個名為`researchAction`的函數,該函數使用下面的程式碼研究某個主題。 ``` // Define a runtime environment variable, indicating the environment where the code is expected to run. export const runtime = "edge"; // Define an annotated function for research. This object includes metadata and an implementation for the function. const researchAction: AnnotatedFunction<any> = { name: "research", // Function name. description: "Call this function to conduct research on a certain topic. Respect other notes about when to call this function", // Function description. argumentAnnotations: [ // Annotations for arguments that the function accepts. { name: "topic", // Argument name. type: "string", // Argument type. description: "The topic to research. 5 characters or longer.", // Argument description. required: true, // Indicates that the argument is required. }, ], implementation: async (topic) => { // The actual function implementation. console.log("Researching topic: ", topic); // Log the research topic. return await researchWithLangGraph(topic); // Call the research function and return its result. }, }; ``` 然後在上面的程式碼下加入下面的程式碼來定義處理POST請求的非同步函數。 ``` // Define an asynchronous function that handles POST requests. export async function POST(req: Request): Promise<Response> { const actions: AnnotatedFunction<any>[] = []; // Initialize an array to hold actions. // Check if a specific environment variable is set, indicating access to certain functionality. if (process.env.TAVILY_API_KEY) { actions.push(researchAction); // Add the research action to the actions array if the condition is true. } // Instantiate CopilotBackend with the actions defined above. const copilotKit = new CopilotBackend({ actions: actions, }); // Use the CopilotBackend instance to generate a response for the incoming request using an OpenAIAdapter. return copilotKit.response(req, new OpenAIAdapter()); } ``` 如何產生 UI 元件 ---------- 現在轉到您之前整合的應用程式內聊天機器人,並給它一個提示,例如「產生聯絡表單」。 生成完成後,您應該會看到生成的聯絡表單元件及其實作教程,如下所示。您也可以使用嵌入式程式碼編輯器修改產生的程式碼。   恭喜!您已完成本教學的專案。 結論 -- [CopilotKit](https://copilotkit.ai/)是一款令人難以置信的工具,可讓您在幾分鐘內將 AI Copilot 加入到您的產品中。無論您是對人工智慧聊天機器人和助理感興趣,還是對複雜任務的自動化感興趣,CopilotKit 都能讓您輕鬆實現。 如果您需要建立 AI 產品或將 AI 工具整合到您的軟體應用程式中,您應該考慮 CopilotKit。 您可以在 GitHub 上找到本教學的源程式碼: <https://github.com/TheGreatBonnie/AIPoweredUIComponentsGenerator> --- 原文出處:https://dev.to/the_greatbonnie/ai-powered-frontend-ui-components-generator-nextjs-gpt4-langchain-copilotkit-1hac
此頁面詳細介紹了我作為開發人員使用的大部分內容。我使用 Mac,因此許多工具都是 macOS 特定的,但清單中也有一些與作業系統無關的工具。 在我們開始之前要提到的一件事是,這些工具可以提高我的工作效率。也許他們不會像他們為我所做的那樣讓你有生產力。我總是說,*使用能讓你最有效率的工具*。 其中一些工具是免費的,但有些是付費的。我個人認為付費的是值得的,但這取決於你和你的錢包。 *注意:我在這裡放置了一些推薦連結。只是想坦率地說明這一點而已。* 編輯 -- 這一切都從編輯器開始。 [Visual Studio Code](https://code.visualstudio.com/) (VS Code) 是我的首選編輯器。我使用[Insider 版本的](https://code.visualstudio.com/insiders/)時間最長,但有些擴充功能會嘗試登入並重定向到 VS Code 普通版,所以我決定回到它。也就是說,VS Code Insider 非常穩定。 我很長時間以來都是 Dank Mono 的忠實粉絲,但 GitHub 今年發布了一堆等寬字體,我一直很喜歡[Monaspace Krypton](https://monaspace.githubnext.com/) 。 對於主題,它有所不同。我最近一直在使用輕現代預設主題,因為我發現它更適合[我的直播](https://nickyt.live),但我也是[休士頓](https://marketplace.visualstudio.com/items?itemName=astro-build.houston)和[堡壘之夜](https://marketplace.visualstudio.com/items?itemName=sdras.fortnite-vscode-theme)主題的粉絲。 [](https://x.com/nickytonline/status/1787621116636221727) 雖然我安裝了[iTerm](https://iterm2.com/) ,這是一個很棒的 macOS 終端,但老實說,99.999% 的時間我都住在 VS Code 終端中。 ### 編輯器設定 如果您對我的編輯器設定感興趣,[這是我目前的設定](https://gist.github.com/nickytonline/e6ceb17a1fb7b6438c3f09ff800748da)。 更有趣的事情之一是您可以更改標題欄,因此我加入了一些表情符號。 ``` "window.title": "🦙⚡🫡 – ${activeEditorShort}${separator}${rootName} – 🫡⚡🦙", ```  我發現超級方便的另一個設定是`terminal.integrated.autoReplies` 。我從來不想獲取我的 .env 文件,這可以完美地處理它。 ``` "terminal.integrated.autoReplies": { "dotenv: found '.env' file. Source it? ([Y]es/[n]o/[a]lways/n[e]ver)": "e\r" }, ``` ### 也許澤德很快? 我確實想向[Zed](https://zed.dev/)編輯大聲喊叫。我偶爾會使用它,而且速度超級快,但它還沒有成為我的主要編輯器。我認為一旦擴展生態系統進一步發展,我就會轉向這個。也許在明年。我們拭目以待。 😎 瀏覽器擴充 ----- 我並不是每天都使用所有這些,但這些是我首選的瀏覽器擴充功能。 - [精緻的 GitHub](https://chrome.google.com/webstore/detail/refined-github/hlepfoohegkhhmjieoechaddaejaokhf) - GitHub 上的類固醇 - [VisBug](https://chrome.google.com/webstore/detail/visbug/cdockenadnadldjbbgcallicgledbeoc?hl=en) - 一個很棒的前端工具(這對我來說是新工具)(僅適用於基於 Chromium 的瀏覽器) - [React 開發者工具](https://chrome.google.com/webstore/detail/react-developer-tools/fmkadmapgofadopljbjfkapdkoienihi?hl=en)- 因為 React - [Preact DevTools](https://preactjs.github.io/preact-devtools/) - 因為 Preact - [Axe](https://chrome.google.com/webstore/detail/axe-web-accessibility-tes/lhdoppojpmngadmnindnejefpokejbdd) - 用於網路可存取性測試 - [WAVE](https://wave.webaim.org/extension/) - 用於網路可存取性測試 - [HTTPS 無所不在](https://www.eff.org/https-everywhere) - [優布洛克](https://ublock.org/) - [LanguageTool](https://languagetool.org) - 文法和拼字檢查工具 - [Pocket](https://getpocket.com/) - 用於為要閱讀的內容加入書籤 - [JSONView](https://chrome.google.com/webstore/detail/jsonview/chklaanhfefbnpoihckbnefhakgolnmc) - JSON 有效負載的美化視圖 - [調整新 Twitter](https://github.com/insin/tweak-new-twitter/) - 消除 Twitter 使用者介面中的大量噪音 - [a11y Twitter](https://github.com/nickytonline/a11y-twitter) - 對如何使用 Twitter 進行小幅更改,以方便的方式推廣推文。 桌面應用程式 ------ 這些是我每天使用的大部分桌面應用程式。讓我們從一些通用的開始。 ### 我每天做的常見事情的通用工具 [Arc 瀏覽器](https://arc.net/gift/93e342bc)是一款基於 Chromium 的瀏覽器,在我看來,它解決了我在使用任何其他瀏覽器時遇到的大量使用者體驗 (UX) 問題。垂直選項卡、命令面板和自動畫中畫影片等等。 我在頂部選單列圖示上使用[Vanilla 的](https://matthewpalmer.net/vanilla/)時間最長,但當我拿到帶有瀏海的 MacBook Pro 後,它就不太好用了。從那以後,我開始使用[Bartender](https://www.macbartender.com)來管理我的選單列。 macOS 上的表情符號選擇器並不是那麼好,但[Rocket](https://matthewpalmer.net/rocket/)讓加入表情符號變得如此簡單。我無法告訴你我一天使用它多少次。 [Raycast](https://raycast.com)是我首選的 macOS 聚光燈替代品。這就像類固醇的聚光燈。我之前使用過[Alfred](https://www.alfredapp.com/) ,這是另一個出色的 Spotlight 替代品,但由於某種原因 Raycast 越來越吸引我了。我也用它來進行視窗管理。 對於那些坐在電腦前的夜晚, [f.lux](https://justgetflux.com/)是必須的。正如一些智者所說:「善待你的眼球」。 macOS 的[Nightshift](https://support.apple.com/en-ca/102191)還可以,但 f.lux 卻破壞了它。 對於管理會議, [Dato](https://sindresorhus.com/dato)是一款更好的 macOS 約會應用程式。在網址列中顯示多個時區非常有用。我有當地時間和 UTC。我還將它用於即將舉行的會議和活動。以前我使用的是[Meeter](https://trymeeter.com) ,它對此非常有用,但現在我需要的應用程式少了一個。 我幾乎每天都會截取螢幕截圖或錄製短影片, [Cleanshot X](https://cleanshot.com/)非常適合此操作。 ### Git 工具 我的大部分「git」工作都是在命令列上進行的,但有時我需要圖形使用者介面(GUI)來真正了解正在發生的事情。當我需要它時,我會伸手去拿[Fork](https://git-fork.com/) 。  向 Cassidy (@cassidoo) 的精彩 GIF 致敬! 如果你使用 Git(我想你們大多數人都使用 Git), [那麼簽署你的提交](https://docs.github.com/en/authentication/managing-commit-signature-verification/signing-commits)就非常重要。 [GPG Suite](https://gpgtools.org/)讓設定變得簡單。 ### 前端工具 我做了很多建立使用者介面 (UI) 的工作,這些都是這類工作不可或缺的工具。 [xScope](https://xscope.app)是一個非常棒的前端開發工具組。標尺、指南等 當我需要與設計師協調、查看設計或提取一些資源時, [Figma](https://www.figma.com/)就是我居住的地方。 我以前聽說過[Polypane](https://polypane.app/) ,我想幾年前我可能已經嘗試過它,但現在,它是前端的必備品。它可以幫助您建立具有各種優點的響應靈敏、易於存取的應用程式。對此感到好奇嗎?今年早些時候,我在一次直播中與 Polypane 的創作者 Kilian Valkhof (@kilianvalkhof) 進行了交流。 https://www.youtube.com/watch?v=fsIhghVlHJE 對於顏色對比問題,TPGi 的[顏色對比分析儀](https://www.tpgi.com/color-contrast-checker/)是頂級的。我強烈推薦它。感謝 Todd Libby (@colabottles) 去年向我推薦了這個。 ### 我使用的其他桌面應用程式 - [Cloudflare Warp](https://blog.cloudflare.com/1111-warp-better-vpn/) - 更快的網路和一些 VPN 優點 - [Plash](https://apps.apple.com/us/app/plash/id1494023538) - 適用於 Mac 的互動式桌面背景(一個或多個網頁) - [CleanMyMac X](https://macpaw.com/cleanmymac) - 一套實用程序,可讓您的 Mac 保持最佳狀態。 - [Starship](https://starship.rs/) - 跨 shell 提示符 直播軟體 ---- 我確信有些擁有更多觀眾的主播擁有更好的設置,但這就是我的工作方式。 我使用[Restream.io](https://restream.io/join/zZ8Wr)串流傳輸到多個平台,目前包括 Twitch、YouTube、X/Twitter 和 LinkedIn。 [OBS](https://obsproject.com/download)被很多人使用,包括我自己。這是一個很棒的開源軟體。我使用它來進行串流傳輸,而不是 Restream Studio 或 Streamyard 等類似工具,因為我有自訂疊加層和其他一些自訂功能。 https://github.com/obsproject/obs-studio [Krisp](https://krisp.ai/)在過濾通話和串流中不需要的噪音方面表現出色。在直播時告別背景的消防車。 🤣 我將[Loopback](https://rogueamoeba.com/loopback/)用於虛擬音訊來源。這非常有用,因為我建立了一個音頻源,即我的麥克風和客人的音頻,並將其視為一個輸入源。我使用這個音訊來源作為即時字幕的音訊來源。 我沒有用於串流媒體的精美相機。我曾經使用我的羅技網路攝像頭,這很好,但當我終於得到一部像樣的 iPhone 時,我覺得它的相機太棒了!所以我決定用它來進行直播。 [Camo](https://reincubate.com/camo/)使這成為可能,並且它有很多細節,如縮放、水印、濾鏡等。 ### 直播嘉賓工具 在很長一段時間裡,我都不明白人們是如何把嘉賓帶上直播的。在我從事串流媒體的早期,我曾經引入完整的 Discord 螢幕並在我的直播中分享。雖然這有效,但並不理想。我也嘗試了類似的 Zoom,然後我也開始在螢幕上裁剪 Zoom 的部分內容,但同樣不理想。 最終,我發現了[vdo.ninja](https://vdo.ninja/) 。 TLDR 是,它使用點對點技術將遠端攝影機引入 OBS 或其他工作室軟體。 https://github.com/steveseguin/vdo.ninja 這是一個很棒的專案,我強烈推薦它。如果您的客人有 Twitch 帳戶,另一個類似的軟體是 Twitch 的[Stream Together](https://help.twitch.tv/s/article/stream-together-host-guide?language=en_US) 。我也用這個,取決於客人。 命令列介面 (CLI) 工具 -------------- 我沒有很多 CLI 工具,但以下是一些我常用的工具: - [Homebrew](https://brew.sh) - macOS(或 Linux)缺少的套件管理器 - [GitHub CLI](https://github.com/cli/cli) - 命令列上的 GitHub。非常適合建立 PR 等。 https://dev.to/opensauced/boost-productivity-with-the-github-cli-2mne - [nvm](https://github.com/nvm-sh/nvm) - 節點版本管理器 - [cloudflared](https://github.com/cloudflare/cloudflared) - 透過安全隧道將本地伺服器公開到公共網路 如果您對我的設定(例如硬體和辦公室設定)的重置或我在旅途中攜帶的物品感到好奇,請隨時查看[我的使用頁面](https://nickyt.co/uses)。 直到下一篇! --- 原文出處:https://dev.to/nickytonline/tools-that-keep-me-productive-1no5
介紹 -- 在當今資料驅動的世界中,有效儲存和管理資訊對於各種規模的企業和組織都至關重要。關聯式資料庫已成為以結構化和可擴展的方式組織和操作資料的強大解決方案。在這篇文章中,我們將探討關聯式資料庫的基礎知識、它們的管理系統以及支援有效資料庫設計的原則。 --- 什麼是資料庫? ------- 資料庫是資料的結構化集合,其組織和儲存方式有利於高效檢索、操作和管理。將其視為數位文件櫃,其中不是實體資料夾和文件,而是整齊排列的表格和記錄,以便於存取。 什麼是關係資料庫? --------- 關聯式資料庫是一種將資料組織成具有行(記錄)和列(欄位)的表(關係)的資料庫。這些表透過關係互連,允許以各種方式存取和組合資料。想像一下電子表格的集合,每個電子表格代表資料的不同方面,但能夠無縫連結和組合它們之間的資訊。 關係型資料庫管理系統 ---------- 關聯式資料庫管理系統 (RDBMS) 是一種軟體應用程式,旨在建立、管理關聯式資料庫並與之互動。它提供了一個用於在資料庫中儲存、檢索和操作資料的結構化框架。 RDBMS 的一些熱門範例包括 MySQL、PostgreSQL、Oracle 和 Microsoft SQL Server。 --- SQL簡介 ----- SQL(結構化查詢語言)是用於與關聯式資料庫互動的標準程式語言。它允許您建立、讀取、更新和刪除資料庫中的資料,以及定義和修改資料庫結構本身。 SQL 就像一種通用語言,可讓您與不同的 RDBMS 平台進行通訊。 命名約定 ---- 在 SQL 中,遵循一致的命名約定對於清晰度和可維護性至關重要。這是一個例子: ``` -- Good naming conventions CREATE TABLE customers ( customer_id INT PRIMARY KEY, first_name VARCHAR(100), last_name VARCHAR(100), email VARCHAR(100) ); ``` 什麼是資料庫設計? --------- 資料庫設計是建立用於儲存和管理資料庫中的資料的高效且有組織的結構的過程。它涉及定義表、列、關係和約束,以確保資料完整性、最小化冗餘並優化效能。正確的資料庫設計是建立健全且可擴展的應用程式的基礎。 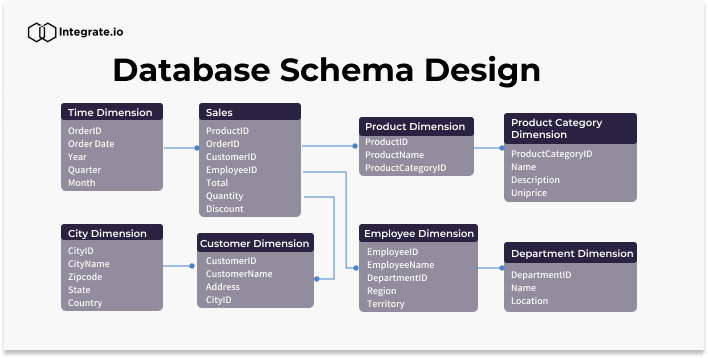 資料的完整性 ------ 資料完整性是指資料庫中儲存的資料的準確性、一致性和可靠性。它確保資料遵循特定的規則和約束,防止錯誤和不一致。資料完整性分為三種: 1. **實體完整性**:確保表中的每一行都可以透過主鍵唯一標識,且主鍵不能有空值。 2. **參照完整性**:透過確保一個表中的外鍵值與另一表中的主鍵值相符來維護表之間的關係。 3. **域完整性**:透過限制可儲存的資料類型、格式和值範圍,強制給定列輸入有效的條目。 ``` -- Example: Enforcing data integrity CREATE TABLE orders ( order_id INT PRIMARY KEY, -- Entity integrity customer_id INT FOREIGN KEY REFERENCES customers(customer_id), -- Referential integrity order_date DATE NOT NULL, -- Domain integrity total_amount DECIMAL(10, 2) CHECK (total_amount >= 0) -- Domain integrity ); ``` 資料庫術語 ----- - **表**:按行和列組織的相關資料的集合。 - **行**:表中的單一實例或條目(也稱為記錄或元組)。 - **列**:表中資料的特定特徵或屬性(也稱為欄位或屬性)。 - **主鍵**:唯一標識表中每一行的列或列組合。 - **外鍵**:引用另一個表的主鍵的列或列的組合,在兩個表之間建立關係。 - **連接**:根據相關列組合兩個或多個表中的行的操作。 - **索引**:一種資料結構,透過建立表格中資料的排序表示來提高資料檢索操作的效能。 - **視圖**:從一個或多個基礎表動態產生的虛擬表。 - **預存程序**:預先編譯的 SQL 語句集合,可以作為單一單元執行。 - **觸發器**:特殊類型的預存程序,當表中發生特定事件(例如 INSERT、UPDATE 或 DELETE 語句)時會自動執行。 原子值 --- 在資料庫設計中,儲存原子值非常重要,這意味著儲存無法進一步劃分的最小資訊片段。這項原則有助於保持資料完整性並避免冗餘。 例如,與其將客戶的全名儲存在單一欄位中,不如將其分成名字和姓氏欄位。這樣,您可以輕鬆地獨立搜尋、排序或操作名稱的每個部分。 ``` -- Example: Storing atomic values CREATE TABLE customers ( customer_id INT PRIMARY KEY, first_name VARCHAR(50), last_name VARCHAR(50), email VARCHAR(100) ); ``` --- 按鍵簡介 ---- 鍵是資料庫設計中的重要組成部分,有助於確保資料完整性並建立表之間的關係。它們充當記錄的唯一標識符,並實現高效的資料檢索和操作。 主鍵索引 ---- 主鍵是唯一標識表中每筆記錄的列或列的組合。它確保每個記錄都是唯一的並且可以輕鬆找到。通常會對主鍵建立索引以提高查詢效能。 ``` CREATE TABLE customers ( customer_id INT PRIMARY KEY, first_name VARCHAR(50), last_name VARCHAR(50), email VARCHAR(100) ); ``` 查找表 --- 查找表也稱為參考表或程式碼表,是包含預定義值集的表,這些值可用於填入其他表中的列。查找表透過確保一致性和減少冗餘來幫助維護資料完整性。 ``` -- Lookup table for product categories CREATE TABLE product_categories ( category_id INT PRIMARY KEY, category_name VARCHAR(100) ); -- Products table referencing the lookup table CREATE TABLE products ( product_id INT PRIMARY KEY, product_name VARCHAR(100), category_id INT, FOREIGN KEY (category_id) REFERENCES product_categories(category_id) ); ``` 超級密鑰和候選密鑰 --------- 超級鍵是表中唯一標識每筆記錄的一組或多列。候選鍵是最小超鍵,這意味著它不包含不必要的列。換句話說,候選鍵是一個超級鍵,具有唯一標識每個記錄所需的最少列數。 主鍵和備用鍵 ------ 主鍵是選擇作為表的主要唯一辨識符的候選鍵。備用鍵也稱為唯一鍵,是任何其他本來可以被選為主鍵但沒有被選為主鍵的候選鍵。 ``` CREATE TABLE employees ( employee_id INT PRIMARY KEY, email VARCHAR(100) UNIQUE, -- Alternate key first_name VARCHAR(50), last_name VARCHAR(50) ); ``` 代理鍵和自然鍵 ------- 代理鍵是用作表中主鍵的人工鍵(通常是序號或 GUID)。它與資料本身沒有固有的意義或關係。另一方面,自然金鑰是從資料本身衍生的金鑰,例如員工 ID 或產品程式碼。 ``` -- Surrogate key CREATE TABLE orders ( order_id INT PRIMARY KEY IDENTITY(1,1), -- Surrogate key customer_name VARCHAR(100), order_date DATE ); -- Natural key CREATE TABLE products ( product_code VARCHAR(10) PRIMARY KEY, -- Natural key product_name VARCHAR(100), price DECIMAL(10,2) ); ``` 我應該使用代理鍵還是自然鍵? -------------- 代理鍵和自然鍵之間的選擇取決於多個因素,包括資料的性質、資料變更的可能性以及重複或衝突的可能性。 代理鍵通常是首選,因為它們是: - 不可變:即使資料發生變化,它們也不會隨著時間而改變。 - 保證唯一性:由資料庫系統生成,保證唯一性。 - 不透明:它們不會洩露有關資料本身的任何訊息,這對於安全和隱私來說是有益的。 另一方面,自然鍵在以下情況下可能會很有優勢: - 資料具有固有的唯一性,例如產品程式碼或員工 ID。 - 資料不太可能隨著時間的推移而改變,從而降低了衝突或重複的風險。 - 需要人類可讀且有意義的辨識符。 外鍵 -- 外鍵是一個表中引用另一個表的主鍵的列或列的組合。它在兩個表之間建立連結並強制引用完整性,確保子表中的資料有效且與父表中的資料一致。 ``` CREATE TABLE orders ( order_id INT PRIMARY KEY, customer_id INT, order_date DATE, FOREIGN KEY (customer_id) REFERENCES customers(customer_id) ); ``` NOT NULL 外鍵 ----------- 在某些情況下,可能需要對外鍵列設定 NOT NULL 約束,這表示該列不能有空值。此約束可確保子表中的每筆記錄都與父表中的有效記錄相關聯。 ``` CREATE TABLE orders ( order_id INT PRIMARY KEY, customer_id INT NOT NULL, order_date DATE, FOREIGN KEY (customer_id) REFERENCES customers(customer_id) ); ``` 外鍵約束 ---- 外鍵約束定義表之間引用完整性的規則。這些約束可以包括更新或刪除父表中引用的記錄時要採取的操作,例如: - `CASCADE` :當父表中的記錄被更新或刪除時,子表中對應的記錄也會被更新或刪除。 - `SET NULL` :當父表中的記錄被更新或刪除時,子表中對應的外鍵值被設定為NULL。 - `NO ACTION` :當父表中的記錄被更新或刪除時,子表中對應的外鍵值保持不變,如果違反引用完整性則回滾操作。 ``` CREATE TABLE orders ( order_id INT PRIMARY KEY, customer_id INT, order_date DATE, FOREIGN KEY (customer_id) REFERENCES customers(customer_id) ON UPDATE CASCADE ON DELETE SET NULL ); ``` 簡單鍵、複合鍵、複合鍵 ----------- - 簡單鍵是用作主鍵或外鍵的單一欄位。 - 複合鍵是用作主鍵或外鍵的兩個或多個列的組合。 - 複合鍵是用作外鍵的兩個或多個簡單鍵的組合。 ``` -- Simple key CREATE TABLE orders ( order_id INT PRIMARY KEY, ... ); -- Composite key CREATE TABLE order_items ( order_id INT, product_id INT, quantity INT, PRIMARY KEY (order_id, product_id) ); -- Compound key CREATE TABLE shipments ( shipment_id INT PRIMARY KEY, order_id INT, product_id INT, FOREIGN KEY (order_id, product_id) REFERENCES order_items(order_id, product_id) ); ``` --- 關係 ---- 關係是關聯式資料庫的基石,可讓您連接和組合來自不同表的資料。關係主要分為三種: 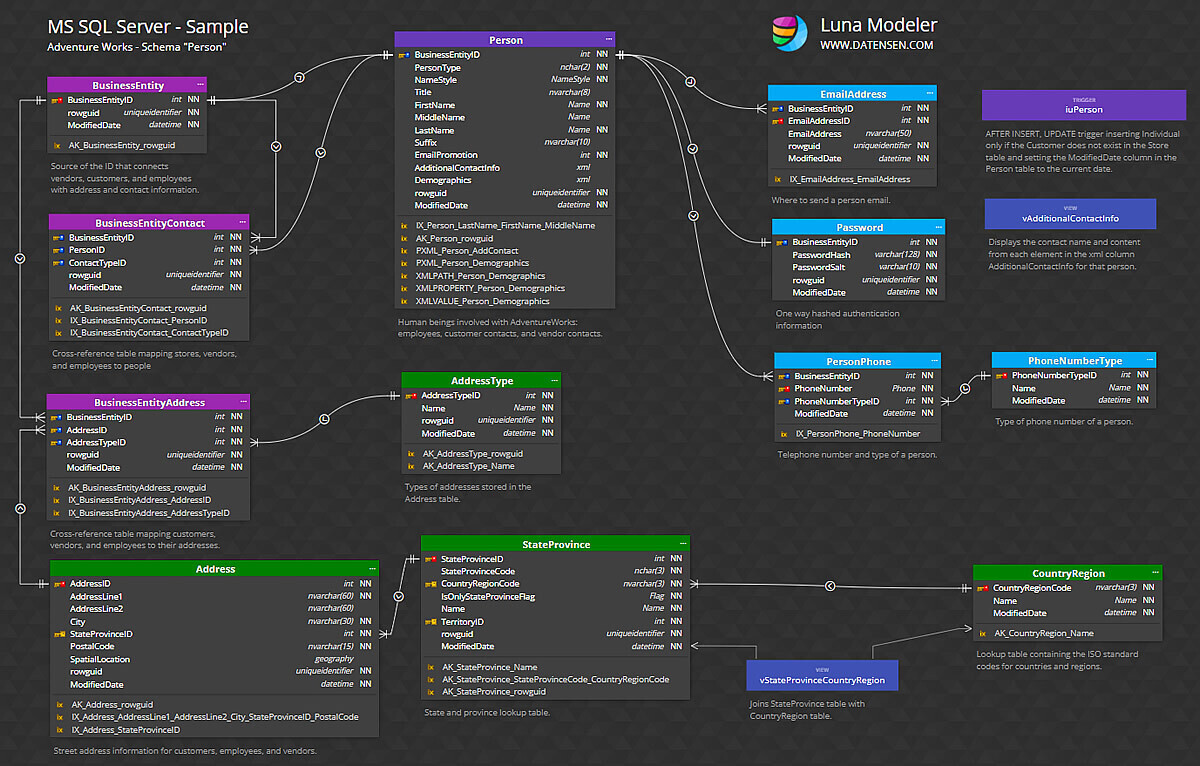 一對一的關係 ------ 在一對一關係中,一個表中的每筆記錄都與另一個表中的一筆記錄相關聯,反之亦然。例如,考慮一個資料庫,其中每位員工都有一名且僅有一名經理,且每位經理管理一名且僅有一名員工。這種關係在實務上比較少見。 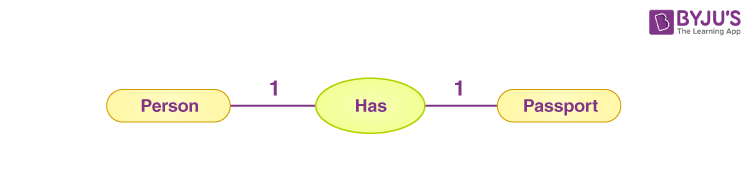 一對多關係 ----- 在一對多關係中,一個表格(「一」側)中的每筆記錄都可以與另一個表(「多」側)中的多個記錄關聯。例如,在學校的資料庫中,一位老師可以教授多個班級,但每個班級只有一位老師授課。 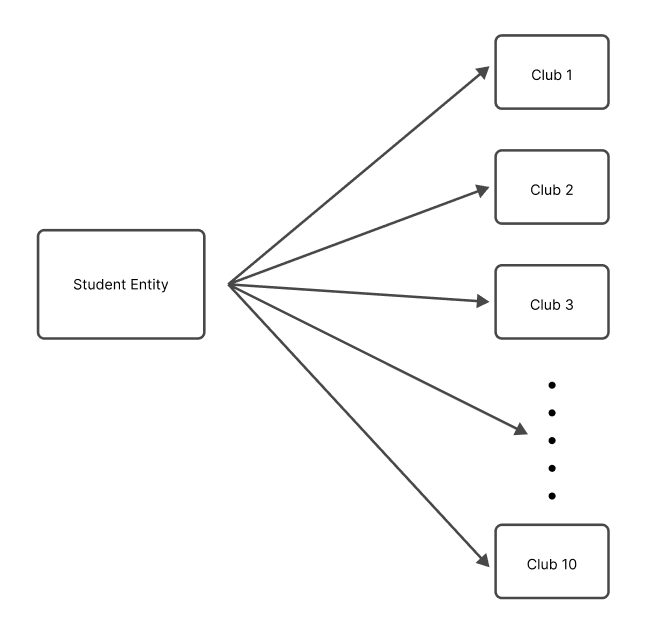 多對多關係 ----- 在多對多關係中,一個表中的每筆記錄可以與另一表中的多筆記錄關聯,反之亦然。例如,在大學的資料庫中,一個學生可以註冊多個課程,每個課程可以有多個學生註冊。 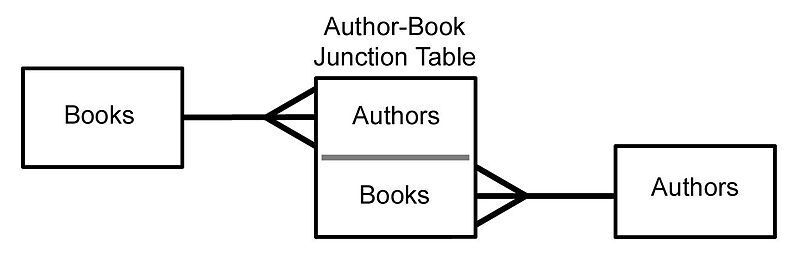 ### 關係摘要 - 一對一:表A中的一筆記錄與表B中的一筆且只有一筆記錄相關,反之亦然。 - 一對多:A表中的一筆記錄可以與B表中的多筆記錄相關,但B表中的一筆記錄只能與A表中的一筆記錄相關。 - 多對多:表A中的多筆記錄可以與表B中的多筆記錄相關,反之亦然。 設計關係(SQL 實作) ------------ **1 - 設計一對一關係** 要設計一對一關係,您可以將兩個表中的所有列包含在一個表中,也可以建立兩個單獨的表並使用外鍵約束來連結它們。 ``` -- Option 1: Single table CREATE TABLE employees ( employee_id INT PRIMARY KEY, first_name VARCHAR(50), last_name VARCHAR(50), manager_first_name VARCHAR(50), manager_last_name VARCHAR(50) ); -- Option 2: Two tables with foreign key CREATE TABLE employees ( employee_id INT PRIMARY KEY, first_name VARCHAR(50), last_name VARCHAR(50), manager_id INT UNIQUE, FOREIGN KEY (manager_id) REFERENCES employees(employee_id) ); ``` 2 -**設計一對多關係** 要設計一對多關係,通常會建立兩個表:父表(“一”側)和子表(“多”側)。子表包含引用父表主鍵的外鍵列。 ``` -- Parent table CREATE TABLE teachers ( teacher_id INT PRIMARY KEY, first_name VARCHAR(50), last_name VARCHAR(50) ); -- Child table CREATE TABLE classes ( class_id INT PRIMARY KEY, class_name VARCHAR(100), teacher_id INT, FOREIGN KEY (teacher_id) REFERENCES teachers(teacher_id) ); ``` **3 - 設計多對多關係** 要設計多對多關係,通常會建立第三個表(稱為聯結表或關聯表),將兩個主表連結在一起。此聯結表包括引用主表的外鍵列 ``` -- Table 1 CREATE TABLE students ( student_id INT PRIMARY KEY, first_name VARCHAR(50), last_name VARCHAR(50) ); -- Table 2 CREATE TABLE courses ( course_id INT PRIMARY KEY, course_name VARCHAR(100), description TEXT ); -- Junction or Intemediary table CREATE TABLE enrollments ( enrollment_id INT PRIMARY KEY, student_id INT, course_id INT, FOREIGN KEY (student_id) REFERENCES students(student_id), FOREIGN KEY (course_id) REFERENCES courses(course_id) ); ``` 父表和子表 ----- 在一對多或多對多關係中, **“一”**側的表通常稱為父表,而**“多”**側的表稱為子表。子表包含引用父表主鍵的外鍵。 例如,在教師-班級關係中, `teachers`表是父表, `classes`表是子表。同樣,在學生-課程關係中, `students`和`courses`表是父表,而`enrollm`是父表。 實體關係建模簡介 -------- 實體關係建模(ER Modeling)是資料庫設計中使用的一種技術,用於直觀地表示資料庫的邏輯結構。它有助於辨識實體(表)、屬性(列)以及它們之間的關係,從而更容易理解和傳達資料庫設計。 ER 圖由以下部分組成: - **實體**:以矩形表示,實體是資料庫中的表或物件。 - **屬性**:在實體矩形內列出,屬性是描述實體的列或欄位。 - **關係**:以連接實體的線表示,關係描述了實體之間的關聯。 基數 -- 基數定義了兩個實體之間的數值關係。它指定一個實體可以與另一個實體的單一實例關聯的最大實例數。最常見的基數是: - 一對一(1:1):實體 A 的一個實例最多可以與實體 B 的一個實例關聯,反之亦然。 - 一對多(1:N):實體 A 的一個實例可以與實體 B 的多個實例關聯,但實體 B 的一個實例只能與實體 A 的一個實例關聯。 - 多對多 (M:N):實體 A 的多個實例可以與實體 B 的多個實例關聯,反之亦然。 在 ER 圖中,基數以特定的符號表示,例如單線表示一對一,帶箭頭的線表示一對多,兩端帶箭頭的線表示多對多關係。 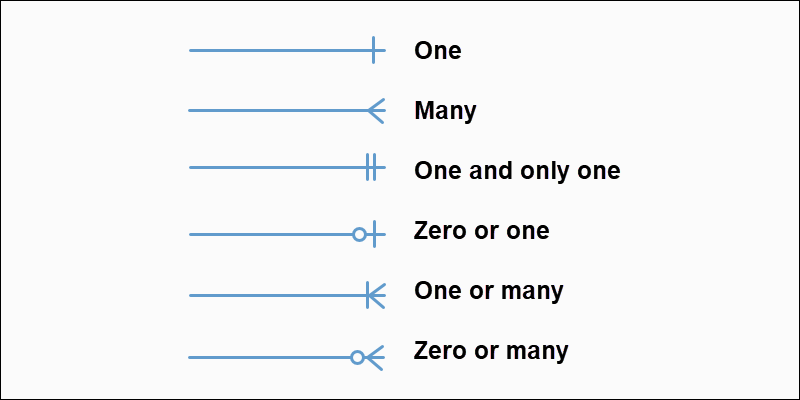 模態 -- 模態是指一個實體實例的存在是否依賴它與另一個實體的關係。有兩種類型的模態: - 部分模態:實例的存在不依賴它與另一個實體的關係。例如,客戶可以在沒有任何訂單的情況下存在。 - 總模態:實例的存在取決於它與另一個實體的關係。例如,沒有訂單,訂單項就不可能存在。 在 ER 圖中,模態使用特定的符號表示,例如單一條表示部分模態,雙條表示總模態。 --- 資料庫規範化簡介 -------- 資料庫規範化是組織資料庫中的資料以減少冗餘、最大限度地減少資料異常(插入、更新和刪除異常)並提高資料完整性的過程。它涉及將資料庫分解為較小的表,並根據特定規則或範式定義它們之間的關係。 資料庫規範化的主要目標是: - 消除冗餘資料 - 確保資料完整性 - 促進資料操作和維護 資料庫規範化有多種範式,每種都建立在前一種範式的基礎上。最常用的範式是: 1. 第一範式 (1NF) 2. 第二範式 (2NF) 3. 第三範式 (3NF) 1NF(資料庫規範化第一範式) --------------- 第一範式(1NF)是最基本的規範化形式。它規定表中的屬性(列)必須具有原子值,這意味著表中的每個單元格應包含單一值,而不是一組值。 例如,假設一個表格具有名為「PhoneNumbers」的資料列,該資料列儲存客戶的多個電話號碼。這違反了 1NF,因為該列包含一組值而不是單一值。為了符合 1NF,您需要將電話號碼分成單獨的列或為電話號碼建立單獨的表。 ``` -- Violates 1NF CREATE TABLE customers ( customer_id INT PRIMARY KEY, name VARCHAR(100), phone_numbers VARCHAR(200) -- Stores multiple phone numbers, violating 1NF ); -- Conforms to 1NF CREATE TABLE customers ( customer_id INT PRIMARY KEY, name VARCHAR(100), phone1 VARCHAR(20), phone2 VARCHAR(20), phone3 VARCHAR(20) ); ``` 2NF(資料庫規範化的第二範式) ---------------- 第二範式 (2NF) 建立在 1NF 的基礎上,解決了部分依賴問題。如果表屬於 1NF,且每個非主屬性(列)完全依賴整個主鍵,則該表屬於 2NF。 換句話說,如果一個表有一個複合主鍵(由多個列組成),那麼所有非鍵列必須依賴整個主鍵,而不僅僅是它的一部分。 例如,考慮一個具有複合主鍵`(student_id, course_id)`和列`grade`的表。如果`grade`欄位僅取決於`course_id` ,而不取決於`student_id`和`course_id`的組合,則該表違反了 2NF。 ``` -- Violates 2NF CREATE TABLE student_courses ( student_id INT, course_id INT, course_name VARCHAR(100), grade CHAR(2), -- Depends only on course_id, not the entire primary key PRIMARY KEY (student_id, course_id) ); -- Conforms to 2NF CREATE TABLE student_courses ( student_id INT, course_id INT, grade CHAR(2), PRIMARY KEY (student_id, course_id) ); CREATE TABLE courses ( course_id INT PRIMARY KEY, course_name VARCHAR(100) ); ``` 3NF(資料庫規範化的第三範式) ---------------- 第三範式 (3NF) 建立在 2NF 的基礎上,解決了傳遞依賴問題。如果表屬於 2NF,且每個非主屬性都非傳遞依賴於主鍵,則該表屬於 3NF。 換句話說,如果一個非鍵列依賴另一個非鍵列,那麼該表就違反了 3NF,並且非鍵列應該分離到它們自己的表中。 例如,考慮一個包含`student_id` 、 `student_name` 、 `class_id`和`class_name`欄位的表。 `student_name`欄位取決於`student_id` ,而`class_name`欄位取決於`class_id` 。但是, `class_name`欄位也透過`class_id`欄位傳遞依賴`student_id` 。這違反了 3NF。 ``` -- Violates 3NF CREATE TABLE student_classes ( student_id INT, student_name VARCHAR(100), class_id INT, class_name VARCHAR(100), PRIMARY KEY (student_id, class_id) ); -- Conforms to 3NF CREATE TABLE students ( student_id INT PRIMARY KEY, student_name VARCHAR(100) ); CREATE TABLE classes ( class_id INT PRIMARY KEY, class_name VARCHAR(100) ); CREATE TABLE student_classes ( student_id INT, class_id INT, PRIMARY KEY (student_id, class_id), FOREIGN KEY (student_id) REFERENCES students(student_id), FOREIGN KEY (class_id) REFERENCES classes(class_id) ); ``` 透過遵循資料庫規範化的原則,您可以建立結構良好且高效的資料庫,從而最大限度地減少冗餘、保持資料完整性並促進資料操作和維護。 --- 索引(聚集索引、非聚集索引、複合索引) ------------------- 索引是提高資料庫中資料檢索操作效能的資料結構。它們在表中建立資料的排序表示,從而允許更快的搜尋和查詢。索引有幾種類型: - **聚集索引**:聚集索引根據索引鍵值對表中的行進行實體重新排序。每個表只能有一個聚集索引。 - **非聚集索引**:非聚集索引是一個單獨的物件,其中包含索引鍵值和指向表中相應行的指標。一個表可以有多個非聚集索引。 - **複合索引**:複合索引是索引鍵中包含多個欄位的索引。它可以是集群的,也可以是非集群的。 ``` -- Clustered index CREATE CLUSTERED INDEX idx_customers_name ON customers (last_name, first_name); -- Nonclustered index CREATE NONCLUSTERED INDEX idx_orders_date ON orders (order_date); -- Composite index CREATE INDEX idx_products_category_price ON products (category_id, price); ``` 資料類型 ---- 在資料庫領域,資料類型就像是保存特定類型資訊的不同形狀的容器。就像您不會將液體儲存在籃子中或將固體物體儲存在罐子中一樣,資料庫需要強制執行特定的資料類型以確保資料的完整性和一致性。 SQL 中的一些常見資料類型包括: - `INT`或`INTEGER` :儲存整數,例如`42`或`17` 。 - `FLOAT`或`DOUBLE` :儲存十進制數,例如`3.14159`或`0.00005` 。 - `VARCHAR`或`TEXT` :儲存文字資料,例如名稱或描述。 - `DATE`或`DATETIME` :儲存日期和時間值,例如`'2023-05-06'`或`'2024-01-01 12:34:56'` 。 - `BOOLEAN` :儲存真/假值,例如`1` (真)或`0` (假)。 選擇正確的資料類型至關重要,因為它會影響資料的儲存、查詢和操作方式。例如,嘗試在`INT`列中儲存大字串會導致錯誤或資料截斷。 ``` CREATE TABLE users ( id INT PRIMARY KEY, name VARCHAR(50) NOT NULL, age INT, is_active BOOLEAN DEFAULT 1 ); ``` 在此範例中,我們建立一個`users`表,其中包含`id` (整數)、 `name` (最多 50 個字元的字串)、 `age` (整數)和`is_active` (布林值,預設值為`1`或 true)欄位。 --- 連接簡介 ---- 連接就像連接資料庫中不同表的橋樑,允許您組合和檢索來自多個來源的相關資料。它們是關係資料庫中的基本概念,對於有效查詢和操作資料至關重要。 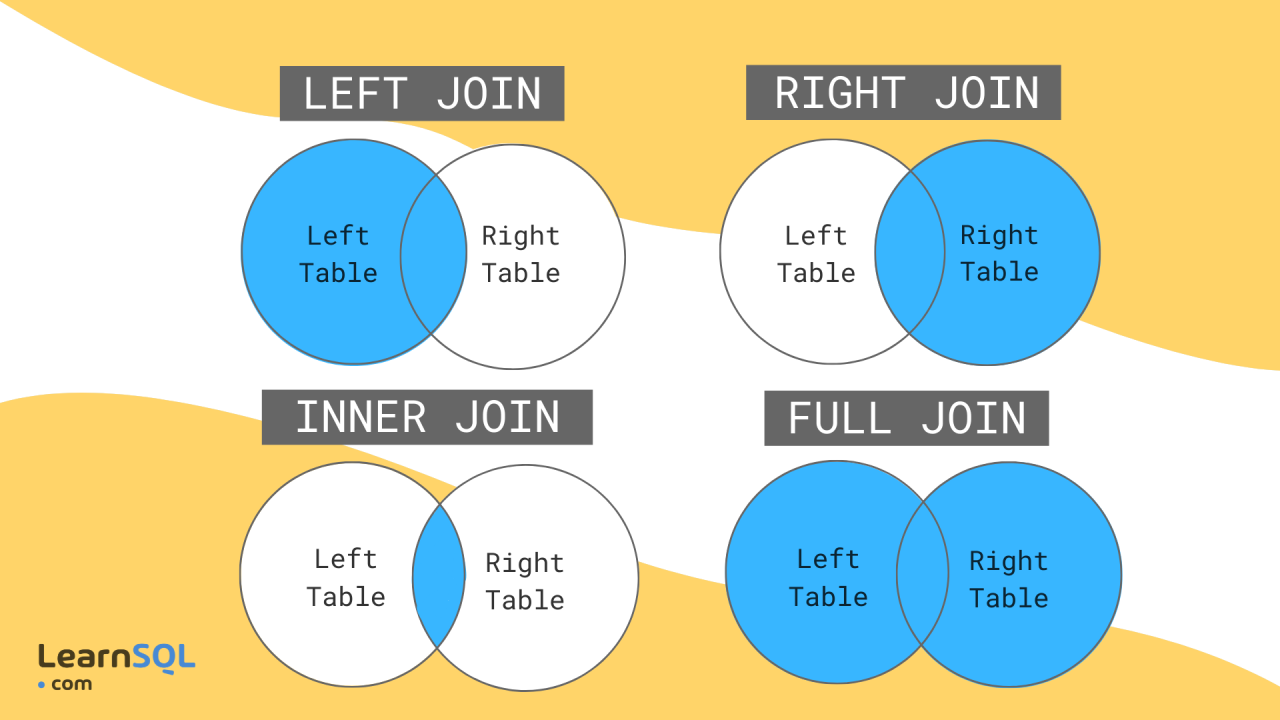 內部聯接 ---- 內部聯結就像兩個表之間的友好握手,其中只有在兩個表中具有匹配值的行才會包含在結果集中。這是一種基於公共列或列集組合多個表中的資料的方法。 ``` SELECT users.name, orders.order_date FROM users INNER JOIN orders ON users.id = orders.user_id; ``` 在這個範例中,我們從`users`表中檢索`name`列,從`orders`表中檢索`order_date`列,但僅限於`users`表中的`id`與`orders`表中的`user_id`相符的行。 3 個表上的內連接(範例) ------------- 假設我們有三個表: `users` 、 `orders`和`products` 。我們想要檢索每個訂單的使用者名稱、訂單日期和產品名稱。我們可以透過在所有三個表之間執行內部聯結來實現這一點: ``` SELECT users.name, orders.order_date, products.product_name FROM users INNER JOIN orders ON users.id = orders.user_id INNER JOIN products ON orders.product_id = products.id; ``` 在這裡,我們首先在`id`和`user_id`列上連接`users`和`orders`表。然後,我們將該連接的結果與`products`表的`product_id`和`id`列連接起來。這樣,我們可以在單一查詢中從所有三個表中檢索資料,但僅限於滿足連接條件的行。 外連接簡介 ----- 內部連接就像友好的握手,而外部連接更像是歡迎的擁抱。它們不僅包括兩個表中的匹配行,還包括一個或兩個表中的不匹配行,具體取決於外連接的類型。 右外連接 ---- 右外連接就像從右表到左表的溫暖擁抱。它包括右表中的所有行以及左表中的匹配行。如果左表中沒有符合的行,則結果將包含左表列的`NULL`值。 ``` SELECT users.name, orders.order_date FROM users RIGHT OUTER JOIN orders ON users.id = orders.user_id; ``` 在此範例中,我們從`orders`表(右表)中檢索所有行,以及`users`表(左表)中的符合`name`值。如果訂單沒有符合的用戶,則`name`列將包含`NULL` 。 JOIN 與 NOT NULL 列 ----------------- 有時,您可能只想對不為空的列執行聯接。當您想要從結果集中排除缺少資料的行時,這會很有用。 ``` SELECT users.name, orders.order_date FROM users INNER JOIN orders ON users.id = orders.user_id AND users.name IS NOT NULL; ``` 在此範例中,我們在`users`和`orders`表之間執行內部聯接,但我們新增了一個附加條件`users.name IS NOT NULL`以確保結果集中僅包含具有非空`name`值的行。 跨 3 個表的外連接 ---------- 與內連接範例類似,我們可以跨多個表執行外連接。假設我們想要檢索所有訂單以及使用者名稱和產品名稱,即使`users`或`products`表中缺少值。 ``` SELECT users.name, orders.order_date, products.product_name FROM orders LEFT OUTER JOIN users ON orders.user_id = users.id LEFT OUTER JOIN products ON orders.product_id = products.id; ``` 在這裡,我們從`orders`表開始,並對`users`和`products`表執行左外連接。這可確保所有訂單以及符合的使用者名稱和產品名稱(如果可用)都包含在結果集中。如果`users`或`products`表中沒有符合的行,則對應的列將包含`NULL`值。 別名 -- 別名就像 SQL 查詢中表格或欄位的暱稱。它們可以使查詢更具可讀性和更容易理解,特別是在處理長表或列名時,或在查詢中多次引用同一個表時。 ``` SELECT u.name, o.order_date, p.product_name FROM users u INNER JOIN orders o ON u.id = o.user_id INNER JOIN products p ON o.product_id = p.id; ``` 在此範例中,我們對`users`表使用別名`u` ,對`orders`表使用別名`o` ,對`products`表使用`p` 。這使得查詢更加簡潔且更易於閱讀,而不必多次重複完整的表名稱。 自加入 --- 自連結就像一張表在與自己對話。這是一種根據同一個表中的特定條件或關係將表與其自身連接的方法。這在處理分層或遞歸資料結構(例如員工-經理關係或巢狀類別)時非常有用。 ``` SELECT e.name AS employee, m.name AS manager FROM employees e LEFT OUTER JOIN employees m ON e.manager_id = m.id; ``` 在此範例中,我們對`employees`表執行自聯接以檢索每位員工的姓名及其對應經理的姓名。我們使用左外連接來確保所有員工都包含在結果集中,即使他們沒有指派經理。 --- 資料庫標記語言 (DBML) -------------- 資料庫建模語言(DBML)是一種簡單直觀的標記語言,用於描述關係型資料庫的結構。它提供了一種人類可讀的方式來定義表、列、關係和約束,從而使資料庫設計方面的溝通和協作變得輕鬆。 **DBML 入門** 要開始使用 DBML,您需要一個文字編輯器並對資料庫概念有基本的了解。讓我們建立第一個 DBML 檔案: ``` // my_database.dbml Table users { id int [pk, increment] username varchar email varchar [unique] created_at datetime [default: `now()`] } ``` 在這個範例中,我們定義了一個`users`表,其中包含`id` 、 `username` 、 `email`和`created_at`列。 `[pk]`標記指定`id`為主鍵, `[increment]`表示自動遞增, `[unique]`確保`email`的唯一性, `[default:` now() `]`將`created_at`的預設值設為目前時間戳記。 **建立表** DBML 可讓您在單一檔案中定義多個表格及其列。讓我們為資料庫新增更多表: ``` // my_database.dbml Table users { id int [pk, increment] username varchar email varchar [unique] created_at datetime [default: `now()`] } Table posts { id int [pk, increment] title varchar content text user_id int [ref: > users.id] created_at datetime [default: `now()`] } ``` 在這個範例中,我們新增了一個`posts`表,其中包含`id` 、 `title` 、 `content` 、 `user_id`和`created_at`欄位。 `[ref: > users.id]`標籤在`posts`表中的`user_id`欄位和`users`表中的`id`列之間建立外鍵關係。 **定義關係** DBML 支援表之間各種類型的關係,包括一對一、一對多和多對多。讓我們在資料庫中定義一些關係: ``` // my_database.dbml Table users { id int [pk, increment] username varchar email varchar [unique] created_at datetime [default: `now()`] } Table posts { id int [pk, increment] title varchar content text user_id int [ref: > users.id] created_at datetime [default: `now()`] } Ref: users.id < posts.user_id ``` 在此範例中,我們定義了`users`和`posts`表之間的一對多關係。 `Ref: users.id < posts.user_id`行指定`users`表中的`user_id`欄位引用`posts`表中的`id`列。 **新增約束** 約束確保資料完整性並在資料庫上強制執行規則。 DBML 支援各種約束,例如主鍵、外鍵、唯一約束和預設值。讓我們在表格中加入一些約束: ``` // my_database.dbml Table users { id int [pk, increment] username varchar [unique] email varchar [unique] created_at datetime [default: `now()`] } Table posts { id int [pk, increment] title varchar content text user_id int [ref: > users.id] created_at datetime [default: `now()`] } Ref: users.id < posts.user_id ``` 在此更新的範例中,我們為`users`表中的`username`名列新增了`[unique]`約束,以確保每個使用者名稱都是唯一的。 **記錄您的資料庫** DBML 可讓您為資料庫模式新增註解和註釋,使其更易於理解和維護。讓我們用註釋來記錄我們的表格: ``` // my_database.dbml Table users { id int [pk, increment] // Unique identifier for users username varchar [unique] // User's username email varchar [unique] // User's email address created_at datetime [default: `now()`] // Date and time when the user was created } Table posts { id int [pk, increment] // Unique identifier for posts title varchar // Title of the post content text // Content of the post user_id int [ref: > users.id] // ID of the user who created the post created_at datetime [default: `now()`] // Date and time when the post was created } Ref: users.id < posts.user_id // Relationship between users and posts ``` **DBML 的好處** - 簡單且人類可讀的語法 - 與資料庫無關的方法 - [dbdiagram.io](dbdiagram.io)上的免費視覺化工具 - 一致的可讀性和可維護性約定 - 豐富的文件和範例 --- 結論 -- 總而言之,關聯式資料庫設計構成了現代應用程式中高效能資料組織的支柱。了解其原理使您能夠建立強大且可擴展的資料庫。接下來,我們將深入研究 SQL 語法,釋放與資料庫有效互動的能力。請繼續關注我們對 SQL 世界的探索! --- 原文出處:https://dev.to/louaiboumediene/mastering-relational-database-design-a-comprehensive-guide-3jh8
開發者生態系統已經發展了很多,並且有許多開發者不知道的框架。 我們「作為開發人員」有很多關於如何建立我們的應用程式的框架選項。這些選擇非常重要。 讓我們介紹 15 個框架,供您製作下一個專案。我將提供詳細的資源,以便您可以學習其中的每一個。 相信我!這份清單就是您所需要的。 讓我們開始吧。  --- ### 庫與框架 在開始之前,讓我們先來了解一下框架與函式庫有何不同。開發人員可以互換使用它! 函式庫和框架都是由其他人編寫的可重複使用程式碼。 > 簡單來說: 將圖書館想像成IKEA之旅。您家裡有自己的空間,但您需要一些家具幫助。您不想從頭開始,所以您可以前往宜家,在那裡您可以挑選您需要的東西。你是做出決定的人。 現在,框架更像是建造一個樣品房。您已經有了一套計劃以及一些佈局和設計的選擇。但最終,藍圖和建造者處於控制之中。他們會讓你知道在哪裡可以加入你的意見,但他們正在掌控一切。 > 從技術角度來說。 透過庫,您可以指導應用程式的流程。您決定何時何地使用庫的功能。但有了框架,框架就控制了流程。它為您提供了一些插入程式碼的位置,但它是程式碼執行時發號施令的地方。 我使用了 Freecodecamp 的這篇文章“ [框架和庫之間的區別](https://www.freecodecamp.org/news/the-difference-between-a-framework-and-a-library-bd133054023f/)”,特別是因為它的解釋很簡單。完整閱讀一下! --- 1. [Wing](https://git.new/winlang-repo) - 一種雲端程式語言。 ---------------------------------------------------  Wing是一個旨在開發雲端應用程式的框架。 它允許您在雲端中建立應用程式,並且具有相當簡單的語法。 核心概念是您可以直接在應用程式中指定資源。 您可以執行本機模擬並使用 Winglang 控制台視覺化每個步驟中發生的情況。 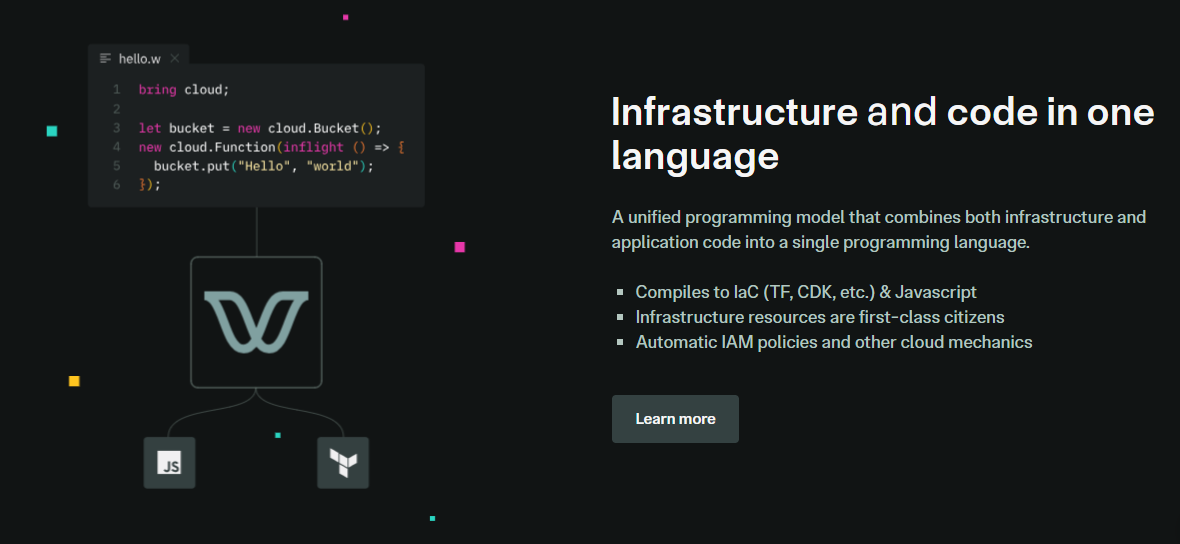 你**程式碼**。**本地測試**。**編譯**。**部署到雲端提供者**。 Wing 需要 Node `v20 or higher` 。 建立一個父目錄(我們使用的是`shared-counter` )並使用 Vite 使用新的 React 應用程式設定前端。您可以使用這個 npm 指令。 ``` npm create -y vite frontend --template react-ts // once installed, you can check if it's running properly. cd frontend npm install npm run dev ``` 您可以使用此 npm 命令安裝 Wing。 ``` npm install -g winglang ``` 您可以使用`wing -V`驗證安裝。 Wing 還提供官方[VSCode 擴充功能](https://marketplace.visualstudio.com/items?itemName=Monada.vscode-wing)和[IntelliJ](https://plugins.jetbrains.com/plugin/22353-wing) ,後者提供語法突出顯示、補全、轉到定義和嵌入式 Wing 控制台支援。您可以在建立應用程式之前安裝它! 您可以使用 Wing 作為雲端後端來建立任何全端應用程式。 建立後端目錄。 ``` mkdir ~/shared-counter/backend cd ~/shared-counter/backend ``` 建立一個新的空 Wing 專案。 ``` wing new empty // This will generate three files: package.json, package-lock.json and main.w file with a simple "hello world" program wing it // to run it in the Wing simulator // The Wing Simulator will be opened in your browser and will show a map of your app with a single function. //You can invoke the function from the interaction panel and check out the result. ``` 使用指令`wing new empty`後的結構如下。 ``` bring cloud; // define a queue, a bucket, and a counter let bucket = new cloud.Bucket(); let counter = new cloud.Counter(initial: 1); let queue = new cloud.Queue(); // When a message is received in the queue -> it should be consumed // by the following closure queue.setConsumer(inflight (message: str) => { // Increment the distributed counter, the index variable will // store the value before the increment let index = counter.inc(); // Once two messages are pushed to the queue, e.g. "Wing" and "Queue". // Two files will be created: // - wing-1.txt with "Hello Wing" // - wing-2.txt with "Hello Queue" bucket.put("wing-{index}.txt", "Hello, {message}"); log("file wing-{index}.txt created"); }); ``` 您可以安裝`@winglibs/vite`來啟動開發伺服器,而不是使用`npm run dev`來啟動本機 Web 伺服器。 ``` // in the backend directory npm i @winglibs/vite ``` 您可以使用`backend/main.w`中提供的 publicEnv 將資料傳送到前端。 讓我們來看一個小例子。 ``` // backend/main.w bring vite; new vite.Vite( root: "../frontend", publicEnv: { TITLE: "Wing + Vite + React" } ); // import it in frontend // frontend/src/App.tsx import "../.winglibs/wing-env.d.ts" //You can access that value like this. <h1>{window.wing.env.TITLE}</h1> ``` 你還可以做更多: - 讀取/更新 API 路線並使用 Wing Simulator 檢查它。 - 使用後端獲取值。 - 使用`@winglibs/websockets`來同步瀏覽器,在後端部署一個 WebSocket 伺服器,你可以連接這個 WebSocket 來接收即時通知。 可以節省大量時間的一些功能包括熱重載,以獲得即時回饋並順利產生必要的安全策略。 無需學習每個雲端提供者的語法。 您的程式碼可以編譯到 AWS、GCP、Azure 或任何自訂平台。太棒了:D 您可以閱讀完整的逐步指南,以了解[如何使用 React 作為前端和 Wing 作為後端建立簡單的 Web 應用程式](https://www.winglang.io/docs/guides/react-vite-websockets)。測試是使用 Wing Simulator 完成的,並使用 Terraform 部署到 AWS。 部署後的AWS架構是這樣的。 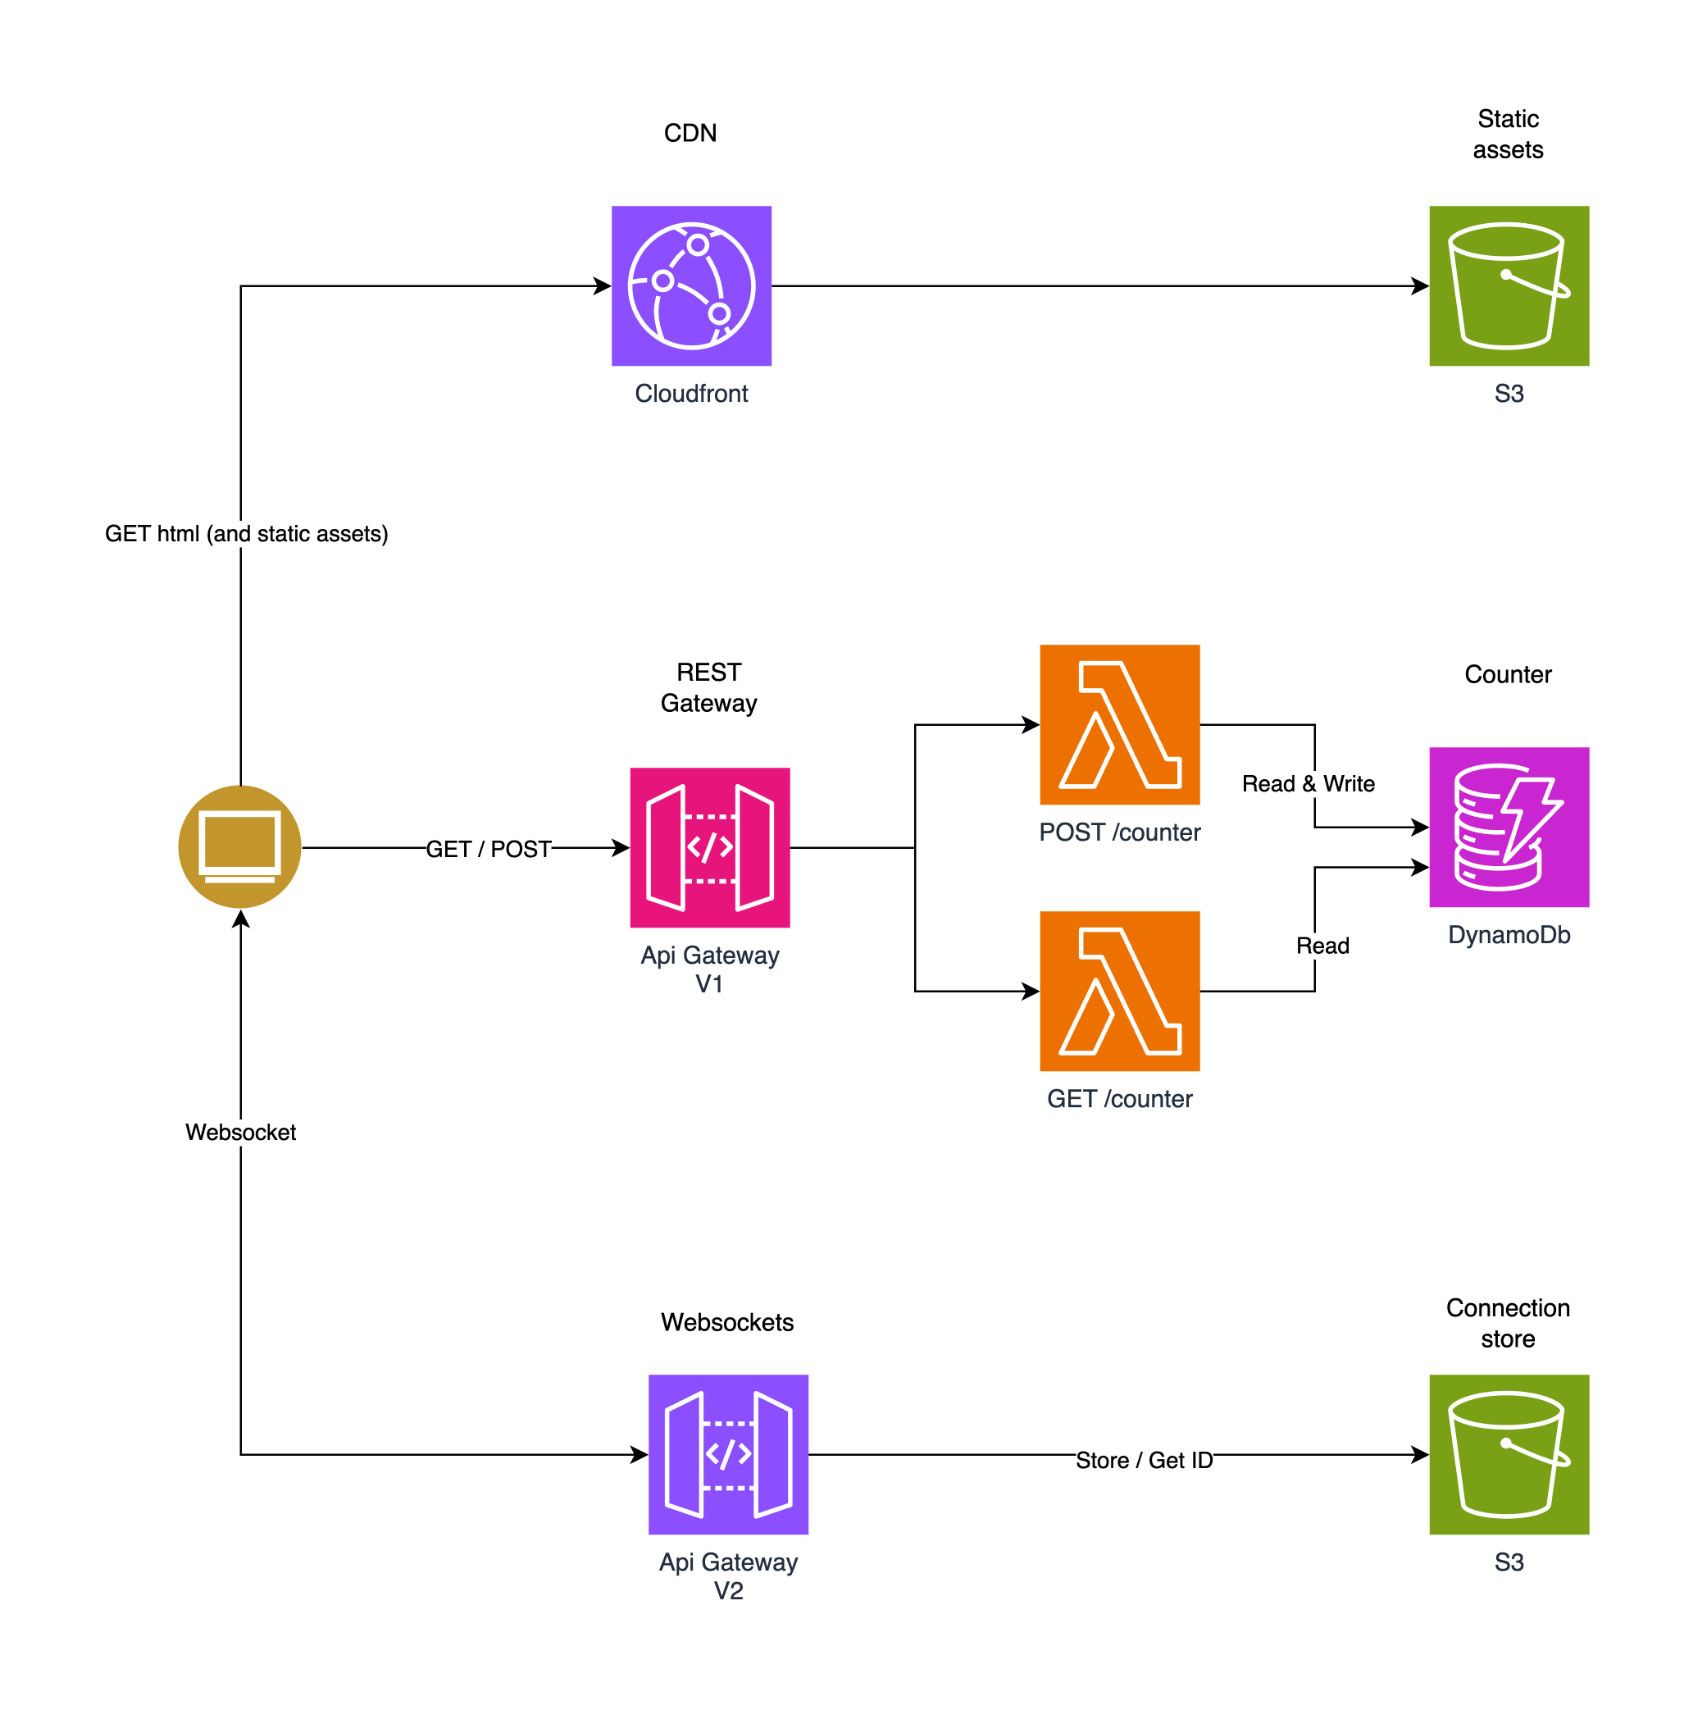 為了提供開發者選擇和更好的體驗,Wing 推出了對[TypeScript (Wing)](https://www.winglang.io/docs/typescript/)等其他語言的全面支援。唯一強制的事情是您必須安裝 Wing SDK。 這也將使控制台完全可用於本地偵錯和測試,而無需學習 Wing 語言。 該翼目前支援以下輸出: - AWS CDK 平台 - Terraform/AWS 平台 - Terraform/GCP 平台 - Terraform/Azure 平台 - 模擬器平台 - 客製化平台 Wing 甚至還有其他[指南](https://www.winglang.io/docs/category/guides),因此更容易遵循。  您可以閱讀[文件](https://www.winglang.io/docs)並查看[範例](https://www.winglang.io/docs/category/examples)。 您也可以在[Playground](https://www.winglang.io/play/)中使用 Wing 查看結構和範例。 如果你比較像輔導員。看這個! {% 嵌入 https://www.youtube.com/watch?v=wzqCXrsKWbo %}  Wing 在 GitHub 上有 4500+ 顆星,1600+ 個版本,但仍未進入 v1 版本,這意味著意義重大。 {% cta https://git.new/winlang-repo %} 星翼 ⭐️ {% endcta %} --- 2. [Nest](https://github.com/nestjs/nest) - 高效且可擴展的伺服器端應用程式。 ------------------------------------------------------------  一個先進的 Node.js 框架,用於使用 TypeScript/JavaScript 建立高效且可擴展的伺服器端應用程式。 它使用現代 JavaScript,使用 TypeScript 建構(保留與純 JavaScript 的兼容性),並結合了 OOP(物件導向程式設計)、FP(函數式程式設計)和 FRP(函數式反應式程式設計)的元素。 在底層,Nest 使用 Express,但也提供與 Fastify 等各種其他庫的兼容性,從而可以輕鬆使用無數可用的第三方外掛程式。 Nest 提供了高於這些常見 Node.js 框架(Express/Fastify)的抽象級別,但也直接向開發人員公開其 API。這為開發人員提供了一定程度的自由。 在我們了解更多之前,請觀看 100 秒內的 Nestjs! {% 嵌入 https://www.youtube.com/watch?v=0M8AYU\_hPas&pp=ygUXZW1iZXIganMgaW4gMTAwIHNlY29uZHM%3D %} 考慮到它們提供的靈活性,您當然不必重新發明輪子。 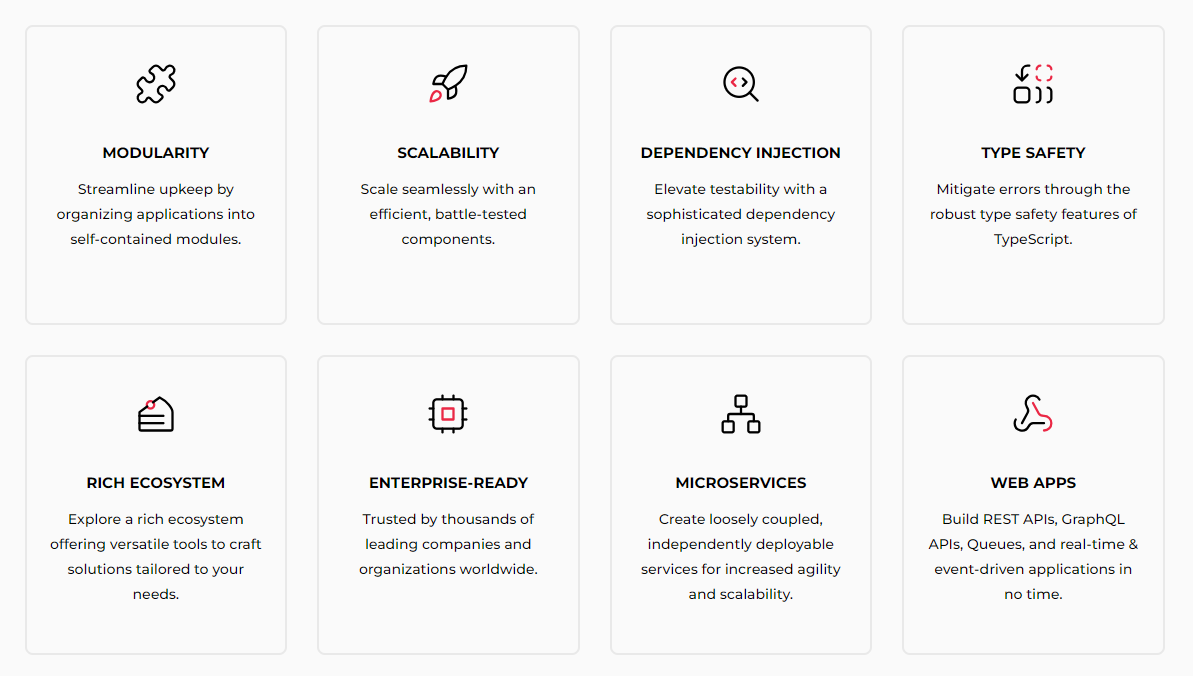 這是使用 Nest CLI 設定新專案的方法。 ``` npm i -g @nestjs/cli nest new project-name ``` 這將引導該應用程式。 ``` import { NestFactory } from '@nestjs/core'; import { AppModule } from './app.module'; async function bootstrap() { const app = await NestFactory.create(AppModule); await app.listen(3000); } bootstrap(); ``` 您可以閱讀[文件](docs.nestjs.com)。 他們還提供一套付費課程(我想知道為什麼)。如果您需要完整的路線圖並想成為 Nest 的使用專家,請隨時查看它們。 但我建議使用 Freecodecamp 提供的這些免費教學來學習。 - [NestJs 初學者課程 - 建立 REST API](https://www.youtube.com/watch?v=GHTA143_b-s) - 大約 3.42 小時,涵蓋許多[主題](https://www.freecodecamp.org/news/learn-nestjs-by-building-a-crud-api/)。 - [綜合 NestJS 課程](https://www.youtube.com/watch?v=sFnAHC9lLaw&t=1s)- 涵蓋 20 個模組,時長 14 小時。 {% 嵌入 https://www.youtube.com/watch?v=sFnAHC9lLaw&t=1s %} 如果您正在尋找入門專案,請學習[如何在 NestJS 中使用 Nodemailer 發送電子郵件](https://www.freecodecamp.org/news/how-to-use-nodemailer-in-nestjs/)。您可以使用它來獲得紮實的基礎知識。 Nest.js 擁有龐大的開發人員社區,並被許多公司使用。尋找已使用 Nest[的專案和公司的完整清單](https://docs.nestjs.com/discover/companies)。  順便說一句,作為初學者,我最常擔心的是相似的名稱:Nextjs、Nuxtjs 和 Nestjs。我涵蓋了所有內容,這樣您就不必感到困惑。哈哈! Nest 在 GitHub 上擁有超過 64k 個 star,提交次數超過 15k,並且已發布`v10`版本。 {% cta https://github.com/nestjs/nest %} 星巢 ⭐️ {% endcta %} --- 3. [Gatsby](https://github.com/gatsbyjs/gatsby) - 最好的基於 React 的框架,具有內建的效能、可擴展性和安全性。 -----------------------------------------------------------------------------------  Gatsby 是一個基於 React 的免費開源框架,可協助開發人員建立速度極快的網站和應用程式。 它將動態呈現網站的控制和可擴展性與靜態網站生成的速度結合起來,創造了一個全新的可能性網絡。 Gatsby 從任何資料來源提取資料,無論是 Markdown 檔案、Contentful 或 WordPress 等無頭 CMS,還是 REST 或 GraphQL API。使用來源插件載入資料,然後使用 Gatsby 的統一 GraphQL 介面進行開發。 與 Next.js 不同,Gatsby 不執行伺服器端渲染。相反,它會在建置期間在客戶端產生 HTML 內容。 我見過一些使用 Gatsby 建立的優秀作品集。 開始使用以下 npm 指令。 ``` npm init gatsby ``` 它會要求提供網站標題和專案目錄的名稱。繼續按照提示選擇您的首選語言(JavaScript 或 TypeScript)、CMS、樣式工具和其他功能。 您可以這樣使用它。 ``` cd my-gatsby-site // to start the local dev server npm run develop ``` 您可以閱讀[文件](https://www.gatsbyjs.com/docs)。我個人很喜歡文件的流程。 您也可以按照[教學](https://www.gatsbyjs.com/docs/tutorial/getting-started/)開始,[操作指南](https://www.gatsbyjs.com/docs/how-to/)和[概念指南](https://www.gatsbyjs.com/docs/conceptual/)深入了解 Gatsby 概念以及網站架構。 Gatsby 提供了開箱即用的 PWA 和大量主題。使用 Gatsby 主題,您的所有預設配置(共享功能、資料來源、設計)都會從您的網站中抽象化出來,並放入可安裝的套件中。您可以閱讀有關[主題的](https://www.gatsbyjs.com/docs/themes/)更多資訊。 例如, `gatsby-theme-blog`是用於建立部落格的官方 Gatsby 主題。可能有可以透過`gatsby-config.js`配置的主題選項。 ``` npm install gatsby-theme-blog ``` 對於電子商務商店或廣泛的媒體網站等內容密集的企業級網站來說,Gatsby 並不是理想的解決方案。隨著內容大小的增加,建置時間將急劇增加。 尋找使用 Gatsby 建立的[606 個網站](https://www.gatsbyjs.com/showcase/)的清單。其中,53 個網站是開源的,因此這可以提供靈感,也是一個起點。  他們還提供了[大量按類別劃分的插件](https://www.gatsbyjs.com/plugins)以及每個插件中清晰的文件。其中一個範例是將 Google Analytics 新增至您的應用程式的插件。 ``` npm install gatsby-plugin-google-analytics ``` 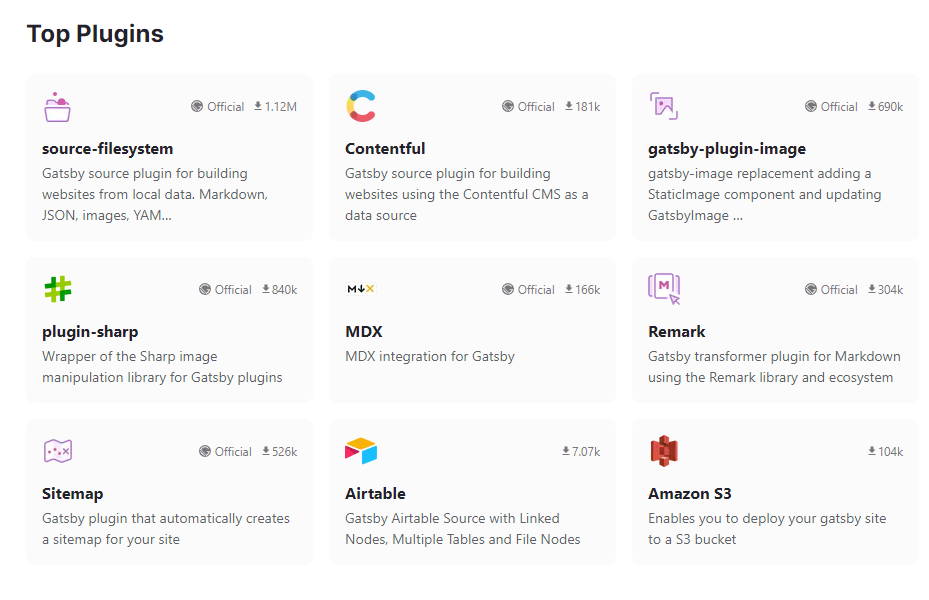 您也可以使用 Gatsby 的[Starter 庫](https://www.gatsbyjs.com/starters/)。使用 Gatsby 建立下一個應用程式還需要什麼?  使用這些[參考指南](https://www.gatsbyjs.com/docs/reference/)來獲取有關 Gatsby API 的詳細資訊。 如果您喜歡完整的課程,我建議您觀看[Gatsby 靜態網站產生器教學](https://www.youtube.com/watch?v=RaTpreA0v7Q)- Freecodecamp 提供的 9 小時教學。 Gatsby 在 GitHub 上有 55,000 顆星,目前處於 v5 版本,並有超過 245,000 名開發人員使用。 {% cta https://github.com/gatsbyjs/gatsby %} 明星蓋茲比 ⭐️ {% endcta %} --- 4. [Nextjs](https://github.com/vercel/next.js) - Web 的 React 框架。 ----------------------------------------------------------------  由於它提供的優化級別,它是我最喜歡的框架之一。 Next.js 使您能夠透過擴展最新的 React 功能並整合強大的基於 Rust 的 JavaScript 工具來建立全端 Web 應用程式,以實現最快的建置。 Next.js 由荷蘭公司 Vercel(以前稱為 ZEIT)於 2017 年建立。 Next.js 也像 Gatsby 一樣提供靜態產生器。 Next.js 的建置遵循`Build once, runs everywhere`的原則,因此您可以使用 Next.js 製作 Web 應用程式、行動應用程式、桌面應用程式和漸進式 Web 應用程式。  Nextjs 提供了許多功能,例如檔案路由、渲染技術(例如 ISR)以及深層的圖像和字體最佳化。你可以檢查任何 nextjs 網站的 SEO 統計資料,在大多數情況下它都是一流的。 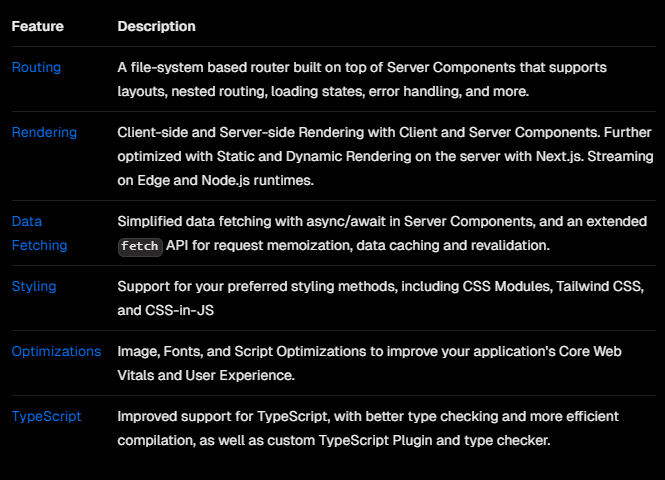 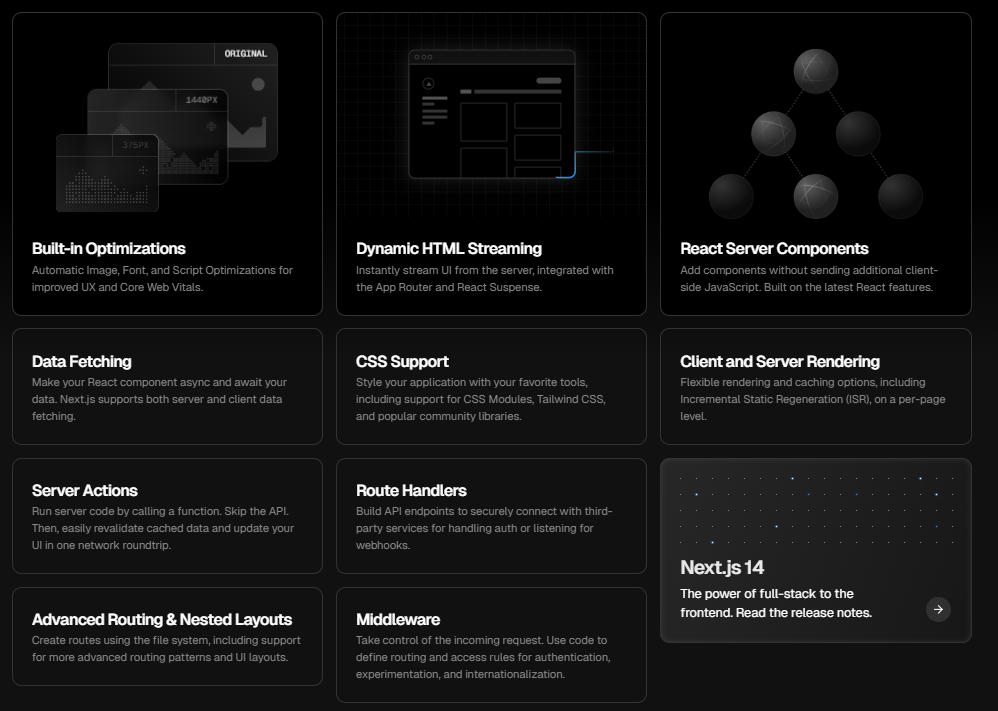 開始使用以下 npm 指令。 ``` npx create-next-app@latest ``` 您可以閱讀[文件](https://nextjs.org/docs)並按照[本指南](https://nextjs.org/docs/getting-started/installation)開始使用。 其中涉及很多概念,閱讀完整的文件需要幾個月的時間。我前段時間寫過一篇文章,你可以看看。它並沒有出名,但它是我憑藉多年的 Nextjs 經驗編寫的最好的文章之一。我還提到了 Nextjs 團隊提供的[官方課程](https://nextjs.org/learn/dashboard-app/getting-started)。 {% 嵌入 https://dev.to/anmolbaranwal/12-things-you-didnt-know-you-could-do-with-nextjs-386b %} 如果您想透過 YouTube 教學進行學習,我建議您觀看這些最近的教程,因為文件更新得非常頻繁,因此最好觀看最近的內容,而不是幾年前的內容。 - \[帶有 TypeScript 的 Nextjs 13(應用程式路由器)\](https://www.youtube.com/watch?v=ZVnjOPwW4ZA&pp=ygUTbmV4dGpzIGNyYXNoIGNvdXJzZQ%3D%3D ) - 1 小時教程。 - [Next.js 14 完整課程 2024](https://www.youtube.com/watch?v=wm5gMKuwSYk) - 3 小時教學。 您也可以觀看 Nextjs 100 秒。他們加入了一個基本教程,使其長達 11 分鐘。 {% 嵌入 https://www.youtube.com/watch?v=Sklc\_fQBmcs&t=4s&pp=ygUObmV4dGpzIGluIDEwMHM%3D %} 我自己使用文件學習了它,並使用它建置了超過 6 個專案,甚至是一個超過 20k 程式碼庫的 SAAS 應用程式。這就是為什麼我說,它是您可以選擇的最佳框架之一。 使用 Next.js 建立的一些熱門網站包括 Auth0、Coinbase、Docker、GitHub、Hulu、Netflix、Sesame、Starbucks、Trulia、Twitch 和 Uber。你可以看到所有使用Nextjs的[網站](https://nextjs.org/showcase)。  他們還提供了各種可以直接使用的[入門模板](https://vercel.com/templates/next.js)。 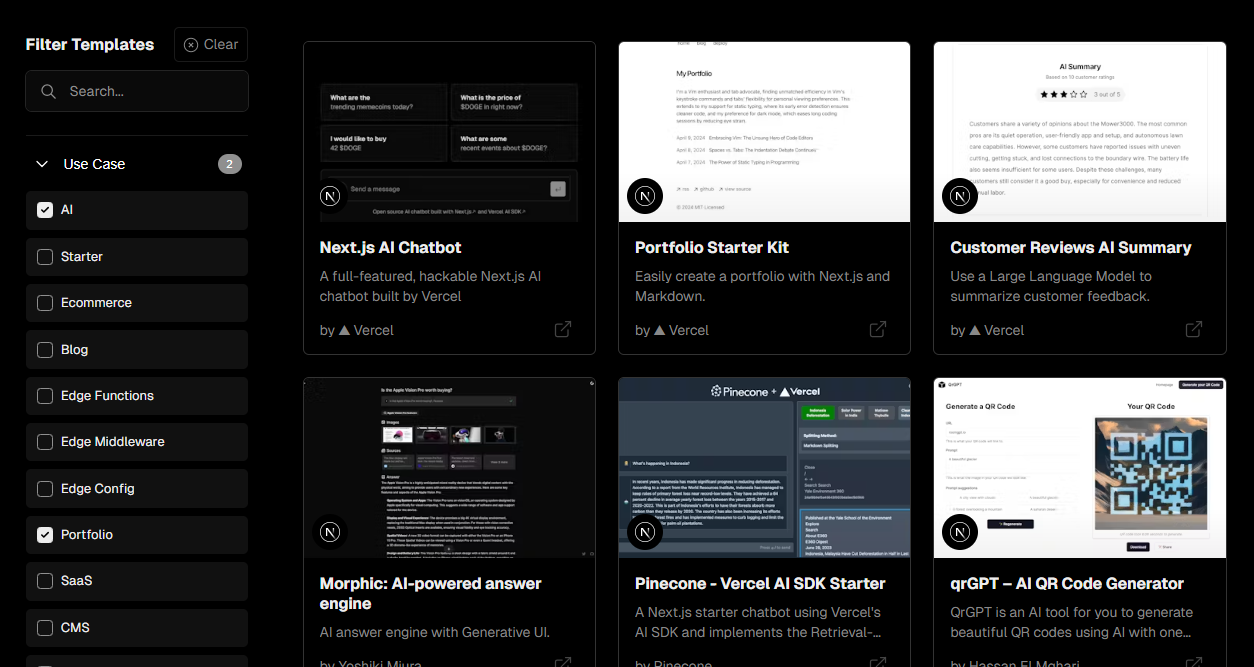 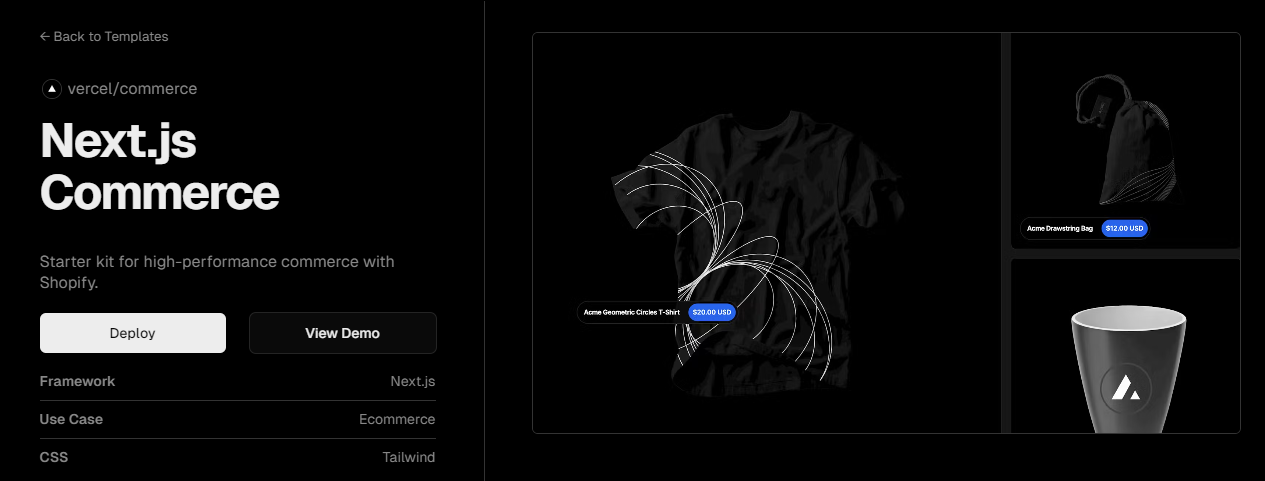 Next 在 GitHub 上有 12 萬顆星,發布`v14.2`版本,在 NPM 上每週下載量超過 600 萬次。如其儲存庫所示,有 260 萬開發人員使用。 {% cta https://github.com/vercel/next.js %} 明星 Nextjs ⭐️ {% endcta %} --- 5. [Preact](https://github.com/preactjs/preact) - 具有相同現代 API 的快速 3kB React 替代品。 -------------------------------------------------------------------------------  Preact 是一個輕量級、快速、高效能的函式庫,是 React 的替代品。 Preact 的大小僅為 3kb(經過壓縮和壓縮),但卻為您提供了 React 所需的所有功能,使其成為最好的 JavaScript 框架之一。 Preact 的建立者 Jason Miller 是 Google 的高級開發者計畫工程師。 Preact 基本上具有 Virtual DOM 元件的所有功能,而沒有諸如以下的開銷: - 熟悉 React API 和 ES6 類別、鉤子和功能元件模式。 - 透過簡單的 preact/compat 別名實現廣泛的 React 相容性。 - 您需要的一切,例如 JSX、VDOM、DevTools、HMR、SSR。 在生產過程中,您可以輕鬆地從現有專案中的 React 切換到 Preact,因為它們支援相同的 API。 程式碼範例結構如下所示。您也可以查看此範例[程式碼筆](https://codepen.io/developit/pen/LpNOdm),您可以查看它以了解 Preact 中程式碼庫的結構。  開始使用以下 npm 指令。 ``` npm init preact ``` 這是執行開發伺服器的方式。 ``` # Go into the generated project folder cd my-preact-app # Start a development server npm run dev ``` 您將必須配置一些東西,尤其是別名。請遵循[本指南](https://preactjs.com/guide/v10/getting-started)。 您可以閱讀[文件](https://preactjs.com/guide/v10/getting-started/)並查看詳細的[演示和範例](https://preactjs.com/about/demos-examples)清單。 他們還提供了基於 Web 的[教程](https://preactjs.com/tutorial/),您可以按照該教程來學習 Preact。 如果您需要範例應用程式、樣板檔案、元件、工具包等,請使用[Awesome Preact](https://github.com/preactjs/awesome-preact) 。 Preact 在 GitHub 上有 36,000 顆星,目前已發布`v10`版本。 {% cta https://github.com/preactjs/preact %} Star Preact ⭐️ {% endcta %} --- 6. [tRPC](https://github.com/trpc/trpc) - 端到端類型安全性 API 變得簡單。 ------------------------------------------------------------  tRPC 可讓您輕鬆建立和使用完全類型安全的 API,而無需模式或程式碼產生。  上面的客戶端沒有從伺服器導入任何程式碼,僅導入其類型聲明 如果我們要深入了解,那麼您絕對應該閱讀一些歷史。 {% 嵌入 https://dev.to/zenstack/a-brief-history-of-api-rpc-rest-graphql-trpc-fme %} 目前,GraphQL 是在 TypeScript 中實作型別安全 API 的主要方式(這太棒了!)。由於 GraphQL 被設計為用於實現 API 的與語言無關的規範,因此它沒有充分利用 TypeScript 這樣的語言的強大功能。 如果您的專案是使用全端 TypeScript 建置的,您可以直接在客戶端和伺服器之間共用類型,而無需依賴程式碼生成。 tRPC 適用於全端 TypeScript 開發人員。它使您可以輕鬆編寫可以在應用程式的前端和後端安全使用的端點。 API 合約的類型錯誤將在建置時被捕獲,從而減少應用程式在執行時出現錯誤的可能性。 這是為 Mono 儲存庫設計的,因為您需要從伺服器匯出/匯入類型定義。  開始使用以下 npm 指令。 ``` npm install @trpc/server@next @trpc/client@next ``` 您必須使用實例定義後端路由器。閱讀[快速入門指南](https://trpc.io/docs/quickstart)以了解更多詳細資訊。 了解[trpc 中涉及的概念](https://trpc.io/docs/concepts)(例如 rpc 和使用的術語)非常重要。 您可以閱讀[文件](https://trpc.io/docs)。 如果您已經在一個混合語言的團隊中工作,或者擁有您無法控制的第三方消費者,那麼您應該建立一個與語言無關的 GraphQL-API。 如果您想測試一下,我建議使用此[模板](https://github.com/new?template_name=examples-minimal&template_owner=trpc),其中包含一個最小的範例。 您還可以觀看這個[45 分鐘的 YouTube 教學](https://www.youtube.com/watch?v=UfUbBWIFdJs&pp=ygUMd2hhdCBpcyB0cnBj)來了解有關 trpc 的更多資訊。 {% 嵌入 https://www.youtube.com/watch?v=UfUbBWIFdJs&pp=ygUMd2hhdCBpcyB0cnBj %} 它們在 GitHub 上擁有超過 32,000 顆星,目前處於`v11` beta 版本,並被 51,000 名開發人員使用。 {% cta https://github.com/trpc/trpc %} 啟動 tRPC ⭐️ {% endcta %} --- [7.Nuxtjs](https://github.com/nuxt/nuxt) - 直覺的 Vue 框架。 ------------------------------------------------------  Nuxt 是一個基於 Vue.js 生態系統的漸進式開源框架,用於建立高效能 Web 應用程式,尤其是伺服器端渲染應用程式。 但請記住,Nuxt 並不是 Vue.js 的替代品,因為它無法單獨運作。而且它也不能被視為像 Express 這樣成熟的後端框架。 100 秒觀看 Nuxtjs,掌握整體概念。 {% 嵌入 https://www.youtube.com/watch?v=dCxSsr5xuL8 %} Nuxt 是建立這三種 Web 應用程式的最佳 JavaScript 框架之一 - 預先渲染靜態頁面、單頁 Web 應用程式 (SPA)、伺服器端渲染 Web 應用程式 (SSR) 甚至通用應用程式。 開發人員特別喜歡 Nuxt,因為它有豐富的函式庫和模組。 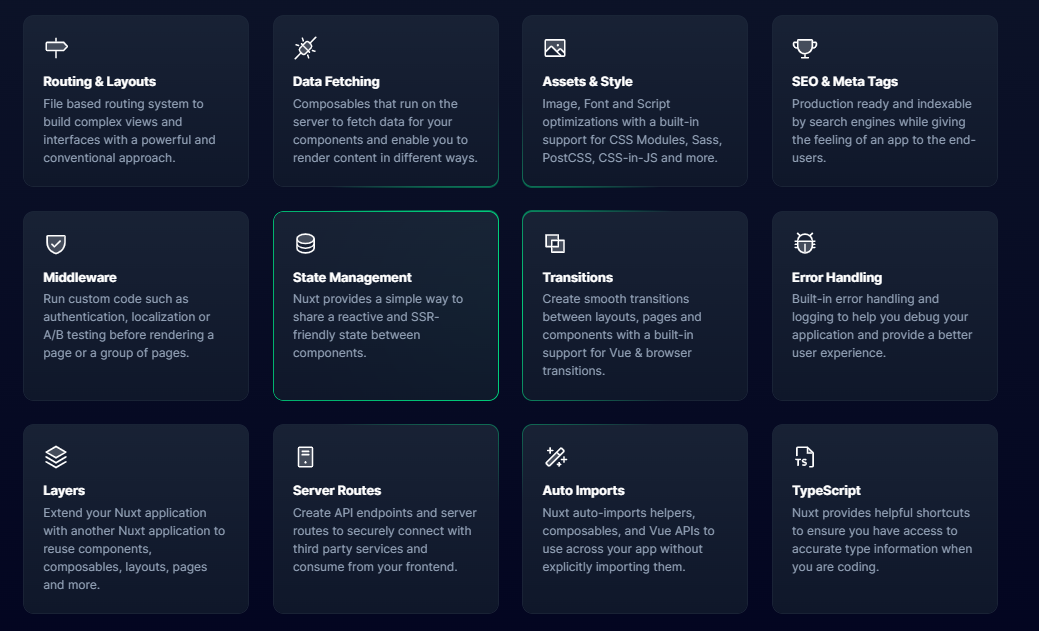 開始使用以下 npm 指令。 ``` npx nuxi@latest init <my-project> ``` 您可以閱讀[文件](https://nuxt.com/docs/getting-started/introduction)並檢查[codesandbox範例](https://codesandbox.io/s/github/nuxt/starter/tree/v3/)。 您可以按照本[指南](https://nuxt.com/docs/guide/concepts/auto-imports)了解更多關鍵概念。 有許多整合選項,因此您可以更輕鬆地繼續使用您喜歡的工具和服務。 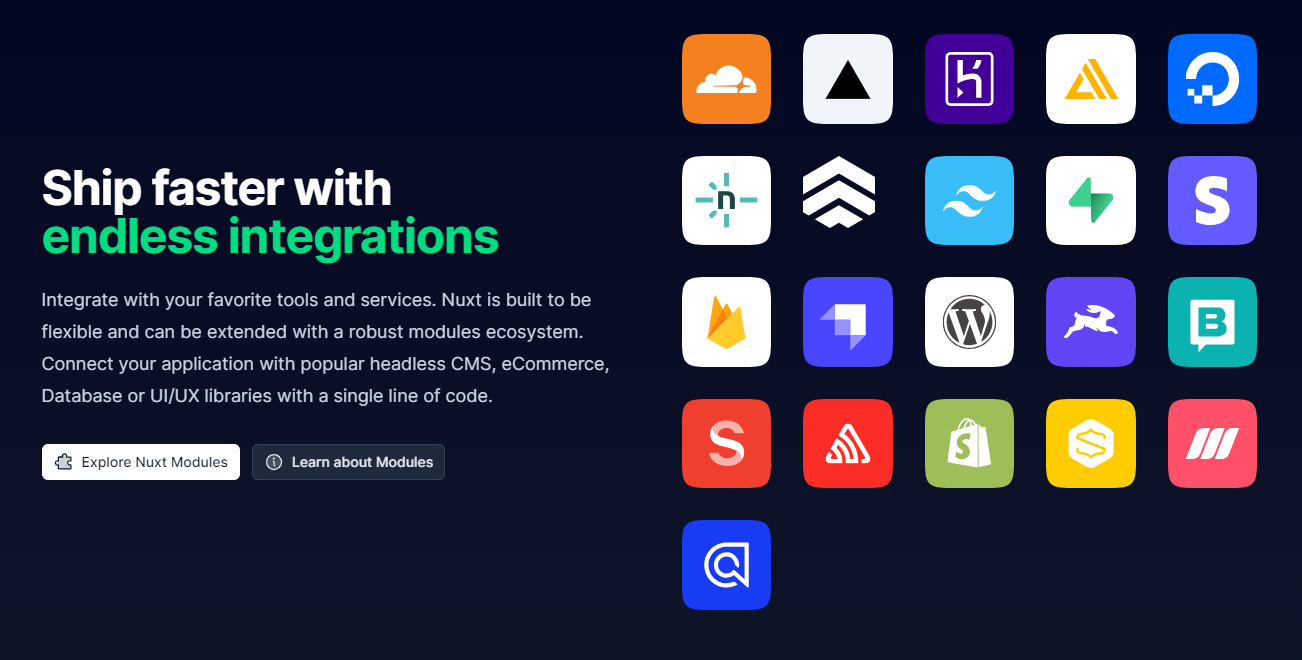 您可以查看[免費課程清單](https://nuxt.com/video-courses)來了解 Nuxt 生態系統。 如果您想要推薦的課程,請學習[Nuxt 3 — 初學者課程](https://www.youtube.com/watch?v=fTPCKnZZ2dk)— Freecodecamp 提供的 3 小時教學。 使用 Nuxt 建立的一些流行網站包括 Aircall、Amplitude、Backmarket、Bitpay、Bootstrap Vue、Fox News、Gitlab、Icons8、Instrument、MyScript、Nespresso、Note.com、Ozon.ru、Roland Garros、System76、Todoist、加油,Wappalyzer 。尋找不同類別下[展示網站的完整清單](https://nuxt.com/showcase)。 如果您想快速測試和建置,那麼我建議您查看[入門模板](https://nuxt.com/templates)。 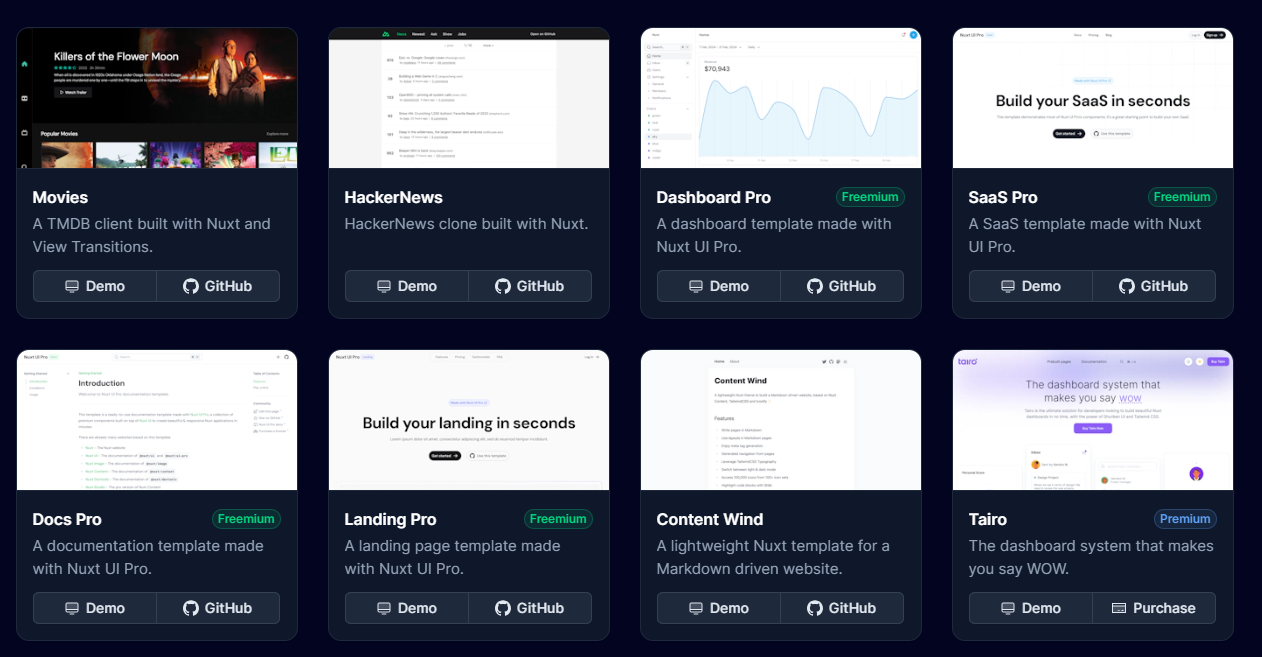 Nuxt 在 GitHub 上擁有超過 51,000 顆星,並被超過 318,000 名開發者使用。 {% cta https://github.com/nuxt/nuxt %} Star Nuxt ⭐️ {% endcta %} --- 8. [Ember.js](https://github.com/emberjs/ember.js) - 用於建立雄心勃勃的 Web 應用程式的 JavaScript 框架。 ---------------------------------------------------------------------------------------  Ember.js 是一個 JavaScript 框架,用於為企業建立可擴展的單頁 Web 應用程式。與其他框架不同,模型-視圖-視圖模型 (MVVW) 架構是 Ember 的基礎。 Ember.js 最初是一個 SproutCore 2.0 框架,由其建立者 Yehuda Katz 更名為 Ember.js,Yehuda Katz 是一位出色的開發人員,被譽為 jQuery 的主要建立者之一。 他們還提供命令列介面工具。 Ember CLI 是建立、建置、測試和提供構成 Ember 應用程式或外掛程式的檔案的官方方式。 ``` npm install -g ember-cli ``` 儘管與 React、Vue 和 Svelte 相比,Ember.js 是一個較舊的前端 JavaScript 框架,但它仍然具有強大的功能,並且在 Microsoft、LinkedIn、Netflix 和 Twitch 等大公司中擁有龐大的用戶群。查看[完整清單](https://emberjs.com/ember-users/)。  借助強大的預設設置,您可能永遠不需要在應用程式中配置任何內容,但如果您需要的話,選項就在那裡! 這意味著 Ember.js 遵循「CoC – 約定優於配置」方法,這可確保在大多數情況下不需要任何配置,以便您可以直接跳到編碼和建立 Web 應用程式。 它們還支援類似於 AngularJS 的 2 路資料綁定。 當我們深入研究時,了解 ember.js 是如何誕生的、其建立背後的先驅者以及製作開源軟體時做出的改變生活的決定非常重要。看這個! {% 嵌入 https://www.youtube.com/watch?v=Cvz-9ccflKQ %} 安裝 Ember CLI 後。 ``` npm install -g ember-cli ``` 您可以建立一個新應用程式,如圖所示。 ``` ember new ember-quickstart --lang en cd ember-quickstart npm start ``` 您可以閱讀[詳細的快速入門文件](https://guides.emberjs.com/release/getting-started/quick-start/)和[官方指南](https://guides.emberjs.com/release/)。 要學習 ember.js,您可以按照他們的官方團隊建立的[逐步教程](https://guides.emberjs.com/release/tutorial/part-1/)進行操作。您可以在[Ember API 文件](https://api.emberjs.com/ember/release)上閱讀有關 API 的更多資訊。 有數以千計的 JavaScript 庫可以在 Ember 中很好地工作。當 npm 套件提供一些 Ember 特定的功能時,他們稱之為`addon` 。外掛程式提供了一種編寫可重複使用程式碼、共用元件和樣式、擴充建置工具等的方法,所有這些都只需最少的配置。尋找[插件的完整清單](https://emberobserver.com/)。 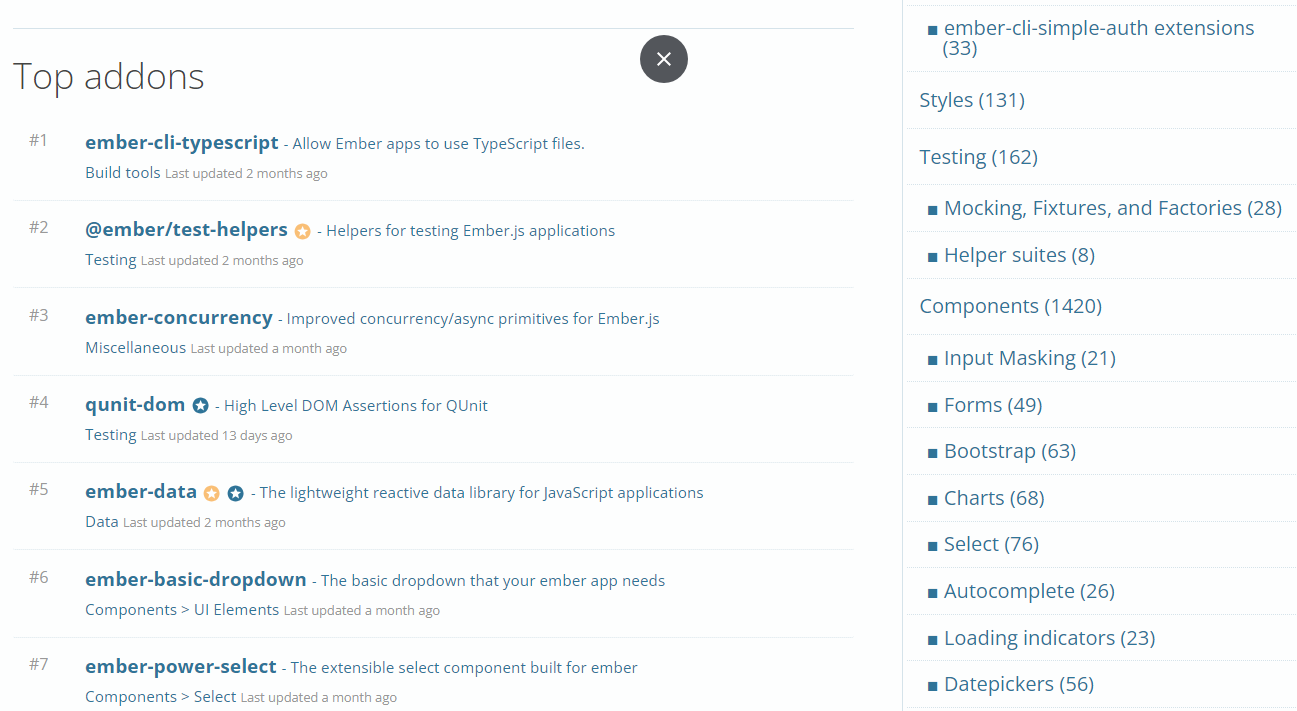 如果您正在尋找更多文章來學習 Ember.js,我推薦這些: - [Ember JS Essentials:Startech 提供的安裝及其功能的初學者指南](https://www.startechup.com/blog/ember-js/)。 - Toptal [建立您的第一個 Ember.js 應用程式的指南](https://www.toptal.com/javascript/a-step-by-step-guide-to-building-your-first-ember-js-app)。 這足以理解結構並決定 Ember 何時適合您的專案。 他們在 GitHub 上有 22k+ 顆星,而`v5.8`版本有 500 多個版本。 {% cta https://github.com/emberjs/ember.js %} 明星 Ember.js ⭐️ {% endcta %} --- 9. [Backbone.js](https://github.com/jashkenas/backbone) - 為您的 JS 應用程式提供一些帶有模型、視圖、集合和事件的 Backbone。 ------------------------------------------------------------------------------------------------- 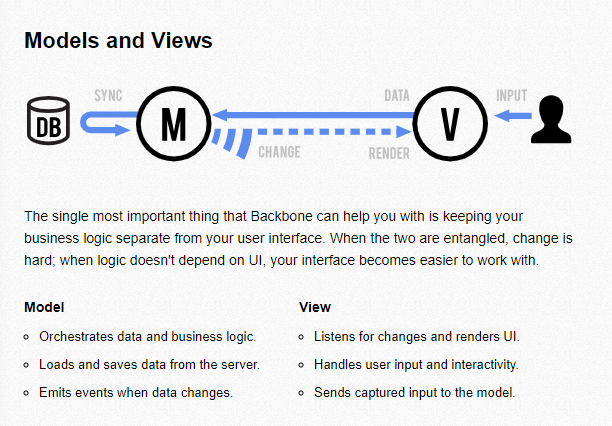 Backbone.js 是一個基於 JavaScript 的框架,透過 RESTful JSON 介面連接到 API。 Jeremy Ashkenas 因建立一些最好的 JavaScript 框架(例如 CoffeeScript 和 Underscore.js)而聞名,他於 2010 年 10 月推出了 Backbone.js。 它旨在建立單頁 Web 應用程式並維護不同 Web 應用程式元件(例如眾多客戶端和伺服器)之間的同步。 Backbone.js 以小而輕而聞名,因為它只需要 jQuery 和一個 JavaScript 函式庫 Underscore.js 即可使用整個函式庫。 Backbone.js 透過提供具有鍵值綁定和自訂事件的模型、具有豐富的可枚舉函數API 的集合、具有聲明性事件處理的視圖,為JavaScript 密集型應用程式提供結構,並透過RESTful JSON 接口將其全部連接到您現有的應用程式。 這是一個簡單的主幹視圖。 ``` var AppView = Backbone.View.extend({ // el - stands for element. Every view has an element associated with HTML // content will be rendered. el: '#container', // It's the first function called when this view is instantiated. initialize: function(){ this.render(); }, // $el - it's a cached jQuery object (el), in which you can use jQuery functions // to push content. Like the Hello World in this case. render: function(){ this.$el.html("Hello World"); } }); ``` 您可以閱讀[文件](https://backbonejs.org/)。 Backbone.js 被許多值得信賴的公司使用,例如 Walmart、Pinterest、SoundCloud 等。 您可以參考他們的[wiki](https://github.com/jashkenas/backbone/wiki/Tutorials%2C-blog-posts-and-example-sites) ,其中記錄了教程、部落格文章和範例網站。 您可以參考幾篇很棒的文章來了解更多: - [BackboneJS:入門](https://auth0.com/blog/backbonejs-getting-started/)- 推薦。 - [適合絕對初學者的 Backbone.js](https://adrianmejia.com/backbone-dot-js-for-absolute-beginners-getting-started/) - [BackboneJS 教學](https://www.tutorialspoint.com/backbonejs/index.htm)- 教學點。 根據儲存庫統計,它們在 GitHub 上擁有超過 28,000 顆星,並被超過 66,000 名開發人員使用。 {% cta https://github.com/jashkenas/backbone %} 明星 Backbone.js ⭐️ {% endcta %} --- 10. [Svelte](https://github.com/sveltejs/svelte) - 控制論增強的網路應用程式。 ----------------------------------------------------------------  Svelte 是一種建立 Web 應用程式的新方法。 它是由 Rich Harris(著名前端開發人員)建立的。 Svelte 於 2016 年首次推出,人氣暴漲。 許多開發人員認為 Svelte 是一個真正改變遊戲規則的革命性想法,它從根本上改變了我們編碼 Web 應用程式的方式。 與 React 或 Vue.js 等其他 JavaScript 框架不同,Svelte 沒有虛擬 DOM。相反,您可以使用簡單的 HTML、CSS 和 JavaScript 程式碼來建立無樣板的元件。 然後,Svelte Compiler 在建置期間將此程式碼編譯成小型的無框架的普通 JavaScript 模組,並在狀態變更時精確地更新 DOM。 因此,與 React 或 Vue.js 等其他傳統框架不同,Svelte 不需要很高的瀏覽器處理能力。 Svelte 依靠反應式程式來徹底更新 DOM。因此,與幾乎任何其他框架相比,它可以實現最快的渲染,並且在大多數效能基準測試中名列前茅。 開始使用以下 npm 指令。 ``` npm create svelte@latest my-app ``` 您可以這樣使用它。 ``` cd my-app npm install npm run dev -- --open ``` 您可以閱讀[文件](https://svelte.dev/docs/introduction)。該團隊還提供了[官方的 VSCode 擴展](https://marketplace.visualstudio.com/items?itemName=svelte.svelte-vscode),它也可以與各種其他編輯器和工具整合。  他們還提供了[詳細的基於網路的教程](https://svelte.dev/tutorial/basics)來學習 Svelte。 您可以查看所有[範例](https://svelte.dev/examples/nested-components)來了解關鍵概念和結構,包括 DOM 事件、生命週期、運動、過渡和處理 SVG。 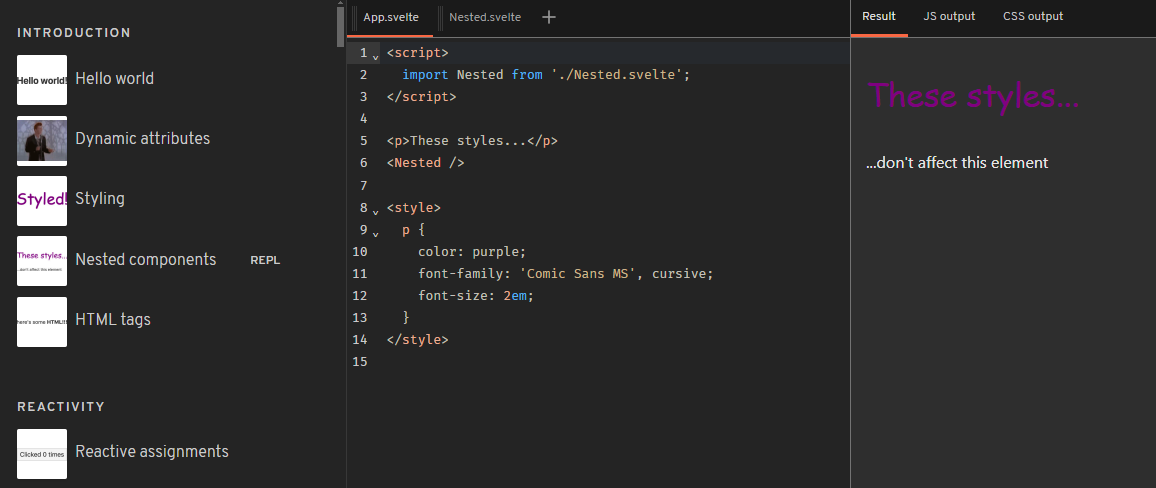 您可以觀看這些教學來了解有關 Svelte 的所有知識。 - [Learn Svelte – 初學者完整課程](https://www.youtube.com/watch?v=UGBJHYpHPvA)– Freecodecamp 的 23 小時教學。 - [Sveltekit & Tailwind](https://www.youtube.com/watch?v=vb7CgDcA_6U&t=2s) - Freecodecamp 的 2 小時教學。 非常感謝老師們免費提供如此詳細的教學! Svelte 在 GitHub 上擁有超過 76k 顆星,目前處於`v4.2`版本,有 282k 開發人員使用。 {% cta https://github.com/sveltejs/svelte %} Star Svelte ⭐️ {% endcta %} --- 11. [Remix](https://github.com/remix-run/remix) - 建立更好的網站。 ---------------------------------------------------------- 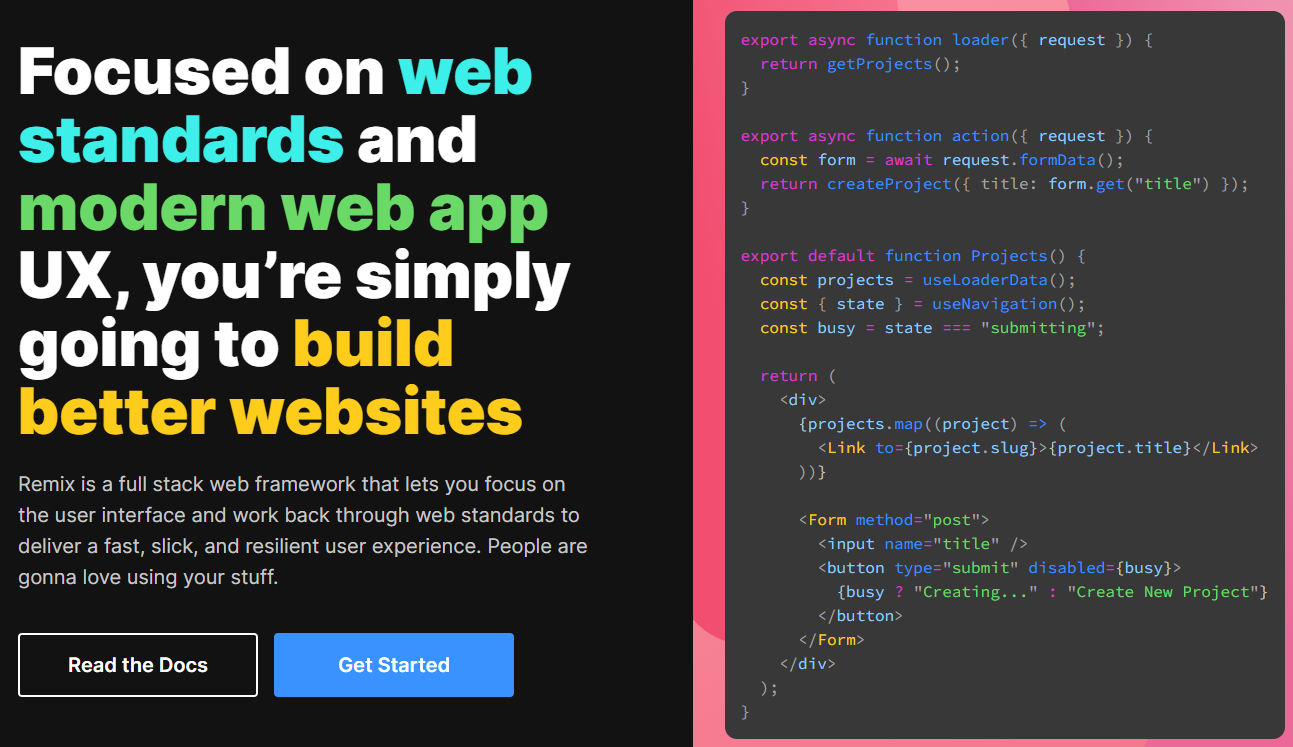 Remix 是一個全端Web 框架,可讓您專注於使用者介面並透過Web 基礎知識進行工作,以提供快速、流暢且有彈性的使用者體驗,可部署到任何Node.js 伺服器,甚至非Node. js 環境像 Cloudflare Workers 這樣的邊緣。 Remix 建構在 React Router 之上,有四個特點: - 一個編譯器 - 伺服器端 HTTP 處理程序 - 一個伺服器框架 - 一個瀏覽器框架 您可以觀看此內容以了解有關 Remix by Fireship 的更多資訊。 {% 嵌入 https://www.youtube.com/watch?v=r4B69HAOXnA&pp=ygUUcmVtaXggaW4gMTAwIHNlY29uZHM%3D %} 透過嵌套路由,Remix 可以消除幾乎所有載入狀態,如圖所示。 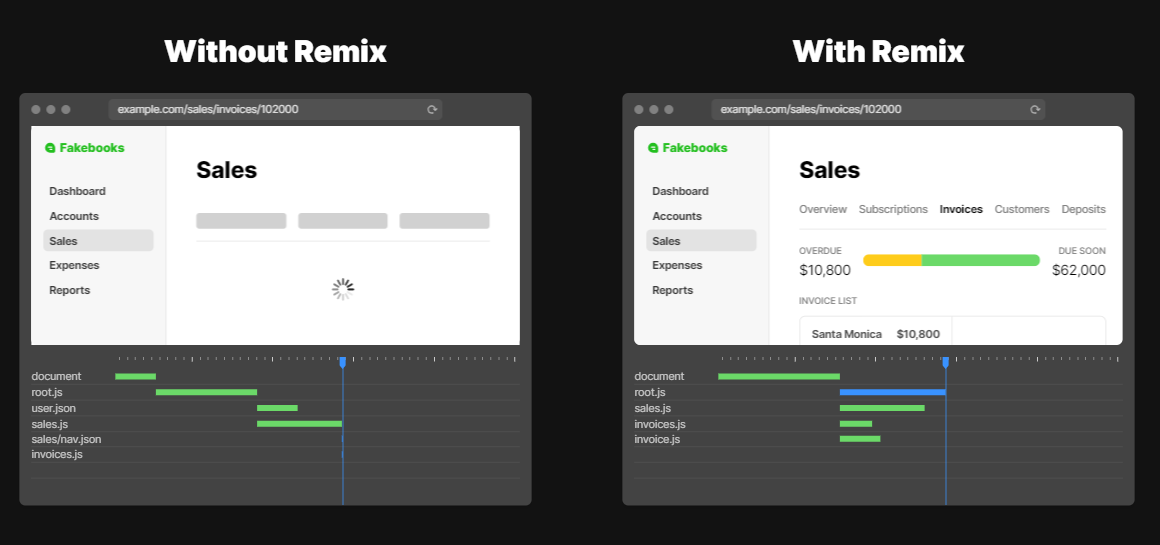 開始使用以下 npm 指令。 ``` npx create-remix@latest ``` 您可以這樣使用它。 ``` mkdir my-remix-app cd my-remix-app npm init -y # install runtime dependencies npm i @remix-run/node @remix-run/react @remix-run/serve isbot@4 react react-dom # install dev dependencies npm i -D @remix-run/dev vite ``` 如果您想包含您的伺服器,請閱讀此[快速入門指南](https://remix.run/docs/en/main/start/quickstart),並了解更多有關如何透過 Remix Vite 插件提供 Vite 配置的訊息,因為 Remix 使用 Vite。 您可以閱讀[文件](https://remix.run/docs/en/main)。他們根據你想做的事情來分發它,順便說一句,我很喜歡。  尋找使用 Remix 建立的[網站的完整清單](https://remix.run/showcase)。 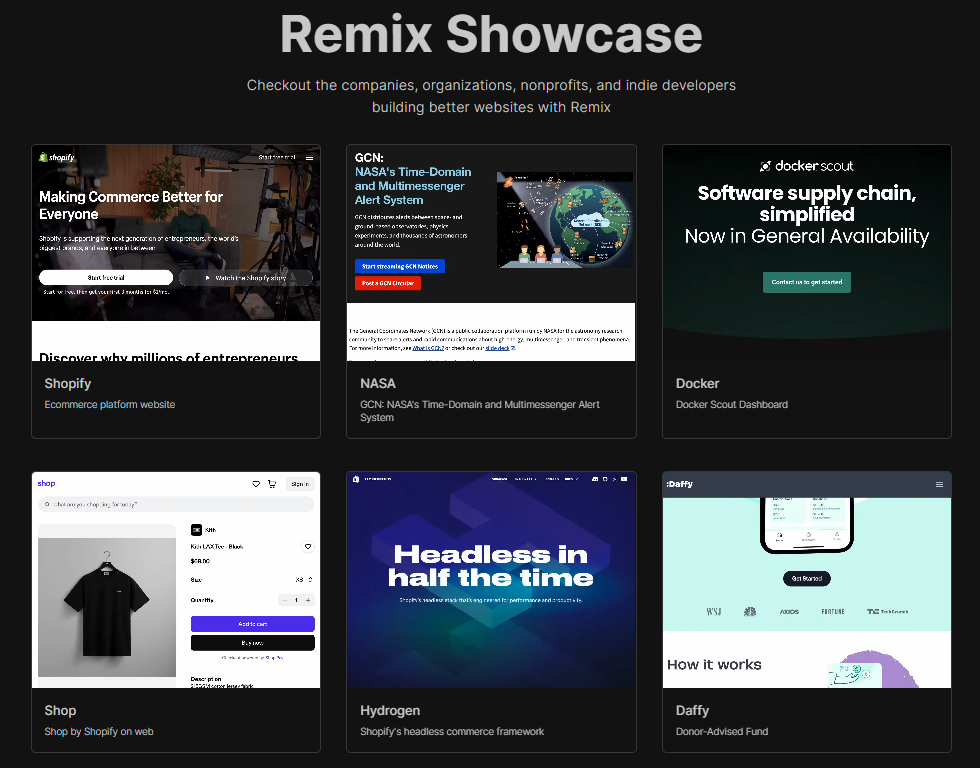 您還應該查看社區製作的[Remix 資源](https://remix.run/resources?category=all)。其中一些是有幫助的,可以改善整個生態系統。 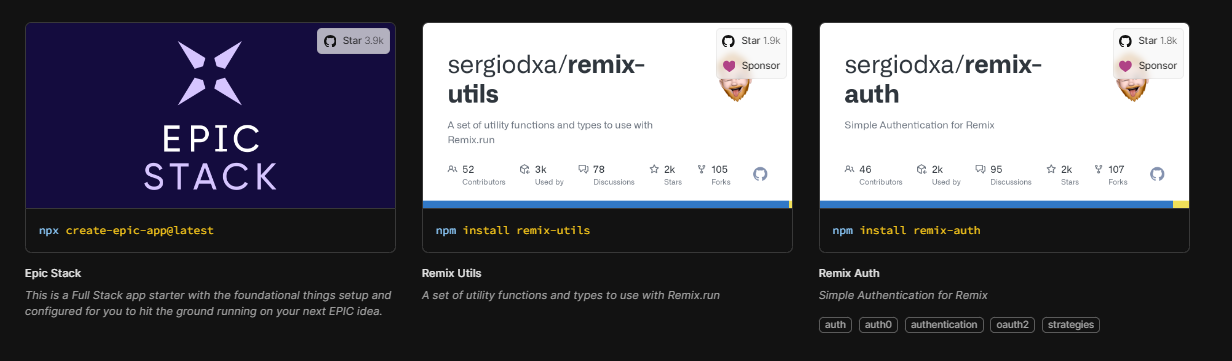 如果您是第一次接觸 Remix,我建議您閱讀官方團隊建立的[Remix 教學 -30min](https://remix.run/docs/en/main/start/tutorial) 。 他們在 GitHub 上擁有超過 27k 個 star,並且發布了`v2.8`版本。 {% cta https://github.com/remix-run/remix %} 明星混音 ⭐️ {% endcta %} --- 12. [AdonisJS](https://github.com/adonisjs/core) - TypeScript 優先的 Web 框架,用於建立 Web 應用程式和 API 伺服器。 ------------------------------------------------------------------------------------------------ 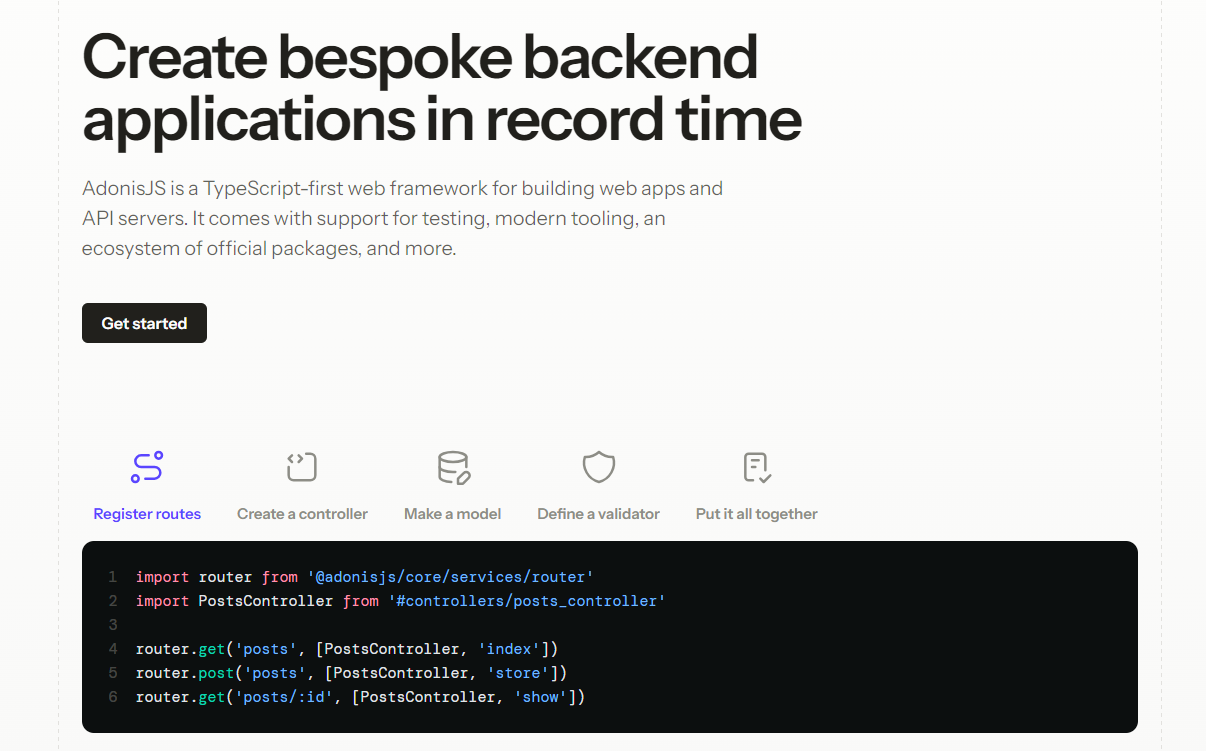 AdonisJS 是一個功能齊全的 Node.js 後端框架。該框架是從頭開始建立的,非常重視開發人員的人體工學和易用性。 AdonisJS 專注於後端,讓您選擇您選擇的前端堆疊,這意味著前端不可知。 它是 Node.js 社群中最稀有的框架之一,附帶一套第一方包,可幫助您建立和發布產品,而無需浪費數百小時組裝不同的 npm 包。 在基礎層面上,AdonisJS 為您的應用程式提供架構,配置無縫的 TypeScript 開發環境,為您的後端程式碼配置 HMR,並提供大量維護良好且記錄廣泛的軟體包。 他們強調了一點測試,這是非常好的。 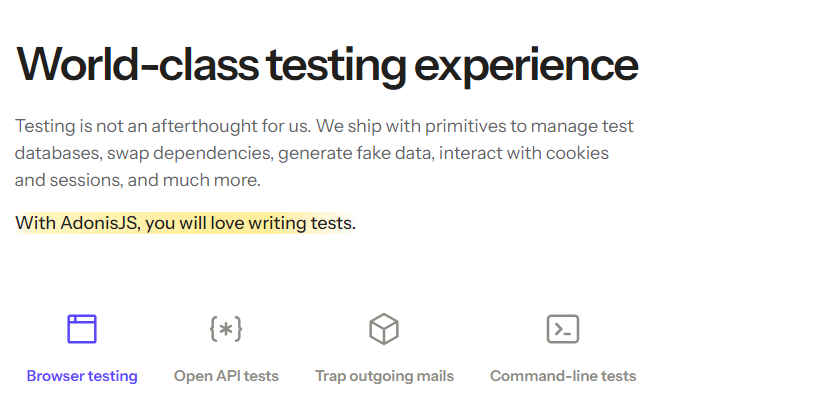 開始使用以下 npm 指令。 ``` npm init adonisjs@latest hello-world ``` AdonisJS 採用經典的 MVC 設計模式。首先,使用函數式 JavaScript API 定義路由,將控制器綁定到它們,並編寫邏輯來處理控制器內的 HTTP 請求。 ``` import router from '@adonisjs/core/services/router' import PostsController from '#controllers/posts_controller' router.get('posts', [PostsController, 'index']) ``` 控制器可以使用模型從資料庫中獲取資料並呈現視圖(也稱為模板)作為回應。 ``` import { HttpContext } from '@adonisjs/core/http' import Post from '#models/post' export default class PostsController { async index({ view }: HttpContext) { const posts = await Post.all() return view.render('pages/posts/list', { posts }) } } ``` 如果您正在建立 API 伺服器,則可以用 JSON 回應取代視圖層。但是,處理和回應 HTTP 請求的流程保持不變。 您可以閱讀[文件](https://docs.adonisjs.com/guides/introduction)。 您也可以參考[入門套件](https://docs.adonisjs.com/guides/installation#starter-kits)。 他們還提供了[VSCode 擴展,](https://marketplace.visualstudio.com/items?itemName=jripouteau.adonis-vscode-extension)如果您開始使用 Adonisjs,則應該使用該擴展。 您必須查看[Awesome Adonisjs](https://github.com/adonisjs-community/awesome-adonisjs) ,它提供了一系列很棒的書籤、軟體包、教程、影片、課程、擁有使用此內容的網站的公司以及來自 AdonisJS 生態系統的其他很酷的資源。 大多數時候,開始接觸一些非常新的東西是很困難的,因此團隊提供了[10 多個課程](https://adonismastery.com/)來了解 Adonisjs 生態系統。  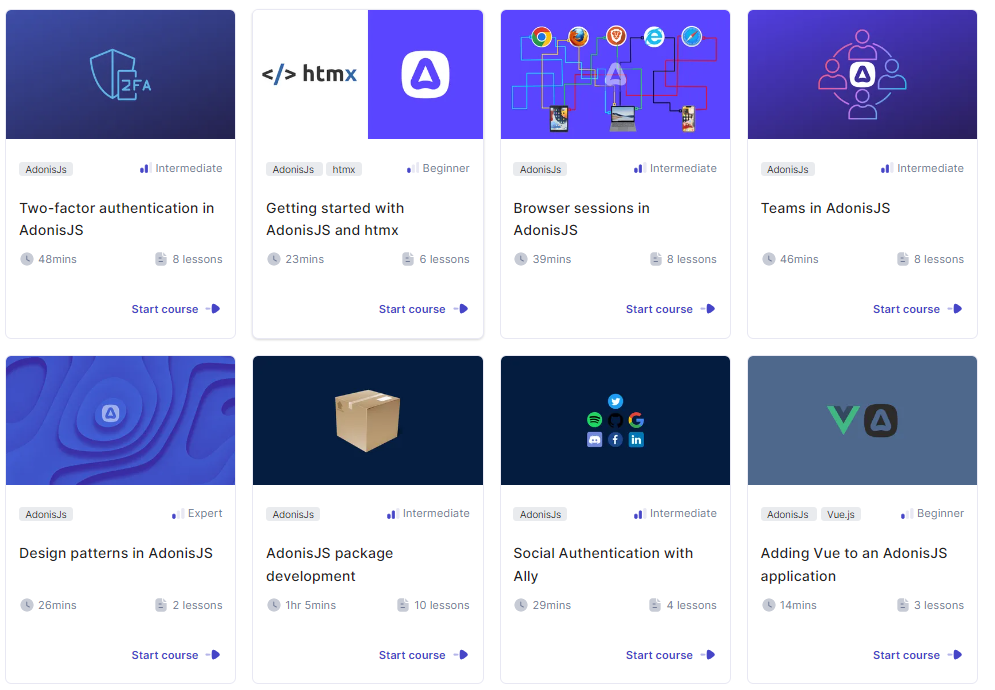 他們在 GitHub 上擁有超過 15k 個 star,並且發布了`v6.8`版本。 {% cta https://github.com/adonisjs/core %} 明星 AdonisJS ⭐️ {% endcta %} --- 13. [Astro](https://github.com/withastro/astro) - 內容驅動網站的網頁框架。 --------------------------------------------------------------  Astro 是一個開源、伺服器優先的 Web 框架,它結合了靜態網站產生 (SSG) 和伺服器端渲染 (SSR) 的優點,可建立快速、SEO 友善的網站。 Astro 專門為部落格和電子商務等內容豐富的網站提供支持,並擁有良好的開發生態系統。 開始使用以下 npm 指令。 ``` npm create astro@latest ``` 您可以閱讀使用 Astro 建立的[文件](https://docs.astro.build/en/getting-started/)和[展示的網站](https://astro.build/showcase/)。其中一些真的很棒並且視覺上令人驚嘆! Astro 支援 React、Preact、Svelte、Vue、Solid、Lit、HTMX、Web 元件等。閱讀所有[記錄的功能](https://docs.astro.build/en/concepts/why-astro/#features)。 您可以按照本教學[使用 Astro 建立您的第一個部落格](https://docs.astro.build/en/tutorial/0-introduction/)。或使用主題來快速啟動您的下一個專案。其中一些是免費的,而另一些則是付費的!  您可以看到如圖所示的加載性能,甚至我對此感到驚訝。 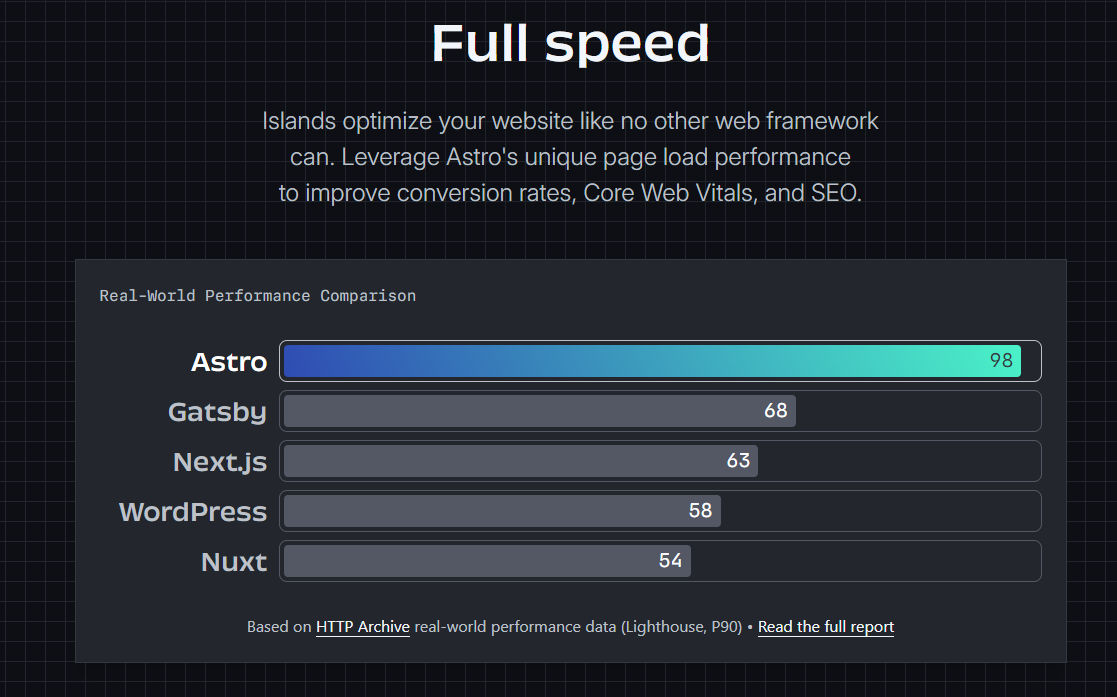 性能至關重要,尤其是在您從事商業活動時,因為高效的演算法將節省更多資金並減少麻煩。 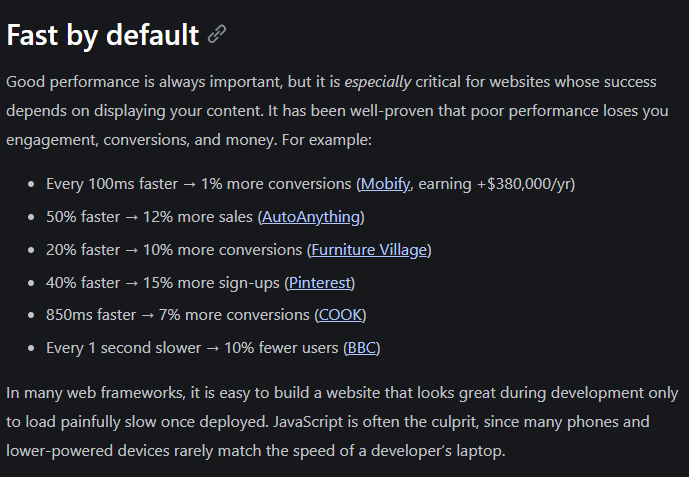 無論是在可存取性、圖標還是使用不同的庫方面,[整合選項](https://astro.build/integrations/)都是巨大的。  您可以觀看 Freecodecamp 提供的一小時[Astro Web 框架速成課程](https://www.youtube.com/watch?v=e-hTm5VmofI)。 {% 嵌入 https://www.youtube.com/watch?v=e-hTm5VmofI %} Astro 在 GitHub 上擁有超過 42k 顆星,處於`v4.6` (1800 多個版本),並由超過 112k 開發人員使用。 {% cta https://github.com/withastro/astro %} Star Astro ⭐️ {% endcta %} --- 14. [Fresh](https://github.com/denoland/fresh) - 下一代網路框架。 ---------------------------------------------------------  Fresh 是下一代 Web 框架,專為速度、可靠性和簡單性而建置。 一些突出的特點: - 島上的客戶水合作用可達到最大程度的互動。 - 零執行時開銷意味著預設不會將 JS 傳送到客戶端。 - 無需配置。 - 開箱即用的 TypeScript 支援。 該框架使用 Preact 和 JSX 進行渲染和模板化,處理伺服器和客戶端上的任務。 此外,Fresh 消除了建造步驟的需要。您編寫的程式碼直接在伺服器端和客戶端執行。 TypeScript 或 JSX 到純 JavaScript 的轉換是在需要時動態發生的。這有助於實現極其快速的迭代周期和快速部署。 從這個開始吧。 ``` deno run -A -r https://fresh.deno.dev ``` Fresh 採用的最重要的架構決策是其對[島嶼架構模式](https://www.patterns.dev/vanilla/islands-architecture)的使用。 這意味著 Fresh 應用程式預設將純 HTML 發送到客戶端。然後,伺服器渲染頁面的某些部分可以透過互動式小工具(島嶼)獨立重新水化。 客戶端只負責渲染頁面中互動性足以保證額外工作的部分。任何純靜態內容都沒有相關的客戶端 JavaScript,因此非常輕量級。 您可以閱讀[文件](https://fresh.deno.dev/docs/introduction)。 您可以找到所有使用此建立的[網站](https://fresh.deno.dev/showcase),例如[Max Schmidt](https://mooxl.dev/)的投資組合網站。  他們在 GitHub 上擁有超過 11k 個 star,並且發布了`v1.6`版本。 {% cta https://github.com/denoland/fresh %} 明星新鮮 ⭐️ {% endcta %} --- 15. [Vue.js](https://github.com/vuejs/core) - 用於在網路上建立 UI 的漸進式 JavaScript 框架。 -----------------------------------------------------------------------------  Vue.js 是一個漸進式框架,因為它能夠透過雙整合模式促進高階單頁 Web 應用程式的設計。閱讀[使用 Vue 的所有方法](https://vuejs.org/guide/extras/ways-of-using-vue.html),包括從嵌入 Web 元件到獨立腳本,甚至使用伺服器端渲染或靜態網站生成來建立複雜的應用程式。 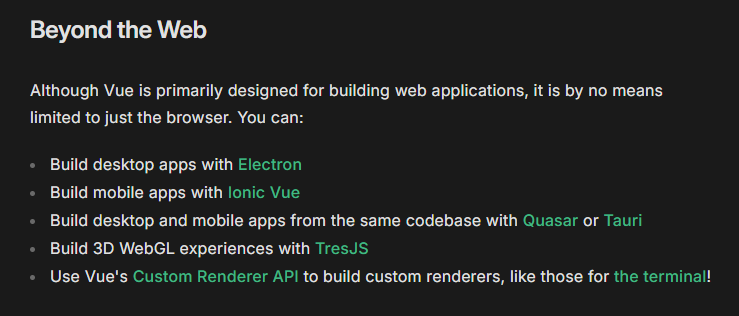 使用 MVVM(模型-視圖-視圖模型)架構,Vue.js 讓事情變得簡單、靈活且適合初學者。 Vue.js 於 2014 年由 Google 的開發人員 Evan You 首次推出,他從 AngularJS 中汲取靈感,提供了一種簡單、輕量級且高效的替代方案。 Vue.js 借用了 ReactJS 和 AngularJS 的一些功能,並對其進行了增強,以提供更流暢、更用戶友好的體驗。例如,Vue.js 將 AngularJS 的 2 路資料綁定與 React 的高效虛擬 DOM 結合。 與 React 不同,Vue 有一個內建的 MVC,可以快速輕鬆地進行設定。此外,Vue.js 的壓縮版本只有 18-20 kb,比其臃腫笨重的競爭對手(如 React 或 AngularJS)輕得多。 Vue.js 還包含一個方便的內建 CSS 過渡和動畫元件。 100 秒觀看 Vue.js 了解更多! {% 嵌入 https://www.youtube.com/watch?v=nhBVL41-\_Cw&pp=ygUXZW1iZXIganMgaW4gMTAwIHNlY29uZHM%3D %} 開始使用以下 npm 指令。 ``` npm create vue@latest ``` 該命令將安裝並執行 create-vue,官方的 Vue 專案腳手架工具。您將收到有關多個可選功能的提示,例如 TypeScript 和測試支援。 這是啟動開發伺服器的方法。 ``` cd <your-project-name> npm install npm run dev ``` 一個簡單的應用程式。 ``` import { createApp } from 'vue' createApp({ data() { return { count: 0 } } }).mount('#app') <div id="app"> <button @click="count++"> Count is: {{ count }} </button> </div> ``` 上面的例子展示了Vue的兩個核心特性: 1. **聲明式渲染**:Vue 使用模板語法擴充了標準 HTML,該模板語法基於 JavaScript 狀態以聲明方式描述 HTML 輸出。 2. **反應性**:Vue 會自動追蹤 JavaScript 狀態變化,並在變化發生時有效地更新 DOM。 您也可以使用 CDN 來使用它,CDN 將使用全域建置。閱讀[快速入門指南](https://vuejs.org/guide/quick-start)以了解更多資訊。 您可以閱讀[文件](https://vuejs.org/guide/introduction)並查看不同主題的[程式碼編輯器範例](https://vuejs.org/examples/#hello-world),甚至可以了解如何建立 Markdown 編輯器。 要體驗 Vue.js,您也可以直接在他們的[現場 Playground](https://play.vuejs.org/#eNp9kVFLwzAQx7/KeS9TmBuiT6MOVAbqg4oKvuSltLeuM01CcpmF0u/utaXVhzEISe7/vyS/yzV459ziEAlXmITMl47XylDtrGfIaZtGzdAoA5CnnJ5fDHsATxy9GSOAKhQrmD2S1ha+rNf52Wyw2m6RSUaynB6QgKlyOmWSCCDZXa2bprsF2jZZStSrpXGR4XBZ2Zz0rULxFYqVLKfTOEcOmTXbsljsgzVSRw+lMLOVKzX5V8elNUHhasRVmArnz3OvsY80H/VsR9n3EX0f6k5T+OYpkD+Qwsnj1BfEg735eKFa9pMp5FFL9gnznYLVsWMc0u6jyQX7X15P+1R1PSlN8Rk2NZMJY1EdaP/Jfb5CaebDidL/cK8XN2NzsP0F+HSp8w==)中嘗試。 我非常喜歡的一篇關於 Vue 的文章是 Michael 在 DEV 上發表的。必讀! {% 嵌入 https://dev.to/michaelthiessen/25-vue-tips-you-need-to-know-2h70 %} 如果您剛開始,您可以按照他們的團隊建立的[官方教程](https://vuejs.org/tutorial/#step-1)進行操作。 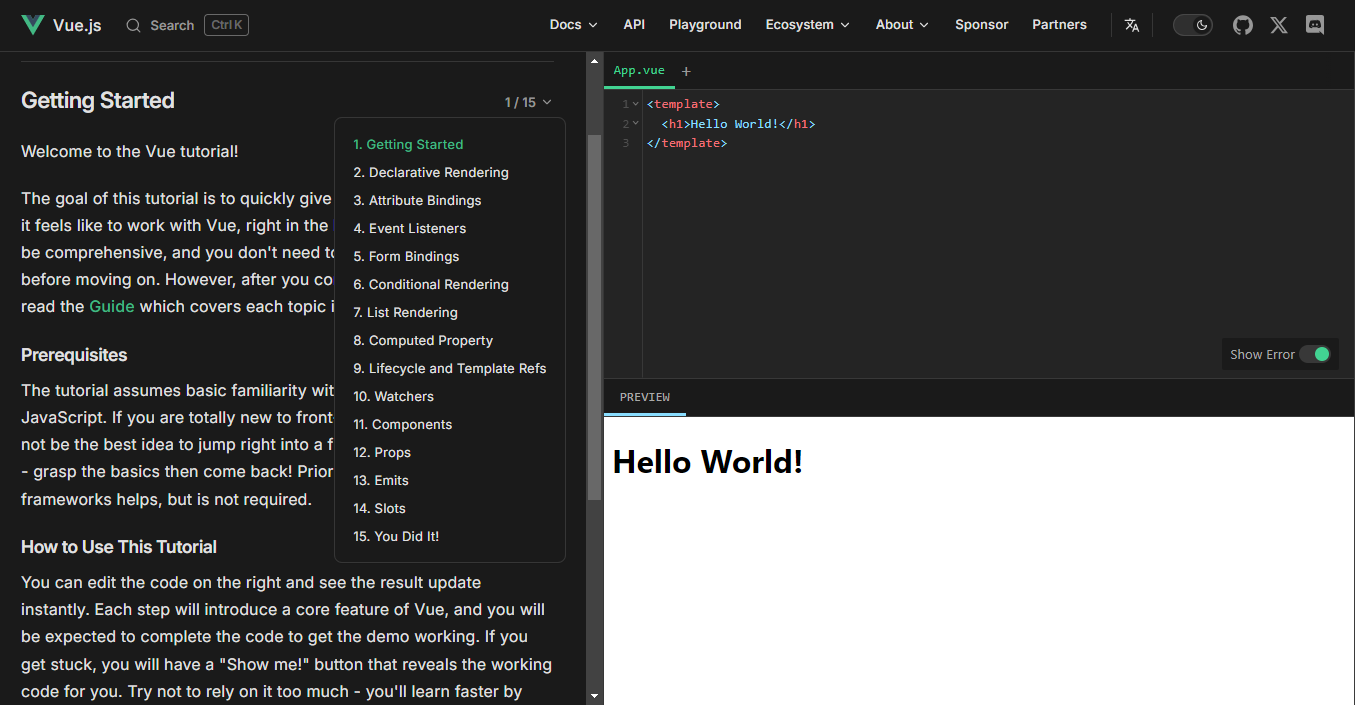 與 Astro 類似,他們也有[課程部分](https://www.vuemastery.com/courses/)和[Vue School](https://vueschool.io/) ,您可以在其中找到各種主題。 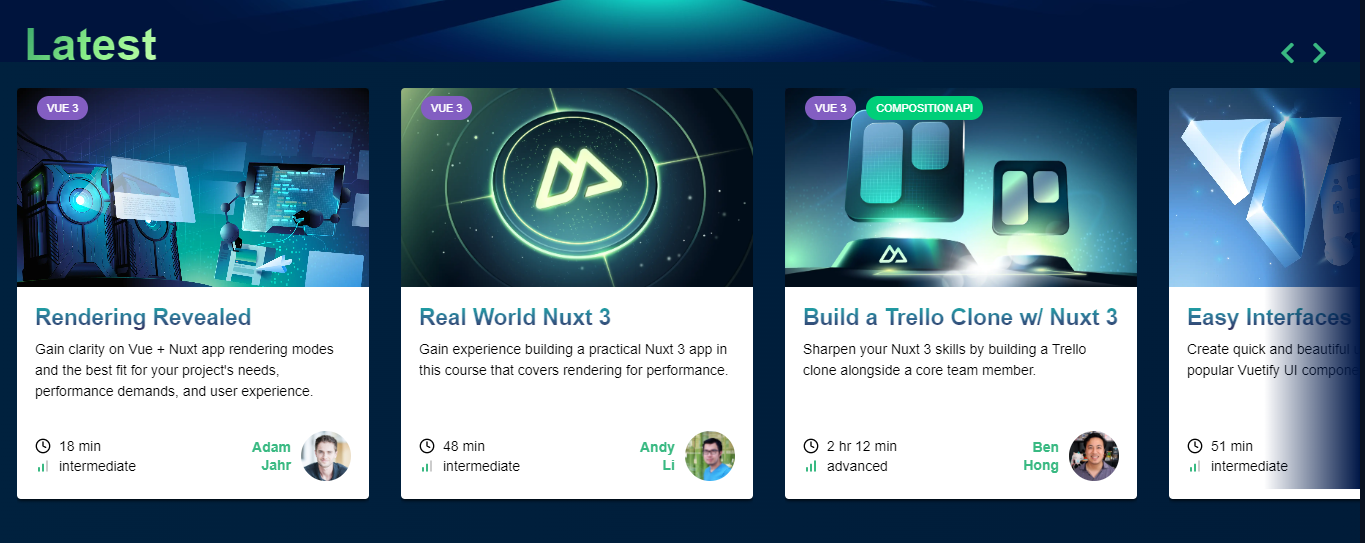 Vue.js 為許多知名網站提供支持,包括 Font Awesome、Upwork 和 Namecheap 等。 Freecodecamp 有一個[針對初學者的 3 小時 Vue](https://www.youtube.com/watch?v=4deVCNJq3qc)教程,但我不推薦它,因為它是 2019 年的,而且我們知道這些框架中的概念變化有多快。 他們在 GitHub 上擁有超過 44k 個 star,並且發布了`v3.4`版本。它是有史以來最受開發人員喜愛的框架之一。 {% cta https://github.com/vuejs/core %} Star Vuejs ⭐️ {% endcta %} --- 還有很多其他框架,您可以查看其中一些: [Aurelia.js](https://github.com/aurelia/framework) 、 [Mithril.js](https://github.com/MithrilJS/mithril.js) 、 [Stimulus.js](https://github.com/hotwired/stimulus) 、 [Meteor.js](https://github.com/meteor/meteor) 、 [Angular.js](https://github.com/angular/angular) 、 [React.js](https://github.com/facebook/react) 、 [Knockout.js](https://github.com/knockout/knockout)和[Alpine.js](https://github.com/alpinejs/alpine) 。 是的,我知道,我同時感到 😵 和興奮。哈哈! 我有一些影片推薦,可以讓本文更加深入。 {% 嵌入 https://www.youtube.com/watch?v=cuHDQhDhvPE&pp=ygUXZW1iZXIganMgaW4gMTAwIHNlY29uZHM%3D %} {% 嵌入 https://www.youtube.com/watch?v=WJRf7dh5Zws&pp=ygURZW1iZXIganMgdHV0b3JpYWw%3D %} --- 我特意製作了這一系列教程,以幫助您在一個地方找到所有內容。我希望你喜歡這個! 雖然我是 Next.js 的忠實粉絲,但探索 Wing 等其他出色的框架可能非常適合您的下一個專案。 讓我們知道您計劃使用哪些框架,或者您認為其他人是否應該了解其他內容。 祝你有美好的一天!直到下一次。 我建立技術內容是為了幫助其他人每天成長 1%,這樣您就可以在 Twitter 和 LinkedIn 上關注我以獲得每日見解。 |如果你喜歡這類東西, 請關注我以了解更多:) | [](https://twitter.com/Anmol_Codes) [](https://github.com/Anmol-Baranwal) [](https://www.linkedin.com/in/Anmol-Baranwal/) | |------------|----------| 關注Winglang以獲取更多此類內容。 {% 嵌入 https://dev.to/winglang %} --- 原文出處:https://dev.to/winglang/15-javascript-frameworks-for-your-next-project-1o7n
--- title:恭喜前端挑戰賽:地球日版的得獎者! 發表:真實 描述:我們收到了許多富有創意、技術精湛且鼓舞人心的提交作品,展現了社群的才華。 標籤: frontendchallenge、devchallenge、js、css 封面圖:https://dev-to-uploads.s3.amazonaws.com/uploads/articles/v1j6wz3srlywj4z0u7vd.png 使用 100:42 的比例可獲得最佳效果。 ===================== 發佈於: 2024-04-25 15:53 +0000 =========================== --- 本月早些時候,我們啟動了第二次前端挑戰,以慶祝地球上最大的公民活動「地球日」。我們邀請社區參與兩個提示,有機會贏得額外的獎品類別: **提示** - CSS 藝術:地球日 - 魅力我的標記:地球日慶祝活動登陸頁面 **附加獎類別** - 世界地球日:授予提高人們對氣候變遷認識的最佳提交作品。 反應令人難以置信!我們收到了許多富有創意、技術精湛且鼓舞人心的提交作品,展現了社群的才華。但隨著每一次挑戰的進行,最終只能有少數獲勝者。 恭喜… --- @schmoris 教育了我們所有人並展示了我們可以用更少的資源做什麼。所謂更少的資源,是指只用 CSS! 這款遊戲的精美程度和互動性令人難以置信,並且對挑戰進行了令人難以置信的演示。 {% 連結 https://dev.to/schmoris/earth-rescue-a-css-only-game-o0e %} --- @devdongsu 使用我們提供的 HTML 設計了一個互動式且深思熟慮的地球日登陸頁面。 這是一個簡單、可存取的頁面,可在桌面和行動裝置上使用。儘管簡單,但它包含引人注目的動畫和個性。這裡有很多很棒的作品,而這個最終確實成功了。 {% 連結 https://dev.to/devdongsu/earth-day-frontend-challenge-landing-page-hugging-earth-30j0 %} --- @jorgedelcampo,我們的額外獎項類別獲得者,以提高人們對氣候變遷的認識。 談論用 CSS 講故事!這是另一項事半功倍的提交,在這種情況下,我們得到了關於我們的地球和我們的影響的完整故事。 {% 連結 https://dev.to/jorgedelcampo/happy-earth-day-3mgn %} 下一步是什麼? ------- 我們很快就會舉辦另一場前端挑戰賽!請務必關注我們的挑戰標籤,這樣您就不會錯過公告。 {% 標籤前端挑戰 %} {% 標籤 devchallenge %} 感謝所有參與的人。 ❤️ 我們希望您玩得開心,感受到挑戰,並可能為您的職業檔案加入一兩件事。 下次見! --- 原文出處:https://dev.to/devteam/congrats-to-the-winners-of-the-frontend-challenge-earth-day-edition-4gd7
--- 標題:加入我們參加 Netlify 動態網站挑戰:獎品為 3,000 美元! 發表:真實 說明:使用 Netlify 的全新不可知平台原語證明您的技能、贏得現金獎勵並獲得經驗。 標籤: netlifychallenge、devchallenge、webdev、javascript 封面圖:https://dev-to-uploads.s3.amazonaws.com/uploads/articles/lbcz1t2nzsbn3ygf1jx3.jpg 使用 100:42 的比例可獲得最佳效果。 ===================== 發佈於: 2024-04-23 14:24 +0000 =========================== --- 我們很高興與[Netlify](https://netlify.com)合作,為您帶來下一個 DEV 挑戰。本次挑戰賽的主題是跨任何框架的動態和高效能數位體驗! Netlify 動態網站挑戰賽將持續到**5 月 12 日**,您將有機會證明您的技能、贏得現金獎勵並獲得 Netlify 新的[不可知平台原語的](https://www.netlify.com/platform/primitives/)經驗。跨所有框架解鎖前所未有的功能 - Next.js、Astro、Nux、Remix,應有盡有! 這項挑戰提供了一個投資開放網路、開源以及您在新的和不斷發展的框架方面的技能的機會。我們期待看到您創造的作品。 我們希望您至少嘗試我們的三個提示中的一個! 提示 -- ### 視覺饗宴 使用**Netlify 圖像 CDN**建立動態圖像庫 - 您的專案應利用 Netlify 的按需圖像轉換功能,並演示如何獲取圖像、應用調整大小和格式優化等轉換,以及在圖庫佈局中渲染優化的圖像。 這是供任何想要直接參與的人使用的提交模板,但請在提交之前查看[官方挑戰頁面](https://dev.to/challenges/netlify)上的所有挑戰規則。 {% cta https://dev.to/new?prefill=---%0Atitle%3A%20%0Apublished%3A%20%0Atags%3A%20netlifychallenge%2C%20devchallenge%2C%20webdev%2C%20javascript%0A ---%0A%0A*這%20是%20a%20submission%20for%20the%20%5BNetlify%20Dynamic%20Site%20Challenge%5D(https%3A%2F%2Fdev.to%2Fchallenges%2Fnetlify)%3A%2F%2Fdev.to%2Fchallenges%2Fnetlify)%3A% % 20 盛宴。* %0A%0A%0A%23%23%20什麼%20I%20Built%0A%3C! --%20Share%20an%20概述%20about%20您的%20專案。 0A%23%23 %20Demo%0A%3C!--%20將%20a%20link%20分享至%20您的%20Netlify%20app%20和%20在此處包括%20some%20螢幕截圖%20 。 -%3E%0A%0A%3C!--%20Did%20you% 20實現%20additional%20platform%20primitives%20like%20Netlify%20Blobs%20or%20Cache%20Control%3F%20告訴%20us%2000%20Cache%20Control%3F%20告訴%20us%2000%20abouttoo% !%20You%20may%20qualify%20for%20more%20than%20one%20prompt.% 20--%3E%0A%0A%3C!--%20Team%20Submissions%3A%20請%20pick%20one%20m %20publish%20the%20submission%20and%20credit%20teammates%20by%20listing%20their%20DEV %20usernames%20directly%20in%20the%20body%20of%20the%2000%20in%20the%20body%20of%20the%20postA% 3C!--%20Don%27t%20forget%20to%20add%20a%20cover%20image %20(如果%20你%20想要).%20--%3E%0A%0A%0A%3C!-- %20感謝%20%20的參與!%20--%3E %} 視覺饗宴提交模板 {% 結束%} ### 使用 Blob 建置 建立使用**Netlify Blob**讀取和寫入資料的應用程式 - 您的專案應示範儲存和擷取 Blob 物件、處理元資料以及將 Blob 儲存與 Netlify Functions 整合以處理任務。 這是供任何想要直接參與的人使用的提交模板,但請在提交之前查看[官方挑戰頁面](https://dev.to/challenges/netlify)上的所有挑戰規則。 {% cta https://dev.to/new?prefill=---%0Atitle%3A%20%0Apublished%3A%20%0Atags%3A%20netlifychallenge%2C%20devchallenge%2C%20webdev%2C%20javascript%0A ---%0A%0A*這%20是%20a%20submission%20for%20the%20%5BNetlify%20Dynamic%20Site%20Challenge%5D(https%3A%2F%2Fdev.to%2Fchallenges%2Fge%5D(https%3A%2F%2Fdev.to%2Fchallenges%2Fnetlify)%3A%2F%2Fdev.to%2Fchallenges%2Fnetlify)%3A% % 20%20Blob。* %0A%0A%0A%23%23%20什麼%20I%20Built%0A%3C! --%20Share%20an%20概述%20about%20您的%20專案。 0A%23%23 %20Demo%0A%3C!--%20將%20a%20link%20分享至%20您的%20Netlify%20app%20和%20在此處包括%20some%20螢幕截圖%20 。 %0A%0A%3C!--%20Did%20you%20implement%20additional% 20platform%20primitives%20like%20the%20Netlify%20Image%20CDN%20or%20Cache%20Control3F%20Image%20CDN%20or%20Cache%20Control20%20T%200%2020 %20You%20may%20qualify%20for%20more%20than%20one%20prompt.% 20--%3E%0A%0A%3C!--%20Team%20Submissions%3A%20請%20pick%20one%20mick% 20publish%20the%20submission%20and%20credit%20teammates%20by%20listing%20their%20DEV %20usernames%20directly%20in%20the%20body%20of%20the%20postE20A% !--%20Don%27t%20forget%20to%20add%20a%20cover%20image %20(如果%20你%20想要)。 20感謝%20%20參與! 使用 Blob 提交模板建置 {% 結束%} ### 巧妙的緩存 建立一個利用**Netlify 細粒度快取控制功能**的 Web 應用程式 - 您的專案應該實現自訂 Cache-Control 標頭,利用 Netlify-CDN-Cache-Control 標頭進行邊緣緩存,並使用快取標記演示快取失效。 這是供任何想要直接參與的人使用的提交模板,但請在提交之前查看[官方挑戰頁面](https://dev.to/challenges/netlify)上的所有挑戰規則。 {% cta https://dev.to/new?prefill=---%0Atitle%3A%20%0Apublished%3A%20%0Atags%3A%20netlifychallenge%2C%20devchallenge%2C%20webdev%2C%20javascript%0A ---%0A%0A*這%20是%20a%20submission%20for%20the%20%5BNetlify%20Dynamic%20Site%20Challenge%5D(https%3A%2F%2Fdev.to%2Fchallenges%2Fge%5D(https%3A%2F%2Fdev.to%2Fchallenges%2Fnetlify)%3A% % 20快取*%0A%0A%0A%23%23%20What%20I%20Built%0A%3C! --%20Share%20an%20overview%20about%20your%20project.%20--%3E%0A%0A% 23% 23%20Demo%0A%3C! --%20將%20a%20link%20分享到%20您的%20Netlify%20app%20和%20在此處包含%20some%20螢幕截圖%20。 20--%3E%0A%0A%23%23% 20Platform%20Primitives%0A%3C!--%20告訴%20us%20如何%20you%20利用%20Netlify%20Cache%20Control.%20--%3E %0A%0A%3C!--%20Did%20you%20implement%20additional %20platform%20primitives%20like%20the%20Netlify%20Image%20CDN%20or%20Blobs%3F%200%20%20%20%20%! 20You%20may%20qualify%20for%20more%20than%20one%20提示。 %20publish%20the%20submission%20and%20credit%20teammates%20by%20listing%20their%20DEV% 20usernames%20directly%20in%20the%20body%20of%20the%20postA%20in%20the%20body%20of%20the%200.A% 3C!--%20Don%27t%20forget%20to%20add%20a%20cover%20image% 20(如果%20你%20想要).%20--%3E%0A%0A%0A%3C!-- %20感謝%20參與%20! 巧妙的快取提交模板 {% 結束%} 評審標準和獎項 ------- 所有三個提示都將根據以下內容進行判斷: - 底層技術的使用 - 可用性和使用者體驗 - 無障礙 - 創造力 每個提示的獲勝者將收到: - $1,000 禮品卡或同等金額 - 專屬開發者徽章 - 來自[DEV 商店](https://shop.forem.com)的禮物 **所有提交有效提交的參與者都**將在其 DEV 個人資料中收到完成徽章。 如何參與 ---- 為了參與,您需要使用與每個提示關聯的提交範本來發布貼文。所有提交都必須在 Netlify 上建置和執行,並至少利用每個提示中所述的一個平台原語。提交的作品將根據 Netlify 免費入門平台進行評審,因此任何使用 Netlify 付費服務的行為都將在評審過程中考慮。 **請在提交之前查看我們的完整[規則、指南和常見問題解答頁面,](https://dev.to/challenges/netlify)以便您了解我們的參與指南和[官方競賽規則](https://dev.to/page/netlify-dynamic-site-challenge-contest-rules)(例如資格要求)。** 需要幫忙? ----- 您可以利用 Netlify 的文件和教學來了解 Netlify 平台: - [平台原語](https://docs.netlify.com/platform/primitives/) - [開發者文件](https://docs.netlify.com/get-started/) Netlify 團隊也將為挑戰期間需要技術支援的任何人發布協助線程。關注他們的組織,這樣您就不會錯過該帖子: {% 嵌入 https://dev.to/netlify %} 重要的日子 ----- - 5 月 1 日:Netlify 動態網站挑戰賽開始! - 5 月 12 日:提交截止時間為太平洋夏令時間晚上 11:59 - 5 月 14 日:得獎者公佈 我們希望您享受框架的自由,我們迫不及待想看看您建造的內容!對挑戰有疑問嗎?請在下面詢問他們。 祝你好運,編碼愉快! --- 原文出處:https://dev.to/devteam/join-us-for-the-netlify-dynamic-site-challenge-3000-in-prizes-3mfn
長話短說 ---- 在本文中,您將了解如何建立基於 AI 的行銷活動管理應用程式,該應用程式可讓您建立和分析廣告活動,從而使您能夠為您的業務做出正確的決策。 我們將介紹如何: - 使用 Next.js 建立 Web 應用程式, - 使用 CopilotKit 將 AI 助理整合到軟體應用程式中,以及 - 建立特定於操作的人工智慧副駕駛來處理應用程式中的各種任務。 - 建立一名競選經理  --- CopilotKit:建構應用內人工智慧副駕駛的框架 -------------------------- CopilotKit是一個[開源的AI副駕駛平台](https://github.com/CopilotKit/CopilotKit)。我們可以輕鬆地將強大的人工智慧整合到您的 React 應用程式中。 建造: - ChatBot:上下文感知的應用內聊天機器人,可以在應用程式內執行操作 💬 - CopilotTextArea:人工智慧驅動的文字字段,具有上下文感知自動完成和插入功能📝 - 聯合代理:應用程式內人工智慧代理,可以與您的應用程式和使用者互動🤖  {% cta https://git.new/devtoarticle1 %} Star CopilotKit ⭐️ {% endcta %} --- 先決條件 ---- 要完全理解本教程,您需要對 React 或 Next.js 有基本的了解。 我們還將利用以下內容: - [Radix UI](https://www.radix-ui.com/) - 用於為應用程式建立可存取的 UI 元件。 - [OpenAI API 金鑰](https://platform.openai.com/api-keys)- 使我們能夠使用 GPT 模型執行各種任務。 - [CopilotKit](https://github.com/CopilotKit/CopilotKit) - 一個開源副駕駛框架,用於建立自訂 AI 聊天機器人、應用程式內 AI 代理程式和文字區域。 --- 專案設定和套件安裝 --------- 首先,透過在終端機中執行以下程式碼片段來建立 Next.js 應用程式: ``` npx create-next-app campaign-manager ``` 選擇您首選的配置設定。在本教學中,我們將使用 TypeScript 和 Next.js App Router。 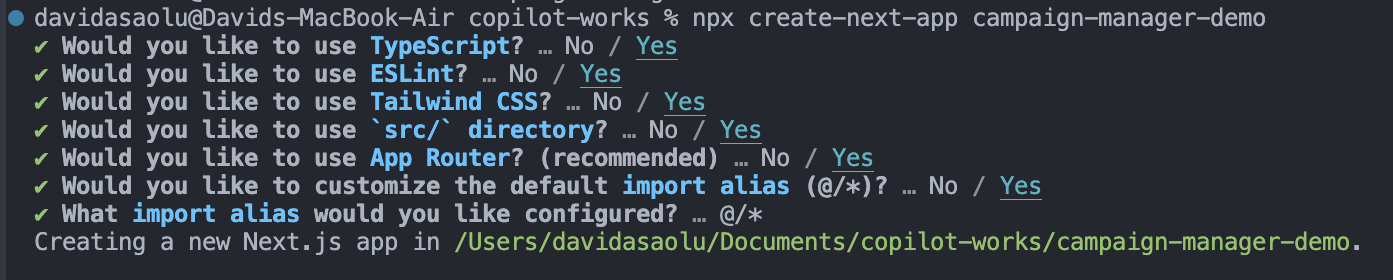 接下來,將[Heroicons](https://www.npmjs.com/package/@heroicons/react) 、 [Radix UI](https://www.radix-ui.com/)及其原始元件安裝到專案中。 ``` npm install @heroicons/react @radix-ui/react-avatar @radix-ui/react-dialog @radix-ui/react-dropdown-menu @radix-ui/react-icons @radix-ui/react-label @radix-ui/react-popover @radix-ui/react-select @radix-ui/react-slot @radix-ui/react-tabs ``` 另外,安裝[Recharts 程式庫](https://recharts.org/en-US)(一個用於建立互動式圖表的 React 程式庫)以及以下實用程式套件: ``` npm install recharts class-variance-authority clsx cmdk date-fns lodash react-day-picker tailwind-merge tailwindcss-animate ``` 最後,安裝[CopilotKit 軟體套件](https://docs.copilotkit.ai/getting-started/quickstart-chatbot)。這些套件使 AI copilot 能夠從 React 狀態檢索資料並在應用程式中做出決策。 ``` npm install @copilotkit/react-ui @copilotkit/react-textarea @copilotkit/react-core @copilotkit/backend ``` 恭喜!您現在已準備好建立應用程式。 --- 使用 Next.js 建立 Campaign Manager 應用程式 ----------------------------------- 在本節中,我將引導您建立活動管理器應用程式的使用者介面。 首先,讓我們進行一些初始設定。 在`src`資料夾中建立一個`components`和`lib`資料夾。 ``` cd src mkdir components lib ``` 在**`lib`**資料夾中,我們將聲明應用程式的靜態類型和預設活動。因此,在**`lib`**資料夾中建立**`data.ts`**和**`types.ts`**檔案。 ``` cd lib touch data.ts type.ts ``` 將下面的程式碼片段複製到`type.ts`檔中。它聲明了活動屬性及其資料類型。 ``` export interface Campaign { id: string; objective?: | "brand-awareness" | "lead-generation" | "sales-conversion" | "website-traffic" | "engagement"; title: string; keywords: string; url: string; headline: string; description: string; budget: number; bidStrategy?: "manual-cpc" | "cpa" | "cpm"; bidAmount?: number; segment?: string; } ``` 為應用程式建立預設的行銷活動清單並將其複製到`data.ts`檔案中。 ``` import { Campaign } from "./types"; export let DEFAULT_CAMPAIGNS: Campaign[] = [ { id: "1", title: "CopilotKit", url: "https://www.copilotkit.ai", headline: "Copilot Kit - The Open-Source Copilot Framework", description: "Build, deploy, and operate fully custom AI Copilots. In-app AI chatbots, AI agents, AI Textareas and more.", budget: 10000, keywords: "AI, chatbot, open-source, copilot, framework", }, { id: "2", title: "EcoHome Essentials", url: "https://www.ecohomeessentials.com", headline: "Sustainable Living Made Easy", description: "Discover our eco-friendly products that make sustainable living effortless. Shop now for green alternatives!", budget: 7500, keywords: "eco-friendly, sustainable, green products, home essentials", }, { id: "3", title: "TechGear Solutions", url: "https://www.techgearsolutions.com", headline: "Innovative Tech for the Modern World", description: "Find the latest gadgets and tech solutions. Upgrade your life with smart technology today!", budget: 12000, keywords: "tech, gadgets, innovative, modern, electronics", }, { id: "4", title: "Global Travels", url: "https://www.globaltravels.com", headline: "Travel the World with Confidence", description: "Experience bespoke travel packages tailored to your dreams. Luxury, adventure, relaxation—your journey starts here.", budget: 20000, keywords: "travel, luxury, adventure, tours, global", }, { id: "5", title: "FreshFit Meals", url: "https://www.freshfitmeals.com", headline: "Healthy Eating, Simplified", description: "Nutritious, delicious meals delivered to your door. Eating well has never been easier or tastier.", budget: 5000, keywords: "healthy, meals, nutrition, delivery, fit", }, ]; ``` 由於我們使用 Radix UI 建立可以使用 TailwindCSS 輕鬆自訂的基本 UI 元件,因此請在**`lib`**資料夾中建立一個**`utils.ts`**文件,並將以下程式碼片段複製到該文件中。 ``` //👉🏻 The lib folder now contains 3 files - data.ts, type.ts, util.ts //👇🏻 Copy the code below into the "lib/util.ts" file. import { type ClassValue, clsx } from "clsx"; import { twMerge } from "tailwind-merge"; export function cn(...inputs: ClassValue[]) { return twMerge(clsx(inputs)); } export function randomId() { return Math.random().toString(36).substring(2, 15); } ``` 導航到`components`資料夾並在其中建立其他三個資料夾。 ``` cd components mkdir app dashboard ui ``` `components/app`資料夾將包含應用程式中使用的各種元件,而儀表板資料夾包含某些元素的 UI 元件。 `ui`資料夾包含使用 Radix UI 建立的多個 UI 元素。將[專案儲存庫中的這些元素](https://github.com/CopilotKit/campaign-manager-demo/tree/main/src/components/ui)複製到該資料夾中。 恭喜! `ui`資料夾應包含必要的 UI 元素。現在,我們可以使用它們來建立應用程式中所需的各種元件。 ### 建立應用程式 UI 元件 在這裡,我將引導您完成為應用程式建立使用者介面的過程。 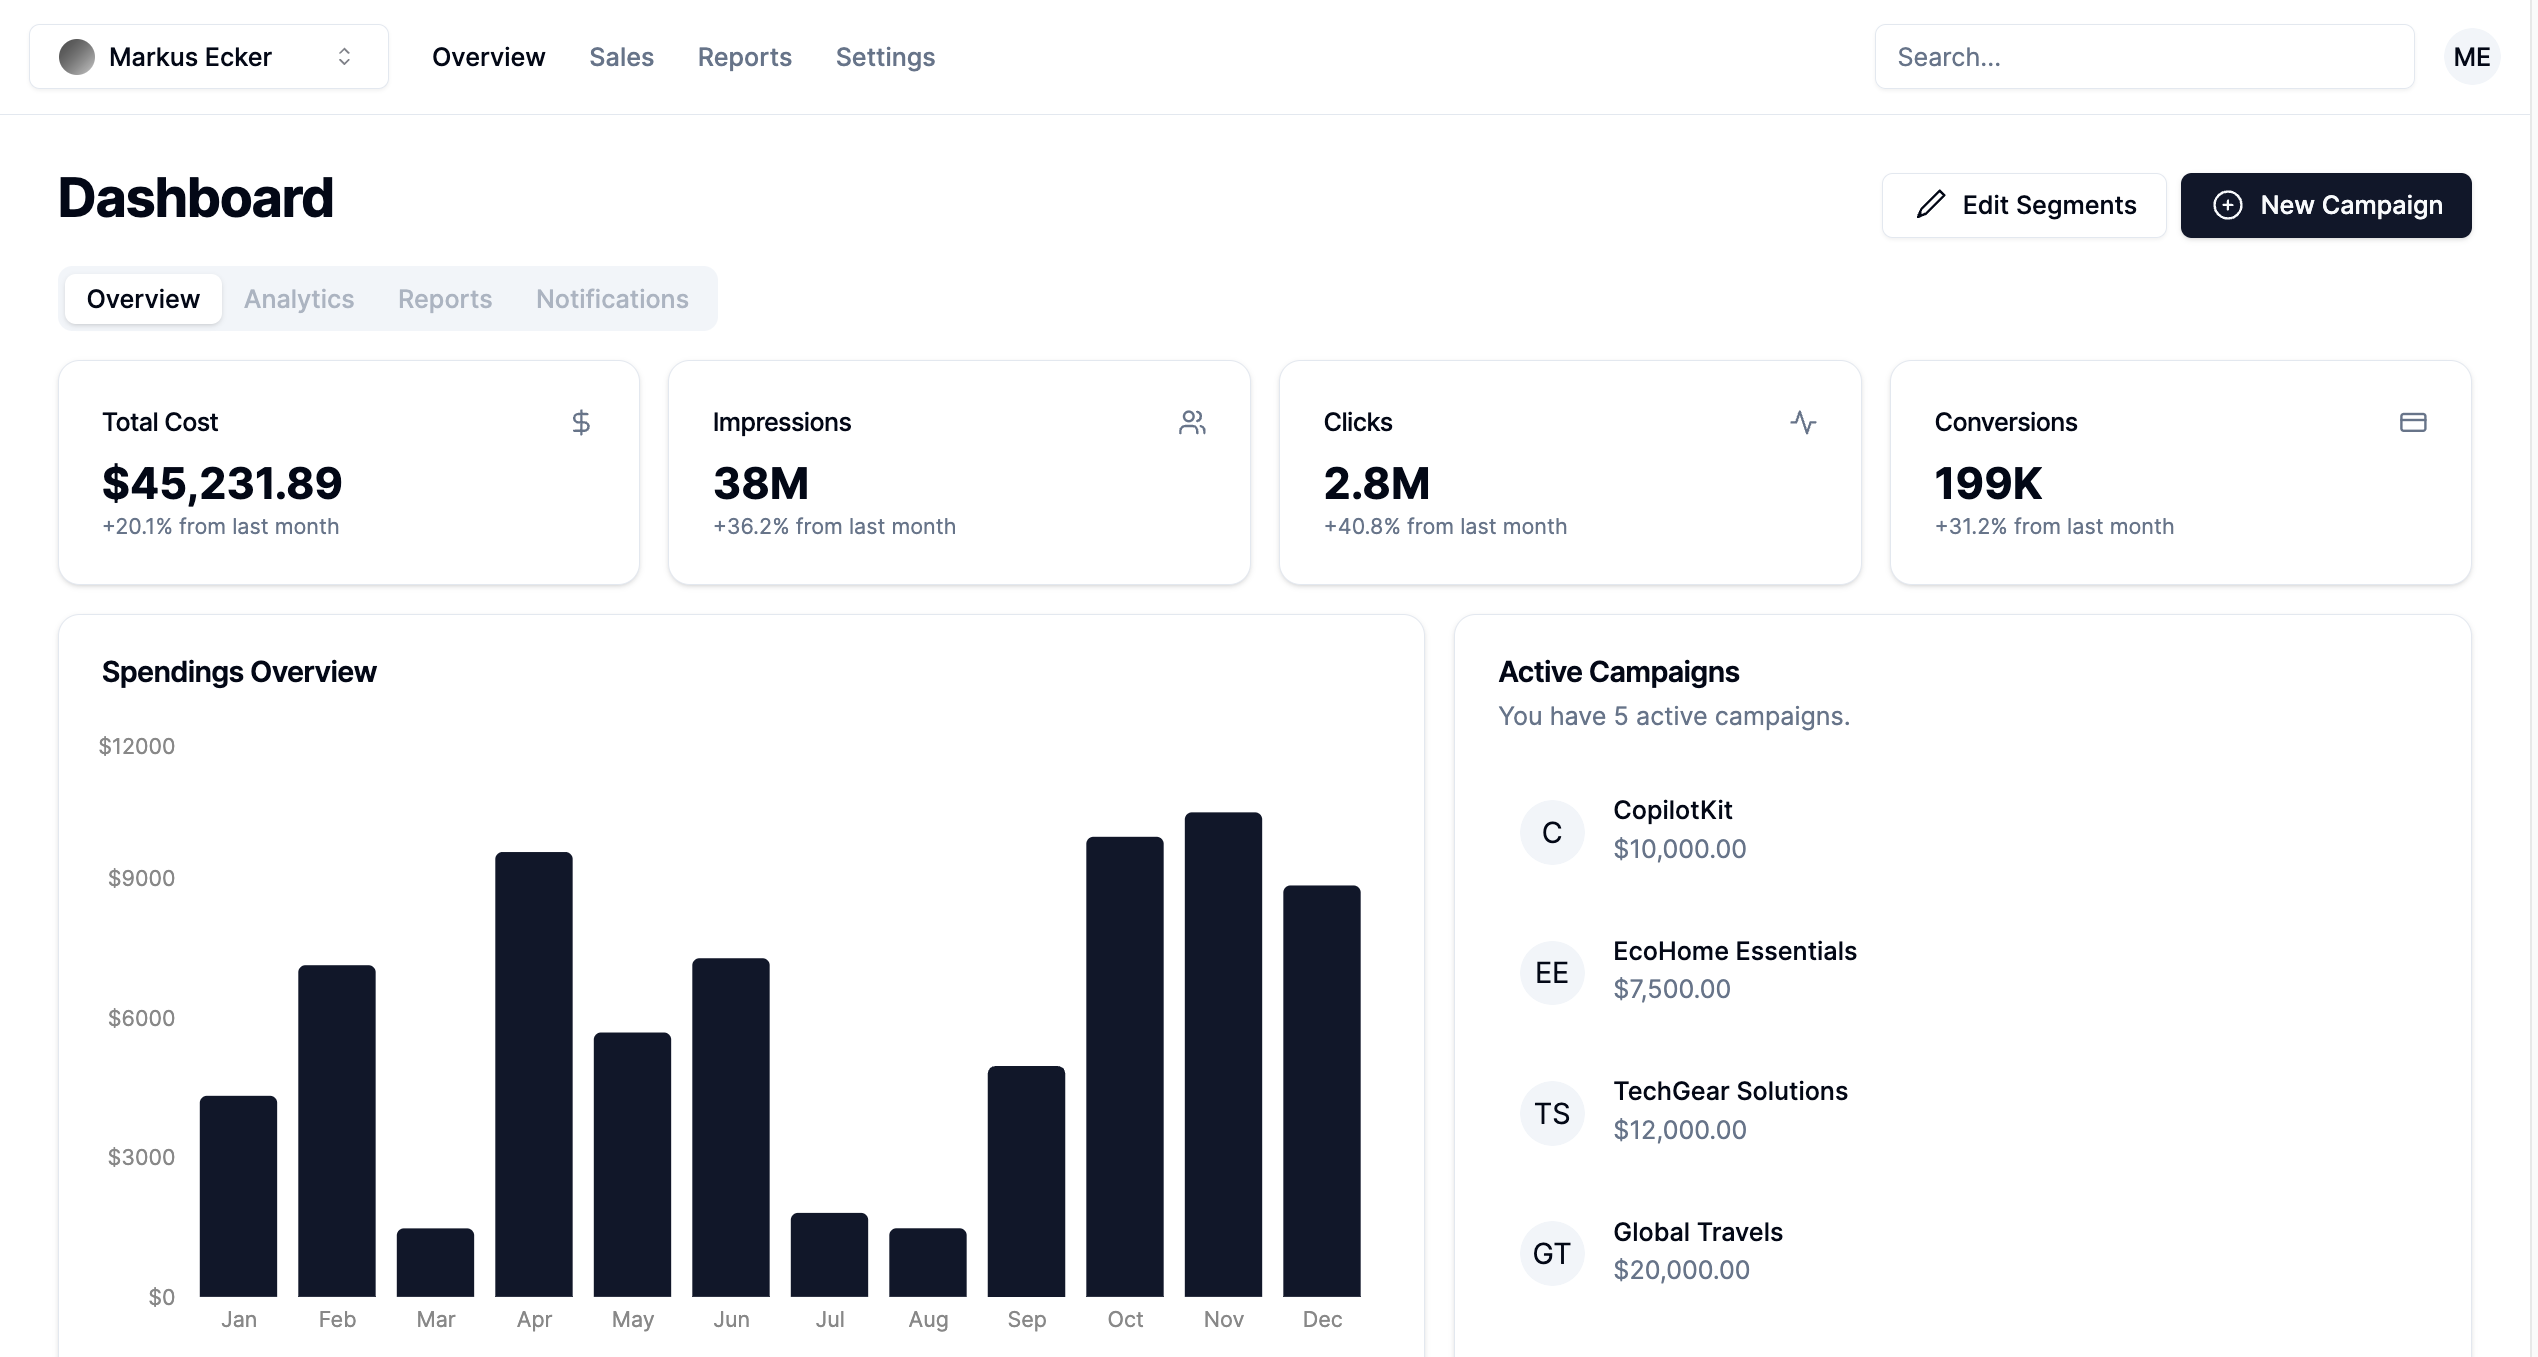 首先,導航至**`app/page.tsx`**檔案並將以下程式碼片段貼到其中。該文件呈現在**`components/app`**資料夾中聲明的 App 元件。 ``` "use client"; import { App } from "@/components/app/App"; export default function DashboardPage() { return <App />; } ``` 在`components/app`資料夾中建立`App.tsx` 、 `CampaignForm.tsx` 、 `MainNav.tsx`和`UserNav.tsx`檔案。 ``` cd components/app touch App.tsx CampaignForm.tsx MainNav.tsx UserNav.tsx ``` 將下面的程式碼片段複製到`App.tsx`檔案中。 ``` "use client"; import { DEFAULT_CAMPAIGNS } from "@/lib/data"; import { Campaign } from "@/lib/types"; import { randomId } from "@/lib/utils"; import { Dashboard } from "../dashboard/Dashboard"; import { CampaignForm } from "./CampaignForm"; import { useState } from "react"; import _ from "lodash"; export function App() { //👇🏻 default segments const [segments, setSegments] = useState<string[]>([ "Millennials/Female/Urban", "Parents/30s/Suburbs", "Seniors/Female/Rural", "Professionals/40s/Midwest", "Gamers/Male", ]); const [campaigns, setCampaigns] = useState<Campaign[]>( _.cloneDeep(DEFAULT_CAMPAIGNS) ); //👇🏻 updates campaign list function saveCampaign(campaign: Campaign) { //👇🏻 newly created campaign if (campaign.id === "") { campaign.id = randomId(); setCampaigns([campaign, ...campaigns]); } else { //👇🏻 existing campaign - search for the campaign and updates the campaign list const index = campaigns.findIndex((c) => c.id === campaign.id); if (index === -1) { setCampaigns([...campaigns, campaign]); } else { campaigns[index] = campaign; setCampaigns([...campaigns]); } } } const [currentCampaign, setCurrentCampaign] = useState<Campaign | undefined>( undefined ); return ( <div className='relative'> <CampaignForm segments={segments} currentCampaign={currentCampaign} setCurrentCampaign={setCurrentCampaign} saveCampaign={(campaign) => { if (campaign) { saveCampaign(campaign); } setCurrentCampaign(undefined); }} /> <Dashboard campaigns={campaigns} setCurrentCampaign={setCurrentCampaign} segments={segments} setSegments={setSegments} /> </div> ); } ``` - 從上面的程式碼片段來看, - 我為行銷活動建立了預設細分列表,並對已定義的行銷活動列表進行了深層複製。 - `saveCampaign`函數接受行銷活動作為參數。如果行銷活動沒有 ID,則表示它是新建立的,因此會將其新增至行銷活動清單。否則,它會找到該活動並更新其屬性。 - `Dashboard`和`CampaignForm`元件接受細分和行銷活動作為 props。 [Dashboard 元件](https://github.com/CopilotKit/campaign-manager-demo/blob/main/src/components/dashboard/Dashboard.tsx)在儀表板上顯示各種 UI 元素,而[CampaignForm 元件](https://github.com/CopilotKit/campaign-manager-demo/blob/main/src/components/app/CampaignForm.tsx)使用戶能夠在應用程式中建立和保存新的行銷活動。 您也可以使用[GitHub 儲存庫](https://github.com/CopilotKit/campaign-manager-demo/tree/main/src/components)中的程式碼片段來更新儀表板和應用程式元件。 恭喜!您應該有一個有效的 Web 應用程式,可讓使用者查看和建立新的行銷活動。 在接下來的部分中,您將了解如何將 CopilotKit 加入到應用程式中,以根據每個行銷活動的目標和預算進行分析和決策。  --- 使用 CopilotKit 透過 AI 分析廣告活動 -------------------------- 在這裡,您將學習如何將人工智慧加入到應用程式中,以幫助您分析行銷活動並做出最佳決策。 在繼續之前,請造訪[OpenAI 開發者平台](https://platform.openai.com/api-keys)並建立一個新的金鑰。 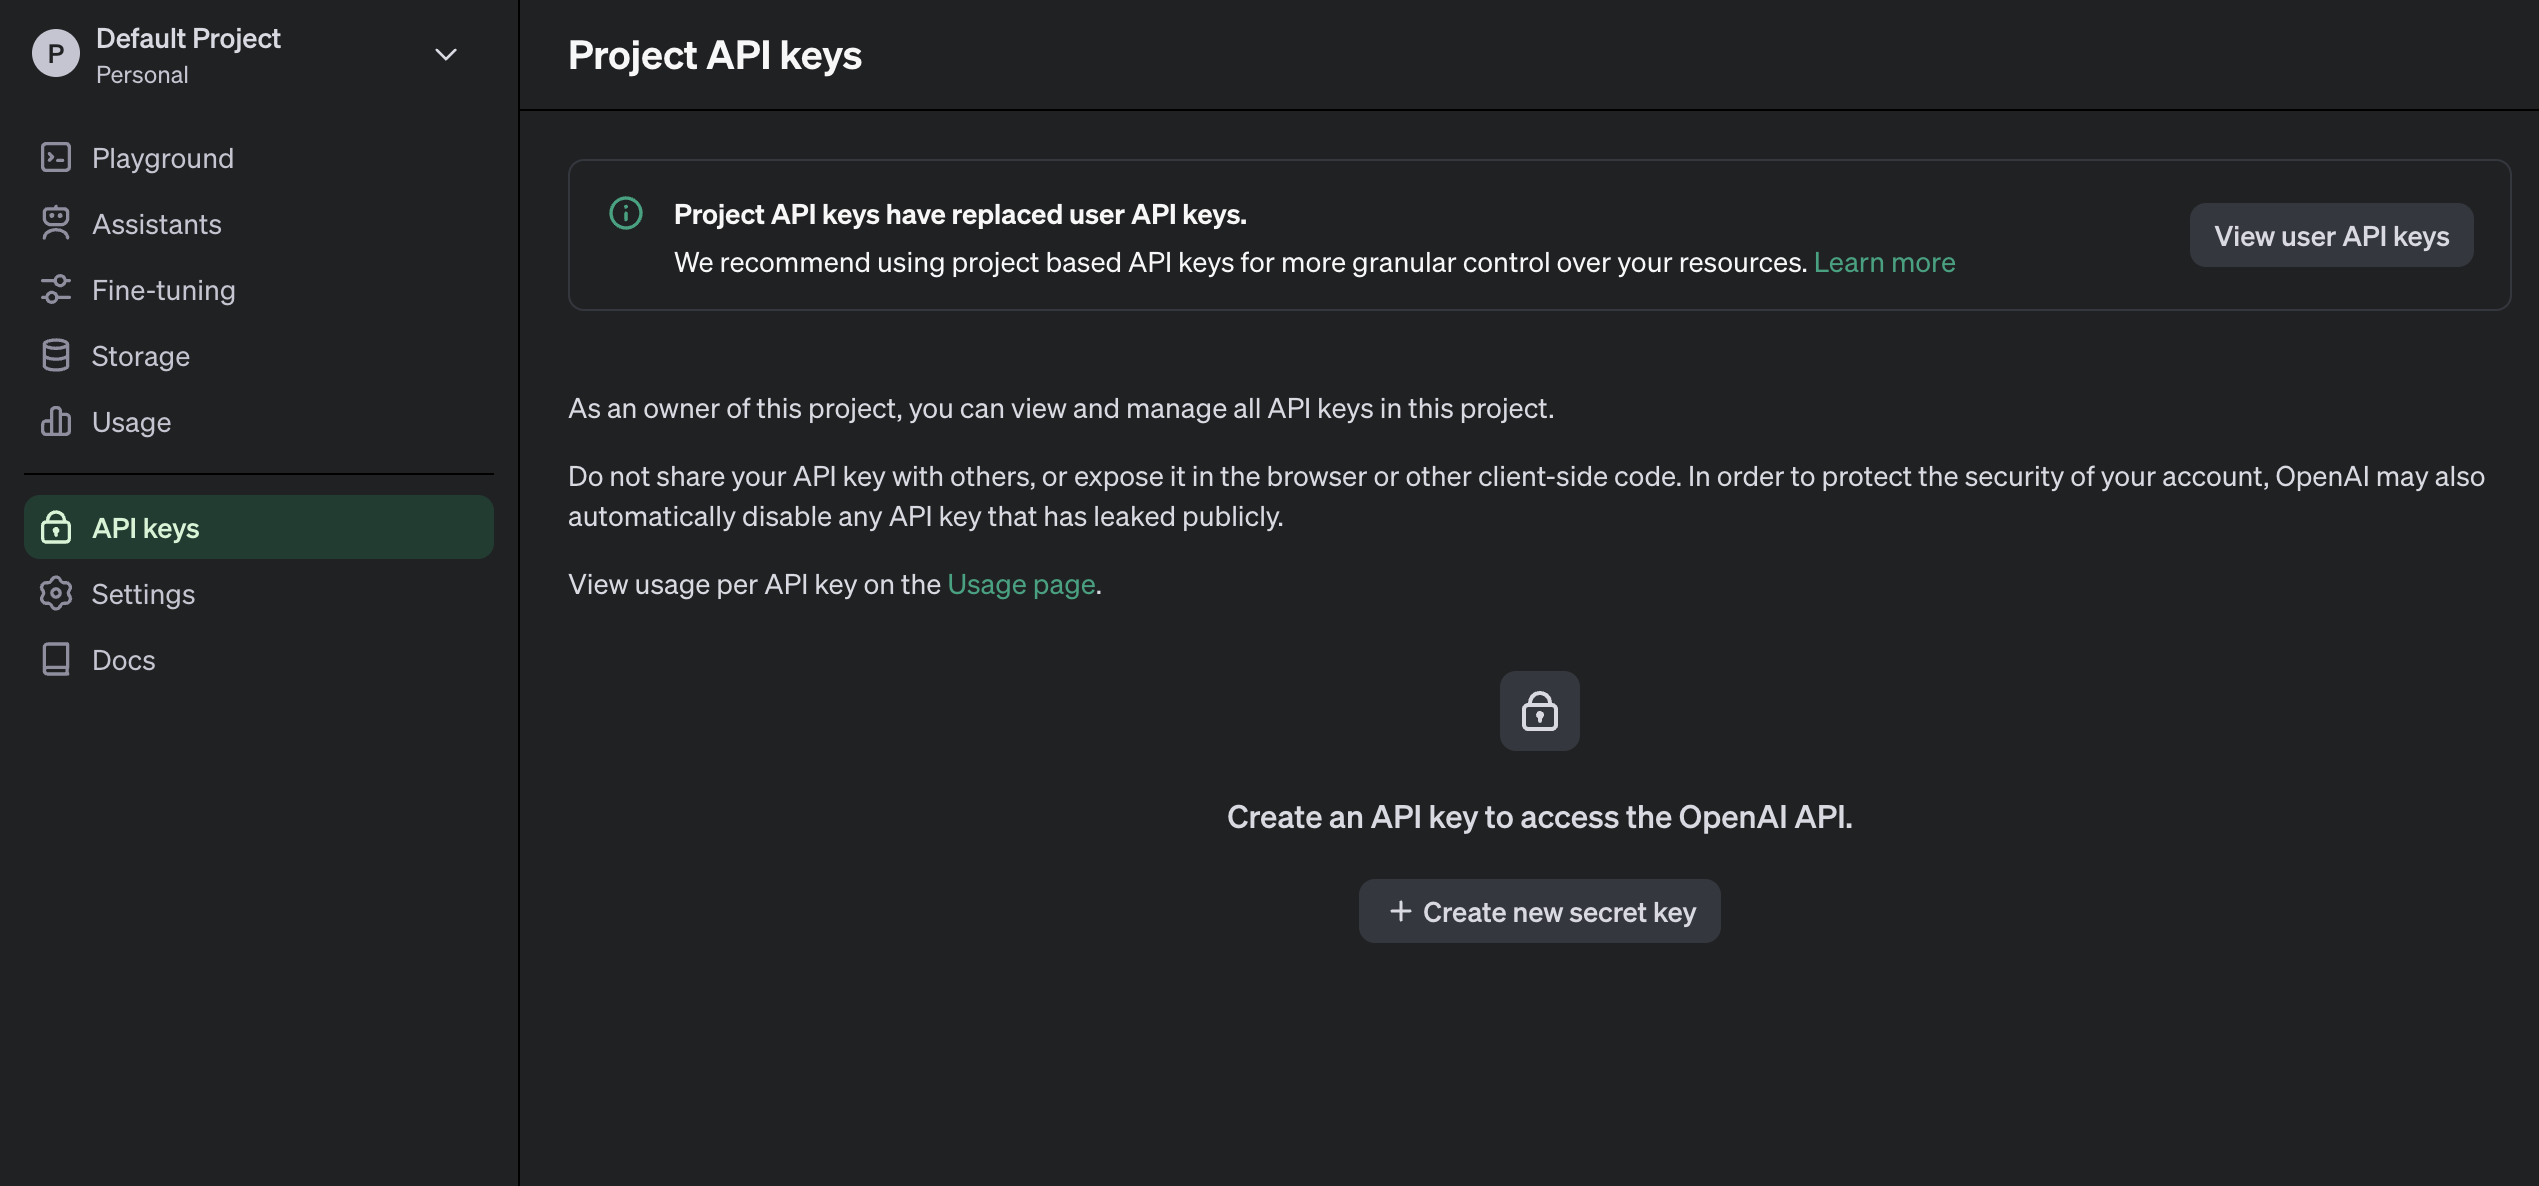 建立一個`.env.local`檔案並將新建立的金鑰複製到該檔案中。 ``` OPENAI_API_KEY=<YOUR_OPENAI_SECRET_KEY> OPENAI_MODEL=gpt-4-1106-preview ``` 接下來,您需要為 CopilotKit 建立 API 端點。在 Next.js 應用程式資料夾中,建立一個包含`route.ts`檔案的`api/copilotkit`資料夾。 ``` cd app mkdir api && cd api mkdir copilotkit && cd copilotkit touch route.ts ``` 將下面的程式碼片段複製到`route.ts`檔中。 [CopilotKit 後端](https://docs.copilotkit.ai/reference/CopilotBackend)接受使用者的請求並使用 OpenAI 模型做出決策。 ``` import { CopilotBackend, OpenAIAdapter } from "@copilotkit/backend"; export const runtime = "edge"; export async function POST(req: Request): Promise<Response> { const copilotKit = new CopilotBackend({}); const openaiModel = process.env["OPENAI_MODEL"]; return copilotKit.response(req, new OpenAIAdapter({ model: openaiModel })); } ``` 若要將您的應用程式連接到此 API 端點,請更新`app/page.tsx`文件,如下所示: ``` "use client"; import { App } from "@/components/app/App"; import { CopilotKit } from "@copilotkit/react-core"; import { CopilotSidebar } from "@copilotkit/react-ui"; export default function DashboardPage() { return ( <CopilotKit url='/api/copilotkit/'> <CopilotSidebar instructions='Help the user create and manage ad campaigns.' defaultOpen={true} labels={{ title: "Campaign Manager Copilot", initial: "Hello there! I can help you manage your ad campaigns. What campaign would you like to work on?", }} clickOutsideToClose={false} > <App /> </CopilotSidebar> </CopilotKit> ); } ``` `CopilotKit`元件包裝整個應用程式並接受包含 API 端點連結的`url`屬性。 `CopilotSidebar`元件為應用程式加入了一個聊天機器人側邊欄面板,使我們能夠向 CopilotKit 提供各種指令。  ### 如何讓AI副駕駛執行各種動作 CopilotKit 提供了兩個鉤子,使我們能夠處理使用者的請求並插入應用程式狀態: [useCopilotAction](https://docs.copilotkit.ai/reference/useCopilotAction)和[useMakeCopilotReadable](https://docs.copilotkit.ai/reference/useMakeCopilotReadable) 。 `useCopilotAction`掛鉤可讓您定義 CopilotKit 執行的動作。它接受包含以下參數的物件: - name - 操作的名稱。 - 描述 - 操作的描述。 - 參數 - 包含所需參數清單的陣列。 - render - 預設的自訂函數或字串。 - handler - 由操作觸發的可執行函數。 ``` useCopilotAction({ name: "sayHello", description: "Say hello to someone.", parameters: [ { name: "name", type: "string", description: "name of the person to say greet", }, ], render: "Process greeting message...", handler: async ({ name }) => { alert(`Hello, ${name}!`); }, }); ``` `useMakeCopilotReadable`掛鉤向 CopilotKit 提供應用程式狀態。 ``` import { useMakeCopilotReadable } from "@copilotkit/react-core"; const appState = ...; useMakeCopilotReadable(JSON.stringify(appState)); ``` CopilotKit 還允許您為使用者提示提供上下文,使其能夠做出充分且準確的決策。 將`guidance.ts`和`script.ts`加入到專案內的`lib`資料夾中,並將此[指導](https://github.com/CopilotKit/campaign-manager-demo/blob/main/src/lib/guideline.ts)和[腳本建議](https://github.com/CopilotKit/campaign-manager-demo/blob/main/src/lib/script.ts)複製到檔案中,以便 CopilotKit 做出決策。 在應用程式元件中,將當前日期、腳本建議和指導傳遞到 CopilotKit。 ``` import { GUIDELINE } from "@/lib/guideline"; import { SCRIPT_SUGGESTION } from "@/lib/script"; import { useCopilotAction, useMakeCopilotReadable, } from "@copilotkit/react-core"; export function App() { //-- 👉🏻 ...other component functions //👇🏻 Ground the Copilot with domain-specific knowledge for this use-case: marketing campaigns. useMakeCopilotReadable(GUIDELINE); useMakeCopilotReadable(SCRIPT_SUGGESTION); //👇🏻 Provide the Copilot with the current date. useMakeCopilotReadable("Today's date is " + new Date().toDateString()); return ( <div className='relative'> <CampaignForm segments={segments} currentCampaign={currentCampaign} setCurrentCampaign={setCurrentCampaign} saveCampaign={(campaign) => { if (campaign) { saveCampaign(campaign); } setCurrentCampaign(undefined); }} /> <Dashboard campaigns={campaigns} setCurrentCampaign={setCurrentCampaign} segments={segments} setSegments={setSegments} /> </div> ); } ``` 在`App`元件中建立一個 CopilotKit 操作,該操作可在使用者提供此類指令時建立新的活動或編輯現有的活動。 ``` useCopilotAction({ name: "updateCurrentCampaign", description: "Edit an existing campaign or create a new one. To update only a part of a campaign, provide the id of the campaign to edit and the new values only.", parameters: [ { name: "id", description: "The id of the campaign to edit. If empty, a new campaign will be created", type: "string", }, { name: "title", description: "The title of the campaign", type: "string", required: false, }, { name: "keywords", description: "Search keywords for the campaign", type: "string", required: false, }, { name: "url", description: "The URL to link the ad to. Most of the time, the user will provide this value, leave it empty unless asked by the user.", type: "string", required: false, }, { name: "headline", description: "The headline displayed in the ad. This should be a 5-10 words", type: "string", required: false, }, { name: "description", description: "The description displayed in the ad. This should be a short text", type: "string", required: false, }, { name: "budget", description: "The budget of the campaign", type: "number", required: false, }, { name: "objective", description: "The objective of the campaign", type: "string", enum: [ "brand-awareness", "lead-generation", "sales-conversion", "website-traffic", "engagement", ], }, { name: "bidStrategy", description: "The bid strategy of the campaign", type: "string", enum: ["manual-cpc", "cpa", "cpm"], required: false, }, { name: "bidAmount", description: "The bid amount of the campaign", type: "number", required: false, }, { name: "segment", description: "The segment of the campaign", type: "string", required: false, enum: segments, }, ], handler: (campaign) => { const newValue = _.assign( _.cloneDeep(currentCampaign), _.omitBy(campaign, _.isUndefined) ) as Campaign; setCurrentCampaign(newValue); }, render: (props) => { if (props.status === "complete") { return "Campaign updated successfully"; } else { return "Updating campaign"; } }, }); ``` {% 嵌入 https://www.youtube.com/watch?v=gCJpH6Tnj5g %} 新增另一個模擬 API 呼叫的操作,以允許 CopilotKit 從先前建立的活動中檢索歷史資料。 ``` // Provide this component's Copilot with the ability to retrieve historical cost data for certain keywords. // Will be called automatically when needed by the Copilot. useCopilotAction({ name: "retrieveHistoricalData", description: "Retrieve historical data for certain keywords", parameters: [ { name: "keywords", description: "The keywords to retrieve data for", type: "string", }, { name: "type", description: "The type of data to retrieve for the keywords.", type: "string", enum: ["CPM", "CPA", "CPC"], }, ], handler: async ({ type }) => { // fake an API call that retrieves historical data for cost for certain keywords based on campaign type (CPM, CPA, CPC) await new Promise((resolve) => setTimeout(resolve, 2000)); function getRandomValue(min: number, max: number) { return (Math.random() * (max - min) + min).toFixed(2); } if (type == "CPM") { return getRandomValue(0.5, 10); } else if (type == "CPA") { return getRandomValue(5, 100); } else if (type == "CPC") { return getRandomValue(0.2, 2); } }, render: (props) => { // Custom in-chat component rendering. Different components can be rendered based on the status of the action. let label = "Retrieving historical data ..."; if (props.args.type) { label = `Retrieving ${props.args.type} for keywords ...`; } if (props.status === "complete") { label = `Done retrieving ${props.args.type} for keywords.`; } const done = props.status === "complete"; return ( <div className=''> <div className=' w-full relative max-w-xs'> <div className='absolute inset-0 h-full w-full bg-gradient-to-r from-blue-500 to-teal-500 transform scale-[0.80] bg-red-500 rounded-full blur-3xl' /> <div className='relative shadow-xl bg-gray-900 border border-gray-800 px-4 py-8 h-full overflow-hidden rounded-2xl flex flex-col justify-end items-start'> <h1 className='font-bold text-sm text-white mb-4 relative z-50'> {label} </h1> <p className='font-normal text-base text-teal-200 mb-2 relative z-50 whitespace-pre'> {props.args.type && `Historical ${props.args.type}: ${props.result || "..."}`} </p> </div> </div> </div> ); }, }); ```  恭喜!您已完成本教學的專案。 結論 -- [CopilotKit](https://copilotkit.ai/)是一款令人難以置信的工具,可讓您在幾分鐘內將 AI Copilot 加入到您的產品中。無論您是對人工智慧聊天機器人和助理感興趣,還是對複雜任務的自動化感興趣,CopilotKit 都能讓您輕鬆實現。 如果您需要建立 AI 產品或將 AI 工具整合到您的軟體應用程式中,您應該考慮 CopilotKit。 您可以在 GitHub 上找到本教學的源程式碼: <https://github.com/CopilotKit/campaign-manager-demo> 感謝您的閱讀! --- 原文出處:https://dev.to/copilotkit/build-an-ai-powered-campaign-manager-nextjs-openai-copilotkit-59ii
視覺化獎品 ===== 想像一下,您正在開發全端應用程式,並且想要實作一項新功能。這是一個複雜的過程,因此您拿出筆和紙,或轉到[tldraw](https://www.tldraw.com/) ,並開始繪製應用程式目前的樣子的圖表,從資料庫到伺服器,再到客戶端。 但是,如果您有一個**工具可以為您可視化整個全端應用程式,**那該有多酷?如果該工具有潛力做更偉大的事情,例如立即為您在整個堆疊中加入有用的功能,或者與人工智慧和大型語言模型配合用於程式碼生成,會怎麼樣? 嗯,這個想法已經成為現實,它被稱為`wasp studio` 。在這裡查看: {% 嵌入 https://youtu.be/SIAhAvDEoMw %} 黃蜂工作室是這個名字 ========== 首先, [Wasp 是一個具有超能力的全端 React、NodeJS 和 Prisma 框架](https://github.com/wasp-lang/wasp)。它[在 GitHub 上的星數剛剛突破 10,000 個](https://github.com/wasp-lang/wasp),並已被用來建立超過 50,000 個專案。 為什麼它很特別?它使用設定檔和自己的編譯器來為您管理一系列功能,例如身份驗證、cron 作業、路由和電子郵件發送,為您節省大量時間並讓您專注於有趣的事情。 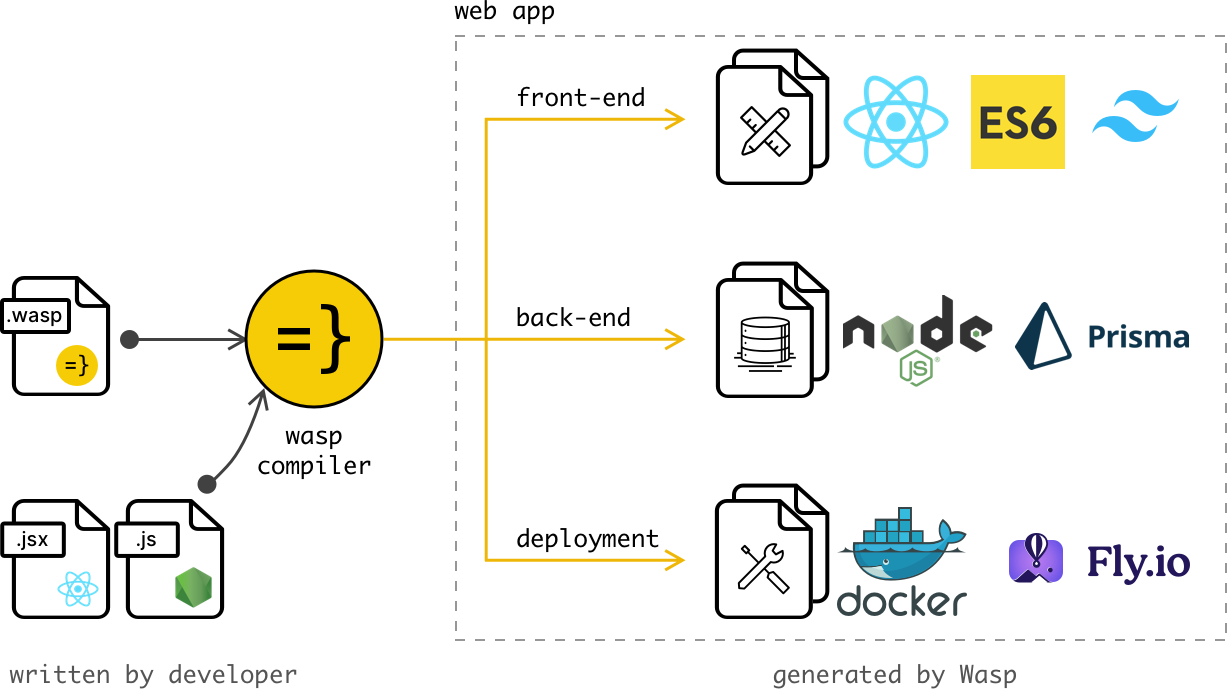 [Wasp 的中央設定檔](https://wasp-lang.dev/docs)(充當應用程式的一組指令)和編譯器的組合還允許 Wasp 透過單行命令為您執行一系列複雜且有趣的任務,例如: - 全端部署 → `wasp deploy` - 使用 Docker 啟動開發資料庫 → `wasp start db` - 建立整個範例應用程式,例如 SaaS 入門 → `wasp new` - 為您提供整個全端應用程式的視覺示意圖 → `wasp studio` 如果你想親自嘗試一下,你所要做的就是: 1. 使用`curl -sSL https://get.wasp-lang.dev/installer.sh | sh`[安裝Wasp](https://wasp-lang.dev/docs/quick-start) https://get.wasp-lang.dev/installer.sh | `curl -sSL https://get.wasp-lang.dev/installer.sh | sh` 2. 使用`wasp new -t todo-ts`在 TypeScript 中建立一個新的待辦事項應用程式 3. 然後要獲得下面螢幕截圖中的視覺化工具,請執行`wasp studio` 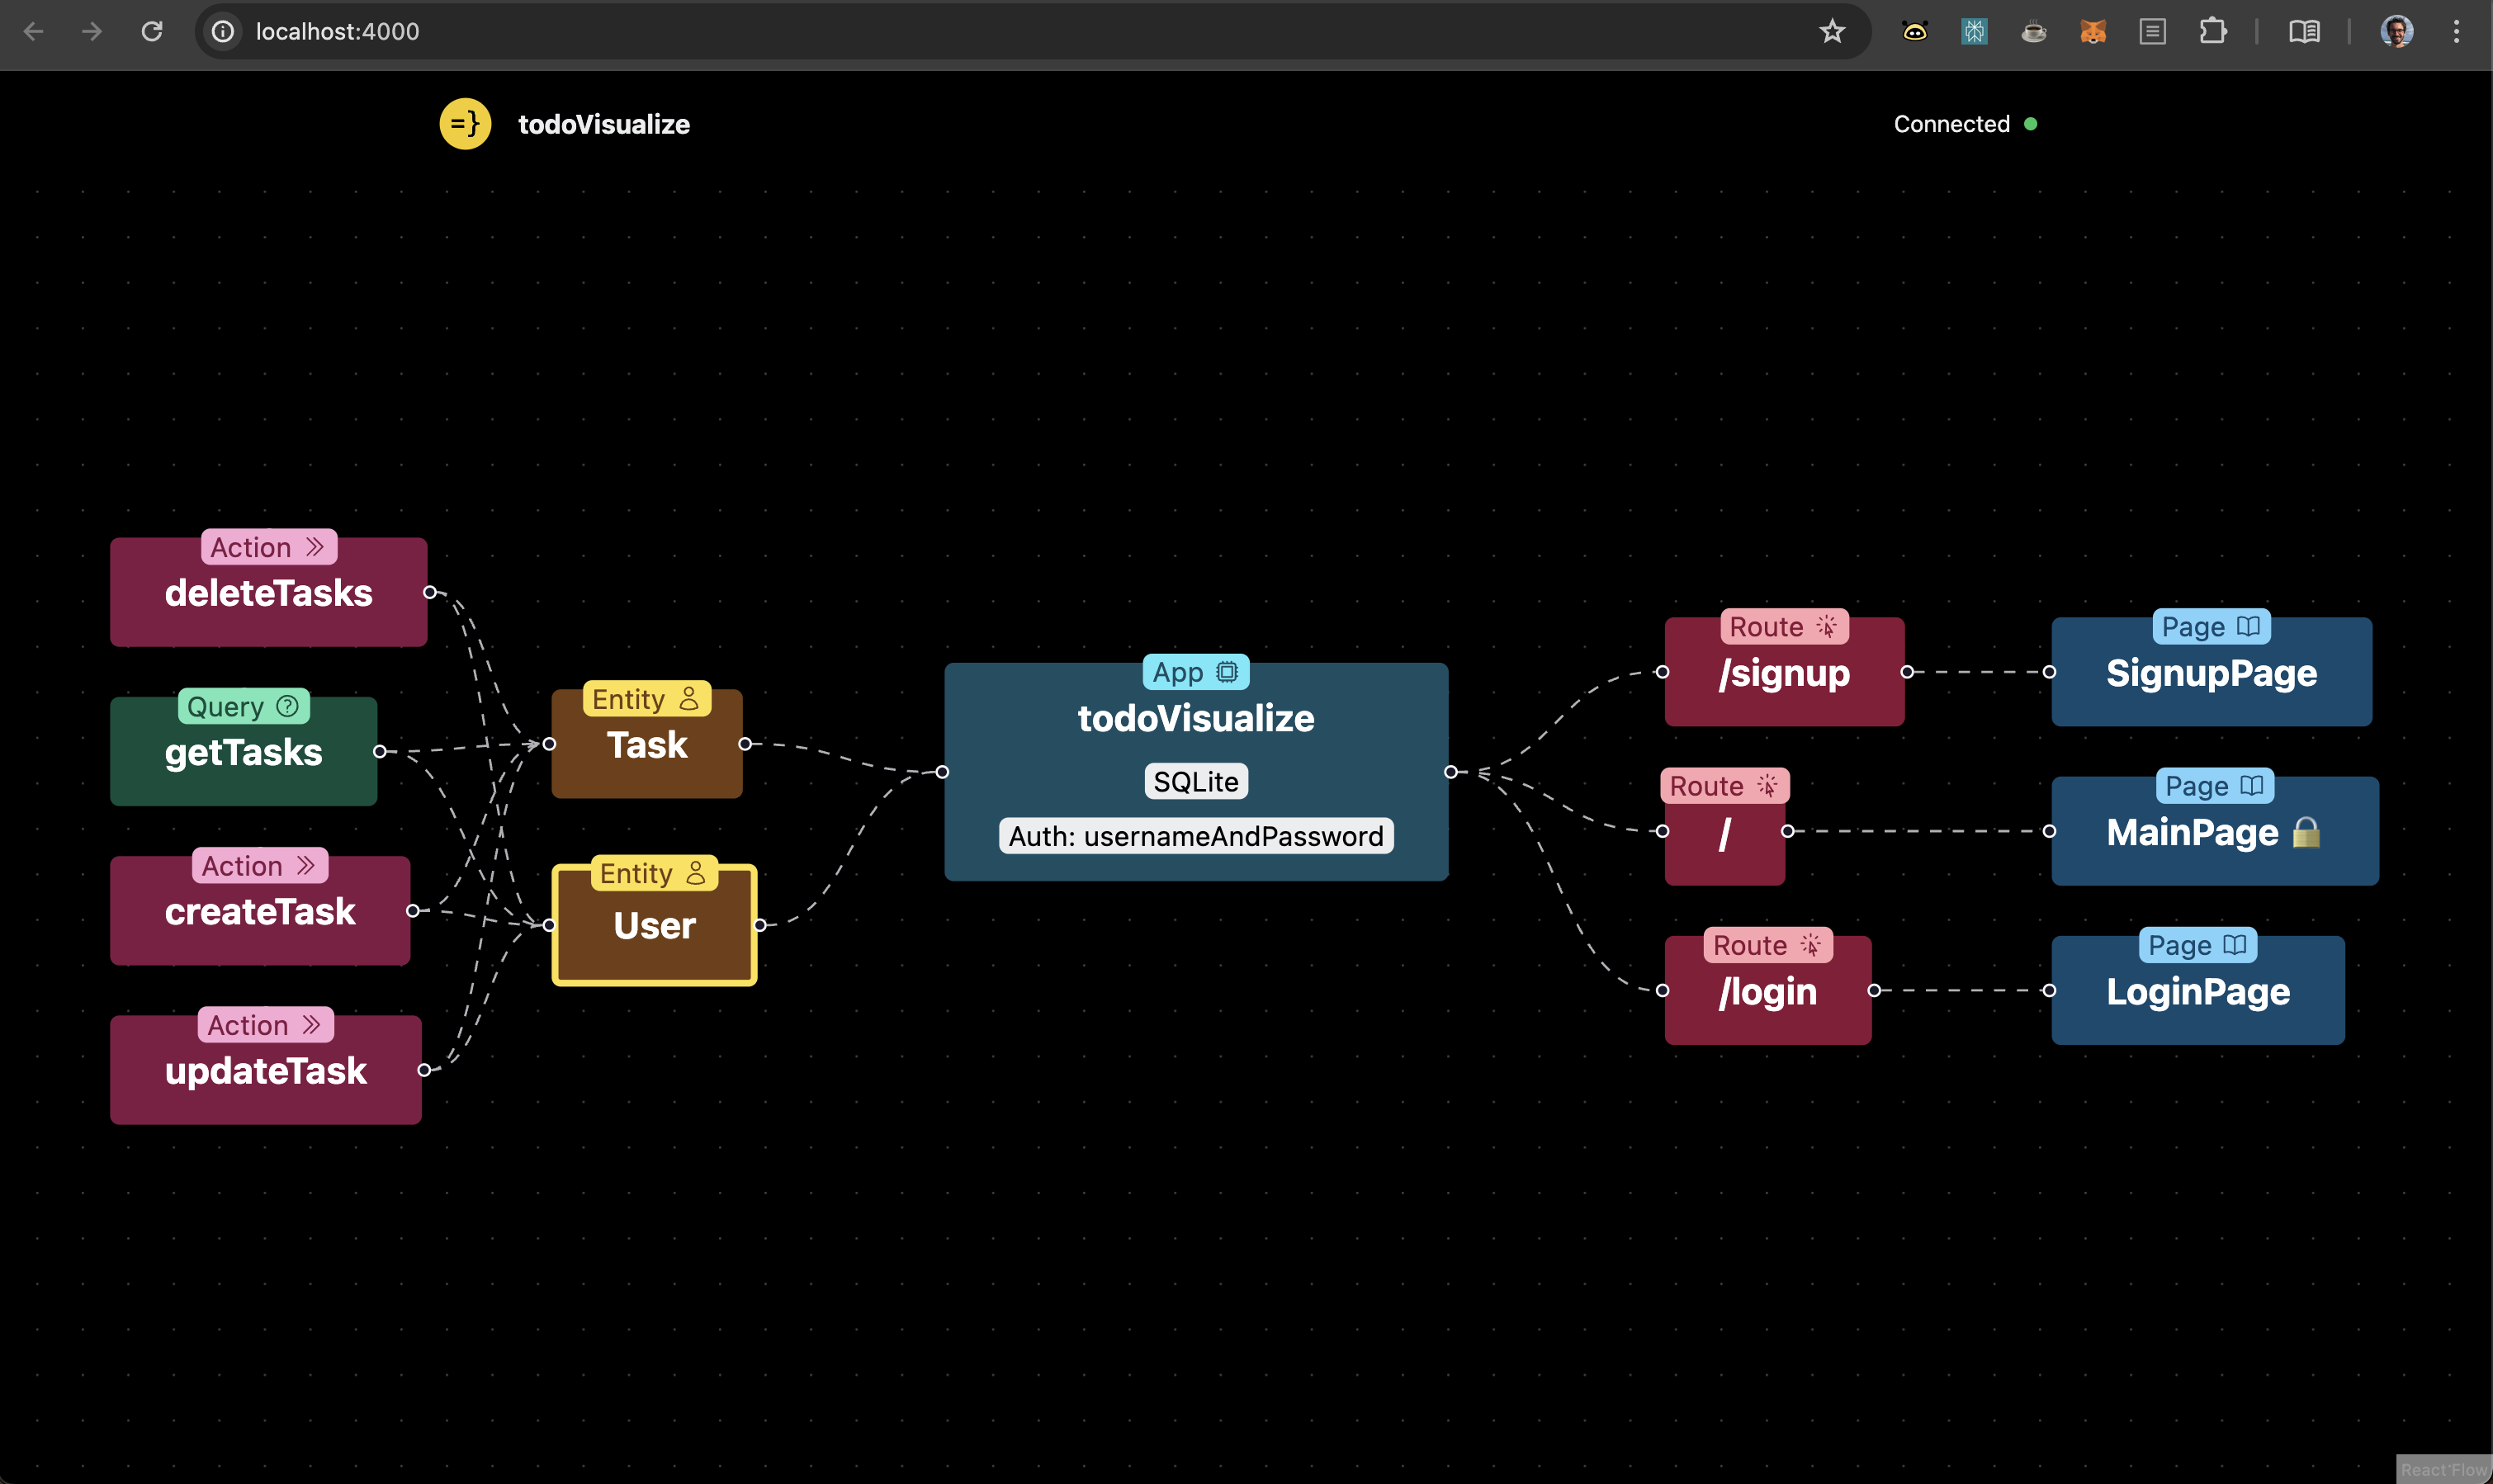 讓我們快速分解一下我們在這裡看到的內容: - 中間藍色的主應用程式元件顯示了應用程式的名稱、我們正在使用的資料庫及其身份驗證方法 - 左邊的黃色實體向我們展示了我們定義的資料庫模型 - 最左邊的紅色和綠色的操作和查詢向我們展示了作用於資料庫實體的伺服器操作 - 右側的路由和頁面向我們展示了 React 元件所在的位置以及它們是否需要授權(以 🔒 表示) 如果您想知道更複雜的應用程式會是什麼樣子,以下是在[Open SaaS(我們的免費開源 SaaS 樣板啟動器)](https://OpenSaaS.sh)上執行時的樣子。 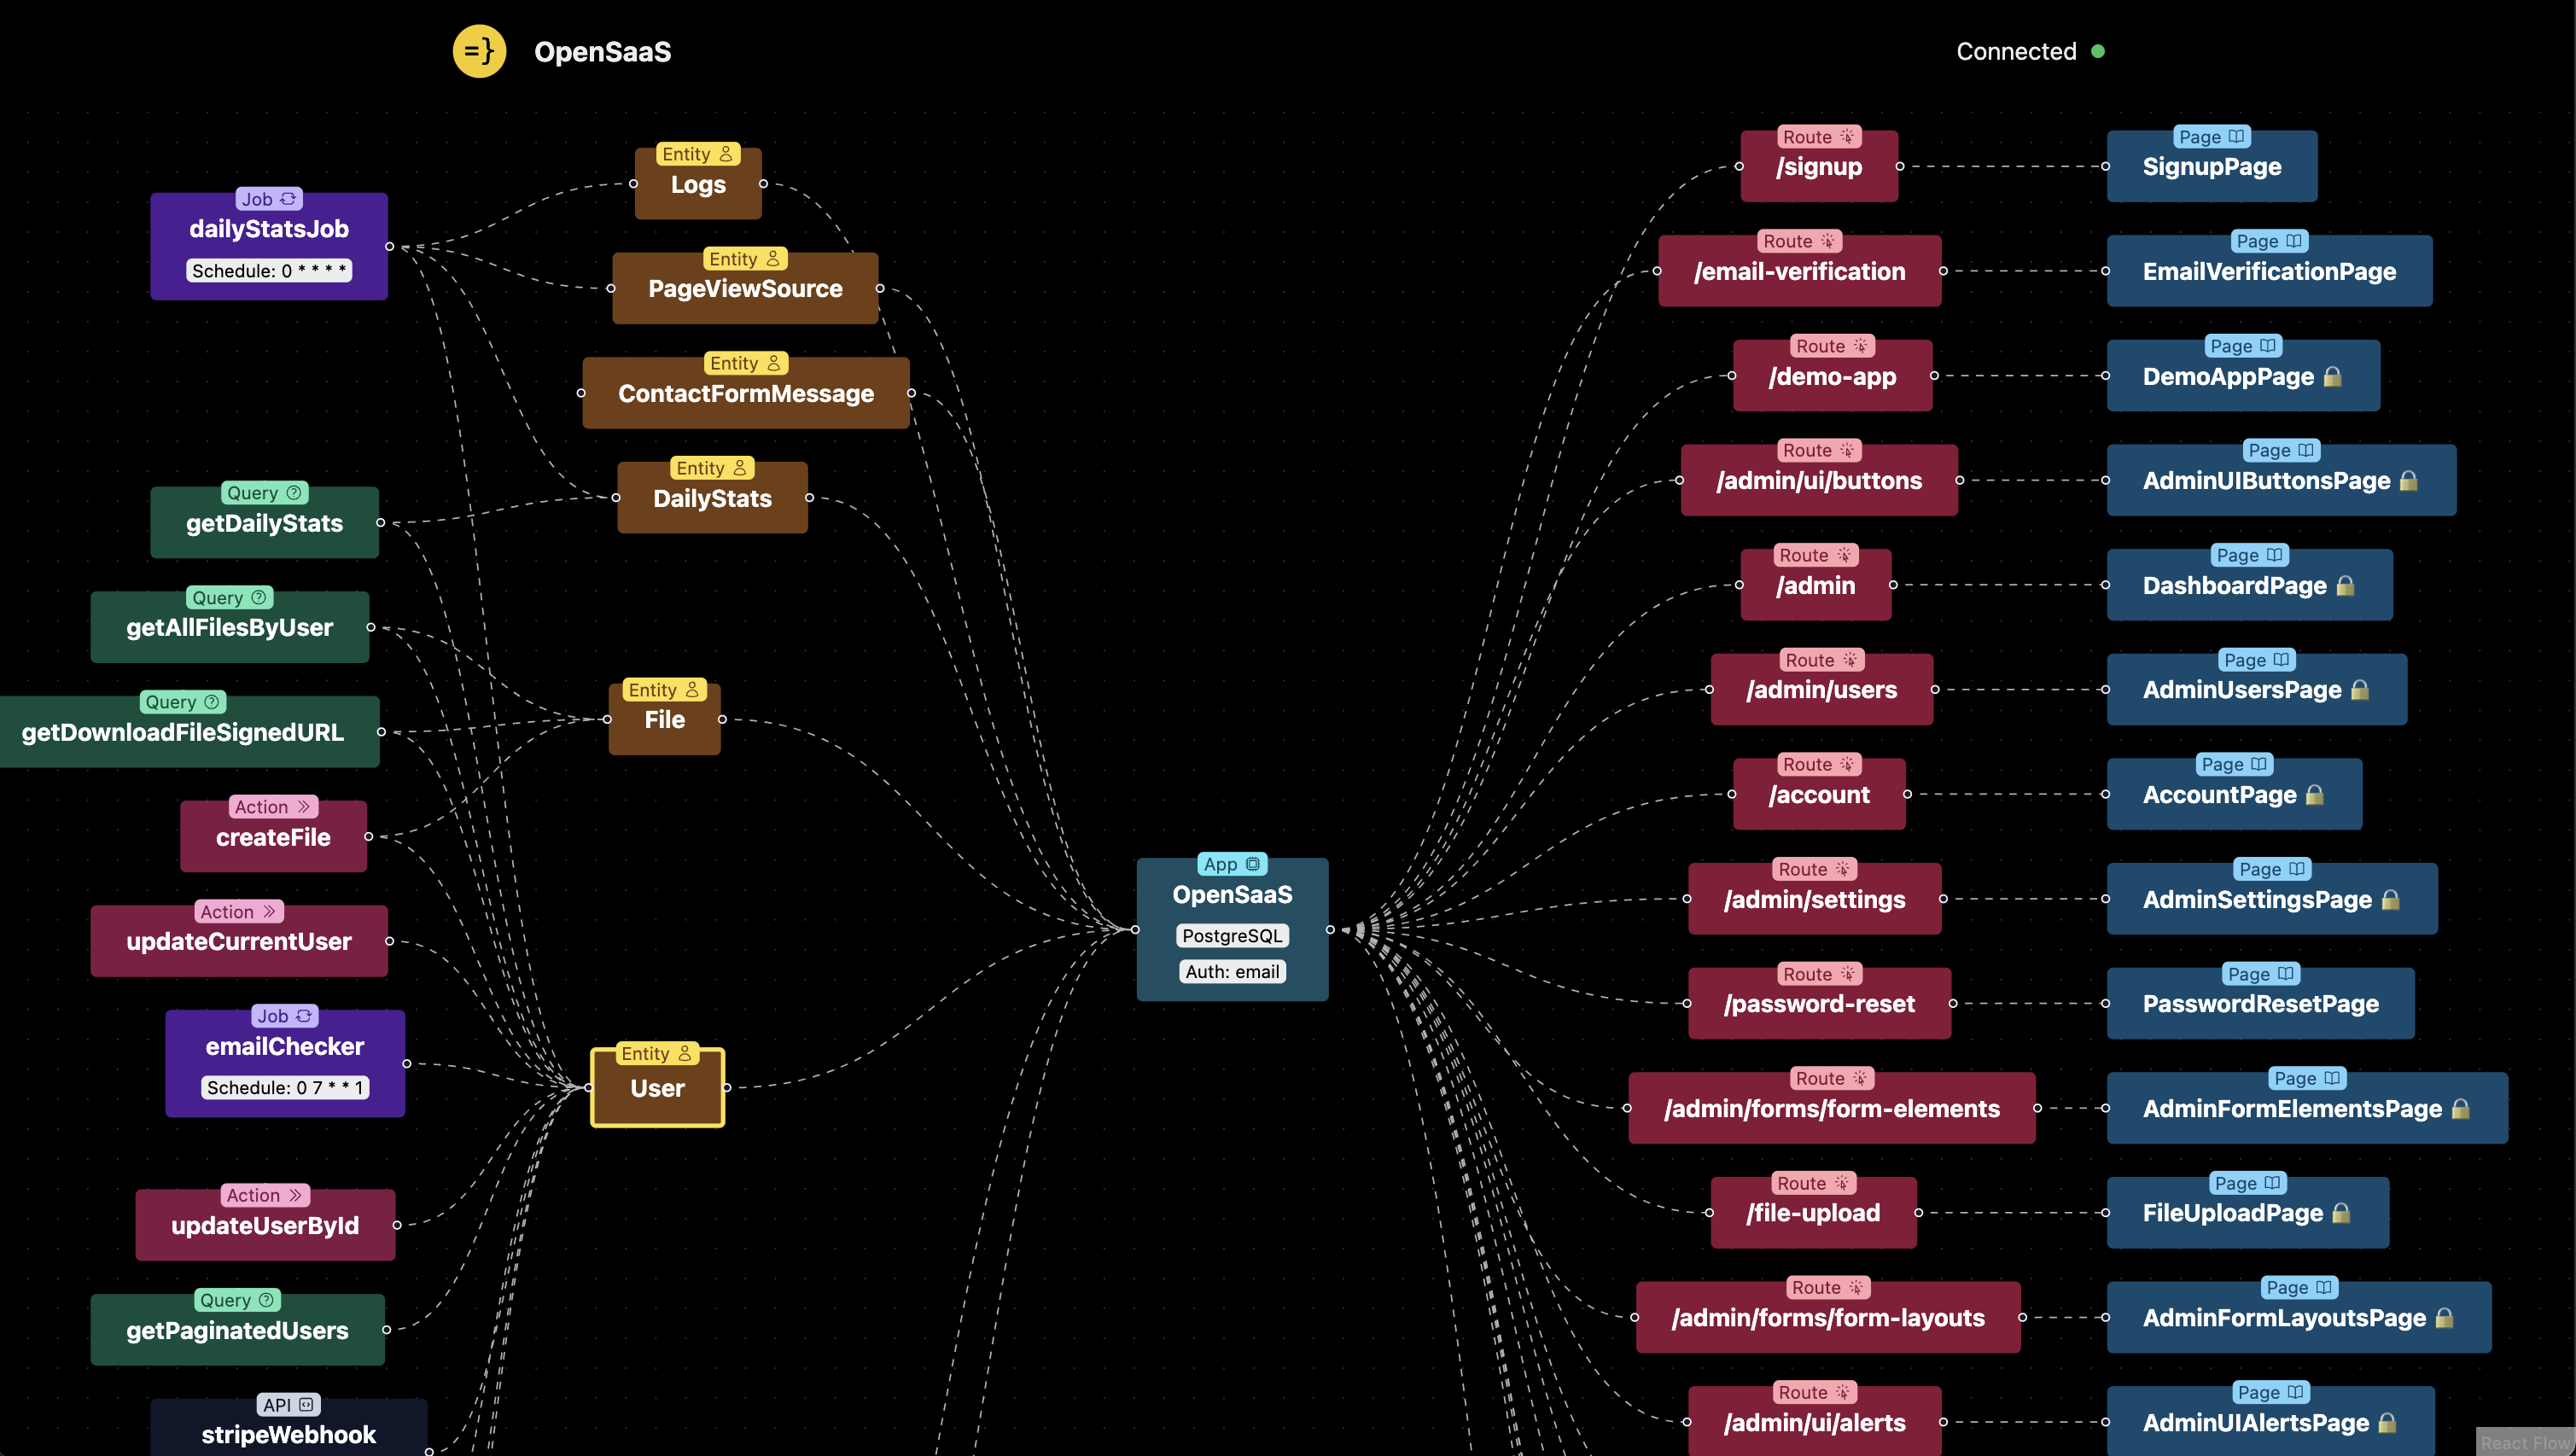 這樣做的好處是,我們可以概覽所有資料庫實體以及它們所依賴的伺服器功能(也稱為「操作」)。在上圖的左上角,您甚至會看到一個 cron 作業`dailyStatsJob` ,它每小時執行一次 ( `0 * * * *` )。 例如,這使得開發後端邏輯變得輕而易舉,特別是如果您不是經驗豐富的後端開發人員。考慮一下讓您到達那裡的程式碼就像這樣簡單: ``` job dailyStatsJob { executor: PgBoss, perform: { fn: import { calculateDailyStats } from "@src/calculateDailyStats" }, schedule: { cron: "0 * * * *" }, entities: [User, DailyStats, Logs, PageViewSource] } ``` 是的,這就是您在伺服器上取得非同步作業所需的全部內容。現在你的`calculateDailyStats`函數將每小時執行一次——不需要第三方服務🙂 這是派對把戲嗎! ======== 好的。您可能會想,視覺化工具很酷,但它真的有用途嗎,還是只是一個不錯的「派對把戲」?老實說,*目前*這只是派對上的把戲。 但這是一個具有**很大潛力的**派對技巧。讓我解釋。  當然,您可以以當前形式使用它來更好地了解您的應用程式,或者計劃一些新功能,但將來您將能夠使用它做更多事情,例如: - 只需點擊幾下即可新增新的身份驗證方法 - 透過伺服器操作快速搭建功能性客戶端元件 - 立即為您的整個應用程式新增新的全端功能,例如 Stripe 支付 - 與大型語言模型 (LLM) 輕鬆協作,即時產生功能! 同樣,這一切都是可能的,因為中央設定檔充當了應用程式的一組「指令」。透過這個文件,Wasp 確實知道您的應用程式是如何建置的,因此它可以輕鬆地以視覺形式向您顯示您的應用程式。它還使您可以更輕鬆地以令人興奮的新方式建立應用程式的新部分。 看看下面 Wasp 設定檔中的另一個片段。這就是為您的網頁應用程式獲得全端身份驗證所需的一切!這是因為 Wasp 編譯器正在為您管理樣板程式碼。 ``` app todoVisualize { title: "todo-visualize", auth: { userEntity: User, methods: { usernameAndPassword: {}, google: {}, }, } } entity User {=psl id Int @id @default(autoincrement()) tasks Task[] psl=} ``` 一張圖值一千枚代幣 ========= 現在我們已經了解了 Wasp 的工作原理,接下來讓我們更深入地探討 Wasp 和`wasp studio`與 LLM 結合作為未來用例的潛力。 目前,人工智慧輔助程式碼產生的最大限制之一是上下文。現在,我們都知道LLM喜歡產生幻覺,[但他們的「記憶力」也很差](https://glazkov.com/2023/05/18/ai-developer-experience-asymptotes/)。因此,如果您試圖讓他們為您的應用程式建立功能,以確保新功能適用於您的應用程式,您必須不斷「提醒」他們應用程式的工作方式、結構和依賴項。 但是,透過 Wasp 的設定檔(本質上只是全端應用程式及其功能的更高層次抽象),我們為法學碩士提供了成功為手頭上的應用程式建立新功能所需的上下文。  這非常有效,因為我們不僅為 LLM 提供了所需的上下文,而且 Wasp 的編譯器還承擔了為我們編寫大部分樣板文件的責任(謝謝,朋友),為 LLM 提供了更簡單的任務的寫作,例如: - 修改Wasp設定檔 - 在伺服器上執行的函數 - 使用 Wasp 程式碼的 React 元件 從這個意義上說,法學碩士必須掌握的上下文要少得多,並且其糟糕的記憶力是可以原諒的,因為黃蜂是確保一切都很好地粘在一起的人! 為了進一步說明這一點,讓我們再看看上面介紹的授權碼: ``` auth: { userEntity: User, methods: { usernameAndPassword: {}, google: {}, }, ``` 請考慮此程式碼在整個堆疊中提供身份驗證。因此,您不僅可以在伺服器上獲得為您產生和管理的所有身份驗證邏輯,還[可以在客戶端上獲得可供您使用的 UI 元件和身份驗證掛鉤](https://wasp-lang.dev/docs/auth/ui)!  另一方面,如果沒有 Wasp 給我們的抽象,我們最終只能依靠 LLM,它的記憶力很差,容易產生幻覺,一遍又一遍地為我們編寫一堆樣板文件,如下圖所示的 JWT 中間件:  法學碩士非常擅長單獨編寫樣板程式碼、重複性任務。但期望他們將其作為有凝聚力的全端應用程式的一部分來完成,這意味著我們有更多的表面積來暴露可能的錯誤。 另一方面,對於 Wasp,**只需幾行程式碼**。如果人類寫起來很容易,那麼法學碩士也很容易寫。 順便說一句,這不僅為我們省去了很多麻煩,還可以為我們節省很多錢,因為[AI 生成的 Wasp 應用程式使用的令牌(即輸入和輸出文字)比同類工具少約 10-40 倍](https://wasp-lang.dev/blog/2023/07/17/how-we-built-gpt-web-app-generator),因此他們以一小部分的價格產生程式碼。 幫助計算機幫助我們 ========= 隨著技術的不斷改進,專業知識較少的用戶將更容易進行編程,因為更多的專業知識將嵌入我們的工具中。 但這意味著我們需要抽象,使我們人類能夠輕鬆地使用這些工具。 就像上面的 LLM 範例一樣,我們可以建立工具,讓人工智慧一遍又一遍地為我們編寫所有樣板文件,但問題是,當他們*可以*做其他更有用的事情時,我們*是否應該*讓他們這樣做?法學碩士擅長快速產生大量新想法。為什麼不建構讓人工智慧在這方面幫助我們的工具呢? 這正是我們對`wasp studio`未來的規劃。一個視覺化介面,讓您在有或沒有法學碩士的幫助下拼湊應用程式的新功能,然後快速對這些不同的想法進行 A/B 測試。 {% 嵌入 https://www.youtube.com/watch?v=ERwtJtNQL28 %} 不僅如此,我們還可以使用一個抽象來與不太懂科技的使用者輕鬆協作。在這些工具的幫助下,甚至您的產品經理也可以從中獲得樂趣並開始建立新功能以供開發人員簽署。 Wasp 及其功能集的強大之處在於,我們獲得的程式碼對於人和機器來說都**更容易閱讀、除錯和維護**。與視覺化介面相結合,我們將能夠快速迭代整個堆疊中的新功能,將其用作我們自己的規劃和編排工具,或者作為更輕鬆地除錯和監督法學碩士可能為我們所做的工作的一種方式。 這是對 Web 開發未來的令人興奮的展望,這些新工具將帶來許多利用它們的新方法。 您認為像`wasp studio`這樣的工具有哪些使用方法?您能想像人工智慧與人類協作領域即將出現哪些其他發展嗎?請在下面的評論中告訴我們,感謝您的閱讀! --- 原文出處:https://dev.to/wasp/the-first-framework-that-lets-you-visualize-your-reactnodejs-app-1d63
ReactJS 庫已經上市很久了,我們都非常了解它的強大功能。我們都知道如何使用 ReactJS 建立 UI、建立元件等等。如果您不了解 React,您可以使用大量線上免費資源。 在本部落格中,我們將研究 Wing 以及如何建立連接到 Wing 後端的 React 應用程式。 Wing 是世界上第一個在雲端服務上執行的雲端程式語言。 Wing 讓開發人員可以輕鬆建置和部署雲端應用程式。 Wing 使得在單一模型中編寫基礎設施程式碼 (terraform) 和應用程式程式碼成為可能。 Wing 附帶一個標準函式庫“cloud”,並有“Api”方法。 Api 方法表示客戶端可以透過 Internet 呼叫的 HTTP 端點的集合。此 Api 方法可用於建立一個 API,該 API 可以作為後端 API 來儲存和擷取資料。 您可以嘗試使用 Winglang 語言並了解它在[遊樂場功能](http://winglang.io/play)中的工作原理。 讓我們建立一個 React 應用程式,它將連接到使用 Wing 建立的 API。 安裝 -- 在您的裝置中安裝[Wing 工具鏈](https://www.winglang.io/)。確保您的裝置中有 Node.js 18.13.0 或更高版本。要安裝 Wing Toolchain,請在您的裝置中執行以下命令 - ``` npm install -g winglang ``` 安裝[VS Code 市場](https://marketplace.visualstudio.com/items?itemName=Monada.vscode-wing)上提供的 Wing VS code 擴充。 您可以檢查已安裝的 Wing CLI 的版本: ``` wing --version ``` 建立專案 ---- 在檔案系統中建立專案目錄並為其指定所需的名稱。在 VS Code 中開啟此目錄。在專案目錄中建立一個名為 backend 的目錄。 在後端目錄中建立一個名為“main.w”的文件,並將以下程式碼貼到其中: ``` bring cloud; let queue = new cloud.Queue(); let bucket = new cloud.Bucket(); let counter = new cloud.Counter(); queue.setConsumer(inflight (body: str): void => { let next = counter.inc(); let key = "key-{next}"; bucket.put(key, body); }); ``` *注意:如果您在整個過程中遇到任何困難,我們建議您加入我們的[Slack 頻道](https://t.winglang.io/slack)* 在本地執行 Wing 工具鏈以檢查其是否按預期工作。在終端機中執行此命令: ``` wing run backend/main.w ``` 輸出顯示將是: 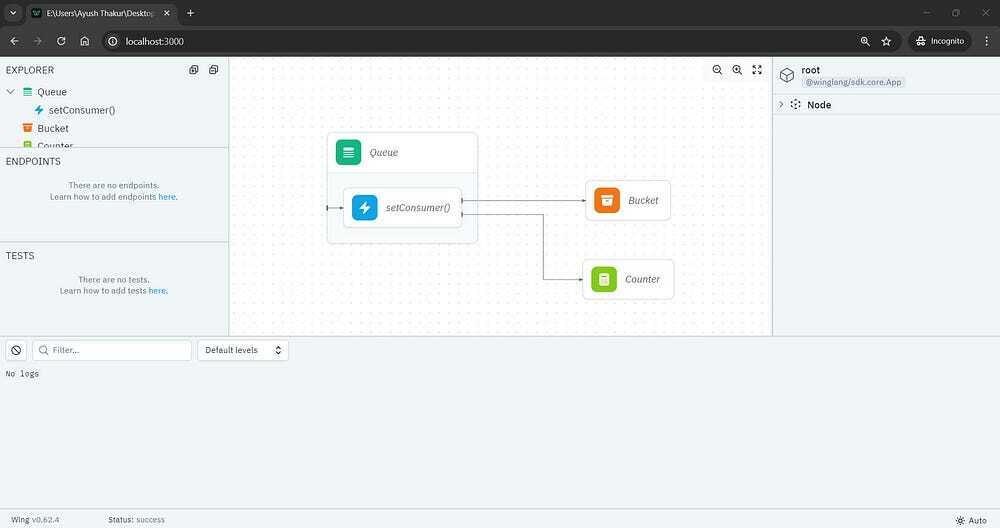 這是 Wing Console,它充當模擬器,您可以在其中嘗試、測試和試驗雲端應用程式,看看它是否正常工作。 建立反應應用程式 -------- 現在讓我們建立一個 React App 作為前端,然後將其連接到我們建立的 Wing 後端。 我們將使用`create-react-app`在您的專案目錄中建立 React App。確保您位於主專案目錄內,而不是後端目錄內。 打開一個新終端機並執行以下命令: ``` npx create-react-app client cd client npm i --save @babel/plugin-proposal-private-property-in-object npm start ``` 一旦您看到 React 應用程式成功執行,您可以使用`CTRL+C`關閉伺服器。 連接Wing後端 -------- 現在,我們將 Wing 後端連接到我們的 React 應用程式。它將允許我們從 Wing 後端獲取資料並將其顯示在使用者介面上。 開啟`backend/main.w`檔案並將其內容替換為: 對於 Windows: ``` bring ex; bring cloud; let react = new ex.ReactApp( useBuildCommand: true, projectPath: "../client", buildCommand: "npm run start", ); ``` 對於Linux: ``` bring ex; bring cloud; let react = new ex.ReactApp( projectPath: "../client", ); ``` 使用`CTRL+C`終止`wing run`正在執行的終端,並使用設定`BROWSER=none`環境變數再次執行它: 對於 Windows: ``` set BROWSER=none wing run backend/main.w ``` 對於 Linux/Mac: ``` BROWSER=none wing run backend/main.w ``` `BROWSER=none`將限制 React 在每次執行時開啟一個新的瀏覽器視窗。 現在,您已經成功執行了一個連接到 Wing 工具鏈後端的 React 應用程式。 將配置從後端傳遞到前端 ----------- Wing 在`client/public/wing.js`中產生一個`wing.js`文件,該文件將配置從 Wing 後端傳遞到前端程式碼。 該文件的目前內容將包含: ``` // This file is generated by Wing window.wingEnv = {}; ``` 將以下程式碼加入`backend/main.w` : ``` react.addEnvironment("key1", "value1"); ``` 正在執行的`wing run`會將此鍵值對新增至`client/public/wing.js` : ``` // This file is generated by wing window.wingEnv = { "key1": "value1" }; ``` 現在,您需要將前端程式碼連結到`wing.js`檔案。將以下程式碼複製並貼上到`client/public/index.html`檔案中的`<title>`標記上方: ``` <script src="./wing.js"></script> ``` 我們將從後端獲取標題並將其顯示在 React 應用程式中。將`client/src/App.js`檔案中的「Learn React」(出現在第 18 行左右)字串替換為以下程式碼: ``` {window.wingEnv.title || "Learn React"} ``` 此表達式顯示從 React 應用程式中的 wingEnv 物件動態取得的標題。如果 wingEnv 物件沒有 title 屬性或 window.wingEnv.title 的值為假,它將顯示預設標題「Learn React」。 返回`backend/main.w`並加入以下程式碼: ``` react.addEnvironment("title", "Learn React with Wing"); ``` 這將在`wing.js`檔案中加入包含`Learn React with Wing`訊息的`title`鍵。 從後台取得標題 ------- 現在我們知道如何從客戶端向後端傳遞參數(資料)。我們可以使用這種做法在客戶端設定`window.wingEnv.apiUrl`並從後端取得標題。 我們需要透過在`backend/main.w`檔案中加入以下程式碼來啟用跨域資源共享(CORS): ``` let api = new cloud.Api( cors: true ); ``` 這會將`apiUrl`鍵和後端 API 的目前 URL 新增到`main.w`檔案中。 在後端 API 中建立`/title`路由。將此程式碼加入`backend/main.w`檔案: ``` api.get("/title", inflight () => { return { status: 200, body: "Hello from the API" }; }); ``` 當向`/tite`端點發出 GET 請求時,伺服器將使用 HTTP 狀態碼 200 和`Hello from the API`進行回應。 您可以根據您的意願更改此正文資訊。 將以下程式碼替換為`client/src/App.js`中的內容: ``` import logo from './logo.svg'; import { useEffect, useState } from "react"; import './App.css'; function App() { const [title, setTitle] = useState("Default Value"); const getTitle = async () => { const response = await fetch(`${window.wingEnv.apiUrl}/title`); setTitle(await response.text()); } useEffect(() => { getTitle(); }, []); return ( <div className="App"> <header className="App-header"> <img src={logo} className="App-logo" alt="logo" /> {title} </header> </div> ); } export default App; ``` 在這裡,我們使用`fetch`方法從後端 API 取得標題, `useState`和`useEffect`鉤子用於將取得的標題儲存在`title`變數中。 最終輸出將是: 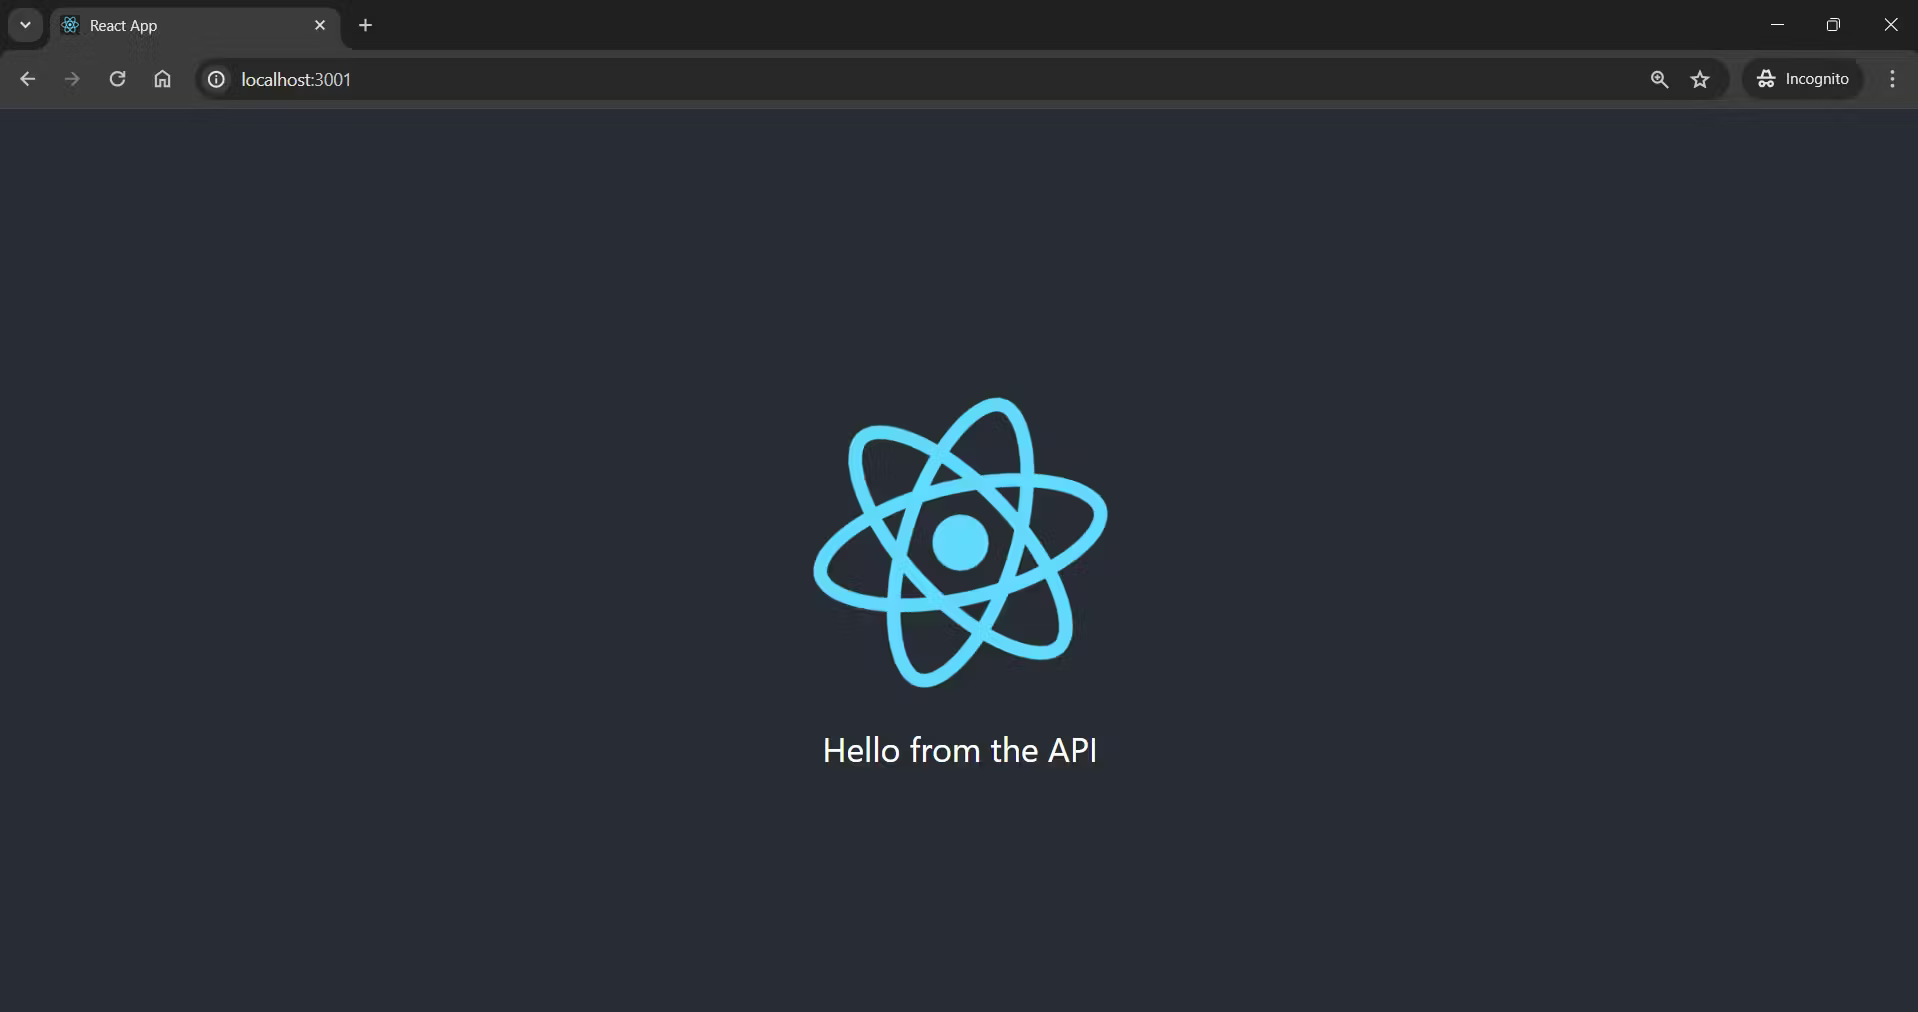 恭喜!您已成功建立一個從 Wing 工具鏈後端取得資料的 React 應用程式。 這就是您如何將資料儲存在 Winglang 後端並獲取它以將其顯示在前端 UI 上。 有什麼地方卡住了嗎?請查看我們的影片教程,我們已經實際解釋了整個過程: {% 嵌入 https://www.youtube.com/embed/LMDnTCRXzJU?si=vuFGkqoK2fKBXb00 %} --- 原文出處:https://dev.to/ayush2390/create-react-app-with-wing-30hm
**長話短說** -------- 在本文中,您將學習如何建立人工智慧驅動的電子表格應用程式,該應用程式允許您使用簡單的英語命令執行各種會計功能並輕鬆與資料互動。 我們將介紹如何: - 使用 Next.js 建立 Web 應用程式, - 使用 React Spreadsheet 建立電子表格應用程式,以及 - 使用 CopilotKit 將 AI 整合到軟體應用程式中。 - 讓電子表格更容易使用、更有趣  --- CopilotKit:建構應用內人工智慧副駕駛的框架 ========================== CopilotKit是一個[開源的AI副駕駛平台](https://github.com/CopilotKit/CopilotKit)。我們可以輕鬆地將強大的人工智慧整合到您的 React 應用程式中。 建造: - ChatBot:上下文感知的應用內聊天機器人,可以在應用程式內執行操作 💬 - CopilotTextArea:人工智慧驅動的文字字段,具有上下文感知自動完成和插入功能📝 - 聯合代理:應用程式內人工智慧代理,可以與您的應用程式和使用者互動🤖  {% cta https://github.com/CopilotKit/CopilotKit %} Star CopilotKit ⭐️ {% endcta %} (請原諒 AI 的拼字錯誤並給 CopilotKit 加上星號:) 現在回到文章! --- 先決條件 ---- 要完全理解本教程,您需要對 React 或 Next.js 有基本的了解。 以下是建立人工智慧驅動的電子表格應用程式所需的工具: - [React Spreadsheet](https://github.com/iddan/react-spreadsheet) - 一個簡單的包,使我們能夠在 React 應用程式中加入電子表格。 - [OpenAI API](https://platform.openai.com/api-keys) - 提供 API 金鑰,使我們能夠使用 ChatGPT 模型執行各種任務。 - [Tavily AI](https://tavily.com/) - 一個搜尋引擎,使人工智慧代理能夠在應用程式中進行研究並存取即時知識。 - [CopilotKit](https://github.com/CopilotKit) - 一個開源副駕駛框架,用於建立自訂 AI 聊天機器人、應用程式內 AI 代理程式和文字區域。 專案設定和套件安裝 --------- 首先,透過在終端機中執行以下程式碼片段來建立 Next.js 應用程式: ``` npx create-next-app spreadsheet-app ``` 選擇您首選的配置設定。在本教學中,我們將使用 TypeScript 和 Next.js App Router。 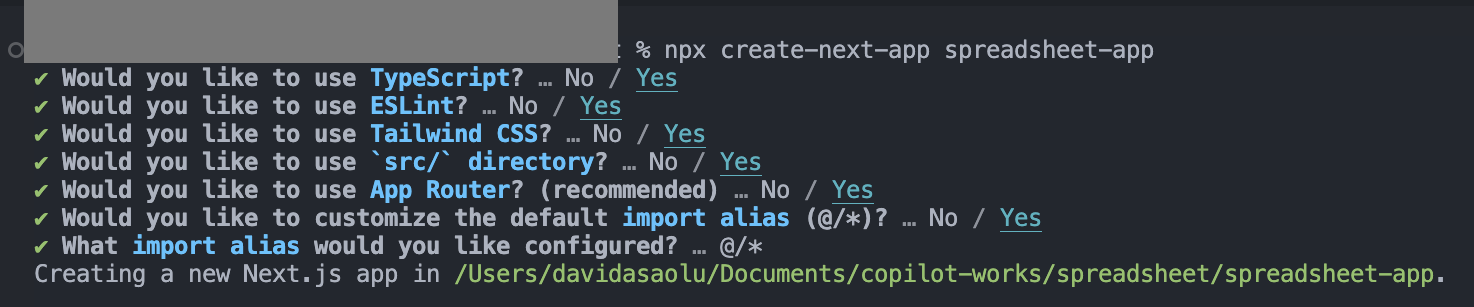 接下來,安裝[OpenAI 函式庫](https://platform.openai.com/docs/introduction)、 [Heroicons](https://www.npmjs.com/package/@heroicons/react)和[React Spreadsheet](https://github.com/iddan/react-spreadsheet)套件及其相依性: ``` npm install openai react-spreadsheet scheduler @heroicons/react ``` 最後,安裝 CopilotKit 軟體套件。這些套件使我們能夠從 React 狀態檢索資料並將 AI copilot 新增至應用程式。 ``` npm install @copilotkit/react-ui @copilotkit/react-textarea @copilotkit/react-core @copilotkit/backend ``` 恭喜!您現在已準備好建立應用程式。 --- 建立電子表格應用程式 ---------- 在本節中,我將引導您使用 React Spreadsheet 建立電子表格應用程式。 該應用程式分為兩個元件: `Sidebar`和`SingleSpreadsheet` 。 要設定這些元件,請導航至 Next.js 應用程式資料夾並建立一個包含以下檔案的`components`資料夾: ``` cd app mkdir components && cd components touch Sidebar.tsx SingleSpreadsheet.tsx ``` 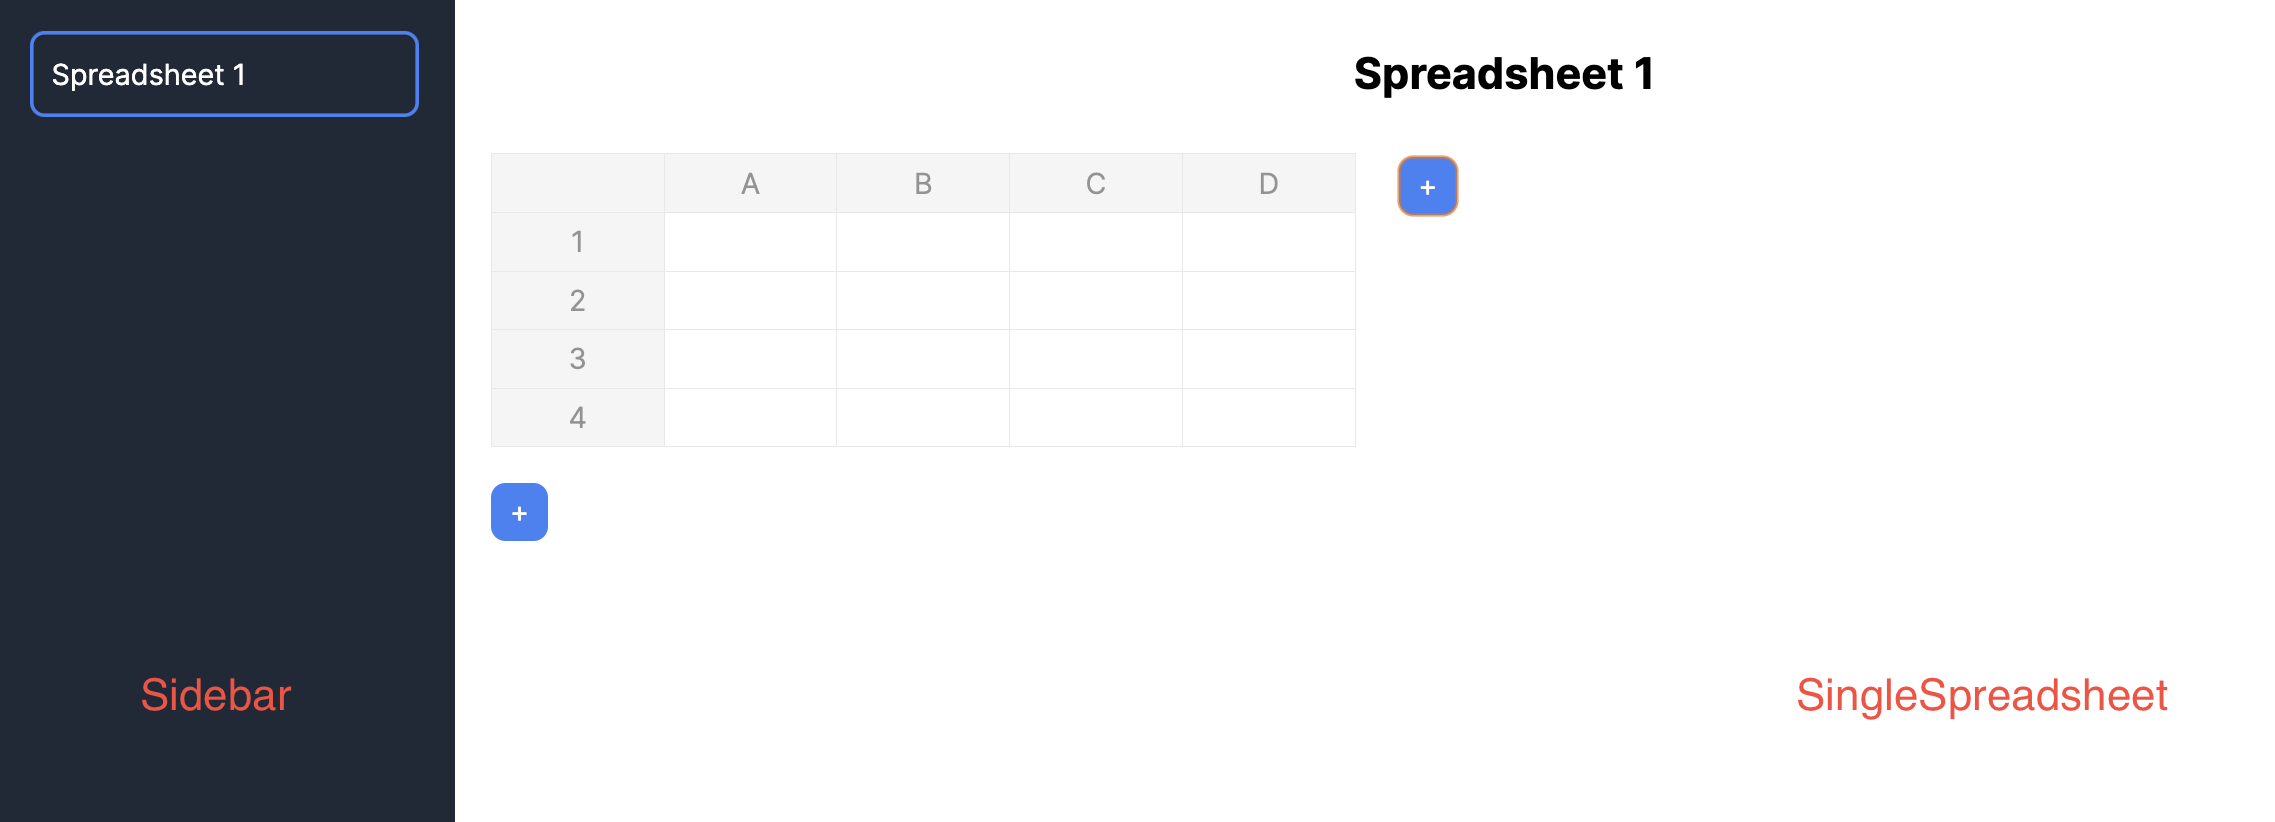 將新建立的元件匯入到**`app/page.tsx`**檔案中。 ``` "use client"; import React, { useState } from "react"; //👇🏻 import the components import { SpreadsheetData } from "./types"; import Sidebar from "./components/Sidebar"; import SingleSpreadsheet from "./components/SingleSpreadsheet"; const Main = () => { return ( <div className='flex'> <p>Hello world</p> </div> ); }; export default Main; ``` 接下來,建立將包含電子表格資料的 React 狀態,並將它們作為 props 傳遞到元件中。 ``` const Main = () => { //👇🏻 holds the title and data within a spreadsheet const [spreadsheets, setSpreadsheets] = React.useState<SpreadsheetData[]>([ { title: "Spreadsheet 1", data: [ [{ value: "" }, { value: "" }, { value: "" }], [{ value: "" }, { value: "" }, { value: "" }], [{ value: "" }, { value: "" }, { value: "" }], ], }, ]); //👇🏻 represents the index of a spreadsheet const [selectedSpreadsheetIndex, setSelectedSpreadsheetIndex] = useState(0); return ( <div className='flex'> <Sidebar spreadsheets={spreadsheets} selectedSpreadsheetIndex={selectedSpreadsheetIndex} setSelectedSpreadsheetIndex={setSelectedSpreadsheetIndex} /> <SingleSpreadsheet spreadsheet={spreadsheets[selectedSpreadsheetIndex]} setSpreadsheet={(spreadsheet) => { setSpreadsheets((prev) => { console.log("setSpreadsheet", spreadsheet); const newSpreadsheets = [...prev]; newSpreadsheets[selectedSpreadsheetIndex] = spreadsheet; return newSpreadsheets; }); }} /> </div> ); }; ``` 此程式碼片段建立了 React 狀態,用於保存電子表格資料及其索引,並將它們作為 props 傳遞到元件中。 `Sidebar`元件接受所有可用的電子表格, `SingleSpreadsheet`元件接收所有電子表格,包括更新電子表格資料的`setSpreadsheet`函數。 將下面的程式碼片段複製到`Sidebar.tsx`檔案中。它顯示應用程式中的所有電子表格,並允許使用者在它們之間進行切換。 ``` import React from "react"; import { SpreadsheetData } from "../types"; interface SidebarProps { spreadsheets: SpreadsheetData[]; selectedSpreadsheetIndex: number; setSelectedSpreadsheetIndex: (index: number) => void; } const Sidebar = ({ spreadsheets, selectedSpreadsheetIndex, setSelectedSpreadsheetIndex, }: SidebarProps) => { return ( <div className='w-64 h-screen bg-gray-800 text-white overflow-auto p-5'> <ul> {spreadsheets.map((spreadsheet, index) => ( <li key={index} className={`mb-4 cursor-pointer ${ index === selectedSpreadsheetIndex ? "ring-2 ring-blue-500 ring-inset p-3 rounded-lg" : "p-3" }`} onClick={() => setSelectedSpreadsheetIndex(index)} > {spreadsheet.title} </li> ))} </ul> </div> ); }; export default Sidebar; ```  更新`SingleSpreadsheet.tsx`文件,如下所示: ``` import React from "react"; import Spreadsheet from "react-spreadsheet"; import { SpreadsheetData, SpreadsheetRow } from "../types"; interface MainAreaProps { spreadsheet: SpreadsheetData; setSpreadsheet: (spreadsheet: SpreadsheetData) => void; } //👇🏻 adds a new row to the spreadsheet const addRow = () => { const numberOfColumns = spreadsheet.rows[0].length; const newRow: SpreadsheetRow = []; for (let i = 0; i < numberOfColumns; i++) { newRow.push({ value: "" }); } setSpreadsheet({ ...spreadsheet, rows: [...spreadsheet.rows, newRow], }); }; //👇🏻 adds a new column to the spreadsheet const addColumn = () => { const spreadsheetData = [...spreadsheet.data]; for (let i = 0; i < spreadsheet.data.length; i++) { spreadsheet.data[i].push({ value: "" }); } setSpreadsheet({ ...spreadsheet, data: spreadsheetData, }); }; const SingleSpreadsheet = ({ spreadsheet, setSpreadsheet }: MainAreaProps) => { return ( <div className='flex-1 overflow-auto p-5'> {/** -- Spreadsheet title ---*/} <div className='flex items-start'> {/** -- Spreadsheet rows and columns---*/} {/** -- Add column button ---*/} </div> {/** -- Add row button ---*/} </div> ); }; export default SingleSpreadsheet; ``` - 從上面的程式碼片段來看, ``` - The `SingleSpreadsheet.tsx` file includes the addRow and addColumn functions. ``` ``` - The `addRow` function calculates the current number of rows, adds a new row, and updates the spreadsheet accordingly. ``` ``` - Similarly, the `addColumn` function adds a new column to the spreadsheet. ``` ``` - The `SingleSpreadsheet` component renders placeholders for the user interface elements. ``` 更新`SingleSpreadsheet`元件以呈現電子表格標題、其資料以及新增行和列按鈕。 ``` return ( <div className='flex-1 overflow-auto p-5'> {/** -- Spreadsheet title ---*/} <input type='text' value={spreadsheet.title} className='w-full p-2 mb-5 text-center text-2xl font-bold outline-none bg-transparent' onChange={(e) => setSpreadsheet({ ...spreadsheet, title: e.target.value }) } /> {/** -- Spreadsheet rows and columns---*/} <div className='flex items-start'> <Spreadsheet data={spreadsheet.data} onChange={(data) => { console.log("data", data); setSpreadsheet({ ...spreadsheet, data: data as any }); }} /> {/** -- Add column button ---*/} <button className='bg-blue-500 text-white rounded-lg ml-6 w-8 h-8 mt-0.5' onClick={addColumn} > + </button> </div> {/** -- Add row button ---*/} <button className='bg-blue-500 text-white rounded-lg w-8 h-8 mt-5 ' onClick={addRow} > + </button> </div> ); ``` 為了確保一切按預期工作,請在`app`資料夾中建立一個`types.ts`文件,其中包含應用程式中聲明的所有靜態類型。 ``` export interface Cell { value: string; } export type SpreadsheetRow = Cell[]; export interface SpreadsheetData { title: string; rows: SpreadsheetRow[]; } ``` 恭喜! 🎉 您的電子表格應用程式應該可以完美執行。在接下來的部分中,您將了解如何新增 AI 副駕駛,以使用 CopilotKit 自動執行各種任務。 --- 使用 CopilotKit 改進應用程式功能 ---------------------- 在這裡,您將學習如何將 AI 副駕駛加入到電子表格應用程式,以使用 CopilotKit 自動執行複雜的操作。 CopilotKit 提供前端和[後端](https://docs.copilotkit.ai/getting-started/quickstart-backend)套件。它們使您能夠插入 React 狀態並使用 AI 代理在後端處理應用程式資料。 首先,我們將 CopilotKit React 元件新增到應用程式前端。 ### 將 CopilotKit 加入前端 在`app/page.tsx`中,將以下程式碼片段加入`Main`元件的頂部。 ``` import "@copilotkit/react-ui/styles.css"; import { CopilotKit } from "@copilotkit/react-core"; import { CopilotSidebar } from "@copilotkit/react-ui"; import { INSTRUCTIONS } from "./instructions"; const HomePage = () => { return ( <CopilotKit url='/api/copilotkit'> <CopilotSidebar instructions={INSTRUCTIONS} labels={{ initial: "Welcome to the spreadsheet app! How can I help you?", }} defaultOpen={true} clickOutsideToClose={false} > <Main /> </CopilotSidebar> </CopilotKit> ); }; const Main = () => { //--- Main component // }; export default HomePage; ``` - 從上面的程式碼片段來看, ``` - I imported the CopilotKit, its sidebar component, and CSS file to use its frontend components within the application. ``` ``` - The [CopilotKit component](https://docs.copilotkit.ai/reference/CopilotKit) accepts a `url` prop that represents the API server route where CopilotKit will be configured. ``` ``` - The Copilot component also renders the [CopilotSidebar component](https://docs.copilotkit.ai/reference/CopilotSidebar) , allowing users to provide custom instructions to the AI copilot within the application. ``` ``` - Lastly, you can export the `HomePage` component containing the `CopilotSidebar` and the `Main` components. ``` 從上面的程式碼片段中,您會注意到`CopilotSidebar`元件有一個`instructions`屬性。此屬性使您能夠為 CopilotKit 提供額外的上下文或指導。 因此,在`app`資料夾中建立`instructions.ts`檔案並將這些[命令](https://github.com/CopilotKit/spreadsheet-demo/blob/main/src/app/instructions.ts)複製到該檔案中。 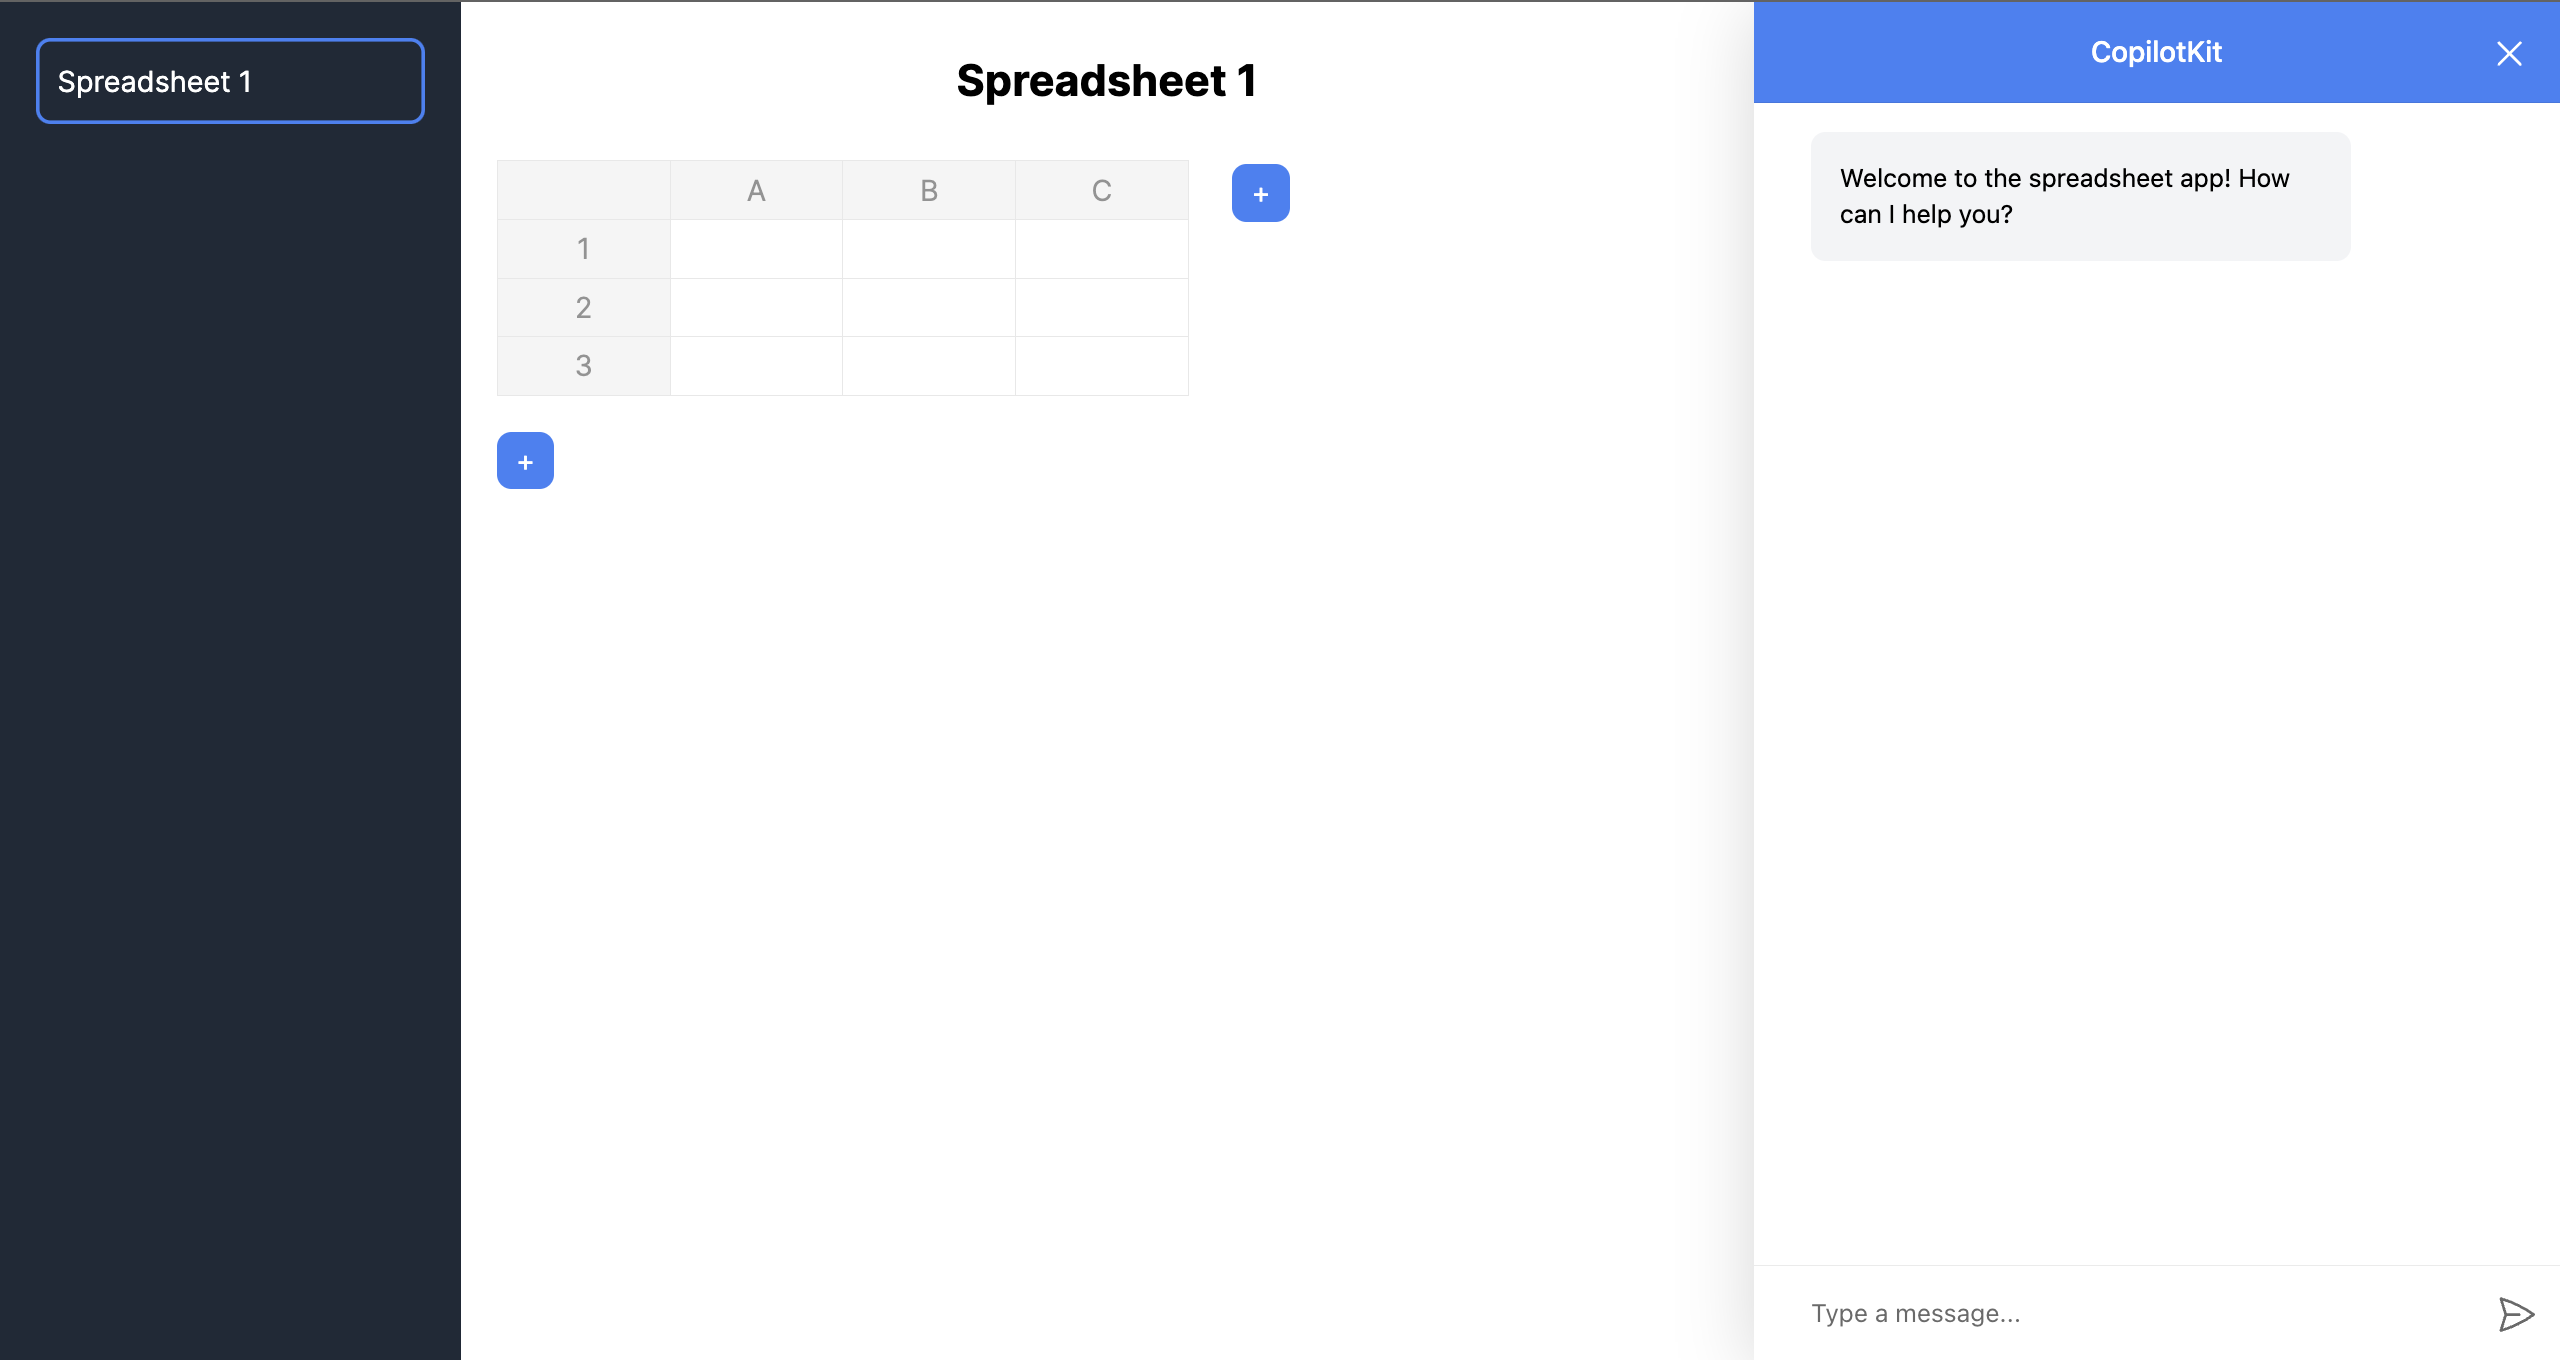 接下來,您需要將 CopilotKit 插入應用程式的狀態以存取應用程式的資料。為了實現這一點,CopilotKit 提供了兩個鉤子: [useCopilotAction](https://docs.copilotkit.ai/reference/useCopilotAction)和[useMakeCopilotReadable](https://docs.copilotkit.ai/reference/useMakeCopilotReadable) 。 [useCopilotAction](https://docs.copilotkit.ai/reference/useCopilotAction)掛鉤可讓您定義 CopilotKit 執行的動作。它接受包含以下參數的物件: - `name` - 操作的名稱。 - `description` - 操作的描述。 - `parameters` - 包含所需參數清單的陣列。 - `render` - 預設的自訂函數或字串。 - `handler` - 由操作觸發的可執行函數。 ``` useCopilotAction({ name: "sayHello", description: "Say hello to someone.", parameters: [ { name: "name", type: "string", description: "name of the person to say greet", }, ], render: "Process greeting message...", handler: async ({ name }) => { alert(`Hello, ${name}!`); }, }); ``` [useMakeCopilotReadable](https://docs.copilotkit.ai/reference/useMakeCopilotReadable)掛鉤向 CopilotKit 提供應用程式狀態。 ``` import { useMakeCopilotReadable } from "@copilotkit/react-core"; const appState = ...; useMakeCopilotReadable(JSON.stringify(appState)); ``` 現在,讓我們回到電子表格應用程式。在`SingleSpreadsheet`元件中,將應用程式狀態傳遞到 CopilotKit 中,如下所示。 ``` import { useCopilotAction, useMakeCopilotReadable, } from "@copilotkit/react-core"; const SingleSpreadsheet = ({ spreadsheet, setSpreadsheet }: MainAreaProps) => { //👇🏻 hook for providing the application state useMakeCopilotReadable( "This is the current spreadsheet: " + JSON.stringify(spreadsheet) ); // --- other lines of code }; ``` 接下來,您需要在`SingleSpreadsheet`元件中新增兩個操作,該元件在使用者更新電子表格資料並使用 CopilotKit 新增資料行時執行。 在繼續之前,請在`app`資料夾中建立一個包含`canonicalSpreadsheetData.ts`檔案的`utils`資料夾。 ``` cd app mkdir utils && cd utils touch canonicalSpreadsheetData.ts ``` 將下面的程式碼片段複製到檔案中。它接受對電子表格所做的更新,並將其轉換為電子表格中資料行所需的格式。 ``` import { SpreadsheetRow } from "../types" export interface RowLike { cells: CellLike[] | undefined; } export interface CellLike { value: string; } export function canonicalSpreadsheetData( rows: RowLike[] | undefined ): SpreadsheetRow[] { const canonicalRows: SpreadsheetRow[] = []; for (const row of rows || []) { const canonicalRow: SpreadsheetRow = []; for (const cell of row.cells || []) { canonicalRow.push({value: cell.value}); } canonicalRows.push(canonicalRow); } return canonicalRows; } ``` 現在,讓我們使用`SingleSpreadsheet`元件中的`useCopilotAction`掛鉤建立操作。複製下面的第一個操作: ``` import { canonicalSpreadsheetData } from "../utils/canonicalSpreadsheetData"; import { PreviewSpreadsheetChanges } from "./PreviewSpreadsheetChanges"; import { SpreadsheetData, SpreadsheetRow } from "../types"; import { useCopilotAction } from "@copilotkit/react-core"; useCopilotAction({ name: "suggestSpreadsheetOverride", description: "Suggest an override of the current spreadsheet", parameters: [ { name: "rows", type: "object[]", description: "The rows of the spreadsheet", attributes: [ { name: "cells", type: "object[]", description: "The cells of the row", attributes: [ { name: "value", type: "string", description: "The value of the cell", }, ], }, ], }, { name: "title", type: "string", description: "The title of the spreadsheet", required: false, }, ], render: (props) => { const { rows } = props.args const newRows = canonicalSpreadsheetData(rows); return ( <PreviewSpreadsheetChanges preCommitTitle="Replace contents" postCommitTitle="Changes committed" newRows={newRows} commit={(rows) => { const updatedSpreadsheet: SpreadsheetData = { title: spreadsheet.title, rows: rows, }; setSpreadsheet(updatedSpreadsheet); }} /> ) }, handler: ({ rows, title }) => { // Do nothing. // The preview component will optionally handle committing the changes. }, }); ``` 上面的程式碼片段執行使用者的任務並使用 CopilotKit 產生 UI 功能顯示結果預覽。 `suggestSpreadsheetOverride`操作傳回一個自訂元件 ( `PreviewSpreadsheetChanges` ),該元件接受以下內容為 props: - 要新增到電子表格的新資料行, - 一些文字 - `preCommitTitle`和`postCommitTitle` ,以及 - 更新電子表格的`commit`函數。 您很快就會學會如何使用它們。 在元件資料夾中建立`PreviewSpreadsheetChanges`元件,並將下列程式碼片段複製到檔案中: ``` import { CheckCircleIcon } from '@heroicons/react/20/solid' import { SpreadsheetRow } from '../types'; import { useState } from 'react'; import Spreadsheet from 'react-spreadsheet'; export interface PreviewSpreadsheetChanges { preCommitTitle: string; postCommitTitle: string; newRows: SpreadsheetRow[]; commit: (rows: SpreadsheetRow[]) => void; } export function PreviewSpreadsheetChanges(props: PreviewSpreadsheetChanges) { const [changesCommitted, setChangesCommitted] = useState(false); const commitChangesButton = () => { return ( <button className="inline-flex items-center gap-x-2 rounded-md bg-indigo-600 px-3.5 py-2.5 text-sm font-semibold text-white shadow-sm hover:bg-indigo-500 focus-visible:outline focus-visible:outline-2 focus-visible:outline-offset-2 focus-visible:outline-indigo-600" onClick={() => { props.commit(props.newRows); setChangesCommitted(true); }} > {props.preCommitTitle} </button> ); } const changesCommittedButtonPlaceholder = () => { return ( <button className=" inline-flex items-center gap-x-2 rounded-md bg-gray-100 px-3.5 py-2.5 text-sm font-semibold text-green-600 shadow-sm cursor-not-allowed" disabled > {props.postCommitTitle} <CheckCircleIcon className="-mr-0.5 h-5 w-5" aria-hidden="true" /> </button> ); } return ( <div className="flex flex-col"> <Spreadsheet data={props.newRows} /> <div className="mt-5"> {changesCommitted ? changesCommittedButtonPlaceholder() : commitChangesButton() } </div> </div> ); } ``` `PreviewSpreadsheetChanges`元件傳回一個電子表格,其中包含從請求產生的資料和一個按鈕(帶有`preCommitTitle`文字),該按鈕允許您將這些變更提交到主電子表格表(透過觸發`commit`函數)。這可確保您在將結果新增至電子表格之前對結果感到滿意。 將下面的第二個操作加入到`SingleSpreadsheet`元件。 ``` useCopilotAction({ name: "appendToSpreadsheet", description: "Append rows to the current spreadsheet", parameters: [ { name: "rows", type: "object[]", description: "The new rows of the spreadsheet", attributes: [ { name: "cells", type: "object[]", description: "The cells of the row", attributes: [ { name: "value", type: "string", description: "The value of the cell", }, ], }, ], }, ], render: (props) => { const status = props.status; const { rows } = props.args const newRows = canonicalSpreadsheetData(rows); return ( <div> <p>Status: {status}</p> <Spreadsheet data={newRows} /> </div> ) }, handler: ({ rows }) => { const canonicalRows = canonicalSpreadsheetData(rows); const updatedSpreadsheet: SpreadsheetData = { title: spreadsheet.title, rows: [...spreadsheet.rows, ...canonicalRows], }; setSpreadsheet(updatedSpreadsheet); }, }); ``` `appendToSpreadsheet`操作透過在電子表格中新增資料行來更新電子表格。 以下是操作的簡短示範: \[https://www.youtube.com/watch?v=kGQ9xl5mSoQ\] 最後,在`Main`元件中新增一個操作,以便在使用者提供指令時建立一個新的電子表格。 ``` useCopilotAction({ name: "createSpreadsheet", description: "Create a new spreadsheet", parameters: [ { name: "rows", type: "object[]", description: "The rows of the spreadsheet", attributes: [ { name: "cells", type: "object[]", description: "The cells of the row", attributes: [ { name: "value", type: "string", description: "The value of the cell", }, ], }, ], }, { name: "title", type: "string", description: "The title of the spreadsheet", }, ], render: (props) => { const { rows, title } = props.args; const newRows = canonicalSpreadsheetData(rows); return ( <PreviewSpreadsheetChanges preCommitTitle="Create spreadsheet" postCommitTitle="Spreadsheet created" newRows={newRows} commit={ (rows) => { const newSpreadsheet: SpreadsheetData = { title: title || "Untitled Spreadsheet", rows: rows, }; setSpreadsheets((prev) => [...prev, newSpreadsheet]); setSelectedSpreadsheetIndex(spreadsheets.length); }} /> ); }, handler: ({ rows, title }) => { // Do nothing. // The preview component will optionally handle committing the changes. }, }); ``` 恭喜!您已成功為此應用程式建立所需的操作。現在,讓我們將應用程式連接到 Copilotkit 後端。 ### 將 Tavily AI 和 OpenAI 加入到 CopilotKit 在本教程的開頭,我向您介紹了[Tavily AI](https://tavily.com/) (一個為 AI 代理提供知識的搜尋引擎)和 OpenAI(一個使我們能夠存取[GPT-4 AI 模型的](https://openai.com/gpt-4)庫)。 在本部分中,您將了解如何取得 Tavily 和 OpenAI API 金鑰並將它們整合到 CopilotKit 中以建立高級智慧應用程式。 造訪[Tavily AI 網站](https://app.tavily.com/sign-in),建立一個帳戶,然後將您的 API 金鑰複製到您專案的`.env.local`檔案中。 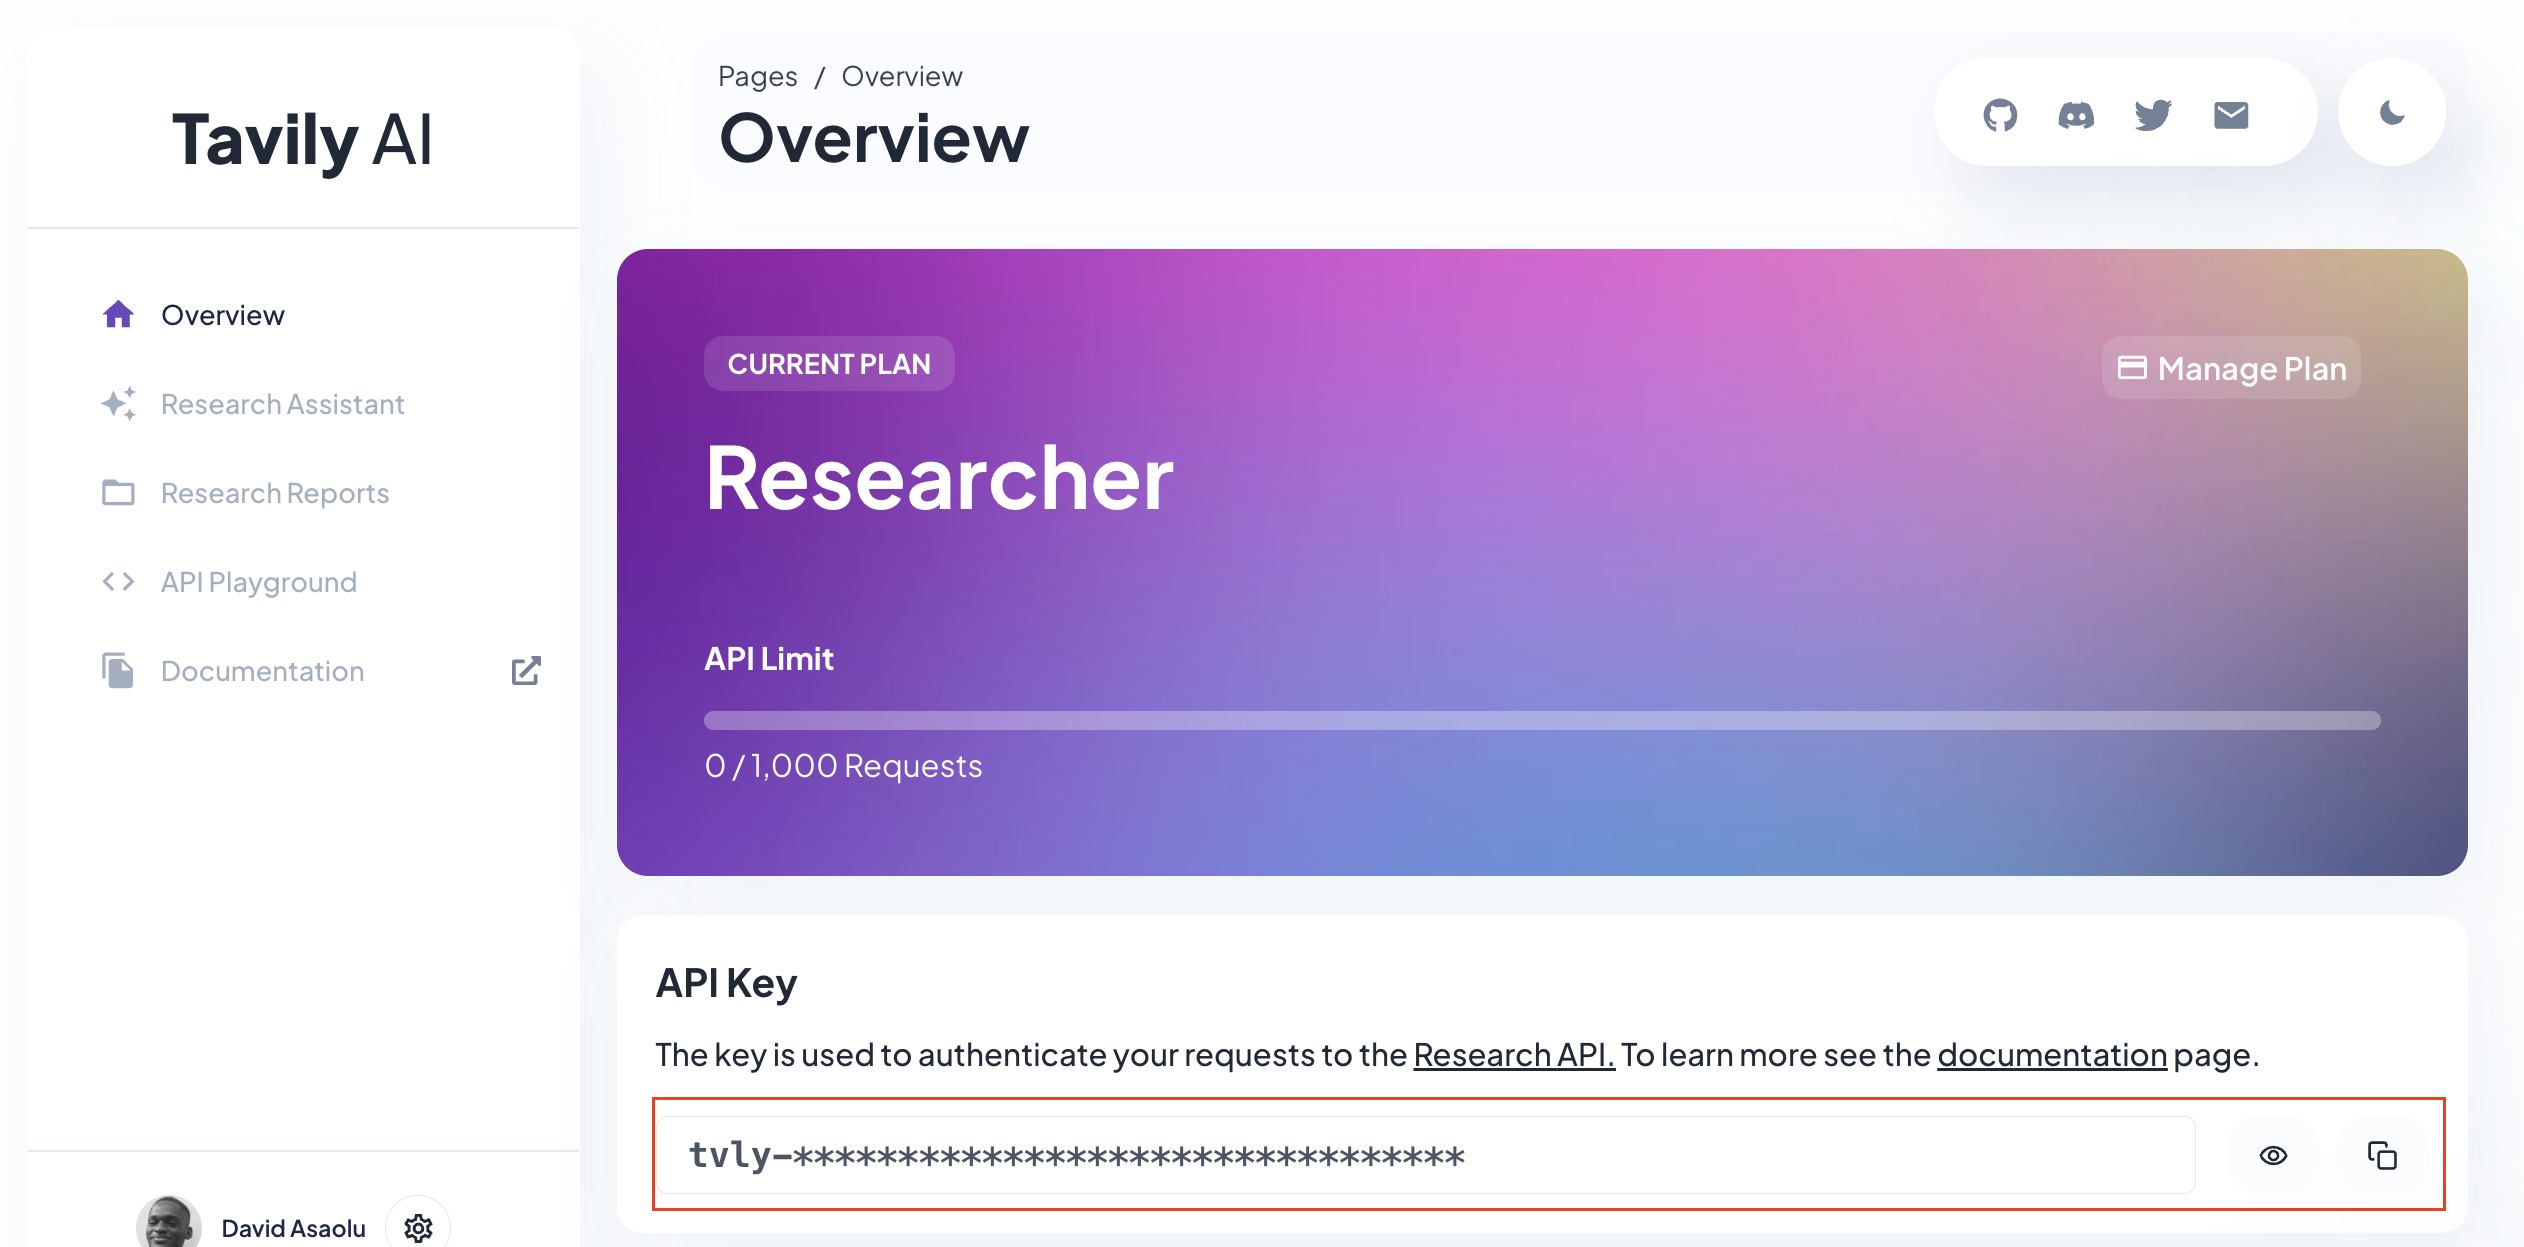 接下來,導覽至[OpenAI 開發者平台](https://platform.openai.com/api-keys),建立 API 金鑰,並將其複製到`.env.local`檔案中。 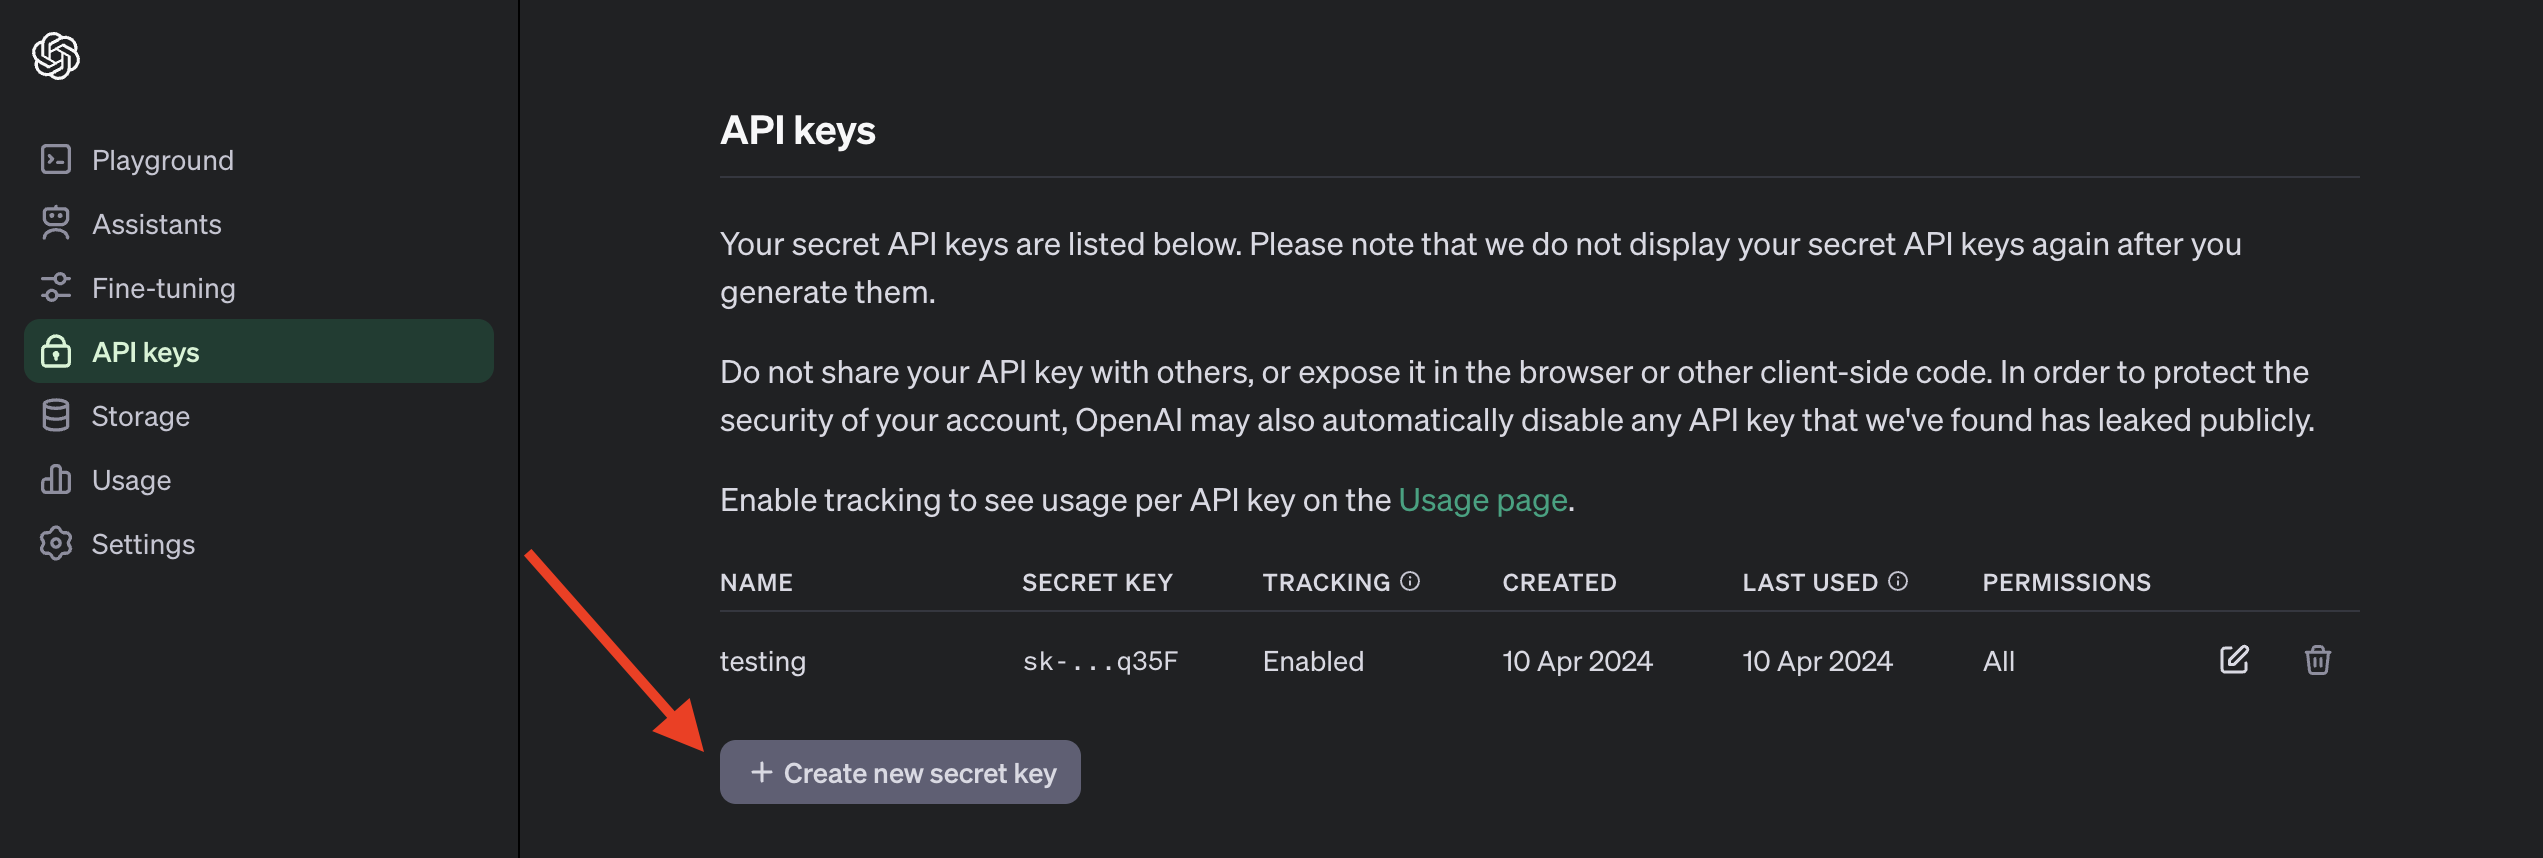 以下是`.env.local`檔案的預覽,其中包括 API 金鑰並指定要使用的 OpenAI 模型。請注意,存取 GPT-4 模型需要[訂閱 ChatGPT Plus](https://openai.com/chatgpt/pricing) 。 ``` TAVILY_API_KEY=<your_API_key> OPENAI_MODEL=gpt-4-1106-preview OPENAI_API_KEY=<your_API_key> ``` 回到我們的應用程式,您需要為 Copilot 建立 API 路由。因此,建立一個包含`route.ts`的`api/copilotkit`資料夾並新增一個`tavily.ts`檔案。 ``` cd app mkdir api && cd api mkdir copilotkit && cd copilotkit touch route.ts tavily.ts ``` 在`tavily.ts`檔案中建立一個函數,該函數接受使用者的查詢,使用 Tavily Search API 對查詢進行研究,並使用[OpenAI GPT-4 模型](https://openai.com/gpt-4)總結結果。 ``` import OpenAI from "openai"; export async function research(query: string) { //👇🏻 sends the request to the Tavily Search API const response = await fetch("https://api.tavily.com/search", { method: "POST", headers: { "Content-Type": "application/json", }, body: JSON.stringify({ api_key: process.env.TAVILY_API_KEY, query, search_depth: "basic", include_answer: true, include_images: false, include_raw_content: false, max_results: 20, }), }); //👇🏻 the response const responseJson = await response.json(); const openai = new OpenAI({ apiKey: process.env.OPENAI_API_KEY! }); //👇🏻 passes the response into the OpenAI GPT-4 model const completion = await openai.chat.completions.create({ messages: [ { role: "system", content: `Summarize the following JSON to answer the research query \`"${query}"\`: ${JSON.stringify( responseJson )} in plain English.`, }, ], model: process.env.OPENAI_MODEL, }); //👇🏻 returns the result return completion.choices[0].message.content; } ``` 最後,您可以透過將使用者的查詢傳遞到函數中並向 CopilotKit 提供其回應來執行`route.ts`檔案中的`research`函數。 ``` import { CopilotBackend, OpenAIAdapter } from "@copilotkit/backend"; import { Action } from "@copilotkit/shared"; import { research } from "./tavily"; //👇🏻 carries out a research on the user's query const researchAction: Action<any> = { name: "research", description: "Call this function to conduct research on a certain query.", parameters: [ { name: "query", type: "string", description: "The query for doing research. 5 characters or longer. Might be multiple words", }, ], handler: async ({ query }) => { console.log("Research query: ", query); const result = await research(query); console.log("Research result: ", result); return result; }, }; export async function POST(req: Request): Promise<Response> { const actions: Action<any>[] = []; if (process.env.TAVILY_API_KEY!) { actions.push(researchAction); } const copilotKit = new CopilotBackend({ actions: actions, }); const openaiModel = process.env.OPENAI_MODEL; return copilotKit.response(req, new OpenAIAdapter({ model: openaiModel })); } ``` 恭喜!您已完成本教學的專案。 結論 -- [CopilotKit](https://copilotkit.ai/)是一款令人難以置信的工具,可讓您在幾分鐘內將 AI Copilot 加入到您的產品中。無論您是對人工智慧聊天機器人和助理感興趣,還是對複雜任務的自動化感興趣,CopilotKit 都能讓您輕鬆實現。 如果您需要建立 AI 產品或將 AI 工具整合到您的軟體應用程式中,您應該考慮 CopilotKit。 您可以在 GitHub 上找到本教學的源程式碼: https://github.com/CopilotKit/spreadsheet-demo 感謝您的閱讀! --- 原文出處:https://dev.to/copilotkit/build-an-ai-powered-spreadsheet-app-nextjs-langchain-copilotkit-109d
--- 標題:加入我們,迎接下一個前端挑戰:地球日版! 發表:真實 描述: 標籤: frontendchallenge、devchallenge、js、css 封面圖:https://dev-to-uploads.s3.amazonaws.com/uploads/articles/emb626o0mysdsw32ox4k.png 使用 100:42 的比例可獲得最佳效果。 ===================== 發表於: 2024-04-17 14:14 +0000 =========================== --- 幾週前,我們開始了[第一個前端挑戰](https://dev.to/devteam/join-our-first-community-challenge-the-frontend-challenge-8be),並承諾如果社區喜歡參與,我們將定期舉辦這些挑戰 - 您的提交讓我們欣喜若狂,所以現在**我們又回來了**,我們的下一個前端挑戰! 對於下一個前端挑戰,我們將慶祝地球上最大的公民活動:**世界地球日**。 🌍🌏🌎 此挑戰有兩個提示。我們將為此挑戰帶回**CSS Art**和**Glam Up My Markup**提示 - 別擔心,One Byte Expander 將來會再次出現! 和上次一樣,每個提示都會有一個獲勝者,為了慶祝地球日,我們也將為此挑戰設置一個額外的獎品類別。這是贏得炫耀權、DEV 商店禮物和專屬 DEV 徽章的 3 次機會。與往常一樣,提交有效提交的參與者將獲得完成徽章。 *前端不是你的菜嗎?或者您正在尋找更大獎勵的挑戰? [Coze AI 機器人挑戰賽](https://dev.to/devteam/join-us-for-the-coze-ai-bot-challenge-3000-in-prizes-4dp7)現已開始,獎金池為 3,000 美元。* 繼續閱讀以了解每個提示以及如何參與! 提示 -- ### CSS 藝術:地球日 畫出您在地球日時想到的內容。這是我們美麗的星球嗎?它是提高人們對氣候變遷認識的象徵嗎?不管是什麼,告訴我們! 您提交的內容**不應使用任何 JavaScript** ,而應在 CSS 中發揮您的創造力。您提交的內容將包括標記,可能包括 SVG 等,但主要應該*展示*您的 CSS 技能。 **評審標準** - 創造力 - 有效使用CSS - 美感效果 這是供任何想要直接參與的人使用的提交模板,但請在提交之前查看[官方挑戰頁面](https://dev.to/challenges/frontend-2024-04-17)上的所有評審標準和挑戰規則。 {% cta https://dev.to/new?prefill=---%0Atitle%3A%20%0Apublished%3A%20%0Atags%3A%20frontendchallenge%2C%20devchallenge%2C%20css%0A---% 0A%0A\_This%20is%20a%20submission%20for%20%5BFrontend%20Challenge%20v24.04.17%5D(https%3A%2F%2Fdev.to%2Fdevteam%2Fjoin-us-for-the-next-frontend地球日版-52e4)%2C%20CSS%20Art%3A%20Earth%20Day.\_%0A%0A%23%23%20靈感%0A%3C!--%20What%20are%20you%20highlighting%20today% 3F %20--%3E%0A%0A%23%23%20Demo%20%0A%3C!--%20Show%20us%20your%20CSS%20Art!%20You%20can%20directly%20embed%20Art!%20You%20can%20directly%20embed%20an%20editor%20an%20editor%進入%20this%20post%20(參見%20the%20FAQ%20section%20of%20the%20challenge%20頁面)%20或%20you%20can%20share%20an%20image%20of%20your%20can%20share%20an%20image%20of%20your%20project%20% 20a%20public %20link%20到%20%20程式碼。 %2C%20what%20you %20已學會%2C%20anything%20you%20are%20尤其%20proud%20of%2C%20what%20you%20hope%20to%20do%20next%2C%20etc.%20--%3E %0A%0A%3C!-- %20Team%20Submissions%3A%20請%20pick%20one%20member%20to%20publish%20the%20submission%20and%20credit%20teammates%20by%20listing%20their%20DEV%20usernames%20directly %20in%20the%20body%20of%20the %20post.%20--%3E%0A%0A%3C!--%20We%20鼓勵%20you%20to%20考慮%20為%20your%20程式碼新增% 20a%20license%20。 %20想要)。 CSS 藝術挑戰提交模板 {% 結束%} ### 魅力我的標記:地球日慶祝活動登陸頁面 使用 CSS 和 JavaScript 使下面的入門 HTML 標記美觀、互動且有用。 您提交的內容應該比我們提供的 HTML 更有趣、更具互動性,而且還應該可用且易於存取。您不應直接編輯提供的 HTML,除非是透過 JavaScript。我們期待風格和實質。您可以加入基本樣板,包括元標記等以用於演示目的。 ``` <body> <header> <h1>Welcome to Our Earth Day Celebration!</h1> </header> <section> <article class="facts"> <h2>Did You Know?</h2> <p>Earth Day was first celebrated on April 22, 1970, and now includes a wide range of events coordinated globally by EARTHDAY.ORG including 1 billion people in more than 193 countries.</p> </article> <article> <h2>Why Celebrate Earth Day?</h2> <p>Earth Day is more than just a single day — April 22. It's a day to remind us to take action in our communities and beyond, to protect the environment, restore damaged ecosystems, and live a more sustainable life.</p> </article> <article> <h2>How You Can Help</h2> <p>Join us in making a difference! Here are some ways you can contribute to preserving our planet:</p> <ul> <li>Reduce, reuse, and recycle.</li> <li>Volunteer for cleanups in your community.</li> <li>Conserve water and electricity.</li> <li>Plant a tree.</li> <li>Educate others about environmental conservation.</li> </ul> </article> <div class="action-call"> <h2>Take Action Now</h2> <p>Join our Earth Day quiz to test your knowledge and learn more about what you can do to help our planet!</p> <a href="#">Start the Quiz!</a> </div> </section> <div class="testimonial"> <h2>Inspiration Corner</h2> <p>"The Earth does not belong to us: we belong to the Earth." - Marlee Matlin</p> <p>This Earth Day, let's remember we are part of a larger ecosystem and our actions have a profound impact on our planet.</p> </div> <div class="events"> <h2>Join an Event</h2> <p>Participate in local and global Earth Day events to take action towards a sustainable future. Check out <a href="#">events near you</a>.</p> </div> <footer> <p>Happy Earth Day! Together, we can make a difference.</p> </footer> </body> ``` **評審標準**: - 無障礙 - 可用性和使用者體驗 - 創造力 - 程式碼品質 這是供任何想要直接參與的人使用的提交模板,但請在提交之前查看[官方挑戰頁面](https://dev.to/challenges/frontend-2024-04-17)上的所有評審標準和挑戰規則。 {% cta https://dev.to/new?prefill=---%0Atitle%3A%20%0Apublished%3A%20%0Atags%3A%20devchallenge%2C%20frontendchallenge%2C%20css%2C%20javascript%2C%20frontendchallenge%2C%20css%2C%20javascript%0Ajava ---%0A%0A\_This%20is%20a%20submission%20for%20%5BFrontend%20Challenge%20v24.04.17%5D(https%3A%2F%2Fdev.to%2Fdevteam%2Fjoin-us-for-the-next前端挑戰-地球日-版本-52e4)%2C%20Glam%20Up%20My%20Markup%3A%20Earth%20Day%20Celebration%20Landing%20Page\_%0A%0A%23%23%20What%20I%20A0ABuilt% %3C!--%20告訴%20us%20什麼%20you%20built%20和%20what%20you%20是%20期待%20實現%20實現。 23%20示範%0A %3C!--%20Show%20us%20您的%20專案! 20the%20FAQ%20section%20from%20the%20challenge%20page )%20或%20you%20can%20share%20an%20image%20of%20your%20project%20and%20share%20a%20share%200%200%200%20share%程式碼。 20you%20are%20specially%20proud%20of%2C%20what%20you%20hope% 20至%20do%20next%2C%20等%20--%3E%0A%0A%3C!--%20團隊%20Submissions% 3A%20請%20pick%20one%20member%20至%20publish%20the%20submission%20and% 20credit%20teammates%20by%20listing%20their%20DEV%20usernames%20by%20listing%20their%20DEV%20usernames%20directthe%200%0%200inbody%200%200%200% %20--%3E%0A%0A%3C!--%20We%20encourage%20you% 20to%20考慮%20加入%20a%20許可證%20用於%20您的%20程式碼。 -%3E%0A%0A%3C! --%20Don%27t%20忘記%20to%20add%20a%20cover%20image%20to% 20您的%20貼文%20(如果%20您%20) 。 使我的標記提交模板更加迷人 {% 結束%} 附加獎類別 ----- 除了能夠贏得每個提示之外,我們還有一個特殊的獎品類別來紀念我們的星球: - 世界地球日:授予提高人們對氣候變遷認識的最佳提交作品。 除了前端挑戰賽獲勝者徽章和 DEV 商店贈送的禮物之外,我們的地球日獲勝者還將獲得一枚額外的超專屬徽章,用於展示其開發者檔案。 如何參與 ---- 為了參與,您需要使用提示的提交範本發布貼文。**您可以在[官方挑戰頁面](https://dev.to/challenges/frontend-2024-04-17)上找到所有評審標準、挑戰規則和提交範本。** 我們的規則和指南涵蓋了參賽要求、團隊提交、人工智慧的使用等主題,因此請務必仔細閱讀。 重要的日子 ----- 4 月 17 日:前端挑戰 v24.04.17 開始! 4 月 28 日:提交截止時間為太平洋夏令時間晚上 11:59 4 月 30 日:公佈得獎者  我們很高興看到您的地球日專案!問題?請在下面詢問他們。 祝你好運,編碼愉快! --- 原文出處:https://dev.to/devteam/join-us-for-the-next-frontend-challenge-earth-day-edition-52e4
--- 標題:加入我們參加 Coze AI 機器人挑戰賽:獎品為 3,000 美元! 發表:真實 描述: 標籤:cozechallenge、devchallenge、人工智慧、機器學習 封面圖:https://dev-to-uploads.s3.amazonaws.com/uploads/articles/lox2s2e29vq74sg0xcqn.jpg 使用 100:42 的比例可獲得最佳效果。 ===================== 發表於: 2024-04-16 19:51 +0000 =========================== --- 我們很高興與[Coze](https://www.coze.com)合作,為社群帶來我們的下一個人工智慧挑戰——這次,挑戰全部關於機器人以及建立與機器人相關的插件或工作流程! **[Coze AI 機器人挑戰賽](https://dev.to/challenges/coze)**將持續到 4 月 28 日,屆時您將有機會嘗試機器人開發平台、免費在 GPT-4 上建立、部署強大的功能並贏得現金獎勵。此挑戰有兩種提示,但獲勝方式有四種! Coze 為開發人員提供了一種低門檻的方式來利用人工智慧模型並建立令人難以置信的東西,因此無論您的經驗水平如何,我們都真誠地希望您嘗試! 提示 -- ### 機器人創新者 突破技術限制,**建立具有特定且引人注目的用例的強大機器人**。向我們展示您的機器人可以做些什麼! **評審標準** - 底層技術的使用 - 產品化或貨幣化潛力 - 用例的流行潛力 這是供任何想要直接參與的人使用的提交模板,但請在提交之前查看[官方挑戰頁面](https://dev.to/challenges/coze)上的所有挑戰規則。 {% cta https://dev.to/new?prefill=---%0Atitle%3A%20%0Apublished%3A%20%0Atags%3A%20cozechallenge%2C%20devchallenge%2C%20ai%2C%20machinelearning%0A ---%0A%0A*這%20是%20a%20submission%20for%20the%20%5BCoze%20AI%20Bot%20Challenge%5D(https%3A%2F%2Fdev.to%2Fdevteam%2Fjoin-us-for- the -coze-ai-bot-challenge-3000-in-prizes-4dp7)%3A%20Bot%20創新者。* %0A%0A%23%23%20What%20I%20Built%0A%3C! --%20告訴%20us%20what%20your%20bot%20does%2C%20who%20it%27s%20for%2C%20and%20what20 % 20問題%20it%20解決%20--%3E%0A%0A%23%23%20Demo%0A%0A%3C!--%20Share%20a%20link%20to%20your%20bot%20in%20the% 20Coze%20Bot %20商店%20和%20包括%20螢幕截圖%20或%20錄音%20展示%20a%20用戶%27s%20聊天%20介面%20與%20your%20bot。 %3E%0A%0A%0A%23%23%20Your% 20配置%0A%0A%3C!--%20螢幕截圖%20或%20記錄%20您的%20bot%27s%20配置%2C% 20包括%20提示%20和%20技能%20已使用。 20about%20your%20process%2C%20what%20you%20learn%2C%20anything%20you%20are%20尤其%20proud%20of%2C%20what %20you%20hope%20to%20do%20next%C%C%20next. -%3E%0A%0A%3C!--%20團隊%20Submissions%3A%20請%20pick%20one%20member%20to%20publish%20the %20submission%20and%20credit%20隊友%20by%他們0listing%20by%他們0listing%20by%的%20DEV%20用戶名%20直接%20in%20the%20body%20of%20the%20post。 20a%20cover%20image%20(如果%20you%20想要)。 %} 機器人創新者提交模板 {% 結束%} ### 烘焙開拓者 透過在 Coze 上建立高品質的自訂外掛程式或自訂工作流程,為未來的 Coze 開發人員開闢一條新道路。在生態系統中留下您的印記! **評審標準** - 底層技術的使用 - 穩健性 - 用例的流行潛力 這是供任何想要直接參與的人使用的提交模板,但請在提交之前查看[官方挑戰頁面](https://dev.to/challenges/coze)上的所有挑戰規則。 {% cta https://dev.to/new?prefill=---%0Atitle%3A%20%0Apublished%3A%20%0Atags%3A%20cozechallenge%2C%20devechallenge%2C%20ai%2C%20machinelearning%0A ---%0A%0A*這%20是%20a%20submission%20for%20the%20%5BCoze%20AI%20Bot%20Challenge%5D(https%3A%2F%2Fdev.to%2Fdevteam%2Fjoin-us-for- the -coze-ai-bot-challenge-3000-in-prizes-4dp)%3A%20Trailblazer。* %0A%0A%23%23%20What%20I%20Built%0A%3C! --%20告訴%20us%20what%20your%20plugin%20or%20workflow%20does%20and%20what%20problemsol020 - -%3E%0A%0A%23%23%20Demo%0A%0A%3C!--%20If%20submitting%20a%20plugin%2C%20share%20a%20link%20to%20your%20plugin%20in%20the% 20Coze %20Plugin%20Store%20--%3E%0A%0A%3C!--%20Screenshot%20or%20record%20your%20plugin%2Fworkflow%20setup%20and%20show%20us%200%20itdo%) 20 %20--%3E%0A%0A%23%23%20旅程%0A%0A%3C!--%20告訴%20us%20about%20your%20process%2C%20what%20you%20learned%2C%20anything %20you% 20是%20特別%20自豪%20的%2C%20什麼%20你%20希望%20到%20做%20下一個%2C%20等%20--%3E%0A%0A %3C!--%20團隊%20提交%3A%20請% 20pick%20one%20member%20to%20publish%20the%20submission%20and%20credit%20teammates%20by%20listing%20their%usernameDEVdit%20teammates%20by%20listing%20their% %20the%20body%20of%20the%20post。 ).%20--%3E%0A%0A%3C!-- %20感謝%20%20的參與!%20--%3E%0A %} 科茲開拓者提交模板 {% 結束%} ### 附加獎品類別 除了能夠贏得每個提示之外,您還可以爭取另外兩個獎品類別: - 最受歡迎:授予擁有大量用戶的頂級提交。 - 最具創意:授予具有獨特且富有創意的用例的最佳提交作品。 專業提示:儘早提交,以便您可以更快地將專案交到使用者手中!如果您正在建立聊天機器人,我們鼓勵您跨社交平台和訊息應用程式(例如 Discord、Telegram 和 Slack)部署您的專案,以便您的朋友和家人可以與您的機器人互動! 獎品 -- 我們的四位獲獎者將獲得以下獎品: **即時獲勝者 (2)** - $1,000 禮品卡或同等金額 - 專屬開發者徽章 - 來自[DEV 商店](https://shop.forem.com)的禮物 **其他獎項類別得獎者 (2)** - $500 禮品卡或同等金額 - 專屬開發者徽章 - 來自[DEV 商店](https://shop.forem.com)的禮物 **所有提交有效提交的參與者都**將在其 DEV 個人資料中收到完成徽章。 如何參與 ---- 為了參與,您需要使用提示的提交範本發布貼文。所有參與挑戰的機器人都應在[Coze Bot Store](https://www.coze.com/store/bot)中發布,所有插件都應在[Coze Plugin Store](https://www.coze.com/store/plugin)中發布。 Coze Workflow Marketplace 仍在開發中,因此工作流程只需在您提交的內容中作為直接連結進行共用。 目前,您在 Coze 開發平台上建立機器人、插件或工作流程所需的一切都是免費的,因此入門沒有任何障礙! 所有提交的作品都將基於免費平台進行評審,因此任何使用 Coze 的 API(付費服務)的行為都將在評審過程中被考慮。 {% cta https://dev.to/new?prefill=---%0Atitle%3A%20%0Apublished%3A%20%0Atags%3A%20cozechallenge%2C%20devchallenge%2C%20ai%2C%20machinelearning%0A ---%0A%0A*這%20是%20a%20submission%20for%20the%20%5BCoze%20AI%20Bot%20Challenge%5D(https%3A%2F%2Fdev.to%2Fdevteam%2Fjoin-us-for- the -coze-ai-bot-challenge-3000-in-prizes-4dp7)%3A%20Bot%20創新者。* %0A%0A%23%23%20What%20I%20Built%0A%3C! --%20告訴%20us%20what%20your%20bot%20does%2C%20who%20it%27s%20for%2C%20and%20what20 % 20問題%20it%20解決%20--%3E%0A%0A%23%23%20Demo%0A%0A%3C!--%20Share%20a%20link%20to%20your%20bot%20in%20the% 20Coze%20Bot %20Store%20和%20包括%20螢幕截圖%20或%20錄音%20展示%20a%20用戶%27s%20聊天%20介面%20和%20your%20bot。 3E%0A%0A%0A%23%23%20Your% 20配置%0A%0A%3C!--%20螢幕截圖%20或%20記錄%20您的%20bot%27s%20配置%2C%20包括%20提示%20和%20技能%20已使用。 %20your%20process%2C%20what%20you%20learn%2C%20anything%20you%20are%20尤其%20proud%20of%2C%20what %20you%20hope%20to%20do%20next%200%20next.C% %3E%0A%0A%3C!--%20團隊%20Submissions%3A%20請%20pick%20one%20member%20to%20publish%20the %20submission%20and%20credit%20%20by%20list%20by% %20DEV%20用戶名%20直接%20in%20the%20body%20of%20the%20post。 %20cover%20image%20(如果%20you%20想要)。 } 機器人創新者提交模板 {% 結束%} {% cta https://dev.to/new?prefill=---%0Atitle%3A%20%0Apublished%3A%20%0Atags%3A%20cozechallenge%2C%20devechallenge%2C%20ai%2C%20machinelearning%0A ---%0A%0A*這%20是%20a%20submission%20for%20the%20%5BCoze%20AI%20Bot%20Challenge%5D(https%3A%2F%2Fdev.to%2Fdevteam%2Fjoin-us-for- the -coze-ai-bot-challenge-3000-in-prizes-4dp)%3A%20Trailblazer。* %0A%0A%23%23%20What%20I%20Built%0A%3C! --%20告訴%20us%20what%20your%20plugin%20or%20workflow%20does%20and%20what%20problemsol020 - -%3E%0A%0A%23%23%20Demo%0A%0A%3C!--%20If%20submitting%20a%20plugin%2C%20share%20a%20link%20to%20your%20plugin%20in%20the% 20Coze %20Plugin%20Store%20--%3E%0A%0A%3C!--%20Screenshot%20or%20record%20your%20plugin%2Fworkflow%20setup%20and%20show%20us%200%20itdo%) 20 %20--%3E%0A%0A%23%23%20旅程%0A%0A%3C!--%20告訴%20us%20about%20your%20process%2C%20what%20you%20learned%2C%20anything %20you% 20是%20特別%20自豪%20的%2C%20什麼%20你%20希望%20到%20做%20下一個%2C%20等%20--%3E%0A%0A %3C!--%20團隊%20提交%3A%20請% 20pick%20one%20member%20to%20publish%20the%20submission%20and%20credit%20teammates%20by%20listing%20their%usernameDEVdit%20teammates%20by%20listing%20their% %20the%20body%20of%20the%20post。 ).%20--%3E%0A%0A%3C!-- %20感謝%20%20的參與!%20--%3E%0A %} 科茲開拓者提交模板 {% 結束%} 請在提交之前查看我們的完整[規則、指南和常見問題解答頁面,](https://dev.to/challenges/coze)以便您了解我們的參與指南和[官方競賽規則](https://dev.to/page/coze-ai-bot-challenge-contest-rules)(例如資格要求)。 需要靈感、回饋或幫助? ----------- Coze 團隊將於太平洋夏令時 4 月 22 日星期一下午 2 點在 DEV 上現場演示和建造機器人。他們將從頭到尾經歷整個過程,這將是了解 Coze 開發平台並提出問題的絕佳機會。 如果您無法觀看直播,您仍然可以利用 Coze 的文件和教學來了解 Coze 平台: - [開發者文件](https://www.coze.com/docs/welcome.html) - [教學影片](https://www.youtube.com/@CozeHQ) 我們也鼓勵所有參與者加入[Coze Discord 社區,](https://discord.gg/m6S2fT66CK)作為分享您的專案、獲取回饋和尋求幫助的地方。 重要的日子 ----- - 4 月 17 日:Coze AI 機器人挑戰賽開始! - 4 月 22 日:太平洋夏令時間下午 2:00 進行機器人建構直播 - 4 月 28 日:提交截止時間為太平洋夏令時間晚上 11:59 - 4 月 30 日:公佈得獎者 我們迫不及待想看看您建造了什麼!對挑戰有疑問嗎?請在下面詢問他們。 祝你好運,編碼愉快! --- 原文出處:https://dev.to/devteam/join-us-for-the-coze-ai-bot-challenge-3000-in-prizes-4dp7
--- title:恭喜 Cloudflare AI 挑戰賽獲勝者! 發表:真實 描述:從假新聞偵測到生成藝術,再到 AI 支援的 PostgreSQL,我們看到了一些真正令人印象深刻且富有創意的專案,我們將在未來幾週內討論這些專案。 標籤: cloudflarechallenge、devchallenge、人工智慧、無伺服器 封面圖:https://dev-to-uploads.s3.amazonaws.com/uploads/articles/xv3z4g8nufk501he4eyl.jpg 使用 100:42 的比例可獲得最佳效果。 ===================== --- 今天就是這一天!我們非常高興地宣布我們首個贊助挑戰賽的獲獎者: [Cloudflare AI 挑戰賽](https://dev.to/devteam/join-us-for-the-cloudflare-ai-challenge-3000-in-prizes-5f99)。 我們對社區在不到兩週內所取得的成就感到非常震驚。從假新聞偵測到生成藝術,再到人工智慧驅動的 PostgreSQL,我們看到了一些真正令人印象深刻且富有創意的專案,我們將在未來幾週內討論這些專案。但遺憾的是,勝利者只能是少數。 恭喜… --- ### 總冠軍 @kaarthik108,我們[Di1 的整體提示獲勝者 - 利用 Cloudflare 進行 AI 驅動的見解](https://dev.to/kaarthik108/di1-ai-driven-insights-with-cloudflare-1jbd) {% 嵌入 https://dev.to/kaarthik108/di1-ai-driven-insights-with-cloudflare-1jbd %} 正如 Kaarthik 在帖子中所說,該專案“全力以赴提供 cloudflare 產品”,同時建立了[RAG](https://dev.to/t/rag)架構的流暢實用演示。 Kaarthik 結合了網路、資料和法學碩士技術,提供了一種以直觀且有用的方式查詢有趣資料集的方法,同時提供一些奇妙的資料視覺化。提交的內容立即有用,但也為探索其他有趣的資料集和未來的擴展提供了良好的基礎! ### 多個型號獎項類別得主 @anselm94,我們的多模型獲獎者,因為每個任務利用多個模型[,透過 Cloudflare AI 為兒童製作有趣、美麗、安全、可列印的“故事卡”](https://dev.to/anselm94/fun-beautiful-printable-story-cards-for-kids-with-cloudflare-ai-3fbf) {% 嵌入 https://dev.to/anselm94/fun-beautiful-printable-story-cards-for-kids-with-cloudflare-ai-3fbf %} 受到最近為兒子購買的故事書的啟發,Merbin 建立了一個有趣且引人入勝的故事卡生成器,配有生成的圖像、上下文感知故事和翻譯功能。 Merbin 不僅建立了一個功能齊全的應用程式,展示了可用文本生成模型強大的講故事功能,而且他還重要地使用了額外的文本生成模型來確保生成內容的安全性和適用性。使用多個模型來平滑生成內容可能存在的粗糙邊緣是這一概念的一個很好的演示,並且足以確保我們的多模型獎類別。 ### 三重任務類型獎項類別獲獎者 @julianandreszb,我們的三重任務類型獲勝者,因為在他們的專案中利用了三個或更多任務,即[AI 協作講故事 + 圖像生成器 + 翻譯(英語-西班牙語)](https://dev.to/julianandreszb/ai-collaborative-storytelling-image-generator-translate-english-spanish-939) {% 嵌入 https://dev.to/julianandreszb/ai-collaborative-storytelling-image-generator-translate-english-spanish-939 %} @julianandreszb 展示了多種任務類型的無縫集成,這些任務類型相互交接,以建立令人愉悅的協作講故事體驗!調整聊天機器人介面的熟悉度,但讓人工智慧產生第一個提示,保持了體驗的吸引力,並很好地展示了以新的強大方式使用多種任務類型的力量。 我們的三位獲獎者將獲得以下獎品: **整體提示獲勝者** - $1,500 禮品卡或同等金額 - 專屬開發者徽章 - 來自[DEV 商店](https://shop.forem.com)的禮物 **其他獎項類別獲獎者** - $750 禮品卡或同等金額 - 專屬開發者徽章 - 來自[DEV 商店](https://shop.forem.com)的禮物 **所有提交有效提交的參與者都**將在其 DEV 個人資料中收到完成徽章。 我們的贊助商 ------ 我們只是想對 Cloudflare 與我們一起組織這次挑戰表示大力的讚揚。他們正在建立最具創新性和最重要的網路平台之一,我們很高興能夠與他們合作。 @saulitis 和團隊合作非常愉快! 下一步是什麼? ------- 當然還有更多挑戰!查看我們的[挑戰頁面](https://dev.to/challenges),了解接下來將推出什麼,並遵循挑戰標籤,這樣您就不會錯過任何公告: {% 標籤 devchallenge %} 感謝所有參與的人!我們希望您玩得開心,感受到挑戰,並可能為您的職業檔案加入一兩件事。下次見! --- 原文出處:https://dev.to/devteam/congrats-to-the-cloudflare-ai-challenge-winners-25lm
**長話短說** -------- 在本文中,您將學習如何建立一個人工智慧驅動的部落格平台,該平台可以搜尋網路並研究部落格文章的任何主題。 我們將涵蓋: - 用於應用程式框架的 Next.js 🖥️ - 法學碩士 OpenAI 🧠 - LangChain 和 Tavily 的網路搜尋人工智慧代理🤖 - 使用 CopilotKit 將 AI 整合到您的應用程式中 🪁 - Supabase 用於儲存和檢索部落格平台文章資料。 --- CopilotKit:開源 Copilot 框架 ======================== CopilotKit 是[開源 AI 副駕駛框架和平台。](https://github.com/CopilotKit/CopilotKit)我們可以輕鬆地將強大的人工智慧整合到您的 React 應用程式中。 建造: - ChatBots💬:上下文感知的應用內聊天機器人,可以在應用程式內執行操作 - CopilotTextArea📝:人工智慧驅動的文字字段,具有上下文感知自動完成和插入功能 - 聯合代理🤖:應用程式內人工智慧代理,可以與您的應用程式和使用者互動。由浪鏈提供技術支援。  {% cta https://github.com/CopilotKit/CopilotKit %} Star CopilotKit ⭐️ {% endcta %} (原諒人工智慧的拼字錯誤並給一顆星:) 現在回到文章。 --- **先決條件** -------- 在開始建立應用程式之前,讓我們先查看建置應用程式所需的依賴項或套件 - `copilotkit/react-core` :CopilotKit 前端包,帶有 React hooks,用於向副駕駛提供應用程式狀態和操作(AI 功能) - `copilotkit/react-ui:`聊天機器人側邊欄 UI 的 CopilotKit 前端包 - `copilotkit/react-textarea:` CopilotKit 前端包,用於在演講者筆記中進行人工智慧輔助文字編輯。 - `LangChainJS:`用於開發由語言模型支援的應用程式的框架。 - `Tavily Search API:`幫助將法學碩士和人工智慧應用程式連接到可信賴的即時知識的 API。 安裝所有專案包和依賴項 ----------- 在安裝所有專案包和依賴項之前,我們首先在終端機上執行以下命令來建立 Nextjs 專案。 ``` npx create-next-app@latest ``` 然後系統會提示您選擇一些選項。請隨意標記它們,如下所示。 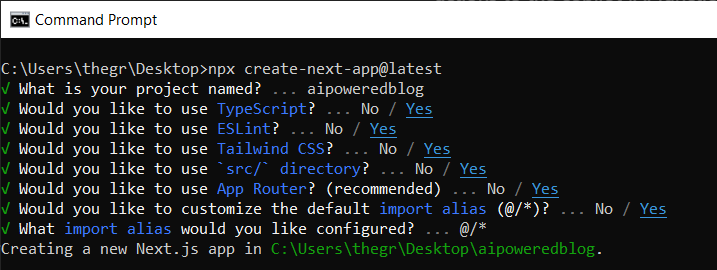 之後,使用您選擇的文字編輯器開啟新建立的 Nextjs 專案。然後在命令列中執行以下命令來安裝所有專案包和依賴項。 ``` npm i @copilotkit/backend @copilotkit/shared @langchain/langgraph @copilotkit/react-core @copilotkit/react-ui @copilotkit/react-textarea @supabase/ssr @supabase/auth-helpers-nextjs ``` **建立部落格平台前端** ------------- 在本節中,我將引導您完成使用靜態內容建立部落格平台前端的過程,以定義平台的使用者介面。 首先,前往`/[root]/src/app`並建立一個名為`components`的資料夾。在 Components 資料夾中,建立一個名為`Article.tsx`的檔案。 之後,將以下程式碼新增至定義名為`Article`功能元件的檔案中,該元件將用於呈現文章建立表單。 ``` "use client"; import { useRef, useState } from "react"; export function Article() { // Define state variables for article outline, copilot text, and article title const [articleOutline, setArticleOutline] = useState(""); const [copilotText, setCopilotText] = useState(""); const [articleTitle, setArticleTitle] = useState(""); return ( // Form element for article input <form action={""} className="w-full h-full gap-10 flex flex-col items-center p-10"> {/* Input field for article title */} <div className="flex w-full items-start gap-3"> <textarea className="p-2 w-full h-12 rounded-lg flex-grow overflow-x-auto overflow-y-hidden whitespace-nowrap" id="title" name="title" value={articleTitle} placeholder="Article Title" onChange={(event) => setArticleTitle(event.target.value)} /> </div> {/* Textarea for article content */} <textarea className="p-4 w-full aspect-square font-bold text-xl bg-slate-800 text-white rounded-lg resize-none" id="content" name="content" value={copilotText} placeholder="Write your article content here" onChange={(event) => setCopilotText(event.target.value)} /> {/* Publish button */} <button type="submit" className="p-4 w-full !bg-slate-800 text-white rounded-lg">Publish</button> </form> ); } ``` 接下來,將另一個檔案新增到元件資料夾中,並將其命名為`Header.tsx` 。然後將以下程式碼新增至定義名為`Header`的功能元件的檔案中,該元件將呈現部落格平台的導覽列。 ``` import Link from "next/link"; export default function Header() { return ( <> <header className="flex flex-wrap sm:justify-start sm:flex-nowrap z-50 w-full bg-white border-b border-gray-200 text-sm py-3 sm:py-0 "> <nav className="relative max-w-7xl w-full mx-auto px-4 sm:flex sm:items-center sm:justify-between sm:px-6 lg:px-8" aria-label="Global"> <div className="flex items-center justify-between"> <Link className="flex-none text-xl font-semibold " href="/" aria-label="Brand"> AIBlogging </Link> </div> <div id="navbar-collapse-with-animation" className=""> <div className="flex flex-col gap-y-4 gap-x-0 mt-5 sm:flex-row sm:items-center sm:justify-end sm:gap-y-0 sm:gap-x-7 sm:mt-0 sm:ps-7"> <Link className="flex items-center font-medium text-gray-500 border-2 border-indigo-600 text-center p-2 rounded-md hover:text-blue-600 sm:border-s sm:my-6 " href="/writearticle"> Create Post </Link> </div> </div> </nav> </header> </> ); } ``` 之後,轉到`/[root]/src/app`並建立一個名為`writearticle`的資料夾。在`writearticle`資料夾中,建立一個名為`page.tsx`檔案。然後將以下程式碼加入匯入`Article`和`Header`元件的檔案中。然後,程式碼定義了一個名為`WriteArticle`的功能元件,它將呈現導覽列和文章建立表單。 ``` import { Article } from "../components/Article"; import Header from "../components/Header"; export default function WriteArticle() { return ( <> <Header /> <Article /> </> ); } ``` 接下來,前往`/[root]/src/page.tsx`文件,並新增以下程式碼,該程式碼定義一個名為`Home`功能元件,該元件呈現將顯示已發佈文章清單的部落格平台主頁。 ``` import Image from "next/image"; import Link from "next/link"; import Header from "./components/Header"; const Home = async () => { return ( <> <Header /> <div className="max-w-[85rem] h-full px-4 py-10 sm:px-6 lg:px-8 lg:py-14 mx-auto"> <div className="grid sm:grid-cols-2 lg:grid-cols-3 gap-6"> <Link key={""} className="group flex flex-col h-full bg-white border border-gray-200 hover:border-transparent hover:shadow-lg transition-all duration-300 rounded-xl p-5 " href={""}> <div className="aspect-w-16 aspect-h-11"> <Image className="object-cover h-48 w-96 rounded-xl" src={`https://source.unsplash.com/featured/?${encodeURIComponent( "hello world" )}`} width={500} height={500} alt="Image Description" /> </div> <div className="my-6"> <h3 className="text-xl font-semibold text-gray-800 "> Hello World </h3> </div> </Link> </div> </div> </> ); }; export default Home; ``` 之後,請轉到`next.config.js`檔案並加入以下程式碼,該程式碼允許您使用 Unsplash 中的圖像作為已發布文章的封面圖像。 ``` module.exports = { images: { remotePatterns: [ { protocol: "https", hostname: "source.unsplash.com", }, ], }, }; ``` 最後,在命令列上執行命令`npm run dev` ,然後導航到 http://localhost:3000/。現在您應該在瀏覽器上查看部落格平台前端,如下所示。 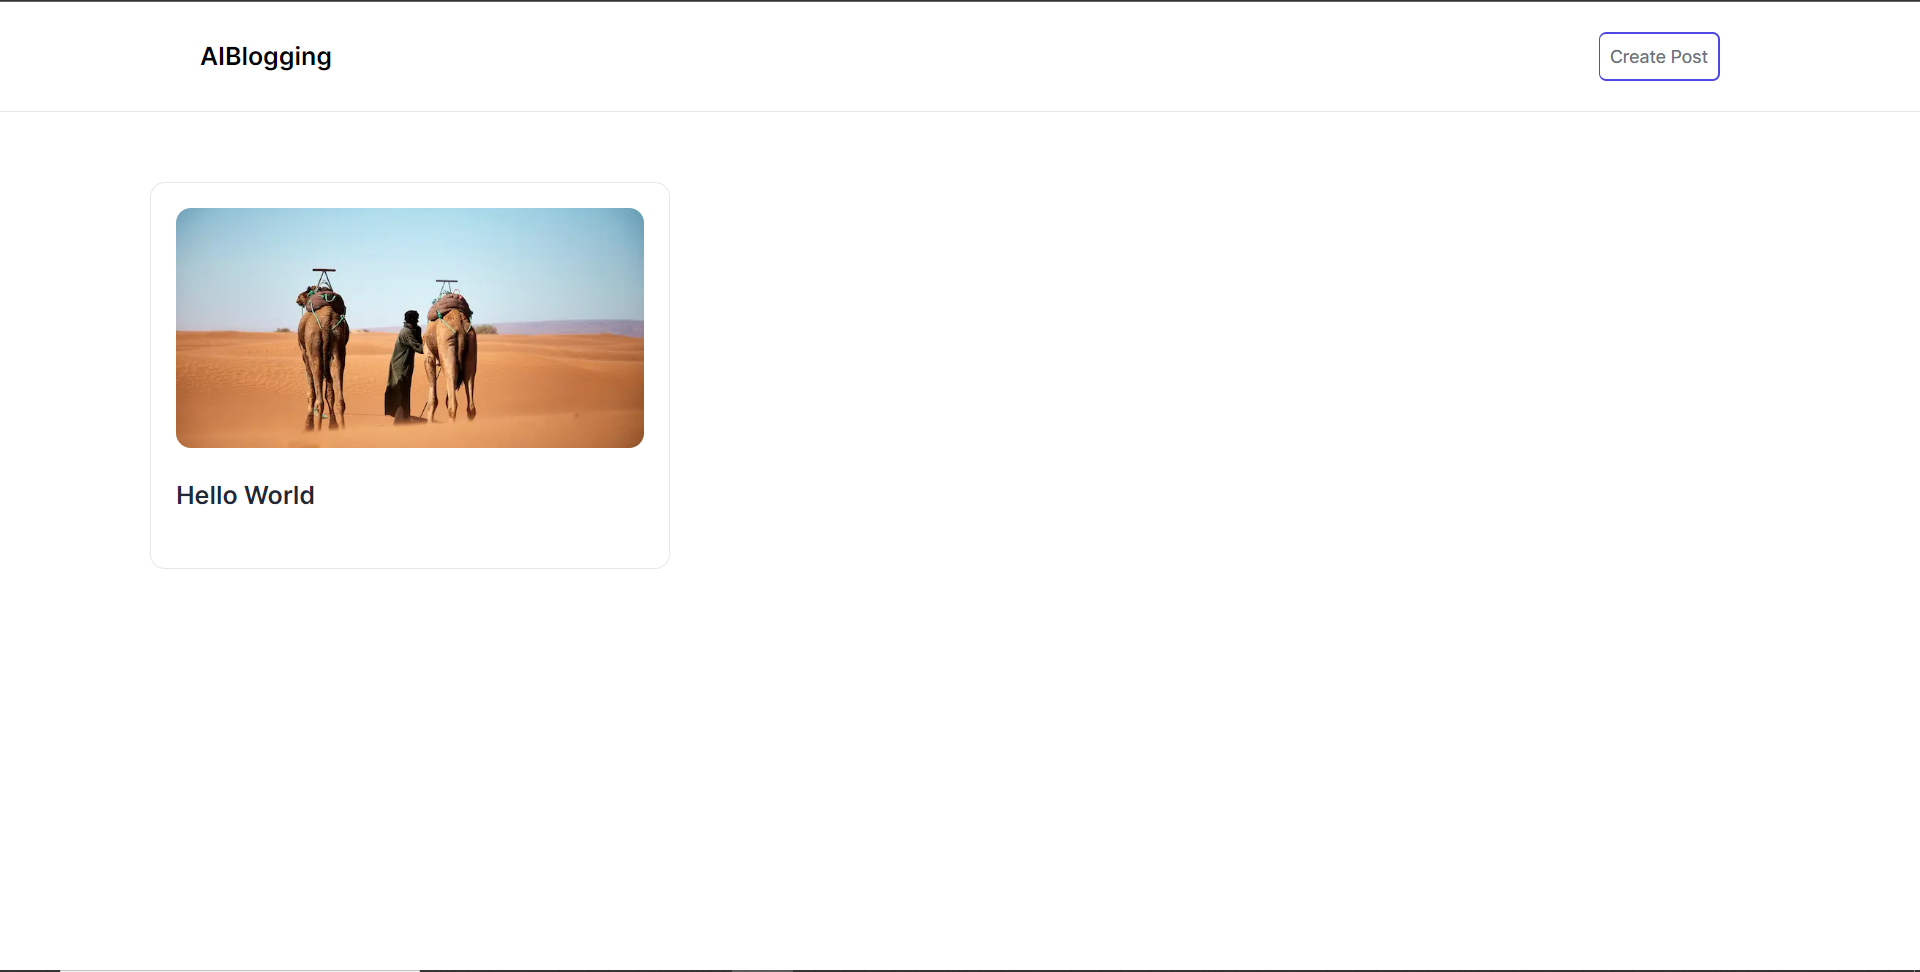 **將部落格平台與 CopilotKit 後端集成** --------------------------- 在本節中,我將引導您完成將部落格平台與 CopilotKit 後端整合的過程,CopilotKit 後端處理來自前端的請求,提供函數呼叫和各種 LLM 後端(例如 GPT)。此外,我們將整合一個名為 Tavily 的人工智慧代理,它可以研究網路上的任何主題。 首先,在根目錄中建立一個名為`.env.local`的檔案。然後在保存`ChatGPT`和`Tavily` Search API 金鑰的檔案中加入下面的環境變數。 ``` OPENAI_API_KEY="Your ChatGPT API key" TAVILY_API_KEY="Your Tavily Search API key" ``` 若要取得 ChatGPT API 金鑰,請導覽至 https://platform.openai.com/api-keys。 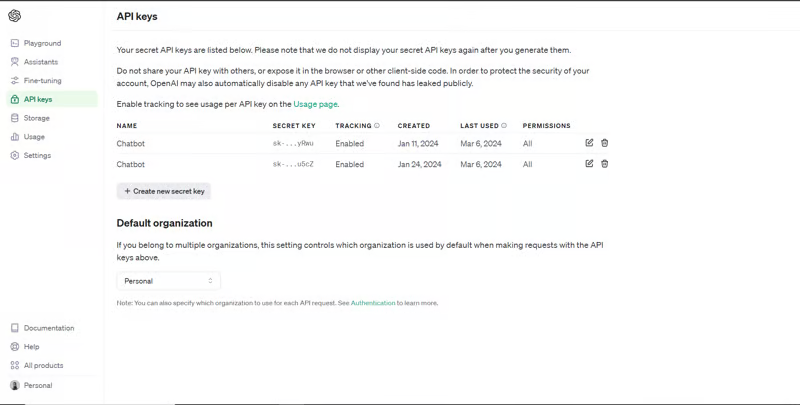 若要取得 Tavilly Search API 金鑰,請導覽至 https://app.tavily.com/home 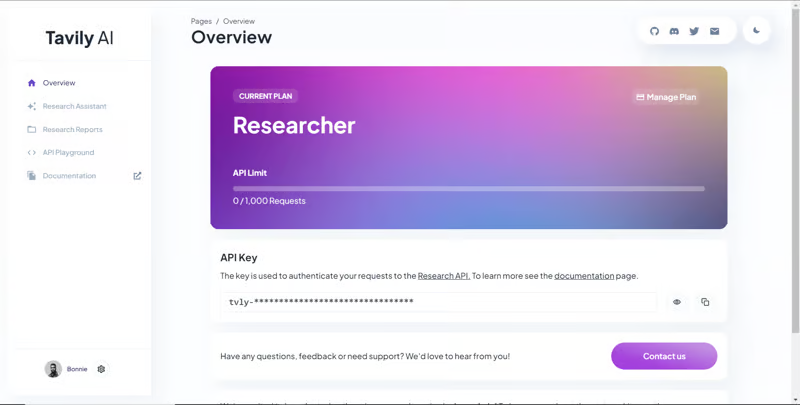 之後,轉到`/[root]/src/app`並建立一個名為`api`的資料夾。在`api`資料夾中,建立一個名為`copilotkit`的資料夾。在`copilotkit`資料夾中,建立一個名為`research.ts`的檔案。然後導航到[該 Research.ts gist 文件](https://gist.github.com/TheGreatBonnie/58dc21ebbeeb8cbb08df665db762738c),複製程式碼,並將其新增至**`research.ts`**檔案中 接下來,在`/[root]/src/app/api/copilotkit`資料夾中建立一個名為`route.ts`的檔案。該文件將包含設定後端功能來處理 POST 請求的程式碼。它有條件地包括對給定主題進行研究的“研究”操作。 現在在文件頂部導入以下模組。 ``` import { CopilotBackend, OpenAIAdapter } from "@copilotkit/backend"; // For backend functionality with CopilotKit. import { researchWithLangGraph } from "./research"; // Import a custom function for conducting research. import { AnnotatedFunction } from "@copilotkit/shared"; // For annotating functions with metadata. ``` 在上面的程式碼下面,定義一個執行時間環境變數和一個名為`researchAction`的函數,該函數使用下面的程式碼對某個主題進行研究。 ``` // Define a runtime environment variable, indicating the environment where the code is expected to run. export const runtime = "edge"; // Define an annotated function for research. This object includes metadata and an implementation for the function. const researchAction: AnnotatedFunction<any> = { name: "research", // Function name. description: "Call this function to conduct research on a certain topic. Respect other notes about when to call this function", // Function description. argumentAnnotations: [ // Annotations for arguments that the function accepts. { name: "topic", // Argument name. type: "string", // Argument type. description: "The topic to research. 5 characters or longer.", // Argument description. required: true, // Indicates that the argument is required. }, ], implementation: async (topic) => { // The actual function implementation. console.log("Researching topic: ", topic); // Log the research topic. return await researchWithLangGraph(topic); // Call the research function and return its result. }, }; ``` 然後在上面的程式碼下加入下面的程式碼來定義處理POST請求的非同步函數。 ``` // Define an asynchronous function that handles POST requests. export async function POST(req: Request): Promise<Response> { const actions: AnnotatedFunction<any>[] = []; // Initialize an array to hold actions. // Check if a specific environment variable is set, indicating access to certain functionality. if (process.env["TAVILY_API_KEY"]) { actions.push(researchAction); // Add the research action to the actions array if the condition is true. } // Instantiate CopilotBackend with the actions defined above. const copilotKit = new CopilotBackend({ actions: actions, }); // Use the CopilotBackend instance to generate a response for the incoming request using an OpenAIAdapter. return copilotKit.response(req, new OpenAIAdapter()); } ``` **將部落格平台與 CopilotKit 前端集成** --------------------------- 在本節中,我將引導您完成將部落格平台與 CopilotKit 前端整合的過程,以促進部落格文章研究和文章大綱生成。我們將使用聊天機器人側欄元件、copilot 文字區域元件、用於向 Copilot 提供應用程式狀態和其他資訊的 useMakeCopilotReadable 掛鉤,以及用於提供 Copilot 可以呼叫的操作的 useCopilotAction 掛鉤 首先,導入`/[root]/src/app/components/Article.tsx`檔案頂部的`useMakeCopilotReadable` 、 `useCopilotAction` 、 `CopilotTextarea`和`HTMLCopilotTextAreaElement`掛鉤。 ``` import { useMakeCopilotReadable, useCopilotAction, } from "@copilotkit/react-core"; import { CopilotTextarea, HTMLCopilotTextAreaElement, } from "@copilotkit/react-textarea"; ``` 在 Article 函數內的狀態變數下方,新增以下程式碼,該程式碼使用`useMakeCopilotReadable`掛鉤來新增將作為應用程式內聊天機器人的上下文產生的文章大綱。鉤子使副駕駛可以閱讀文章大綱。 ``` useMakeCopilotReadable("Blog article outline: " + JSON.stringify(articleOutline)); ``` 在`useMakeCopilotReadable`掛鉤下方,使用以下程式碼建立一個名為`copilotTextareaRef`的引用,該引用指向名為`HTMLCopilotTextAreaElement`的文字區域元素。 ``` const copilotTextareaRef = useRef<HTMLCopilotTextAreaElement>(null); ``` 在上面的程式碼下方,加入以下程式碼,該程式碼使用`useCopilotAction`掛鉤來設定名為`researchBlogArticleTopic`的操作,該操作將啟用對部落格文章的給定主題的研究。此操作採用兩個參數,稱為`articleTitle`和`articleOutline` ,這兩個參數可以產生文章標題和大綱。 該操作包含一個處理程序函數,該函數根據給定主題生成文章標題和大綱。在處理函數內部, `articleOutline`狀態會使用新產生的大綱進行更新,而`articleTitle`狀態會使用新產生的標題進行更新,如下所示。 ``` useCopilotAction( { name: "researchBlogArticleTopic", description: "Research a given topic for a blog article.", parameters: [ { name: "articleTitle", type: "string", description: "Title for a blog article.", required: true, }, { name: "articleOutline", type: "string", description:"Outline for a blog article that shows what the article covers.", required: true, }, ], handler: async ({ articleOutline, articleTitle }) => { setArticleOutline(articleOutline); setArticleTitle(articleTitle); }, }, [] ); ``` 在上面的程式碼下方,前往表單元件並新增以下`CopilotTextarea`元素,該元素將使您能夠為文章內容新增補全、插入和編輯。 ``` <CopilotTextarea value={copilotText} ref={copilotTextareaRef} placeholder="Write your article content here" onChange={(event) => setCopilotText(event.target.value)} className="p-4 w-full aspect-square font-bold text-xl bg-slate-800 text-white rounded-lg resize-none" placeholderStyle={{ color: "white", opacity: 0.5, }} autosuggestionsConfig={{ textareaPurpose: articleTitle, chatApiConfigs: { suggestionsApiConfig: { forwardedParams: { max_tokens: 5, stop: ["\n", ".", ","], }, }, insertionApiConfig: {}, }, debounceTime: 250, }} /> ``` 然後將Tailwindcss隱藏類別加入文章內容的Textarea中,如下所示。文字區域將保存文章的內容,並在文章發布後將其插入資料庫。 ``` {/* Textarea for article content */} <textarea className="p-4 w-full aspect-square font-bold text-xl bg-slate-800 text-white rounded-lg resize-none hidden" id="content" name="content" value={copilotText} placeholder="Write your article content here" onChange={(event) => setCopilotText(event.target.value)} /> ``` 之後,請前往`/[root]/src/app/writearticle/page.tsx`檔案並使用下面的程式碼匯入頂部的 CopilotKit 前端套件和樣式。 ``` import { CopilotKit } from "@copilotkit/react-core"; import { CopilotSidebar } from "@copilotkit/react-ui"; import "@copilotkit/react-ui/styles.css"; import "@copilotkit/react-textarea/styles.css"; ``` 然後使用`CopilotKit`和`CopilotSidebar`包裹Article元件,如下所示。 `CopilotKit`元件指定 CopilotKit 後端端點 ( `/api/copilotkit/openai/` ) 的 URL,而`CopilotSidebar`則呈現應用程式內聊天機器人,您可以提示您研究文章的任何主題。 ``` export default function WriteArticle() { return ( <> <Header /> <CopilotKit url="/api/copilotkit"> <CopilotSidebar instructions="Help the user research a blog article topic." defaultOpen={true} labels={{ title: "Blog Article Copilot", initial: "Hi you! 👋 I can help you research any topic for a blog article.", }} clickOutsideToClose={false}> <Article /> </CopilotSidebar> </CopilotKit> </> ); } ``` 之後,執行開發伺服器並導航到 http://localhost:3000/writearticle。您應該會看到應用程式內聊天機器人已整合到部落格平台中。 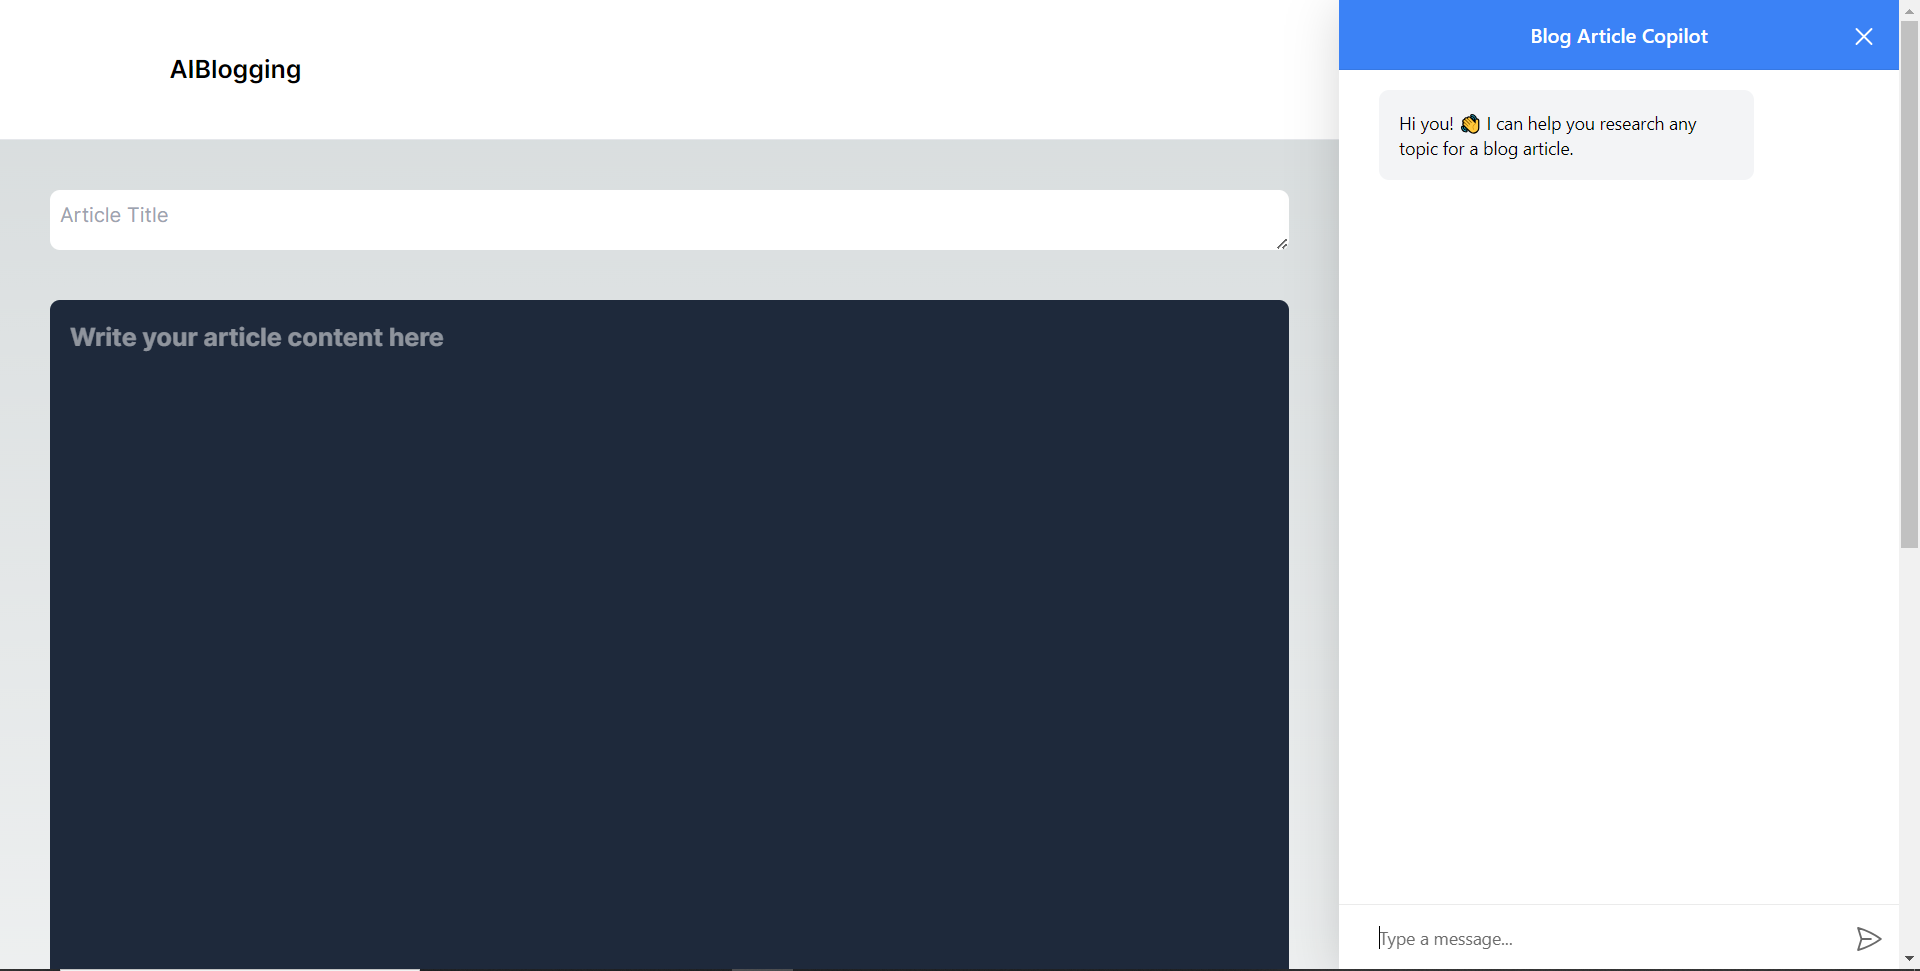 給右側的聊天機器人一個提示,例如“研究一篇關於生成人工智慧的部落格文章主題,然後給我文章大綱。”聊天機器人將開始研究該主題,然後產生部落格標題。 當您開始在編輯器上寫作時,您應該會看到內容自動建議,如下所示。 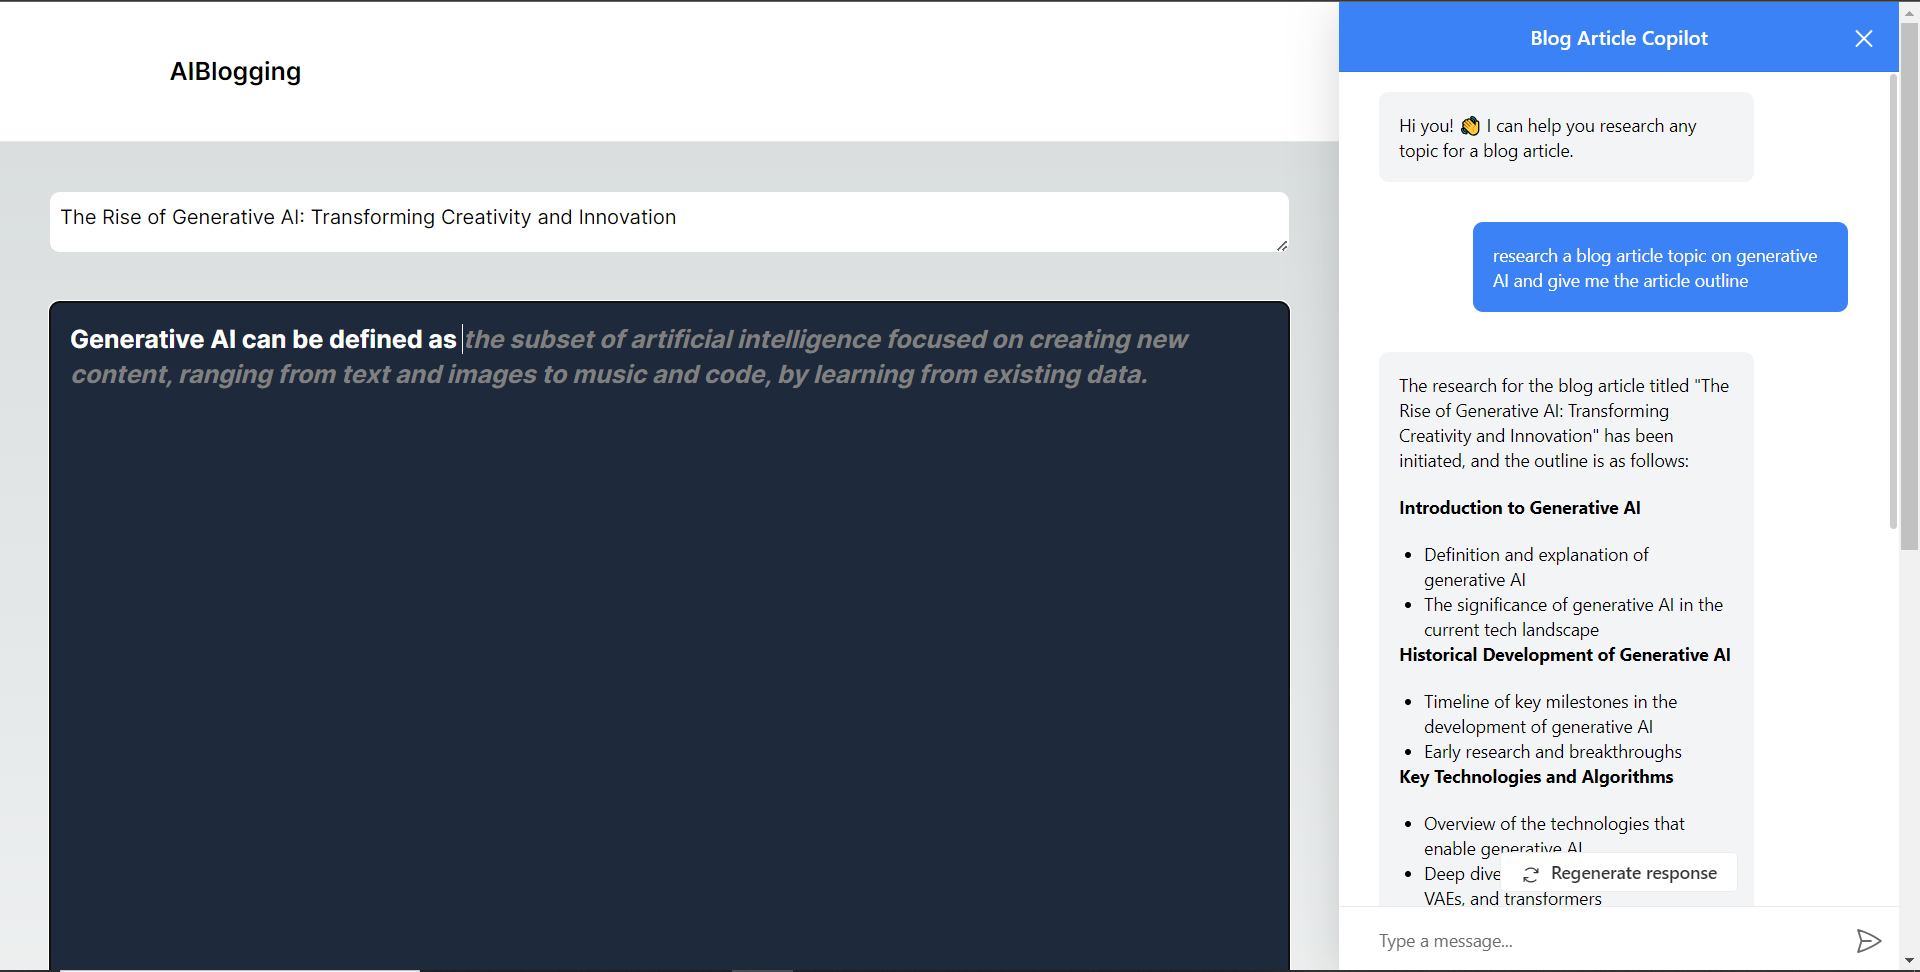 **將部落格平台與 Supabase 資料庫集成** -------------------------- 在本節中,我將引導您完成將部落格平台與 Supabase 資料庫整合以插入和獲取部落格文章資料的過程。 首先,導覽至[supabase.com](http://supabase.com)並點擊主頁上的「啟動您的專案」按鈕。  然後新建一個專案,名為AiBloggingPlatform,如下圖所示。 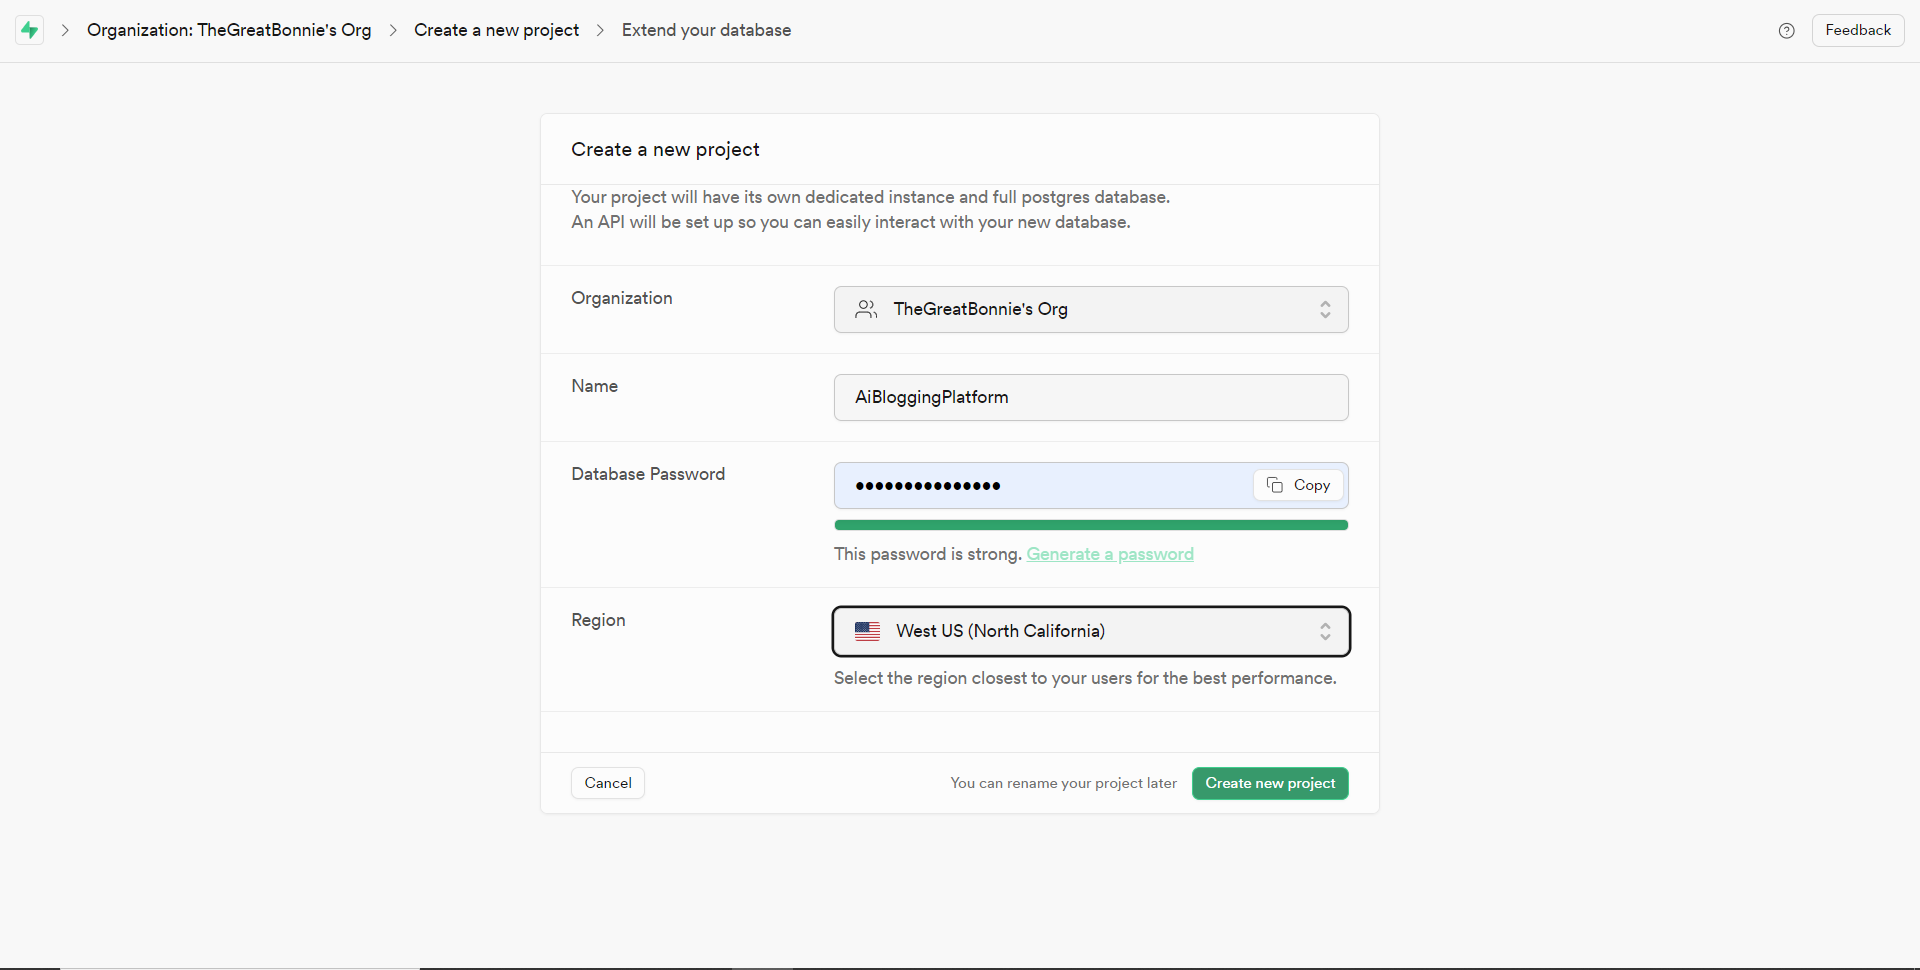 建立專案後,將 Supabase URL 和 API 金鑰新增至 env.local 檔案中的環境變數中,如下所示。 ``` NEXT_PUBLIC_SUPABASE_URL=”Your Supabase URL” NEXT_PUBLIC_SUPABASE_ANON_KEY=”Your Supabase API Key” ``` 之後,請前往 Supabase 上專案的儀表板並開啟 SQL 編輯器部分。然後將下列 SQL 程式碼新增至編輯器中,然後按一下 CTRL + Enter 鍵建立一個名為articles 的表。文章表包含 id、標題和內容行。 ``` create table if not exists articles ( id bigint primary key generated always as identity, title text, content text ); ``` 建立表格後,您應該會收到一條成功訊息,如下所示。 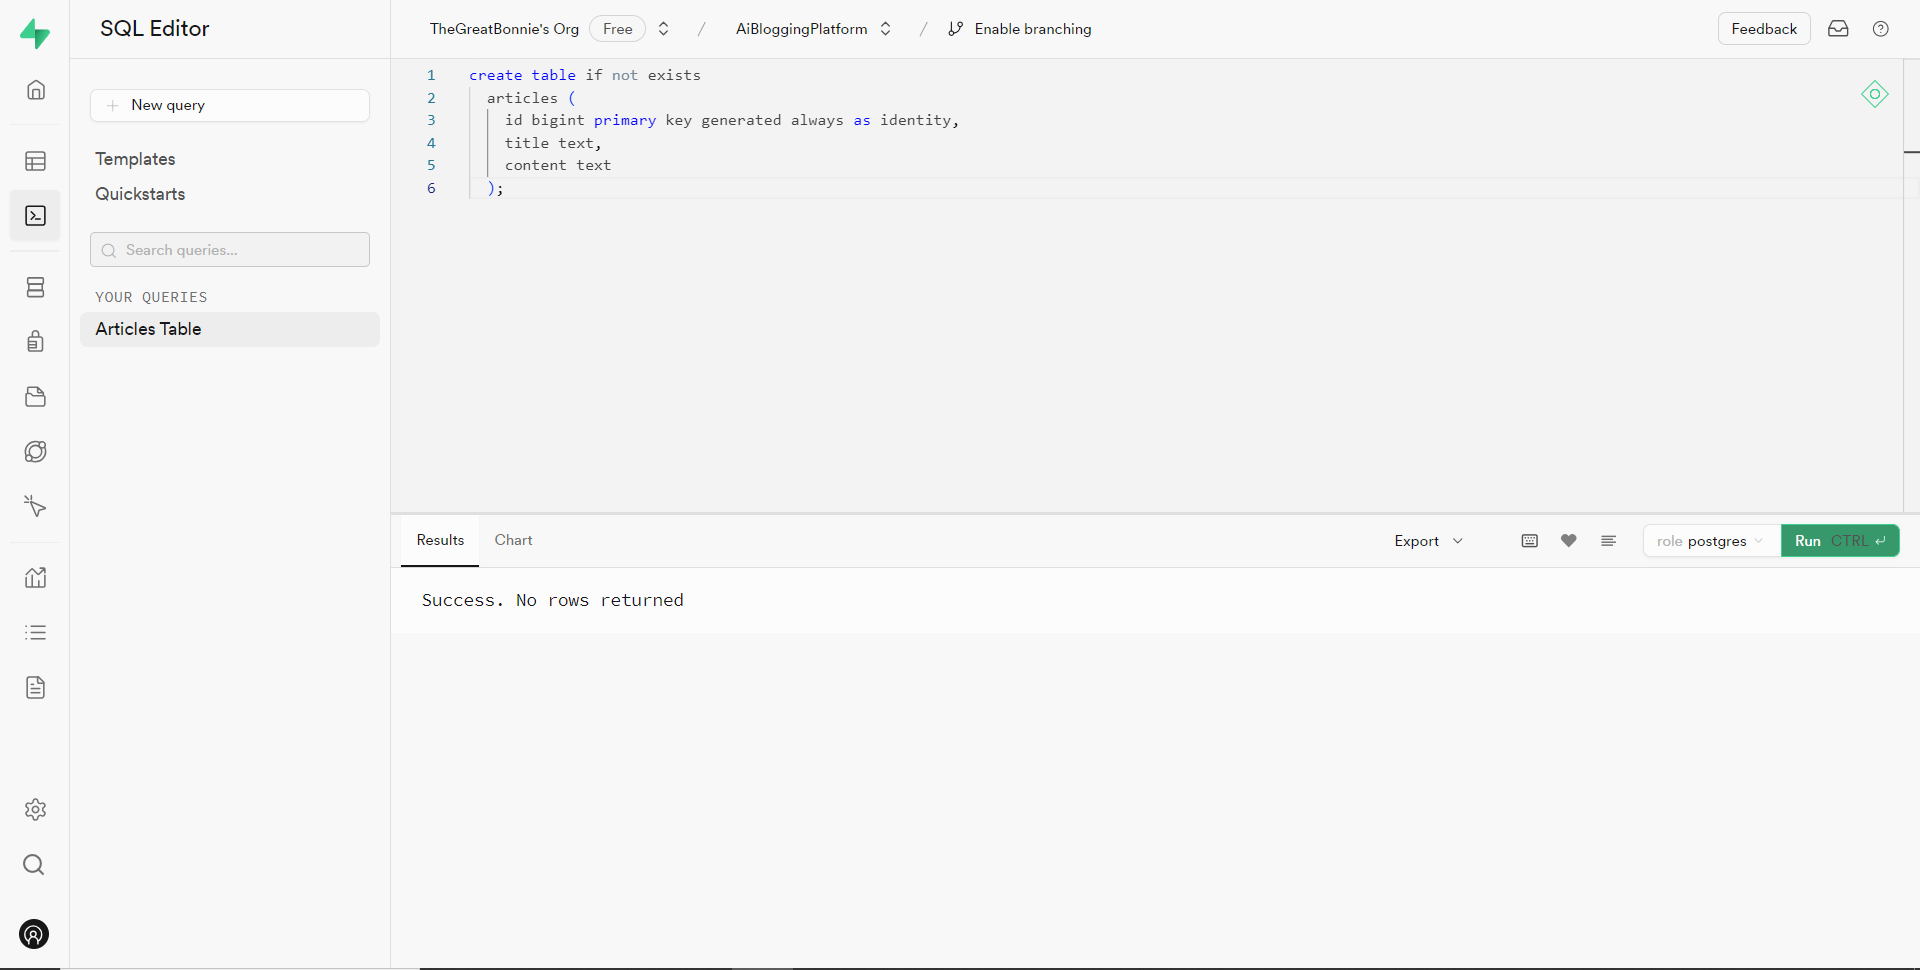 之後,轉到`/[root]/src/`資料夾並建立一個名為`utils`的資料夾。在`utils`資料夾內,建立一個名為`supabase.ts`文件,並新增以下用於建立並傳回 Supabase 用戶端的程式碼。 ``` // Importing necessary functions and types from the Supabase SSR package import { createServerClient, type CookieOptions } from '@supabase/ssr' // Define a function named 'supabase' that takes a 'CookieOptions' object as input export const supabase = (cookies: CookieOptions) => { // Retrieve cookies from the provided 'CookieOptions' object const cookieStore = cookies() // Create and return a Supabase client configured with environment variables and cookie handling return createServerClient( // Retrieve Supabase URL from environment variables process.env.NEXT_PUBLIC_SUPABASE_URL!, // Retrieve Supabase anonymous key from environment variables process.env.NEXT_PUBLIC_SUPABASE_ANON_KEY!, { cookies: { // Define a custom 'get' function to retrieve cookies by name from the cookie store get(name: string) { return cookieStore.get(name)?.value }, }, } ) } ``` 然後轉到`/[root]/src/app`資料夾並建立一個名為`serveractions`的資料夾。在`serveractions`資料夾中,建立一個名為`AddArticle.ts`的文件,並新增以下程式碼,將部落格文章資料插入到 Supabase 資料庫中。 ``` // Importing necessary functions and modules for server-side operations "use server"; import { createServerComponentClient } from "@supabase/auth-helpers-nextjs"; import { cookies } from "next/headers"; import { redirect } from "next/navigation"; // Define an asynchronous function named 'addArticle' that takes form data as input export async function addArticle(formData: any) { // Extract title and content from the provided form data const title = formData.get("title"); const content = formData.get("content"); // Retrieve cookies from the HTTP headers const cookieStore = cookies(); // Create a Supabase client configured with the provided cookies const supabase = createServerComponentClient({ cookies: () => cookieStore }); // Insert the article data into the 'articles' table on Supabase const { data, error } = await supabase.from("articles").insert([ { title, content, }, ]); // Check for errors during the insertion process if (error) { console.error("Error inserting data", error); return; } // Redirect the user to the home page after successfully adding the article redirect("/"); // Return a success message return { message: "Success" }; } ``` 之後,轉到`/[root]/src/app/components/Article.tsx`檔案並導入`addArticle`函數。 ``` import { addArticle } from "../serveractions/AddArticle"; ``` 然後加入`addArticle`函數作為表單動作參數,如下所示。 ``` // Form element for article input <form action={addArticle} className="w-full h-full gap-10 flex flex-col items-center p-10"> </form> ``` 之後,導覽至http://localhost:3000/writearticle,研究您選擇的主題,新增文章內容,然後點擊底部的發布按鈕來發布文章。 然後轉到 Supabase 上專案的儀表板並導航到表編輯器部分。您應該會看到您的文章資料已插入 Supabase 資料庫,如下所示。 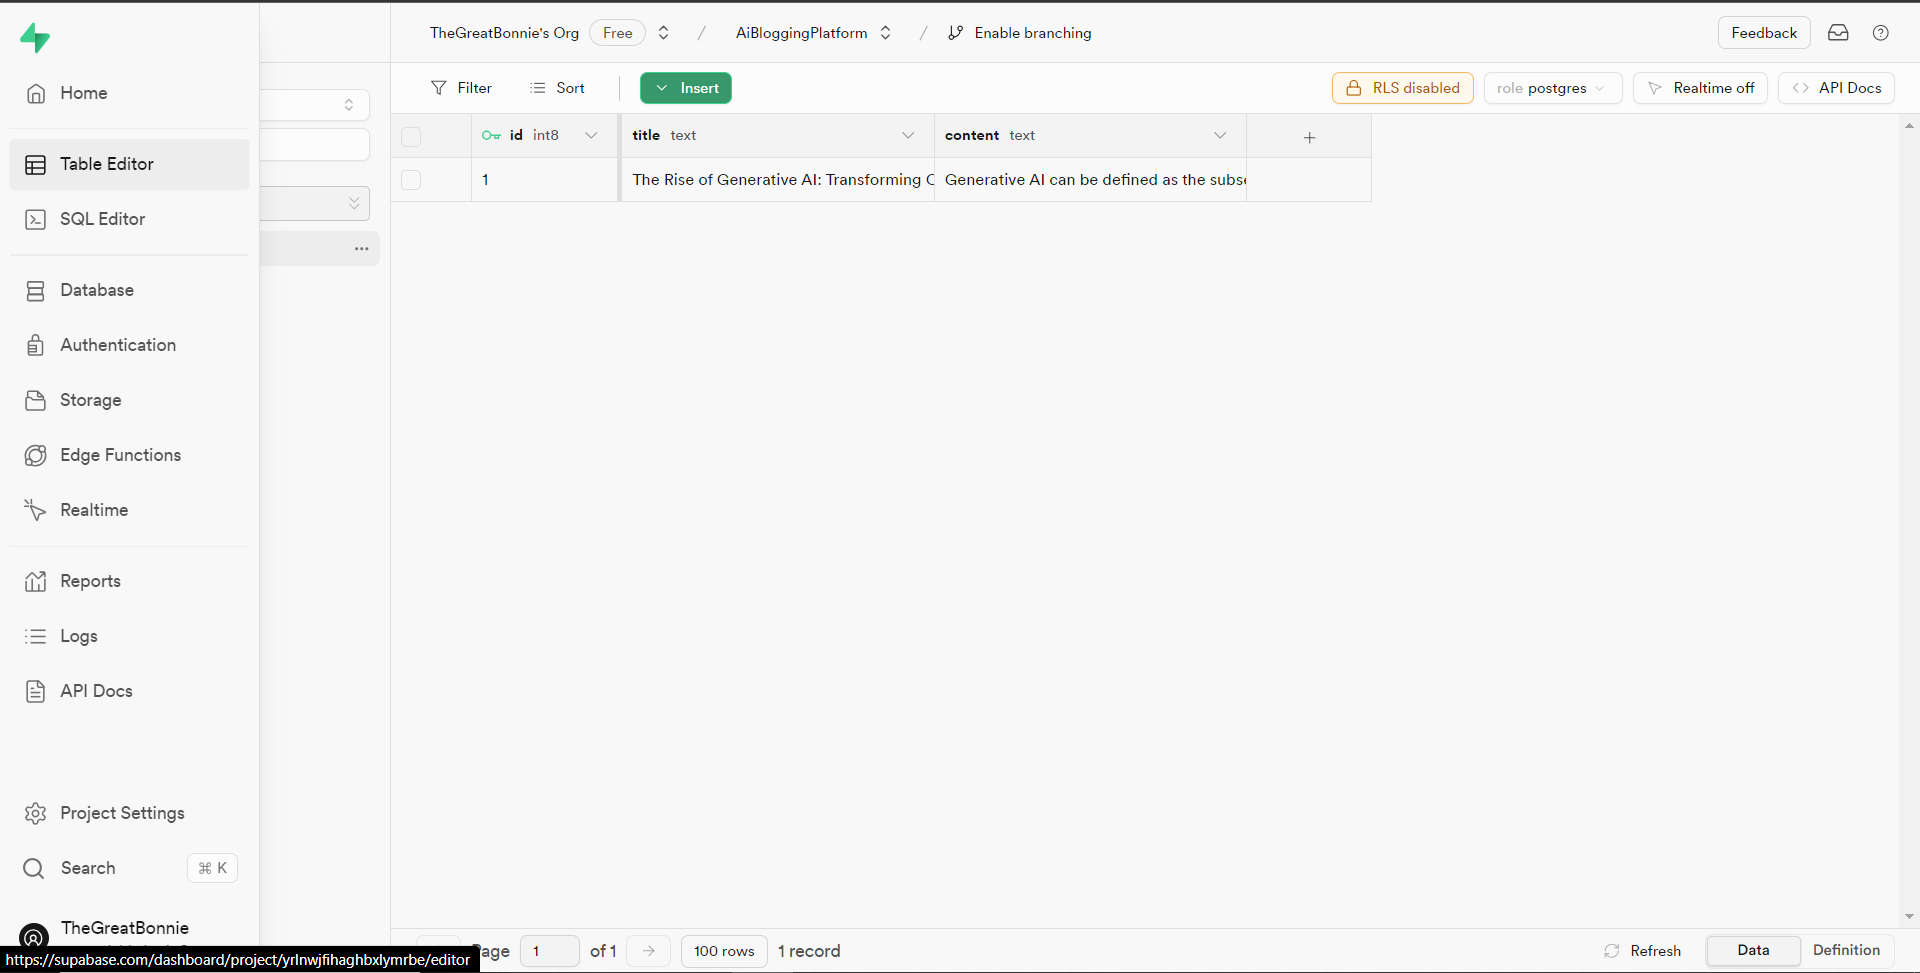 接下來,前往`/[root]/src/app/page.tsx`檔案並在頂部導入 cookie 和 supabase 套件。 ``` import { cookies } from "next/headers"; import { supabase } from "@/utils/supabase"; ``` 然後在 Home 函數中加入以下程式碼,從 Supabase 資料庫中取得文章資料。 ``` const { data: articles, error } = await supabase(cookies).from('articles').select('*') ``` 之後,更新如下所示的元素程式碼,以將已發佈的文章呈現在部落格平台主頁上。 ``` return ( <> <Header /> <div className="max-w-[85rem] h-full px-4 py-10 sm:px-6 lg:px-8 lg:py-14 mx-auto"> <div className="grid sm:grid-cols-2 lg:grid-cols-3 gap-6"> {articles?.map((post: any) => ( <Link key={post.id} className="group flex flex-col h-full bg-white border border-gray-200 hover:border-transparent hover:shadow-lg transition-all duration-300 rounded-xl p-5 " href={`/posts/${post.id}`}> <div className="aspect-w-16 aspect-h-11"> <Image className="object-cover h-48 w-96 rounded-xl" src={`https://source.unsplash.com/featured/?${encodeURIComponent( post.title )}`} width={500} height={500} alt="Image Description" /> </div> <div className="my-6"> <h3 className="text-xl font-semibold text-gray-800 "> {post.title} </h3> </div> </Link> ))} </div> </div> </> ); ``` 然後導航到[http://localhost:3000](http://localhost:3000/writearticle) ,您應該會看到您發布的文章,如下所示。 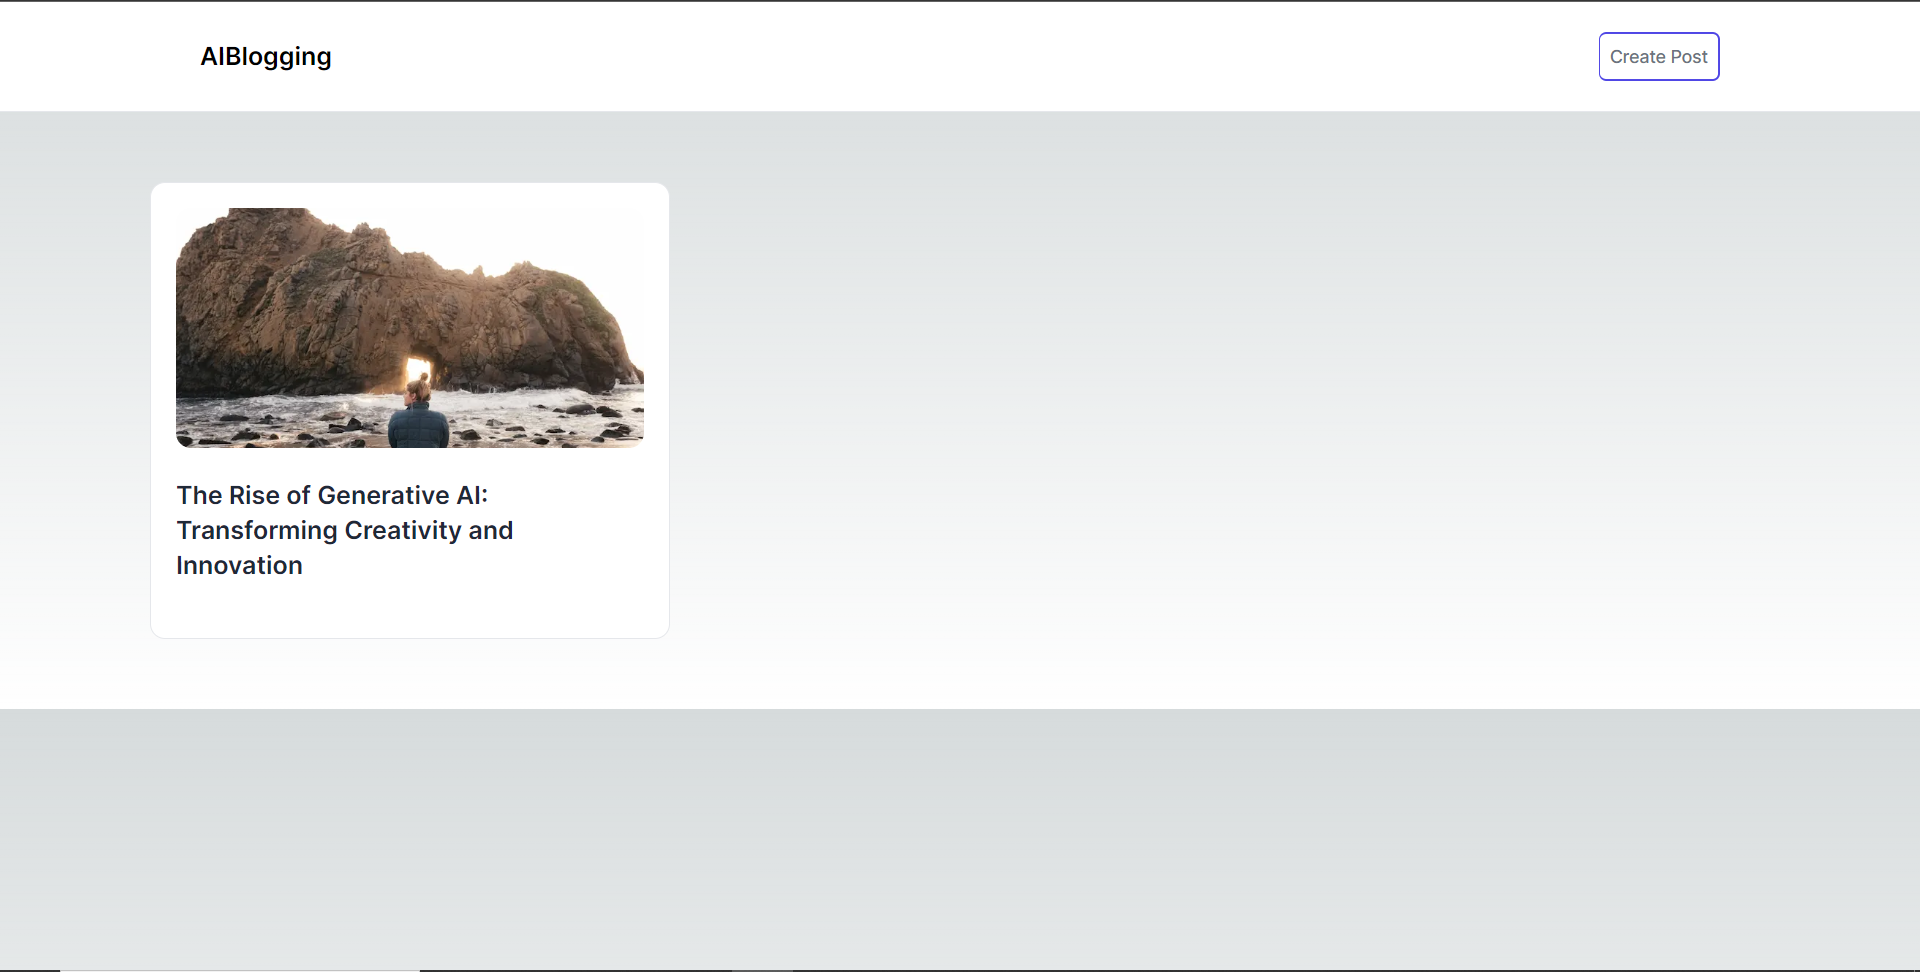 之後,轉到`/[root]/src/app`資料夾並建立一個名為`[id].`在`[id]`資料夾中,建立一個名為`page.tsx`的文件,並在頂部匯入以下套件和元件。 ``` import { supabase } from '@/utils/supabase'; import { cookies } from "next/headers"; import Header from '@/app/components/Header'; ``` 在導入下面,定義一個名為「getArticles」的非同步函數,該函數根據 id 參數從 supabase 資料庫檢索文章資料,如下所示。 ``` // Define an asynchronous function named 'getArticles' that retrieves article data based on the provided parameters async function getArticles(params: any) { // Extract the 'id' parameter from the provided 'params' object const { id } = params // Retrieve article data from Supabase database where the 'id' matches the provided value const { data, error } = await supabase(cookies) .from('articles') .select('*') .eq('id', id) .single(); // Return the retrieved data return data } ``` 在上面的程式碼下面,定義一個名為“Post”的函數,它將“params”作為 props,如下所示。 ``` // Define a default asynchronous function named 'Post' that takes 'params' as props export default async function Post({ params }: { params: any }) { // Retrieve the post data asynchronously based on the provided 'params' const post = await getArticles(params); // Return JSX to render the post details return ( <> {/* Render the header component */} <Header /> {/* Main content wrapper */} <div className="max-w-3xl px-4 pt-6 lg:pt-10 pb-12 sm:px-6 lg:px-8 mx-auto"> <div className="max-w-2xl"> <div className="space-y-5 md:space-y-8"> <div className="space-y-3"> {/* Render the post title */} <h2 className="text-2xl font-bold md:text-3xl dark:text-white"> {/* Render the post title only if 'post' is truthy */} {post && post.title} </h2> {/* Render the post content */} <p className="text-lg text-gray-800 dark:text-gray-200"> {/* Render the post content only if 'post' is truthy */} {post && post.content} </p> </div> </div> </div> </div> </> ); } ``` 之後,導覽至[http://localhost:3000](http://localhost:3000/writearticle)並點擊部落格平台主頁上顯示的文章。 然後您應該被重定向到文章的內容,如下所示。 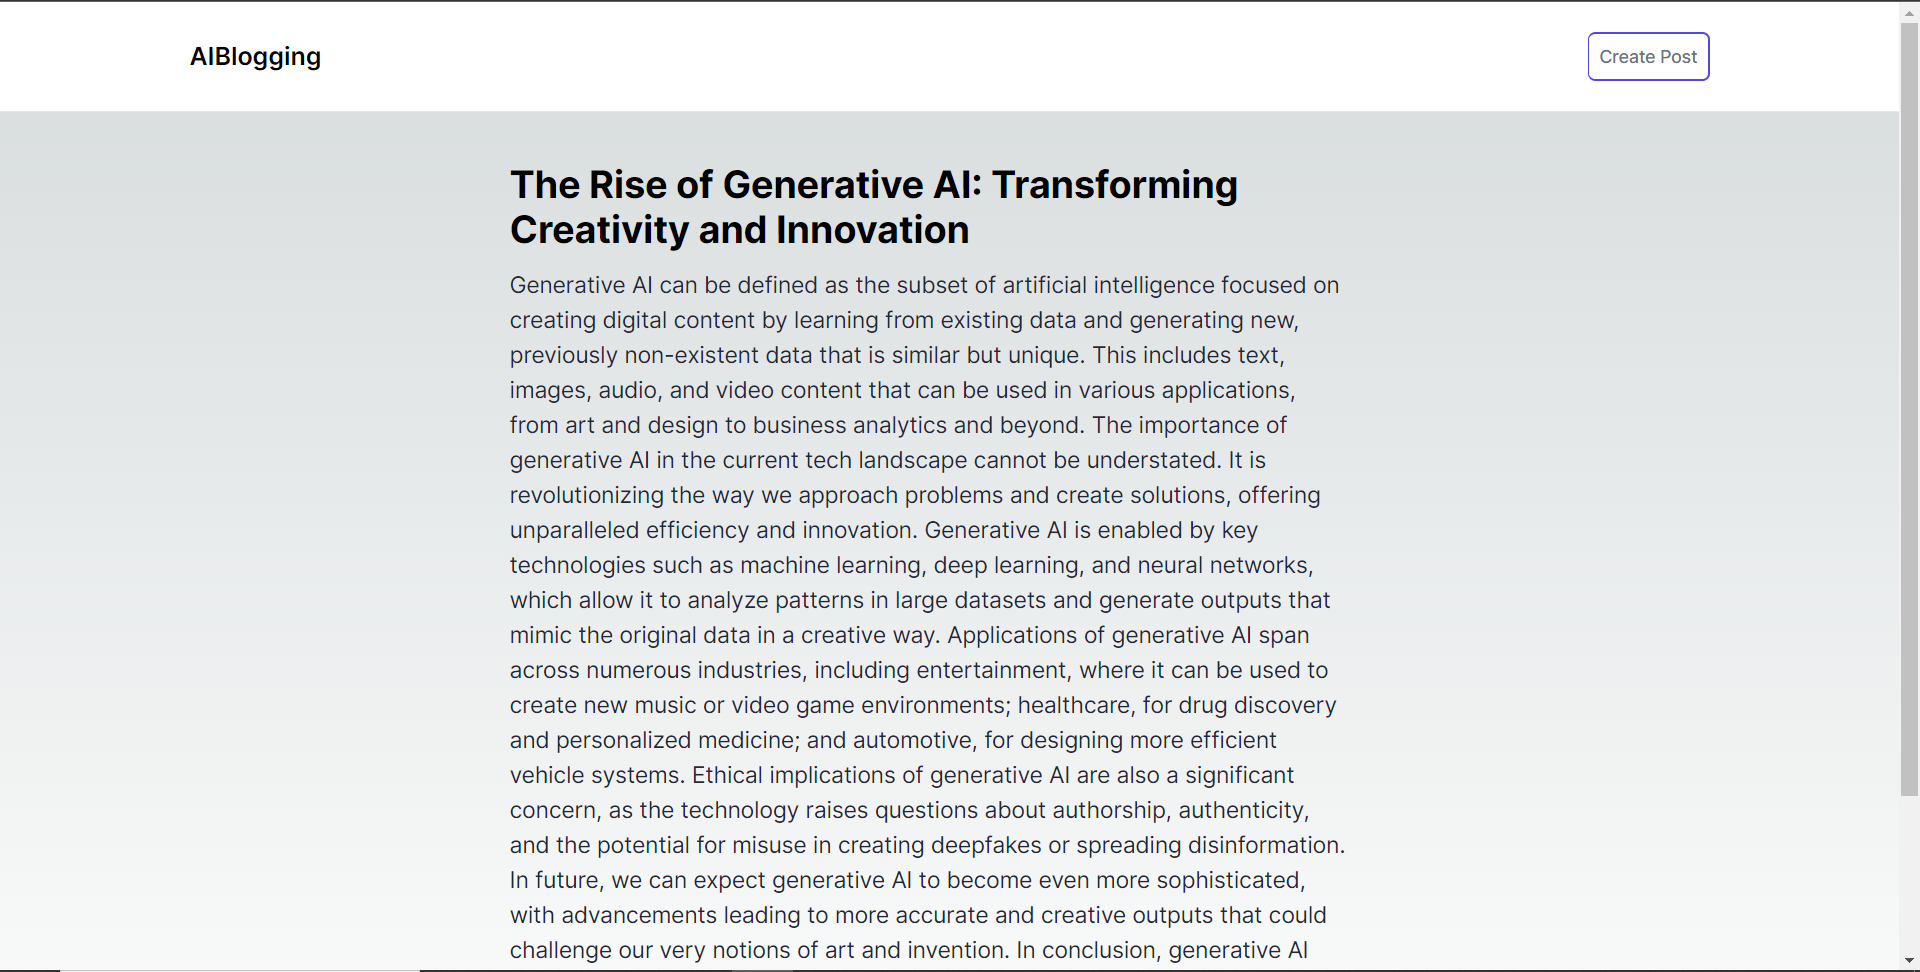 結論 -- 總而言之,您可以使用 CopilotKit 建立應用內 AI 聊天機器人,該機器人可以查看當前應用程式狀態並在應用程式內執行操作。 AI 聊天機器人可以與您的應用程式前端、後端和第三方服務對話。 完整的原始碼:https://github.com/TheGreatBonnie/aipoweredblog --- 原文出處:https://dev.to/copilotkit/how-to-build-an-ai-powered-blogging-platform-nextjs-langchain-supabase-1hdp
在這篇文章中,我將分享 21 個帶有程式碼片段的 HTML 技巧,可以提高您的編碼技能。 讓我們直接進入正題吧。🚀 建立聯絡連結 ------ 使用 HTML 建立可點擊的電子郵件、電話和簡訊連結: ``` <!-- Email link --> <a href="mailto:[email protected]"> Send Email </a> <!-- Phone call link --> <a href="tel:+1234567890"> Call Us </a> <!-- SMS link --> <a href="sms:+1234567890"> Send SMS </a> ``` 建立可折疊內容 ------- 當您想要在網頁上包含可折疊內容時,可以使用`<details>`和`<summary>`標記。 `<details>`標籤建立隱藏內容的容器,而`<summary>`標籤提供可點擊的標籤來切換該內容的可見性。 ``` <details> <summary>Click to expand</summary> <p>This content can be expanded or collapsed.</p> </details> ``` 利用語意元素 ------ 為您的網站選擇語義元素而不是非語義元素。它們使您的程式碼變得有意義,並改善結構、可存取性和 SEO。 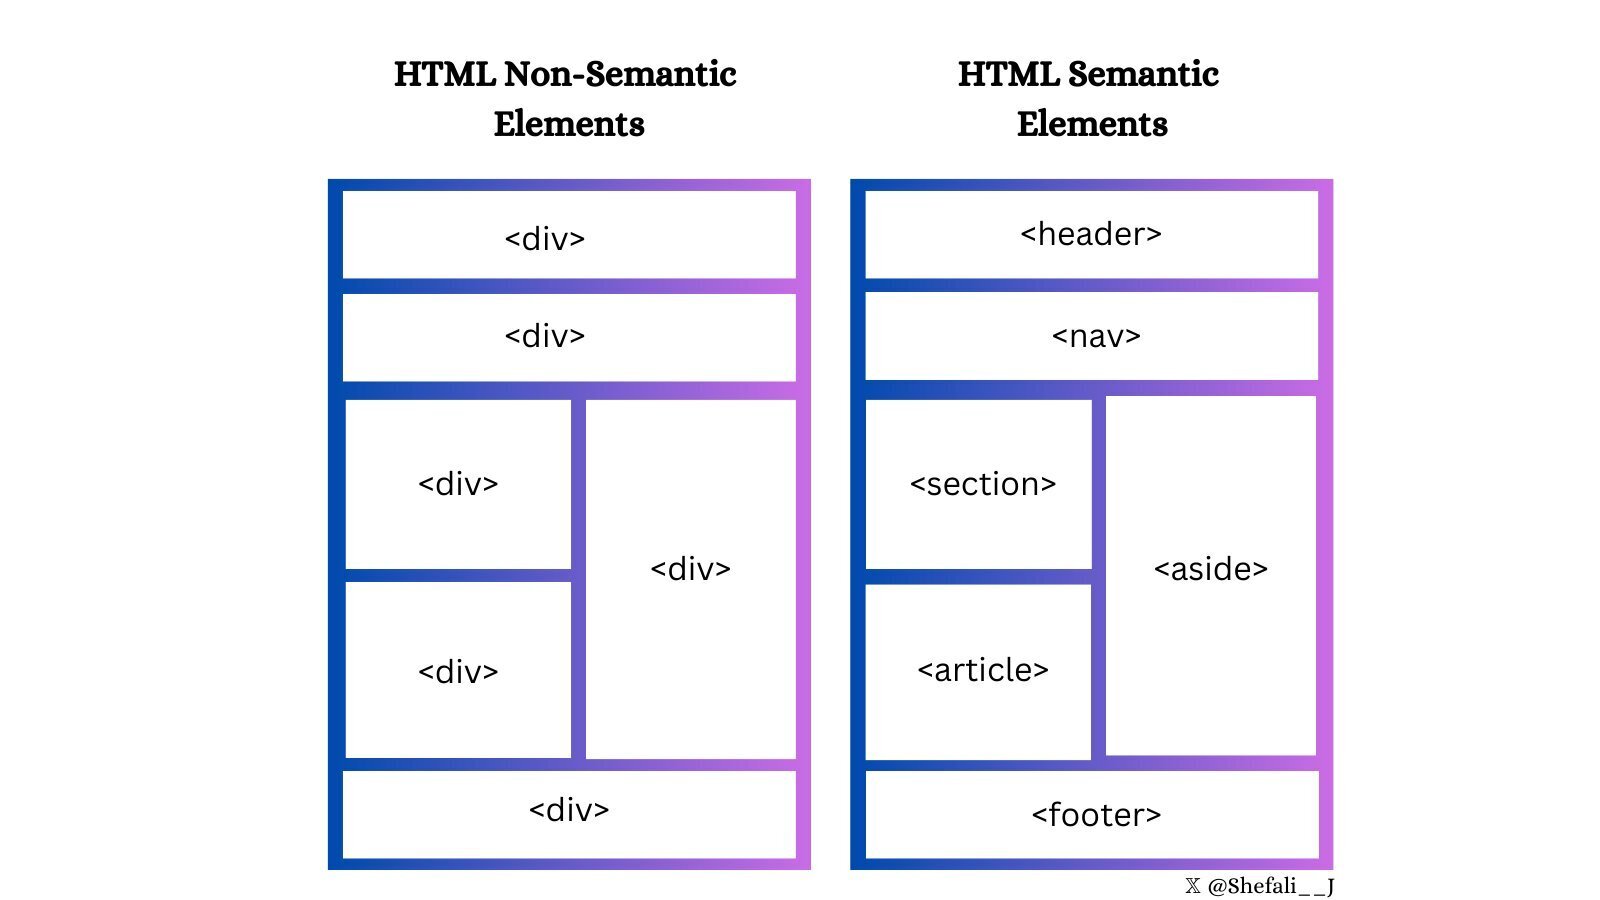 將表單元素分組 ------- 使用`<fieldset>`標記對表單中的相關元素進行分組,並使用`<legend>`標記和`<fieldset>`來定義`<fieldset>`標記的標題。 這對於建立更有效率、更易於存取的表單非常有用。 ``` <form> <fieldset> <legend>Personal details</legend> <label for="firstname">First name:</label> <input type="text" id="firstname" name="firstname" /> <label for="email">Email:</label> <input type="email" id="email" name="email" /> <label for="contact">Contact:</label> <input type="text" id="contact" name="contact" /> <input type="button" value="Submit" /> </fieldset> </form> ``` 增強下拉式選單 ------- 您可以使用`<optgroup>`標籤對`<select>` HTML 標籤中的相關選項進行分組。 當您使用大型下拉式選單或長選項清單時可以使用此功能。 ``` <select> <optgroup label="Fruits"> <option>Apple</option> <option>Banana</option> <option>Mango</option> </optgroup> <optgroup label="Vegetables"> <option>Tomato</option> <option>Broccoli</option> <option>Carrot</option> </optgroup> </select> ``` 改進視訊演示 ------ `poster`屬性可以與`<video>`元素一起使用來顯示圖像,直到使用者播放影片。 ``` <video controls poster="image.png" width="500"> <source src="video.mp4" type="video/mp4 /> </video> ``` 支援多項選擇 ------ 您可以將`multiple`屬性與`<input>`和`<select>`元素一起使用,以允許使用者一次選擇/輸入`multiple`值。 ``` <input type="file" multiple /> <select multiple> <option value="java">Java</option> <option value="javascript">JavaScript</option> <option value="typescript">TypeScript</option> <option value="rust">Rust</option> </select> ``` 將文字顯示為下標和上標 ----------- `<sub>`和`<sup>`元素可用於分別將文字顯示為下標和上標。  建立下載連結 ------ 您可以使用帶有`<a>`元素的`download`屬性來指定當使用者點擊連結時,應下載而不是導航到連結的資源。 ``` <a href="document.pdf" download="document.pdf"> Download PDF </a> ``` 定義相對連結的基本 URL ------------- 您可以使用`<base>`標籤來定義網頁中所有相對 URL 的基本 URL。 當您想要為網頁上的所有相對 URL 建立共用起點時,這會很方便,從而更輕鬆地導航和載入資源。 ``` <head> <base href="https://shefali.dev" target="_blank" /> </head> <body> <a href="/blog">Blogs</a> <a href="/get-in-touch">Contact</a> </body> ``` 控制圖像加載 ------ `<img>`元素的`loading`屬性可用來控制瀏覽器載入圖片的方式。它有三個值:「eager」、「lazy」和「auto」。 ``` <img src="picture.jpg" loading="lazy"> ``` 管理翻譯功能 ------ 您可以使用`translate`屬性來指定元素的內容是否應由瀏覽器的翻譯功能來翻譯。 ``` <p translate="no"> This text should not be translated. </p> ``` 設定最大輸入長度 -------- 透過使用`maxlength`屬性,您可以設定使用者在輸入欄位中輸入的最大字元數。 ``` <input type="text" maxlength="4"> ``` 設定最小輸入長度 -------- 透過使用`minlength`屬性,您可以設定使用者在輸入欄位中輸入的最小字元數。 ``` <input type="text" minlength="3"> ``` 啟用內容編輯 ------ 使用`contenteditable`屬性指定元素的內容是否可編輯。 它允許使用者修改元素內的內容。 ``` <div contenteditable="true"> You can edit this content. </div> ``` 控制拼字檢查 ------ 您可以`spellcheck`屬性與`<input>`元素、內容可編輯元素和`<textarea>`元素結合使用,以啟用或停用瀏覽器的拼字檢查。 ``` <input type="text" spellcheck="true"/> ``` 確保無障礙 ----- `alt`屬性指定圖像無法顯示時的替代文字。 始終包含圖像的描述性 alt 屬性,以提高可存取性和 SEO。 ``` <img src="picture.jpg" alt="Description for the image"> ``` 定義連結的目標行為 --------- 您可以使用`target`屬性來指定您按一下連結資源時將顯示的位置。 ``` <!-- Opens in the same frame --> <a href="https://shefali.dev" target="_self">Open</a> <!-- Opens in a new window or tab --> <a href="https://shefali.dev" target="_blank">Open</a> <!-- Opens in the parent frame --> <a href="https://shefali.dev" target="_parent">Open</a> <!-- Opens in the full body of the window --> <a href="https://shefali.dev" target="_top">Open</a> <!-- Opens in the named frame --> <a href="https://shefali.dev" target="framename">Open</a> ``` 提供附加資訊 ------ `title`屬性可用於在使用者將滑鼠懸停在元素上時提供有關該元素的附加資訊。 ``` <p title="World Health Organization">WHO</p> ``` 接受特定文件類型 -------- 可以使用`accept`屬性指定伺服器接受的檔案類型(僅適用於檔案類型)。這與`<input>`元素一起使用。 ``` <input type="file" accept="image/png, image/jpeg" /> ``` 優化影片載入 ------ 您可以透過使用`<video>`元素的`preload`屬性來加快影片檔案的載入速度,從而實現更流暢的播放。 ``` <video src="video.mp4" preload="auto"> Your browser does not support the video tag. </video> ``` 這就是今天的全部內容。 我希望這有幫助。 謝謝閱讀。 欲了解更多此類內容,[請點擊此處](https://shefali.dev/blog)。 您也可以在[X(Twitter)](https://twitter.com/Shefali__J)上關注我,以獲取有關 Web 開發的每日提示。 繼續編碼! [](https://www.buymeacoffee.com/devshefali) --- 原文出處:https://dev.to/devshefali/21-html-tips-you-must-know-about-55j7
長話短說 ---- 在本文中,您將了解如何建立 Vercel 的 V0.dev 的克隆。這是一個很棒的專案,可以加入到您的投資組合中並磨練您的人工智慧能力。 我們將介紹使用: - 用於應用程式框架的 Next.js 🖥️ - 法學碩士 OpenAI 🧠 - v0 👾 的應用程式邏輯 - 使用 CopilotKit 將 AI 整合到您的應用程式中 🪁  --- CopilotKit:應用內人工智慧的作業系統框架 ========================= CopilotKit 是[開源人工智慧副駕駛平台。](https://github.com/CopilotKit/CopilotKit)我們可以輕鬆地將強大的人工智慧整合到您的 React 應用程式中。 建造: - ChatBot:上下文感知的應用內聊天機器人,可以在應用程式內執行操作 💬 - CopilotTextArea:人工智慧驅動的文字字段,具有上下文感知自動完成和插入功能📝 - 聯合代理:應用程式內人工智慧代理,可以與您的應用程式和使用者互動🤖  {% cta https://github.com/CopilotKit/CopilotKit %} Star CopilotKit ⭐️ {% endcta %} (原諒人工智慧的拼字錯誤並給一顆星:) 現在回到文章。 --- 先決條件 ---- 要開始學習本教程,您需要具備以下條件: - 文字編輯器(VS Code、遊標) - React、Next.js、Typescript 和 Tailwind CSS 的基本知識。 - Node.js 安裝在您的 PC/Mac 上 - 套件管理器 (npm) - [OpenAI](https://platform.openai.com/docs/overview) API 金鑰 - [CopilotKit](https://docs.copilotkit.ai/getting-started/quickstart-textarea)安裝在您的 React 專案中 v0是什麼? ------ **v0**是[Vercel 開發的](https://vercel.com/blog/announcing-v0-generative-ui)生成式使用者介面 (UI) 工具,允許使用者給予提示並描述他們的想法,然後將其轉換為用於建立 Web 介面的 UI 程式碼。它利用[生成式 AI](https://medium.com/data-science-at-microsoft/generative-ai-openai-and-chatgpt-what-are-they-3c80397062c4)以及[React](https://developer.mozilla.org/en-US/docs/Learn/Tools_and_testing/Client-side_JavaScript_frameworks/React_getting_started) 、 [Tailwind CSS](https://tailwindcss.com/)和[Shadcn UI](https://ui.shadcn.com/)等開源工具,根據使用者提供的描述產生程式碼。 *這是使用 v0 產生的 Web 應用程式 UI 的範例* https://v0.dev/t/nxGnMd1uVGc 了解專案要求 ------ 在本逐步教程結束時,克隆將具有以下專案要求: 1. **使用者輸入:**使用者輸入文字作為提示,描述他們想要產生的 UI。這將使用 CopilotKit 聊天機器人來完成,該聊天機器人由[CopilotSidebar](https://docs.copilotkit.ai/reference/CopilotSidebar)提供。 2. **CopilotKit 整合:** CopilotKit 將用於為 Web 應用程式提供 AI 功能以產生 UI。 3. **渲染 UI:**在 UI React/JSX 程式碼和渲染 UI 之間切換的切換開關。 使用 CopilotKit 建立 v0 克隆 ---------------------- **第 1 步:建立一個新的 Next.JS 應用程式** 在終端機中開啟工作區資料夾並執行以下命令建立新的 Next.js 應用程式: ``` npx create-next-app@latest copilotkit-v0-clone ``` 這將建立一個名為`copilotkit-v0-clone`新目錄,其中包含 Next.JS 專案結構,並安裝了所需的依賴項。它將在您的終端中顯示這一點,並對除最後一個之外的所有選項都選擇**“是”** ,因為建議使用預設`import alias` 。其他提示安裝我們將在專案中使用的 Typescript 和 TailwindCSS。  使用`cd`指令導航到專案目錄,如下所示: ``` cd copilotkit-v0-clone ``` **步驟 2:設定 CopilotKit 後端端點。閱讀[文件](https://docs.copilotkit.ai/getting-started/quickstart-backend)以了解更多資訊。** 執行以下命令來安裝 CopilotKit 後端軟體包: ``` npm i @copilotkit/backend ``` 然後造訪 https://platform.openai.com/api-keys 以取得您的**GPT 4** OpenAI API 金鑰。  取得 API 金鑰後,在根目錄中建立一個`.env.local`檔案。 `.env.local`檔案應該是這樣的: ``` OPENAI_API_KEY=Your OpenAI API key ``` 在**app**目錄下建立該目錄; `api/copilot/openai`並建立一個名為`route.ts`的檔案。該檔案用作 CopilotKit 請求和 OpenAI 互動的**後端**端點。它處理傳入的請求,使用 CopilotKit 處理它們,並傳回適當的回應。 我們將在`route.ts`檔案中建立一個POST請求函數,在post請求內部建立一個`CopilotBackend`類別的新實例,該類別提供了處理CopilotKit請求的方法。 然後,我們呼叫`CopilotBackend`實例的`response`方法,並傳遞請求物件 ( `req` ) 和`OpenAIAdapter`類別的新實例作為參數。此方法使用 CopilotKit 和 OpenAI API 處理請求並回傳回應。 如下面的程式碼所示,我們從`@copilotkit/backend`套件導入`CopilotBackend`和`OpenAIAdapter`類別。這些類別對於與 CopilotKit 和 OpenAI API 互動是必需的。 ``` import { CopilotBackend, OpenAIAdapter } from "@copilotkit/backend"; export const runtime = "edge"; export async function POST(req: Request): Promise<Response> { const copilotKit = new CopilotBackend(); return copilotKit.response(req, new OpenAIAdapter()); } ``` **步驟 3:為 v0 克隆建立元件** 我們將使用 Shadcn UI 庫中的元件。要處理這個問題,讓我們透過執行`shadcn-ui init`命令來設定 Shadcn UI 庫來設定您的專案 ``` npx shadcn-ui@latest init ``` 然後我們將用這個問題來配置components.json ``` Which style would you like to use? › Default Which color would you like to use as base color? › Slate Do you want to use CSS variables for colors? › no / yes ``` 我們在 Shadcn UI 中使用的元件是**按鈕**和**對話框**。那麼讓我們來安裝它們吧! 對於[按鈕](https://ui.shadcn.com/docs/components/button),執行此命令 ``` npx shadcn-ui@latest add button ``` 若要安裝[對話](https://ui.shadcn.com/docs/components/dialog)方塊元件,請執行以下命令 ``` npx shadcn-ui@latest add dialog ``` **第 4 步:設定 CopilotKit 前端。閱讀[文件](https://docs.copilotkit.ai/getting-started/quickstart-textarea)以了解更多資訊。** 若要安裝 CopilotKit 前端軟體包,請執行以下命令: ``` npm i @copilotkit/react-core @copilotkit/react-ui ``` 根據[CopilotKit 文件](https://docs.copilotkit.ai/getting-started/quickstart-textarea),要使用 CopilotKit,我們必須設定前端包裝器以透過 Copilot 傳遞任何 React 應用程式。當提示傳遞到 CopilotKit 時,它會透過 URL 將其傳送到 OpenAI,後者會回傳回應。 在**應用程式**目錄中,讓我們更新`layout.tsx`檔案。該文件將定義我們應用程式的佈局結構並將 CopilotKit 整合到前端。 輸入以下程式碼: ``` "use client"; import { CopilotKit } from "@copilotkit/react-core"; import "@copilotkit/react-textarea/styles.css"; // also import this if you want to use the CopilotTextarea component import "@copilotkit/react-ui/styles.css"; import { Inter } from "next/font/google"; import "./globals.css"; import { CopilotSidebar, } from "@copilotkit/react-ui"; const inter = Inter({ subsets: ["latin"] }); export default function RootLayout({ children, }: Readonly<{ children: React.ReactNode; }>) { return ( <html lang="en"> <body className={inter.className}> <CopilotKit url="/api/copilotkit/openai/"> <CopilotSidebar defaultOpen>{children}</CopilotSidebar> </CopilotKit> </body> </html> ); } ``` 該元件代表我們應用程式的根佈局。它使用 CopilotKit 包裝整個應用程式,根據我們在**步驟 2**中為後端建立的內容指定 CopilotKit 後端端點的 URL ( `/api/copilotkit/openai/` )。此外,它還包括一個 CopilotSidebar 元件,可作為 CopilotKit 的側邊欄,並將 Children 屬性作為其內容傳遞。 **第 5 步:設定主應用程式** 讓我們建立應用程式的結構。它將有一個標題、側邊欄和預覽畫面。 對於**Header** ,導航到**元件**目錄,如下所示, `src/components`然後建立一個`header.tsx`檔案並輸入以下程式碼: ``` import { CodeXmlIcon } from "lucide-react"; import { Button } from "./ui/button"; const Header = (props: { openCode: () => void }) => { return ( <div className="w-full h-20 bg-white flex justify-between items-center px-4"> <h1 className="text-xl font-bold">Copilot Kit</h1> <div className="flex gap-x-2"> <Button className=" px-6 py-1 rounded-md space-x-1" variant={"default"} onClick={props.openCode} > <span>Code</span> <CodeXmlIcon size={20} /> </Button> </div> </div> ); }; export default Header; ``` 對於**側欄,**建立一個`sidebar.tsx`檔案並輸入以下程式碼: ``` import { ReactNode } from "react"; const Sidebar = ({ children }: { children: ReactNode }) => { return ( <div className="w-[12%] min-h-full bg-white rounded-md p-4"> <h1 className="text-sm mb-1">History</h1> {children} </div> ); }; export default Sidebar; ``` 然後對於**預覽**螢幕,建立一個`preview-screen.tsx`檔案並輸入程式碼: ``` const PreviewScreen = ({ html_code }: { html_code: string }) => { return ( <div className="w-full h-full bg-white rounded-lg shadow-lg p-2 border"> <div dangerouslySetInnerHTML={{ __html: html_code }} /> </div> ); }; export default PreviewScreen; ``` 現在讓我們將它們放在一起,打開`page.tsx`檔案並貼上以下程式碼: ``` "use client"; import { useState } from "react"; import { Dialog, DialogContent, DialogDescription, DialogHeader, DialogTitle, } from "@/components/ui/dialog"; import Header from "@/components/header"; import Sidebar from "@/components/sidebar"; import PreviewScreen from "@/components/preview-screen"; import { Input } from "@/components/ui/input"; export default function Home() { const [code, setCode] = useState<string[]>([ `<h1 class="text-red-500">Hello World</h1>`, ]); const [codeToDisplay, setCodeToDisplay] = useState<string>(code[0] || ""); const [showDialog, setShowDialog] = useState<boolean>(false); const [codeCommand, setCodeCommand] = useState<string>(""); return ( <> <main className="bg-white min-h-screen px-4"> <Header openCode={() => setShowDialog(true)} /> <div className="w-full h-full min-h-[70vh] flex justify-between gap-x-1 "> <Sidebar> <div className="space-y-2"> {code.map((c, i) => ( <div key={i} className="w-full h-20 p-1 rounded-md bg-white border border-blue-600" onClick={() => setCodeToDisplay(c)} > v{i} </div> ))} </div> </Sidebar> <div className="w-10/12"> <PreviewScreen html_code={readableCode || ""} /> </div> </div> <div className="w-8/12 mx-auto p-1 rounded-full bg-primary flex my-4 outline-0"> <Input type="text" placeholder="Enter your code command" className="w-10/12 p-6 rounded-l-full outline-0 bg-primary text-white" value={codeCommand} onChange={(e) => setCodeCommand(e.target.value)} /> <button className="w-2/12 bg-white text-primary rounded-r-full" onClick={() => generateCode.run(context)} > Generate </button> </div> </main> <Dialog open={showDialog} onOpenChange={setShowDialog}> <DialogContent> <DialogHeader> <DialogTitle>View Code.</DialogTitle> <DialogDescription> You can use the following code to start integrating into your application. </DialogDescription> <div className="p-4 rounded bg-primary text-white my-2"> {readableCode} </div> </DialogHeader> </DialogContent> </Dialog> </> ); } ``` 我們來分解一下上面的程式碼: `const [code, setCode] = useState<string[]>([]);`將用於保存生成的程式碼 `const [codeToDisplay, setCodeToDisplay] = useState<string>(code[0] || "");`將用於保存預覽畫面上顯示的程式碼。 `const [showDialog, setShowDialog] = useState<boolean>(false);`這將保持對話框的狀態,該對話框顯示您可以複製的生成程式碼。 在下面的程式碼中,我們循環產生的程式碼(一串陣列)將其顯示在側邊欄上,這樣當我們選擇一個程式碼時,它就會顯示在預覽畫面上。 ``` <Sidebar> <div className="space-y-2"> {code.map((c, i) => ( <div key={i} className="w-full h-20 p-1 rounded-md bg-white border border-blue-600" onClick={() => setCodeToDisplay(c)} > v{i} </div> ))} </div> </Sidebar> ``` `<PreviewScreen html_code={codeToDisplay} />`在這裡,我們發送要在預覽畫面上顯示的程式碼。預覽畫面元件採用 CopilotKit 產生的程式碼字串,並使用`dangerouslySetInnerHTML`來呈現產生的程式碼。 下面我們有一個`Dialog`元件,它將顯示 CoplilotKit 產生的程式碼,可以將其複製並加入到您的程式碼中。 ``` <Dialog open={showDialog} onOpenChange={setShowDialog}> <DialogContent> <DialogHeader> <DialogTitle>View Code.</DialogTitle> <DialogDescription> You can use the following code to start integrating into your application. </DialogDescription> <div className="p-4 rounded bg-primary text-white my-2"> {readableCode} </div> </DialogHeader> </DialogContent> </Dialog> ``` **步驟6:實作主要應用程式邏輯** 在這一步驟中,我們將 CopilotKit 整合到我們的 v0 克隆應用程式中,以促進人工智慧驅動的 UI 生成。我們將使用 CopilotKit 的 React hook 來管理狀態,使元件可供 Copilot 讀取和操作,並與 OpenAI API 互動。 在您的`page.tsx`檔案中,匯入以下內容: ``` import { CopilotTask, useCopilotContext, useMakeCopilotReadable, } from "@copilotkit/react-core"; ``` 然後我們在`Home`元件中使用`CopilotTask`定義一個`generateCode`任務: ``` const readableCode = useMakeCopilotReadable(codeToDisplay); const generateCode = new CopilotTask({ instructions: codeCommand, actions: [ { name: "generateCode", description: "Create Code Snippet with React.js, tailwindcss.", parameters: [ { name: "code", type: "string", description: "Code to be generated", required: true, }, ], handler: async ({ code }) => { setCode((prev) => [...prev, code]); setCodeToDisplay(code); }, }, ], }); const context = useCopilotContext(); ``` 我們使用`useMakeCopilotReadable`來傳遞現有程式碼並確保可讀性。然後我們使用`CopilotTask`產生UI,並將`generateCode`任務綁定到**生成**按鈕,這樣就可以透過與按鈕元件互動來產生程式碼片段。 此操作由使用者互動觸發,並在呼叫時執行非同步`handler`函數。 `handler`將產生的程式碼新增至程式碼陣列中,更新應用程式狀態以包含新產生的程式碼片段,並將產生的程式碼傳送到預覽畫面上顯示和呈現,預覽畫面也可以複製。 此外, `instructions`屬性指定提供給 Copilot 的命令,該命令儲存在`codeCommand`狀態變數中。 有關`CopilotTask`運作方式的完整說明,請查看此處的文件:https://docs.copilotkit.ai/reference/CopilotTask **第 6 步:執行 v0 克隆應用程式** 至此,我們已經完成了 v0 克隆設置,然後可以透過執行來啟動開發伺服器 ``` npm run dev ``` 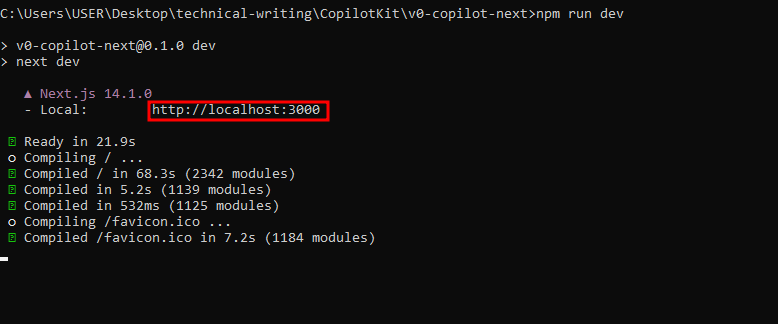 可以使用此 URL 在瀏覽器中存取該 Web 應用程式 [http://本地主機:3000](http://localhost:3000/) 然後您可以輸入提示並點擊**“生成”。**這裡有些例子: - **定價頁面:**如下所示,這是產生的UI,有一個切換按鈕可以在UI和React程式碼之間切換: 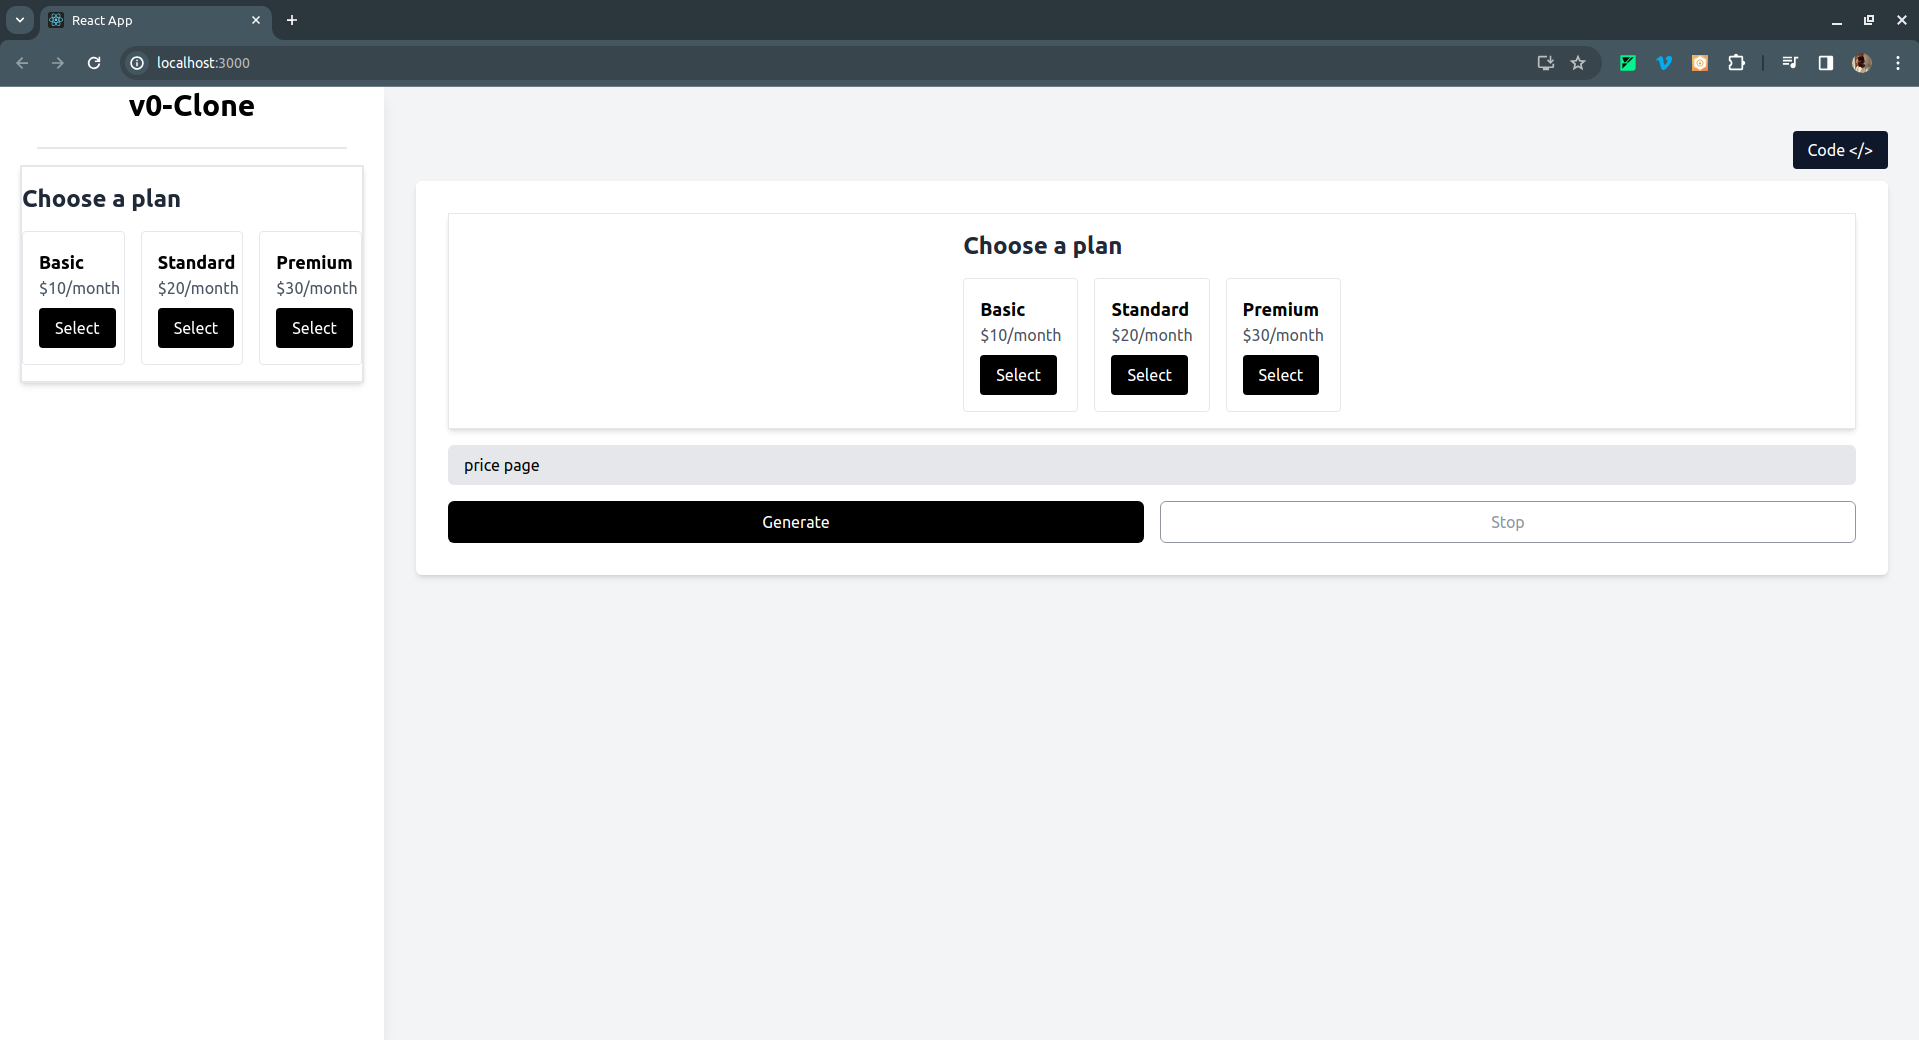 如果點擊右上角的**Code** </> 按鈕,它會切換到產生的 UI 的 React 程式碼,如下所示: 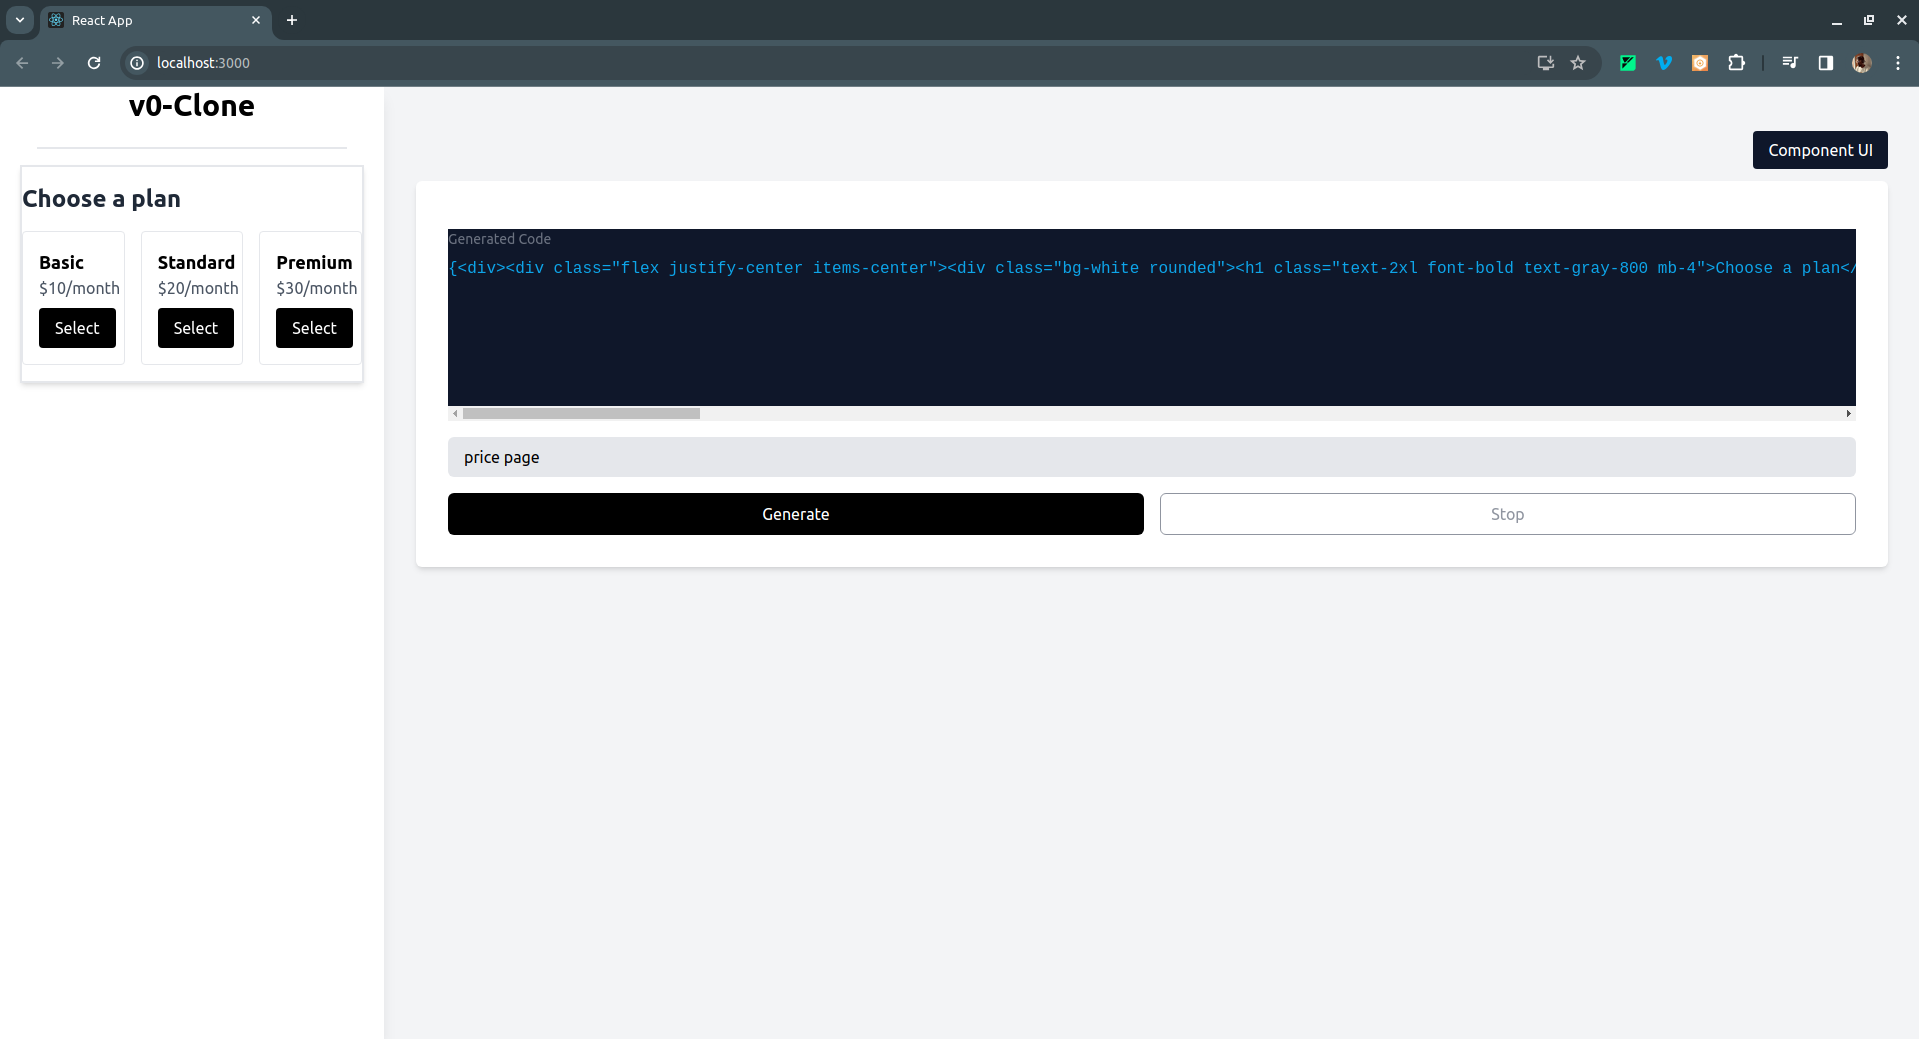 - 註冊頁面 UI 範例: 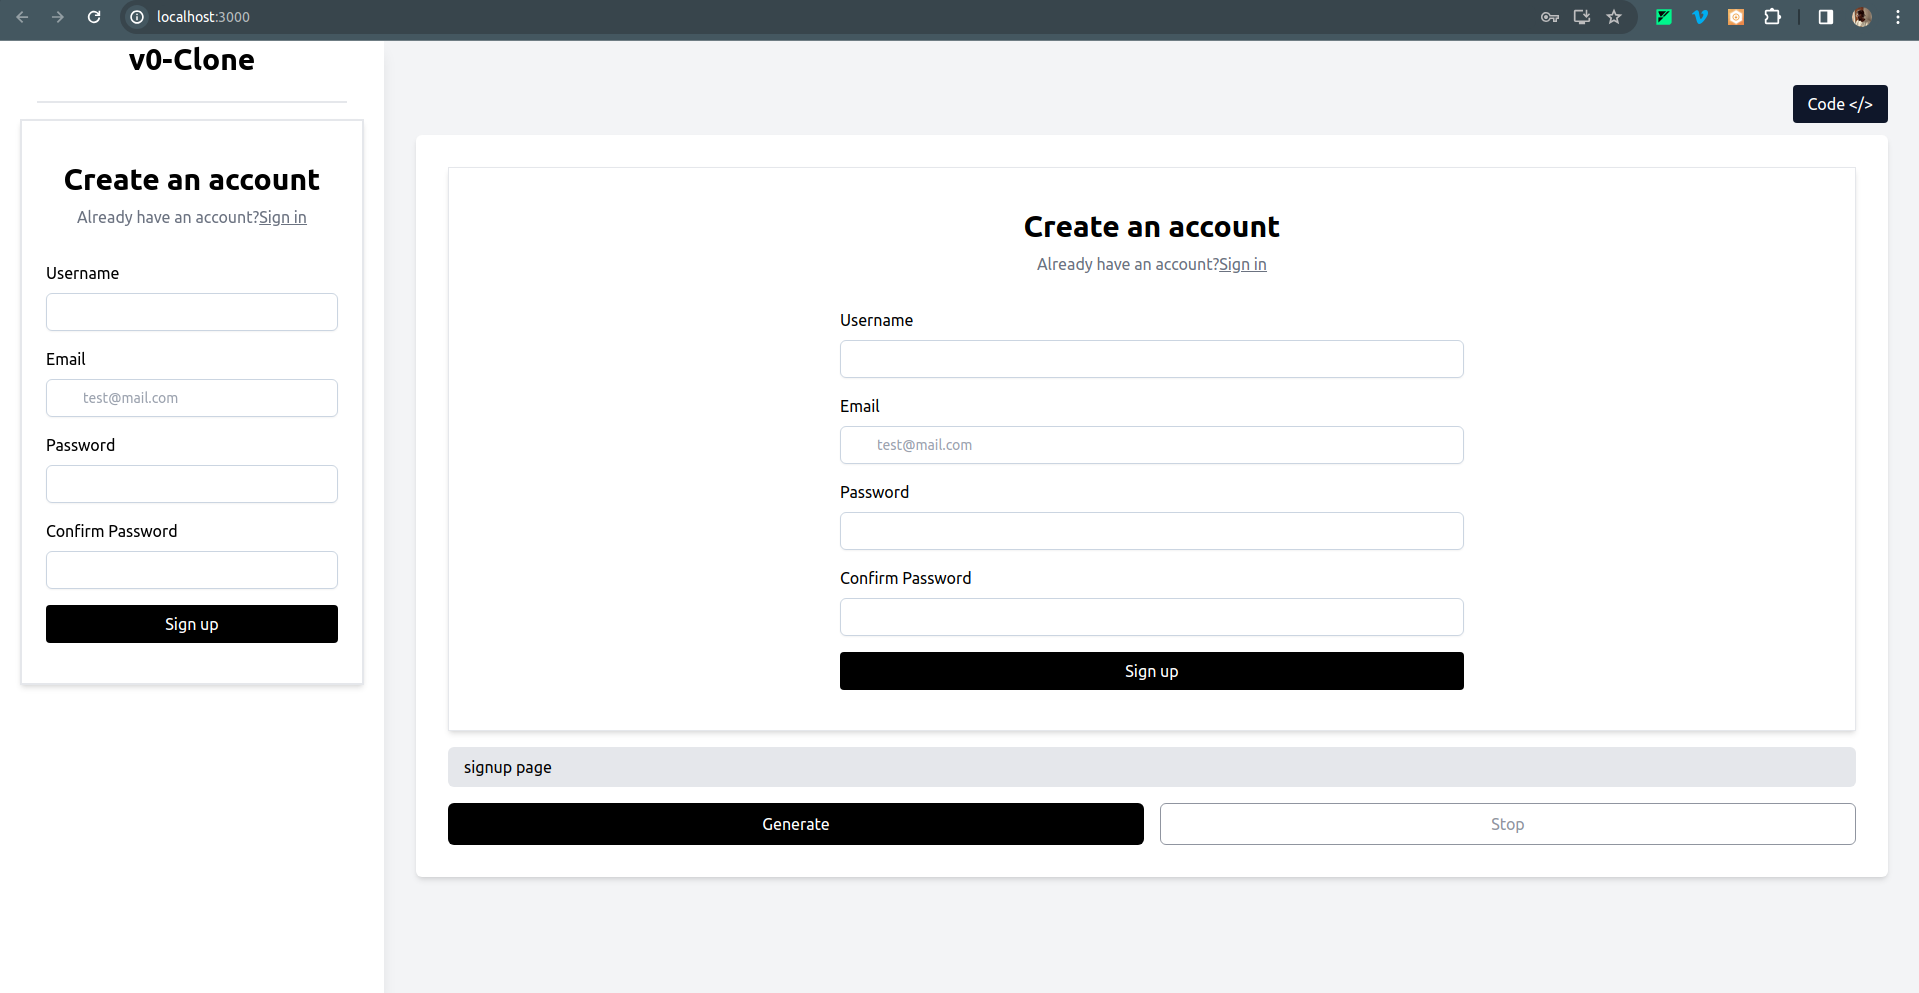 - 還有一個結帳頁面 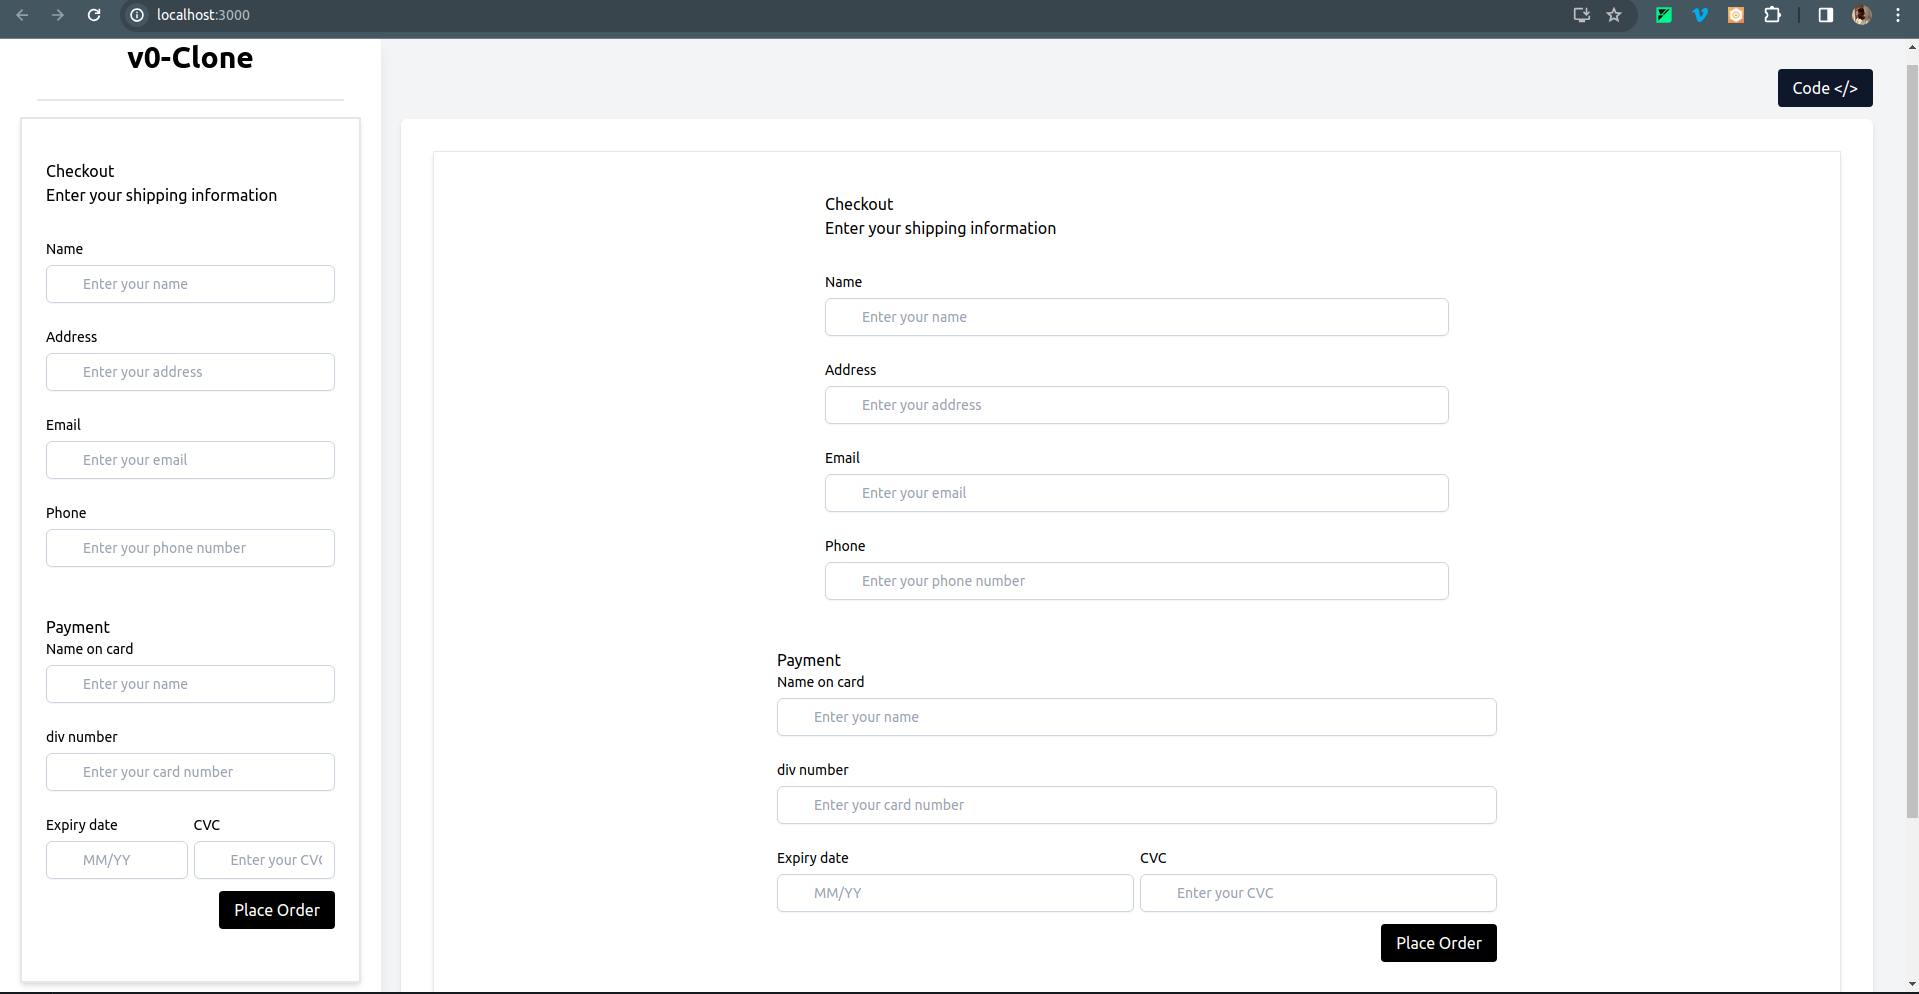 要克隆專案並在本地執行它,請打開終端並執行以下命令: ``` git clone https://github.com/Tabintel/v0-copilot-next ``` 然後執行`npm install`以安裝專案所需的所有依賴項,並`npm run dev`來執行 Web 應用程式。 結論 -- 總而言之,您可以使用[CopilotKit](https://github.com/CopilotKit/CopilotKit)建立 v0 克隆,為您的設計提供 UI 提示。 CopilotKit 不僅適用於 UI 提示,它還可以用於建立[AI 驅動的 PowerPoint 生成器](https://dev.to/copilotkit/how-to-build-ai-powered-powerpoint-app-nextjs-openai-copilotkit-ji2)、 [AI 簡歷產生器](https://dev.to/copilotkit/how-to-build-the-with-nextjs-openai-1mhb)等應用程式。 可能性是無限的,立即查看 CopilotKit,將您的 AI 想法變為現實。 在[GitHub](https://github.com/Tabintel/v0-copilot-next)上取得完整原始碼。 從[文件](https://docs.copilotkit.ai/getting-started/quickstart-textarea)中了解有關如何使用 CopilotKit 的更多資訊。 另外,別忘了[Star CopilotKit!](https://github.com/CopilotKit/CopilotKit) ⭐ --- 原文出處:https://dev.to/copilotkit/i-created-a-v0-clone-with-nextjs-gpt4-copilotkit-3cmb
你的轉職路上,還缺少一份自學作業包!寫完這幾包,直接拿作品去面試上班!
本論壇另有附設一個 LINE 新手發問&交流群組!歡迎加入討論!


