對於未來的軟體工程師、設計師或產品經理來說,個人網站幾乎和履歷一樣成為標準——這是有充分理由的。個人網站是展示技術或設計悟性的好方法,並提供比標準簡歷更個性化和有趣的格式(而且您無論如何都可以將簡歷放在您的網站上)。網站比一張紙更具互動性,會讓您脫穎而出,並開啟潛在的對話主題。建立個人網站的方法有很多種,您應該仔細考慮您的方法——這將是您在網路上向招聘人員和許多臨時谷歌或linkedin搜尋者展示的方式。 接下來,我們將看看特別令人難忘的個人網站(前面很漂亮),並提供一些建立或更新您自己的網站的建議。 ### 個人網站的不同用途 個人網站可以實現許多不同的目的。我已經介紹了下面一些較大的類別。 #### 資料夾 對於藝術家或設計師來說,個人網站可以作為您的作品集。這是一種很棒的格式,並且很容易保持最新狀態。例如,考慮一下自由插畫家 Paddy Donnelly 的這個[網站](http://lefft.com/)。打開這些網站以獲得完整的體驗。  #### 履歷 從最基本的形式來看,個人網站是讓您的履歷變得更有趣的好方法。即使從紙質簡歷中取出文字並在帶有電子郵件連結的網站上很好地格式化它也是一個很好的開始。例如,Jackie Luo 在她的[網站](http://jackieluo.com/)上提供了她簡歷的可讀版本。  #### 以我為中心 即使您不想展示您的專業經驗,個人網站也是集中搜尋有關您自己的資訊的好方法。許多人在其網站上提供社交媒體帳戶的連結。例如,Safia Abdella 的[網站](https://safia.rocks/)乾淨、簡單,可以輕鬆存取造訪她網站的任何人可能需要的關鍵資訊。  #### 部落格 個人網站是保存部落格的好地方,這是向訪客展示您的作品的好方法。阿萊娜·卡夫克斯 (Alaina Kafkes) 除了在 dev.to 和 Medium 上提供她的個人資料連結之外,還提供她[網站](http://alainakafk.es/#/words)上所有最新內容的連結。  #### 其他的東西 向網路講述您的故事。履歷、社群媒體資料,甚至你的 Facebook 頁面都受到相當嚴格的控制。網站是一個可以是任何你喜歡的空間:一個遊戲化的仙境,最少的描述,或其他什麼。考慮一下 Robby Leonardi 屢獲殊榮的遊戲化簡歷[網站](http://www.rleonardi.com/interactive-resume/)。  ### 整個職業生涯中的個人網站 如果您是應屆畢業生或正在進行職業轉型,個人網站對技術招募人員來說會很有吸引力。早在 2013 年,《富比士》就報導稱,56% 的招募經理表示,與其他品牌工具相比,他們對候選人的個人網站印象更深刻。 作為未來的設計師或軟體工程師,您可以在頁面上展示您的技術能力!即使你不做技術性的事情,網站也比紙質簡歷更引人注目、更個性化,所以這是一個很好的方法,可以通過簡單的“在i-am-the-bomb.com 查看我的簡歷」來獲得優勢。 」。 當您繼續您的職業生涯時,您仍然可以保留個人網站來展示您正在從事的工作並維護您的個人品牌。例如,Cassidy Williams 在她的[網站](http://cassidoo.co/)上提供了有關她所做的事情的更新時間表。  如果您正在尋找寫作和演講的機會,這是一個很好的地方,可以展示您的所作所為,並向在線查找您的任何人提供可存取的資訊。 隨著時間的推移維護您的網站可以讓您在開始另一次求職時輕鬆地短暫刷新,這也是吸引不可預見的機會和聯繫的好方法。我曾經有一個我不認識的表弟透過個人網站聯絡我——你永遠不知道! ### 入門 現在製作網站比以往任何時候都容易。那裡有一些很棒的入門教程。如果您想快速入門,我推薦[WordPress](http://www.wpbeginner.com/guides/)或[SquareSpace](https://developers.squarespace.com/beginner-tutorial/)的這些教學。如果您想建立和託管自己的, [Github Pages](https://guides.github.com/features/pages/)中的本指南是一個很好的起點。如果您想深入了解建置、託管和服務,這是一個很好的學習方式!以下是一些可能有用的資源: - MEAN 入門網站[儲存庫](https://github.com/manishrw/mean-starter-website) - Jekyll 入門套件儲存[庫](https://github.com/nirgn975/generator-jekyll-starter-kit) - Github 自己的 Web Starter it[儲存庫](https://github.com/google/web-starter-kit) - 關於工具和框架的[實用開發線程](https://dev.to/nayeonkim/what-toolframeworkcmsetc-do-you-use-to-build-your-own-personal-website) - 與實用開發文章相對應的[Twitter 線程](https://twitter.com/thepracticaldev/status/894161129492156416) ### 一般建議 1. **從某個地方開始。**人們很容易對一個網站感到興奮,努力獲取域名,將其加入到您的個人簡介中,在頁面上貼上“正在進行中”的標籤,然後完全忘記它。當我點擊某人的個人網站時,大約有 10-20% 的時間,該網站要么完全關閉,要么「正在進行」數月或數年。不要被所有令人驚嘆的網站嚇倒。作為一個初學者,至少要在大文本中加入指向您的相關帳戶和您的姓名的連結 - 這比看起來像一個無法完成他們開始的事情要好得多。 2. 從所有可能看到的人的角度**來批判性地審視您在網站上放置的內容**。雖然 Twitter 和 linkedin 帳戶很棒,但如果您不希望招聘人員看到您的 tumblr 頁面上有關野貓的訊息,請不要將其連結到那裡。同樣,如果你認為你的黑客馬拉松專案在更好的Tinder 上對公司來說看起來很棒,但可能會讓你的父母不高興,那麼你可以將你的個人網站從你的Facebook 公開資料中刪除。有時我們都可以提醒網路是公共的! 3. **並非您的所有作品都需要展示。**個人網站可以是展示您早期專案的有趣方式,儘管您在七年級製作的海報可能會讓您感到溫暖和懷舊,但它可能會引起招聘人員的懷疑。選擇最能展現你的作品。 4. **讓它個性化。**這是您的個人網站是有原因的。不要害怕在你的網站上放一些東西。例如,Terri Burns 在她的[網站](http://tcburning.com/)上分享了她的興趣的隨機集合。這樣的事情會讓招募人員對你更有興趣,並且讓其他網站追蹤你的人也能了解你的興趣!  5. 發揮創意。更多激發您創造力的好點子: - 艾伯塔德沃爾 (Alberta Devor) 的火車路線靈感[網站](https://albertadevor.com/)  - 像素獎得主 Maria Passo 製作的精美動畫[網站](http://marisapassos.com/)  - 加里·勒馬森 (Gary Le Masson)[網站](http://www.garylemasson.com/)上引人注目的搜尋引擎框  - Kristine Flatland 格式有趣的[網站](http://kristineflat.land/#work2)  - 克萊門汀‧雅各比 (Clementine Jacoby) 繪製的她曾經造訪過的[網站](http://clementinejacoby.com/new_map.html)的地圖  在評論中分享在您的網站上對您有用的內容! --- 原文出處:https://dev.to/amandasopkin/fantastic-personal-websites-and-how-to-make-them--22om
目錄 == - [介紹](#introduction) - [技術堆疊](#tech-stack) - [特徵](#features) - [設定 Next.js 應用程式](#step-1-setting-up-the-nextjs-application) - [安裝所需的套件](#step-2-installing-required-packages) - [設定 Redis 連接](#step-3-setting-up-redis-connection) - [配置 BullMQ 佇列](#step-4-configuring-bullmq-queue) - [Next.js 儀器設置](#step-5-nextjs-instrumentation-setup) - [設定 Bright Data 的抓取瀏覽器](#step-6-setting-up-bright-datas-scraping-browser) - [Bright Data 的抓取瀏覽器是什麼?](#what-is-bright-datas-scraping-browser) - [設定 Bright Data 抓取瀏覽器的步驟](#steps-to-set-up-bright-datas-scraping-browser) - [使用 Puppeteer 實作抓取邏輯](#implementing-the-scraping-logic-with-puppeteer) - [航班搜尋功能](#flight-search-feature) - [顯示航班搜尋結果](#displaying-flight-search-results) - [探索完整的指南和程式碼庫](#discover-the-complete-guide-and-codebase) - [在 YouTube 上觀看詳細說明](#watch-the-detailed-explanation-on-youtube) - [在 GitHub 上探索完整程式碼](#explore-the-full-code-on-github) - [結論](#conclusion) 介紹 == 在不斷發展的 Web 開發領域,有效收集、處理和顯示外部來源資料的能力變得越來越有價值。無論是市場研究、競爭分析或客戶洞察,網路抓取在釋放網路資料的巨大潛力方面都發揮著至關重要的作用。 這篇部落格文章介紹了建立強大的 Next.js 應用程式的綜合指南,該應用程式旨在從領先的旅行搜尋引擎之一 Kayak 抓取航班資料。透過利用 Next.js 的強大功能以及 BullMQ、Redis 和 Puppeteer 等現代技術。 技術堆疊 ==== - [Next.js](https://nextjs.org/docs) - [順風CSS](https://tailwindcss.com/docs) - [下一個介面](https://nextui.org/docs) - [健康)狀況](https://zustand.surge.sh/) - [條紋](https://stripe.com/docs) - [Bright Data 的抓取瀏覽器](https://brdta.com/kishansheth21) - [打字稿](https://www.typescriptlang.org/docs) - [雷迪斯](https://redis.io/documentation) - [BullMQ](https://docs.bullmq.io/) - [傀儡師](https://pptr.dev/) - [智威湯遜](https://jwt.io/introduction) - [阿克西奧斯](https://axios-http.com/docs/intro) - [PostgreSQL](https://www.postgresql.org/docs) - [棱鏡](https://www.prisma.io/docs) 特徵 == - 🚀 帶有 Tailwind CSS 的 Next.js 14 應用程式目錄 - 體驗由最新 Next.js 14 提供支援的時尚現代的 UI,並使用 Tailwind CSS 進行設計,以實現完美的外觀和感覺。 - 🔗 API 路由和伺服器操作 - 深入研究與 Next.js 14 的 API 路由和伺服器操作的無縫後端集成,確保高效的資料處理和伺服器端邏輯執行。 - 🕷 使用 Puppeteer Redis 和 BullMQ 進行抓取 - 利用 Puppeteer 的強大功能進行進階 Web 抓取,並使用 Redis 和 BullMQ 管理佇列和作業以實現強大的後端操作。 - 🔑 用於身份驗證和授權的 JWT 令牌 - 使用 JWT 令牌保護您的應用程式,為整個平台提供可靠的身份驗證和授權方法。 - 💳 支付網關 Stripe - 整合 Stripe 進行無縫支付處理,為預訂旅行、航班和飯店提供安全、輕鬆的交易。 - ✈️ 使用 Stripe 支付網關預訂旅行、航班和飯店 - 使用我們的 Stripe 支援的支付系統,讓您的旅遊預訂體驗變得輕鬆。 - 📊 從多個網站抓取即時資料 - 從多個來源抓取即時資料,保持領先,讓您的應用程式更新最新資訊。 - 💾 使用 Prisma 將抓取的資料儲存在 PostgreSQL 中 - 利用 PostgreSQL 和 Prisma 高效儲存和管理抓取的資料,確保可靠性和速度。 - 🔄 用於狀態管理的 Zustand - 透過 Zustand 簡化狀態邏輯並增強效能,在您的應用程式中享受流暢且可管理的狀態管理。 - 😈 該應用程式的最佳功能 - 使用 Bright Data 的抓取瀏覽器抓取不可抓取的資料。  Bright Data的抓取瀏覽器為我們提供了自動驗證碼解決功能,可以幫助我們抓取不可抓取的資料。 第 1 步:設定 Next.js 應用程式 --------------------- 1. **建立 Next.js 應用程式**:首先建立一個新的 Next.js 應用程式(如果您還沒有)。您可以透過在終端機中執行以下命令來完成此操作: ``` npx create-next-app@latest booking-app ``` 2. **導航到您的應用程式目錄**:變更為您新建立的應用程式目錄: ``` cd booking-app ``` 步驟2:安裝所需的軟體包 ------------ 您需要安裝多個軟體包,包括 Redis、BullMQ 和 Puppeteer Core。執行以下命令來安裝它們: ``` npm install ioredis bullmq puppeteer-core ``` - `ioredis`是 Node.js 的強大 Redis 用戶端,支援與 Redis 進行通訊。 - `bullmq`以 Redis 作為後端來管理作業和訊息佇列。 - `puppeteer-core`可讓您控制外部瀏覽器以進行抓取。 步驟3:設定Redis連接 ------------- 在適當的目錄(例如`lib/` )中建立一個檔案(例如`redis.js` )來配置 Redis 連線: ``` // lib/redis.js import Redis from 'ioredis'; // Use REDIS_URL from environment or fallback to localhost const REDIS_URL = process.env.REDIS_URL || 'redis://localhost:6379'; const connection = new Redis(REDIS_URL); export { connection }; ``` 步驟4:配置BullMQ佇列 -------------- 透過在 Redis 配置所在的相同目錄中建立另一個檔案(例如, `queue.js` )來設定 BullMQ 佇列: ``` // lib/queue.js import { Queue } from 'bullmq'; import { connection } from './redis'; export const importQueue = new Queue('importQueue', { connection, defaultJobOptions: { attempts: 2, backoff: { type: 'exponential', delay: 5000, }, }, }); ``` 第 5 步:Next.js 儀器設置 ------------------ Next.js 允許偵測,可以在 Next.js 配置中啟用。您還需要建立一個用於作業處理的工作文件。 1.**在 Next.js 中啟用 Instrumentation** :將以下內容新增至`next.config.js`以啟用 Instrumentation: ``` // next.config.js module.exports = { experimental: { instrumentationHook: true, }, }; ``` 2.**建立用於作業處理的 Worker** :在您的應用程式中,建立一個檔案 ( `instrumentation.js` ) 來處理作業處理。該工作人員將使用 Puppeteer 來執行抓取任務: ``` // instrumentation.js export const register = async () => { if (process.env.NEXT_RUNTIME === 'nodejs') { const { Worker } = await import('bullmq'); const puppeteer = await import('puppeteer-core'); const { connection } = await import('./lib/redis'); const { importQueue } = await import('./lib/queue'); new Worker('importQueue', async (job) => { // Job processing logic with Puppeteer goes here }, { connection, concurrency: 10, removeOnComplete: { count: 1000 }, removeOnFail: { count: 5000 }, }); } }; ``` 第 6 步:設定 Bright Data 的抓取瀏覽器 --------------------------- 在設定 Bright 資料抓取瀏覽器之前,我們先來談談什麼是抓取瀏覽器。 ### Bright Data 的抓取瀏覽器是什麼? Bright Data 的抓取瀏覽器是一款用於自動網頁抓取的尖端工具,旨在與 Puppeteer、Playwright 和 Selenium 無縫整合。它提供了一套網站解鎖功能,包括代理輪換、驗證碼解決等,以提高抓取效率。它非常適合需要互動的複雜網頁抓取,透過在 Bright Data 基礎架構上託管無限的瀏覽器會話來實現可擴展性。如欲了解更多詳情,請造訪[光明資料](https://brdta.com/kishansheth21)。 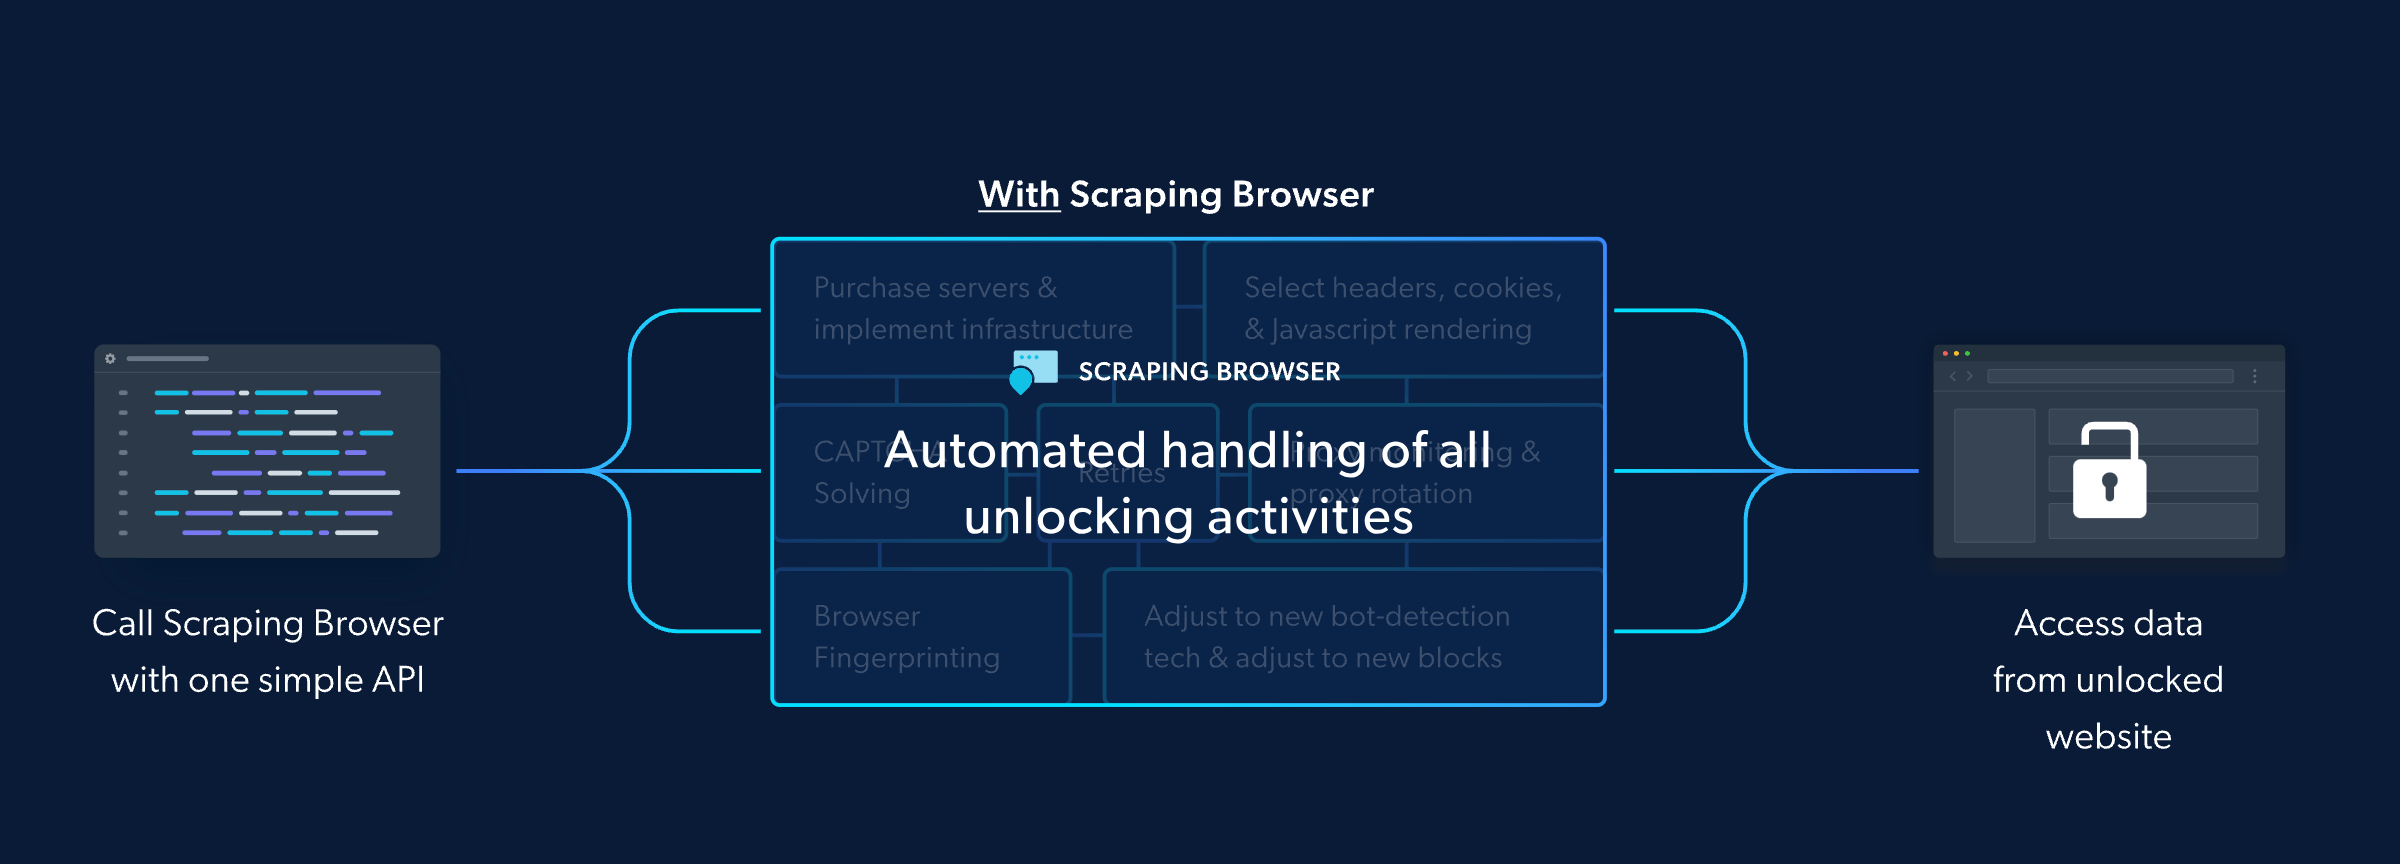 <a id="steps-to-set-up-bright-datas-scraping-browser"></a> #### 第 1 步:導覽至 Bright Data 網站 首先造訪[Brightdata.com](https://brdta.com/kishansheth21) 。這是您存取 Bright Data 提供的豐富網頁抓取資源和工具的入口。  #### 第 2 步:建立帳戶 造訪 Bright Data 網站後,註冊並建立一個新帳戶。系統將提示您輸入基本資訊以啟動並執行您的帳戶。  #### 第 3 步:選擇您的產品 在產品選擇頁面上,尋找代理商和抓取基礎設施產品。本產品專為滿足您的網路抓取需求而設計,提供強大的資料擷取工具和功能。 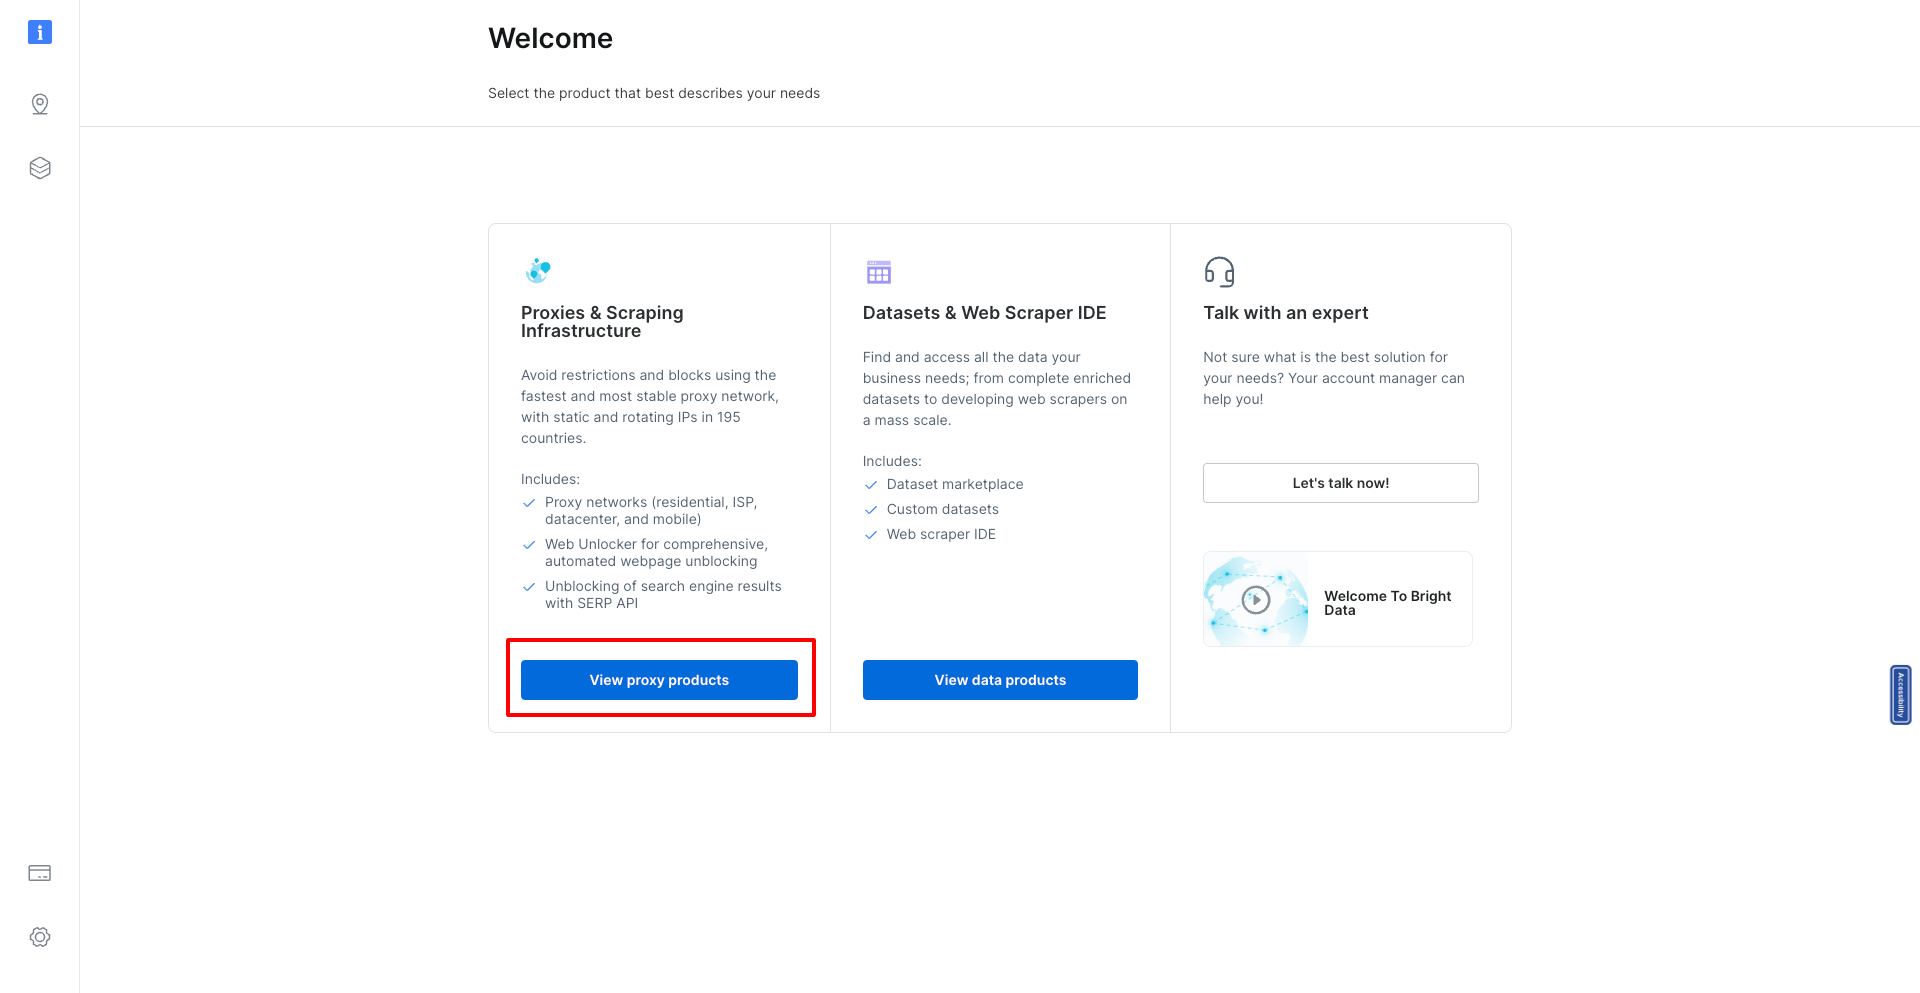 #### 第 4 步:新增代理 在「代理程式和抓取基礎設施」頁面中,您會找到一個「新增按鈕」。點擊此按鈕開始將新的抓取瀏覽器新增到您的工具包的過程。 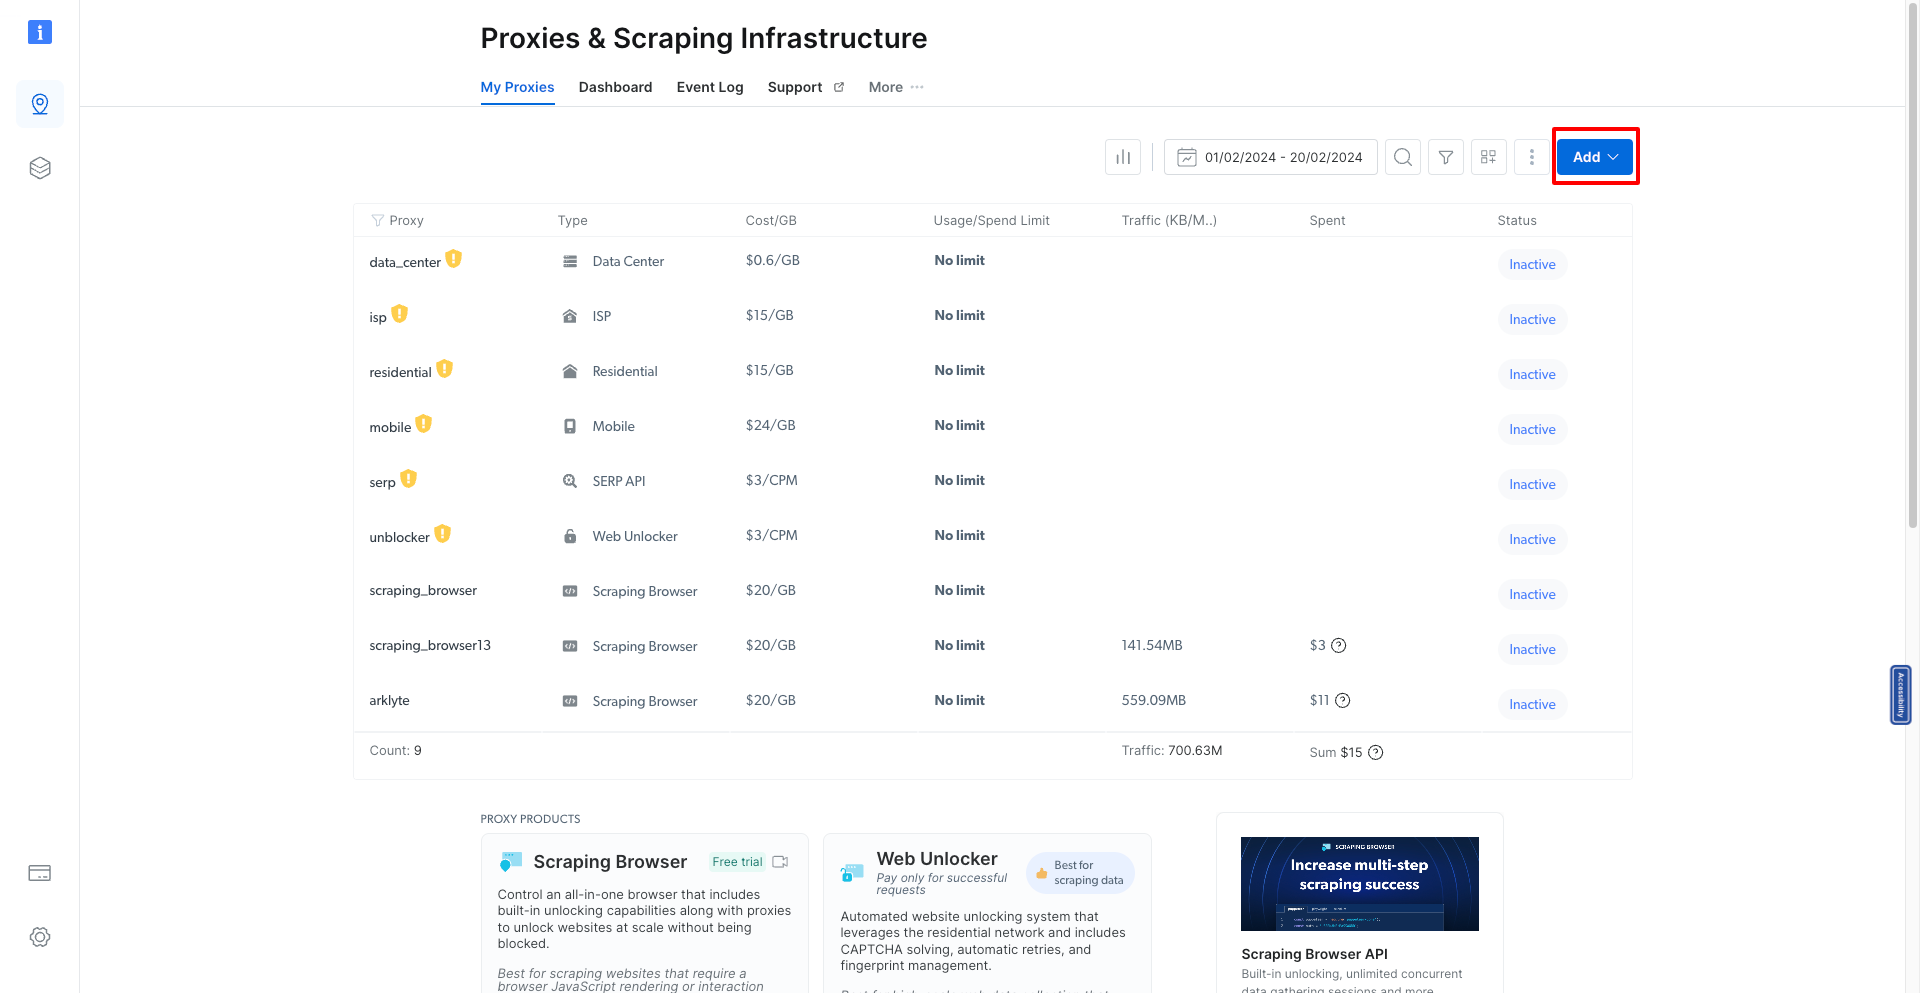 #### 第五步:選擇抓取瀏覽器 將出現一個下拉列表,您應該從中選擇抓取瀏覽器選項。這告訴 Bright Data 您打算設定一個新的抓取瀏覽器環境。  #### 第 6 步:為您的抓取瀏覽器命名 為您的新抓取瀏覽器指定一個唯一的名稱。這有助於稍後辨識和管理它,特別是如果您計劃對不同的抓取專案使用多個瀏覽器。 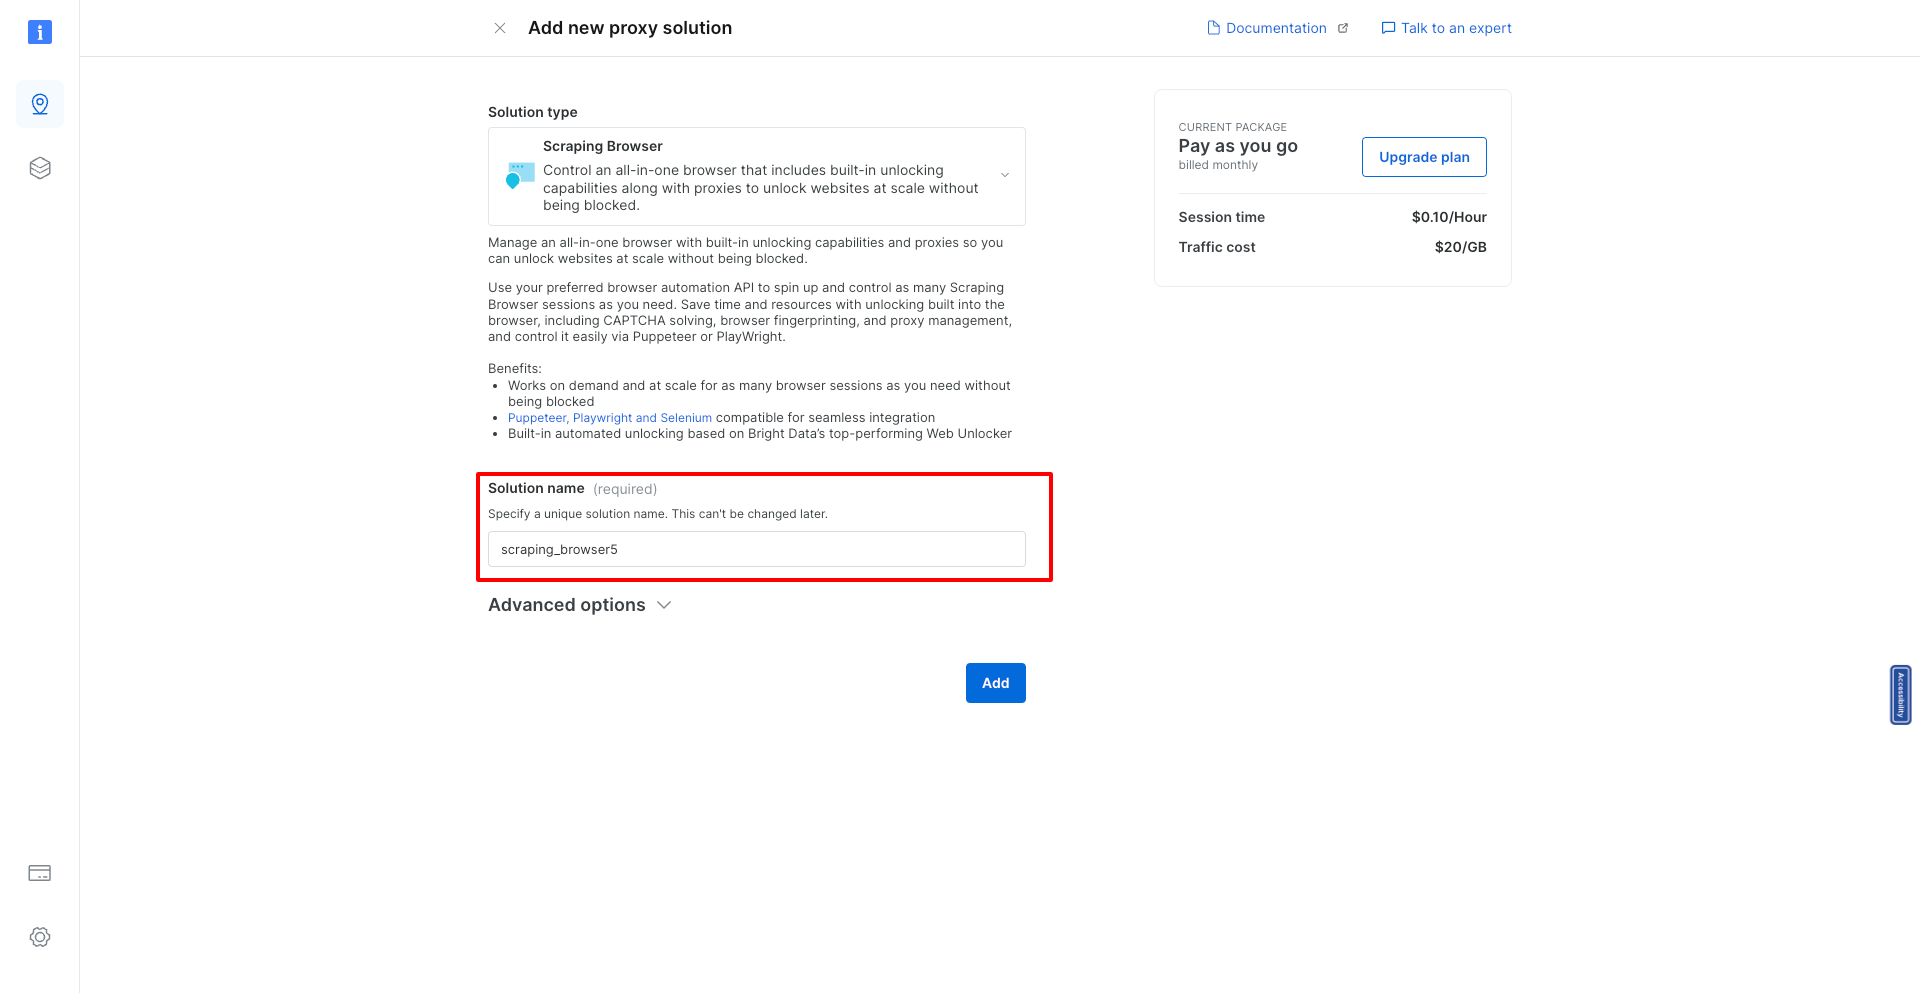 #### 步驟7:新增瀏覽器 命名您的瀏覽器後,按一下「新增」按鈕。此操作完成了新的抓取瀏覽器的建立。 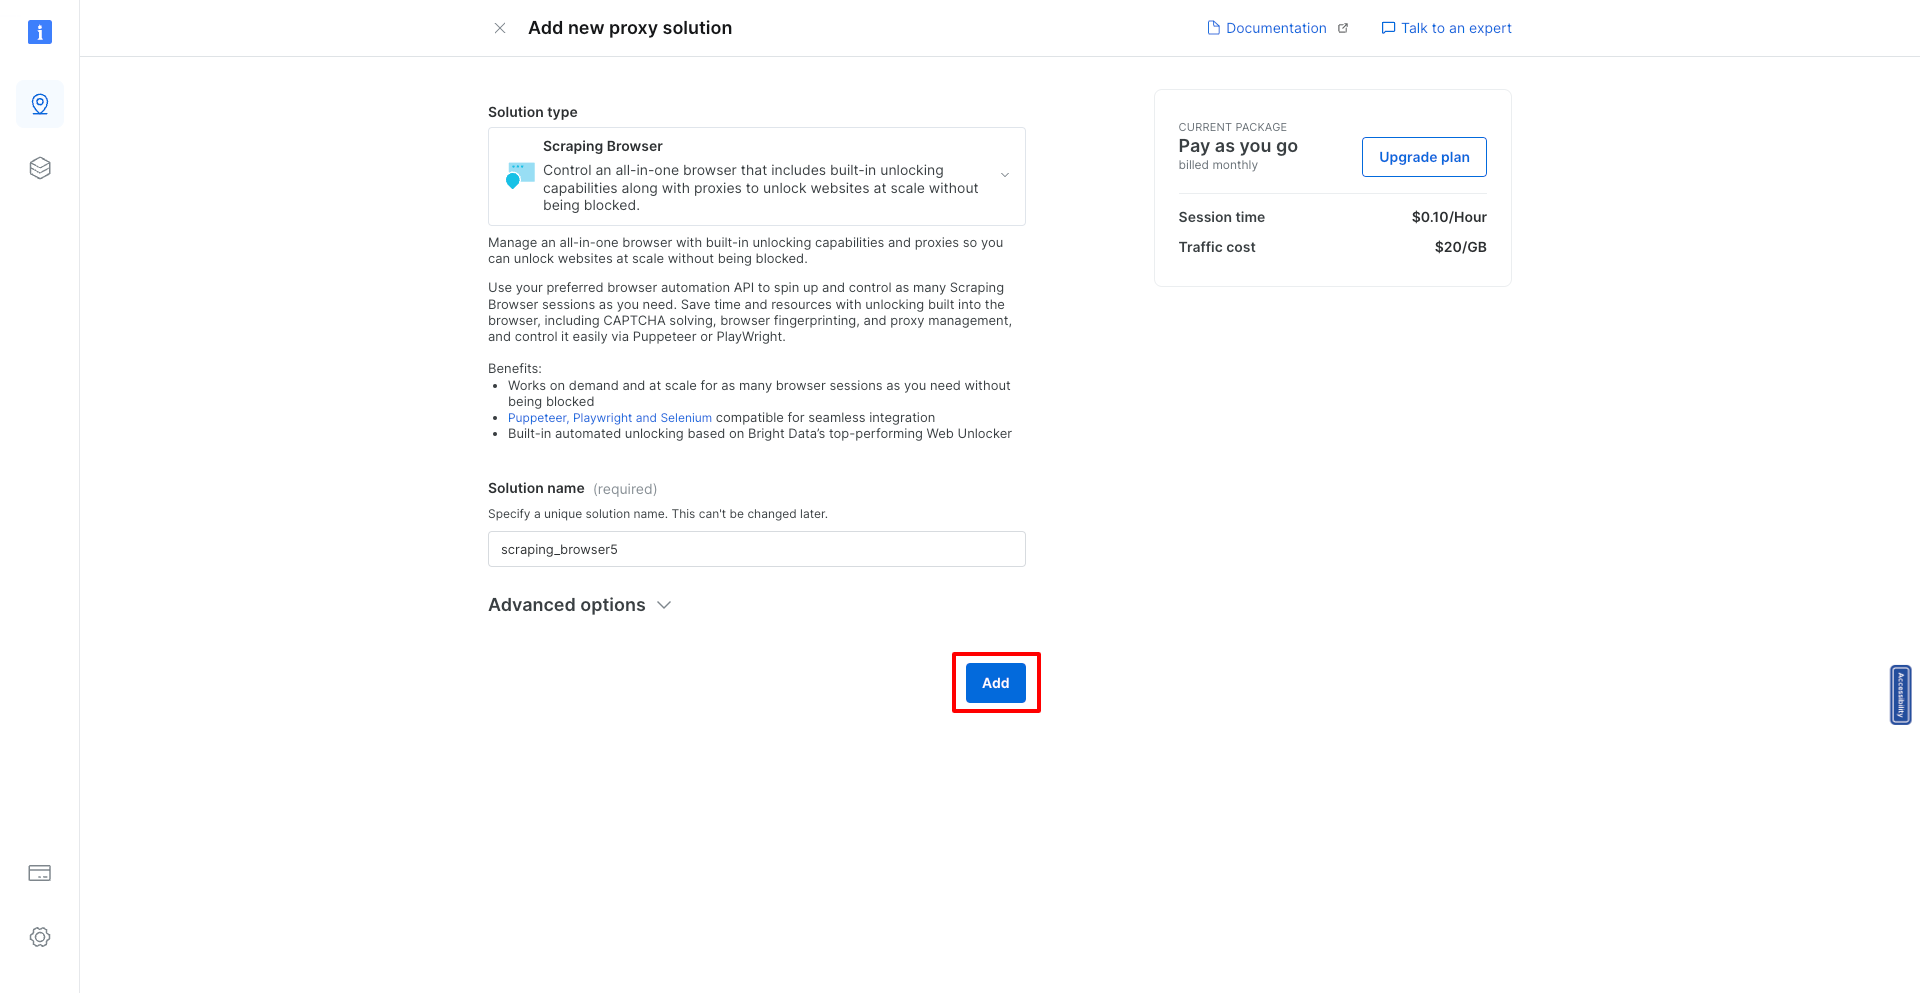 #### 第 8 步:查看您的抓取瀏覽器詳細訊息 新增抓取瀏覽器後,您將被導向到一個頁面,您可以在其中查看新建立的抓取瀏覽器的所有詳細資訊。這些資訊對於整合和使用至關重要。 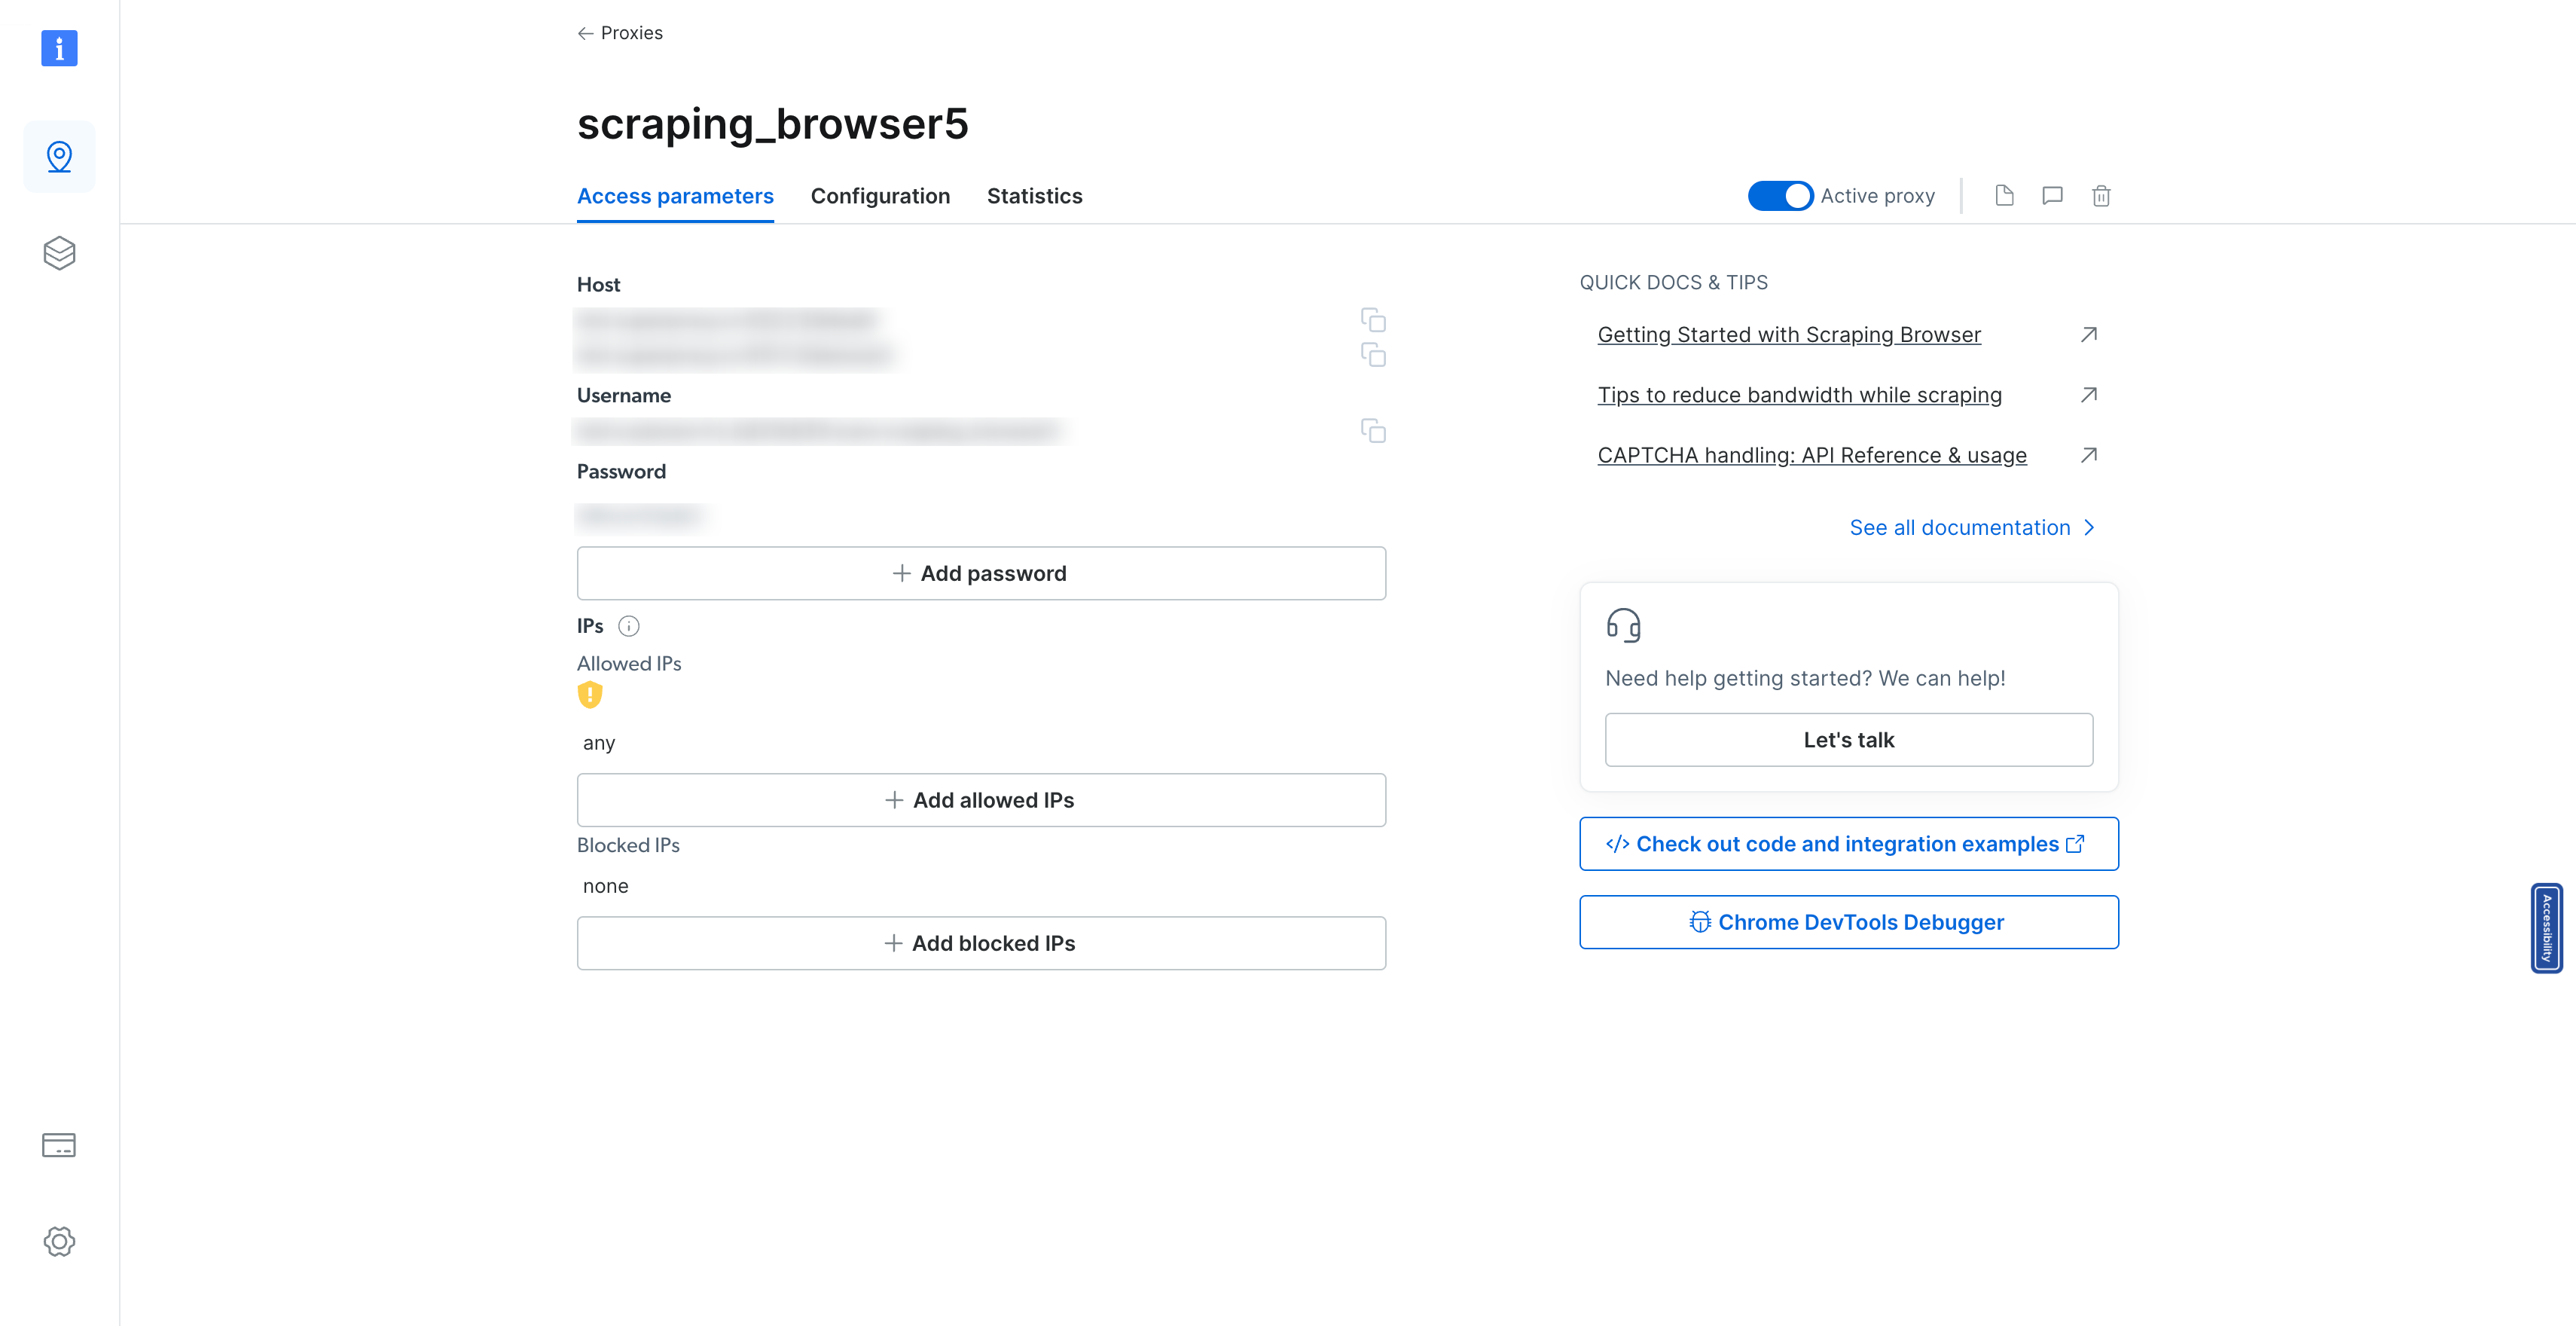 #### 第 9 步:存取程式碼和整合範例 尋找“查看程式碼和整合範例”按鈕。點擊此按鈕將為您提供如何跨多種程式語言和程式庫整合和使用抓取瀏覽器的全面視圖。對於希望自訂抓取設定的開發人員來說,此資源非常寶貴。 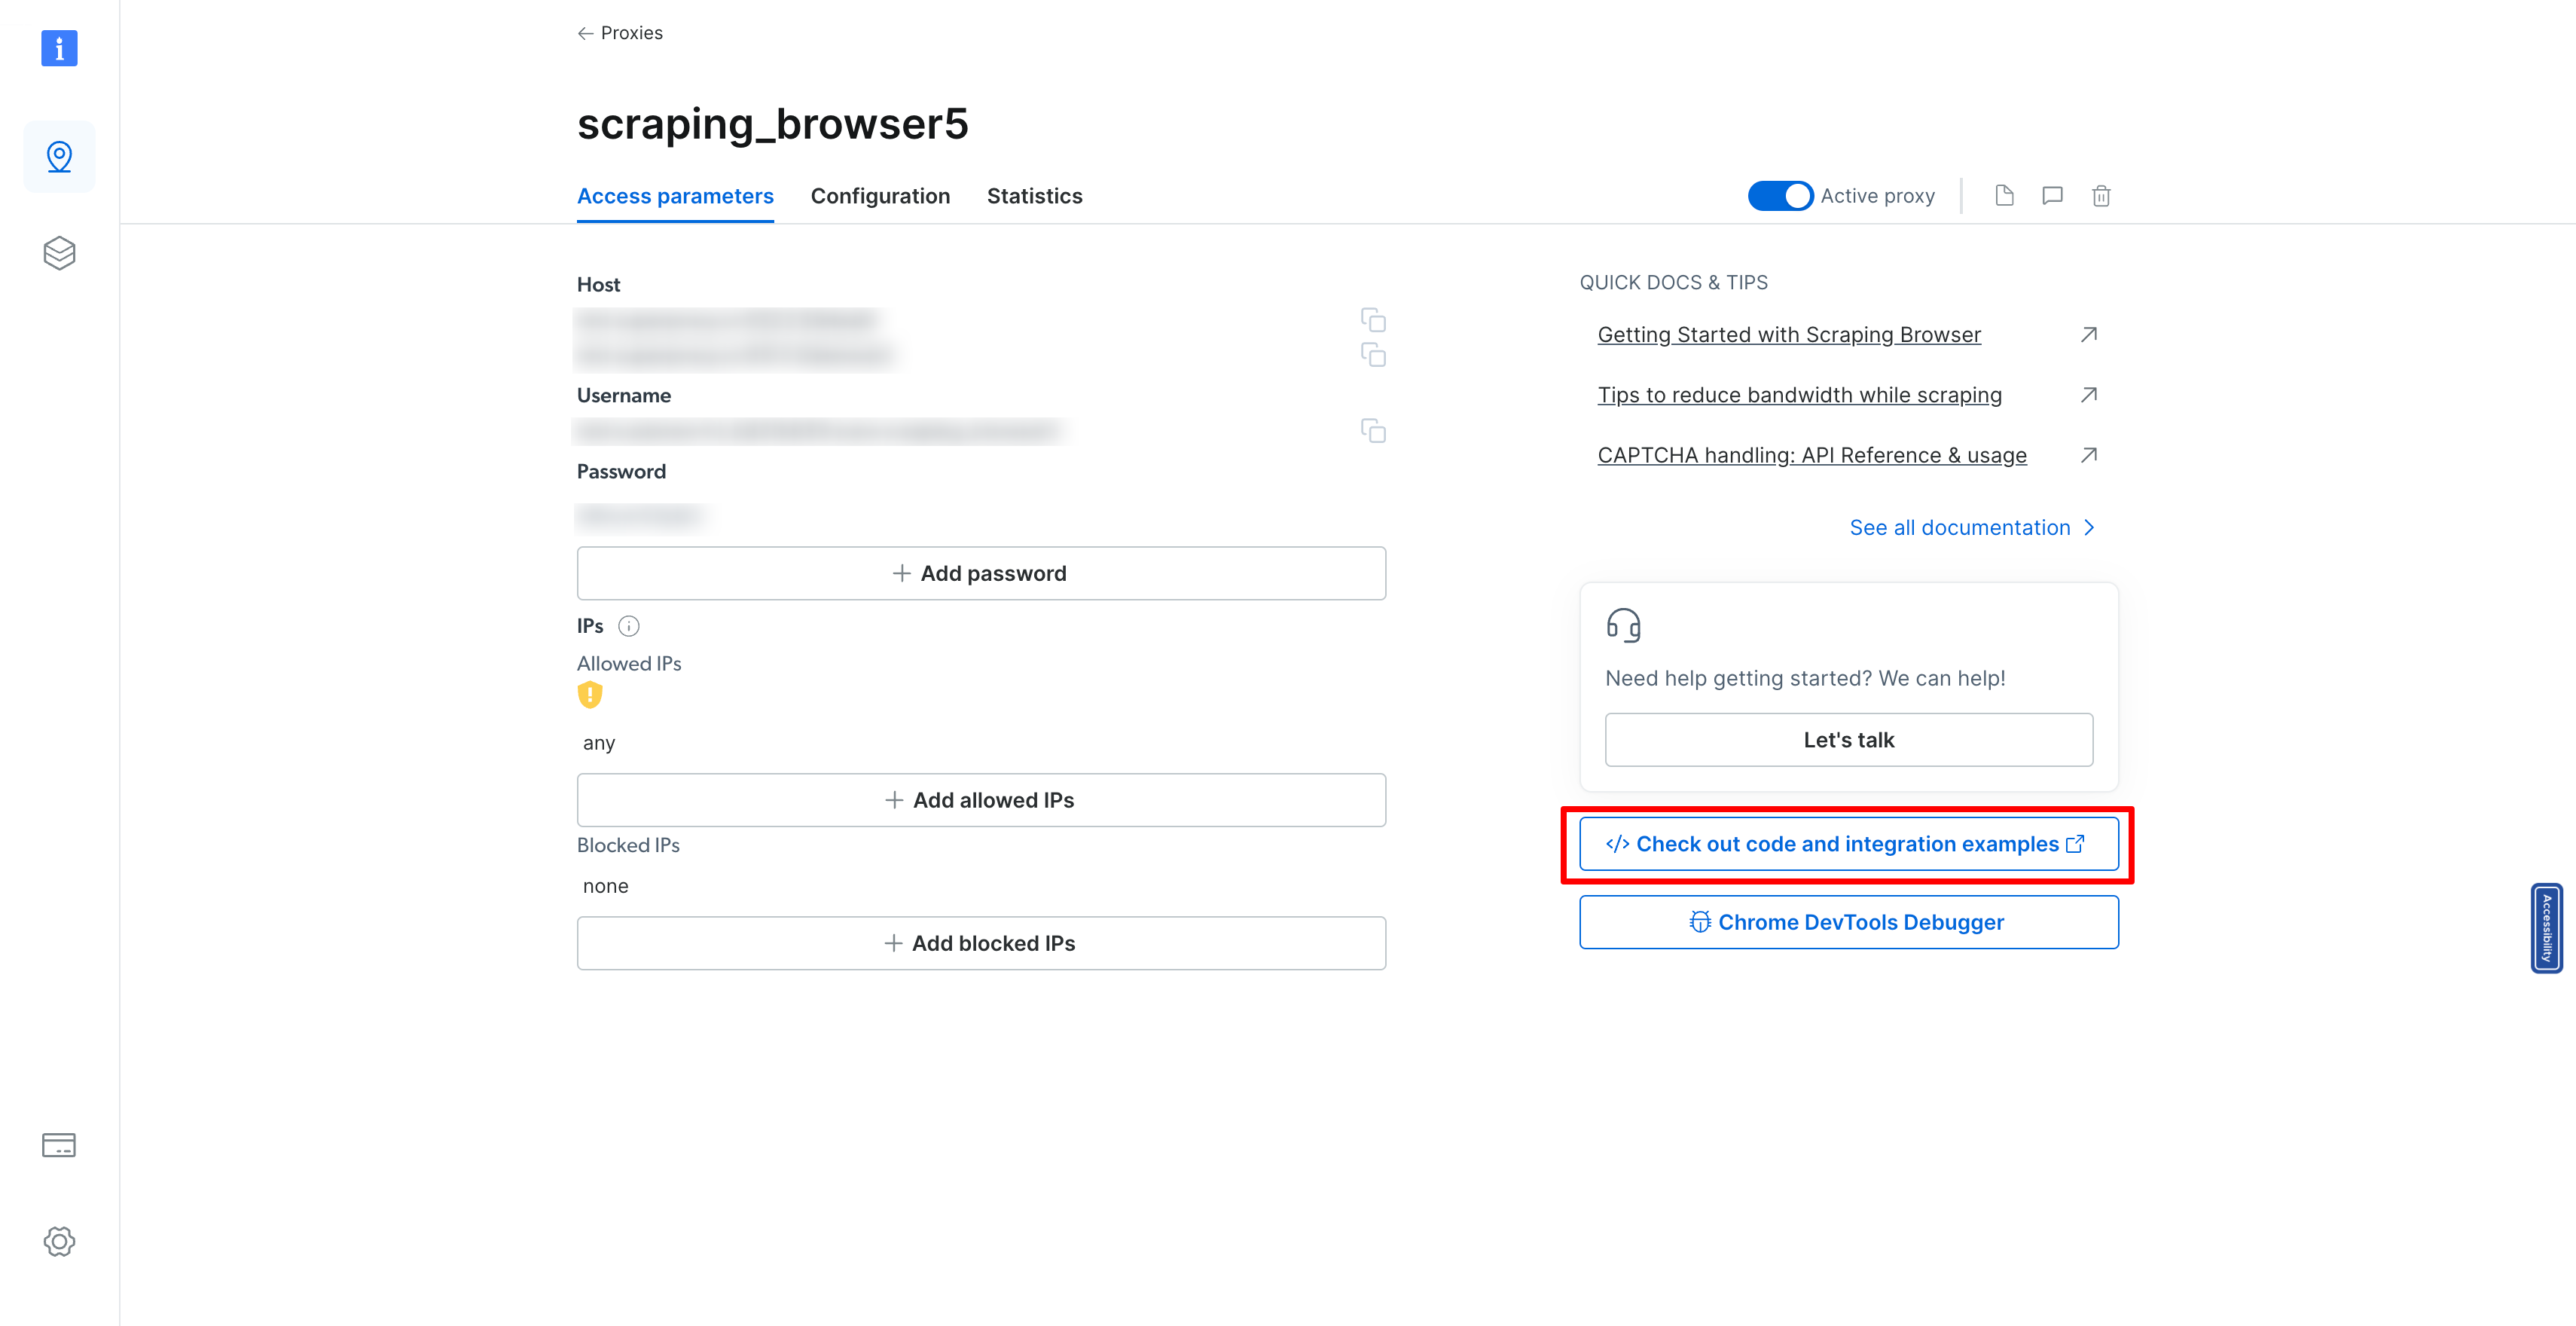 #### 第 10 步:整合您的抓取瀏覽器 最後,複製 SRS\_WS\_ENDPOINT 變數。這是一條關鍵訊息,您需要將其整合到原始程式碼中,以便您的應用程式能夠與您剛剛設定的抓取瀏覽器進行通訊。 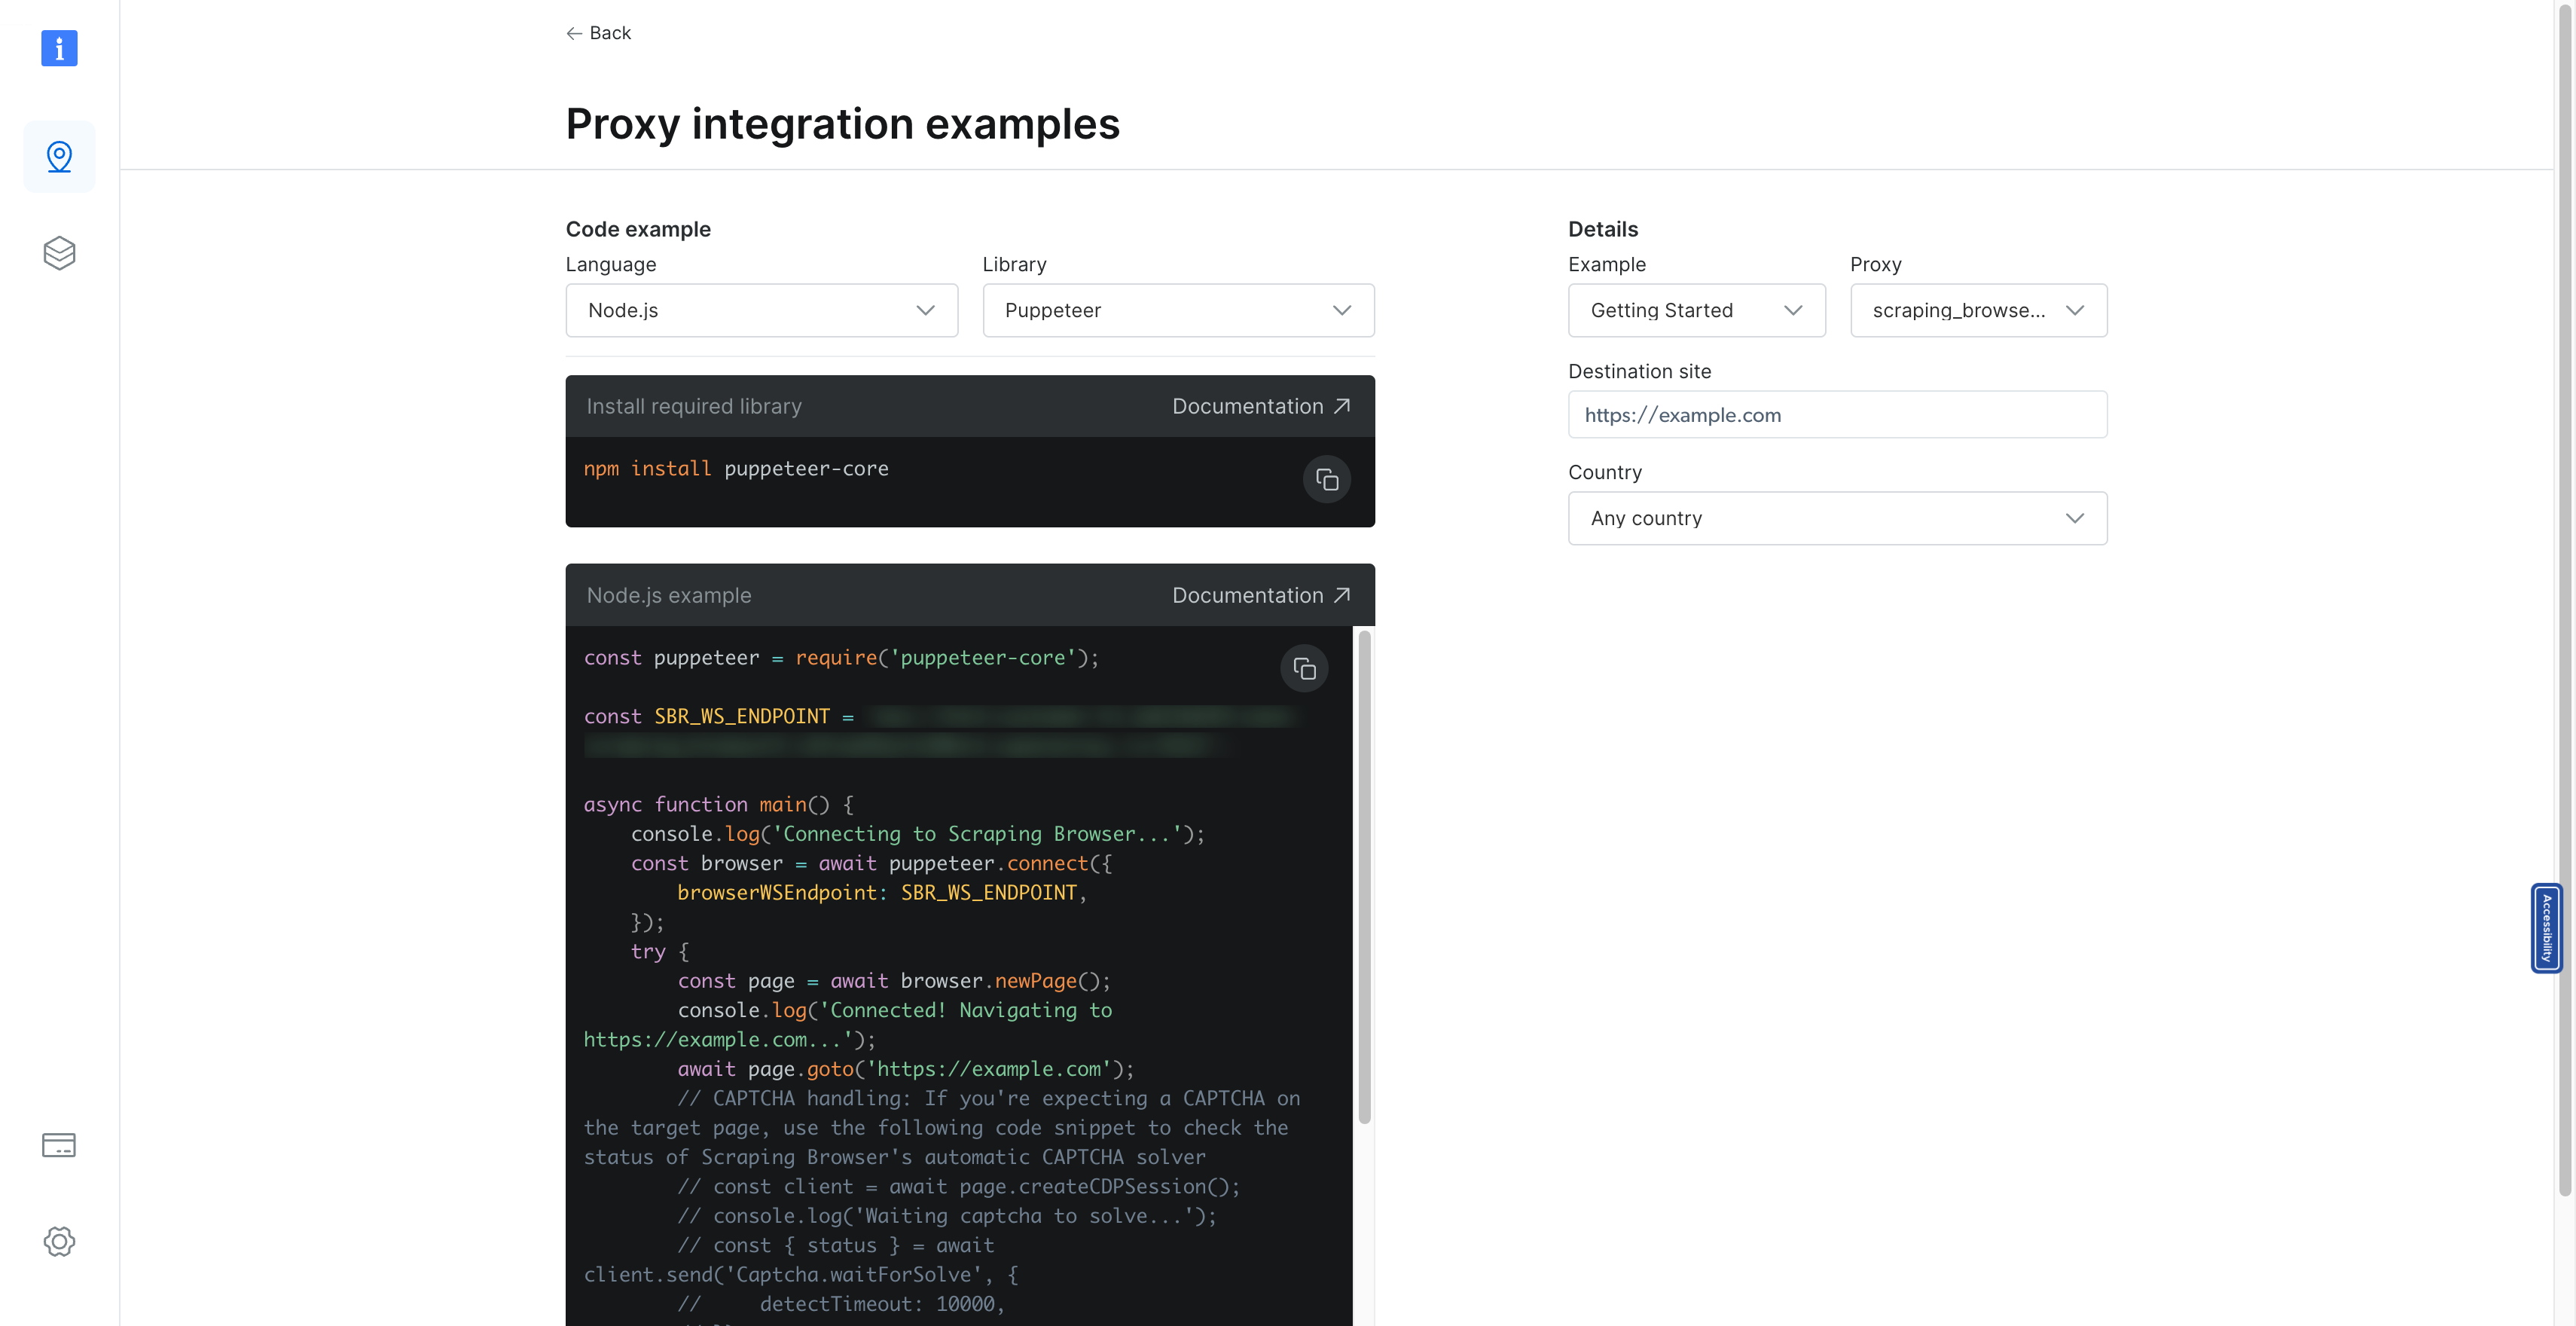 透過遵循這些詳細步驟,您已在 Bright Data 平台中成功建立了一個抓取瀏覽器,準備好處理您的網頁抓取任務。請記住,Bright Data 提供廣泛的文件和支持,幫助您最大限度地提高抓取專案的效率和效果。無論您是在收集市場情報、進行研究還是監控競爭格局,新設定的抓取瀏覽器都是資料收集庫中的強大工具。 ### 第 7 步:使用 Puppeteer 實作抓取邏輯 從我們上次設定用於抓取航班資料的 Next.js 應用程式的地方開始,下一個關鍵步驟是實現實際的抓取邏輯。此過程涉及利用 Puppeteer 連接到瀏覽器實例、導航到目標 URL(在我們的範例中為 Kayak)並抓取必要的飛行資料。提供的程式碼片段概述了實現此目標的複雜方法,與我們先前建立的 BullMQ 工作設定無縫整合。讓我們分解這個抓取邏輯的元件,並了解它如何適合我們的應用程式。 #### 建立與瀏覽器的連接 我們抓取過程的第一步是透過 Puppeteer 建立與瀏覽器的連線。這是透過利用`puppeteer.connect`方法來完成的,該方法使用 WebSocket 端點 ( `SBR_WS_ENDPOINT` ) 連接到現有的瀏覽器實例。此環境變數應設定為您正在使用的抓取瀏覽器服務的 WebSocket URL,例如 Bright Data: ``` const browser = await puppeteer.connect({ browserWSEndpoint: SBR_WS_ENDPOINT, }); ``` #### 開啟新頁面並導航到目標 URL 連線後,我們在瀏覽器中建立一個新頁面並導航到作業資料中指定的目標 URL。此 URL 是我們打算從中抓取航班資料的特定 Kayak 搜尋結果頁面: ``` const page = await browser.newPage(); await page.goto(job.data.url); ``` #### 抓取航班資料 我們邏輯的核心在於從頁面中抓取航班資料。我們透過使用`page.evaluate`來實現這一點,這是一種 Puppeteer 方法,允許我們在瀏覽器上下文中執行腳本。在此腳本中,我們等待必要的元素加載,然後繼續收集航班資訊: - **Flight Selector** :我們以`.nrc6-wrapper`類別為目標元素,其中包含航班詳細資訊。 - **資料擷取**:對於每個航班元素,我們提取詳細訊息,例如航空公司徽標、出發和到達時間、航班持續時間、航空公司名稱和價格。出發和到達時間經過清理,以刪除最後不必要的數值,確保我們準確地捕捉時間。 - **價格處理**:價格在刪除所有非數字字元後提取為整數,確保其可用於數值運算或比較。 擷取的資料被建構成飛行物件陣列,每個物件都包含上述詳細資訊: ``` const scrappedFlights = await page.evaluate(async () => { // Data extraction logic const flights = []; // Process each flight element // ... return flights; }); ``` #### 錯誤處理和清理 我們的抓取邏輯被包裝在一個 try-catch 區塊中,以在抓取過程中優雅地處理任何潛在的錯誤。無論結果如何,我們都會確保瀏覽器在finally區塊中正確關閉,從而保持資源效率並防止潛在的記憶體洩漏: ``` try { // Scraping logic } catch (error) { console.log({ error }); } finally { await browser.close(); console.log("Browser closed successfully."); } ``` #### 整個程式碼 ``` const SBR_WS_ENDPOINT = process.env.SBR_WS_ENDPOINT; export const register = async () => { if (process.env.NEXT_RUNTIME === "nodejs") { const { Worker } = await import("bullmq"); const puppeteer = await import("puppeteer"); const { connection } = await import("./lib/redis"); const { importQueue } = await import("./lib/queue"); new Worker( "importQueue", async (job) => { const browser = await puppeteer.connect({ browserWSEndpoint: SBR_WS_ENDPOINT, }); try { const page = await browser.newPage(); console.log("in flight scraping"); console.log("Connected! Navigating to " + job.data.url); await page.goto(job.data.url); console.log("Navigated! Scraping page content..."); const scrappedFlights = await page.evaluate(async () => { await new Promise((resolve) => setTimeout(resolve, 5000)); const flights = []; const flightSelectors = document.querySelectorAll(".nrc6-wrapper"); flightSelectors.forEach((flightElement) => { const airlineLogo = flightElement.querySelector("img")?.src || ""; const [rawDepartureTime, rawArrivalTime] = ( flightElement.querySelector(".vmXl")?.innerText || "" ).split(" – "); // Function to extract time and remove numeric values at the end const extractTime = (rawTime: string): string => { const timeWithoutNumbers = rawTime .replace(/[0-9+\s]+$/, "") .trim(); return timeWithoutNumbers; }; const departureTime = extractTime(rawDepartureTime); const arrivalTime = extractTime(rawArrivalTime); const flightDuration = ( flightElement.querySelector(".xdW8")?.children[0]?.innerText || "" ).trim(); const airlineName = ( flightElement.querySelector(".VY2U")?.children[1]?.innerText || "" ).trim(); // Extract price const price = parseInt( ( flightElement.querySelector(".f8F1-price-text")?.innerText || "" ) .replace(/[^\d]/g, "") .trim(), 10 ); flights.push({ airlineLogo, departureTime, arrivalTime, flightDuration, airlineName, price, }); }); return flights; }); } catch (error) { console.log({ error }); } finally { await browser.close(); console.log("Browser closed successfully."); } }, { connection, concurrency: 10, removeOnComplete: { count: 1000 }, removeOnFail: { count: 5000 }, } ); } }; ``` ### 步驟8:航班搜尋功能 基於我們的航班資料抓取功能,讓我們將全面的航班搜尋功能整合到我們的 Next.js 應用程式中。此功能將為使用者提供一個動態介面,透過指定出發地、目的地和日期來搜尋航班。利用強大的 Next.js 框架以及現代 UI 庫和狀態管理,我們建立了引人入勝且響應迅速的航班搜尋體驗。 #### 航班搜尋功能的關鍵組成部分 1. **動態城市選擇**:此功能包括來源和目的地輸入的自動完成功能,由預先定義的城市機場程式碼清單提供支援。當使用者輸入時,應用程式會過濾並顯示匹配的城市,透過更輕鬆地尋找和選擇機場來增強用戶體驗。 2. **日期選擇**:使用者可以透過日期輸入選擇預期的航班日期,為規劃旅行提供彈性。 3. **抓取狀態監控**:啟動抓取作業後,應用程式透過定期 API 呼叫來監控作業的狀態。這種非同步檢查允許應用程式使用抓取過程的狀態更新 UI,確保使用者了解進度和結果。 #### 航班搜尋元件的完整程式碼 ``` "use client"; import { useAppStore } from "@/store"; import { USER_API_ROUTES } from "@/utils/api-routes"; import { cityAirportCode } from "@/utils/city-airport-codes"; import { Button, Input, Listbox, ListboxItem } from "@nextui-org/react"; import axios from "axios"; import Image from "next/image"; import { useRouter } from "next/navigation"; import React, { useEffect, useRef, useState } from "react"; import { FaCalendarAlt, FaSearch } from "react-icons/fa"; const SearchFlights = () => { const router = useRouter(); const { setScraping, setScrapingType, setScrappedFlights } = useAppStore(); const [loadingJobId, setLoadingJobId] = useState<number | undefined>(undefined); const [source, setSource] = useState(""); const [sourceOptions, setSourceOptions] = useState< { city: string; code: string; }[] >([]); const [destination, setDestination] = useState(""); const [destinationOptions, setDestinationOptions] = useState< { city: string; code: string; }[] >([]); const [flightDate, setFlightDate] = useState(() => { const today = new Date(); return today.toISOString().split("T")[0]; }); const handleSourceChange = (query: string) => { const matchingCities = Object.entries(cityAirportCode) .filter(([, city]) => city.toLowerCase().includes(query.toLowerCase())) .map(([code, city]) => ({ code, city })) .splice(0, 5); setSourceOptions(matchingCities); }; const destinationChange = (query: string) => { const matchingCities = Object.entries(cityAirportCode) .filter(([, city]) => city.toLowerCase().includes(query.toLowerCase())) .map(([code, city]) => ({ code, city })) .splice(0, 5); setDestinationOptions(matchingCities); }; const startScraping = async () => { if (source && destination && flightDate) { const data = await axios.get(`${USER_API_ROUTES.FLIGHT_SCRAPE}?source=${source}&destination=${destination}&date=${flightDate}`); if (data.data.id) { setLoadingJobId(data.data.id); setScraping(true); setScrapingType("flight"); } } }; useEffect(() => { if (loadingJobId) { const checkIfJobCompleted = async () => { try { const response = await axios.get(`${USER_API_ROUTES.FLIGHT_SCRAPE_STATUS}?jobId=${loadingJobId}`); if (response.data.status) { set ScrappedFlights(response.data.flights); clearInterval(jobIntervalRef.current); setScraping(false); setScrapingType(undefined); router.push(`/flights?data=${flightDate}`); } } catch (error) { console.log(error); } }; jobIntervalRef.current = setInterval(checkIfJobCompleted, 3000); } return () => clearInterval(jobIntervalRef.current); }, [loadingJobId]); return ( <div className="h-[90vh] flex items-center justify-center"> <div className="absolute left-0 top-0 h-[100vh] w-[100vw] max-w-[100vw] overflow-hidden overflow-x-hidden"> <Image src="/flight-search.png" fill alt="Search" /> </div> <div className="absolute h-[50vh] w-[60vw] flex flex-col gap-5"> {/* UI and functionality for flight search */} </div> </div> ); }; export default SearchFlights; ``` ### 步驟9:航班搜尋頁面UI  ### 顯示航班搜尋結果 成功抓取飛行資料後,下一個關鍵步驟是以使用者友善的方式將這些結果呈現給使用者。 Next.js 應用程式中的 Flights 元件就是為此目的而設計的。 ``` "use client"; import { useAppStore } from "@/store"; import { USER_API_ROUTES } from "@/utils/api-routes"; import { Button } from "@nextui-org/react"; import axios from "axios"; import Image from "next/image"; import { useRouter, useSearchParams } from "next/navigation"; import React from "react"; import { FaChevronLeft } from "react-icons/fa"; import { MdOutlineFlight } from "react-icons/md"; const Flights = () => { const router = useRouter(); const searchParams = useSearchParams(); const date = searchParams.get("date"); const { scrappedFlights, userInfo } = useAppStore(); const getRandomNumber = () => Math.floor(Math.random() * 41); const bookFLight = async (flightId: number) => {}; return ( <div className="m-10 px-[20vw] min-h-[80vh]"> <Button className="my-5" variant="shadow" color="primary" size="lg" onClick={() => router.push("/search-flights")} > <FaChevronLeft /> Go Back </Button> <div className="flex-col flex gap-5"> {scrappedFlights.length === 0 && ( <div className="flex items-center justify-center py-5 px-10 mt-10 rounded-lg text-red-500 bg-red-100 font-medium"> No Flights found. </div> )} {scrappedFlights.map((flight: any) => { const seatsLeft = getRandomNumber(); return ( <div key={flight.id} className="grid grid-cols-12 border bg-gray-200 rounded-xl font-medium drop-shadow-md" > <div className="col-span-9 bg-white rounded-l-xl p-10 flex flex-col gap-5"> <div className="grid grid-cols-4 gap-4"> <div className="flex flex-col gap-3 font-medium"> <div> <div className="relative w-20 h-16"> <Image src={flight.logo} alt="airline name" fill /> </div> </div> <div>{flight.name}</div> </div> <div className="col-span-3 flex justify-between"> <div className="flex flex-col gap-2"> <div className="text-blue-600">From</div> <div> <span className="text-3xl"> <strong>{flight.departureTime}</strong> </span> </div> <div>{flight.from}</div> </div> <div className="flex flex-col items-center justify-center gap-2"> <div className="bg-violet-100 w-max p-3 text-4xl text-blue-600 rounded-full"> <MdOutlineFlight /> </div> <div> <span className="text-lg"> <strong>Non-stop</strong> </span> </div> <div>{flight.duration}</div> </div> <div className="flex flex-col gap-2"> <div className="text-blue-600">To</div> <div> <span className="text-3xl"> <strong>{flight.arrivalTime}</strong> </span> </div> <div>{flight.to}</div> </div> </div> </div> <div className="flex justify-center gap-10 bg-violet-100 p-3 rounded-lg"> <div className="flex"> <span>Airplane </span> <span className="text-blue-600 font-semibold"> Boeing 787 </span> </div> <div className="flex"> <span>Travel Class: </span> <span className="text-blue-600 font-semibold">Economy</span> </div> </div> <div className="flex justify-between font-medium"> <div> Refundable <span className="text-blue-600"> $5 ecash</span> </div> <div className={`${ seatsLeft > 20 ? "text-green-500" : "text-red-500" }`} > Only {seatsLeft} Seats Left </div> <div className="cursor-pointer">Flight Details</div> </div> </div> <div className="col-span-3 bg-violet-100 rounded-r-xl h-full flex flex-col items-center justify-center gap-5"> <div> <div> <span className="line-through font-light"> ${flight.price + 140} </span> </div> <div className="flex items-center gap-2"> <span className="text-5xl font-bold">${flight.price}</span> <span className="text-blue-600">20% OFF</span> </div> </div> <Button variant="ghost" radius="full" size="lg" color="primary" onClick={() => { if (userInfo) bookFLight(flight.id); }} > {userInfo ? "Book Now" : "Login to Book"} </Button> </div> </div> ); })} </div> </div> ); }; export default Flights; ``` #### 航班搜尋結果 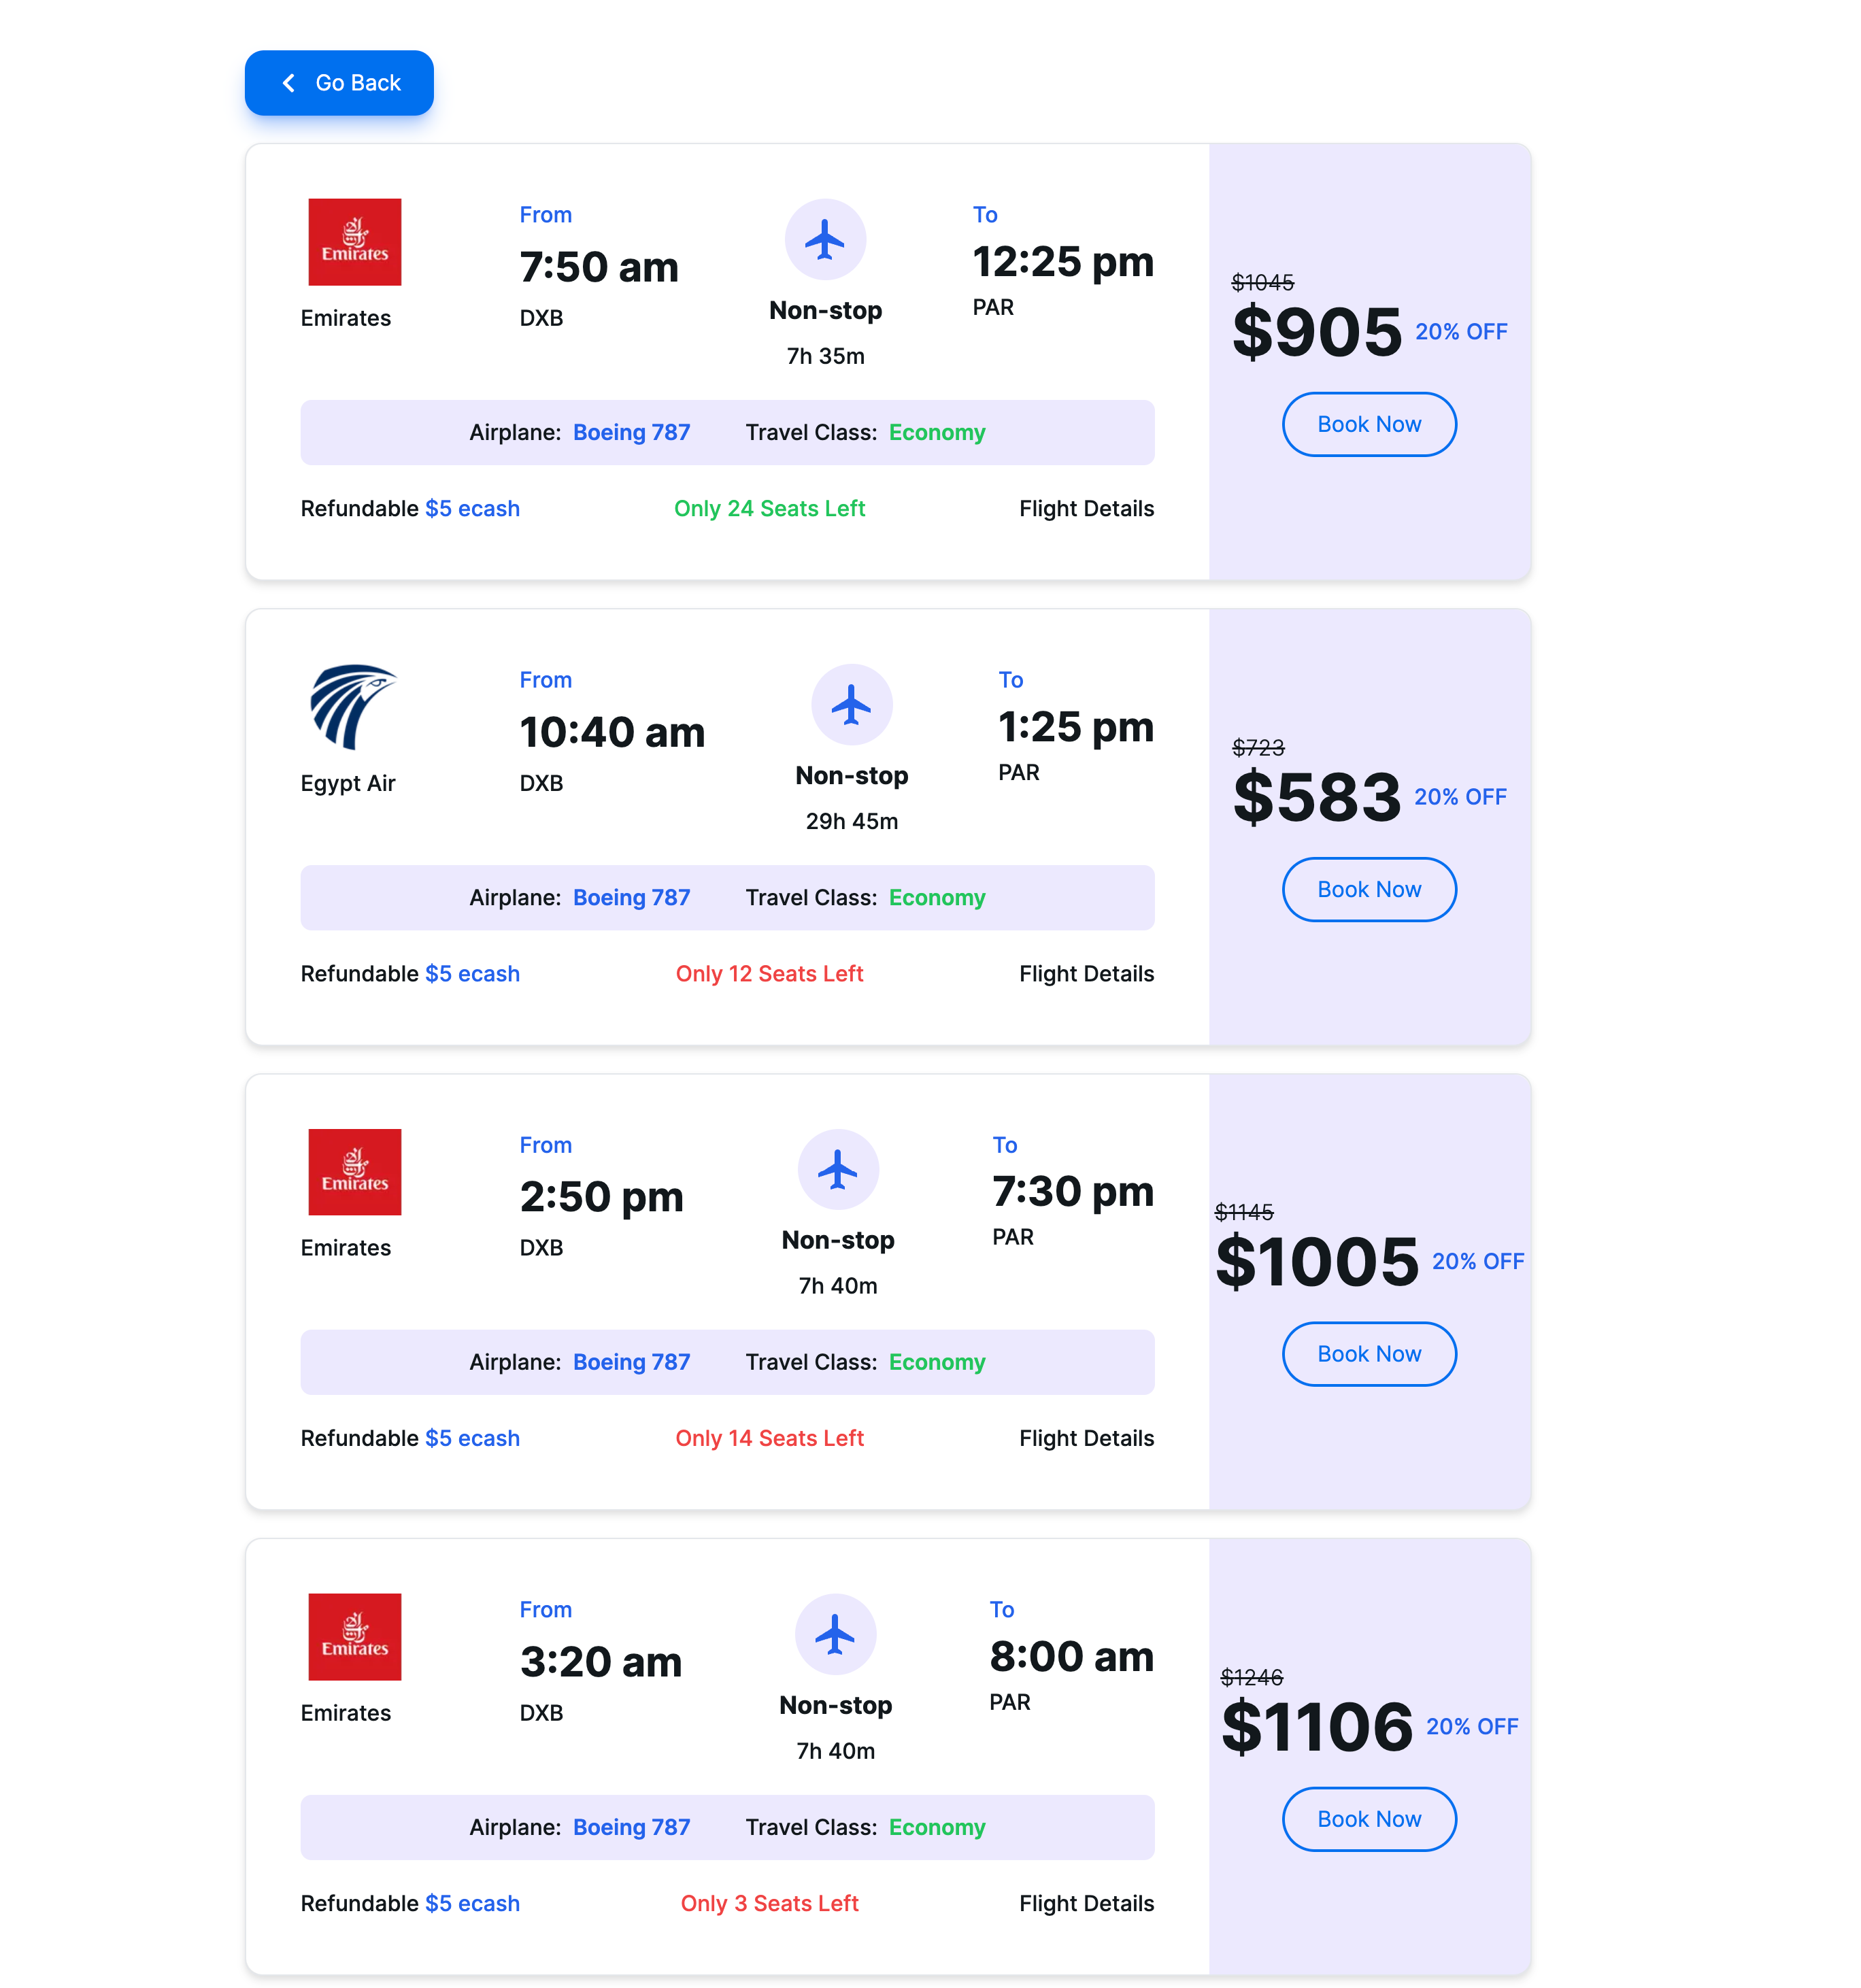 ### 探索完整的指南和程式碼庫 上面共享的部分和程式碼片段僅代表使用 Next.js 建立強大的航班資料抓取和搜尋應用程式所需的完整功能和程式碼的一小部分。為了掌握這個專案的全部內容,包括高級功能、優化和最佳實踐,我邀請您更深入地研究我的線上綜合資源。 #### 在 YouTube 上觀看詳細說明 有關引導您完成此應用程式的開發過程、編碼細微差別和功能的逐步影片指南,請觀看我的 YouTube 影片。本教程旨在讓您更深入地了解這些概念,讓您按照自己的步調進行操作並獲得對 Next.js 應用程式開發的寶貴見解。 https://www.youtube.com/watch?v=ZWVhk0fxHM0 #### 在 GitHub 上探索完整程式碼 如果您渴望探索完整的程式碼,請造訪我的 GitHub 儲存庫。在那裡,您將找到完整的程式碼庫,包括讓該應用程式在您自己的電腦上執行所需的所有元件、實用程式和設定說明。 https://github.com/koolkishan/nextjs-travel-planner ### 結論 使用 Next.js 建立飛行資料抓取和搜尋工具等綜合應用程式展示了現代 Web 開發工具和框架的強大功能和多功能性。無論您是希望提高技能的經驗豐富的開發人員,還是渴望深入 Web 開發的初學者,這些資源都是為您的旅程量身定制的。在 YouTube 上觀看詳細教程,在 GitHub 上探索完整程式碼,並加入對話以增強您的開發專業知識並為充滿活力的開發者社群做出貢獻。 --- 原文出處:https://dev.to/kishansheth/nextjs-14-booking-app-with-live-data-scraping-using-scraping-browser-610
如果您嘗試在 PC 上使用終端,我對您的痛苦表示歉意。以下是一些可以提高您的工作流程的最佳終端模擬器: ### [1.Cmder](https://cmder.net//)  [Cmder](https://cmder.net//)是一款便攜式控制台模擬器,基於已經流行的[Conemu](https://conemu.github.io/)建置; Conemu 也值得一試,因為它可以作為 Cmder 的替代品。 Cmders網站對此解釋得非常完美: > 將 cmder 更多地視為一個軟體包,而不是一個單獨的應用程式。所有的魔力都是透過 ConEmu 發生的。透過[Clink](https://mridgers.github.io/clink/)的增強。 儘管 Cmder 有時會出現速度問題(儘管建議它是便攜式的),但它仍然是一個很好的基本控制台模擬器,可以用來實現您的目標。 ### [2.Hyper.is](https://hyper.is/)  [Hyper](https://hyper.is/)是一款時尚的終端,可在 PC 和 MAC 上使用,並且在主題、插件和 shell 方面是完全可自訂的。由於我在安裝[zsh shell](https://github.com/robbyrussell/oh-my-zsh)時遇到了一些錯誤,因此在開發方面似乎仍然有很多工作要做。不管怎樣,它都是一個值得研究的出色的可擴展終端。 (注意:如果您想選擇 Pokemon 主題,可以[在這裡獲取!](https://github.com/klaussinani/hyper-pokemon) ) ### [3. terminus](https://eugeny.github.io/terminus/) 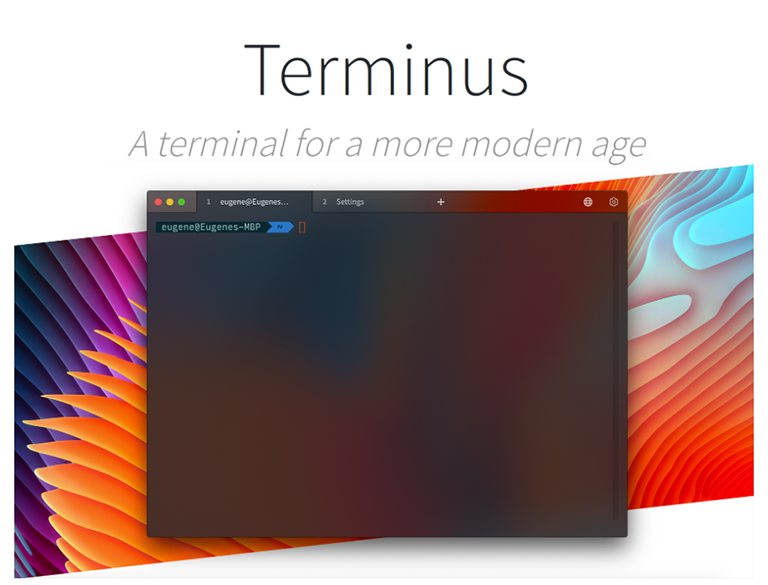 「現代的航站」是總站的口號。該終端看起來類似於開發環境,它帶有分割窗格、完全可配置的快捷方式、選項卡以及對所有主要 shell 的支援。這個航站樓仍然是新的,接下來會發生什麼將會令人興奮。 ### [4. FluentTerminal](https://github.com/felixse/FluentTerminal) 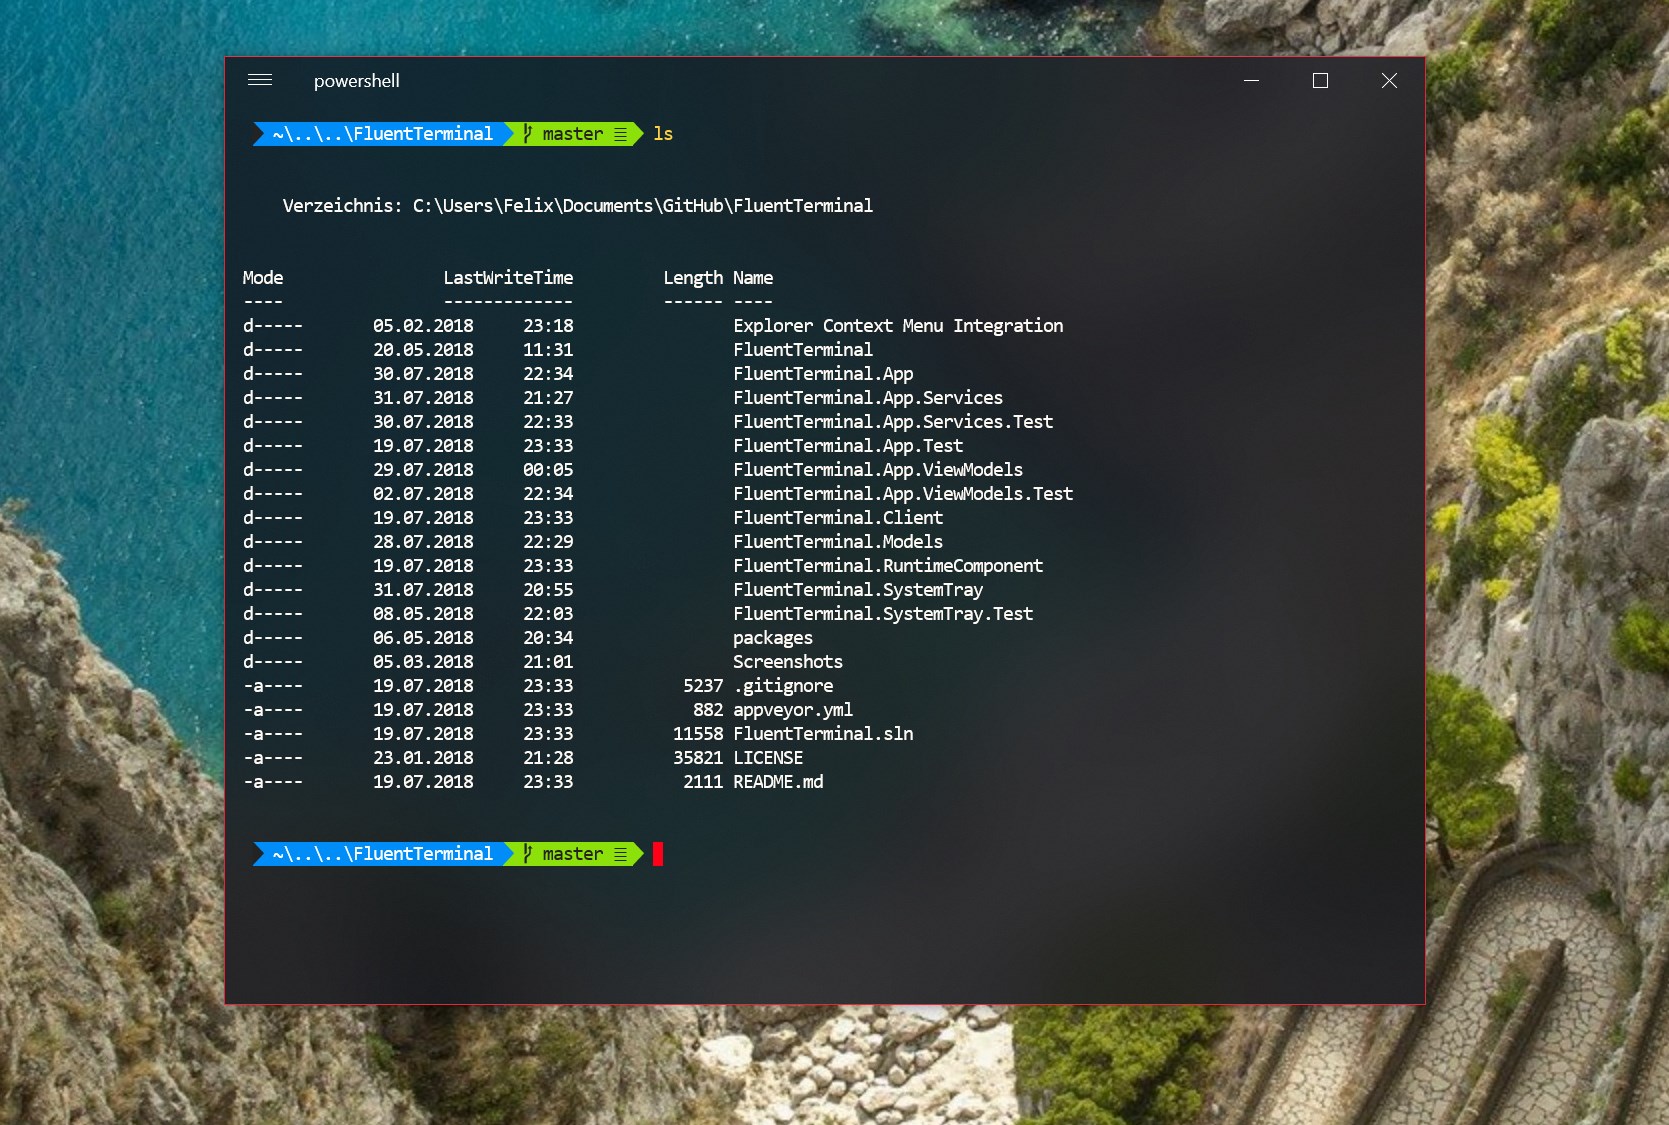 適用於PowerShell、CMD、WSL 或自訂shell 的終端,甚至可以從iTerm 獲取主題,並具有可編輯的鍵綁定和快速可調整的設置,[Fluent](https://github.com/felixse/FluentTerminal) 絕對值得一試。 ### [5. alacritty](https://github.com/jwilm/alacritty) 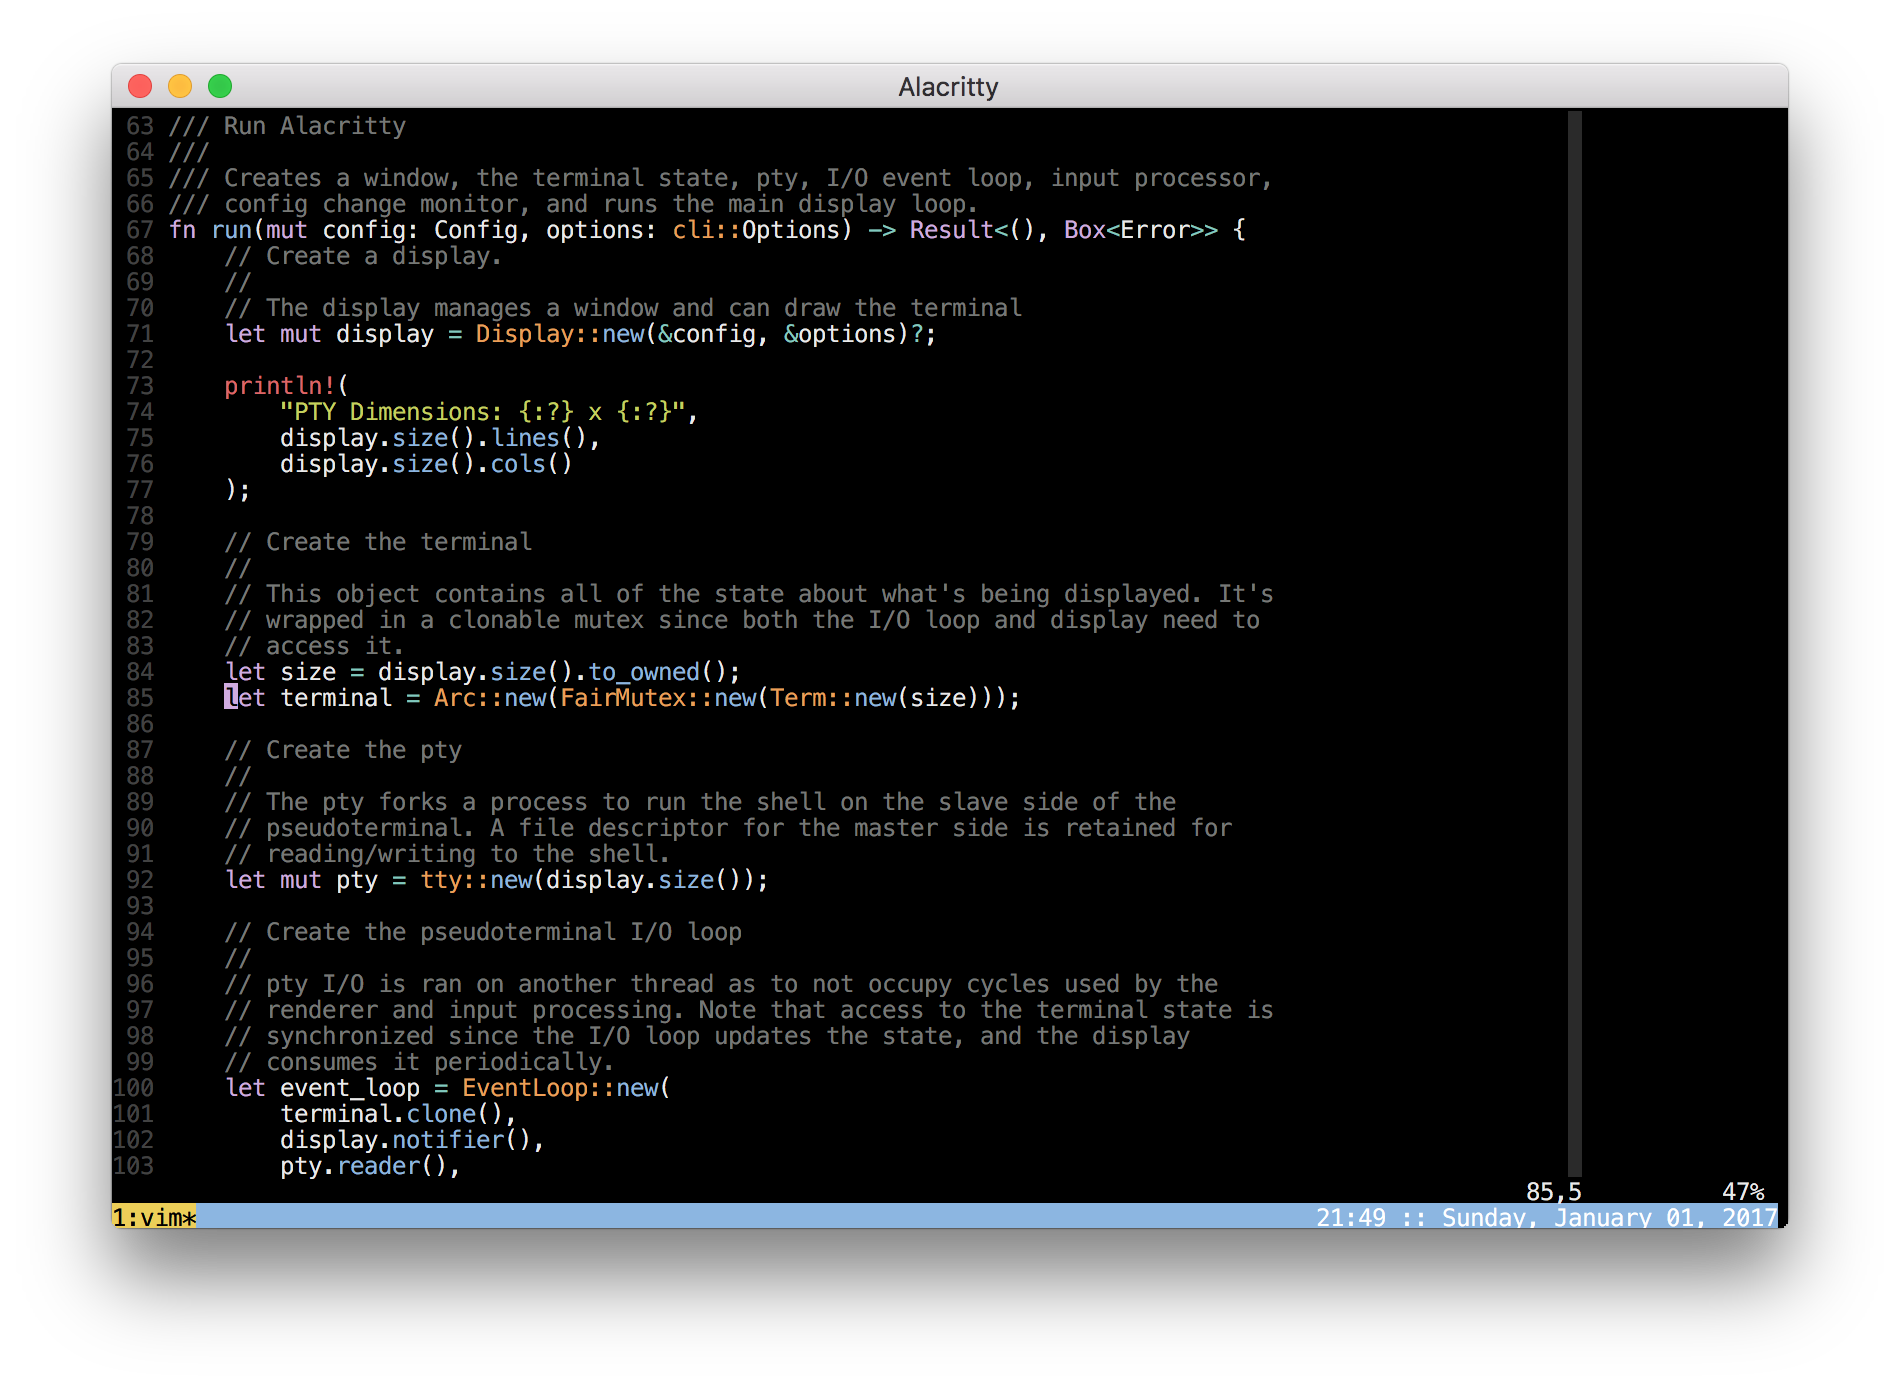 這個有點爭議。 Alacritty 聲稱自己是「現有最快的終端模擬器」。雖然這[可能不完全正確,](https://news.ycombinator.com/item?id=16936181)但許多用戶報告使用 Alacritty 時速度很快,但使用速度很低。因此,儘管它可能不適合所有人,但它也許能夠解決您在終端上遇到的一些滯後/撕裂問題。 這篇文章是否有幫助或想要加入一些內容/提出問題?請隨意 [connect](https://dev.to/connect) 並[關注](https://dev.to/adnanmostafa)以了解更多資訊或在下面發表評論! --- 原文出處:https://dev.to/adnanmostafa/the-best-free-standalone-terminals-for-windows-2019-kmj
--- 標題:6 個 JavaScript 控制台方法,如泰勒絲民間傳說歌詞 發表:真實 描述:了解六種鮮為人知的 JavaScript 控制台方法,這些方法與泰勒絲 (Taylor Swift) 最新專輯《Followre》中的歌詞類似。 標籤: javascript、webdev、除錯、生產力 封面圖片:https://twilio-cms-prod.s3.amazonaws.com/images/ts\_AMVvYGp.width-1616.png --- 這篇部落格文章是為[Twilio](https://www.twilio.com/)撰寫的,[最初發佈在 Twilio 部落格上](https://www.twilio.com/blog/js-console-methods-like-taylor-swift-folklore-lyrics)。 如果您進行 Web 開發,您可能至少使用過一次`console.log` (或超過一千次...誰在數?),因為這是最好的偵錯方法!但您知道還有其他控制台方法嗎? Taylor Swift 的最新專輯《Followre》 充滿了沉思的隱喻、典故和象徵意義,這篇文章將其中一些歌詞比作 6 個鮮為人知的 JavaScript `console`方法。 ### 控制台到底是什麼? `console`是一個[全域物件](https://developer.mozilla.org/en-US/docs/Glossary/Global_object),允許開發人員存取偵錯控制台。它有大量的方法,可以更輕鬆地記錄語句、變數、函數、錯誤等——天哪! #### 6種類似民間傳說歌詞的控制台方法 #### *1. console.log = "但這會很有趣 // 如果你是那個人"* `console.log`是最常用的方法。用於通用日誌記錄,它在 Web 控制台中顯示傳遞給它的訊息。你知道你可以用 CSS 來裝飾它嗎? ``` console.log("%cWARNING: you will be obsessed with folklore", "font: 2em sans-serif; color: yellow; background-color: red;"); ```  `Log`簡單、可靠,並且可以完成工作,但它被過度使用,吸引了類似`console`方法的所有註意力,這些方法做得更多。如果`Log`是您需要的一種或唯一的控制台方法,那麼它會很有趣 - 但正如本文將要展示的,您將透過其他`console`方法獲得更多樂趣! #### *2. console.table = "我是一個鏡球 // 今晚我會向你展示你自己的每個版本"* `table`方法接受一個物件或陣列並將輸入記錄為表格,使其看起來更乾淨:它就像`log`的更好版本。與鏡像球一樣, `table`可以透過接受可選參數`columns`來選擇要顯示的列子集來顯示不同版本的輸入。 陣列中的每個元素(如果資料是物件,則為每個可枚舉屬性)將是表中的一行。下面的 JavaScript 程式碼有一個物件,您可以看到最初使用 log 的輸出。 ``` function Album(name, year, numSongs) { this.name = name; this.year = year; this.numSongs = numSongs; } const fearless = new Album("Fearless", 2008, 13); const speakNow = new Album("Speak Now", 2010, 19); const folklore = new Album("folklore", 2020, 16); console.log([fearless, speakNow, folklore]); ```  這很好,但是給定陣列時`table`的輸出看起來更好: ``` console.table([fearless, speakNow, folklore]); ```  接受`columns`參數,如`console.table([fearless, speakNow, folklore], ["name"]);`會顯示:  您也可以傳遞它(而不是`name` ) `year`或`numSongs` - 就像鏡子球一樣,表格可以向您顯示其輸入的每個版本! #### *3. console.assert =“如果你從不流血,你就永遠不會成長”* `console.assert(expression, message)`僅在表達式為 false 時才列印。泰勒絲 (Taylor Swift) 在歌曲*《The 1》*中的歌詞「如果你從不流血,你就永遠不會成長」也同意這一點——如果你從不流血,或者失敗,或者有時不正確,你就永遠不會成長。 `assert`表明,透過錯誤,您可以成長為一名開發人員,因為您可以修復錯誤,控制台會透過將斷言變成漂亮的紅色來幫助您。 ``` const numFolkloreSongs = 16; const num1989Songs = 13; console.assert(numFolkloreSongs > num1989Songs, 'folklore has more songs than 1989'); //won't run console.assert(num1989Songs + 3 > numFolkloreSongs, 'the number of songs on 1989 + 3 is not greater than the number of folklore songs'); ```  #### *4. console.time/console.timeEnd = "時間,神秘的時間/切開我,然後治癒我。"* `console.time()`建立一個計時器來查看某些操作需要多長時間。它可以採用名稱或標籤的可選參數來區分網頁上最多 10,000 個計時器。 `console.timeEnd()`停止計時器,並在控制台中顯示結果。 時間可能很艱難——它可以讓你心碎,但它也可以治癒你,讓你感覺更好。 ``` console.time('sms timer'); let x = 0; while (x < 3) { console.log("They told me all of my cages were mental/So I got wasted like all my potential"); x+=1; } console.timeEnd('sms timer'); ```  如果沒有標籤傳遞給`console.time()` ,它將記錄 default 而不是*sms time* 。 #### *5. console.clear:“如果我對你來說已經死了,為什麼你還在守靈?”* `console.clear`簡短、甜蜜、簡潔。它會清除控制台,並且在某些環境中,可能會列印諸如“控制台已清除”之類的訊息。 歌詞“如果我對你來說已經死了,為什麼你還在守靈?”是憂鬱的,但也有一些尖銳的味道:它非常適合當你想要結束對話時,就像`clear`一樣,你可以重新開始,重新開始。 #### *6. console.group/console.groupEnd ="想到一直以來有一條看不見的繩子把你和我綁在一起,這不是很美好嗎?"* `console.group`表示內聯訊息群組的開始, `console.groupEnd`標記其結束。如果群組包含日誌,它們將作為一個群組列印,因此格式更清晰,您可以更輕鬆地了解群組包含的內容。 就像有一些看不見的字串(或`console`命令)將群組中的專案捆綁在一起。 ``` console.group("folklore"); console.log("the 1"); console.log("cardigan"); console.log("the last great american dynasty"); console.log("invisible string"); console.log("my tears ricochet"); console.groupEnd(); console.log("outside"); ```  #### 控制台的下一步是什麼?  還有許多其他控制台方法未包含在此處(部分原因是它們與 Taylor Swift 歌詞的關係不大。)有關控制台方法的更多訊息,[請查看 Mozilla 開發者網絡有關 Web 技術的文件](https://developer.mozilla.org/en-US/docs/Web/API/console)。讓我知道您最喜歡或最不喜歡的民俗歌曲在線或在評論中! 1. 推特: [@lizziepika](https://twitter.com/lizziepika) 2. GitHub:[伊莉莎白西格爾](https://github.com/elizabethsiegle) 3. 電子郵件:[email protected] --- 原文出處:https://dev.to/twilio/6-javascript-console-methods-like-taylor-swift-folklore-lyrics-3h0k
介紹 == Visual Studio Code 允許您透過命令面板或鍵盤上的快捷鍵存取它提供的幾乎所有功能。 您可能每個工作日工作 8 小時,希望您能在這些工作時間中大部分時間進行編碼。所以你花了很多時間盯著你選擇的程式碼編輯器。 了解一些快捷方式可以幫助您更快地完成工作。知道如何更快地找到您需要的文件。您需要立即執行 NPM 命令,而不是開啟外部終端。  捷徑備忘單 ===== Visual Studio Code 的開發者 - [視窗](https://code.visualstudio.com/shortcuts/keyboard-shortcuts-windows.pdf) - [Linux](https://code.visualstudio.com/shortcuts/keyboard-shortcuts-linux.pdf) - [蘋果系統](https://code.visualstudio.com/shortcuts/keyboard-shortcuts-macos.pdf) 您可以下載這些備忘單,列印出來,然後將其放在辦公桌上以供快速參考,或嘗試在上班途中學習它們。不要試圖一次學會所有這些。這需要時間。所以要有耐心,你就會掌握它們。 鍵位圖 === 您是 Vim 用戶嗎?也許 Emacs 快捷方式已經刻在你的大腦裡了?或者,無論出於何種原因,您使用記事本++並欣賞記事本++的鍵盤快捷鍵😵? Visual Studio 為大家提供了一個擴充功能!讓我們安裝 ⚛ `Atom Keymap` 。我們將在沒有我們心愛的滑鼠的幫助下(幾乎)做到這一點。 1\) 開啟 Visual Studio 程式碼。 2\) Visual Studio Code 開啟後,按: `CTRL+SHIFT+X` 。該快捷方式將打開擴展列表,並且您的遊標將聚焦在搜尋欄上。輸入以下`@category:keymaps` 。 (如果您想了解更多有關本節中擴展程序如何工作的訊息,請在下面發表評論!) 3\) 您現在會看到鍵盤映射清單。按`Tab` ,然後按`Down Arrow ⬇` 。 4\) 按`⬇`直到選擇`Atom Keymap` 。現在按`Enter` 。 5)遺憾的是我找不到選擇「安裝」按鈕的方法。您現在需要點擊🖱! 您可以找到幾乎所有您能想像到的編輯器的鍵盤映射。安裝您最喜歡的那個,您就有了快捷方式!很酷吧? 鍵盤快速鍵設定 (JSON) ============== 有多種方法可以查看鍵盤快捷鍵設定。其中一種是透過圖形介面,也可以選擇使用透過 JSON 檔案來編輯捷徑。 圖形介面 ---- 我們可以按`CTRL+k`開啟圖形介面,然後仍然按住`CTRL` ,您應該按`CTRL+s` 。  頂部有一個搜尋欄,您可以在其中搜尋要查看的命令或鍵盤快捷鍵。這些對話框在 Visual Studio Code 中看起來往往相同,您將開始經常看到它們。 您可以看到四列。讓我們來看看它們。 \*指令:Visual Studio Code 執行的操作。 - 鍵綁定:執行操作時必須按下的按鍵組合。 - 何時:這是 Visual Studio Code 的過濾器,它告訴 Visual Studio Code 捷徑是否應該在該上下文中可操作。有些過濾器可能是整合終端、原始碼中的錯誤等等。 - 來源:Visual Studio 程式碼可以透過多種方式了解捷徑。最常見的是`Default` ,這些命令是 Visual Studio Code 隨附的開箱即用命令。顧名思義`User`是由用戶建立的命令。第三種方式是透過`Extension` 。擴展作者還可以決定加入快捷方式。如果您最喜歡的快捷方式不起作用,這可能是它停止工作的原因。 若要變更鍵綁定,請雙擊該行,然後會彈出一個模式。然後按下所需的組合鍵並按下`Enter` 。 鍵綁定 JSON 文件 ----------- 現在我們知道了鍵綁定的一般工作原理,讓我們來看看`keybindings.json`檔案。 其中有兩個:預設的`keybindings.json`和使用者特定的`keybindings.json`檔案。按`CTRL+SHIFT+P`或`F1`開啟命令匣並鍵入`keyboard shortcuts`現在您應該在命令托盤中看到至少兩個條目。 - 首選項:開啟預設鍵盤快速鍵 (JSON)。 這是 Visual Studio Code 儲存所有預設快捷方式的文件,以及底部未使用的可用捷徑清單。我會避免在這裡更改它們。 - 首選項:開啟鍵盤快速鍵 (JSON) 這是用戶特定的鍵綁定文件,您應該編輯此文件。一開始,它只是一個空陣列而已! 要在 JSON 檔案中新增快捷方式,您只需新增一個如下所示的物件: ``` [ { "key": "CTRL+ALT+P", "command": "git.pull", "when": "" } ] ``` 您需要指定密鑰和命令。 `when`告訴 Visual Studio Code 應在何處執行此命令。如果你把它留空,它會到處監聽。我們在上一部分談到了這一點。 有用的快捷鍵 ====== 打開命令面板 ------ 您已經知道這一點,但也許您跳到了這一部分 😉 - `CRTL+SHIFT+P`或`F1` 這將開啟 Visual Studio Code 中最強大的功能。命令面板。只需輸入您認為想要的內容,它仍然可以找到它! 打開和關閉側邊欄 -------- 有時您想要更多的水平空間,但側邊欄卻妨礙了您!只需按 - `CTRL+B` 您可以打開和關閉側邊欄 輸入禪宗模式 ------ 你喜歡 Visual Studio 程式碼中的 Zen Mod 嗎?是的,它是內建的! 為此,您需要按: - `CTRL+k` ,放開兩個按鍵並按`z` 。 這將打開和關閉 Zen Mod。 聚焦綜合終端 ------ 我最喜歡的功能之一是 Visual Studio Code 中的整合終端機。我99%的時間都在用它!因此要快速打開或關閉它,您需要按: - `CTRL+j` 這將打開整合終端並將遊標聚焦在其中。如果您再次按下它,它將關閉,並且您的遊標將返回到原來的位置。 在您的專案中搜尋文件 ---------- Visual Studio Code 有一個很棒的檔案搜尋內建功能。當您使用遠端擴展時,它也非常快。要打開它,您只需按: - `CTRL+p` 這將打開一個對話框,您可以在其中查看最近打開的文件,這本身就非常好。它還支援模糊搜尋。這意味著您可以鍵入任何單字,它會在檔案的路徑中找到。所以你不必精確!該對話還支持更多的事情。例如`go-to line`或除錯以及更多功能!如果您想了解更多請在下面評論。 切換到最近開啟的工作區 ----------- 您在微服務架構中工作並且需要一直切換資料夾?因為你不使用 mono 倉庫?我有捷徑給你!按: - `CTRL+r` 這將開啟一個對話框,其中包含最近開啟的工作區/資料夾的清單。 額外提示:如果您在該對話方塊中按`CTRL+ENTER` Visual Studio Code 將在新視窗中開啟它。 分割編輯器視窗 ------- 人們喜歡 vim,因為它很容易在編輯器之間分割視圖。 Visual Studio Code 也內建了功能。只需按 - `CTRL+\` 若要建立 2 列或 - `CTRL+k` ,放開`k`並按住`CTRL`並按`\` 建立一個新行。第二個聽起來比它更難,但是一旦它進入你的大腦,它需要你幾秒鐘的時間,你現在知道如何更改或建立新的快捷方式😉 聚焦編輯器視窗 ------- 既然您知道如何拆分編輯器窗口,您還需要學習如何快速跳轉這些視圖。這非常簡單,並且還有預設的鍵綁定。你需要按 - `CTRL+[1-9]` 這表示您需要按`CTRL`加您想要關注的視窗的編號。對於第一個視窗按`CTRL+1` ,第二個視窗`CTRL+2` ,您明白了 Easy 的想法嗎? 關閉目前編輯器視窗 --------- 現在您打開了太多編輯器窗口,並且您想要關閉它們。這可以透過按快速完成 - `CTRL+w` 這將關閉目前開啟的視窗。 僅關閉已儲存的編輯器視窗 ------------ 有時您會開啟如此多的編輯器,以至於您不再知道要儲存了什麼。是的,我知道您可以透過選項卡欄中的那個點看到這一點,但是,您仍然無法集中精力並找到正確的檔案。 Visual Studio Code 為您提供支援!只需按 - `CTRL+k`然後放開`CTRL`和`k`並按`u` 這將保存所有窗口,以便您可以檢查未保存的窗口並保存它們。 開啟一個新文件 ------- 您需要一個新檔案來繪製一些程式碼嗎?或者,您需要為您的寵物專案建立一個新檔案?按 - `CTRL+n` 這將開啟一個新編輯器。 更改目前文件的語言 --------- 您想切換目前文件中選定的語言,因為您想要`Javascript (react)`而不是`Javascript` ?按 - `CTRL+k` 然後放開`CTRL`和`k`並按 'm`。 這將打開一個新的對話,您可以在其中搜尋所需的語言。 前往線路 ---- 現在讓我們專注於如何讓編輯變得更容易。第 1042 行有錯誤(如果您的文件那麼長,那麼問題就來了)。你不想滾動!按 - `CTRL+g` 這將開啟一個對話框,您需要輸入要跳到的行號。與`CTRL+p`結合使用會非常強大。 轉到符號 ---- 您的第一個問題是,什麼是符號?在程式語言中,符號通常是變數。在 CSS 中,它們是選擇器。若要查看對話,請按 - `CTRL+SHIFT+O` 這將開啟一個對話框,其中包含目前文件中可用符號的清單。 - `CTRL+t` 您會看到一個只有`#`的對話框,您需要鍵入所需的符號,Visual Studio Code 會在空工作區中搜尋該符號(如果您使用的語言支援該符號)。所以你需要自己檢查一下。 向上或向下移動一條線。 ----------- 有時您需要移出`if`內的那行程式碼,或只是移動一行,因為它被提前呼叫了。您可以透過按 - `Alt+Down` 將目前選定的行向下移動一行 - `Alt+Up` 將目前選定的行向上移動一行 複製目前行 ----- 您想用一些變數填充該陣列,但您懶得寫一個循環。那麼要如何填滿`array[0]` `array[1]`和`array[2]`呢?透過複製第一行兩次並僅更改您需要的內容。對於那個新聞界 - `ALT+SHIFT+Up` 這將複製當前選定的行並將其貼上到上面的一行中 - `ALT+SHIFT+Down` 這將複製目前選定的行並將其貼上到下面的一行中 (這個快捷方式在這裡會很方便) 顯示建議 ---- Visual Studio Code 有內建建議。大多數時候它會自動為您彈出,但有時不會,而您確實需要它。簡單,按 - `CTRL+Spacebar` 這將打開建議對話框 註解掉目前選擇 ------- 有時您需要隔離程式碼並註解掉它周圍的所有內容。按 - `CTRL+/` 如果您選擇了多行,則會將其註解掉。如果您沒有選擇任何內容,它只會註解掉這一行。 選擇多行程式碼 ------- 要註解掉該程式碼區塊,您需要選擇多行。這是透過按完成的 - `CTRL+Shift+Up` 從目前行開始選擇並向上移動遊標。 - `CTRL+Shift+down` 從目前行開始選擇並向下移動遊標。 折疊和展開您的程式碼 ---------- 你有這麼大的功能,但你真的看不到它了,因為它太大了,需要重構,但你沒有時間,所以你想忘記它嗎?您可以折疊和展開程式碼,以便在 100 行中可以產生 1 行。若要執行此操作,請按 - `CTRL+SHIFT+[` 折疊(隱藏)程式碼 - `CTRL+SHIFT+]` 展開(顯示)程式碼 切一條孔線 ----- 對於此,您不能選擇任何程式碼。按 - `CTRL+x` 當沒有選擇任何內容時,這會剪切整行。 縮排/減少線 ------ 人們通常知道如何縮排程式碼。您可以選擇要縮排的程式碼並按 - `Tab` 按下您想要的次數按 Tab 鍵,這樣效果就適合您了。 您知道可以取消縮排嗎?將程式碼從右移到左?您可以透過按 - `SHIFT+tab` 結論 == 還有更多的捷徑。這些快捷鍵是我最常使用的快捷鍵。我希望這可以幫助您更多地了解 Visual Studio Code 中的快捷方式,並且您現在可以建立自己的快捷方式。 我是否忽略了每個人都需要知道的有用命令? 你錯過了什麼嗎?有什麼不清楚嗎? 請寫評論。我盡我所能回答你所有的問題! **👋問好!** [Instagram](https://www.instagram.com/lampewebdev/) |[推特](https://twitter.com/lampewebdev)|[領英](https://www.linkedin.com/in/michael-lazarski-25725a87)|[中等](https://medium.com/@lampewebdevelopment)|[抽搐](https://dev.to/twitch_live_streams/lampewebdev)| [Youtube](https://www.youtube.com/channel/UCYCe4Cnracnq91J0CgoyKAQ) --- 原文出處:https://dev.to/lampewebdev/the-guide-to-visual-studio-code-shortcuts-higher-productivity-and-30-of-my-favourite-shortcuts-you-need-to-learn-mb3
可以說,對於任何開源專案來說,最重要的文件就是自述文件。一個好的自述文件不僅告訴人們該專案的用途和用途,還告訴人們他們如何使用該專案並為其做出貢獻。 如果您在撰寫自述文件時沒有充分解釋您的專案的用途或人們如何使用它,那麼它幾乎違背了開源的目的,因為其他開發人員不太可能參與或為其做出貢獻。 TL;DR - 太長?跳到最後並使用我的[模板](#template)。 什麼是自述文件? -------- 本質上,自述文件是一個單一的文字檔案( `.txt`或`.md` ),可作為專案或目錄的一站式文件。對於大多數開源專案來說,它通常是最明顯的文件和登陸頁面。即使自述文件的名稱全部大寫,也是為了吸引讀者的注意力並確保這是他們首先閱讀的內容。 有證據顯示自述文件的歷史可以追溯到 20 世紀 70 年代。我能找到的最古老的例子是 DEC PDP-10 計算機的[自述文件](http://pdp-10.trailing-edge.com/decus_20tap3_198111/01/decus/20-0079/readme.txt.html),日期為 1974 年 11 月 27 日。儘管自述文件名稱的起源存在爭議,但最流行的兩種理論是: 1. 帶有打孔卡的原始大型計算機的程式設計師會留下一疊帶有“READ ME!”的紙質指令。寫在前面。 2. 這個名字是向劉易斯·卡羅爾的《愛麗絲夢遊仙境》致敬,其中主角愛麗絲發現了一瓶標有“喝我”的藥水和標有“吃我”的蛋糕,這使她的體型發生了變化。 自述文件中應包含哪些內容? ------------- 好的,那麼一個很棒的自述文件該包含什麼內容呢?作為起點,我建議您包括以下關鍵內容: **1. 命名事物** 不要忘記為您的專案或功能命名。 GitHub 上有數量驚人的沒有名稱的專案。 **2. 介紹或總結** 寫一篇簡短的兩三行簡介,解釋你的專案的用途和用途。還要省略“簡介”、“摘要”或“概述”等標題 - 很明顯這是一個簡介。 **3. 先決條件** 在介紹之後立即加入一個部分,標題為列出任何想要使用該專案的人在開始之前可能需要的任何先決知識或工具。例如,如果它在最新版本的 Python 上執行,請告訴他們安裝 Python。這是一個例子: ``` Prerequisites Before you continue, ensure you have met the following requirements: * You have installed the latest version of Ruby. * You are using a Linux or Mac OS machine. Windows is not currently supported. * You have a basic understanding of graph theory. ``` **4. 如何安裝** 提供安裝步驟!令人驚訝的是,我遇到的許多專案只提供基本的使用說明,並期望您神奇地知道如何安裝它。如果需要多個步驟,請確保將安裝分解為編號的步驟。 **5. 如何使用該東西** 新增使用者安裝專案後如何使用該專案的步驟。如果您認為有用,請確保包含使用範例和解釋命令選項或標誌的參考。如果您在單獨的文件或網站中有更高級的文件,請從此處連結到該文件。 **6. 如何為事情做出貢獻** 提供為專案做出貢獻的步驟。或者,如果您希望人們在向您的專案貢獻拉取請求之前閱讀它,您可能希望在單獨的文件中建立貢獻者指南,並從自述文件連結到該指南。 **7. 加入貢獻者** 在作者部分感謝為該專案提供幫助的任何貢獻者。這是一種很好的方式,讓開源感覺像是團隊的努力,並感謝每個花時間做出貢獻的人。 **8. 加入致謝** 同樣,如果您使用了其他人的作品(程式碼、設計、圖像等),並且該作品具有需要確認的版權,您可能需要在此處加入。您還可以感謝為該專案提供幫助的任何其他開發商或機構。 **九、聯絡方式** 您可能不想這樣做,因為您是一個非常注重隱私的人,但如果有人有疑問、想要與您合作或對您的專案印象深刻並為您提供工作機會,那麼將您的聯絡方式放在前面是有意義的中心。 **10.新增許可證訊息** 如果適用,您肯定希望包含許可證資訊。除非您提供此軟體,否則依賴第三方軟體的新創公司和其他公司不太可能能夠使用您的專案。請造訪[Choosealicense.com](https://choosealicense.com/)或[opensource.org](https://opensource.org/licenses) ,以取得您可以使用的授權清單。 在您的自述文件中加入耀斑 🔥 -------------- 如果您確實想讓您的自述文件脫穎而出並且看起來具有視覺吸引力,您可以執行以下操作: - **新增徽標**:如果您的專案有徽標,請將其新增至自述文件的頂部。品牌使專案看起來更專業並幫助人們記住它。 - **新增徽章或盾牌**:您可以新增徽章和盾牌以反映專案的當前狀態、它使用的許可證以及它使用的任何依賴項是否是最新的。而且它們看起來很酷!您可以在[Shields.io](https://shields.io/)找到徽章清單或自行設計。 - **新增螢幕截圖**:有時一個簡單的螢幕截圖或一組螢幕截圖可以表達的內容遠遠超過一千個單字。但請注意,如果您確實使用螢幕截圖,則每次更新專案時都需要更新它們。 - **使用表情符號?** :現在很多專案似乎都使用表情符號,儘管是否使用它們取決於您。它們是為你的自述文件注入一點色彩和幽默的好方法,讓專案感覺更人性化。 如果您使用[所有貢獻者](https://allcontributors.org/)來感謝貢獻,您可以使用他們的[表情符號鍵](https://allcontributors.org/docs/en/emoji-key)來表示不同的貢獻類型: ``` * 🐛 for raising a bug ``` ``` * 💻 for submitting code ``` ``` * 📖 for docs contributions etc. ``` 這是 GitHub 徽章或盾牌的樣子,供參考(毫無疑問您以前見過它們!):  我的模板<a name="template"></a> --------------------------- 我建立了一個模板,涵蓋了本文中提出的大部分建議。請隨意分叉存儲庫,提出改進建議或根據自己的目的自訂它!您可以在 GitHub[上](https://github.com/scottydocs/README-template.md)找到我的模板。 資源 -- 如果您需要更多有關自述文件的建議,我還推薦以下資源: - Daniel Beck 在 2016 年 Write the Docs 的演講[「Write the Readable」](https://www.youtube.com/watch?v=2dAK42B7qtw) 。 - Lorna Jane Mitchell 在 API 文件 2019 中的演講[「Github 作為登陸頁面」](https://youtu.be/fXMN4X9B8Rg) 。 - 查看 Franck Abgrall 的[README 產生器](https://github.com/kefranabg/readme-md-generator)。 --- 原文出處:https://dev.to/scottydocs/how-to-write-a-kickass-readme-5af9
在軟體開發領域,這個以其多樣化和強烈持有觀點而聞名的領域,很少有實踐能夠像 SOLID 原則那樣達成共識,作為成為更好的軟體工程師的保證途徑。 Robert C. Martin 在 2000 年代初期正式製定的 5 條黃金法則極大地影響了軟體開發產業,並為更好的程式碼品質和決策過程製定了新標準,至今仍具有相關性。  SOLID 原則是專門為支援 OOP(物件導向程式設計)範例而設計的。因此,本文是為希望提高開發技能並編寫更優雅、可維護和可擴展程式碼的 OOP 開發人員而設計的。 這裡使用的語言是 TypeScript,遵循常見的跨語言 OOP 概念。需要基本的 OOP 知識。 --- 1. S = 單一職責原則(SRP) ------------------ 單一職責原則 (SRP) 是五個 SOLID 原則之一,它規定每個類別應該只有一個職責,以保持有意義的關注點分離。 此模式是一種稱為「上帝物件」的常見反模式的解決方案,「上帝物件」只是指承擔太多職責的類別或物件,使其難以理解、測試和維護。 遵循 SRP 規則有助於使程式碼元件可重複使用、鬆散耦合且易於理解。讓我們探討這項原則,展示 SRP 違規情況和解決方案。 ### 全域宣告 ``` enum Color { BLUE = 'blue', GREEN = 'green', RED = 'red' } enum Size { SMALL = 'small', MEDIUM = 'medium', LARGE = 'large' } class Product { private _name: string; private _color: Color; private _size: Size; constructor (name: string, color: Color, size: Size) { this._name = name; this._color = color; this._size = size; } public get name(): string { return this._name; } public get color(): Color { return this._color; } public get size(): Size { return this._size; } } ``` ### 違反 在下面的程式碼中, `ProductManager`類別負責**products 的建立和存儲**,違反了單一職責原則。 ``` class ProductManager { private _products: Product[] = []; createProduct (name: string, color: Color, size: Size): Product { return new Product(name, color, size); } storeProduct (product: Product): void { this._products.push(product); } getProducts (): Product[] { return this._products; } } const productManager: ProductManager = new ProductManager(); const product: Product = productManager.createProduct('Product 1', Color.BLUE, Size.LARGE); productManager.storeProduct(product); const allProducts: Product[] = productManager.getProducts(); ``` ### 解決 將產品建立和儲存的處理分離到兩個不同的類別可以減少`ProductManager`類別的職責數量。這種方法進一步模組化了程式碼並使其更易於維護。 ``` class ProductManager { createProduct (name: string, color: Color, size: Size): Product { return new Product(name, color, size); } } class ProductStorage { private _products: Product[] = []; storeProduct (product: Product): void { this._products.push(product); } getProducts (): Product[] { return this._products; } } ``` #### 用法: ``` const productManager: ProductManager = new ProductManager(); const productStorage: ProductStorage = new ProductStorage(); const product: Product = productManager.createProduct("Product 1", Color.BLUE, Size.LARGE); productStorage.storeProduct(product); const allProducts: Product[] = productStorage.getProducts(); ``` --- 2. O = 開閉原理 (OCP) ----------------- > “軟體實體應該對擴展開放,但對修改關閉” 開閉原則 (OCP) 是*「寫一次,寫得夠好以便可擴展,然後就忘記它」。* 這項原則的重要性取決於這樣一個事實:模組可能會根據新的需求不時發生變化。如果在模組編寫、測試並上傳到生產環境後出現新需求,則修改此模組通常是不好的做法,尤其是當其他模組依賴它時。為了防止這種情況,我們可以使用開閉原則。 ### 全域宣告 ``` enum Color { BLUE = 'blue', GREEN = 'green', RED = 'red' } enum Size { SMALL = 'small', MEDIUM = 'medium', LARGE = 'large' } class Product { private _name: string; private _color: Color; private _size: Size; constructor (name: string, color: Color, size: Size) { this._name = name; this._color = color; this._size = size; } public get name(): string { return this._name; } public get color(): Color { return this._color; } public get size(): Size { return this._size; } } class Inventory { private _products: Product[] = []; public add(product: Product): void { this._products.push(product); } addArray(products: Product[]) { for (const product of products) { this.add(product); } } public get products(): Product[] { return this._products; } } ``` ### 違反 讓我們描述一個實作產品過濾類別的場景。讓我們加入按顏色過濾產品的功能。 ``` class ProductsFilter { byColor(inventory: Inventory, color: Color): Product[] { return inventory.products.filter(p => p.color === color); } } ``` 我們已經測試了此程式碼並將其部署到生產中。 幾天后,客戶請求一項新功能 - 也按大小過濾。然後我們修改該類別以支援新的要求。 **現在違反了開閉原則!** ``` class ProductsFilter { byColor(inventory: Inventory, color: Color): Product[] { return inventory.products.filter(p => p.color === color); } bySize(inventory: Inventory, size: Size): Product[] { return inventory.products.filter(p => p.size === size); } } ``` ### 解決 在不違反 OCP 的情況下實現過濾機制的正確方法應該使用「規範」類別。 ``` abstract class Specification { public abstract isValid(product: Product): boolean; } class ColorSpecification extends Specification { private _color: Color; constructor (color) { super(); this._color = color; } public isValid(product: Product): boolean { return product.color === this._color; } } class SizeSpecification extends Specification { private _size: Size; constructor (size) { super(); this._size = size; } public isValid(product: Product): boolean { return product.size === this._size; } } // A robust mechanism to allow different combinations of specifications class AndSpecification extends Specification { private _specifications: Specification[]; // "...rest" operator, groups the arguments into an array constructor ((...specifications): Specification[]) { super(); this._specifications = specifications; } public isValid (product: Product): boolean { return this._specifications.every(specification => specification.isValid(product)); } } class ProductsFilter { public filter (inventory: Inventory, specification: Specification): Product[] { return inventory.products.filter(product => specification.isValid(product)); } } ``` #### 用法: ``` const p1: Product = new Product('Apple', Color.GREEN, Size.LARGE); const p2: Product = new Product('Pear', Color.GREEN, Size.LARGE); const p3: Product = new Product('Grapes', Color.GREEN, Size.SMALL); const p4: Product = new Product('Blueberries', Color.BLUE, Size.LARGE); const p5: Product = new Product('Watermelon', Color.RED, Size.LARGE); const inventory: Inventory = new Inventory(); inventory.addArray([p1, p2, p3, p4, p5]); const greenColorSpec: ColorSpecification = new ColorSpecification(Color.GREEN); const largeSizeSpec: SizeSpecification = new SizeSpecification(Size.LARGE); const andSpec: AndSpecification = new AndSpecification(greenColorSpec, largeSizeSpec); const productsFilter: ProductsFilter = new ProductsFilter(); const filteredProducts: Product[] = productsFilter.filter(inventory, andSpec); // All large green products ``` 過濾機制現在是完全可擴展的。現有的類別不應該再被修改。 如果有新的過濾要求,我們只需建立一個新規範即可。或者如果需要更改規範組合,可以透過使用`AndSpecification`類別輕鬆完成。 --- 3. L=里氏替換原理(LSP) ---------------- 里氏替換原則(LSP)是軟體元件靈活性和穩健性的重要規則。它由 Barbara Liskov 提出,並成為 SOLID 原則的基本要素。 LSP 規定**超類別的物件應該可以用子類別的物件替換,而不影響程式的正確性。**換句話說,子類別應該擴展超類別的行為而不改變其原始功能。採用這種方法可以提高軟體元件的質量,確保可重複使用性並減少意外的副作用。 ### 違反 下面的範例說明了違反里氏替換原則 (LSP) 的場景。當`Rectangle`物件被`Square`物件取代時,透過檢查程序的行為可以觀察到這種違規的跡象。 #### 聲明: ``` class Rectangle { protected _width: number; protected _height: number; constructor (width: number, height: number) { this._width = width; this._height = height; } get width (): number { return this._width; } get height (): number { return this._height; } set width (width: number) { this._width = width; } set height (height: number) { this._height = height; } getArea (): number { return this._width * this._height; } } // A square is also rectangle class Square extends Rectangle { get width (): number { return this._width; } get height (): number { return this._height; } set height (height: number) { this._height = this._width = height; // Changing both width & height } set width (width: number) { this._width = this._height = width; // Changing both width & height } } function increaseRectangleWidth(rectangle: Rectangle, byAmount: number) { rectangle.width += byAmount; } ``` #### 用法: ``` const rectangle: Rectangle = new Rectangle(5, 5); const square: Square = new Square(5, 5); console.log(rectangle.getArea()); // Expected: 25, Got: 25 (V) console.log(square.getArea()); // Expected: 25, Got: 25 (V) // LSP Violation Indication: Can't replace object 'rectangle' (superclass) with 'square' (subclass) since the results would be different. increaseRectangleWidth(rectangle, 5); increaseRectangleWidth(square, 5); console.log(rectangle.getArea()); // Expected: 50, Got: 50 (V) // LSP Violation, increaseRectangleWidth() changed both width and height of the square, unexpected behavior. console.log(square.getArea()); //Expected: 50, Got: 100 (X) ``` ### 解決 重構的程式碼現在遵循 LSP,確保超類別`Shape`的物件可以替換為子類別`Rectangle`和`Square`的物件,而不會影響計算面積的正確性,也不會引入任何改變程式行為的不必要的副作用。 #### 聲明: ``` abstract class Shape { public abstract getArea(): number; } class Rectangle extends Shape { private _width: number; private _height: number; constructor (width: number, height: number) { super(); this._width = width; this._height = height; } getArea (): number { return this._width * this._height; } } class Square extends Shape { private _side: number; constructor (side: number) { super(); this._side = side; } getArea (): number { return this._side * this._side; } } function displayArea (shape: Shape): void { console.log(shape.getArea()); } ``` #### 用法: ``` const rectangle: Rectangle = new Rectangle(5, 10); const square: Square = new Square(5); // The rectangle's area is correctly calculated displayArea(rectangle); // Expected: 50, Got: 50 (V) // The square's area is correctly calculated displayArea(square); // Expected: 25, Got: 25 (V) ``` --- 4. I = 介面隔離原則 (ISP) ------------------- 介面隔離原則 (ISP) 強調建立特定於客戶端的介面而不是一刀切的重要性。 這種方法根據客戶的需求集中類,消除了類別必須實現它實際上不使用或不需要的方法的情況。 透過應用介面隔離原則,軟體系統可以以更靈活、易於理解和易於重構的方式建構。讓我們來看一個例子。 ### 違反 這裡違反了 ISP 規則,因為`Robot`必須實現完全沒有必要的`eat()`函數。 ``` interface Worker { work(): void; eat(): void; } class Developer implements Worker { public work(): void { console.log('Coding..'); } public eat(): void { console.log('Eating..'); } } class Robot implements Worker { public work(): void { console.log('Building a car..'); } // ISP Violation: Robot is forced to implement this function even when unnecessary public eat(): void { throw new Error('Cannot eat!'); } } ``` ### 解決 下面的範例代表了我們之前遇到的問題的解決方案。現在,介面更加簡潔且更加特定於客戶端,允許客戶端類別僅實現與其相關的方法。 ``` interface Workable { work(): void; } interface Eatable { eat(): void; } class Developer implements Workable, Eatable { public work(): void { console.log('Coding..'); } public eat(): void { console.log('Eating...'); } } class Robot implements Workable { public work(): void { console.log('Building a car..'); } // No need to implement eat(), adhering ISP. } ``` #### ISP 前後:  --- 5. D = 依賴倒置原理(DIP) ------------------ 依賴倒置原則(DIP)是最終的SOLID原則,重點是透過使用抽象來減少低層模組(例如資料讀取/寫入)和高層模組(執行關鍵操作)之間的耦合。 DIP 對於設計能夠適應變化、模組化且易於更新的軟體至關重要。 **DIP 的關鍵準則是:** 1. **高層模組不應該依賴低層模組。兩者都應該依賴抽象。**這意味著應用程式的功能不應該依賴特定的實現,以便使系統更加靈活並且更容易更新或替換低階實現。 2. **抽像不應該依賴細節。細節應該取決於抽象。**這鼓勵設計專注於實際需要什麼操作,而不是如何實現這些操作。 ### 違反 讓我們來看一個展示依賴倒置原則 (DIP) 違規的範例。 `MessageProcessor` (高階模組)緊密耦合並直接依賴`FileLogger` (低階模組),違反了原則,因為它不依賴抽象層,而是依賴特定的類別實作。 **額外獎勵:**這也違反了開閉原則(OCP)。如果我們想要更改日誌記錄機制以寫入資料庫而不是文件,我們將被迫直接修改`MessageProcessor`函數。 ``` import fs from 'fs'; // Low Level Module class FileLogger { logMessage(message: string): void { fs.writeFileSync('somefile.txt', message); } } // High Level Module class MessageProcessor { // DIP Violation: This high-level module is is tightly coupled with the low-level module (FileLogger), making the system less flexible and harder to maintain or extend. private logger = new FileLogger(); processMessage(message: string): void { this.logger.logMessage(message); } } ``` ### 解決 以下重構的程式碼表示為了遵守依賴倒置原則 (DIP) 所需進行的變更。與前面的範例相反,高階類別`MessageProcessor`持有特定低階類別`FileLogger`的私有屬性,現在它持有`Logger`類型的私有屬性(表示抽象層的介面)。 這種更好的方法減少了類別之間的依賴關係,從而使程式碼更具可擴展性和可維護性。 #### 聲明: ``` import fs from 'fs'; // Abstraction Layer interface Logger { logMessage(message: string): void; } // Low Level Module #1 class FileLogger implements Logger { logMessage(message: string): void { fs.writeFileSync('somefile.txt', message); } } // Low Level Module #2 class ConsoleLogger implements Logger { logMessage(message: string): void { console.log(message); } } // High Level Module class MessageProcessor { // Resolved: The high level module is now loosely coupled with the low level logger modules. private _logger: Logger; constructor (logger: Logger) { this._logger = logger; } processMessage (message: string): void { this._logger.logMessage(message); } } ``` #### 用法: ``` const fileLogger = new FileLogger(); const consoleLogger = new ConsoleLogger(); // Now the logging mechanism can be easily replaced const messageProcessor = new MessageProcessor(consoleLogger); messageProcessor.processMessage('Hello'); ``` #### DIP 之前和之後:  結論 -- 透過遵循 SOLID 原則,開發人員在開發或維護任何規模的軟體系統時,可以避免常見的陷阱,例如緊密耦合、缺乏靈活性、程式碼可重複使用性差以及一般維護困難。掌握這些原則是成為更好的軟體工程師的又一步。 --- 原文出處:https://dev.to/idanref/solid-the-5-golden-rules-to-level-up-your-coding-skills-2p82
*ESLINT* :你有沒有想過ESLINT 是什麼,當我第一次聽說ESLINT 時,我很好奇它到底是怎麼回事,從那時起我就一直在我的專案中使用它,儘管一開始我錯誤地使用了它,那就是為什麼我發布這篇文章是為了讓人們能夠正確理解。但在深入探討之前,讓我先快速解釋一下什麼是 ESLINT 和 VS Code。 **ESLINT**是用於 Javascript 和 JSX 的可插入 linting 實用程序,它有助於發現可能的錯誤。 **VS Code**是頂級的開發編輯器之一,它由 Microsoft 開發和維護,它有助於提高生產力,並且還具有許多功能,我要強調的功能之一是擴充。擴充功能是 VS Code 中的外部套件,可讓您擴展編輯器的功能 你可以從他們的官方網站下載 VS Code [VS Code Download](https://code.visualstudio.com/) **注意:***我不會深入研究 VS Code。本文中有關 VS Code 的所有內容都只與 ESLINT 相關*。 **腳步**: - 建立一個 JavaScript 專案 - 在 VS Code 編輯器中安裝 eslint 作為擴展 - 使用 npm 將 eslint 安裝為全域包 - 在您的 javascript 專案中初始化 eslint - 修改專案中的 eslint 設定檔。 讓我們使用`npm init --yes`建立一個簡單的 javascript 專案  操作成功後,它將建立一個*package.json*文件,該文件將管理我們專案的所有配置。 讓我們嘗試在 VS Code 編輯器上安裝 ESLINT 擴充  一旦我們在 VS Code 編輯器上安裝了 eslint 擴展,然後使用下面的程式碼透過 npm 將 eslint 安裝為全域包 ``` npm install eslint -g ``` 您需要在專案中初始化 eslint,以便可以利用 eslint 的強大功能。從您的根專案輸入以下程式碼來初始化 eslint ``` eslint --init ``` 在初始化期間 eslint 會問你一些問題,更像是設定你的設定檔。 - **您想如何使用 ESLint?** ``` * __To check syntax only__ => it helps you correct your syntax and make sure it conform to standard. ``` ``` * __To check syntax and find problems__ => to help you check for syntax correctness and also help to find any problems in your code base ``` ``` * __To check syntax, find problems, and enforce code style___ => to help you check for syntax, find problem and enforce style, enforcing style means to conforms to a particular coding standard such as Airbnb, Google and other Standard coding style. But I always go for the last option the one with syntax, find problems and enforce code style ``` - **您的專案使用什麼類型的模組?** ``` * __Javascript module (import/export)__ => if your project has babel installed then you definitely need to choose this option. If you are working on a project such as React, Vue, Angular e.t.c they all use babel so you need choose this option. ``` ``` * __CommonJS (require/exports)__ => this option is meant for commonJS that has nothing to do with babel, maybe your nodejs project and any other javascript project ``` - **您的專案使用哪個框架?** ``` * __React__ => if you are using react in/for your project then this option is for you ``` ``` * __Vue__ => if you are using Vue in/for your project then this option is for you ``` ``` * __None of these__ => if you are using neither React or Vue in your project choose this option ``` - **你的程式碼在哪裡執行?** ``` * __Browser__ => if your project runs on browser e.g React, Angular, Vue e.t.c then go for this option ``` ``` * __Node__ => if your project is a node based then gladly choose this option ``` - **您希望如何為您的專案定義風格?** ``` * __Use a popular style guide__ => This allows you to choose from set of popular style such as Airbnb,Standard and Google style guide, it is advisable to choose this option in order for you to follow popular and most used style guide and i will be choosen this option in this post. ``` ``` * Answer questions about your style: _This is for custom style guide_ ``` ``` * Inspect your JavaScript file(s).: _custom style guide_ ``` - **您希望設定檔採用什麼格式?** ``` * __Javascript__ => whether you want your eslint config file to be in *.js* file ``` ``` * __YAML__ => whether you want your eslint config file to be in *.yaml* file ``` ``` * __JSON__ => whether you want your eslint config file to be in *.json* file ``` 您可以選擇此部分中的任何選項 選擇首選設定檔類型後,它將提示您安裝所有必要的依賴項。成功安裝所有必要的依賴項後,它將產生一個帶有“.eslintrc”.“js/json/yaml”的設定檔。 **如下所示的設定檔範例**  下面是一個小動畫圖像,顯示 VS Code 如何與 eslint 配合使用來通知您 javascript 專案中的錯誤  **在專案中設定 ESLINT 規則** 在專案中定義 ESLINT 規則會告知 eslint 您要新增或刪除的規則類型。您可以在設定檔的規則部分修改/設定規則 要設定的規則範例是 ``` "rules" : { no-console: 0; no-empty: 0; no-irregular-whitespace:0; } ``` 您可以定義盡可能多的規則,您可以在其官方文件[ESLINT Rules Documentation](https://eslint.org/docs/rules/)上閱讀有關 ESLINT 規則的更多訊息 最後,我將向您展示如何將 eslint 連結到 javascript 專案編譯器/轉譯器 以下步驟 - 前往`package.json`文件,在文件的腳本段中加入以下內容 ``` script:{ "lint":"eslint" } ``` **注意:** *“lint”只是一個普通單詞,您可以使用任何您喜歡的單詞* 然後在你的根專案中你可以執行你的 linting 腳本 ``` npm run lint ``` > ESLINT 有助於提高工作效率,根據標準編寫程式碼,並在您的程式碼庫違反樣式指南規則時標記錯誤。透過這篇文章,您應該能夠將 ESLINT 整合到您的 Javascript 專案中。 --- 原文出處:https://dev.to/devdammak/setting-up-eslint-in-your-javascript-project-with-vs-code-2amf
我們都曾在某個時刻經歷過有關 git commit 訊息的混亂。  我也不例外。我的部落格的提交訊息如下所示: ``` fixxxx stuff post post post post posts mmm posts front maddy Add chris oliver add syntax article add git patch article fix video video arty art art Fix links oops ``` 因為我部落格的 git 歷史記錄只有我自己看過,所以沒關係。我已經接受了我永遠無法在我的部落格中充分利用 git 的事實,而且我完全同意這一點。 不幸的是,有些人對待有多個貢獻者的真實專案就像我對待我的部落格一樣。我發現這種做法是無知而不是懶惰的結果。因此,我將分享一些關於如何在實際專案中使用提交訊息的技巧。 ### 為什麼要關心? 😤[我不在乎,跳到模板!](#the-final-template) 🚀 Git 是一個強大的工具,即使您只使用它來保存程式碼更改歷史記錄並且不利用其最強大的功能。 然而,你會發現你挖掘得越深,git 就會變得越強大。您還會發現 git 的許多最有用的功能都是在提交訊息有用的假設下運作的。 想想你上次使用`git blame`是什麼時候。如果您發現一條提交訊息,上面`fixed a bad bug` ,這會有幫助嗎?可能不是,您可能試圖找到有關您正在處理的程式碼的更多上下文;你需要解釋什麼以及為什麼。 Git 提交訊息必須包含每次更改背後的內容和原因,以便明天勇敢的 git 探索者能夠進入提交作者的頭腦。如果提交訊息不包含該訊息,為什麼還要寫一個?提交訊息只有在對將來某個時候試圖理解更改的人有用時才有用。 為了建立一個良好的提交訊息的模板,我將把提交訊息分成幾個部分。 ### 首先,主題行 在提交訊息中,第一行(有時稱為主題行)應與正文隔離。理想情況下,這一行總結了提交中所做的更改。 當我寫主題行時,我嘗試完成這句話,“這次提交將......” 例如,我可能會編寫一個主題行,內容類似於`Remove unused, commented code` 。這可以很好地結束我的句子:“此提交將刪除未使用的帶註釋的程式碼。” 在設定主題行格式時,需要記住一兩個規則。 首先,主題行中的第一個字元應大寫;這只是一個常見的約定。根據我的經驗,它還使閱讀一長串的單行提交清單變得更加容易。 其次,您的提交訊息不應超過五十個字元。這是因為 GitHub 等工具會將該行截斷為 50 個字元。因此,為了讓其他人能夠有效地瀏覽和理解你的主題行,你應該嘗試用五十個字符來總結整個變化。 我的提交訊息範本的第一行如下所示: `Summarize the change in less than 50 characters` ### 接下來,第一個正文“段落” 在某些提交中,主題行足以傳達整個想法。例如,如果您的提交將`Add a comma to the README` ,您可能不需要自己解釋。 然而,在大多數提交中,您的更改可能會受益於一些額外的上下文。我們不希望未來的開發人員在嘗試理解更改背後的原因時錯過上下文。 這就是訊息正文發揮作用的地方。我將正文分為“段落”,這些“段落”只是鬆散定義的由空格分隔的文字字串。它們可以是要點、句子或其他東西;重要的是它們從冷開始就易於閱讀和理解。 過去,我通常使用提交訊息正文的第一段來解釋我所做的事情。這些天,我已經不再關注*「什麼」* ,而是開始記錄*「為什麼」* 。 [Ben Orenstein 最近改變了我對提交訊息格式的看法](https://twitter.com/r00k/status/1175100703829909505?s=20): {% 推特 1175100703829909505 %} 因此,在這種情況下,我們想要引導我們做出改變*的原因*。 這是一個例子: ``` Refactor the coupon UI Because: - The old UI code is fairly slow - There were a few unused dependencies - The old UI has aged poorly ``` 這些「段落」的偉大之處在於只有一個格式規則:72 個字元換行。這更多的是一種遺留傳統,而不是任何實質的東西。然而,主要原因是這允許 git 縮進一些空間(假設最大字元限制為 80)。我建議遵循這條規則,儘管它並不總是嚴格必要的。 這是到目前為止的提交訊息範本: ``` Summarize the change in less than 50 characters Because: - Explain the reasons you made this change - Make a new bullet for each reason - Each line should be under 72 characters ``` ### 現在是第二正文“段落” 既然我們已經總結了更改並分享了進行更改的原因,那麼以較長的形式準確地解釋我們所做的事情可能是謹慎的做法。 我用第二個「段落」來更詳細地解釋我在更改中所做的事情,例如: ``` Refactor the coupon UI Because: - The old UI code is fairly slow - There were a few unused dependencies - The old UI has aged poorly I thought it was necessary to remove some of the old coupon UI code. Unfortunately, it has aged pretty poorly, and I think this refactor makes the code much easier to support in the long-run. Primarily, this commit improves the performance of the coupon component. It also removes some unused dependencies. ``` 提交正文的這一部分應該比 50 個字元的摘要更深入地解釋所做的事情。格式由您決定(只要您以 72 個字元換行即可)。 這是更新後的模板: ``` Summarize the change in less than 50 characters Because: - Explain the reasons you made this change - Make a new bullet for each reason - Each line should be under 72 characters Explain exactly what was done in this commit with more depth than the 50 character subject line. Remember to wrap at 72 characters! ``` ### 其他部分:附加註釋和合著者 此時,我們正在編寫有效且連貫的提交訊息。然而,有時提交訊息需要一些額外的註釋。這可以在最後一節中完成。 例如: ``` Refactor the coupon UI Because: - The old UI code is fairly slow - There were a few unused dependencies - The old UI has aged poorly I thought it was necessary to remove some of the old coupon UI code. Unfortunately, it has aged pretty poorly, and I think this refactor makes the code much easier to support in the long-run. Primarily, this commit improves the performance of the coupon component. It also removes some unused dependencies. These changes should resolve issue #1337. This commit removed the left-pad dependency, so please stop using it! Co-authored-by: nspinazz89 <[email protected]> ``` 在這個例子中我能夠: - 參考相關問題 - 加入一行以警告我刪除了依賴項 - 包含與我一起參與該提交的人員的引用 此時,任何查看此提交訊息的人都會知道: 1. 做了什麼一目了然 2. 為什麼需要改變 3. 有關已完成操作的詳細訊息 4. 有關變更的任何有用的詳細訊息 這使得我們的提交訊息對我們未來的自己和任何其他需要理解我們程式碼的開發人員來說更加有用。 即使您不同意我編寫提交訊息的方法,也很難否認我們必須編寫提交訊息,以便其他開發人員在閱讀我們的程式碼時能夠進入我們的視野。 我認為大多數人都同意“好”程式碼的標誌是可維護性,您可以透過編寫有助於其他人理解甚至將來更改您的程式碼的提交訊息來增強程式碼的可維護性。 ### 最終模板 ``` Summarize the change in less than 50 characters Because: - Explain the reasons you made this change - Make a new bullet for each reason - Each line should be under 72 characters Explain exactly what was done in this commit with more depth than the 50 character subject line. Remember to wrap at 72 characters! Include any additional notes, relevant links, or co-authors. ``` ### 還有更多... 這些天我寫了[很多文章](https://jh.codes),我經營一個[播客](https://www.devpath.fm),並且我已經開始發送一份關於我聽到的所有精彩故事的[時事通訊摘要](https://pages.convertkit.com/674caf55d4/f30f7753a7)。 您還可以在[Twitter](https://twitter.com/jakeherrington)上關注我,我在那裡製作一些愚蠢的表情包並談論如何成為開發人員。 --- 原文出處:https://dev.to/jacobherrington/how-to-write-useful-commit-messages-my-commit-message-template-20n9
您聽過反向代理嗎?來這裡,我會盡力向你解釋! ### 什麼是代理?<a name="O que é Proxy?"></a> 代理就像電腦和網路之間的中介。當您想要存取網路上的某些內容時,您不是直接連接,而是透過代理連接,然後代理代表您發出請求。收到回應後,代理會將其發送回給您。 有不同類型的代理商! #### 範例:匿名代理<a name="Exemplo: proxy anônimo"></a> 假設您想造訪 google,但您不希望網站知道您的真實 IP 位址。您可以使用匿名代理,而不是直接連接到網站。  因此,代理商基本上充當您和網路之間的“中介”,出於安全、存取控製或匿名等原因而使用。 ### 反向代理<a name="Proxy Reverso"></a> 假設一家公司擁有三台內部伺服器,每台伺服器託管一個不同的網站:「site1.com」、「site2.com」和「site3.com」。他們設置了反向代理伺服器來處理外部流量。  #### 例子:<a name="Exemplo:"></a> 1. 外部用戶端嘗試透過在瀏覽器中輸入位址來存取「site1.com」。 2. 反向代理伺服器接收客戶端請求。 3. 反向代理伺服器將請求轉送到託管「site1.com」的內部伺服器。 4. 內部伺服器處理請求並將回應傳回反向代理伺服器。 5. 反向代理伺服器接收來自內部伺服器的回應並將其發送回外部客戶端。  這種設定允許公司在內部伺服器上託管多個網站,並透過**單一入口點(反向代理)**提供對它們的外部存取。 ### 安全:<a name="Segurança:"></a> 反向代理位於伺服器端,與位於客戶端的普通代理不同。這意味著它位於伺服器和網際網路之間,保護內部伺服器。 此外,反向代理可以配置為提供附加功能,例如負載平衡、內容快取、SSL 加密和請求過濾,以提高安全性和效能。 ### 結論:<a name="Conclusão:"></a> 代理商就像網路的守護者,保護您免受危險網站的侵害,隱藏您的線上身份,甚至繞過網站封鎖。此外,它還可以加快您經常造訪的頁面的載入速度,並關注公司員工的線上活動。 哦,還有一個反向代理,它有助於平衡不同伺服器之間的流量並保持您的網站快速安全地執行。 結束。  感謝那些讀到這裡的人<3 --- 原文出處:https://dev.to/camilacodes/devops-para-noobs-proxy-reverso-1lg0
--- 標題: 如何將 .py 轉換為 .exe?一步步指導。 發表:真實 封面圖片:https://thepracticaldev.s3.amazonaws.com/i/3c27e6ni9a7preeeqo0v.jpg 描述:如何將 .py 轉換為 .exe 的說明 標籤: python, 初學者, oop, 學習 --- 自動 PY 到 EXE =========== 我們要使用的唯一工具是**Auto PY to EXE** ! **Auto PY to EXE**是一款令人驚嘆的應用程式,用於從專案中產生 .exe 文件,無論它是一個 .py 檔案還是任意數量的檔案。 該應用程式有一個漂亮的 GUI,如下所示:  如何開始 ---- 步驟一、安裝 ------ 使用 PyPI 安裝: 要安裝該應用程式,請在**cmd**中執行以下行: `pip install auto-py-to-exe` 若要開啟應用程式,請在**cmd**中執行此行: `auto-py-to-exe` 注意:如果您以這種方式安裝時遇到任何問題,或者您想從GitHub 安裝它,請前往\[主頁\] (https://pypi.org/project/auto-py-to-exe) 或觀看此說明影片「Auto PY to EXE」的開發者\[他自己\] (https://github.com/brentvollebregt)。 {% youtube OZSZHmWSOeM %} ### 欲了解更多附加訊息,請使用此 #### \[「使用 auto-py-to-exe 時的問題」\] (https://nitratine.net/blog/post/issues-when-using-auto-py-to-exe) 步驟 2. 轉換 -------- 您需要選擇幾個主要選項: 1. 選擇你的 .py 文件 2. 選擇“一個目錄”或“一個檔案”選項 3. 選擇其他文件 1. 選擇你的 .py 文件 -------------- 如果您有多個文件,請選擇一個來啟動程式。 2.1. 「一個目錄」選項 -------------  很簡單。當選擇“One Directory”選項時,“Auto PY to EXE”會將所有相依性放在**一個資料夾**中。您可以在“進階”選單中選擇輸出目錄。如果您有圖標和背景等媒體文件,如果您將媒體文件/資料夾放在輸出目錄中,那麼在 .exe 中使用它們應該不會有任何問題。 像這樣的東西:  2.2. 「一個檔案」選項 -------------  當選擇“One File”選項時,“Auto PY to EXE”將建立一個包含所有依賴項但**不包含媒體檔案的.exe 檔案**。如果您的程式只有**預設的 Windows GUI** ,沒有圖示、背景、媒體文件,或者您可以將媒體資料夾放在 .exe 文件附近,請隨意跳過以下說明。對於那些想要將媒體檔案打包到 .exe 檔案本身的人,請閱讀第 3 段。 3. 選擇其他文件 --------- 「Auto PY to EXE」中有一個名為「Additional Files」的選單,可讓您新增您選擇的檔案。但有一個問題。 「Auto PY to EXE」使用**pyinstaller**將資料解壓縮到臨時資料夾中,並將該目錄路徑儲存在 \_MEIPASS 環境變數中。您的專案將找不到必要的文件,因為路徑已更改,也不會看到新路徑。換句話說,如果選擇「一個檔案」選項,則在「其他檔案」功能表中選擇的檔案**將不會新增**到 .exe 檔案中。要解決此問題,您應該使用Auto PY to EXE 開發人員提供的程式碼\[此處\](https://nitratine.net/blog/post/issues-when-using-auto-py-to-exe/#debugging ) ``` def resource_path(relative_path): ``` ``` """ Get absolute path to resource, works for dev and for PyInstaller """ ``` ``` try: ``` ``` # PyInstaller creates a temp folder and stores path in _MEIPASS ``` ``` base_path = sys._MEIPASS ``` ``` except Exception: ``` ``` base_path = os.path.abspath(".") ``` ``` return os.path.join(base_path, relative_path) ``` 要在您的專案中使用此程式碼,請替換您*現在*擁有的媒體檔案的連結 例如: ``` setWindowIcon(QIcon('media\icons\logo.png')) ``` *和* ``` setWindowIcon(QIcon(resource_path('logo.png')) ``` 現在連結將被正確引用,並且所選檔案已成功打包到 .exe 檔案中。 用於比較: 之前可能有連結 ``` "C:\Users\User\PycharmProjects\media\icons\logo.png" ``` 之後可能有連結 ``` "C:\Users\User\AppData\Local\Temp\\_MEI34121\logo.png" ``` 按下**“轉換 .PY 至 .EXE”**  等待  步驟 3. 執行您的程式! ------------- 現在一切都完成了! 執行。測試一下。看看發生了什麼事。 確保一切正常。 #### 您建立了一個目錄 您需要的每個檔案都應該位於**單一目錄**中。 #### 你製作了一個文件 這樣你應該有**一個 .exe 檔**。如果您有需要並且正確完成,您的 .exe 檔案將包含其中的所有媒體。**您不需要任何帶有 .exe 檔案的媒體檔案/資料夾**即可正確顯示它們。 --- ### 聚苯乙烯 如果您對應加入哪些重要資訊有任何回饋或建議,請隨時告訴我! 本指南並未描述以各種可能的方式完成的每個可能的選項。 我希望您發現這些資訊有用! 祝您的專案順利! --- 原文出處:https://dev.to/eshleron/how-to-convert-py-to-exe-step-by-step-guide-3cfi
長話短說 ---- 在這個易於理解的教程中,您將學習如何在幾分鐘內建立自己的 MonkeyType CLI 版本。 😎 **您將學到什麼:✨** - 使用 Pythoncurses 模組建立具有**WPM**和**Accuracy**支援的強大打字 CLI 應用程式。 您準備好成為 CLI MonkeyTyper 了嗎? 😉 無論這是您的第一個 CLI 應用程式還是第 n 個應用程式。請隨意跟隨。  --- 設定環境🙈 ----- > ℹ️不需要設定虛擬環境,我們不會使用任何外部相依性。 建立一個資料夾來保存專案的所有原始程式碼: ``` mkdir cli-monkeytype-python cd cli-monkeytype-python ``` 建立兩個新文件,我們將在其中編寫程式: ``` touch main.py typing_test.py ``` `main.py`檔案將作為我們應用程式的起點,而`typing_test.py`檔案將保存程式的所有邏輯。 > ℹ️對於Linux或Mac用戶,您不需要下載任何依賴項,我們將主要使用**curses** 、 **time**和**random**模組,這些模組都包含在Python標準庫中。 ⚠️**注意** > Windows 使用者可能必須安裝curses,因為它不包含在Windows 的Python 標準庫中。在繼續下一步之前,請確保已安裝它。 --- 讓我們來寫程式吧🐵 --------- > 💡 我們將在本節中研究應用程式的方法、大綱和實際編碼部分。 😵💫 ### 方法和概要👀 我們將在這裡採取不同的方法,而不是將所有程式碼都塞在`main`文件中。我們將把程式碼分成不同文件中的類別。 將有一個單獨的文件,其中包含一個負責封裝與打字測試相關的所有邏輯的類別。在主文件中,我們將呼叫此類的方法。聽起來,對吧?讓我們開始吧。 🚀 這是我們類別的骨架以及我們將要處理的所有方法。 ``` class TypingTest: def __init__(self, stdscr): pass def get_line_to_type(self): pass def display_wpm(self): pass def display_accuracy(self): pass def display_typed_chars(self): pass def display_details(self): pass def test_accuracy(self): pass def test_wpm(self): pass ``` 所有函數名稱都應該是不言自明的。如果您需要協助理解每個函數的作用,即使在查看了此大綱之後,為什麼還要閱讀這篇文章?只是開玩笑\*不是真的\*。 😏 > 🥱 這是一個適合初學者的應用程式。別擔心,一起編碼吧。 ### 真正的樂趣開始了!  我們將從導入模組並編寫`__init__`方法開始。這將初始化程式執行所需的所有術語。 ``` import curses import random import time class TypingTest: def __init__(self, stdscr): self.stdscr = stdscr self.to_type_text = self.get_line_to_type() self.user_typed_text = [] self.wpm = 0 self.start_time = time.time() # Initialize color pairs curses.init_pair(3, curses.COLOR_WHITE, curses.COLOR_BLACK) curses.init_pair(2, curses.COLOR_RED, curses.COLOR_BLACK) curses.init_pair(1, curses.COLOR_GREEN, curses.COLOR_BLACK) # --SNIP-- ``` `stdscr`用於控制終端螢幕,對於建立使用者可以看到其擊鍵的基於文字的使用者介面至關重要。 ⌨️ `get_line_to_type`方法取得一行文字供使用者鍵入。該文字儲存在`self.to_type_text`變數中。當他們鍵入時,他們輸入的字元將保存在`self.user_typed_text`清單中。我們使用列表是因為當使用者更正錯誤輸入的字元時,彈出最後一項會更容易。 初始每分鐘字數 (WPM) 分數設定為 0,我們記錄測驗的開始時間。我們也初始化了一些**顏色對**,根據它們是否正確來指示字元上的顏色。稍後,我們將根據使用者打字所需的時間來計算**WPM** 。 現在,新增以下功能的程式碼 > ℹ️ 確保在專案根目錄中建立一個名為`typing_texts.txt`的新文件,其中包含幾行文字。參考:[點這裡](https://github.com/shricodev/blogs/blob/main/cli-monkeytype-python/typing_texts.txt)。 ``` # --SNIP-- def get_line_to_type(self): with open("typing_texts.txt", "r", encoding="utf-8") as file: lines = file.readlines() return random.choice(lines).strip() def display_wpm(self): self.stdscr.addstr(1, 0, f"WPM: {self.wpm}", curses.color_pair(3)) def display_accuracy(self): self.stdscr.addstr( 2, 0, f"Accuracy: {self.test_accuracy()}%", curses.color_pair(3), ) def display_typed_chars(self): for i, char in enumerate(self.user_typed_text): correct_character = self.to_type_text[i] # Use color pair 1 if correct, else color pair 2. color = 1 if char == correct_character else 2 self.stdscr.addstr(0, i, char, curses.color_pair(color)) def display_details(self): self.stdscr.addstr(self.to_type_text) self.display_wpm() self.display_accuracy() self.display_typed_chars() # --SNIP-- ``` 讓我總結一下這些方法,它們非常簡單: 🎯 `get_line_to_type(self)` :從名為「typing\_texts.txt」的檔案中擷取刪除了尾隨空格的隨機行。 🎯 `display_wpm(self)` :當使用者鍵入時在螢幕上的第一行顯示 WPM。 🎯 `display_accuracy(self)` :在螢幕上第 2 行顯示**準確率百分比。**準確率由我們即將編寫的`test_accuracy()`方法計算。 🎯 `display_typed_chars(self)` :顯示使用者在螢幕上輸入的字符,突出顯示一個顏色對(顏色 1)中的正確字符和另一個顏色對(顏色 2)中的錯誤字符。 🎯 `display_details(self)` :它本質上是一個輔助函數,幫助顯示上面所有顯示函數的內容。 好的,現在我們已經編寫了這些顯示方法,讓我們實現實際的邏輯來測試準確性和 WPM 本身。 新增以下程式碼行: ``` # --SNIP-- def test_accuracy(self): total_characters = min(len(self.user_typed_text), len(self.to_type_text)) # If there are no typed chars, show accuracy 0. if total_characters == 0: return 0.0 matching_characters = 0 for current_char, target_char in zip(self.user_typed_text, self.to_type_text): if current_char == target_char: matching_characters += 1 matching_percentage = (matching_characters / total_characters) * 100 return matching_percentage def test_wpm(self): # getkey method by default is blocking. # We do not want to wait until the user types each char to check WPM. # Else the entire logic will be faulty. self.stdscr.nodelay(True) while True: # Since we have nodelay = True, if not using max(), # users might end up with time.time() equal to start_time, # resulting in 0 and potentially causing a zero-divisible error in the below line. time_elapsed = max(time.time() - self.start_time, 1) # Considering the average word length in English is 5 characters self.wpm = round((len(self.user_typed_text) / (time_elapsed / 60)) / 5) self.stdscr.clear() self.display_details() self.stdscr.refresh() # Exit the loop when the user types in the total length of the text. if len(self.user_typed_text) == len(self.to_type_text): self.stdscr.nodelay(False) break # We have `nodelay = True`, so we don't want to wait for the keystroke. # If we do not get a key, it will throw an exception # in the below lines when accessing the key. try: key = self.stdscr.getkey() except Exception: continue # Check if the key is a single character before using ord() if isinstance(key, str) and len(key) == 1: if ord(key) == 27: # ASCII value for ESC break # If the user has not typed anything reset to the current time if not self.user_typed_text: self.start_time = time.time() if key in ("KEY_BACKSPACE", "\b", "\x7f"): if len(self.user_typed_text) > 0: self.user_typed_text.pop() elif len(self.user_typed_text) < len(self.to_type_text): self.user_typed_text.append(key) ``` 🎯 `test_accuracy(self)` :透過將使用者輸入的字元與目標文字進行比較,計算並返回打字準確度(以百分比形式)。如果字元匹配,則將匹配字元的計數加1。最後,計算匹配的百分比。 🎯 `test_wpm(self)` :計算每分鐘字數(WPM)並即時更新顯示。我們用一個**公式**來計算WPM,這不是我想出來的,我從網路複製的。它追蹤使用者輸入的內容,處理退格鍵,並在使用者完成輸入目標文字或按**ESC**時停止。 偉大的!這就是我們的**TypingTest**類別。 🎉 > ✅ 我們編寫程式碼的方式可以幫助我們輕鬆地將程式碼匯入到任何未來的專案中,並使維護變得更加容易。 是時候測試我們的實作了。 🙈 在`main.py`檔案中,加入以下程式碼行: ``` from curses import wrapper from typing_test import TypingTest def main(stdscr): stdscr.clear() stdscr.addstr("Welcome to the typing speed test") stdscr.addstr("\nPress any key to continue!") while True: typing_test = TypingTest(stdscr) stdscr.getkey() typing_test.test_wpm() stdscr.addstr( 3, 0, "Congratulations! You have completed the test! Press any key to continue...", ) stdscr.nodelay(False) key = stdscr.getkey() # Check if the key is a single character before using ord() if isinstance(key, str) and len(key) == 1: if ord(key) == 27: # ASCII value for ESC break if __name__ == "__main__": wrapper(main) ``` > 💡 注意:我們從curses `wrapper`方法內的main 函數,該函數處理curses 模組的初始化和清理。 在 main 中,我們建立**TypingTest**類別的實例並在無限循環中執行測試,這讓使用者可以繼續執行測試,直到他們決定按**ESC**退出。 讓我們看看它的實際效果。 🔥  > 🫵 如果你已經做到了這一步,我想指派一個小任務給你。目前,我們正在從文件中隨機選擇文字進行輸入。我希望您從網路上**抓取**輸入文字並使用該內容。請隨意在我的儲存庫中開啟包含您的變更的拉取請求。 > 如果您需要幫助,我已經參與了一個類似的 Python 抓取專案。請隨意[檢查](https://github.com/shricodev/IPO-Monitor-NEPSE)一下。 --- **包起來!** 🐒 ---------- 到目前為止,您已經建立了一個 Python CLI 應用程式來測試您在終端機中的打字速度。 本文的記錄原始碼可在此處取得: https://github.com/shricodev/blogs/tree/main/cli-monkeytype-python 非常感謝您的閱讀! 🎉🫡 > 在下面的評論部分寫下你的想法。 👇 {% cta https://twitter.com/shricodev %} 在 Twitter 上追蹤我 🐥 {% endcta %} {% 嵌入 https://dev.to/shricodev %} --- 原文出處:https://dev.to/shricodev/build-your-own-cli-version-of-monkeytype-bm7
嗨大家好,新年快樂:煙火::煙火::煙火:! ---------------------- 這是一篇很長的文章,所以請耐心聽我一秒鐘或一個小時。每個問題的每個答案都有一個向上箭頭**↑**連結,可讓您返回到問題列表,這樣您就不會浪費時間上下滾動。 ### 問題 - [1. `undefined`和`null`有什麼差別?](#1-whats-the-difference-between-undefined-and-null) - [2. && 運算子的作用是什麼?](#2-what-does-the-ampamp-operator-do) - [3. || 是什麼意思?運營商做什麼?](#3-what-does-the-operator-do) - [4. 使用 + 或一元加運算子是將字串轉換為數字的最快方法嗎?](#4-is-using-the-or-unary-plus-operator-the-fastest-way-in-converting-a-string-to-a-number) - [5.什麼是DOM?](#5-what-is-the-dom) - [6.什麼是事件傳播?](#6-what-is-event-propagation) - [7.什麼是事件冒泡?](#7-whats-event-bubbling) - [8. 什麼是事件擷取?](#8-whats-event-capturing) - [9. `event.preventDefault()`和`event.stopPropagation()`方法有什麼差別?](#9-whats-the-difference-between-eventpreventdefault-and-eventstoppropagation-methods) - [10. 如何知道元素中是否使用了`event.preventDefault()`方法?](#10-how-to-know-if-the-eventpreventdefault-method-was-used-in-an-element) - [11. 為什麼這段程式碼 obj.someprop.x 會拋出錯誤?](#11-why-does-this-code-objsomepropx-throw-an-error) - \[12.什麼是`event.target` ?\](#12-什麼是 eventtarget- ) - [13.什麼是`event.currentTarget` ?](#13-what-is-eventcurrenttarget) - [14. `==`和`===`有什麼差別?](#14-whats-the-difference-between-and-) - [15. 為什麼在 JavaScript 中比較兩個相似的物件時回傳 false?](#15-why-does-it-return-false-when-comparing-two-similar-objects-in-javascript) - [16. `!!`是什麼意思?運營商做什麼?](#16-what-does-the-operator-do) - [17. 如何計算一行中的多個表達式?](#17-how-to-evaluate-multiple-expressions-in-one-line) - [18.什麼是吊裝?](#18-what-is-hoisting) - [19.什麼是範圍?](#19-what-is-scope) - [20.什麼是閉包?](#20-what-are-closures) - [21. JavaScript 中的假值是什麼?](#21-what-are-the-falsy-values-in-javascript) - [22. 如何檢查一個值是否為假值?](#22-how-to-check-if-a-value-is-falsy) - [23. `"use strict"`有什麼作用?](#23-what-does-use-strict-do) - [24. JavaScript 中`this`的值是什麼?](#24-whats-the-value-of-this-in-javascript) - [25. 物件的`prototype`是什麼?](#25-what-is-the-prototype-of-an-object) - \[26.什麼是 IIFE,它有什麼用?\](#26-what-is-an-iife-what-is-the-use-of-it ) - [27. `Function.prototype.apply`方法有什麼用?](#27-what-is-the-use-functionprototypeapply-method) - [28. `Function.prototype.call`方法有什麼用?](#28-what-is-the-use-functionprototypecall-method) - [29. `Function.prototype.apply`和`Function.prototype.call`有什麼差別?](#29-whats-the-difference-between-functionprototypeapply-and-functionprototypecall) - [30. `Function.prototype.bind`的用法是什麼?](#30-what-is-the-usage-of-functionprototypebind) - \[31.什麼是函數式程式設計以及 JavaScript 的哪些特性使其成為函數式語言的候選者?\](#31-什麼是函數式程式設計和 javascript 的特性是什麼-使其成為函數式語言的候選者 ) - [32.什麼是高階函數?](#32-what-are-higher-order-functions) - [33.為什麼函數被稱為First-class Objects?](#33-why-are-functions-called-firstclass-objects) - \[34.手動實作`Array.prototype.map`方法。\](#34-手動實作 arrayprototypemap-method ) - [35. 手動實作`Array.prototype.filter`方法。](#35-implement-the-arrayprototypefilter-method-by-hand) - [36. 手動實作`Array.prototype.reduce`方法。](#36-implement-the-arrayprototypereduce-method-by-hand) - [37.什麼是`arguments`物件?](#37-what-is-the-arguments-object) - [38. 如何創造沒有**原型的**物件?](#38-how-to-create-an-object-without-a-prototype) - [39. 為什麼當你呼叫這個函數時,這段程式碼中的`b`會變成全域變數?](#39-why-does-b-in-this-code-become-a-global-variable-when-you-call-this-function) - [40.什麼是**ECMAScript** ?](#40-what-is-ecmascript) - [41. **ES6**或**ECMAScript 2015**有哪些新功能?](#41-what-are-the-new-features-in-es6-or-ecmascript-2015) - [42. `var` 、 `let`和`const`關鍵字有什麼差別?](#42-whats-the-difference-between-var-let-and-const-keywords) - [43. 什麼是**箭頭函數**?](#43-what-are-arrow-functions) - [44.什麼是**類別**?](#44-what-are-classes) - [45.什麼是**模板文字**?](#45-what-are-template-literals) - [46.什麼是**物件解構**?](#46-what-is-object-destructuring) - [47.什麼是`ES6 Modules` ?](#47-what-are-es6-modules) - [48.什麼是`Set`物件以及它如何運作?](#48-what-is-the-set-object-and-how-does-it-work) - [49. 什麼是回呼函數?](#49-what-is-a-callback-function) - [50. 什麼是**Promise** ?](#50-what-are-promises) - [51. 什麼是*async/await*以及它是如何運作的?](#51-what-is-asyncawait-and-how-does-it-work) - [52. **Spread 運算子**和**Rest 運算**子有什麼差別?](#52-whats-the-difference-between-spread-operator-and-rest-operator) - [53. 什麼是**預設參數**?](#53-what-are-default-parameters) - [54.什麼是**包裝物件**?](#54-what-are-wrapper-objects) - [55.**隱性強制**和**顯性**強制有什麼差別?](#55-what-is-the-difference-between-implicit-and-explicit-coercion) - [56. 什麼是`NaN` ?以及如何檢查值是否為`NaN` ?](#56-what-is-nan-and-how-to-check-if-a-value-is-nan) - [57. 如何檢查一個值是否為一個**陣列**?](#57-how-to-check-if-a-value-is-an-array) - [58. 如何在不使用`%`或模運算子的情況下檢查數字是否為偶數?](#58-how-to-check-if-a-number-is-even-without-using-the-or-modulo-operator) - [59. 如何檢查物件中是否存在某個屬性?](#59-how-to-check-if-a-certain-property-exists-in-an-object) - [60.什麼是**AJAX** ?](#60-what-is-ajax) - [61. JavaScript 中建立物件的方式有哪些?](#61-what-are-the-ways-of-making-objects-in-javascript) - [62. `Object.seal`和`Object.freeze`方法有什麼不同?](#62-whats-the-difference-between-objectseal-and-objectfreeze-methods) - [63. `in`運算子和物件中的`hasOwnProperty`方法有什麼差別?](#63-whats-the-difference-between-the-in-operator-and-the-hasownproperty-method-in-objects) - [64. JavaScript中處理**非同步程式碼的**方法有哪些?](#64-what-are-the-ways-to-deal-with-asynchronous-code-in-javasscript) - [65.**函數表達式**和**函數宣告**有什麼不同?](#65-whats-the-difference-between-a-function-expression-and-function-declaration) - \[66.一個函數有多少種*呼叫*方式?\]( 66-函數可以有多少種方式被呼叫) ================= - [67. 什麼是*記憶*,它有什麼用?](#67-what-is-memoization-and-whats-the-use-it) - [68. 實現記憶輔助功能。](#68-implement-a-memoization-helper-function) - [69. 為什麼`typeof null`回傳`object` ?如何檢查一個值是否為`null` ?](#69-why-does-typeof-null-return-object-how-to-check-if-a-value-is-null) - [`new`關鍵字有什麼作用?](#70-what-does-the-new-keyword-do) ### 1. `undefined`和`null`有什麼差別? [^](#the-questions "返回問題")在了解`undefined`和`null`之間的差異之前,我們必須先了解它們之間的相似之處。 - 它們屬於**JavaScript 的**7 種基本型別。 ``` let primitiveTypes = ['string','number','null','undefined','boolean','symbol', 'bigint']; ``` - 它們是**虛假的**價值觀。使用`Boolean(value)`或`!!value`將其轉換為布林值時計算結果為 false 的值。 ``` console.log(!!null); //logs false console.log(!!undefined); //logs false console.log(Boolean(null)); //logs false console.log(Boolean(undefined)); //logs false ``` 好吧,我們來談談差異。 - `undefined`是尚未指派特定值的變數的預設值。或一個沒有**明確**回傳值的函數。 `console.log(1)` 。或物件中不存在的屬性。 JavaScript 引擎為我們完成了**指派**`undefined`值的任務。 ``` let _thisIsUndefined; const doNothing = () => {}; const someObj = { a : "ay", b : "bee", c : "si" }; console.log(_thisIsUndefined); //logs undefined console.log(doNothing()); //logs undefined console.log(someObj["d"]); //logs undefined ``` - `null`是**「代表無值的值」** 。 `null`是已**明確**定義給變數的值。在此範例中,當`fs.readFile`方法未引發錯誤時,我們得到`null`值。 ``` fs.readFile('path/to/file', (e,data) => { console.log(e); //it logs null when no error occurred if(e){ console.log(e); } console.log(data); }); ``` 當比較`null`和`undefined`時,使用`==`時我們得到`true` ,使用`===`時得到`false` 。您可以[在此處](#14-whats-the-difference-between-and-)閱讀原因。 ``` console.log(null == undefined); // logs true console.log(null === undefined); // logs false ``` ### 2. `&&`運算子的作用是什麼? [^](#the-questions "返回問題") `&&`或**邏輯 AND**運算子在其運算元中尋找第一個*假*表達式並傳回它,如果沒有找到任何*假*表達式,則傳回最後一個表達式。它採用短路來防止不必要的工作。在我的一個專案中關閉資料庫連線時,我在`catch`區塊中使用了它。 ``` console.log(false && 1 && []); //logs false console.log(" " && true && 5); //logs 5 ``` 使用**if**語句。 ``` const router: Router = Router(); router.get('/endpoint', (req: Request, res: Response) => { let conMobile: PoolConnection; try { //do some db operations } catch (e) { if (conMobile) { conMobile.release(); } } }); ``` 使用**&&**運算子。 ``` const router: Router = Router(); router.get('/endpoint', (req: Request, res: Response) => { let conMobile: PoolConnection; try { //do some db operations } catch (e) { conMobile && conMobile.release() } }); ``` ### 3. `||`是什麼意思?運營商做什麼? [↑](#the-questions "返回問題") `||` or**邏輯 OR**運算子尋找其運算元中的第一個*真值*表達式並傳回它。這也採用短路來防止不必要的工作。在**ES6預設函數參數**被支援之前,它被用來初始化函數中的預設參數值。 ``` console.log(null || 1 || undefined); //logs 1 function logName(name) { var n = name || "Mark"; console.log(n); } logName(); //logs "Mark" ``` ### 4. 使用**+**或一元加運算子是將字串轉換為數字的最快方法嗎? [^](#the-questions "返回問題")根據[MDN 文件,](https://developer.mozilla.org/en-US/docs/Web/JavaScript/Reference/Operators/Arithmetic_Operators#Unary_plus) `+`是將字串轉換為數字的最快方法,因為如果該值已經是數字,它不會對該值執行任何操作。 ### 5.什麼是**DOM** ? [^](#the-questions "返回問題") **DOM**代表**文件物件模型,**是 HTML 和 XML 文件的介面 ( **API** )。當瀏覽器第一次讀取(*解析*)我們的 HTML 文件時,它會建立一個大物件,一個基於 HTML 文件的非常大的物件,這就是**DOM** 。它是根據 HTML 文件建模的樹狀結構。 **DOM**用於互動和修改**DOM 結構**或特定元素或節點。 想像一下,如果我們有這樣的 HTML 結構。 ``` <!DOCTYPE html> <html lang="en"> <head> <meta charset="UTF-8"> <meta name="viewport" content="width=device-width, initial-scale=1.0"> <meta http-equiv="X-UA-Compatible" content="ie=edge"> <title>Document Object Model</title> </head> <body> <div> <p> <span></span> </p> <label></label> <input> </div> </body> </html> ``` 等效的**DOM**應該是這樣的。  **JavaScript**中的`document`物件代表**DOM** 。它為我們提供了許多方法,我們可以用來選擇元素來更新元素內容等等。 ### 6.什麼是**事件傳播**? [↑](#the-questions "返回問題")當某個**事件**發生在**DOM**元素上時,該**事件**並非完全發生在該元素上。在**冒泡階段**,**事件**向上冒泡,或到達其父級、祖父母、祖父母的父級,直到一直到達`window` ,而在**捕獲階段**,事件從`window`開始向下到達觸發的元素事件或`<a href="#12-what-is-eventtarget-">event.target</a>` 。 **事件傳播**分為**三個**階段。 1. [捕獲階段](#8-whats-event-capturing)-事件從`window`開始,然後向下到達每個元素,直到到達目標元素。 2. [目標階段](#12-what-is-eventtarget-)– 事件已到達目標元素。 3. [冒泡階段](#7-whats-event-bubbling)-事件從目標元素冒起,然後向上移動到每個元素,直到到達`window` 。  ### 7.什麼是**事件冒泡**? [↑](#the-questions "返回問題")當某個**事件**發生在**DOM**元素上時,該**事件**並非完全發生在該元素上。在**冒泡階段**,**事件**向上冒泡,或到達其父級、祖父母、祖父母的父級,直到一直到達`window` 。 如果我們有一個像這樣的範例標記。 ``` <div class="grandparent"> <div class="parent"> <div class="child">1</div> </div> </div> ``` 還有我們的js程式碼。 ``` function addEvent(el, event, callback, isCapture = false) { if (!el || !event || !callback || typeof callback !== 'function') return; if (typeof el === 'string') { el = document.querySelector(el); }; el.addEventListener(event, callback, isCapture); } addEvent(document, 'DOMContentLoaded', () => { const child = document.querySelector('.child'); const parent = document.querySelector('.parent'); const grandparent = document.querySelector('.grandparent'); addEvent(child, 'click', function (e) { console.log('child'); }); addEvent(parent, 'click', function (e) { console.log('parent'); }); addEvent(grandparent, 'click', function (e) { console.log('grandparent'); }); addEvent(document, 'click', function (e) { console.log('document'); }); addEvent('html', 'click', function (e) { console.log('html'); }) addEvent(window, 'click', function (e) { console.log('window'); }) }); ``` `addEventListener`方法有第三個可選參數**useCapture ,**預設值為`false`事件將在**冒泡階段**發生,如果為`true` ,事件將在**捕獲階段**發生。如果我們點擊`child`元素,它會分別在**控制台**上記錄`child` 、 `parent`元素、 `grandparent` 、 `html` 、 `document`和`window` 。這就是**事件冒泡**。 ### 8. 什麼是**事件擷取**? [↑](#the-questions "返回問題")當某個**事件**發生在**DOM**元素上時,該**事件**並非完全發生在該元素上。在**捕獲階段**,事件從`window`開始一直到觸發事件的元素。 如果我們有一個像這樣的範例標記。 ``` <div class="grandparent"> <div class="parent"> <div class="child">1</div> </div> </div> ``` 還有我們的js程式碼。 ``` function addEvent(el, event, callback, isCapture = false) { if (!el || !event || !callback || typeof callback !== 'function') return; if (typeof el === 'string') { el = document.querySelector(el); }; el.addEventListener(event, callback, isCapture); } addEvent(document, 'DOMContentLoaded', () => { const child = document.querySelector('.child'); const parent = document.querySelector('.parent'); const grandparent = document.querySelector('.grandparent'); addEvent(child, 'click', function (e) { console.log('child'); }, true); addEvent(parent, 'click', function (e) { console.log('parent'); }, true); addEvent(grandparent, 'click', function (e) { console.log('grandparent'); }, true); addEvent(document, 'click', function (e) { console.log('document'); }, true); addEvent('html', 'click', function (e) { console.log('html'); }, true) addEvent(window, 'click', function (e) { console.log('window'); }, true) }); ``` `addEventListener`方法有第三個可選參數**useCapture ,**預設值為`false`事件將在**冒泡階段**發生,如果為`true` ,事件將在**捕獲階段**發生。如果我們點擊`child`元素,它會分別在**控制台**上記錄`window` 、 `document` 、 `html` 、 `grandparent` 、 `parent`和`child` 。這就是**事件捕獲**。 ### 9. `event.preventDefault()`和`event.stopPropagation()`方法有什麼差別? [↑](#the-questions "返回問題") `event.preventDefault()`方法**阻止**元素的預設行為。如果在`form`元素中使用,它**會阻止**其提交。如果在`anchor`元素中使用,它**會阻止**其導航。如果在`contextmenu`中使用,它**會阻止**其顯示或顯示。而`event.stopPropagation()`方法會停止事件的傳播或停止事件在[冒泡](#7-whats-event-bubbling)或[捕獲](#8-whats-event-capturing)階段發生。 ### 10. 如何知道元素中是否使用了`event.preventDefault()`方法? [↑](#the-questions "返回問題")我們可以使用事件物件中的`event.defaultPrevented`屬性。它傳回一個`boolean` ,指示是否在特定元素中呼叫了`event.preventDefault()` 。 ### 11. 為什麼這段程式碼`obj.someprop.x`會拋出錯誤? ``` const obj = {}; console.log(obj.someprop.x); ``` [^](#the-questions "返回問題")顯然,由於我們嘗試存取 a 的原因,這會引發錯誤 `someprop`屬性中的`x`屬性具有`undefined`值。請記住,物件中的**屬性**本身並不存在,且其**原型**具有預設值`undefined`且`undefined`沒有屬性`x` 。 ### 12.什麼是**event.target** ? [↑](#the-questions "返回問題")最簡單來說, **event.target**是**發生**事件的元素或**觸發**事件的元素。 HTML 標記範例。 ``` <div onclick="clickFunc(event)" style="text-align: center;margin:15px; border:1px solid red;border-radius:3px;"> <div style="margin: 25px; border:1px solid royalblue;border-radius:3px;"> <div style="margin:25px;border:1px solid skyblue;border-radius:3px;"> <button style="margin:10px"> Button </button> </div> </div> </div> ``` JavaScript 範例。 ``` function clickFunc(event) { console.log(event.target); } ``` 如果您單擊按鈕,它會記錄**按鈕**標記,即使我們將事件附加在最外部的`div`上,它也會始終記錄**按鈕**,因此我們可以得出結論, **event.target**是觸發事件的元素。 ### 13.什麼是**event.currentTarget** ? [↑](#the-questions "返回問題") **event.currentTarget**是我們**明確**附加事件處理程序的元素。 複製**問題 12**中的標記。 HTML 標記範例。 ``` <div onclick="clickFunc(event)" style="text-align: center;margin:15px; border:1px solid red;border-radius:3px;"> <div style="margin: 25px; border:1px solid royalblue;border-radius:3px;"> <div style="margin:25px;border:1px solid skyblue;border-radius:3px;"> <button style="margin:10px"> Button </button> </div> </div> </div> ``` 並且稍微改變我們的**JS** 。 ``` function clickFunc(event) { console.log(event.currentTarget); } ``` 如果您按一下該按鈕,即使我們按一下該按鈕,它也會記錄最外層的**div**標記。在此範例中,我們可以得出結論, **event.currentTarget**是我們附加事件處理程序的元素。 ### 14. `==`和`===`有什麼差別? [^](#the-questions "返回問題") `==` \_\_(抽象相等)\_\_ 和`===` \_\_(嚴格相等)\_\_ 之間的區別在於`==`在*強制轉換*後按**值**進行比較,而`===`在不進行*強制轉換的*情況下按**值**和**類型**進行比較。 讓我們更深入地研究`==` 。那麼首先我們來談談*強制*。 *強制轉換*是將一個值轉換為另一種類型的過程。在本例中, `==`進行*隱式強制轉換*。在比較兩個值之前, `==`需要執行一些條件。 假設我們必須比較`x == y`值。 1. 如果`x`和`y`具有相同的類型。 然後將它們與`===`運算子進行比較。 2. 如果`x`為`null`且`y` `undefined` ,則傳回`true` 。 3. 如果`x` `undefined`且`y`為`null`則傳回`true` 。 4. 如果`x`是`number`類型, `y`是`string`類型 然後回傳`x == toNumber(y)` 。 5. 如果`x`是`string`類型, `y`是`number`類型 然後返回`toNumber(x) == y` 。 6. 如果`x`是`boolean`類型 然後返回`toNumber(x) == y` 。 7. 如果`y`是`boolean`類型 然後回傳`x == toNumber(y)` 。 8. 如果`x`是`string` 、 `symbol`或`number`且`y`是 type `object` 然後回傳`x == toPrimitive(y)` 。 9. 如果`x`是`object`且`x`是`string` 、 `symbol` 然後返回`toPrimitive(x) == y` 。 10. 返回`false` 。 **注意:** `toPrimitive`首先使用物件中的`valueOf`方法,然後使用`toString`方法來取得該物件的原始值。 讓我們舉個例子。 | `x` | `y` | `x == y` | | ------------- |:-------------:| ----------------: | | `5` | `5` | `true` | | `1` | `'1'` | `true` | | `null` | `undefined` | `true` | | `0` | `false` | `true` | | `'1,2'` | `[1,2]` | `true` | | `'[object Object]'` | `{}` | `true` | 這些範例都傳回`true` 。 **第一個範例**屬於**條件一**,因為`x`和`y`具有相同的類型和值。 **第二個範例**轉到**條件四,**在比較之前將`y`轉換為`number` 。 **第三個例子**涉及**條件二**。 **第四個範例**轉到**條件七,**因為`y`是`boolean` 。 **第五個範例**適用於**條件八**。使用`toString()`方法將陣列轉換為`string` ,該方法傳回`1,2` 。 **最後一個例子**適用於**條件十**。使用傳回`[object Object]`的`toString()`方法將該物件轉換為`string` 。 | `x` | `y` | `x === y` | | ------------- |:-------------:| ----------------: | | `5` | `5` | `true` | | `1` | `'1'` | `false` | | `null` | `undefined` | `false` | | `0` | `false` | `false` | | `'1,2'` | `[1,2]` | `false` | | `'[object Object]'` | `{}` | `false` | 如果我們使用`===`運算符,則除第一個範例之外的所有比較都將傳回`false` ,因為它們不具有相同的類型,而第一個範例將傳回`true` ,因為兩者俱有相同的類型和值。 ### 15. 為什麼在 JavaScript 中比較兩個相似的物件時回傳**false** ? [^](#the-questions "返回問題")假設我們有下面的例子。 ``` let a = { a: 1 }; let b = { a: 1 }; let c = a; console.log(a === b); // logs false even though they have the same property console.log(a === c); // logs true hmm ``` **JavaScript**以不同的方式比較*物件*和*基元*。在*基元*中,它透過**值**來比較它們,而在*物件*中,它透過**引用**或**儲存變數的記憶體位址**來比較它們。這就是為什麼第一個`console.log`語句回傳`false`而第二個`console.log`語句回傳`true`的原因。 `a`和`c`有相同的引用,而`a`和`b`則不同。 ### 16. **!!**是什麼意思?運營商做什麼? [↑](#the-questions "返回問題")**雙非**運算子或**!!**將右側的值強制轉換為布林值。基本上,這是一種將值轉換為布林值的奇特方法。 ``` console.log(!!null); //logs false console.log(!!undefined); //logs false console.log(!!''); //logs false console.log(!!0); //logs false console.log(!!NaN); //logs false console.log(!!' '); //logs true console.log(!!{}); //logs true console.log(!![]); //logs true console.log(!!1); //logs true console.log(!![].length); //logs false ``` ### 17. 如何計算一行中的多個表達式? [↑](#the-questions "返回問題")我們可以使用`,`或逗號運算子來計算一行中的多個表達式。它從左到右計算並傳回右側最後一項或最後一個操作數的值。 ``` let x = 5; x = (x++ , x = addFive(x), x *= 2, x -= 5, x += 10); function addFive(num) { return num + 5; } ``` 如果記錄`x`的值,它將是**27** 。首先,我們**增加**x 的值,它將是**6** ,然後我們呼叫函數`addFive(6)`並將 6 作為參數傳遞,並將結果分配給`x` , `x`的新值將是**11** 。之後,我們將`x`的當前值乘以**2**並將其分配給`x` , `x`的更新值將是**22** 。然後,我們將`x`的當前值減去 5 並將結果指派給`x` ,更新後的值將是**17** 。最後,我們將`x`的值增加 10 並將更新後的值指派給`x` ,現在`x`的值將是**27** 。 ### 18.什麼是**吊裝**? [^](#the-questions "返回問題")**提升**是一個術語,用於描述將*變數*和*函數*移動到其*(全域或函數)*作用域的頂部(即我們定義該變數或函數的位置)。 要理解**提升**,我必須解釋*執行上下文*。 **執行上下文**是目前正在執行的「程式碼環境」。**執行上下文**有兩個階段*:編譯*和*執行*。 **編譯**- 在此階段,它獲取所有*函數聲明*並將它們*提升*到作用域的頂部,以便我們稍後可以引用它們並獲取所有*變數聲明***(使用 var 關鍵字聲明)** ,並將它們*提升*並給它們一個默認值*未定義*的 . **執行**- 在此階段,它將值指派給先前*提升的*變數,並*執行*或*呼叫*函數**(物件中的方法)** 。 **注意:**只有使用*var*關鍵字宣告的**函數宣告**和變數才會*被提升*,而不是**函數表達式**或**箭頭函數**、 `let`和`const`關鍵字。 好吧,假設我們在下面的*全域範圍*內有一個範例程式碼。 ``` console.log(y); y = 1; console.log(y); console.log(greet("Mark")); function greet(name){ return 'Hello ' + name + '!'; } var y; ``` 此程式碼記錄`undefined` , `1` , `Hello Mark!`分別。 所以*編譯*階段看起來像這樣。 ``` function greet(name) { return 'Hello ' + name + '!'; } var y; //implicit "undefined" assignment //waiting for "compilation" phase to finish //then start "execution" phase /* console.log(y); y = 1; console.log(y); console.log(greet("Mark")); */ ``` 出於範例目的,我對變數和*函數呼叫*的*賦值*進行了評論。 *編譯*階段完成後,它開始*執行*階段,呼叫方法並向變數賦值。 ``` function greet(name) { return 'Hello ' + name + '!'; } var y; //start "execution" phase console.log(y); y = 1; console.log(y); console.log(greet("Mark")); ``` ### 19.什麼是**範圍**? [↑](#the-questions "返回問題") JavaScript 中的**作用域**是我們可以有效存取變數或函數的**區域**。 JavaScript 有三種類型的作用域。**全域作用域**、**函數作用域**和**區塊作用域(ES6)** 。 - **全域作用域**- 在全域命名空間中宣告的變數或函數位於全域作用域中,因此可以在程式碼中的任何位置存取。 ``` //global namespace var g = "global"; function globalFunc(){ function innerFunc(){ console.log(g); // can access "g" because "g" is a global variable } innerFunc(); } ``` - **函數作用域**- 函數內聲明的變數、函數和參數可以在該函數內部存取,但不能在函數外部存取。 ``` function myFavoriteFunc(a) { if (true) { var b = "Hello " + a; } return b; } myFavoriteFunc("World"); console.log(a); // Throws a ReferenceError "a" is not defined console.log(b); // does not continue here ``` - **區塊作用域**- 在區塊`{}`內宣告的變數**( `let` 、 `const` )**只能在區塊內存取。 ``` function testBlock(){ if(true){ let z = 5; } return z; } testBlock(); // Throws a ReferenceError "z" is not defined ``` **範圍**也是一組查找變數的規則。如果一個變數在**當前作用域中**不存在,它會在**外部作用域中查找**並蒐索該變數,如果不存在,它會再次**查找,**直到到達**全域作用域。**如果該變數存在,那麼我們可以使用它,如果不存在,我們可以使用它來拋出錯誤。它搜尋**最近的**變數,一旦找到它就停止**搜尋**或**尋找**。這稱為**作用域鏈**。 ``` /* Scope Chain Inside inner function perspective inner's scope -> outer's scope -> global's scope */ //Global Scope var variable1 = "Comrades"; var variable2 = "Sayonara"; function outer(){ //outer's scope var variable1 = "World"; function inner(){ //inner's scope var variable2 = "Hello"; console.log(variable2 + " " + variable1); } inner(); } outer(); // logs Hello World // because (variable2 = "Hello") and (variable1 = "World") are the nearest // variables inside inner's scope. ```  ### 20.什麼是**閉包**? [^](#the-questions "返回問題")這可能是所有這些問題中最難的問題,因為**閉包**是一個有爭議的話題。那我就從我的理解來解釋。 **閉包**只是函數在宣告時記住其當前作用域、其父函數作用域、其父函數的父函數作用域上的變數和參數的引用的能力,直到在**作用域鏈**的幫助下到達全域作用域。基本上它是聲明函數時建立的**作用域**。 例子是解釋閉包的好方法。 ``` //Global's Scope var globalVar = "abc"; function a(){ //testClosures's Scope console.log(globalVar); } a(); //logs "abc" /* Scope Chain Inside a function perspective a's scope -> global's scope */ ``` 在此範例中,當我們宣告`a`函數時**,全域**作用域是`a's`*閉包*的一部分。  變數`globalVar`在影像中沒有值的原因是該變數的值可以根據我們呼叫`a`**位置**和**時間**而改變。 但在上面的範例中, `globalVar`變數的值為**abc** 。 好吧,讓我們來看一個複雜的例子。 ``` var globalVar = "global"; var outerVar = "outer" function outerFunc(outerParam) { function innerFunc(innerParam) { console.log(globalVar, outerParam, innerParam); } return innerFunc; } const x = outerFunc(outerVar); outerVar = "outer-2"; globalVar = "guess" x("inner"); ``` 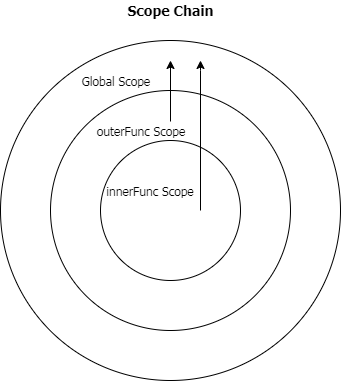 這將列印“猜測外部內部”。對此的解釋是,當我們呼叫`outerFunc`函數並將`innerFunc`函數的回傳值指派給變數`x`時,即使我們將新值**outer-2**指派給`outerVar`變數, `outerParam`也會具有**outer**值,因為 重新分配發生在呼叫`outer`函數之後,當我們呼叫`outerFunc`函數時,它會在**作用域鏈**中尋找`outerVar`的值,而`outerVar`的值為**「outer」** 。現在,當我們呼叫引用了`innerFunc`的`x`變數時, `innerParam`的值為**inner,**因為這是我們在呼叫中傳遞的值,而`globalVar`變數的值為**猜測**,因為在呼叫`x`變數之前,我們為`globalVar`分配了一個新值,並且在呼叫`x`時**作用域鏈**中`globalVar`的值是**猜測**。 我們有一個例子來示範沒有正確理解閉包的問題。 ``` const arrFuncs = []; for(var i = 0; i < 5; i++){ arrFuncs.push(function (){ return i; }); } console.log(i); // i is 5 for (let i = 0; i < arrFuncs.length; i++) { console.log(arrFuncs[i]()); // all logs "5" } ``` 由於**Closures**的原因,此程式碼無法按我們的預期工作。 `var`關鍵字建立一個全域變數,當我們推送一個函數時 我們返回全域變數`i` 。因此,當我們在循環之後呼叫該陣列中的其中一個函數時,它會記錄`5` ,因為我們得到 `i`的目前值為`5` ,我們可以存取它,因為它是全域變數。因為**閉包**保留該變數的**引用,**而不是其建立時的**值**。我們可以使用**IIFES**或將`var`關鍵字變更為`let`來解決此問題,以實現區塊作用域。 ### 21. **JavaScript**中的**假**值是什麼? [↑](#the-questions "返回問題") ``` const falsyValues = ['', 0, null, undefined, NaN, false]; ``` **假**值是轉換為布林值時變成**false 的**值。 ### 22. 如何檢查一個值是否為**假值**? [↑](#the-questions "返回問題")使用**布林**函數或雙非運算符**[!!](#16-what-does-the-operator-do)** ### 23. `"use strict"`有什麼作用? [^](#the-questions "返回問題") `"use strict"`是**JavaScript**中的 ES5 功能,它使我們的程式碼在*函數*或*整個腳本*中處於**嚴格模式**。**嚴格模式**幫助我們避免程式碼早期出現**錯誤**並為其加入限制。 **嚴格模式**給我們的限制。 - 分配或存取未宣告的變數。 ``` function returnY(){ "use strict"; y = 123; return y; } ``` - 為唯讀或不可寫的全域變數賦值; ``` "use strict"; var NaN = NaN; var undefined = undefined; var Infinity = "and beyond"; ``` - 刪除不可刪除的屬性。 ``` "use strict"; const obj = {}; Object.defineProperty(obj, 'x', { value : '1' }); delete obj.x; ``` - 參數名稱重複。 ``` "use strict"; function someFunc(a, b, b, c){ } ``` - 使用**eval**函數建立變數。 ``` "use strict"; eval("var x = 1;"); console.log(x); //Throws a Reference Error x is not defined ``` - **該**值的預設值是`undefined` 。 ``` "use strict"; function showMeThis(){ return this; } showMeThis(); //returns undefined ``` **嚴格模式**的限制遠不止這些。 ### 24. JavaScript 中`this`的值是什麼? [↑](#the-questions "返回問題")基本上, `this`是指目前正在執行或呼叫函數的物件的值。我說**目前**是因為**它**的值會根據我們使用它的上下文和使用它的位置而改變。 ``` const carDetails = { name: "Ford Mustang", yearBought: 2005, getName(){ return this.name; }, isRegistered: true }; console.log(carDetails.getName()); // logs Ford Mustang ``` 這是我們通常所期望的,因為在**getName**方法中我們傳回`this.name` ,在此上下文中`this`指的是`carDetails`物件,該物件目前是正在執行的函數的「擁有者」物件。 好吧,讓我們加入一些程式碼讓它變得奇怪。在`console.log`語句下面加入這三行程式碼 ``` var name = "Ford Ranger"; var getCarName = carDetails.getName; console.log(getCarName()); // logs Ford Ranger ``` 第二個`console.log`語句印製了**「Ford Ranger」**一詞,這很奇怪,因為在我們的第一個`console.log`語句中它印了**「Ford Mustang」** 。原因是`getCarName`方法有一個不同的「擁有者」物件,即`window`物件。在全域作用域中使用`var`關鍵字聲明變數會在`window`物件中附加與變數同名的屬性。請記住,當未使用`"use strict"`時,全域範圍內的`this`指的是`window`物件。 ``` console.log(getCarName === window.getCarName); //logs true console.log(getCarName === this.getCarName); // logs true ``` 本例中的`this`和`window`指的是同一個物件。 解決此問題的一種方法是使用函數中的`<a href="#27-what-is-the-use-functionprototypeapply-method">apply</a>`和`<a href="#28-what-is-the-use-functionprototypecall-method">call</a>`方法。 ``` console.log(getCarName.apply(carDetails)); //logs Ford Mustang console.log(getCarName.call(carDetails)); //logs Ford Mustang ``` `apply`和`call`方法期望第一個參數是一個物件,該物件將是該函數內`this`的值。 **IIFE** (即**立即呼叫函數表達式)** 、在全域作用域中宣告的函數、物件內部方法中的**匿名函數**和內部函數都有一個指向**window**物件的預設**值**。 ``` (function (){ console.log(this); })(); //logs the "window" object function iHateThis(){ console.log(this); } iHateThis(); //logs the "window" object const myFavoriteObj = { guessThis(){ function getThis(){ console.log(this); } getThis(); }, name: 'Marko Polo', thisIsAnnoying(callback){ callback(); } }; myFavoriteObj.guessThis(); //logs the "window" object myFavoriteObj.thisIsAnnoying(function (){ console.log(this); //logs the "window" object }); ``` 如果我們想要取得`myFavoriteObj`物件中的`name`屬性**(Marko Polo)**的值,有兩種方法可以解決這個問題。 首先,我們將`this`的值保存在變數中。 ``` const myFavoriteObj = { guessThis(){ const self = this; //saves the this value to the "self" variable function getName(){ console.log(self.name); } getName(); }, name: 'Marko Polo', thisIsAnnoying(callback){ callback(); } }; ``` 在此圖像中,我們保存`this`的值,該值將是`myFavoriteObj`物件。所以我們可以在`getName`內部函數中存取它。 其次,我們使用**ES6[箭頭函數](#43-what-are-arrow-functions)**。 ``` const myFavoriteObj = { guessThis(){ const getName = () => { //copies the value of "this" outside of this arrow function console.log(this.name); } getName(); }, name: 'Marko Polo', thisIsAnnoying(callback){ callback(); } }; ``` [箭頭函數](#43-what-are-arrow-functions)沒有自己的`this` 。它複製封閉詞法範圍的`this`值,或複製`getName`內部函數外部的`this`值(即`myFavoriteObj`物件)。我們也可以根據[函數的呼叫方式](#66-how-many-ways-can-a-function-be-invoked)來決定`this`的值。 ### 25. 物件的`prototype`是什麼? [↑](#the-questions "返回問題")最簡單的`prototype`是一個物件的*藍圖*。如果目前物件中確實存在它,則將其用作**屬性**和**方法**的後備。這是在物件之間共享屬性和功能的方式。這是 JavaScript**原型繼承**的核心概念。 ``` const o = {}; console.log(o.toString()); // logs [object Object] ``` 即使`o.toString`方法不存在於`o`物件中,它也不會拋出錯誤,而是傳回字串`[object Object]` 。當物件中不存在屬性時,它會尋找其**原型**,如果仍然不存在,則會尋找**原型的原型**,依此類推,直到在**原型鏈**中找到具有相同屬性的屬性。**原型鏈**的末尾在**Object.prototype**之後為`null` 。 ``` console.log(o.toString === Object.prototype.toString); // logs true // which means we we're looking up the Prototype Chain and it reached // the Object.prototype and used the "toString" method. ``` ### 26. 什麼是**IIFE** ,它有什麼用? [^](#the-questions "返回問題") **IIFE**或**立即呼叫函數表達式**是在建立或宣告後將被呼叫或執行的函數。建立**IIFE**的語法是,我們將`function (){}`包裝在括號`()`或**分組運算**子內,以將函數視為表達式,然後用另一個括號`()`呼叫它。所以**IIFE**看起來像這樣`(function(){})()` 。 ``` (function () { }()); (function () { })(); (function named(params) { })(); (() => { })(); (function (global) { })(window); const utility = (function () { return { //utilities }; })(); ``` 這些範例都是有效的**IIFE** 。倒數第二個範例顯示我們可以將參數傳遞給**IIFE**函數。最後一個範例表明我們可以將**IIFE**的結果保存到變數中,以便稍後引用它。 **IIFE**的最佳用途是進行初始化設定功能,並避免與全域範圍內的其他變數**發生命名衝突**或污染全域名稱空間。讓我們舉個例子。 ``` <script src="https://cdnurl.com/somelibrary.js"></script> ``` 假設我們有一個指向庫`somelibrary.js`的連結,該庫公開了我們可以在程式碼中使用的一些全域函數,但該庫有兩個我們不使用`createGraph`和`drawGraph`方法,因為這些方法中有錯誤。我們想要實作我們自己的`createGraph`和`drawGraph`方法。 - 解決這個問題的一種方法是改變腳本的結構。 ``` <script src="https://cdnurl.com/somelibrary.js"></script> <script> function createGraph() { // createGraph logic here } function drawGraph() { // drawGraph logic here } </script> ``` 當我們使用這個解決方案時,我們將覆蓋庫為我們提供的這兩種方法。 - 解決這個問題的另一種方法是更改我們自己的輔助函數的名稱。 ``` <script src="https://cdnurl.com/somelibrary.js"></script> <script> function myCreateGraph() { // createGraph logic here } function myDrawGraph() { // drawGraph logic here } </script> ``` 當我們使用此解決方案時,我們還將這些函數呼叫更改為新函數名稱。 - 另一種方法是使用**IIFE** 。 ``` <script src="https://cdnurl.com/somelibrary.js"></script> <script> const graphUtility = (function () { function createGraph() { // createGraph logic here } function drawGraph() { // drawGraph logic here } return { createGraph, drawGraph } })(); </script> ``` 在此解決方案中,我們建立一個實用程式變數,它是**IIFE**的結果,它傳回一個包含`createGraph`和`drawGraph`兩個方法的物件。 **IIFE**解決的另一個問題就是這個例子。 ``` var li = document.querySelectorAll('.list-group > li'); for (var i = 0, len = li.length; i < len; i++) { li[i].addEventListener('click', function (e) { console.log(i); }) } ``` 假設我們有一個`ul`元素,其類別為**list-group** ,並且它有 5 個`li`子元素。當我們**點擊**單一`li`元素時,我們希望`console.log` `i`的值。 但我們想要的程式碼中的行為不起作用。相反,它會在對`li`元素的任何**點擊**中記錄`5` 。我們遇到的問題是由於**閉包的**工作方式造成的。**閉包**只是函數記住其當前作用域、其父函數作用域和全域作用域中的變數引用的能力。當我們在全域範圍內使用`var`關鍵字聲明變數時,顯然我們正在建立一個全域變數`i` 。因此,當我們單擊`li`元素時,它會記錄**5** ,因為這是我們稍後在回調函數中引用它時的`i`值。 - 解決這個問題的一種方法是**IIFE** 。 ``` var li = document.querySelectorAll('.list-group > li'); for (var i = 0, len = li.length; i < len; i++) { (function (currentIndex) { li[currentIndex].addEventListener('click', function (e) { console.log(currentIndex); }) })(i); } ``` 這個解決方案之所以有效,是因為**IIFE**為每次迭代建立一個新範圍,並且我們捕獲`i`的值並將其傳遞到`currentIndex`參數中,因此當我們呼叫**IIFE**時,每次迭代的`currentIndex`值都是不同的。 ### 27. `Function.prototype.apply`方法有什麼用? [^](#the-questions "返回問題") `apply`呼叫一個函數,在呼叫時指定`this`或該函數的「所有者」物件。 ``` const details = { message: 'Hello World!' }; function getMessage(){ return this.message; } getMessage.apply(details); // returns 'Hello World!' ``` 這個方法的工作方式類似於`<a href="#28-what-is-the-use-functionprototypecall-method">Function.prototype.call</a>`唯一的差異是我們傳遞參數的方式。在`apply`中,我們將參數作為陣列傳遞。 ``` const person = { name: "Marko Polo" }; function greeting(greetingMessage) { return `${greetingMessage} ${this.name}`; } greeting.apply(person, ['Hello']); // returns "Hello Marko Polo!" ``` ### 28. `Function.prototype.call`方法有什麼用? [^](#the-questions "返回問題")此`call`呼叫一個函數,指定呼叫時該函數的`this`或「擁有者」物件。 ``` const details = { message: 'Hello World!' }; function getMessage(){ return this.message; } getMessage.call(details); // returns 'Hello World!' ``` 這個方法的工作方式類似於`<a href="#27-what-is-the-use-functionprototypeapply-method">Function.prototype.apply</a>`唯一的差異是我們傳遞參數的方式。在`call`中,我們直接傳遞參數,對於每個參數`,`用逗號分隔它們。 ``` const person = { name: "Marko Polo" }; function greeting(greetingMessage) { return `${greetingMessage} ${this.name}`; } greeting.call(person, 'Hello'); // returns "Hello Marko Polo!" ``` ### 29. `Function.prototype.apply`和`Function.prototype.call`有什麼差別? [↑](#the-questions "返回問題") `apply`和`call`之間的唯一區別是我們如何在被呼叫的函數中傳遞**參數**。在`apply`中,我們將參數作為**陣列**傳遞,而在`call`中,我們直接在參數列表中傳遞參數。 ``` const obj1 = { result:0 }; const obj2 = { result:0 }; function reduceAdd(){ let result = 0; for(let i = 0, len = arguments.length; i < len; i++){ result += arguments[i]; } this.result = result; } reduceAdd.apply(obj1, [1, 2, 3, 4, 5]); // returns 15 reduceAdd.call(obj2, 1, 2, 3, 4, 5); // returns 15 ``` ### 30. `Function.prototype.bind`的用法是什麼? [↑](#the-questions "返回問題") `bind`方法傳回一個新*綁定的*函數 到特定的`this`值或“所有者”物件,因此我們可以稍後在程式碼中使用它。 `call` 、 `apply`方法立即呼叫函數,而不是像`bind`方法那樣傳回一個新函數。 ``` import React from 'react'; class MyComponent extends React.Component { constructor(props){ super(props); this.state = { value : "" } this.handleChange = this.handleChange.bind(this); // Binds the "handleChange" method to the "MyComponent" component } handleChange(e){ //do something amazing here } render(){ return ( <> <input type={this.props.type} value={this.state.value} onChange={this.handleChange} /> </> ) } } ``` ### 31.什麼是**函數式程式設計**? **JavaScript**的哪些特性使其成為**函數式語言**的候選者? [^](#the-questions "返回問題")**函數式程式設計**是一種**聲明式**程式設計範式或模式,它介紹如何**使用表達式來**計算值而不改變傳遞給它的參數的函數來建立應用程式。 JavaScript**陣列**具有**map** 、 **filter** 、 **reduce**方法,這些方法是函數式程式設計世界中最著名的函數,因為它們非常有用,而且它們不會改變或改變陣列,這使得這些函數變得**純粹**,並且JavaScript 支援**閉包**和**高階函數**,它們是**函數式程式語言**的一個特徵。 - **map**方法建立一個新陣列,其中包含對陣列中每個元素呼叫提供的回調函數的結果。 ``` const words = ["Functional", "Procedural", "Object-Oriented"]; const wordsLength = words.map(word => word.length); ``` - **filter**方法會建立一個新陣列,其中包含透過回調函數中測試的所有元素。 ``` const data = [ { name: 'Mark', isRegistered: true }, { name: 'Mary', isRegistered: false }, { name: 'Mae', isRegistered: true } ]; const registeredUsers = data.filter(user => user.isRegistered); ``` - **reduce**方法對累加器和陣列中的每個元素(從左到右)套用函數,將其減少為單一值。 ``` const strs = ["I", " ", "am", " ", "Iron", " ", "Man"]; const result = strs.reduce((acc, currentStr) => acc + currentStr, ""); ``` ### 32.什麼是**高階函數**? [^](#the-questions "返回問題")**高階函數**是可以傳回函數或接收具有函數值的一個或多個參數的函數。 ``` function higherOrderFunction(param,callback){ return callback(param); } ``` ### 33.為什麼函數被稱為**First-class Objects** ? [^](#the-questions "返回問題") JavaScript 中的 \_\_Functions\_\_ 是**一流物件**,因為它們被視為該語言中的任何其他值。它們可以分配給**變數**,可以是稱為**方法的物件的屬性**,可以是**陣列中的專案**,可以**作為參數傳遞給函數**,也可以**作為函數的值返回**。函數與**JavaScript**中任何其他值之間的唯一區別是**函數**可以被呼叫。 ### 34. 手動實作`Array.prototype.map`方法。 [↑](#the-questions "返回問題") ``` function map(arr, mapCallback) { // First, we check if the parameters passed are right. if (!Array.isArray(arr) || !arr.length || typeof mapCallback !== 'function') { return []; } else { let result = []; // We're making a results array every time we call this function // because we don't want to mutate the original array. for (let i = 0, len = arr.length; i < len; i++) { result.push(mapCallback(arr[i], i, arr)); // push the result of the mapCallback in the 'result' array } return result; // return the result array } } ``` 正如`Array.prototype.map`方法的MDN描述。 **map() 方法建立一個新陣列,其中包含對呼叫陣列中的每個元素呼叫所提供函數的結果。** ### 35. 手動實作`Array.prototype.filter`方法。 [↑](#the-questions "返回問題") ``` function filter(arr, filterCallback) { // First, we check if the parameters passed are right. if (!Array.isArray(arr) || !arr.length || typeof filterCallback !== 'function') { return []; } else { let result = []; // We're making a results array every time we call this function // because we don't want to mutate the original array. for (let i = 0, len = arr.length; i < len; i++) { // check if the return value of the filterCallback is true or "truthy" if (filterCallback(arr[i], i, arr)) { // push the current item in the 'result' array if the condition is true result.push(arr[i]); } } return result; // return the result array } } ``` 正如`Array.prototype.filter`方法的 MDN 描述。 **filter() 方法建立一個新陣列,其中包含透過所提供函數實現的測試的所有元素。** ### 36. 手動實作`Array.prototype.reduce`方法。 [↑](#the-questions "返回問題") ``js 函數reduce(arr,reduceCallback,initialValue){ // 首先,我們檢查傳遞的參數是否正確。 if (!Array.isArray(arr) || !arr.length || typeof reduceCallback !== 'function') { ``` return []; ``` } 別的 { ``` // If no initialValue has been passed to the function we're gonna use the ``` ``` let hasInitialValue = initialValue !== undefined; ``` ``` let value = hasInitialValue ? initialValue : arr[0]; ``` ``` // first array item as the initialValue ``` ``` // Then we're gonna start looping at index 1 if there is no ``` ``` // initialValue has been passed to the function else we start at 0 if ``` ``` // there is an initialValue. ``` ``` for (let i = hasInitialValue ? 0 : 1, len = arr.length; i < len; i++) { ``` ``` // Then for every iteration we assign the result of the ``` ``` // reduceCallback to the variable value. ``` ``` value = reduceCallback(value, arr[i], i, arr); ``` ``` } ``` ``` return value; ``` } } ``` As the MDN description of the <code>Array.prototype.reduce</code> method. __The reduce() method executes a reducer function (that you provide) on each element of the array, resulting in a single output value.__ ###37. What is the __arguments__ object? [↑](#the-questions "Back To Questions") The __arguments__ object is a collection of parameter values pass in a function. It's an __Array-like__ object because it has a __length__ property and we can access individual values using array indexing notation <code>arguments[1]</code> but it does not have the built-in methods in an array <code>forEach</code>,<code>reduce</code>,<code>filter</code> and <code>map</code>. It helps us know the number of arguments pass in a function. We can convert the <code>arguments</code> object into an array using the <code>Array.prototype.slice</code>. ``` 函數一(){ 返回 Array.prototype.slice.call(參數); } ``` Note: __the <code>arguments</code> object does not work on ES6 arrow functions.__ ``` 函數一(){ 返回參數; } 常數二 = 函數 () { 返回參數; } 常量三 = 函數三() { 返回參數; } const 四 = () => 參數; 四(); // 拋出錯誤 - 參數未定義 ``` When we invoke the function <code>four</code> it throws a <code>ReferenceError: arguments is not defined</code> error. We can solve this problem if your enviroment supports the __rest syntax__. ``` const 四 = (...args) => args; ``` This puts all parameter values in an array automatically. ###38. How to create an object without a __prototype__? [↑](#the-questions "Back To Questions") We can create an object without a _prototype_ using the <code>Object.create</code> method. ``` 常數 o1 = {}; console.log(o1.toString()); // Logs \[object Object\] 取得此方法到Object.prototype const o2 = Object.create(null); // 第一個參數是物件「o2」的原型,在此 // case 將為 null 指定我們不需要任何原型 console.log(o2.toString()); // 拋出錯誤 o2.toString 不是函數 ``` ###39. Why does <code>b</code> in this code become a global variable when you call this function? [↑](#the-questions "Back To Questions") ``` 函數 myFunc() { 令a = b = 0; } myFunc(); ``` The reason for this is that __assignment operator__ or __=__ has right-to-left __associativity__ or __evaluation__. What this means is that when multiple assignment operators appear in a single expression they evaluated from right to left. So our code becomes likes this. ``` 函數 myFunc() { 令 a = (b = 0); } myFunc(); ``` First, the expression <code>b = 0</code> evaluated and in this example <code>b</code> is not declared. So, The JS Engine makes a global variable <code>b</code> outside this function after that the return value of the expression <code>b = 0</code> would be 0 and it's assigned to the new local variable <code>a</code> with a <code>let</code> keyword. We can solve this problem by declaring the variables first before assigning them with value. ``` 函數 myFunc() { 令 a,b; a = b = 0; } myFunc(); ``` ###40. <div id="ecmascript">What is __ECMAScript__</div>? [↑](#the-questions "Back To Questions") __ECMAScript__ is a standard for making scripting languages which means that __JavaScript__ follows the specification changes in __ECMAScript__ standard because it is the __blueprint__ of __JavaScript__. ###41. What are the new features in __ES6__ or __ECMAScript 2015__? [↑](#the-questions "Back To Questions") * [Arrow Functions](#43-what-are-arrow-functions) * [Classes](#44-what-are-classes) * [Template Strings](#45-what-are-template-literals) * __Enhanced Object literals__ * [Object Destructuring](#46-what-is-object-destructuring) * [Promises](#50-what-are-promises) * __Generators__ * [Modules](#47-what-are-es6-modules) * Symbol * __Proxies__ * [Sets](#48-what-is-the-set-object-and-how-does-it-work) * [Default Function parameters](#53-what-are-default-parameters) * [Rest and Spread](#52-whats-the-difference-between-spread-operator-and-rest-operator) * [Block Scoping with <code>let</code> and <code>const</code>](#42-whats-the-difference-between-var-let-and-const-keywords) ###42. What's the difference between <code>var</code>, <code>let</code> and <code>const</code> keywords? [↑](#the-questions "Back To Questions") Variables declared with <code>var</code> keyword are _function scoped_. What this means that variables can be accessed across that function even if we declare that variable inside a block. ``` 函數給MeX(showX) { 如果(顯示X){ ``` var x = 5; ``` } 返回x; } console.log(giveMeX(false)); console.log(giveMeX(true)); ``` The first <code>console.log</code> statement logs <code>undefined</code> and the second <code>5</code>. We can access the <code>x</code> variable due to the reason that it gets _hoisted_ at the top of the function scope. So our function code is intepreted like this. ``` 函數給MeX(showX) { 變數 x; // 有一個預設值未定義 如果(顯示X){ ``` x = 5; ``` } 返回x; } ``` If you are wondering why it logs <code>undefined</code> in the first <code>console.log</code> statement remember variables declared without an initial value has a default value of <code>undefined</code>. Variables declared with <code>let</code> and <code>const</code> keyword are _block scoped_. What this means that variable can only be accessed on that block <code>{}</code> on where we declare it. ``` 函數給MeX(showX) { 如果(顯示X){ ``` let x = 5; ``` } 返回x; } 函數給MeY(顯示Y){ 如果(顯示Y){ ``` let y = 5; ``` } 返回y; } ``` If we call this functions with an argument of <code>false</code> it throws a <code>Reference Error</code> because we can't access the <code>x</code> and <code>y</code> variables outside that block and those variables are not _hoisted_. There is also a difference between <code>let</code> and <code>const</code> we can assign new values using <code>let</code> but we can't in <code>const</code> but <code>const</code> are mutable meaning. What this means is if the value that we assign to a <code>const</code> is an object we can change the values of those properties but can't reassign a new value to that variable. ###43. What are __Arrow functions__? [↑](#the-questions "Back To Questions") __Arrow Functions__ are a new way of making functions in JavaScript. __Arrow Functions__ takes a little time in making functions and has a cleaner syntax than a __function expression__ because we omit the <code>function</code> keyword in making them. ``` //ES5版本 var getCurrentDate = 函數 (){ 返回新日期(); } //ES6版本 const getCurrentDate = () => new Date(); ``` In this example, in the ES5 Version have <code>function(){}</code> declaration and <code>return</code> keyword needed to make a function and return a value respectively. In the __Arrow Function__ version we only need the <code>()</code> parentheses and we don't need a <code>return</code> statement because __Arrow Functions__ have a implicit return if we have only one expression or value to return. ``` //ES5版本 函數問候(名稱){ return '你好' + 名字 + '!'; } //ES6版本 const 問候 = (name) => `Hello ${name}` ; constgreet2 = 名稱 => `Hello ${name}` ; ``` We can also parameters in __Arrow functions__ the same as the __function expressions__ and __function declarations__. If we have one parameter in an __Arrow Function__ we can omit the parentheses it is also valid. ``` const getArgs = () => 參數 const getArgs2 = (...休息) => 休息 ``` __Arrow functions__ don't have access to the <code>arguments</code> object. So calling the first <code>getArgs</code> func will throw an Error. Instead we can use the __rest parameters__ to get all the arguments passed in an arrow function. ``` 常量資料 = { 結果:0, 數字:\[1,2,3,4,5\], 計算結果() { ``` // "this" here refers to the "data" object ``` ``` const addAll = () => { ``` ``` // arrow functions "copies" the "this" value of ``` ``` // the lexical enclosing function ``` ``` return this.nums.reduce((total, cur) => total + cur, 0) ``` ``` }; ``` ``` this.result = addAll(); ``` } }; ``` __Arrow functions__ don't have their own <code>this</code> value. It captures or gets the <code>this</code> value of lexically enclosing function or in this example, the <code>addAll</code> function copies the <code>this</code> value of the <code>computeResult</code> method and if we declare an arrow function in the global scope the value of <code>this</code> would be the <code>window</code> object. ###44. What are __Classes__? [↑](#the-questions "Back To Questions") __Classes__ is the new way of writing _constructor functions_ in __JavaScript__. It is _syntactic sugar_ for using _constructor functions_, it still uses __prototypes__ and __Prototype-Based Inheritance__ under the hood. ``` //ES5版本 函數人(名字,姓氏,年齡,地址){ ``` this.firstName = firstName; ``` ``` this.lastName = lastName; ``` ``` this.age = age; ``` ``` this.address = address; ``` } Person.self = 函數(){ ``` return this; ``` } Person.prototype.toString = function(){ ``` return "[object Person]"; ``` } Person.prototype.getFullName = function (){ ``` return this.firstName + " " + this.lastName; ``` } //ES6版本 類人{ ``` constructor(firstName, lastName, age, address){ ``` ``` this.lastName = lastName; ``` ``` this.firstName = firstName; ``` ``` this.age = age; ``` ``` this.address = address; ``` ``` } ``` ``` static self() { ``` ``` return this; ``` ``` } ``` ``` toString(){ ``` ``` return "[object Person]"; ``` ``` } ``` ``` getFullName(){ ``` ``` return `${this.firstName} ${this.lastName}`; ``` ``` } ``` } ``` __Overriding Methods__ and __Inheriting from another class__. ``` //ES5版本 Employee.prototype = Object.create(Person.prototype); 函數 Employee(名字, 姓氏, 年齡, 地址, 職位名稱, 開始年份) { Person.call(this, 名字, 姓氏, 年齡, 地址); this.jobTitle = jobTitle; this.yearStarted = YearStarted; } Employee.prototype.describe = function () { return `I am ${this.getFullName()} and I have a position of ${this.jobTitle} and I started at ${this.yearStarted}` ; } Employee.prototype.toString = function () { 返回“\[物件員工\]”; } //ES6版本 class Employee extends Person { //繼承自「Person」類 建構函數(名字,姓氏,年齡,地址,工作標題,開始年份){ ``` super(firstName, lastName, age, address); ``` ``` this.jobTitle = jobTitle; ``` ``` this.yearStarted = yearStarted; ``` } 描述() { ``` return `I am ${this.getFullName()} and I have a position of ${this.jobTitle} and I started at ${this.yearStarted}`; ``` } toString() { // 重寫「Person」的「toString」方法 ``` return "[object Employee]"; ``` } } ``` So how do we know that it uses _prototypes_ under the hood? ``` 類別東西{ } 函數 AnotherSomething(){ } const as = new AnotherSomething(); const s = new Something(); console.log(typeof Something); // 記錄“函數” console.log(AnotherSomething 類型); // 記錄“函數” console.log(as.toString()); // 記錄“\[物件物件\]” console.log(as.toString()); // 記錄“\[物件物件\]” console.log(as.toString === Object.prototype.toString); console.log(s.toString === Object.prototype.toString); // 兩個日誌都回傳 true 表示我們仍在使用 // 底層原型,因為 Object.prototype 是 // 原型鏈的最後一部分和“Something” // 和「AnotherSomething」都繼承自Object.prototype ``` ###45. What are __Template Literals__? [↑](#the-questions "Back To Questions") __Template Literals__ are a new way of making __strings__ in JavaScript. We can make __Template Literal__ by using the backtick or back-quote symbol. ``` //ES5版本 vargreet = '嗨,我是馬克'; //ES6版本 讓問候 = `Hi I'm Mark` ; ``` In the ES5 version, we need to escape the <code>'</code> using the <code>\\</code> to _escape_ the normal functionality of that symbol which in this case is to finish that string value. In Template Literals, we don't need to do that. ``` //ES5版本 var 最後一個字 = '\\n' - ' 在' - '我\\n' - '鋼鐵人\\n'; //ES6版本 讓最後一個單字=` ``` I ``` ``` Am ``` 鋼鐵人 `; ``` In the ES5 version, we need to add this <code>\n</code> to have a new line in our string. In Template Literals, we don't need to do that. ``` //ES5版本 函數問候(名稱){ return '你好' + 名字 + '!'; } //ES6版本 const 問候 = 名稱 => { 返回`Hello ${name} !` ; } ``` In the ES5 version, If we need to add an expression or value in a string we need to use the <code>+</code> or string concatenation operator. In Template Literals, we can embed an expression using <code>${expr}</code> which makes it cleaner than the ES5 version. ###46. What is __Object Destructuring__? [↑](#the-questions "Back To Questions") __Object Destructuring__ is a new and cleaner way of __getting__ or __extracting__ values from an object or an array. Suppose we have an object that looks like this. ``` 常量僱員 = { 名字:“馬可”, 姓氏:“波羅”, 職位:“軟體開發人員”, 聘用年份:2017 }; ``` The old way of getting properties from an object is we make a variable t
長話短說 ==== 在本文中,您將學習如何使用 Nextjs、CopilotKit 和 OpenAI 建立人工智慧驅動的 PowerPoint 應用程式。我們將涵蓋: - 利用 ChatGPT 建立您的 PowerPoint 簡報📊 - 與您的 PowerPoint 簡報聊天💬 - 將音訊和圖像新增至您的 PowerPoint 簡報🔉  --- CopilotKit:建構深度整合的應用內人工智慧聊天機器人💬 ------------------------------- CopilotKit 是[開源人工智慧副駕駛平台。](https://github.com/CopilotKit/CopilotKit)我們可以輕鬆地將強大的人工智慧聊天機器人整合到您的 React 應用程式中。完全可定制和深度集成。  {% cta https://github.com/CopilotKit/CopilotKit %} Star CopilotKit ⭐️ {% endcta %} ###### \*在布胡布上 現在回到文章。 --- **先決條件** -------- 要開始學習本教程,您需要在電腦上安裝以下軟體: - 文字編輯器(例如 Visual Studio Code) - Node.js - 套件管理器 使用 NextJS 建立 PowerPoint 應用程式前端 ------------------------------ **步驟 1:**使用下列指令 Git 複製 PowerPoint 應用程式樣板。 ``` git clone https://github.com/TheGreatBonnie/aipoweredpowerpointpresentation ``` **步驟 2:**在文字編輯器上開啟 PowerPoint 應用程式樣板,並使用下列指令安裝所有專案相依性。 ``` npm install ``` 步驟3: • 前往根目錄\*\*\*\*並建立一個名為**`.env.local`的檔案。**在該文件中,加入下面保存您的 ChatGPT API 金鑰的環境變數。 ``` OPENAI_API_KEY="Your ChatGPT API Key” ``` **步驟4:**在命令列執行命令*npm run dev* 。導航至 http://localhost:3000/,您應該會看到 PowerPoint 應用程式前端。  建立 PowerPoint 投影片功能 ------------------- 步驟 1:前往**`/[root]/src/app/components`** ,並建立一個名為`present.tsx`的檔案。然後在文件頂部導入以下相依性。 ``` "use client"; import { useCopilotContext } from "@copilotkit/react-core"; import { CopilotTask } from "@copilotkit/react-core"; import { useMakeCopilotActionable, useMakeCopilotReadable, } from "@copilotkit/react-core"; import { useEffect, useState } from "react"; import "./../presentation/styles.css"; import Markdown from "react-markdown"; ``` 步驟 2:定義一個名為 Slide 的 TypeScript 接口,其中包含 PowerPoint 簡報投影片的標題和內容屬性。 ``` // Define slide interface interface Slide { title: string; content: string; } ``` 步驟 3:建立一個名為`Presentation`函數,並使用usestate 初始化名為`allSlides`和`currentSlideIndex`狀態變數`usestate.`變數`allSlides`將保存幻燈片陣列,而`currentSlideIndex`將保存目前幻燈片索引。 ``` export function Presentation (){ const [allSlides, setAllSlides] = useState<Slide[]>([]); const [currentSlideIndex, setCurrentSlideIndex] = useState<number>(0); } ``` 步驟 4:在`Presentation`函數中,使用`useMakeCopilotReadable`掛鉤新增投影片的`allSlides`陣列作為應用程式內聊天機器人的上下文。 ``` useMakeCopilotReadable("Powerpoint presentation slides: " + JSON.stringify(allSlides)); ``` 步驟 5:使用`useMakeCopilotActionable`掛鉤設定一個名為`createNewPowerPointSlide`操作,其中包含描述和更新`allSlides`和`currentSlideIndex`狀態變數的實作函數,如下所示。 ``` useMakeCopilotActionable( { name: "createNewPowerPointSlide", description: "create slides for a powerpoint presentation. Call this function multiple times to present multiple slides.", argumentAnnotations: [ { name: "slideTitle", type: "string", description: "The topic to display in the presentation slide. Use simple markdown to outline your speech, like a headline.", required: true, }, { name: "content", type: "string", description: "The content to display in the presentation slide. Use simple markdown to outline your speech, like lists, paragraphs, etc.", required: true }, ], implementation: async (newSlideTitle, newSlideContent) => { const newSlide: Slide = { title: newSlideTitle, content: newSlideContent}; const updatedSlides = [...allSlides, newSlide]; setAllSlides(updatedSlides); setCurrentSlideIndex(updatedSlides.length - 1); }, }, [], ); ``` 步驟6:定義一個名為`displayCurrentSlide`的函數,用於在前端顯示目前投影片索引。 ``` // Display current slide const displayCurrentSlide = () => { const slide = allSlides[currentSlideIndex]; return slide ? ( <div className="h-screen flex flex-col justify-center items-center text-5xl text-white bg-cover bg-center bg-no-repeat p-10 text-center" style={{ textShadow: "1px 1px 0 #000, -1px -1px 0 #000, 1px -1px 0 #000, -1px 1px 0 #000", }} > <Markdown className="markdown">{slide.title}</Markdown> <Markdown className="markdown">{slide.content}</Markdown> </div> ) : ( <div className="h-screen flex flex-col justify-center items-center text-5xl text-white bg-cover bg-center bg-no-repeat p-10 text-center"> No Slide To Display </div> ); }; ``` 步驟 7: 定義一個名為 addSlide 的函數,該函數包含一個名為 CopilotTask 的類別。 CopilotTask 類別定義新增投影片的功能。 ``` // Add new slide function const addSlide = new CopilotTask({ instructions: "create a new slide", actions: [ { name: "newSlide", description: "Make a new slide related to the current topic.", argumentAnnotations: [ { name: "title", type: "string", description: "The title to display in the presentation slide.", required: true, }, { name: "content", type: "string", description: "The title to display in the presentation slide.", required: true, }, ], implementation: async (newSlideTitle,newSlideContent,) => { const newSlide: Slide = {title: newSlideTitle,content: newSlideContent,}; const updatedSlides = [...allSlides, newSlide]; setAllSlides(updatedSlides); setCurrentSlideIndex(updatedSlides.length - 1); }, }, ], }); const context = useCopilotContext(); const [randomSlideTaskRunning, setRandomSlideTaskRunning] = useState(false); ``` 步驟 8:定義兩個函數 goBack 和 goForward。 goBack 函數定義導覽到上一張投影片的功能,而 goForward 函數定義導覽到下一張投影片的功能。 ``` // Button click handlers for navigation const goBack = () => setCurrentSlideIndex((prev) => Math.max(0, prev - 1)); const goForward = () => setCurrentSlideIndex((prev) => Math.min(allSlides.length - 1, prev + 1)); ``` 步驟9:傳回一個呼叫displayCurrentSlide函數的元件,並包含呼叫addSlide、goBack和goForward函數的按鈕。 ``` return ( <div> {displayCurrentSlide()} <button disabled={randomSlideTaskRunning} className={`absolute bottom-12 left-0 mb-4 ml-4 bg-blue-500 text-white font-bold py-2 px-4 rounded ${randomSlideTaskRunning ? "opacity-50 cursor-not-allowed" : "hover:bg-blue-700"}`} onClick={async () => { try { setRandomSlideTaskRunning(true); await addSlide.run(context); } finally { setRandomSlideTaskRunning(false); } }} > {randomSlideTaskRunning ? "Loading slide..." : "Add Slide +"} </button> <button className={`absolute bottom-0 left-0 mb-4 ml-4 bg-blue-500 text-white font-bold py-2 px-4 rounded ${randomSlideTaskRunning ? "opacity-50 cursor-not-allowed" : "hover:bg-blue-700"}`} onClick={goBack}>Prev</button> <button className={`absolute bottom-0 left-20 mb-4 ml-4 bg-blue-500 text-white font-bold py-2 px-4 rounded ${randomSlideTaskRunning ? "opacity-50 cursor-not-allowed" : "hover:bg-blue-700"}`} onClick={goForward}>Next</button> </div> ); ``` 步驟10:在Presentation資料夾中,將以下程式碼加入page.tsx檔案。 ``` "use client"; import { CopilotKit } from "@copilotkit/react-core"; import { CopilotSidebar } from "@copilotkit/react-ui"; import {Presentation} from "../components/present"; import "./styles.css"; let globalAudio: any = undefined; let globalAudioEnabled = false; const Demo = () => { return ( <CopilotKit url="/api/copilotkit/openai"> <CopilotSidebar defaultOpen={true} labels={{ title: "Presentation Copilot", initial: "Hi you! 👋 I can give you a presentation on any topic.", }} clickOutsideToClose={false} onSubmitMessage={async (message) => { if (!globalAudioEnabled) { globalAudio.play(); globalAudio.pause(); } globalAudioEnabled = true; }} > <Presentation/> </CopilotSidebar> </CopilotKit> ); }; export default Demo; ``` 步驟11:導覽至http://localhost:3000/,點擊「開始」按鈕,您將被重定向到與聊天機器人整合的演示頁面,如下所示。  步驟12:給右側的聊天機器人一個提示,例如「在TypeScript上建立PowerPoint簡報」聊天機器人將開始產生回應,完成後,它將在頁面左側顯示產生的PowerPoint投影片,如下圖所示  步驟 13:關閉聊天機器人窗口,然後按一下新增投影片 + 按鈕將新投影片新增至 PowerPoint 簡報中,如下所示。  第 14 步:按一下「上一張」按鈕,您將導覽至上一張投影片。如果您按一下「下一步」按鈕,您將導覽至下一張投影片。  建立 PowerPoint 投影片 自動語音功能 ------------------------ 步驟1:在`present.tsx`檔案中,宣告一個名為`globalAudio`的變數,如下所示。 ``` let globalAudio: any = undefined; ``` 步驟2:在`Presentation`元件中,宣告一個`useEffect`鉤子,用一個新的**`Audio`**物件初始化**`globalAudio`** ,如下所示。 ``` useEffect(() => { if (!globalAudio) { globalAudio = new Audio(); } }, []); ``` 步驟 3:更新 useMakeCopilotActionable 掛鉤,透過 API 將 PowerPoint 幻燈片文字轉換為語音,如下所示。 ``` useMakeCopilotActionable( { name: "createNewPowerPointSlide", description: "create slides for a powerpoint presentation. Call this function multiple times to present multiple slides.", argumentAnnotations: [ { name: "slideTitle", type: "string", description: "The topic to display in the presentation slide. Use simple markdown to outline your speech, like a headline.", required: true, }, { name: "content", type: "string", description: "The content to display in the presentation slide. Use simple markdown to outline your speech, like lists, paragraphs, etc.", required: true }, { name: "speech", type: "string", description: "An informative speech about the current slide.", required: true, }, ], implementation: async (newSlideTitle, newSlideContent, speech) => { const newSlide: Slide = { title: newSlideTitle, content: newSlideContent }; const updatedSlides = [...allSlides, newSlide]; setAllSlides(updatedSlides); setCurrentSlideIndex(updatedSlides.length - 1); const encodedText = encodeURIComponent(speech); const url = `/api/tts?text=${encodedText}`; globalAudio.src = url; await globalAudio.play(); await new Promise<void>((resolve) => { globalAudio.onended = function () { resolve(); }; }); await new Promise((resolve) => setTimeout(resolve, 500)); }, }, [], ); ``` 步驟 4:更新 addSlide 函數,透過 API 將新的 PowerPoint 投影片文字轉換為語音,如下所示。 ``` // Add new slide function const addSlide = new CopilotTask({ instructions: "create a new slide", actions: [ { name: "newSlide", description: "Make a new slide related to the current topic.", argumentAnnotations: [ { name: "title", type: "string", description:"The title to display in the presentation slide.", required: true, }, { name: "content", type: "string", description:"The title to display in the presentation slide.", required: true, }, { name: "speech", type: "string", description: "An informative speech about the current slide.", required: true, }, ], implementation: async (newSlideTitle, newSlideContent, speech) => { const newSlide: Slide = { title: newSlideTitle, content: newSlideContent }; const updatedSlides = [...allSlides, newSlide]; setAllSlides(updatedSlides); setCurrentSlideIndex(updatedSlides.length - 1); const encodedText = encodeURIComponent(speech); const url = `/api/tts?text=${encodedText}`; globalAudio.src = url; await globalAudio.play(); await new Promise<void>((resolve) => { globalAudio.onended = function () { resolve(); }; }); await new Promise((resolve) => setTimeout(resolve, 500)); }, } ] }); ``` 步驟 5: 再次向聊天機器人發出「在 TypeScript 上建立 PowerPoint 簡報」提示,您應該會聽到簡報投影片的聲音。  建立圖像生成功能 -------- 步驟1:在present.tsx檔案中,新增一個名為backgroundImage的新屬性來鍵入介面Slide,如下所示。 ``` // Define slide interface interface Slide { title: string; content: string; backgroundImage: string; } ``` 步驟 2:更新 useMakeCopilotActionable 掛鉤以產生 PowerPoint 簡報投影片的圖片。 ``` useMakeCopilotActionable( { name: "createPowerPointSlides", description: "create slides for a powerpoint presentation. Call this function multiple times to present multiple slides.", argumentAnnotations: [ { name: "slideTitle", type: "string", description: "The topic to display in the presentation slide. Use simple markdown to outline your speech, like a headline.", required: true, }, { name: "content", type: "string", description: "The content to display in the presentation slide. Use simple markdown to outline your speech, like lists, paragraphs, etc.", required: true }, { name: "backgroundImage", type: "string", description: "What to display in the background of the slide (i.e. 'dog' or 'house').", required: true, }, { name: "speech", type: "string", description: "An informative speech about the current slide.", required: true, }, ], implementation: async (newSlideTitle, newSlideContent, newSlideBackgroundImage, speech) => { const newSlide: Slide = { title: newSlideTitle, content: newSlideContent, backgroundImage: newSlideBackgroundImage }; const updatedSlides = [...allSlides, newSlide]; setAllSlides(updatedSlides); setCurrentSlideIndex(updatedSlides.length - 1); const encodedText = encodeURIComponent(speech); const url = `/api/tts?text=${encodedText}`; globalAudio.src = url; await globalAudio.play(); await new Promise<void>((resolve) => { globalAudio.onended = function () { resolve(); }; }); await new Promise((resolve) => setTimeout(resolve, 500)); }, }, [], ); ``` 步驟 2:更新 addSlide 函數以產生新的 PowerPoint 簡報投影片的圖片。 **步驟3:**更新`slide.tsx`檔案中的`Slide`元件以透過[`unsplash.com`](http://unsplash.com/)產生映像 ``` // Add new slide function const addSlide = new CopilotTask({ instructions: "create a new slide", functions: [ { name: "newSlide", description: "Make a new slide related to the current topic.", argumentAnnotations: [ { name: "title", type: "string", description:"The title to display in the presentation slide.", required: true, }, { name: "content", type: "string", description:"The title to display in the presentation slide.", required: true, }, { name: "backgroundImage", type: "string", description: "What to display in the background of the slide (i.e. 'dog' or 'house').", required: true, }, { name: "speech", type: "string", description: "An informative speech about the current slide.", required: true, }, ], implementation: async (newSlideTitle, newSlideContent, newSlideBackgroundImage, speech) => { const newSlide: Slide = { title: newSlideTitle, content: newSlideContent, backgroundImage: newSlideBackgroundImage }; const updatedSlides = [...allSlides, newSlide]; setAllSlides(updatedSlides); setCurrentSlideIndex(updatedSlides.length - 1); const encodedText = encodeURIComponent(speech); const url = `/api/tts?text=${encodedText}`; globalAudio.src = url; await globalAudio.play(); await new Promise<void>((resolve) => { globalAudio.onended = function () { resolve(); }; }); await new Promise((resolve) => setTimeout(resolve, 500)); }, } ] }); ``` 步驟 3:更新 displayCurrentSlide 函數以將背景圖像新增至 PowerPoint 簡報投影片中。 ``` // Display current slide const displayCurrentSlide = () => { const slide = allSlides[currentSlideIndex]; return slide ? ( <div className="h-screen flex flex-col justify-center items-center text-5xl text-white bg-cover bg-center bg-no-repeat p-10 text-center" style={{ backgroundImage: 'url("https://source.unsplash.com/featured/?' + encodeURIComponent(allSlides[currentSlideIndex].backgroundImage) + '")', textShadow: "1px 1px 0 #000, -1px -1px 0 #000, 1px -1px 0 #000, -1px 1px 0 #000", }} > <Markdown className="markdown">{slide.title}</Markdown> <Markdown className="markdown">{slide.content}</Markdown> </div> ) : ( <div className="h-screen flex flex-col justify-center items-center text-5xl text-white bg-cover bg-center bg-no-repeat p-10 text-center"> No Slide To Display </div> ); }; ``` **步驟 4:**前往 Web 應用程式,您應該會看到背景圖像已新增至 PowerPoint 投影片中。  結論 -- 總而言之,您可以使用 CopilotKit 建立應用內 AI 聊天機器人,該機器人可以查看當前應用程式狀態並在應用程式內執行操作。 AI 聊天機器人可以與您的應用程式前端、後端和第三方服務對話。 筆記: - 告訴聊天機器人要寫什麼 - 建立包含文字、圖片和自動語音的幻燈片。 這是全部實作程式碼: https://github.com/CopilotKit/CopilotKit/blob/mme/tools/CopilotKit/examples/next-openai/src/app/helloworld/page.tsx 你可以拿程式碼寫文章,一定要截圖。 確保按照邏輯實現的順序寫文章: - 首先,外部 React 元件( `page.tsx`中的`HelloWorld`元件) ``` - cover `CopilotKit` and `CopliotSidebar` ``` - 然後覆蓋`Presentation`反應元件而不加入 Copilot 功能 ``` - include the `Slide` react component ``` - 最後,在建立基本的 React 應用程式後,加入描述 Copilot 特定功能的部分( `useMakeCopilotReadable`和`useMakeCopilotActionable` ) - 最後,介紹生成音訊+影像的函數。保持描述非常簡短,只需說“我們透過瀏覽器audio-gen API產生音訊”和“我們透過[`unsplash.com`](http://unsplash.com/)產生圖像” 執行演示: - 請參閱文件/貢獻指南,以了解如何執行 CopilotKit 儲存庫中包含的範例應用程式:https://docs.copilotkit.ai/contribute/quickstart-contribute - 執行 - 前往`/helloworld`頁面 --- 結論 -- 總而言之,您可以使用 CopilotKit 建立應用內 AI 聊天機器人,該機器人可以查看當前應用程式狀態並在應用程式內執行操作。 AI 聊天機器人可以與您的應用程式前端、後端和第三方服務對話。 對於完整的源程式碼: https://github.com/TheGreatBonnie/aipoweredpresentation 感謝@theGreatBonnie 在本文中所做的出色工作。 別忘了...  {% cta https://github.com/CopilotKit/CopilotKit %} Star CopilotKit ⭐️ {% endcta %} --- 原文出處:https://dev.to/copilotkit/how-to-build-ai-powered-powerpoint-app-nextjs-openai-copilotkit-ji2
嗨,我是文斯 ------ 大家好,我是[Vince](https://twitter.com/hot_town) ,一位全球教育家轉型為 Web 開發人員。  上圖中間的就是我,當時我在肯亞北部從事農業教育計畫。  這些天,我正在建立業餘專案(如上圖所示的[Open SaaS)](https://opensaas.sh) ,並擔任開發人員關係工程師。 提升你的開發生涯 -------- 我必須承認,我即將向您呈現的「10個殘酷事實」不一定是事實,而是我在轉行過程中形成的觀點。我想我的獨特視角可能對有抱負的開發人員和其他職業轉換者有一定的價值。 眾所周知,對於那些想要尋找新職業而不走傳統教育路線的人來說,軟體開發是一個可行的選擇。正因為如此,而且事實上薪水往往非常好,我認為一部分做出轉變的人可能是出於錯誤的原因。 一旦你確立了自己的初級地位,通常很難知道你應該做什麼來推進你的職業生涯。正如我和我的同事在最近的[Reddit 貼文](https://www.reddit.com/r/webdev/comments/112im2m/senior_devs_what_are_the_most_damaging/)和[後續影片](/blog/2023/02/21/junior-developer-misconceptions)中討論的那樣,那裡有很多觀點(包括我的),而後輩往往會產生很多誤解。 因此,我列出了在開始從事科技職業時應考慮的事項。 10 個殘酷的事實 --------- 1 👎**如果你只是為了錢而做,你就不會成功。**確實,你不需要學位或任何人的許可才能在這個職業中取得進步,但你需要野心和精神耐力。需要真正的興趣來維持它們。 2 🧱**盡快開始建造。**找到您感興趣的問題並自行建立解決方案。為您使用的開源專案做出貢獻。一系列獨特的作品充分說明了您的能力。另外,沒有比經驗更好的老師了。 3 💰**您無需支付樣板、訓練營或課程的費用。**事實上,你最好自己解決問題,只有在真正陷入困境時才尋求幫助。那裡有大量的免費資源,當您在工作時,這些可能是唯一可以幫助您的東西。 --- 說到樣板,我們剛剛發布了[Open SaaS](https://opensaas.sh) ,這是一個完全免費、開源、功能豐富的 React + NodeJS SaaS 模板,可幫助您快速輕鬆地啟動 SaaS 應用程式。 [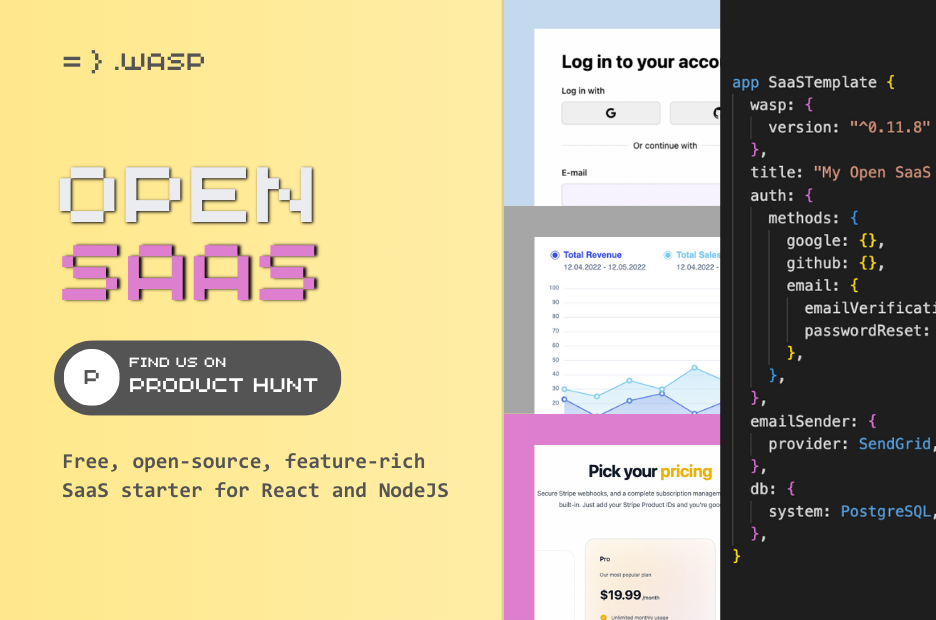](https://opensaas.sh) 如果您對此有疑問、需要幫助、反饋或靈感,請跳入[Discord 伺服器](https://discord.gg/zKFDFrsHa9)並介紹自己。 --- 4 😎**你不必跟隨潮流。跟隨你感興趣的。**正如我之前所說,從事這份工作需要有心理承受能力。追隨你的興趣會讓你保持專注並有助於避免倦怠。 5 👩💻**您不需要對一項技術瞭如指掌,這**與一些開發人員可能希望您相信的相反。事實是,你一直在學習,你的知識中總是會存在差距。重要的是您對能夠填補這些空白的信心。 6 😱**無所畏懼並尋求回饋。**把你的作品放在那裡,並準備好接受批評。如果你能忍受它,你就會成為一個更好的開發者。 7 🧐**你應該對自己在做什麼有深刻的體會。**不要只是複製貼上別人的答案(或 GPT 的答案)來解決您的問題,然後就到此為止。質疑事物為何有效,自己找出答案。 8 🏋️♀️**不幸的是,你必須做繁重的工作。不要一開始就期望高薪。**而且您可能希望透過在空閒時間從事業餘專案來改進您的作品集,或者您可能會比您希望的時間更長時間地擔任初級開發人員。 9 🧗♂️**挑戰自我。但不要太多。**如果你不尋求挑戰,你就不會進步。但如果你承擔的任務遠遠超出你目前的能力,你就會受苦。找到最佳位置,處理那些讓你感覺有點不舒服的事情,但你仍然可以集中註意力。堅持下去,一年後你會對自己所取得的成就感到驚訝。 10 🗣**程式設計絕對不是您需要的唯一技能。**尊重他人、善於溝通、認真負責、雄心勃勃和謙遜將使您處於不同的聯盟,並使您成為任何技術團隊中的寶貴資產。 現在開始工作吧! -------- 這就是我的總結。 對於這10個“真相”,你有何看法?我錯過了什麼?我是不是已經完全飽了💩?!請在下面的評論中告訴我們。 --- 原文出處:https://dev.to/wasp/10-hard-truths-junior-developers-need-to-hear-3j0e
管理社區是一項艱鉅的工作,但經過幾年的努力,它就變得容易了。這是我們社區的第一個月,我想向您展示我們迄今為止所取得的成就。 如果您打算經營一個社區甚至加入一個社區,本系列將以[地下室開發人員](https://discord.gg/basementdevs)為例向您展示如何衡量社區的健康狀況。 目錄 -- - [一、整體成就](#1-general-achievements) - [2. 人口統計](#1-demographics) ``` * [2.1 New Members](#21-new-members) ``` ``` * [2.2 Members Activation](#22-members-activation) ``` ``` * [2.3 Member Visits & Comunicators](#23-member-visits-amp-comunicators) ``` - [3. 活動](#3-events) - [4. 合作夥伴](#4-partnerships) - [5. 發佈內容](#5-published-content) - [6. 現在怎麼辦?](#6-what-now) 一、整體成就 ------ 首先,我要感謝加入社群的幾位讀者。現在我們有幾個波蘭人每天在那裡參與活動。 > 僅供參考:社群正在尋找像您這樣的成員,所以請盡快加入我們! :D  我們最新的每週例會人數達到了 71 人的高峰。 自從我們建立社群以來,我們的每週會議一直是討論新機會、專案和其他機會,並聽取成員意見的地方。 < 視訊控制樣式=“高度:100%;”> 您的瀏覽器不支援影片標籤。 說到社群回饋,我們的大多數成員都是想要習慣英語的巴西人,因此社群中製作的第一個專案是一個覆蓋層,用於將我們在每週會議中所說的所有內容從英語翻譯成巴西葡萄牙語!為[Pantotone](https://github.com/Pantotone)乾杯,這個神奇工具的創造者!  此外,由於我們開始建立專案,因此建立了一個新的 GitHub 組織來託管與我們社區相關的所有專案。不要忘記[關注我們的社區](https://github.com/basementdevs)以獲取最新的專案更新! 2. 人口統計 ------- 當我們談論成長時,我們談論的是數字!以下是**1 月 14 日至 2 月 12 日**的回顧。 ### 2.1 新成員 自 1 月 15 日起,我們的會員人數增加了一倍!目前我們的伺服器上有 2197 名活躍會員,其中許多人每天都在不同風格的語音頻道(小組或一對一)和文字頻道中練習英語。  ### 2.2 會員激活 我們本月將研究的指標之一是新成員的“激活”,即他們了解社區的含義以及為什麼它非常適合他們。  我們在第一個月做得很好,你可以看到圖表直接到底部,但這只是因為上週我們在巴西舉辦了**狂歡**節,所以這是預料之中的,我們的巴西開發商值得參加這個令人驚嘆的活動和一個愉快的假期。 ### 2.3 會員來訪及溝通  我們的平均溝通者數量或參與度是 8%。我們的目標是到 3 月底達到 15%。我們要怎麼做呢?我還不知道,但有了這份每週活動列表,這應該是個不錯的選擇。 3. 活動 ----- 活動是我們社區的核心,上個月舉辦了 16 場預先安排的活動,分為 5 個模式: - **地下室會議:**我們的每週會議於每週二晚上 07:00 BRT 舉行。其目的是分享我們社區的計劃、宣布新的合作夥伴關係、向成員通報最新訊息,當然還有練習英語。 - **和雷納託一起練習:**每週三,我們的社區都會聚在一起和雷納託一起練習英語。在這次練習中,我們的成員會得到一個主題,每個人都與雷納托就這個主題進行對話,總是引入新單字來擴大社群的詞彙量。 - **與JP一起旅行:**在本次會議中,我們的會員將與JP一起計劃他們的夢想旅行,討論費用、參觀地點、當地美食等等!快來和我們一起規劃您的旅程。 - **與李奧納多一起練習:**每週四早上,我們的社區都會與李奧納多一起參加英語練習課程。參與者被分配一個主題並與李奧納多對話,融入新單字建立詞彙量。 - **Coding Dojo:**二月初,我們推出了 Basement Coding Dojo,這是一項社群成員在模擬衝刺期間在開發團隊中扮演角色的活動。我們的第一個 Dojo 開發團隊由[Gabriel](https://github.com/gvieiragoulart) 、 [Lorena](https://github.com/Lorenalgm) 、 [Lucas](https://github.com/lucas-pace) 、 [Pedro](https://github.com/pedrovian4) 、 [Renato](https://github.com/reenatoteixeira)和[Yuri](https://github.com/yurastico)組成。在一個月的時間裡,團隊的目標是建立一個簡單但完整的應用程式,從事設計、後端和前端工作,參加每週會議並與開源專案互動。您可以在[此存儲庫](https://github.com/basementdevs/english-coding-dojo)中找到有關此事件的更多資訊。 4. 合作夥伴 ------- 現在我們最大的目標是找到HR公司甚至是正在積極招募開發人員的公司。 這個月,我們的目標是建立一個人口統計資料,提供更多有關有趣事物的訊息,為我們的會員帶來這些機會,例如:資歷、堆疊等。到目前為止,我們已經取得了一些成果,但還沒有什麼意義,因為這對我們來說是一種新方法。  如果您的公司有空缺職位,請發送電子郵件至 [email protected],我會將其轉發給我們最好的會員進行申請! 5. 發佈內容 ------- 上個月,我們社群的成員在這個平台上發表的文章獲得了多項認可。我們想重點介紹以下文章,這些文章是其發布週中最相關的文章(前 7 名)。 {% 嵌入 https://dev.to/danielhe4rt/database-101-how-to-model-leaderboards-for-1m-players-game-2pfa %} 「在他的『Database 101』系列的最新一期中,@danielhe4rt 探索了為擁有100 萬玩家的遊戲排行榜建模的複雜藝術。本文借鑒開源節奏遊戲YARG 的個人經驗並利用ScyllaDB 的效率,深入研究了查詢驅動的資料建模和寬列資料庫概念,為製作高性能排行榜提供了全面的指南。” {% 嵌入 https://dev.to/reenatoteixeira/everything-that-you-need-to-know-about-git-2440 %} 「透過這份全面的初學者指南,探索GIT 的程式碼版本控制世界!這篇突破性文章由首次DEV 貢獻者@reenatoteixeira 撰寫,精心解開了GIT 的所有要點,確保學習之旅順利進行。具有清晰的解釋和詳細的步驟-通過逐步指導,您將掌握 GIT 的藝術,為您提供無縫的版本控制功能。” {% 嵌入 https://dev.to/kecbm/staircase-detail-112g %} 透過我們的貢獻者@kebcm 建立的這個精彩的分步教程,了解如何為初學者在編程中建立樓梯!樓梯是由一系列台階形成的視覺表示,每個台階都由 # 字元表示。探索如何建立列印自訂尺寸樓梯的函數。 {% 嵌入 https://dev.to/anthonyvii/be-a-better-developer-with-these-git-good-practices-2dim %} 如果您是開發人員,您可能會經常使用 Git。無論是單獨還是團隊開發,這對於應用程式開發都至關重要。但許多人都在與混亂的儲存庫和不清楚的提交訊息/分支名稱作鬥爭。學好 Git 並堅持最佳實踐是職業發展的關鍵之一。 6. 現在怎麼辦? --------- 到目前為止,我們的社區正在以一種我們意想不到的方式發展,但仍然以健康的方式發展。許多以前從未嘗試過**技術英語**的人已經邁出了練習的第一步,並開始**看到新的可能性**,這就是我們需要的燃料。 如果您想成為這一變革之旅的一部分,請加入我們的[Discord 伺服器](https://discord.gg/basementdevs),並且不要忘記喜歡和評論本文! 歡迎任何讓我們的社區變得更好的建議,好嗎?保持水分,下個月見! > 順便說一句,**雷納托**和**安東尼**在這份報告中幫助我乾杯:D --- 原文出處:https://dev.to/danielhe4rt/what-weve-achieved-with-1-month-of-basement-devs-3pec
DevOps 是 IT 產業中一個快速發展的領域。作為一名 DevOps 工程師,跟上開發空間以避免落後至關重要。 GitOPs 是該領域已經發展成熟的流行範例。 **GitOps**是一種 DevOps 框架或實踐,透過它,我們使 Git 儲存庫成為單一事實來源,同時將 CI/CD 和版本控制應用於基礎設施自動化。 [紅帽](https://www.redhat.com/en/topics/devops/what-is-gitops)將其定義為「使用 Git 儲存庫作為單一事實來源來交付基礎設施即程式碼」。 另一方面, **[DevSecOps](https://aws.amazon.com/what-is/devsecops/#:~:text=DevSecOps%20is%20the%20practice%20of,is%20both%20efficient%20and%20secure.)**是 DevOps 的新改進版本,它在 SDLC(軟體開發生命週期)中灌輸安全工具和控制措施。 devsecops 方法的主要目標是“將安全性左移”,即安全性應該從一開始就成為開發生命週期的一部分,而不是事後才想到。 在本專案指南中,我們將應用 GitOps 實踐,同時實作包含許多工具的高階端對端 DevSecOps 管道。 專案概況 ==== 這是一個由兩部分組成的專案。在第一部分中,我們將設定執行 CI 管道的 EC2 執行個體。 **若要了解如何使用 jenkins 建立標準的持續整合管道,請按[此處](https://dev.to/kelvinskell/a-practical-guide-to-building-a-standard-continuous-integration-pipeline-with-jenkins-2kp9)。** 在第二部分中,我們將設定 EKS 叢集、ArgoCD 用於持續交付,並配置 Prometheus 和 Grafana 用於應用程式監控。 在這個專案中,我們將涵蓋以下內容: **- 基礎架構即程式碼:**我們將使用 terraform 來設定我們的 EC2 執行個體以及 EKS 叢集。 **- Jenkins 伺服器設定:**在 Jenkins 伺服器上安裝和設定基本工具,包括 Jenkins 本身、Docker、OWASP 相依性檢查、Sonarqube 和 Trivy。 **- EKS 叢集部署:**利用 Terraform 建立 Amazon EKS 叢集,這是 AWS 上的託管 Kubernetes 服務。 **- 負載平衡器配置:**為 EKS 叢集配置 AWS 應用程式負載平衡器 (ALB)。 **- ArgoCD 安裝:**安裝並設定 ArgoCD 以實現持續交付和 GitOps。 **- Sonarqube 整合:**整合 Sonarqube 以在 DevSecOps 管道中進行程式碼品質分析。 **- 監控設定:**使用 Helm、Prometheus 和 Grafana 實現對 EKS 叢集的監控。 **- ArgoCD應用程式部署:**使用ArgoCD部署微服務應用程式,包括資料庫和入口元件。 第一部分:設定 CI 管道 ============= **- 第 1 步:設定 EC2 執行個體** 克隆[Git 儲存庫](https://github.com/Kelvinskell/microservices-devops-1)。 `cd`進入 terraform 目錄。 執行`terraform init` ,然後執行`terraform plan`以查看建議的基礎架構變更。 執行`terraform apply`來實作這些變更並配置實例。 此實例使用使用者資料進行引導,一旦配置完畢,將自動安裝 jenkins、sonarqube、trivy 和 docker。  **- 步驟2:修改應用程式程式碼** 這是一個簡單但關鍵的步驟。在您剛剛複製的儲存庫中包含的**Jenkinsfile**中,您必須將所有出現的「 **kelvinskell** 」變更為您的 DockerHub 使用者名稱。如果您想自己實施這個專案,這是非常有必要的。 **- 第 3 步:設定 Jenkins 伺服器** - 在瀏覽器上登入jenkins伺服器。  - 安裝建議的插件並完成註冊。 - 前往“管理Jenkins”、“插件”,然後安裝以下插件:Docker、Docker Commons、Docker pipeline、SonarQube Scanner、Sonar 品質門、SSH2 Easy、OWASP 依賴項檢查、OWASP Markup Formatter 插件、GitHub API pluin 和GitHub pipeline插件。  - 設定工具:前往 Dashborad > 管理 jenkins > 工具 **git安裝**  **聲納掃描器安裝**  **依賴性檢查**  **Docker安裝**  **- 第 4 步:配置 SonarQube** - 在瀏覽器上,連接到連接埠 9000 上的 Jenkins 伺服器 IP 位址並登入伺服器。 預設使用者名稱和密碼是“admin”。  登入後,按一下“手動”。  請按照上圖中的說明操作,然後按一下「設定」。 **注意:**您的專案金鑰必須完全是**newsread-microservices-application** 。這樣,您就不必編輯 Jenkinsfile。 - 選擇**“With Jenkins”**並選擇 GitHub 作為 DevOps 平台。  - 點擊**“配置分析”** ,在步驟3中,複製“sonar.projectKey”,稍後您將需要它。  - 點選「帳戶」>「我的帳戶」>「產生令牌」。 為其命名並點擊“生成”。  - 前往“管理 Jenkins”>“憑證” - 選擇 Secret tex 並貼上您剛剛複製的令牌。  - 現在前往 Jenkins 儀表板 > 設定 Jenkins > 系統 > Sonarqube 伺服器 > 新增 Sonarqube - 將其命名為“SonarQube Server”,輸入秘密令牌的伺服器 URL 和憑證 ID。 請注意,我們的伺服器 url 是 localhost,因為 SonarQube 與 jenkins 託管在同一台伺服器上。  - 點選“儲存”。 **- 第 5 步:整合您的 DockerHub 憑證** 此階段對於 Jenkins 存取您的 DockerHub 帳戶至關重要。 - 前往“管理 Jenkins”>“憑證”>“新增憑證”  **- 第 6 步:設定 Jenkins 管道** - 從 Jenkins 的儀表板中,按一下「新專案」並建立管道作業。  - 在“建置觸發器”下,選擇“觸發遠端建置”。  在「身份驗證令牌」方塊下設定秘密令牌。我們將在建立 GitHub Webhook 時使用它。 - 在管道下,確保參數設定如下: - 定義:來自 SCM 的管道腳本 - SCM:設定您的 SCM。確保只建立您的主分支。例如,如果您的主分支名為“main”,請將“\*/main”放在要建置的分支下。 - 腳本路徑:Jenkinsfile  **注意:**您必須將我的[儲存庫](https://github.com/Kelvinskell/microservices-devops-1)分叉到您自己的 GitHub 帳戶。這是您存取儲存庫並能夠對其進行配置所必需的。 完成此操作後,建立 GitHub 個人存取權杖。 我們將使用 GitHub PAT 從 Jenkins 向我們的儲存庫進行身份驗證。 - 連接到 EC2 實例,切換到 jenkins 用戶,建立 SSH 金鑰對。公鑰將作為您的 PAT 上傳到 GitHub,而私鑰將加入到我們的 Jenkins 配置中。  - 返回 Jenkins 伺服器,點擊“新增憑證”  錯誤訊息現已消失。  - 點選“儲存”。 **- 第 7 步:建立 GitHub WebHook** 這對於遠端觸發我們的詹金斯建置是必要的。 - 前往儲存庫的 GitHub Webhook 建立頁面並輸入以下資訊: URL:輸入以下 URL,根據需要替換 \*\*\* 之間的值: ``` ***JENKINS_SERVER_URL***/job/***JENKINS_JOB_NAME***/build?token=***JENKINS_BUILD_TRIGGER_TOKEN*** ```  **- 第 8 步:執行管道** 現在,我們已經完成了該管道的配置。是時候檢驗我們的工作了。 您可以透過進行變更並推送到 GitHub 儲存庫來觸發管道。如果正確配置了 Web hook 觸發器,這將自動啟動管道。 或者,您只需點擊“立即建置”即可執行管道。 如果一切都按預期配置,您將得到以下輸出:  結論 -- 我們現在已經結束了這個專案的第一部分。在第一部分中,我們配置並設定了持續整合管道。第二部分將涉及使用 ArgoCD 實施 GitOps。 我們將使用 terraform 配置 EKS 集群,然後使用 ArgoCD 持續部署到 EKS 集群。 這裡的想法是,您可以讓單獨的團隊管理流程的兩個部分 - 持續整合和持續部署。從而進一步解耦和簡化整個過程,同時使用 Git 作為我們的單一事實來源。 **PS:**我願意接受遠距 DevOps、雲端和科技寫作機會。 在[LinkedIn](https://linkedin.com/in/kelvin-onuchukwu-3460871a1)上與我聯絡。 --- 原文出處:https://dev.to/kelvinskell/advanced-end-to-end-devops-project-deploying-a-microservices-app-to-aws-eks-using-terraform-helm-jenkins-and-argocd-part-i-3a53
介紹 -- 過去一年,生成式人工智慧一直是科技領域的熱門話題。每個人都在使用它來建造很酷的專案。谷歌有自己的生成人工智慧,稱為 Gemini。 最近,Google 為 Gemini 開發者推出了 API。它附帶了幾個庫和框架,開發人員可以使用它們將其合併到他們的應用程式中。 在本文中,我們將建立一個簡單的 Node.js 應用程式並將 Google Gemini 整合到其中。我們將使用[**Google Gemini SDK**](https://www.npmjs.com/package/@google/generative-ai) 。 那麼,事不宜遲,讓我們開始吧! 什麼是雙子座? -------  Google Gemini 是由 Google AI 開發的強大且多方面的 AI 模型。 Gemini 不僅處理文字;也處理文字。它可以理解和操作各種格式,如程式碼、音訊、圖像和視訊。這為您的 Node.js 專案帶來了令人興奮的可能性。 專案設定: ----- ### **1.建立Node.js專案:** 要啟動我們的專案,我們需要設定 Node.js 環境。那麼,讓我們建立一個節點專案。在終端機中執行以下命令。 ``` npm init ``` 這將初始化一個新的 Node.js 專案。 ### 2.安裝依賴項: 現在,我們將安裝專案所需的依賴項。 ``` npm install express body-parser @google/generative-ai dotenv ``` 這將安裝以下軟體包: - express:流行的 Node.js Web 框架 - body-parser:用來解析請求體的中介軟體 - @google/generative-ai:用於存取 Gemini 模型的套件 - dotenv:從 .env 檔案載入環境變數 ### 3.**設定環境變數:** 接下來,我們將建立一個`.env`資料夾來安全地儲存 API 憑證等敏感資訊。 ``` //.env API_KEY=YOUR_API_KEY PORT=3000 ``` ### 4.**取得API金鑰:** 在使用 Gemini 之前,我們需要從 Google Developers Console 設定 API 憑證。為此,我們需要註冊 Google 帳戶並建立 API 金鑰。 登入後,前往<https://makersuite.google.com/app/apikey> 。我們會得到這樣的結果:  然後我們將點擊“建立 API 金鑰”按鈕。這將產生一個唯一的 API 金鑰,我們將使用它來驗證對 Google Generative AI API 的請求。 > 要測試您的 API,您可以執行以下 Curl 命令: > > ```javascript > 捲曲\\ > -H '內容類型:application/json' \\ > -d '{"contents":\[{"parts":\[{"text":"寫一個關於魔法背包的故事"}\]}\]}' \\ > -X POST https://generativelanguage.googleapis.com/v1beta/models/gemini-pro:generateContent?key=YOUR\_API\_KEY > ```` > > 將`YOUR_API_KEY`替換為我們先前獲得的實際 API 金鑰。 取得 API 金鑰後,我們將使用 API 金鑰更新`.env`檔。 ### 5. 建立 Express 伺服器: 現在,我們將在根目錄中建立一個`index.js`檔案並設定一個基本的express 伺服器。請看下面的程式碼: ``` const express = require("express"); const dotenv = require("dotenv"); dotenv.config(); const app = express(); const port = process.env.PORT; app.get("/", (req, res) => { res.send("Hello World"); }); app.listen(port, () => { console.log(`Server running on port ${port}`); }); ``` 在這裡,我們使用“dotenv”套件從`.env`檔案存取連接埠號碼。 在專案的頂部,我們使用`dotenv.config()`載入環境變數,使其可以在整個檔案中存取。 ### 6. 執行專案: 在此步驟中,我們將向`package.json`檔案新增一個啟動腳本,以輕鬆執行我們的專案。 因此,將以下腳本新增至 package.json 檔案中。 ``` "scripts": { "start": "node index.js" } ``` package.json 檔案應如下所示:  要檢查一切是否正常,讓我們使用以下命令執行該專案: ``` npm run start ``` 這將啟動 Express 伺服器。現在如果我們造訪這個 URL <http://localhost:3000/>我們會得到:  驚人的!專案設定已完成並且執行完美。接下來,我們將在下一節中將 Gemini 加入我們的專案中 新增Google雙子座: ------------ ### 1. 設定路由和中介軟體: 要將 Gemini 新增至我們的專案中,我們將建立一個`/generate`路由,以便與 Gemini AI 進行通訊。 為此,將以下程式碼新增至`index.js`檔案。 ``` const bodyParser = require("body-parser"); const { generateResponse } = require("./controllers/index.js"); //middleware to parse the body content to JSON app.use(bodyParser.json()); app.post("/generate", generateResponse); ``` 在這裡,我們使用`body-parser`中間件將內容解析為 JSON 格式。 ### 2.設定Google Generative AI: 現在,我們將建立一個控制器資料夾,並在其中建立一個`index.js`檔案。在這裡,我們將建立一個新的控制器函數來處理上面程式碼中聲明的生成路由。 ``` const { GoogleGenerativeAI } = require("@google/generative-ai"); const dotenv = require("dotenv"); dotenv.config(); // GoogleGenerativeAI required config const configuration = new GoogleGenerativeAI(process.env.API_KEY); // Model initialization const modelId = "gemini-pro"; const model = configuration.getGenerativeModel({ model: modelId }); ``` 在這裡,我們透過傳遞環境變數中的 API 金鑰來為 Google Generative AI API 建立一個配置物件。 然後,我們透過向配置物件的`getGenerativeModel`方法提供模型 ID(“gemini-pro”)來初始化模型。 > #### **型號配置:** > > 我們也可以依照自己的方便配置模型參數 > > 這些參數值控制模型如何產生回應。 > > 例子: > > ```javascript > 常量產生配置 = { > 停止序列:\[“紅色”\], > 最大輸出令牌:200, > 溫度:0.9, > 頂部P:0.1, > 頂級K:16, > }; > > const model = configuration.getGenerativeModel({ model: modelId, GenerationConfig }); > ```` > #### **安全設定:** > > 我們可以使用安全設定來防止有害的反應。預設情況下,安全性設定配置為阻止在各個維度上具有中等到高可能性不安全的內容。 > > 這是一個例子: > > ```javascript > const { HarmBlockThreshold, HarmCategory } = require("@google/generative-ai"); > > 常量安全設定 = \[ > { > ``` > category: HarmCategory.HARM_CATEGORY_HARASSMENT, > > ``` > ``` > threshold: HarmBlockThreshold.BLOCK_ONLY_HIGH, > > ``` > }, > { > ``` > category: HarmCategory.HARM_CATEGORY_HATE_SPEECH, > > ``` > ``` > threshold: HarmBlockThreshold.BLOCK_MEDIUM_AND_ABOVE, > > ``` > }, > \]; > > const model = genAI.getGenerativeModel({ model: "MODEL\_NAME", safetySettings }); > ```` > > 透過這些安全設置,我們可以透過最大限度地減少有害內容生成的可能性來增強安全性。 ### 3. 管理對話歷史記錄: 為了追蹤對話歷史記錄,我們建立了一個陣列`history`並將其從控制器檔案中匯出: ``` export const history = []; ``` ### 4.**實現控制器功能:** 現在,我們將編寫一個控制器函數`generateResponse`來處理產生路由(/generate)並產生對使用者請求的回應。 ``` /** * Generates a response based on the given prompt. * @param {Object} req - The request object. * @param {Object} res - The response object. * @returns {Promise} - A promise that resolves when the response is sent. */ export const generateResponse = async (req, res) => { try { const { prompt } = req.body; const result = await model.generateContent(prompt); const response = await result.response; const text = response.text(); console.log(text); history.push(text); console.log(history); res.send({ response: text }); } catch (err) { console.error(err); res.status(500).json({ message: "Internal server error" }); } }; ``` 在這裡,我們從請求正文中獲取提示,並使用`model.generateContent`方法根據提示產生回應。 為了追蹤響應,我們將響應推送到歷史陣列。 ### 5. 查看回覆紀錄: 現在,我們將建立一條路線來檢查我們的回應歷史記錄。該端點傳回`history`陣列。 將簡單程式碼加入`./index.js`資料夾中。 ``` app.get("/generate", (req, res) => { res.send(history); }); ``` 我們就完成了! ### 6.執行專案: 現在,我們必須檢查我們的應用程式是否正常運作! 讓我們使用以下命令來執行我們的專案: ``` npm run start ``` 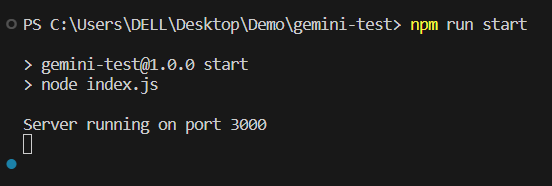 沒有錯誤!感謝上帝! :) 它運作正常。 ### 7. 檢查功能 接下來,我們將使用 Postman 發出 Post 請求來驗證我們的控制器功能。 我們將使用以下 JSON 負載向<http://localhost:3000/generate>發送 POST 請求: ``` { "prompt": "Write 3 Javascript Tips for Beginners" } ``` 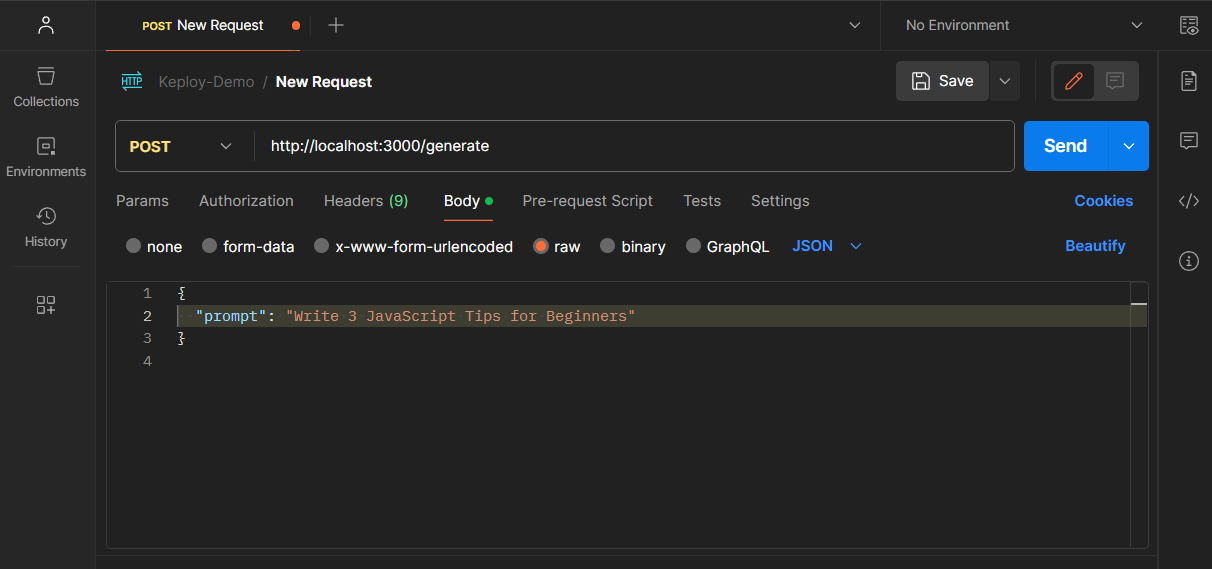 我們得到了回應: ``` { "response": "1. **Use console.log() for Debugging:**\n - console.log() is a useful tool for debugging your JavaScript code. It allows you to inspect the values of variables and expressions, and to see how your code is executing. This can be especially helpful when you encounter errors or unexpected behavior in your program.\n\n2. **Learn the Basics of Data Types:**\n - JavaScript has several built-in data types, including strings, numbers, booleans, and objects. Understanding the properties and behaviors of each data type is crucial for writing effective code. For instance, strings can be manipulated using string methods, while numbers can be used in mathematical operations.\n\n3. **Use Strict Mode:**\n - Strict mode is a way to opt-in to a restricted and secure subset of JavaScript. It helps you to write more secure and reliable code, as it throws errors for common mistakes that would otherwise go unnoticed in regular JavaScript mode. To enable strict mode, simply add \"use strict;\" at the beginning of your JavaScript file or module." } ``` 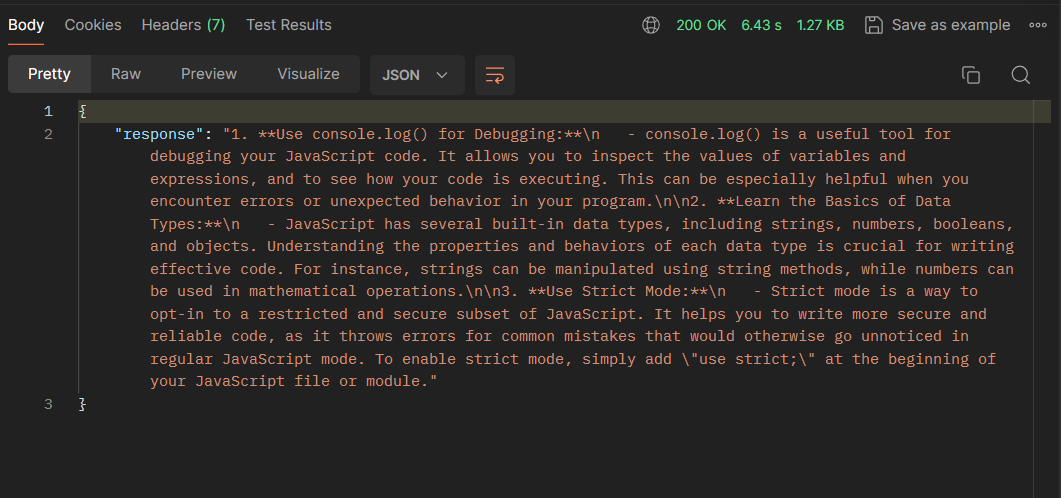 偉大的!我們的 Gemini AI 整合正在按預期工作! 此外,我們可以造訪[http://localhost:3000/generate 的](http://localhost:3000/generate)歷史記錄端點來查看對話歷史記錄。 這樣,我們就將 Gemini AI 整合到了 Node.js 應用程式中。在接下來的文章中,我們將探索 Gemini AI 的更多用例。 到那時,請繼續關注! 結論 -- 如果您發現這篇部落格文章有幫助,請考慮與可能受益的其他人分享。您也可以關注我,以了解更多有關 Javascript、React 和其他 Web 開發主題的內容。 要贊助我的工作,請存取: [Arindam 的贊助頁面](https://arindam1729.hashnode.dev/sponsor)並探索各種贊助選項。 在[Twitter](https://twitter.com/intent/follow?screen_name=Arindam_1729) 、 [LinkedIn](https://www.linkedin.com/in/arindam2004/) 、 [Youtube](https://www.youtube.com/channel/@Arindam_1729)和[GitHub](https://github.com/Arindam200)上與我聯絡。 感謝您的閱讀:)  --- 原文出處:https://dev.to/arindam_1729/how-to-use-google-gemini-with-nodejs-2d39
你能在 4 小時內完成你的作品集嗎? 聽起來很瘋狂,對吧? > 您的作品集是一個展示您最好的作品、個性和才能的網站。您可以被雇用,人們可以更多地了解您。 建立一個好的投資組合需要遵循各種規則,而條件取決於您的職業。例如,使用者體驗設計師與軟體開發人員的情況可能完全不同。 ### 我認為一個好的作品集應該是什麼樣的。 對我來說,這三件事對於一個好的作品集是必不可少的。 應該很**簡單**。**在職的**。**專業的**。 - 存取作品集的人的體驗應該很好。 - 此人應該能夠與您聯繫(通常是聯絡表單)。 - 作品集應該有一個故事和一點個人風格。 - 它應該放在網域上以提高可信度。 - 它不應該有太多會破壞這一刻的花俏動畫。 ### 為什麼你應該製作一個投資組合? 擁有作品集是一種常見的做法,尤其是當您有多個東西要展示時。 > 並非每個人都有時間或資源來製作完全適合自己需求的獨特投資組合。 嗯,你不應該。 在這個不斷發展的世界中沒有必要。 沒有非常容易使用的程式碼工具。 但是你能在一天甚至一小時內製作出作品集嗎? 我們無法製作最好的作品集,但我們可以製作一個效果良好的體面作品集。 如果您不喜歡這個也沒關係,因為我知道製作具有自己獨特風格的作品集需要花費很多時間。 每個人都有自己的經歷,每個人都試圖根據我們多年來所學到的知識互相幫助。 一點注意 ---- 我是使用者體驗法則的忠實粉絲,知道如何才能做到優秀。 我不會介紹像 Bubble、Framer、Wix 和 Squarespace 這樣的無程式碼工具,因為它們已經很流行了。 --- 我管理多個社群檔案,因此我總是糾結於將觀眾引導至哪些社群媒體。 大多數人都在努力擁有多個配置文件,您一定聽說過`linkfree`或`bento` 。 您不僅僅是一系列關於您的連結。 你必須講述你的故事。這個故事很重要。 作品集是實現這一目標的最佳方式,因此這裡有一些工具,對於想要快速獲得具有良好使用者體驗的作品集的人來說將很有幫助。 您可以使用每個選項連接到您的網域。 我敢打賭這篇文章會讓你大吃一驚。 那我們就開始吧。 --- 1.[聚合工作](https://www.polywork.com/invite/anmol_baranwal-voltorb) ---------------------------------------------------------------- Polywork 是 2022 年最好的產品之一。 它可以在幾秒鐘內將您的 LinkedIn 個人資料轉換為個人網站。 我是 Polywork 的忠實粉絲,因為製作獨特風格的作品集是多麼容易。它有一個圖形編輯器,可以讓你建立部分,你也可以在後台使用人工智慧。 相信我,這就是您所需要的一切。  最棒的是它是免費的,您可以以大約 96 美元購買一年。考慮到您將透過高級版本解鎖所有新`fonts` 、 `layouts`和`colors` ,這是一個相當不錯的交易。 這是來自其中一個模板。酷吧 :D  在免費版本中,您將獲得一個按鈕來隨機化您的作品集(不同的主題和佈局)。一定要嘗試! 您可以加入這樣的個人化連結。  您可以建立亮點以及「關於我」、「社交連結」和個人化「標題」等部分。此外,還有超過 1,000 種針對不同個人資料量身定制的徽章供您選擇。  開箱即用的是,您可以控制您的`social card` 、 `metadata` ,甚至頁面`title` 。這使您可以完全控制,使您的投資組合看起來真實。  有很多話要說,但最方便的功能是有人可以多快與您聯繫。 就好像在短短幾秒鐘內,讓我們面對現實吧,這正是每個投資組合所需要的。  您可以查看我的[Polywork 個人資料](https://www.polywork.com/anmolbaranwal)作為樣本。  關於 Polywork 的最佳簡介之一來自 Craftwork 的共同創辦人[Mike Bifulco](https://www.polywork.com/irreverentmike) 。一探究竟! > 在 Polywork 上創造一個好的作品集甚至不需要超過 4 小時。 2.[來自珍珠](https://peerlist.io/anmolbaranwal/signup) -------------------------------------------------- 我加入 Peerlist 已經幾個月了。我也是他們的測試版行動用戶之一。 除了可以使用同行清單做的其他事情之外,您還可以在網域上製作良好的投資組合。 讓我們討論其中的一些。   您可以在一個設定檔中包含所有內容。 - GitHub 個人資料、貢獻和固定儲存庫 - DEV + Hashnode + Medium 部落格文章 - YouTube影片 - 子堆疊 + RSS 來源 - Codeforces 和其他編碼設定文件 - 您甚至可以從 Product Hunt 加入您的狩獵或製造商產品 基本上一切:D   對等列表上還有一個集合的概念。我在其他地方見過這些,但是將這些放在您的個人資料中確實很棒。 您可以在一個地方新增社交資料卡。 以及您推薦的影片、書籍、播客或自訂內容。  您甚至可以找到工作並通過您的簡歷和經驗進行驗證。  您還可以做的另一件事是為某人提供擔保,這可以提高可信度並讓您在個人資料中具有明顯的優勢。它與LinkedIn上的推薦類似,但他們在卡片上做了一些創意。  您可以免費將您的個人資料連接到您的自訂網域。所以,這就是你的投資組合的樣子。  順便說一句,如果您想知道 -> 您的社交連結將位於底部。 您甚至可以讓您的專案在同行清單中受到關注:D 牽涉的事情很多,我無法一一列舉。 我將在後面的文章中介紹 Peerlist 中令人興奮的內容。 請注意! 3.[展示](https://www.showwcase.com/) ---------------------------------- Showwcase 的主要目標是建立一個強大的開發者社群。 Showwcase 是我幾個月前使用的第一個。  一種簡單而強大的方式來展示您的故事。 最獨特的功能之一是您可以與 Stripe 連接,並且可以從付費追蹤者那裡賺錢。多麼酷啊? 這些是您可以在自訂部分之外製作的一些部分。  您可以輕鬆加入社交連結並查看一些很棒的社區,例如`Open Source` 、 `Hackathons` 、 `Internships` 、 `Portfolios`等等。  您可以獲得推薦,甚至可以加入合作者,這是一件很划算的事情。我從一開始就對此感到驚訝。  您可以使用您的個人連結產生並製作適合 ATS 的簡歷。 例如,您可以[在這裡](https://www.showwcase.com/anmol-baranwal/resume/ats)找到我的。它使用網站資訊。順便說一下,我的個人資料沒有更新:D 這個社群非常龐大,我已經加入 Showwcase 幾個月了。  您可以在[anmol-baranwal.showwcase.com](https://anmol-baranwal.showwcase.com/)查看我的展示個人資料 請參閱 Showwcase 執行長[Rong](https://www.showwcase.com/tianrongliew)的簡介。 您可以在 Showwcase 進行招募和受聘。 我不喜歡簡歷功能,該功能只是從個人資料中收集資料。有履歷會更有利。 但 Showwcase 已經提供了超出您所需的功能。 4.[閱讀](https://read.cv/) ------------------------ 這是製作作品集的另一種方式。我喜歡 Read 的使用者介面。 最好的事情是有人可以隨時隨地與您聯繫,並且很容易找到帶有甜蜜表情符號的聯繫按鈕。它實際上鼓勵人們使用該聯繫部分。  您可以在 ReadCV 上查看[Edmundo Santos](https://read.cv/edmundo)的個人資料。非常棒。 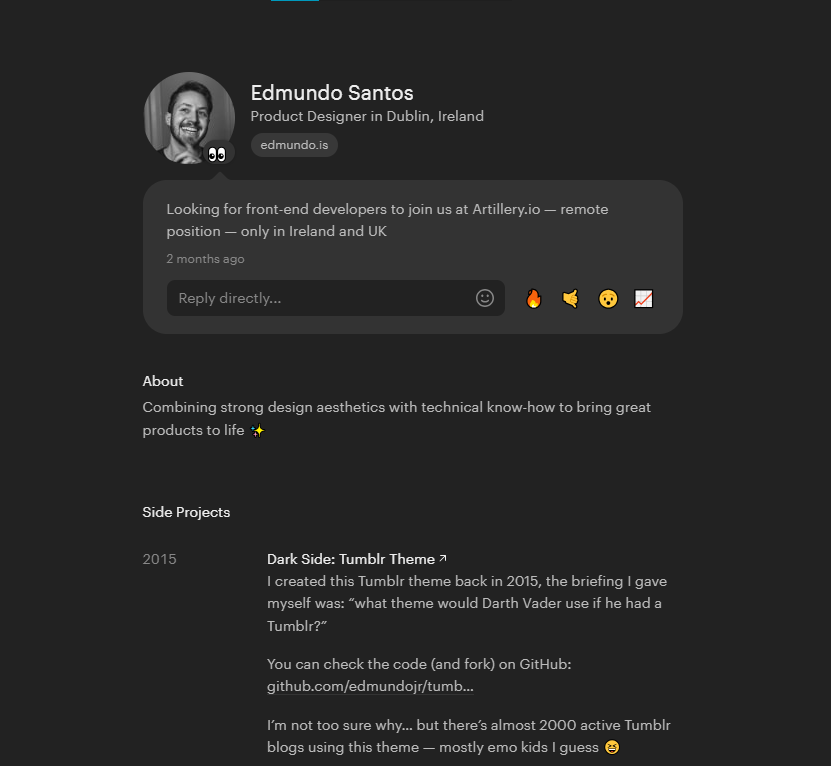 有各種各樣的部分,如社交聯繫、經驗、副專案、演講、寫作等等。  您可以加入的部分數量令人難以置信。它為您在各個部分提供了很大的靈活性。  當然,還有職位列表和自訂網域,您可以將您的個人資料連結到其中。 佈局是固定的,但足以讓您入門。 我見過很多偉大的人使用“閱讀”作為他們的首選個人資料! --- 這些是您可以使用的一些很棒的資源。 - [超過 25 個帶有程式碼的令人驚嘆的作品集](https://dev.to/anmolbaranwal/stunning-portfolios-that-will-blow-your-mind-fuel-your-creativity-226o) - [無需編碼即可建立令人驚嘆的網站的 20 個工具](https://dev.to/anmolbaranwal/20-game-changing-website-builders-to-build-classy-websites-without-coding-4ll7) - [開發人員的最小組合模板](https://github.com/cobiwave/simplefolio)- GitHub 上有 13k Stars --- 當您將個人資料連接到網域時,沒有人有時間查看您是否自己製作了作品集。只要它對你有用,那就太棒了。 你覺得有用嗎? 除了 ReadCV(新手)之外,我已經嘗試了這些方法好幾個月了,直到那時我才讓你知道。 順便說一句,這些都沒有贊助。我希望如此。哈哈! 如果你堅持使用那些簡單、無聊的工具,你就錯過了。在這個科技世界中,您可以毫無麻煩地建立您的投資組合。 程式設計師會否認建立這樣的作品集行不通,但這不是真的,如果它對你有用那就太好了。 我已經完成了 5000 多個小時的編程,我可以這麼說。 任何好的東西都比糟糕的投資組合好。 正如我在一開始所說的,如果您不想透過程式設計來建立原始作品集也沒關係,因為只有開發人員才應該使用程式碼來完成它。 您還需要什麼? 匆忙!建立您的作品集並向世界展示:D 你認為哪個最好?我喜歡 Polywork & Read。兩者都是我在列表中使用最少的:D 我很高興我終於寫了這篇文章。 我透過深入研究並分享我的經驗來撰寫內容。您可以透過[在 GitHub 上贊助](https://github.com/sponsors/Anmol-Baranwal)我來支持我。 請在[GitHub](https://github.com/Anmol-Baranwal)和[Twitter](https://twitter.com/Anmol_Codes)上關注我:) > 如果您熱衷於贊助這篇文章,請給我發訊息 [email protected] 或在 Twitter 上聯繫我! 🚀 {% 嵌入 https://github.com/Anmol-Baranwal %} 多寫,多啟發。  --- 原文出處:https://dev.to/anmolbaranwal/make-your-portfolio-in-just-4-hours-its-possible-2p3
**長話短說** -------- 到 2024 年,Python 仍然是資料科學的主要語言,因為它簡單,而且還擁有用於資料清理、特徵工程、視覺化和機器學習的各種函式庫。 如果您想開始或將您的職業生涯轉向更加以資料科學為導向的方向,此列表將為您提供您需要了解的庫。  --- 1-太皮 ---- **領域:全面應用**  Taipy 旨在加快應用程式開發,從最初的原型到生產就緒的應用程式。 這個開源 Python 函式庫專為輕鬆開發前端 (GUI) 和 ML/資料管道而設計。 它程式碼量低,專為任何 pythonista 設計。 主要特徵: - 邁向資料科學:筆記本相容並與機器學習平台(Dataiku、Databricks 等......)輕鬆集成 - Taipy 隨著應用程式用戶的增加而擴展 - Taipy 適用於大型資料集 - 非同步模式:非常適合處理高負載應用程式  {% cta https://github.com/Avaiga/taipy %} Star ⭐ Taipy 儲存庫 {% endcta %} 您的支持意義重大🌱,並且在許多方面為我們帶來了很大的幫助,例如寫文章! 🙏 --- 2-Matplotlib ------------ **領域:資料視覺化**  Matplotlib 是最著名的視覺化小工具庫。 借助該庫,您可以利用其廣泛的圖表和自訂功能輕鬆繪製任何 2D 圖形。 一個很棒的庫,可以透過簡單快速的圖表檢查模型的效能。 {% cta https://github.com/matplotlib/matplotlib %} Star ⭐ 儲存庫 {% endcta %} --- 3- 熊貓 ----- **領域:資料處理與分析**  如何在不了解 Pandas 的情況下使用 Python 進行編碼?熊貓是Python皇室! 該庫的兩個資料結構是: - 資料框 - 系列 該庫允許快速且有效率地載入、清理和準備資料。 主要功能包括: - 載入資料中 - 重塑資料框 - 基礎統計 {% cta https://github.com/pandas-dev/pandas %} Star ⭐ 儲存庫 {% endcta %} --- 4-Numpy ------- **領域:數值計算**  Numpy 不如 Pandas 通用,但它是科學計算和資料預處理的重要工具。 使用 Numpy 時,您將熟悉陣列並知道如何有效地進行資料操作和數學函數。 這個庫對於您的資料科學專案絕對是必不可少的。 {% cta https://github.com/numpy/numpy %} Star ⭐ 儲存庫 {% endcta %} --- 5-Scikit-學習 ----------- **領域:機器學習**  另一個 Python 函式庫,這一次,您在 Python 中進行機器學習的首選。 該庫有多種演算法: - K-均值聚類 - 回歸 - 分類 但它還透過例如資料分割和降維技術來設定您的機器學習專案。 {% cta https://github.com/scikit-learn/scikit-learn %} Star ⭐ 儲存庫 {% endcta %} --- 6-西伯恩 ----- **領域:統計資料視覺化**  Seaborn 將為 Matplotlib 帶來一些附加功能。 當 Matplotlib 強調精確性和簡單性時,該程式庫帶來了複雜且有吸引力的視覺化效果。 {% cta https://github.com/mwaskom/seaborn %} Star ⭐ 儲存庫 {% endcta %} --- 7-TensorFlow 或 Pytorch ---------------------- **領域:深度學習**  Pytorch 還是 TensorFlow 這就是問題所在。 這兩個庫提供了神經網路的介面。 它們非常靈活,可為您提供高效的 API 來建立和建立神經網路模型。 選擇取決於您,但這裡有一些區別: - PyTorch 具有更自然語言處理的角度 - Pytorch 更具 Python 風格 {% cta https://github.com/tensorflow/tensorflow %} Star ⭐ TensorFlow 儲存庫 {% endcta %} {% cta https://github.com/pytorch/pytorch %} Star ⭐ PyTorch 儲存庫 {% endcta %} --- 8-硬 --- **領域:深度學習**  Keras 是開始深度學習的好方法,因為它在 TensorFlow 之上執行,但實作過程得到簡化。 {% cta https://github.com/keras-team/keras %} Star ⭐ 儲存庫 {% endcta %} --- 9-狀態模型 ------ **領域:統計建模**  該庫有一系列統計模型。 它是機器學習專案探索性資料分析階段的絕佳工具。 一系列功能涵蓋從描述性分析到統計測試;它也是一個適合處理時間序列資料、單變數和多元統計等的函式庫。 {% cta https://github.com/statsmodels/statsmodels %} Star ⭐ 儲存庫 {% endcta %} --- 10-極地 ----- **領域:快速資料操作**  Polars 是一個為處理大型資料集而建立的 DataFrame 函式庫。 它的靈感來自 Python 的頂級庫 - Pandas,但進行了(快速)調整,速度提高了 10 到 100 倍。處理大型資料集時必須了解的工具。 {% cta https://github.com/pola-rs/polars %} Star ⭐ 儲存庫 {% endcta %} --- 結論 -- 這十個函式庫對於任何機器學習專案都是必不可少的,掌握它們將增強您的資料科學履歷。 請隨時評論您最喜歡的 ML/AI 庫! --- 原文出處:https://dev.to/taipy/python-libraries-for-your-datascience-cv-in-2024-5cl7
你的轉職路上,還缺少一份自學作業包!寫完這幾包,直接拿作品去面試上班!
本論壇另有附設一個 LINE 新手發問&交流群組!歡迎加入討論!


