## 課程目標 - 學習開發狀態複雜的 vue 元件 ## 課程內容 前面的課程中,元件的狀態很單純,數量也很少 但是有些元件,雖然對外溝通的狀態很少 但是在元件內部,其實需要維持額外的多個狀態,才能使用 比方說「顏色選擇器」類型的元件:雖然對外就一個代表色碼的字串而已,但在內部需要不少狀態來維持 ## 課後作業 這一課作業,請先看一下 Color Picker 元件的用法 https://quasar.dev/vue-components/color-picker --- 請使用官方的元件試玩工具:Vue SFC Playground https://sfc.vuejs.org/ - 請建立 `MyColor.vue` 元件,並支援下列功能 - `v-model` 能夠設定色碼、取得色碼,格式支援 HEX 即可,例如:經典藍 `#34568b` - 不用支援各種花俏的顏色選擇面板,就做 RGB 三捲軸就好了:使用 `<input type="range">` 製作三個可以拉動的捲軸,分別代表紅色、綠色、藍色的比例 - 請自行搜尋 `hex to rgb javascript` `rgb to hex javascript` 研究 hex 色碼與 rgb 色碼如何轉換 完成之後,請在 `App.vue` 之中匯入此元件,並用多個範例證明,有完成上述規格 做出以上功能,你就完成這次的課程目標了!
## 課程目標 - 學習用外部狀態管理 vue 元件 ## 課程內容 前面的課程中,元件的狀態很單純,都是匯入之後直接使用 但是有些元件匯入之後,一開始在畫面上是不顯示的 比方說視窗類型的元件:這種元件需要額外有一個狀態,來管理它是否顯示 ## 課後作業 這一課作業,請先看一下 Dialog 視窗元件的用法 https://quasar.dev/vue-components/dialog --- 請使用官方的元件試玩工具:Vue SFC Playground https://sfc.vuejs.org/ - 請建立 `MyDialog.vue` 元件,並支援下列功能 - `v-model` 能夠管理視窗是否顯示 - `預設的 slot` 能夠放入視窗內容 完成之後,請在 `App.vue` 之中匯入此元件,並用多個範例證明,有完成上述規格 做出以上功能,你就完成這次的課程目標了!
## 課程目標 - 學習 vue 的 slots ## 課程內容 來學一下 slots 的用法 - https://vuejs.org/guide/components/slots.html ## 課後作業 這一課作業,請先看一下 Banner 公告元件的用法 https://quasar.dev/vue-components/banner --- 請使用官方的元件試玩工具:Vue SFC Playground https://sfc.vuejs.org/ - 請建立 `MyBanner.vue` 元件,並支援下列功能 - `預設的 slot` 能夠放入公告內容 - `action slot` 能夠在下一排最右側放入額外內容 - `rounded` 樣式 完成之後,請在 `App.vue` 之中匯入此元件,並用多個範例證明,有完成上述規格 做出以上功能,你就完成這次的課程目標了!
## 課程目標 - 學習 vue 的 v-model ## 課程內容 來學一下 v-model 的用法 - https://vuejs.org/guide/components/v-model.html 老話一句,不要把這功能想得太神奇 這只是一種 props + events 的縮寫而已 功能完全一樣,只是讓元件更方便使用而已 如果真的很不喜歡,實務上完全不用,其實也不會怎樣 ## 課後作業 這一課作業,請先看一下 Input 輸入元件的用法 https://quasar.dev/vue-components/input --- 請使用官方的元件試玩工具:Vue SFC Playground https://sfc.vuejs.org/ - 請建立 `MyInput.vue` 元件,並支援下列功能 - `v-model` 能夠設定值、取得值 - `label` 能夠設定欄位名稱(可以不用像 Quasar 動畫那樣華麗,就簡單顯示在旁邊即可) - `filled` 樣式 - `outlined` 樣式 完成之後,請在 `App.vue` 之中匯入此元件,並用多個範例證明,有完成上述規格 做出以上功能,你就完成這次的課程目標了!
## 課程目標 - 學習 vue 的 events ## 課程內容 來學一下怎麼替元件設計事件 - https://vuejs.org/guide/components/events.html ## 課後作業 這一課作業,請先看一下 Button 按鈕元件的用法 https://quasar.dev/vue-components/button --- 請使用官方的元件試玩工具:Vue SFC Playground https://sfc.vuejs.org/ - 請建立 `MyButton.vue` 元件,並支援下列功能 - `color` 能夠設定背景顏色 - `text-color` 能夠設定文字顏色 - `label` 能夠設定文字內容 - `size` 能夠設定按鈕大小 - `round` 樣式 - `square` 樣式 - `@click` 能夠設定點擊後的任務 完成之後,請在 `App.vue` 之中匯入此元件,並用多個範例證明,有完成上述規格 做出以上功能,你就完成這次的課程目標了!
## 課程目標 - 學習 vue 的 props ## 課程內容 來學一下怎麼傳參數到元件裡面 - https://vuejs.org/guide/components/props.html 順帶一提,在實務中,我個人是從來不寫 Prop Validation 的 我不去寫 Runtime Type Checks 那些,因為我覺得很麻煩、很花時間 當然,在很多人眼裡,我這種習慣很糟糕 我有我的理由,不過嚴重超出本課程度,未來有機會再談吧 ## 課後作業 在第二課~第七課的作業,我們要研習一款叫做 Quasar Framework 的工具 這是一個極度強大的 vue 元件工具,功能非常豐富、好用 我們每一課的作業,都要試著親自做出類似 Quasar 中的元件 (沒辦法做到像 Quasar 那麼強大,我們只要實作部分功能就好) 這一課作業,請先看一下 Badge 徽章元件的用法 https://quasar.dev/vue-components/badge --- 請使用官方的元件試玩工具:Vue SFC Playground https://sfc.vuejs.org/ - 請建立 `MyBadge.vue` 元件,並支援下列功能 - `color` 能夠設定背景顏色 - `text-color` 能夠設定文字顏色 - `label` 能夠設定文字內容 - `rounded` 樣式 完成之後,請在 `App.vue` 之中匯入此元件,並用多個範例證明,有完成上述規格 做出以上功能,你就完成這次的課程目標了!
## 課程目標 - 能夠運行 Vue 元件 ## 課程內容 我們一樣讀官網文件就好 先來讀元件基本觀念 https://vuejs.org/guide/essentials/component-basics.html 再來讀註冊元件的方法 https://vuejs.org/guide/components/registration.html 再來讀元件的檔案格式 https://vuejs.org/guide/scaling-up/sfc.html 我鼓勵你習慣去讀英文,但實在不行就讀中文沒關係 https://cn.vuejs.org/guide/essentials/component-basics.html --- 在我的課程中反覆說過很多次 官網文件中各種內容很多,大部份看不懂沒關係,稍微有個印象就好 很多內容學了,其實根本實際上也很少用到 留個印象,遇到問題大概知道去哪翻閱就可以 整個程式設計師生涯,就用這種態度即可,沒問題的 --- 很多時候,甚至一知半解,也沒關係,根本不重要 舉個例,官網有時候會這樣寫 ``` <ButtonCounter /> ``` 有時候會這樣寫 ``` <button-counter></button-counter> ``` 官網有說明,分別在什麼時候,建議哪種寫法比較好 老實說,那些說明,連我都看不太懂,我也不認同官網的建議 我建議你就隨便寫,能跑就可以了 上過我前面課程的話就知道,我對 Vue 的許多設計細節,充滿意見、不認同 但是這個行業就是這樣,大家都充滿主觀看法,工具本身也充滿主觀看法 這些很正常,並不妨礙你成為一個專業的程式設計師 反正,框架的背後,就是會轉換成你在系列一~六學過的那些:DOM 操作、事件處理、狀態管理,就這樣而已 ## 課後作業 請使用官方的元件試玩工具:Vue SFC Playground https://sfc.vuejs.org/ 這一課我們來試著匯入元件就好 - 請建立 `Header.vue` `Main.vue` `Footer.vue` 三個元件 - 元件內容分別顯示 `I am header!` `I am main!` `I am footer!` 就好 - 在 `App.vue` 之中匯入以上元件 做出以上功能,你就完成這次的課程目標了!
作為一名開發人員,了解最新的技術和工具對於在就業市場上保持競爭力至關重要。 在這篇文章中,我們整理了一份 2023 年最熱門開發專案的完整列表,以及掌握每個專案的教程和資源。 無論您是希望提高技能的初學者,還是希望擴展您的技能組合的資深開發人員,此列表都適合每個人。 - 原文出處:https://dev.to/rahul3002/2023s-top-development-projects-for-programmers-a-complete-list-of-tutorials-and-tools-for-mastering-the-latest-technologies-37o3 --- ## 專案教程列表: ### Web開發: |專案 |技術 |連結 | | :--- |:---|:---| |使用 NextJS 建置 Reddit 2.0 克隆 | React、SQL、Supabase、Next.js、GraphQL | [連結](https://projectlearn.io/learn/web-development/project/build-reddit-2.0-clone-with-nextjs-205?from=github)| |使用 React 建置 YouTube 克隆 | Express、Node、JavaScript、HTML、CSS | [連結](https://projectlearn.io/learn/web-development/project/build-a-youtube-clone-with-react-200?from=github)| |使用 JavaScript 圖表庫建立發散條形圖 | JavaScript、HTML、CSS | [連結](https://projectlearn.io/learn/web-development/project/create-a-diverging-bar-chart-with-a-javascript-charting-library-197?from=github)| |通過建置卡片組件學習 CSS 基礎知識 | HTML, CSS | [連結](https://projectlearn.io/learn/web-development/project/learn-css-basics-by-building-a-card-component-196?from=github)| |建立無伺服器模因即服務 | JavaScript、Rust、CSS、HTML | [連結](https://projectlearn.io/learn/web-development/project/create-a-serverless-meme-as-a-service-194?from=github)| |天氣預報網站 | JavaScript、HTML、CSS、React | [連結](https://projectlearn.io/learn/web-development/project/weather-forecast-website-193?from=github)| |連結縮短網站 | JavaScript、Vue、HTML、CSS、React | [連結](https://projectlearn.io/learn/web-development/project/link-shortener-website-192?from=github)| |抄襲檢查器網站 | Python, 引導 | [連結](https://projectlearn.io/learn/web-development/project/plagiarism-checker-website-189?from=github)| |建置自定義 Google 地圖主題 | JavaScript、HTML、CSS | [連結](https://projectlearn.io/learn/web-development/project/build-a-custom-google-maps-theme-187?from=github)| |使用 JavaScript 建置超級馬里奧主題的 Google 地圖 | JavaScript、HTML5、CSS3 | [連結](https://projectlearn.io/learn/web-development/project/build-a-super-mario-themed-google-map-with-javascript-180?from=github)| |建置社區驅動的交付應用程式 | Python、Django、PostgreSQL、JavaScript、Mapbox | [連結](https://projectlearn.io/learn/web-development/project/build-a-community-driven-delivery-application-176?from=github)| |建置本地商店搜尋和發現應用程式 | Python、Django、PostgreSQL、JavaScript、Mapbox | [連結](https://projectlearn.io/learn/web-development/project/build-a-local-store-search-and-discovery-application-175?from=github)| |使用 React.js 和 Node.js 的中型克隆 |React、Node、CSS3、JavaScript、HTML5 | [連結](https://projectlearn.io/learn/web-development/project/medium-clone-using-react.js-and-node.js-174?from=github)| |使用 React JS 克隆 Facebook |React、Firebase、CSS3、JavaScript、HTML5 | [連結](https://projectlearn.io/learn/web-development/project/facebook-clone-with-react-js-171?from=github)| | JavaScript30 - 30 天 Vanilla JS 編碼挑戰 | JavaScript | [連結](https://projectlearn.io/learn/web-development/project/javascript30---30-day-vanilla-js-coding-challenge-170?from=github)| |使用 Gatsby 和 GraphCMS 的旅行遺願清單地圖 |Gatsby、Leaflet、GraphCMS、HTML、CSS | [連結](https://projectlearn.io/learn/web-development/project/travel-bucket-list-map-with-gatsby-and-graphcms-168?from=github)| |使用 Vue.js 的記憶卡遊戲 | Vue、JavaScript、HTML、CSS | [連結](https://projectlearn.io/learn/web-development/project/memory-card-game-with-vue.js-167?from=github)| | Strapi 和 GatsbyJS 課程 - 投資組合專案 | Strapi、Gatsby、JavaScript、HTML、CSS | [連結](https://projectlearn.io/learn/web-development/project/strapi-and-gatsbyjs-course---portfolio-project-166?from=github)| | Storybook - Node、Express、MongoDB 和 Google OAuth | MongoDB、Node、JavaScript、HTML、CSS | [連結](https://projectlearn.io/learn/web-development/project/storybook---node,-express,-mongodb-and-google-oauth-165?from=github)| |呼吸和放鬆應用程式 - JavaScript 和 CSS 動畫 | JavaScript、HTML、CSS | [連結](https://projectlearn.io/learn/web-development/project/breathe-and-relax-app---javascript-and-css-animations-164?from=github)| |用於加密貨幣價格的 Node.js CLI |Node,JavaScript | [連結](https://projectlearn.io/learn/web-development/project/node.js-cli-for-cryptocurrency-prices-163?from=github)| | React 和 Tailwind CSS 圖片庫 |React,順風,JavaScript,HTML,CSS | [連結](https://projectlearn.io/learn/web-development/project/react-and-tailwind-css-image-gallery-162?from=github)| |使用 React 的番茄鐘 |React,JavaScript,HTML,CSS | [連結](https://projectlearn.io/learn/web-development/project/pomodoro-clock-using-react-161?from=github)| | Laravel 從零開始的關鍵字密度工具 | Laravel、PHP、JQuery、AJAX、SEO | [連結](https://projectlearn.io/learn/web-development/project/keyword-density-tool-with-laravel-from-scratch-160?from=github)| |使用 Yii2 PHP 框架克隆 YouTube | Yii2, PHP | [連結](https://projectlearn.io/learn/web-development/project/youtube-clone-using-yii2-php-framework-159?from=github)| |使用 React、GraphQL 和 Amplify 克隆 Reddit | React、Amplify、AWS、GraphQL、Node | [連結](https://projectlearn.io/learn/web-development/project/reddit-clone-with-react,-graphql-and-amplify-157?from=github)| |使用 React 和 GraphQL 的全棧 Yelp 克隆 |React、GraphQL、HTML、CSS、JavaScript | [連結](https://projectlearn.io/learn/web-development/project/full-stack-yelp-clone-with-react-and-graphql-155?from=github)| |帶有 React Hooks 和 Context API 的 Pokémon Web App |React、HTML、CSS、JavaScript | [連結](https://projectlearn.io/learn/web-development/project/pokémon-web-app-with-react-hooks-and-context-api-154?from=github)| |使用 JavaScript 和 Rails 進行分水嶺監控 | Ruby、Rails、JavaScript | [連結](https://projectlearn.io/learn/web-development/project/watershed-monitor-using-javascript-and-rails-153?from=github)| |使用 React 和 Redux 的氣候資料儀表板 | React、Redux、HTML、CSS、JavaScript | [連結](https://projectlearn.io/learn/web-development/project/climate-data-dashboard-using-react-and-redux-152?from=github)| |僅使用 CSS 翻轉 UNO 卡片 | HTML, CSS | [連結](https://projectlearn.io/learn/web-development/project/flipping-uno-cards-using-only-css-151?from=github)| |使用 Redis、WebSocket 和 Go 的聊天應用程式 | Redis、Web Socket、Go、Azure | [連結](https://projectlearn.io/learn/web-development/project/chat-app-with-redis,-websocket-and-go-146?from=github)| |使用 React 導航的 Spotify 登錄動畫 |React、HTML、CSS、JavaScript | [連結](https://projectlearn.io/learn/web-development/project/spotify-login-animation-with-react-navigation-145?from=github)| |僅使用 CSS 的動態天氣界面 | HTML, CSS | [連結](https://projectlearn.io/learn/web-development/project/dynamic-weather-interface-with-just-css-144?from=github)| |使用 Airtable 和 Vue 的簡單 CRUD 應用程式 | Airtable、Vue、Vuetify、API、HTML | [連結](https://projectlearn.io/learn/web-development/project/simple-crud-app-with-airtable-and-vue-143?from=github)| |帶有 MEVN 堆棧的全棧 RPG 角色生成器 | MongoDB、Express、Vue、Node、HTML | [連結](https://projectlearn.io/learn/web-development/project/full-stack-rpg-character-generator-with-mevn-stack-142?from=github)| |帶有 PERN 堆棧的 Todo 應用 | PostgreSQL、Express、React、Node、HTML | [連結](https://projectlearn.io/learn/web-development/project/todo-app-with-the-pern-stack-141?from=github)| |帶有 Gatsby 的夏季公路旅行地圖應用程式 |React,Gatsby,Leaflet | [連結](https://projectlearn.io/learn/web-development/project/summer-road-trip-mapping-app-with-gatsby-140?from=github)| |使用 Socket.io 的多人紙牌遊戲 | Phaser 3、Express、Socket.io、JavaScript | [連結](https://projectlearn.io/learn/web-development/project/multiplayer-card-game-with-socket.io-139?from=github)| |帶有 Gatsby 的 COVID-19 儀表板和地圖應用程式 |React,Gatsby,Leaflet | [連結](https://projectlearn.io/learn/web-development/project/covid-19-dashboard-and-map-app-with-gatsby-138?from=github)| | React 抽認卡測驗 |React、API、JavaScript、HTML5、CSS3 | [連結](https://projectlearn.io/learn/web-development/project/flashcard-quiz-with-react-125?from=github)| |用純 JavaScript 打地鼠 | JavaScript、HTML5、CSS3 | [連結](https://projectlearn.io/learn/web-development/project/whack-a-mole-with-pure-javascript-124?from=github)| |使用 JavaScript 的諾基亞 3310 貪吃蛇遊戲 | JavaScript、HTML5、CSS3 | [連結](https://projectlearn.io/learn/web-development/project/nokia-3310-snake-game-using-javascript-123?from=github)| |原版 JavaScript 中的石頭剪刀布 | JavaScript、HTML5、CSS3 | [連結](https://projectlearn.io/learn/web-development/project/rock-paper-scissors-in-vanilla-javascript-122?from=github)| |純 JavaScript 的俄羅斯方塊 | JavaScript、HTML5、CSS3 | [連結](https://projectlearn.io/learn/web-development/project/tetris-with-pure-javascript-121?from=github)| |使用 React 製作 Meme Maker |React,JavaScript,HTML5,CSS3 | [連結](https://projectlearn.io/learn/web-development/project/meme-maker-with-react-119?from=github)| |使用 React 克隆 Evernote |React、Firebase、Node、JavaScript、HTML5 | [連結](https://projectlearn.io/learn/web-development/project/evernote-clone-with-react-118?from=github)| |開發者 Meetup App with Vue | Vue、Firebase、Vuetify、JavaScript、HTML5 | [連結](https://projectlearn.io/learn/web-development/project/developer-meetup-app-with-vue-117?from=github)| | Vue 實時聊天應用 | Vue、Firebase、Vuex、JavaScript、HTML5 | [連結](https://projectlearn.io/learn/web-development/project/real-time-chat-app-with-vue-116?from=github)| |使用 Vue 的加密貨幣追踪器 | Vue、Vuetify、API、JavaScript、HTML5 | [連結](https://projectlearn.io/learn/web-development/project/cryptocurrency-tracker-with-vue-115?from=github)| | Vue 多人問答遊戲 | Vue、Pusher、Node、Express、JavaScript | [連結](https://projectlearn.io/learn/web-development/project/multiplayer-quiz-game-with-vue-114?from=github)| | Vue 掃雷遊戲 | Vue、Vuex、Vuetify、JavaScript、HTML5 | [連結](https://projectlearn.io/learn/web-development/project/minesweeper-game-with-vue-113?from=github)| |使用 Vue 克隆 Instagram | Vue、CSSGram、JavaScript、HTML5、CSS3 | [連結](https://projectlearn.io/learn/web-development/project/instagram-clone-with-vue-112?from=github)| |使用 Angular 克隆黑客新聞 |角度、燈塔、JavaScript、HTML5、CSS3 | [連結](https://projectlearn.io/learn/web-development/project/hacker-news-clone-with-angular-111?from=github)| |聊天界面 | HTML5, CSS3 | [連結](https://projectlearn.io/learn/web-development/project/chat-interface-110?from=github)| |純 CSS3 工具提示 | HTML5, CSS3 | [連結](https://projectlearn.io/learn/web-development/project/pure-css3-tooltip-109?from=github)| |社交媒體按鈕 | HTML5, CSS3 | [連結](https://projectlearn.io/learn/web-development/project/social-media-buttons-108?from=github)| |推薦卡 | HTML5, CSS3 | [連結](https://projectlearn.io/learn/web-development/project/testimonial-card-107?from=github)| |帶有 CSS3 Flexbox 的導航欄 | HTML5, CSS3 | [連結](https://projectlearn.io/learn/web-development/project/navigation-bar-with-css3-flexbox-106?from=github)| |使用 CSS3 Flexbox 的移動應用程式佈局 | HTML5, CSS3 | [連結](https://projectlearn.io/learn/web-development/project/mobile-app-layout-with-css3-flexbox-105?from=github)| |受 Reddit 啟發的加載微調器 | HTML5, CSS3 | [連結](https://projectlearn.io/learn/web-development/project/reddit-inspired-loading-spinner-104?from=github)| |帶 CSS3 網格的日曆 | JavaScript、HTML5、CSS3 | [連結](https://projectlearn.io/learn/web-development/project/calendar-with-css3-grid-103?from=github)| | React 中的俄羅斯方塊遊戲 |React,JavaScript,HTML5,CSS3 | [連結](https://projectlearn.io/learn/web-development/project/tetris-game-in-react-102?from=github)| | 2D 突圍遊戲 | JavaScript、HTML5、CSS3 | [連結](https://projectlearn.io/learn/web-development/project/2d-breakout-game-101?from=github)| |精靈動畫 | JavaScript、HTML5、CSS3 | [連結](https://projectlearn.io/learn/web-development/project/sprite-animation-100?from=github)| |蛇遊戲 | JavaScript、HTML5、CSS3 | [連結](https://projectlearn.io/learn/web-development/project/snake-game-99?from=github)| |記憶遊戲 | JavaScript、HTML5、CSS3 | [連結](https://projectlearn.io/learn/web-development/project/memory-game-98?from=github)| |簡單的身份驗證和授權 | GraphQL、Apollo、Node、JavaScript、HTML5 | [連結](https://projectlearn.io/learn/web-development/project/simple-authentication-and-authorization-97?from=github)| |加密貨幣追踪器 | NextJS、GraphQL、Apollo、Node、JavaScript | [連結](https://projectlearn.io/learn/web-development/project/cryptocurrency-tracker-96?from=github)| |使用 Vanilla Javascript 進行即時搜尋 | JavaScript、HTML5、CSS3 | [連結](https://projectlearn.io/learn/web-development/project/instant-search-with-vanilla-javascript-95?from=github)| |計算器應用 | JavaScript、HTML5、CSS3 | [連結](https://projectlearn.io/learn/web-development/project/calculator-app-94?from=github)| |待辦事項 | Vue、JavaScript、CSS3、HTML5 | [連結](https://projectlearn.io/learn/web-development/project/todo-app-45?from=github)| |博客應用 | Vue、GraphQL、阿波羅、JavaScript、CSS3 | [連結](https://projectlearn.io/learn/web-development/project/blog-app-44?from=github)| |簡單的預算應用程式 | Vue、布爾瑪、JavaScript、CSS3、HTML5 | [連結](https://projectlearn.io/learn/web-development/project/simple-budgeting-app-43?from=github)| |搜尋機器人 |Node、Twilio、Cheerio、API、自動化 | [連結](https://projectlearn.io/learn/web-development/project/search-bot-42?from=github)| |推特機器人 |Node、JavaScript、API、自動化 | [連結](https://projectlearn.io/learn/web-development/project/twitter-bot-41?from=github)| |實時 Markdown 編輯器 |Node、JavaScript、Express、Redis、HTML5 | [連結](https://projectlearn.io/learn/web-development/project/real-time-markdown-editor-40?from=github)| |待辦事項 | Angular、TypeScript、RxJS、HTML5、CSS3 | [連結](https://projectlearn.io/learn/web-development/project/todo-app-39?from=github)| |黑客新聞客戶端 |角度、RxJS、Webpack、HTML5、CSS3 | [連結](https://projectlearn.io/learn/web-development/project/hacker-news-client-38?from=github)| |隨機報價機 |React,JavaScript,HTML5,CSS3 | [連結](https://projectlearn.io/learn/web-development/project/random-quote-machine-37?from=github)| | Todoist克隆| React, Firebase, JavaScript, 測試, HTML5 | [連結](https://projectlearn.io/learn/web-development/project/todoist-clone-36?from=github)| |帶有情感分析的聊天應用 | NextJS、Pusher、Sentiment、Node、React | [連結](https://projectlearn.io/learn/web-development/project/chat-app-with-sentiment-analysis-35?from=github)| |預約安排 | React、Twilio、CosmicJS、Material-UI、JavaScript | [連結](https://projectlearn.io/learn/web-development/project/appointment-scheduler-34?from=github)| |生命遊戲 |React、2D、JavaScript、HTML5、CSS3 | [連結](https://projectlearn.io/learn/web-development/project/game-of-life-33?from=github)| |新聞應用 | React Native、Node、API、React、JavaScript | [連結](https://projectlearn.io/learn/web-development/project/news-app-32?from=github)| |聊天應用 | React、Redux、Redux Saga、Web 套接字、Node | [連結](https://projectlearn.io/learn/web-development/project/chat-app-31?from=github)| |待辦事項 | React Native、GraphQL、Apollo、API、Hasura | [連結](https://projectlearn.io/learn/web-development/project/todo-app-30?from=github)| | Chrome 擴展 |React,包裹,JavaScript,HTML5,CSS3 | [連結](https://projectlearn.io/learn/web-development/project/chrome-extension-29?from=github)| |電影投票應用 | React、Redux、API、不可變、JavaScript | [連結](https://projectlearn.io/learn/web-development/project/movie-voting-app-27?from=github)| |特雷洛克隆 | React、Elixir、Phoenix、JWT、JavaScript | [連結](https://projectlearn.io/learn/web-development/project/trello-clone-25?from=github)| | Wiki 風格的 CMS | C#、.NET、Razor 頁面 | [連結](https://projectlearn.io/learn/web-development/project/wiki-style-cms-18?from=github)| |使用 ReactJS 克隆 Spotify |React,HTML5,CSS3 | [連結](https://projectlearn.io/learn/web-development/project/spotify-clone-with-reactjs-15?from=github)| |微軟主頁克隆 | HTML5、CSS3、JavaScript | [連結](https://projectlearn.io/learn/web-development/project/microsoft-homepage-clone-14?from=github)| |簡單甘特圖 | HTML5、CSS3、JavaScript | [連結](https://projectlearn.io/learn/web-development/project/simple-gantt-chart-13?from=github)| |工作抓取應用 |Node、JavaScript、REST、API、Express | [連結](https://projectlearn.io/learn/web-development/project/job-scraping-app-12?from=github)| |電子商務應用 |React,引導程序,JavaScript,HTML5,CSS3 | [連結](https://projectlearn.io/learn/web-development/project/e-commerce-app-11?from=github)| | Netflix 著陸頁 | HTML5、CSS3、JavaScript | [連結](https://projectlearn.io/learn/web-development/project/netflix-landing-page-10?from=github)| |人工智能聊天機器人 | Web 語音 API、Node、JavaScript、Express、Socket.io | [連結](https://projectlearn.io/learn/web-development/project/ai-chatbot-9?from=github)| |社交網絡應用 |React、Node、Redux、Firebase、REST | [連結](https://projectlearn.io/learn/web-development/project/social-networking-app-8?from=github)| |在 Node.js 中建置一個簡單的加密貨幣區塊鏈 |Node、JavaScript、密碼學、區塊鏈 | [連結](https://projectlearn.io/learn/web-development/project/build-a-simple-cryptocurrency-blockchain-in-node.js-7?from=github)| | BT 客戶端 |Node、JavaScript、TCP、計算機網絡 | [連結](https://projectlearn.io/learn/web-development/project/bittorrent-client-6?from=github)| |使用 JavaScript 的待辦事項列表應用 | JavaScript、HTML5、CSS3 | [連結](https://projectlearn.io/learn/web-development/project/todo-list-app-with-javascript-4?from=github)| |使用 Anime.js 的 JavaScript 動畫 | JavaScript、CSS3、庫、HTML5、API | [連結](https://projectlearn.io/learn/web-development/project/javascript-animations-with-anime.js-3?from=github)| |帶有 React 的工作板應用程式 |React、Node、Cron、JavaScript、HTML5 | [連結](https://projectlearn.io/learn/web-development/project/job-board-app-with-react-1?from=github)| ### 移動開發: |專案 |技術 |連結 | | :--- |:---|:---| |使用 React Native 建置一個 Uber Eats 克隆 | React Native、Javascript、Android、iOS | [連結](https://projectlearn.io/learn/mobile-development/project/build-an-uber-eats-clone-with-react-native-204?from=github)| |使用 React Native 建置一個 Uber 克隆 | React Native、Javascript、Android、iOS | [連結](https://projectlearn.io/learn/mobile-development/project/build-an-uber-clone-with-react-native-203?from=github)| |使用 Flutter SDK 建置帶有故事的聊天應用程式 |顫振,飛鏢 | [連結](https://projectlearn.io/learn/mobile-development/project/build-a-chat-app-with-stories-using-the-flutter-sdk-199?from=github)| |建置 Robinhood 風格的應用程式來跟踪 COVID-19 病例 |科特林, 安卓 | [連結](https://projectlearn.io/learn/mobile-development/project/build-a-robinhood-style-app-to-track-covid-19-cases-198?from=github)| | Tinder 風格的 Swipe 移動應用程式 |科特林、Java、斯威夫特 | [連結](https://projectlearn.io/learn/mobile-development/project/tinder-style-swipe-mobile-app-186?from=github)| |加密貨幣價格列表移動應用程式 | React Native、Swift、Flutter、Dart | [連結](https://projectlearn.io/learn/mobile-development/project/cryptocurrency-price-listing-mobile-app-185?from=github)| |餐廳社交移動應用程式 | React Native、Swift、Flutter、Dart | [連結](https://projectlearn.io/learn/mobile-development/project/restaurants-social-mobile-app-184?from=github)| |休息時間提醒移動應用 | React Native、Kotlin、Java、Swift | [連結](https://projectlearn.io/learn/mobile-development/project/break-time-reminder-mobile-app-183?from=github)| |發票和付款提醒移動應用程式 | React、Node、Express、MongoDB | [連結](https://projectlearn.io/learn/mobile-development/project/invoicing-and-payment-reminder-mobile-app-182?from=github)| |倒計時移動應用 | Swift、Java、React Native | [連結](https://projectlearn.io/learn/mobile-development/project/countdown-mobile-app-181?from=github)| |使用 Swift 的 Flappy Bird iOS 遊戲 |斯威夫特、XCode、iOS | [連結](https://projectlearn.io/learn/mobile-development/project/flappy-bird-ios-game-using-swift-130?from=github)| |使用 Swift 的 Bull's Eye iOS 遊戲 |斯威夫特、XCode、iOS | [連結](https://projectlearn.io/learn/mobile-development/project/bull's-eye-ios-game-using-swift-129?from=github)| |使用 SwiftUI 的任務列表 iOS 應用 |斯威夫特、XCode、iOS | [連結](https://projectlearn.io/learn/mobile-development/project/task-list-ios-app-using-swiftui-128?from=github)| |使用 SwiftUI 的餐廳 iOS 應用 |斯威夫特、XCode、iOS | [連結](https://projectlearn.io/learn/mobile-development/project/restaurant-ios-app-using-swiftui-127?from=github)| |使用 Swift 的骰子 iOS 應用 |斯威夫特、XCode、iOS | [連結](https://projectlearn.io/learn/mobile-development/project/dice-ios-app-with-swift-126?from=github)| | TrueCaller 克隆 | Java、MySQL、XAMPP、Android | [連結](https://projectlearn.io/learn/mobile-development/project/truecaller-clone-83?from=github)| |天氣應用 | Java, API, Android | [連結](https://projectlearn.io/learn/mobile-development/project/weather-app-82?from=github)| |電子商務應用 | Java、Firebase、Android | [連結](https://projectlearn.io/learn/mobile-development/project/e-commerce-app-81?from=github)| |聊天應用 | Java、Firebase、Android | [連結](https://projectlearn.io/learn/mobile-development/project/chat-app-80?from=github)| |待辦事項 | Flutter、Dart、Android、iOS | [連結](https://projectlearn.io/learn/mobile-development/project/todo-app-79?from=github)| |旅遊應用程式用戶界面 | Flutter、Dart、Android、iOS | [連結](https://projectlearn.io/learn/mobile-development/project/travel-app-ui-78?from=github)| | Reddit 客戶端 |安卓,科特林 | [連結](https://projectlearn.io/learn/mobile-development/project/reddit-client-46?from=github)| |待辦事項 | React Native、Android、iOS、JavaScript | [連結](https://projectlearn.io/learn/mobile-development/project/todo-app-24?from=github) |照片庫查看器 | C#、iOS、Xamarin、Visual Studio、Android | [連結](https://projectlearn.io/learn/mobile-development/project/photo-library-viewer-19?from=github)| |使用 React Native 克隆 WhatsApp | React Native、Node、GraphQL、Apollo、JavaScript | [連結](https://projectlearn.io/learn/mobile-development/project/whatsapp-clone-with-react-native-2?from=github)| ### 遊戲開發: |專案 |技術 |連結 | | :--- |:---|:---| |使用 Kaboom.js 建置超級馬里奧兄弟、塞爾達傳說和太空侵略者 | JavaScript,Kaboom | [連結](https://projectlearn.io/learn/game-development/project/build-super-mario-bros,-zelda,-and-space-invaders-with-kaboom.js-201?from=github) | |使用 TypeScript 建立打磚塊遊戲 |打字稿、HTML、CSS、JavaScript | [連結](https://projectlearn.io/learn/game-development/project/create-an-arkanoid-game-with-typescript-195?from=github)| |簡單遊戲 | Lua、LÖVE、Python、Pygame 零 | [連結](https://projectlearn.io/learn/game-development/project/simple-games-179?from=github)| | Python在線多人遊戲|蟒蛇 | [連結](https://projectlearn.io/learn/game-development/project/python-online-multiplayer-game-173?from=github)| |打敗他們格鬥遊戲 |統一,C# | [連結](https://projectlearn.io/learn/game-development/project/beat-em-up-fight-game-172?from=github)| |使用 Godot 3.1 的簡單 3D 遊戲 |戈多,C#,3D | [連結](https://projectlearn.io/learn/game-development/project/simple-3d-game-using-godot-3.1-150?from=github)| | Godot 中的簡單益智遊戲- Box and Switch |戈多,C#,二維 | [連結](https://projectlearn.io/learn/game-development/project/simple-puzzle-game-in-godot---box-and-switch-149?from=github)| | Godot 3 中的遊戲界面從頭開始 |戈多,C#,二維 | [連結](https://projectlearn.io/learn/game-development/project/game-interface-from-scratch-in-godot-3-148?from=github)| | Godot 的 2D 遊戲:玩家與敵人 |戈多,C#,二維 | [連結](https://projectlearn.io/learn/game-development/project/2d-game-with-godot:-player-and-enemy-147?from=github)| |使用 Socket.io 的多人紙牌遊戲 | Phaser 3、Express、Socket.io、JavaScript | [連結](https://projectlearn.io/learn/game-development/project/multiplayer-card-game-with-socket.io-139?from=github)| |使用 Unity 2D 和 Mirror 的多人紙牌遊戲 | C#、Unity、二維、鏡像 | [連結](https://projectlearn.io/learn/game-development/project/multiplayer-card-game-with-unity-2d-and-mirror-137?from=github)| | Rust 中的 Roguelike 教程 |生鏽,二維 | [連結](https://projectlearn.io/learn/game-development/project/roguelike-tutorial-in-rust-136?from=github)| | Rust 歷險記 - 一款基本的 2D 遊戲 |生鏽,二維 | [連結](https://projectlearn.io/learn/game-development/project/adventures-in-rust---a-basic-2d-game-135?from=github)| |使用 Ruby 的終端貪吃蛇遊戲 |紅寶石,二維 | [連結](https://projectlearn.io/learn/game-development/project/terminal-snake-game-with-ruby-134?from=github)| |使用 OpenGL 的太空入侵者 | OpenGL、C/C++、2D | [連結](https://projectlearn.io/learn/game-development/project/space-invaders-using-opengl-133?from=github)| | C 中的數獨求解器 | C/C++, 二維 | [連結](https://projectlearn.io/learn/game-development/project/sudoku-solver-in-c-132?from=github)| | C 中的國際象棋引擎 | C/C++, 二維 | [連結](https://projectlearn.io/learn/game-development/project/chess-engine-in-c-131?from=github)| |使用 Swift 的 Flappy Bird iOS 遊戲 |斯威夫特、XCode、iOS | [連結](https://projectlearn.io/learn/game-development/project/flappy-bird-ios-game-using-swift-130?from=github)| |使用 Swift 的 Bull's Eye iOS 遊戲 |斯威夫特、XCode、iOS | [連結](https://projectlearn.io/learn/game-development/project/bull's-eye-ios-game-using-swift-129?from=github)| |用純 JavaScript 打地鼠 | JavaScript、HTML5、CSS3 | [連結](https://projectlearn.io/learn/game-development/project/whack-a-mole-with-pure-javascript-124?from=github)| |使用 JavaScript 的諾基亞 3310 貪吃蛇遊戲 | JavaScript、HTML5、CSS3 | [連結](https://projectlearn.io/learn/game-development/project/nokia-3310-snake-game-using-javascript-123?from=github)| |原版 JavaScript 中的石頭剪刀布 | JavaScript、HTML5、CSS3 | [連結](https://projectlearn.io/learn/game-development/project/rock-paper-scissors-in-vanilla-javascript-122?from=github)| |純 JavaScript 的俄羅斯方塊 | JavaScript、HTML5、CSS3 | [連結](https://projectlearn.io/learn/game-development/project/tetris-with-pure-javascript-121?from=github)| | Vue 多人問答遊戲 | Vue、Pusher、Node、Express、JavaScript | [連結](https://projectlearn.io/learn/game-development/project/multiplayer-quiz-game-with-vue-114?from=github)| | Vue 掃雷遊戲 | Vue、Vuex、Vuetify、JavaScript、HTML5 | [連結](https://projectlearn.io/learn/game-development/project/minesweeper-game-with-vue-113?from=github)| | React 中的俄羅斯方塊遊戲 |React,JavaScript,HTML5,CSS3 | [連結](https://projectlearn.io/learn/game-development/project/tetris-game-in-react-102?from=github)| | 2D 突圍遊戲 | JavaScript、HTML5、CSS3 | [連結](https://projectlearn.io/learn/game-development/project/2d-breakout-game-101?from=github)| |精靈動畫 | JavaScript、HTML5、CSS3 | [連結](https://projectlearn.io/learn/game-development/project/sprite-animation-100?from=github)| |蛇遊戲 | JavaScript、HTML5、CSS3 | [連結](https://projectlearn.io/learn/game-development/project/snake-game-99?from=github)| |記憶遊戲 | JavaScript、HTML5、CSS3 | [連結](https://projectlearn.io/learn/game-development/project/memory-game-98?from=github)| |坦克射手 | 3D、統一、C# | [連結](https://projectlearn.io/learn/game-development/project/tanks-shooter-93?from=github)| | 2D Roguelike |二維、Unity、C# | [連結](https://projectlearn.io/learn/game-development/project/2d-roguelike-92?from=github)| |約翰·萊蒙鬧鬼的短途旅行 3D | 3D、統一、C# | [連結](https://projectlearn.io/learn/game-development/project/john-lemon's-haunted-jaunt-3d-91?from=github)| | VR 初學者:密室逃脫 |虛擬現實、Unity、C# | [連結](https://projectlearn.io/learn/game-development/project/vr-beginner:-the-escape-room-90?from=github)| |露比的冒險 |二維、Unity、C# | [連結](https://projectlearn.io/learn/game-development/project/ruby's-adventure-89?from=github)| |角色扮演遊戲 |二維、Unity、C# | [連結](https://projectlearn.io/learn/game-development/project/rpg-game-88?from=github)| |滾球| 3D、統一、C# | [連結](https://projectlearn.io/learn/game-development/project/roll-a-ball-87?from=github)| | FPS 微型遊戲 |統一,C# | [連結](https://projectlearn.io/learn/game-development/project/fps-microgame-86?from=github)| |平台微遊戲 | Unity、C#、2D | [連結](https://projectlearn.io/learn/game-development/project/platformer-microgame-85?from=github)| |卡丁車小遊戲 |統一,C# | [連結](https://projectlearn.io/learn/game-development/project/karting-microgame-84?from=github)| |街機射擊 | Lua,愛 | [連結](https://projectlearn.io/learn/game-development/project/arcade-shooter-47?from=github)| |生命遊戲 |React、2D、JavaScript、HTML5、CSS3 | [連結](https://projectlearn.io/learn/game-development/project/game-of-life-33?from=github)| |手工英雄 | C/C++、OpenGL、2D | [連結](https://projectlearn.io/learn/game-development/project/handmade-hero-23?from=github)| |突圍 | C/C++、OpenGL、2D | [連結](https://projectlearn.io/learn/game-development/project/breakout-22?from=github)| |俄羅斯方塊 | C/C++, 二維 | [連結](https://projectlearn.io/learn/game-development/project/tetris-21?from=github)| |紅白機遊戲 | C/C++、Python、二維 | [連結](https://projectlearn.io/learn/game-development/project/nes-game-20?from=github)| | Roguelike 遊戲 | C#、.NET、RogueSharp、MonoGame、RLNet | [連結](https://projectlearn.io/learn/game-development/project/roguelike-game-17?from=github)| |簡單的角色扮演遊戲 | C#、SQL、二維 | [連結](https://projectlearn.io/learn/game-development/project/simple-rpg-game-16?from=github)| ### 機器學習與人工智能: |專案 |技術 |連結 | | :--- |:---|:---| |使用 BeautifulSoup 建置網絡爬蟲 | Python, BeautifulSoup | [連結](https://projectlearn.io/learn/machine-learning-and-ai/project/build-a-web-scraper-using-beautifulsoup-202?from=github)| |從胸部 X 光檢測肺炎的 CNN |美國有線電視新聞網,蟒蛇 | [連結](https://projectlearn.io/learn/machine-learning-and-ai/project/cnn-that-detects-pneumonia-from-chest-x-rays-169?from=github)| |使用 AWS 在 Python 中自動更新資料可視化 | Python、AWS、Matplotlib | [連結](https://projectlearn.io/learn/machine-learning-and-ai/project/auto-updating-data-visualizations-in-python-with-aws-158?from=github)| |使用 GCP 和 Node 的 Twitter 情感分析工具 | API、GCP、Node、JavaScript | [連結](https://projectlearn.io/learn/machine-learning-and-ai/project/twitter-sentiment-analysis-tool-using-gcp-and-node-156?from=github)| |使用 CNN 進行 Twitter 情緒分析 | Python、Matplotlib、Numpy、熊貓 | [連結](https://projectlearn.io/learn/machine-learning-and-ai/project/twitter-sentiment-analysis-using-cnn-120?from=github)| |泰勒斯威夫特歌詞生成器 | Python、Keras、Numpy、熊貓 | [連結](https://projectlearn.io/learn/machine-learning-and-ai/project/taylor-swift-lyrics-generator-77?from=github)| | MNIST 數字辨識器 | Python、Keras、TensorFlow、Numpy、SciKit | [連結](https://projectlearn.io/learn/machine-learning-and-ai/project/mnist-digit-recognizer-76?from=github)| |訓練模型生成顏色 | Python、Keras、TensorFlow、Numpy | [連結](https://projectlearn.io/learn/machine-learning-and-ai/project/train-a-model-to-generate-colors-75?from=github)| |圖片說明生成器 | Python、TensorFlow、Numpy | [連結](https://projectlearn.io/learn/machine-learning-and-ai/project/image-caption-generator-74?from=github)| |使用 CNN 破解驗證碼系統 | Python、Keras、TensorFlow、OpenCV、Numpy | [連結](https://projectlearn.io/learn/machine-learning-and-ai/project/break-a-captcha-system-using-cnn-73?from=github)| |生成一張平均臉 | Python、OpenCV、Numpy、C/C++ | [連結](https://projectlearn.io/learn/machine-learning-and-ai/project/generate-an-average-face-72?from=github)| |圖像拼接 | Python、OpenCV、Numpy | [連結](https://projectlearn.io/learn/machine-learning-and-ai/project/image-stitching-71?from=github)| |手部關鍵點檢測 | Python、OpenCV、Numpy、C/C++ | [連結](https://projectlearn.io/learn/machine-learning-and-ai/project/hand-keypoint-detection-70?from=github)| |特徵臉 | Python、OpenCV、Numpy、C/C++ | [連結](https://projectlearn.io/learn/machine-learning-and-ai/project/eigenface-69?from=github)| |無人機目標檢測 | Python、OpenCV、Numpy | [連結](https://projectlearn.io/learn/machine-learning-and-ai/project/drone-target-detection-68?from=github)| |使用 Mask R-CNN 進行目標檢測 | Python、OpenCV、Numpy | [連結](https://projectlearn.io/learn/machine-learning-and-ai/project/object-detection-using-mask-r-cnn-67?from=github)| |面部地標檢測 | Python、OpenCV、DLib、Numpy | [連結](https://projectlearn.io/learn/machine-learning-and-ai/project/facial-landmark-detection-66?from=github)| |文本傾斜校正 | Python、OpenCV、Numpy | [連結](https://projectlearn.io/learn/machine-learning-and-ai/project/text-skew-correction-65?from=github)| | OCR 和文本辨識 | Python、OpenCV、Tesseract、Numpy | [連結](https://projectlearn.io/learn/machine-learning-and-ai/project/ocr-and-text-recognition-64?from=github)| |人數統計 | Python、OpenCV、Numpy | [連結](https://projectlearn.io/learn/machine-learning-and-ai/project/people-counter-63?from=github)| |文本檢測 | Python、OpenCV、Numpy | [連結](https://projectlearn.io/learn/machine-learning-and-ai/project/text-detection-62?from=github)| |語義分割 | Python、OpenCV、Numpy | [連結](https://projectlearn.io/learn/machine-learning-and-ai/project/semantic-segmentation-61?from=github)| |物件跟踪 | Python、OpenCV、Numpy、CamShift | [連結](https://projectlearn.io/learn/machine-learning-and-ai/project/object-tracking-60?from=github)| |人臉聚類 | Python、OpenCV、Numpy | [連結](https://projectlearn.io/learn/machine-learning-and-ai/project/face-clustering-59?from=github)| |條碼掃描儀 | Python、OpenCV、ZBar、Numpy | [連結](https://projectlearn.io/learn/machine-learning-and-ai/project/barcode-scanner-58?from=github)| |顯著性檢測 | Python、OpenCV、Numpy | [連結](https://projectlearn.io/learn/machine-learning-and-ai/project/saliency-detection-57?from=github)| |人臉檢測 | Python、OpenCV、Numpy | [連結](https://projectlearn.io/learn/machine-learning-and-ai/project/face-detection-56?from=github)| |文件掃描儀 | Python、OpenCV、Numpy、SciKit | [連結](https://projectlearn.io/learn/machine-learning-and-ai/project/document-scanner-55?from=github)| |音樂推薦 | Python、SciKit、Numpy、熊貓 | [連結](https://projectlearn.io/learn/machine-learning-and-ai/project/music-recommender-54?from=github)| |預測葡萄酒質量 | Python、Matplotlib、Numpy、熊貓 | [連結](https://projectlearn.io/learn/machine-learning-and-ai/project/predict-quality-of-wine-53?from=github)| |遺傳算法 | Python、SciKit、Numpy、熊貓 | [連結](https://projectlearn.io/learn/machine-learning-and-ai/project/genetic-algorithms-52?from=github)| |深夢 | Python、TensorFlow、可視化 | [連結](https://projectlearn.io/learn/machine-learning-and-ai/project/deepdream-51?from=github)| |股價預測| Python、SciKit、Matplotlib | [連結](https://projectlearn.io/learn/machine-learning-and-ai/project/stock-price-prediction-50?from=github)| |電影推薦系統 | Python, LightFM | [連結](https://projectlearn.io/learn/machine-learning-and-ai/project/movie-recommendation-systems-49?from=github)| | Twitter 情緒分析 | Python, API | [連結](https://projectlearn.io/learn/machine-learning-and-ai/project/twitter-sentiment-analysis-48?from=github)| |帶有情感分析的聊天應用 | NextJS、Pusher、Sentiment、Node、React | [連結](https://projectlearn.io/learn/machine-learning-and-ai/project/chat-app-with-sentiment-analysis-35?from=github)| --- **結論** 2023 年將成為令人振奮的發展年,新技術和工具層出不窮。 希望這篇文章對您有幫助。
自從改用 React Hooks 搭配 Functional Component 之後,Class 的概念都快忘光光了呢~ (也有可能是根本沒懂過?) 決定 refresh 一下 Class 如何使用。 # 甚麼是 Class? class 是用來創造 Object 的。 想像成 class 是一間汽車工廠,只要給不同的零件就能生成不同型號的車。 # Property 和 Method ### Property Property 用來表示 Object 內有什麼東西。 在定義 Class 之初,需要先建構一個 constructor,用來接收外部參數並指派這些參數給對應的 Property。 ### Method Method 用來表示 Object 可以執行什麼動作。Method 會定義在 constructor 之後。 範例: ``` class Animal { constructor(_species, _sound){ this.species = _species this.sound = _sound } makeSound(){ return `${this.sound.toUpperCase()}!` } } const scooby = new Animal('dog','scooby-dooby-doo'); console.log(`Scooby is a ${scooby.species}`); // Scooby is a dog console.log(`Scooby says "${scooby.makeSound()}"`) // Scooby says "SCOOBY-DOOBY-DOO!" ``` **注意** 如果在 constructor 以外的地方要使用傳進來的參數,要指派給 Property 再用 this.PropertyName 來取用喔! --- 參考資料: [JavaScript Classes Tutorial from freecodecamp_YT](https://youtu.be/2ZphE5HcQPQ)
框架背後有什麼必學觀念的?這篇文章簡單整理如下 原文出處:https://dev.to/lexlohr/concepts-behind-modern-frameworks-4m1g --- 很多初學者會問“我應該學哪個框架?”和“學一個框架之前需要學多少JS或TS?” - 無數自以為是的文章都在宣傳作者首選框架或庫的優勢,而不是向讀者展示其背後的概念、教他們如何做出明智的決定。讓我們先解決第二個問題: ## “在學習框架之前要學多少 JS/TS?” 盡可能多地理解它們的基本概念。您將需要了解基本資料類型、函數、基本運算符和文檔對像模型 (DOM),這是 HTML 和 CSS 在 JS 中的基礎。雖然先學一點當然沒關係,但沒必要先精通框架或庫。 如果您是一個完全的初學者,[JS for cats](http://jsforcats.com/) 可能是您第一步的好資源。繼續前進,直到您感到自信為止,然後繼續前進,直到您開始感到自信不足。那就是你了解足夠的 JS/TS 並可以開始學框架的時間。其餘的你可以邊走邊學。 ## “你指的是什麼概念?” - 狀態 - 效果 - 記憶化 - 模板和渲染 所有現代框架都從這些概念中衍伸出它們的功能。 ### 狀態 狀態只是讓您的應用程式跑起來的資料。它可能在全局級別上,適用於應用程式的較大部分,或適用於單個元件。讓我們以一個簡單的計數器為例。它保留的計數是狀態。我們可以讀取狀態並寫入狀態以增加計數。 最簡單的表示通常是一個變數,其中包含我們的狀態所包含的資料: ``` let count = 0; const increment = () => { count++; }; const button = document.createElement('button'); button.textContent = count; button.addEventListener('click', increment); document.body.appendChild(button); ``` 但是這段程式碼有一個問題:對 count 的更改,就像對 increment 所做的更改一樣,不會更新按鈕的文本內容。我們可以手動更新所有內容,但這對於更複雜的用例來說並不能很好地擴展。 `count` 更新其用戶的能力稱為*反應性*。這是通過訂閱並重新執行應用程式的訂閱部分來更新的。 幾乎每個現代前端框架和庫都有一種響應式管理狀態的方法。解決方案分為三部分,至少採用其中之一或混合使用: - Observables / Signals - Reconciliation of immutable updates - Transpilation #### Observables / Signals Observables 基本上是允許藉由訂閱閱讀器的函數來進行讀取的結構。然後訂閱者在更新時重新執行: ``` const state = (initialValue) => ({ _value: initialValue, get: function() { /* subscribe */; return this._value; }, set: function(value) { this._value = value; /* re-run subscribers */; } }); ``` 這個概念的第一個用途之一是在 [knockout](https://knockoutjs.com/) 中,它使用相同的函數,帶和不帶參數進行寫/讀存取。 這種模式目前正在以「信號」的形式復興,例如在 [Solid.js](https://www.solidjs.com/docs/latest/api#createsignal) 和 [preact signals](https://preactjs.com /guide/v10/signals/),但在 [Vue](https://vuejs.org/) 和 [Svelte](https://svelte.dev/) 的底層使用了相同的模式。 [RxJS](https://rxjs.dev/) 為 [Angular](https://angular.io/) 的反應層提供動力,是這一原則的延伸,超越了簡單狀態,但有人可能會爭辯說它模擬複雜性的能力可能反而綁手綁腳。 [Solid.js](https://www.solidjs.com/) 還以儲存(可以通過 setter 操作的物件)和可變(可以像平常一樣使用的物件)的形式進一步抽象這些信號 JS 物件或 [Vue](https://vuejs.org/) 中的狀態來處理巢狀狀態物件。 #### Reconciliation of immutable states 不變性意味著如果一個物件的屬性發生變化,整個物件引用必須改變,所以簡單的引用比較可以很容易地檢測到是否有變化,這就是協調器所做的。 ``` const state1 = { todos: [{ text: 'understand immutability', complete: false }], currentText: '' }; // updating the current text: const state2 = { todos: state1.todos, currentText: 'understand reconciliation' }; // adding a to-do: const state3 = { todos: [ state.todos[0], { text: 'understand reconciliation', complete: true } ], currentText: '' }; // this breaks immutability: state3.currentText = 'I am not immutable!'; ``` 如您所見,未更改專案的引用被重新使用。如果協調器檢測到不同的物件引用,它會再次使用狀態(props, memos, effects, context)來重跑所有元件。由於讀取存取是被動的,這需要手動指定對反應值的依賴性。 顯然,您不是以這種方式定義狀態。您可以從現有屬性建置它,也可以使用所謂的 reducer。reducer 是一個函數,它接受一個狀態並返回另一個狀態。 [react](https://reactjs.org/) 和 [preact](https://preactjs.com/) 使用此模式。它適合與 vDOM 一起使用,我們將在稍後描述模板時探討它。 並非每個框架都使用其 vDOM 來使狀態完全響應。 例如 [Mithril.JS](https://mithril.js.org/components.html#state),元件會在設置的事件後變化後更新狀態;否則你必須手動觸發 `m.redraw()`。 #### Transpilation Transpilation 是一個建置步驟,它重寫我們的程式碼以使其在舊瀏覽器上執行或賦予它額外的能力;在這種情況下,該技術用於將簡單變數更改為反應系統的一部分。 [Svelte](https://svelte.dev/) 基於一個轉譯器,該轉譯器還通過看似簡單的變數宣告和存取為其反應式系統提供動力。 順便說一句,[Solid.js](https://solidjs.com) 使用轉譯,但不是針對它的狀態,只是針對模板。 ### 效果 在大多數情況下,我們需要對反應狀態做更多的事情,而不是從中衍伸並渲染到 DOM 中。我們必須管理副作用,這些都是由於視圖更新之外的狀態更改而發生的所有事情(儘管 [Solid.js](https://solidjs.com) 等一些框架也將視圖更改視為效果)。 還記得第一個例子中,訂閱處理被故意遺漏的狀態嗎?讓我們完成這個處理效果,來作為對更新的反應: ``` const context = []; const state = (initialValue) => ({ _subscribers: new Set(), _value: initialValue, get: function() { const current = context.at(-1); if (current) { this._subscribers.add(current); } return this._value; }, set: function(value) { if (this._value === value) { return; } this._value = value; this._subscribers.forEach(sub => sub()); } }); const effect = (fn) => { const execute = () => { context.push(execute); try { fn(); } finally { context.pop(); } }; execute(); }; ``` 這基本上是 [preact signals](https://preactjs.com/guide/v10/signals/) 或 [Solid.js](https://solidjs.com) 中反應狀態的簡化,沒有錯誤處理和狀態突變模式(使用接收前一個值並返回下一個值的函數),但這很容易加入。 它允許我們使前面的範例具有反應性: ``` const count = state(0); const increment = () => count.set(count.get() + 1); const button = document.createElement('button'); effect(() => { button.textContent = count.get(); }); button.addEventListener('click', increment); document.body.appendChild(button); ``` > ☝ 使用您的開發人員工具在 [空白頁面](about:blank) 中嘗試上述兩個程式碼塊。 在大多數情況下,框架允許不同的時間安排,讓效果在渲染 DOM 之前、期間或之後執行。 ### 記憶化 Memoization 意味著緩存從狀態計算的值,它會從狀態衍伸的變化更新時更新。它基本上是一種回傳衍伸狀態的效果。 在重新執行元件功能的框架中,例如 [react](https://reactjs.org/) 和 [preact](https://preactjs.com/),這讓某些複雜計算不需要每次都重複計算。 對於其他框架,情況恰恰相反:它允許您選擇部分組件進行響應式更新,同時緩存之前的計算。 對於我們簡單的反應式系統,memo 看起來像這樣: ``` const memo = (fn) => { let memoized; effect(() => { if (memoized) { memoized.set(fn()); } else { memoized = state(fn()); } }); return memoized.get; }; ``` ### 模板化和渲染 現在我們有了純的、衍伸的和緩存形式的狀態,我們想把它展示給用戶。在我們的範例中,我們直接使用 DOM 來加入按鈕並更新其文本內容。 為了對開發人員更加友好,幾乎所有現代框架都支持一些特定領域的語言來編寫類似於程式碼中所需輸出的內容。儘管有不同的風格,比如 `.jsx`、`.vue` 或 `.svelte` 文件,但它們都歸結為用類似於 HTML 的程式碼表示 DOM,因此基本上 ``` <div>Hello, World</div> // in your JS // becomes in your HTML: <div>Hello, World</div> ``` 你可能會問“我要把狀態放在哪裡?”。很好的問題。在大多數情況下,`{}` 用於表示屬性和節點周圍的動態內容。 最常用的 JS 模板語言擴展無疑是 JSX。對於 [react](https://reactjs.org),它被編譯為純 JavaScript,其方式允許它建立 DOM 的虛擬表示,一種稱為虛擬文檔對像模型或簡稱 vDOM 的內部視圖狀態。 這樣設計的原因是:建立物件比存取 DOM 快得多,所以如果你能用當前的替換後者,你可以節省時間。但是,如果您在任何情況下都有大量 DOM 更改或建立無數物件而沒有更改,則此解決方案的優點就變成必須通過「記憶化」來規避的缺點。 ``` // original code <div>Hello, {name}</div> // transpiled to js createElement("div", null, "Hello, ", name); // executed js { "$$typeof": Symbol(react.element), "type": "div", "key": null, "ref": null, "props": { "children": "Hello, World" }, "_owner": null } // rendered vdom /* HTMLDivElement */<div>Hello, World</div> ``` 不過,JSX 不僅限於 react。例如,Solid 使用其轉譯器更徹底地更改程式碼: ``` // 1. original code <div>Hello, {name()}</div> // 2. transpiled to js const _tmpl$ = /*#__PURE__*/_$template(`<div>Hello, </div>`, 2); (() => { const _el$ = _tmpl$.cloneNode(true), _el$2 = _el$.firstChild; _$insert(_el$, name, null); return _el$; })(); // 3. executed js code /* HTMLDivElement */<div>Hello, World</div> ``` 雖然轉譯後的程式碼乍看可能令人望而生畏,但解釋這裡發生的事情卻相當簡單。首先,建立包含所有靜態部分的模板,然後複製它以建立其內容的新實體,並加入動態部分並連接以根據狀態更改進行更新。 Svelte 走得更遠,不僅可以轉換模板,還可以轉換狀態。 ``` // 1. original code <script> let name = 'World'; setTimeout(() => { name = 'you'; }, 1000); </script> <div>Hello, {name}</div> // 2. transpiled to js /* generated by Svelte v3.55.0 */ import { SvelteComponent, append, detach, element, init, insert, noop, safe_not_equal, set_data, text } from "svelte/internal"; function create_fragment(ctx) { let div; let t0; let t1; return { c() { div = element("div"); t0 = text("Hello, "); t1 = text(/*name*/ ctx[0]); }, m(target, anchor) { insert(target, div, anchor); append(div, t0); append(div, t1); }, p(ctx, [dirty]) { if (dirty & /*name*/ 1) set_data(t1, /*name*/ ctx[0]); }, i: noop, o: noop, d(detaching) { if (detaching) detach(div); } }; } function instance($$self, $$props, $$invalidate) { let name = 'World'; setTimeout( () => { $$invalidate(0, name = 'you'); }, 1000 ); return [name]; } class Component extends SvelteComponent { constructor(options) { super(); init(this, options, instance, create_fragment, safe_not_equal, {}); } } export default Component; // 3. executed JS code /* HTMLDivElement */<div>Hello, World</div> ``` 也有例外。例如,在 [Mithril.js](https://mithril.js.org/) 中,雖然可以使用 JSX,但我們鼓勵您編寫 JS: ``` // 1. original JS code const Hello = { name: 'World', oninit: () => setTimeout(() => { Hello.name = 'you'; m.redraw(); }, 1000), view: () => m('div', 'Hello, ' + Hello.name + '!') }; // 2. executed JS code /* HTMLDivElement */<div>Hello, World</div> ``` 雖然大多數人會發現開發人員缺乏經驗,但其他人更喜歡完全控制他們的程式碼。根據他們主要想解決的問題,缺少轉譯步驟甚至可能是有益的。 儘管很少有人這樣推薦,許多其他框架都允許在不進行轉譯的情況下使用。 ## “我現在應該學習什麼框架或庫?” 我有一些好訊息和一些壞訊息要告訴你。 壞訊息是:沒有萬靈丹。沒有哪個框架在每個方面都比其他框架好得多。他們每個人都有自己的優勢和妥協。 [React](https://reactjs.org/) 有它的鉤子規則,[Angular](https://angular.io/) 缺乏簡單的信號,[Vue](https://vuejs.org/)缺乏向後兼容性,[Svelte](https://svelte.dev/) 不能很好地擴展,[Solid.js](https://www.solidjs.com/) 禁止解構,[Mithril.js]( https://mithril.js.org/) 並不是真正的反應式,僅舉幾例。 好訊息是:沒有錯誤的選擇——至少,除非專案的要求真的很有限,無論是在 bundle 大小還是性能方面。每個框架都會完成它的工作。有些人可能需要配合團隊的設計決策,這可能會使您的速度變慢,但無論如何您都應該能夠獲得可行的結果。 話雖這麼說,沒有框架也可能是一個可行的選擇。許多專案都被過度使用 JavaScript 破壞了。其實帶有一些互動性的靜態頁面就可以完成這項工作。 現在您已經了解了這些框架和庫應用的概念,請選擇最適合您當前任務的概念。不要害怕在下一個專案中切換框架。沒有必要學習所有這些。 如果你嘗試一個新的框架,我發現最有幫助的事情之一就是跟它的社群有所連結,無論是在社群媒體、discord、github 還是其他地方。他們可以告訴您哪些方法適合他們的框架,這將幫助您更快地獲得更好的解決方案。 ## “拜託,你*總是*有個人喜好吧!” 如果你的主要目標是就業,我建議學習 [react](https://reactjs.org/)。如果您想要輕鬆的性能和控制體驗,請嘗試 [Solid.js](https://solidjs.com);你可能會在 Solid 的 [Discord](https://discord.com/invite/solidjs) 上見到我。 但請記住,所有其他選擇都同樣有效。你不應該因為我這麼說就選擇一個框架,而應該使用最適合你的框架。
## 課程目標 認識並且能實做 toast 元件 ## 課程內容 toast 中文叫「吐司」元件,就跟烤土司機,烤好吐司會跳出來一樣 用這元件來讓一些操作回饋訊息跳出,可以讓使用者體驗(User Experience,簡稱 UX)更好 很多網站因為沒有做好適當的 toast 元件,使用者在操作時常常覺得「表單到底有沒有送出?」「網站當機了是不是?」 通常要將 toast 做成幾種不同樣式,根據不同使用情境來使用 由於 toast 通常會直接蓋在網站的上方正中央(或者右上角、左下角,不一定) 會蓋到網頁畫面,所以通常會做成「顯示幾秒之後自動關閉」 請上網搜尋 `toast ui` `toast component`,四處觀摩一下業界常見的設計 --- 要在倒數幾秒之後執行任務,你需要 `setTimeout` 這個函式。請自行上網搜尋一下,了解這個函式的用法 ## 課後作業 請使用 https://jsfiddle.net 用以下 html 為基礎(你可以稍微修改),接著寫出 css 與 js 的部份 ``` <button onclick="toastSuccess()">成功訂購商品</button> <hr> <button onclick="toastError()">訂購商品失敗</button> <div class="toast toast-success"> 訂購成功!可以查看 Email 確認訂單細節! </div> <div class="toast toast-error"> 抱歉,訂購失敗!請稍後重新嘗試 </div> ``` --- 這邊共有兩個按鈕,模擬兩種使用情境 兩個吐司元件,一開始預設是隱藏的,不會在畫面上看到 請寫出 `toastSuccess` 函式的內容,在點擊按鈕後,將「成功吐司」顯示在畫面上 5 秒鐘,之後自動消失 請寫出 `toastError` 函式的內容,在點擊按鈕後,將「錯誤吐司」顯示在畫面上 5 秒鐘,之後自動消失 成功吐司請做成綠色 錯誤吐司請做成紅色 這個顏色變化,可以是邊框、背景顏色、字體顏色、影子顏色,都可以,你自由決定 --- 請稍微加一些 css 屬性,弄得漂亮一點 `<hr>` 只是方便隔開元素,方便別人查看元件用的,醜醜的留在畫面上沒關係 --- 做出以上功能,你就完成這次的課程目標了!
## 課程目標 認識並且能實做 alert 元件 ## 課程內容 alert 中文叫「示警」元件,當有訊息要公告在網站上,就可使用 或者當用戶執行了某些動作,在頁面上要提示、回饋訊息的時候,也可使用 通常要將 alert 做成幾種不同樣式,根據不同使用情境來使用 由於 alert 可能會佔據網頁上方、或下方,一整塊長條區域 會有點佔空間,所以通常會多做「關閉」按鈕,方便用戶保持畫面整潔 請上網搜尋 `alert ui` `alert component`,四處觀摩一下業界常見的設計 ## 課後作業 請使用 https://jsfiddle.net 用以下 html 為基礎(你可以稍微修改),接著寫出 css 與 js 的部份 ``` <div class="alert alert-primary"> 歡迎您點擊「抖內」按鈕,以實際行動支持我們。 <button class="btn-close">×</button> </div> <hr> <div class="alert alert-success"> 您已成功下訂單!以下為您的訂單詳細資訊。 <button class="btn-close">×</button> </div> <hr> <div class="alert alert-danger"> 抱歉,系統發生錯誤,請稍後重新嘗試。 <button class="btn-close">×</button> </div> <hr> <div class="alert alert-warning"> 請注意,以下內容包含「劇透」爆雷資訊。 <button class="btn-close">×</button> </div> ``` --- 這邊共有四個 alert 元件,各自有不同樣式 primary 用在主要公告事項,呈現藍色 success 用來傳遞讓人安心的成功訊息,呈現綠色 danger 用來提示錯誤訊息,呈現紅色 warning 用來呈現敏感注意事項,呈現橘色 這個顏色變化,可以是邊框、背景顏色、字體顏色、影子顏色,都可以,你自由決定 --- 訊息的旁邊,有一個關閉按鈕,點擊按鈕,要能關閉整個 alert 元件 --- 請稍微加一些 css 屬性,弄得漂亮一點 `<hr>` 只是方便隔開元素,方便別人查看元件用的,醜醜的留在畫面上沒關係 --- 做出以上功能,你就完成這次的課程目標了!
# 第6課 課程目標 學會如何套用 bootstrap 的表格、表單與與按鈕樣式。 # 第6課 課程內容 表格、表單與按鈕是網頁最基本的元素之一,就算不使用 bootstrap,html 原生就有這些元素的樣式。 不過,套用 bootstrap 樣式之後,會馬上讓這些元素好看起來,這一課要學習如何套用它們。 請閱讀入門教學: https://www.w3schools.com/bootstrap5/bootstrap_tables.php https://www.w3schools.com/bootstrap5/bootstrap_forms.php https://www.w3schools.com/bootstrap5/bootstrap_buttons.php 並參考官方說明文件: https://getbootstrap.com/docs/5.3/content/tables/ https://getbootstrap.com/docs/5.3/forms/overview/ https://getbootstrap.com/docs/5.3/components/buttons/ # 第6課 作業 這一課的作業有兩個,我們先不使用 bootstrap,把畫面做出來,接著再套用 bootstrap,讓畫面變漂亮。 作業一:請將「自學網頁の嬰兒教材:HTML與CSS」的第四課作業完成,並接著將 bootstrap table 套用進去 https://codelove.tw/@howtomakeaturn/post/l3j253 作業二:請將「自學網頁の嬰兒教材:HTML與CSS」的第五課作業完成,並接著將 bootstrap form、input 與 button 套用進去 https://codelove.tw/@howtomakeaturn/post/vx8Lgx 完成這些,你就完成這次的課程目標了!
# 第5課 課程目標 學會使用 Bootstrap 的訊息框框元件。 # 第5課 課程內容 訊息框框在所有網站都會有,在需要顯示歡迎訊息、提醒訊息、公告事項等等的時候,都可以使用。 這一課要學習使用它。 請閱讀入門教學: https://www.w3schools.com/bootstrap5/bootstrap_alerts.php 以及官方說明文件: https://getbootstrap.com/docs/5.3/components/alerts/ # 第5課 作業 這一課的作業要延續第3課的作業一。 在第3課的作業一中,我們做出了 Yahoo 新聞頁的排版。 假設你是發佈新聞的平台,你希望顯示訊息歡迎使用者,並且顯示訊息提醒讀者內容是由合作的媒體發佈,新聞平台不對內容負責任。 請在這個新聞頁面加上兩個 alert 元件。 第一個 alert 元件使用 alert-info 樣式,內含歡迎訊息,並且這個 alert 要可以點擊 × 關閉。 第二個 alert 元件使用 alert-warning 樣式,內含免除責任聲明,這個 alert 無法點擊 × 關閉,會一直顯示在那裡。 注意:這一課作業是以練習為主,實際上 Yahoo 新聞頁面並沒有這些東西。 完成這些,你就完成這次的課程目標了!
# 第4課 課程目標 學會使用 Bootstrap 的卡片元件。 # 第4課 課程內容 卡片式設計近幾年非常流行,在各大網站中都看得到它。 它的功能非常通用,可以在各種場景中使用,這一課要學習使用它。 請閱讀入門教學: https://www.w3schools.com/bootstrap5/bootstrap_cards.php 以及官方說明文件: https://getbootstrap.com/docs/5.3/components/card/ 內容不用全部讀完,也不用全部讀懂,能做出基本的卡片設計即可。 # 第4課 作業 這一課的作業要延續第3課的作業二。 在上一次的作業中,我們做出了整個 Yahoo 新聞首頁的排版,不過各區塊的內容都簡化了。 我們這一次要把內容補上,讓畫面變豐富。 請利用本課學到的卡片元件,在畫面中所有看起來像卡片的地方,全部套用卡片元件,讓卡片元件內有圖片、文字。 做完之後,整個畫面看起來會更接近真正的 Yahoo 新聞首頁。 注意:實際上 Yahoo 新聞首頁的卡片元件不多,幾乎都不是卡片元件(比如說根本沒有邊框)。 這一課作業是以練習為主,把看起來能套用卡片的地方套用就好,套不進去的地方維持原本的陽春即可。或是到處都套用卡片元件也沒關係,看起來類似原本的 Yahoo 新聞首頁即可。 完成這些,你就完成這次的課程目標了!
# 第2課 課程目標 學會使用 Bootstrap 的 Navbar 元件。 # 第2課 課程內容 本課內容非常非常簡單,只要能在網頁上做出導覽列就可以了。 請參考: https://www.w3schools.com/bootstrap5/bootstrap_navbar.php https://getbootstrap.com/docs/5.3/components/navbar/ 內容不用全部讀完,也不用全部讀懂,把其中的程式碼貼一貼,把玩一下,能做出一個最簡單的導覽列即可。 # 第2課 作業 上一課的作業,我們模仿 Yahoo 新聞的內容,做了一個簡單的新聞文章頁面。 請繼續修改這份作業,將 Yahoo 新聞上方的導覽列做出來。 你將會發現,使用 Bootstrap 能夠快速做出導覽列,比自己用手寫 html、css 方便且快速多了! 完成這些,你就完成這次的課程目標了!
**舊的 React 文件幾乎沒什麼用,這大家都知道,因為它沒反映該框架的現代用法。在本文中,我們將探索它的新文件並討論它為何很棒。** 原文出處:https://dev.to/diogorodrigues/reacts-new-killer-documentation-focused-only-on-functional-components-jnk --- React Hooks 與 [2019 年初版本 16.8](https://reactjs.org/blog/2019/02/06/react-v16.8.0.html) 一起發布,迅速流行起來並在前端社區中得到廣泛採用。通過這個版本,使用基於類別的元件編寫的複雜性,被有狀態的功能元件所取代。雖然我們可以在文件中找到對這些新功能的很好解釋,但大多數範例都繼續使用類別。 現在,在發生革命性變化 3 年多之後,**React 發布了其文件的 BETA 版本,從其解釋中刪除了類別,專注於使用帶有互動範例的鉤子的現代開發方式。** > “一旦我們與現有的 React 文檔達到內容一致,我們的目標是將此網站切換為主要網站。舊的 React 網站將存檔在一個子域中,因此您仍然可以存取它。舊內容鏈接將重定向到存檔的子域,該子域將有關於過時內容的通知。” - [BETA React 文檔](https://beta.reactjs.org/) _P.S.重要的是,當我寫這篇文章時,新內容幾乎 100% 完成了。_ ## 你可以在新的 React 文檔中找到什麼 雖然這個 React BETA 文檔不是很廣泛,但我不會逐個主題地介紹它,我將在下面重點介紹它的一些主要優點。 ### Quick Start 真的是非常快速的開始 **對我來說,這是改善超多的部分,因為與舊版本不同,現在我們可以通過其文檔中的互動式程式碼範例來使用 React 程式碼。** 這不是很神奇嗎? 一個完整的介紹,非常簡單,解釋清楚,並且不需要為現在開始學習的人設置任何專案。  ### 很好地解釋了使用 React Effects 的最佳方式 就個人而言,我認為**他們為解釋 Effects 所做的工作非常出色。**這確實是我研究了很多的東西,肯定會幫助我使用 React 開發更好的程式碼。 有一些詳盡的頁面展示了[如何停止將 Effects 視為生命週期掛鉤](https://beta.reactjs.org/learn/lifecycle-of-reactive-effects),而是 [Effects 作為與外部系統的同步器](https://beta.reactjs.org/learn/synchronizing-with-effects)。發生這種混淆是因為我們習慣於將使用 useEffect 鉤子的功能組件與基於類別的元件生命週期進行比較,但這不再有意義了。 https://twitter.com/dan_abramov/status/1157250198659354624 **另一個令人驚嘆的內容是 [“你可能不需要 effect”](https://beta.reactjs.org/learn/you-might-not-need-an-effect) 主題,我們可以在其中了解如何刪除不必要的效果**通過許多用例和互動式程式碼示例。您可以在下面的影片中找到關於該主題的精彩摘要。 https://www.youtube.com/watch?v=bGzanfKVFeU&t=742s&ab_channel=BeJS ### 精通狀態管理 我知道這個標題聽起來太冒險了,但是這個 React BETA 文檔有很多內容是關於[如何更好地建置狀態,避免冗餘狀態相關的錯誤](https://beta.reactjs.org/learn/managing-state),等等。 > “良好地建置狀態可以區分一個易於修改和除錯的元件,以及一個經常產生錯誤的組件。” - React 文檔 查看 [管理狀態部分](https://beta.reactjs.org/learn/managing-state) 以及 [Referencing Values with Refs](https://beta.reactjs.org/learn/referencing-values-with-refs) 主題以更好地理解 React 中狀態的使用。 ### 更多你可以在新的 React 文檔中找到的知識 我想強調的其他一些內容是: - [React API 參考](https://beta.reactjs.org/apis/react) 部分包含所有內容,以便更快地諮詢程式碼片段。 - “[聲明式 UI 與命令式 UI 相比如何](https://beta.reactjs.org/learn/reacting-to-input-with-state#how-declarative-ui-compares-to-imperative )”主題展示瞭如何更好地編寫聲明式 React 元件。 - “[Render and Commit](https://beta.reactjs.org/learn/render-and-commit)” 了解渲染 React 元件過程中的步驟。 - “[排隊一系列狀態更新](https://beta.reactjs.org/learn/queueing-a-series-of-state-updates)”主題將解釋為什麼有時它不起作用以及如何解決它. - “[通過自定義掛鉤重用邏輯](https://beta.reactjs.org/learn/reusing-logic-with-custom-hooks)”了解如何在元件之間共享邏輯。 ## 結論 **從基礎主題到進階主題,這些文檔涵蓋了您學習如何使用最好的現代 React 建立用戶界面所需的一切。**如果您是 React 世界的新手,本文檔肯定會對您有很大幫助互動式範例。對於經驗豐富的 React 開發人員,本文檔匯集了幾個重要的進階概念,這些概念一定會幫助您建立更好的 UI 元件。
一名資深的德國軟體架構師 Jeroen De Dauw,寫了一篇很好的文章,給新手工程師一些寫程式的建議。 - 原文出處:https://dev.to/jeroendedauw/advice-for-junior-developers-30am --- ## 給新手工程師的一般建議 ### 1. 程式碼不是重點 作為開發者,我們喜歡寫程式。大多數工程師希望收到的任務明確,可以不用管技術之外的事情,專心解決有趣的技術挑戰。 請花足夠的心力去確認,您正在解決正確的問題。引用管理學大師 Peter Drucker 的話:高效率地去做一件根本沒必要的事情,結果依然是完全沒意義。儘早、經常去搜集回饋,透過「持續交付」來向真正的用戶互動,成為敏捷(Agile)的工程師。 軟體開發成本高昂,現實世界專案的絕大部份工作都是在維護而已。再加上目標應該是對用戶、對生意有幫助,所以結論就是:寫程式最好的方法,經常是完全不寫。引用比爾蓋茲的話:用程式碼有幾行來衡量工程進度,就像用重量來衡量飛機的製造進度。 另請參閱:YAGNI 原則、KISS 原則、The Last Responsible Moment 文章。 ### 2. 軟體設計很重要 在我開發生涯的前五年,我以為軟體設計是架構師或其他特殊職位的人在做的事。我以為開發者專注在完成任務即可,以為軟體設計、最佳實踐、寫測試這些,都不關我的事。我的程式能跑,我的生產力很高,我以為這樣就對了。 直到我閱讀了 Robert C. Martin 的 Clean Code,這書刺激了我對軟體設計的關注,並包含許多範例與啟發。其中最啟發我的是:走得快的唯一方法,就是走得好。也就是說,如果你把事情搞得一團糟,結果只會讓你速度更慢。 學習寫出設計良好的乾淨程式碼,需要時間和精力。而且剛開始的時候,會寫比較慢,並且會犯錯誤。 ### 3. 使用最佳實踐 寫測試通常會有幫助。雖有例外,但大多數時候,寫自動化測試會大有幫助。寫測試就是一種最佳實踐。 如果你不太會寫測試,請遵循最佳實踐並為所有內容寫測試。**開始時,盲目遵循最佳實踐比遵循自己弱弱的判斷要好**。一段時間之後,您將知道怎麼寫測試比較有效,並能夠區分您搞砸了和不值得編寫測試的情況。因為 bug 變少了、重構起來更輕鬆了,您將開始理解測試帶來的深入的價值。**到有了自己的判斷力後,您將能夠超越最佳實踐**。 此建議適用於您在學習任何最佳實踐的新手時期。自動化測試只是一個例子。 有個陷阱要注意,明智的最佳實踐,與荒謬、適得其反的做法之間,只有一線之隔。因為大多數程式碼都很亂,而且大多數開發者(包括資深人員)不了解軟體設計的基礎知識,因此事情就更複雜了。有一個好的指導者很重要。除此之外,根據我自己的經驗,要小心只存在您的語言、框架社群的最佳實踐。尋找那些已經存在了幾十年的長青建議比較好。 --- ## 給新手工程師的技術建議 ### 4. 寫測試 寫自動化測試。也許在寫程式之前先寫測試,例如運用測試驅動開發(TDD)。這讓您可以輕鬆反覆驗證幾段程式是否正確,而不用一直手動跑測試、除錯。 > 你覺得先寫測試很煩嗎?但之後再忙著抓 bug 有比較好? 更重要的是,測試為您重構時提供了額外保障。你需要持續重構來保持程式乾淨。沒有可靠的測試保障,程式碼就可能越變越亂。 如果您的程式碼設計不佳,例如使用繼承進行重用,或使用靜態函數,則編寫測試會很困難。另一方面,如果您有遵循 SOLID 原則、沒有全局依賴項,那麼寫出好的測試並不困難。 設計好測試也很重要,因為糟糕的測試只會拖慢開發速度。避免將測試綁定到被測程式碼的實作細節或系統結構。 ### 5. 不要用繼承來做到程式碼重用 這是讓人以為是最佳實踐的其中一個反例。我的建議是:剛開始時,根本就不要用繼承來做到程式碼重用。這通常都幫助有限,而且帶來一大堆麻煩。請多用組合、少用繼承(關鍵字:composition over inheritance)。 ### 6. 寫出 OOP 程式碼 學習 SOLID 原則,避免寫出 STUPID 原則的程式碼 ( https://williamdurand.fr/2013/07/30/from-stupid-to-solid-code/ )。理解這些原則和反模式非常有價值。 創造一些真正的物件。只有靜態方法的類別,根本不算是物件導向。盡量避免完全使用靜態寫法。 ### 7. 寫出函數式程式碼 不要把函數式程式設計,跟指令式程式設計搞混了。 重點不是完全切換到函數式語言。而是學習使用函數式風格的優點。例如減少狀態、讓函數專心一件事。另請參閱:https://www.destroyallsoftware.com/screencasts/catalog/functional-core-imperative-shell ### 8. 程式碼稍微重複沒關係 將一大塊程式碼到處複製貼上當然很不好。有尊嚴的開發者很快就發現這一點,並開始遵循某種形式的:不重複自己原則 Don't Repeat Yourself (DRY)。不幸的是,對 DRY 的追求往往會導致過度工程和額外的複雜性。所以會有一條新原則:寫兩次原則 Write Everything Twice(WET)。也就是僅在第三次出現重複時,才動手改善重複段落。 ### 9. 型別、命名、註解 試著寫一些能夠表達自我的程式碼,避免寫註解。 > 每次寫註解時,都應該要皺一下眉頭,感受到自己的表達能力有點失敗。 —— Robert C. Martin 註解很危險,因為有可能說謊。程式碼可以不更新註解就修改,那一開始的註解就變錯誤了。這種情況下,註解不但沒幫助,還會誤導到別人。 要寫出能夠表達自我的程式碼: - **一個函數只做一件事** 因為只做一件事,就能給一個清楚的命名。 - **減少狀態** - **使用型別** 定義清楚的型別,加上跑測試,能讓系統更穩定。 - **減少混合型別** 避免可以同時是整數、布林值或字串的參數或回傳值。如果讓每個函數專心一件事,這自然會做到。 - **寫測試** 良好的全面測試,也同時會是程式碼的使用說明範例。 Robert C. Martin 的書 Clean Code 在命名和寫註解方面有提供一些很好的經驗法則。 --- 以上,希望對大家有幫助!
網路上免費的 React 版型資源不太好找,最好有一份懶人包。 這份列表整理了各式各樣的模板與主題套件,希望對您有幫助。 - 原文出處:https://dev.to/davidepacilio/35-free-react-templates-and-themes-32ci --- ##1. Open  [**Live demo**](https://open.cruip.com/) / [**Download**](https://github.com/cruip/open-react-template) Open 是一個免費的 React 模板,專為開源專案、線上服務、數位產品,創建快速、專業的登陸頁面而生。為了吸引潛在客戶和電子郵件訂閱者,Open 提供了一個多功能的資源庫,其中包含時尚、簡約和可重複使用的元件和元素。 --- ##2. Atomize 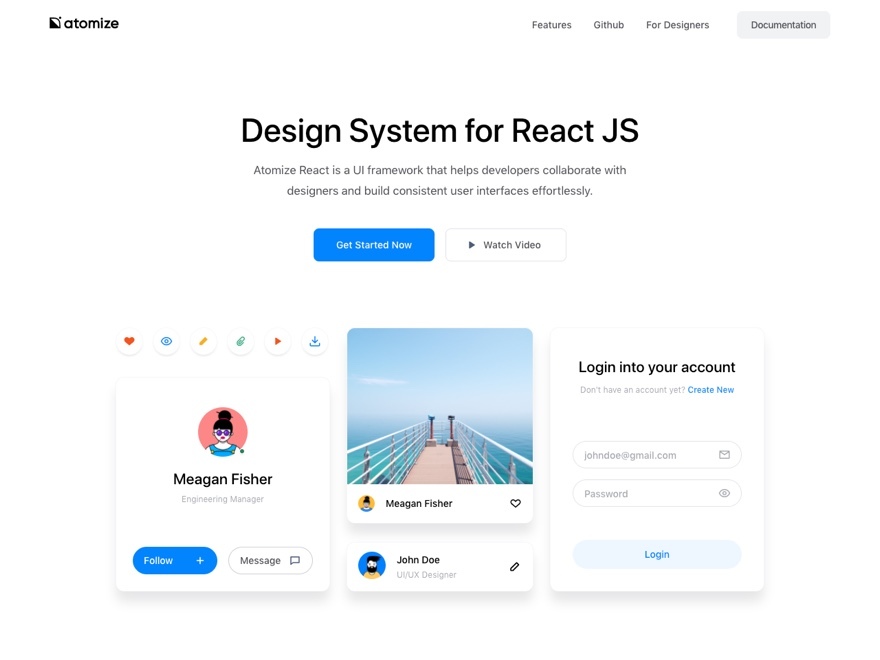 [**Live demo**](https://atomizecode.com/) / [**Download**](https://github.com/proksh/atomize) Atomize 是一個 React UI 框架,旨在幫助開發人員與設計師合作,輕鬆構建一致和諧的用戶界面。由於樣式指南和靈活網格等資源的完美結合,Atomize 適合建立任何類型的響應式網站。 --- ##3. Treact 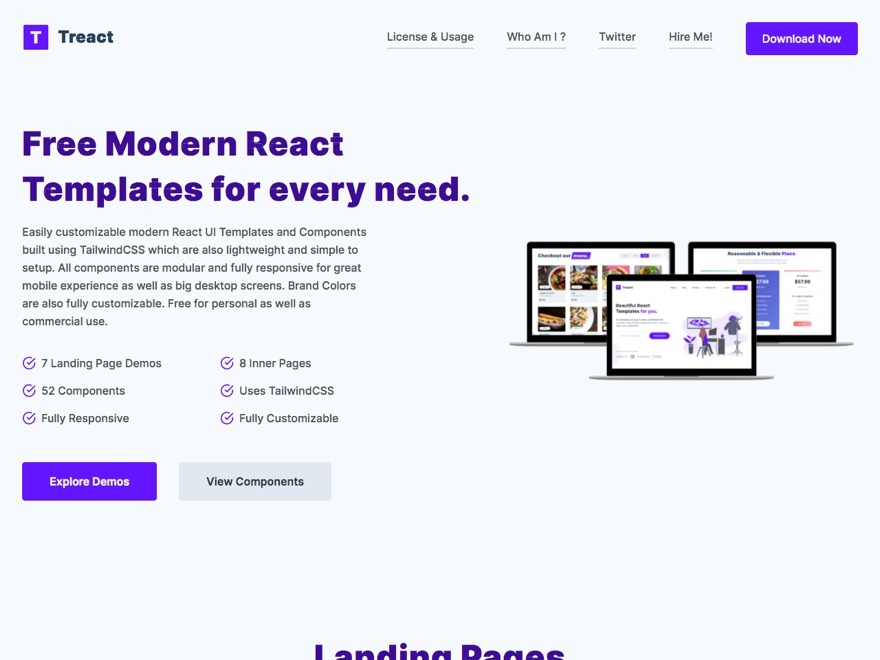 [**Live demo**](https://treact.owaiskhan.me/) / [**Download**](https://gumroad.com/l/QaruQ) Treact 是使用 TailwindCSS 作為前端框架開發的現代 React 模板和 UI 組件展示庫。這個精美的檔案庫提供了 7 個內建的主頁、8 個輔助頁面以及 52 個預先設計的元素和段落。每個內容都可以針對家用電腦、平板電腦和移動設備進行擴充。 --- ##4. MatX  [**Live demo**](http://matx-react.ui-lib.com/dashboard/analytics) / [**Download**](https://ui-lib.com/downloads/matx-react-dashboard/) MatX 是一個建立在 Material Design 之上的精美 React Native 模板。此模板使用 React、Redux 和 Material UI,它包含為 Web 應用程式提供新造型可能需要的所有基本功能。 MatX 的免費版本可用於輕鬆設置管理面板、用戶管理系統和專案管理系統。 --- ##5. Holly  [**Live demo**](https://lukemcdonald.github.io/holly-react/) / [**Download**](https://github.com/lukemcdonald/holly-react) Holly 是一個響應式 React JS 模板,適用於線上服務和數位產品的生產者,能在主要產品仍在開發中時,就開始搜集電子郵件地址。這個模板最初是由 [Cruip](https://cruip.com/) 用 HTML 設計的,然後在這個版本中用 React 撰寫。 --- ##6. OAH-Admin 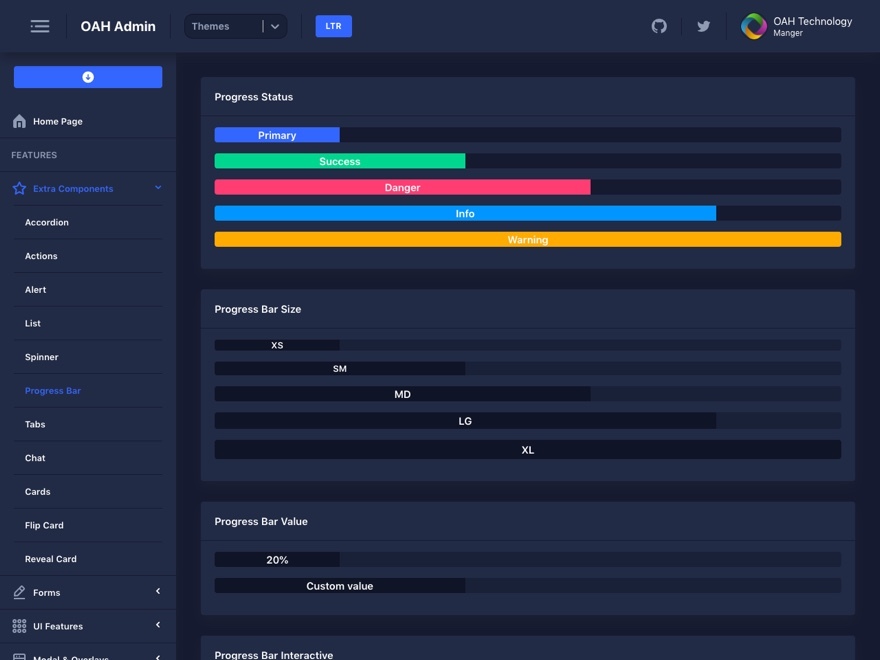 [**Live demo**](https://oah-admin.ahmedelywa.com/extra-components/progress/) / [**Download**](https://github.com/AhmedElywa/oah-admin) OAH-Admin 是一個基於 Gatsby 的免費 React 管理儀表板模板,帶有 oah-ui 元件和元素包。這個 React 模板有良好的 UI 元件色調,超級整潔和靈活的格式使任何人都可以輕鬆建立 SaaS 應用程式、管理面板、儀表板。 --- ##7. Gatsby Starter Ghost  [**Live demo**](https://gatsby.ghost.org/) / [**Download**](https://github.com/TryGhost/gatsby-starter-ghost) 使用 Ghost 這個基於 Gatsby 的入門模板,輕鬆建立高效能網站。Gatsby Starter Ghost 是一個乾淨而現代的模板,適用於部落格、雜誌或任何新聞網站。該產品專門設計來幫助任何人在網路上建立個人空間並分享想法、創意和更新。 --- ##8. Star Admin  [**Live demo**](https://www.bootstrapdash.com/demo/star-admin-free/react/template/demo_1/preview/dashboard) / [**Download**](https://github.com/BootstrapDash/StarAdmin-Free-React-Admin-Template) 一個免費的 React Native 模板,提供了無窮無盡的各種基本元素,可以將任何想法變為現實。該模板具有精心製作的儀表板,包含大量整齊排列和組織的元件,它可以完美地與所有最新和現代的瀏覽器配合使用,並且能夠使資料可視化過程更易於管理。 --- ##9. Carolina Admin Dashboard 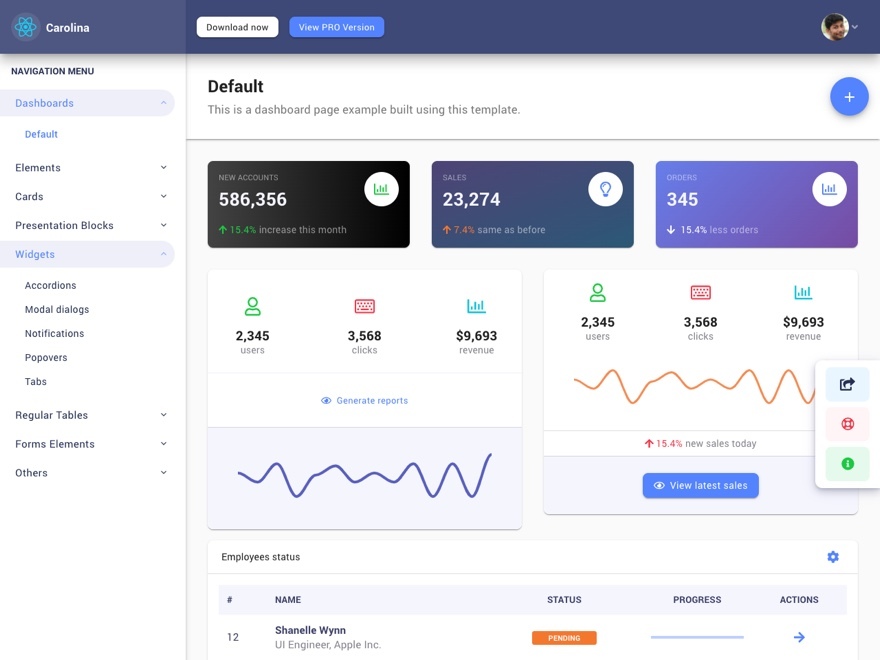 [**Live demo**](https://demo.uifort.com/carolina-react-admin-dashboard-material-ui-free-demo/LandingPage) / [**Download**](https://uifort.com/template/carolina-react-admin-dashboard-material-ui-free/) 如果您正在尋找一個令人驚嘆且實用的 React 儀表板模板,Carolina Admin Dashboard 擁有啟動和運行您 Web 專案所需的一切。這個漂亮的模板建立在 Material-UI 框架之上,採用乾淨清新的設計,遵循所有 Google 的 Material Design 指南。此外,核心結構是完全響應式和開源的。 --- ##10. Tabler  [**Live demo**](http://tabler-react.com/) / [**Download**](https://github.com/tabler/tabler-react) Tabler 是一個免費的 React 管理儀表板模板,非常適合任何類型的後端 Web 應用。此管理模板包含大量精心設計的範例,無需從頭開始,可為您節省大量時間,它還附帶可重複使用的元件,例如按鈕、地圖、圖表、表單等。 --- ##11. React Nice Resume  [**Live demo**](https://nordicgiant2.github.io/react-nice-resume-page/#home) / [**Download**](https://github.com/nordicgiant2/react-nice-resume) React Nice Resume 是一個漂亮的主題,如果您是開發人員、設計師或一般的數位創作者,可以用來宣傳您自己和您的作品。該資源展示了一個獨特的主頁,帶有粒子背景、工作經驗時間線、技能圖表、顯示最新專案的縮略圖、一個帶有功能輸入表單的段落。 --- ##12. Boss Lite 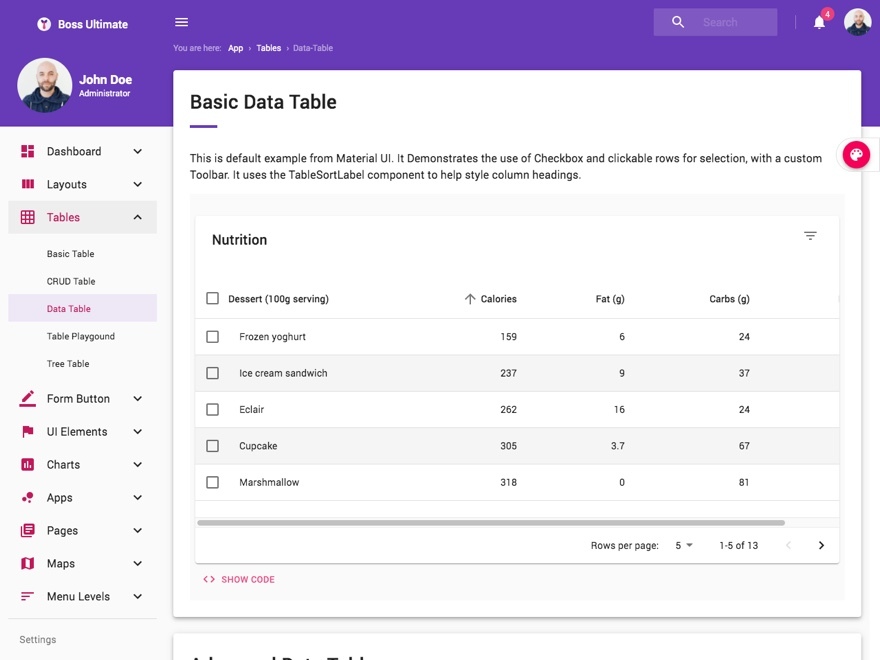 [**Live demo**](http://boss.ux-maestro.com/app/tables/data-table) / [**Download**](https://github.com/ilhammeidi/boss-lite) Boss Lite 是一個基於 React 和 Redux 的管理儀表板模板。此模板為您帶來清新現代的設計和多種配色方案。它支援大多類型的 Web 專案,並且 Flexbox 佈局而變得很流暢。 --- ##13. Chakra UI 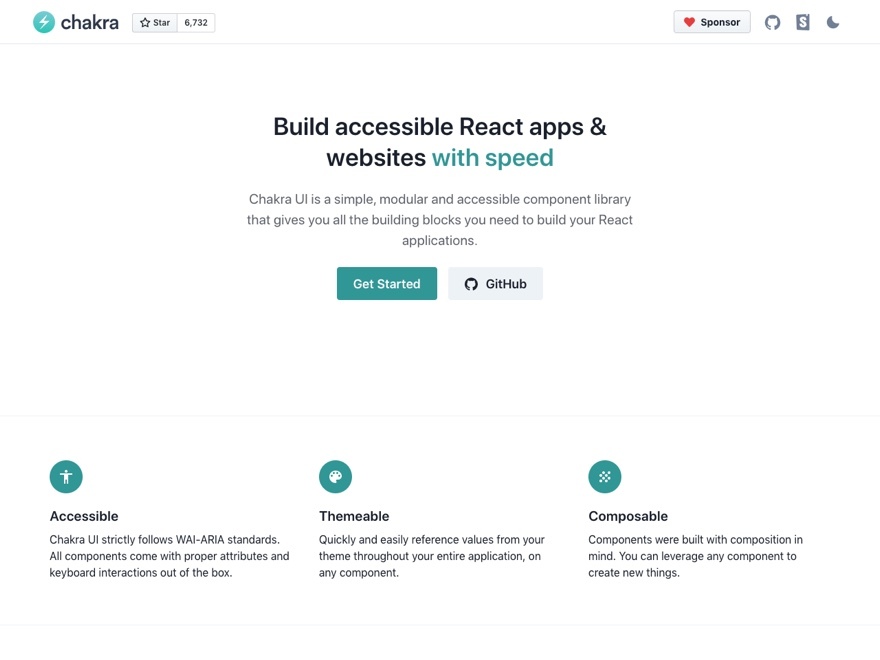 [**Live demo**](https://chakra-ui.com/) / [**Download**](https://github.com/chakra-ui/chakra-ui/) Chakra UI 提供了一組好用、可重用的 React 功能元件,使建立好用網站和用戶界面變得非常簡單。 Chakra UI 中的幾乎所有元素都兼容深色模式,它們遵循 WAI-ARIA 指南規範,並構建在 React UI Primitive 之上以實現無限的可組合性。 --- ##14. Black Dashboard React 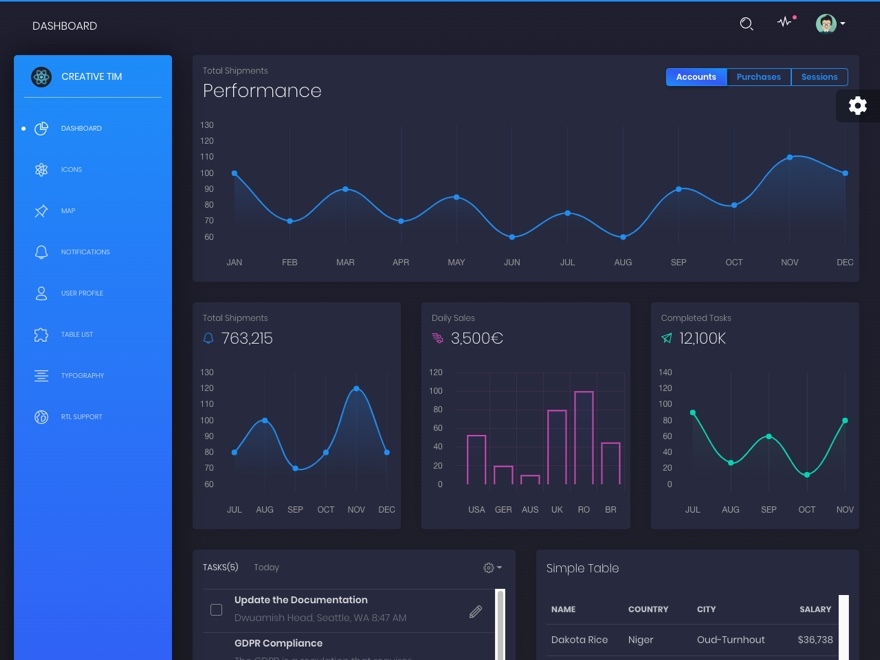 [**Live demo**](https://demos.creative-tim.com/black-dashboard-react/#/admin/dashboard) / [**Download**](https://www.creative-tim.com/product/black-dashboard-react) Black Dashboard React 是用於管理界面的 React 模板。該模板基於 Bootstrap 建立的設計指南,是基於企業的應用程式,是強大後端軟體可用的優秀前端選項。它具有更高等級的切分、設計套件、可重複使用的圖表,能夠不斷改善用戶和開發體驗。 --- ##15. Argon Design System  [**Live demo**](https://demos.creative-tim.com/argon-design-system-react/) / [**Download**](https://github.com/creativetimofficial/argon-design-system-react) 使用 Bootstrap 4 和 Reactstrap 的 React 設計系統。Argon Design System 帶有 100 多個單獨的元件、內建的範例,並且每個元素都有多種樣式、懸停、焦點狀態,任何人都可以輕鬆使用。該產品是從原型設計到正式上線的完美解決方案。 --- ##16. Devias Kit - Admin Dashboard 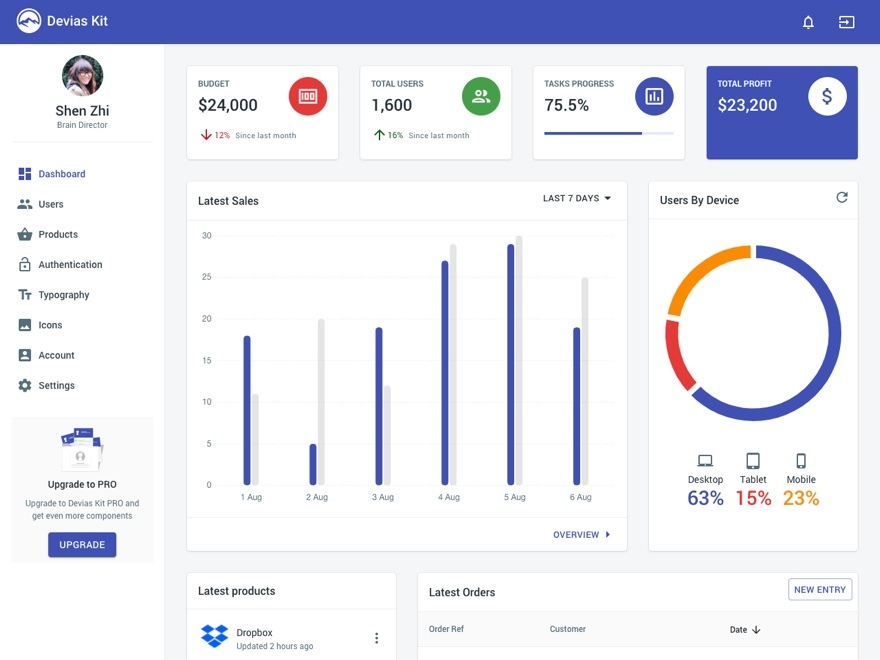 [**Live demo**](https://react-material-dashboard.devias.io/dashboard) / [**Download**](https://github.com/devias-io/react-material-dashboard) Devias Kit 是一個響應式 Material Design 管理儀表板,專為 React 使用 Google 自己的 Material Design 框架建立。可以自定義設置、指令、圖標和樣式。該模板包含清晰直觀的目錄和文件、快速入門文件,如果您想對設計進行任何更改,甚至還有 Sketch 文件。 --- ##17. Dev Blog  [**Live demo**](https://ryanfitzgerald.github.io/devblog/) / [**Download**](https://github.com/RyanFitzgerald/devblog) Dev Blog 是一個 React 網站模板,專為快速建立副專案和產品而生。該網站模板帶有一個首頁,其中顯示了部落格名稱、社交媒體圖示以及帶有文字和圖像的文章縮圖。該模板還包括單個文章頁面,有漂亮且精心策劃的排版。 --- ##18. Material PRO 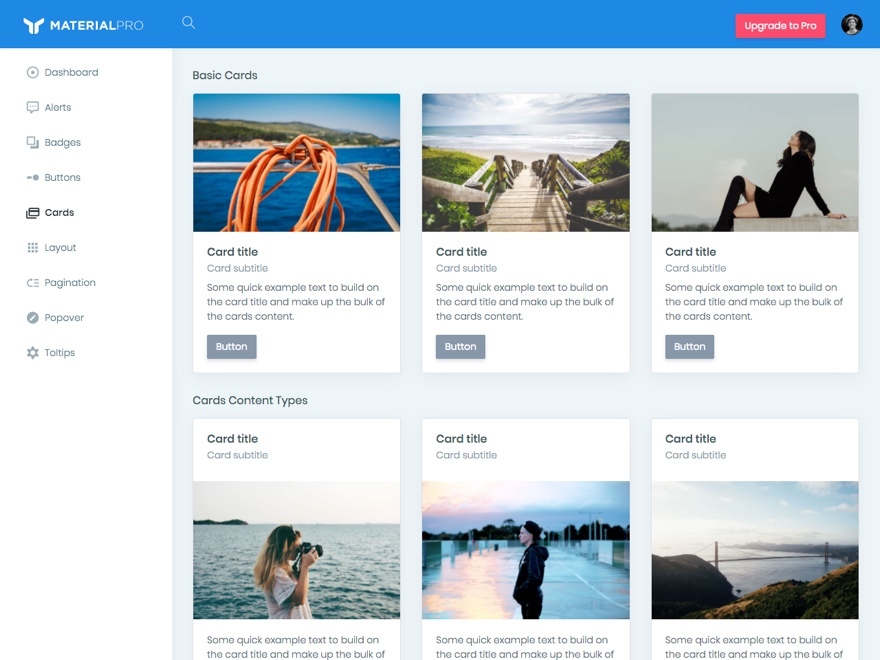 [**Live demo**](https://wrappixel.com/demos/free-admin-templates/materialpro-reactadmin-lite/main/#/starter/starter) / [**Download**](https://www.wrappixel.com/templates/materialpro-react-admin-lite/) Material Pro 是一個免費的 React Native 模板,為任何需要管理儀表板的人精心製作。這個漂亮而清爽的產品採用模組化和現代設計理念開發,100% 免費使用和下載,並包含許多頁面,可幫助您更快、更輕鬆地建立專案。 --- ##19. Ant Design Landing 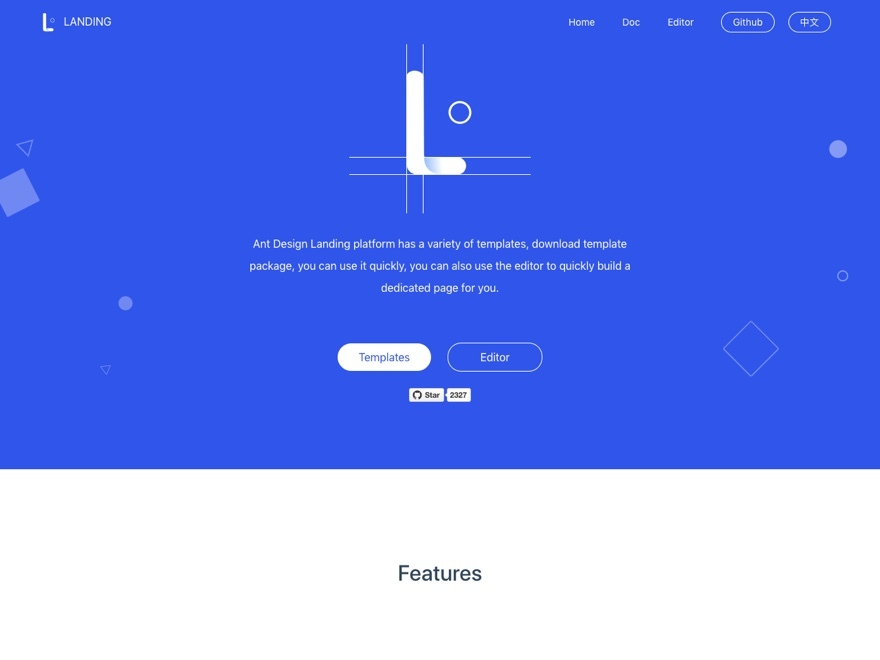 [**Live demo**](https://landing.ant.design/) / [**Download**](https://github.com/ant-design/ant-design-landing) Landing 是 Ant Design System 建立的模板。內涵不同樣式的首頁和內頁模組。 --- ##20. Isomorphic  [**Live demo**](https://isomorphic.redq.io/dashboard) / [**Download**](https://github.com/pujoey/ismorphic) Isomorphic 是一個易於管理且有吸引力的管理模板,具有大量靈活的元件。 --- ##21. Shards Dashboard Lite  [**Live demo**](https://designrevision.com/demo/shards-dashboard-lite-react/blog-overview) / [**Download**](https://designrevision.com/downloads/shards-dashboard-lite-react/) Shards 是一個免費的 React 儀表板模板,具有現代設計系統和許多自定義頁面和部分。 --- ##22. uiw  [**Live demo**](https://uiwjs.github.io/) / [**Download**](https://github.com/uiwjs/uiw) uiw 是用於 React 16+ 的高質量 React 元件庫和 UI 工具包。 --- ##23. React Material Admin  [**Live demo**](https://flatlogic.github.io/react-material-admin/#/login) / [**Download**](https://flatlogic.com/templates/react-material-admin) React Material Admin 是一個建立在 Material-UI 框架之上的 React 儀表板。 --- ##24. Material KIT React 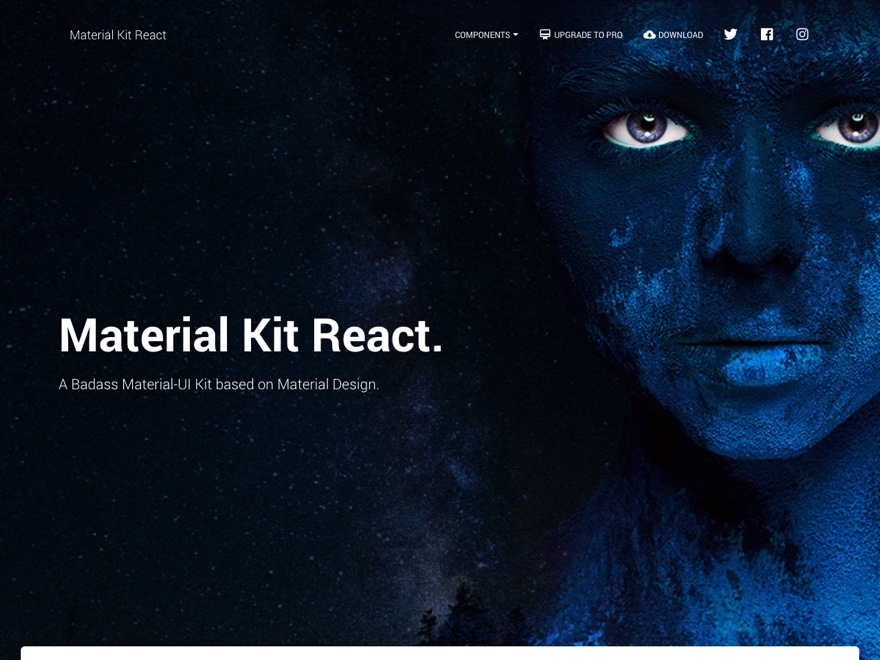 [**Live demo**](https://demos.creative-tim.com/material-kit-react/) / [**Download**](https://www.creative-tim.com/product/material-kit-react) Material UI KIT 是一款免費的 React UI 主題,其設計靈感來自 Google 的 Material Design,設計清新整潔。 --- ##25. Airframe  [**Live demo**](http://dashboards.webkom.co/react/airframe/dashboards/projects/) / [**Download**](https://github.com/0wczar/airframe-react) Airframe 是一個基於 Bootstrap 4 和 React 16 的免費開源 React 應用程式模板。 --- ##26. Gatsby Simplefolio  [**Live demo**](https://gatsby-simplefolio.netlify.app/) / [**Download**](https://github.com/cobidev/gatsby-simplefolio) Gatsby Simplefolio 是一個乾淨、美觀且響應迅速的 React 組合模板。 --- ##27. Ant Design Pro  [**Live demo**](https://pro.ant.design/) / [**Download**](https://github.com/ant-design/ant-design-pro/) React --- ##28. React SaaS Template  [**Live demo**](https://reactsaastemplate.com/) / [**Download**](https://github.com/dunky11/react-saas-template) --- ##29. Shards React  [**Live demo**](https://designrevision.com/downloads/shards-react/) / [**Download**](https://github.com/designrevision/shards-react) --- ##30. Base Web 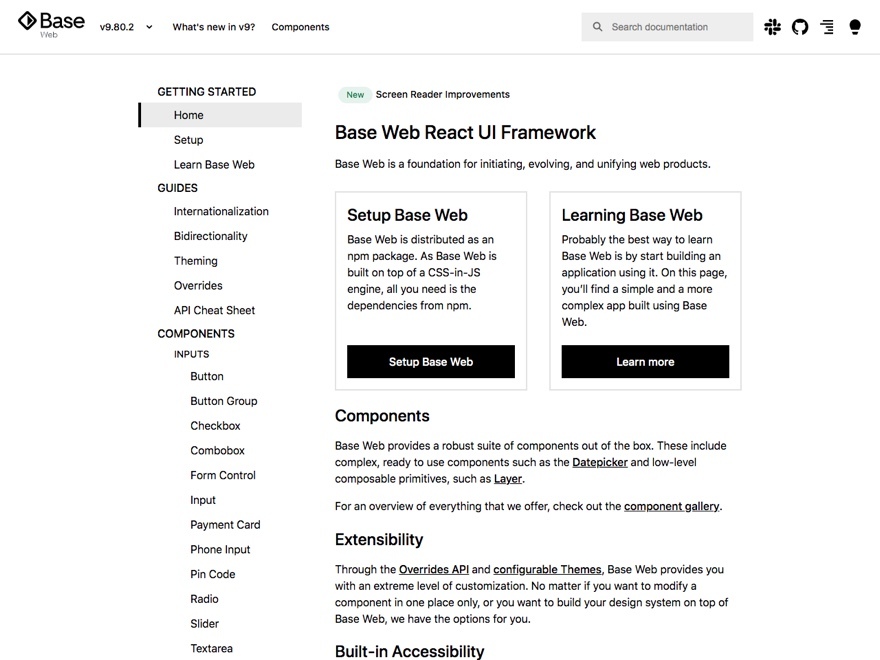 [**Live demo**](https://baseweb.design/) / [**Download**](https://github.com/uber/baseweb) --- ##31. Light Blue React Dashboard  [**Live demo**](https://demo.flatlogic.com/light-blue-react/#/app/main/dashboard) / [**Download**](https://github.com/flatlogic/light-blue-react-template) --- ##32. React JS Landing  [**Live demo**](https://react-landing-page-template.herokuapp.com/#page-top) / [**Download**](https://github.com/IssaafKattan/React-Landing-Page-Template) --- ##33. Admin Pro  [**Live demo**](https://wrappixel.com/demos/free-admin-templates/adminpro-react-lite/main/#/dashboard) / [**Download**](https://www.wrappixel.com/templates/adminpro-react-admin-lite/#comparison) --- ##34. Blueprint 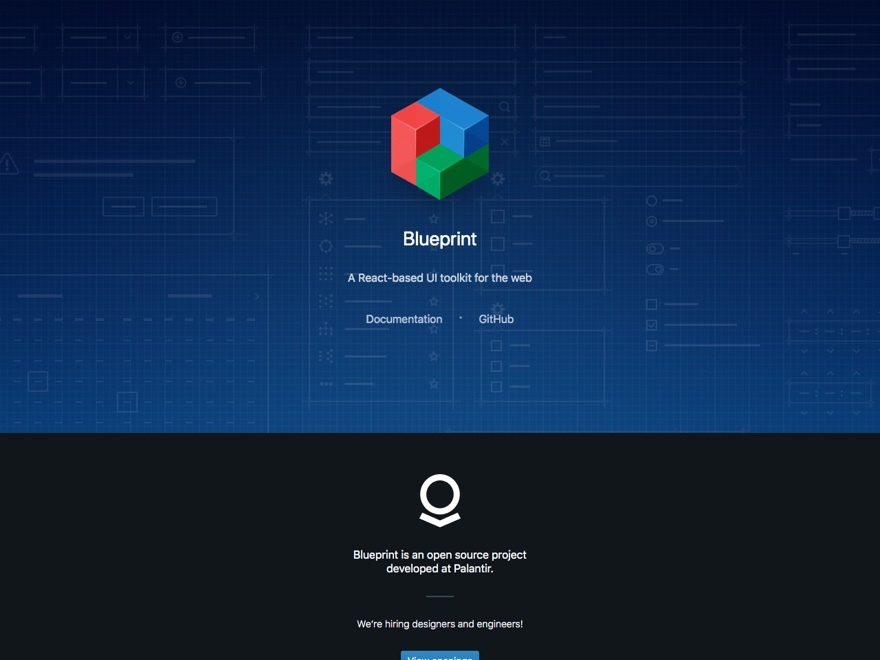 [**Live demo**](https://blueprintjs.com/) / [**Download**](https://github.com/palantir/blueprint) --- ##35. Datta 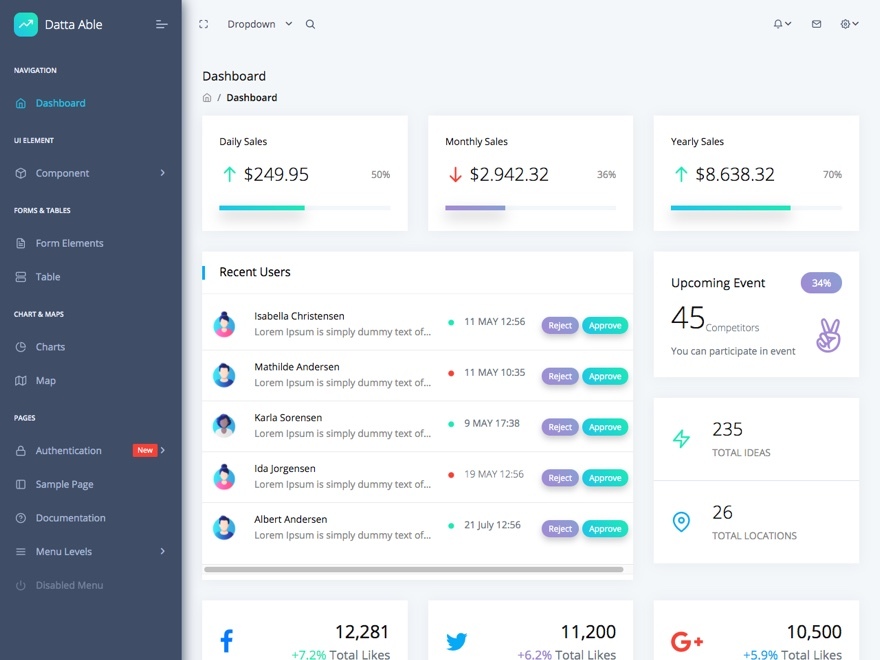 [**Live demo**](http://lite.codedthemes.com/datta-able/react/default/dashboard/default) / [**Download**](https://codedthemes.com/item/datta-able-react-free-admin-template/) --- ##36. Flatlogic One  [**Live demo**](https://flatlogic.github.io/one-react-template/#/login) / [**Download**](https://flatlogic.com/templates/one-free-react-template) --- ##結論 我希望這組免費的 React 模板和主題能夠幫助您!
React 作為一個強大的前端工具,有很多需要熟悉的基本觀念&語法。 這篇文章做一個快速的全面整理,方便工作時,可以隨時翻閱,希望您喜歡。 - 原文出處:https://dev.to/reedbarger/the-react-cheatsheet-for-2020-real-world-examples-4hgg ## 核心概念 ### 元素和 JSX - React 元素的基本語法 ``` // In a nutshell, JSX allows us to write HTML in our JS // JSX can use any valid html tags (i.e. div/span, h1-h6, form/input, etc) <div>Hello React</div> ``` - JSX 元素就是一段表達式 ``` // as an expression, JSX can be assigned to variables... const greeting = <div>Hello React</div>; const isNewToReact = true; // ... or can be displayed conditionally function sayGreeting() { if (isNewToReact) { // ... or returned from functions, etc. return greeting; // displays: Hello React } else { return <div>Hi again, React</div>; } } ``` - JSX 允許我們嵌套表達式 ``` const year = 2020; // we can insert primitive JS values in curly braces: {} const greeting = <div>Hello React in {year}</div>; // trying to insert objects will result in an error ``` - JSX 允許我們嵌套元素 ``` // to write JSX on multiple lines, wrap in parentheses: () const greeting = ( // div is the parent element <div> {/* h1 and p are child elements */} <h1>Hello!</h1> <p>Welcome to React</p> </div> ); // 'parents' and 'children' are how we describe JSX elements in relation // to one another, like we would talk about HTML elements ``` - HTML 和 JSX 的語法略有不同 ``` // Empty div is not <div></div> (HTML), but <div/> (JSX) <div/> // A single tag element like input is not <input> (HTML), but <input/> (JSX) <input name="email" /> // Attributes are written in camelcase for JSX (like JS variables <button className="submit-button">Submit</button> // not 'class' (HTML) ``` - 最基本的 React 應用程式需要三樣東西: - 1. ReactDOM.render() 渲染我們的應用程序 - 2. 一個 JSX 元素(在此情況下,稱為根節點) - 3. 一個用於掛載應用程式的 DOM 元素(通常是 index.html 文件中 id 為 root 的 div) ``` // imports needed if using NPM package; not if from CDN links import React from "react"; import ReactDOM from "react-dom"; const greeting = <h1>Hello React</h1>; // ReactDOM.render(root node, mounting point) ReactDOM.render(greeting, document.getElementById("root")); ``` ### 元件和 Props - 基本 React 元件的語法 ``` import React from "react"; // 1st component type: function component function Header() { // function components must be capitalized unlike normal JS functions // note the capitalized name here: 'Header' return <h1>Hello React</h1>; } // function components with arrow functions are also valid const Header = () => <h1>Hello React</h1>; // 2nd component type: class component // (classes are another type of function) class Header extends React.Component { // class components have more boilerplate (with extends and render method) render() { return <h1>Hello React</h1>; } } ``` - 如何使用元件 ``` // do we call these function components like normal functions? // No, to execute them and display the JSX they return... const Header = () => <h1>Hello React</h1>; // ...we use them as 'custom' JSX elements ReactDOM.render(<Header />, document.getElementById("root")); // renders: <h1>Hello React</h1> ``` - 元件可以在我們的應用程式中重複使用 ``` // for example, this Header component can be reused in any app page // this component shown for the '/' route function IndexPage() { return ( <div> <Header /> <Hero /> <Footer /> </div> ); } // shown for the '/about' route function AboutPage() { return ( <div> <Header /> <About /> <Testimonials /> <Footer /> </div> ); } ``` - 資料可以通過 props 動態傳遞給元件 ``` // What if we want to pass data to our component from a parent? // I.e. to pass a user's name to display in our Header? const username = "John"; // we add custom 'attributes' called props ReactDOM.render( <Header username={username} />, document.getElementById("root") ); // we called this prop 'username', but can use any valid JS identifier // props is the object that every component receives as an argument function Header(props) { // the props we make on the component (i.e. username) // become properties on the props object return <h1>Hello {props.username}</h1>; } ``` - Props 不可直接改變(mutate) ``` // Components must ideally be 'pure' functions. // That is, for every input, we be able to expect the same output // we cannot do the following with props: function Header(props) { // we cannot mutate the props object, we can only read from it props.username = "Doug"; return <h1>Hello {props.username}</h1>; } // But what if we want to modify a prop value that comes in? // That's where we would use state (see the useState section) ``` - 如果我們想將元素/元件作為 props 傳遞給其它元件,可以用 children props ``` // Can we accept React elements (or components) as props? // Yes, through a special property on the props object called 'children' function Layout(props) { return <div className="container">{props.children}</div>; } // The children prop is very useful for when you want the same // component (such as a Layout component) to wrap all other components: function IndexPage() { return ( <Layout> <Header /> <Hero /> <Footer /> </Layout> ); } // different page, but uses same Layout component (thanks to children prop) function AboutPage() { return ( <Layout> <About /> <Footer /> </Layout> ); } ``` - 可以用三元運算子來條件顯示元件 ``` // if-statements are fine to conditionally show , however... // ...only ternaries (seen below) allow us to insert these conditionals // in JSX, however function Header() { const isAuthenticated = checkAuth(); return ( <nav> <Logo /> {/* if isAuth is true, show AuthLinks. If false, Login */} {isAuthenticated ? <AuthLinks /> : <Login />} {/* if isAuth is true, show Greeting. If false, nothing. */} {isAuthenticated && <Greeting />} </nav> ); } ``` - Fragments 是用來顯示多個元件的特殊元件,無需向 DOM 添加額外的元素 - Fragments 適合用在條件邏輯 ``` // we can improve the logic in the previous example // if isAuthenticated is true, how do we display both AuthLinks and Greeting? function Header() { const isAuthenticated = checkAuth(); return ( <nav> <Logo /> {/* we can render both components with a fragment */} {/* fragments are very concise: <> </> */} {isAuthenticated ? ( <> <AuthLinks /> <Greeting /> </> ) : ( <Login /> )} </nav> ); } ``` ### 列表和 keys - 使用 .map() 將資料列表(陣列)轉換為元素列表 ``` const people = ["John", "Bob", "Fred"]; const peopleList = people.map(person => <p>{person}</p>); ``` - .map() 也可用來轉換為元件列表 ``` function App() { const people = ['John', 'Bob', 'Fred']; // can interpolate returned list of elements in {} return ( <ul> {/* we're passing each array element as props */} {people.map(person => <Person name={person} />} </ul> ); } function Person({ name }) { // gets 'name' prop using object destructuring return <p>this person's name is: {name}</p>; } ``` - 迭代的每個 React 元素都需要一個特殊的 `key` prop - key 對於 React 來說是必須的,以便能夠追蹤每個正在用 map 迭代的元素 - 沒有 key,當資料改變時,React 較難弄清楚元素應該如何更新 - key 應該是唯一值,才能讓 React 知道如何分辨 ``` function App() { const people = ['John', 'Bob', 'Fred']; return ( <ul> {/* keys need to be primitive values, ideally a generated id */} {people.map(person => <Person key={person} name={person} />)} </ul> ); } // If you don't have ids with your set of data or unique primitive values, // you can use the second parameter of .map() to get each elements index function App() { const people = ['John', 'Bob', 'Fred']; return ( <ul> {/* use array element index for key */} {people.map((person, i) => <Person key={i} name={person} />)} </ul> ); } ``` ### 事件和事件處理器 - React 和 HTML 中的事件略有不同 ``` // Note: most event handler functions start with 'handle' function handleToggleTheme() { // code to toggle app theme } // in html, onclick is all lowercase <button onclick="handleToggleTheme()"> Submit </button> // in JSX, onClick is camelcase, like attributes / props // we also pass a reference to the function with curly braces <button onClick={handleToggleTheme}> Submit </button> ``` - 最該先學的 React 事件是 onClick 和 onChange - onClick 處理 JSX 元素上的點擊事件(也就是按鈕動作) - onChange 處理鍵盤事件(也就是打字動作) ``` function App() { function handleChange(event) { // when passing the function to an event handler, like onChange // we get access to data about the event (an object) const inputText = event.target.value; const inputName = event.target.name; // myInput // we get the text typed in and other data from event.target } function handleSubmit() { // on click doesn't usually need event data } return ( <div> <input type="text" name="myInput" onChange={handleChange} /> <button onClick={handleSubmit}>Submit</button> </div> ); } ``` ## React Hooks ### State and useState - useState 為我們提供 function component 中的本地狀態 ``` import React from 'react'; // create state variable // syntax: const [stateVariable] = React.useState(defaultValue); function App() { const [language] = React.useState('javascript'); // we use array destructuring to declare state variable return <div>I am learning {language}</div>; } ``` - 注意:此段文章中的任何 hook 都來自 React 套件,且可以單獨導入 ``` import React, { useState } from "react"; function App() { const [language] = useState("javascript"); return <div>I am learning {language}</div>; } ``` - useState 還為我們提供了一個 `setter` 函數來更新它的狀態 ``` function App() { // the setter function is always the second destructured value const [language, setLanguage] = React.useState("python"); // the convention for the setter name is 'setStateVariable' return ( <div> {/* why use an arrow function here instead onClick={setterFn()} ? */} <button onClick={() => setLanguage("javascript")}> Change language to JS </button> {/* if not, setLanguage would be called immediately and not on click */} <p>I am now learning {language}</p> </div> ); } // note that whenever the setter function is called, the state updates, // and the App component re-renders to display the new state ``` - useState 可以在單個元件中使用一次或多次 ``` function App() { const [language, setLanguage] = React.useState("python"); const [yearsExperience, setYearsExperience] = React.useState(0); return ( <div> <button onClick={() => setLanguage("javascript")}> Change language to JS </button> <input type="number" value={yearsExperience} onChange={event => setYearsExperience(event.target.value)} /> <p>I am now learning {language}</p> <p>I have {yearsExperience} years of experience</p> </div> ); } ``` - useState 可以接受 primitive value 或物件 ``` // we have the option to organize state using whatever is the // most appropriate data type, according to the data we're tracking function App() { const [developer, setDeveloper] = React.useState({ language: "", yearsExperience: 0 }); function handleChangeYearsExperience(event) { const years = event.target.value; // we must pass in the previous state object we had with the spread operator setDeveloper({ ...developer, yearsExperience: years }); } return ( <div> {/* no need to get prev state here; we are replacing the entire object */} <button onClick={() => setDeveloper({ language: "javascript", yearsExperience: 0 }) } > Change language to JS </button> {/* we can also pass a reference to the function */} <input type="number" value={developer.yearsExperience} onChange={handleChangeYearsExperience} /> <p>I am now learning {developer.language}</p> <p>I have {developer.yearsExperience} years of experience</p> </div> ); } ``` - 如果新狀態依賴於之前的狀態,我們可以在 setter 函數中使用一個函數來為我們提供之前狀態的值 ``` function App() { const [developer, setDeveloper] = React.useState({ language: "", yearsExperience: 0, isEmployed: false }); function handleToggleEmployment(event) { // we get the previous state variable's value in the parameters // we can name 'prevState' however we like setDeveloper(prevState => { return { ...prevState, isEmployed: !prevState.isEmployed }; // it is essential to return the new state from this function }); } return ( <button onClick={handleToggleEmployment}>Toggle Employment Status</button> ); } ``` ### side effects 和 useEffect - useEffect 讓我們在 function component 中執行副作用。什麼是副作用? - 副作用是我們需要接觸外部世界的地方。例如,從 API 獲取資料或操作 DOM。 - 副作用是可能以不可預測的方式,改變我們元件狀態的操作(導致「副作用」)。 - useEffect 接受 callback function(稱為 effect 函數),預設情況下,每次重新渲染時都會運行 - useEffect 在我們的元件載入後運行,可以準確在元件的各個生命週期觸發 ``` // what does our code do? Picks a color from the colors array // and makes it the background color function App() { const [colorIndex, setColorIndex] = React.useState(0); const colors = ["blue", "green", "red", "orange"]; // we are performing a 'side effect' since we are working with an API // we are working with the DOM, a browser API outside of React useEffect(() => { document.body.style.backgroundColor = colors[colorIndex]; }); // whenever state is updated, App re-renders and useEffect runs function handleChangeIndex() { const next = colorIndex + 1 === colors.length ? 0 : colorIndex + 1; setColorIndex(next); } return <button onClick={handleChangeIndex}>Change background color</button>; } ``` - 如果不想在每次渲染後都執行 callback function,可以在第二個參數傳一個空陣列 ``` function App() { ... // now our button doesn't work no matter how many times we click it... useEffect(() => { document.body.style.backgroundColor = colors[colorIndex]; }, []); // the background color is only set once, upon mount // how do we not have the effect function run for every state update... // but still have it work whenever the button is clicked? return ( <button onClick={handleChangeIndex}> Change background color </button> ); } ``` - useEffect 讓我們能夠在 dependencies 陣列的內容改變時,才執行 - dependencies 陣列是第二個參數,如果陣列中的任何一個值發生變化,effect function 將再次運行 ``` function App() { const [colorIndex, setColorIndex] = React.useState(0); const colors = ["blue", "green", "red", "orange"]; // we add colorIndex to our dependencies array // when colorIndex changes, useEffect will execute the effect fn again useEffect(() => { document.body.style.backgroundColor = colors[colorIndex]; // when we use useEffect, we must think about what state values // we want our side effect to sync with }, [colorIndex]); function handleChangeIndex() { const next = colorIndex + 1 === colors.length ? 0 : colorIndex + 1; setColorIndex(next); } return <button onClick={handleChangeIndex}>Change background color</button>; } ``` - 可以在 useEffect 最後回傳一個函數,來取消訂閱某些效果 ``` function MouseTracker() { const [mousePosition, setMousePosition] = useState({ x: 0, y: 0 }); React.useEffect(() => { // .addEventListener() sets up an active listener... window.addEventListener("mousemove", handleMouseMove); // ...so when we navigate away from this page, it needs to be // removed to stop listening. Otherwise, it will try to set // state in a component that doesn't exist (causing an error) // We unsubscribe any subscriptions / listeners w/ this 'cleanup function' return () => { window.removeEventListener("mousemove", handleMouseMove); }; }, []); function handleMouseMove(event) { setMousePosition({ x: event.pageX, y: event.pageY }); } return ( <div> <h1>The current mouse position is:</h1> <p> X: {mousePosition.x}, Y: {mousePosition.y} </p> </div> ); } // Note: we could extract the reused logic in the callbacks to // their own function, but I believe this is more readable ``` - 使用 useEffect 撈取資料 - 請注意,如果要使用更簡潔的 async/awit 語法處理 promise,則需要建立一個單獨的函數(因為 effect callback function 不能是 async) ``` const endpoint = "https://api.github.com/users/codeartistryio"; // with promises: function App() { const [user, setUser] = React.useState(null); React.useEffect(() => { // promises work in callback fetch(endpoint) .then(response => response.json()) .then(data => setUser(data)); }, []); } // with async / await syntax for promise: function App() { const [user, setUser] = React.useState(null); // cannot make useEffect callback function async React.useEffect(() => { getUser(); }, []); // instead, use async / await in separate function, then call // function back in useEffect async function getUser() { const response = await fetch("https://api.github.com/codeartistryio"); const data = await response.json(); setUser(data); } } ``` ### 效能和 useCallback - useCallback 是一個用來提高元件性能的 hook - 如果你有一個經常重新渲染的元件,useCallback 可以防止元件內的 callback function 在每次元件重新渲染時都重新創建(導致元件重新運行) - useCallback 僅在其依賴項之一改變時重新運行 ``` // in Timer, we are calculating the date and putting it in state a lot // this results in a re-render for every state update // we had a function handleIncrementCount to increment the state 'count'... function Timer() { const [time, setTime] = React.useState(); const [count, setCount] = React.useState(0); // ... but unless we wrap it in useCallback, the function is // recreated for every single re-render (bad performance hit) // useCallback hook returns a callback that isn't recreated every time const inc = React.useCallback( function handleIncrementCount() { setCount(prevCount => prevCount + 1); }, // useCallback accepts a second arg of a dependencies array like useEffect // useCallback will only run if any dependency changes (here it's 'setCount') [setCount] ); React.useEffect(() => { const timeout = setTimeout(() => { const currentTime = JSON.stringify(new Date(Date.now())); setTime(currentTime); }, 300); return () => { clearTimeout(timeout); }; }, [time]); return ( <div> <p>The current time is: {time}</p> <p>Count: {count}</p> <button onClick={inc}>+</button> </div> ); } ``` ### Memoization 和 useMemo - useMemo 和 useCallback 非常相似,都是為了提高效能。但就不是為了暫存 callback function,而是為了暫存耗費效能的運算結果 - useMemo 允許我們「記憶」已經為某些輸入進行了昂貴計算的結果(之後就不用重新計算了) - useMemo 從計算中回傳一個值,而不是 callback 函數(但可以是一個函數) ``` // useMemo is useful when we need a lot of computing resources // to perform an operation, but don't want to repeat it on each re-render function App() { // state to select a word in 'words' array below const [wordIndex, setWordIndex] = useState(0); // state for counter const [count, setCount] = useState(0); // words we'll use to calculate letter count const words = ["i", "am", "learning", "react"]; const word = words[wordIndex]; function getLetterCount(word) { // we mimic expensive calculation with a very long (unnecessary) loop let i = 0; while (i < 1000000) i++; return word.length; } // Memoize expensive function to return previous value if input was the same // only perform calculation if new word without a cached value const letterCount = React.useMemo(() => getLetterCount(word), [word]); // if calculation was done without useMemo, like so: // const letterCount = getLetterCount(word); // there would be a delay in updating the counter // we would have to wait for the expensive function to finish function handleChangeIndex() { // flip from one word in the array to the next const next = wordIndex + 1 === words.length ? 0 : wordIndex + 1; setWordIndex(next); } return ( <div> <p> {word} has {letterCount} letters </p> <button onClick={handleChangeIndex}>Next word</button> <p>Counter: {count}</p> <button onClick={() => setCount(count + 1)}>+</button> </div> ); } ``` ### Refs 和 useRef - Refs 是所有 React 組件都可用的特殊屬性。允許我們在元件安裝時,創建針對特定元素/元件的引用 - useRef 允許我們輕鬆使用 React refs - 我們在元件開頭呼叫 useRef,並將回傳值附加到元素的 ref 屬性來引用它 - 一旦我們創建了一個引用,就可以用它來改變元素的屬性,或者可以呼叫該元素上的任何可用方法(比如用 .focus() 來聚焦) ``` function App() { const [query, setQuery] = React.useState("react hooks"); // we can pass useRef a default value // we don't need it here, so we pass in null to ref an empty object const searchInput = useRef(null); function handleClearSearch() { // current references the text input once App mounts searchInput.current.value = ""; // useRef can store basically any value in its .current property searchInput.current.focus(); } return ( <form> <input type="text" onChange={event => setQuery(event.target.value)} ref={searchInput} /> <button type="submit">Search</button> <button type="button" onClick={handleClearSearch}> Clear </button> </form> ); } ``` ## 進階 Hook ### Context 和 useContext - 在 React 中,盡量避免創建多個 props 來將資料從父元件向下傳遞兩個或多個層級 ``` // Context helps us avoid creating multiple duplicate props // This pattern is also called props drilling: function App() { // we want to pass user data down to Header const [user] = React.useState({ name: "Fred" }); return ( // first 'user' prop <Main user={user} /> ); } const Main = ({ user }) => ( <> {/* second 'user' prop */} <Header user={user} /> <div>Main app content...</div> </> ); const Header = ({ user }) => <header>Welcome, {user.name}!</header>; ``` - Context 有助於將 props 從父組件向下傳遞到多個層級的子元件 ``` // Here is the previous example rewritten with Context // First we create context, where we can pass in default values const UserContext = React.createContext(); // we call this 'UserContext' because that's what data we're passing down function App() { // we want to pass user data down to Header const [user] = React.useState({ name: "Fred" }); return ( {/* we wrap the parent component with the provider property */} {/* we pass data down the computer tree w/ value prop */} <UserContext.Provider value={user}> <Main /> </UserContext.Provider> ); } const Main = () => ( <> <Header /> <div>Main app content...</div> </> ); // we can remove the two 'user' props, we can just use consumer // to consume the data where we need it const Header = () => ( {/* we use this pattern called render props to get access to the data*/} <UserContext.Consumer> {user => <header>Welcome, {user.name}!</header>} </UserContext.Consumer> ); ``` - useContext hook 可以移除這種看起來很怪的 props 渲染模式,同時又能在各種 function component 中隨意使用 ``` const Header = () => { // we pass in the entire context object to consume it const user = React.useContext(UserContext); // and we can remove the Consumer tags return <header>Welcome, {user.name}!</header>; }; ``` ### Reducers 和 useReducer - Reducers 是簡單、可預測的(純)函數,它接受一個先前的狀態物件和一個動作物件,並回傳一個新的狀態物件。例如: ``` // let's say this reducer manages user state in our app: function reducer(state, action) { // reducers often use a switch statement to update state // in one way or another based on the action's type property switch (action.type) { // if action.type has the string 'LOGIN' on it case "LOGIN": // we get data from the payload object on action return { username: action.payload.username, isAuth: true }; case "SIGNOUT": return { username: "", isAuth: false }; default: // if no case matches, return previous state return state; } } ``` - Reducers 是一種強大的狀態管理模式,用於流行的 Redux 狀態管理套件(這套很常與 React 一起使用) - 與 useState(用於本地元件狀態)相比,Reducers 可以通過 useReducer hook 在 React 中使用,以便管理我們應用程序的狀態 - useReducer 可以與 useContext 配對來管理資料並輕鬆地將資料傳遞給元件 - useReducer + useContext 可以當成應用程式的整套狀態管理系統 ``` const initialState = { username: "", isAuth: false }; function reducer(state, action) { switch (action.type) { case "LOGIN": return { username: action.payload.username, isAuth: true }; case "SIGNOUT": // could also spread in initialState here return { username: "", isAuth: false }; default: return state; } } function App() { // useReducer requires a reducer function to use and an initialState const [state, dispatch] = useReducer(reducer, initialState); // we get the current result of the reducer on 'state' // we use dispatch to 'dispatch' actions, to run our reducer // with the data it needs (the action object) function handleLogin() { dispatch({ type: "LOGIN", payload: { username: "Ted" } }); } function handleSignout() { dispatch({ type: "SIGNOUT" }); } return ( <> Current user: {state.username}, isAuthenticated: {state.isAuth} <button onClick={handleLogin}>Login</button> <button onClick={handleSignout}>Signout</button> </> ); } ``` ### 編寫 custom hooks - 創建 hook 就能輕鬆在元件之間重用某些行為 - hook 是一種比以前的 class component 更容易理解的模式,例如 higher-order components 或者 render props - 根據需要,隨時可以自創一些 hook ``` // here's a custom hook that is used to fetch data from an API function useAPI(endpoint) { const [value, setValue] = React.useState([]); React.useEffect(() => { getData(); }, []); async function getData() { const response = await fetch(endpoint); const data = await response.json(); setValue(data); }; return value; }; // this is a working example! try it yourself (i.e. in codesandbox.io) function App() { const todos = useAPI("https://todos-dsequjaojf.now.sh/todos"); return ( <ul> {todos.map(todo => <li key={todo.id}>{todo.text}</li>)} </ul> ); } ``` ### Hooks 規則 - 使用 React hooks 有兩個核心規則,要遵守才能正常運作: - 1. Hooks 只能在元件開頭呼叫 - Hooks 不能放在條件、迴圈或嵌套函數中 - 2. Hooks只能在 function component 內部使用 - Hooks 不能放在普通的 JavaScript 函數或 class component 中 ``` function checkAuth() { // Rule 2 Violated! Hooks cannot be used in normal functions, only components React.useEffect(() => { getUser(); }, []); } function App() { // this is the only validly executed hook in this component const [user, setUser] = React.useState(null); // Rule 1 violated! Hooks cannot be used within conditionals (or loops) if (!user) { React.useEffect(() => { setUser({ isAuth: false }); // if you want to conditionally execute an effect, use the // dependencies array for useEffect }, []); } checkAuth(); // Rule 1 violated! Hooks cannot be used in nested functions return <div onClick={() => React.useMemo(() => doStuff(), [])}>Our app</div>; } ``` --- 以上是快速整理,希望對您有幫助!
你的轉職路上,還缺少一份自學作業包!寫完這幾包,直接拿作品去面試上班!
本論壇另有附設一個 LINE 新手發問&交流群組!歡迎加入討論!