_「現在是2021 年了,我的飛行汽車在哪裡?」_ - Joel Spolsky(Stack Overflow 和Trello 的建立者)用這句話來表達他對Web 開發仍然與20 年前幾乎相同的感覺的幻滅。 但今天,有了 GPT,我們就可以再問這個問題了。我們看到了所有這些花哨的推文和演示,但是**當我需要啟動一個新的全端 Web 應用程式時**,這對我作為開發人員意味著什麼?我真的必須經歷“npm create vite my-new-app”,並再次從空白頁面開始嗎? 最後的答案是「否」——你可以使用很多很酷的東西來讓你的生活更輕鬆。它可能還不是超音速德羅寧,但它至少肯定是在地面上盤旋。 讓我們探討一下今天的 AI 場景為我們提供了什麼,以便更輕鬆地啟動和建立全端 Web 應用程式: ## 🐝 🤖 MAGE - 一分鐘內從單一提示到全端、React 和 Node.js 應用程式(免費使用!) 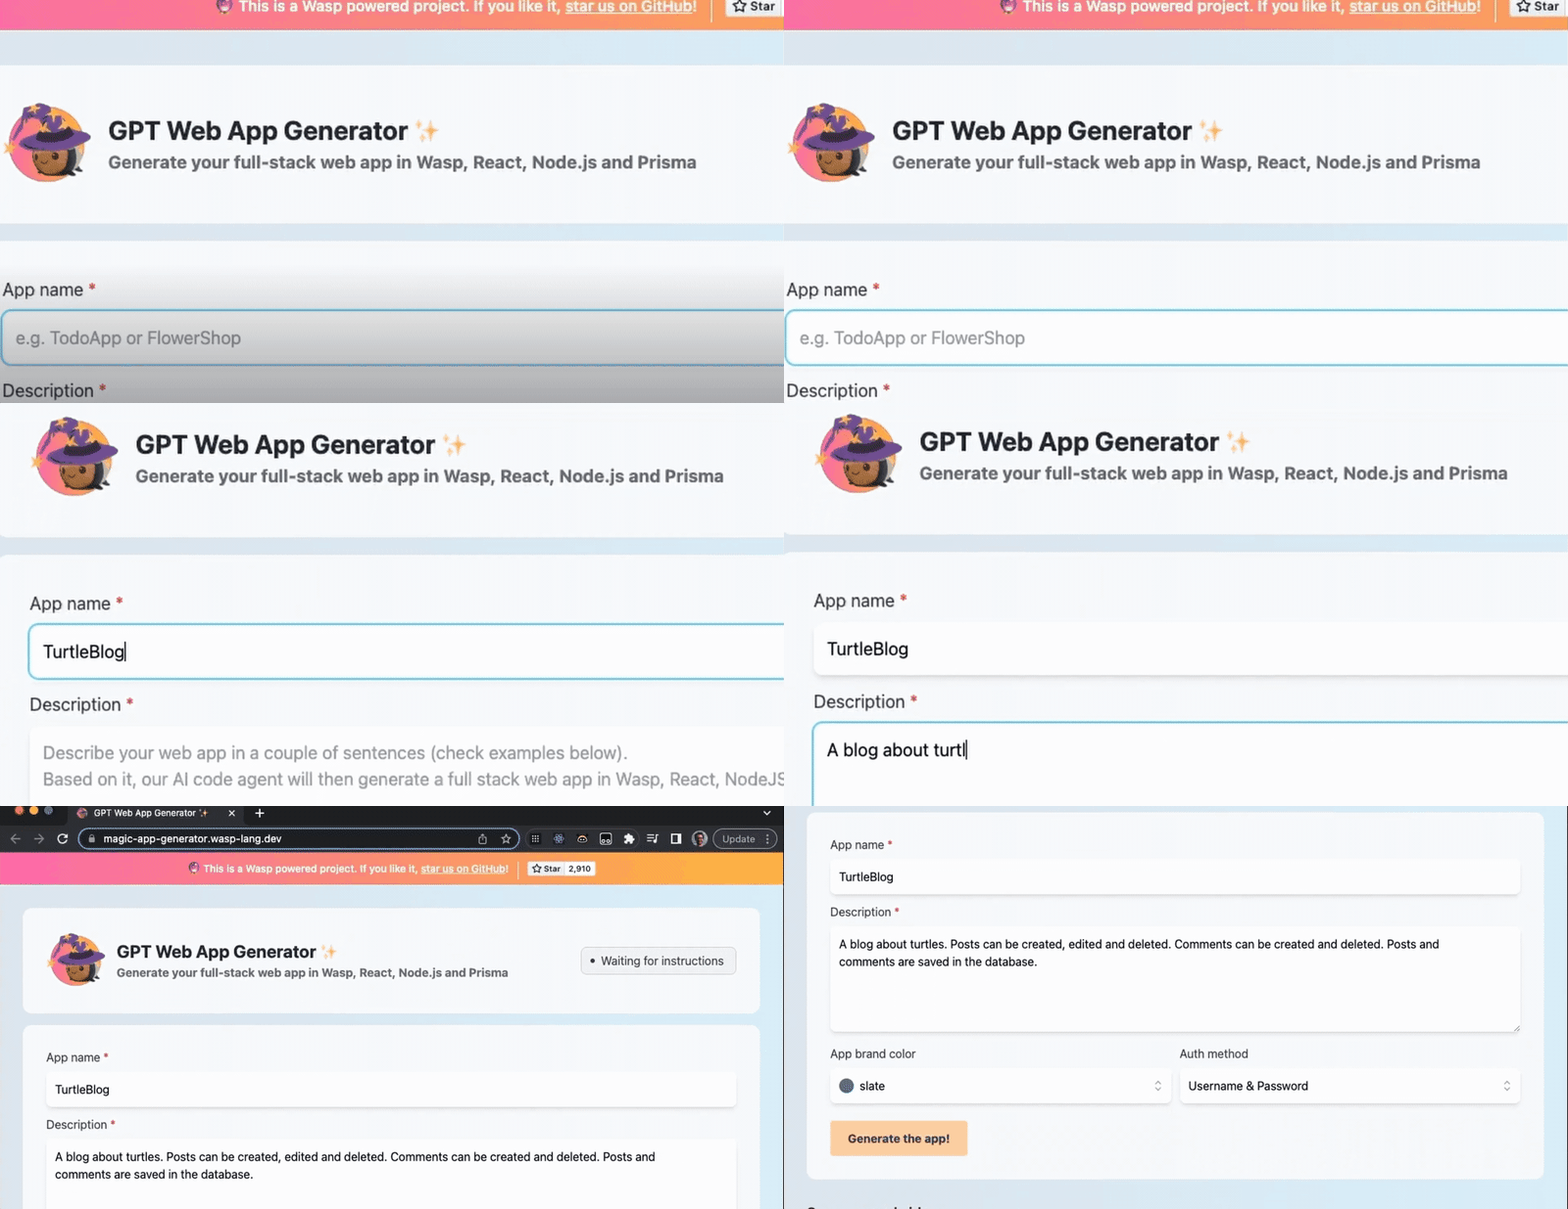 [MAGE](https://usemage.ai/) (*Magic App GEnerator*) 可能是最容易使用的 AI 編碼代理 - 一切都透過 Web 介面進行,**您所要做的就是輸入您要建立的應用程式的簡短描述**。這樣,MAGE 將在由 [Wasp](https://wasp-lang.dev/) 提供支援的 React、Tailwind、Node.js 和 Prisma 中產生完整的全端程式碼庫,您可以免費下載。 MAGE 最好的部分是**它是完全開源且完全免費使用** - 您所需要做的就是[使用您的 GitHub 登入](https://usemage.ai/),然後您就可以開始建立應用程式! MAGE [於7 月在Product Hunt 上推出](https://www.producthunt.com/products/wasp-lang-alpha#gpt-webapp-generator-for-react-node-js),從那時起就被用來建立近 30,000 個應用程式。 ## 📟 Aider - 終端機中的 AI 配對程式設計師 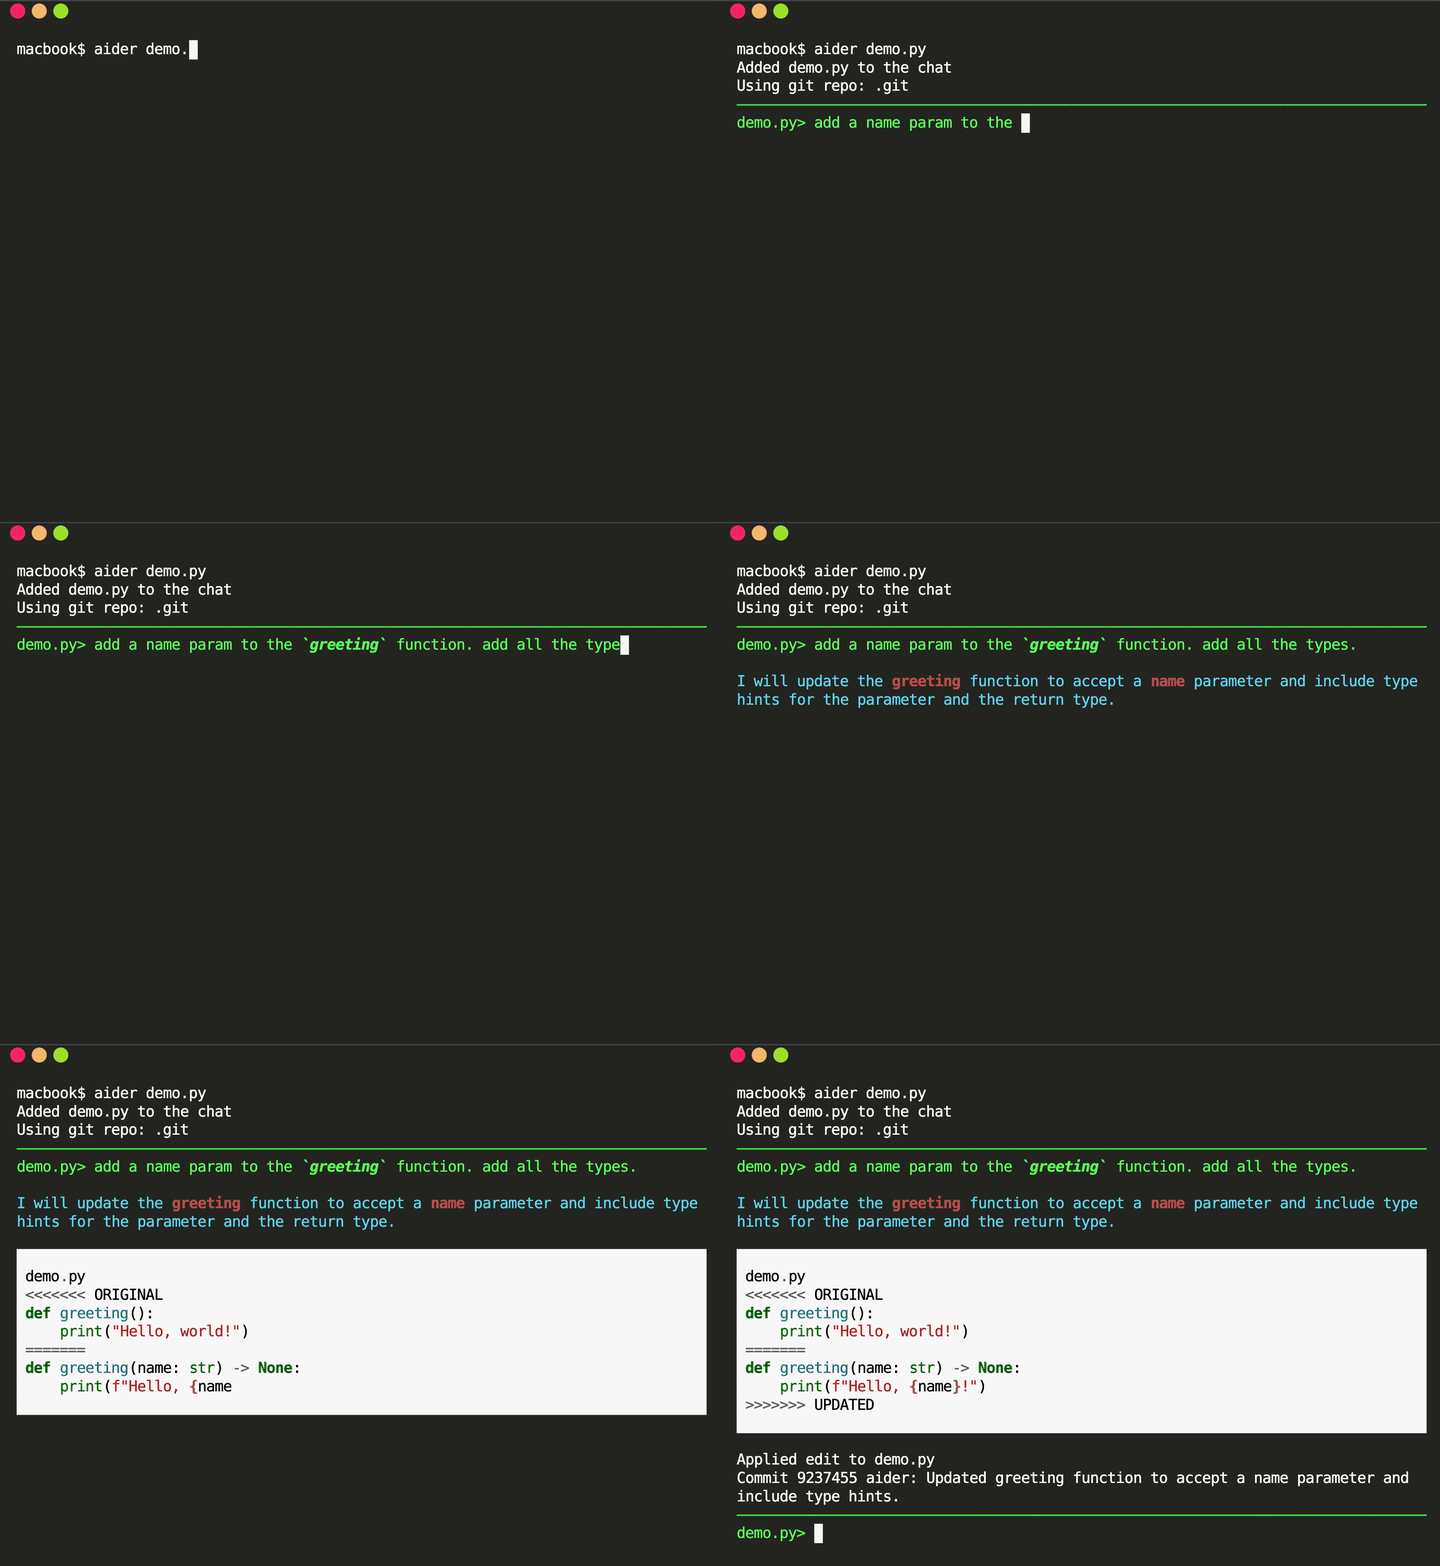 在您使用 MAGE 建立應用程式的 v1 版並獲得基本功能後,您可能會想要加入更多功能。為什麼不使用人工智慧來實現這一點呢?這就是 Aider 發揮作用的地方! Aider 的超能力在於您可以將其插入任何現有專案並開始使用!這感覺就像與坐在您旁邊的開發人員同事聊天 - 只需描述您的下一個功能,Aider 將盡力實現它,同時提供流程的所有詳細訊息,並自動向您的存儲庫加入新的提交!多麼酷啊? 您可以了解更多有關 Aider 的資訊並在這裡嘗試一下:https://github.com/paul-gauthier/aider ## 🦀 🚀 Shuttle AI - 使用 GPT 在 Rust 中建立後端!  當您聽到“網頁應用程式”這個詞時,我們大多數人都會立即想到 JavaScript。雖然對於前端來說這在很大程度上是正確的,但我們可以用我們喜歡的任何技術來建立後端! 除了 Python、Java 和 PHP 等常見的嫌疑犯之外,Rust 又如何呢?它是開發人員最喜愛的語言之一,它不應該只用於低階演算法。 Shuttle AI 讓這一切成為可能 - 他們強大的基於 Rust 的框架已經使建置和部署後端變得容易,而頂部的 AI 使其變得輕而易舉! 在這裡了解更多:https://www.shuttle.rs/ai ## ⚡️📦 Supabase AI - 再見,複雜的 SQL 查詢 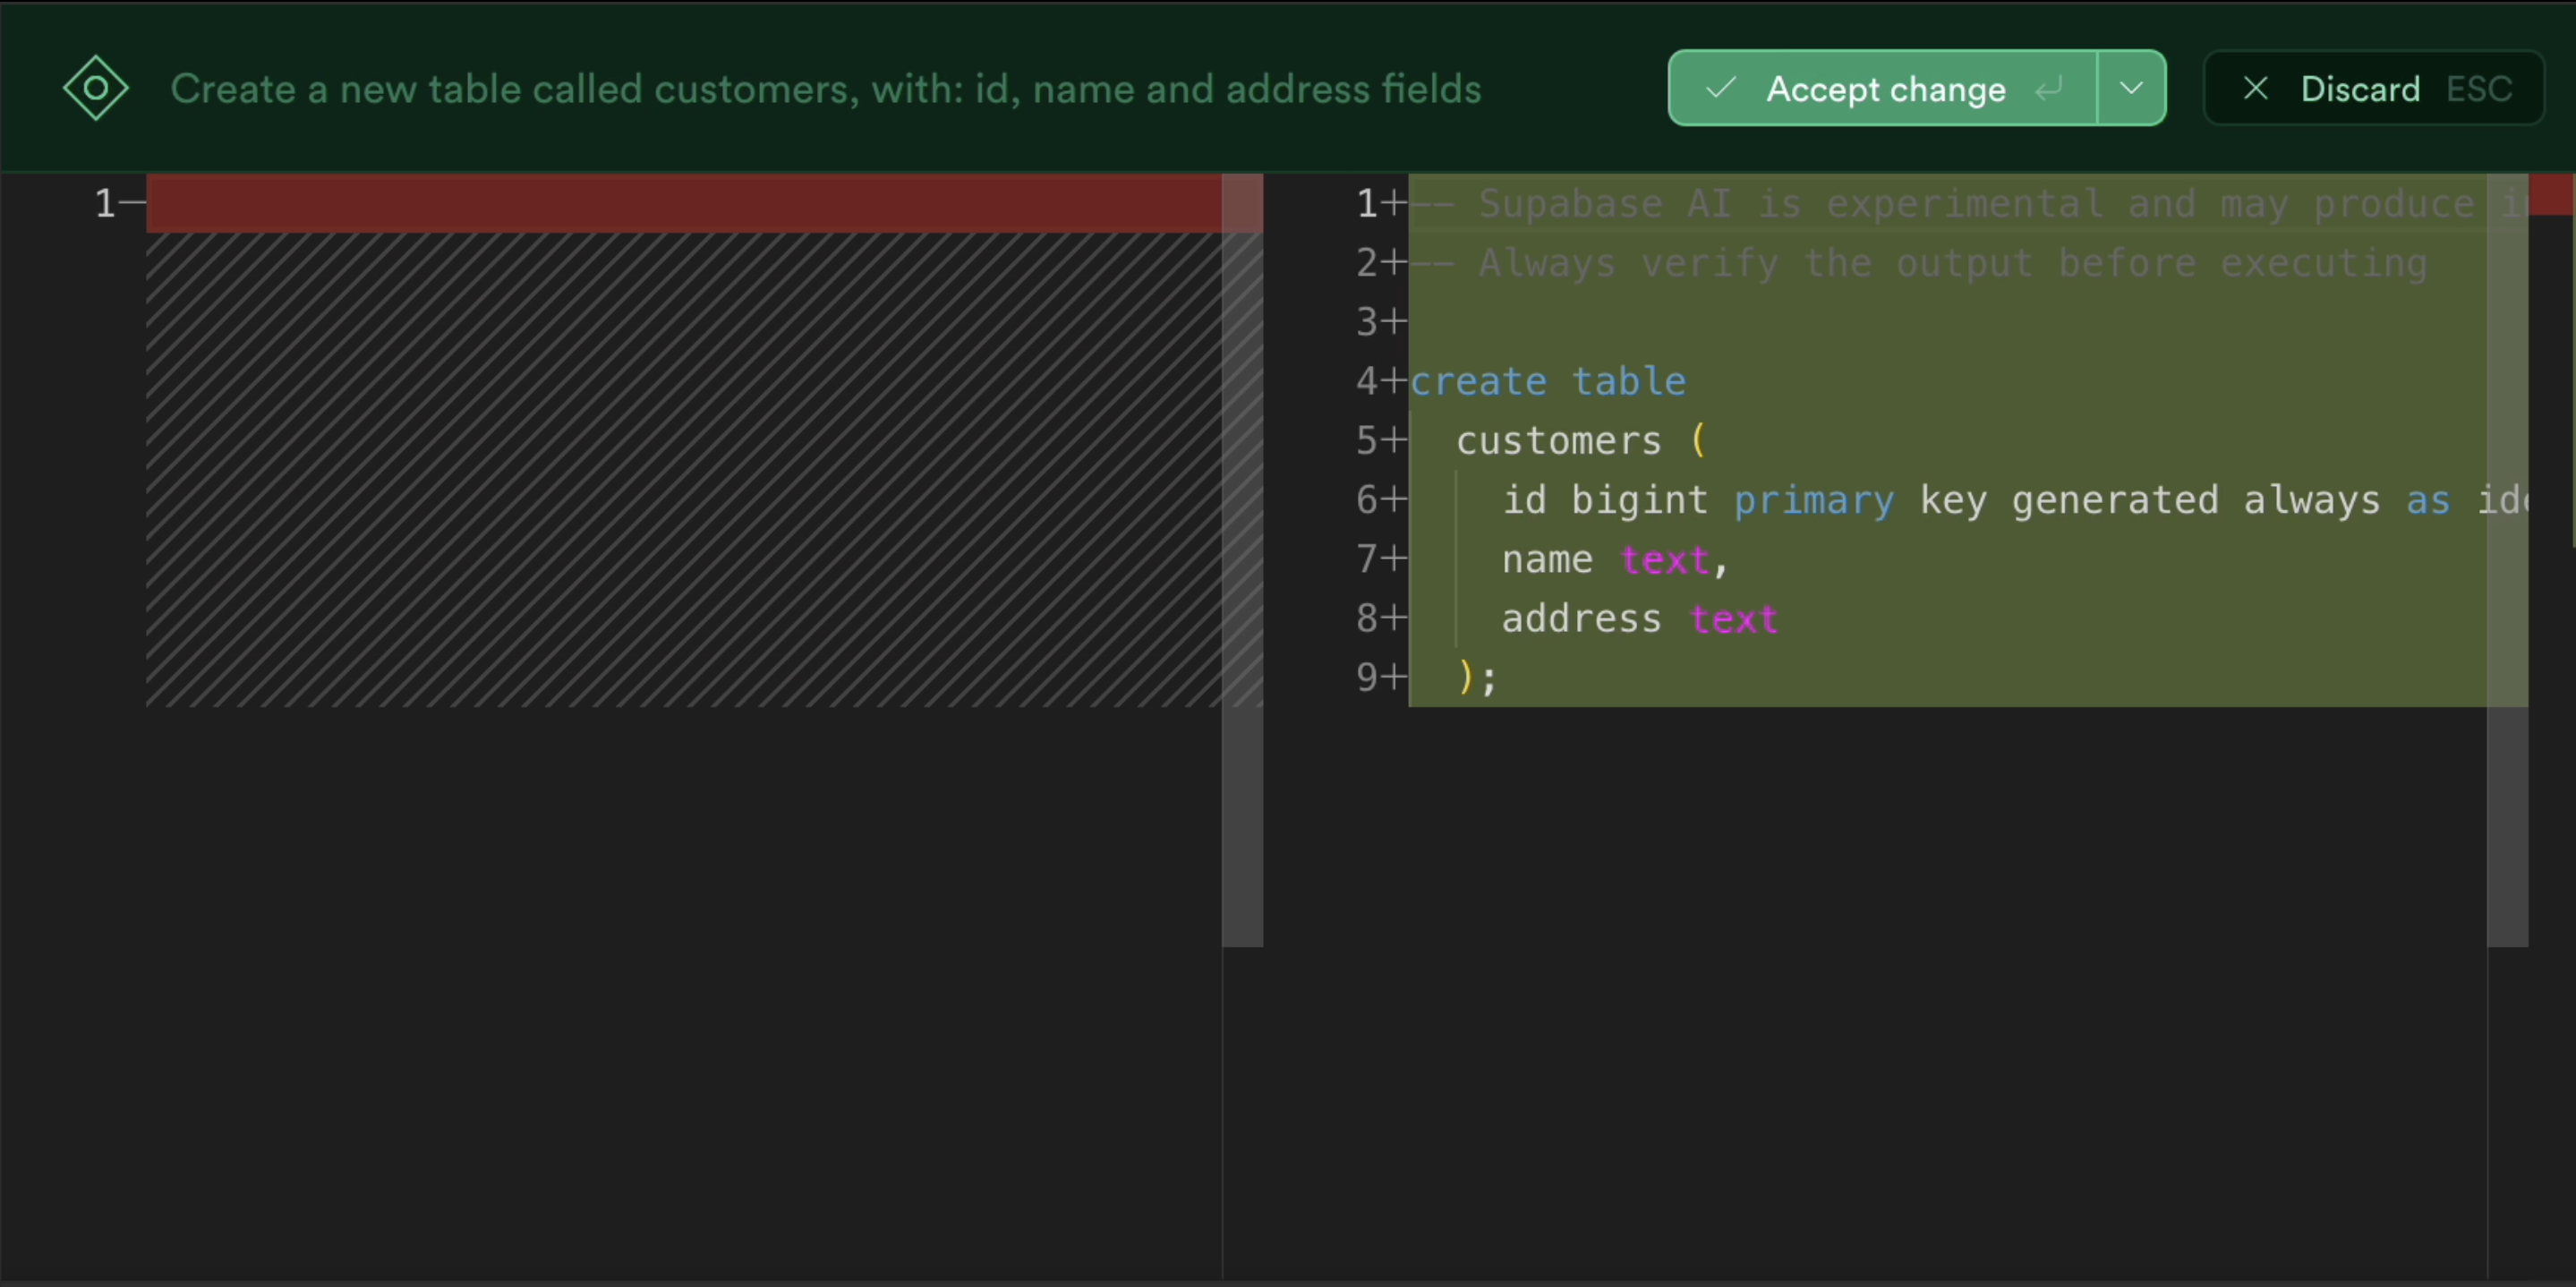 [Supabase](https://supabase.com/) 是為您的全端應用程式啟動和執行資料庫的最佳方法之一,除此之外您還可以獲得大量功能!由於它專門用於 Postgresql,這意味著您偶爾需要編寫一些 SQL。為什麼不從人工智慧得到一些幫助呢? Supabase 因其美觀且用戶友好的儀表板(帶有整合 SQL 編輯器)而聞名,現在他們透過加入自己的 AI 代理使其變得更好。要求它建立新的表和索引,甚至編寫資料庫函數! 在這裡了解更多:https://supabase.com/blog/supabase-studio-3-0 ## 👁️ 🧑✈️Visual Copilot - 將 Figma 設計編碼 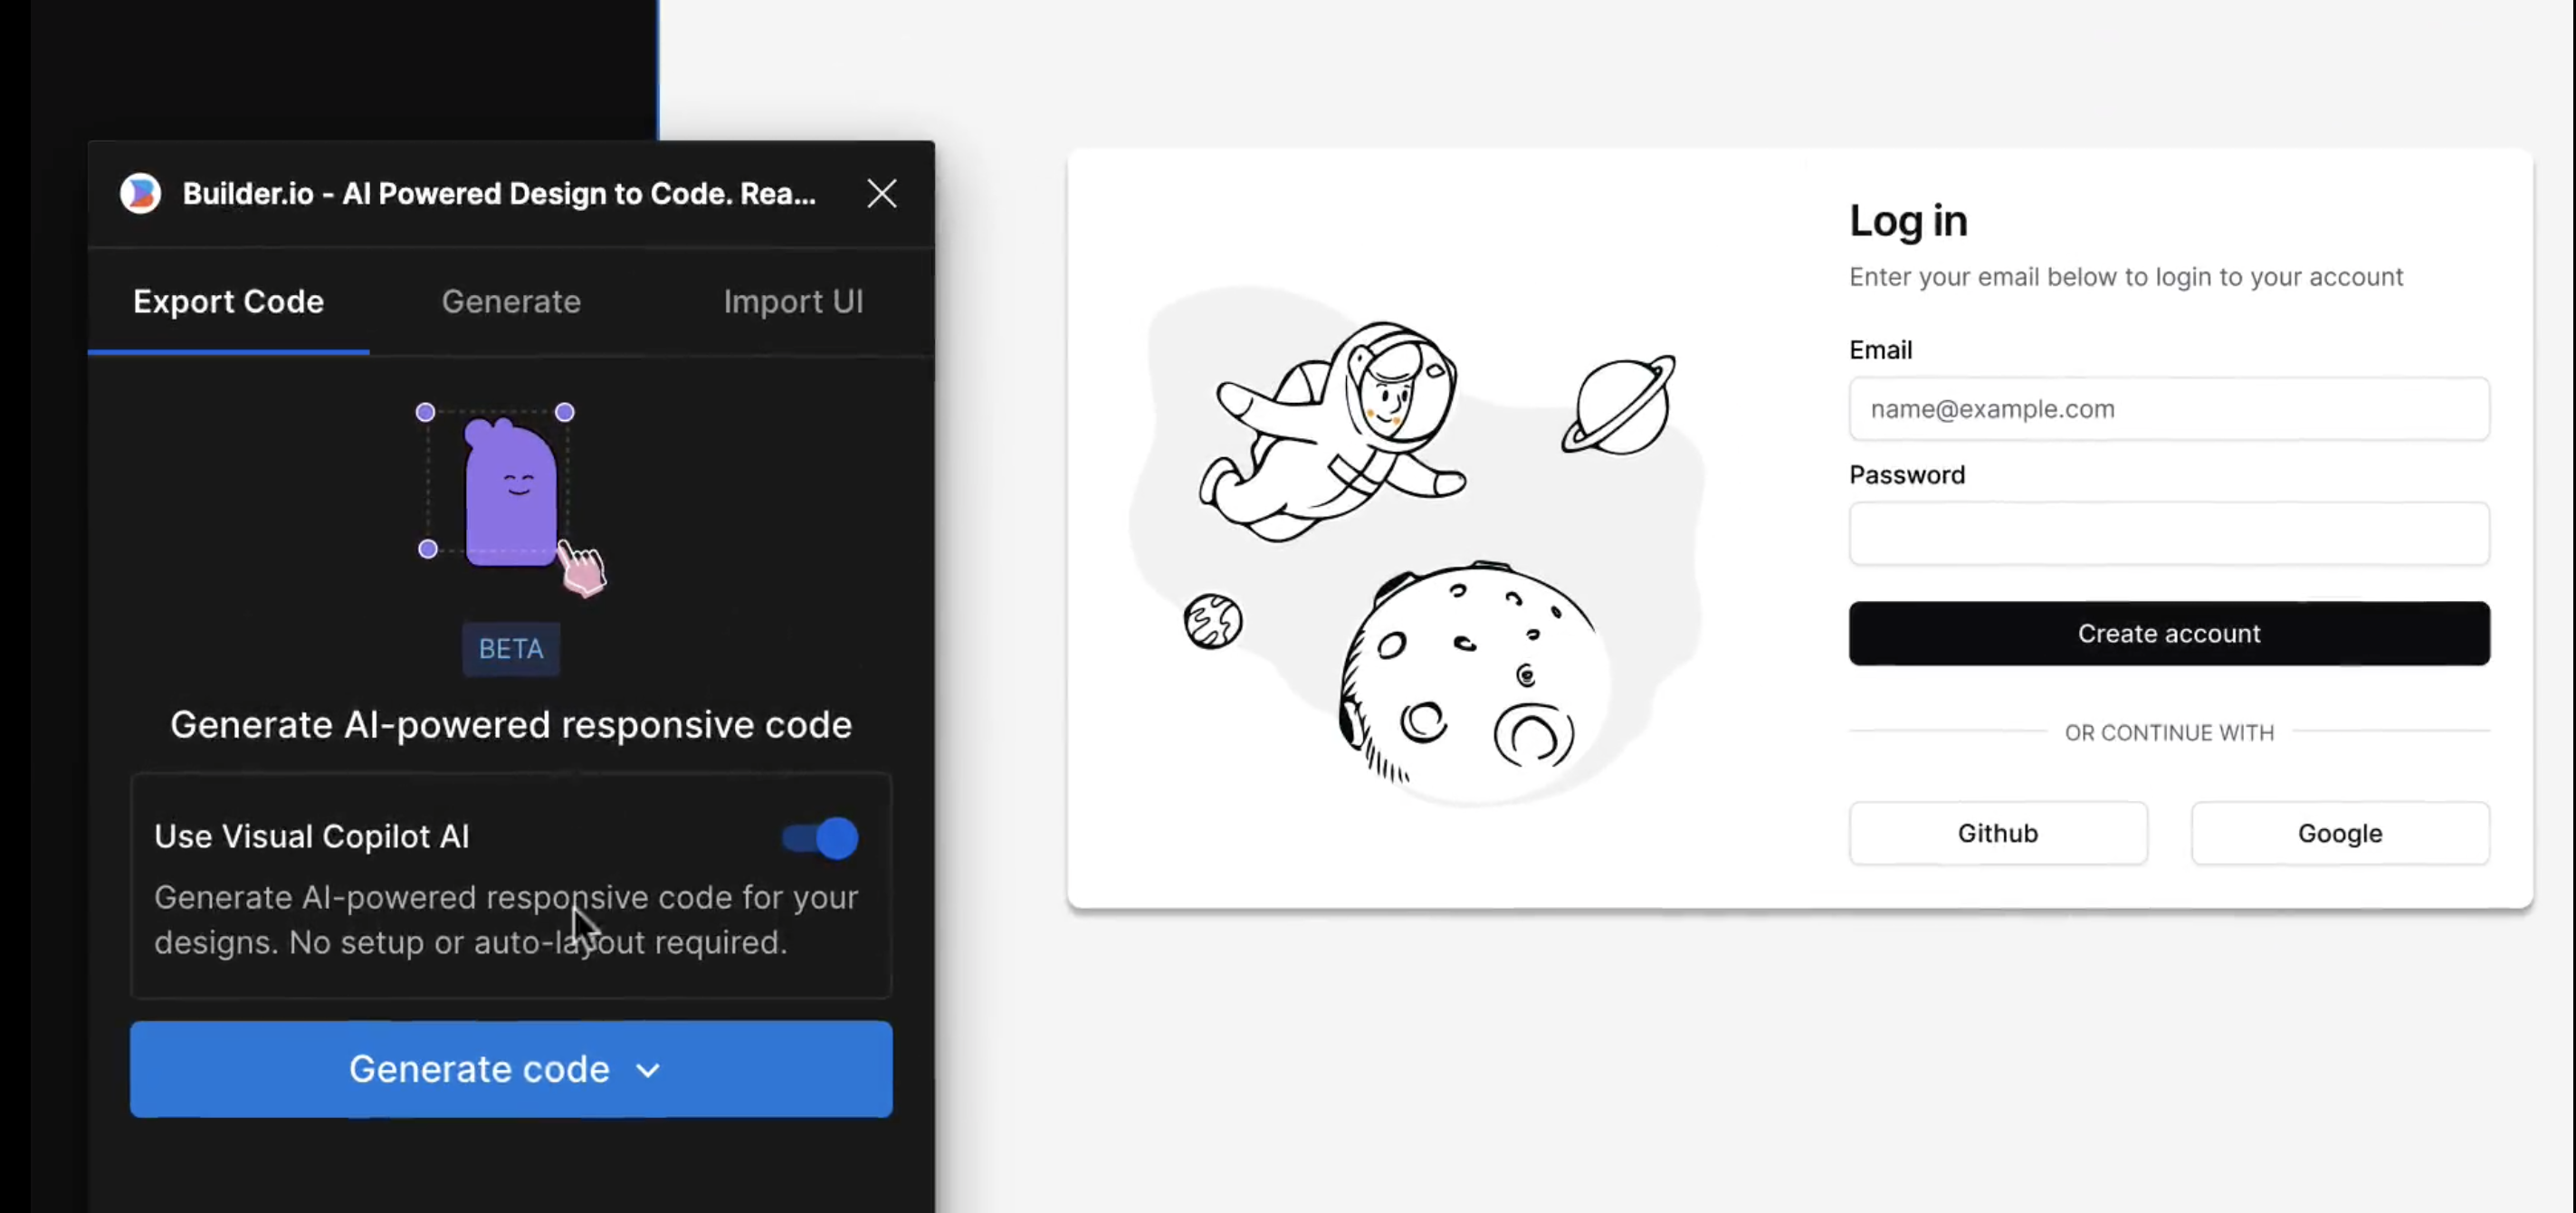 如果您曾經從設計師那裡獲得 Figma 設計講義,然後您的任務是用它來實現 UI,您是否想過是否有一種方法可以自動化此操作?這就是 Visual Copilot 所追求的! 只需點擊一下,並給出 Figma 設計,Visual Copilot 就會為其產生前端程式碼!它將盡最大努力使其具有響應性並保持程式碼整潔和可重複使用。 它目前可作為 [Figma 社群插件](https://www.figma.com/community/plugin/747985167520967365/builder-io-ai-powered-figma-to-code-react-vue-tailwind-more) 。 ## ✈️ 🤖 GPT Pilot - 使用協作 AI 啟動新應用程式  GPT Pilot 是專門用於從頭開始建立新應用程式的編碼代理程式。它獨特的做法是它與開發者合作——每當遇到困難時,它都會尋求你的幫助! 在內部,它由多個代理組成,這些代理一起協作並經歷應用程式開發的不同階段 - 從產品所有者和架構師到 DevOps 和開發人員!  這是另一個完全開源的解決方案,最近受到了開發人員的喜愛,並多次出現在 GitHub 趨勢排行榜上。 了解更多並在這裡嘗試一下:https://github.com/Pythagora-io/gpt-pilot ## 概括  這就是一個包裝!還有更多的人工智慧工具,而且每天都有新的工具出現,但在本概述中,我們試圖專注於您今天可以用來啟動新的網路應用程式的工具。 希望您發現這很有幫助,並學到了一些可能派上用場的新東西!我也很想在評論中聽到您的意見 - 您最喜歡的 Web 開發人工智慧工具是什麼,無論是您每天使用的工具還是只是感到興奮的工具,接下來我們應該介紹什麼? --- 原文出處:https://dev.to/matijasos/6-tools-to-kickstart-your-full-stack-app-with-ai-4oh3
# 簡介 ChatGPT 訓練至 2022 年。 但是,如果您希望它專門為您提供有關您網站的資訊怎麼辦?最有可能的是,這是不可能的,**但不再是了!** OpenAI 推出了他們的新功能 - [助手](https://platform.openai.com/docs/assistants/how-it-works)。 現在您可以輕鬆地為您的網站建立索引,然後向 ChatGPT 詢問有關該網站的問題。在本教程中,我們將建立一個系統來索引您的網站並讓您查詢它。我們將: - 抓取文件網站地圖。 - 從網站上的所有頁面中提取資訊。 - 使用新資訊建立新助理。 - 建立一個簡單的ChatGPT前端介面並查詢助手。  --- ## 你的後台工作平台🔌 [Trigger.dev](https://trigger.dev/) 是一個開源程式庫,可讓您使用 NextJS、Remix、Astro 等為您的應用程式建立和監控長時間執行的作業! [](https://github.com/triggerdotdev/trigger.dev) 請幫我們一顆星🥹。 這將幫助我們建立更多這樣的文章💖 --- ## 讓我們開始吧🔥 讓我們建立一個新的 NextJS 專案。 ``` npx create-next-app@latest ``` >💡 我們使用 NextJS 新的應用程式路由器。安裝專案之前請確保您的節點版本為 18+ 讓我們建立一個新的資料庫來保存助手和抓取的頁面。 對於我們的範例,我們將使用 [Prisma](https://www.prisma.io/) 和 SQLite。 安裝非常簡單,只需執行: ``` npm install prisma @prisma/client --save ``` 然後加入架構和資料庫 ``` npx prisma init --datasource-provider sqlite ``` 轉到“prisma/schema.prisma”並將其替換為以下架構: ``` // This is your Prisma schema file, // learn more about it in the docs: https://pris.ly/d/prisma-schema generator client { provider = "prisma-client-js" } datasource db { provider = "sqlite" url = env("DATABASE_URL") } model Docs { id Int @id @default(autoincrement()) content String url String @unique identifier String @@index([identifier]) } model Assistant { id Int @id @default(autoincrement()) aId String url String @unique } ``` 然後執行 ``` npx prisma db push ``` 這將建立一個新的 SQLite 資料庫(本機檔案),其中包含兩個主表:“Docs”和“Assistant” - 「Docs」包含所有抓取的頁面 - `Assistant` 包含文件的 URL 和內部 ChatGPT 助理 ID。 讓我們新增 Prisma 客戶端。 建立一個名為「helper」的新資料夾,並新增一個名為「prisma.ts」的新文件,並在其中新增以下程式碼: ``` import {PrismaClient} from '@prisma/client'; export const prisma = new PrismaClient(); ``` 我們稍後可以使用“prisma”變數來查詢我們的資料庫。 ---  ## 刮擦和索引 ### 建立 Trigger.dev 帳戶 抓取頁面並為其建立索引是一項長期執行的任務。 **我們需要:** - 抓取網站地圖的主網站元 URL。 - 擷取網站地圖內的所有頁面。 - 前往每個頁面並提取內容。 - 將所有內容儲存到 ChatGPT 助手中。 為此,我們使用 Trigger.dev! 註冊 [Trigger.dev 帳號](https://trigger.dev/)。 註冊後,建立一個組織並為您的工作選擇一個專案名稱。 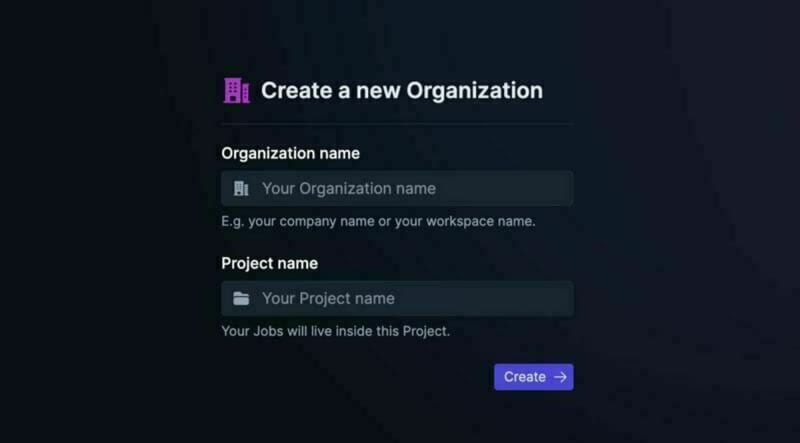 選擇 Next.js 作為您的框架,並按照將 Trigger.dev 新增至現有 Next.js 專案的流程進行操作。  否則,請點選專案儀表板側邊欄選單上的「環境和 API 金鑰」。  複製您的 DEV 伺服器 API 金鑰並執行下面的程式碼片段來安裝 Trigger.dev。 仔細按照說明進行操作。 ``` npx @trigger.dev/cli@latest init ``` 在另一個終端中執行以下程式碼片段,在 Trigger.dev 和您的 Next.js 專案之間建立隧道。 ``` npx @trigger.dev/cli@latest dev ``` ### 安裝 ChatGPT (OpenAI) 我們將使用OpenAI助手,因此我們必須將其安裝到我們的專案中。 [建立新的 OpenAI 帳戶](https://platform.openai.com/) 並產生 API 金鑰。 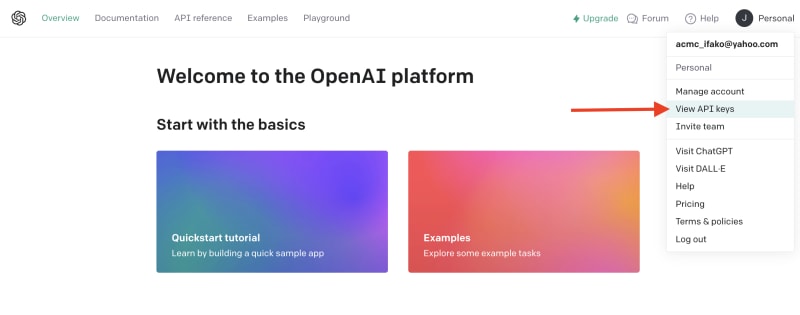 點擊下拉清單中的「檢視 API 金鑰」以建立 API 金鑰。 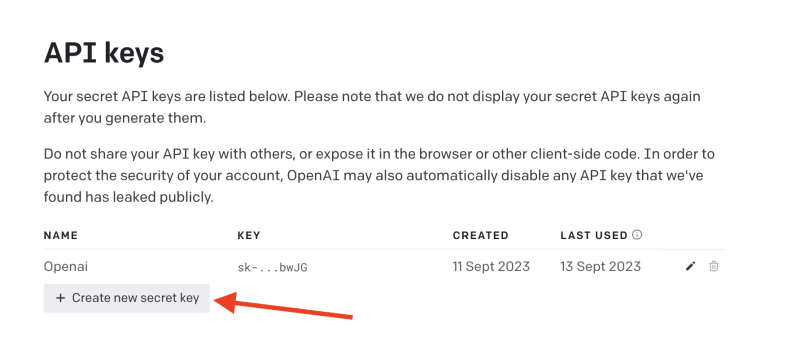 接下來,透過執行下面的程式碼片段來安裝 OpenAI 套件。 ``` npm install @trigger.dev/openai ``` 將您的 OpenAI API 金鑰新增至「.env.local」檔案。 ``` OPENAI_API_KEY=<your_api_key> ``` 建立一個新目錄“helper”並新增一個新檔案“open.ai.tsx”,其中包含以下內容: ``` import {OpenAI} from "@trigger.dev/openai"; export const openai = new OpenAI({ id: "openai", apiKey: process.env.OPENAI_API_KEY!, }); ``` 這是我們透過 Trigger.dev 整合封裝的 OpenAI 用戶端。 ### 建立後台作業 讓我們繼續建立一個新的後台作業! 前往“jobs”並建立一個名為“process.documentation.ts”的新檔案。 **新增以下程式碼:** ``` import { eventTrigger } from "@trigger.dev/sdk"; import { client } from "@openai-assistant/trigger"; import {object, string} from "zod"; import {JSDOM} from "jsdom"; import {openai} from "@openai-assistant/helper/open.ai"; client.defineJob({ // This is the unique identifier for your Job; it must be unique across all Jobs in your project. id: "process-documentation", name: "Process Documentation", version: "0.0.1", // This is triggered by an event using eventTrigger. You can also trigger Jobs with webhooks, on schedules, and more: https://trigger.dev/docs/documentation/concepts/triggers/introduction trigger: eventTrigger({ name: "process.documentation.event", schema: object({ url: string(), }) }), integrations: { openai }, run: async (payload, io, ctx) => { } }); ``` 我們定義了一個名為「process.documentation.event」的新作業,並新增了一個名為 URL 的必要參數 - 這是我們稍後要傳送的文件 URL。 正如您所看到的,該作業是空的,所以讓我們向其中加入第一個任務。 我們需要獲取網站網站地圖並將其返回。 抓取網站將返回我們需要解析的 HTML。 為此,我們需要安裝 JSDOM。 ``` npm install jsdom --save ``` 並將其導入到我們文件的頂部: ``` import {JSDOM} from "jsdom"; ``` 現在,我們可以新增第一個任務。 用「runTask」包裝我們的程式碼很重要,這可以讓 Trigger.dev 將其與其他任務分開。觸發特殊架構將任務拆分為不同的進程,因此 Vercel 無伺服器逾時不會影響它們。 **這是第一個任務的程式碼:** ``` const getSiteMap = await io.runTask("grab-sitemap", async () => { const data = await (await fetch(payload.url)).text(); const dom = new JSDOM(data); const sitemap = dom.window.document.querySelector('[rel="sitemap"]')?.getAttribute('href'); return new URL(sitemap!, payload.url).toString(); }); ``` - 我們透過 HTTP 請求從 URL 取得整個 HTML。 - 我們將其轉換為 JS 物件。 - 我們找到網站地圖 URL。 - 我們解析它並返回它。 接下來,我們需要抓取網站地圖,提取所有 URL 並返回它們。 讓我們安裝“Lodash”——陣列結構的特殊函數。 ``` npm install lodash @types/lodash --save ``` 這是任務的程式碼: ``` export const makeId = (length: number) => { let text = ''; const possible = 'ABCDEFGHIJKLMNOPQRSTUVWXYZabcdefghijklmnopqrstuvwxyz0123456789'; for (let i = 0; i < length; i += 1) { text += possible.charAt(Math.floor(Math.random() * possible.length)); } return text; }; const {identifier, list} = await io.runTask("load-and-parse-sitemap", async () => { const urls = /(http|ftp|https):\/\/([\w_-]+(?:(?:\.[\w_-]+)+))([\w.,@?^=%&:\/~+#-]*[\w@?^=%&\/~+#-])/g; const identifier = makeId(5); const data = await (await fetch(getSiteMap)).text(); // @ts-ignore return {identifier, list: chunk(([...new Set(data.match(urls))] as string[]).filter(f => f.includes(payload.url)).map(p => ({identifier, url: p})), 25)}; }); ``` - 我們建立一個名為 makeId 的新函數來為所有頁面產生隨機辨識碼。 - 我們建立一個新任務並加入正規表示式來提取每個可能的 URL - 我們發送一個 HTTP 請求來載入網站地圖並提取其所有 URL。 - 我們將 URL「分塊」為 25 個元素的陣列(如果有 100 個元素,則會有四個 25 個元素的陣列) 接下來,讓我們建立一個新作業來處理每個 URL。 **這是完整的程式碼:** ``` function getElementsBetween(startElement: Element, endElement: Element) { let currentElement = startElement; const elements = []; // Traverse the DOM until the endElement is reached while (currentElement && currentElement !== endElement) { currentElement = currentElement.nextElementSibling!; // If there's no next sibling, go up a level and continue if (!currentElement) { // @ts-ignore currentElement = startElement.parentNode!; startElement = currentElement; if (currentElement === endElement) break; continue; } // Add the current element to the list if (currentElement && currentElement !== endElement) { elements.push(currentElement); } } return elements; } const processContent = client.defineJob({ // This is the unique identifier for your Job; it must be unique across all Jobs in your project. id: "process-content", name: "Process Content", version: "0.0.1", // This is triggered by an event using eventTrigger. You can also trigger Jobs with webhooks, on schedules, and more: https://trigger.dev/docs/documentation/concepts/triggers/introduction trigger: eventTrigger({ name: "process.content.event", schema: object({ url: string(), identifier: string(), }) }), run: async (payload, io, ctx) => { return io.runTask('grab-content', async () => { // We first grab a raw html of the content from the website const data = await (await fetch(payload.url)).text(); // We load it with JSDOM so we can manipulate it const dom = new JSDOM(data); // We remove all the scripts and styles from the page dom.window.document.querySelectorAll('script, style').forEach((el) => el.remove()); // We grab all the titles from the page const content = Array.from(dom.window.document.querySelectorAll('h1, h2, h3, h4, h5, h6')); // We grab the last element so we can get the content between the last element and the next element const lastElement = content[content.length - 1]?.parentElement?.nextElementSibling!; const elements = []; // We loop through all the elements and grab the content between each title for (let i = 0; i < content.length; i++) { const element = content[i]; const nextElement = content?.[i + 1] || lastElement; const elementsBetween = getElementsBetween(element, nextElement); elements.push({ title: element.textContent, content: elementsBetween.map((el) => el.textContent).join('\n') }); } // We create a raw text format of all the content const page = ` ---------------------------------- url: ${payload.url}\n ${elements.map((el) => `${el.title}\n${el.content}`).join('\n')} ---------------------------------- `; // We save it to our database await prisma.docs.upsert({ where: { url: payload.url }, update: { content: page, identifier: payload.identifier }, create: { url: payload.url, content: page, identifier: payload.identifier } }); }); }, }); ``` - 我們從 URL 中獲取內容(之前從網站地圖中提取) - 我們用`JSDOM`解析它 - 我們刪除頁面上存在的所有可能的“<script>”或“<style>”。 - 我們抓取頁面上的所有標題(`h1`、`h2`、`h3`、`h4`、`h5`、`h6`) - 我們迭代標題並獲取它們之間的內容。我們不想取得整個頁面內容,因為它可能包含不相關的內容。 - 我們建立頁面原始文字的版本並將其保存到我們的資料庫中。 現在,讓我們為每個網站地圖 URL 執行此任務。 觸發器引入了名為“batchInvokeAndWaitForCompletion”的東西。 它允許我們批量發送 25 個專案進行處理,並且它將同時處理所有這些專案。下面是接下來的幾行程式碼: ``` let i = 0; for (const item of list) { await processContent.batchInvokeAndWaitForCompletion( 'process-list-' + i, item.map( payload => ({ payload, }), 86_400), ); i++; } ``` 我們以 25 個為一組[手動觸發](https://trigger.dev/docs/documentation/concepts/triggers/invoke)之前建立的作業。 完成後,讓我們將保存到資料庫的所有內容並連接它: ``` const data = await io.runTask("get-extracted-data", async () => { return (await prisma.docs.findMany({ where: { identifier }, select: { content: true } })).map((d) => d.content).join('\n\n'); }); ``` 我們使用之前指定的標識符。 現在,讓我們在 ChatGPT 中使用新資料建立一個新檔案: ``` const file = await io.openai.files.createAndWaitForProcessing("upload-file", { purpose: "assistants", file: data }); ``` `createAndWaitForProcessing` 是 Trigger.dev 建立的任務,用於將檔案上傳到助手。如果您在沒有整合的情況下手動使用“openai”,則必須串流傳輸檔案。 現在讓我們建立或更新我們的助手: ``` const assistant = await io.openai.runTask("create-or-update-assistant", async (openai) => { const currentAssistant = await prisma.assistant.findFirst({ where: { url: payload.url } }); if (currentAssistant) { return openai.beta.assistants.update(currentAssistant.aId, { file_ids: [file.id] }); } return openai.beta.assistants.create({ name: identifier, description: 'Documentation', instructions: 'You are a documentation assistant, you have been loaded with documentation from ' + payload.url + ', return everything in an MD format.', model: 'gpt-4-1106-preview', tools: [{ type: "code_interpreter" }, {type: 'retrieval'}], file_ids: [file.id], }); }); ``` - 我們首先檢查是否有針對該特定 URL 的助手。 - 如果我們有的話,讓我們用新文件更新助手。 - 如果沒有,讓我們建立一個新的助手。 - 我們傳遞「你是文件助理」的指令,需要注意的是,我們希望最終輸出為「MD」格式,以便稍後更好地顯示。 對於拼圖的最後一塊,讓我們將新助手儲存到我們的資料庫中。 **這是程式碼:** ``` await io.runTask("save-assistant", async () => { await prisma.assistant.upsert({ where: { url: payload.url }, update: { aId: assistant.id, }, create: { aId: assistant.id, url: payload.url, } }); }); ``` 如果該 URL 已經存在,我們可以嘗試使用新的助手 ID 來更新它。 這是該頁面的完整程式碼: ``` import { eventTrigger } from "@trigger.dev/sdk"; import { client } from "@openai-assistant/trigger"; import {object, string} from "zod"; import {JSDOM} from "jsdom"; import {chunk} from "lodash"; import {prisma} from "@openai-assistant/helper/prisma.client"; import {openai} from "@openai-assistant/helper/open.ai"; const makeId = (length: number) => { let text = ''; const possible = 'ABCDEFGHIJKLMNOPQRSTUVWXYZabcdefghijklmnopqrstuvwxyz0123456789'; for (let i = 0; i < length; i += 1) { text += possible.charAt(Math.floor(Math.random() * possible.length)); } return text; }; client.defineJob({ // This is the unique identifier for your Job; it must be unique across all Jobs in your project. id: "process-documentation", name: "Process Documentation", version: "0.0.1", // This is triggered by an event using eventTrigger. You can also trigger Jobs with webhooks, on schedules, and more: https://trigger.dev/docs/documentation/concepts/triggers/introduction trigger: eventTrigger({ name: "process.documentation.event", schema: object({ url: string(), }) }), integrations: { openai }, run: async (payload, io, ctx) => { // The first task to get the sitemap URL from the website const getSiteMap = await io.runTask("grab-sitemap", async () => { const data = await (await fetch(payload.url)).text(); const dom = new JSDOM(data); const sitemap = dom.window.document.querySelector('[rel="sitemap"]')?.getAttribute('href'); return new URL(sitemap!, payload.url).toString(); }); // We parse the sitemap; instead of using some XML parser, we just use regex to get the URLs and we return it in chunks of 25 const {identifier, list} = await io.runTask("load-and-parse-sitemap", async () => { const urls = /(http|ftp|https):\/\/([\w_-]+(?:(?:\.[\w_-]+)+))([\w.,@?^=%&:\/~+#-]*[\w@?^=%&\/~+#-])/g; const identifier = makeId(5); const data = await (await fetch(getSiteMap)).text(); // @ts-ignore return {identifier, list: chunk(([...new Set(data.match(urls))] as string[]).filter(f => f.includes(payload.url)).map(p => ({identifier, url: p})), 25)}; }); // We go into each page and grab the content; we do this in batches of 25 and save it to the DB let i = 0; for (const item of list) { await processContent.batchInvokeAndWaitForCompletion( 'process-list-' + i, item.map( payload => ({ payload, }), 86_400), ); i++; } // We get the data that we saved in batches from the DB const data = await io.runTask("get-extracted-data", async () => { return (await prisma.docs.findMany({ where: { identifier }, select: { content: true } })).map((d) => d.content).join('\n\n'); }); // We upload the data to OpenAI with all the content const file = await io.openai.files.createAndWaitForProcessing("upload-file", { purpose: "assistants", file: data }); // We create a new assistant or update the old one with the new file const assistant = await io.openai.runTask("create-or-update-assistant", async (openai) => { const currentAssistant = await prisma.assistant.findFirst({ where: { url: payload.url } }); if (currentAssistant) { return openai.beta.assistants.update(currentAssistant.aId, { file_ids: [file.id] }); } return openai.beta.assistants.create({ name: identifier, description: 'Documentation', instructions: 'You are a documentation assistant, you have been loaded with documentation from ' + payload.url + ', return everything in an MD format.', model: 'gpt-4-1106-preview', tools: [{ type: "code_interpreter" }, {type: 'retrieval'}], file_ids: [file.id], }); }); // We update our internal database with the assistant await io.runTask("save-assistant", async () => { await prisma.assistant.upsert({ where: { url: payload.url }, update: { aId: assistant.id, }, create: { aId: assistant.id, url: payload.url, } }); }); }, }); export function getElementsBetween(startElement: Element, endElement: Element) { let currentElement = startElement; const elements = []; // Traverse the DOM until the endElement is reached while (currentElement && currentElement !== endElement) { currentElement = currentElement.nextElementSibling!; // If there's no next sibling, go up a level and continue if (!currentElement) { // @ts-ignore currentElement = startElement.parentNode!; startElement = currentElement; if (currentElement === endElement) break; continue; } // Add the current element to the list if (currentElement && currentElement !== endElement) { elements.push(currentElement); } } return elements; } // This job will grab the content from the website const processContent = client.defineJob({ // This is the unique identifier for your Job; it must be unique across all Jobs in your project. id: "process-content", name: "Process Content", version: "0.0.1", // This is triggered by an event using eventTrigger. You can also trigger Jobs with webhooks, on schedules, and more: https://trigger.dev/docs/documentation/concepts/triggers/introduction trigger: eventTrigger({ name: "process.content.event", schema: object({ url: string(), identifier: string(), }) }), run: async (payload, io, ctx) => { return io.runTask('grab-content', async () => { try { // We first grab a raw HTML of the content from the website const data = await (await fetch(payload.url)).text(); // We load it with JSDOM so we can manipulate it const dom = new JSDOM(data); // We remove all the scripts and styles from the page dom.window.document.querySelectorAll('script, style').forEach((el) => el.remove()); // We grab all the titles from the page const content = Array.from(dom.window.document.querySelectorAll('h1, h2, h3, h4, h5, h6')); // We grab the last element so we can get the content between the last element and the next element const lastElement = content[content.length - 1]?.parentElement?.nextElementSibling!; const elements = []; // We loop through all the elements and grab the content between each title for (let i = 0; i < content.length; i++) { const element = content[i]; const nextElement = content?.[i + 1] || lastElement; const elementsBetween = getElementsBetween(element, nextElement); elements.push({ title: element.textContent, content: elementsBetween.map((el) => el.textContent).join('\n') }); } // We create a raw text format of all the content const page = ` ---------------------------------- url: ${payload.url}\n ${elements.map((el) => `${el.title}\n${el.content}`).join('\n')} ---------------------------------- `; // We save it to our database await prisma.docs.upsert({ where: { url: payload.url }, update: { content: page, identifier: payload.identifier }, create: { url: payload.url, content: page, identifier: payload.identifier } }); } catch (e) { console.log(e); } }); }, }); ``` 我們已經完成建立後台作業來抓取和索引文件🎉 ### 詢問助理 現在,讓我們建立一個任務來詢問我們的助手。 前往“jobs”並建立一個新檔案“question.assistant.ts”。 **新增以下程式碼:** ``` import {eventTrigger} from "@trigger.dev/sdk"; import {client} from "@openai-assistant/trigger"; import {object, string} from "zod"; import {openai} from "@openai-assistant/helper/open.ai"; client.defineJob({ // This is the unique identifier for your Job; it must be unique across all Jobs in your project. id: "question-assistant", name: "Question Assistant", version: "0.0.1", // This is triggered by an event using eventTrigger. You can also trigger Jobs with webhooks, on schedules, and more: https://trigger.dev/docs/documentation/concepts/triggers/introduction trigger: eventTrigger({ name: "question.assistant.event", schema: object({ content: string(), aId: string(), threadId: string().optional(), }) }), integrations: { openai }, run: async (payload, io, ctx) => { // Create or use an existing thread const thread = payload.threadId ? await io.openai.beta.threads.retrieve('get-thread', payload.threadId) : await io.openai.beta.threads.create('create-thread'); // Create a message in the thread await io.openai.beta.threads.messages.create('create-message', thread.id, { content: payload.content, role: 'user', }); // Run the thread const run = await io.openai.beta.threads.runs.createAndWaitForCompletion('run-thread', thread.id, { model: 'gpt-4-1106-preview', assistant_id: payload.aId, }); // Check the status of the thread if (run.status !== "completed") { console.log('not completed'); throw new Error(`Run finished with status ${run.status}: ${JSON.stringify(run.last_error)}`); } // Get the messages from the thread const messages = await io.openai.beta.threads.messages.list("list-messages", run.thread_id, { query: { limit: "1" } }); const content = messages[0].content[0]; if (content.type === 'text') { return {content: content.text.value, threadId: thread.id}; } } }); ``` - 該事件需要三個參數 - `content` - 我們想要傳送給助理的訊息。 - `aId` - 我們先前建立的助手的內部 ID。 - `threadId` - 對話的執行緒 ID。正如您所看到的,這是一個可選參數,因為在第一個訊息中,我們還沒有線程 ID。 - 然後,我們建立或取得前一個執行緒的執行緒。 - 我們在助理提出的問題的線索中加入一條新訊息。 - 我們執行線程並等待它完成。 - 我們取得訊息清單(並將其限制為 1),因為第一則訊息是對話中的最後一則訊息。 - 我們返回訊息內容和我們剛剛建立的線程ID。 ### 新增路由 我們需要為我們的應用程式建立 3 個 API 路由: 1、派新助理進行處理。 2. 透過URL獲取特定助手。 3. 新增訊息給助手。 在「app/api」中建立一個名為assistant的新資料夾,並在其中建立一個名為「route.ts」的新檔案。裡面加入如下程式碼: ``` import {client} from "@openai-assistant/trigger"; import {prisma} from "@openai-assistant/helper/prisma.client"; export async function POST(request: Request) { const body = await request.json(); if (!body.url) { return new Response(JSON.stringify({error: 'URL is required'}), {status: 400}); } // We send an event to the trigger to process the documentation const {id: eventId} = await client.sendEvent({ name: "process.documentation.event", payload: {url: body.url}, }); return new Response(JSON.stringify({eventId}), {status: 200}); } export async function GET(request: Request) { const url = new URL(request.url).searchParams.get('url'); if (!url) { return new Response(JSON.stringify({error: 'URL is required'}), {status: 400}); } const assistant = await prisma.assistant.findFirst({ where: { url: url } }); return new Response(JSON.stringify(assistant), {status: 200}); } ``` 第一個「POST」方法取得一個 URL,並使用用戶端傳送的 URL 觸發「process.documentation.event」作業。 第二個「GET」方法從我們的資料庫中透過客戶端發送的 URL 取得助手。 現在,讓我們建立向助手新增訊息的路由。 在「app/api」內部建立一個新資料夾「message」並新增一個名為「route.ts」的新文件,然後新增以下程式碼: ``` import {prisma} from "@openai-assistant/helper/prisma.client"; import {client} from "@openai-assistant/trigger"; export async function POST(request: Request) { const body = await request.json(); // Check that we have the assistant id and the message if (!body.id || !body.message) { return new Response(JSON.stringify({error: 'Id and Message are required'}), {status: 400}); } // get the assistant id in OpenAI from the id in the database const assistant = await prisma.assistant.findUnique({ where: { id: +body.id } }); // We send an event to the trigger to process the documentation const {id: eventId} = await client.sendEvent({ name: "question.assistant.event", payload: { content: body.message, aId: assistant?.aId, threadId: body.threadId }, }); return new Response(JSON.stringify({eventId}), {status: 200}); } ``` 這是一個非常基本的程式碼。我們從客戶端獲取訊息、助手 ID 和線程 ID,並將其發送到我們之前建立的「question.assistant.event」。 最後要做的事情是建立一個函數來獲取我們所有的助手。 在「helpers」內部建立一個名為「get.list.ts」的新函數並新增以下程式碼: ``` import {prisma} from "@openai-assistant/helper/prisma.client"; // Get the list of all the available assistants export const getList = () => { return prisma.assistant.findMany({ }); } ``` 非常簡單的程式碼即可獲得所有助手。 我們已經完成了後端🥳 讓我們轉到前面。 ---  ## 建立前端 我們將建立一個基本介面來新增 URL 並顯示已新增 URL 的清單: 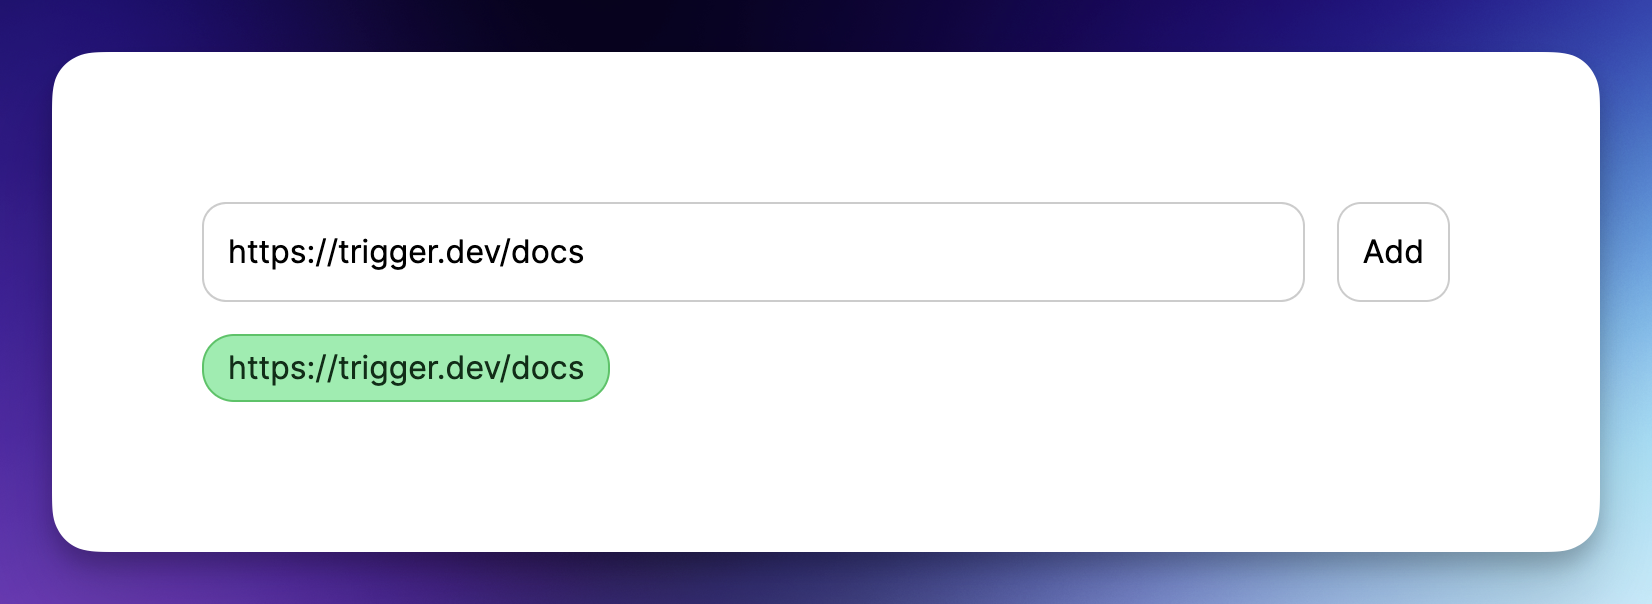 ### 首頁 將 `app/page.tsx` 的內容替換為以下程式碼: ``` import {getList} from "@openai-assistant/helper/get.list"; import Main from "@openai-assistant/components/main"; export default async function Home() { const list = await getList(); return ( <Main list={list} /> ) } ``` 這是一個簡單的程式碼,它從資料庫中取得清單並將其傳遞給我們的 Main 元件。 接下來,讓我們建立“Main”元件。 在「app」內建立一個新資料夾「components」並新增一個名為「main.tsx」的新檔案。 **新增以下程式碼:** ``` "use client"; import {Assistant} from '@prisma/client'; import {useCallback, useState} from "react"; import {FieldValues, SubmitHandler, useForm} from "react-hook-form"; import {ChatgptComponent} from "@openai-assistant/components/chatgpt.component"; import {AssistantList} from "@openai-assistant/components/assistant.list"; import {TriggerProvider} from "@trigger.dev/react"; export interface ExtendedAssistant extends Assistant { pending?: boolean; eventId?: string; } export default function Main({list}: {list: ExtendedAssistant[]}) { const [assistantState, setAssistantState] = useState(list); const {register, handleSubmit} = useForm(); const submit: SubmitHandler<FieldValues> = useCallback(async (data) => { const assistantResponse = await (await fetch('/api/assistant', { body: JSON.stringify({url: data.url}), method: 'POST', headers: { 'Content-Type': 'application/json' } })).json(); setAssistantState([...assistantState, {...assistantResponse, url: data.url, pending: true}]); }, [assistantState]) const changeStatus = useCallback((val: ExtendedAssistant) => async () => { const assistantResponse = await (await fetch(`/api/assistant?url=${val.url}`, { method: 'GET', headers: { 'Content-Type': 'application/json' } })).json(); setAssistantState([...assistantState.filter((v) => v.id), assistantResponse]); }, [assistantState]) return ( <TriggerProvider publicApiKey={process.env.NEXT_PUBLIC_TRIGGER_PUBLIC_API_KEY!}> <div className="w-full max-w-2xl mx-auto p-6 flex flex-col gap-4"> <form className="flex items-center space-x-4" onSubmit={handleSubmit(submit)}> <input className="flex-grow p-3 border border-black/20 rounded-xl" placeholder="Add documentation link" type="text" {...register('url', {required: 'true'})} /> <button className="flex-shrink p-3 border border-black/20 rounded-xl" type="submit"> Add </button> </form> <div className="divide-y-2 divide-gray-300 flex gap-2 flex-wrap"> {assistantState.map(val => ( <AssistantList key={val.url} val={val} onFinish={changeStatus(val)} /> ))} </div> {assistantState.filter(f => !f.pending).length > 0 && <ChatgptComponent list={assistantState} />} </div> </TriggerProvider> ) } ``` 讓我們看看這裡發生了什麼: - 我們建立了一個名為「ExtendedAssistant」的新接口,其中包含兩個參數「pending」和「eventId」。當我們建立一個新的助理時,我們沒有最終的值,我們將只儲存`eventId`並監聽作業處理直到完成。 - 我們從伺服器元件取得清單並將其設定為新狀態(以便我們稍後可以修改它) - 我們新增了「TriggerProvider」來幫助我們監聽事件完成並用資料更新它。 - 我們使用「react-hook-form」建立一個新表單來新增助手。 - 我們新增了一個帶有一個輸入「URL」的表單來提交新的助理進行處理。 - 我們迭代並顯示所有現有的助手。 - 在提交表單時,我們將資訊傳送到先前建立的「路由」以新增助理。 - 事件完成後,我們觸發「changeStatus」以從資料庫載入助手。 - 最後,我們有了 ChatGPT 元件,只有在沒有等待處理的助手時才會顯示(`!f.pending`) 讓我們建立 `AssistantList` 元件。 在「components」內,建立一個新檔案「assistant.list.tsx」並在其中加入以下內容: ``` "use client"; import {FC, useEffect} from "react"; import {ExtendedAssistant} from "@openai-assistant/components/main"; import {useEventRunDetails} from "@trigger.dev/react"; export const Loading: FC<{eventId: string, onFinish: () => void}> = (props) => { const {eventId} = props; const { data, error } = useEventRunDetails(eventId); useEffect(() => { if (!data || error) { return ; } if (data.status === 'SUCCESS') { props.onFinish(); } }, [data]); return <div className="pointer bg-yellow-300 border-yellow-500 p-1 px-3 text-yellow-950 border rounded-2xl">Loading</div> }; export const AssistantList: FC<{val: ExtendedAssistant, onFinish: () => void}> = (props) => { const {val, onFinish} = props; if (val.pending) { return <Loading eventId={val.eventId!} onFinish={onFinish} /> } return ( <div key={val.url} className="pointer relative bg-green-300 border-green-500 p-1 px-3 text-green-950 border rounded-2xl hover:bg-red-300 hover:border-red-500 hover:text-red-950 before:content-[attr(data-content)]" data-content={val.url} /> ) } ``` 我們迭代我們建立的所有助手。如果助手已經建立,我們只顯示名稱。如果沒有,我們渲染`<Loading />`元件。 載入元件在螢幕上顯示“正在載入”,並長時間輪詢伺服器直到事件完成。 我們使用 Trigger.dev 建立的 useEventRunDetails 函數來了解事件何時完成。 事件完成後,它會觸發「onFinish」函數,用新建立的助手更新我們的客戶端。 ### 聊天介面 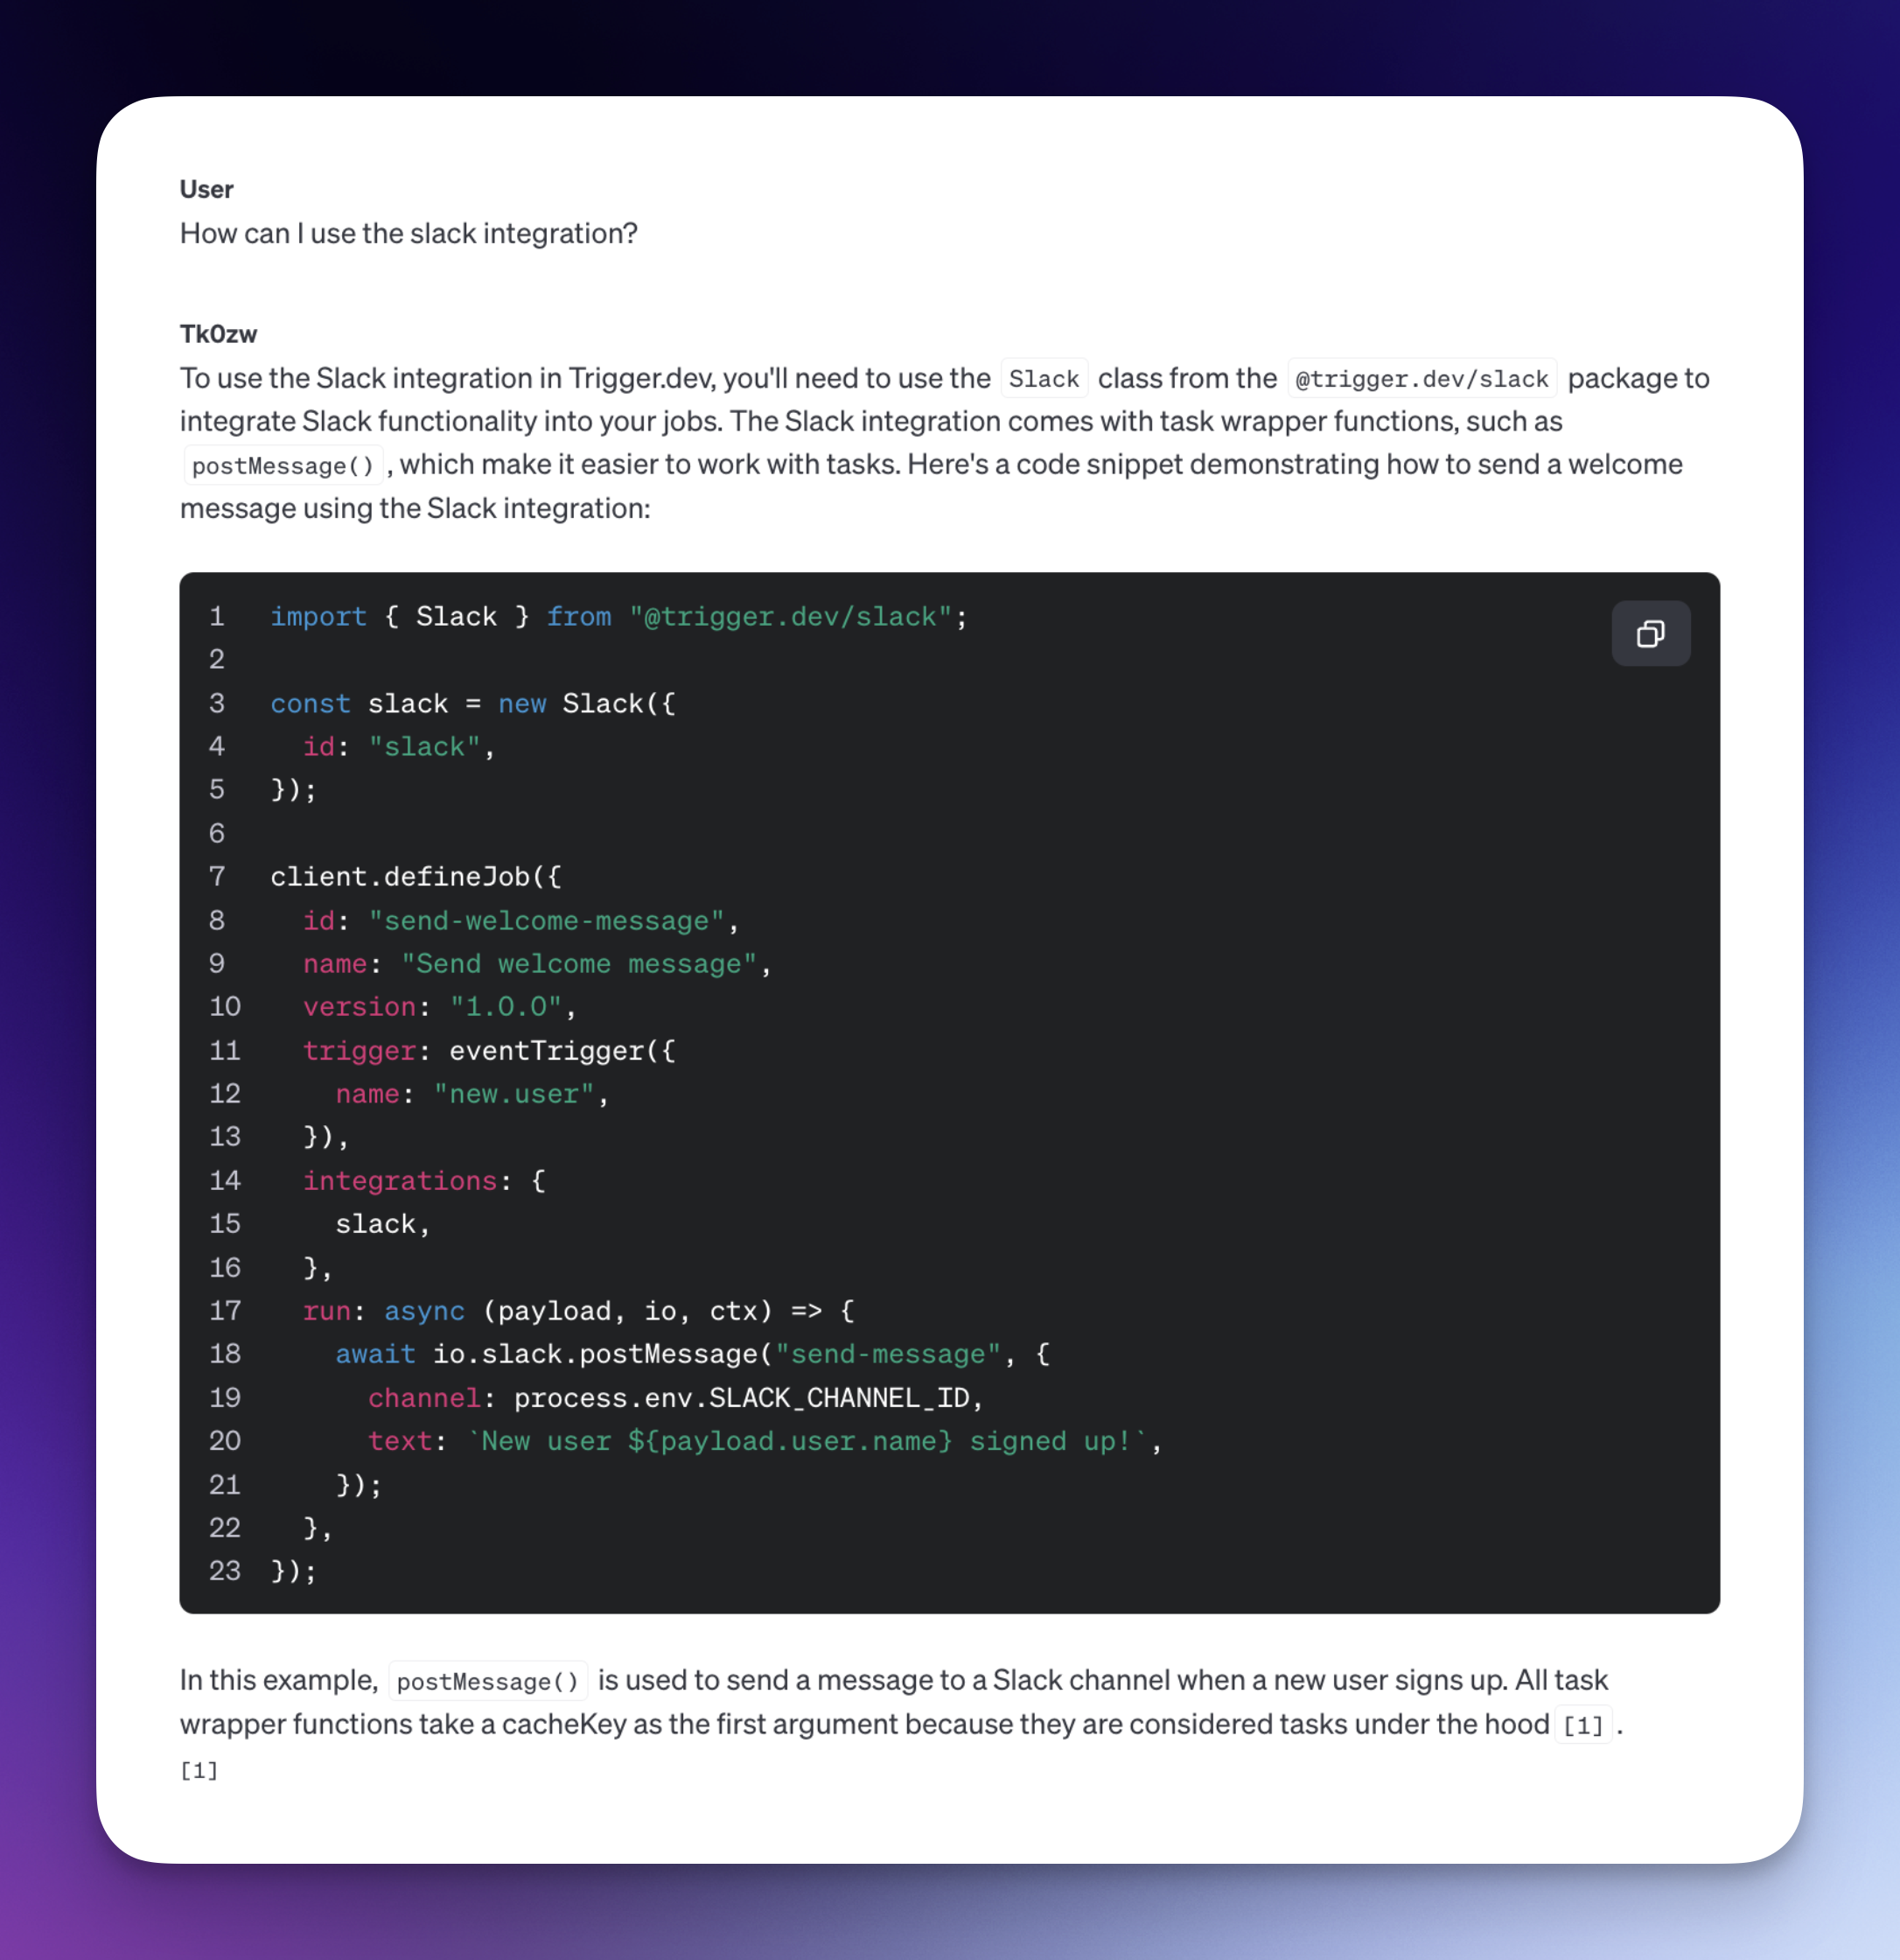 現在,讓我們加入 ChatGPT 元件並向我們的助手提問! - 選擇我們想要使用的助手 - 顯示訊息列表 - 新增我們要傳送的訊息的輸入和提交按鈕。 在「components」內部新增一個名為「chatgpt.component.tsx」的新文件 讓我們繪製 ChatGPT 聊天框: ``` "use client"; import {FC, useCallback, useEffect, useRef, useState} from "react"; import {ExtendedAssistant} from "@openai-assistant/components/main"; import Markdown from 'react-markdown' import {useEventRunDetails} from "@trigger.dev/react"; interface Messages { message?: string eventId?: string } export const ChatgptComponent = ({list}: {list: ExtendedAssistant[]}) => { const url = useRef<HTMLSelectElement>(null); const [message, setMessage] = useState(''); const [messagesList, setMessagesList] = useState([] as Messages[]); const [threadId, setThreadId] = useState<string>('' as string); const submitForm = useCallback(async (e: any) => { e.preventDefault(); setMessagesList((messages) => [...messages, {message: `**[ME]** ${message}`}]); setMessage(''); const messageResponse = await (await fetch('/api/message', { method: 'POST', body: JSON.stringify({message, id: url.current?.value, threadId}), })).json(); if (!threadId) { setThreadId(messageResponse.threadId); } setMessagesList((messages) => [...messages, {eventId: messageResponse.eventId}]); }, [message, messagesList, url, threadId]); return ( <div className="border border-black/50 rounded-2xl flex flex-col"> <div className="border-b border-b-black/50 h-[60px] gap-3 px-3 flex items-center"> <div>Assistant:</div> <div> <select ref={url} className="border border-black/20 rounded-xl p-2"> {list.filter(f => !f.pending).map(val => ( <option key={val.id} value={val.id}>{val.url}</option> ))} </select> </div> </div> <div className="flex-1 flex flex-col gap-3 py-3 w-full min-h-[500px] max-h-[1000px] overflow-y-auto overflow-x-hidden messages-list"> {messagesList.map((val, index) => ( <div key={index} className={`flex border-b border-b-black/20 pb-3 px-3`}> <div className="w-full"> {val.message ? <Markdown>{val.message}</Markdown> : <MessageComponent eventId={val.eventId!} onFinish={setThreadId} />} </div> </div> ))} </div> <form onSubmit={submitForm}> <div className="border-t border-t-black/50 h-[60px] gap-3 px-3 flex items-center"> <div className="flex-1"> <input value={message} onChange={(e) => setMessage(e.target.value)} className="read-only:opacity-20 outline-none border border-black/20 rounded-xl p-2 w-full" placeholder="Type your message here" /> </div> <div> <button className="border border-black/20 rounded-xl p-2 disabled:opacity-20" disabled={message.length < 3}>Send</button> </div> </div> </form> </div> ) } export const MessageComponent: FC<{eventId: string, onFinish: (threadId: string) => void}> = (props) => { const {eventId} = props; const { data, error } = useEventRunDetails(eventId); useEffect(() => { if (!data || error) { return ; } if (data.status === 'SUCCESS') { props.onFinish(data.output.threadId); } }, [data]); if (!data || error || data.status !== 'SUCCESS') { return ( <div className="flex justify-end items-center pb-3 px-3"> <div className="animate-spin rounded-full h-3 w-3 border-t-2 border-b-2 border-blue-500" /> </div> } return <Markdown>{data.output.content}</Markdown>; }; ``` 這裡正在發生一些令人興奮的事情: - 當我們建立新訊息時,我們會自動將其呈現在螢幕上作為「我們的」訊息,但是當我們將其發送到伺服器時,我們需要推送事件 ID,因為我們還沒有訊息。這就是我們使用 `{val.message ? <Markdown>{val.message}</Markdown> : <MessageComponent eventId={val.eventId!} onFinish={setThreadId} />}` - 我們用「Markdown」元件包裝訊息。如果您還記得,我們在前面的步驟中告訴 ChatGPT 以 MD 格式輸出所有內容,以便我們可以正確渲染它。 - 事件處理完成後,我們會更新線程 ID,以便我們從以下訊息中獲得相同對話的上下文。 我們就完成了🎉 ---  ## 讓我們聯絡吧! 🔌 作為開源開發者,您可以加入我們的[社群](https://discord.gg/nkqV9xBYWy) 做出貢獻並與維護者互動。請隨時造訪我們的 [GitHub 儲存庫](https://github.com/triggerdotdev/trigger.dev),貢獻並建立與 Trigger.dev 相關的問題。 本教學的源程式碼可在此處取得: [https://github.com/triggerdotdev/blog/tree/main/openai-assistant](https://github.com/triggerdotdev/blog/tree/main/openai-assistant) 感謝您的閱讀! --- 原文出處:https://dev.to/triggerdotdev/train-chatgpt-on-your-documentation-1a9g
## 你好!我是[鮑里斯](https://www.martinovic.dev/)! 我是一名軟體工程師,專門從事保險工作,教授其他開發人員,並在會議上發言。多年來,我使用了相當多的不同開發環境和作業系統,除了 .Net 開發之外,我個人從來不喜歡在 Windows 中進行開發。這是為什麼?讓我們更深入地研究一下。 好吧,我的大部分問題都可以歸結為一個詞:**麻煩**。無論是在日常使用中處理Windows,您都會經常遇到作業系統本身的不同方式帶給您的困擾。這樣的例子很多,無論是登錄問題、套件管理、切換節點版本或 Windows 更新,這些問題本身就可以讓人們放棄作業系統。 所以你可以明白為什麼我開始與下圖的烏鴉產生連結。  我並沒有放棄尋找可行的解決方案。而且,我(有點)找到了它。 ## 什麼是 WSL?我為什麼要對它感興趣? Windows Subsystem for Linux(或 WSL)讓開發人員可以直接在 Windows 上執行功能齊全的本機 GNU/Linux 環境。換句話說,我們可以直接執行Linux,而無需使用虛擬機器或雙重開機系統。 **第一個很酷的事情是 WSL 允許您永遠不用切換作業系統,但仍然可以在作業系統中擁有兩全其美的優點。** 這對我們普通用戶意味著什麼?當您查看WSL 在實踐中的工作方式時,它可以被視為一項Windows 功能,直接在Windows 10 或11 內執行Linux 作業系統,具有功能齊全的Linux 檔案系統、Linux 命令列工具、*** *** 和****** Linux GUI 應用程式(*真的很酷,順便說一句*)。除此之外,與虛擬機器相比,它使用的運作資源要少得多,並且不需要單獨的工具來建立和管理這些虛擬機器。 WSL 主要針對開發人員,因此本文將重點放在開發人員的使用以及如何使用 VS Code 設定完全工作的開發環境。在本文中,我們將介紹一些很酷的功能以及如何在實踐中使用它們。另外,理解新事物的最好方法就是實際開始使用它們。 ### 覺得這篇文章有用嗎? 我們正在 [Wasp](https://wasp-lang.dev/) 努力建立這樣的內容,更不用說建立一個現代的開源 React/NodeJS 框架了。 表達您支援的最簡單方法就是為 Wasp 儲存庫加註星標! 🐝 但如果您可以查看[存儲庫](https://github.com/wasp-lang/wasp)(用於貢獻,或只是測試產品),我們將不勝感激。點擊下面的按鈕給黃蜂星一顆星並表示您的支持!  https://github.com/wasp-lang/wasp ## 在 Windows 作業系統上安裝 WSL 為了在 Windows 上安裝 WSL,請先啟用 [Hyper-V](https://learn.microsoft.com/en-us/virtualization/hyper-v-on-windows/quick-start/enable-hyper-v )架構是微軟的硬體虛擬化解決方案。要安裝它,請右鍵單擊 Windows 終端機/Powershell 並以管理員模式開啟它。 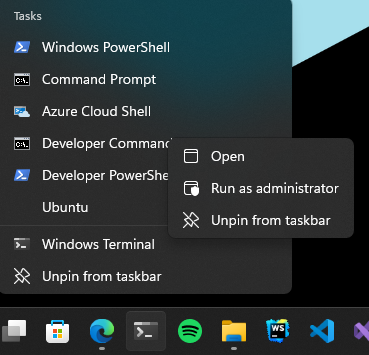 然後,執行以下命令: ``` Enable-WindowsOptionalFeature -Online -FeatureName Microsoft-Hyper-V -All ``` 這將確保您具備安裝的所有先決條件。然後,在管理員模式下開啟 Powershell(最好在 Windows 終端機中完成)。然後,執行 ``` wsl —install ``` 有大量的 Linux 發行版需要安裝,但 Ubuntu 是預設安裝的。本指南將介紹許多控制台命令,但其中大多數將是複製貼上過程。 如果您之前安裝過 Docker,那麼您的系統上很可能已經安裝了 WSL 2。在這種情況下,您將收到安裝所選發行版的提示。由於本教程將使用 Ubuntu,因此我建議執行。 ``` wsl --install -d Ubuntu ``` 安裝 Ubuntu(或您選擇的其他發行版)後,您將進入 Linux 作業系統並出現歡迎畫面提示。在那裡,您將輸入一些基本資訊。首先,您將輸入您的用戶名,然後輸入密碼。這兩個都是 Linux 特定的,因此您不必重複您的 Windows 憑證。完成此操作後,安裝部分就結束了!您已經在 Windows 電腦上成功安裝了 Ubuntu!說起來還是感覺很奇怪吧? ### 等一下! 但在我們開始討論開發環境設定之前,我想向您展示一些很酷的技巧,這些技巧將使您的生活更輕鬆,並幫助您了解為什麼 WSL 實際上是 Windows 用戶的遊戲規則改變者。 WSL 的第一個很酷的事情是您不必放棄目前透過 Windows 資源管理器管理檔案的方式。在 Windows 資源管理器的側邊欄中,您現在可以在網路標籤下找到 Linux 選項。 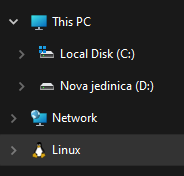 從那裡,您可以直接從 Windows 資源管理器存取和管理 Linux 作業系統的檔案系統。這個功能真正酷的是,你基本上可以在不同的作業系統之間複製、貼上和移動文件,沒有任何問題,這開啟了一個充滿可能性的世界。實際上,您不必對文件工作流程進行太多更改,並且可以輕鬆地將許多專案和文件從一個作業系統移動到另一個作業系統。如果您在 Windows 瀏覽器上下載 Web 應用程式的映像,只需將其複製並貼上到您的 Linux 作業系統中即可。  我們將在範例中使用的另一個非常重要的事情是 WSL2 虛擬路由。由於您的作業系統中現在有作業系統,因此它們有一種通訊方式。當您想要存取 Linux 作業系統的網路時(例如,當您想要存取在 Linux 中本機執行的 Web 應用程式時),您可以使用 *${PC-name}.local*。對我來說,由於我的電腦名稱是 Boris-PC,所以我的網路位址是 boris-pc.local。這樣你就不必記住不同的 IP 位址,這真的很酷。如果您出於某種原因需要您的位址,您可以前往 Linux 發行版的終端,然後輸入 ipconfig。然後,您可以看到您的 Windows IP 和 Linux 的 IP 位址。這樣,您就可以毫無摩擦地與兩個作業系統進行通訊。 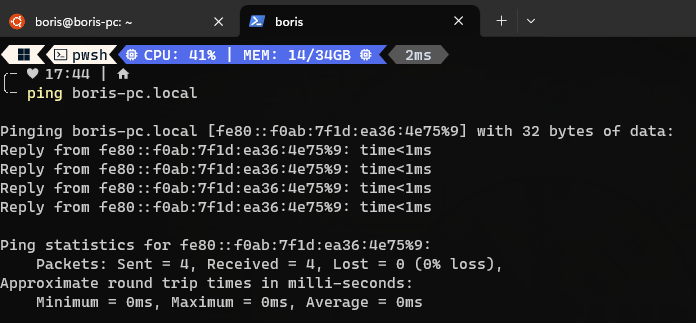 我想強調的最後一件很酷的事情是 Linux GUI 應用程式。這是一項非常酷的功能,有助於使 WSL 對普通用戶更具吸引力。您可以使用流行的套件管理器(例如 apt(Ubuntu 上的預設值)或 flatpak)在 Linux 系統上安裝任何您想要的應用程式。然後,您也可以從命令列啟動它們,應用程式將啟動並在 Windows 作業系統中可見。但這可能會引起一些摩擦並且不方便用戶使用。此功能真正具有突破性的部分是,您可以直接從 Windows 作業系統啟動它們,甚至無需親自啟動 WSL。因此,您可以建立捷徑並將它們固定到「開始」功能表或任務欄,沒有任何摩擦,並且實際上不需要考慮您的應用程式來自哪裡。為了演示,我安裝了 Dolphin 檔案管理器並透過 Windows 作業系統執行它。您可以在下面看到它與 Windows 資源管理器並排的操作。 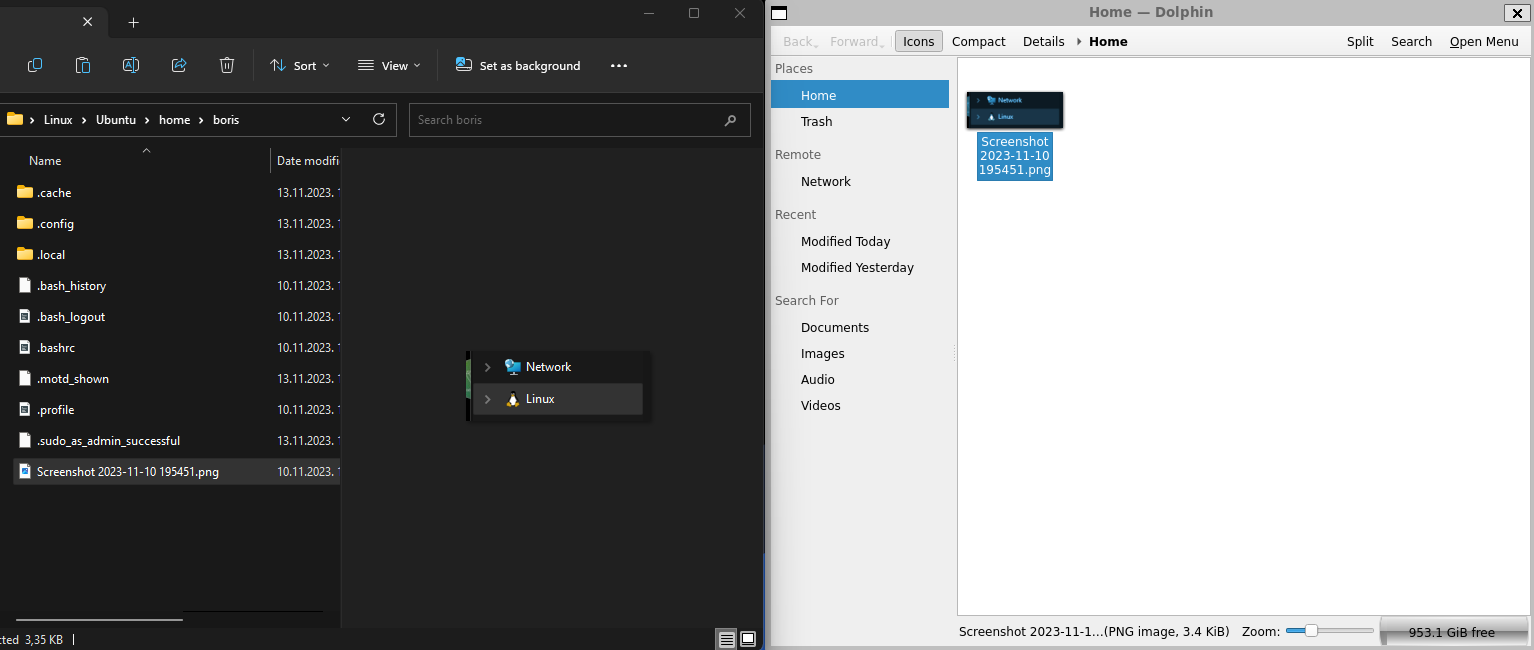 ## WSL 開發入門 在了解了 WSL 的所有酷炫功能後,讓我們慢慢回到教學的正軌。接下來是設定我們的開發環境並啟動我們的第一個應用程式。我將設定一個 Web 開發環境,我們將使用 [Wasp](https://wasp-lang.dev/) 作為範例。 如果你不熟悉的話,Wasp 是一個類似 Rails 的 React、Node.js 和 Prisma 框架。這是開發和部署全端 Web 應用程式的快速、簡單的方法。對於我們的教程,Wasp 是一個完美的候選者,因為它本身不支援 Windows 開發,而只能透過 WSL 來支持,因為它需要 Unix 環境。 讓我們先開始安裝 Node.js。目前,Wasp 要求使用者使用 Node v18(版本要求很快就會放寬),因此我們希望從 Node.js 和 NVM 的安裝開始。 但首先,讓我們先從 Node.js 開始。在 WSL 中,執行: ``` sudo apt install nodejs ``` 為了在您的 Linux 環境中安裝 Node。接下來是 NVM。我建議存取 https://github.com/nvm-sh/nvm 並從那裡獲取最新的安裝腳本。目前下載的是: ``` curl -o- [https://raw.githubusercontent.com/nvm-sh/nvm/v0.39.5/install.sh](https://raw.githubusercontent.com/nvm-sh/nvm/v0.39.5/install.sh) | bash ``` 之後,我們在系統中設定了 Node.js 和 NVM。 接下來是在我們的 Linux 環境中安裝 Wasp。 Wasp 安裝也非常簡單。因此,只需複製並貼上此命令: ``` curl -sSL [https://get.wasp-lang.dev/installer.sh](https://get.wasp-lang.dev/installer.sh) | sh ``` 並等待安裝程序完成它的事情。偉大的!但是,如果您從 0 開始進行 WSL 設置,您會注意到下面有以下警告:看起來“/home/boris/.local/bin”不在您的 PATH 上!您將無法透過終端名稱呼叫 wasp。 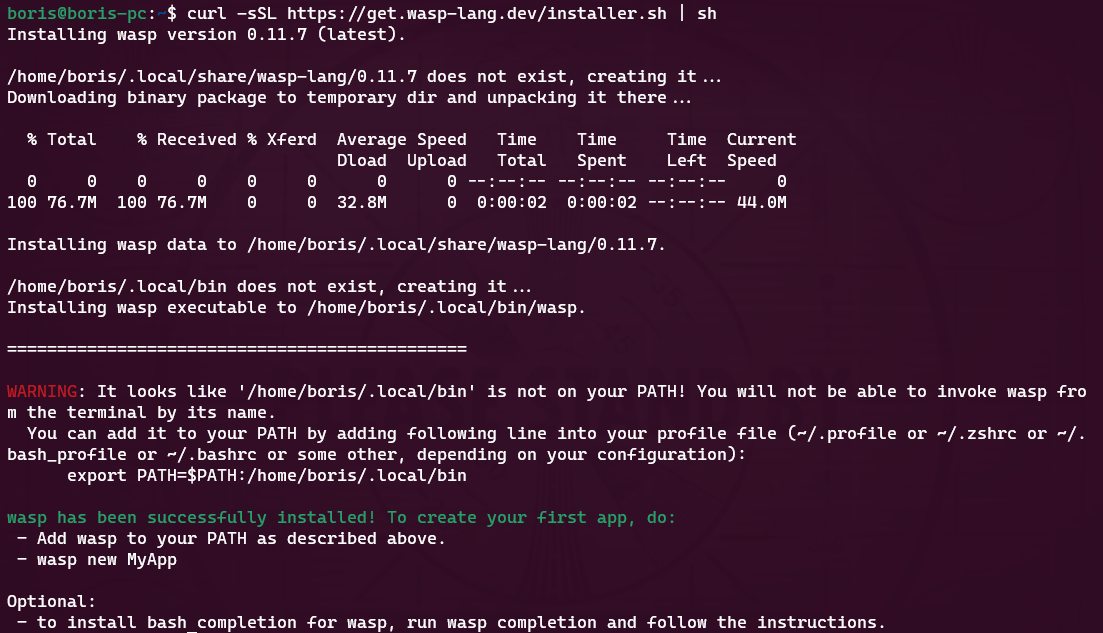 讓我們快速解決這個問題。為了做到這一點,讓我們執行 ``` code ~/.profile ``` 如果我們還沒有 VS Code,它會自動設定所需的一切並啟動,以便您可以將命令新增至檔案末端。每個人的系統名稱都會有所不同。例如我的是: ``` export PATH=$PATH:/home/boris/.local/bin ``` 偉大的!現在我們只需要將節點版本切換到 v18.14.2 即可確保與 Wasp 完全相容。我們將一次性安裝並切換到 Node 18!為此,只需執行: ``` nvm install v18.14.2 && nvm use v18.14.2 ``` 設定 Wasp 後,我們希望了解如何執行應用程式並從 VS Code 存取它。在幕後,您仍將使用 WSL 進行開發,但我們將能夠使用主機作業系統 (Windows) 中的 VS Code 來完成大多數事情。 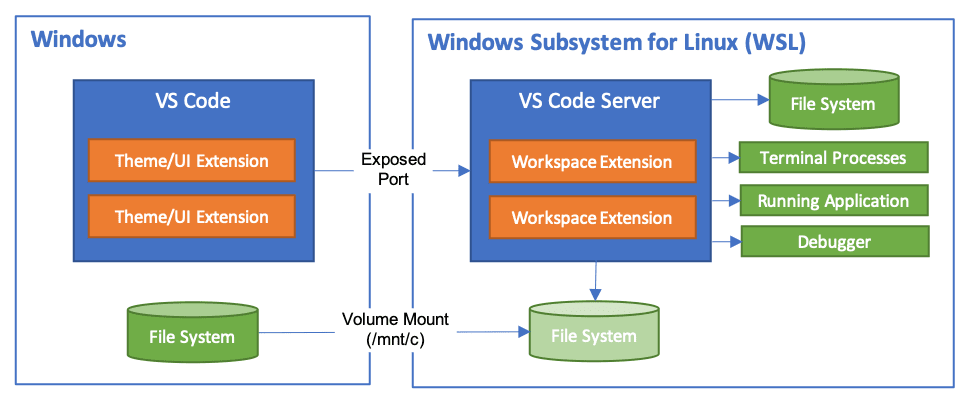 首先,將 [WSL 擴充功能](https://marketplace.visualstudio.com/items?itemName=ms-vscode-remote.remote-wsl) 下載到 Windows 中的 VS Code。然後,讓我們啟動一個新的 Wasp 專案來看看它是如何運作的。開啟 VS Code 命令面板(ctrl + shift + P)並選擇「在 WSL 中開啟資料夾」選項。 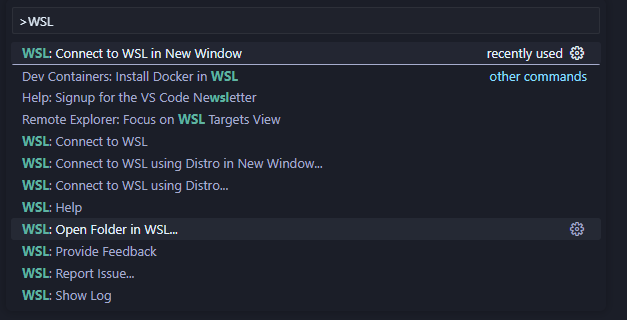 我打開的資料夾是 ``` \\wsl.localhost\Ubuntu\home\boris\Projects ``` 這是我在 WSL 中的主資料夾中的「Projects」資料夾。我們可以透過兩種方式知道我們處於 WSL 中:頂部欄和 VS Code 的左下角。在這兩個地方,我們都編寫了 WSL: Ubuntu,如螢幕截圖所示。  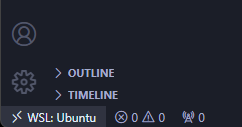 進入該資料夾後,我將打開一個終端。它還將已經連接到 WSL 中的正確資料夾,因此我們可以開始工作了!讓我們執行 ``` wasp new ``` 命令建立一個新的 Wasp 應用程式。我選擇了基本模板,但您可以自由建立您選擇的專案,例如[SaaS 入門](https://github.com/wasp-lang/SaaS-Template-GPT) 具有 GPT、Stripe 等預先配置。如螢幕截圖所示,我們應該將專案的當前目錄變更為正確的目錄,然後用它來執行我們的專案。 ``` wasp start ``` 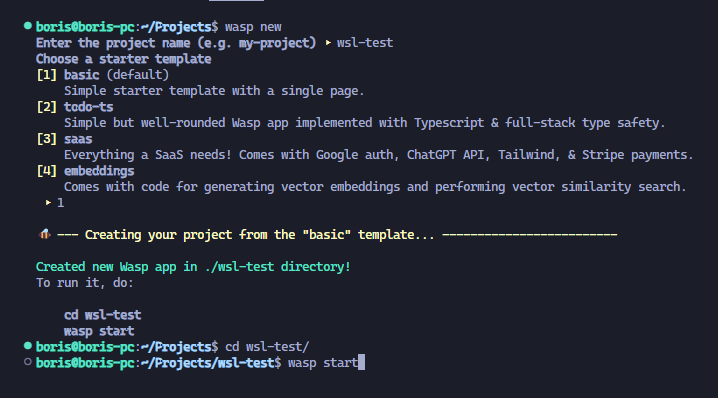 就像這樣,我的 Windows 電腦上將打開一個新螢幕,顯示我的 Wasp 應用程式已開啟。涼爽的!我的位址仍然是預設的 localhost:3000,但它是從 WSL 執行的。恭喜,您已透過 WSL 成功啟動了您的第一個 Wasp 應用程式。這並不難,不是嗎? 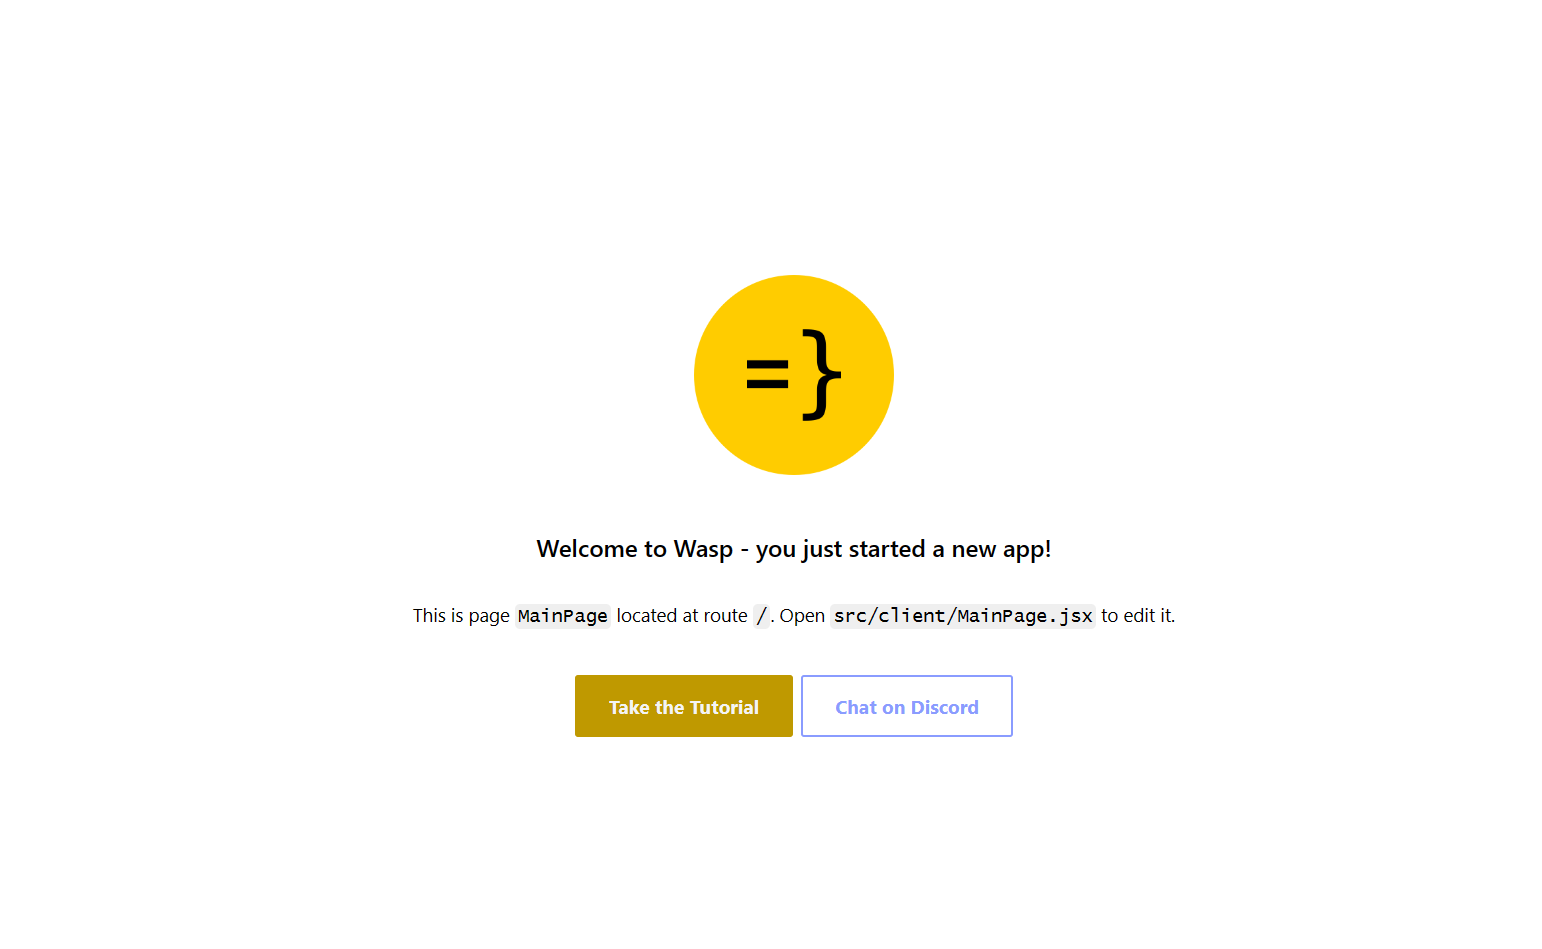 對於我們的最後一個主題,我想重點介紹使用 WSL 的 Git 工作流程,因為它的設定相對輕鬆。您始終可以手動進行 git config 設置,但我為您提供了一些更酷的東西:在 Windows 和 WSL 之間共享憑證。要設定共享 Git 憑證,我們必須執行以下操作。在 Powershell(在 Windows 上)中,設定 Windows 上的憑證管理員。 ``` git config --global credential.helper wincred ``` 讓我們在 WSL 中做同樣的事情。 ``` git config --global credential.helper "/mnt/c/Program\ Files/Git/mingw64/bin/git-credential-manager.exe" ``` 這使我們能夠共享 Git 使用者名稱和密碼。 Windows 中設定的任何內容都可以在 WSL 中運作(反之亦然),我們可以根據需要在 WSL 中使用 Git(透過 VS Code GUI 或透過 shell)。 ## 結論 透過我們在這裡的旅程,我們了解了 WSL 是什麼、它如何有助於增強 Windows PC 的工作流程,以及如何在其上設定初始開發環境。 Microsoft 在這個工具方面做得非常出色,並且確實使 Windows 作業系統成為所有開發人員更容易使用和可行的選擇。我們了解如何安裝啟動開發所需的開發工具以及如何掌握基本的開發工作流程。如果您想深入了解該主題,這裡有一些重要的連結: - [https://wasp-lang.dev/](https://wasp-lang.dev/) - [https://github.com/microsoft/WSL](https://github.com/microsoft/WSL) - [https://learn.microsoft.com/en-us/windows/wsl/install](https://learn.microsoft.com/en-us/windows/wsl/install) - [https://code.visualstudio.com/docs/remote/wsl](https://code.visualstudio.com/docs/remote/wsl) --- 原文出處:https://dev.to/wasp/supercharge-your-windows-development-the-ultimate-guide-to-wsl-195m
# 簡介 在上一篇文章中,我討論了建立一個[GitHub stars 監視器](https://dev.to/triggerdotdev/take-nextjs-to-the-next-level-create-a-github-stars-monitor-130a)。 在這篇文章中,我想向您展示如何每天了解新星的資訊。 我們將學習: - 如何建立通用系統來建立和使用提供者。 - 如何使用提供者發送通知。 - 使用不同提供者的不同用例。  --- ## 你的後台工作平台🔌 [Trigger.dev](https://trigger.dev/) 是一個開源程式庫,可讓您使用 NextJS、Remix、Astro 等為您的應用程式建立和監控長時間執行的作業! [](https://github.com/triggerdotdev/trigger.dev) 請幫我們一顆星🥹。 這將幫助我們建立更多這樣的文章💖 https://github.com/triggerdotdev/trigger.dev --- ## 讓我們來設定一下 🔥 我們將建立不同的提供者來通知我們何時有新的明星。我們將設定「電子郵件」、「簡訊」、「Slack」和「Discord」通知。 我們的目標是讓每個貢獻者都足夠簡單,以便在未來貢獻更多的提供者。 每個提供者都會有一組不同的參數,有些只有“API 金鑰”,有些則有電話號碼,具體取決於提供者。 為了驗證這些金鑰,讓我們安裝“zod”;它是一個很棒的庫,可以定義模式並根據模式檢查資料。 您可以透過執行以下命令開始: ``` npm install zod --save ``` 完成後,建立一個名為「providers」的新資料夾,然後在其中建立一個名為「register.provider.ts」的新檔案。 這是文件的程式碼: ``` import {Schema} from "zod"; export function registerProvider<T>( name: string, options: {active: boolean}, validation: Schema<T>, run: (libName: string, stars: number, values: T) => Promise<void> ) { // if not active, we can just pass an empty function, nothing will run if (!options.active) { return () => {}; } // will validate and remove unnecessary values (Security wise) const env = validation.parse(process.env); // return the function we will run at the end of the job return async (libName: string, stars: number) => { console.log(`Running provider ${name}`); await run(libName, stars, env as T); console.log(`Finished running provider ${name}`); } } ``` 程式碼不多,但可能有點複雜。 我們首先建立一個名為「registerProvider」的新函數。該函數獲得一個通用類型“T”,基本上是我們所需的環境變數。 然後我們還有 4 個參數: - 名稱 - 可以是「Twilio」、「Discord」、「Slack」或「Resend」中的任何一個。 - 選項 - 目前,一個參數是提供者是否處於活動狀態? - 驗證 - 在這裡,我們在 .env 檔案中傳遞所需參數的「zod」模式。 - run - 實際上用於發送通知。請注意,傳入其中的參數是庫名稱、星星數量以及我們在「validation」中指定的環境變數 **然後我們就有了實際的功能:** 首先,我們檢查提供者是否處於活動狀態。如果沒有,我們發送一個空函數。 然後,我們驗證並提取我們在模式中指定的變數。如果變數缺少 `zod` 將發送錯誤並且不會讓應用程式執行。 最後,我們傳回一個函數,該函數會取得庫名稱和星星數量並觸發通知。 在我們的「providers」資料夾中,建立一個名為「providers.ts」的新文件,並在其中新增以下程式碼: ``` export const Providers = []; ``` 稍後,我們將在那裡加入所有提供者。 --- ## 修改 TriggerDev 作業 本文是上一篇關於建立 [GitHub stars 監視器](https://dev.to/triggerdotdev/take-nextjs-to-the-next-level-create-a-github-stars-monitor-130a)。 編輯檔案 `jobs/sync.stars.ts` 並將以下程式碼加入檔案底部: ``` const triggerNotification = client.defineJob({ id: "trigger-notification", name: "Trigger Notification", version: "0.0.1", trigger: invokeTrigger({ schema: z.object({ stars: z.number(), library: z.string(), providerNumber: z.number(), }) }), run: async (payload, io, ctx) => { await io.runTask("trigger-notification", async () => { return Providers[payload.providerNumber](payload.library, payload.stars); }); } }); ``` 此作業取得星星數量、圖書館名稱和提供者編號,並從先前定義的提供者觸發特定提供者的通知。 現在,我們繼續修改“getStars”,在函數末尾加入以下程式碼: ``` for (let i = 0; i < Providers.length; i++) { await triggerNotification.invoke(payload.name + '-' + i, { library: payload.name, stars: stargazers_count - payload.previousStarCount, providerNumber: i, }); } ``` 這將觸發每個圖書館的通知。 完整頁面程式碼: ``` import { cronTrigger, invokeTrigger } from "@trigger.dev/sdk"; import { client } from "@/trigger"; import { prisma } from "../../helper/prisma"; import axios from "axios"; import { z } from "zod"; import {Providers} from "@/providers/providers"; // Your first job // This Job will be triggered by an event, log a joke to the console, and then wait 5 seconds before logging the punchline. client.defineJob({ id: "sync-stars", name: "Sync Stars Daily", version: "0.0.1", // Run a cron every day at 23:00 AM trigger: cronTrigger({ cron: "0 23 * * *", }), run: async (payload, io, ctx) => { const repos = await io.runTask("get-stars", async () => { // get all libraries and current amount of stars return await prisma.repository.groupBy({ by: ["name"], _sum: { stars: true, }, }); }); //loop through all repos and invoke the Job that gets the latest stars for (const repo of repos) { await getStars.invoke(repo.name, { name: repo.name, previousStarCount: repo?._sum?.stars || 0, }); } }, }); const getStars = client.defineJob({ id: "get-latest-stars", name: "Get latest stars", version: "0.0.1", // Run a cron every day at 23:00 AM trigger: invokeTrigger({ schema: z.object({ name: z.string(), previousStarCount: z.number(), }), }), run: async (payload, io, ctx) => { const stargazers_count = await io.runTask("get-stars", async () => { const {data} = await axios.get(`https://api.github.com/repos/${payload.name}`, { headers: { authorization: `token ${process.env.TOKEN}`, }, }); return data.stargazers_count as number; }); await io.runTask("upsert-stars", async () => { await prisma.repository.upsert({ where: { name_day_month_year: { name: payload.name, month: new Date().getMonth() + 1, year: new Date().getFullYear(), day: new Date().getDate(), }, }, update: { stars: stargazers_count - payload.previousStarCount, }, create: { name: payload.name, stars: stargazers_count - payload.previousStarCount, month: new Date().getMonth() + 1, year: new Date().getFullYear(), day: new Date().getDate(), }, }); }); for (let i = 0; i < Providers.length; i++) { await triggerNotification.invoke(payload.name + '-' + i, { library: payload.name, stars: stargazers_count - payload.previousStarCount, providerNumber: i, }); } }, }); const triggerNotification = client.defineJob({ id: "trigger-notification", name: "Trigger Notification", version: "0.0.1", trigger: invokeTrigger({ schema: z.object({ stars: z.number(), library: z.string(), providerNumber: z.number(), }) }), run: async (payload, io, ctx) => { await io.runTask("trigger-notification", async () => { return Providers[payload.providerNumber](payload.library, payload.stars); }); } }); ``` 現在,有趣的部分🎉 讓我們繼續建立我們的提供者! 首先建立一個名為「providers/lists」的新資料夾 --- ## 1. Discord  建立一個名為「discord.provider.ts」的新檔案並新增以下程式碼: ``` import {object, string} from "zod"; import {registerProvider} from "@/providers/register.provider"; import axios from "axios"; export const DiscordProvider = registerProvider( "discord", {active: true}, object({ DISCORD_WEBHOOK_URL: string(), }), async (libName, stars, values) => { await axios.post(values.DISCORD_WEBHOOK_URL, {content: `The library ${libName} has ${stars} new stars!`}); } ); ``` 如您所見,我們正在使用 `registerProvider` 建立一個名為 DiscordProvider 的新提供程序 - 我們將名稱設定為“discord” - 我們將其設定為活動狀態 - 我們指定需要一個名為「DISCORD_WEBHOOK_URL」的環境變數。 - 我們使用 Axios 的簡單 post 指令將資訊加入支票中。 若要取得“DISCORD_WEBHOOK_URL”: 1. 前往您的 Discord 伺服器 2. 點選其中一個頻道的“編輯” 3. 轉到“整合” 4. 點選“建立 Webhook” 5. 點選建立的 webhook,然後點選“複製 webhook URL” 在根專案上編輯“.env”檔案並加入 ``` SLACK_WEBHOOK_URL=<your copied url> ```  --- ## 2. Slack  建立一個名為「slack.provider.ts」的新檔案並新增以下程式碼: ``` import {object, string} from "zod"; import {registerProvider} from "@/providers/register.provider"; import axios from "axios"; export const SlackProvider = registerProvider( "slack", {active: true}, object({ SLACK_WEBHOOK_URL: string(), }), async (libName, stars, values) => { await axios.post(values.SLACK_WEBHOOK_URL, {text: `The library ${libName} has ${stars} new stars!`}); } ); ``` 如您所見,我們正在使用 `registerProvider` 建立一個名為 SlackProvider 的新提供者 - 我們將名稱設定為“slack” - 我們將其設定為活動狀態 - 我們指定需要一個名為「SLACK_WEBHOOK_URL」的環境變數。 - 我們使用 Axios 的簡單 post 指令將資訊加入支票中。 要取得“SLACK_WEBHOOK_URL”: 1. 使用下列 URL 建立新的 Slack 應用程式:https://api.slack.com/apps?new_app=1 2. 選擇第一個選項:“從頭開始” 3. 指定應用程式名稱(任意)以及您想要新增通知的 Slack 工作區。點擊“建立應用程式”。 4. 在“新增特性和功能”中,按一下“傳入掛鉤” 5. 在啟動傳入 Webhooks 中,將其變更為「開啟」。 6. 按一下「將新 Webhook 新增至工作區」。 7. 選擇您想要的頻道並點選「允許」。 8. 複製 Webhook URL。 在根專案上編輯“.env”檔案並加入 ``` SLACK_WEBHOOK_URL=<your copied url> ```  --- ## 3. 電子郵件  您可以使用不同類型的電子郵件提供者。例如,我們將使用**Resend**來傳送電子郵件。 為此,讓我們在我們的專案上安裝重新發送: ``` npm install resend --save ``` 建立一個名為「resend.provider.ts」的新檔案並新增以下程式碼: ``` import {object, string} from "zod"; import {registerProvider} from "@/providers/register.provider"; import axios from "axios"; import { Resend } from 'resend'; export const ResendProvider = registerProvider( "resend", {active: true}, object({ RESEND_API_KEY: string(), }), async (libName, stars, values) => { const resend = new Resend(values.RESEND_API_KEY); await resend.emails.send({ from: "Eric Allam <[email protected]>", to: ['[email protected]'], subject: 'New GitHub stars', html: `The library ${libName} has ${stars} new stars!`, }); } ); ``` 如您所見,我們正在使用 `registerProvider` 建立一個名為 ResendProvider 的新提供程序 - 我們將名稱設定為“重新發送” - 我們將其設定為活動狀態 - 我們指定需要一個名為「RESEND_API_KEY」的環境變數。 - 我們使用重新發送庫向自己發送一封包含新星數的電子郵件。 若要取得“RESEND_API_KEY”: 1. 建立一個新帳戶:https://resend.com 2. 前往「API 金鑰」或使用此 URL https://resend.com/api-keys 3. 按一下“+ 建立 API 金鑰”,新增金鑰名稱,選擇“傳送存取”並使用預設的“所有網域”。單擊新增。 4. 複製 API 金鑰。 在根專案上編輯“.env”檔案並加入 ``` RESEND_API_KEY=<your API key> ```  --- ## 4.簡訊  SMS 有點複雜,因為它們需要多個變數。 為此,我們在專案中安裝 Twilio: ``` npm install twilio --save ``` 建立一個名為「twilio.provider.ts」的新檔案並新增以下程式碼: ``` import {object, string} from "zod"; import {registerProvider} from "@/providers/register.provider"; import axios from "axios"; import client from 'twilio'; export const TwilioProvider = registerProvider( "twilio", {active: true}, object({ TWILIO_SID: string(), TWILIO_AUTH_TOKEN: string(), TWILIO_FROM_NUMBER: string(), TWILIO_TO_NUMBER: string(), }), async (libName, stars, values) => { const twilio = client(values.TWILIO_SID, values.TWILIO_AUTH_TOKEN); await twilio.messages.create({ body: `The library ${libName} has ${stars} new stars!`, from: values.TWILIO_FROM_NUMBER, to: values.TWILIO_TO_NUMBER, }); } ); ``` 如您所見,我們正在使用 `registerProvider` 建立一個名為 TwilioProvider 的新提供者 - 我們將名稱設定為“twilio” - 我們將其設定為活動狀態 - 我們指定需要環境變數:`TWILIO_SID`、`TWILIO_AUTH_TOKEN`、`TWILIO_FROM_NUMBER` 和 `TWILIO_TO_NUMBER` - 我們使用 Twilio「建立」功能發送簡訊。 取得“TWILIO_SID”、“TWILIO_AUTH_TOKEN”、“TWILIO_FROM_NUMBER”和“TWILIO_TO_NUMBER” 1. 在 https://twilio.com 建立一個新帳戶 2. 標記您要使用它來發送簡訊。 3. 點選“取得電話號碼” 4. 複製“帳戶 SID”、“身份驗證令牌”和“我的 Twilio 電話號碼” 在根專案上編輯“.env”檔案並加入 ``` TWILIO_SID=<your SID key> TWILIO_AUTH_TOKEN=<your AUTH TOKEN key> TWILIO_FROM_NUMBER=<your FROM number> TWILIO_TO_NUMBER=<your TO number> ``` 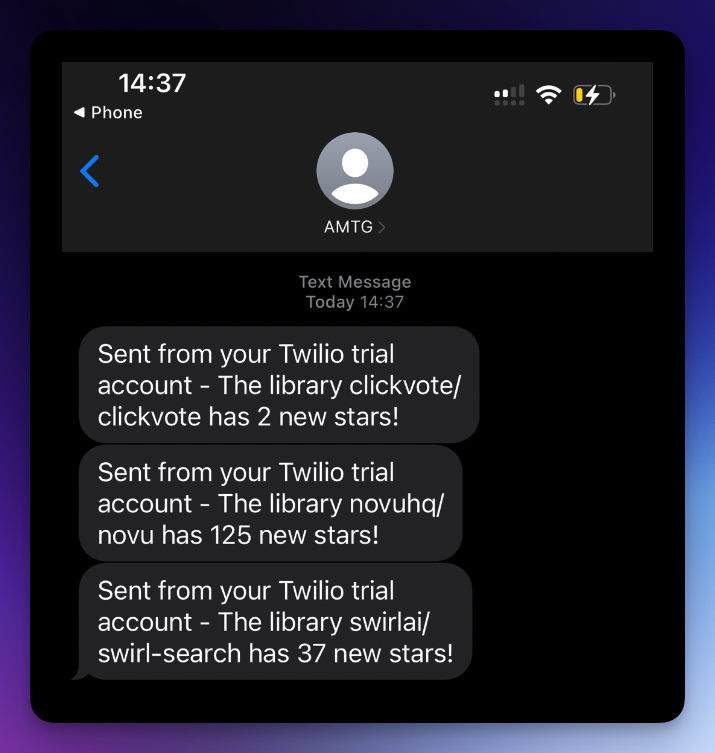 --- ## 建立新的提供者 正如您所看到的,現在建立提供者非常容易。 您也可以使用開源社群來建立新的提供程序,因為他們只需要在「providers/list」目錄中建立一個新檔案。 最後要做的事情是編輯“providers.ts”檔案並加入所有提供程序。 ``` import {DiscordProvider} from "@/providers/list/discord.provider"; import {ResendProvider} from "@/providers/list/resend.provider"; import {SlackProvider} from "@/providers/list/slack.provider"; import {TwilioProvider} from "@/providers/list/twilio.provider"; export const Providers = [ DiscordProvider, ResendProvider, SlackProvider, TwilioProvider, ]; ``` 請隨意建立更多推播通知、網路推播通知、應用程式內通知等提供者。 你就完成了🥳 --- ## 讓我們聯絡吧! 🔌 作為開源開發者,我們邀請您加入我們的[社群](https://discord.gg/nkqV9xBYWy),以做出貢獻並與維護者互動。請隨時造訪我們的 [GitHub 儲存庫](https://github.com/triggerdotdev/trigger.dev),貢獻並建立與 Trigger.dev 相關的問題。 本教學的源程式碼可在此處取得: [https://github.com/triggerdotdev/blog/tree/main/stars-monitor-notifications](https://github.com/triggerdotdev/blog/tree/main/stars-monitor-notifications) 感謝您的閱讀! --- 原文出處:https://dev.to/triggerdotdev/top-4-ways-to-send-notifications-about-new-stars-1cgb
我們正在開發 [Wasp](https://github.com/wasp-lang/wasp) - 一個基於 React、Node.js 和 Prisma 建置的全端 Web 框架。自從 GPT 出現以來,我們想知道是否可以使用它來更快地建立 Web 應用程式。這讓我們想到了 [MAGE - 一個由 GPT 驅動的 Web 應用程式產生器](https://usemage.ai/),它可以根據簡短的描述建立完整的堆疊程式碼庫。 我們已經寫過[MAGE 可以(和不能)做什麼](https://dev.to/wasp/gpt-web-app-generator-let-ai-create-a-full-stack-react-nodejs-codebase-based-on-your-description-2g39)和[它在幕後的工作原理](https://wasp-lang.dev/blog/2023/07/17/how-we-built-gpt-web-app-generator)。這是關於它的起源和採用的故事 - 為什麼我們決定建立它,開發人員如何發現它,以及他們實際上用它做什麼。 ## 為什麼要建構另一個 AI 編碼代理? 我們很晚才進入整個 GPT 編碼代理遊戲。在我們開始考慮建立自己的工具之前,Smol AI、GPT Engineer 和 MetaGPT 等工具就已經受到了廣泛的關注,我們對此也很清楚。 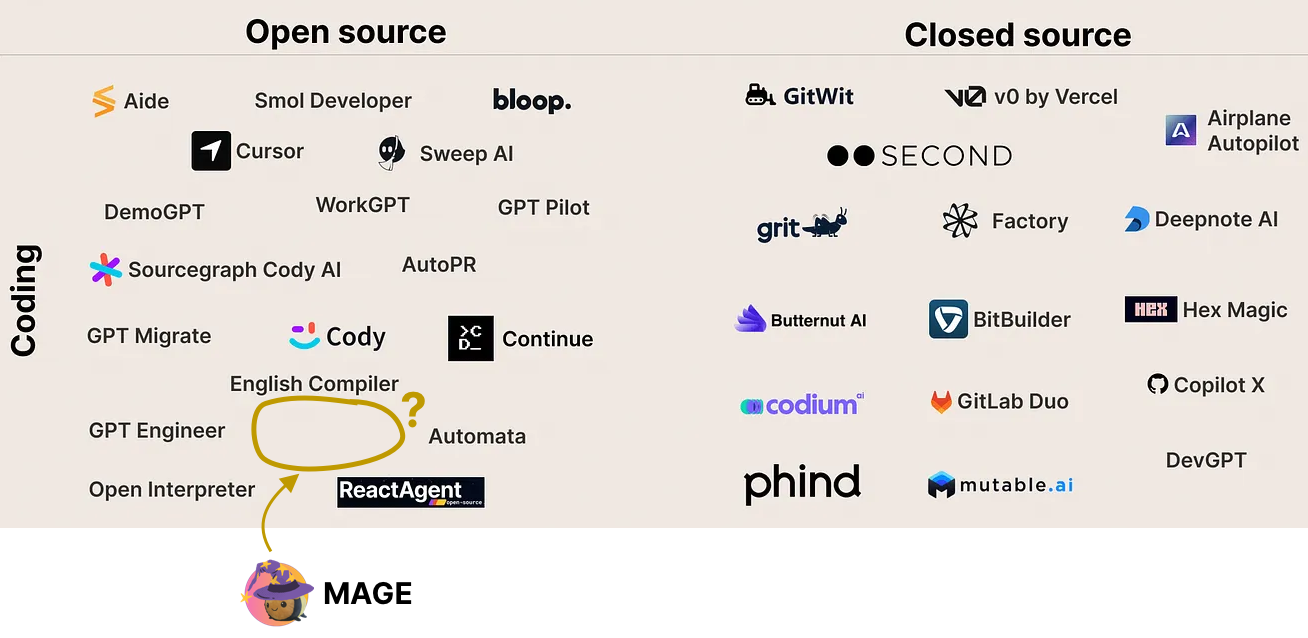 那為什麼還要麻煩呢?事實是,這些代理程式都不是專門為建立 Web 應用程式而設計的,而這正是我們看到機會的地方。 儘管使用 GPT 代理進行編碼可以讓人感覺超級強大,但它們通常會很慢並且沒有抓住要點,需要多次迭代,最終使該過程相當麻煩且昂貴。 有了這些經驗,我們想知道,*「如果我們為特定堆疊中的 Web 應用程式製作一個高度專業化的編碼代理,而不做其他事情會怎麼樣?它能變得更容易、更快、更便宜嗎?」* 儘管我們對此很感興趣,但作為一個兼顧多個優先事項的小團隊,我們仍然相當懷疑,幾乎放棄了整個專案。事實證明,它的效果比我們預期的還要好。 ## 第 1 步:建造它🛠️ 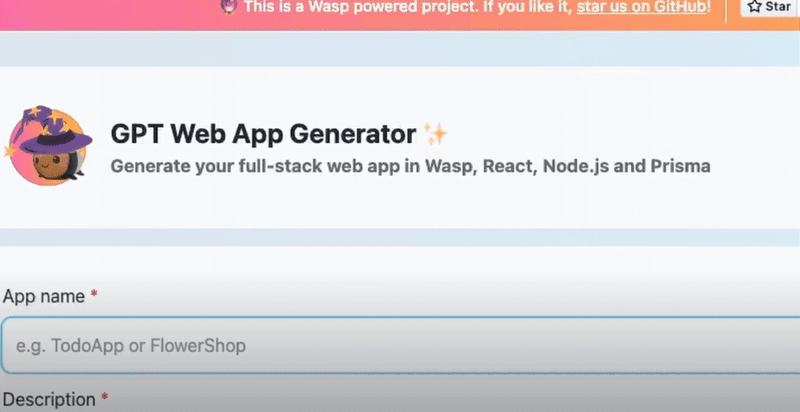 在決定 MAGE(*Magic App Generator*)的 v0 版本時,我們考慮了多種選擇。第一個也是最直接的一個是將其與 Wasp CLI 集成,因為我們已經擁有了圍繞它的所有工具。然後,開發人員將執行“wasp new myProject -ai”,而不是執行“wasp new myProject -ai”,CLI 會要求他們提供應用程式描述和其他所需的輸入,然後在終端中完成所有工作。 另一方面,我們知道在開始描述您的應用程式之前下載並安裝 Wasp 是一個很大的要求。最重要的是,CLI 中的使用者介面功能非常有限。這就是我們選擇網路介面的原因 - 零摩擦開始,我們可以讓應用程式建立流程變得非常簡單且美觀。 花了幾週的時間來建構它,最終的結果是一個[用Wasp 製作的完全開源的Web 應用程式](https://github.com/wasp-lang/wasp/tree/wasp-ai/wasp-ai)可以在 https://usemage.ai/ 上免費使用,或在本地託管以獲得更多控制和靈活性(例如,使用您自己的 OpenAI API 金鑰)。 ### 超級具體(僅限網頁應用程式)得到了回報! 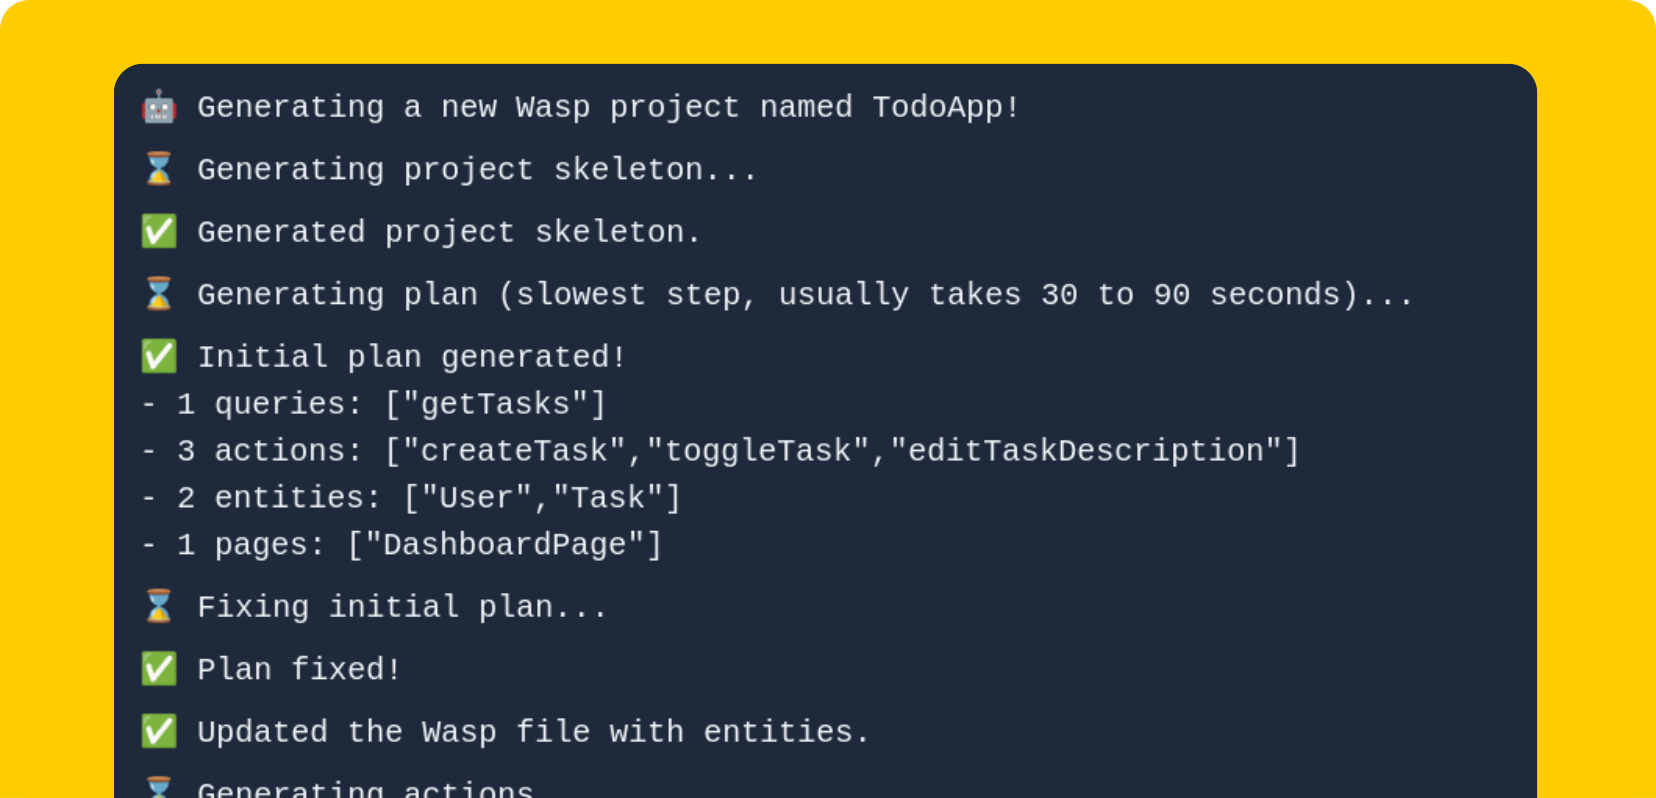 如上所述,我們的主要賭注是建立一個專門的編碼代理來建立全端 Web 應用程式,而不是其他任何東西,這得到了回報。它使我們能夠預先為代理提供大量上下文和結構,並引入專門的啟發式方法來修復錯誤。此外,由於 Wasp 的高級抽象(例如身份驗證、專案結構、查詢和作業系統等),我們顯著減少了錯誤的表面積。 另一個結果是執行時間顯著減少,甚至更重要的是成本減少。典型的MAGE 建立的Web 應用程式成本在0.10 至0.20 美元之間,而一般編碼代理[同一應用程式的花費可能高達10 美元](https://wasp-lang.dev/blog/2023/08/01/smol-ai-vs-wasp-ai#thoughts--further-considerations)(所有價格均在 OpenAI 23 年 11 月 7 日定價更新公告之前)。 您可以閱讀有關Wasp 內部工作原理的更多資訊[此處](https://wasp-lang.dev/blog/2023/07/17/how-we-built-gpt-web-app-generator),以及它的比較其他編碼代理[此處](https://wasp-lang.dev/blog/2023/07/17/how-we-built-gpt-web-app-generator)。 ## 第 2 步:啟動它🚀 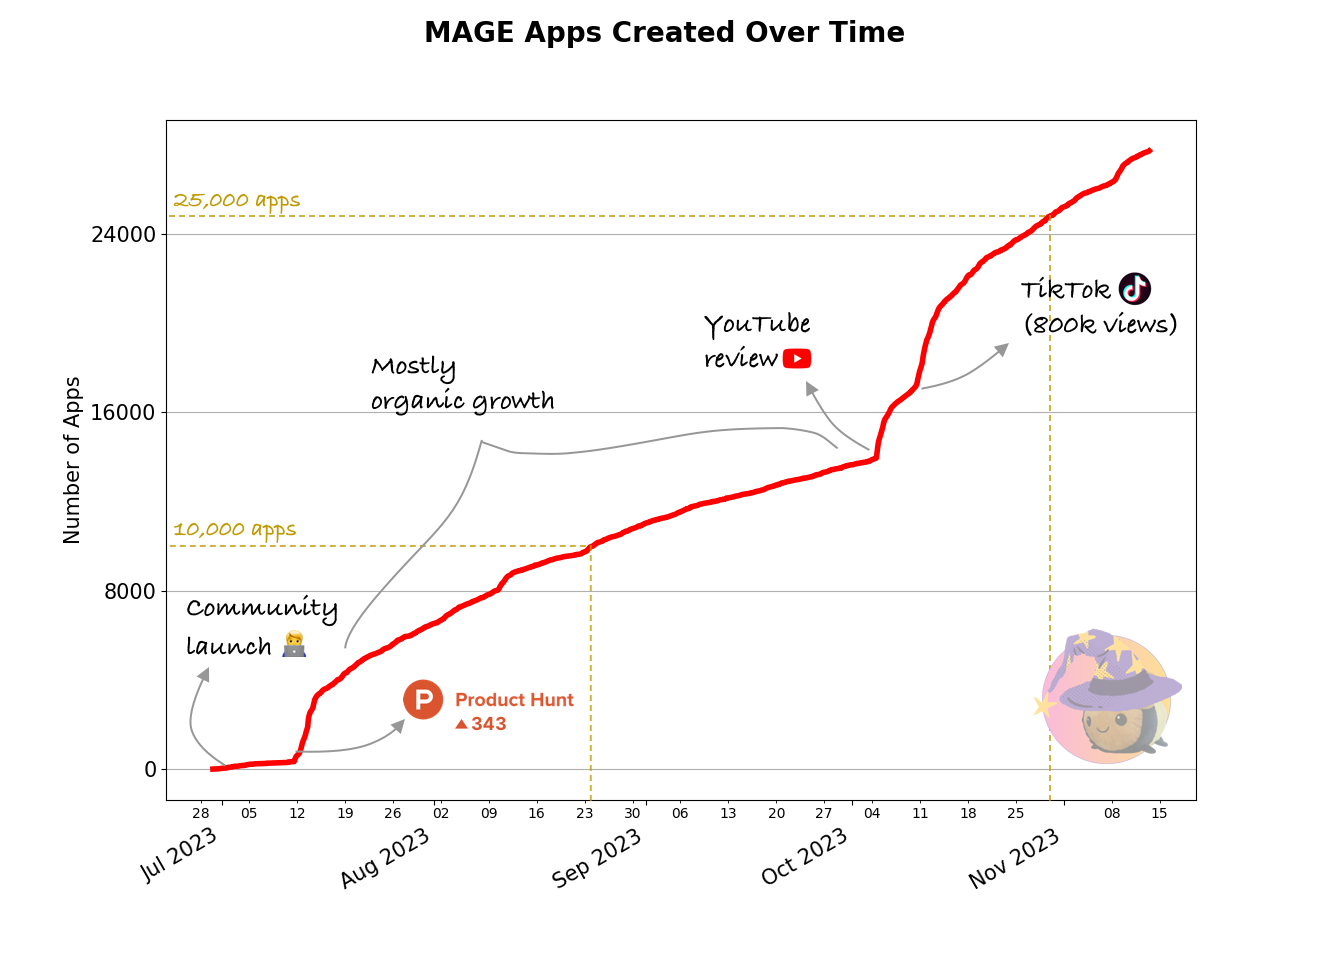 開發產品是一回事,但傳播產品並讓人們使用它則完全是另一回事。在我們建立了 MAGE 並在團隊內對其進行了測試之後,問題是下一步該做什麼?我們如何真正聯繫開發人員並開始接收回饋? ### 社區啟動 - 生命的證明  由於當時我們已經擁有一個[擁有大約 1,000 名成員的 Wasp 社區](https://discord.gg/rzdnErX),因此我們[發布了 MAGE 作為我們發布週 #3 的一部分](https://wasp-lang.dev/blog/2023/06/22/wasp-launch-week-third#gpt-web-app-generator--friday-waspularity---tutorial-o-thon)。這是一個很好的測試平台,我們可以看到第一個應用程式正在建置。儘管如此,更多的開發人員本可以從更簡單的方式來啟動他們的 React 和 Node.js 專案中受益,但他們卻無法找到 MAGE。 ### 啟動 Product Hunt — 首次「真正」使用 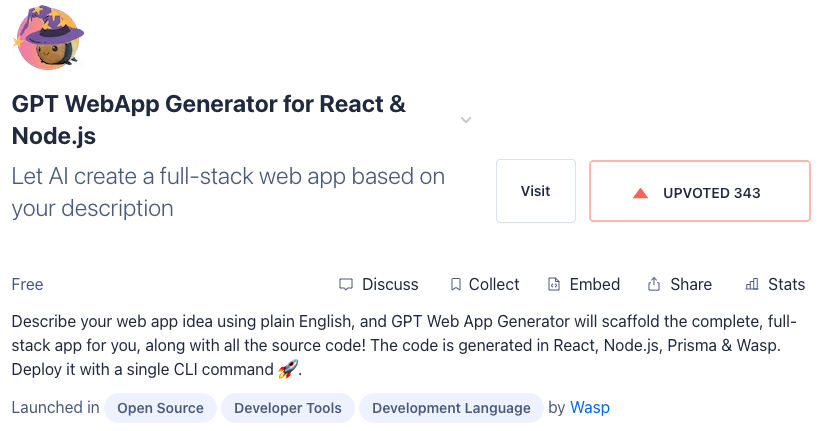 這就是為什麼我們決定在內部社群啟動後將 MAGE 放在 Product Hunt 上。儘管Product Hunt 不是一個特定於開發工具的平台,並且吸引了來自不同背景的人群,但仍然有很多開發人員在使用它,而且我們[之前有很好的經驗](https://www.producthunt.com/products/wasp-lang-alpha/launches) 與它。 Product Hunt 對於[獲得Wasp 的第一批用戶並在GitHub 上獲得1,000 顆星](https://wasp-lang.dev/blog/2022/09/29/journey-to-1000-gh-stars) 至關重要,因此我們想再試一次。 有些人在發布準備工作上投入了大量精力,需要提前幾個月才能準備好,但我們沒有那個時間,只是想盡快完成。我們要求我們的朋友和社區查看 [MAGE on Product Hunt](https://www.producthunt.com/products/wasp-lang-alpha#gpt-webapp-generator-for-react-node-js) 並提供支持我們在發布當天就進入了當天的前十名產品,後來又躋身本週排名第二的開發者工具! 這就是我們的目標,因為排名前十的產品最終會出現在第二天的電子報中,有超過 100 萬訂閱者閱讀。很快,我們看到建立的應用程式數量顯著增加,新的人開始加入我們的 Discord 社群! ### 有機成長(又稱「無所事事」)階段 在 Product Hunt 推出後,我們放鬆了行銷工作,因為其他與 Wasp 相關的任務趕上了團隊。我們必須為即將到來的[發布週#4](https://wasp-lang.dev/blog/2023/10/13/wasp-launch-week-four)做準備,所以 MAGE 最終被擱置了。在我們決定投入更多資源之前,我們也想看看社區如何接受它。 我們發布了更多後續文章,「[它是如何在後台工作的](https://wasp-lang.dev/blog/2023/07/17/how-we-built-gpt-web-app-generator)”和“[MAGE vs. 一般編碼代理](https://wasp-lang.dev/blog/2023/08/01/smol-ai-vs-wasp-ai)”,獲得平均數量牽引力,但沒有爆炸。我們在 Reddit 和 Hackernews 上也沒有什麼成功,感覺社群已經厭倦了所有的人工智慧內容。 儘管如此,使用 MAGE 建立的應用程式數量持續增長(約 200 個應用程式/天),偶爾會出現小規模爆炸。我們無法真正追蹤用戶來自哪裡 - MAGE 似乎是透過封閉社區和時事通訊中的口碑傳播的。 ### YouTube 和 TikTok 影片 - 病毒式傳播(每天 1,300 個應用程式!) 在我們的第 4 週發布週結束後,我們意識到,在近 2 個月的時間裡,在我們付出最小努力的情況下,MAGE 一直在不斷成長。這向我們表明它具有一定的實際價值,因此我們決定對其進行更多投資。  我們決定與該領域的影響者碰碰運氣。我們不想簡單地支付廣告費用,而是希望與真正對我們正在建立的產品感興趣並且想要客觀地審查 MAGE 的人合作。我們發現 [Matthew Berman](https://www.youtube.com/watch?v=KQrGu8cnwvA&t=2s&ab_channel=MatthewBerman) 涵蓋了 LLM 領域從最新模型到工具的所有內容,他將 MAGE 視為非常適合他的觀眾。 該影片在幾週內就準備好了,當它發佈時,觀看次數很快就達到了約 25,000 次。許多觀眾對透過 Web 介面從單一提示中獲取全端程式碼庫的可能性感到興奮,我們看到使用率和開發人員再次嘗試。 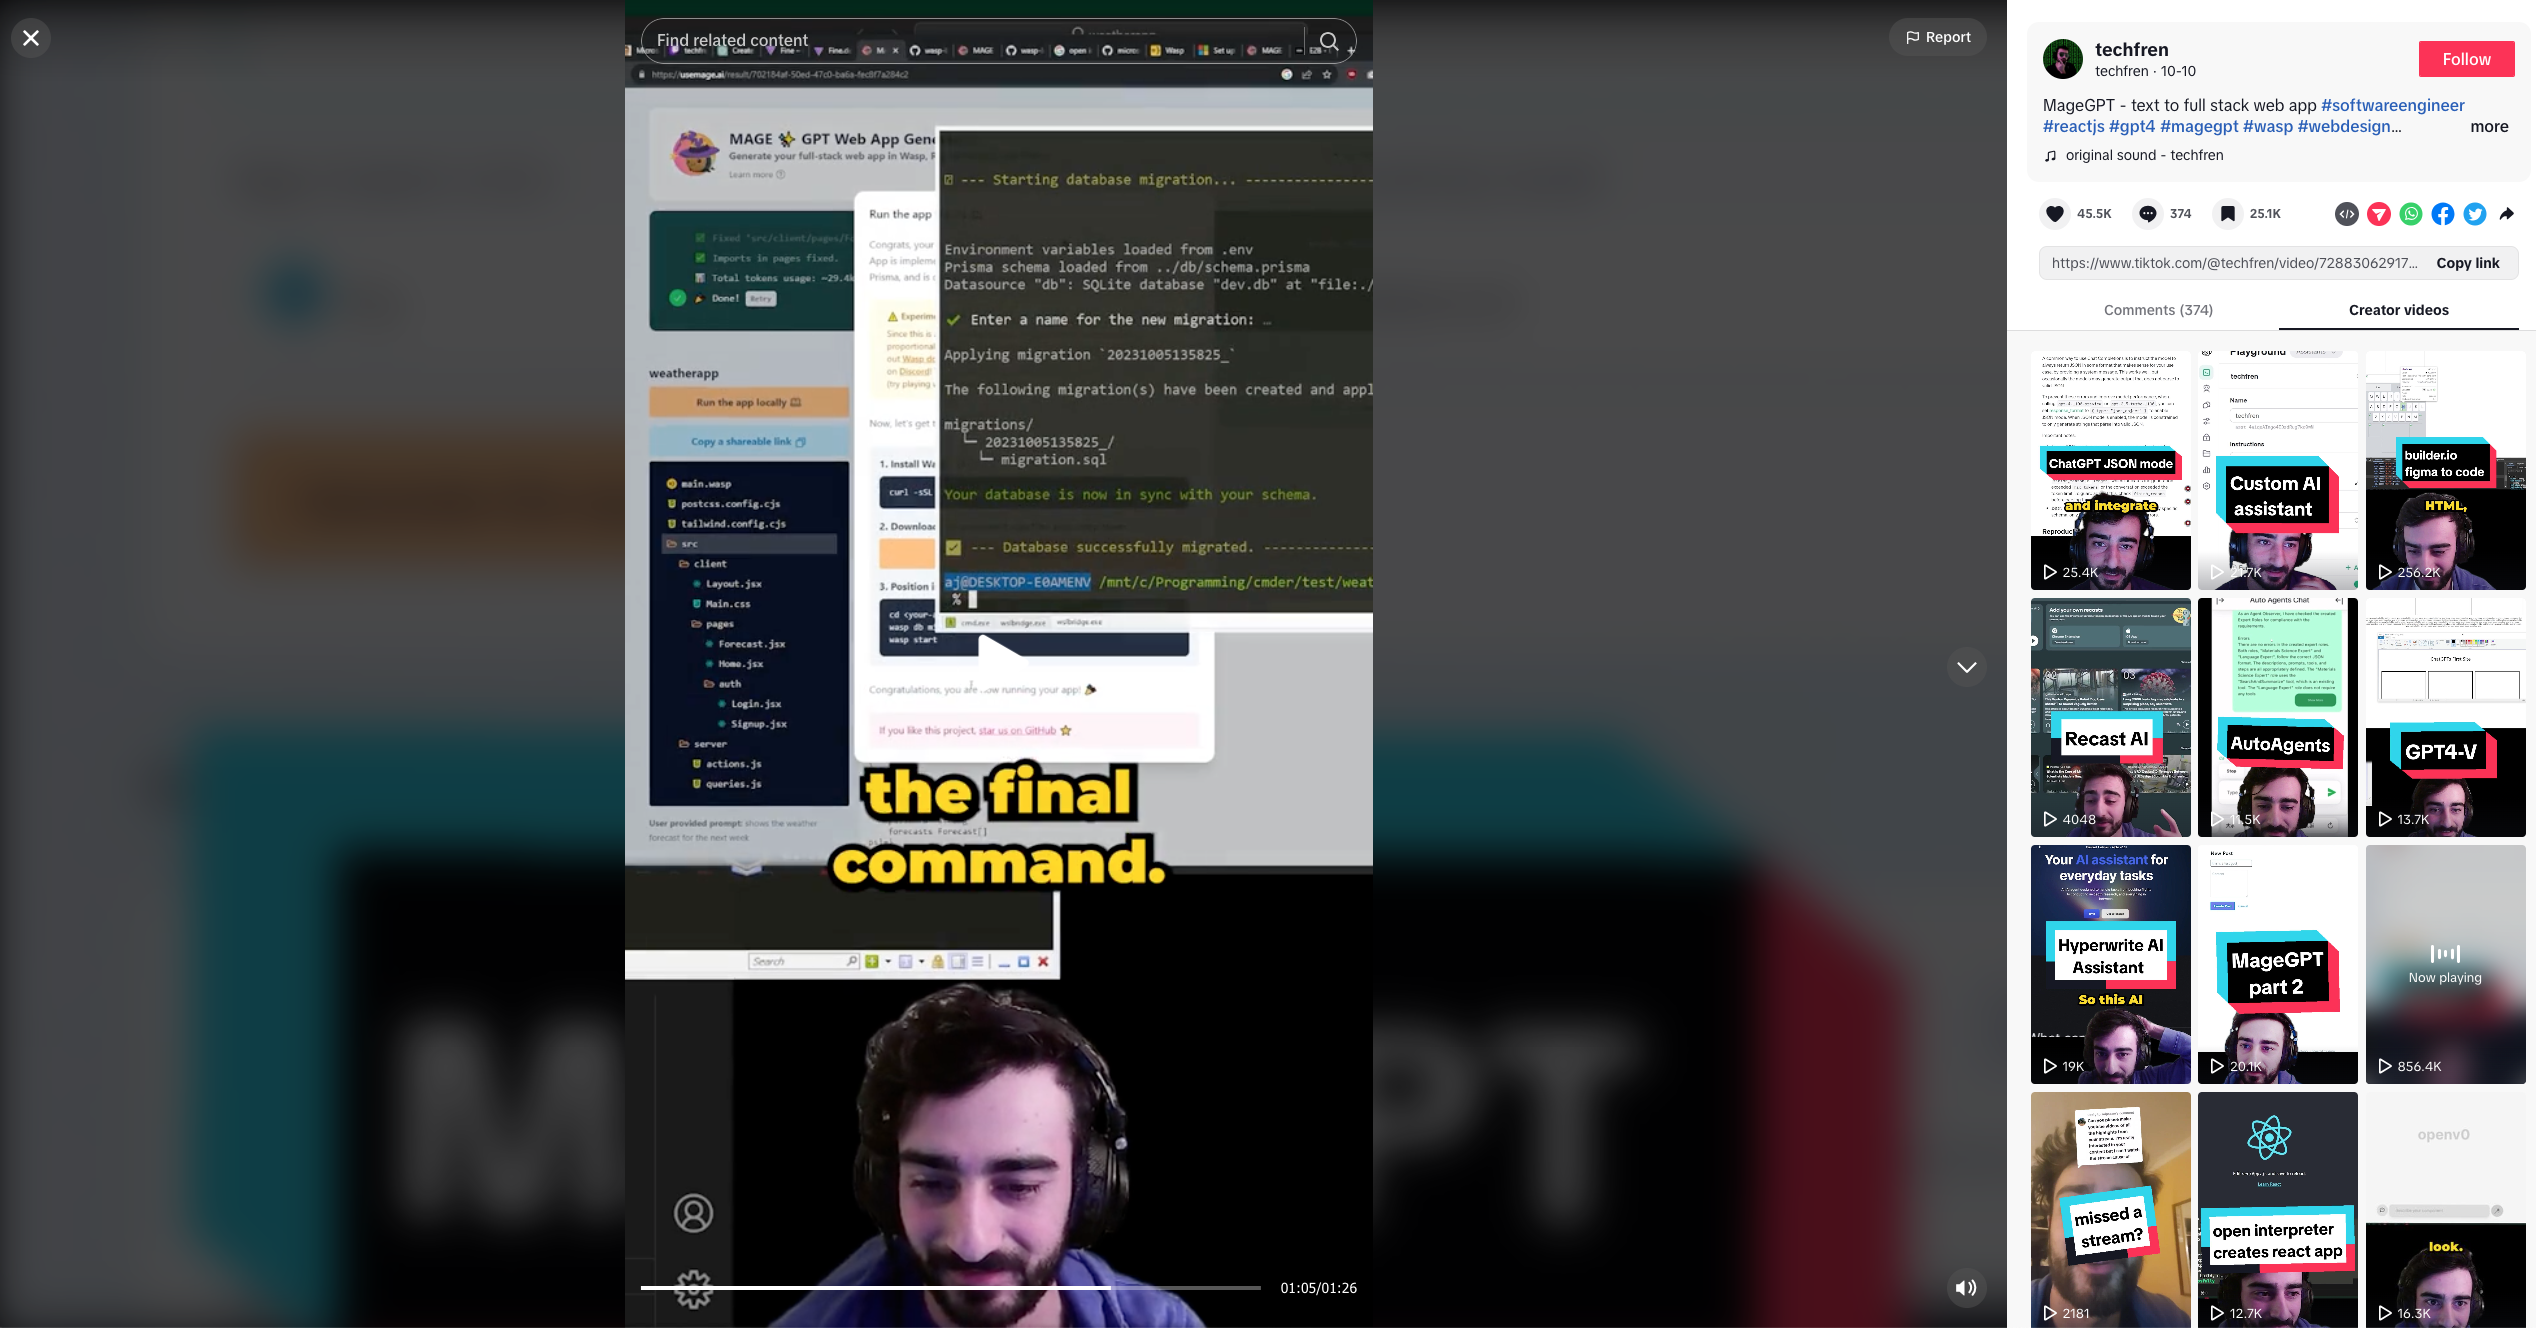 大約一周後,我們看到建立的應用程式數量再次大幅增加,但無法弄清楚它來自哪裡。我們做了一些搜尋,在TikTok 上找到了一位開發者@techfren,他製作了[一個關於它的短影片](https://www.tiktok.com/@techfren/video/7288306291733269778)(MAGE 甚至最終無法在就是那個!),一天之內瀏覽量猛增至 20 萬次,並迅速走紅。如今,它的瀏覽量已接近 100 萬。 ## 現實 - 所有這些應用程式會發生什麼? 儘管 25,000 個建立的應用程式聽起來令人印象深刻,但退後一步並進一步細分是很好的。 與大多數人工智慧驅動的編碼工具一樣,想要建立自己產品的開發人員和非開發人員都對該領域抱持極大的興趣和好奇心。許多人甚至沒有想要建立的具體專案,但他們熱衷於嘗試一下,看看它是如何運作的。此外,由於法學碩士不是確定性的,因此還沒有任何工具能夠完美執行,並且經常會出現需要手動幹預和編碼知識的小錯誤。 雖然我們對此非常明確(https://wasp-lang.dev/blog/2023/07/10/gpt-web-app-generator#what-kind-of-apps-can-i-build-with-it )和其他[挑戰](https://wasp-lang.dev/blog/2023/07/10/gpt-web-app-generator#challenges)GPT驅動的工具面臨,MAGE仍然吸引了一部分的用戶對建置自己的產品感到興奮,但不精通編碼,需要幫助下載、執行和修復應用程式。另一方面,它是一種非常友好且易於參與 Web 開發和編碼的方式。我們不會阻止非編碼人員嘗試,而是盡可能透明地管理期望。 因此,大約 40% 的所有建立的應用程式都會下載並在本地執行。 ## 結論 事實證明,我們對 MAGE 的實驗非常成功,甚至超越了我們最初的預期。除了許多現有的通用編碼代理之外,高度專業化和結構化的方法可以以低廉的價格產生更好、更一致的結果。 此外,開發人員對啟動全端應用程式的簡單方法(其中包含最佳實踐)感到興奮,並且正在積極尋找這樣的解決方案並在彼此之間共享。 我預計人工智慧輔助的 SaaS 新創公司將成為 Web 開發的未來。如果有人可以使用已經為其應用程式定制的資料模型和 CRUD 邏輯來建立他們的應用程式,那麼為什麼有人會使用通用樣板啟動器呢?另一個問題是誰以及如何具體實現這一點,但我預計未來每個主流框架都會有一個。 ## 祝你好運! 我希望這篇概述對您有所幫助,並讓您了解建立和行銷新的(人工智慧驅動的)開發工具時幕後的情況。請記住,這是我們獨特的經歷,每個故事都是不同的,因此對一切都持保留態度,只選擇對您和您的產品有意義的內容。 我們祝您好運,如果您有任何疑問或想了解 [MAGE](https://usemage.ai/) 和 [Wasp](https://github.com/wasp-lang/wasp)! --- 原文出處:https://dev.to/wasp/how-we-built-a-gpt-web-app-generator-for-react-nodejs-from-idea-to-25000-apps-in-4-months-1aol
在本文中,您將學習如何建立 **GitHub 星數監視器** 來檢查您幾個月內的星數以及每天獲得的星數。 - 使用 GitHub API 取得目前每天收到的星星數量。 - 在螢幕上每天繪製美麗的星星圖表。 - 創造一個工作來每天收集新星星。  --- ## 你的後台工作平台🔌 [Trigger.dev](https://trigger.dev/) 是一個開源程式庫,可讓您使用 NextJS、Remix、Astro 等為您的應用程式建立和監控長時間執行的作業! [](https://github.com/triggerdotdev/trigger.dev) 請幫我們一顆星🥹。 這將幫助我們建立更多這樣的文章💖 https://github.com/triggerdotdev/trigger.dev --- ## 這是你需要知道的 😻 取得 GitHub 上星星數量的大部分工作將透過 GitHub API 完成。 GitHub API 有一些限制: - 每個請求最多 100 名觀星者 - 最多 100 個同時請求 - 每小時最多 60 個請求 [TriggerDev](https://github.com/triggerdotdev/trigger.dev) 儲存庫擁有超過 5000 顆星,實際上不可能在合理的時間內(即時)計算所有星數。 因此,我們將採用與 [GitHub Stars History](https://star-history.com/) 相同的技巧。 - 取得星星總數 (**5,715**) 除以每頁 **100** 結果 = **58 頁** - 設定我們想要的最大請求量(**20 頁最大**)除以 **58 頁** = 跳過 3 頁。 - 從這些頁面中獲取星星**(2000 顆星)**,然後獲取剩餘的星星,我們將按比例加入到其他日期(**3715 顆星**)。 它會為我們繪製一個漂亮的圖表,並在需要的地方用星星凸起。 當我們每天獲取新數量的星星時,事情就會變得容易得多。 我們將用目前擁有的星星總數減去 GitHub 上的新星星數量。 **我們不再需要迭代觀星者。** --- ## 讓我們來設定一下 🔥 我們的申請將包含一頁: - 新增您想要監控的儲存庫。 - 查看儲存庫清單及其 GitHub 星圖。 - 刪除那些你不再想要的。 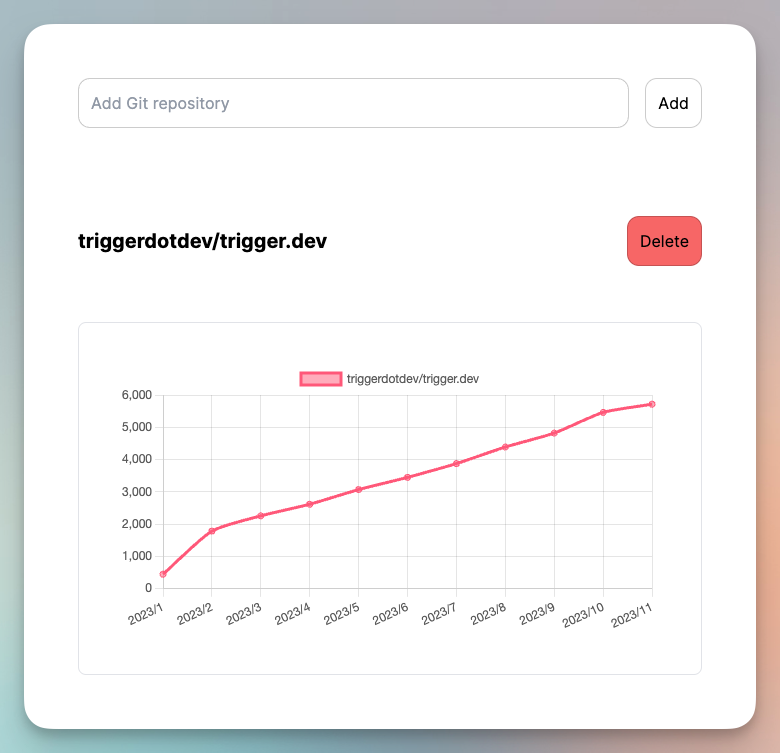 > 💡 我們將使用 NextJS 新的應用程式路由器,在安裝專案之前請確保您的節點版本為 18+。 > 使用 NextJS 設定一個新專案 ``` npx create-next-app@latest ``` 我們必須將所有星星保存到我們的資料庫中! 在我們的示範中,我們將使用 SQLite 和 `Prisma`。 它非常容易安裝,但可以隨意使用任何其他資料庫。 ``` npm install prisma @prisma/client --save ``` 在我們的專案中安裝 Prisma ``` npx prisma init --datasource-provider sqlite ``` 轉到“prisma/schema.prisma”並將其替換為以下模式: ``` generator client { provider = "prisma-client-js" } datasource db { provider = "sqlite" url = env("DATABASE_URL") } model Repository { id String @id @default(uuid()) month Int year Int day Int name String stars Int @@unique([name, day, month, year]) } ``` 然後執行 ``` npx prisma db push ``` 我們基本上已經在 SQLite 資料庫中建立了一個名為「Repository」的新表: - 「月」、「年」、「日」是日期。 - `name` 儲存庫的名稱 - 「星星」以及該特定日期的星星數量。 你還可以看到我們在底部加入了一個`@@unique`,這意味著我們可以將`name`,`month`,`year`,`day`一起重複記錄。它會拋出一個錯誤。 讓我們新增 Prisma 客戶端。 建立一個名為「helper」的新資料夾,並新增一個名為「prisma.ts」的新文件,並在其中新增以下程式碼: ``` import {PrismaClient} from '@prisma/client'; export const prisma = new PrismaClient(); ``` 我們稍後可以使用該「prisma」變數來查詢我們的資料庫。 --- ## 應用程式 UI 骨架 💀 我們需要一些函式庫來完成本教學: - **Axios** - 向伺服器發送請求(如果您覺得更舒服,可以隨意使用 fetch) - **Dayjs -** 很棒的處理日期的函式庫。它是 moment.js 的替代品,但不再完全維護。 - **Lodash -** 很酷的資料結構庫。 - **react-hook-form -** 處理表單的最佳函式庫(驗證/值/等) - **chart.js** - 我選擇繪製 GitHub 星圖的函式庫。 讓我們安裝它們: ``` npm install axios dayjs lodash @types/lodash chart.js react-hook-form react-chartjs-2 --save ``` 建立一個名為“components”的新資料夾並新增一個名為“main.tsx”的新文件 新增以下程式碼: ``` "use client"; import {useForm} from "react-hook-form"; import axios from "axios"; import {Repository} from "@prisma/client"; import {useCallback, useState} from "react"; export default function Main() { const [repositoryState, setRepositoryState] = useState([]); const {register, handleSubmit} = useForm(); const submit = useCallback(async (data: any) => { const {data: repositoryResponse} = await axios.post('/api/repository', {todo: 'add', repository: data.name}); setRepositoryState([...repositoryState, ...repositoryResponse]); }, [repositoryState]) const deleteFromList = useCallback((val: List) => () => { axios.post('/api/repository', {todo: 'delete', repository: `https://github.com/${val.name}`}); setRepositoryState(repositoryState.filter(v => v.name !== val.name)); }, [repositoryState]) return ( <div className="w-full max-w-2xl mx-auto p-6 space-y-12"> <form className="flex items-center space-x-4" onSubmit={handleSubmit(submit)}> <input className="flex-grow p-3 border border-black/20 rounded-xl" placeholder="Add Git repository" type="text" {...register('name', {required: 'true'})} /> <button className="flex-shrink p-3 border border-black/20 rounded-xl" type="submit"> Add </button> </form> <div className="divide-y-2 divide-gray-300"> {repositoryState.map(val => ( <div key={val.name} className="space-y-4"> <div className="flex justify-between items-center py-10"> <h2 className="text-xl font-bold">{val.name}</h2> <button className="p-3 border border-black/20 rounded-xl bg-red-400" onClick={deleteFromList(val)}>Delete</button> </div> <div className="bg-white rounded-lg border p-10"> <div className="h-[300px]]"> {/* Charts Component */} </div> </div> </div> ))} </div> </div> ) } ``` **超簡單的React元件** - 允許我們新增新的 GitHub 庫並將其發送到伺服器 POST 的表單 - `/api/repository` `{todo: 'add'}` - 刪除我們不需要 POST 的儲存庫 - `/api/repository` `{todo: 'delete'}` - 所有新增的庫及其圖表的清單。 讓我們轉到本文的複雜部分,新增儲存庫。 --- ## 數星星  在「helper」內部建立一個名為「all.stars.ts」的新檔案並新增以下程式碼: ``` import axios from "axios"; import dayjs from "dayjs"; import utc from 'dayjs/plugin/utc'; dayjs.extend(utc); const requestAmount = 20; export const getAllGithubStars = async (owner: string, name: string) => { // Get the amount of stars from GitHub const totalStars = (await axios.get(`https://api.github.com/repos/${owner}/${name}`)).data.stargazers_count; // get total pages const totalPages = Math.ceil(totalStars / 100); // How many pages to skip? We don't want to spam requests const pageSkips = totalPages < requestAmount ? requestAmount : Math.ceil(totalPages / requestAmount); // Send all the requests at the same time const starsDates = (await Promise.all([...new Array(requestAmount)].map(async (_, index) => { const getPage = (index * pageSkips) || 1; return (await axios.get(`https://api.github.com/repos/${owner}/${name}/stargazers?per_page=100&page=${getPage}`, { headers: { Accept: "application/vnd.github.v3.star+json", }, })).data; }))).flatMap(p => p).reduce((acc: any, stars: any) => { const yearMonth = stars.starred_at.split('T')[0]; acc[yearMonth] = (acc[yearMonth] || 0) + 1; return acc; }, {}); // how many stars did we find from a total of `requestAmount` requests? const foundStars = Object.keys(starsDates).reduce((all, current) => all + starsDates[current], 0); // Find the earliest date const lowestMonthYear = Object.keys(starsDates).reduce((lowest, current) => { if (lowest.isAfter(dayjs.utc(current.split('T')[0]))) { return dayjs.utc(current.split('T')[0]); } return lowest; }, dayjs.utc()); // Count dates until today const splitDate = dayjs.utc().diff(lowestMonthYear, 'day') + 1; // Create an array with the amount of stars we didn't find const array = [...new Array(totalStars - foundStars)]; // Set the amount of value to add proportionally for each day let splitStars: any[][] = []; for (let i = splitDate; i > 0; i--) { splitStars.push(array.splice(0, Math.ceil(array.length / i))); } // Calculate the amount of stars for each day return [...new Array(splitDate)].map((_, index, arr) => { const yearMonthDay = lowestMonthYear.add(index, 'day').format('YYYY-MM-DD'); const value = starsDates[yearMonthDay] || 0; return { stars: value + splitStars[index].length, date: { month: +dayjs.utc(yearMonthDay).format('M'), year: +dayjs.utc(yearMonthDay).format('YYYY'), day: +dayjs.utc(yearMonthDay).format('D'), } }; }); } ``` 那麼這裡發生了什麼事: - `totalStars` - 我們計算圖書館擁有的星星總數。 - `totalPages` - 我們計算頁數 **(每頁 100 筆記錄)** - `pageSkips` - 由於我們最多需要 20 個請求,因此我們檢查每次必須跳過多少頁。 - `starsDates` - 我們填充每個日期的星星數量。 - `foundStars` - 由於我們跳過日期,我們需要計算實際找到的星星總數。 - `lowestMonthYear` - 尋找我們擁有的恆星的最早日期。 - `splitDate` - 最早的日期和今天之間有多少個日期? - `array` - 一個包含 `splitDate` 專案數量的空陣列。 - `splitStars` - 我們缺少的星星數量,需要按比例加入每個日期。 - 最終返回 - 新陣列包含自開始以來每天的星星數量。 所以,我們已經成功建立了一個每天可以給我們星星的函數。 我嘗試過這樣顯示,結果很混亂。 您可能想要顯示每個月的星星數量。 此外,您可能想要累積星星**而不是:** - 二月 - 300 顆星 - 三月 - 200 顆星 - 四月 - 400 顆星 **如果有這樣的就更好了:** - 二月 - 300 顆星 - 三月 - 500 顆星 - 四月 - 900 顆星 兩個選項都有效。 **這取決於你想展示什麼!** 因此,讓我們轉到 helper 資料夾並建立一個名為「get.list.ts」的新檔案。 這是文件的內容: ``` import {prisma} from "./prisma"; import {groupBy, sortBy} from "lodash"; import {Repository} from "@prisma/client"; function fixStars (arr: any[]): Array<{name: string, stars: number, month: number, year: number}> { return arr.map((current, index) => { return { ...current, stars: current.stars + arr.slice(index + 1, arr.length).reduce((acc, current) => acc + current.stars, 0), } }).reverse(); } export const getList = async (data?: Repository[]) => { const repo = data || await prisma.repository.findMany(); const uniqMonth = Object.values( groupBy( sortBy( Object.values( groupBy(repo, (p) => p.name + '-' + p.year + '-' + p.month)) .map(current => { const stars = current.reduce((acc, current) => acc + current.stars, 0); return { name: current[0].name, stars, month: current[0].month, year: current[0].year } }), [(p: any) => -p.year, (p: any) => -p.month] ),p => p.name) ); const fixMonthDesc = uniqMonth.map(p => fixStars(p)); return fixMonthDesc.map(p => ({ name: p[0].name, list: p })); } ``` 首先,它將所有按日的星星轉換為按月的星星。 稍後我們會累積每個月的星星數量。 這裡要注意的一件主要事情是 `data?: Repository[]` 是可選的。 我們制定了一個簡單的邏輯:如果我們不傳遞資料,它將為我們資料庫中的所有儲存庫傳遞資料。 如果我們傳遞資料,它只會對其起作用。 為什麼問? - 當我們建立一個新的儲存庫時,我們需要在將其新增至資料庫後處理特定的儲存庫資料。 - 當我們重新載入頁面時,我們需要取得所有資料。 現在,讓我們來處理我們的星星建立/刪除路線。 轉到“src/app/api”並建立一個名為“repository”的新資料夾。在該資料夾中,建立一個名為「route.tsx」的新檔案。 在那裡加入以下程式碼: ``` import {getAllGithubStars} from "../../../../helper/all.stars"; import {prisma} from "../../../../helper/prisma"; import {Repository} from "@prisma/client"; import {getList} from "../../../../helper/get.list"; export async function POST(request: Request) { const body = await request.json(); if (!body.repository) { return new Response(JSON.stringify({error: 'Repository is required'}), {status: 400}); } const {owner, name} = body.repository.match(/github.com\/(?<owner>.*)\/(?<name>.*)/).groups; if (!owner || !name) { return new Response(JSON.stringify({error: 'Repository is invalid'}), {status: 400}); } if (body.todo === 'delete') { await prisma.repository.deleteMany({ where: { name: `${owner}/${name}` } }); return new Response(JSON.stringify({deleted: true}), {status: 200}); } const starsMonth = await getAllGithubStars(owner, name); const repo: Repository[] = []; for (const stars of starsMonth) { repo.push( await prisma.repository.upsert({ where: { name_day_month_year: { name: `${owner}/${name}`, month: stars.date.month, year: stars.date.year, day: stars.date.day, }, }, update: { stars: stars.stars, }, create: { name: `${owner}/${name}`, month: stars.date.month, year: stars.date.year, day: stars.date.day, stars: stars.stars, } }) ); } return new Response(JSON.stringify(await getList(repo)), {status: 200}); } ``` 我們共享 DELETE 和 CREATE 路由,這些路由通常不應在生產中使用,但我們在本文中這樣做是為了讓您更輕鬆。 我們從請求中取得 JSON,檢查「repository」欄位是否存在,並且它是 GitHub 儲存庫的有效路徑。 如果是刪除請求,我們使用 prisma 根據儲存庫名稱從資料庫中刪除儲存庫並傳回請求。 如果是建立,我們使用 getAllGithubStars 來獲取資料以保存到我們的資料庫中。 > 💡 由於我們已經在 `name`、`month`、`year` 和 `day` 上放置了唯一索引,如果記錄已經存在,我們可以使用 `prisma` `upsert` 來更新資料 最後,我們將新累積的資料回傳給客戶端。 最困難的部分完成了🍾 --- ## 主頁人口 💽 我們還沒有建立我們的主頁元件。 **我們開始做吧。** 前往“app”資料夾建立或編輯“page.tsx”並新增以下程式碼: ``` "use server"; import Main from "@/components/main"; import {getList} from "../../helper/get.list"; export default async function Home() { const list: any[] = await getList(); return ( <Main list={list} /> ) } ``` 我們使用與 getList 相同的函數來取得累積的所有儲存庫的所有資料。 我們還修改主要元件以支援它。 編輯 `components/main.tsx` 並將其替換為: ``` "use client"; import {useForm} from "react-hook-form"; import axios from "axios"; import {Repository} from "@prisma/client"; import {useCallback, useState} from "react"; interface List { name: string, list: Repository[] } export default function Main({list}: {list: List[]}) { const [repositoryState, setRepositoryState] = useState(list); const {register, handleSubmit} = useForm(); const submit = useCallback(async (data: any) => { const {data: repositoryResponse} = await axios.post('/api/repository', {todo: 'add', repository: data.name}); setRepositoryState([...repositoryState, ...repositoryResponse]); }, [repositoryState]) const deleteFromList = useCallback((val: List) => () => { axios.post('/api/repository', {todo: 'delete', repository: `https://github.com/${val.name}`}); setRepositoryState(repositoryState.filter(v => v.name !== val.name)); }, [repositoryState]) return ( <div className="w-full max-w-2xl mx-auto p-6 space-y-12"> <form className="flex items-center space-x-4" onSubmit={handleSubmit(submit)}> <input className="flex-grow p-3 border border-black/20 rounded-xl" placeholder="Add Git repository" type="text" {...register('name', {required: 'true'})} /> <button className="flex-shrink p-3 border border-black/20 rounded-xl" type="submit"> Add </button> </form> <div className="divide-y-2 divide-gray-300"> {repositoryState.map(val => ( <div key={val.name} className="space-y-4"> <div className="flex justify-between items-center py-10"> <h2 className="text-xl font-bold">{val.name}</h2> <button className="p-3 border border-black/20 rounded-xl bg-red-400" onClick={deleteFromList(val)}>Delete</button> </div> <div className="bg-white rounded-lg border p-10"> <div className="h-[300px]]"> {/* Charts Components */} </div> </div> </div> ))} </div> </div> ) } ``` --- ## 顯示圖表! 📈 前往“components”資料夾並新增一個名為“chart.tsx”的新檔案。 新增以下程式碼: ``` "use client"; import {Repository} from "@prisma/client"; import {useMemo} from "react"; import React from 'react'; import { Chart as ChartJS, CategoryScale, LinearScale, PointElement, LineElement, Title, Tooltip, Legend, } from 'chart.js'; import { Line } from 'react-chartjs-2'; ChartJS.register( CategoryScale, LinearScale, PointElement, LineElement, Title, Tooltip, Legend ); export default function ChartComponent({repository}: {repository: Repository[]}) { const labels = useMemo(() => { return repository.map(r => `${r.year}/${r.month}`); }, [repository]); const data = useMemo(() => ({ labels, datasets: [ { label: repository[0].name, data: repository.map(p => p.stars), borderColor: 'rgb(255, 99, 132)', backgroundColor: 'rgba(255, 99, 132, 0.5)', tension: 0.2, }, ], }), [repository]); return ( <Line options={{ responsive: true, }} data={data} /> ); } ``` 我們使用“chart.js”函式庫來繪製“Line”類型的圖表。 這非常簡單,因為我們在伺服器端完成了所有資料結構。 這裡需要注意的一件大事是我們「匯出預設值」我們的 ChartComponent。那是因為它使用了「Canvas」。這在伺服器端不可用,我們需要延遲載入該元件。 讓我們修改“main.tsx”: ``` "use client"; import {useForm} from "react-hook-form"; import axios from "axios"; import {Repository} from "@prisma/client"; import dynamic from "next/dynamic"; import {useCallback, useState} from "react"; const ChartComponent = dynamic(() => import('@/components/chart'), { ssr: false, }) interface List { name: string, list: Repository[] } export default function Main({list}: {list: List[]}) { const [repositoryState, setRepositoryState] = useState(list); const {register, handleSubmit} = useForm(); const submit = useCallback(async (data: any) => { const {data: repositoryResponse} = await axios.post('/api/repository', {todo: 'add', repository: data.name}); setRepositoryState([...repositoryState, ...repositoryResponse]); }, [repositoryState]) const deleteFromList = useCallback((val: List) => () => { axios.post('/api/repository', {todo: 'delete', repository: `https://github.com/${val.name}`}); setRepositoryState(repositoryState.filter(v => v.name !== val.name)); }, [repositoryState]) return ( <div className="w-full max-w-2xl mx-auto p-6 space-y-12"> <form className="flex items-center space-x-4" onSubmit={handleSubmit(submit)}> <input className="flex-grow p-3 border border-black/20 rounded-xl" placeholder="Add Git repository" type="text" {...register('name', {required: 'true'})} /> <button className="flex-shrink p-3 border border-black/20 rounded-xl" type="submit"> Add </button> </form> <div className="divide-y-2 divide-gray-300"> {repositoryState.map(val => ( <div key={val.name} className="space-y-4"> <div className="flex justify-between items-center py-10"> <h2 className="text-xl font-bold">{val.name}</h2> <button className="p-3 border border-black/20 rounded-xl bg-red-400" onClick={deleteFromList(val)}>Delete</button> </div> <div className="bg-white rounded-lg border p-10"> <div className="h-[300px]]"> <ChartComponent repository={val.list} /> </div> </div> </div> ))} </div> </div> ) } ``` 您可以看到我們使用“nextjs/dynamic”來延遲載入元件。 我希望將來 NextJS 能為客戶端元件加入類似「使用延遲載入」的內容 😺 --- ## 但是新星呢?來認識一下 Trigger.Dev! 每天加入新星星的最佳方法是執行 cron 請求來檢查新加入的星星並將其加入到我們的資料庫中。 不要使用 Vercel cron / GitHub 操作,或(上帝禁止)為此建立一個新伺服器。 我們可以使用 [Trigger.DEV](http://Trigger.DEV) 直接與我們的 NextJS 應用程式搭配使用。 那麼就讓我們來設定一下吧! 註冊 [Trigger.dev 帳號](https://trigger.dev/)。 註冊後,建立一個組織並為您的工作選擇一個專案名稱。  選擇 Next.js 作為您的框架,並按照將 Trigger.dev 新增至現有 Next.js 專案的流程進行操作。 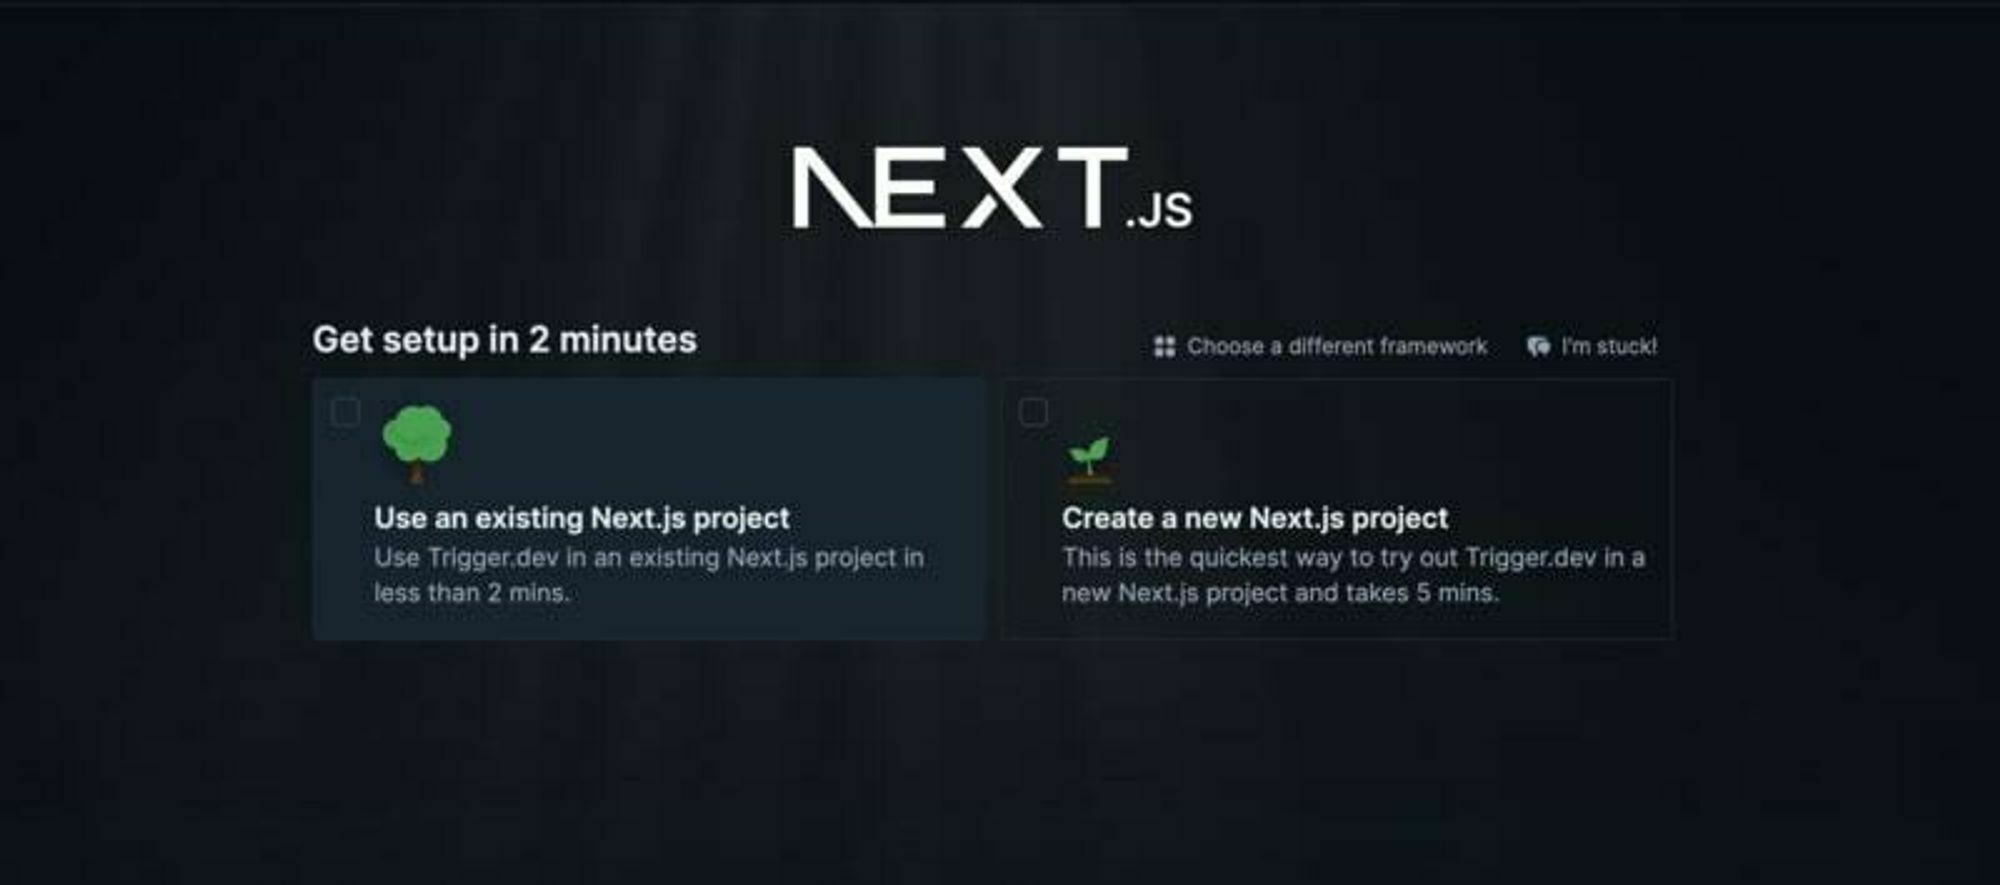 否則,請點選專案儀表板側邊欄選單上的「環境和 API 金鑰」。  複製您的 DEV 伺服器 API 金鑰並執行下面的程式碼片段以安裝 Trigger.dev。 仔細按照說明進行操作。 ``` npx @trigger.dev/cli@latest init ``` 在另一個終端中執行以下程式碼片段,在 Trigger.dev 和您的 Next.js 專案之間建立隧道。 ``` npx @trigger.dev/cli@latest dev ``` 讓我們建立 TriggerDev 作業! 您將看到一個新建立的資料夾,名為“jobs”。 在那裡建立一個名為“sync.stars.ts”的新文件 新增以下程式碼: ``` import { cronTrigger, invokeTrigger } from "@trigger.dev/sdk"; import { client } from "@/trigger"; import { prisma } from "../../helper/prisma"; import axios from "axios"; import { z } from "zod"; // Your first job // This Job will be triggered by an event, log a joke to the console, and then wait 5 seconds before logging the punchline. client.defineJob({ id: "sync-stars", name: "Sync Stars Daily", version: "0.0.1", // Run a cron every day at 23:00 AM trigger: cronTrigger({ cron: "0 23 * * *", }), run: async (payload, io, ctx) => { const repos = await io.runTask("get-stars", async () => { // get all libraries and current amount of stars return await prisma.repository.groupBy({ by: ["name"], _sum: { stars: true, }, }); }); //loop through all repos and invoke the Job that gets the latest stars for (const repo of repos) { getStars.invoke(repo.name, { name: repo.name, previousStarCount: repo?._sum?.stars || 0, }); } }, }); const getStars = client.defineJob({ id: "get-latest-stars", name: "Get latest stars", version: "0.0.1", // Run a cron every day at 23:00 AM trigger: invokeTrigger({ schema: z.object({ name: z.string(), previousStarCount: z.number(), }), }), run: async (payload, io, ctx) => { const stargazers_count = await io.runTask("get-stars", async () => { const { data } = await axios.get( `https://api.github.com/repos/${payload.name}`, { headers: { authorization: `token ${process.env.TOKEN}`, }, } ); return data.stargazers_count as number; }); await prisma.repository.upsert({ where: { name_day_month_year: { name: payload.name, month: new Date().getMonth() + 1, year: new Date().getFullYear(), day: new Date().getDate(), }, }, update: { stars: stargazers_count - payload.previousStarCount, }, create: { name: payload.name, stars: stargazers_count - payload.previousStarCount, month: new Date().getMonth() + 1, year: new Date().getFullYear(), day: new Date().getDate(), }, }); }, }); ``` 我們建立了一個名為“Sync Stars Daily”的新作業,該作業將在每天下午 23:00 執行 - 它在 cron 文本中的表示為:`0 23 * * *` 我們在資料庫中取得所有目前儲存庫,按名稱將它們分組,並對星星進行求和。 由於一切都在 Vercel 無伺服器上執行,因此我們可能會在檢查所有儲存庫時遇到逾時。 為此,我們將每個儲存庫傳送到不同的作業。 我們使用“invoke”建立新作業,然後在“獲取最新的星星”中處理它們 我們迭代所有新儲存庫並獲取當前的星星數量。 我們用舊的星星數量去除新的星星數量,得到今天的星星數量。 我們使用“prisma”將其新增至資料庫。沒有比這更簡單的了! 最後一件事是編輯“jobs/index.ts”並將內容替換為: ``` export * from "./sync.stars"; ``` 你就完成了🥳 --- ## 讓我們聯絡吧! 🔌 作為開源開發者,我們邀請您加入我們的[社群](https://discord.gg/nkqV9xBYWy),以做出貢獻並與維護者互動。請隨時造訪我們的 [GitHub 儲存庫](https://github.com/triggerdotdev/trigger.dev),貢獻並建立與 Trigger.dev 相關的問題。 本教學的源程式碼可在此處取得: [https://github.com/triggerdotdev/blog/tree/main/stars-monitor](https://github.com/triggerdotdev/blog/tree/main/stars-monitor) 感謝您的閱讀! --- 原文出處:https://dev.to/triggerdotdev/take-nextjs-to-the-next-level-create-a-github-stars-monitor-130a
原文出處:https://dev.to/madza/24-open-source-projects-for-developers-in-2023-391l --- 標題:2023 年開發人員的 24 個開源專案 🔥👍 發表:真實 描述: 標籤: 開源、 github、 程式設計、 Web 開發 封面圖:https://dev-to-uploads.s3.amazonaws.com/uploads/articles/74998ffdt3doqvxtxumz.png canonical_url:https://madza.hashnode.dev/24-open-source-projects-for-developers-in-2023 --- 開源專案是創新、協作和創造力的遊樂場。它是來自世界各地的開發人員聚集在一起分享他們的想法、技能和熱情的中心。 在本文中,我精心挑選了 24 個涵蓋廣泛興趣和技術的開源專案。 從尖端的人工智慧框架到漂亮的生產力工具以及介於兩者之間的一切,每個開發人員都能找到適合自己的東西。 我提供了直接連結、描述和視覺效果,以便您可以立即獲得每個工具的初步印象。 --- ## 1\. [集算器SPL](https://github.com/SPLWare/esProc)(贊助) 集算器SPL是一種基於腳本的資料操作語言,與SQL資料庫集成,支援進階分析和高效能並行處理。 它適合處理大型資料集,與各種工具集成,提供資料視覺化,並跨多個平台工作。一些主要功能包括: **💪 強大的資料處理能力:** 集算器SPL是一種腳本語言,具有豐富的函數庫和強大的語法。 **✨ 預存程序等效項:** 它允許透過 JDBC 介面執行 SPL 腳本。 **📈 多功能視覺化:** 它提供了成熟的報告工具,具有廣泛的視覺化配置,用於建立各種類型的報告。 **⚡ 自動化工作流程:** 它支援軟體工作流程的自動化,包括用於程式碼建置、測試和部署的 CI/CD 流程。 **🔥 相比SQL更具彈性:** 與SQL語法不同,集算器SPL允許將資料處理程式碼寫在多條語句中。  ⭐ 支援他們的 GitHub 倉庫:[https://github.com/SPLWare/esProc](https://github.com/SPLWare/esProc) ## 2\. [跳房子](https://github.com/hoppscotch/hoppscotch) 一種多功能開源 API 開發和測試工具,提供使用者友善的介面,用於發出 HTTP 請求來測試 API 並與 API 互動。 它簡化了製作和發送請求的過程,使其成為使用 API 的開發人員和測試人員的必備工具。  ## 3\. [Supabase](https://github.com/supabase/supabase) Firebase 的開源替代方案,為開發人員提供了一組用於建立可擴展的即時應用程式的工具。 它提供了強大的後端即服務 (BaaS) 平台,具有身份驗證、資料庫管理和即時功能等功能,使其成為創建現代 Web 和行動應用程式的強大選擇。 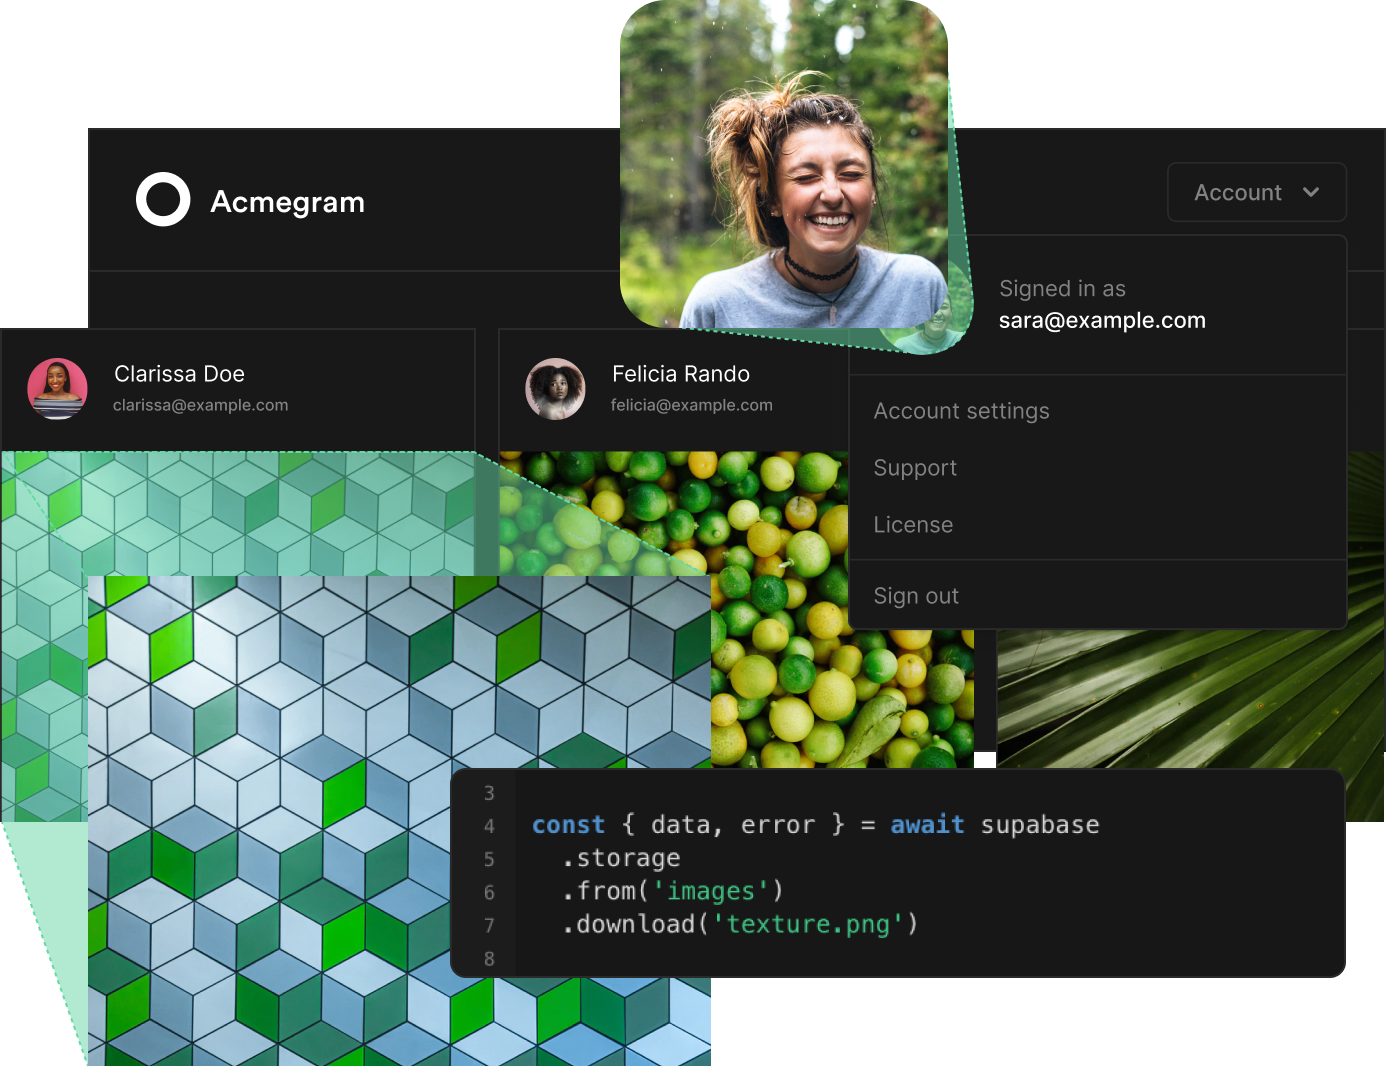 ## 4\. [超級代幣](https://github.com/supertokens/supertokens-core) 一種開源身份驗證解決方案,提供強大的安全功能和輕鬆集成,以增強 Web 和行動應用程式中的使用者身份驗證和授權。 它為開發人員提供了一個全面的工具包,用於保護用戶資料並確保無縫登入體驗。  ## 5\. [Git](https://github.com/git/git) Git 版本控制系統的官方開源程式庫,最初由 Linus Torvalds 建立。 Git 廣泛用於追蹤原始程式碼的更改,並透過提供強大的分支和合併功能來實現協作軟體開發。  ## 6\. [VS 代碼](https://github.com/microsoft/vscode) 由 Microsoft 開發的免費開源程式碼編輯器。 它提供了高度可自訂且高效的程式設計環境,具有 IntelliSense、調試支援和龐大的擴充庫等功能,可增強您的開發工作流程。 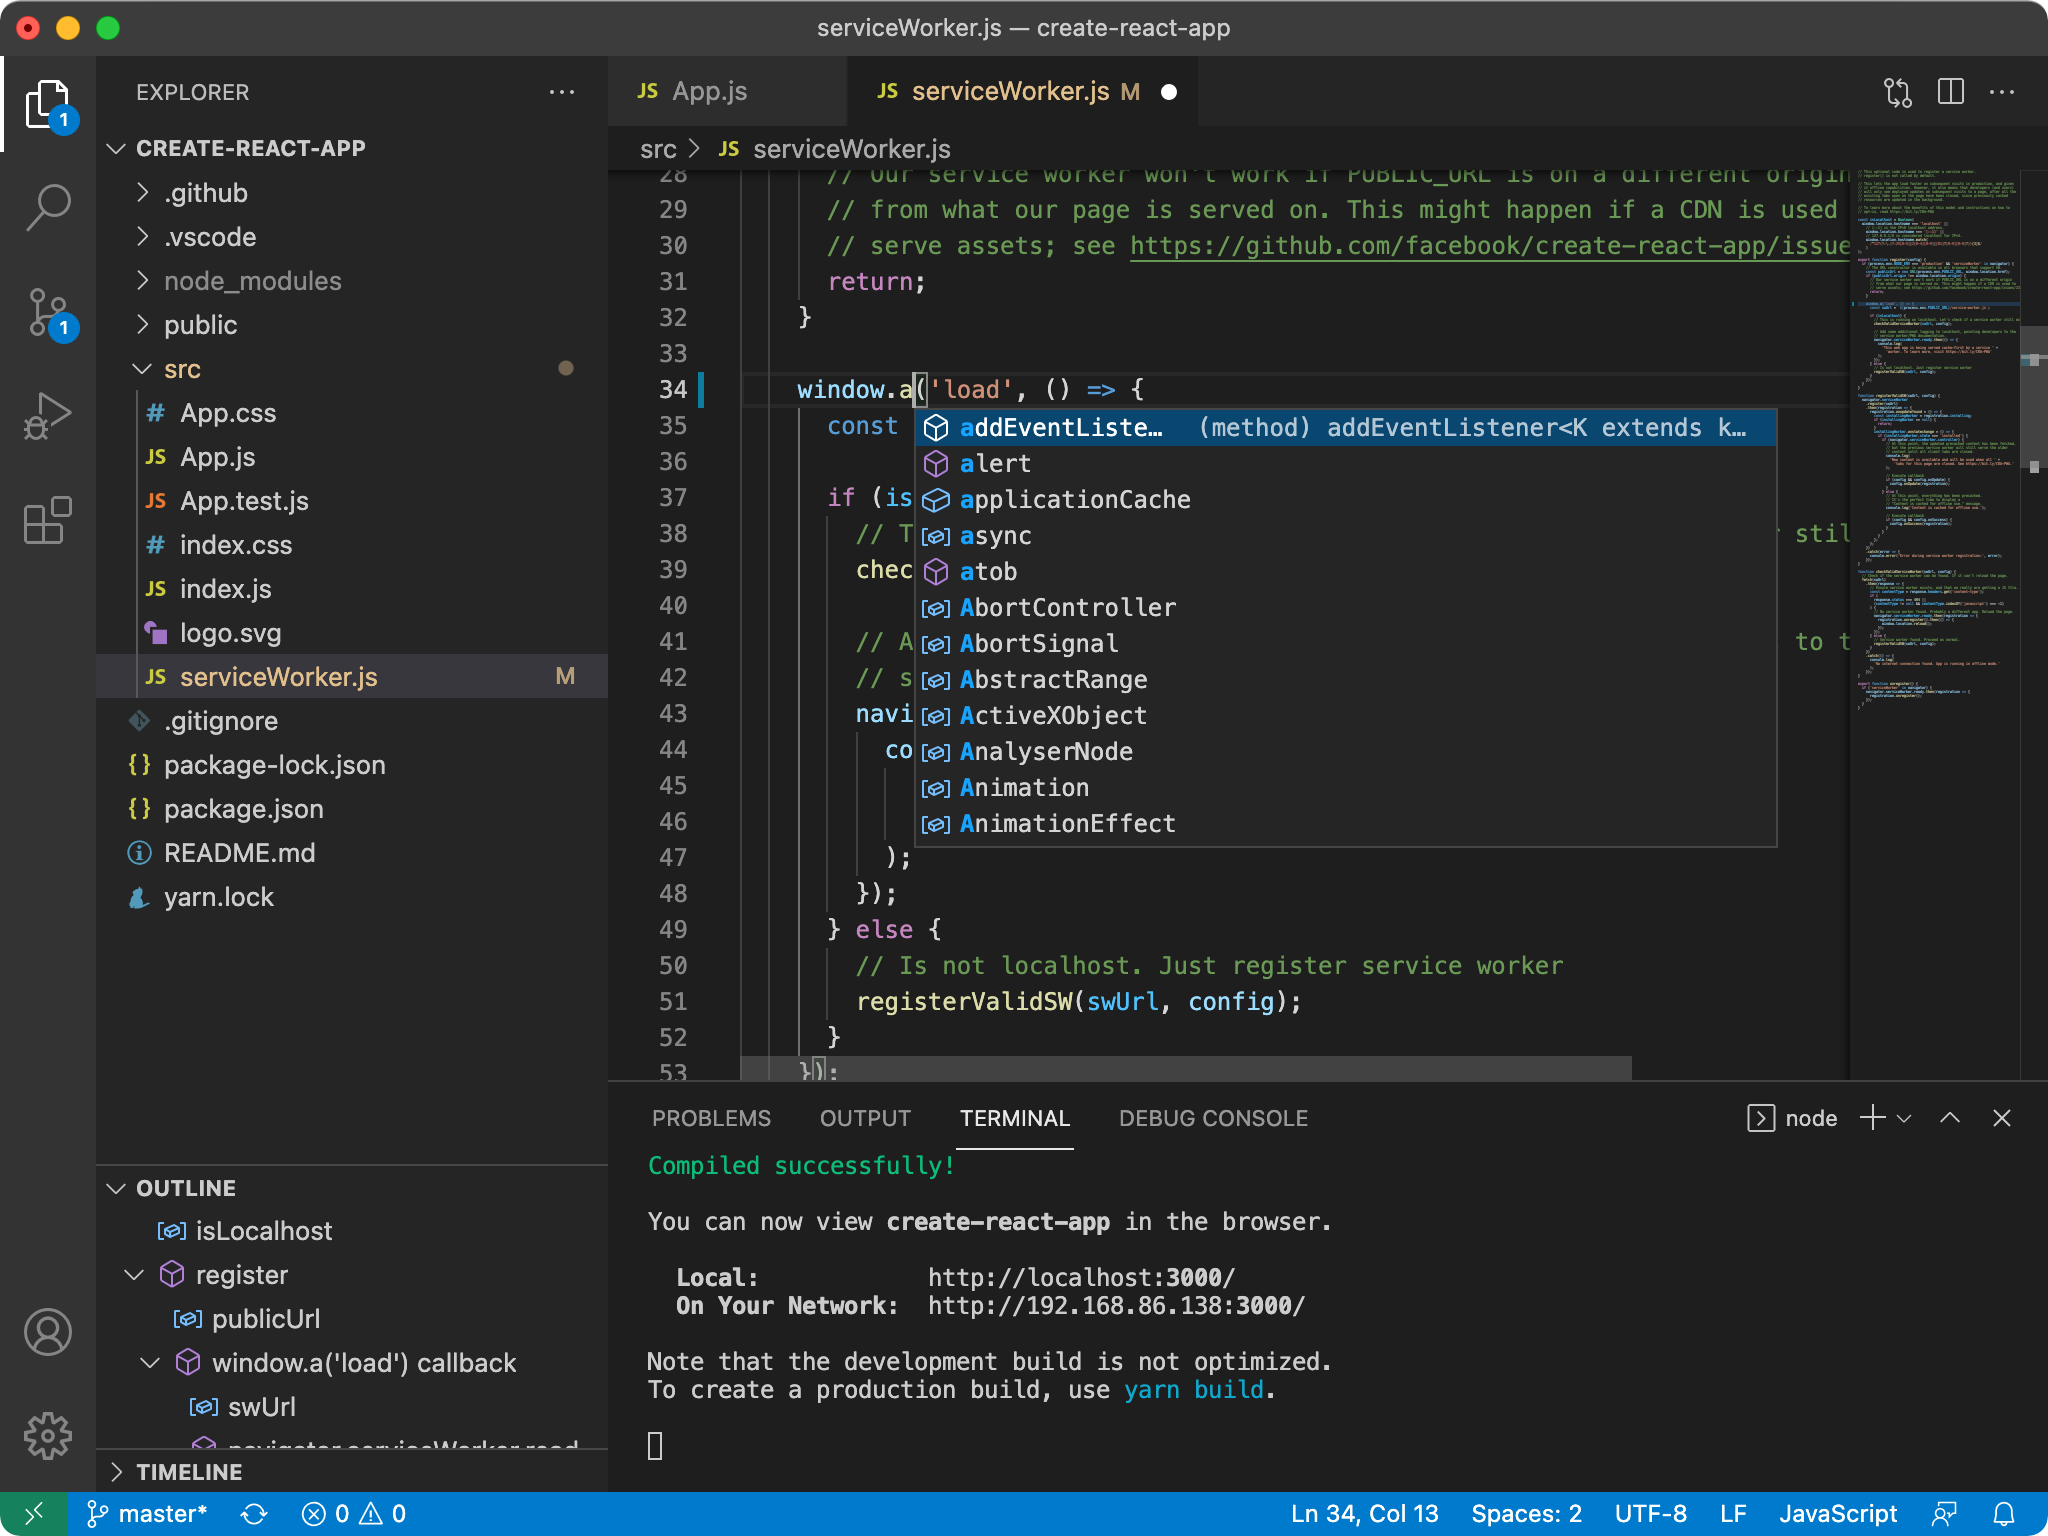 ## 7\. [OhMyZsh](https://github.com/ohmyzsh/ohmyzsh) 一個流行且高度可自訂的框架,用於在類 Unix 作業系統中管理 Zsh 配置。 它簡化了 shell 自訂,提供了大量插件和主題來增強您的命令列體驗。  ## 8\. [包子](https://github.com/oven-sh/bun) 一個開源 JavaScript 工具包,旨在簡化和優化為 Web 應用程式捆綁 JavaScript 程式碼的過程。 它提供了一種現代且快速的方法來建立捆綁包,從而增強了使用 JavaScript 專案時的效能和開發人員體驗。 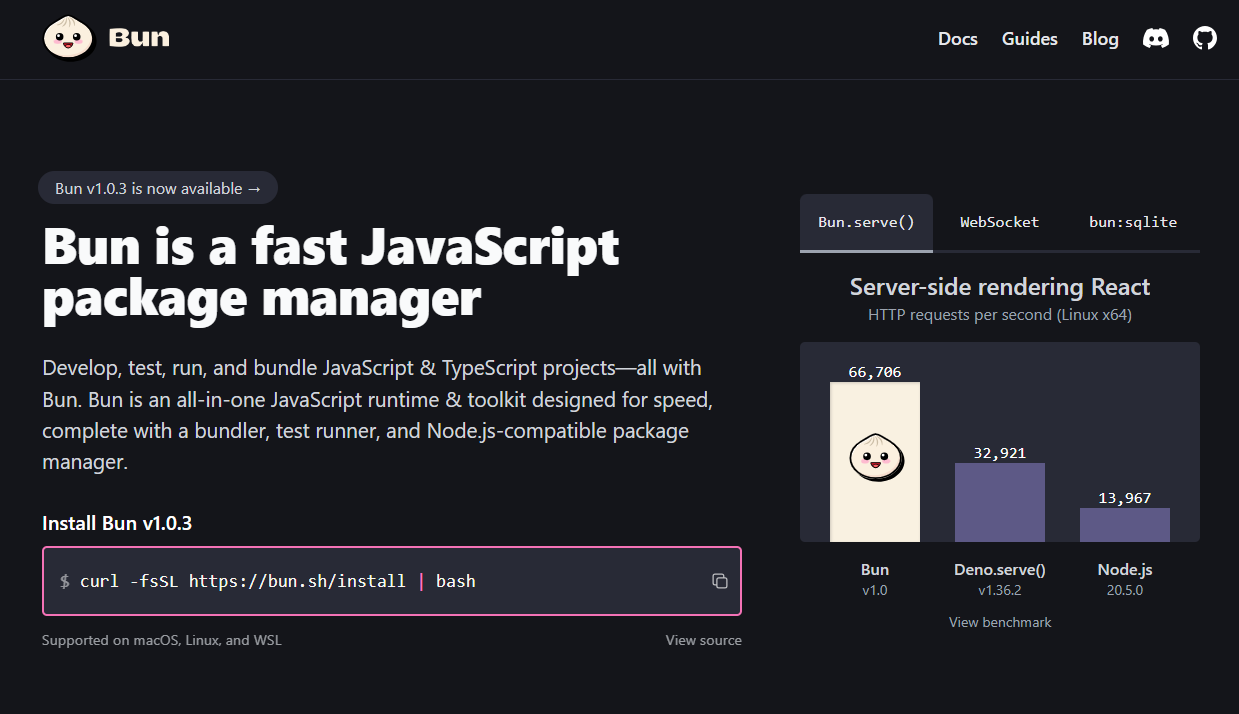 ## 9\. [SWR](https://github.com/vercel/swr) SWR(Stale-While-Revalidate)是一個用於在 React 應用程式中取得資料的 JavaScript 函式庫。 它可以在客戶端和伺服器之間實現高效、自動的資料同步,提供無縫的即時更新,同時確保資料保持新鮮和最新。 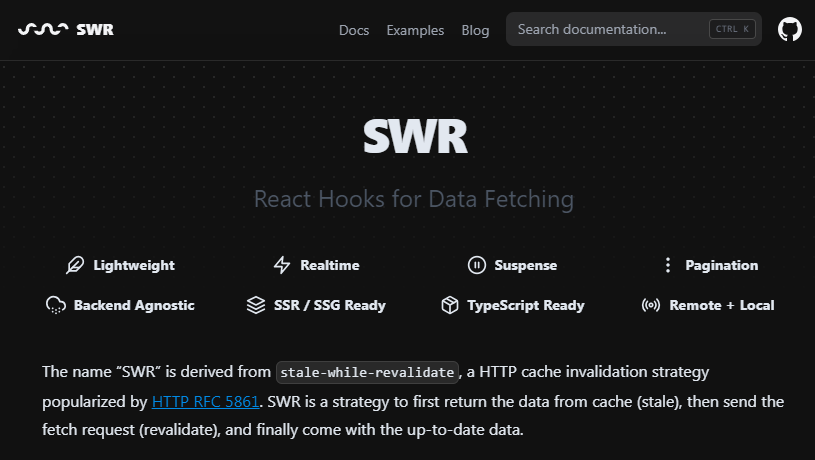 ## 10\. [Prisma](https://github.com/prisma/prisma) 用於現代應用程式開發的開源資料庫工具包,透過強大的查詢產生器和類型安全的 ORM(物件關聯映射)層簡化資料庫存取和操作。 它允許開發人員使用聲明性和直觀的方法管理資料庫並與之交互,從而使資料庫操作在各種資料庫系統中無縫且安全。  ## 11\. [ElasticSearch](https://github.com/elastic/elasticsearch) 由 Elastic 開發的強大且可擴展的開源搜尋和分析引擎。 它旨在幫助用戶快速有效地搜尋、分析和視覺化大量數據,使其成為從全文搜尋引擎到日誌分析等應用程式的熱門選擇。 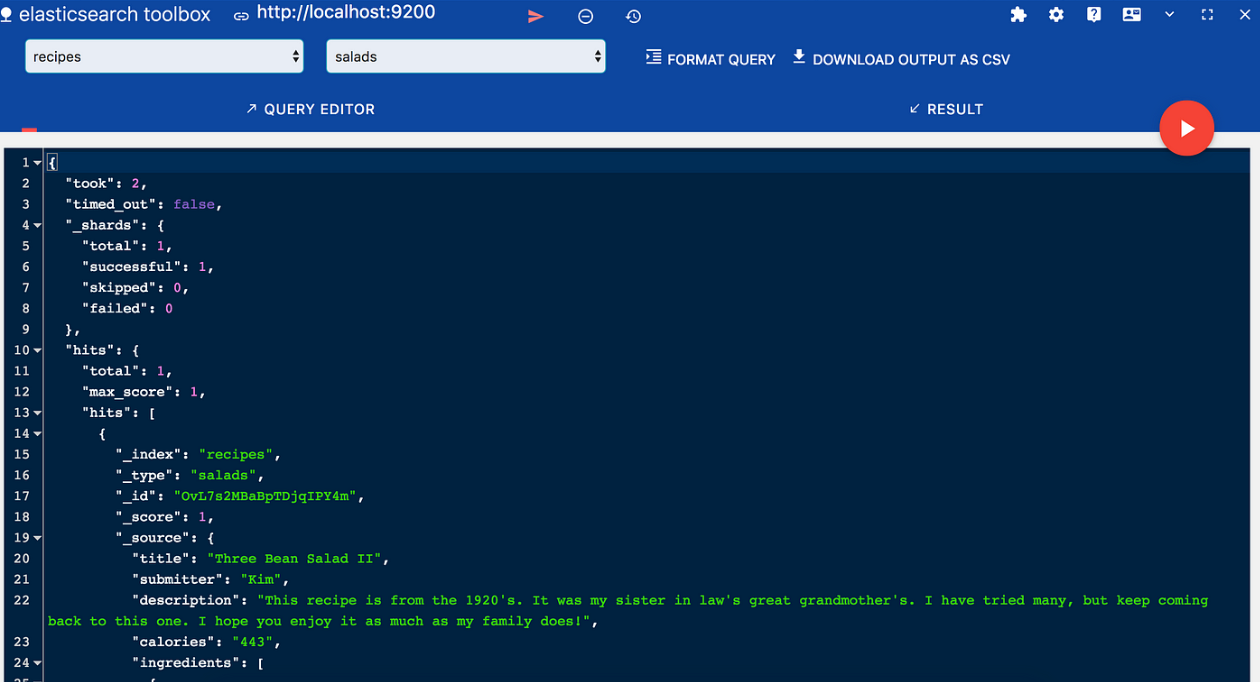 ## 12\. [哈蘇拉](https://github.com/hasura/graphql-engine) 一款功能強大的開源工具,可簡化應用程式的 GraphQL API 開發。 借助 Hasura,您可以輕鬆建立、管理和保護 GraphQL API,從而更輕鬆地與資料來源互動並建立現代的資料驅動應用程式。 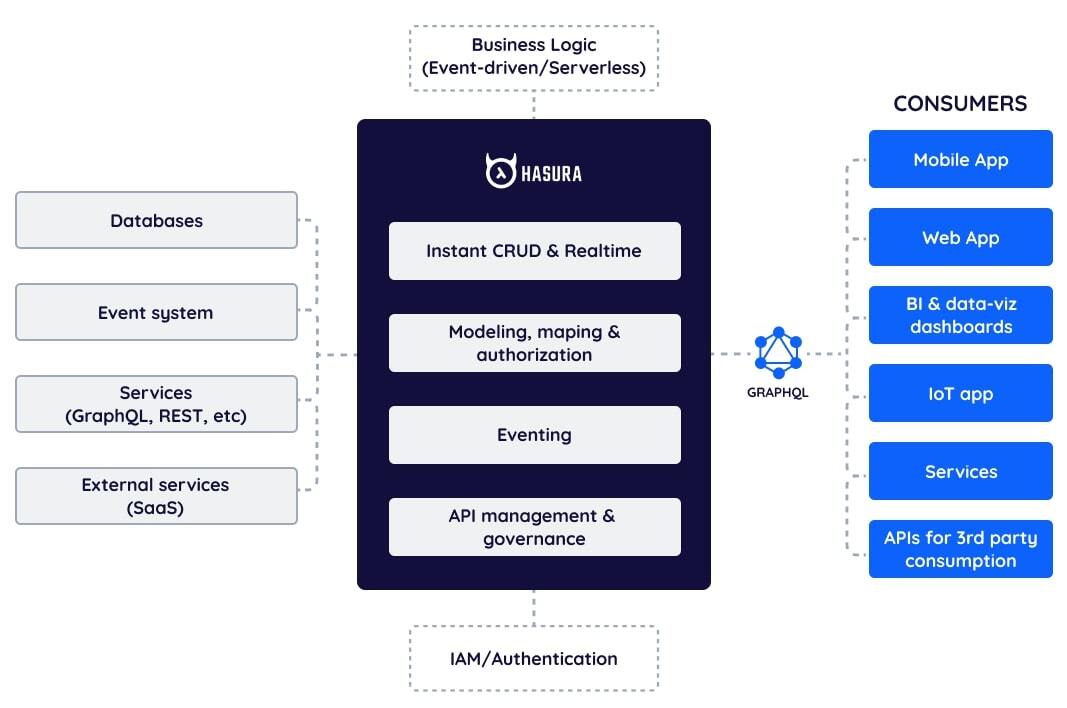 ## 13\. [BioDrop](https://github.com/EddieHubCommunity/BioDrop) 透過單一連結與您的受眾建立聯繫。在一處展示您創建的內容和項目。 讓人們更容易找到、關注和訂閱。  ## 14\. [Powertoys](https://github.com/microsoft/PowerToys) 適用於 Windows 的開源實用程序,可提高工作效率和自訂功能。 它提供了一系列方便的工具和實用程序,包括快速啟動器、文件預覽和視窗管理等功能,旨在簡化您的 Windows 體驗。 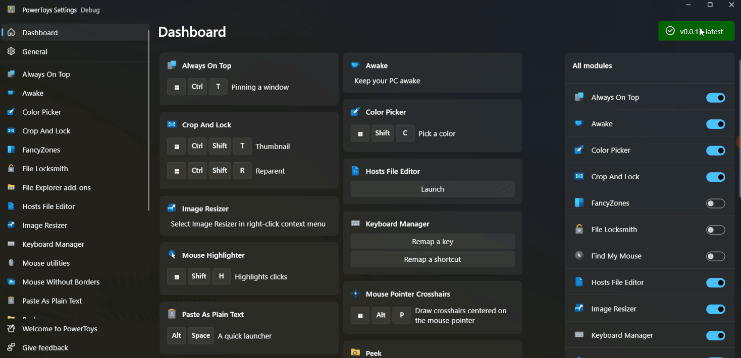 ## 15\. [Strapi](https://github.com/strapi/strapi) 開源無頭內容管理系統 (CMS),使開發人員能夠快速建立強大且可自訂的 API。 它使團隊能夠輕鬆創建和管理內容豐富的網站和應用程序,為各種專案提供靈活性和可擴展性。 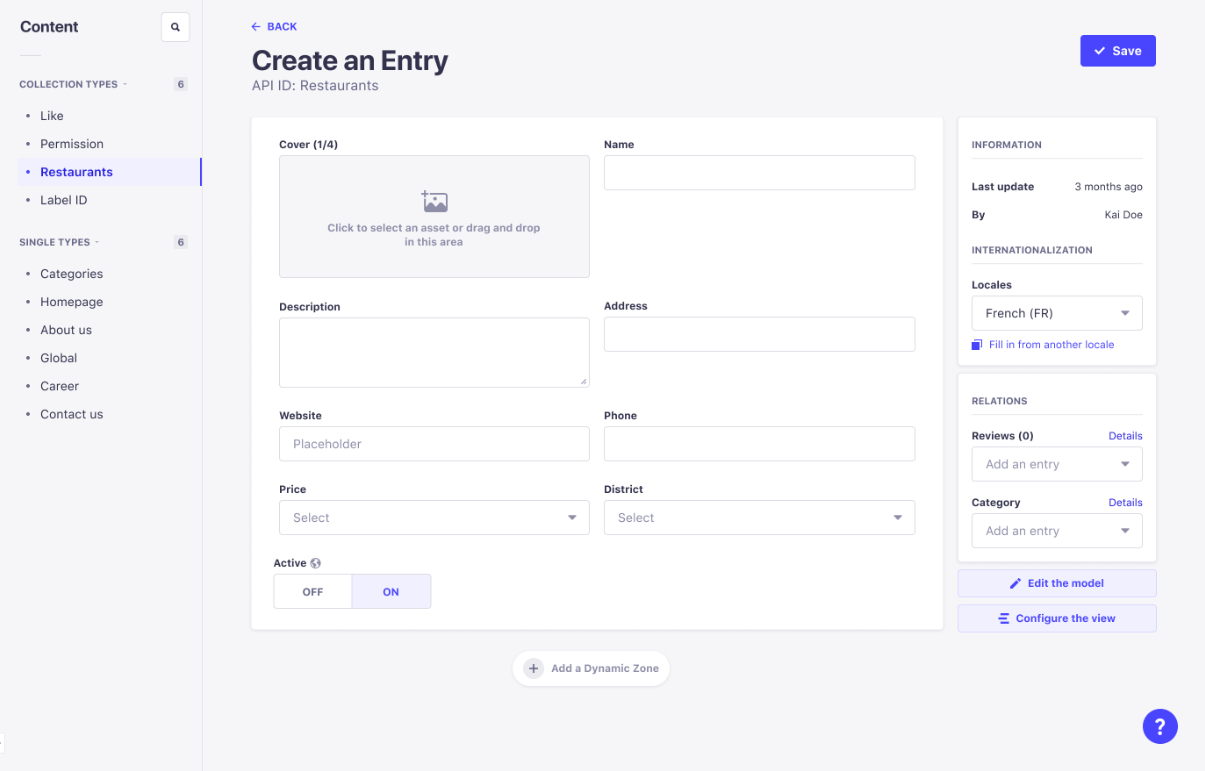 ## 16\. [看似合理](https://github.com/plausible/analytics) 一種開源網路分析工具,旨在為網站所有者提供對其網站效能的簡單且注重隱私的見解。 它提供用戶友好、輕量級的跟踪,且不會損害訪問者的隱私,使其成為那些重視數據分析而無需侵入性跟踪方法的人的理想選擇。  ## 17\. [Astro](https://github.com/withastro/astro) 現代靜態網站產生器,透過僅傳送頁面所需的 JavaScript 來提供閃電般的效能,從而實現近乎即時的載入時間。 它將傳統伺服器渲染框架的靈活性與靜態網站產生器的速度相結合,使其成為建立高效動態網站的絕佳選擇。  ## 18\. [混音](https://github.com/remix-run/remix) 用於建立現代 JavaScript 應用程式的 Web 框架,注重速度和開發人員體驗。 它使開發人員能夠透過無縫組合伺服器渲染和客戶端渲染的內容來創建高效能的 Web 應用程式。  ## 19\. [張量流](https://github.com/tensorflow/tensorflow) 由Google開發的開源機器學習框架。 它為建立和部署機器學習模型提供了靈活且全面的生態系統,使其成為人工智慧領域研究人員和開發人員的熱門選擇。 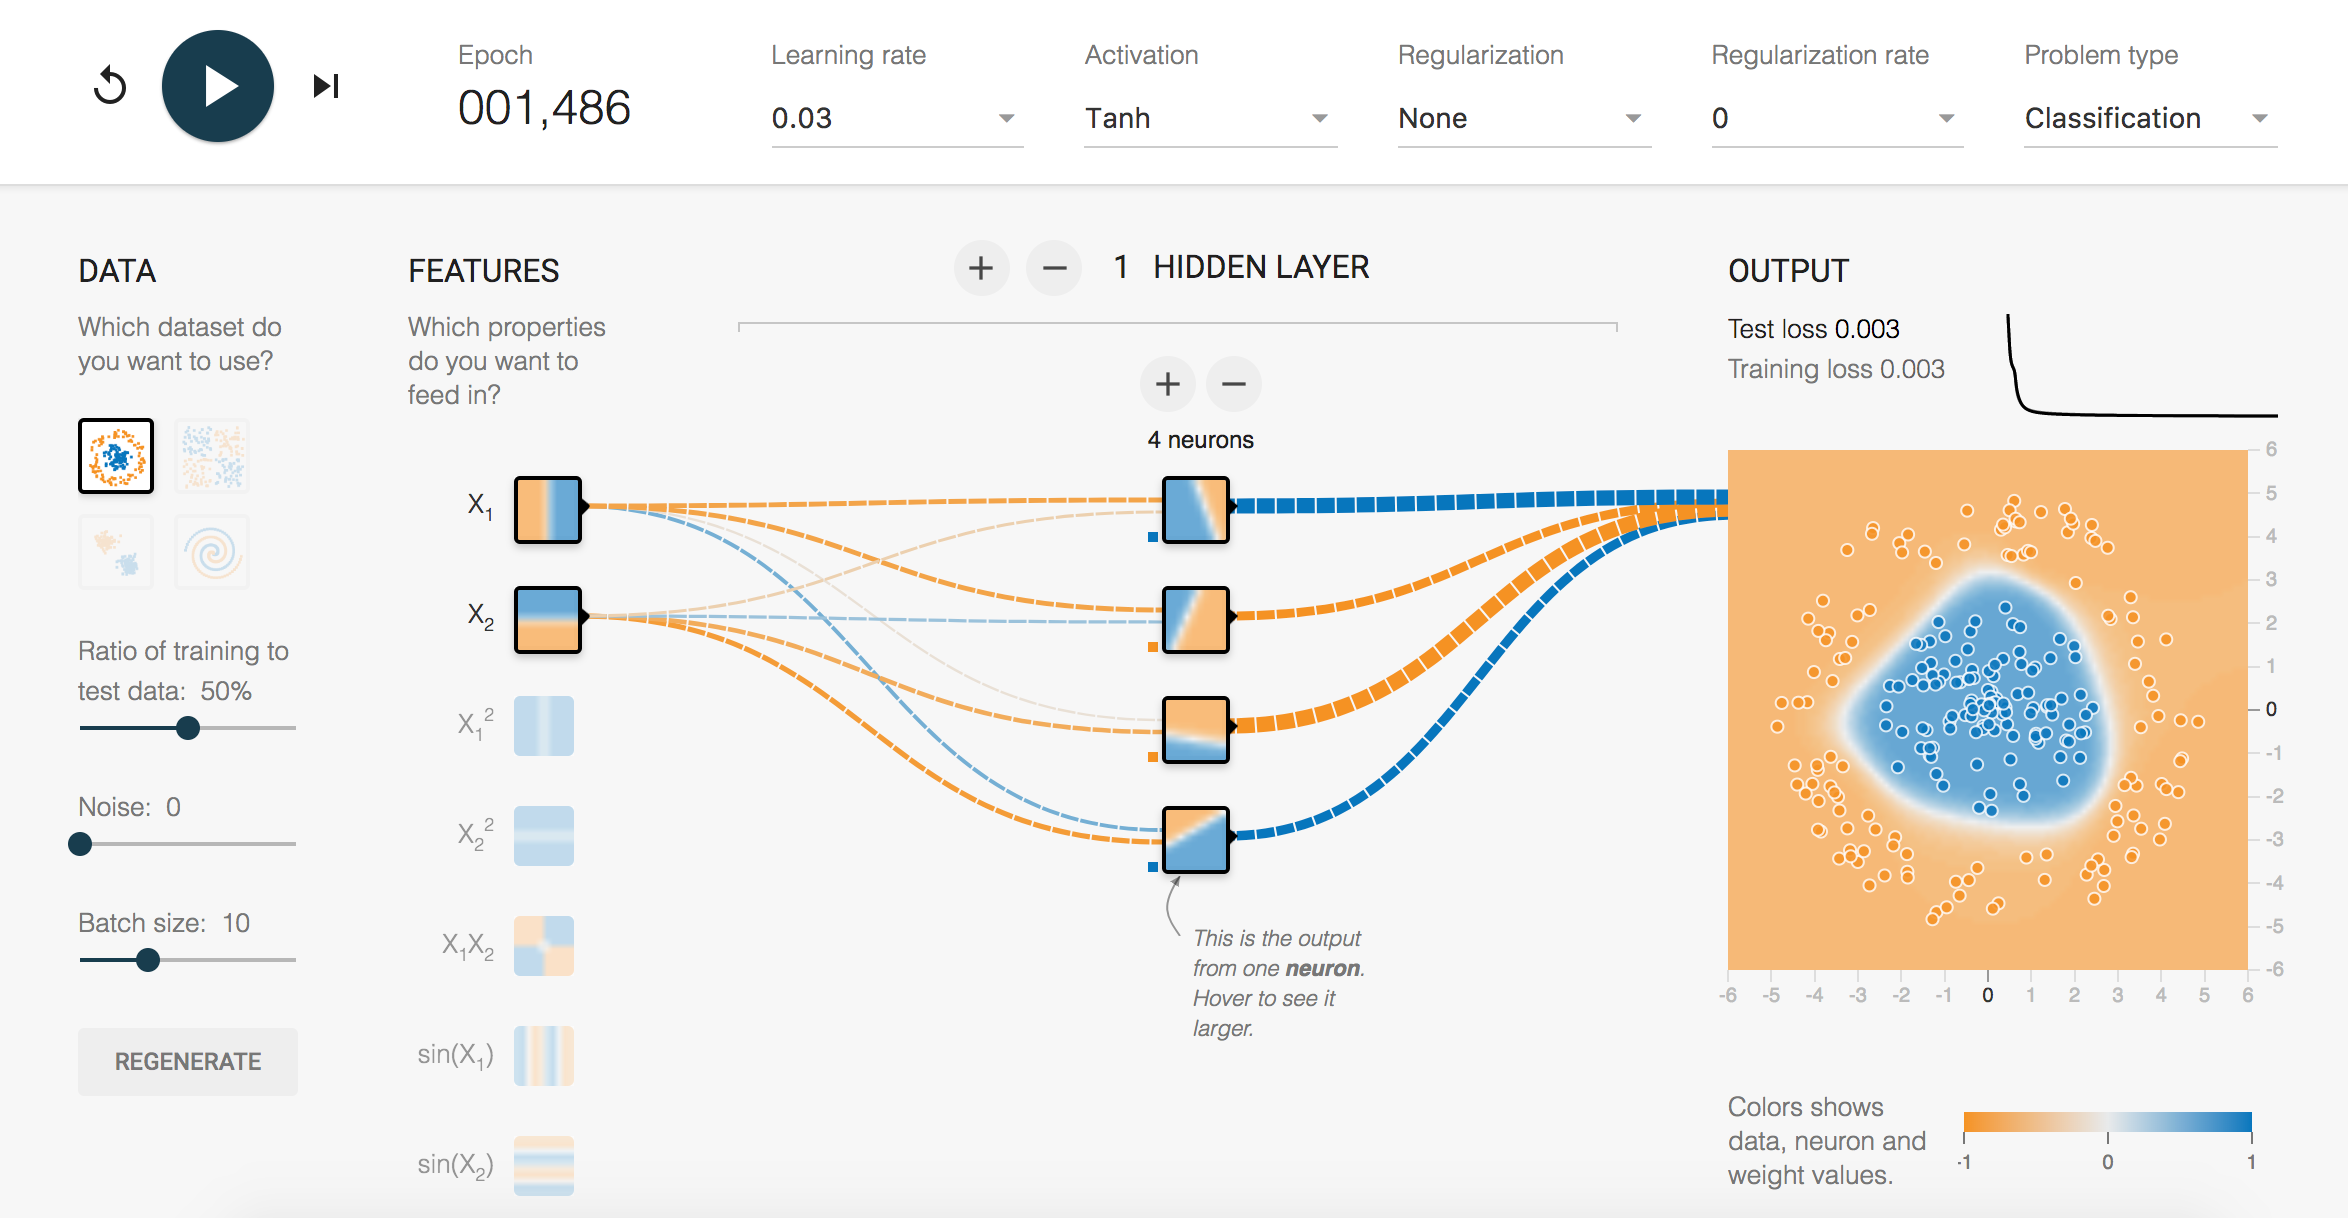 ## 20\. [顫動](https://github.com/flutter/flutter) 由 Google 創建的開源 UI 軟體開發工具包,以其從單一程式碼庫建立適用於行動、Web 和桌面的本機編譯應用程式的能力而聞名。 它使開發人員能夠使用單一程式語言 Dart 跨多個平台創建美觀、快速且高度可自訂的使用者介面。 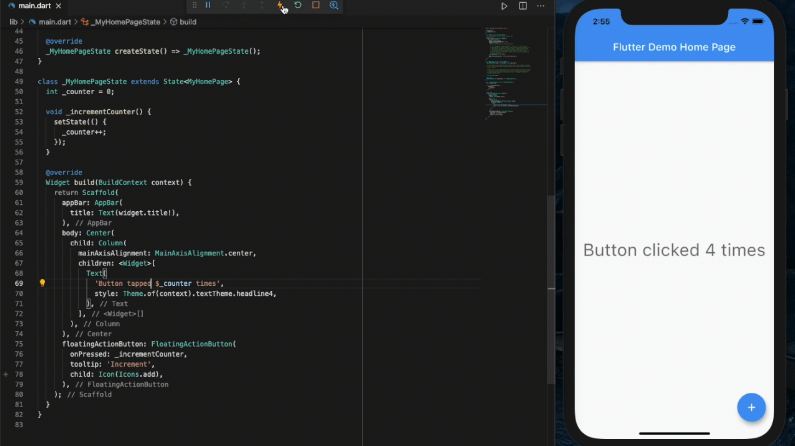 ## 21\. [Kubernetes](https://github.com/kubernetes/kubernetes) 一個開源容器編排平台,可自動執行容器化應用程式的部署、擴充和管理。 它為編排容器提供了強大而靈活的基礎架構,使在雲端原生環境中大規模管理複雜的分散式系統變得更加容易。  ## 22\. [Docker](https://www.docker.com/community/open-source/) 一個開源工具,可簡化多容器 Docker 應用程式的管理。 它允許開發人員使用簡單的 YAML 檔案定義和運行多容器應用程序,從而更輕鬆地編排和部署複雜的服務。 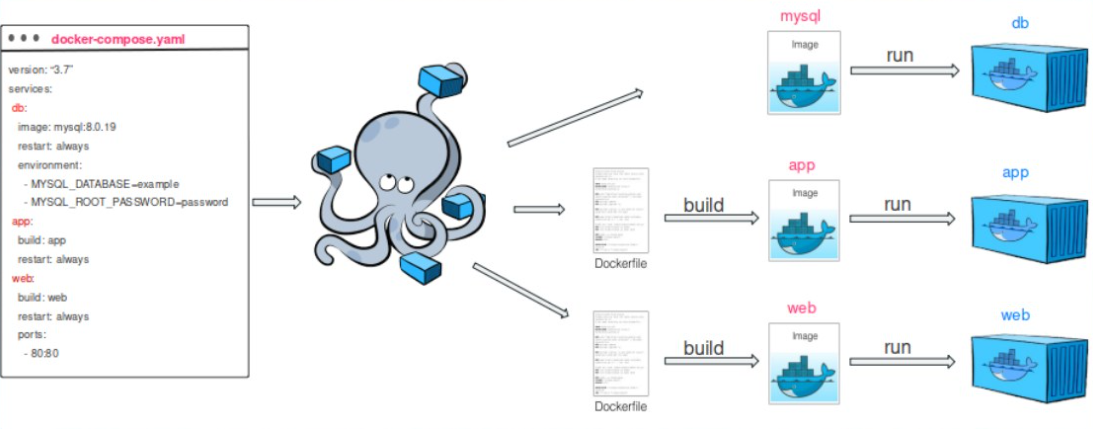 ## 23\. [鉻](https://github.com/chromium/chromium) Google 的一個開源瀏覽器項目,旨在為所有使用者建立更安全、更快、更穩定的網路體驗方式。 它是開發人員在網路瀏覽技術領域做出貢獻和創新的平台。  ## 24\. [Linux 核心](https://github.com/torvalds/linux) 由 Linus Torvalds 和全球貢獻者社群開發的開源、類別 Unix 作業系統核心。 它作為各種基於 Linux 的作業系統的核心組件,提供硬體互動和系統管理的基本功能。  --- 寫作一直是我的熱情,幫助和激勵人們讓我感到很高興。如果您有任何疑問,請隨時與我們聯繫! 透過[Twitter](https://twitter.com/madzadev)、[LinkedIn](https://www.linkedin.com/in/madzadev/) 和[GitHub](https://github.com) 與我聯繫/madzadev)! 請訪問我的[部落格](https://madza.dev/blog)以獲取更多此類文章。
開源專案是創新、協作和創造力的遊樂場。它是來自世界各地的開發人員聚集在一起分享他們的想法、技能和熱情的中心。 在本文中,我精心挑選了 24 個涵蓋廣泛興趣和技術的開源專案。 從尖端的人工智慧框架到漂亮的生產力工具以及介於兩者之間的一切,每個開發人員都能找到適合自己的東西。 我提供了直接連結、描述和視覺效果,以便您可以立即獲得每個工具的初步印象。 原文出處:https://dev.to/madza/24-open-source-projects-for-developers-in-2023-391l --- ## 1\. [ esProc SPL](https://github.com/SPLWare/esProc)(贊助) 集算器SPL是一種基於腳本的資料操作語言,與SQL資料庫集成,支援進階分析和高效能並行處理。 它適合處理大型資料集,與各種工具集成,提供資料視覺化,並跨多個平台工作。一些主要功能包括: **💪 強大的資料處理能力:** 集算器SPL是一種腳本語言,具有豐富的函數庫和強大的語法。 **✨ 預存程序等效項:** 它允許透過 JDBC 介面執行 SPL 腳本。 **📈 多功能視覺化:** 它提供了成熟的報告工具,具有廣泛的視覺化配置,用於建立各種類型的報告。 **⚡ 自動化工作流程:** 它支援軟體工作流程的自動化,包括用於程式碼建置、測試和部署的 CI/CD 流程。 **🔥 相比SQL更具彈性:** 與SQL語法不同,集算器SPL允許將資料處理程式碼寫在多條語句中。  ⭐ 支援他們的 GitHub 倉庫:[https://github.com/SPLWare/esProc](https://github.com/SPLWare/esProc) ## 2\. [Hoppscotch](https://github.com/hoppscotch/hoppscotch) 一種多功能開源 API 開發和測試工具,提供使用者友善的介面,用於發出 HTTP 請求來測試 API 並與 API 互動。 它簡化了製作和發送請求的過程,使其成為使用 API 的開發人員和測試人員的必備工具。  ## 3\. [Supabase](https://github.com/supabase/supabase) Firebase 的開源替代方案,為開發人員提供了一組用於建立可擴展的即時應用程式的工具。 它提供了強大的後端即服務 (BaaS) 平台,具有身份驗證、資料庫管理和即時功能等功能,使其成為建立現代 Web 和行動應用程式的強大選擇。  ## 4\. [Supertokens](https://github.com/supertokens/supertokens-core) 一種開源身份驗證解決方案,提供強大的安全功能和輕鬆集成,以增強 Web 和行動應用程式中的使用者身份驗證和授權。 它為開發人員提供了一個全面的工具包,用於保護用戶資料並確保無縫登入體驗。  ## 5\. [Git](https://github.com/git/git) Git 版本控制系統的官方開源程式庫,最初由 Linus Torvalds 建立。 Git 廣泛用於追蹤原始程式碼的更改,並透過提供強大的分支和合併功能來實現協作軟體開發。 ## 6\. [VS Code](https://github.com/microsoft/vscode) 由 Microsoft 開發的免費開源程式碼編輯器。 它提供了高度可自訂且高效的程式設計環境,具有 IntelliSense、除錯支援和龐大的擴充庫等功能,可增強您的開發工作流程。  ## 7\. [OhMyZsh](https://github.com/ohmyzsh/ohmyzsh) 一個流行且高度可自訂的框架,用於在類 Unix 作業系統中管理 Zsh 配置。 它簡化了 shell 自訂,提供了大量插件和主題來增強您的命令列體驗。  ## 8\. [Bun](https://github.com/oven-sh/bun) 一個開源 JavaScript 工具包,旨在簡化和優化為 Web 應用程式捆綁 JavaScript 程式碼的過程。 它提供了一種現代且快速的方法來建立捆綁包,從而增強了使用 JavaScript 專案時的效能和開發人員體驗。  ## 9\. [SWR](https://github.com/vercel/swr) SWR(Stale-While-Revalidate)是一個用於在 React 應用程式中取得資料的 JavaScript 函式庫。 它可以在客戶端和伺服器之間實現高效、自動的資料同步,提供無縫的即時更新,同時確保資料保持新鮮和最新。  ## 10\. [Prisma](https://github.com/prisma/prisma) 用於現代應用程式開發的開源資料庫工具包,透過強大的查詢產生器和類型安全的 ORM(物件關聯映射)層簡化資料庫存取和操作。 它允許開發人員使用聲明性和直觀的方法管理資料庫並與之交互,從而使資料庫操作在各種資料庫系統中無縫且安全。  ## 11\. [ElasticSearch](https://github.com/elastic/elasticsearch) 由 Elastic 開發的強大且可擴展的開源搜尋和分析引擎。 它旨在幫助用戶快速有效地搜尋、分析和視覺化大量資料,使其成為從全文搜尋引擎到日誌分析等應用程式的熱門選擇。  ## 12\. [Hasura](https://github.com/hasura/graphql-engine) 一款功能強大的開源工具,可簡化應用程式的 GraphQL API 開發。 借助 Hasura,您可以輕鬆建立、管理和保護 GraphQL API,從而更輕鬆地與資料來源互動並建立現代的資料驅動應用程式。  ## 13\. [BioDrop](https://github.com/EddieHubCommunity/BioDrop) 透過單一連結與您的受眾建立聯繫。在一處展示您建立的內容和專案。 讓人們更容易找到、關注和訂閱。  ## 14\. [Powertoys](https://github.com/microsoft/PowerToys) 適用於 Windows 的開源實用程序,可提高工作效率和自訂功能。 它提供了一系列方便的工具和實用程序,包括快速啟動器、文件預覽和視窗管理等功能,旨在簡化您的 Windows 體驗。  ## 15\. [Strapi](https://github.com/strapi/strapi) 開源無頭內容管理系統 (CMS),使開發人員能夠快速建立強大且可自訂的 API。 它使團隊能夠輕鬆建立和管理內容豐富的網站和應用程式,為各種專案提供靈活性和可擴展性。  ## 16\. [Plausible](https://github.com/plausible/analytics) 一種開源網路分析工具,旨在為網站所有者提供對其網站效能的簡單且注重隱私的見解。 它提供用戶友好、輕量級的跟踪,且不會損害存取者的隱私,使其成為那些重視資料分析而無需侵入性跟踪方法的人的理想選擇。  ## 17\. [Astro](https://github.com/withastro/astro) 現代靜態網站產生器,透過僅傳送頁面所需的 JavaScript 來提供閃電般的效能,從而實現近乎即時的載入時間。 它將傳統伺服器渲染框架的靈活性與靜態網站產生器的速度相結合,使其成為建立高效動態網站的絕佳選擇。  ## 18\. [Remix](https://github.com/remix-run/remix) 用於建立現代 JavaScript 應用程式的 Web 框架,注重速度和開發人員體驗。 它使開發人員能夠透過無縫組合伺服器渲染和客戶端渲染的內容來建立高效能的 Web 應用程式。  ## 19\. [Tensorflow](https://github.com/tensorflow/tensorflow) 由Google開發的開源機器學習框架。 它為建立和部署機器學習模型提供了靈活且全面的生態系統,使其成為人工智慧領域研究人員和開發人員的熱門選擇。  ## 20\. [Flutter](https://github.com/flutter/flutter) 由 Google 建立的開源 UI 軟體開發工具包,以其從單一程式碼庫建立適用於行動、Web 和桌面的本機編譯應用程式的能力而聞名。 它使開發人員能夠使用單一程式語言 Dart 跨多個平台建立美觀、快速且高度可自訂的使用者介面。  ## 21\. [Kubernetes](https://github.com/kubernetes/kubernetes) 一個開源容器編排平台,可自動執行容器化應用程式的部署、擴充和管理。 它為編排容器提供了強大而靈活的基礎架構,使在雲端原生環境中大規模管理複雜的分散式系統變得更加容易。 ## 22\. [Docker](https://www.docker.com/community/open-source/) 一個開源工具,可簡化多容器 Docker 應用程式的管理。 它允許開發人員使用簡單的 YAML 檔案定義和執行多容器應用程式,從而更輕鬆地編排和部署複雜的服務。  ## 23\. [Chromium](https://github.com/chromium/chromium) Google 的一個開源瀏覽器專案,旨在為所有使用者建立更安全、更快、更穩定的網路體驗方式。 它是開發人員在網路瀏覽技術領域做出貢獻和創新的平台。  ## 24\. [Linux 核心](https://github.com/torvalds/linux) 由 Linus Torvalds 和全球貢獻者社群開發的開源、類別 Unix 作業系統核心。 它作為各種基於 Linux 的作業系統的核心元件,提供硬體互動和系統管理的基本功能。  --- 以上,簡單分享!
開源對很多事情都非常有用。其中之一是學習新技能。在本文中,我們將介紹 GitHub 上一些最好的開源 React 專案,您可以使用它們來快速提升您的 React 技能。 原文出處:https://dev.to/livecycle/top-github-repositories-to-learn-modern-react-development-5d3h ## 你可以學習的開源 React 專案  ## Cal.com  [https://github.com/calcom/cal.com](https://github.com/calcom/cal.com) Cal.com 將自己標榜為“絕對適合所有人的日程安排基礎設施”。他們是 Calendly 等預約安排服務的競爭對手。他們同時提供託管和自託管產品。它是一個全棧 Next.js 應用程式,它依賴 tRPC 進行類型安全的客戶端到伺服器通信。該存儲庫具有相當廣泛的 Monorepo 設置(使用 Turborepo),可將應用程式拆分為多個包。在樣式方面,Cal.com 使用 TailwindCSS 和無頭 Radix 元件。存儲庫非常活躍,他們積極鼓勵貢獻者。許多問題被標記為“良好的第一期”和“需要幫助”。 ## Taxonomy 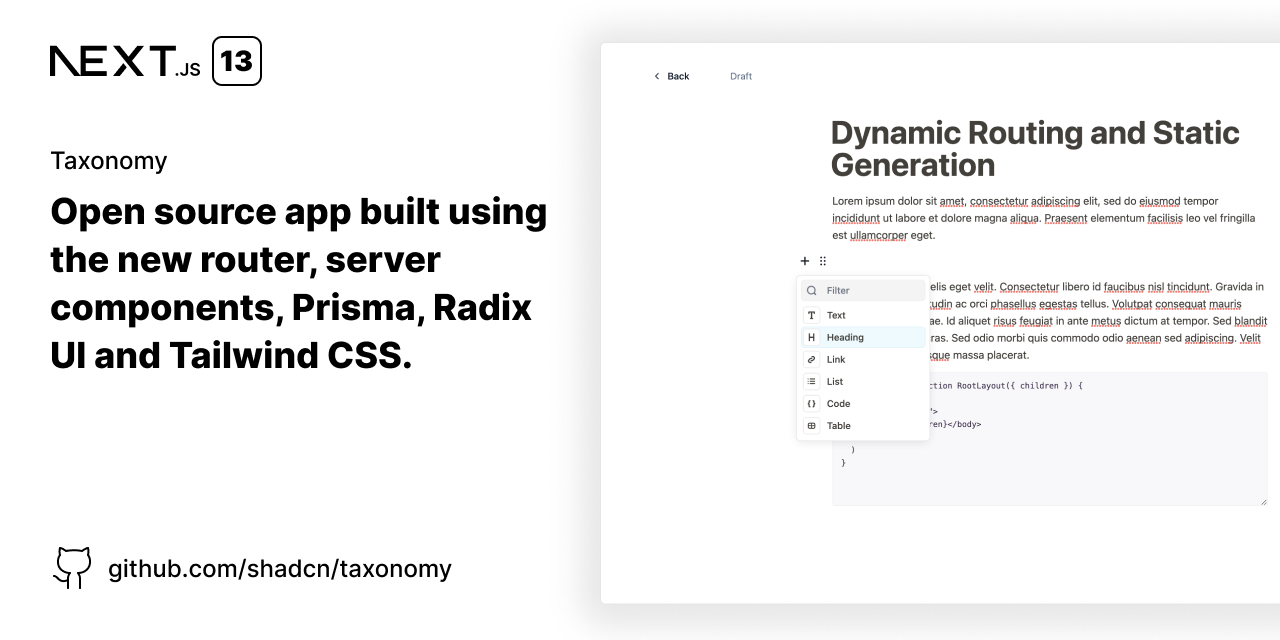 [https://github.com/shadcn/taxonomy](https://github.com/shadcn/taxonomy) 這個有點不同。它由單個開發人員建置,作為探索新的 Next.js 13 App Router 功能的演示。但是不要讓那個愚弄你。它可以說是使用新 App Router 的最全面的開源應用程式之一。因此,即使對於想要學習如何在生產中使用 App Router 的經驗豐富的 React 開發人員來說,這也是一個很好的資源。 除了用於前端和後端的 Next.js 之外,Taxonomy 使用 NextAuth 進行身份驗證,使用 Prisma 作為 ORM,使用帶有 Radix 的 TailwindCSS 進行樣式設置。特別有趣的是 Stripe 訂閱集成。因此,如果您想了解如何將訂閱集成到您的應用程式中,這就是適合您的存儲庫。 ## Highstorm  [https://github.com/chronark/highstorm](https://github.com/chronark/highstorm) Highstorm 是這個街區的新玩家。它是一種監視應用程式中發生的事件的服務。您通過他們的 API 提交事件,然後將其輸入 Highstorm 儀表板。再次重申,這是一個基於 Next.js 的專案。它使用 Tinybird 作為分析資料的資料庫,並使用 Clerk 進行身份驗證。如果您想學習如何處理大量分析資料並將它們顯示在精美的圖表中,那麼這個專案很棒。 ## Dub.sh  [https://github.com/steven-tey/dub](https://github.com/steven-tey/dub) Dub.sh 大約在一年前作為開源連結縮短器推出。它是 Bitly 等服務的替代品。它也是基於 Next.js 並結合使用舊頁面和新 App 路由器。它通常是最早採用 Next.js 新功能(例如元資料 API)的專案之一。 該存儲庫是了解多租戶 Next 應用程式的好地方。這些是為不同域下的不同用戶提供服務的應用程式。在 Dub.sh 的情況下,用戶可以加入自己的域以在其下建立縮短的連結。該應用程式的設計也很精美,整個網站上都有許多令人愉悅的動畫。 Framer Motion 庫用於幫助解決此問題。 ## Bulletproof React  [https://github.com/alan2207/bulletproof-react](https://github.com/alan2207/bulletproof-react) Bulletproof React 與我們目前介紹的其他專案不同。該存儲庫確實包含一個功能齊全的演示 React 應用程式。但最大的價值來自閱讀此應用程式附帶的綜合文件。本文件列出了設計大型 React 應用程式各個方面的最佳實踐。這是一個很好的資源,可以定期參考以刷新您對最佳實踐的記憶。 ## 總結和開始 正如我們所見,上述每個存儲庫都提供了一個獨特的視角來了解大型 React 應用程式是如何建置的。每個人都可以從研究存儲庫的程式碼中獲益,無論您有多有經驗。 開始從存儲庫中學習的一個很好的實用技巧是提出一個特定的問題。例如,您可能會問“Taxonomy 如何處理 Stripe 訂閱?”之類的問題。然後挖掘程式碼層以找到問題的答案。 最後一點——探索開源存儲庫是提升 React 技能的好方法,但這不是您唯一應該做的事情。將您新獲得的知識應用到您自己的專案中也很重要。這就是您鞏固新技能和保留訊息的方式。 最主要的是享受這個過程,並認識到開源是培養新技能的友好場所,無論您目前的經驗水平如何。
你的轉職路上,還缺少一份自學作業包!寫完這幾包,直接拿作品去面試上班!
本論壇另有附設一個 LINE 新手發問&交流群組!歡迎加入討論!