歡迎來到使用 JavaScript 的命令列介面 (CLI) 工具世界的令人興奮的旅程。 在本指南中,我將引導您建立 CLI 工具,該工具設定基本的專案結構,解釋每個步驟和程式碼片段,以確保您可以遵循。 設定您的開發環境 -------- 在我們深入 CLI 工具的世界之前,讓我們先設定我們的環境: 1. **安裝 Node.js 和 npm:**前往[Node.js 的官方網站](https://nodejs.org/en/)並下載建議的版本。安裝 Node.js 也會安裝 npm,這是您將用來處理 JavaScript 套件的套件管理器。 2. **驗證您的安裝:**開啟終端機並執行以下命令,確保所有內容均已正確安裝: ``` node --version npm --version ``` 查看版本號碼即可確認您已全部設定完畢! 建立您的 CLI 工具:專案設定自動化 ------------------- 我們的目標是建立一個能夠自動產生基本專案結構的 CLI 工具,從而省去您每次啟動新專案時手動建立資料夾和檔案的麻煩。 ### 第 1 步:啟動您的專案 1. **建立專案目錄:**這是 CLI 工具程式碼所在的位置。 ``` mkdir my-project-setup cd my-project-setup ``` 2. **初始化您的 npm 套件:**此步驟產生`package.json`文件,這對於管理專案的依賴項和配置至關重要。 ``` npm init -y ``` ### 第 2 步:建立 CLI 應用程式 1. **建立主檔案:**將此檔案命名為`index.js` 。它將包含 CLI 工具的邏輯。 2. **合併 Shebang 行:**在`index.js`的開頭新增: ``` #!/usr/bin/env node ``` ``` This line tells your system to use Node.js to execute this script. ``` 3. **實作邏輯:**下面的程式碼建立一個包含目錄和檔案的預定義專案結構: ``` const fs = require('fs'); // File System module to handle file operations // Define the project structure: directories and their respective files const projectStructure = { 'src': ['index.js'], 'public': ['index.html', 'styles.css'], }; // Iterate over the structure, creating directories and files Object.entries(projectStructure).forEach(([dir, files]) => { fs.mkdirSync(dir, { recursive: true }); // Create directories files.forEach(file => fs.writeFileSync(`${dir}/${file}`, '')); // Create files }); console.log("Project structure created successfully!"); ``` ``` Here's what each part of the code does: ``` - **需要 fs 模組:**這是 Node.js 的檔案系統模組,您將使用它來建立目錄和檔案。 - **定義專案結構:**我們指定要建立哪些目錄以及它們應包含哪些檔案。 - **建立目錄和檔案:**使用`fs.mkdirSync`和`fs.writeFileSync` ,腳本根據定義的結建置立每個目錄和檔案。 **4. 讓您的腳本可執行:**修改`package.json`以包含`"bin"`部分。這告訴 npm 哪個指令應該執行你的腳本: ``` `"bin": { ``` ``` "setup-project": "./index.js" ``` ``` }` ``` ### 第 3 步:在本地測試和連結您的工具 在分享您的工具之前,請先對其進行測試: 1. **連結您的工具:**在專案目錄中執行`npm link` 。此命令建立一個符號連結,允許您從終端中的任何位置執行 CLI 工具。 2. **執行您的工具:**只需在終端機的專案目錄中輸入`setup-project`即可。如果一切設定正確,您將看到“專案結構已成功建立!”訊息,以及提到的專案結構。 > 是的,就這樣! ### 第 4 步:增強功能 您的工具現在可以自動執行專案設置,但仍有改進的空間。考慮新增更多功能或處理使用者輸入來自訂專案結構。探索像`yargs`這樣的套件來解析命令列參數。您可以透過[此處的官方文件了解有關 yargs 的更多資訊。](https://yargs.js.org/) ### 第 5 步:在 npm 上分享您的工具 準備好與世界分享您的 CLI 工具了嗎?就是這樣: 1. **在 npm 上註冊:**如果您沒有帳戶,請在<https://www.npmjs.com/signup>建立帳戶。 2. **透過終端登入:**執行`npm login`並輸入您的 npm 憑證。 3. **發佈您的套件:**在您的專案目錄中,執行`npm publish` 。 恭喜!您的 CLI 工具現已在 npm 上提供,供所有人使用。 > 如果您已經關注我到這裡,請查看我用 Javascript 製作並發佈在 npm 上的第一個 CLI 工具:Naturalshell。 Naturalshell在您的終端中提供AI,現在無需記住shell命令! > 您可以[在此處查看 npm 套件](https://www.npmjs.com/package/naturalshell),[在此處查看 github 儲存庫](https://github.com/shreshthgoyal/naturalshell)。 > 請打 ⭐,並隨時加入新功能並與我一起在 naturalshell 上建置! > 該工具利用人工智慧來解析自然語言,並根據使用者的需求向使用者提供 shell 命令。除了提供命令之外,它還提供簡潔的解釋,確保使用者不僅知道要做什麼,而且了解其工作原理。憑藉直接在工具內編輯命令的便利性以及立即執行命令的能力,NaturalShell 提供了用戶友好、直觀的體驗 包起來 --- 您已經向使用 JavaScript 進行 CLI 工具開發的領域邁出了重要的第一步。透過建立一個簡單但實用的工具,您已經了解了建立、測試和發布 CLI 應用程式的基本知識。不斷嘗試、學習和建構。命令列是一個強大的盟友,現在,由您來指揮。快樂編碼! > 如果您發現本指南很有幫助並建立了您自己的出色 CLI 工具,我很樂意看到它!請在下面的評論部分分享您的 GitHub 儲存庫。讓我們一起建造吧! --- 原文出處:https://dev.to/shreshthgoyal/a-guide-to-building-cli-tools-in-javascript-28nn
如果您是開發人員,您就使用過程式語言。它們是讓電腦做你想做的事的好方法。也許您甚至已經深入研究過彙編或機器碼程式設計。許多人再也不想回來。但有些人想知道,我怎麼能透過做更多的低階程式來更折磨自己呢?我想更多地了解程式語言是如何製作的!開個玩笑,寫一門新語言並不像聽起來那麼糟糕,所以如果你有一點好奇心,我建議你留下來看看它是關於什麼的。 這篇文章的目的是簡單地介紹如何建立程式語言,以及如何建立自己的特殊語言。甚至可以用自己的名字命名。誰知道。 我還敢打賭,這似乎是一項令人難以置信的艱鉅任務。別擔心,因為我已經考慮過這一點。我盡力相對簡單地解釋了一切,沒有講*太多*離題的話。在這篇文章結束時,您將能夠建立自己的程式語言(將有幾個部分),但還有更多。了解幕後發生的事情會讓你更好地進行除錯。您將更能理解新的程式語言以及為何它們做出這樣的決定。如果我之前沒有提到的話,你可以擁有一種以你自己的名字命名的程式語言。而且,這真的很有趣。至少對我來說。 編譯器和解釋器 ------- 程式語言通常是高階的。也就是說,你看的不是0和1,也不是暫存器和組合程式碼。但是,您的電腦只能辨識 0 和 1,因此它需要一種方法來從您輕鬆讀取的內容轉變為機器可以輕鬆讀取的內容。該翻譯可以透過編譯或解釋來完成。 編譯是將原始語言的整個原始檔轉換為目標語言的過程。出於我們的目的,我們將考慮從全新的、最先進的語言一直編譯到可執行的機器碼。  我的目標是讓「魔法」消失 解釋是或多或少直接執行原始檔中的程式碼的過程。我會讓你覺得這很神奇。 那麼,如何從易於閱讀的原始語言變成難以理解的目標語言呢? 編譯器的階段 ------ 編譯器可以透過多種方式分為多個階段,但有一種方法是最常見的。當你第一次看到它時,它的意義不大,但它是這樣的:  哎呀,我選錯了圖,但這樣就可以了。基本上,您獲取原始文件,將其設置為計算機想要的格式(刪除空格之類的內容),將其更改為計算機可以很好地移動的格式,然後從中生成程式碼。還有更多。那是下次,或者如果你的好奇心快要殺死你的話,也可以供你自己研究。 詞法分析 ---- ### 又名“讓原始碼變得漂亮” 考慮以下完全虛構的語言,它基本上只是一個帶有分號的計算器: ``` // source.ect 3 + 3.2; 5.0 / 1.9; 6 * 2; ``` 計算機不需要所有這些。空間只適合我們狹隘的頭腦。還有新線?沒有人需要那些。電腦將您看到的程式碼轉換為可以使用的標記流,而不是原始檔案。基本上,它知道`3`是整數, `3.2`是浮點數, `+`是對這兩個值進行運算的東西。這就是計算機*真正*需要完成的全部工作。**詞法分析器**的工作是提供這些標記而不是原始程式。 它的實現方式非常簡單:給詞法分析器(詞法分析器的一種聽起來不那麼自命不凡的說法)一些期望的東西,然後告訴它當它看到這些東西時要做什麼。這些稱為*規則*。這是一個例子: ``` int cout << "I see an integer!" << endl; ``` 當 int 通過詞法分析器並執行此規則時,您將看到一個非常明顯的“我看到一個整數!”感嘆。這不是我們使用詞法分析器的方式,但看到程式碼執行是任意的很有用:沒有規則要求您必須建立某個物件並傳回它,它只是常規的舊程式碼。甚至可以用大括號括起來來使用多條線。 順便說一句,我們將使用稱為[FLEX 的](https://github.com/westes/flex)東西來進行詞法分析。它使事情變得非常簡單,但是沒有什麼可以阻止您自己編寫一個程式來執行此操作。 為了了解我們如何使用 flex,請看這個例子: ``` // scanner.lex /* Definitions */ %{ #include <iostream> using namespace std; extern "C" int yylex(); %} /* Rules next */ %% [0-9]+.[0-9]+ cout << "FLOAT: (" << yytext << ")" << endl; [0-9]+ cout << "INT: (" << yytext << ")" << endl; "+" cout << "PLUS" << endl; "-" cout << "MINUS" << endl; "*" cout << "TIMES" << endl; "/" cout << "DIVIDED BY" << endl; ";" cout << "SEMICOLON" << endl; [\t\r\n\f] ; /* ignore whitespace */ %% /* Code */ int main() { yylex(); } ``` 這引入了一些新概念,讓我們回顧一下它們: `%%`用於分隔 .lex 檔案的各個部分。第一部分是聲明 - 基本上是使詞法分析器更具可讀性的變數。這也是您導入的位置,由`%{`和`%}`包圍。 第二部分是規則,我們之前已經看過。這些基本上是一個大的`if` `else if`塊。它將執行*最長的匹配*行。因此,即使您更改 float 和 int 的順序,float 仍然會匹配,因為匹配`3.2`的 3 個字元比`3`的 1 個字元多。請注意,如果這些規則均不匹配,則會採用預設規則,只需將字元列印到標準輸出即可。然後,您可以使用`yytext`來引用它看到的與該規則相符的內容。 第三部分是程式碼,它只是在執行時執行的 C 或 C++ 原始碼。 `yylex();`是執行詞法分析器的函數呼叫。您也可以讓它從檔案中讀取輸入,但預設情況下它從標準輸入中讀取。 假設您將這兩個檔案建立為`source.ect`和`scanner.lex` 。我們可以使用`flex`命令建立一個 C++ 程式(假設您已經安裝了`flex` ),然後編譯它並輸入我們的原始程式碼以達到我們很棒的列印語句。讓我們將其付諸行動吧! ``` evan:ectlang/ $ flex scanner.lex evan:ectlang/ $ g++ lex.yy.c -lfl evan:ectlang/ $ ./a.out < source.ect INT: (3) PLUS FLOAT: (3.2) SEMICOLON FLOAT: (5.0) DIVIDED BY FLOAT: (1.9) SEMICOLON INT: (6) TIMES INT: (2) SEMICOLON evan:ectlang/ $ ``` 嘿,酷!您只需編寫將輸入與規則相符的 C++ 程式碼,以便執行某些操作。 現在,編譯器如何使用它?一般來說,每個規則都會返回一些東西,而不是打印一些東西——一個令牌!這些標記可以在編譯器的下一部分中定義... 語法分析器 ----- ### 又名“使漂亮的源程式碼可用” 是時候玩得開心了!一旦我們到達這裡,我們就開始定義程式的結構。解析器只是獲得一個標記流,它必須匹配該流中的元素,以使原始程式碼具有可用的結構。為了做到這一點,它使用了[語法](https://en.wikipedia.org/wiki/Formal_grammar),你可能在理論課上看到或聽到你奇怪的朋友閒聊的東西。它們非常強大,並且有很多東西需要了解,但我只會提供您需要了解的關於我們有點愚蠢的解析器的資訊。 基本上,語法將非終結符與終結符和非終結符的某種組合相匹配。終端是樹的葉子;非終端有孩子。如果這沒有意義,請不要擔心,程式碼可能會更容易理解。 我們將使用一個名為[Bison 的](https://www.gnu.org/software/bison/)解析器產生器。這次,為了解釋目的,我將把文件分成幾個部分。首先,聲明: ``` // parser.y %{ #include <iostream> using namespace std; extern "C" void yyerror(char *s); extern "C" int yyparse(); %} %union{ int intVal; float floatVal; } %start program %token <intVal> INTEGER_LITERAL %token <floatVal> FLOAT_LITERAL %token SEMI %type <floatVal> exp %type <floatVal> statement %left PLUS MINUS %left MULT DIV ``` 第一部分應該看起來很熟悉:我們正在導入我們想要使用的東西。之後就變得有點棘手了。 聯合是「真正的」C++ 類型到我們將在整個程式中呼叫它的類型的映射。因此,當我們看到`intVal`時,您可以將頭腦中的值替換為`int` ,而當我們看到`floatVal`時,您可以將頭腦中的值替換為`float` 。稍後你就會明白為什麼。 接下來我們來看看符號。您可以在腦海中將它們分為終結符和非終結符,就像我們之前討論的語法一樣。大寫字母表示終端,因此它們不會繼續擴展。小寫意味著非終結符,因此它們繼續擴展。這只是慣例。 每個聲明(以`%`開頭)聲明一些符號。首先,我們看到我們從一個非終端`program`開始。然後,我們定義一些標記。 `<>`括號定義回傳類型:因此`INTEGER_LITERAL`終端機回傳`intVal` 。 `SEMI`終端不會回傳任何內容。使用`type`可以對非終結符完成類似的操作,如將`exp`定義為傳回`floatVal`的非終結符時所見。 最後我們取得了優先權。我們知道 PEMDAS,或者您可能已經學過的任何其他縮寫詞,它告訴您一些簡單的優先規則:乘法在加法之前,等等。現在,我們以一種奇怪的方式在這裡聲明這一點。首先,清單中的位置越低意味著優先順序越高。其次,您可能想知道`left`是什麼意思。這就是關聯性:差不多,如果我們有`a op b op c` , `a`和`b`會在一起,還是`b`和`c`會在一起?我們的大多數運算子都執行前者,即`a`和`b`首先結合在一起:這稱為左結合性。某些運算子(例如求冪)會執行相反的操作: `a^b^c`期望您先提高`b^c`然後再提高`a^(b^c)` 。不過,我們不會處理這個問題。如果您想了解更多詳細訊息,請查看 Bison 頁面。 好吧,我可能已經厭倦了聲明,這是語法規則: ``` // parser.y %% program: /* empty */ | program statement { cout << "Result: " << $2 << endl; } ; statement: exp SEMI exp: INTEGER_LITERAL { $$ = $1; } | FLOAT_LITERAL { $$ = $1; } | exp PLUS exp { $$ = $1 + $3; } | exp MINUS exp { $$ = $1 - $3; } | exp MULT exp { $$ = $1 * $3; } | exp DIV exp { $$ = $1 / $3; } ; ``` 這就是我們之前講的文法。如果您不熟悉語法,這非常簡單:左側可以變成右側的任何內容,並用`|`分隔。 (邏輯`or` )。如果它可以走多條路徑,那就是不行的,我們稱之為*歧義語法*。由於我們的優先聲明,這並不含糊 - 如果我們更改它,使 plus 不再保持關聯,而是聲明為像`SEMI`這樣的`token` ,我們會看到發生移位/歸約衝突。想知道更多?看看Bison是如何運作的,提示,它使用LR解析演算法。 好的,所以`exp`可以是以下情況之一: `INTEGER_LITERAL` 、 `FLOAT_LITERAL`等。請注意,它也是遞歸的,因此`exp`可以變成兩個`exp` 。這允許我們使用複雜的表達式,例如`1 + 2 / 3 * 5` 。請記住,每個`exp`都會傳回一個 float 類型。 括號內的內容與我們在詞法分析器中看到的相同:任意 C++ 程式碼,但帶有更奇怪的語法糖。在這種情況下,我們有一些以`$`開頭的特殊變數。變數`$$`基本上就是回傳的內容。 `$1`是第一個參數傳回的內容, `$2`第二個參數傳回的內容,等等。我所說的「參數」是指語法規則的一部分:因此規則`exp PLUS exp`有參數 1 `exp` 、參數 2 `PLUS`和參數 3 `exp` 。因此,在程式碼執行中,我們將第一個表達式的結果加到第三個表達式中。 最後,一旦它回到`program`非終端,它將列印語句的結果。在這種情況下,程式是一堆語句,其中語句是一個表達式,後面跟著一個分號。 現在我們來編寫程式碼部分。這是當我們通過解析器時實際執行的內容: ``` // parser.y %% int main(int argc, char **argv) { if (argc < 2) { cout << "Provide a filename to parse!" << endl; exit(1); } FILE *sourceFile = fopen(argv[1], "r"); if (!sourceFile) { cout << "Could not open source file " << argv[1] << endl; exit(1); } // Sets input for flex to the file instead of standard in yyin = sourceFile; // Now let's parse it! yyparse(); } // Called on error with message s void yyerror(char *s) { cerr << s << endl; } ``` 好吧,這開始變得有趣了。我們的主函數現在從第一個參數提供的檔案而不是標準輸入中讀取,並且我們加入了一些錯誤程式碼。這是非常不言自明的,並且註釋很好地解釋了正在發生的事情,所以我將把它作為練習留給讀者來弄清楚這一點。您需要知道的是現在我們回到詞法分析器以向解析器提供標記!這是我們的新詞法分析器: ``` // scanner.lex %{ extern "C" int yylex(); #include "parser.tab.c" // Defines the tokens %} %% [0-9]+ { yylval.intVal = atoi(yytext); return INTEGER_LITERAL; } [0-9]+.[0-9]+ { yylval.floatVal = atof(yytext); return FLOAT_LITERAL; } "+" { return PLUS; } "-" { return MINUS; } "*" { return MULT; } "/" { return DIV; } ";" { return SEMI; } [ \t\r\n\f] ; /* ignore whitespace */ ``` 嘿嘿,現在確實變小了!我們看到的是,我們回傳的是終端符號,而不是列印。其中一些,例如整數和浮點數,我們首先在繼續之前設定值( `yylval`是終端符號的回傳值)。除此之外,它只是為解析器提供了一個終端標記流以供其自行決定使用。 酷,那麼讓我們執行吧! ``` evan:ectlang/ $ bison parser.y evan:ectlang/ $ flex scanner.lex evan:ectlang/ $ g++ lex.yy.c -lfl evan:ectlang/ $ ./a.out source.ect Result: 6.2 Result: 2.63158 Result: 12 ``` 我們開始了 - 我們的解析器列印出正確的值!但這並不是真正的編譯器,它只是執行 C++ 程式碼來執行我們想要的內容。為了製作編譯器,我們希望將其轉換為機器碼。為此,我們需要加入一點... 直到下次... ------- 我現在意識到這篇文章會比我想像的要長很多,所以我想我應該在這裡結束這篇文章。我們基本上有一個可用的詞法分析器和解析器,所以這是一個很好的停止點。 如果您對最終產品感到好奇,我已將原始程式碼放在[我的 Github](https://github.com/evantypanski/ectlang)上。隨著更多帖子的發布,該存儲庫將出現更多活動。 有了我們的詞法分析器和解析器,我們現在可以產生程式碼的中間表示,該中間表示最終可以轉換為真實的機器碼,我將向您展示具體的操作方法。 [第 2 部分來了!](https://dev.to/evantypanski/writing-a-simple-programming-language-from-scratch-part-2-2522) ### 其他資源 如果您想了解有關此處介紹的任何內容的更多訊息,我已經連結了一些內容以供您開始使用。我已經講了很多,所以這是我向您展示如何深入研究這些主題的機會。 - Flex 程式碼庫: <https://github.com/westes/flex> - 我們使用的詞法分析工具。 - Bison 文件: <https://www.gnu.org/software/bison/> - 我們使用的解析器產生器。這裡有很棒的文件。 - LALR 解析: <https://web.cs.dal.ca/~sjackson/lalr1.html> - 關於 LALR(1) 解析器(如 Bison 產生的解析器!)如何運作的精心解釋。 - 解決解析衝突: <http://www.cs.ecu.edu/karl/5220/spr16/Notes/Bottom-up/conflict.html> - 如何解決shift/reduce或reduce/reduce衝突,就像我們之前看到的那樣。 - Chomsky 層次結構: [https://en.wikipedia.org/wiki/Chomsky\_hierarchy](https://en.wikipedia.org/wiki/Chomsky_hierarchy) - 對此沒有詳細介紹,但我們使用了上下文無關語法,以便 Bison 可以編譯它。如果您需要上下文敏感性,那是為了後面的階段。 - 符號表: [https://www.tutorialspoint.com/compiler\_design/compiler\_design\_symbol\_table.htm](https://www.tutorialspoint.com/compiler_design/compiler_design_symbol_table.htm) - 使用符號表,編譯器如何處理變數。 哦,順便說一句,如果您不喜歡我的編譯器階段,這裡有一個實際的圖表。我仍然保留了符號表和錯誤處理程序。另請注意,許多圖表與此不同,但這最好地說明了我們所關心的內容。  --- 原文出處:https://dev.to/evantypanski/writing-a-simple-programming-language-from-scratch-part-1-54a2
今天,我們將學習如何使用 Wing 作為後端建立全端應用程式。  我們將使用 React 和 Vite 作為前端。 我知道還有其他框架,如 Vue、Angular 和 Next,但 React 仍然是最常見的,並且迄今為止有大量值得信賴的新創公司使用它。 如果您不知道, [React](https://github.com/facebook/react)是 Facebook 建立的開源程式庫,用於建立 Web 和本機使用者介面。正如您從儲存庫中看到的,它被超過 2040 萬開發人員使用。所以,這是值得的。 讓我們看看如何使用 Wing 作為後端。  --- [Wing](https://git.new/wing-repo) - 一種雲端程式語言。 ---------------------------------------------  Winglang 是一種專為雲端(又稱「面向雲端」)設計的新型開源程式語言。它允許您在雲端中建立應用程式,並且具有相當簡單的語法。 Wing 程式可以使用功能齊全的模擬器在本地執行(是的,不需要網路),也可以部署到任何雲端供應商。  Wing 需要 Node `v20 or higher` 。 建立一個父目錄(我們使用的`shared-counter` )並使用 Vite 使用新的 React 應用程式設定前端。您可以使用這個 npm 指令。 ``` npm create -y vite frontend -- --template react-ts // once installed, you can check if it's running properly. cd frontend npm install npm run dev ``` 您可以使用此 npm 命令安裝 Wing。 ``` npm install -g winglang ``` 您可以使用`wing -V`驗證安裝。 Wing 還提供官方[VSCode 擴充功能](https://marketplace.visualstudio.com/items?itemName=Monada.vscode-wing)和[IntelliJ](https://plugins.jetbrains.com/plugin/22353-wing) ,後者提供語法突出顯示、補全、轉到定義和嵌入式 Wing 控制台支援。您可以在建立應用程式之前安裝它! 建立後端目錄。 ``` mkdir ~/shared-counter/backend cd ~/shared-counter/backend ``` 建立一個新的空 Wing 專案。 ``` wing new empty // This will generate three files: package.json, package-lock.json and main.w file with a simple "hello world" program wing it // to run it in the Wing simulator // The Wing Simulator will be opened in your browser and will show a map of your app with a single function. //You can invoke the function from the interaction panel and check out the result. ``` 使用指令`wing new empty`後的結構如下。 ``` bring cloud; // define a queue, a bucket, and a counter let bucket = new cloud.Bucket(); let counter = new cloud.Counter(initial: 1); let queue = new cloud.Queue(); // When a message is received in the queue -> it should be consumed // by the following closure queue.setConsumer(inflight (message: str) => { // Increment the distributed counter, the index variable will // store the value before the increment let index = counter.inc(); // Once two messages are pushed to the queue, e.g. "Wing" and "Queue". // Two files will be created: // - wing-1.txt with "Hello Wing" // - wing-2.txt with "Hello Queue" bucket.put("wing-{index}.txt", "Hello, {message}"); log("file wing-{index}.txt created"); }); ``` 您可以安裝`@winglibs/vite`來啟動開發伺服器,而不是使用`npm run dev`來啟動本機 Web 伺服器。 ``` // in the backend directory npm i @winglibs/vite ``` 您可以使用`backend/main.w`中提供的 publicEnv 將資料傳送到前端。 讓我們來看一個小例子。 ``` // backend/main.w bring vite; new vite.Vite( root: "../frontend", publicEnv: { TITLE: "Wing + Vite + React" } ); // import it in frontend // frontend/src/App.tsx import "../.winglibs/wing-env.d.ts" //You can access that value like this. <h1>{window.wing.env.TITLE}</h1> ``` 你還可以做更多: - 讀取/更新 API 路線並使用 Wing Simulator 檢查它。 - 使用後端獲取值。 - 使用`@winglibs/websockets`同步瀏覽器,它在後端部署一個 WebSocket 伺服器,您可以連接此 WebSocket 來接收即時通知。 您可以閱讀完整的逐步指南,以了解[如何使用 React 作為前端和 Wing 作為後端建立簡單的 Web 應用程式](https://www.winglang.io/docs/guides/react-vite-websockets)。測試是使用 Wing Simulator 完成的,並使用 Terraform 部署到 AWS。 部署後的AWS架構是這樣的。 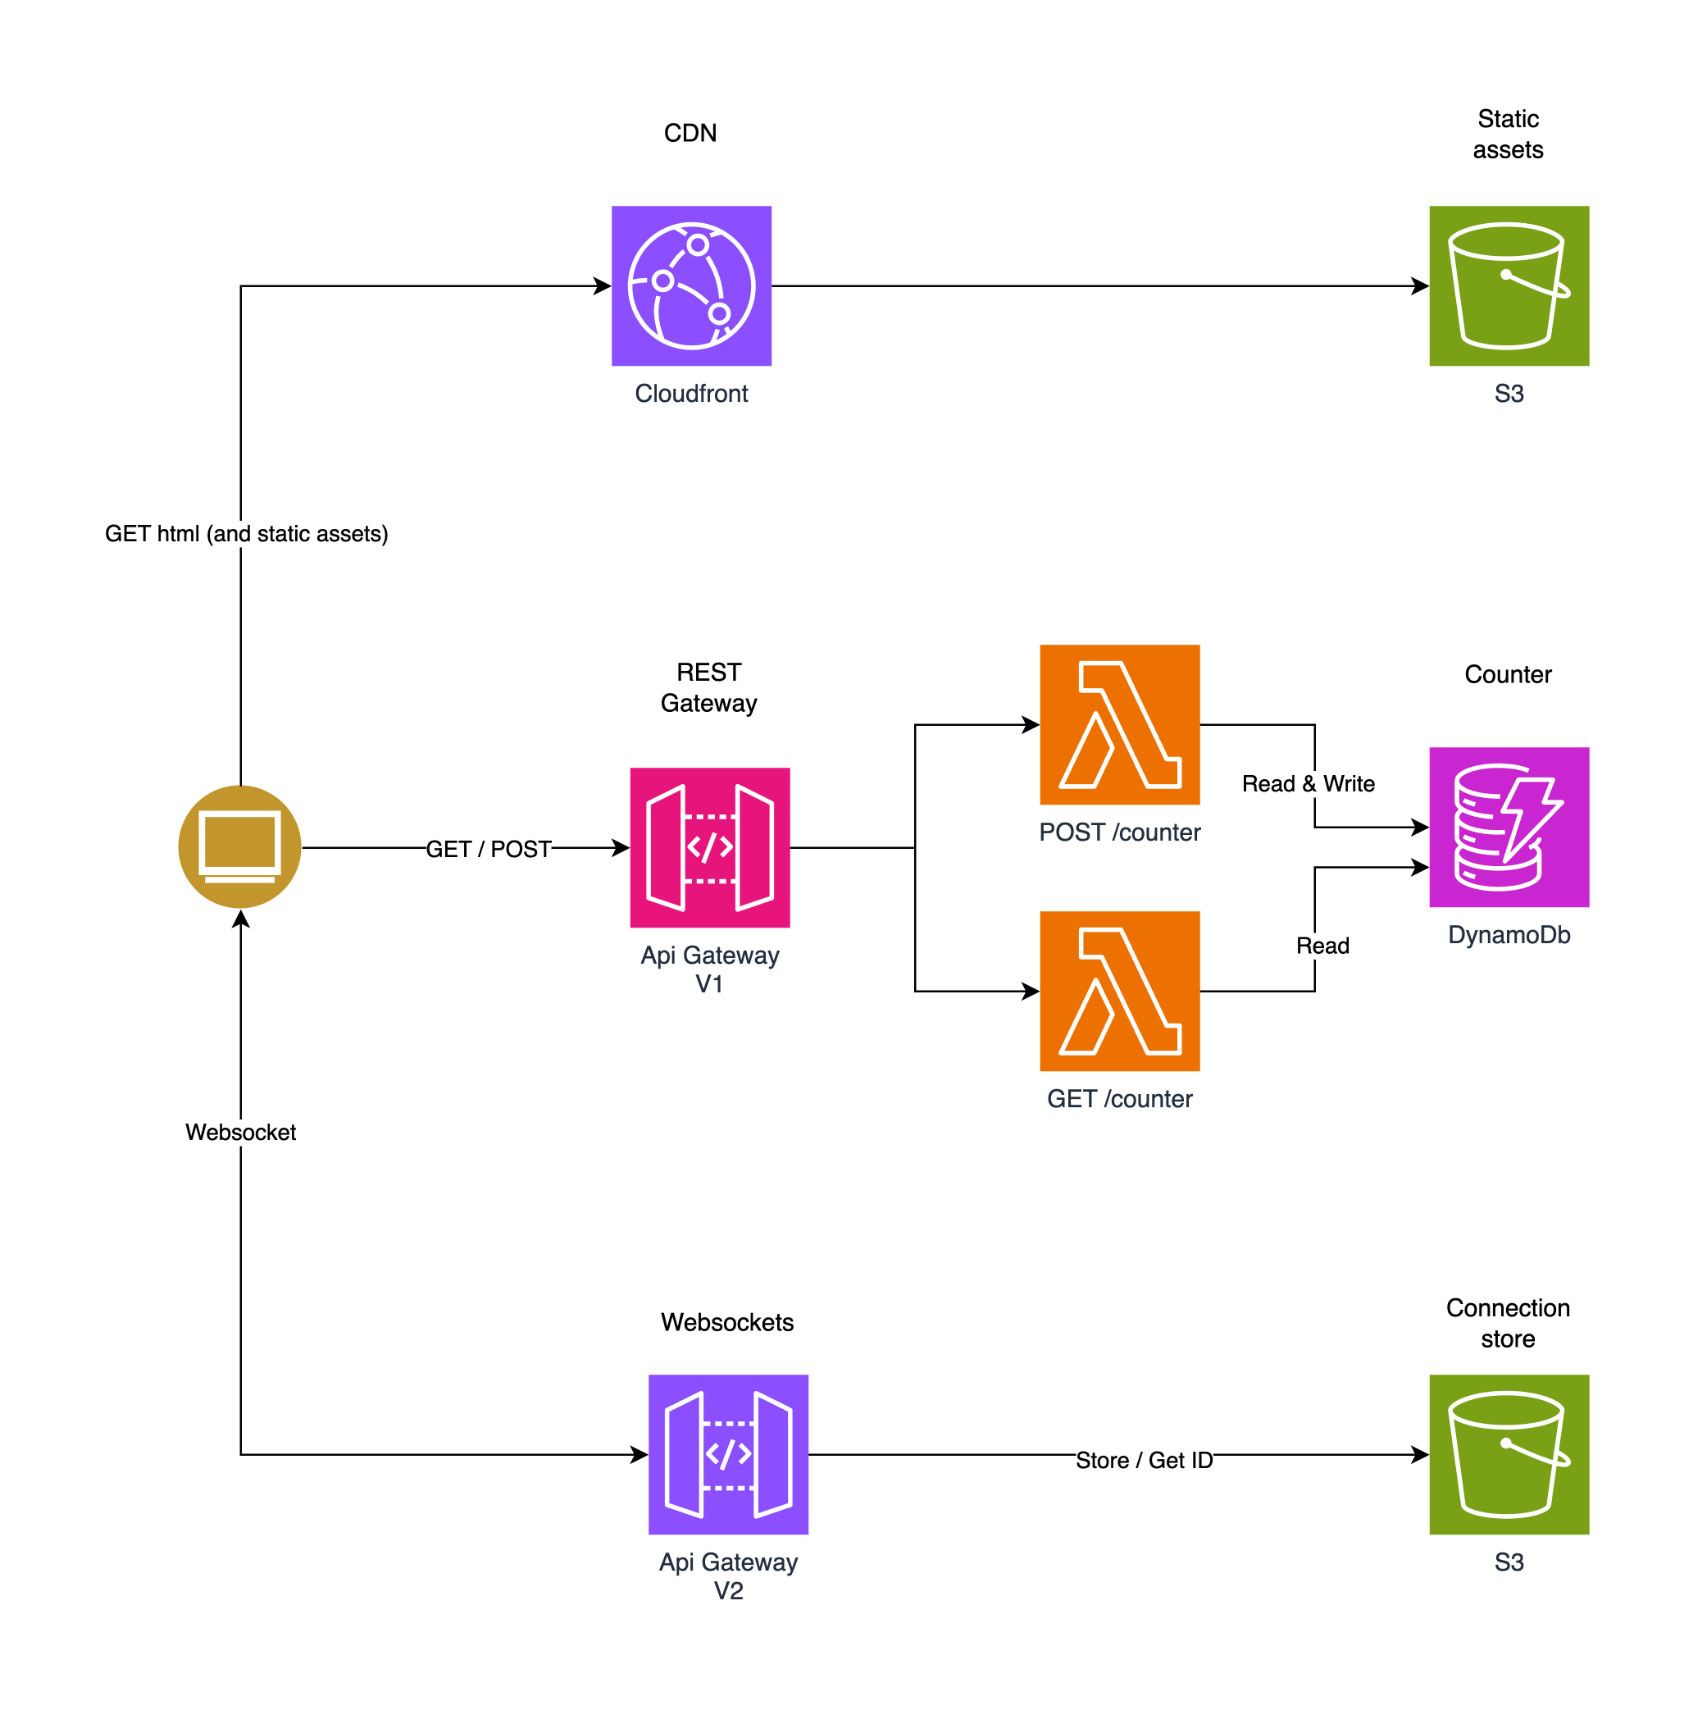 為了提供開發者選擇和更好的體驗,Wing 推出了對[TypeScript (Wing)](https://www.winglang.io/docs/typescript/)等其他語言的全面支援。唯一強制性的事情是您必須安裝 Wing SDK。 這也將使控制台完全可用於本地偵錯和測試,而無需學習 Wing 語言。 Wing 甚至還有其他[指南](https://www.winglang.io/docs/category/guides),因此更容易遵循。 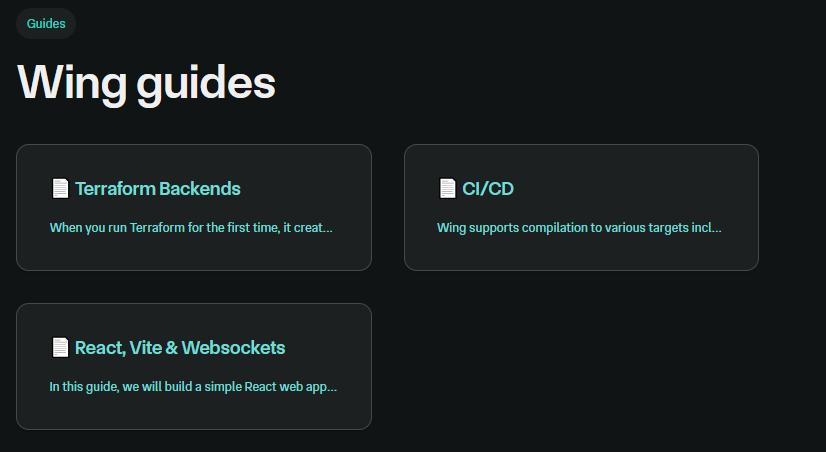 您可以閱讀[文件](https://www.winglang.io/docs)並查看[範例](https://www.winglang.io/docs/category/examples)。 您也可以在[Playground](https://www.winglang.io/play/?code=LwAvACAAVABoAGkAcwAgAGkAcwAgAHQAaABlACAAaQBtAHAAbwByAHQAIABzAHQAYQB0AGUAbQBlAG4AdAAgAGkAbgAgAFcAaQBuAGcALgAKAC8ALwAgAEgAZQByAGUAIAB3AGUAIABiAHIAaQBuAGcAIAB0AGgAZQAgAFcAaQBuAGcAIABzAHQAYQBuAGQAYQByAGQAIABsAGkAYgByAGEAcgB5ACAAdABoAGEAdAAgAAoALwAvACAAYwBvAG4AdABhAGkAbgBzACAAYQBiAHMAdAByAGEAYwB0AGkAbwBuAHMAIABvAGYAIABwAG8AcAB1AGwAYQByACAAYwBsAG8AdQBkACAAcwBlAHIAdgBpAGMAZQBzAC4ACgBiAHIAaQBuAGcAIABjAGwAbwB1AGQAOwAKAAoALwAvACAAVABoAGkAcwAgAGMAbwBkAGUAIABkAGUAZgBpAG4AZQBzACAAYQAgAGIAdQBjAGsAZQB0ACAAYQBzACAAcABhAHIAdAAgAG8AZgAgAHkAbwB1AHIAIABhAHAAcAAuAAoALwAvACAAVwBoAGUAbgAgAGMAbwBtAHAAaQBsAGkAbgBnACAAdABvACAAYQAgAHMAcABlAGMAaQBmAGkAYwAgAGMAbABvAHUAZAAgAHAAcgBvAHYAaQBkAGUAcgAKAC8ALwAgAGkAdAAgAHcAaQBsAGwAIABiAGUAIABzAHUAYgBzAHQAaQB0AHUAdABlAGQAIABiAHkAIABhAG4AIABpAG0AcABsAGUAbQBlAG4AdABhAHQAaQBvAG4AIABmAG8AcgAKAC8ALwAgAHQAaABhAHQAIABjAGwAbwB1AGQALgAgAEkALgBlACwAIABmAG8AcgAgAEEAVwBTACAAaQB0ACAAdwBpAGwAbAAgAGIAZQAgAGEAbgAgAFMAMwAgAEIAdQBjAGsAZQB0AC4ACgBsAGUAdAAgAGIAdQBjAGsAZQB0ACAAPQAgAG4AZQB3ACAAYwBsAG8AdQBkAC4AQgB1AGMAawBlAHQAKAApADsACgAKAC8ALwAgACEAIQAhACEAIQAhACEAIQAhACEAIQAhACEAIQAhACEAIQAhACEAIQAhACEAIQAhACEAIQAhACEAIQAhACEAIQAhACEAIQAhACEAIQAhACEAIQAhACEAIQAhACEAIQAhACEAIQAKAC8ALwAgAFkAbwB1ACAAYwBhAG4AIABpAG4AdABlAHIAYQBjAHQAIAB3AGkAdABoACAAdABoAGUAIABhAHAAcAAgAGkAbgAgAHQAaABlACAAYwBvAG4AcwBvAGwAZQAgAC0ALQA%2BAAoALwAvACAACgAvAC8AIABDAGwAaQBjAGsAIABvAG4AIAB0AGgAZQAgAEYAdQBuAGMAdABpAG8AbgAsACAAYQBuAGQAIAB0AGgAZQBuACAAaQBuAHYAbwBrAGUAIABpAHQAIABpAG4AIAB0AGgAZQAKAC8ALwAgAGwAbwB3AGUAcgAgAHIAaQBnAGgAdAAgAHAAYQBuAGUAbAAsACAAbwByACAAYwBsAGkAYwBrACAAbwBuACAAdABoAGUAIABCAHUAYwBrAGUAdAAKAC8ALwAgAHQAbwAgAHMAZQBlACAAaQB0AHMAIABjAG8AbgB0AGUAbgB0AHMAIABpAG4AIAB0AGgAZQAgAHAAYQBuAGUAbAAsACAAZQB0AGMALgAKAC8ALwAgACEAIQAhACEAIQAhACEAIQAhACEAIQAhACEAIQAhACEAIQAhACEAIQAhACEAIQAhACEAIQAhACEAIQAhACEAIQAhACEAIQAhACEAIQAhACEAIQAhACEAIQAhACEAIQAhACEAIQAKAAoALwAvACAAYABpAG4AZgBsAGkAZwBoAHQAcwBgACAAcgBlAHAAcgBlAHMAZQBuAHQAIABjAG8AZABlACAAdABoAGEAdAAgAHIAdQBuAHMAIABsAGEAdABlAHIALAAgAG8AbgAKAC8ALwAgAG8AdABoAGUAcgAgAG0AYQBjAGgAaQBuAGUAcwAsACAAaQBuAHQAZQByAGEAYwB0AGkAbgBnACAAdwBpAHQAaAAgAGMAYQBwAHQAdQByAGUAZAAgAGQAYQB0AGEAIABhAG4AZAAKAC8ALwAgAHIAZQBzAG8AdQByAGMAZQBzACAAZgByAG8AbQAgAHQAaABlACAAcAByAGUALQBmAGwAaQBnAGgAdAAgAHAAaABhAHMAZQAuAAoAbABlAHQAIABoAGUAbABsAG8AXwB3AG8AcgBsAGQAIAA9ACAAaQBuAGYAbABpAGcAaAB0ACAAKAApACAAPQA%2BACAAewAKACAAIABiAHUAYwBrAGUAdAAuAHAAdQB0ACgAIgBoAGUAbABsAG8ALgB0AHgAdAAiACwAIAAiAEgAZQBsAGwAbwAsACAAVwBvAHIAbABkACEAIgApADsACgB9ADsACgAKAC8ALwAgAEkAbgBmAGwAaQBnAGgAdABzACAAYwBhAG4AIABiAGUAIABkAGUAcABsAG8AeQBlAGQAIABhAHMAIABzAGUAcgB2AGUAcgBsAGUAcwBzACAAZgB1AG4AYwB0AGkAbwBuAHMACgBuAGUAdwAgAGMAbABvAHUAZAAuAEYAdQBuAGMAdABpAG8AbgAoAGgAZQBsAGwAbwBfAHcAbwByAGwAZAApADsACgAgACAAIAAgACAAIAAgACAAIAAgACAAIAAgACAAIAAgACAAIAAgACAAIAAgACAAIAAgACAAIAAgACAAIAAgACAAIAAgACAAIAAgACAACgAvAC8AIACRISAAUwB3AGkAdABjAGgAIABmAGkAbABlAHMAIABhAG4AZAAgAHMAZQBlACAAbwB0AGgAZQByACAAZQB4AGEAbQBwAGwAZQBzACAAdwBpAHQAaAAgAG0AbwByAGUACgAvAC8AIABlAHgAcABsAGUAbgBhAHQAaQBvAG4AcwAgAGEAYgBvAHYAZQAuAA%3D%3D)中使用 Wing 查看結構和範例。 如果你比較像輔導員。看這個! https://www.youtube.com/watch?v=wzqCXrsKWbo Wing 在 GitHub 上擁有超過 3500 個 Star,發布了 1500 多個版本,但仍未進入 v1 版本,這意味著意義重大。 去嘗試一下,做一些很酷的事情吧! https://git.new/wing-repo 星翼 ⭐️ --- 開發者生態系統不斷發展,許多開發者圍繞 React 建置了一些獨特的東西。 我不會介紹如何使用 React,因為這是一個非常廣泛的主題,我在最後貼了一些資源來幫助您學習 React。 但為了幫助您建立出色的 React 專案,我們介紹了 25 個開源專案,您可以使用它們來使您的工作更輕鬆。 這將有大量的資源、想法和概念。 我甚至會給你一些學習資源,以及一些產品的專案範例來學習 React。 一切都是免費的,而且只有 React。 讓我們涵蓋這一切! --- 1. [Mantine Hooks](https://www.npmjs.com/package/@mantine/hooks) - 用於狀態和 UI 管理的 React hooks。 -------------------------------------------------------------------------------------------- 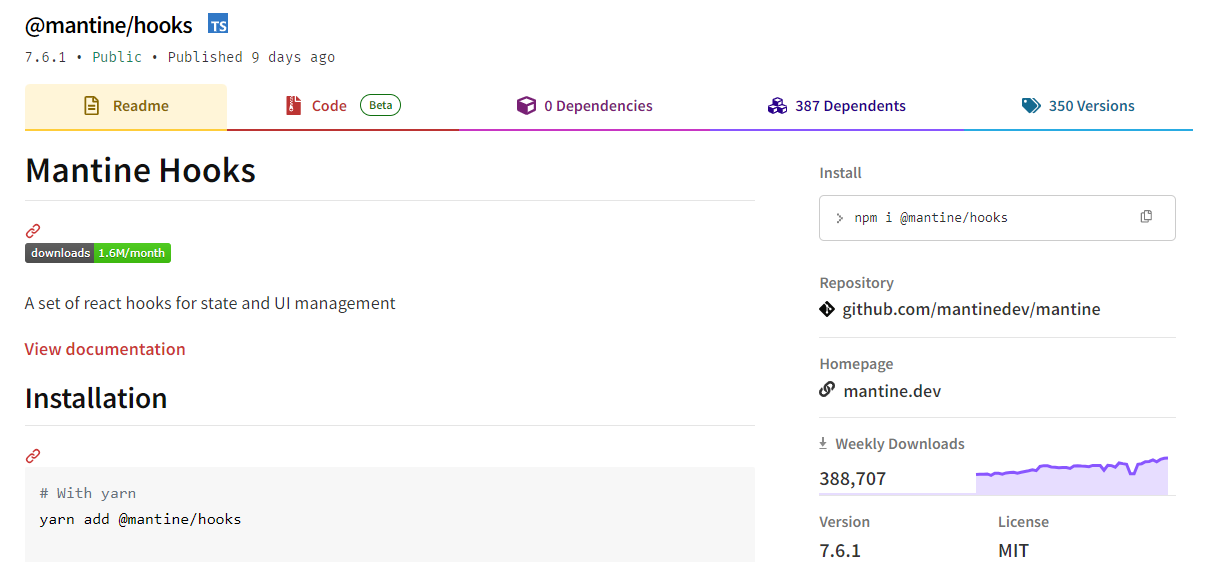 這可能不是專門針對 React 的,但是您可以使用這些鉤子來使您的工作更輕鬆。這些鉤子隨時可用,每個鉤子都有許多選項。 如果我必須評價的話,這將是每個人都可以使用的最有用的專案,而不是從頭開始編寫程式碼。 相信我,獲得 60 多個 Hooks 是一件大事,因為他們有一個簡單的方法讓您可以透過簡單的文件查看每個 Hooks 的演示。 開始使用以下 npm 指令。 ``` npm install @mantine/hooks ``` 這就是如何使用`useScrollIntoView`作為 mantine 掛鉤的一部分。 ``` import { useScrollIntoView } from '@mantine/hooks'; import { Button, Text, Group, Box } from '@mantine/core'; function Demo() { const { scrollIntoView, targetRef } = useScrollIntoView<HTMLDivElement>({ offset: 60, }); return ( <Group justify="center"> <Button onClick={() => scrollIntoView({ alignment: 'center', }) } > Scroll to target </Button> <Box style={{ width: '100%', height: '50vh', backgroundColor: 'var(--mantine-color-blue-light)', }} /> <Text ref={targetRef}>Hello there</Text> </Group> ); } ``` 它們幾乎擁有從本地儲存到分頁、滾動視圖、交叉點,甚至一些非常酷的實用程式(例如滴管和文字選擇)的所有功能。這實在太有幫助了! 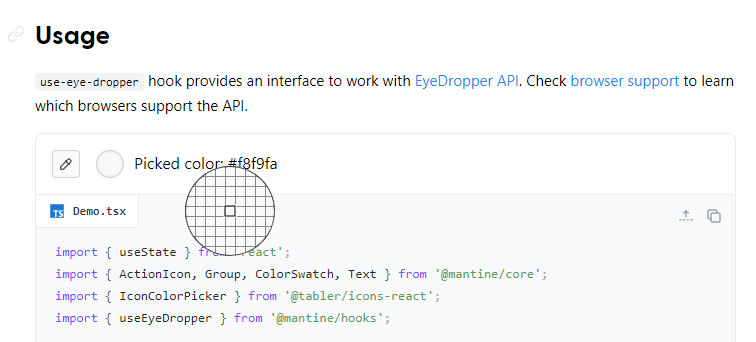 您可以閱讀[文件](https://mantine.dev/hooks/use-click-outside/)。 如果您正在尋找更多選項,您也可以使用[替代庫](https://antonioru.github.io/beautiful-react-hooks/)。 他們在 GitHub 上擁有超過 23k star,但這不僅僅是為了 hooks,因為他們是 React 的元件庫。 隨著`v7`版本的發布,它的每週下載量已超過 38 萬次,這表明它們正在不斷改進且值得信賴。 https://github.com/mantinedev/mantine Star Mantine Hooks ⭐️ --- 2. [React Grid Layout](https://github.com/react-grid-layout/react-grid-layout) - 可拖曳且可調整大小的網格佈局,具有響應式斷點。 --------------------------------------------------------------------------------------------------------  React-Grid-Layout 是專為 React 應用程式建構的響應式網格佈局系統。 透過支援可拖曳、可調整大小和靜態小部件,它提供了使用網格的簡單解決方案。 與 Packery 或 Gridster 等類似系統不同,React-Grid-Layout 不含 jQuery,確保輕量級且高效的實作。 它與伺服器渲染應用程式的無縫整合以及序列化和恢復佈局的能力使其成為開發人員在 React 專案中使用網格佈局的寶貴工具。 開始使用以下 npm 指令。 ``` npm install react-grid-layout ``` 這就是如何使用響應式網格佈局。 ``` import { Responsive as ResponsiveGridLayout } from "react-grid-layout"; class MyResponsiveGrid extends React.Component { render() { // {lg: layout1, md: layout2, ...} const layouts = getLayoutsFromSomewhere(); return ( <ResponsiveGridLayout className="layout" layouts={layouts} breakpoints={{ lg: 1200, md: 996, sm: 768, xs: 480, xxs: 0 }} cols={{ lg: 12, md: 10, sm: 6, xs: 4, xxs: 2 }} > <div key="1">1</div> <div key="2">2</div> <div key="3">3</div> </ResponsiveGridLayout> ); } } ``` 您可以閱讀[文件](https://github.com/react-grid-layout/react-grid-layout?tab=readme-ov-file#installation)並查看[演示](https://react-grid-layout.github.io/react-grid-layout/examples/0-showcase.html)。有一系列[演示](https://github.com/react-grid-layout/react-grid-layout?tab=readme-ov-file#demos),甚至可以透過點擊“查看下一個範例”來獲得。 您也可以嘗試[codesandbox](https://codesandbox.io/p/devbox/github/gilbarbara/react-joyride-demo/tree/main/?embed=1)上的東西。 該專案在 GitHub 上有超過 19k+ 的星星,有超過 16k+ 的開發者使用,並且[npm 套件](https://www.npmjs.com/package/react-grid-layout)的每週下載量超過 600k+。 https://github.com/react-grid-layout/react-grid-layout 明星 React 網格佈局 ⭐️ --- 3. [React Spectrum](https://github.com/adobe/react-spectrum) - 提供出色使用者體驗的程式庫和工具的集合。 -----------------------------------------------------------------------------------  React Spectrum 是一個庫和工具的集合,可幫助您建立自適應、可存取且強大的使用者體驗。 它們提供了太多的東西,以至於很難在一篇文章中涵蓋所有內容。 總的來說,他們提供了這四個庫。 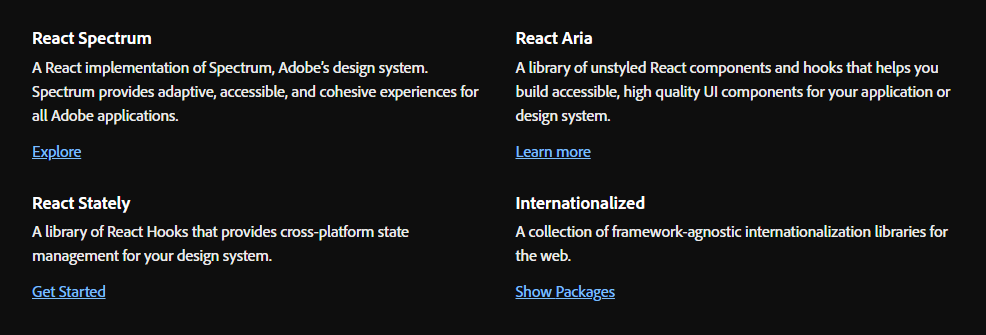 - [反應譜](https://react-spectrum.adobe.com/react-spectrum/index.html) - [React Stately](https://react-spectrum.adobe.com/react-stately/index.html) - 一組龐大的 React Hooks,為您的設計系統提供跨平台狀態管理。 - [反應詠嘆調](https://react-spectrum.adobe.com/react-aria/index.html) - [國際化](https://react-spectrum.adobe.com/internationalized/index.html) 我們將了解一些有關 React Aria 的內容,它是一個無樣式 React 元件和鉤子庫,可幫助您為應用程式建立可存取的、高品質的 UI 元件。 它經過了各種設備、互動方式和輔助技術的精心測試,以確保為所有用戶提供最佳體驗。 開始使用以下 npm 指令。 ``` npm i react-aria-components ``` 這就是建立自訂`select`的方法。 ``` import {Button, Label, ListBox, ListBoxItem, Popover, Select, SelectValue} from 'react-aria-components'; <Select> <Label>Favorite Animal</Label> <Button> <SelectValue /> <span aria-hidden="true">▼</span> </Button> <Popover> <ListBox> <ListBoxItem>Cat</ListBoxItem> <ListBoxItem>Dog</ListBoxItem> <ListBoxItem>Kangaroo</ListBoxItem> </ListBox> </Popover> </Select> ``` 相信我,出於學習目的,這是一座金礦。 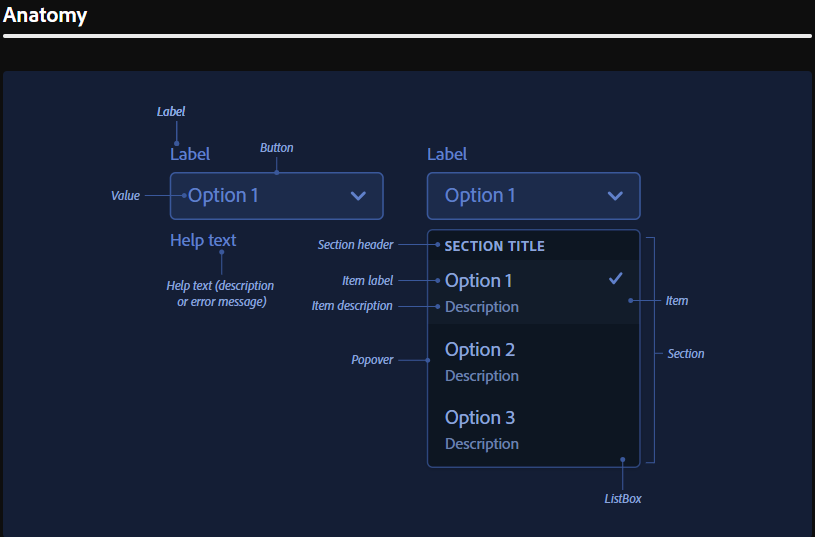 他們使用自己強大的[40 多個樣式元件](https://opensource.adobe.com/spectrum-css/),這比通常提供的要多得多。他們也有自己的一套[設計系統,](https://spectrum.adobe.com/)例如字體、UI、版面、動作等等。   您可以詳細了解[Spectrum](https://react-spectrum.adobe.com/index.html)及其[架構](https://react-spectrum.adobe.com/architecture.html)。 他們在 GitHub 上擁有超過 11,000 顆星,這表明了他們的質量,儘管他們並不廣為人知。研究它們可以為您建立圖書館提供寶貴的見解。 https://github.com/adobe/react-spectrum Star React Spectrum ⭐️ --- 4.[保留 React](https://github.com/StaticMania/keep-react) - Tailwind CSS 和 React.js 的 UI 元件庫。 -------------------------------------------------------------------------------------------  Keep React 是一個基於 Tailwind CSS 和 React.js 建立的開源元件庫。它提供了一組多功能的預先設計的 UI 元件,使開發人員能夠簡化現代、響應式且具有視覺吸引力的 Web 應用程式的建立。 開始使用以下 npm 指令。 ``` npm i keep-react ``` 這就是使用時間軸的方法。 ``` "use client"; import { Timeline } from "keep-react"; import { CalendarBlank } from "phosphor-react"; export const TimelineComponent = () => { return ( <Timeline horizontal={true}> <Timeline.Item> <Timeline.Point icon={<CalendarBlank size={16} />} /> <Timeline.Content> <Timeline.Title>Keep Library v1.0.0</Timeline.Title> <Timeline.Time>Released on December 2, 2021</Timeline.Time> <Timeline.Body> Get started with dozens of web components and interactive elements. </Timeline.Body> </Timeline.Content> </Timeline.Item> <Timeline.Item> <Timeline.Point icon={<CalendarBlank size={16} />} /> <Timeline.Content> <Timeline.Title>Keep Library v1.1.0</Timeline.Title> <Timeline.Time>Released on December 23, 2021</Timeline.Time> <Timeline.Body> Get started with dozens of web components and interactive elements. </Timeline.Body> </Timeline.Content> </Timeline.Item> <Timeline.Item> <Timeline.Point icon={<CalendarBlank size={16} />} /> <Timeline.Content> <Timeline.Title>Keep Library v1.3.0</Timeline.Title> <Timeline.Time>Released on January 5, 2022</Timeline.Time> <Timeline.Body> Get started with dozens of web components and interactive elements. </Timeline.Body> </Timeline.Content> </Timeline.Item> </Timeline> ); } ``` 輸出如下。 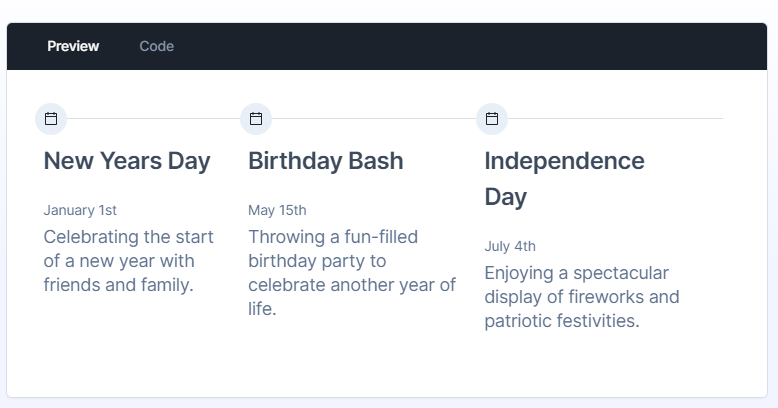 流暢的小動畫讓這一切都是值得的,如果你想快速建立一個 UI,沒有任何麻煩,你可以使用它。   您可以閱讀[文件](https://react.keepdesign.io/docs/getting-started/Introduction)並查看[故事書](https://react-storybook.keepdesign.io/?path=/docs/components-accordion--docs)以進行詳細的使用測驗。 該專案在 GitHub 上有超過 1000 顆星,而且它的一些元件使用起來非常方便。 https://github.com/StaticMania/keep-react Star Keep React ⭐️ --- 5. [React Content Loader](https://github.com/danilowoz/react-content-loader) - SVG 支援的元件,可輕鬆建立骨架載入。 ---------------------------------------------------------------------------------------------------  該專案為您提供了一個由 SVG 驅動的元件,可以輕鬆建立佔位符載入(如 Facebook 的卡片載入)。 在載入狀態期間使用骨架來向使用者指示內容仍在載入。 總的來說,這是一個非常方便的專案,可以增強整體使用者體驗。 開始使用以下 npm 指令。 ``` npm i react-content-loader --save ``` 您可以這樣使用它。 ``` import React from "react" import ContentLoader from "react-content-loader" const MyLoader = (props) => ( <ContentLoader speed={2} width={400} height={160} viewBox="0 0 400 160" backgroundColor="#f3f3f3" foregroundColor="#ecebeb" {...props} > <rect x="48" y="8" rx="3" ry="3" width="88" height="6" /> <rect x="48" y="26" rx="3" ry="3" width="52" height="6" /> <rect x="0" y="56" rx="3" ry="3" width="410" height="6" /> <rect x="0" y="72" rx="3" ry="3" width="380" height="6" /> <rect x="0" y="88" rx="3" ry="3" width="178" height="6" /> <circle cx="20" cy="20" r="20" /> </ContentLoader> ) export default MyLoader ``` 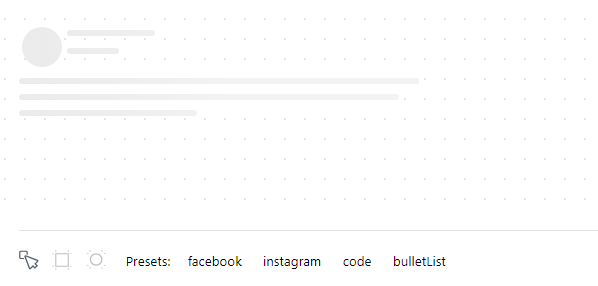 您甚至可以拖曳單一骨架或使用為 Facebook 和 Instagram 等不同社群媒體預先定義的骨架。 您可以閱讀[文件](https://github.com/danilowoz/react-content-loader?tab=readme-ov-file#gettingstarted)並查看[演示](https://skeletonreact.com/)。 該專案在 GitHub 上擁有 13k+ Stars,並在 GitHub 上有 45k+ 開發人員使用。 https://github.com/danilowoz/react-content-loader Star React 內容載入器 ⭐️ --- 6. [React PDF](https://github.com/diegomura/react-pdf) - 使用 React 建立 PDF 檔案。 ---------------------------------------------------------------------------- 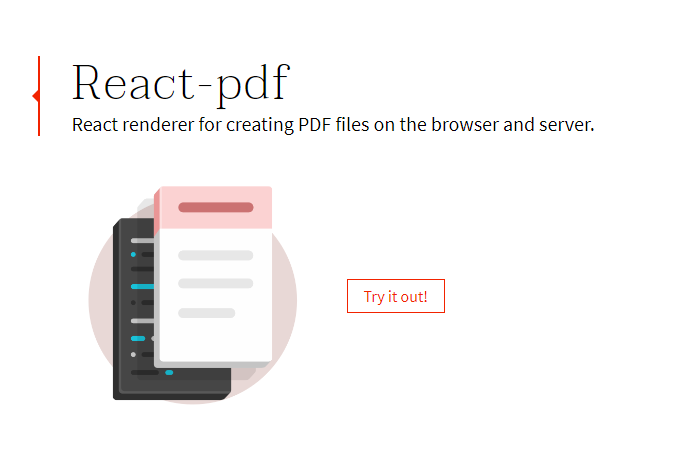 該套件用於使用 React 建立 PDF。 開始使用以下 npm 指令。 ``` npm install @react-pdf/renderer --save ``` 您可以這樣使用它。 ``` import React from 'react'; import { Document, Page, Text, View, StyleSheet } from '@react-pdf/renderer'; // Create styles const styles = StyleSheet.create({ page: { flexDirection: 'row', backgroundColor: '#E4E4E4', }, section: { margin: 10, padding: 10, flexGrow: 1, }, }); // Create Document Component const MyDocument = () => ( <Document> <Page size="A4" style={styles.page}> <View style={styles.section}> <Text>Section #1</Text> </View> <View style={styles.section}> <Text>Section #2</Text> </View> </Page> </Document> ); ```   您可以閱讀[文件](https://react-pdf.org/)並查看[演示](https://react-pdf.org/repl)。 React-pdf 現在提供了一個名為`usePDF`的鉤子,可以透過 React hook API 存取所有 PDF 建立功能。如果您需要更多控製文件的呈現方式或更新頻率,這非常有用。 ``` const [instance, update] = usePDF({ document }); ``` 該專案在 GitHub 上有 13k+ Stars,有超過 270 個版本,[每週下載量超過 400k](https://www.npmjs.com/package/@react-pdf/renderer) ,這是一個好兆頭。 https://github.com/diegomura/react-pdf Star React PDF ⭐️ --- 7. [Recharts](https://github.com/recharts/recharts) - 使用 React 和 D3 建立的重新定義的圖表庫。 --------------------------------------------------------------------------------  該庫的主要目的是幫助您輕鬆地在 React 應用程式中編寫圖表。 Recharts 的主要原則是。 1. 只需使用 React 元件進行部署即可。 2. 原生 SVG 支持,輕量級,僅依賴一些 D3 子模組。 3. 聲明性元件、圖表元件純粹是表示性的。 開始使用以下 npm 指令。 ``` npm install recharts ``` 您可以這樣使用它。 ``` <LineChart width={500} height={300} data={data} accessibilityLayer> <XAxis dataKey="name"/> <YAxis/> <CartesianGrid stroke="#eee" strokeDasharray="5 5"/> <Line type="monotone" dataKey="uv" stroke="#8884d8" /> <Line type="monotone" dataKey="pv" stroke="#82ca9d" /> <Tooltip/> </LineChart> ``` 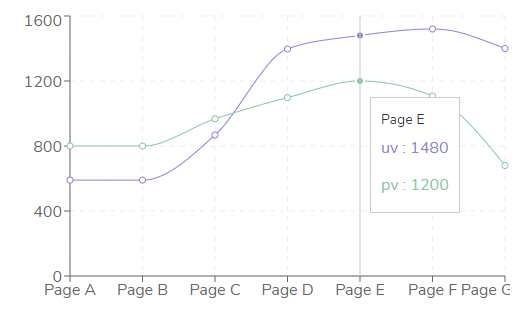 您可以閱讀[文件](https://recharts.org/en-US/guide)並查看有關[Storybook](https://recharts.org/en-US/storybook)的更多資訊。 他們提供了大量的選項來自訂它,這就是開發人員喜歡它的原因。他們也提供一般常見問題的[wiki](https://github.com/recharts/recharts/wiki)頁面。 您也可以在此處的codesandbox 上嘗試。 https://codesandbox.io/embed/kec3v?view=Editor+%2B+Preview&module=%2Fsrc%2Findex.tsx 該專案在 GitHub 上有 22k+ Stars,有 200k+ 開發人員使用。 https://github.com/recharts/recharts 明星 Recharts ⭐️ --- 8. [React Joyride](https://github.com/gilbarbara/react-joyride) - 在您的應用程式中建立導遊。 -------------------------------------------------------------------------------  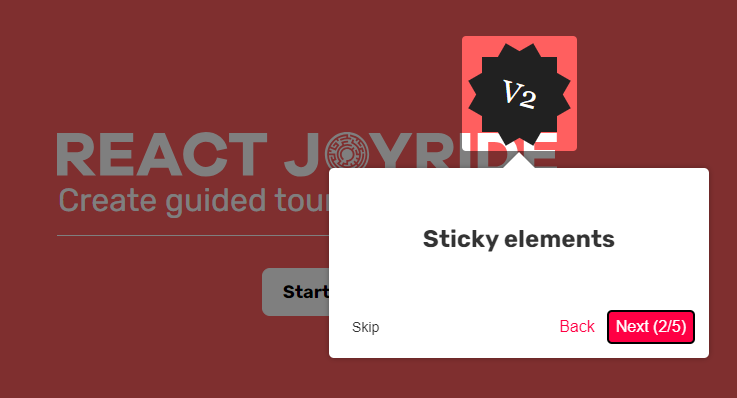 導覽是向新用戶展示您的應用程式或解釋新功能的絕佳方式。它改善了用戶體驗並可以創造個人化的觸感。 開始使用以下 npm 指令。 ``` npm i react-joyride ``` 您可以這樣使用它。 ``` import React, { useState } from 'react'; import Joyride from 'react-joyride'; /* * If your steps are not dynamic you can use a simple array. * Otherwise you can set it as a state inside your component. */ const steps = [ { target: '.my-first-step', content: 'This is my awesome feature!', }, { target: '.my-other-step', content: 'This another awesome feature!', }, ]; export default function App() { // If you want to delay the tour initialization you can use the `run` prop return ( <div> <Joyride steps={steps} /> ... </div> ); } ``` 它們還提供[元件列表](https://docs.react-joyride.com/custom-components)以及自訂預設用戶介面的簡單方法。 您可以閱讀[文件](https://docs.react-joyride.com/)並查看[演示](https://react-joyride.com/)。 您也可以嘗試[codesandbox](https://codesandbox.io/p/devbox/github/gilbarbara/react-joyride-demo/tree/main/?embed=1)上的東西。 他們在 GitHub 上有超過 6k 顆星,npm 套件每週下載量超過 25 萬次。 https://github.com/gilbarbara/react-joyride Star React Joyride ⭐️ --- 9. [SVGR](https://github.com/gregberge/svgr) - 將 SVG 轉換為 React 元件。 ------------------------------------------------------------------  SVGR 是一個將 SVG 轉換為 React 元件的通用工具。 它需要一個原始的 SVG 並將其轉換為隨時可用的 React 元件。 開始使用以下 npm 指令。 ``` npm install @svgr/core ``` 例如,您採用這個 SVG。 ``` <?xml version="1.0" encoding="UTF-8"?> <svg width="48px" height="1px" viewBox="0 0 48 1" version="1.1" xmlns="http://www.w3.org/2000/svg" xmlns:xlink="http://www.w3.org/1999/xlink" > <!-- Generator: Sketch 46.2 (44496) - http://www.bohemiancoding.com/sketch --> <title>Rectangle 5</title> <desc>Created with Sketch.</desc> <defs></defs> <g id="Page-1" stroke="none" stroke-width="1" fill="none" fill-rule="evenodd"> <g id="19-Separator" transform="translate(-129.000000, -156.000000)" fill="#063855" > <g id="Controls/Settings" transform="translate(80.000000, 0.000000)"> <g id="Content" transform="translate(0.000000, 64.000000)"> <g id="Group" transform="translate(24.000000, 56.000000)"> <g id="Group-2"> <rect id="Rectangle-5" x="25" y="36" width="48" height="1"></rect> </g> </g> </g> </g> </g> </g> </svg> ``` 執行SVGR後,將轉換為. ``` import * as React from 'react' const SvgComponent = (props) => ( <svg width="1em" height="1em" viewBox="0 0 48 1" {...props}> <path d="M0 0h48v1H0z" fill="currentColor" fillRule="evenodd" /> </svg> ) export default SvgComponent ``` 它使用[SVGO](https://github.com/svg/svgo)優化 SVG,並使用 Prettier 格式化程式碼。 將 HTML 轉換為 JSX 需要幾個步驟: 1. 將 SVG 轉換為 HAST (HTML AST) 2. 將 HAST 轉換為 Babel AST (JSX AST) 3. 使用 Babel 轉換 AST(重新命名屬性、更改屬性值…) 您可以在[Playground](https://react-svgr.com/playground/)閱讀[文件](https://react-svgr.com/docs/getting-started)並檢查內容。 該專案在 GitHub 上擁有 10k+ Stars,有超過 800 萬開發者使用,npm 上每週下載量超過 800k。 https://github.com/gregberge/svgr 明星 SVGR ⭐️ --- 10. [React Sortable Tree](https://github.com/frontend-collective/react-sortable-tree) - 用於巢狀資料和層次結構的拖放可排序元件。 ------------------------------------------------------------------------------------------------------------ 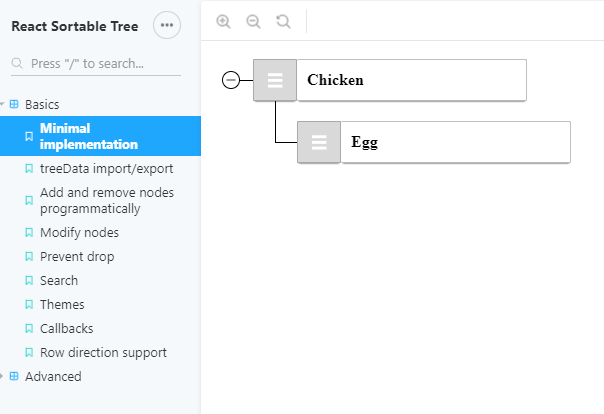 一個 React 元件,支援對分層資料進行拖放排序。  開始使用以下 npm 指令。 ``` npm install react-sortable-tree --save ``` 您可以這樣使用它。 ``` import React, { Component } from 'react'; import SortableTree from 'react-sortable-tree'; import 'react-sortable-tree/style.css'; // This only needs to be imported once in your app export default class Tree extends Component { constructor(props) { super(props); this.state = { treeData: [ { title: 'Chicken', children: [{ title: 'Egg' }] }, { title: 'Fish', children: [{ title: 'fingerline' }] }, ], }; } render() { return ( <div style={{ height: 400 }}> <SortableTree treeData={this.state.treeData} onChange={treeData => this.setState({ treeData })} /> </div> ); } } ``` 檢查由此獲得的各種[道具選項](https://github.com/frontend-collective/react-sortable-tree?tab=readme-ov-file#props)和[主題](https://github.com/frontend-collective/react-sortable-tree?tab=readme-ov-file#featured-themes)。 您可以閱讀[文件](https://github.com/frontend-collective/react-sortable-tree?tab=readme-ov-file#getting-started)並查看[Storybook](https://frontend-collective.github.io/react-sortable-tree/?path=/story/basics--minimal-implementation) ,以獲取一些基本和高級功能的演示。 它可能不會被積極維護(仍然沒有存檔),因此您也可以使用[維護的 fork 版本](https://github.com/nosferatu500/react-sortable-tree)。 該專案在 GitHub 上擁有超過 4,500 個 Star,並被超過 5,000 名開發人員使用。 https://github.com/frontend-collective/react-sortable-tree Star React 可排序樹 ⭐️ --- 11. [React Hot Toast](https://github.com/timolins/react-hot-toast) - 冒煙的 Hot React 通知。 -------------------------------------------------------------------------------------- 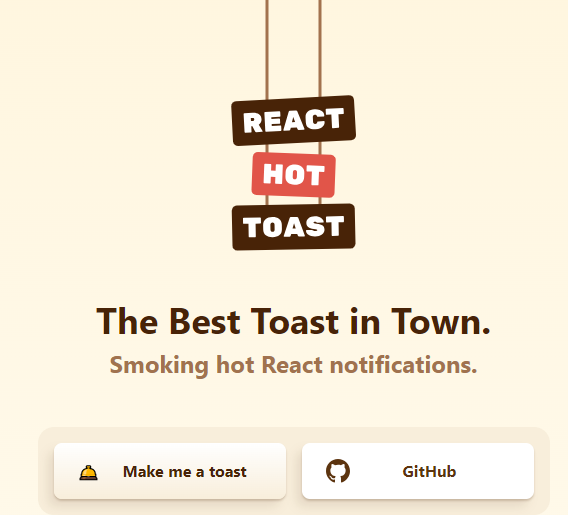 React Hot Toast 透過簡單的自訂選項提供了驚人的 🔥 預設體驗。它利用 Promise API 進行自動加載,確保平穩過渡。 它重量輕,不到 5kb,但仍然可以存取,同時為開發人員提供了像`useToaster()`這樣的無頭鉤子。 首先將 Toaster 加入到您的應用程式中。它將負責渲染發出的所有通知。現在您可以從任何地方觸發 toast() ! 開始使用以下 npm 指令。 ``` npm install react-hot-toast ``` 這就是它的易用性。 ``` import toast, { Toaster } from 'react-hot-toast'; const notify = () => toast('Here is your toast.'); const App = () => { return ( <div> <button onClick={notify}>Make me a toast</button> <Toaster /> </div> ); }; ``` 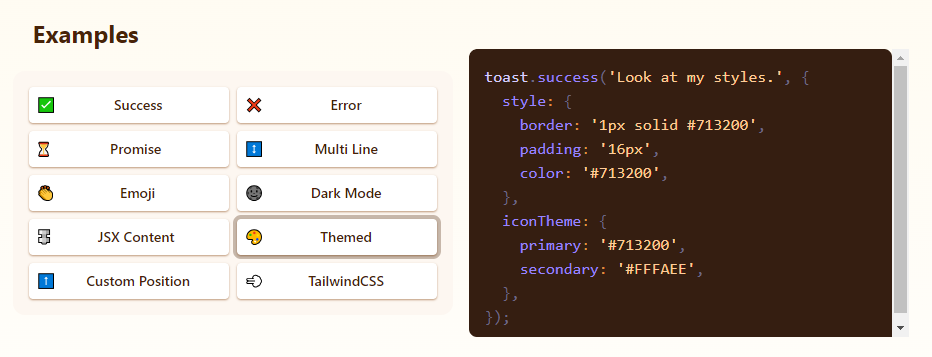  他們有很多自訂選項,但`useToaster()`掛鉤為您提供了一個無頭系統,可以為您管理通知狀態。這使得建立您的通知系統變得更加容易。 您可以閱讀[文件](https://react-hot-toast.com/docs)、[樣式指南](https://react-hot-toast.com/docs/styling)並查看[示範](https://react-hot-toast.com/)。 該專案在 GitHub 上有 8k+ Stars,有 230k+ 開發者使用。 https://github.com/timolins/react-hot-toast Star React Hot Toast ⭐️ --- 12. [Payload](https://github.com/payloadcms/payload) - 建立現代後端+管理 UI 的最佳方式。 --------------------------------------------------------------------------  Payload 是一個無頭 CMS 和應用程式框架。它旨在促進您的開發過程,但重要的是,當您的應用程式變得更加複雜時,不要妨礙您。 Payload 沒有黑魔法,完全開源,它既是一個應用程式框架,也是一個無頭 CMS。它確實是適用於 TypeScript 的 Rails,並且您會獲得一個管理面板。您可以使用此[YouTube 影片](https://www.youtube.com/watch?v=In_lFhzmbME)了解有關 Payload 的更多資訊。 https://www.youtube.com/watch?v=In\_lFhzmbME 您可以透過使用Payload來了解[其中涉及的概念](https://payloadcms.com/docs/getting-started/concepts)。 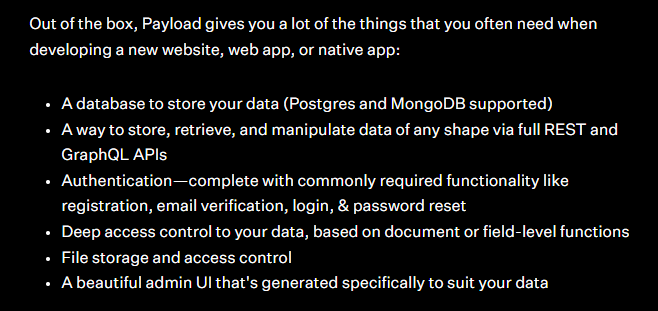 有效負載透過您選擇的資料庫適配器與您的資料庫進行互動。目前,Payload 正式支援兩種資料庫適配器: 1. MongoDB 與 Mongoose 2. Postgres 帶毛毛雨 開始使用以下命令。 ``` npx create-payload-app@latest ``` 您必須產生 Payload 金鑰並更新`server.ts`以初始化 Payload。 ``` import express from 'express' import payload from 'payload' require('dotenv').config() const app = express() const start = async () => { await payload.init({ secret: process.env.PAYLOAD_SECRET, express: app, }) app.listen(3000, async () => { console.log( "Express is now listening for incoming connections on port 3000." ) }) } start() ```  您可以閱讀[文件](https://payloadcms.com/docs/getting-started/what-is-payload)並查看[演示](https://demo.payloadcms.com/?_gl=1*9x0za3*_ga*NzEzMzkwNzIuMTcxMDE2NDk1MA..*_ga_FLQ5THRMZQ*MTcxMDE2NDk1MC4xLjEuMTcxMDE2NDk1MS4wLjAuMA..)。 他們還提供與 Payload + Stripe 無縫整合的[電子商務模板](https://github.com/payloadcms/payload/tree/main/templates/ecommerce)。此範本具有令人驚嘆的、功能齊全的前端,包括購物車、結帳流程、訂單管理等元件。 Payload 在 GitHub 上擁有 18k+ Stars,並且有超過 290 個版本,因此它們不斷改進,尤其是在資料庫支援方面。 https://github.com/payloadcms/payload 明星有效負載 ⭐️ --- 13. [React Player](https://github.com/cookpete/react-player) - 用於播放各種 URL 的 React 元件。 -------------------------------------------------------------------------------------  用於播放各種 URL 的 React 元件,包括檔案路徑、YouTube、Facebook、Twitch、SoundCloud、Streamable、Vimeo、Wistia、Mixcloud、DailyMotion 和 Kaltura。您可以看到[支援的媒體](https://github.com/cookpete/react-player?tab=readme-ov-file#supported-media)清單。 ReactPlayer 的維護工作由 Mux 接管,這使它們成為一個不錯的選擇。 開始使用以下 npm 指令。 ``` npm install react-player ``` 您可以這樣使用它。 ``` import React from 'react' import ReactPlayer from 'react-player' // Render a YouTube video player <ReactPlayer url='https://www.youtube.com/watch?v=LXb3EKWsInQ' /> // If you only ever use one type, use imports such as react-player/youtube to reduce your bundle size. // like this: import ReactPlayer from 'react-player/youtube' ``` 您也可以使用`react-player/lazy`為您傳入的URL 延遲載入適當的播放器。這會為您的輸出加入幾個reactPlayer 區塊,但會減少主包的大小。 ``` import React from 'react' import ReactPlayer from 'react-player/lazy' // Lazy load the YouTube player <ReactPlayer url='https://www.youtube.com/watch?v=ysz5S6PUM-U' /> ``` 您可以閱讀[文件](https://github.com/cookpete/react-player?tab=readme-ov-file#props)並查看[演示](https://cookpete.github.io/react-player/)。他們提供了大量的選項,包括加入字幕並以簡單的方式使其響應。 它們在 GitHub 上擁有超過 8000 顆星,被超過 135,000 名開發人員使用,並且 npm 軟體包[每週的下載量超過 800k](https://www.npmjs.com/package/react-player) 。 https://github.com/cookpete/react-player 明星 React 播放器 ⭐️ --- 14. [Victory](https://github.com/FormidableLabs/victory) - 用於建立互動式資料視覺化的 React 元件。 ----------------------------------------------------------------------------------  Victory 是一個可組合 React 元件的生態系統,用於建立互動式資料視覺化。 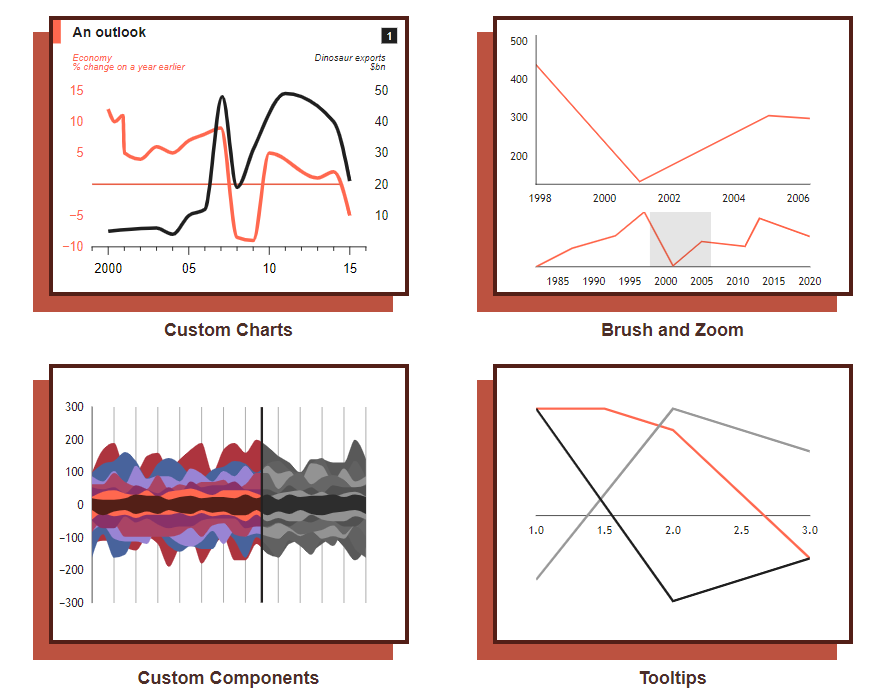 開始使用以下 npm 指令。 ``` npm i --save victory ``` 您可以這樣使用它。 ``` <VictoryChart domainPadding={{ x: 20 }} > <VictoryHistogram style={{ data: { fill: "#c43a31" } }} data={sampleHistogramDateData} bins={[ new Date(2020, 1, 1), new Date(2020, 4, 1), new Date(2020, 8, 1), new Date(2020, 11, 1) ]} /> </VictoryChart> ``` 這就是它的渲染方式。他們還提供通常有用的動畫和主題選項。  您可以閱讀[文件](https://commerce.nearform.com/open-source/victory/docs)並按照[教學](https://commerce.nearform.com/open-source/victory/docs/native)開始。他們提供大約 15 種不同的圖表選項。 它也可用於[React Native(文件)](https://commerce.nearform.com/open-source/victory/docs/native) ,所以這是一個優點。我還建議您查看他們的常見[問題解答](https://commerce.nearform.com/open-source/victory/docs/faq#frequently-asked-questions-faq),其中描述了常見問題的程式碼解決方案和解釋,例如樣式、註釋(標籤)、處理軸。 該專案在 GitHub 上擁有 10k+ Stars,並在 GitHub 上有 23k+ 開發人員使用。 https://github.com/FormidableLabs/victory 勝利之星 ⭐️ --- 15. [React Slick](https://github.com/akiran/react-slick) - React 輪播元件。 ----------------------------------------------------------------------  React Slick 是一個使用 React 建構的輪播元件。它是一個光滑的旋轉木馬的反應端口 開始使用以下 npm 指令。 ``` npm install react-slick --save ``` 這是使用自訂分頁的方法。 ``` import React, { Component } from "react"; import Slider from "react-slick"; import { baseUrl } from "./config"; function CustomPaging() { const settings = { customPaging: function(i) { return ( <a> <img src={`${baseUrl}/abstract0${i + 1}.jpg`} /> </a> ); }, dots: true, dotsClass: "slick-dots slick-thumb", infinite: true, speed: 500, slidesToShow: 1, slidesToScroll: 1 }; return ( <div className="slider-container"> <Slider {...settings}> <div> <img src={baseUrl + "/abstract01.jpg"} /> </div> <div> <img src={baseUrl + "/abstract02.jpg"} /> </div> <div> <img src={baseUrl + "/abstract03.jpg"} /> </div> <div> <img src={baseUrl + "/abstract04.jpg"} /> </div> </Slider> </div> ); } export default CustomPaging; ```  您可以閱讀有關可用的[prop 選項](https://react-slick.neostack.com/docs/api)和[方法](https://react-slick.neostack.com/docs/api#methods)的資訊。 您可以閱讀[文件](https://react-slick.neostack.com/docs/get-started)和所有帶有程式碼和輸出[的範例集](https://react-slick.neostack.com/docs/example/)。 他們在 GitHub 上有超過 11k 顆星,並且有超過 36 萬開發者在 GitHub 上使用它。 https://github.com/akiran/react-slick Star React Slick ⭐️ --- 16. [Medusa](https://github.com/medusajs/medusa) - 數位商務的建構模組。 -------------------------------------------------------------  Medusa 是一組商務模組和工具,可讓您建立豐富、可靠且高效能的商務應用程式,而無需重新發明核心商務邏輯。 這些模組可以客製化並用於建立高級電子商務商店、市場或任何需要基礎商務原語的產品。所有模組都是開源的,可以在 npm 上免費取得。 開始使用以下 npm 指令。 ``` npm install medusa-react @tanstack/[email protected] @medusajs/medusa ``` 將其包含在`app.ts`中。 只有 MedusaProvider 的子級才能從其鉤子中受益。因此,Storefront 元件及其子元件現在可以使用 Medusa React 公開的鉤子。 ``` import { MedusaProvider } from "medusa-react" import Storefront from "./Storefront" import { QueryClient } from "@tanstack/react-query" import React from "react" const queryClient = new QueryClient() const App = () => { return ( <MedusaProvider queryClientProviderProps={{ client: queryClient }} baseUrl="http://localhost:9000" > <Storefront /> </MedusaProvider> ) } export default App ``` 例如,這就是您如何使用突變來建立購物車。 ``` import { useCreateCart } from "medusa-react" const Cart = () => { const createCart = useCreateCart() const handleClick = () => { createCart.mutate({}) // create an empty cart } return ( <div> {createCart.isLoading && <div>Loading...</div>} {!createCart.data?.cart && ( <button onClick={handleClick}> Create cart </button> )} {createCart.data?.cart?.id && ( <div>Cart ID: {createCart.data?.cart.id}</div> )} </div> ) } export default Cart ``` 他們提供了一套電子商務模組(大量選項),例如折扣、價目表、禮品卡等。 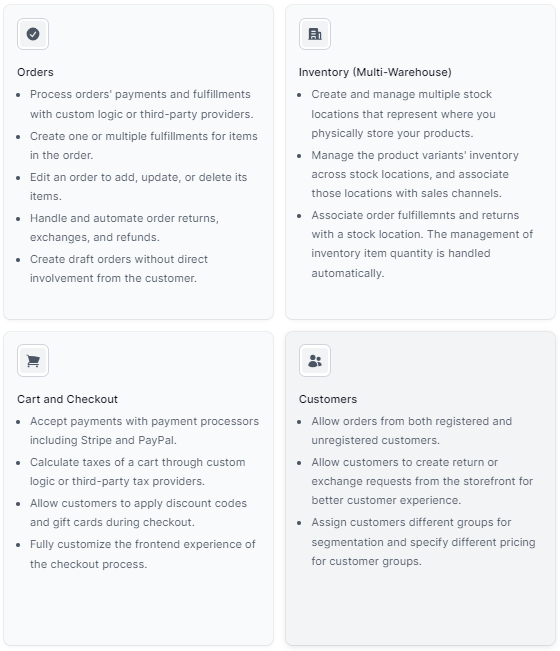 它們還提供了一種簡單的管理員和客戶身份驗證方法,您可以在[文件](https://docs.medusajs.com/)中閱讀。 他們提供了[nextjs 入門模板](https://docs.medusajs.com/starters/nextjs-medusa-starter)和[Medusa React](https://docs.medusajs.com/medusa-react/overview)作為 SDK。 該專案在 GitHub 上有 22k+ Stars,有 4k+ 開發者使用。 https://github.com/medusajs/medusa 明星美杜莎 ⭐️ --- 17. [React Markdown](https://github.com/remarkjs/react-markdown) - React 的 Markdown 元件. --------------------------------------------------------------------------------------- 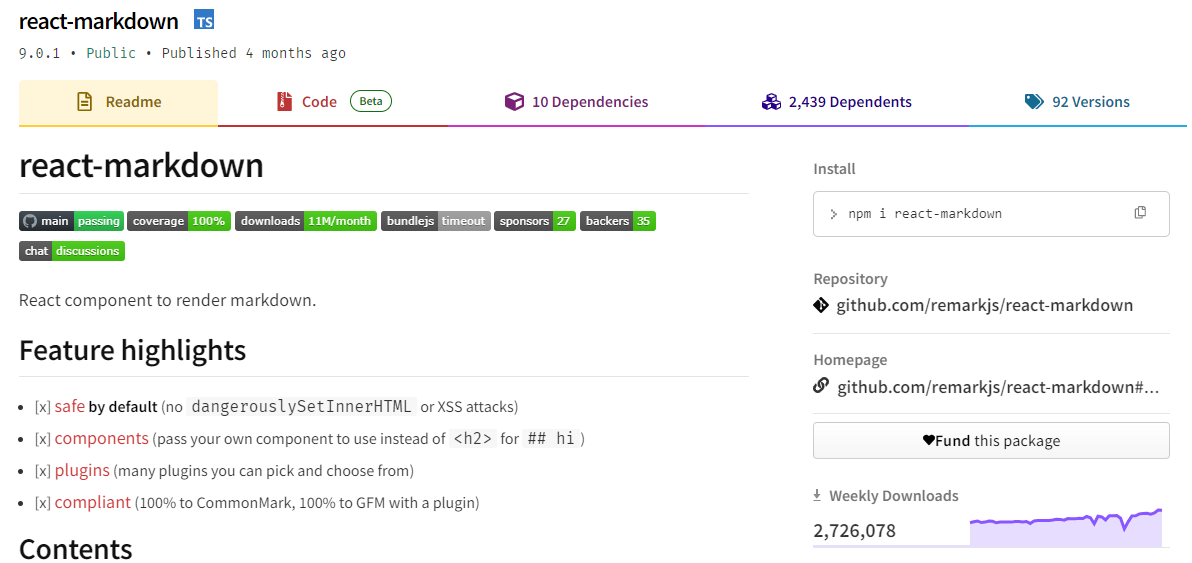 Markdown 至關重要,使用 React 渲染它對於各種場景都非常有用。 它提供了一個 React 元件,能夠安全地將一串 Markdown 渲染到 React 元素中。您可以透過傳遞外掛程式並指定要使用的元件而不是標準 HTML 元素來自訂 Markdown 的轉換。 開始使用以下 npm 指令。 ``` npm i react-markdown ``` 您可以這樣使用它。 ``` import React from 'react' import {createRoot} from 'react-dom/client' import Markdown from 'react-markdown' import remarkGfm from 'remark-gfm' const markdown = `Just a link: www.nasa.gov.` createRoot(document.body).render( <Markdown remarkPlugins={[remarkGfm]}>{markdown}</Markdown> ) ``` 等效的 JSX 是。 ``` <p> Just a link: <a href="http://www.nasa.gov">www.nasa.gov</a>. </p> ``` 他們還提供了一份[備忘錄](https://commonmark.org/help/)和一個十分鐘的逐步[教學](https://commonmark.org/help/tutorial/)。  您可以閱讀[文件](https://github.com/remarkjs/react-markdown?tab=readme-ov-file#install)並查看[演示](https://remarkjs.github.io/react-markdown/)。 該專案在 GitHub 上有 12k+ Stars,[每週下載量超過 2700k](https://www.npmjs.com/package/react-markdown) ,並被 200k+ 開發人員使用,證明了它的真正有用性。 https://github.com/remarkjs/react-markdown Star React Markdown ⭐️ --- 18. [React JSONSchema Form](https://github.com/rjsf-team/react-jsonschema-form) - 用於從 JSON Schema 建立 Web 表單。 ------------------------------------------------------------------------------------------------------------ 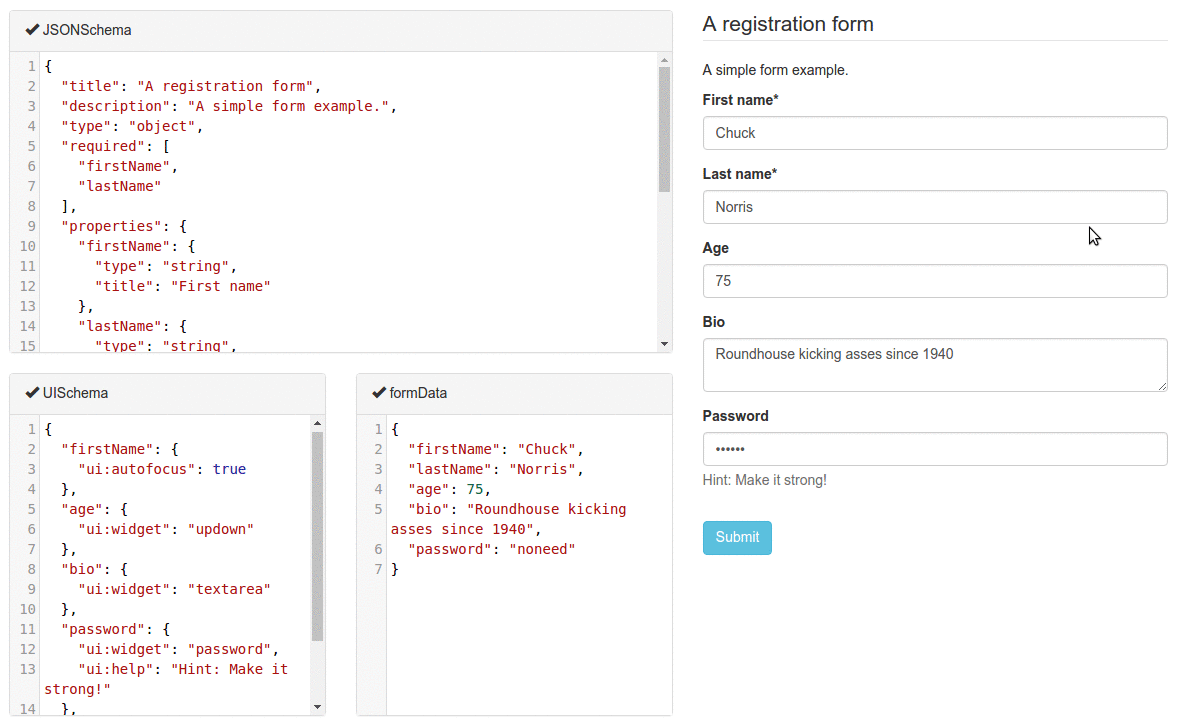 `react-jsonschema-form`會自動從 JSON Schema 產生 React 表單,使其非常適合僅使用 JSON schema 為任何資料產生表單。它提供了像 uiSchema 這樣的自訂選項來自訂預設主題之外的表單外觀。 開始使用以下 npm 指令。 ``` npm install @rjsf/core @rjsf/utils @rjsf/validator-ajv8 --save ``` 您可以這樣使用它。 ``` import { RJSFSchema } from '@rjsf/utils'; import validator from '@rjsf/validator-ajv8'; const schema: RJSFSchema = { title: 'Todo', type: 'object', required: ['title'], properties: { title: { type: 'string', title: 'Title', default: 'A new task' }, done: { type: 'boolean', title: 'Done?', default: false }, }, }; const log = (type) => console.log.bind(console, type); render( <Form schema={schema} validator={validator} onChange={log('changed')} onSubmit={log('submitted')} onError={log('errors')} />, document.getElementById('app') ); ``` 他們提供[高級定制](https://rjsf-team.github.io/react-jsonschema-form/docs/advanced-customization/)選項,包括定制小部件。 您可以閱讀[文件](https://rjsf-team.github.io/react-jsonschema-form/docs/)並查看[即時遊樂場](https://rjsf-team.github.io/react-jsonschema-form/)。 它在 GitHub 上擁有超過 13k 個 Star,並被 5k+ 開發人員使用。他們在`v5`上發布了 190 多個版本,因此他們正在不斷改進。 https://github.com/rjsf-team/react-jsonschema-form Star React JSONSchema 表單 ⭐️ --- 19. [Craft.js](https://github.com/prevwong/craft.js) - 建立可擴充的拖放頁面編輯器。 ---------------------------------------------------------------------  頁面編輯器可以增強使用者體驗,但從頭開始建立頁面編輯器可能會令人望而生畏。現有庫提供具有可編輯元件的預先建置編輯器,但自訂通常需要修改庫本身。 Craft.js 透過模組化頁面編輯器元件、透過拖放功能簡化自訂以及渲染管理來解決這個問題。在 React 中設計你的編輯器,無需複雜的插件系統,專注於你的特定需求和規格。 開始使用以下 npm 指令。 ``` npm install --save @craftjs/core ``` 他們還提供了有關如何入門的[簡短教程](https://craft.js.org/docs/guides/basic-tutorial)。我不會介紹它,因為它非常簡單且詳細。 您可以閱讀[文件](https://craft.js.org/docs/overview)並查看[即時演示](https://craft.js.org/)以及另一個[即時範例](https://craft.js.org/examples/basic)。 它在 GitHub 上有大約 6k+ Stars,但考慮到它們正在改進,仍然很有用。 https://github.com/prevwong/craft.js Star Craft.js ⭐️ --- 20. [Gatsby](https://github.com/gatsbyjs/gatsby) - 最好的基於 React 的框架,具有內建的效能、可擴展性和安全性。 ------------------------------------------------------------------------------------  Gatsby 是一個基於 React 的框架,使開發人員能夠建立閃電般快速的網站和應用程式,將動態渲染的靈活性與靜態網站生成的速度融為一體。 憑藉可自訂的 UI 和對各種資料來源的支援等功能,Gatsby 提供了無與倫比的控制和可擴展性。此外,它還可以自動進行效能最佳化,使其成為靜態網站的首選。 開始使用以下 npm 指令。 ``` npm init gatsby ``` 這就是如何在 Gatsby(反應元件)中使用`Link` 。 ``` import React from "react" import { Link } from "gatsby" const Page = () => ( <div> <p> Check out my <Link to="/blog">blog</Link>! </p> <p> {/* Note that external links still use `a` tags. */} Follow me on <a href="https://twitter.com/gatsbyjs">Twitter</a>! </p> </div> ) ``` 他們提供了一組[入門模板,](https://www.gatsbyjs.com/starters/)其中包含如何使用它、涉及的依賴項以及每個模板的演示。  您可以閱讀有關 Gatsby 的一些[常見概念,](https://www.gatsbyjs.com/docs/conceptual/gatsby-concepts/)例如 React Hydration、Gatsby 建置流程等。 您可以閱讀[文件](https://www.gatsbyjs.com/docs/)並查看入門[教學課程](https://www.gatsbyjs.com/docs/tutorial/)。 Gatsby 在 GitHub 上擁有超過 55,000 顆星,並被超過 240,000 名開發者使用 https://github.com/gatsbyjs/gatsby 明星蓋茲比 ⭐️ --- 21. [Chat UI Kit React](https://github.com/chatscope/chat-ui-kit-react) - 在幾分鐘內使用 React 建立您的聊天 UI。 -------------------------------------------------------------------------------------------------- 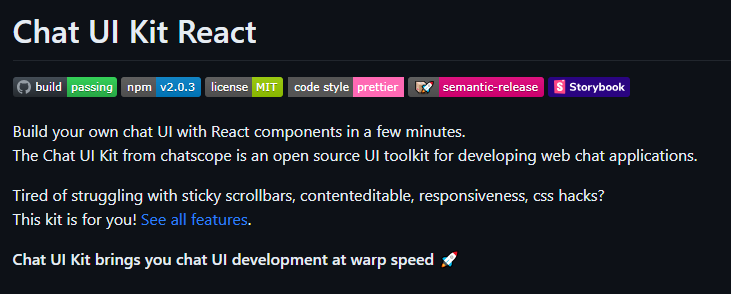 Chatscope 的聊天 UI 工具包是一個用於開發網頁聊天應用程式的開源 UI 工具包。 儘管該專案並未廣泛使用,但這些功能對於剛剛查看該專案的初學者來說還是很有用的。 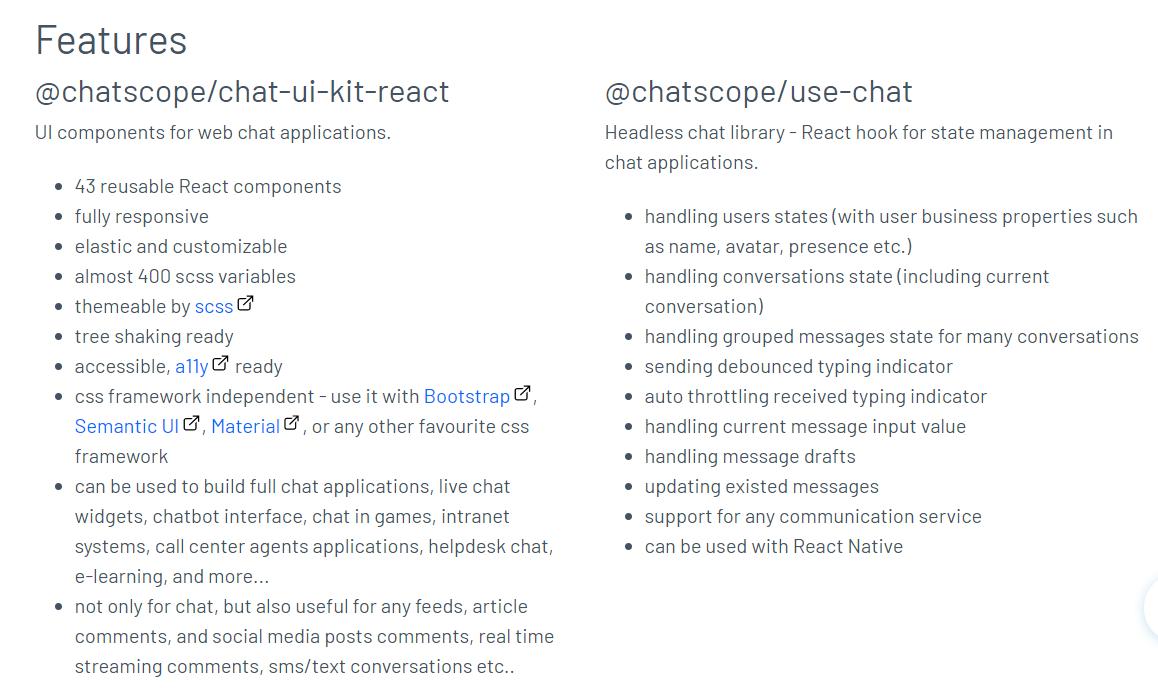 開始使用以下 npm 指令。 ``` npm install @chatscope/chat-ui-kit-react ``` 這就是建立 GUI 的方法。 ``` import styles from '@chatscope/chat-ui-kit-styles/dist/default/styles.min.css'; import { MainContainer, ChatContainer, MessageList, Message, MessageInput } from '@chatscope/chat-ui-kit-react'; <div style={{ position:"relative", height: "500px" }}> <MainContainer> <ChatContainer> <MessageList> <Message model={{ message: "Hello my friend", sentTime: "just now", sender: "Joe" }} /> </MessageList> <MessageInput placeholder="Type message here" /> </ChatContainer> </MainContainer> </div> ``` 您可以閱讀[文件](https://chatscope.io/docs/)。 故事書中有更[詳細的文件](https://chatscope.io/storybook/react/?path=/docs/documentation-introduction--docs)。 它提供了一些方便的元件,例如[`TypingIndicator`](https://chatscope.io/storybook/react/?path=/docs/components-typingindicator--docs) 、 [`Multiline Incoming`](https://chatscope.io/storybook/react/?path=/story/components-message--multiline-incoming)等等。 我知道你們中的一些人更喜歡透過部落格來了解整個結構,因此你可以閱讀使用 Chat UI Kit React 的 Rollbar 的[如何將 ChatGPT 與 React 整合](https://rollbar.com/blog/how-to-integrate-chatgpt-with-react/)。 您可以看到的一些演示: - [聊天機器人使用者介面](https://mars.chatscope.io/) - [與朋友聊天](https://chatscope.io/demo/chat-friends/)- 看看這個! 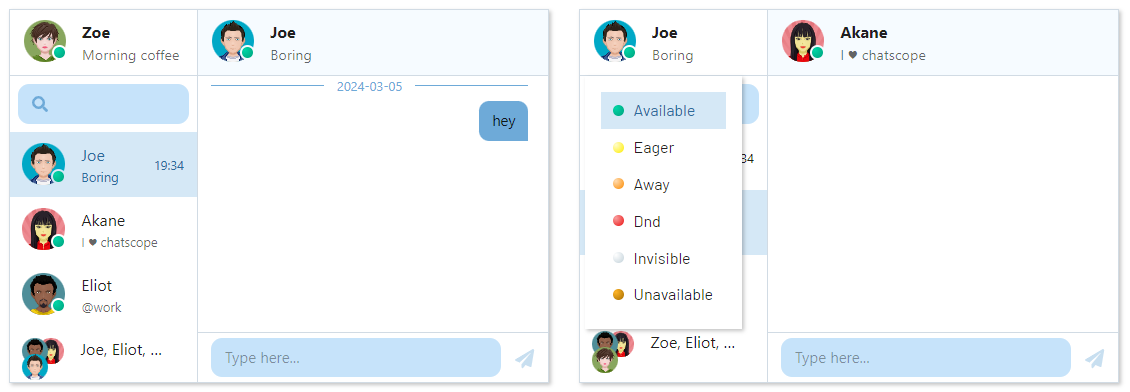 https://github.com/chatscope/chat-ui-kit-react Star Chat UI Kit React ⭐️ --- 22. [Botonic](https://github.com/hubtype/botonic) - 用於建立會話應用程式的 React 框架。 -------------------------------------------------------------------------  Botonic 是一個全端 Javascript 框架,用於建立在多個平台上執行的聊天機器人和現代對話應用程式:Web、行動和訊息應用程式(Messenger、WhatsApp、Telegram 等)。它建構在 ⚛️ React、Serverless 和 Tensorflow.js 之上。 如果您不了解對話應用程式的概念,可以在[官方部落格](https://www.hubtype.com/blog/what-are-conversational-apps)上閱讀它們。 使用 Botonic,您可以建立包含最佳文字外介面(簡單性、自然語言互動)和圖形介面(多媒體、視覺上下文、豐富互動)的會話應用程式。 這是一個強大的組合,可以提供比僅依賴文字和 NLP 的傳統聊天機器人更好的用戶體驗。 這就是 Botonic 的簡單方式。 ``` export default class extends React.Component { static async botonicInit({ input, session, params, lastRoutePath }) { await humanHandOff(session)) } render() { return ( <Text> Thanks for contacting us! One of our agents will attend you as soon as possible. </Text> ) } } ``` 它們也支援 TypeScript,所以這是一個優點。 您可以看到一些使用 Botonic 建置的[範例](https://botonic.io/examples/)及其原始程式碼。 您可以閱讀[文件](https://botonic.io/docs/welcome)以及如何[從頭開始建立會話應用程式](https://botonic.io/docs/create-convapp)。 https://github.com/hubtype/botonic Star Botonic ⭐️ --- 23. [React Flowbite](https://github.com/themesberg/flowbite-react) - 為 Flowbite 和 Tailwind CSS 建構的 React 元件. ------------------------------------------------------------------------------------------------------------  每個人對他們想要用來建立網站的使用者介面都有不同的偏好。 Flowbite React 是 UI 元件的開源集合,在 React 中建置,具有來自 Tailwind CSS 的實用程式類,您可以將其用作使用者介面和網站的起點。 開始使用以下 npm 指令。 ``` npm i flowbite-react ``` 這是一起使用表格和鍵盤元件的方法。 ``` 'use client'; import { Kbd, Table } from 'flowbite-react'; import { MdKeyboardArrowDown, MdKeyboardArrowLeft, MdKeyboardArrowRight, MdKeyboardArrowUp } from 'react-icons/md'; function Component() { return ( <Table> <Table.Head> <Table.HeadCell>Key</Table.HeadCell> <Table.HeadCell>Description</Table.HeadCell> </Table.Head> <Table.Body className="divide-y"> <Table.Row className="bg-white dark:border-gray-700 dark:bg-gray-800"> <Table.Cell className="whitespace-nowrap font-medium text-gray-900 dark:text-white"> <Kbd>Shift</Kbd> <span>or</span> <Kbd>Tab</Kbd> </Table.Cell> <Table.Cell>Navigate to interactive elements</Table.Cell> </Table.Row> <Table.Row className="bg-white dark:border-gray-700 dark:bg-gray-800"> <Table.Cell className="whitespace-nowrap font-medium text-gray-900 dark:text-white"> <Kbd>Enter</Kbd> or <Kbd>Spacebar</Kbd> </Table.Cell> <Table.Cell>Ensure elements with ARIA role="button" can be activated with both key commands.</Table.Cell> </Table.Row> <Table.Row className="bg-white dark:border-gray-700 dark:bg-gray-800"> <Table.Cell className="whitespace-nowrap font-medium text-gray-900 dark:text-white"> <span className="inline-flex gap-1"> <Kbd icon={MdKeyboardArrowUp} /> <Kbd icon={MdKeyboardArrowDown} /> </span> <span> or </span> <span className="inline-flex gap-1"> <Kbd icon={MdKeyboardArrowLeft} /> <Kbd icon={MdKeyboardArrowRight} /> </span> </Table.Cell> <Table.Cell>Choose and activate previous/next tab.</Table.Cell> </Table.Row> </Table.Body> </Table> ); } ``` 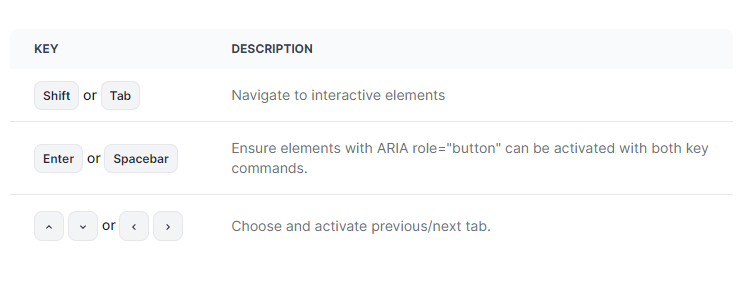 您可以閱讀[文件](https://www.flowbite-react.com/docs/getting-started/introduction)並查看[Storybook](https://storybook.flowbite-react.com/?path=/story/components-accordion--always-open)中的功能。您也可以查看[元件](https://www.flowbite-react.com/docs/components/accordion)清單。 在我看來,如果您想快速設定 UI,但又不想最終為高品質的開源專案使用預先定義的庫元件,那麼這很好。 該專案在 GitHub 上擁有超過 1,500 顆星,擁有超過 37,000 名開發者的用戶群,並受到社群的廣泛認可和信任,使其成為一個可靠的選擇。 https://github.com/themesberg/flowbite-react Star React Flowbite ⭐️ --- 24. [DND 套件](https://github.com/clauderic/dnd-kit)- 輕量級、高效能、可存取且可擴展的拖放功能。 ------------------------------------------------------------------------- 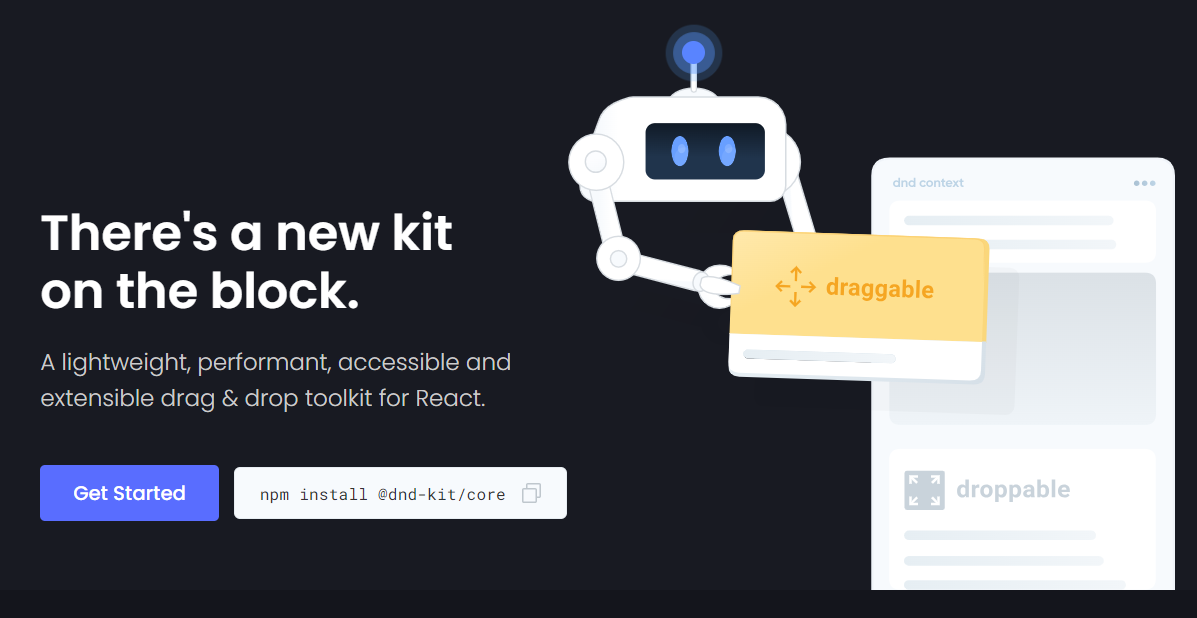 這是一個強大的 React 拖放工具包,擁有可自訂的碰撞檢測、多個啟動器和自動滾動等功能。 它的設計考慮到了 React,提供了方便集成的鉤子,無需進行重大的架構更改。支援從清單到網格和虛擬化清單的各種用例,它既是動態的又是輕量級的,沒有外部相依性。 開始使用以下 npm 指令。 ``` npm install @dnd-kit/core ``` 這就是建立可拖放元件的方法。 `Example.jsx` ``` import React, {useState} from 'react'; import {DndContext} from '@dnd-kit/core'; import {Draggable} from './Draggable'; import {Droppable} from './Droppable'; function Example() { const [parent, setParent] = useState(null); const draggable = ( <Draggable id="draggable"> Go ahead, drag me. </Draggable> ); return ( <DndContext onDragEnd={handleDragEnd}> {!parent ? draggable : null} <Droppable id="droppable"> {parent === "droppable" ? draggable : 'Drop here'} </Droppable> </DndContext> ); function handleDragEnd({over}) { setParent(over ? over.id : null); } } ``` `Droppable.jsx` ``` import React from 'react'; import {useDroppable} from '@dnd-kit/core'; export function Droppable(props) { const {isOver, setNodeRef} = useDroppable({ id: props.id, }); const style = { opacity: isOver ? 1 : 0.5, }; return ( <div ref={setNodeRef} style={style}> {props.children} </div> ); } ``` `Draggable.jsx` ``` import React from 'react'; import {useDraggable} from '@dnd-kit/core'; import {CSS} from '@dnd-kit/utilities'; function Draggable(props) { const {attributes, listeners, setNodeRef, transform} = useDraggable({ id: props.id, }); const style = { // Outputs `translate3d(x, y, 0)` transform: CSS.Translate.toString(transform), }; return ( <button ref={setNodeRef} style={style} {...listeners} {...attributes}> {props.children} </button> ); } ``` 我將可拖曳元件放在可放置元件上。 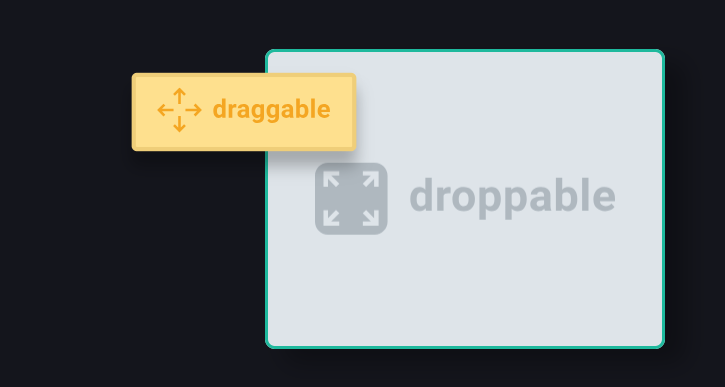 您可以閱讀[文件](https://docs.dndkit.com/)以及滑鼠和指標等[感測器的選項](https://docs.dndkit.com/introduction/installation#core-library)。 它在 GitHub 上擁有 10k+ Stars,並被 GitHub 上 47k+ 開發人員使用。 https://github.com/clauderic/dnd-kit 明星免打擾套件 ⭐️
我已經看過相當多的 React 教程,但是每當他們談論使用 React-router 進行導航時,他們都只展示使用 Link 元件的方式。一旦有人開始處理他/她自己的專案,他們遇到的第一個問題就是如何以程式設計方式進行路由,這基本上意味著除了點擊 \\ 中包含的內容之外的其他方式進行路由。成分。 這個部落格的主要目的是為那些來這裡尋找這個問題答案的人提供一個避難所。 --- 1.\\成分 ------ 我們可以使用 \\ 進行重定向只需傳遞我們想要重定向到的路由並渲染元件即可。它已經載入到react-router-dom 庫中。 ``` import { Redirect } from "react-router-dom"; ``` 使用此方法最簡單的方法是在元件狀態內維護重定向屬性。 ``` state = { redirect: null }; render() { if (this.state.redirect) { return <Redirect to={this.state.redirect} /> } return( // Your Code goes here ) } ``` 每當你想要重定向到另一個路徑時,你可以簡單地改變狀態來重新渲染元件,從而渲染\\成分。 ``` this.setState({ redirect: "/someRoute" }); ``` **筆記** 這是除 \\ 之外的建議導航方式。方法。 在帖子的最後詳細討論了。 這種方法的缺點是,當我們想要直接從 redux 操作重新導向時,我們無法這樣做。 --- 2.使用歷史鉤子 -------- 從 5.1.2 版本開始,react-router 附帶了一些新的鉤子,可以幫助我們存取路由器的狀態。 現在,我們只需要討論 useHistory 鉤子。 ``` import { useHistory } from "react-router-dom"; function App() { let history = useHistory(); } ``` 之後,我們可以使用 .push() 方法重定向到我們想要的任何路由。 ``` history.push('/someRoute') ``` --- 3.歷史道具 ------ 作為 \\ 的直接子級的每個元件元件接收歷史物件作為道具。這是保存 React Router 會話歷史記錄的同一個歷史記錄(庫)。因此,我們可以使用它的屬性來導航到所需的路徑。 ``` this.props.history.push("/first"); ``` 我們在這裡遇到的一個常見問題是,在不是 \\ 的直接子級的元件中元件中,不存在歷史道具。使用 withRouter 函數可以輕鬆解決這個問題。 ### 3.1.帶路由器 withRouter 是react-router-dom庫中提供的一個函數,它可以幫助我們存取不是 \\ 直接子級的元件中的歷史記錄道具成分。 使用 Router 導入 ``` import { withRouter } from "react-router-dom"; ``` 現在為了在我們的元件中取得歷史屬性,我們需要在匯出它時用 withRouter 包裝我們的元件。 ``` export default withRouter(yourComponent); ``` 我們現在可以像上面一樣存取歷史記錄來完成我們所需的導航。 --- 4.建立歷史 ------ 我們上面學到的方法可以涵蓋我們在建立 React 應用程式時遇到的大多數情況,那麼為什麼要使用第四種方法呢? 每次我們需要從 redux 操作重定向時,我們總是必須將歷史記錄傳遞給該操作,從而不必要地增加參數數量。因此,可以使用此方法來獲得更簡潔的程式碼。 在此方法中,我們建立自訂歷史記錄實例,可以將其匯入其他文件中以進行重定向。 ``` // Inside /utils/history.js import createHistory from "history/createBrowserHistory"; export default createHistory(); ``` 作為 \\使用它自己的歷史記錄並且不接受任何外部歷史記錄屬性,我們必須使用 \\而不是它。 ``` import { Router } from "react-router-dom"; import history from "./utils/history"; function App(){ return( <Router history={history}> // Your Routes go here <Router> ) } ``` 之後,我們可以將此歷史實例匯入到我們想要重新導向的任何檔案中。 ``` import history from "./utils/history"; history.push("/somePath"); ``` --- 筆記 -- 從本質上講,React 是一種建立 UI 的聲明式方法。 聲明式方法是一種表達計算邏輯而不描述其控制流或不描述幕後實際發生的情況的方法。 由於這個原因,推薦的導航方式除\\正在使用\\成分。 使用這裡提到的其他方法並沒有什麼壞處,只是它們並不完全符合 React 的願景。 --- 儲存庫 --- 我的 Github 個人資料上提供了上述方法的完整工作實作。如果有人想看到這些方法在專案中實際執行,請隨意探索。 {% github https://github.com/projectescape/blogs-reference %} --- --- 原文出處:https://dev.to/projectescape/programmatic-navigation-in-react-3p1l
下面的函數對於 Web 開發和 JavaScript 程式設計來說是基礎,它們簡化了任務,例如*使用新舊 console.log()***進行偵錯**、**操作 DOM 以及處理 JSON 資料。** 了解和使用這些函數就像*建立該語言的基礎支柱*一樣。 掌握這些工具也肯定會簡化編碼流程,進而帶來良好的開發人員體驗。 --- 長話短說 ---- **控制台和除錯** -> 控制台.log(...args) **定時** -> setTimeout(回呼, 延遲) -> setInterval(回呼, 間隔) **DOM 操作和事件處理** -> 查詢選擇器全部(選擇器) -> addEventListener(事件,回呼) **JSON 處理** -> JSON.parse(jsonString) -> JSON.stringify(物件) **陣列運算(高階函數)** -> forEach(回呼) -> 地圖(回呼) -> 過濾器(回調) -> 減少(回調,初始值) **陣列運算** -> 切片(開始,結束) -> 拼接(開始,刪除計數,...專案) ->indexOf(元素) -> 包含(元素) -> 排序(比較函數) -> 反向() -> isArray(值) **字串操作** -> 分割(分隔符號) -> 連接(分隔符號) -> toLowerCase(), toUpperCase() -> 修剪() --- 控制台和除錯: ------- ### 0️⃣1️⃣ console.log(...args) ⇒ 將訊息或物件輸出到控制台以進行偵錯。 ``` // console.log(...args) console.log("Hello World!"); ``` --- 定時: --- ### 0️⃣2️⃣ setTimeout(回呼、延遲) ⇒ 在指定的延遲(以毫秒為單位)後執行函數。 ### 0️⃣3️⃣ setInterval(回調,間隔) ⇒ 以指定的時間間隔重複執行某個功能。 ``` // setTimeout(callback, delay) setTimeout(function() { console.log("This message will appear after 3 seconds."); }, 3000); // Runs the anonymous function after 3000 milliseconds (3 seconds) // setInterval(callback, interval) function printCounter() { let count = 0; setInterval(function() { console.log("Count:", count++); }, 1000); } printCounter(); // Prints count every second ``` --- DOM 操作與事件處理: ------------ ### 0️⃣4️⃣ querySelectorAll(選擇器) ⇒ 傳回一個 NodeList,其中包含與指定選擇器相符的所有元素。 ### 0️⃣5️⃣ addEventListener(事件,回呼) ⇒ 將事件處理函數附加到 HTML 元素。 ``` // querySelectorAll(selector) console.log("querySelectorAll(selector)"); const container = document.getElementById('container'); const links = container.querySelectorAll('a'); // Accessing the href attribute of each link // Iterate over the NodeList links.forEach(link => { console.log(link.href); }); // addEventListener(event, callback) console.log("addEventListener(event, callback)"); const button = document.getElementById('myButton'); button.addEventListener('click', function() { console.log('Button clicked!'); }); ``` --- JSON 處理: -------- ### 0️⃣6️⃣ JSON.parse(jsonString) ⇒ 解析 JSON 字串並傳回 JavaScript 物件。 ### 0️⃣7️⃣ JSON.stringify(物件) ⇒ 將 JavaScript 物件轉換為 JSON 字串。 ``` // JSON.parse(jsonString) console.log("JSON.parse(jsonString)"); const jsonString = '{"name": "John", "age": 30, "city": "New York"}'; const jsonObject = JSON.parse(jsonString); console.log(jsonObject.name); // Output: John console.log(jsonObject.age); // Output: 30 console.log(jsonObject.city); // Output: New York // JSON.stringify(object) console.log("JSON.stringify(object)"); const person = { name: 'John', age: 30, city: 'New York' }; const jsonString2 = JSON.stringify(person); console.log(jsonString2); // Output: {"name":"John","age":30,"city":"New York"} ``` --- 陣列運算(高階函數): ----------- ### 0️⃣8️⃣ forEach(回呼) ⇒ 對每個陣列元素執行一次提供的函數。 ### 0️⃣9️⃣地圖(回調) ⇒ 使用對每個元素呼叫提供的函數的結果來建立一個新陣列。 ### 1️⃣0️⃣過濾器(回呼) ⇒ 建立一個新陣列,其中的元素滿足給定的條件。 ### 1️⃣1️⃣減少(回調,初始值) ⇒ 透過對每個元素應用函數將陣列縮減為單一值。 ``` const numbers = [1, 2, 3, 4, 5]; // forEach(callback) console.log("forEach:"); numbers.forEach(num => { console.log(num); }); // Output: // 1 // 2 // 3 // 4 // 5 // map(callback) const doubledNumbers = numbers.map(num => num * 2); // Output: [2, 4, 6, 8, 10] // filter(callback) const evenNumbers = numbers.filter(num => num % 2 === 0); // [2, 4] // reduce(callback, initialValue) const sum = numbers.reduce((accumulator, currentValue) => accumulator + currentValue, 0); // 15 ``` --- 陣列操作: ----- ### 1️⃣2️⃣片(開始,結束) ⇒ 傳回指定起始索引和結束索引之間的陣列部分的淺表副本。 ### 1️⃣3️⃣ 拼接(開始,刪除計數,...專案) ⇒ 透過刪除/取代元素和/或新增元素來變更陣列內容。 ### 1️⃣4️⃣indexOf(元素) ⇒ 傳回在陣列中可以找到給定元素的第一個索引,如果不存在則傳回 -1。 ### 1️⃣5️⃣包含(元素) ⇒ 判斷陣列是否包含某個元素,傳回 true 或 false。 ### 1️⃣6️⃣排序(比較函數) ⇒ 根據提供的函數或預設排序順序對陣列元素進行排序。 ### 1️⃣7️⃣反向() ⇒ 反轉陣列中元素的順序。 ### 1️⃣8️⃣ isArray(值) ⇒ 檢查給定值是否為陣列,傳回 true 或 false。 ``` // slice(start, end) const array = [1, 2, 3, 4, 5]; const slicedArray = array.slice(1, 4); console.log("slice:", slicedArray); // Output: [2, 3, 4] // splice(start, deleteCount, ...items) const spliceArray = [1, 2, 3, 4, 5]; spliceArray.splice(2, 2, 'a', 'b'); console.log("splice:", spliceArray); // Output: [1, 2, "a", "b", 5] // indexOf(element) const indexOfArray = ['apple', 'banana', 'cherry']; const indexOfCherry = indexOfArray.indexOf('cherry'); console.log("indexOf:", indexOfCherry); // Output: 2 // includes(element) const includesArray = [1, 2, 3, 4, 5]; const includesValue = includesArray.includes(3); console.log("includes:", includesValue); // Output: true // sort(compareFunction) const sortArray = [3, 1, 4, 1, 5]; sortArray.sort((a, b) => a - b); console.log("sort:", sortArray); // Output: [1, 1, 3, 4, 5] // reverse() const reverseArray = ['a', 'b', 'c', 'd']; reverseArray.reverse(); console.log("reverse:", reverseArray); // Output: ['d', 'c', 'b', 'a'] // isArray(value) const isArrayValue = [1, 2, 3]; const isArray = Array.isArray(isArrayValue); console.log("isArray:", isArray); // Output: true ``` --- 字串操作: ----- ### 1️⃣9️⃣分割(分隔符號) ⇒ 根據指定的分隔符號將字串分割為子字串陣列。 ### 2️⃣0️⃣加入(分隔符號) ⇒ 將陣列的所有元素連接成一個字串,並以指定的分隔符號分隔。 ### 2️⃣1️⃣ toLowerCase(), toUpperCase() ⇒ 將字串轉換為小寫或大寫。 ### 2️⃣2️⃣修剪() ⇒ 刪除字串兩端的空格。 ``` // split(separator) const sentence = "Hello, world! How are you?"; const words = sentence.split(' '); console.log("split:", words); // Output: ["Hello,", "world!", "How", "are", "you?"] // join(separator) const fruits = ['Apple', 'Banana', 'Orange']; const fruitString = fruits.join(', '); console.log("join:", fruitString); // Output: "Apple, Banana, Orange" // toLowerCase(), toUpperCase() const mixedCase = "Hello WoRLd"; const lowerCase = mixedCase.toLowerCase(); const upperCase = mixedCase.toUpperCase(); console.log("toLowerCase:", lowerCase); // Output: "hello world" console.log("toUpperCase:", upperCase); // Output: "HELLO WORLD" // trim() const stringWithWhitespace = " Hello, world! "; const trimmedString = stringWithWhitespace.trim(); console.log("trim:", trimmedString); // Output: "Hello, world!" ``` 🙌 最後的想法 ------- 當我們結束對上述功能的討論時,我請您分享您的見解。 **您認為在 Web 開發或主要是 JavaScript 專案中還需要哪些其他功能?** 請隨時在下面的評論中分享您的想法和有用的功能! 我希望你喜歡這篇文章! ❤️ 與我聯絡: [Linktree。](https://linktr.ee/arjuncodess/) 快樂編碼! 🚀 感謝22097! 🤗 --- 原文出處:https://dev.to/arjuncodess/18-javascript-functions-youll-use-99-of-the-time-2bl4
您是否曾經遇到過一個帶有漂亮滾動條的網站,然後心想“哇,我希望我能建立這樣的東西。”我也是!經過一番調查後,我發現為您的部落格或個人作品集建立自訂捲軸並不需要大量的 CSS。 今天,我們將建立一個漸進式進度條,當您捲動時,它會從零不透明度淡入完全不透明度。本教學只需要基礎的 HTML、CSS 和 JavaScript 知識,不會使用任何 JavaScript 框架或函式庫。您可以在[CodePen](https://codepen.io/emmawedekind/pen/VwabMpX)上找到完整的程式碼! HTML。 ===== 首先讓我們建立我們的文件結構。在 HTML CodePen 編輯器內部新增兩個元素:進度條和進度容器。 進度條將指示使用者向下捲動頁面的距離。進度條容器將跨越頁面的整個高度並包含進度條。 我們還加入一個帶有文字“Welcome”的頁面標題和一些 lorem ipsem 段落。我加入了其中七個段落,但為了簡潔起見,本文僅包含一個。 ``` <h1>Welcome.</h1> <p> Lorem ipsum dolor, sit amet consectetur adipisicing elit. Aspernatur provident eveniet veritatis ipsa id consectetur ab tenetur dolores eaque. Temporibus laboriosam cum corporis amet doloremque animi aut ipsa ea a? </p> ``` 這是我們的網頁目前的樣子。  CSS。 ==== 現在我們準備好加入我們的樣式。首先,讓我們加入一些基本的頁面樣式,以使我們的網站看起來更好。 ``` body { background: #171414; font-family: "Courier New", Courier, monospace; color: #ffffff; padding: 15% 15% 5%; } p { font-size: 1.8rem; } p:first-of-type { margin-top: 100px; } h1 { font-size: 200px; position: absolute; top: -5%; left: 15%; opacity: 25%; font-family: -apple-system, BlinkMacSystemFont, "Segoe UI", Roboto, Oxygen, Ubuntu, Cantarell, "Open Sans", "Helvetica Neue", sans-serif; } ```  接下來讓我們隱藏預設的瀏覽器捲軸。我們可以使用 webkit 供應商前綴來隱藏 Chrome 和 Safari 中的捲軸。 ``` ::-webkit-scrollbar { width: 0; background: transparent; } ``` 我們需要對 Firefox 進行特殊考慮,因為它不是 webkit 瀏覽器,並且不會回應 webkit 供應商前綴(如 Chrome 和 Safari)。 ``` html { scrollbar-width: none; } ``` 現在我們準備好設定自訂捲軸的樣式了。首先讓我們設定滾動條容器。我們希望滾動條容器固定在視窗的右側,因此我們將使用固定位置,並將頂部和右側值設為 0。我們將為滾動容器提供十個像素的寬度和非常淺的灰色背景。 ``` #progressBarContainer { position: fixed; top: 0; right: 0; width: 10px; height: 100%; background: rgba(255, 255, 255, 0.05); } ``` 現在您應該看到滾動容器出現在視窗的右側。  我們的進度條也將固定在視窗的右側,寬度為十個像素,但是,我們將給它一個從紅色到紫色的線性漸進,以使其脫穎而出。 ``` #progressBar { position: fixed; top: 0; right: 0; width: 10px; background: linear-gradient(to top, violet, red); height: 100%; opacity: 100%; } ```  我們希望動態更新滾動進度條的高度和不透明度,因此讓我們將高度和不透明度設為零。 ``` #progressBar { position: fixed; top: 0; right: 0; width: 10px; background: linear-gradient(to top, violet, red); height: 0; opacity: 0; } ``` JavaScript。 =========== 要更新進度條的高度和不透明度,我們需要寫幾行 JavaScript。讓我們先取得進度條 DOM 節點。 ``` const progressBar = document.querySelector("#progressBar"); ``` 我們還需要計算網頁的總高度。我們可以透過整個文件主體滾動高度減去視窗內部高度來計算總高度。 ``` let totalPageHeight = document.body.scrollHeight - window.innerHeight; ``` 接下來,讓我們向視窗新增一個事件偵聽器。當我們滾動時,我們想要計算新的進度高度。我們可以透過先將視窗的頁面 Y 偏移量除以總頁面高度來計算小數。要在 CSS 程式碼中使用這個值,我們必須將該分數乘以 100(得到百分比)。 最後,我們可以將進度條的高度和不透明度設定為新的進度高度。 *不熟`${}`語法?它稱為模板字串或模板文字,它允許您將計算表達式(${} 之間的值)與純字串組合起來。* ``` window.onscroll = () => { let newProgressHeight = (window.pageYOffset / totalPageHeight) * 100; progressBar.style.height = `${newProgressHeight}%`; progressBar.style.opacity = `${newProgressHeight}%`; }; ``` 結論。 === 就是這樣!現在,只需幾行 CSS,您就擁有了一個漂亮的自訂捲軸。 --- 原文出處:https://dev.to/emmabostian/creating-a-custom-scroll-bar-in-24-lines-of-css-4gg0
長話短說 ==== 我收集了您應該了解的 React 庫,以建立許多不同類型的專案並成為 React 奇才🧙♂️。 其中每一項都是獨一無二的,並且都有自己的用例。 別忘了給他們加星號🌟 讓我們開始吧!  --- 1. [CopilotKit](https://github.com/CopilotKit/CopilotKit) - 建立應用內人工智慧聊天機器人、代理程式和文字區域 ------------------------------------------------------------------------------------  將 AI 功能整合到 React 中是很困難的,這就是 Copilot 的用武之地。一個簡單快速的解決方案,可將可投入生產的 Copilot 整合到任何產品中! 您可以使用兩個 React 元件將關鍵 AI 功能整合到 React 應用程式中。它們還提供內建(完全可自訂)Copilot 原生 UX 元件,例如`<CopilotKit />` 、 `<CopilotPopup />` 、 `<CopilotSidebar />` 、 `<CopilotTextarea />` 。 開始使用以下 npm 指令。 ``` npm i @copilotkit/react-core @copilotkit/react-ui ``` Copilot Portal 是 CopilotKit 提供的元件之一,CopilotKit 是一個應用程式內人工智慧聊天機器人,可查看目前應用狀態並在應用程式內採取操作。它透過插件與應用程式前端和後端以及第三方服務進行通訊。 這就是整合聊天機器人的方法。 `CopilotKit`必須包裝與 CopilotKit 互動的所有元件。建議您也開始使用`CopilotSidebar` (您可以稍後切換到不同的 UI 提供者)。 ``` "use client"; import { CopilotKit } from "@copilotkit/react-core"; import { CopilotSidebar } from "@copilotkit/react-ui"; import "@copilotkit/react-ui/styles.css"; export default function RootLayout({children}) { return ( <CopilotKit url="/path_to_copilotkit_endpoint/see_below"> <CopilotSidebar> {children} </CopilotSidebar> </CopilotKit> ); } ``` 您可以使用此[快速入門指南](https://docs.copilotkit.ai/getting-started/quickstart-backend)設定 Copilot 後端端點。 之後,您可以讓 Copilot 採取行動。您可以閱讀如何提供[外部上下文](https://docs.copilotkit.ai/getting-started/quickstart-chatbot#provide-context)。您可以使用`useMakeCopilotReadable`和`useMakeCopilotDocumentReadable`反應掛鉤來執行此操作。 ``` "use client"; import { useMakeCopilotActionable } from '@copilotkit/react-core'; // Let the copilot take action on behalf of the user. useMakeCopilotActionable( { name: "setEmployeesAsSelected", // no spaces allowed in the function name description: "Set the given employees as 'selected'", argumentAnnotations: [ { name: "employeeIds", type: "array", items: { type: "string" } description: "The IDs of employees to set as selected", required: true } ], implementation: async (employeeIds) => setEmployeesAsSelected(employeeIds), }, [] ); ``` 您可以閱讀[文件](https://docs.copilotkit.ai/getting-started/quickstart-textarea)並查看[演示影片](https://github.com/CopilotKit/CopilotKit?tab=readme-ov-file#demo)。 您可以輕鬆整合 Vercel AI SDK、OpenAI API、Langchain 和其他 LLM 供應商。您可以按照本[指南](https://docs.copilotkit.ai/getting-started/quickstart-chatbot)將聊天機器人整合到您的應用程式中。 基本概念是在幾分鐘內建立可用於基於 LLM 的應用程式的 AI 聊天機器人。 用例是巨大的,作為開發人員,我們絕對應該在下一個專案中嘗試使用 CopilotKit。 https://github.com/CopilotKit/CopilotKit Star CopilotKit ⭐️ --- 2. [xyflow](https://github.com/xyflow/xyflow) - 使用 React 建立基於節點的 UI。 -------------------------------------------------------------------- 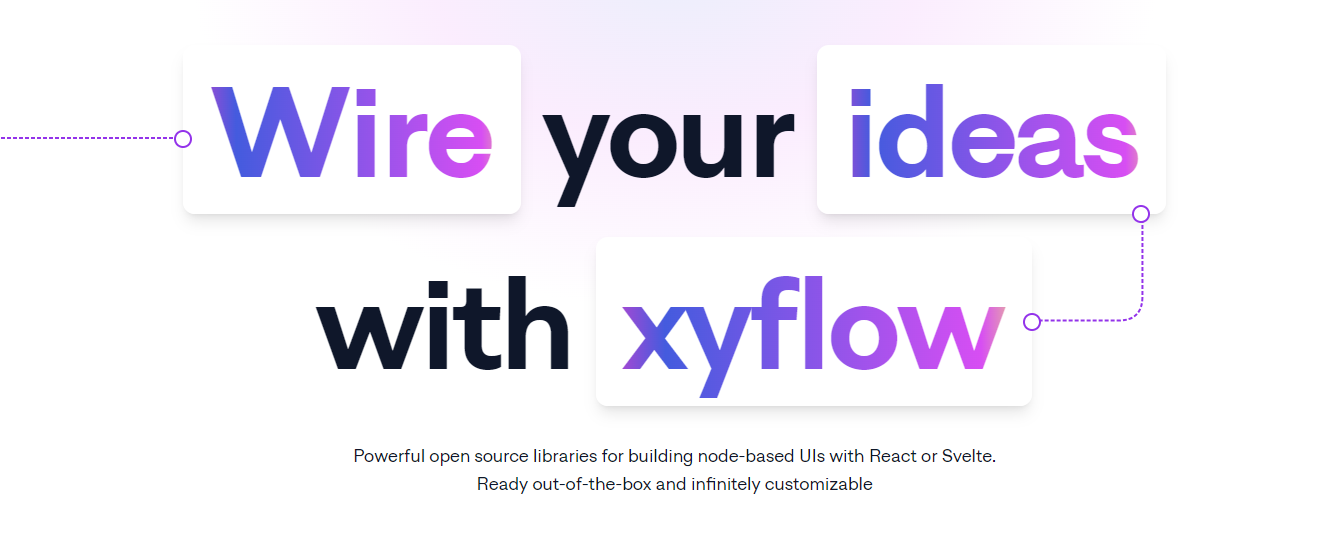 XYFlow 是一個功能強大的開源程式庫,用於使用 React 或 Svelte 建立基於節點的 UI。它是一個 monorepo,提供[React Flow](https://reactflow.dev)和[Svelte Flow](https://svelteflow.dev) 。讓我們更多地了解可以使用 React flow 做什麼。  您可以觀看此影片,在 60 秒內了解 React Flow。 https://www.youtube.com/watch?v=aUBWE41a900 有些功能在專業模式下可用,但免費層中的功能足以形成一個非常互動的流程。 React 流程以 TypeScript 編寫並使用 Cypress 進行測試。 開始使用以下 npm 指令。 ``` npm install reactflow ``` 以下介紹如何建立兩個節點( `Hello`和`World` ,並透過邊連接。節點具有預先定義的初始位置以防止重疊,並且我們還應用樣式來確保有足夠的空間來渲染圖形。 ``` import ReactFlow, { Controls, Background } from 'reactflow'; import 'reactflow/dist/style.css'; const edges = [{ id: '1-2', source: '1', target: '2' }]; const nodes = [ { id: '1', data: { label: 'Hello' }, position: { x: 0, y: 0 }, type: 'input', }, { id: '2', data: { label: 'World' }, position: { x: 100, y: 100 }, }, ]; function Flow() { return ( <div style={{ height: '100%' }}> <ReactFlow nodes={nodes} edges={edges}> <Background /> <Controls /> </ReactFlow> </div> ); } export default Flow; ``` 這就是它的樣子。您還可以新增標籤、更改類型並使其具有互動性。 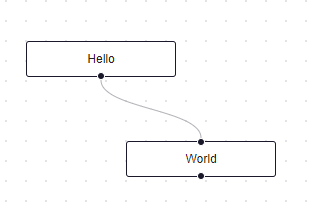 您可以在 React Flow 的 API 參考中查看[完整的選項清單](https://reactflow.dev/api-reference/react-flow)以及元件、鉤子和實用程式。 最好的部分是您還可以加入[自訂節點](https://reactflow.dev/learn/customization/custom-nodes)。在您的自訂節點中,您可以渲染您想要的一切。您可以定義多個來源和目標句柄並呈現表單輸入或圖表。您可以查看此[codesandbox](https://codesandbox.io/p/sandbox/pensive-field-z4kv3w?file=%2FApp.js&utm_medium=sandpack)作為範例。 您可以閱讀[文件](https://reactflow.dev/learn)並查看 Create React App、Next.js 和 Remix 的[範例 React Flow 應用程式](https://github.com/xyflow/react-flow-example-apps)。 React Flow 附帶了幾個額外的[插件](https://reactflow.dev/learn/concepts/plugin-components)元件,可以幫助您使用 Background、Minimap、Controls、Panel、NodeToolbar 和 NodeResizer 元件製作更高級的應用程式。 例如,您可能已經注意到許多網站的背景中有圓點,增強了美觀性。要實現此模式,您可以簡單地使用 React Flow 中的後台元件。 ``` import { Background } from 'reactflow'; <Background color="#ccc" variant={'dots'} /> // this will be under React Flow component. Just an example. ``` 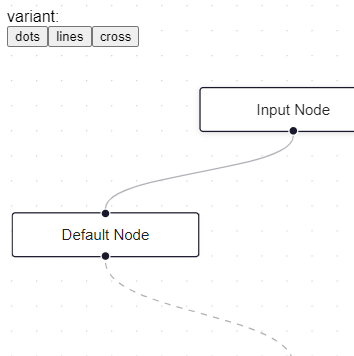 如果您正在尋找一篇快速文章,我建議您查看 Webkid 的[React Flow - A Library for Rendering Interactive Graphs](https://webkid.io/blog/react-flow-node-based-graph-library/) 。 React Flow 由 Webkid 開發和維護。 它在 GitHub 上有超過 19k 顆星,並且在`v11.10.4`上顯示它們正在不斷改進,npm 套件每週下載量超過 40 萬次。您可以輕鬆使用的最佳專案之一。  https://github.com/xyflow/xyflow 星 xyflow ⭐️ --- 3. [Zod](https://github.com/colinhacks/zod) + [React Hook Form](https://github.com/react-hook-form) - 致命的驗證組合。 --------------------------------------------------------------------------------------------------------------  第一個問題是:為什麼我在同一個選項中包含 Zod 和 React Hook 表單?好吧,請閱讀它來找出答案。 Zod 的目標是透過最大限度地減少重複的類型聲明來對開發人員友好。使用 Zod,您聲明一次驗證器,Zod 將自動推斷靜態 TypeScript 類型。將更簡單的類型組合成複雜的資料結構很容易。 開始使用以下 npm 指令。 ``` npm install zod ``` 這是您在建立字串架構時自訂一些常見錯誤訊息的方法。 ``` const name = z.string({ required_error: "Name is required", invalid_type_error: "Name must be a string", }); ``` ``` // It does provide lots of options // validations z.string().min(5, { message: "Must be 5 or more characters long" }); z.string().max(5, { message: "Must be 5 or fewer characters long" }); z.string().length(5, { message: "Must be exactly 5 characters long" }); z.string().email({ message: "Invalid email address" }); z.string().url({ message: "Invalid url" }); z.string().emoji({ message: "Contains non-emoji characters" }); z.string().uuid({ message: "Invalid UUID" }); z.string().includes("tuna", { message: "Must include tuna" }); z.string().startsWith("https://", { message: "Must provide secure URL" }); z.string().endsWith(".com", { message: "Only .com domains allowed" }); z.string().datetime({ message: "Invalid datetime string! Must be UTC." }); z.string().ip({ message: "Invalid IP address" }); ``` 請閱讀[文件](https://zod.dev/)以了解有關 Zod 的更多資訊。 它適用於 Node.js 和所有現代瀏覽器。 現在,第二部分來了。 有很多可用的表單整合。  雖然 Zod 可以驗證物件,但如果沒有自訂邏輯,它不會影響您的用戶端和後端。 React-hook-form 是用於客戶端驗證的優秀專案。例如,它可以顯示輸入錯誤。 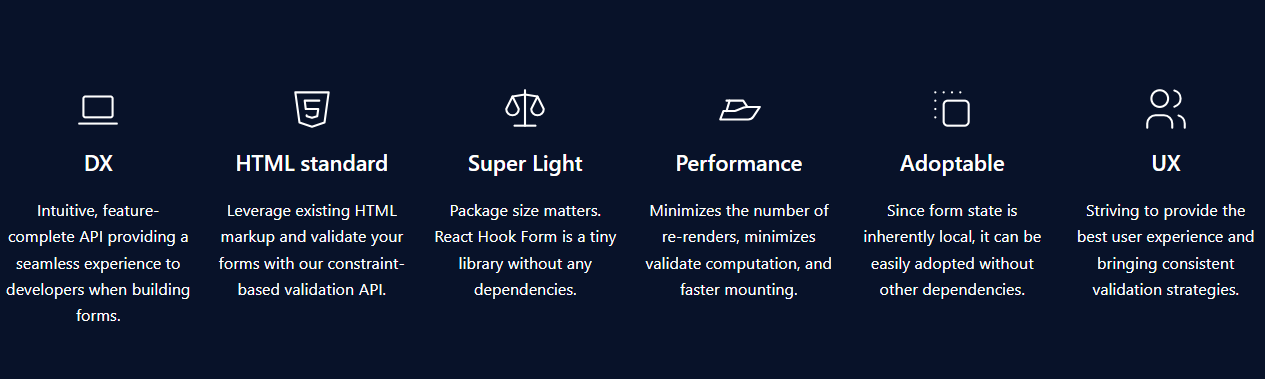 開始使用以下 npm 指令。 ``` npm install react-hook-form ``` 這就是如何使用`React Hook Form` 。 ``` import { useForm, SubmitHandler } from "react-hook-form" type Inputs = { example: string exampleRequired: string } export default function App() { const { register, handleSubmit, watch, formState: { errors }, } = useForm<Inputs>() const onSubmit: SubmitHandler<Inputs> = (data) => console.log(data) console.log(watch("example")) // watch input value by passing the name of it return ( /* "handleSubmit" will validate your inputs before invoking "onSubmit" */ <form onSubmit={handleSubmit(onSubmit)}> {/* register your input into the hook by invoking the "register" function */} <input defaultValue="test" {...register("example")} /> {/* include validation with required or other standard HTML validation rules */} <input {...register("exampleRequired", { required: true })} /> {/* errors will return when field validation fails */} {errors.exampleRequired && <span>This field is required</span>} <input type="submit" /> </form> ) } ``` 您甚至可以隔離重新渲染,從而提高整體效能。 您可以閱讀[文件](https://react-hook-form.com/get-started)。 兩者結合起來就是一個很好的組合。嘗試一下! 我透過 Shadcn 發現了它,它使用它作為表單元件的預設值。我自己在幾個專案中使用過它,效果非常好。它提供了很大的靈活性,這確實很有幫助。 https://github.com/colinhacks/zod Star Zod ⭐️ https://github.com/react-hook-form Star React Hook Form ⭐️ --- 4. [React DND](https://github.com/react-dnd/react-dnd) - 用於 React 的拖放。 ---------------------------------------------------------------------- 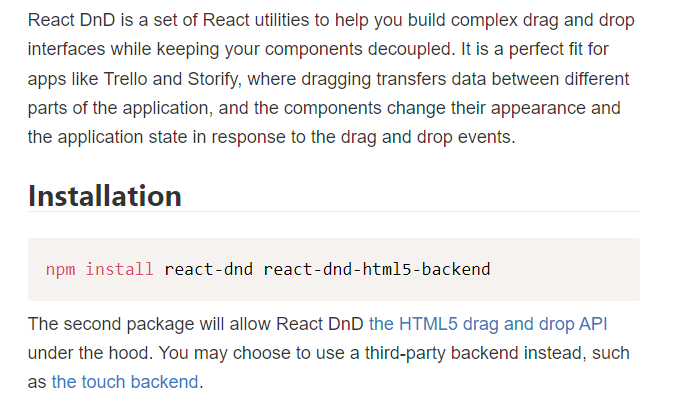 我還沒有完全實現拖放功能,而且我經常發現自己對選擇哪個選項感到困惑。我遇到的另一個選擇是[interactjs.io](https://interactjs.io/) ,根據我讀過的文件,它似乎非常有用。由於他們提供了詳細的範例,這非常容易。 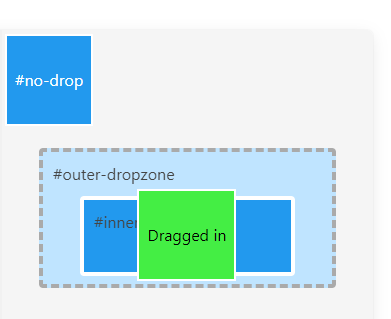 但我現在只介紹 React DND。 開始使用以下 npm 指令。 ``` npm install react-dnd react-dnd-html5-backend ``` 除非您正在編寫自訂後端,否則您可能想要使用 React DnD 隨附的 HTML5 後端。 這是安裝`react-dnd-html5-backend`方法。閱讀[文件](https://react-dnd.github.io/react-dnd/docs/backends/html5)。 這是起點。 ``` import { HTML5Backend } from 'react-dnd-html5-backend' import { DndProvider } from 'react-dnd' export default class YourApp { render() { return ( <DndProvider backend={HTML5Backend}> /* Your Drag-and-Drop Application */ </DndProvider> ) } } ``` 透過這種方式,您可以非常輕鬆地實現卡片的拖放操作。 ``` // Let's make <Card text='Write the docs' /> draggable! import React from 'react' import { useDrag } from 'react-dnd' import { ItemTypes } from './Constants' export default function Card({ isDragging, text }) { const [{ opacity }, dragRef] = useDrag( () => ({ type: ItemTypes.CARD, item: { text }, collect: (monitor) => ({ opacity: monitor.isDragging() ? 0.5 : 1 }) }), [] ) return ( <div ref={dragRef} style={{ opacity }}> {text} </div> ) } ``` 請注意,HTML5 後端不支援觸控事件。因此它不適用於平板電腦和行動裝置。您可以將`react-dnd-touch-backend`用於觸控裝置。閱讀[文件](https://react-dnd.github.io/react-dnd/docs/backends/touch)。 ``` import { TouchBackend } from 'react-dnd-touch-backend' import { DndProvider } from 'react-dnd' class YourApp { <DndProvider backend={TouchBackend} options={opts}> {/* Your application */} </DndProvider> } ``` 這個codesandbox規定了我們如何正確使用React DND。 https://codesandbox.io/embed/3y5nkyw381?view=Editor+%2B+Preview&module=%2Fsrc%2Findex.tsx&hidenavigation=1 你可以看看React DND的[例子](https://react-dnd.github.io/react-dnd/examples)。 它們甚至有一個乾淨的功能,您可以使用 Redux 檢查內部發生的情況。 您可以透過為提供者新增 debugModeprop 來啟用[Redux DevTools](https://github.com/reduxjs/redux-devtools) ,其值為 true。 ``` <DndProvider debugMode={true} backend={HTML5Backend}> ``` 它提供了多種元件選項,我需要親自測試一下。總的來說,這看起來相當不錯,特別是如果你剛開始的話。 React DND 已獲得`MIT`許可,並在 GitHub 上擁有超過 20k Stars,這使其具有令人難以置信的可信度。 https://github.com/react-dnd/react-dnd Star React DND ⭐️ --- 5. [Cypress](https://github.com/cypress-io/cypress) - 快速測試瀏覽器中執行的內容。 --------------------------------------------------------------------  近年來已經證明了測試的重要性,而 Jest 和 Cypress 等選項使其變得異常簡單。 但我們只會介紹 Cypress,因為它本身就很方便。 只需一張圖片就能證明 Cypress 值得付出努力。 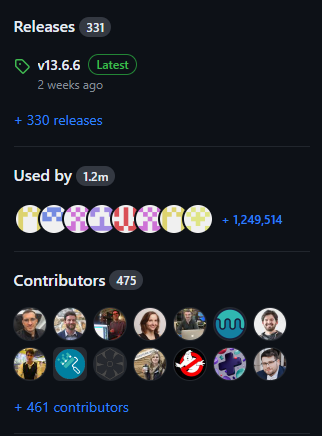 開始使用以下 npm 指令。 ``` npm install cypress -D ``` 如果您在專案中沒有使用 Node 或套件管理器,或者您想快速試用 Cypress,您始終可以[直接從 CDN 下載 Cypress](https://download.cypress.io/desktop) 。 一旦安裝並打開它。您必須使用`.cy.js`建立一個規範檔案。 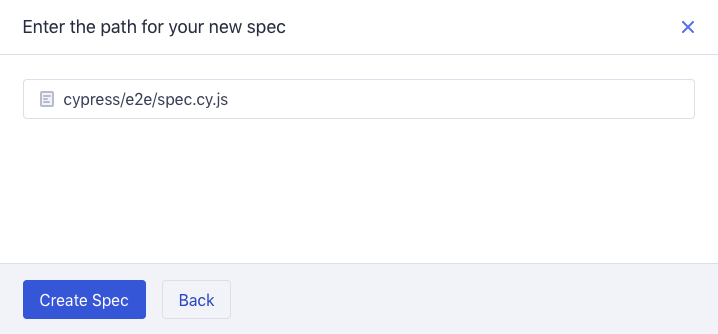 現在,您可以編寫並測試您的應用程式(範例程式碼)。 ``` describe('My First Test', () => { it('Does not do much!', () => { expect(true).to.equal(true) }) }) ``` Cypress 提供了多種選項,例如`cy.visit()`或`cy.contains()` 。由於我沒有廣泛使用 Cypress,因此您需要在其[文件](https://docs.cypress.io/guides/end-to-end-testing/writing-your-first-end-to-end-test)中進一步探索它。 如果它看起來很可怕,那麼請前往這個[為初學者解釋 Cypress 的](https://www.youtube.com/watch?v=u8vMu7viCm8&pp=ygUQY3lwcmVzcyB0dXRvcmlhbA%3D%3D)freeCodeCamp 教程。 Freecodecamp 影片確實是金礦 :D Cypress 在 GitHub 上擁有超過 45,000 顆星,並且在目前的 v13 版本中,它正在不斷改進。 https://github.com/cypress-io/cypress 星柏 ⭐️ --- [6.Refine](https://github.com/refinedev/refine) - 面向企業的開源 Retool。 ----------------------------------------------------------------- 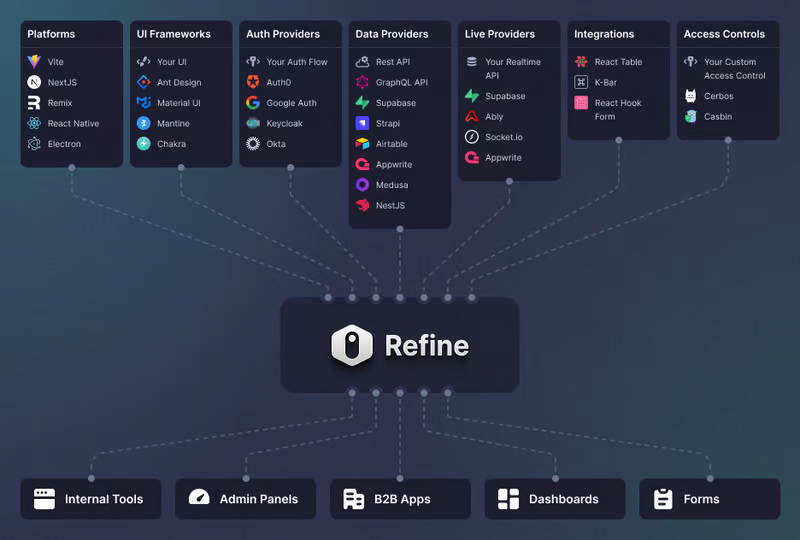 Refine 是一個元 React 框架,可以快速開發各種 Web 應用程式。 從內部工具到管理面板、B2B 應用程式和儀表板,它可作為建立任何類型的 CRUD 應用程式(例如 DevOps 儀表板、電子商務平台或 CRM 解決方案)的全面解決方案。  您可以在一分鐘內使用單一 CLI 命令進行設定。 它具有適用於 15 多個後端服務的連接器,包括 Hasura、Appwrite 等。 您可以查看可用的[整合清單](https://refine.dev/integrations/)。  但最好的部分是,Refine `headless by design` ,從而提供無限的樣式和自訂選項。 由於該架構,您可以使用流行的 CSS 框架(如 TailwindCSS)或從頭開始建立樣式。 這是最好的部分,因為我們不希望最終受到與特定庫的兼容性的樣式限制,因為每個人都有自己的風格並使用不同的 UI。 開始使用以下 npm 指令。 ``` npm create refine-app@latest ``` 這就是使用 Refine 新增登入資訊的簡單方法。 ``` import { useLogin } from "@refinedev/core"; const { login } = useLogin(); ``` 使用 Refine 概述程式碼庫的結構。 ``` const App = () => ( <Refine dataProvider={dataProvider} resources={[ { name: "blog_posts", list: "/blog-posts", show: "/blog-posts/show/:id", create: "/blog-posts/create", edit: "/blog-posts/edit/:id", }, ]} > /* ... */ </Refine> ); ``` 您可以閱讀[文件](https://refine.dev/docs/)。 您可以看到一些使用 Refine 建立的範例應用程式: - [全功能管理面板](https://example.admin.refine.dev/) - [優化不同的用例場景](https://github.com/refinedev/refine/tree/master/examples)。 他們甚至提供模板,這就是為什麼這麼多用戶喜歡Refine。 你可以看到[模板](https://refine.dev/templates/)。  他們在 GitHub 上擁有大約 22k+ 顆星。 https://github.com/refinedev/refine 星際精煉 ⭐️ --- 7. [Tremor](https://github.com/tremorlabs/tremor) - React 元件來建立圖表和儀表板。 ----------------------------------------------------------------------  Tremor 提供了 20 多個開源 React 元件,用於建立基於 Tailwind CSS 的圖表和儀表板,使資料視覺化再次變得簡單。  開始使用以下 npm 指令。 ``` npm i @tremor/react ``` 這就是您如何使用 Tremor 快速建立東西。 ``` import { Card, ProgressBar } from '@tremor/react'; export default function Example() { return ( <Card className="mx-auto max-w-md"> <h4 className="text-tremor-default text-tremor-content dark:text-dark-tremor-content"> Sales </h4> <p className="text-tremor-metric font-semibold text-tremor-content-strong dark:text-dark-tremor-content-strong"> $71,465 </p> <p className="mt-4 flex items-center justify-between text-tremor-default text-tremor-content dark:text-dark-tremor-content"> <span>32% of annual target</span> <span>$225,000</span> </p> <ProgressBar value={32} className="mt-2" /> </Card> ); } ``` 這就是基於此生成的內容。  您可以閱讀[文件](https://www.tremor.so/docs/getting-started/installation)。其間,他們在引擎蓋下使用混音圖標。 從我見過的各種元件來看,這是一個很好的起點。相信我! Tremor 還提供了一個[乾淨的 UI 工具包](https://www.figma.com/community/file/1233953507961010067)。多麼酷啊!  Tremor 在 GitHub 上擁有超過 14k 顆星,並有超過 280 個版本,這意味著它正在不斷改進。 https://github.com/tremorlabs/tremor 星震 ⭐️ --- 8. [Watermelon DB](https://github.com/Nozbe/WatermelonDB) - 用於 React 和 React Native 的反應式和非同步資料庫。 ------------------------------------------------------------------------------------------------ 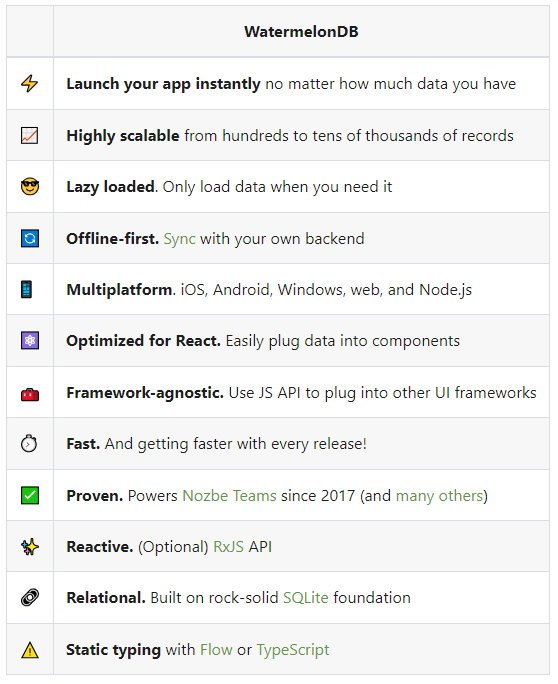 我不知道為什麼資料庫有這麼多選項;甚至很難全部數清。但如果我們使用 React,Watermelon DB 是一個不錯的選擇。即使在 4k+ 提交之後,它們仍然處於`v0.28`版本,這是一個相當大的問題。 Rocket.chat 使用 Watermelon DB,這給了他們巨大的可信度。 開始使用以下 npm 指令。 ``` npm install @nozbe/watermelondb ``` 您需要做的第一件事是建立模型和後續遷移(閱讀文件)。 ``` import { appSchema, tableSchema } from '@nozbe/watermelondb' export default appSchema({ version: 1, tables: [ // We'll add to tableSchemas here ] }) ``` 根據文件,使用 WatermelonDB 時,您正在處理模型和集合。然而,在 Watermelon 之下有一個底層資料庫(SQLite 或 LokiJS),它使用不同的語言:表格和欄位。這些一起稱為資料庫模式。 您可以閱讀有關[CRUD 操作的](https://watermelondb.dev/docs/CRUD)[文件](https://watermelondb.dev/docs/Installation)和更多內容。 https://github.com/Nozbe/WatermelonDB 明星 WatermelonDB ⭐️ --- 9. [Evergreen UI](https://github.com/segmentio/evergreen) - 按 Segment 劃分的 React UI 框架。 --------------------------------------------------------------------------------------  沒有 UI 框架的清單幾乎是不可能的。有許多受歡迎的選項,例如 Material、Ant Design、Next UI 等等。 但我們正在報道 Evergreen,它本身就非常好。 開始使用以下 npm 指令。 ``` $ npm install evergreen-ui ``` [Evergreen Segment 網站](https://evergreen.segment.com/foundations)上顯示了任何使用者介面的基礎以及詳細的選項。 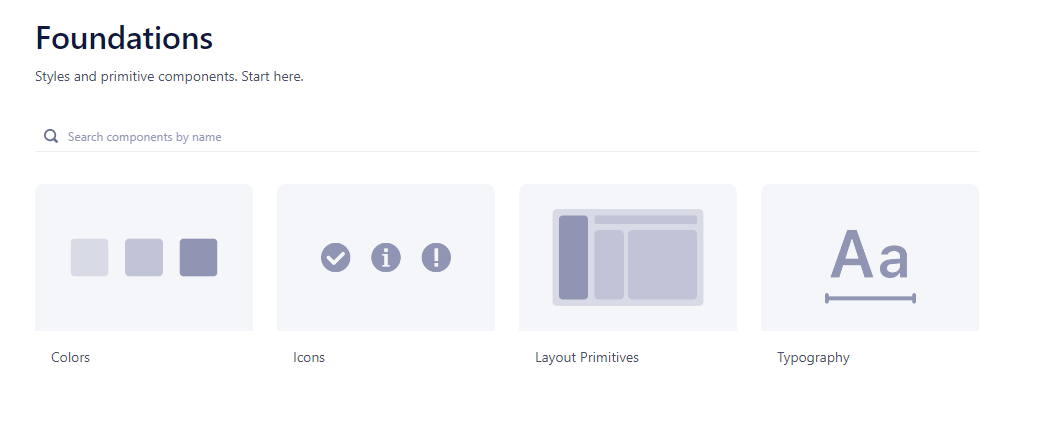 它提供了很多元件,其中一些非常好,例如`Tag Input`或`File uploader` 。 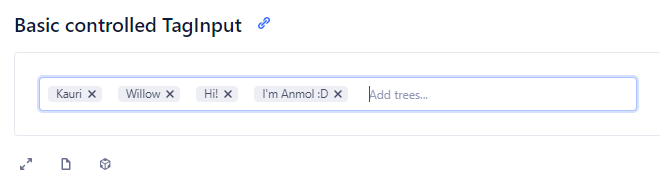 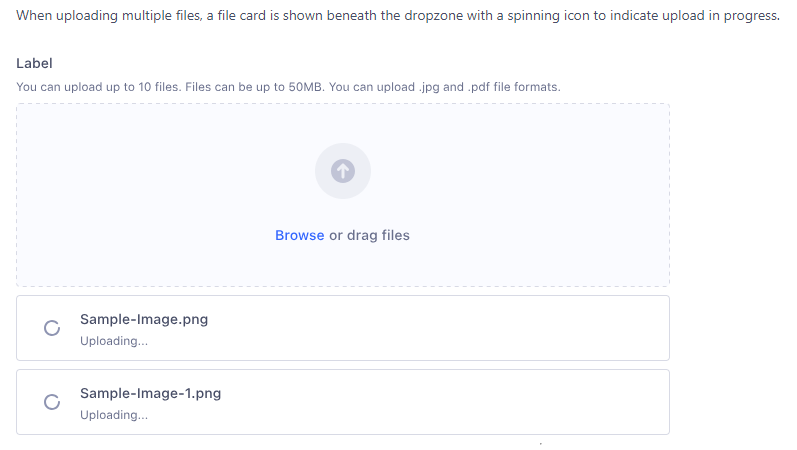 您可以看到 Evergreen UI 提供的所有[元件](https://evergreen.segment.com/components)。 https://github.com/segmentio/evergreen Star Evergreen UI ⭐️ --- 10. [React Spring](https://www.react-spring.dev/) - 流暢的動畫來提升 UI 和互動。 -------------------------------------------------------------------- 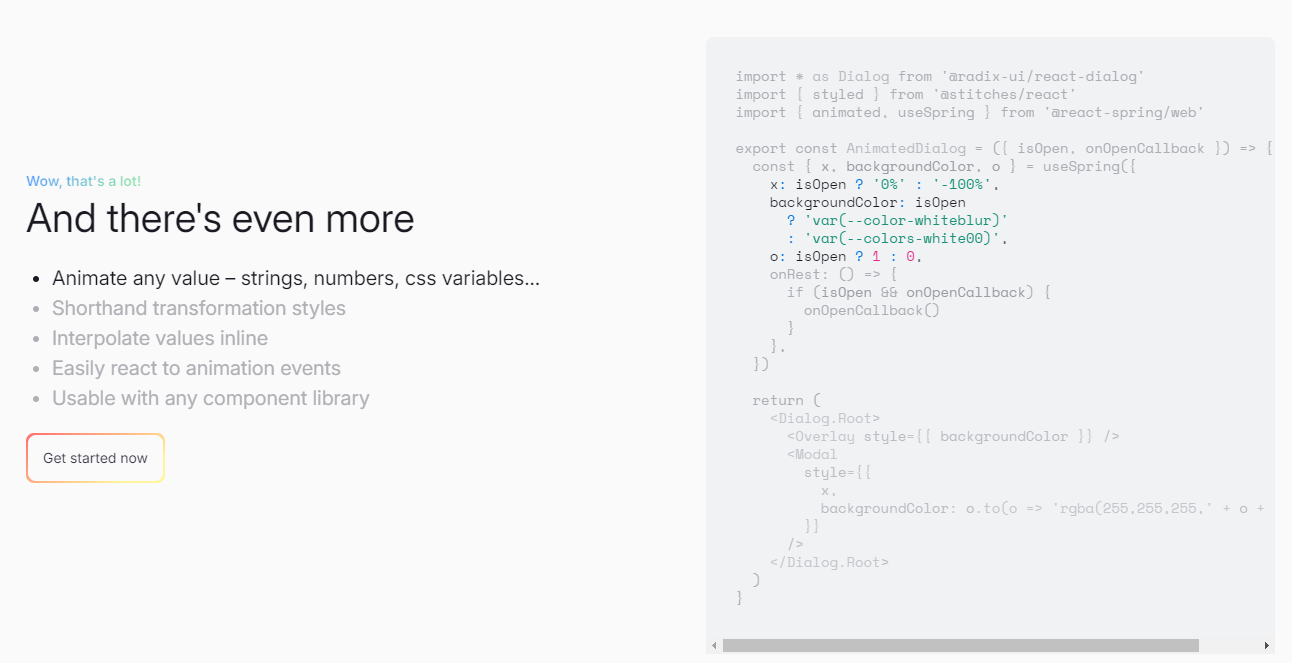 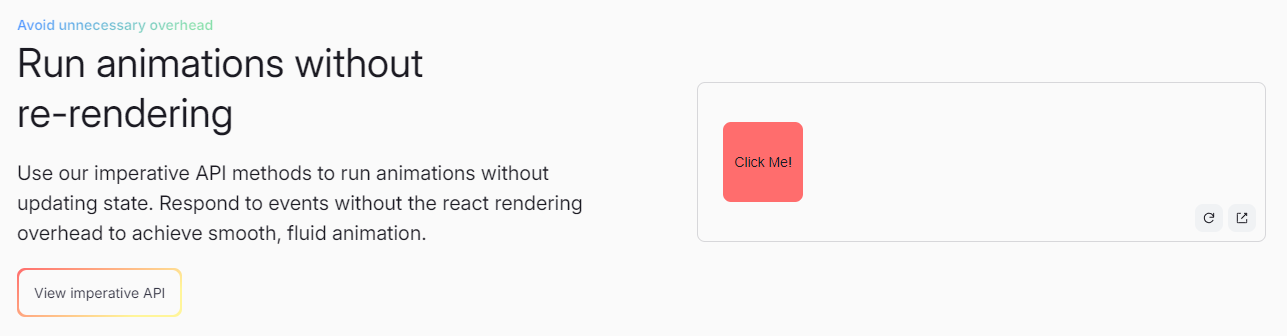 如果您喜歡 React-Motion 但感覺過渡不流暢,那是因為它專門使用 React 渲染。 如果你喜歡 Popmotion,但感覺自己的能力受到限制,那是因為它完全跳過了 React 渲染。 `react-spring`提供了兩種選擇,試試看! 開始使用以下 npm 指令。 ``` npm i @react-spring/web ``` 這就是導入高階元件來包裝動畫的方法。 ``` import { animated } from '@react-spring/web' // use it. export default function MyComponent() { return ( <animated.div style={{ width: 80, height: 80, background: '#ff6d6d', borderRadius: 8, }} /> ) } ``` 由於以下程式碼和框,我決定嘗試 React Spring。令人驚訝的是,我們可以使用 React Spring 做很多事情。 https://codesandbox.io/embed/mdovb?view=Editor+%2B+Preview&module=%2Fsrc%2Findex.tsx&hidenavigation=1 您可以閱讀[文件](https://www.react-spring.dev/docs/getting-started)。 他們還提供了很多您可以學習的[範例](https://www.react-spring.dev/examples)。  它提供了大量的選項,例如`useScroll` ,它允許您建立滾動連結動畫。 例如,這個codesandbox告訴了`useScroll`的用法。 https://codesandbox.io/embed/b07dmz?view=Editor+%2B+Preview&module=%2Fsrc%2Findex.tsx&hidenavigation=1 React Spring 在 GitHub 上有大約 27k+ Stars。 https://github.com/pmndrs/react-spring Star React Spring ⭐️ --- 11. [React Tweet](https://github.com/vercel/react-tweet) - 將推文嵌入到你的 React 應用程式中。 -------------------------------------------------------------------------------- 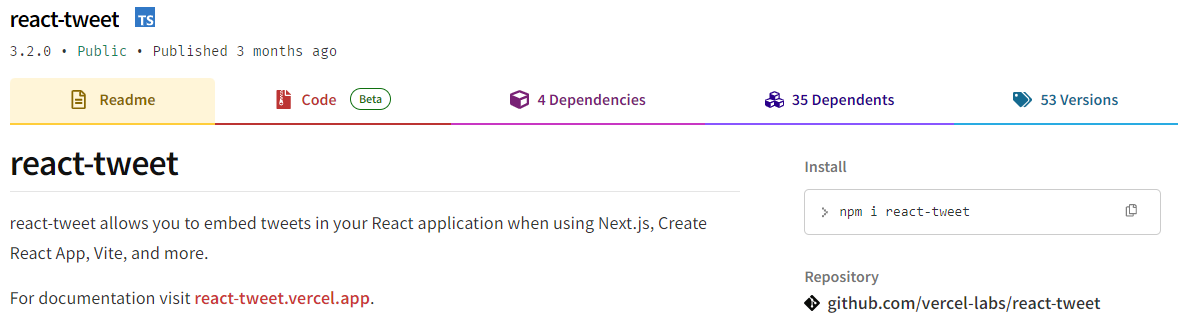 `React Tweet`可讓您在使用 Next.js、Create React App、Vite 等時將推文嵌入到 React 應用程式中。 該函式庫不需要使用 Twitter API。推文可以靜態呈現,從而無需包含 iframe 和額外的客戶端 JavaScript。 它是 Vercel 的開源專案。 開始使用以下 npm 指令。 ``` npm i react-tweet ``` 為了顯示推文,我們需要從 Twitter 的 API 請求資料。透過此 API 進行速率限制具有挑戰性,但如果您僅依賴我們提供的 SWR 端點 ( `react-tweet.vercel.app/api/tweet/:id` ),這是可能的,因為伺服器的IP 位址向Twitter 發出了許多請求API。這也適用於 RSC,其中 API 端點不是必需的,但伺服器仍然從相同 IP 位址發送請求。 為了避免 API 限制,您可以使用 Redis 或 Vercel KV 等資料庫快取推文。例如,您可以使用 Vercel KV。 ``` import { Suspense } from 'react' import { TweetSkeleton, EmbeddedTweet, TweetNotFound } from 'react-tweet' import { fetchTweet, Tweet } from 'react-tweet/api' import { kv } from '@vercel/kv' async function getTweet( id: string, fetchOptions?: RequestInit ): Promise<Tweet | undefined> { try { const { data, tombstone, notFound } = await fetchTweet(id, fetchOptions) if (data) { await kv.set(`tweet:${id}`, data) return data } else if (tombstone || notFound) { // remove the tweet from the cache if it has been made private by the author (tombstone) // or if it no longer exists. await kv.del(`tweet:${id}`) } } catch (error) { console.error('fetching the tweet failed with:', error) } const cachedTweet = await kv.get<Tweet>(`tweet:${id}`) return cachedTweet ?? undefined } const TweetPage = async ({ id }: { id: string }) => { try { const tweet = await getTweet(id) return tweet ? <EmbeddedTweet tweet={tweet} /> : <TweetNotFound /> } catch (error) { console.error(error) return <TweetNotFound error={error} /> } } const Page = ({ params }: { params: { tweet: string } }) => ( <Suspense fallback={<TweetSkeleton />}> <TweetPage id={params.tweet} /> </Suspense> ) export default Page ``` 您可以直接使用它,方法非常簡單。 ``` <div className="dark"> <Tweet id="1629307668568633344" /> </div> ``` 如果您不喜歡使用 Twitter 主題,您也可以使用多個選項建立自己的[自訂主題](https://react-tweet.vercel.app/custom-theme)。 例如,您可以建立自己的推文元件,但沒有回覆按鈕,如下所示: ``` import type { Tweet } from 'react-tweet/api' import { type TwitterComponents, TweetContainer, TweetHeader, TweetInReplyTo, TweetBody, TweetMedia, TweetInfo, TweetActions, QuotedTweet, enrichTweet, } from 'react-tweet' type Props = { tweet: Tweet components?: TwitterComponents } export const MyTweet = ({ tweet: t, components }: Props) => { const tweet = enrichTweet(t) return ( <TweetContainer> <TweetHeader tweet={tweet} components={components} /> {tweet.in_reply_to_status_id_str && <TweetInReplyTo tweet={tweet} />} <TweetBody tweet={tweet} /> {tweet.mediaDetails?.length ? ( <TweetMedia tweet={tweet} components={components} /> ) : null} {tweet.quoted_tweet && <QuotedTweet tweet={tweet.quoted_tweet} />} <TweetInfo tweet={tweet} /> <TweetActions tweet={tweet} /> {/* We're not including the `TweetReplies` component that adds the reply button */} </TweetContainer> ) } ``` 您可以閱讀[文件](https://react-tweet.vercel.app/#installation)。 您可以查看[React Tweet 的演示,](https://react-tweet-next.vercel.app/light/1761133168772489698)以了解它如何在頁面上呈現。 它們已發布`v3.2`版本,這表明它們正在不斷改進,並且[每週下載量超過 46k+](https://www.npmjs.com/package/react-tweet) 。 https://github.com/vercel/react-tweet Star React 推文 ⭐️ --- 12. [React 360](https://github.com/facebookarchive/react-360) - 使用 React 建立令人驚嘆的 360 度和 VR 內容。 ---------------------------------------------------------------------------------------------- 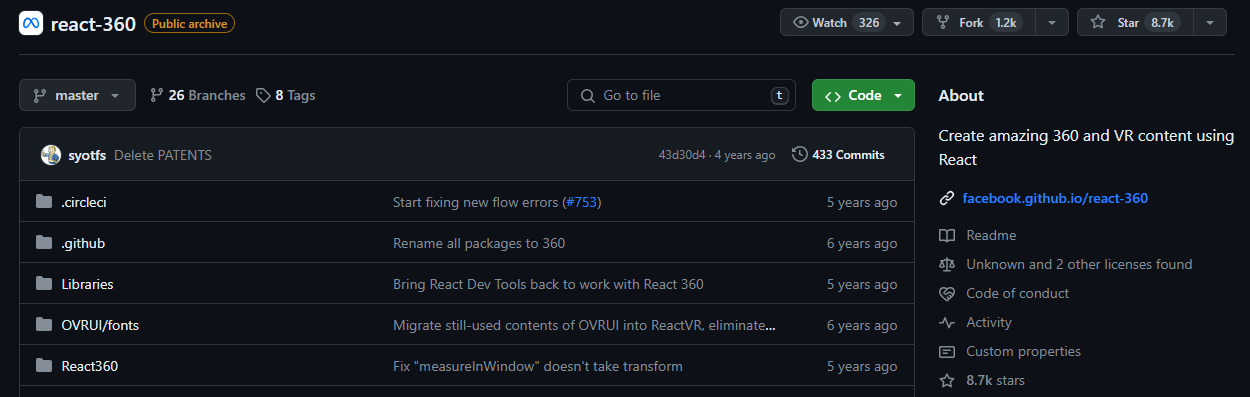 儘管 Facebook 已將其存檔,但許多開發人員仍然發現它足夠有用,因此繼續使用。 React 360 是一個函式庫,它利用大量 React Native 功能來建立在 Web 瀏覽器中執行的虛擬實境應用程式。 它使用 Three.js 進行渲染,並作為 npm 套件提供。透過將 WebGL 和 WebVR 等現代 API 與 React 的聲明性功能結合,React 360 有助於簡化建立跨平台 VR 體驗的過程。 開始使用以下 npm 指令。 ``` npm install -g react-360-cli ``` 涉及的事情有很多,但您可以使用 VrButton 加入重要的互動功能到您的 React VR 應用程式。 ``` import { AppRegistry, StyleSheet, Text, View, VrButton } from 'react-360'; state = { count: 0 }; _incrementCount = () => { this.setState({ count: this.state.count + 1 }) } <View style={styles.panel}> <VrButton onClick={this._incrementCount} style={styles.greetingBox}> <Text style={styles.greeting}> {`You have visited Simmes ${this.state.count} times`} </Text> </VrButton> </View> ``` 除了許多令人驚奇的東西之外,您還可以加入聲音。請參閱[使用 React 360 的 React Resources](https://reactresources.com/topics/react-360)範例。 您也可以閱讀 Log Rocket 撰寫的關於[使用 React 360 建立 VR 應用](https://blog.logrocket.com/building-a-vr-app-with-react-360/)程式的部落格。 這個codesandbox代表了我們可以使用React 360做什麼的一個常見範例。 https://codesandbox.io/embed/2bye27?view=Editor+%2B+Preview&module=%2Fsrc%2Findex.js&hidenavigation=1 https://github.com/facebookarchive/react-360 Star React 360 ⭐️ --- 13. [React Advanced Cropper](https://github.com/advanced-cropper/react-advanced-cropper) - 建立適合您網站的裁剪器。 -------------------------------------------------------------------------------------------------------   React Advanced Cropper 是一個高級庫,可讓您建立適合任何網站設計的裁剪器。這意味著您不僅可以更改裁剪器的外觀,還可以自訂其行為。 它們仍處於測試版本,這意味著 API 可能會在未來版本中發生變化。 簡單的用例是設計軟體和裁剪圖像表面以獲得進一步的見解。 他們有很多選擇,因此值得。 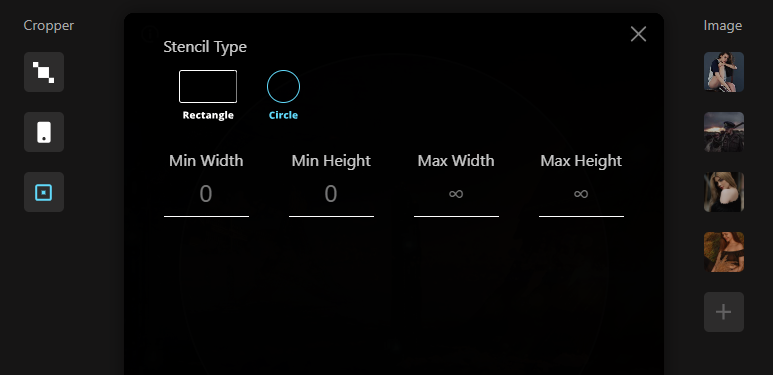  開始使用以下 npm 指令。 ``` npm install --save react-advanced-cropper ``` 您可以這樣使用它。 ``` import React, { useState } from 'react'; import { CropperRef, Cropper } from 'react-advanced-cropper'; import 'react-advanced-cropper/dist/style.css' export const GettingStartedExample = () => { const [image, setImage] = useState( 'https://images.unsplash.com/photo-1599140849279-1014532882fe?ixlib=rb-1.2.1&ixid=eyJhcHBfaWQiOjEyMDd9&auto=format&fit=crop&w=1300&q=80', ); const onChange = (cropper: CropperRef) => { console.log(cropper.getCoordinates(), cropper.getCanvas()); }; return ( <Cropper src={image} onChange={onChange} className={'cropper'} /> ) }; ``` 您可以閱讀[文件](https://advanced-cropper.github.io/react-advanced-cropper/docs/intro),它們提供了[20 多個自訂選項](https://github.com/advanced-cropper/react-advanced-cropper?tab=readme-ov-file#cropper)。 他們主要提供三種類型的[裁剪器選項](https://advanced-cropper.github.io/react-advanced-cropper/docs/guides/cropper-types/):固定、經典和混合以及範例和程式碼。 您可以使用 React Advanced Cropper 製作一些令人興奮的東西來向世界展示:) https://github.com/advanced-cropper/react-advanced-cropper Star React 進階裁剪器 ⭐️ --- 14. [Mobx](https://github.com/mobxjs/mobx) - 簡單、可擴展的狀態管理。 --------------------------------------------------------- 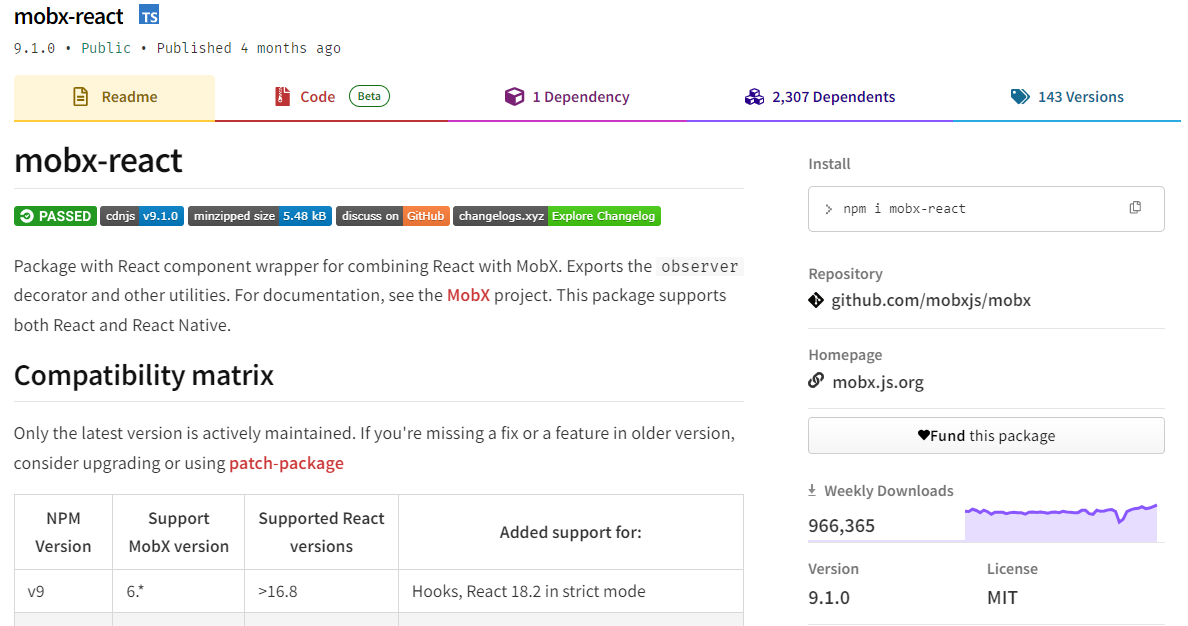 MobX 是一個經過驗證的基於訊號的函式庫,可透過函數反應式程式設計簡化和擴展狀態管理。它提供了靈活性,使您能夠獨立於任何 UI 框架來管理應用程式狀態。 這種方法會產生解耦、可移植且易於測試的程式碼。 以下是使用 MobX 的任何應用程式中處理事件的方式。 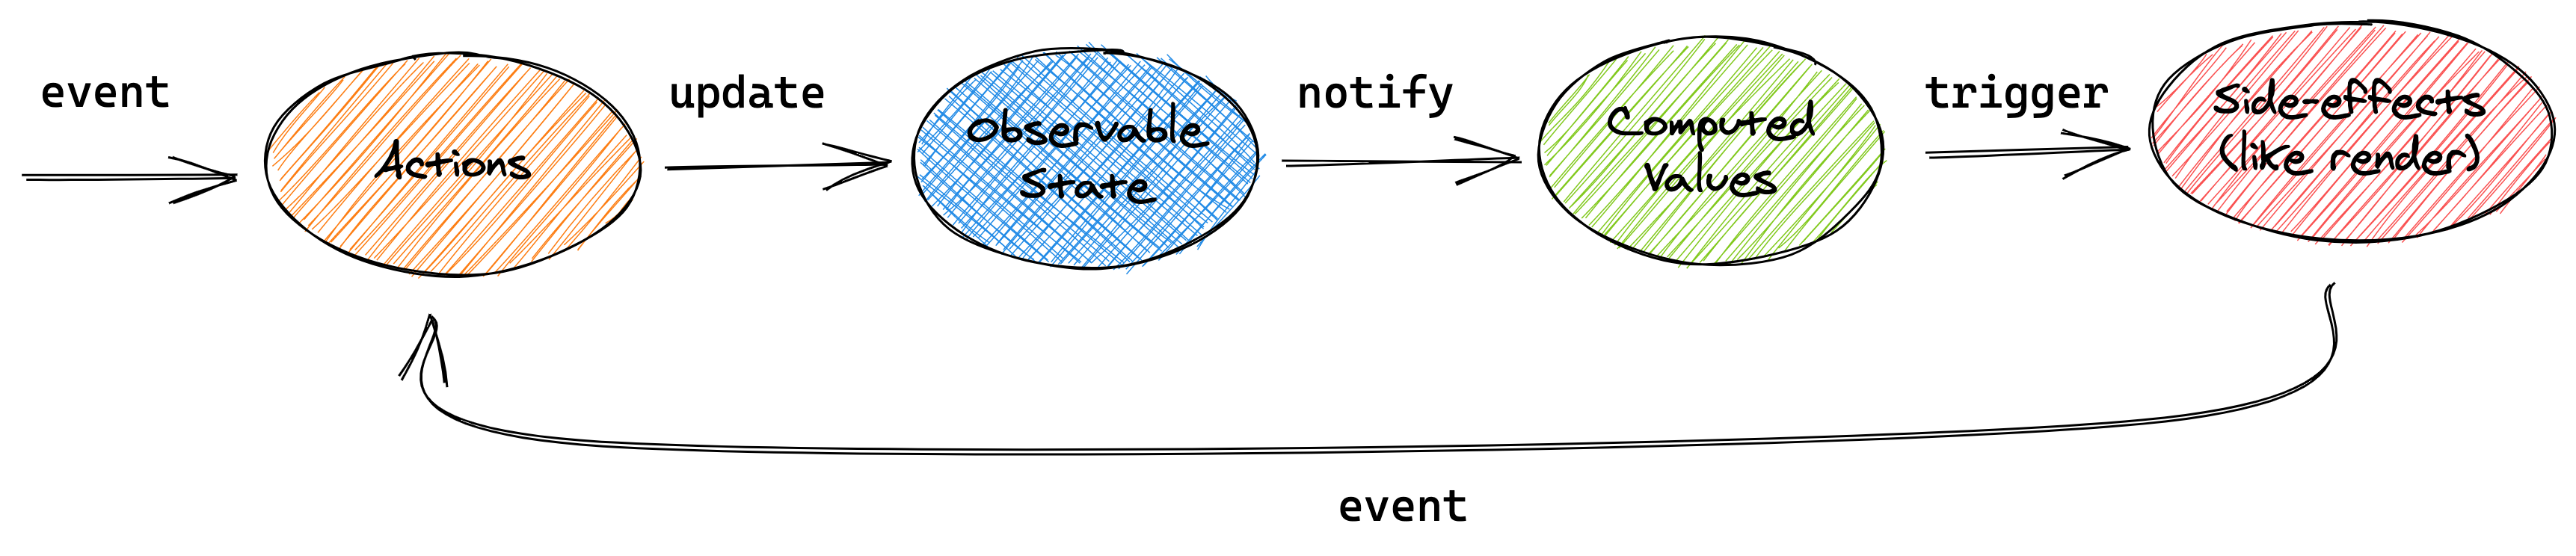 圖片來自文件 開始使用以下 npm 指令。 ``` npm install mobx-react --save // CDN is also available ``` 這就是它的樣子。 ``` import { observer } from "mobx-react" // ---- ES6 syntax ---- const TodoView = observer( class TodoView extends React.Component { render() { return <div>{this.props.todo.title}</div> } } ) // ---- ESNext syntax with decorator syntax enabled ---- @observer class TodoView extends React.Component { render() { return <div>{this.props.todo.title}</div> } } // ---- or just use function components: ---- const TodoView = observer(({ todo }) => <div>{todo.title}</div>) ``` 您可以使用 props、全域變數或使用 React Context 在觀察者中使用外部狀態。 您可以閱讀[有關 React Integration](https://mobx.js.org/react-integration.html)和[npm docs](https://www.npmjs.com/package/mobx-react#api-documentation)的文件。 您也可以閱讀[MobX 和 React 的 10 分鐘互動介紹](https://mobx.js.org/getting-started)。 MobX 在 GitHub 上擁有超過 27k 顆星,並在 GitHub 上被超過 140K 開發者使用。 https://github.com/mobxjs/mobx 明星 Mobx ⭐️ --- 15. [React Virtualized](https://github.com/bvaughn/react-virtualized) - 渲染大型清單和表格資料。 ------------------------------------------------------------------------------------ 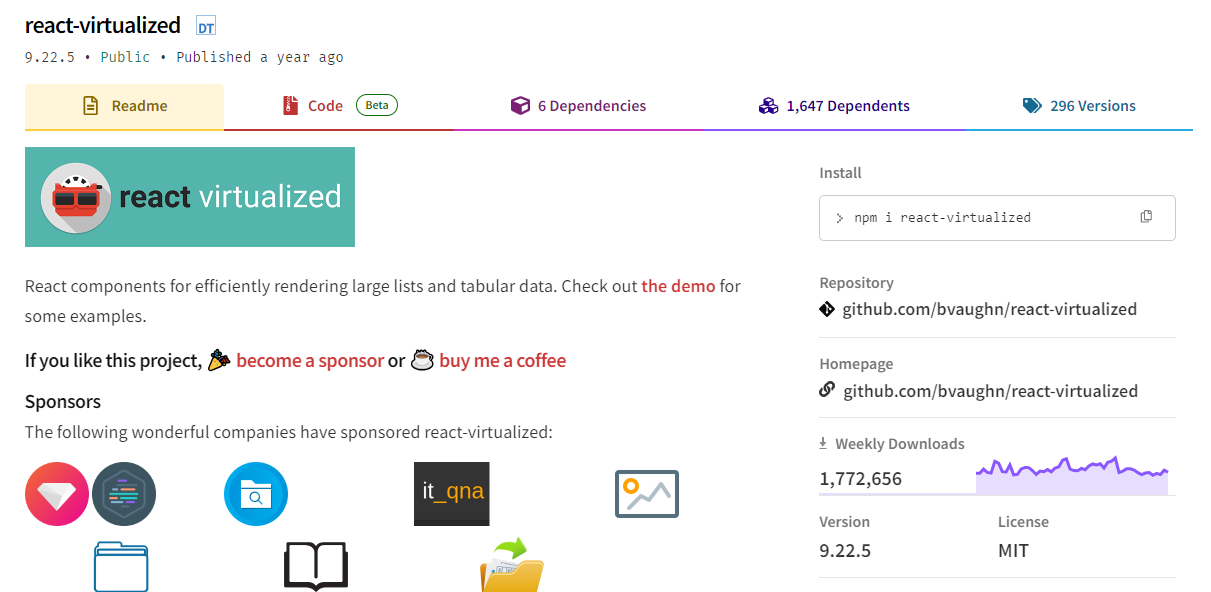 開始使用以下 npm 指令。 ``` npm install react-virtualized --save ``` 以下是如何在網格中使用 ColumnSizer 元件。探索演示(文件)以詳細了解可用選項。 ``` import React from 'react'; import ReactDOM from 'react-dom'; import {ColumnSizer, Grid} from 'react-virtualized'; import 'react-virtualized/styles.css'; // only needs to be imported once // numColumns, numRows, someCalculatedHeight, and someCalculatedWidth determined here... // Render your list ReactDOM.render( <ColumnSizer columnMaxWidth={100} columnMinWidth={50} columnCount={numColumns} width={someCalculatedWidth}> {({adjustedWidth, getColumnWidth, registerChild}) => ( <Grid ref={registerChild} columnWidth={getColumnWidth} columnCount={numColumns} height={someCalculatedHeight} cellRenderer={someCellRenderer} rowHeight={50} rowCount={numRows} width={adjustedWidth} /> )} </ColumnSizer>, document.getElementById('example'), ); ``` 您可以閱讀[文件](https://github.com/bvaughn/react-virtualized/tree/master/docs#documentation)和[演示](https://bvaughn.github.io/react-virtualized/#/components/List)。 他們提供了 React-window 作為輕量級的替代方案,但這個在發布和明星方面更受歡迎,所以我介紹了這個選項。您可以閱讀哪個選項更適合您: [React-Window 與 React-Virtualized 有何不同?](https://github.com/bvaughn/react-window?tab=readme-ov-file#how-is-react-window-different-from-react-virtualized) 。 它被超過 85,000 名開發人員使用,並在 GitHub 上擁有超過 25,000 顆星。它還擁有令人印象深刻的[170 萬+ 每週下載量](https://www.npmjs.com/package/react-virtualized)。 https://github.com/bvaughn/react-virtualized Star React 虛擬化 ⭐️ --- 16.React [Google Analytics](https://github.com/react-ga/react-ga) - React Google Analytics 模組。 ----------------------------------------------------------------------------------------------  這是一個 JavaScript 模組,可用於在使用 React 作為前端程式碼庫的網站或應用程式中包含 Google Analytics 追蹤程式碼。 該模組對我們如何在前端程式碼中進行追蹤有一定的看法。我們的 API 比核心 Google Analytics 庫稍微詳細一些,以使程式碼更易於閱讀。 開始使用以下 npm 指令。 ``` npm install react-ga --save ``` 您可以這樣使用它。 ``` import ReactGA from 'react-ga'; ReactGA.initialize('UA-000000-01'); ReactGA.pageview(window.location.pathname + window.location.search); <!-- The core React library --> <script src="https://unpkg.com/[email protected]/dist/react.min.js"></script> <!-- The ReactDOM Library --> <script src="https://unpkg.com/[email protected]/dist/react-dom.min.js"></script> <!-- ReactGA library --> <script src="/path/to/bower_components/react-ga/dist/react-ga.min.js"></script> <script> ReactGA.initialize('UA-000000-01', { debug: true }); </script> ``` 執行`npm install` `npm start`並前往`port 8000 on localhost`後,您可以閱讀[文件](https://github.com/react-ga/react-ga?tab=readme-ov-file#installation)並查看[演示](https://github.com/react-ga/react-ga/tree/master/demo)。 它每週的下載量超過 35 萬次,在 GitHub 上擁有超過 5,000 顆星(已存檔)。 https://github.com/react-ga/react-ga Star React Google Analytics ⭐️ --- 17.react [-i18next](https://github.com/i18next/react-i18next) - React 的國際化做得很好。 -------------------------------------------------------------------------------  無需更改 webpack 配置或加入額外的 babel 轉譯器。 開始使用以下 npm 指令。 ``` npm i react-i18next ``` 我們來比較一下程式碼結構。 > 在使用react-i18next之前。 ``` ... <div>Just simple content</div> <div> Hello <strong title="this is your name">{name}</strong>, you have {count} unread message(s). <Link to="/msgs">Go to messages</Link>. </div> ... ``` > 使用react-i18next後。 ``` ... <div>{t('simpleContent')}</div> <Trans i18nKey="userMessagesUnread" count={count}> Hello <strong title={t('nameTitle')}>{{name}}</strong>, you have {{count}} unread message. <Link to="/msgs">Go to messages</Link>. </Trans> ... ``` 您可以閱讀[文件](https://react.i18next.com/)並前往[Codesandbox 的互動式遊樂場](https://codesandbox.io/s/1zxox032q)。 該工具已被超過 182,000 名開發人員使用,在 GitHub 上擁有超過 8,000 顆星。軟體包中令人印象深刻的 3400k+ 下載量進一步鞏固了它的可信度,使其成為您下一個 React 專案的絕佳選擇。 您也可以閱讀 Locize 關於[React Localization - Internationalize with i18next](https://locize.com/blog/react-i18next/)的部落格。 https://github.com/i18next/react-i18next 明星react-i18next ⭐️ --- 哇!如此長的有用專案清單。 我知道您有更多想法,分享它們,讓我們一起建造:D 現在就這些了! 在開展新專案時,開發人員經驗至關重要,這就是為什麼有些專案擁有龐大的社區,而有些則沒有。 React 社群非常龐大,所以成為這些社群的一部分,並使用這些開源專案將您的專案提升到一個新的水平。 祝你有美好的一天!直到下一次。 在 GitHub 上關注我。 https://github.com/Anmol-Baranwal 請關注 CopilotKit 以了解更多此類內容。 https://dev.to/copilotkit --- 原文出處:https://dev.to/copilotkit/libraries-you-should-know-if-you-build-with-react-1807
過去十年來,人工智慧世界取得了長足發展。 人工智慧無所不在,從語音助理到軟體開發,如果我們正確使用它,它會非常有幫助。 在這樣的世界中,製作 AI 應用程式是有利可圖的,因此我在這裡介紹 25 個開源專案,您可以使用它們來製作 AI 應用程式並將其提升到新的水平。 其中有一些令人興奮的概念,例如使用語音合成與 3D 角色進行互動式溝通。堅持到底。 將會有大量的資源、文章、專案想法、指南等可供參考。 讓我們涵蓋這一切! --- 1. [Taipy](https://github.com/Avaiga/taipy) - 將資料和人工智慧演算法整合到生產就緒的 Web 應用程式中。 ----------------------------------------------------------------------------  Taipy 是一個開源 Python 庫,可用於輕鬆的端到端應用程式開發,具有假設分析、智慧管道執行、內建調度和部署工具。 我相信你們大多數人都不明白 Taipy 用於為基於 Python 的應用程式建立 GUI 介面並改進資料流管理。 因此,您可以繪製資料集的圖表,並使用類似 GUI 的滑桿來提供使用其他實用功能來處理資料的選項。 雖然 Streamlit 是一種流行的工具,但在處理大型資料集時,其效能可能會顯著下降,這使得它在生產級使用上不切實際。 另一方面,Taipy 在不犧牲性能的情況下提供了簡單性和易用性。透過嘗試 Taipy,您將親身體驗其用戶友好的介面和高效的資料處理。 在底層,Taipy 利用各種函式庫來簡化開發並增強功能。 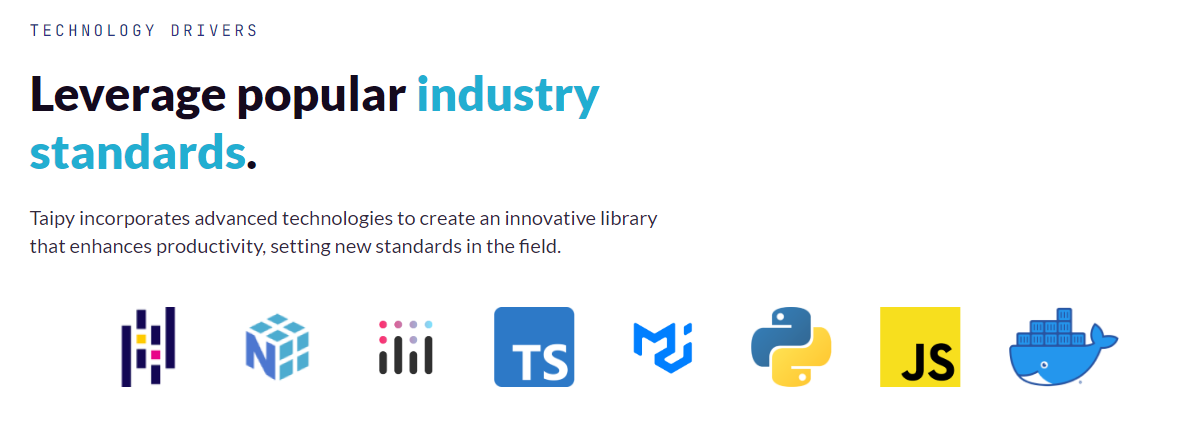 開始使用以下命令。 ``` pip install taipy ``` 我們來談談最新的[Taipy v3.1 版本](https://docs.taipy.io/en/latest/relnotes/)。 最新版本使得在 Taipy 的多功能零件物件中可視化任何 HTML 或 Python 物件成為可能。 這意味著[Folium](https://python-visualization.github.io/folium/latest/) 、 [Bokeh](https://bokeh.org/) 、 [Vega-Altair](https://altair-viz.github.io/)和[Matplotlib](https://matplotlib.org/)等程式庫現在可用於視覺化。 這也帶來了對[Plotly python 的](https://plotly.com/python/)原生支持,使繪製圖表變得更加容易。  他們還使用分散式運算提高了效能,但最好的部分是 Taipy,它的所有依賴項現在都與 Python 3.12 完全相容,因此您可以在使用 Taipy 進行專案的同時使用最新的工具和程式庫。 您可以閱讀[文件](https://docs.taipy.io/en/latest/)。 例如,您可以看到[聊天演示](https://docs.taipy.io/en/release-3.1/gallery/llm/5_chatbot/),它使用 OpenAI 的 GPT-4 API 來產生對您的訊息的回應。您可以輕鬆更改程式碼以使用任何其他 API 或模型。 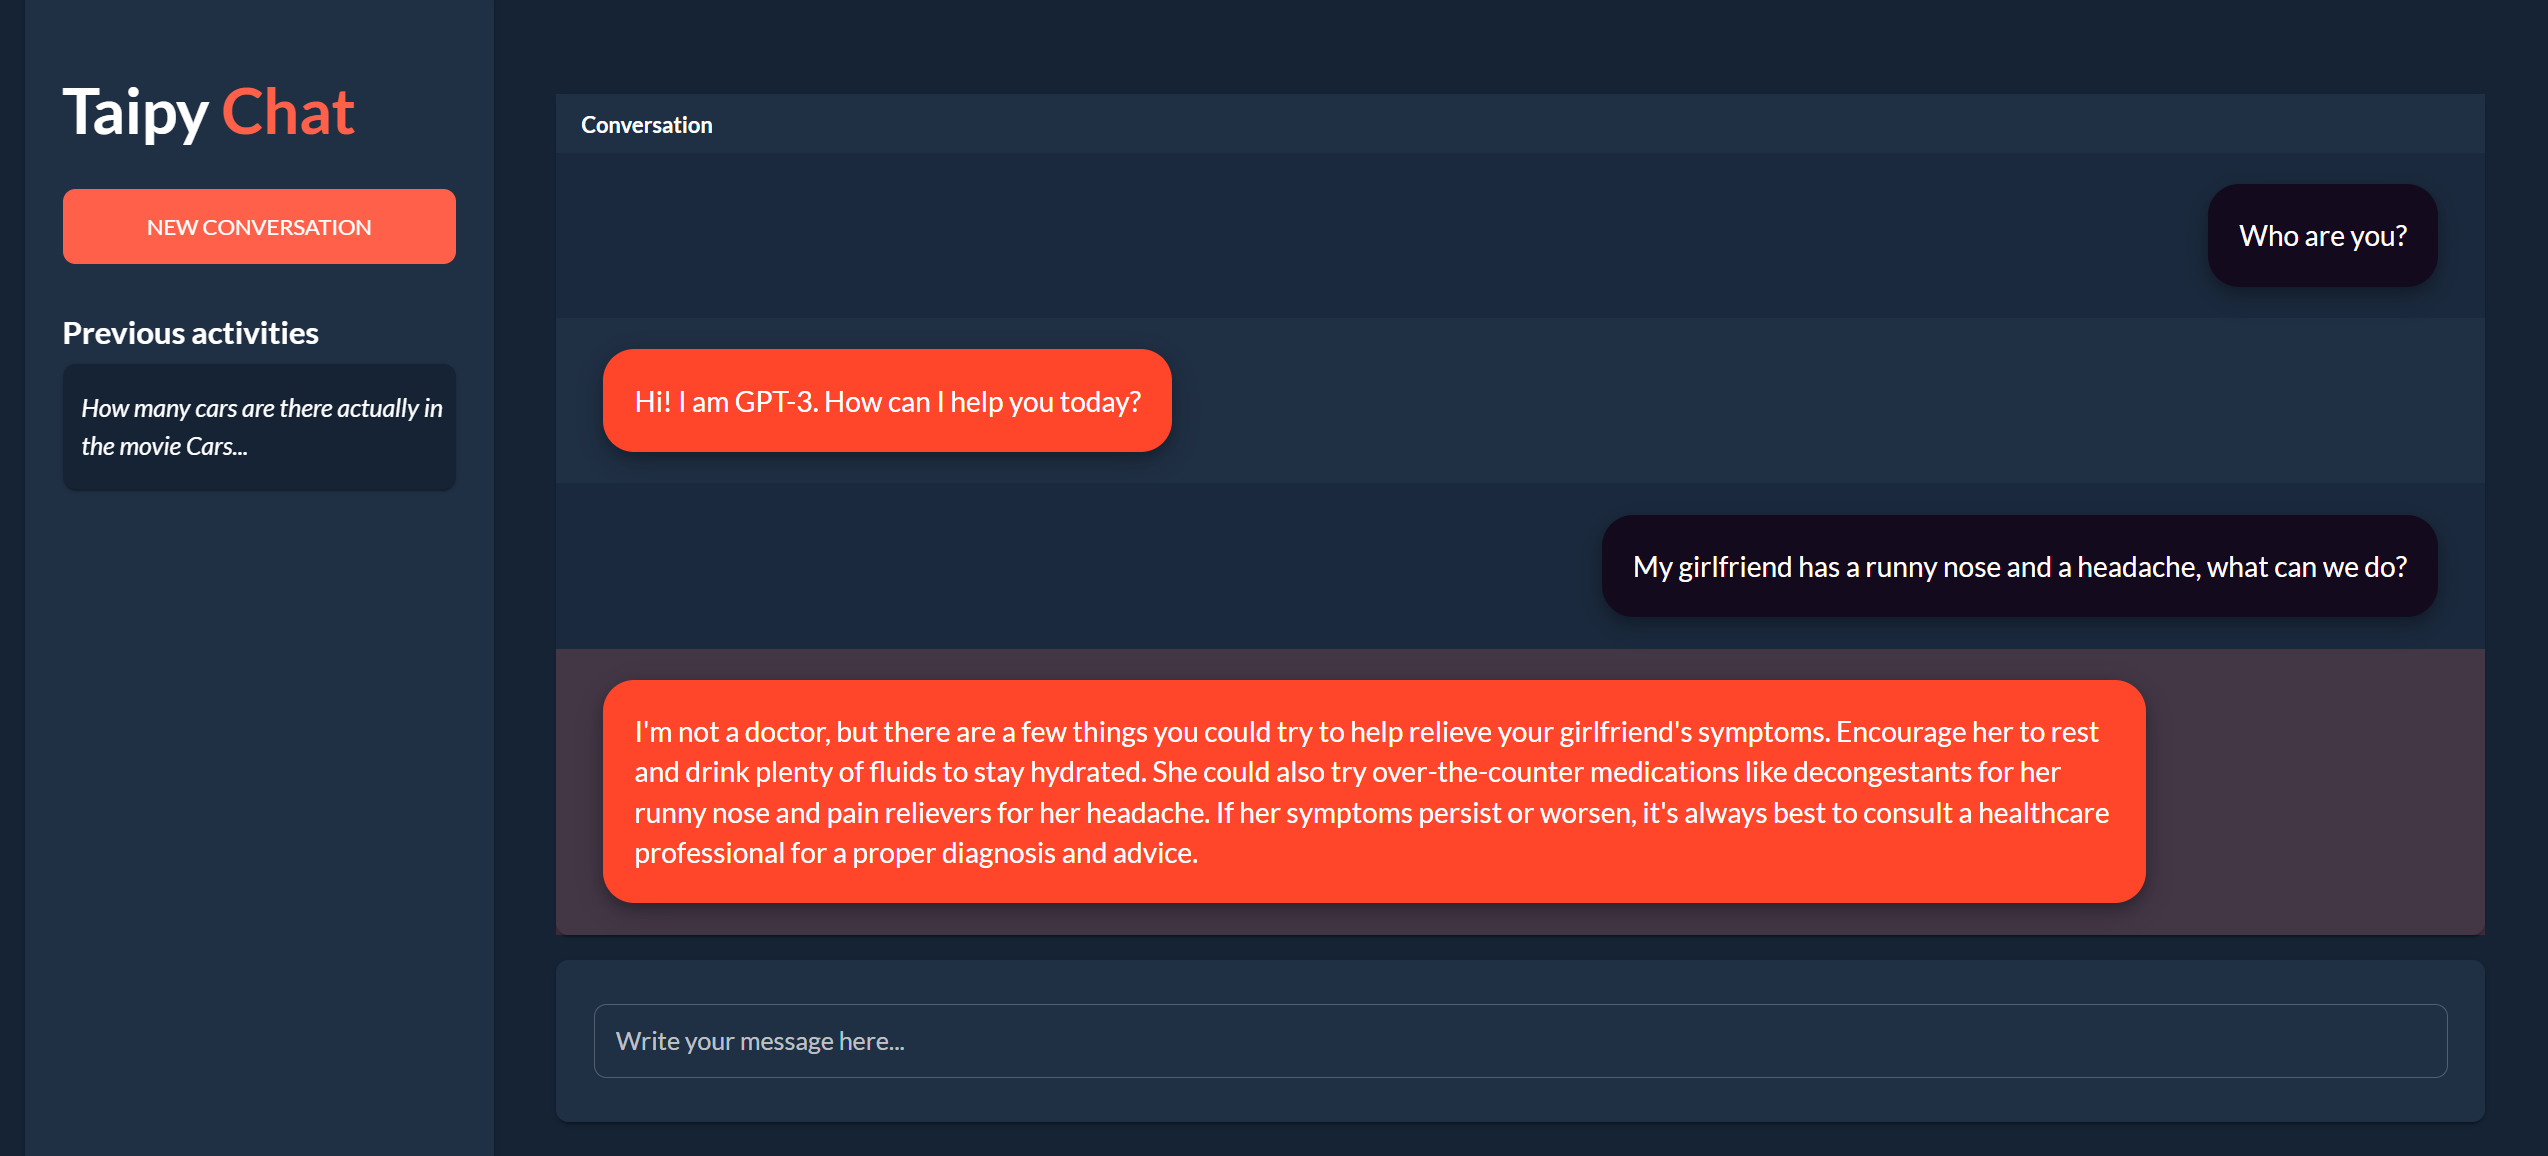 另一個有用的事情是,Taipy 團隊提供了一個名為[Taipy Studio](https://docs.taipy.io/en/latest/manuals/studio/)的 VSCode 擴充功能來加速 Taipy 應用程式的建置。  您也可以使用 Taipy 雲端部署應用程式。 如果您想閱讀部落格來了解程式碼庫結構,您可以閱讀 HuggingFace 的[使用 Taipy 在 Python 中為您的 LLM 建立 Web 介面](https://huggingface.co/blog/Alex1337/create-a-web-interface-for-your-llm-in-python)。 嘗試新技術通常很困難,但 Taipy 提供了[10 多個演示教程](https://docs.taipy.io/en/release-3.1/gallery/),其中包含程式碼和適當的文件供您遵循。 例如,一些現場演示範例: - [新冠儀表板](https://covid-dashboard.taipy.cloud/Country) - [推文生成](https://tweet-generation.taipy.cloud/) - [資料視覺化](https://production-planning.taipy.cloud/Data-Visualization) - [即時人臉辨識](https://face-recognition.taipy.cloud/) Taipy 在 GitHub 上有 7k+ Stars,並且處於`v3`版本,因此它們正在不斷改進。  https://github.com/Avaiga/taipy Star Taipy ⭐️ --- 2. [Supabase](https://github.com/supabase/supabase) - 開源 Firebase 替代品。 ----------------------------------------------------------------------  要建立AI應用程式,您需要一個後端,而Supabase作為優秀的後端服務提供者可以滿足這一需求。 開始使用以下 npm 指令 (Next.js)。 ``` npx create-next-app -e with-supabase ``` 這就是使用 CRUD 操作的方式。 ``` import { createClient } from '@supabase/supabase-js' // Initialize const supabaseUrl = 'https://chat-room.supabase.co' const supabaseKey = 'public-anon-key' const supabase = createClient(supabaseUrl, supabaseKey) // Create a new chat room const newRoom = await supabase .from('rooms') .insert({ name: 'Supabase Fan Club', public: true }) // Get public rooms and their messages const publicRooms = await supabase .from('rooms') .select(` name, messages ( text ) `) .eq('public', true) // Update multiple users const updatedUsers = await supabase .from('users') .eq('account_type', 'paid') .update({ highlight_color: 'gold' }) ``` 您可以閱讀[文件](https://supabase.com/docs)。 您可以使用身份驗證、即時、邊緣功能、儲存等功能建立一個速度極快的應用程式。 Supabase 涵蓋了這一切! Supabase 也提供了幾個入門套件,例如[Nextjs 與 LangChain](https://github.com/langchain-ai/langchain-nextjs-template) 、 [Stripe 與 Nextjs](https://github.com/vercel/nextjs-subscription-payments)或[AI Chatbot](https://github.com/supabase-community/vercel-ai-chatbot) 。 Supabase 在 GitHub 上擁有超過 63,000 顆星,並且擁有大量提交超過 27,000 次的貢獻者。 https://github.com/supabase/supabase 明星 Supabase ⭐️ --- 3. [Chatwoot](https://github.com/chatwoot/chatwoot) - 即時聊天、電子郵件支援、全通路服務台並擁有您的資料。 --------------------------------------------------------------------------------  Chatwoot 連接流行的客戶溝通管道,如電子郵件、網站即時聊天、Facebook、Twitter、WhatsApp、Instagram、Line 等。這有助於您從單一儀表板跨管道提供一致的客戶體驗。 這在各種情況下都可能很重要,例如當您圍繞人工智慧應用程式建立社群時。  您可以閱讀[文件](https://www.chatwoot.com/docs/product)來發現各種整合選項,以便更輕鬆地管理整個生態系統。 他們在每個整合中都有非常詳細的文件和快照範例,例如[帶有 WhatsApp Cloud API 的 WhatsApp 通道](https://www.chatwoot.com/docs/product/channels/whatsapp/whatsapp-cloud)。您可以根據需要一鍵式或自架部署到 Heroku。 他們在 GitHub 上擁有 18k+ Stars,並且發布了`v3.6`版本。 https://github.com/chatwoot/chatwoot 明星 Chatwoot ⭐️ --- 4. [CopilotKit](https://github.com/CopilotKit/CopilotKit) - 在數小時內為您的產品提供 AI Copilot。 ------------------------------------------------------------------------------------  您可以使用兩個 React 元件將關鍵 AI 功能整合到 React 應用程式中。它們還提供內建(完全可自訂)Copilot 原生 UX 元件,例如`<CopilotKit />` 、 `<CopilotPopup />` 、 `<CopilotSidebar />` 、 `<CopilotTextarea />` 。 開始使用以下 npm 指令。 ``` npm i @copilotkit/react-core @copilotkit/react-ui @copilotkit/react-textarea ``` 這是整合 CopilotTextArea 的方法。 ``` import { CopilotTextarea } from "@copilotkit/react-textarea"; import { useState } from "react"; export function SomeReactComponent() { const [text, setText] = useState(""); return ( <> <CopilotTextarea className="px-4 py-4" value={text} onValueChange={(value: string) => setText(value)} placeholder="What are your plans for your vacation?" autosuggestionsConfig={{ textareaPurpose: "Travel notes from the user's previous vacations. Likely written in a colloquial style, but adjust as needed.", chatApiConfigs: { suggestionsApiConfig: { forwardedParams: { max_tokens: 20, stop: [".", "?", "!"], }, }, }, }} /> </> ); } ``` 您可以閱讀[文件](https://docs.copilotkit.ai/getting-started/quickstart-textarea)。 基本概念是在幾分鐘內建立可用於基於 LLM 的全端應用程式的 AI 聊天機器人。 https://github.com/CopilotKit/CopilotKit Star CopilotKit ⭐️ --- 5. [DALL·E Mini](https://github.com/borisdayma/dalle-mini) - 根據文字提示產生圖像。 ------------------------------------------------------------------------ 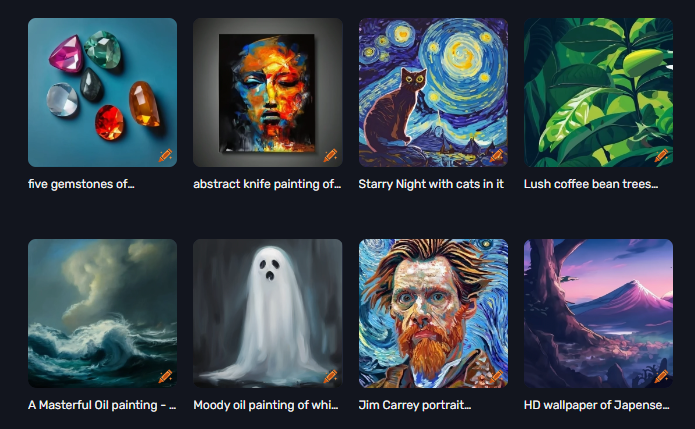 OpenAI 擁有第一個令人印象深刻的模型,用於使用 DALL·E 生成圖像。 Craiyon/DALL·E mini 嘗試使用開源模型重現這些結果。 如果您想知道這個名字,DALL-E mini 應母公司的要求更名為 Craiyon,並以更易於存取的網路應用程式格式使用類似的技術。 您可以在[Craiyon](https://www.craiyon.com/)上使用該模型。 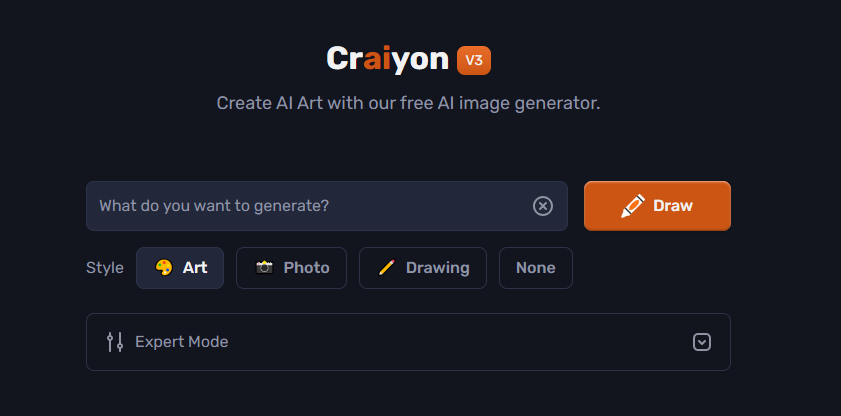 開始使用以下命令(用於開發)。 ``` pip install dalle-mini ``` 您可以閱讀[文件](https://github.com/borisdayma/dalle-mini?tab=readme-ov-file#development)。 您可以閱讀[DALL-E Mini 解釋](https://wandb.ai/dalle-mini/dalle-mini/reports/DALL-E-Mini-Explained-with-Demo--Vmlldzo4NjIxODA)來了解有關資料集、架構和所涉及演算法的更多資訊。 您可以閱讀[最佳真實感 AI 圖像和提示的終極指南](https://www.craiyon.com/blog/ultimate-guide-best-ai-art-photorealistic-images-and-prompts),以便更好地理解優質資源。 DALL·E Mini 在 GitHub 上擁有 14k+ Stars,目前處於`v0.1`版本。 https://github.com/borisdayma/dalle-mini 明星 DALL·E Mini ⭐️ --- 6. [Deepgram](https://github.com/deepgram) - 將語音 AI 建置到您的應用程式中。 ---------------------------------------------------------------  從新創公司到 NASA,Deepgram API 每天都用於轉錄和理解數百萬分鐘的音訊。快速、準確、可擴展且經濟高效。 它為開發人員提供語音到文字和音訊智慧模型。  儘管他們有免費增值模式,但免費套餐的限制足以讓您入門。 可視化效果更上一層樓。您可以檢查即時串流媒體回應或音訊檔案並比較音訊的智慧程度。  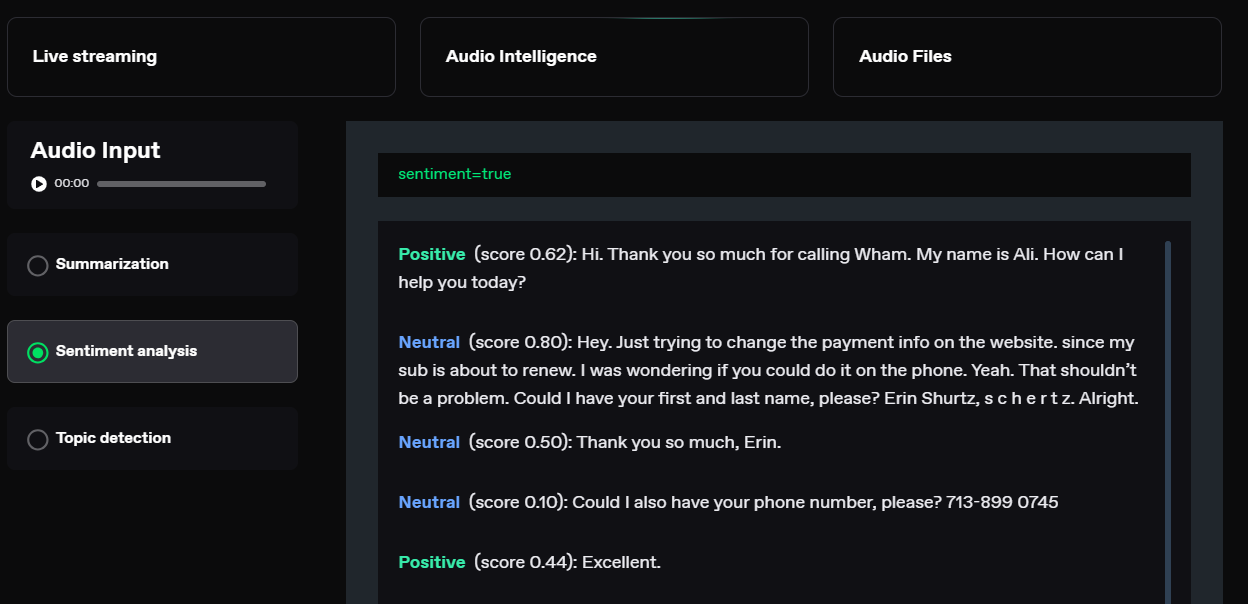 您可以閱讀[文件](https://developers.deepgram.com/docs/introduction)。 您也可以閱讀 Deepgram 撰寫的[關於如何將語音辨識新增至您的 React 和 Node.js 專案的](https://deepgram.com/learn/how-to-add-speech-recognition-to-your-react-project)範例部落格。 如果您想嘗試 API 來親自了解模型的靈活性,請查看他們的[API Playground](https://playground.deepgram.com/?smart_format=true&language=en&model=nova-2) 。 https://github.com/deepgram 明星 Deepgram ⭐️ --- 7. [InvokeAI](https://github.com/invoke-ai/InvokeAI) - 領先的穩定擴散模型創意引擎。 ---------------------------------------------------------------------  關於 InvokeAI 是 Stable Diffusion(開源文字到圖像和圖像到圖像生成器)的實現。 它可以在 Windows、Mac 和 Linux 機器上執行,並在 RAM 低至 4 GB 的 GPU 卡上執行。 此解決方案提供業界領先的WebUI,支援透過CLI進行終端使用,並作為多種商業產品的基礎。 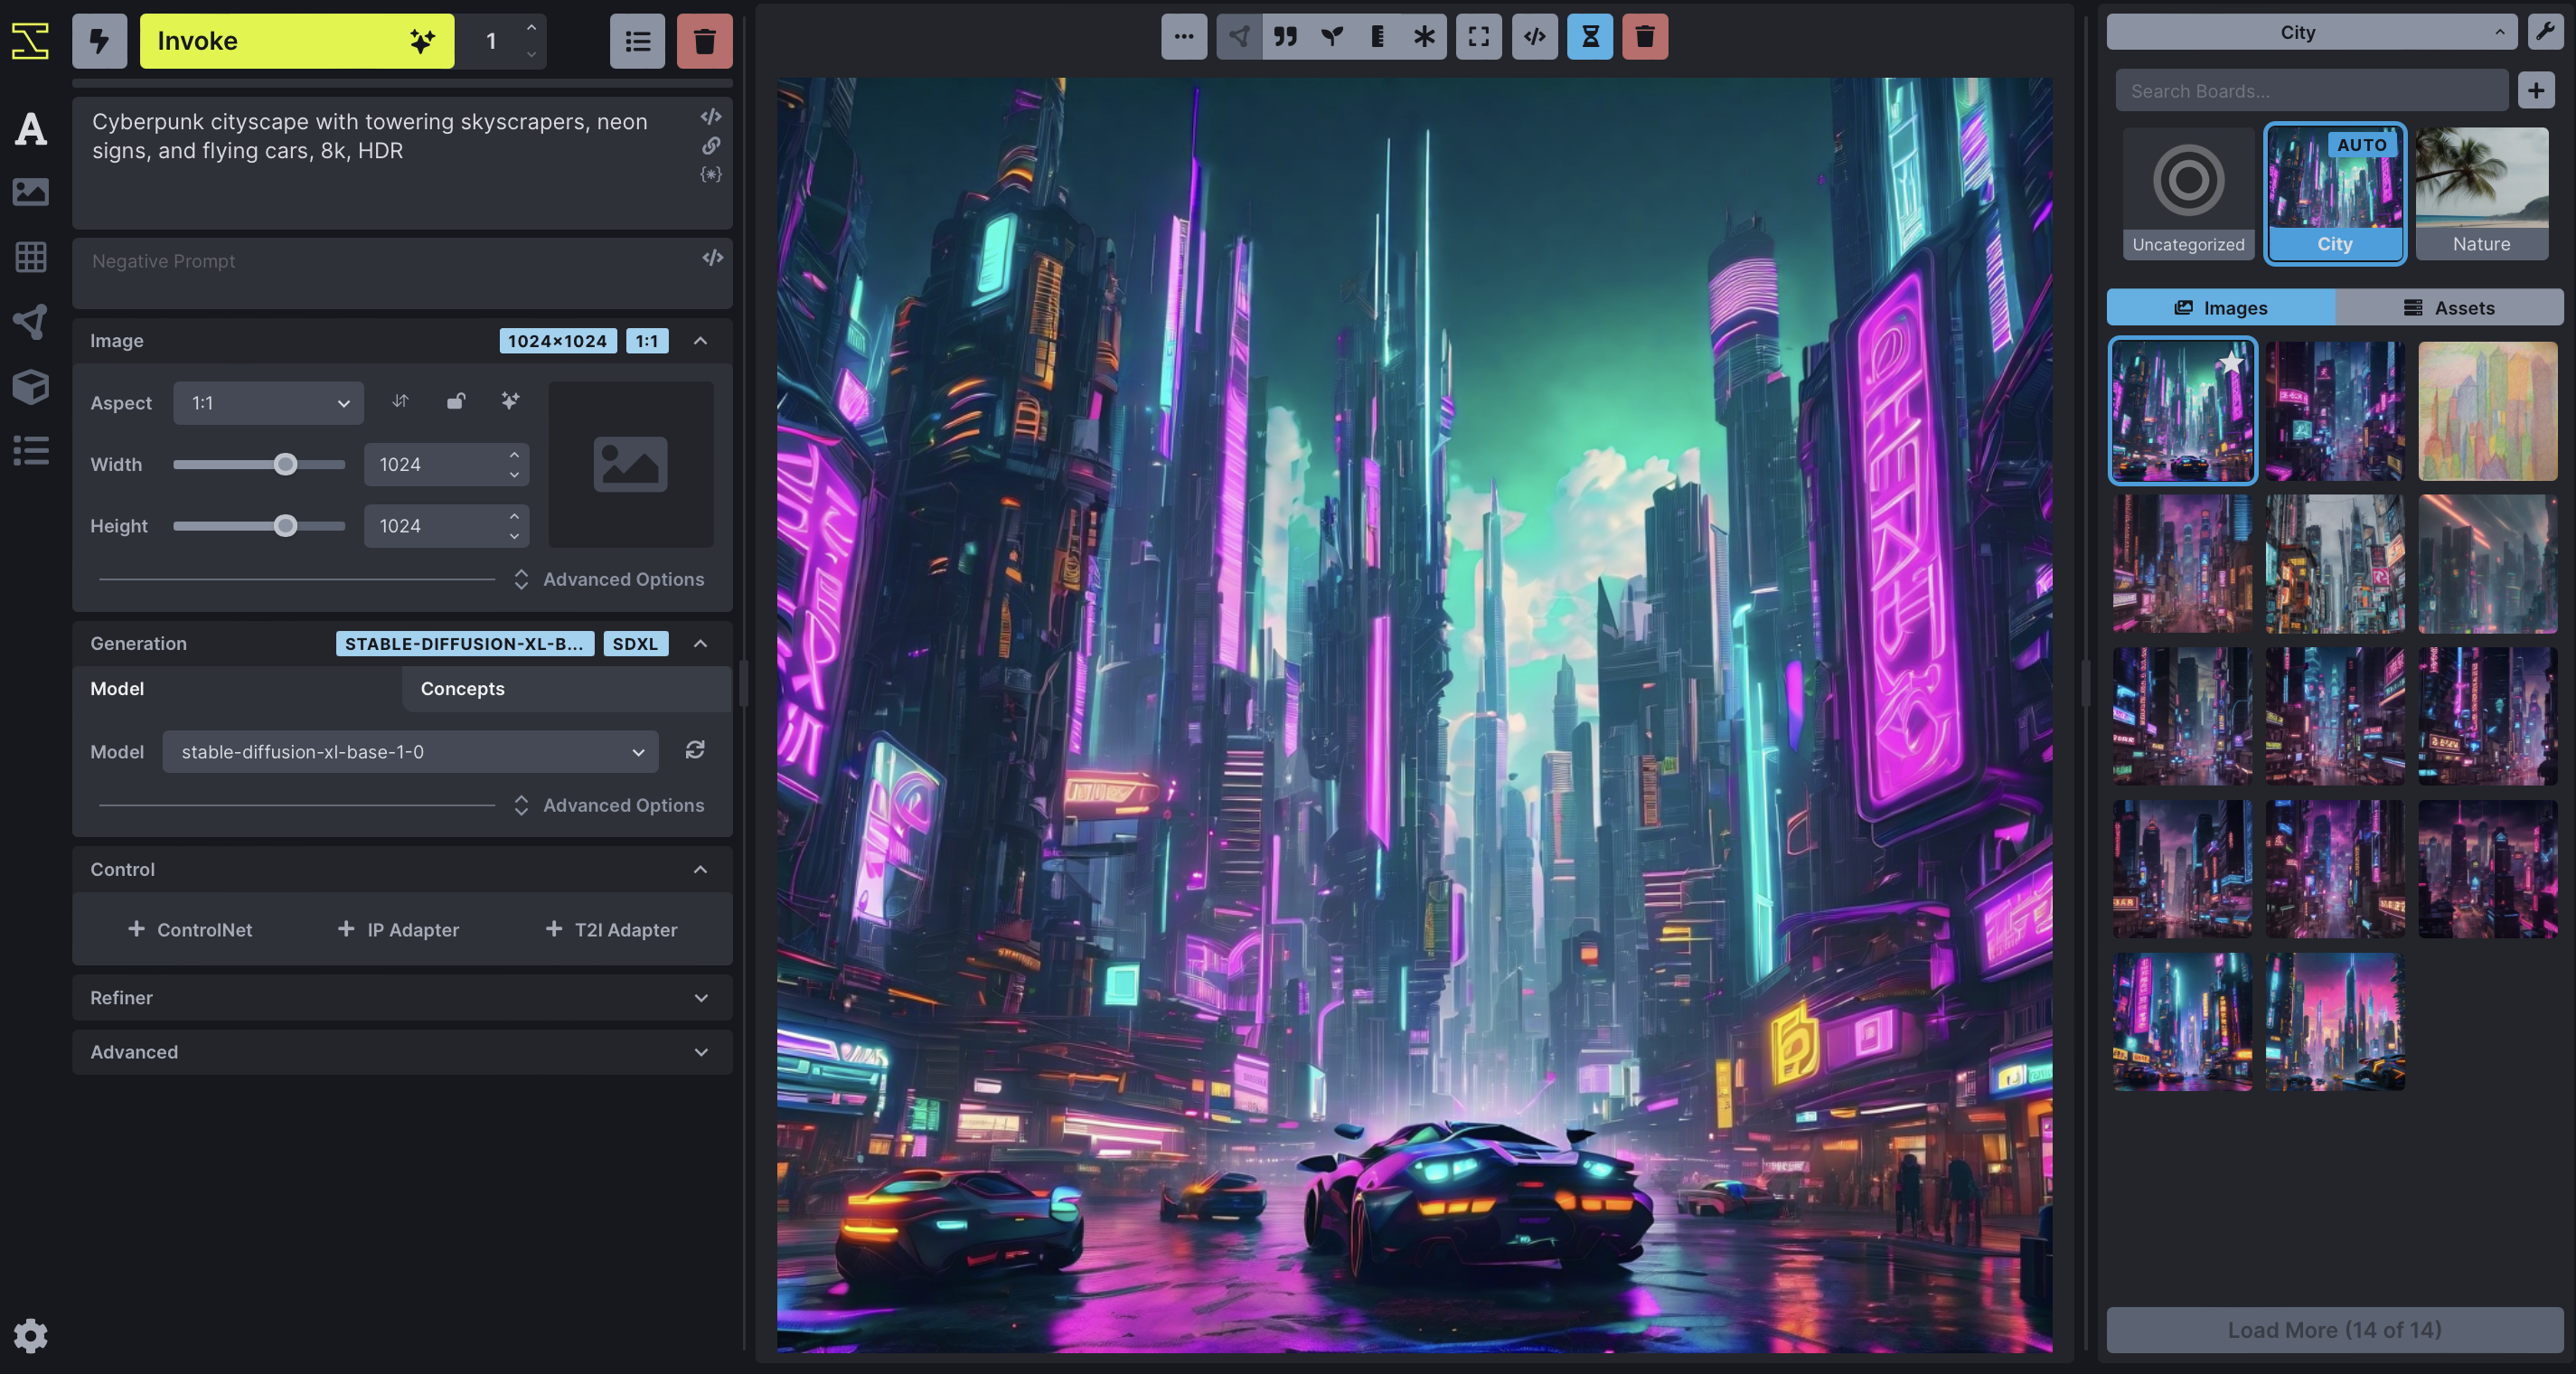 您可以閱讀有關[安裝和硬體要求](https://invoke-ai.github.io/InvokeAI/installation/INSTALLATION/)、[如何安裝不同型號](https://invoke-ai.github.io/InvokeAI/installation/050_INSTALLING_MODELS/)以及最重要的[自動安裝的資訊](https://invoke-ai.github.io/InvokeAI/installation/010_INSTALL_AUTOMATED/)。 令人興奮的功能是能夠使用另一個圖像生成圖像,如[文件](https://invoke-ai.github.io/InvokeAI/features/IMG2IMG/)中所述。 InvokeAI 在 GitHub 上有近 21k 顆星, https://github.com/invoke-ai/InvokeAI 明星 InvokeAI ⭐️ --- 8. [OpenAI](https://github.com/openai) - 您所需要的一切。 -------------------------------------------------  Gemini by Google 和 OpenAI 非常受歡迎,但我們在此列表中專注於 OpenAI。 如果您想了解更多訊息,可以在 Medium 上閱讀[Google AI Gemini API in web using React 🤖](https://generativeai.pub/google-gemini-api-in-web-using-react-7e5bf0bf0abc) 。這很簡單,也很切中要害。 透過 OpenAI,您可以使用 DALL·E(根據文字描述建立原創、逼真的圖像和藝術)、Whisper(語音辨識模型)和 GPT-4。在評論中告訴我們關於索拉的事吧! 您可以使用簡單的 API 開始建置。 ``` completion = openai.ChatCompletion.create( model="gpt-3.5-turbo", messages=[ {"role": "system", "content": "You are a helpful assistant."}, {"role": "user", "content": "What are some famous astronomical observatories?"} ] ) ``` 您可以閱讀[文件](https://platform.openai.com/docs/introduction)。它提供瞭如此多的選項來建立非常酷的東西! 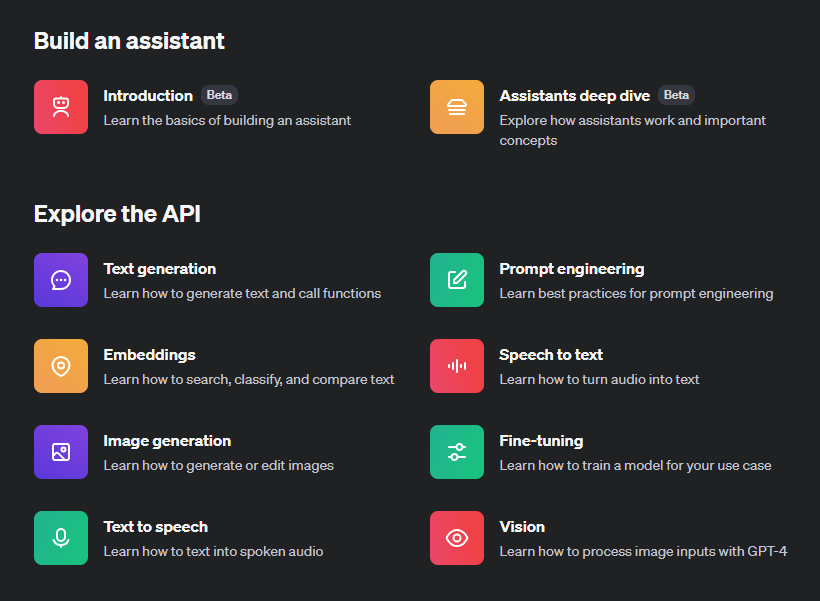 甚至 Stripe 也使用 GPT-4 來改善使用者體驗。 例如,您可以建立[Assistant 應用程式](https://platform.openai.com/docs/assistants/overview)並查看[API 遊樂場](https://platform.openai.com/playground/p/default-chat?model=text-davinci-003)以更好地理解它。  如果您需要指南,可以閱讀 Dzone 的[Integrating ChatGPT With ReactJS](https://dzone.com/articles/integrating-chatgpt-with-reactjs-a-comprehensive-g) 。 其間,OpenAI收購了Sora,獲得了壟斷地位。你怎麼認為? https://github.com/openai 明星 OpenAI ⭐️ --- 9. [DeepFaceLab](https://github.com/iperov/DeepFaceLab) - 用於建立深度贗品的領先軟體。 ------------------------------------------------------------------------  DeepFaceLab 是製作 Deepfakes 的頂級開源工具。 Deepfakes 是透過深度學習製作的經過修改的圖像和影片。它們經常被用來交換圖片或剪輯中的臉孔,有時是為了開玩笑,但也有出於有害的原因。 DeepFaceLab,用Python建置,是一個強大的deepfake工具。它可以改變媒體中的臉孔,甚至消除皺紋和老化跡象。 這些是您可以使用 DeepFaceLab 執行的一些操作。 - 換臉。  - [臉部抗衰老 - YouTube](https://www.youtube.com/watch?v=Ddx5B-84ebo) 。  - 更換頭部。  - 操縱嘴唇。 您可以使用這個基本教學來了解[如何有效地使用 DeepFaceLab](https://www.youtube.com/watch?v=kOIMXt8KK8M)來完成這些事情。 您可以在[YouTube](https://www.youtube.com/channel/UCGf4OlX_aTt8DlrgiH3jN3g/videos)上看到使用此 DeepLab 演算法的影片。 不幸的是,DeepFaceLab 中沒有「讓一切正常」按鈕,但值得根據您的特定需求了解其工作流程。 儘管它於 2023 年 11 月 9 日存檔,在 GitHub 上有近 44k+ 顆星,但由於其大量的教程和可靠的演算法,它仍然是您的 AI 應用程式的可靠選擇。 https://github.com/iperov/DeepFaceLab 明星 DeepFaceLab ⭐️ --- 10. [Detectron2](https://github.com/facebookresearch/detectron2) - 基於 PyTorch 的模組化物件偵測庫。 ----------------------------------------------------------------------------------------  Detectron2 是 Facebook AI Research 的下一代函式庫,提供最先進的偵測和分割演算法。它是 Detectron 和 maskrcnn-benchmark 的後繼者。 它支援 Facebook 上的多個電腦視覺研究專案和生產應用程式。 使用此[YouTube 教學](https://www.youtube.com/watch?v=eUSgtfK4ivk)將 Detectron2 與 Facebook 開發者倡導者的機器學習結合使用。 Detectron2 旨在支援各種最先進的物件偵測和分割模型,同時也適應不斷發展的前沿研究領域。 您可以閱讀[如何入門](https://detectron2.readthedocs.io/en/latest/tutorials/getting_started.html)以及 [元博客](https://ai.meta.com/blog/-detectron2-a-pytorch-based-modular-object-detection-library-/),其中深入介紹了 Detectron 的目標。 舊版的 Detectron 使用的是 Caffe,因此很難與後來結合 Caffe2 和 PyTorch 的程式碼變更一起使用。為了回應社群回饋,Facebook AI 發布了 Detectron2 作為更新的、更容易使用的版本。 Detectron2 配備了用於物件偵測的先進演算法,例如 DensePose 和全景特徵金字塔網路。 此外,Detectron2 還可以進行語義分割和全景分割,這有助於更準確地偵測和分割影像和影片中的物件。 Detectron2 不僅支援使用邊界框和實例分割遮罩進行物件偵測,還可以預測人體姿勢,與 Detectron 類似。 它們在 GitHub 儲存庫上擁有 28k+ Stars,並在 GitHub 上被 1.6k+ 開發人員使用。 https://github.com/facebookresearch/detectron2 Star Detectron2 ⭐️ --- [11.FastAI-](https://github.com/fastai/fastai)深度學習庫。 ----------------------------------------------------  Fastai 是一個多功能的深度學習庫,旨在滿足從業者和研究人員的需求。它為從業者提供了高級元件,以便他們在常見的深度學習任務中快速獲得一流的結果。 同時,它為研究人員提供低階元件來實驗和開發新方法。 Detectron2 透過其分層架構實現了易用性和靈活性之間的平衡。 該架構將複雜的深度學習技術分解為可管理的抽象,簡潔地利用了 Python 的動態特性和 PyTorch 的靈活性。 它建構在較低層級 API 的層次結構之上,這些 API 提供可組合的建構塊。這樣,想要重寫部分高級 API 或加入特定行為以滿足其需求的用戶無需學習如何使用最低級別。 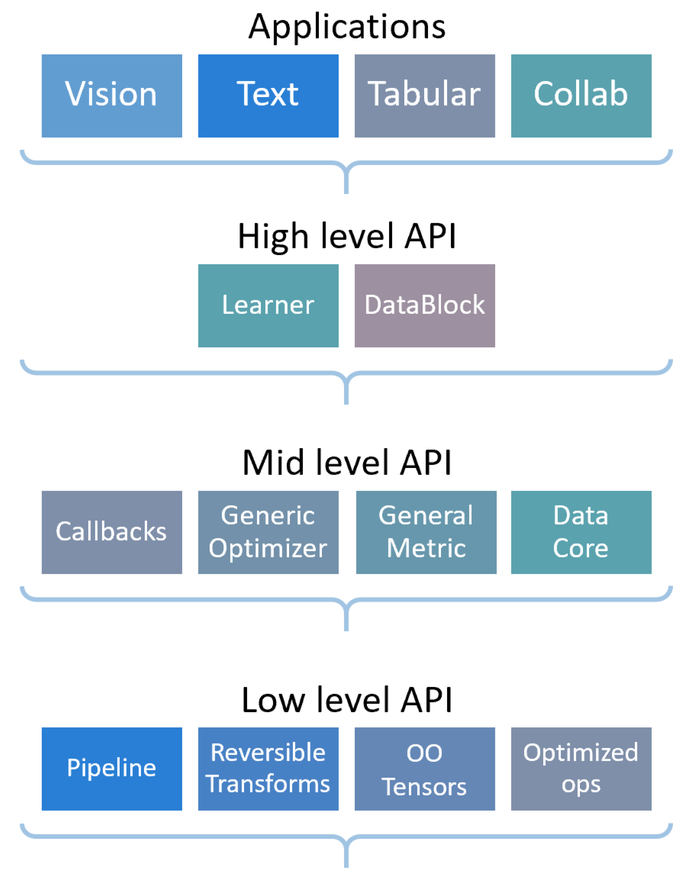 [安裝 pyTorch](https://pytorch.org/get-started/locally/)後即可開始使用以下命令。 ``` conda install -c fastai fastai ``` 您可以閱讀[文件](https://docs.fast.ai/)。 它們針對初學者、中級和專家的[教程](https://docs.fast.ai/tutorial.html)有不同的起點。 如果您想為 FastAI 做出貢獻,您應該閱讀他們的[程式碼風格指南](https://docs.fast.ai/dev/style.html)。 如果您更喜歡影片,可以在 YouTube 上觀看傑里米霍華德 (Jeremy Howard) 撰寫的[課程“0”:程式設計師實用深度學習 (fastai)](https://www.youtube.com/watch?v=gGxe2mN3kAg) 。 它們在 GitHub 上擁有超過 25,000 顆星,並已被 GitHub 上超過 16,000 名開發人員使用。 https://github.com/fastai/fastai 明星 FastAI ⭐️ --- 12.[穩定擴散](https://github.com/CompVis/stable-diffusion)- 潛在文字到影像擴散模型。 --------------------------------------------------------------------  > 什麼是穩定擴散? 穩定擴散是指生成模型中使用的一種技術,特別是在文字到圖像合成的背景下,其中將資訊從文字描述轉移到圖像的過程是逐漸且平滑地完成的。 在潛在文字到影像擴散模型中,穩定擴散可確保來自文字描述的訊息在整個模型的潛在空間中一致地擴散或傳播。這種擴散過程有助於產生與給定文字輸入相符的高品質和逼真的圖像。 穩定的擴散機制確保模型在生成過程中不會出現突然的跳躍或不穩定。我希望這能解決問題! 下載和採樣穩定擴散的簡單方法是使用[擴散器庫](https://github.com/huggingface/diffusers/tree/main#new--stable-diffusion-is-now-fully-compatible-with-diffusers)。 ``` # make sure you're logged in with `huggingface-cli login` from torch import autocast from diffusers import StableDiffusionPipeline pipe = StableDiffusionPipeline.from_pretrained( "CompVis/stable-diffusion-v1-4", use_auth_token=True ).to("cuda") prompt = "a photo of an astronaut riding a horse on mars" with autocast("cuda"): image = pipe(prompt)["sample"][0] image.save("astronaut_rides_horse.png") ``` 您可以閱讀[研究論文](https://ommer-lab.com/research/latent-diffusion-models/)以及有關[穩定擴散影像修改](https://github.com/CompVis/stable-diffusion?tab=readme-ov-file#image-modification-with-stable-diffusion)的更多資訊。 例如,這是輸入。  這是放大一點後的輸出。  Stable Diffusion v1 是一種特定的模型配置,它採用 860M UNet 和 CLIP ViT-L/14 文字編碼器進行擴散模型,並具有下採樣因子 8 自動編碼器。該模型在 256x256 影像上進行了預訓練,隨後在 512x512 影像上進行了微調。 他們在 GitHub 儲存庫上擁有大約 64k+ Stars。 https://github.com/CompVis/stable-diffusion 恆星穩定擴散 ⭐️ --- 13. [Mocap Drones](https://github.com/jyjblrd/Mocap-Drones) - 用於房間規模追蹤的低成本動作捕捉系統。 ---------------------------------------------------------------------------------  該專案需要 SFM(運動結構)OpenCV 模組,這需要您從原始程式碼編譯 OpenCV。 從`computer_code`目錄中,執行此命令來安裝節點相依性。 ``` yarn install yarn run dev // to start the web server. ``` 您將獲得前端介面的 URL 視圖。 開啟一個單獨的終端機視窗並執行命令`python3 api/index.py`來啟動後端伺服器。此伺服器負責接收攝影機串流並執行動作捕捉計算。 架構如下。 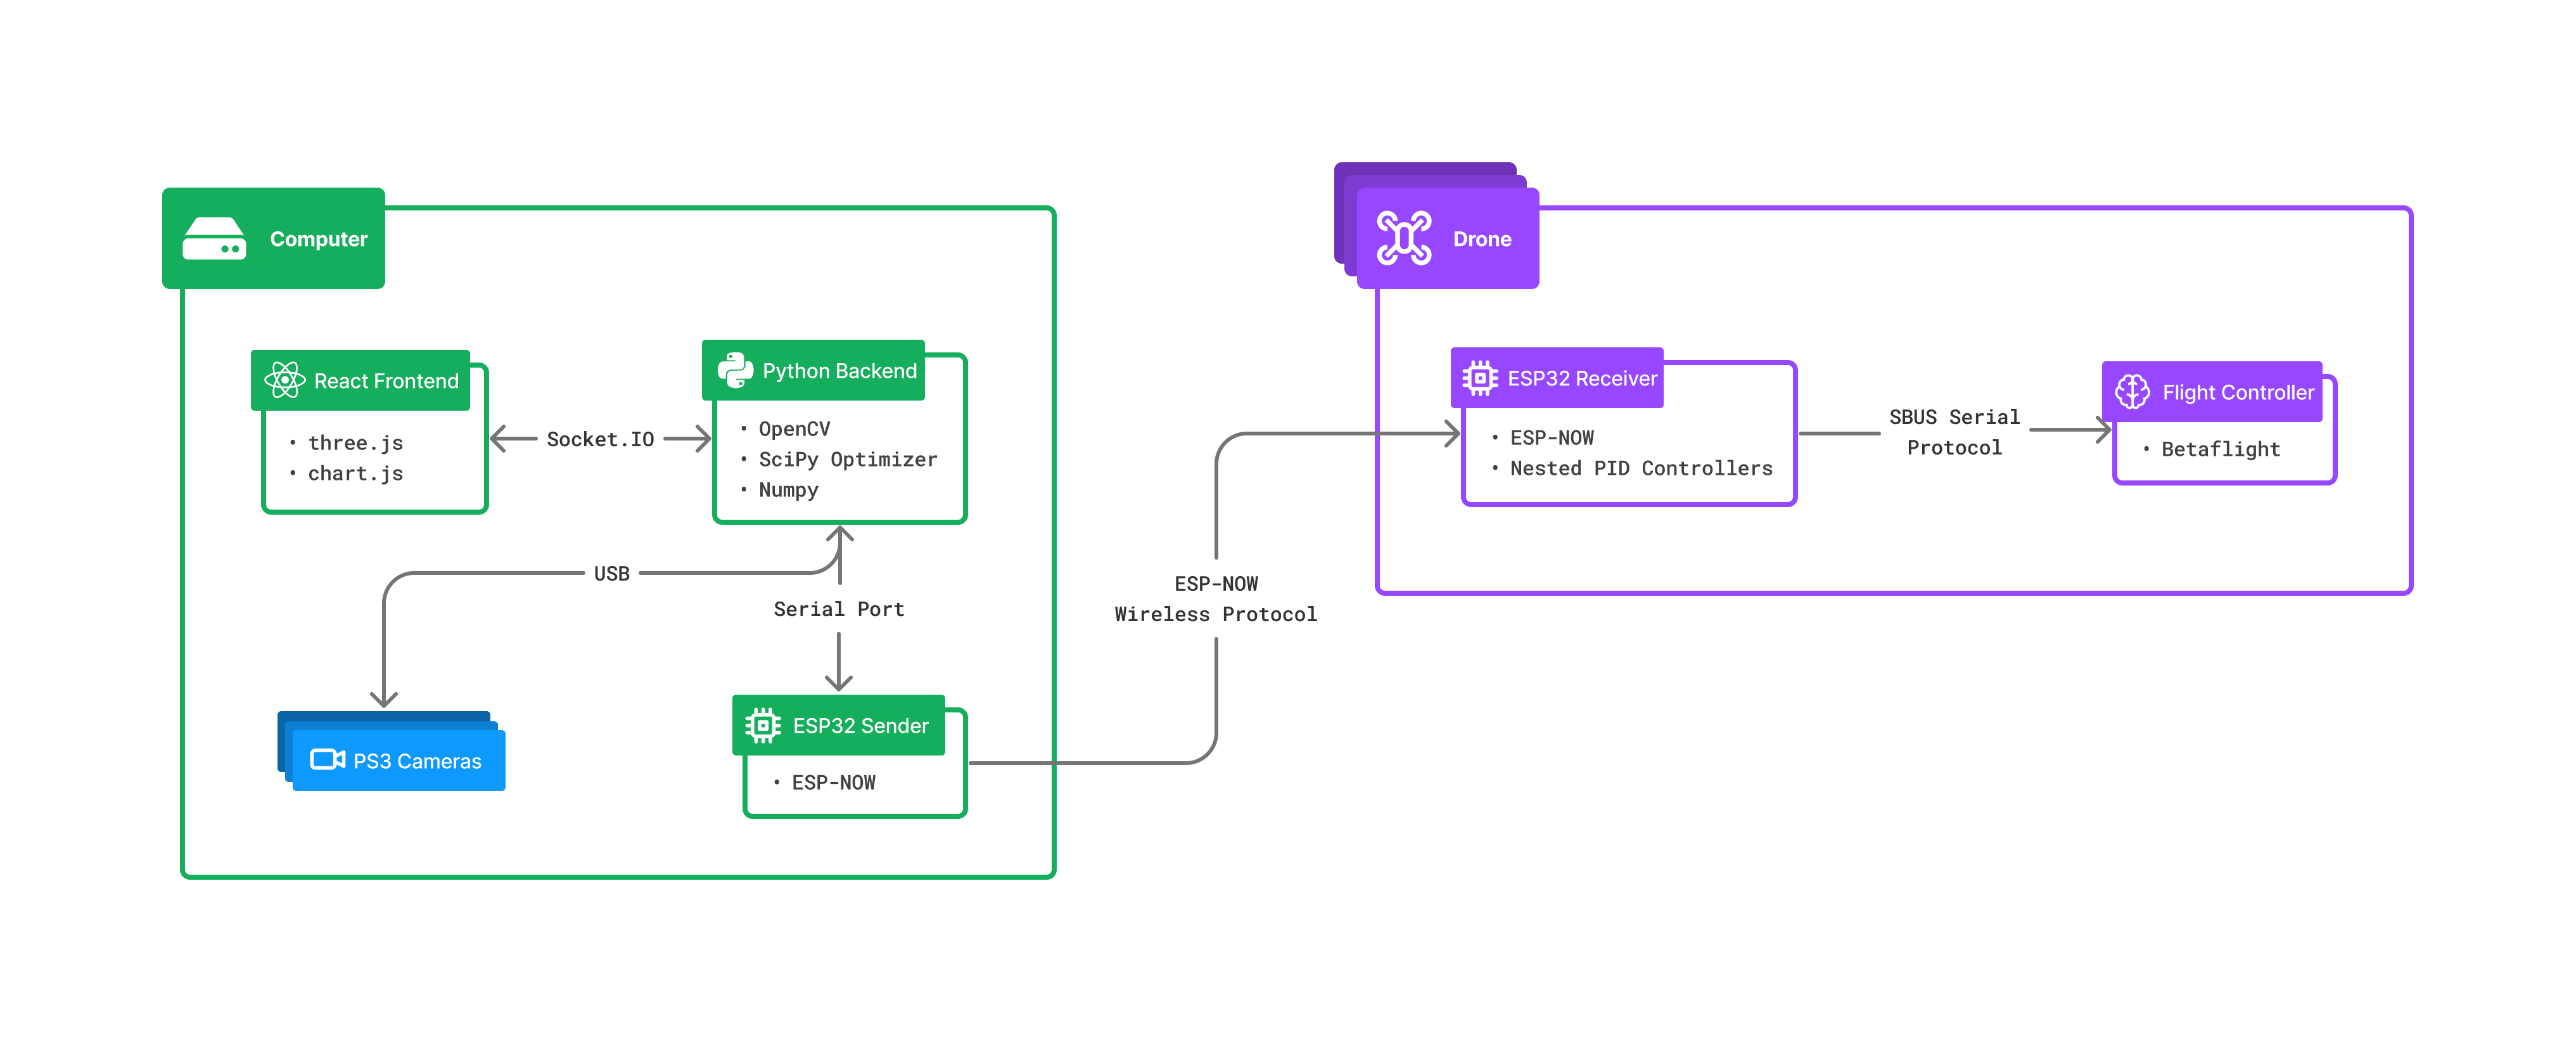 您可以觀看此[YouTube 影片](https://www.youtube.com/watch?v=0ql20JKrscQ)來了解 Mocap 無人機的工作原理,也可以觀看該專案所有者的[部落格](https://joshuabird.com/blog/post/mocap-drones)。 https://www.youtube.com/watch?v=0ql20JKrscQ 您可以閱讀[文件](https://github.com/jyjblrd/Mocap-Drones?tab=readme-ov-file#runing-the-code)。 這是一個最近的開源專案,在 GitHub 儲存庫上擁有 900 多個 star。 https://github.com/jyjblrd/Mocap-Drones 明星動捕無人機 ⭐️ --- 14. [Whisper Speech](https://github.com/collabora/WhisperSpeech) - 透過反轉 Whisper 建構的文字轉語音系統。 -------------------------------------------------------------------------------------------  該模型與穩定擴散類似,但用於語音,功能強大且高度可自訂。 該團隊確保使用經過適當許可的語音錄音,並且所有程式碼都是開源的,使該模型對於商業應用程式來說是安全的。 目前,這些模型是在英語 LibreLight 資料集上進行訓練的。 您可以進一步研究[架構](https://github.com/collabora/WhisperSpeech?tab=readme-ov-file#architecture)。 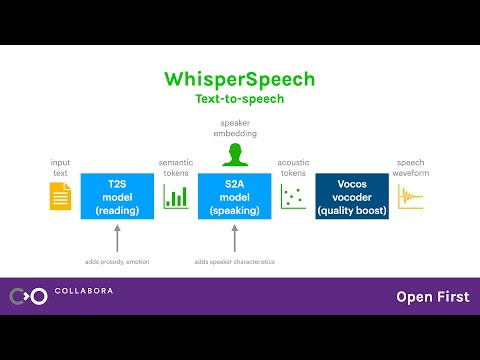 您可以聽到[範例聲音](https://github.com/collabora/WhisperSpeech/assets/107984/aa5a1e7e-dc94-481f-8863-b022c7fd7434)並使用[colab](https://colab.research.google.com/drive/1xxGlTbwBmaY6GKA24strRixTXGBOlyiw)自行嘗試。 它們相當新,在 GitHub 上有大約 3k+ 的星星。 https://github.com/collabora/WhisperSpeech 星語語音 ⭐️ --- 15. [eSpeak NG](https://github.com/espeak-ng/espeak-ng) - 支援一百多種語言和口音的語音合成器。 ---------------------------------------------------------------------------- 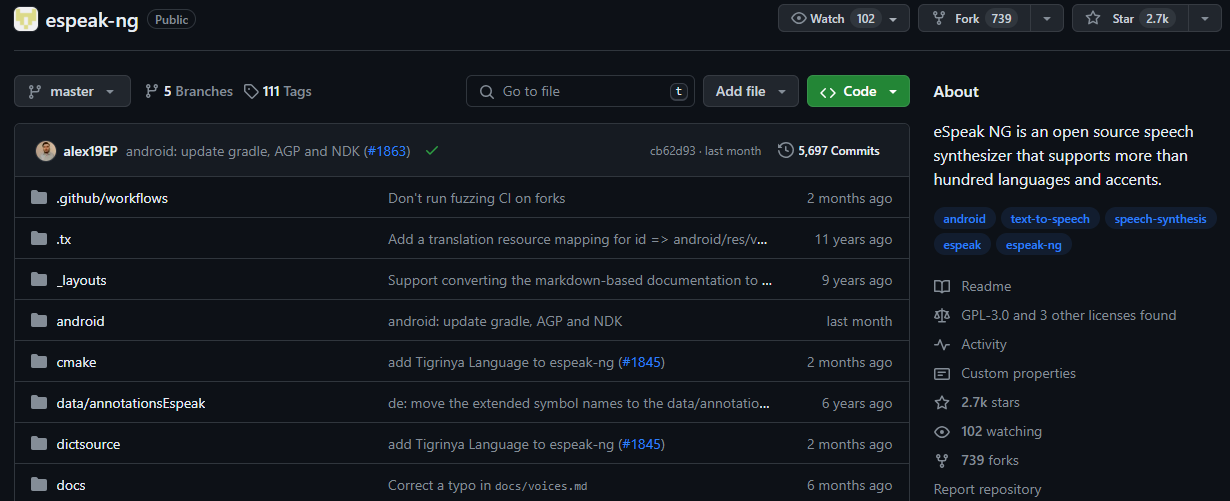 eSpeak NG 是一款緊湊型開源軟體文字語音合成器,適用於 Linux、Windows、Android 和其他作業系統。它支援 100 多種語言和口音。它基於 Jonathan Duddington 建立的 eSpeak 引擎。 您可以閱讀各種系統上的[安裝指南](https://github.com/espeak-ng/espeak-ng/blob/master/docs/guide.md)。 對於類似 Debian 的發行版(例如 Ubuntu、Mint 等)。您可以使用此命令。 ``` sudo apt-get install espeak-ng ``` 您可以查看[支援的語言](https://github.com/espeak-ng/espeak-ng/blob/master/docs/languages.md)清單、閱讀[文件](https://github.com/espeak-ng/espeak-ng/tree/master?tab=readme-ov-file#documentation)並查看[功能](https://github.com/espeak-ng/espeak-ng/tree/master?tab=readme-ov-file#features)。 該模型將文字轉換為音素程式碼,表明其作為另一個語音合成引擎前端的潛在能力。 他們在 GitHub 上有 2700+ 顆星星, https://github.com/espeak-ng/espeak-ng 明星 eSpeak NG ⭐️ --- 16.[聊天機器人 UI](https://github.com/mckaywrigley/chatbot-ui) - 每個模型的人工智慧聊天。 ------------------------------------------------------------------------  我們都使用過 ChatGPT,這個專案可以幫助我們為任何 AI 聊天機器人設定使用者介面。少一麻煩! 你可以閱讀[安裝指南](https://github.com/mckaywrigley/chatbot-ui?tab=readme-ov-file#1-install-docker)來安裝 docker、supabase CLI 和其他東西。 您可以閱讀<a href="">文件</a>並查看[演示](https://twitter.com/mckaywrigley/status/1738273242283151777?s=20)。 這在底層使用了 Supabase (Postgres),這就是我們之前討論它的原因。 我沒有討論 Vercel AI 聊天機器人,因為它與此機器人相比是一個相當新的比較。 Chatbot UI 在 GitHub 上擁有大約 25k+ Stars,因此它仍然是開發人員為任何聊天機器人建立 UI 介面的首選。 https://github.com/mckaywrigley/chatbot-ui 明星聊天機器人 UI ⭐️ --- 17. [GPT-4 & LangChain](https://github.com/mayooear/gpt4-pdf-chatbot-langchain) - 用於大型 PDF 文件的 GPT4 和 LangChain 聊天機器人。 --------------------------------------------------------------------------------------------------------------------------  這可用於新的 GPT-4 API 來為多個大型 PDF 檔案建立 chatGPT 聊天機器人。 該系統是使用 LangChain、Pinecone、Typescript、OpenAI 和 Next.js 建構的。 LangChain 是一個簡化可擴展 AI/LLM 應用程式和聊天機器人開發的框架。 Pinecone 用作向量存儲,用於以文字格式儲存嵌入和 PDF,以便以後檢索類似文件。 您可以閱讀涉及複製、安裝依賴項和設定環境 API 金鑰[的開發指南](https://github.com/mayooear/gpt4-pdf-chatbot-langchain?tab=readme-ov-file#development)。 您可以觀看[YouTube 影片](https://www.youtube.com/watch?v=ih9PBGVVOO4),了解如何遵循和使用它。 他們在 GitHub 上擁有 14k+ Stars,僅提交了 34 次。在您的下一個人工智慧應用程式中嘗試! https://github.com/mayooear/gpt4-pdf-chatbot-langchain 明星 GPT-4 和 Langchain ⭐️ --- 18. [Amica](https://github.com/semperai/amica) - 允許您在瀏覽器中輕鬆與 3D 角色聊天。 ---------------------------------------------------------------------  Amica 是一個開源接口,用於透過語音合成和語音辨識與 3D 角色進行互動式通訊。 您可以匯入 VRM 文件,調整聲音以適合角色,並產生包含情緒表達的回應文字。 他們使用 Three.js、OpenAI、Whisper、Bakllava 等進行視覺處理。您可以閱讀[Amica 的工作原理](https://docs.heyamica.com/overview/how-amica-works)及其所涉及的[核心概念](https://docs.heyamica.com/overview/core-concepts)。 您可以克隆該存儲庫並使用它來[開始](https://docs.heyamica.com/getting-started/installation)。 ``` npm i npm run dev ``` 您可以閱讀[文件](https://docs.heyamica.com/)並查看[演示](https://amica.arbius.ai/),這真是太棒了:D  您可以觀看這段簡短的影片,了解它的功能。 https://www.youtube.com/watch?v=hUxAEnFiXH8 Amica 使用 Tauri 建立桌面應用程式。別擔心,我們在此清單的後面部分介紹了金牛座。 他們在 GitHub 上有 400 多個 Star,看起來非常容易使用。 https://github.com/semperai/amica Star Amica ⭐️ --- 19. [Hugging Face Transformers](https://github.com/huggingface/transformers) - 適用於 Pytorch、TensorFlow 和 JAX 的最先進的機器學習。 ----------------------------------------------------------------------------------------------------------------------  Hugging Face Transformers 可以輕鬆存取最先進的預訓練模型和演算法,用於文字分類、語言生成和問答等任務。該庫建置在 PyTorch 和 TensorFlow 之上,允許用戶以最少的努力將高級 NLP 功能無縫整合到他們的應用程式中。 憑藉大量預訓練模型和支援社區,Hugging Face Transformers 簡化了基於 NLP 的解決方案的開發。 這些模型可用於執行 100 多種語言的文本相關任務,例如文字分類、資訊擷取、問答、摘要、翻譯和文字生成。 它們還可以處理與影像相關的任務,例如影像分類、物件偵測和分割,以及與音訊相關的任務,例如語音辨識和音訊分類。 他們還可以執行各種模式的多任務處理,包括表格問答、光學字元辨識、從掃描文件中提取資訊、視訊分類和視覺問答。 您可以看到大量可用的[模型](https://huggingface.co/models)。 您可以瀏覽[文件](https://huggingface.co/docs/transformers/task_summary)以取得完整的目標並向您展示可以執行的各種任務的範例。 例如,使用管道的一種方法是用於影像分割。 ``` from transformers import pipeline segmenter = pipeline(task="image-segmentation") preds = segmenter( "https://huggingface.co/datasets/huggingface/documentation-images/resolve/main/pipeline-cat-chonk.jpeg" ) preds = [{"score": round(pred["score"], 4), "label": pred["label"]} for pred in preds] print(*preds, sep="\n") ``` Transformer 得到了 Jax、PyTorch 和 TensorFlow 這三個最廣泛使用的深度學習庫的支持,並且它們之間可以無縫整合。這種整合可以使用一個庫輕鬆訓練模型,然後加載它們以使用另一個庫進行推理。 它們在 GitHub 上擁有大約 120k+ 星,並被 142k+ 大量開發人員使用。試試看! https://github.com/huggingface/transformers 明星抱臉變形金剛 ⭐️ --- 20. [LLAMA](https://github.com/facebookresearch/llama) - LLaMA 模型的推理程式碼。 ------------------------------------------------------------------------  Llama 2 是 Facebook Research 開發的尖端技術,使個人、創作者、研究人員和各種規模的企業能夠使用大型語言模型負責任地實驗、創新和擴展他們的想法。 最新版本包括模型權重以及預訓練和微調 Llama 語言模型的起始程式碼,參數範圍從 7B 到 70B。 開始使用涵蓋以下步驟的[安裝指南](https://github.com/facebookresearch/llama?tab=readme-ov-file#quick-start)。 - 克隆並下載儲存庫。 - 安裝所需的依賴項。 - 從 Meta 網站註冊並下載模型。 - 執行提供的腳本來下載模型。 - 使用提供的命令在本地執行所需的模型。 您可以觀看由 ZeroToMastery 製作的關於什麼是美洲駝的[YouTube 影片](https://www.youtube.com/watch?v=OqZ0CSKzu10)。 您也可以在[Hugging Face](https://huggingface.co/meta-llama)和[Meta 官方頁面](https://llama.meta.com/)上查看型號清單和更多資訊。 Ollama 基於 llama,在 GitHub 上擁有 50k+ star。請參閱文件並使用此模型進行更多研究。 https://github.com/facebookresearch/llama 明星 LLAMA ⭐️ --- 21. [Fonoster](https://github.com/fonoster/fonoster) - Twilio 的開源替代品。 ---------------------------------------------------------------------  Fonoster Inc. 研究了一種創新的可編程電信堆棧,該堆疊將為企業提供完全基於雲端的實用程序,將電話服務與網路連接起來。 根據您想要實現的目標,有多種開始方法。 開始使用以下 npm 指令。 ``` npm install @fonoster/websdk // CDN is also available ``` 例如,您可以透過以下方式將 Fonoster 與 Google Speech API 結合使用。 (您將需要服務帳戶的金鑰) ``` npm install @fonoster/googleasr @fonoster/googletts ``` 這是您可以配置語音伺服器以使用插件的方法。 ``` const { VoiceServer } = require("@fonoster/voice"); const GoogleTTS = require("@fonoster/googletts"); const GoogleASR = require("@fonoster/googleasr"); const voiceServer = new VoiceServer(); const speechConfig = { keyFilename: "./google.json" }; // Set the server to use the speech APIS voiceServer.use(new GoogleTTS(speechConfig)); voiceServer.use(new GoogleASR(speechConfig)); voiceServer.listen(async(req, res) => { console.log(req); await res.answer(); // To use this verb you MUST have a TTS plugin const speech = await res.gather(); await res.say("You said " + speech); await res.hangup(); }); ``` 您可以閱讀[文件](https://fonoster.com/docs/overview/)。 他們提供了一個足以入門的免費套餐。 他們在 GitHub 上擁有大約 6k+ 顆星,並發布了 250 多個版本。 https://github.com/fonoster/fonoster 明星 Fonoster ⭐️ --- 22. [DIPY](https://github.com/dipy/dipy) - Python 中的 paragon 3D/4D+ 成像庫。 ------------------------------------------------------------------------  DIPY 是 Python 中領先的 3D/4D+ 成像庫。它包含用於空間歸一化、訊號處理、機器學習、統計分析和醫學影像視覺化的各種方法。 此外,它還包含計算解剖學的專門方法,包括擴散、灌注和結構成像。 您可以開始使用。 ``` pip install dipy // run this in python console import dipy print(dipy.get_info()) ``` 如果您使用的是 anaconda 或其他系統,您可以閱讀完整的[安裝指南](https://docs.dipy.org/stable/examples_built/quick_start/quick_start.html#sphx-glr-examples-built-quick-start-quick-start-py)。 您可以閱讀[文件](https://docs.dipy.org/stable/)並存取他們的[YouTube 頻道](https://www.youtube.com/c/diffusionimaginginpython)。 你可以看看詳細的[例子](https://docs.dipy.org/stable/examples_built/index.html)。 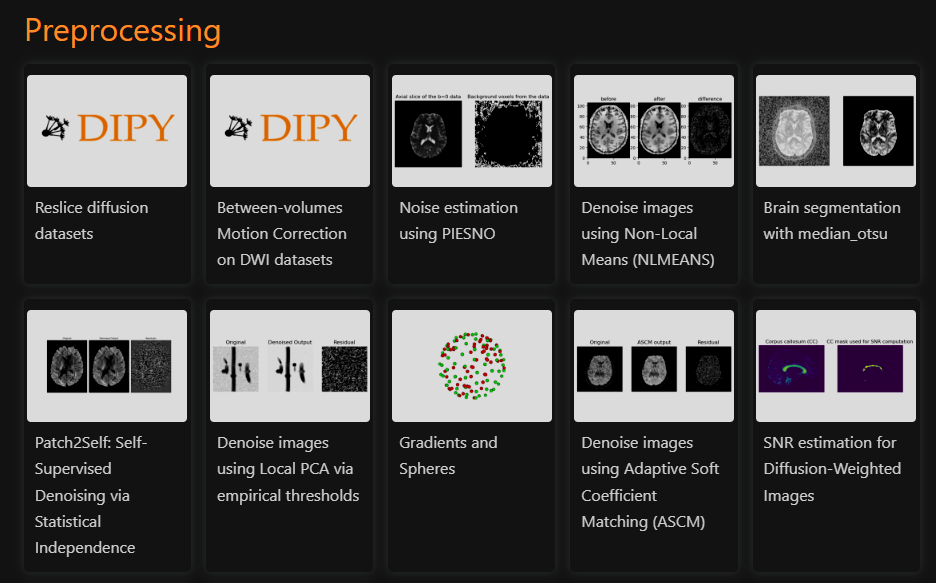 他們的下載量超過 428k,並且在 GitHub 儲存庫上擁有 600 多個 Star。 https://github.com/dipy/dipy 明星 DIPY ⭐️ --- 23. [Elastic Search](https://github.com/elastic/elasticsearch) - 免費開放式、分散式、RESTful 搜尋引擎。 ----------------------------------------------------------------------------------------   Elasticsearch 是一種分散式、RESTful 搜尋和分析引擎,能夠解決大量使用案例。 作為 Elastic Stack 的核心,它集中儲存您的資料,以實現閃電般的快速搜尋、微調的相關性以及可輕鬆擴展的強大分析。 他們闡述了使用 ElasticSearch 的用例。  Elasticsearch 使用標準 RESTful API 和 JSON。我們也使用多種語言(例如 Java、Python、.NET、SQL 和 PHP)來建立和維護客戶端。 該結構如下。 ``` const { Client } = require('@elastic/elasticsearch') const client = new Client({ node: 'http://localhost:9200' }) client .search({ index: 'social-*', body: { query: { match: { message: 'myProduct' } }, aggs: { top_10_states: { terms: { field: 'state', size: 10 } } } } }) .then(({ body }) => { const { hits } = body.hits console.log(hits) }) .catch(console.error) ``` 您可以閱讀<a href="">文件</a>並查看[功能清單](https://www.elastic.co/elasticsearch/features)。 儘管具有有用的功能,Elastic Search 的主要缺點是缺乏免費套餐。但是,您仍然可以利用免費試用版來探索和了解開源專案的架構。 Elastic Search 在 GitHub 上擁有超過 67k+ 的星星和近 1900 名貢獻者,並且處於`v8`版本中,正在不斷發展和改進。 https://github.com/elastic/elasticsearch 明星 Elastic Search ⭐️ --- 24. [Tauri](https://github.com/tauri-apps/tauri) - 使用 Web 前端建立更小、更快且安全的桌面應用程式。 ------------------------------------------------------------------------------  Tauri 是一個工具包,旨在幫助開發人員利用幾乎任何可用的前端框架為主要桌面平台建立應用程式。其核心是使用 Rust 開發的,而 CLI 利用 Node.js,提供了一種真正的多語言方法來開發和維護卓越的應用程式。 Tauri 應用程式中的使用者介面目前利用 Tao 作為 macOS、Windows、Linux、Android 和 iOS 上的視窗處理庫。 為了渲染您的應用程式,Tauri 使用 WRY,這是一個為系統 Web 視圖提供統一介面的程式庫。它在 macOS 和 iOS 上利用 WKWebView、在 Windows 上利用 WebView2、在 Linux 上利用 WebKitGTK 以及在 Android 上利用 Android System WebView。 您可以使用 Vite、HTML/CSS/JS、Next.js、Svelte 等等。 開始使用以下 npm 指令。 ``` npm create tauri-app@latest ``` 您可以閱讀[文件](https://tauri.app/v1/guides/getting-started/prerequisites)並查看 Tauri 提供的[功能清單](https://tauri.app/v1/guides/features/)。 您甚至可以使用 Tauri 建立自己的 CLI,這有多酷:) 團隊提供了[YouTube 影片](https://www.youtube.com/watch?v=UxTJeEbZX-0&t=2s),讓您了解更多關於 Tauri 的訊息。 他們在 GitHub 上擁有超過 75k 顆星星,並發布了 800 多個版本。 https://github.com/tauri-apps/tauri 金牛座之星 ⭐️ --- 25. [AutoGPT](https://github.com/Significant-Gravitas/AutoGPT) - 比 ChatGPT 更令人興奮。 ---------------------------------------------------------------------------------  AutoGPT 的核心在於其主要專案,即由大型語言模型 (LLM) 驅動的半自治代理,旨在為您執行任何任務。 AutoGPT 計畫由[四個主要部分](https://docs.agpt.co/#agent)組成: - 代理 – 也稱為“AutoGPT” - 基準 – 又稱 agbenchmark - 熔爐 - 前端 了解如何使用 OpenAI 金鑰[設定 AutoGPT](https://docs.agpt.co/autogpt/setup/) 。 您可以觀看[Fireship 發布的有關 AutoGPT 的 YouTube 影片](https://www.youtube.com/watch?v=_rGXIXyNqpk)。 https://www.youtube.com/watch?v=\_rGXIXyNqpk 您也可以觀看 Sentral Media 提供的[AutoGPT 教學](https://www.youtube.com/watch?v=FeIIaJUN-4A)。 您可以閱讀[文件](https://docs.agpt.co/)並查看[專案板](https://github.com/orgs/Significant-Gravitas/projects/1),以了解目前正在開發的內容。 即使您對 AI 不太了解,您也可以嘗試 AutoGPT 以了解如何節省時間並建立很酷的東西。 由於如此出色的用例和自動化功能,他們在 GitHub Repo 上擁有大約 159k+ 的星星。 https://github.com/Significant-Gravitas/AutoGPT 明星 AutoGPT ⭐️ --- 還沒結束。 現在,讓我們探索一些有價值的資源,這些資源將幫助您學習新概念並製作更好的人工智慧應用程式。 我們會保持簡單。不掛! - [人工智慧 (AI) 課程、書籍、視訊講座和論文](https://github.com/owainlewis/awesome-artificial-intelligence) - [機器學習/深度學習/AI + Web3 - 教程](https://github.com/TarrySingh/Artificial-Intelligence-Deep-Learning-Machine-Learning-Tutorials) - [ML 初學者](https://github.com/microsoft/ML-For-Beginners)- 12 週、26 節課程、52 個測驗,適合所有人的經典機器學習。 - [機器學習框架、函式庫和軟體](https://github.com/josephmisiti/awesome-machine-learning) - [如何製作人工智慧:逐步指南 - Revelo](https://www.revelo.com/blog/how-to-make-an-ai) 希望這將幫助您學習更多概念! --- 我希望您在列表中找到有用的東西。 我介紹了一些很棒的開源專案,它們可以將您的 AI 應用程式提升到一個新的水平。 人工智慧正在改變世界,最好與人工智慧保持朋友關係,而不是忽視它。 利用它來提高生產力,並抓住機會開發一些非凡的東西。 如果您想以最佳方式改進您的專案,有些開源專案比其他專案更有用,尤其是 Taipy 和 AutoGPT。 請發表評論,讓我們知道哪個專案最讓您感到驚訝。 祝你有美好的一天!直到下一次。 在 GitHub 上關注我。 https://github.com/Anmol-Baranwal 關注 Taipy 以了解更多此類內容。 https://dev.to/taipy --- 原文出處:https://dev.to/taipy/all-the-tools-i-need-to-build-a-perfect-ai-app-2oeh
通常,作為開發人員,我們會編寫類似類型的程式碼,陷入雖然舒適但有時感覺很平凡的模式。 然而,JavaScript 的世界是廣闊的,充滿了高級功能,當發現和使用這些功能時,可以將我們的開發工作變得更加令人興奮和充實。 在本指南中,我們將揭曉 25 個高級 JavaScript 功能,這些功能不僅能揭示這些隱藏的瑰寶,還能將您對 JavaScript 的掌握提升到前所未有的水平。 讓我們一起踏上這段發現之旅,將 JavaScript 的高級功能整合到我們的編碼庫中,以建立更有效率、更優雅、更強大的應用程式。是時候為我們的開發任務注入新的樂趣和創造力了。 1 — 迴圈和區塊語句的標籤 -------------- JavaScript 允許標記迴圈和區塊語句,從而可以使用`break`和`continue`進行精確控制。 ``` outerLoop: for (let i = 0; i < 5; i++) { innerLoop: for (let j = 0; j < 5; j++) { if (i === 2 && j === 2) break outerLoop; console.log(`i=${i}, j=${j}`); } } ``` 2 - 逗號運算符 --------- 逗號運算子允許按序列計算多個表達式,並傳回最後一個表達式的結果。 ``` let a = (1, 2, 3); // a = 3 ``` 3 — 字串格式化以外的標記範本文字 ------------------ 除了建立字串之外,標記範本還可用於 DSL(域特定語言)、清理使用者輸入或本地化。 ``` function htmlEscape(strings, ...values) { // Example implementation } ``` 4 — 區塊內的函數聲明 ------------ 儘管不推薦,但 JavaScript 允許在區塊內聲明函數,這可能會導致非嚴格模式下的不同行為。 ``` if (true) { function test() { return "Yes"; } } else { function test() { return "No"; } } test(); // Behavior varies depending on the environment ``` 5 — 無效運算符 --------- `void`運算子計算任何表達式,然後傳回未定義的值,這對於 JavaScript 的超連結很有用。 ``` void (0); // returns undefined ``` 6 — 用於快速數學的位元運算符 ---------------- 位運算符,例如`|`和`&` ,可以更快地執行一些數學運算,但會犧牲可讀性。 ``` let floor = 5.95 | 0; // Fast way to do Math.floor(5.95) ``` 7 — with 處理物件的語句 ---------------- `with`語句擴展了區塊的作用域鏈,讓您可以編寫更短的程式碼。但是,出於可讀性和效能方面的考慮,不建議這樣做。 ``` with(document.getElementById("myDiv").style) { background = "black"; color = "white"; } ``` [](https://skillshare.eqcm.net/QyLx6z) 與 Christian Heilmann 一起提高您的 JavaScript 技能 - 從今天開始編寫更乾淨、更快、更好的程式碼! 8 — 自動分號插入 (ASI) ---------------- JavaScript 嘗試修復缺少的分號,但依賴它可能會導致意外結果。 ``` let x = 1 let y = 2 [x, y] = [y, x] // Without proper semicolons, this could fail ``` 9 — 在屬性檢查操作員中 ------------- 檢查物件是否具有屬性,而無需直接存取其值。 ``` "toString" in {}; // true ``` 10——instanceof 與 typeof ----------------------- `instanceof`檢查原型鏈,而`typeof`傳回一個字串,指示未計算的操作數的類型。 ``` function Person() {} let person = new Person(); console.log(person instanceof Person); // true console.log(typeof person); // "object" ``` 11 — ES6 中的區塊級函數 ---------------- [ES6](https://www.webdevstory.com/mastering-es6-for-react/)允許函數具有區塊作用域,類似`let`和`const` 。 ``` { function test() { return "block scoped"; } } console.log(typeof test); // "function" in non-strict mode, "undefined" in strict mode ``` 12 — 偵錯器語句 ---------- 使用`debugger`語句暫停執行並開啟偵錯器。 ``` function problematicFunction() { debugger; // Execution pauses here if the developer tools are open } ``` **13 —**用於動態程式碼執行的`eval()` -------------------------- `eval`將字串作為 JavaScript 程式碼執行,但會帶來重大的安全性和效能影響。 ``` eval("let a = 1; console.log(a);"); // 1 ``` [](https://partners.inmotionhosting.com/k0EPWv) 利用 InMotion Hosting 的一系列計劃(從共享伺服器到 VPS 以及專用伺服器)為您的專案找到合適的託管解決方案。 **14 — 非標準**`__proto__`屬性 ------------------------- 雖然`__proto__`被廣泛支持用於設定物件的原型,但它是非標準的。請改用`Object.getPrototypeOf()`和`Object.setPrototypeOf()` 。 ``` let obj = {}; obj.__proto__ = Array.prototype; // Not recommended ``` 15 — document.write() 用於直接文件編輯 ------------------------------ `document.write()`直接寫入 HTML 文件,但使用它可能會產生負面影響,特別是同步載入外部腳本。 ``` document.write("<h1>Hello World!</h1>"); ``` 16 — 鍊式分配 --------- JavaScript 允許鍊式賦值,它可以在一個語句中將單一值指派給多個變數。 ``` let a, b, c; a = b = c = 5; // Sets all three variables to the value of 5 ``` 17 — 屬性存在的 in 運算符 ----------------- `in`運算子檢查屬性是否存在於物件中,而不存取屬性值。 ``` const car = { make: 'Toyota', model: 'Corolla' }; console.log('make' in car); // true ``` 18 — 物件屬性簡寫 ----------- 為物件指派屬性時,如果屬性名稱與變數名稱相同,則可以使用簡寫。 ``` const name = 'Alice'; const age = 25; const person = { name, age }; ``` 19 — 預設參數值和解構組合 --------------- 您可以將預設參數值與函數參數中的解構結合起來,以獲得更具可讀性和更靈活的函數定義。 ``` function createPerson({ name = 'Anonymous', age = 0 } = {}) { console.log(`Name: ${name}, Age: ${age}`); } createPerson({ name: 'Alice' }); // Name: Alice, Age: 0 createPerson(); // Name: Anonymous, Age: 0 ``` **20 — 使用**`Array.fill()`初始化陣列 ------------------------------ 使用`fill()`方法使用特定值快速初始化陣列。 ``` const initialArray = new Array(5).fill(0); // Creates an array [0, 0, 0, 0, 0] ``` [](https://amzn.to/3VhQFae) 利用可調式 LED 照明優化您的工作空間,提高工作效率和舒適度,為專注的工作會議創造理想的環境。 **21 —** `Array.includes()`用於存在檢查 --------------------------------- 使用`includes()`方法可以輕鬆檢查陣列中是否存在元素,這比使用`indexOf()`更具可讀性。 ``` const fruits = ['apple', 'banana', 'mango']; console.log(fruits.includes('banana')); // true ``` 22 — 解構別名 --------- `destructuring`物件時,可以使用別名將屬性指派給具有不同名稱的變數。 ``` const obj = { x: 1, y: 2 }; const { x: newX, y: newY } = obj; console.log(newX); // 1 ``` 23 — 預設值的空合併運算符 --------------- 使用`??`僅在處理`null`或`undefined`時提供預設值,而不是其他`falsy`值,例如 ``` const count = 0; console.log(count ?? 10); // 0, because count is not null or undefined ``` 24 — 動態函數名稱 ----------- 使用物件字面量中的計算屬性名稱建立具有動態名稱的函數。 ``` const dynamicName = 'func'; const obj = { [dynamicName]() { return 'Dynamic Function Name!'; } }; console.log(obj.func()); // "Dynamic Function Name!" ``` 25 — 私有類別字段 ----------- 使用 hash `#`前綴定義類別中的私有字段,該字段無法從類別外部存取。 ``` class Counter { #count = 0; increment() { this.#count++; } getCount() { return this.#count; } } ``` 簡單總結 --- 當我們結束 25 個 JavaScript 高階功能的探索時,JavaScript 的函式庫既龐大又強大。 我們深入研究的每個功能都為解決編碼挑戰開闢了新途徑,類似於在我們的工具包中加入創新工具。 這不僅增強了我們創造性、有效率地制定解決方案的能力,而且還強調了 JavaScript 的動態多功能性。 這些進階功能凸顯了持續學習在 Web 開發領域的關鍵角色。 接受這些細微差別並將它們整合到我們的日常編碼實踐中,使我們能夠提高我們的技能並為[網路技術的發展](https://www.simplilearn.com/what-is-web-1-0-web-2-0-and-web-3-0-with-their-difference-article)做出貢獻。 請記住,[掌握 JavaScript 的](https://www.webdevstory.com/javascript-essential-terms/)道路是一個持續的旅程,每一行程式碼都提供了發現非凡事物的機會。 讓我們不斷突破 JavaScript 所能實現的極限,保持好奇心並對未來的無限可能性保持開放。 ***支持我們的技術見解*** [](https://www.buymeacoffee.com/mmainulhasan) [](https://www.paypal.com/donate/?hosted_button_id=GDUQRAJZM3UR8) 注意:此頁面上的某些連結可能是附屬連結。如果您透過這些連結進行購買,我可能會賺取少量佣金,而您無需支付額外費用。感謝您的支持! --- 原文出處:https://dev.to/mmainulhasan/25-unnoticeable-features-of-javascript-15l1
時間越長,我就越成為函數式程式設計的愛好者。即使當我在 OOP 程式碼庫中工作時,我也會嘗試應用旨在簡化程式碼並更輕鬆地預測結果的小概念。身為 Ruby 專家,我也喜歡使用功能程式碼編寫單元測試是多麼簡單。 本文的目的是分享我對函數式程式設計概念的看法,並提出一種可以在已編寫的 OOP 程式碼中使用函數式概念的方法。希望我們能夠停止爭論哪種範式更好,並開始編寫好的想法,每次都能產生更好的程式碼! 目錄 -- - [一開始,有函數式編程](#in-the-beginning-there-was-functional-programming) - [進入OOP,這個範式是什麼?](#entering-oop-what-is-this-paradigm) - [什麼是類別以及我們如何以不同的方式思考它](#what-is-a-class-and-how-can-we-think-about-it-differently) - [變異還是不變異:什麼是不變性](#to-mutate-or-not-to-mutate-what-is-immutability) - [床下的怪物:有什麼副作用](#the-monster-under-the-bed-what-are-side-effects) - [隔離一切:什麼是純函數](#isolate-everything-what-are-pure-functions) - [使用函數式模式而不需要完整的 haskell](#using-functional-patterns-without-going-full-haskell) - [結論](#conclusion) 一開始,有函數式編程 ----------  函數式程式設計範式於 1958 年隨著第一個 Lisp 語言的出現而出現(美好的時光)。它的根源可以追溯到 Alonzo Church 的 lambda 演算。函數式程式設計的核心原則圍繞著最小化對程式碼庫中狀態的依賴。 與允許狀態但強調封裝的物件導向程式設計 (OOP) 不同,函數式程式設計師努力優先編寫無狀態元件。這種方法鼓勵建立獨立於外部狀態變數的程式碼。 此外,即使引入了狀態,在編寫狀態時也必須考慮不變性、函數的純度,甚至避免副作用。隨著本文的深入,所有這些概念都將進一步介紹。 進入OOP,這個範式是什麼? --------------  OOP,或更廣為人知的名稱為“物件導向程式設計”,是一種可以追溯到 1967 年的範式。其最偉大的代表是 Simula、Smalltalk 和 Java。背後的思想過程是透過強制封裝實踐來將這些狀態以及修改它們的任何行為分組到公共「實體」或「物件」下,從而減少「全局」狀態的數量。 事實上,「物件導向程式設計」這個名字多年來一直被廣泛討論。 OOP 的建立者之一 Alan Key 實際上希望更多地關注該範例的訊息傳遞方面。這意味著我們應該強調封裝並允許物件之間進行狀態和行為的通訊。也許在不同的宇宙中,我們可以擁有「面向訊息的程式」。然而,OOP 這個名字已經經久不衰,而我們就在這裡! 我不知道你怎麼想,但是這個考慮範式的另一個可能名稱的簡單過程讓我的思維變得瘋狂,重新思考了一些概念,並實際上簡化了我建置軟體的方式。 什麼是類別以及我們如何以不同的方式思考它 --------------------  我想每個人都聽過那個經典的講座,其中我們學到了“動物”類,其中包括“狗”類,對嗎?你可能聽過同樣的話(至少我聽過)。 > 類別是現實世界中實體的藍圖,描述其特徵和操作。 雖然不正確,但我想建議稍微改變一下單字的用法,以幫助澄清封裝,以便更好地理解,就像它對我所做的那樣。讓我們考慮以下新引文: > 類別是一種封裝狀態和在該狀態上操作的行為的方法。 這個簡單的字的改變確實讓我的思想改變了。我不再嘗試將類別視為現實世界的實體,而是開始簡單地將其視為將具有相似上下文的狀態分組在一起並公開對這些狀態進行操作的函數的另一種方式。我希望這個小小的改變也能幫助你回顧自己的概念! 以這種方式抽象化這個概念的重要性是,在從具有不同結構(例如模組)的語言中讀取程式碼時變得熟練。我們可以觀察到這段 OOP 程式碼是用 typescript 寫的: ``` class Github { private _url: string; privale _repo: string; private _username: string; constructor(url: string, repo: string, username: string) { this._repo = repo this._username = username this._url = url } public createRepo(name: string): void { // TODO: do stuff here using the provided state in _url, _repo and _username } } ``` 與此 Elixir 程式碼完全等效,即使 Elixir 程式碼使用“模組”而不是“類別”: ``` defmodule Github do @url "" @repo "" @username "" defstruct url: @url, repo: @repo, username: @username def new(url, repo, username) do %Github{url: url, repo: repo, username: username} end def create_repo(%Github{repo: repo, username: username}, name) do # TODO: do stuff here using the provided state in url, repo, and username end end ``` 接下來我們將研究一些功能概念並進一步討論這些範例的合併,讓我們開始吧! 變異還是不變異:什麼是不變性 --------------  現在我們正在達到第一個真正的功能概念,而且是一個非常重要的概念,我可以補充一下(一切都在這裡計劃)!為了正確理解不變性,讓我們回顧一下在程式設計中處理值的方式: 通常,我們將值綁定到變數,以便稍後可以對它們進行操作,對嗎?就像簡單的事情 ``` # Bounding values to variables name = 'Cherry' age = 23 # Operating on it and bounding to another variable year_born = Time.now.year - age # Printing it puts "#{name} has #{age} years old and was born at #{year_born}" ``` 對於這些變數,透過更新其值來更改原始變數是很常見的,但這裡缺少的是:修改變數是一種**破壞性**操作。 但為什麼?好吧,讓我們想像一下多個操作(函數或程式碼區塊)在不同時刻和頻率修改相同變數。在這種情況下,我們會產生很多問題,例如: - **1. 無法對操作重新排序或根本無法更改它們:**當我們有如此多的依賴程式碼時,甚至很難對程式碼進行重新排序或更改,因為所有內容都綁定到特定的更改順序。 - **2. 理解程式碼在做什麼的心理負擔:**雖然這是個人觀點,但我認為這是一個廣受認可的觀點。高度可變的程式碼很容易變得混亂且難以理解資料流,需要除錯器等工具來逐步完成轉換。 - **3. 測試時的困難:**模擬函數轉換的特定狀態確實很困難,這將逐漸擴展您的單元測試,直到它們不再是單元。 不變性可以定義為避免更改(或變異)程式內任何變數的做法。儘管根據語言的不同,我們可能需要做出讓步並改變一些控制變數,但這裡要學到的總體教訓是: > 我們應該不惜一切代價避免改變沒有定義範圍的變數。 透過這句話,我的意思是可以在函數內建立作用域變數並在那裡對其進行變異。然而,一旦您將這個可變變數傳遞給另一個函數,您就會增加改變相同變數的目標數量,並且您將慢慢失去控制。這正是我們想要避免的情況! 床底下的怪物:有什麼副作用 -------------  每當有人提出這個話題來討論時,這個話題就會引起很大的熱度。我可能不會涵蓋這個主題的每一個細微差別,但我一定會向您解釋它們是什麼以及我如何在我自己的軟體中管理副作用,好嗎? 那麼,副作用就是透過呼叫協定(HTTP、WebSocket、GraphQL 等)甚至操作 stdin/stdout 與外部資源(或「外部世界」)互動的每一次計算。是的,我知道,即使是我們無害的`print`也會在這裡受到指責。 😔 但與變異性不同的是,我們不應該盡可能避免使用它,而應該將其隔離在單獨處理副作用的特定函數中。這樣,我們將程式碼分為「不執行任何副作用的函數」和「執行副作用的函數」。但為什麼要擔心這種分離呢? 每次我們觸發對「外部世界」的任何操作時,我們都會失去對這個特定計算部分可能發生的情況的控制(例如在執行 HTTP 呼叫時,伺服器可能會關閉或可能根本不存在)。其他問題包括測試困難和程式碼可預測性降低。 由於我們無法編寫沒有副作用的任何現實世界軟體,因此一般建議是將其聚集成小函數,透過對錯誤的適當抽象來單獨處理它。這樣,就可以只測試我們 100% 控制的函數,並模擬所有執行副作用的函數。 例如,請考慮以下執行 HTTP 請求的函數以及轉換從該請求傳回的資料的小函數。 ``` require 'faraday' module MyServiceModule # This function perform side effects def perform_http_request conn = Faraday.new(url: "fakeapi.com") begin response = conn.get {ok: true, data: response.body} rescue => e {ok: false, error: e} end end # These functions doens't perform any side effects def upcase_name(name) return '' unless name.is_a?(String) name.upcase end def retrieve_born_year(age) return 0 unless age.is_a?(Integer) Time.now.year - age end end ``` > 看到我怎麼說「錯誤周圍的抽象」了嗎?這正是上面的程式碼範例中實現的,而不是讓異常在我們針對雜湊抽象的程式碼中冒泡。 在使用「副作用」和「無副作用」之間的明確定義來定義這些函數之後,很容易預測程式碼中會發生什麼,也更容易測試,如下所示: ``` require 'minitest/autorun' class TestingStuff < Minitest::Test def test_upcase_name assert_equal MyServiceModule.upcase_name "cherry", "CHERRY" assert_equal MyServiceModule.upcase_name "kalane", "KALANE" assert_equal MyServiceModule.upcase_name "Thales", "THALES" end def test_retrieve_born_year Time.stub :now, Time.new(2024, 3, 5) do assert_equal MyServiceModule.retrieve_born_year 23, 2001 assert_equal MyServiceModule.retrieve_born_year 20, 2004 assert_equal MyServiceModule.retrieve_born_year 14, 2010 end end end ``` 這個策略真的很棒,因為您甚至不需要在測試時擔心副作用部分,只需為實際執行某些操作的程式碼轉換部分編寫斷言,您最終會得到更好的測試,真正驗證重要的內容您的程式碼庫的一部分!整齊吧? 隔離一切:什麼是純函數 -----------  現在是時候總結到目前為止所獲得的所有知識了。在前面的範例中,我們觀察到程式碼分為「副作用」和「無副作用」。我們還看到了這些功能如何更容易測試,並且我們的主要轉換業務邏輯應該保持隔離。您想知道這些函數叫什麼嗎?它們是**純函數**! 讓我們檢查純函數的正確形式定義並逐步探索這個概念。 > 純函數是尊重不變性、不執行任何副作用並且在給定相同參數的情況下傳回相同輸出的函數。 基本上,純函數遵循我們之前提到的所有原則,而且它們總是為相同的參數產生相同的返回。讓我們來看看之前的函數。 ``` def upcase_name(name) return '' unless name.is_a?(String) name.upcase end upcase_name('cherry') # => Will be *always* CHERRY ``` 使用純函數,我們可以輕鬆定義多個斷言,因為我們不受任何需要大量模擬的上下文的約束。我們只需用靜態值傳遞所需的參數,就這樣! 由於純函數非常小且可組合,因此它們的數量增加得非常快。為了解決這個問題,像 Elixir 這樣的函數式語言提供了像管道這樣的組合運算符,這使得按順序執行多個純函數變得非常容易。 ``` "cherry " |> trim |> upcase # => "CHERRY" ``` > 管道運算子源自 Bash 等函數。您可以在這裡閱讀更多相關資訊:\[ <https://dev.to/cherryramatis/linux-filters-how-to-streamline-text-like-a-boss-2dp4#what-is-a-pipeline> \] 使用函數式模式而不需要完整的 haskell ----------------------  我一直害怕學習函數範式,因為社群透過使用現成的句子和大概念讓每個試圖學習一些小技巧的人變得非常複雜。在掌握了許多函數式語言並嘗試盡可能多地學習之後,我的目標是簡化這些概念,最重要的是,提倡在 OOP 程式碼中使用函數式概念。 應用純函數(或純方法,如果您願意)、不變性和副作用分離可以使您的 OOP 程式碼看起來更乾淨和解耦。你不需要知道什麼是 monad 或如何在 Haskell 中手動編寫編譯器;您可以使用簡單而有效的函數概念來堅持使用 Ruby on Rails! 我希望透過這篇小文章(以及本系列中的文章),無論您選擇哪種語言和框架,您都可以透過可組合性和簡單性來改進您的程式碼庫。 結論 -- 這篇文章是我嘗試使函數範式的知識民主化(在我的能力和專業知識範圍內)。需要強調的是,我不是函數式專家,本文針對的是了解 OOP 並對函數式程式設計感興趣的初學者。我希望它有用,並且我願意提供任何需要的幫助。願原力與你同在🍒 --- 原文出處:https://dev.to/cherryramatis/ending-the-war-or-continuing-it-lets-bring-functional-programming-to-oop-codebases-3mhd
長話短說 ==== 在本文中,您將學習如何建立由 AI 驅動的 PowerPoint 應用程式,該應用程式可以搜尋網路以自動製作有關任何主題的簡報。 我們將介紹使用: - 用於應用程式框架的 Next.js 🖥️ - 法學碩士 OpenAI 🧠 - LangChain 和 Tavily 的網路搜尋人工智慧代理🤖 - 使用 CopilotKit 將 AI 整合到您的應用程式中 🪁  --- CopilotKit:為您的應用程式建立人工智慧副駕駛 --------------------------- CopilotKit 是[開源人工智慧副駕駛平台。](https://github.com/CopilotKit/CopilotKit)我們可以輕鬆地將強大的人工智慧整合到您的 React 應用程式中。 建造: - ChatBot:上下文感知的應用內聊天機器人,可以在應用程式內執行操作 💬 - CopilotTextArea:人工智慧驅動的文字字段,具有上下文感知自動完成和插入功能📝 - 聯合代理:應用程式內人工智慧代理,可以與您的應用程式和使用者互動🤖  {% cta https://github.com/CopilotKit/CopilotKit %} Star CopilotKit ⭐️ {% endcta %} 現在回到文章。 (本文是我們三週前發表的一篇文章的進展,但您無需閱讀該文章即可理解這一點)。 --- **先決條件** -------- 在開始建立應用程式之前,讓我們先查看建置應用程式所需的依賴項或套件 `copilotkit/react-core` :CopilotKit 前端包,帶有 React hooks,用於向副駕駛提供應用程式狀態和操作(AI 功能) `copilotkit/react-ui` :聊天機器人側邊欄 UI 的 CopilotKit 前端包 `copilotkit/react-textarea` :CopilotKit 前端包,用於在演講者筆記中進行人工智慧輔助文字編輯。 `LangChainJS` :一個用於開發由語言模型支援的應用程式的框架。 `Tavily Search API` :幫助將法學碩士和人工智慧應用程式連接到可信賴的即時知識的 API。 安裝所有專案包和依賴項 ----------- 在安裝所有專案包和依賴項之前,我們首先在終端機上執行以下命令來建立 Nextjs 專案。 ``` npx create-next-app@latest ``` 然後系統會提示您選擇一些選項。請隨意標記它們,如下所示。 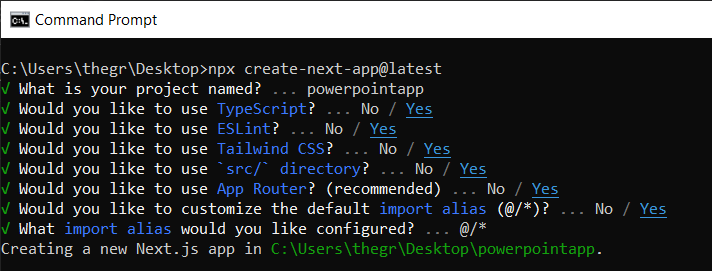 之後,使用您選擇的文字編輯器開啟新建立的 Nextjs 專案。然後在命令列中執行以下命令來安裝所有專案包和依賴項。 ``` npm i @copilotkit/backend @copilotkit/shared @langchain/langgraph @copilotkit/react-core @copilotkit/react-ui @copilotkit/react-textarea @heroicons/react ``` **建立 PowerPoint 應用程式前端** ------------------------ 讓我們先建立一個名為`Slide.tsx`的檔案。該文件將包含顯示和編輯投影片內容的程式碼,包括其`title` 、 `body text` 、 `background image`和`spoken narration text` 。 要建立該文件,請前往`/[root]/src/app`並建立一個名為`components`的資料夾。在 Components 資料夾中,建立`Slide.tsx`檔案。 之後,在文件頂部加入以下程式碼。程式碼定義了兩個名為`SlideModel`和`SlideProps`的 TypeScript 介面。 ``` "use client"; // Define an interface for the model of a slide, specifying the expected structure of a slide object. export interface SlideModel { title: string; content: string; backgroundImageDescription: string; spokenNarration: string; } // Define an interface for the properties of a component or function that manages slides. export interface SlideProps { slide: SlideModel; partialUpdateSlide: (partialSlide: Partial<SlideModel>) => void; } ``` 接下來,在上面的程式碼下面加入以下程式碼。程式碼定義了一個名為`Slide`功能元件,它接受`SlideProps`類型的 props。 ``` // Define a functional component named Slide that accepts props of type SlideProps. export const Slide = (props: SlideProps) => { // Define a constant for the height of the area reserved for speaker notes. const heightOfSpeakerNotes = 150; // Construct a URL for the background image using the description from slide properties, dynamically fetching an image from Unsplash. const backgroundImage = 'url("https://source.unsplash.com/featured/?' + encodeURIComponent(props.slide.backgroundImageDescription) + '")'; // Return JSX for the slide component. return ( <> {/* Slide content container with dynamic height calculation to account for speaker notes area. */} <div className="w-full relative bg-slate-200" style={{ height: `calc(100vh - ${heightOfSpeakerNotes}px)`, // Calculate height to leave space for speaker notes. }} > {/* Container for the slide title with centered alignment and styling. */} <div className="h-1/5 flex items-center justify-center text-5xl text-white text-center z-10" > {/* Textarea for slide title input, allowing dynamic updates. */} <textarea className="text-2xl bg-transparent text-black p-4 text-center font-bold uppercase italic line-clamp-2 resize-none flex items-center" style={{ border: "none", outline: "none", }} value={props.slide.title} placeholder="Title" onChange={(e) => { props.partialUpdateSlide({ title: e.target.value }); }} /> </div> {/* Container for the slide content with background image. */} <div className="h-4/5 flex" style={{ backgroundImage, backgroundSize: "cover", backgroundPosition: "center", }} > {/* Textarea for slide content input, allowing dynamic updates and styled for readability. */} <textarea className="w-full text-3xl text-black font-medium p-10 resize-none bg-red mx-40 my-8 rounded-xl text-center" style={{ lineHeight: "1.5", }} value={props.slide.content} placeholder="Body" onChange={(e) => { props.partialUpdateSlide({ content: e.target.value }); }} /> </div> </div> {/* Textarea for entering spoken narration with specified height and styling for consistency. */} <textarea className=" w-9/12 h-full bg-transparent text-5xl p-10 resize-none bg-gray-500 pr-36" style={{ height: `${heightOfSpeakerNotes}px`, background: "none", border: "none", outline: "none", fontFamily: "inherit", fontSize: "inherit", lineHeight: "inherit", }} value={props.slide.spokenNarration} onChange={(e) => { props.partialUpdateSlide({ spokenNarration: e.target.value }); }} /> </> ); }; ``` 之後,我們現在會建立一個名為`Presentation.tsx`的檔案。 該文件將包含初始化和更新投影片狀態、渲染目前投影片以及根據目前狀態動態啟用或停用按鈕實現導覽和投影片管理操作的程式碼。 要建立該文件,請將另一個文件新增至元件資料夾中,並將其命名為`Presentation.tsx` ,然後使用下列程式碼在檔案頂部匯入`React hooks` 、 `icons` 、 `SlideModel`和`Slide`元件。 ``` "use client"; import { useCallback, useMemo, useState } from "react"; import { BackwardIcon, ForwardIcon, PlusIcon, SparklesIcon, TrashIcon } from "@heroicons/react/24/outline"; import { SlideModel, Slide } from "./Slide"; ``` 之後,在上面的程式碼下面加入以下程式碼。程式碼定義了一個`ActionButton`功能元件,它將呈現具有可自訂屬性的按鈕元素。 ``` export const ActionButton = ({ disabled, onClick, className, children, }: { disabled: boolean; onClick: () => void; className?: string; children: React.ReactNode; }) => { return ( <button disabled={disabled} className={`bg-blue-500 text-white font-bold py-2 px-4 rounded ${disabled ? "opacity-50 cursor-not-allowed" : "hover:bg-blue-700"} ${className}`} onClick={onClick} > {children} </button> ); }; ``` 然後在上面的程式碼下面加入下面的程式碼。程式碼定義了一個名為「Presentation」的功能元件,用於初始化投影片的狀態並定義一個用於更新目前投影片的函數。 ``` // Define the Presentation component as a functional component. export const Presentation = () => { // Initialize state for slides with a default first slide and a state to track the current slide index. const [slides, setSlides] = useState<SlideModel[]>([ { title: `Welcome to our presentation!`, // Title of the first slide. content: 'This is the first slide.', // Content of the first slide. backgroundImageDescription: "hello", // Description for background image retrieval. spokenNarration: "This is the first slide. Welcome to our presentation!", // Spoken narration text for the first slide. }, ]); const [currentSlideIndex, setCurrentSlideIndex] = useState(0); // Current slide index, starting at 0. // Use useMemo to memoize the current slide object to avoid unnecessary recalculations. const currentSlide = useMemo(() => slides[currentSlideIndex], [slides, currentSlideIndex]); // Define a function to update the current slide. This function uses useCallback to memoize itself to prevent unnecessary re-creations. const updateCurrentSlide = useCallback( (partialSlide: Partial<SlideModel>) => { // Update the slides state by creating a new array with the updated current slide. setSlides((slides) => [ ...slides.slice(0, currentSlideIndex), // Copy all slides before the current one. { ...slides[currentSlideIndex], ...partialSlide }, // Merge the current slide with the updates. ...slides.slice(currentSlideIndex + 1), // Copy all slides after the current one. ]); }, [currentSlideIndex, setSlides] // Dependencies for useCallback. ); // The JSX structure for the Presentation component. return ( <div className="relative"> {/* Render the current slide by passing the currentSlide and updateCurrentSlide function as props. */} <Slide slide={currentSlide} partialUpdateSlide={updateCurrentSlide} /> {/* Container for action buttons located at the top-left corner of the screen. */} <div className="absolute top-0 left-0 mt-6 ml-4 z-30"> {/* Action button to add a new slide. Disabled state is hardcoded to true for demonstration. */} <ActionButton disabled={true} onClick={() => { // Define a new slide object. const newSlide: SlideModel = { title: "Title", content: "Body", backgroundImageDescription: "random", spokenNarration: "The speaker's notes for this slide.", }; // Update the slides array to include the new slide. setSlides((slides) => [ ...slides.slice(0, currentSlideIndex + 1), newSlide, ...slides.slice(currentSlideIndex + 1), ]); // Move to the new slide by updating the currentSlideIndex. setCurrentSlideIndex((i) => i + 1); }} className="rounded-r-none" > <PlusIcon className="h-6 w-6" /> {/* Icon for the button. */} </ActionButton> {/* Another action button, currently disabled and without functionality. */} <ActionButton disabled={true} onClick={async () => { }} // Placeholder async function. className="rounded-l-none ml-[1px]" > <SparklesIcon className="h-6 w-6" /> {/* Icon for the button. */} </ActionButton> </div> {/* Container for action buttons at the top-right corner for deleting slides, etc. */} <div className="absolute top-0 right-0 mt-6 mr-24"> <ActionButton disabled={slides.length === 1} // Disable button if there's only one slide. onClick={() => {}} // Placeholder function for the button action. className="ml-5 rounded-r-none" > <TrashIcon className="h-6 w-6" /> {/* Icon for the button. */} </ActionButton> </div> {/* Display current slide number and total slides at the bottom-right corner. */} <div className="absolute bottom-0 right-0 mb-20 mx-24 text-xl" style={{ textShadow: "1px 1px 0 #ddd, -1px -1px 0 #ddd, 1px -1px 0 #ddd, -1px 1px 0 #ddd", }} > Slide {currentSlideIndex + 1} of {slides.length} {/* Current slide and total slides. */} </div> {/* Container for navigation buttons (previous and next) at the bottom-right corner. */} <div className="absolute bottom-0 right-0 mb-6 mx-24"> {/* Button to navigate to the previous slide. */} <ActionButton className="rounded-r-none" disabled={ currentSlideIndex === 0 || true} // Example condition to disable button; 'true' is just for demonstration. onClick={() => { setCurrentSlideIndex((i) => i - 1); // Update currentSlideIndex to move to the previous slide. }} > <BackwardIcon className="h-6 w-6" /> {/* Icon for the button. */} </ActionButton> {/* Button to navigate to the next slide. */} <ActionButton className="mr-[1px] rounded-l-none" disabled={ true || currentSlideIndex + 1 === slides.length} // Example condition to disable button; 'true' is just for demonstration. onClick={async () => { setCurrentSlideIndex((i) => i + 1); // Update currentSlideIndex to move to the next slide. }} > <ForwardIcon className="h-6 w-6" /> {/* Icon for the button. */} </ActionButton> </div> </div> ); }; ``` 要在瀏覽器上呈現 PowerPoint 應用程式,請前往`/[root]/src/app/page.tsx`檔案並新增以下程式碼。 ``` "use client"; import "./style.css"; import { Presentation } from "./components/Presentation"; export default function AIPresentation() { return ( <Presentation /> ); } ``` 如果您想要在 Powerpoint 應用程式前端新增樣式,請在`/[root]/src/app`資料夾中建立名為`style.css`的檔案。 然後導航[到此 gist 文件](https://gist.github.com/TheGreatBonnie/e7c0b790a2e2af3e669810539ba54fed),複製 CSS 程式碼,並將其新增至 style.css 檔案。 最後,在命令列上執行命令`npm run dev` ,然後導航到 http://localhost:3000/。 現在您應該在瀏覽器上查看 PowerPoint 應用程式,如下所示。  **將 PowerPoint 應用程式與 CopilotKit 後端集成** -------------------------------------- 讓我們先在根目錄中建立一個名為`.env.local`的檔案。然後在保存 ChatGPT 和 Tavily Search API 金鑰的檔案中加入下面的環境變數。 ``` OPENAI_API_KEY="Your ChatGPT API key" TAVILY_API_KEY="Your Tavily Search API key" ``` 若要取得 ChatGPT API 金鑰,請導覽至 https://platform.openai.com/api-keys。  若要取得 Tavilly Search API 金鑰,請導覽至 https://app.tavily.com/home  之後,轉到`/[root]/src/app`並建立一個名為`api`的資料夾。在`api`資料夾中,建立一個名為`copilotkit`的資料夾。 在`copilotkit`資料夾中,建立一個名為`research.ts`的檔案。然後導航到[該 Research.ts gist 文件](https://gist.github.com/TheGreatBonnie/58dc21ebbeeb8cbb08df665db762738c),複製程式碼,並將其新增至**`research.ts`**檔案中 接下來,在`/[root]/src/app/api/copilotkit`資料夾中建立一個名為`route.ts`的檔案。該文件將包含設定後端功能來處理 POST 請求的程式碼。它有條件地包括對給定主題進行研究的“研究”操作。 現在在文件頂部導入以下模組。 ``` import { CopilotBackend, OpenAIAdapter } from "@copilotkit/backend"; // For backend functionality with CopilotKit. import { researchWithLangGraph } from "./research"; // Import a custom function for conducting research. import { AnnotatedFunction } from "@copilotkit/shared"; // For annotating functions with metadata. ``` 在上面的程式碼下面,定義一個執行時環境變數和一個註解的函數,以便使用下面的程式碼進行研究。 ``` // Define a runtime environment variable, indicating the environment where the code is expected to run. export const runtime = "edge"; // Define an annotated function for research. This object includes metadata and an implementation for the function. const researchAction: AnnotatedFunction<any> = { name: "research", // Function name. description: "Call this function to conduct research on a certain topic. Respect other notes about when to call this function", // Function description. argumentAnnotations: [ // Annotations for arguments that the function accepts. { name: "topic", // Argument name. type: "string", // Argument type. description: "The topic to research. 5 characters or longer.", // Argument description. required: true, // Indicates that the argument is required. }, ], implementation: async (topic) => { // The actual function implementation. console.log("Researching topic: ", topic); // Log the research topic. return await researchWithLangGraph(topic); // Call the research function and return its result. }, }; ``` 然後在上面的程式碼下加入下面的程式碼來定義處理POST請求的非同步函數。 ``` // Define an asynchronous function that handles POST requests. export async function POST(req: Request): Promise<Response> { const actions: AnnotatedFunction<any>[] = []; // Initialize an array to hold actions. // Check if a specific environment variable is set, indicating access to certain functionality. if (process.env["TAVILY_API_KEY"]) { actions.push(researchAction); // Add the research action to the actions array if the condition is true. } // Instantiate CopilotBackend with the actions defined above. const copilotKit = new CopilotBackend({ actions: actions, }); // Use the CopilotBackend instance to generate a response for the incoming request using an OpenAIAdapter. return copilotKit.response(req, new OpenAIAdapter()); } ``` **將 PowerPoint 應用程式與 CopilotKit 前端集成** -------------------------------------- 讓我們先導入`/[root]/src/app/components/Slide.tsx`檔案頂部的`useMakeCopilotActionable`掛鉤。 ``` import { useMakeCopilotActionable } from "@copilotkit/react-core"; ``` 在 Slide 函數中,新增以下程式碼,該程式碼使用`useMakeCopilotActionable`掛鉤來設定一個名為`updateSlide`的操作,該操作具有特定參數以及根據提供的值更新投影片的實作。 ``` useMakeCopilotActionable({ // Defines the action name. This is a unique identifier for the action within the application. name: "updateSlide", // Describes what the action does. In this case, it updates the current slide. description: "Update the current slide.", // Details the arguments that the action accepts. Each argument has a name, type, description, and a flag indicating if it's required. argumentAnnotations: [ { name: "title", // The argument name. type: "string", // The data type of the argument. description: "The title of the slide. Should be a few words long.", // Description of the argument. required: true, // Indicates that this argument must be provided for the action to execute. }, { name: "content", type: "string", description: "The content of the slide. Should generally consists of a few bullet points.", required: true, }, { name: "backgroundImageDescription", type: "string", description: "What to display in the background of the slide. For example, 'dog', 'house', etc.", required: true, }, { name: "spokenNarration", type: "string", description: "The spoken narration for the slide. This is what the user will hear when the slide is shown.", required: true, }, ], // The implementation of the action. This is a function that will be called when the action is executed. implementation: async (title, content, backgroundImageDescription, spokenNarration) => { // Calls a function passed in through props to partially update the slide with new values for the specified properties. props.partialUpdateSlide({ title, content, backgroundImageDescription, spokenNarration, }); }, }, [props.partialUpdateSlide]); // Dependencies array for the custom hook or function. This ensures that the action is re-initialized only when `props.partialUpdateSlide` changes. ``` 之後,請前往`/[root]/src/app/components/Presentation.tsx`檔案並使用下面的程式碼匯入頂部的 CopilotKit 前端套件。 ``` import { useCopilotContext } from "@copilotkit/react-core"; import { CopilotTask } from "@copilotkit/react-core"; import { useMakeCopilotActionable, useMakeCopilotReadable } from "@copilotkit/react-core"; ``` 在演示函數中,加入以下程式碼,該程式碼使用`useMakeCopilotReadable`掛鉤加入`Slides`和`currentSlide`幻燈片陣列作為應用程式內聊天機器人的上下文。掛鉤使副駕駛可以讀取簡報中的整個幻燈片集合以及當前幻燈片的資料。 ``` useMakeCopilotReadable("These are all the slides: " + JSON.stringify(slides)); useMakeCopilotReadable( "This is the current slide: " + JSON.stringify(currentSlide) ); ``` 在`useMakeCopilotReadable`掛鉤下方,新增以下程式碼,該程式碼使用`useCopilotActionable`掛鉤來設定名為`appendSlide`的操作,其中包含說明和加入多張幻燈片的實作函數。 ``` useMakeCopilotActionable( { // Defines the action's metadata. name: "appendSlide", // Action identifier. description: "Add a slide after all the existing slides. Call this function multiple times to add multiple slides.", // Specifies the arguments that the action takes, including their types, descriptions, and if they are required. argumentAnnotations: [ { name: "title", // The title of the new slide. type: "string", description: "The title of the slide. Should be a few words long.", required: true, }, { name: "content", // The main content or body of the new slide. type: "string", description: "The content of the slide. Should generally consist of a few bullet points.", required: true, }, { name: "backgroundImageDescription", // Description for fetching or generating the background image of the new slide. type: "string", description: "What to display in the background of the slide. For example, 'dog', 'house', etc.", required: true, }, { name: "spokenNarration", // Narration text that will be read aloud during the presentation of the slide. type: "string", description: "The text to read while presenting the slide. Should be distinct from the slide's content, and can include additional context, references, etc. Will be read aloud as-is. Should be a few sentences long, clear, and smooth to read.", required: true, }, ], // The function to execute when the action is triggered. It creates a new slide with the provided details and appends it to the existing slides array. implementation: async (title, content, backgroundImageDescription, spokenNarration) => { const newSlide: SlideModel = { // Constructs the new slide object. title, content, backgroundImageDescription, spokenNarration, }; // Updates the slides state by appending the new slide to the end of the current slides array. setSlides((slides) => [...slides, newSlide]); }, }, [setSlides] // Dependency array for the hook. This action is dependent on the `setSlides` function, ensuring it reinitializes if `setSlides` changes. ); ``` 在上面的程式碼下方,定義一個名為`context`的變數,該變數使用名為`useCopilotContext`的自訂掛鉤從 copilot 上下文中檢索當前上下文。 ``` const context = useCopilotContext(); ``` 之後,定義一個名為`generateSlideTask`的函數,它包含一個名為`CopilotTask`的類別。 `CopilotTask`類別定義用於產生與簡報的整體主題相關的新投影片的指令 ``` const generateSlideTask = new CopilotTask({ instructions: "Make the next slide related to the overall topic of the presentation. It will be inserted after the current slide. Do NOT carry any research", }); ``` 然後在上面的程式碼下面初始化一個名為`generateSlideTaskRunning`的狀態變數,預設值為false。 ``` const [generateSlideTaskRunning, **setGenerateSlideTaskRunning**] = useState(false); ``` 之後,使用下面的程式碼更新簡報元件中的操作按鈕,以透過新增、刪除和導覽投影片來新增動態互動。 ``` // The JSX structure for the Presentation component. return ( <div className="relative"> {/* Renders the current slide using a Slide component with props for the slide data and a method to update it. */} <Slide slide={currentSlide} partialUpdateSlide={updateCurrentSlide} /> {/* Container for action buttons positioned at the top left corner of the relative parent */} <div className="absolute top-0 left-0 mt-6 ml-4 z-30"> {/* ActionButton to add a new slide. It is disabled when a generateSlideTask is running to prevent concurrent modifications. */} <ActionButton disabled={generateSlideTaskRunning} onClick={() => { const newSlide: SlideModel = { title: "Title", content: "Body", backgroundImageDescription: "random", spokenNarration: "The speaker's notes for this slide.", }; // Inserts the new slide immediately after the current slide and updates the slide index to point to the new slide. setSlides((slides) => [ ...slides.slice(0, currentSlideIndex + 1), newSlide, ...slides.slice(currentSlideIndex + 1), ]); setCurrentSlideIndex((i) => i + 1); }} className="rounded-r-none" > <PlusIcon className="h-6 w-6" /> </ActionButton> {/* ActionButton to generate a new slide based on the current context, also disabled during task running. */} <ActionButton disabled={generateSlideTaskRunning} onClick={async () => { setGenerateSlideTaskRunning(true); // Indicates the task is starting. await generateSlideTask.run(context); // Executes the task with the current context. setGenerateSlideTaskRunning(false); // Resets the flag when the task is complete. }} className="rounded-l-none ml-[1px]" > <SparklesIcon className="h-6 w-6" /> </ActionButton> </div> {/* Container for action buttons at the top right, including deleting the current slide and potentially other actions. */} <div className="absolute top-0 right-0 mt-6 mr-24"> {/* ActionButton for deleting the current slide, disabled if a task is running or only one slide remains. */} <ActionButton disabled={generateSlideTaskRunning || slides.length === 1} onClick={() => { console.log("delete slide"); // Removes the current slide and resets the index to the beginning as a simple handling strategy. setSlides((slides) => [ ...slides.slice(0, currentSlideIndex), ...slides.slice(currentSlideIndex + 1), ]); setCurrentSlideIndex((i) => 0); }} className="ml-5 rounded-r-none" > <TrashIcon className="h-6 w-6" /> </ActionButton> </div> {/* Display showing the current slide index and the total number of slides. */} <div className="absolute bottom-0 right-0 mb-20 mx-24 text-xl" style={{ textShadow: "1px 1px 0 #ddd, -1px -1px 0 #ddd, 1px -1px 0 #ddd, -1px 1px 0 #ddd", }} > Slide {currentSlideIndex + 1} of {slides.length} </div> {/* Navigation buttons to move between slides, disabled based on the slide index or if a task is running. */} <div className="absolute bottom-0 right-0 mb-6 mx-24"> {/* Button to move to the previous slide, disabled if on the first slide or a task is running. */} <ActionButton className="rounded-r-none" disabled={generateSlideTaskRunning || currentSlideIndex === 0} onClick={() => { setCurrentSlideIndex((i) => i - 1); }} > <BackwardIcon className="h-6 w-6" /> </ActionButton> {/* Button to move to the next slide, disabled if on the last slide or a task is running. */} <ActionButton className="mr-[1px] rounded-l-none" disabled={generateSlideTaskRunning || currentSlideIndex + 1 === slides.length} onClick={async () => { setCurrentSlideIndex((i) => i + 1); }} > <ForwardIcon className="h-6 w-6" /> </ActionButton> </div> </div> ); ``` 現在讓我們轉到`/[root]/src/app/page.tsx`文件,使用下面的程式碼匯入 CopilotKit 前端包和文件頂部的樣式。 ``` import { CopilotKit, } from "@copilotkit/react-core"; import { CopilotSidebar } from "@copilotkit/react-ui"; import "@copilotkit/react-ui/styles.css"; import "@copilotkit/react-textarea/styles.css"; ``` 然後使用`CopilotKit`和`CopilotSidebar`來包裝Presentation元件,如下所示。 ``` export default function AIPresentation() { return ( <CopilotKit url="/api/copilotkit/"> <CopilotSidebar instructions="Help the user create and edit a powerpoint-style presentation. IMPORTANT NOTE: SOMETIMES you may want to research a topic, before taking further action. BUT FIRST ASK THE USER if they would like you to research it. If they answer 'no', do your best WITHOUT researching the topic first." defaultOpen={true} labels={{ title: "Presentation Copilot", initial: "Hi you! 👋 I can help you create a presentation on any topic.", }} clickOutsideToClose={false} > <Presentation /> </CopilotSidebar> </CopilotKit> ); } ``` 之後,執行開發伺服器並導航到 http://localhost:3000/。您應該會看到應用程式內聊天機器人已整合到 PowerPoint Web 應用中。  最後,給右側的聊天機器人一個提示,例如“在 JavaScript 上建立 PowerPoint 簡報”,聊天機器人將開始產生回應,完成後,使用底部的前進按鈕瀏覽產生的幻燈片。 注意:如果聊天機器人沒有立即產生投影片,請根據其回應給予適當的後續提示。 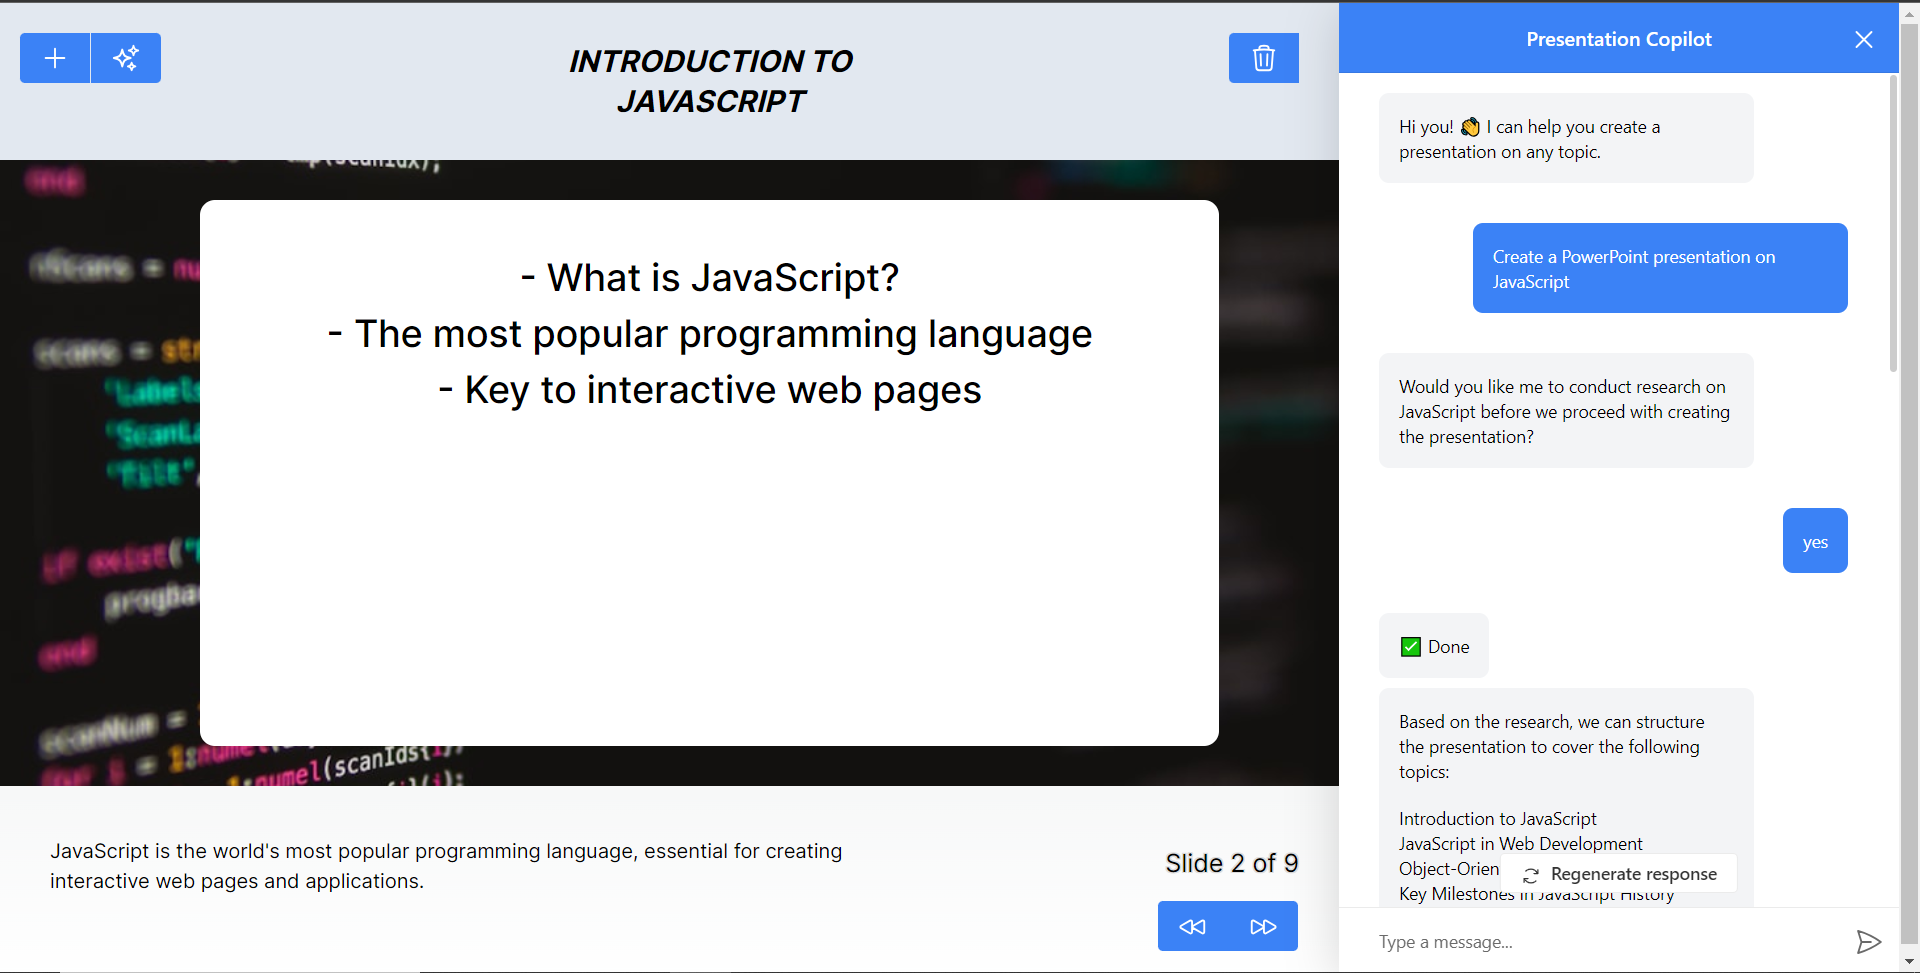 結論 -- 總而言之,您可以使用 CopilotKit 建立應用內 AI 聊天機器人,該機器人可以查看當前應用程式狀態並在應用程式內執行操作。 AI 聊天機器人可以與您的應用程式前端、後端和第三方服務對話。 完整的原始碼:https://github.com/TheGreatBonnie/aipoweredpowerpointapp --- 原文出處:https://dev.to/copilotkit/how-to-build-an-ai-powered-powerpoint-generator-langchain-copilotkit-openai-nextjs-4c76
歡迎使用我們精選的 JavaScript 技巧集合,它將幫助您優化程式碼、使其更具可讀性並節省您的時間。 讓我們深入研究 JavaScript 的功能和超越傳統的技巧,並發現這種強大的程式語言的全部潛力。 ### 1. 使用!!轉換為布林值 使用雙重否定快速將任何值轉換為布林值。 ``` let truthyValue = !!1; // true let falsyValue = !!0; // false ``` ### 2. 預設功能參數 設定函數參數的預設值以避免未定義的錯誤。 ``` function greet(name = "Guest") { return `Hello, ${name}!`; } ``` ### 3. 短 if-else 的三元運算符 `if-else`語句的簡寫。 ``` let price = 100; let message = price > 50 ? "Expensive" : "Cheap"; ``` ### 4. 動態字串的範本文字 使用模板文字在字串中嵌入表達式。 ``` let item = "coffee"; let price = 15; console.log(`One ${item} costs $${price}.`); ``` ### 5. 解構賦值 輕鬆從物件或陣列中提取屬性。 ``` let [x, y] = [1, 2]; let {name, age} = {name: "Alice", age: 30}; ``` ### 6. 用於陣列和物件克隆的擴展運算符 克隆陣列或物件而不引用原始陣列或物件。 ``` let originalArray = [1, 2, 3]; let clonedArray = [...originalArray]; ``` ### 7. 短路評估 使用邏輯運算子進行條件執行。 ``` let isValid = true; isValid && console.log("Valid!"); ``` ### 8. 可選連結 (?.) 如果引用為`nullish`則可以安全地存取巢狀物件屬性,而不會出現錯誤。 ``` let user = {name: "John", address: {city: "New York"}}; console.log(user?.address?.city); // "New York" ``` ### 9. 空合併運算子 (??) 使用`??`為`null`或`undefined`提供預設值。 ``` let username = null; console.log(username ?? "Guest"); // "Guest" ``` [](https://try.monday.com/9xf9ftaa4i2f) ### 10. 使用`map` 、 `filter`和`reduce`進行陣列操作 無需傳統循環即可處理陣列的優雅方法。 ``` // Map let numbers = [1, 2, 3, 4]; let doubled = numbers.map(x => x * 2); // Filter const evens = numbers.filter(x => x % 2 === 0); // Reduce const sum = numbers.reduce((accumulator, currentValue) => accumulator + currentValue, 0); ``` ### 11.標記模板文字 使用模板文字進行函數呼叫以進行自訂字串處理。 ``` function highlight(strings, ...values) { return strings.reduce((prev, current, i) => `${prev}${current}${values[i] || ''}`, ''); } let price = 10; console.log(highlight`The price is ${price} dollars.`); ``` ### 12.使用Object.entries()和Object.fromEntries() 將物件轉換為陣列並返回以方便操作。 ``` let person = {name: "Alice", age: 25}; let entries = Object.entries(person); let newPerson = Object.fromEntries(entries); ``` ### 13. 唯一元素的集合物件 使用 Set 儲存任何類型的唯一值。 ``` let numbers = [1, 1, 2, 3, 4, 4]; let uniqueNumbers = [...new Set(numbers)]; ``` ### 14. 物件中的動態屬性名稱 在物件文字表示法中使用方括號來建立動態屬性名稱。 ``` let dynamicKey = 'name'; let person = {[dynamicKey]: "Alice"}; ``` ### 15. 使用bind()進行函數柯里化 建立一個新函數,在呼叫時將其 this 關鍵字設定為提供的值。 ``` function multiply(a, b) { return a * b; } let double = multiply.bind(null, 2); console.log(double(5)); // 10 ``` ### 16. 使用 Array.from() 從類別陣列物件建立陣列 將類似陣列或可迭代的物件轉換為真正的陣列。 ``` let nodeList = document.querySelectorAll('div'); let nodeArray = Array.from(nodeList); ``` ### 17. 可迭代物件的 for...of 循環 直接迭代可迭代物件(包括陣列、映射、集合等)。 ``` for (let value of ['a', 'b', 'c']) { console.log(value); } ``` ### 18. 使用 Promise.all() 實作並發 Promise 同時執行多個 Promise 並等待所有的都解決。 ``` let promises = [fetch(url1), fetch(url2)]; Promise.all(promises) .then(responses => console.log('All done')); ``` ### 19. 函數參數的剩餘參數 將任意數量的參數捕獲到陣列中。 ``` function sum(...nums) { return nums.reduce((acc, current) => acc + current, 0); } ``` [](https://imp.i384100.net/c/3922519/1320997/14726) ### 20. 用於性能優化的記憶 儲存函數結果以避免冗餘處理。 ``` const memoize = (fn) => { const cache = {}; return (...args) => { let n = args[0]; // assuming single argument for simplicity if (n in cache) { console.log('Fetching from cache'); return cache[n]; } else { console.log('Calculating result'); let result = fn(n); cache[n] = result; return result; } }; }; ``` ### 21. 使用 ^ 交換值 使用 XOR 以位元運算子交換兩個變數的值,無需使用臨時變數。 ``` let a = 1, b = 2; a ^= b; b ^= a; a ^= b; // a = 2, b = 1 ``` ### 22. 使用 flat() 展平陣列 使用`flat()`方法輕鬆展平巢狀陣列,並將展平深度作為可選參數。 ``` let nestedArray = [1, [2, [3, [4]]]]; let flatArray = nestedArray.flat(Infinity); ``` ### 23. 用一元加法轉換為數字 使用一元加運算子快速將字串或其他值轉換為數字。 ``` let str = "123"; let num = +str; // 123 as a number ``` ### 24. HTML 片段的模板字串 使用模板字串建立 HTML 片段,使動態 HTML 生成更加清晰。 ``` let items = ['apple', 'orange', 'banana']; let html = `<ul>${items.map(item => `<li>${item}</li>`).join('')}</ul>`; ``` ### 25. 使用 Object.assign() 合併物件 將多個來源物件合併到一個目標物件中,有效地組合它們的屬性。 ``` let obj1 = { a: 1 }, obj2 = { b: 2 }; let merged = Object.assign({}, obj1, obj2); ``` [](https://amzn.to/3UXGIyx) 使用符合人體工學的滑鼠優化您的編程設置,專為舒適和長時間的編碼會話而定制。 ### 26. 預設值短路 處理潛在的未定義或空變數時,使用邏輯運算子指派預設值。 ``` let options = userOptions || defaultOptions; ``` ### 27. 使用括號表示法動態存取物件屬性 使用括號表示法動態存取物件的屬性,當屬性名稱儲存在變數中時非常有用。 ``` let property = "name"; let value = person[property]; // Equivalent to person.name ``` ### 28. 使用 Array.includes() 進行存在檢查 使用includes() 檢查陣列是否包含某個值,它是indexOf 的更清晰的替代方法。 ``` if (myArray.includes("value")) { // Do something } ``` ### 29. Function.prototype.bind() 的強大功能 將函數綁定到上下文(此值)並部分套用參數,以建立更多可重複使用和模組化的程式碼。 ``` const greet = function(greeting, punctuation) { return `${greeting}, ${this.name}${punctuation}`; }; const greetJohn = greet.bind({name: 'John'}, 'Hello'); console.log(greetJohn('!')); // "Hello, John!" ``` ### 30.防止物件修改 使用`Object.freeze()`防止物件進行修改,使其不可變。對於更深層的不變性,請考慮更徹底地強制不變性的函式庫。 ``` let obj = { name: "Immutable" }; Object.freeze(obj); obj.name = "Mutable"; // Fails silently in non-strict mode ``` 我希望這些 JavaScript 技巧為您提供如何進行[JavaScript 程式設計的](https://www.w3schools.com/js/)新視角。 從利用模板文字的簡潔功能到掌握`map` 、 `filter`和`reduce`的效率,這些 JavaScript 技巧將豐富您的開發工作流程並激發您的下一個專案。 讓這些 JavaScript 技巧不僅可以完善您目前的專案,還可以在您的[程式設計之旅](https://www.webdevstory.com/programming-roadmap/)中激發未來創新的靈感。 ***支持我們的技術見解*** [](https://www.buymeacoffee.com/mmainulhasan) [](https://www.paypal.com/donate/?hosted_button_id=GDUQRAJZM3UR8) 注意:此頁面上的某些連結可能是附屬連結。如果您透過這些連結進行購買,我可能會賺取少量佣金,而無需您支付額外費用。感謝您的支持! --- 原文出處:https://dev.to/mmainulhasan/30-javascript-tricky-hacks-gfc
🔑 關鍵概念 ------ 什麼是可重複使用的 React 元件?您可以將它們視為建置塊。 它們是獨立的程式碼片段,可以在整個網站中重複使用,以節省您的時間和精力。 它們可以是從簡單按鈕到複雜表單的任何內容。 **為什麼要使用可重複使用的元件?** 隨著您的網站的發展,您可以透過組合現有元件輕鬆加入新功能。這使您的程式碼更具可擴展性和適應性。 您可以**在未來的專案中使用可重複使用的程式碼,**而無需從頭開始重新編寫。 --- 🧩 如何寫出乾淨、可重複使用的 React 元件 ------------------------ 在編寫乾淨的可重複使用 React 元件時,需要記住以下*兩個最重要的*事情:  **1. 🩼避免副作用。**不要將與外部資料互動的邏輯(例如進行 API 呼叫)直接放入可重複使用元件中。相反,將此邏輯作為`props`傳遞給元件。 例如,如果一個按鈕不僅僅是看起來漂亮,例如從網路獲取資料,**那麼它可能無法重複使用。** 在您掌握透過最佳實踐傳遞 props 的概念之前,我不會向您展示這方面的範例。繼續閱讀。 這是一個可重複使用的按鈕元件。但它缺乏最佳實踐。我將在範例部分向您展示原因。 ``` // This is a reusable button component (bad practice!) const Button = () => { return ( <button> Click Me </button> ); } ``` **2. 🗃️使用 props。** Props 是傳遞給元件以自訂其行為和外觀的參數。這允許您將相同的元件用於不同的目的。 ``` // This is a button component that can change its color const Button = ({ color }) => { return ( <button style={{ backgroundColor: color }}> Click Here </button> ); } ``` 這仍然是一個不好的做法,因為您有一個名為「點擊這裡」的固定標籤。如果您想更改按鈕上的文本,例如“註冊”,那麼您必須返回按鈕元件並進行更改。 這意味著每次我們想要使用不同的文字時,我們都必須返回並編輯程式碼。換句話說,它不再可重複使用。 **💪 挑戰:**那麼解決方案是什麼? 你已經有了答案。但如果您不這樣做,我將在範例部分向您展示。 **🌴提示:**考慮一下您可能希望如何在不同情況下使用該元件,並將其設計得靈活且適應性強。 🍃可重複使用 React 元件的範例 ------------------ 以下是可重複使用 React 元件的一些常見範例,以及一些幫助您入門的程式碼範例: **1. 按鈕:**具有不同樣式和功能的基本按鈕。 ``` // Button component import React from "react"; const Button = ({ color, label, onClick }) => { return ( <button className={`padding-2 shadow-none hover:shadow background-light-${color} hover:background-dark-${color}`} onClick={onClick} > {label} </button> ); }; export default Button; // Using the Button component <Button color="blue" label="Click Here" onClick={() => console.log("Button clicked!")} /> ``` 正如你所看到的,我沒有在按鈕元件中寫“Click Here”。我想讓我的按鈕可重複使用,因此它不知道有關自訂樣式或文字的任何資訊。 因此,我將它們作為 props(例如,顏色、標籤、onClick)傳遞,以便將來更改它們,而無需觸摸原始按鈕元件。希望這能說清楚。 > **🪜解決方案:**您需要將每個功能作為可重複使用元件中的`props`傳遞 - 就是這樣。 **2. 導覽列:**在整個網站上提供一致導覽的導覽列。 ``` // Navbar component import React from "react"; const Navbar = ({ isLoggedIn }) => { return ( <div className="navbar"> <div className="navbar-container"> <div className="navbar-logo"> <img src={logo} alt="logo" /> </div> <div className="navbar-links"> <a href="/">Home</a> <a href="/about">About</a> <a href="/contact">Contact</a> {isLoggedIn ? ( <a href="/profile">Profile</a> ) : ( <a href="/login">Login</a> )} </div> </div> </div> ); }; export default Navbar; // Using the Navbar component <Navbar isLoggedIn={true} /> ``` 如您所見,我通過了`<Navbar isLoggedIn={true} />` 此行利用`Navbar`元件並傳遞值為 true 的`isLoggedIn`屬性,表示使用者已登入。這將顯示「個人資料」連結並隱藏「登入」連結。 與按鈕元件類似,導覽列元件是可重複使用的,並接受 props 來自訂其行為。完美的! **3. 為什麼在按鈕元件中呼叫 API 是不好的做法** 現在,您已經了解了 React 中可重複使用元件的所有內容。 讓我們透過解決一個複雜的問題來更深入地研究。 考慮這樣的場景,您有一個執行 API 呼叫的按鈕。按鈕元件的程式碼可以如下: ``` import React from "react"; import doAPICall from "../api" const SaveButton = () => { return ( <button onClick={() => { doAPICall(); }} > Save </button> ); } export default SaveButton ``` 很明顯,您不能在多個地方重複使用上述按鈕,因為該按鈕元件內部包含副作用( `doAPICall()` )。 為了使該元件可重複使用,首先,您必須提取副作用並將其作為 prop 傳遞給按鈕元件,如下所示: ``` const App = () => { function doAPICall() { // Does an API call to save the current state of the app. } return ( <div> <SaveButton onClick={doAPICall}/> </div> ) } ``` 按鈕元件將如下所示: ``` const SaveButton = ({ onClick }) => { return ( <button onClick={onClick} > Save </button> ); } ``` 正如您所看到的,現在可以在您想要透過點擊按鈕儲存資料的所有位置重複使用上面的按鈕。該按鈕現在可以在多個地方像這樣使用: ``` const App = () => { function saveUser() { // Does an API call to save the user. } function saveProject() { // Does an API call to save the project. } return ( <div> <SaveButton onClick={saveUser}/> <SaveButton onClick={saveProject}/> </div> ) } ``` 您也可以透過使用 prop 來控制標籤,使按鈕元件更具可重複使用性,如下所示: ``` const App = () => { function saveUser() { // Does an API call to save the user. } function saveProject() { // Does an API call to save the project. } return ( <div> <SaveButton onClick={saveUser} label="Save user" /> <SaveButton onClick={saveProject} label="Save project" /> </div> ) } ``` 按鈕元件將如下所示: ``` const SaveButton = ({ onClick, label }) => { return ( <button onClick={onClick} > {label} </button> ); } ``` **🫧 推薦:🤖🦾 [Figma AI:](https://psxid.figma.com/8g4g75niz3sg-7v0ro9)** 如果您需要快速設計簡報或網站,Figma AI 可以提供現成的範本。並且它可以與[Figma](https://psxid.figma.com/pq1612tcamkx)順利配合。只要告訴它你想要什麼,畫一點,然後繁榮——你的想法就變成現實了! 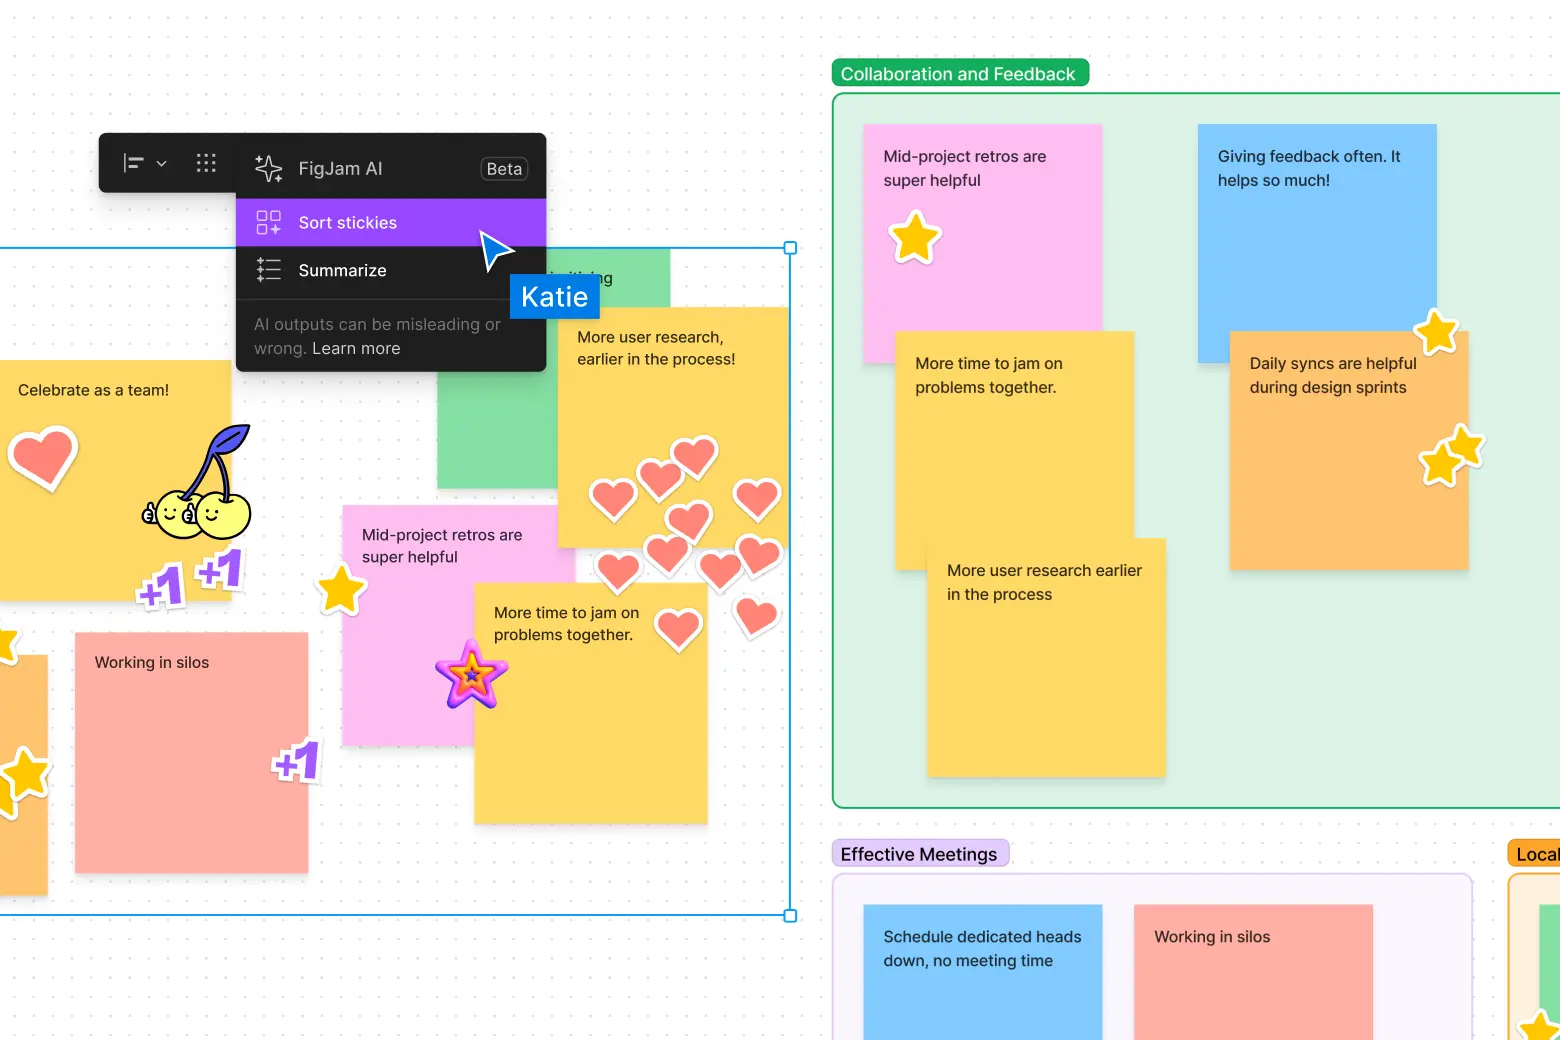 您可以嘗試[Figma AI](https://psxid.figma.com/8g4g75niz3sg-7v0ro9) ,目前它對所有人免費。 --- 👏結論 --- 恭喜!您已經成功學習如何使用最佳實踐建立乾淨的可重複使用 React 元件。 請記住,**可重複使用元件是健壯的 React 開發的建置塊**。透過練習可重複使用元件,您可以建立更乾淨、更有效率、更易於維護的 React 應用程式。 您練習得越多,您就越能更好地辨識在專案中使用它們的機會! 如果您喜歡這篇文章,您可能也會喜歡我的[𝕏](https://twitter.com/shahancd)帳戶,以了解更多有關前端開發的課程。 **閱讀更多:**[前端開發的未來](https://dev.to/codewithshahan/the-future-of-frontend-development-1amd) --- 原文出處:https://dev.to/codewithshahan/writing-clean-reusable-components-in-react-best-practices-2gka
我使用正規表示式的經驗 =========== 我一直遠離正規表示式。在我第一年的電腦科學實驗室中,有一個涉及正規表示式的練習。我想那是我第一次被介紹給它。我當時認為這很酷,但看起來太難了,所以我一直在避免它,或者只是在谷歌上搜尋如何解決某個正規表示式問題。但我*終於*花了一些時間來正確學習它🎉  在閱讀了一些資源並涉獵之後,可以肯定地說我不再害怕正規表示式了!我發現自己在我所做的許多編碼練習中都使用了它。所需要的只是練習!以下是我根據我學到的正規表示式和我使用的資源編寫的備忘單(帶有範例) 備忘錄 === 我已經包含了一些我學到的 Javascript 中不可用的正規表示式。對於這些,我都註解掉了。如果需要的話請記住「g」修飾符!對於我的範例,我省略了修飾符。 ``` let regex; /* matching a specific string */ regex = /hello/; // looks for the string between the forward slashes (case-sensitive)... matches "hello", "hello123", "123hello123", "123hello"; doesn't match for "hell0", "Hello" regex = /hello/i; // looks for the string between the forward slashes (case-insensitive)... matches "hello", "HelLo", "123HelLO" regex = /hello/g; // looks for multiple occurrences of string between the forward slashes... /* wildcards */ regex = /h.llo/; // the "." matches any one character other than a new line character... matches "hello", "hallo" but not "h\nllo" regex = /h.*llo/; // the "*" matches any character(s) zero or more times... matches "hello", "heeeeeello", "hllo", "hwarwareallo" /* shorthand character classes */ regex = /\d/; // matches any digit regex = /\D/; // matches any non-digit regex = /\w/; // matches any word character (a-z, A-Z, 0-9, _) regex = /\W/; // matches any non-word character regex = /\s/; // matches any white space character (\r (carriage return),\n (new line), \t (tab), \f (form feed)) regex = /\S/; // matches any non-white space character /* specific characters */ regex = /[aeiou]/; // matches any character in square brackets regex = /[ck]atherine/; // matches catherine or katherine regex = /[^aeiou]/; // matches anything except the characters in square brackets /* character ranges */ regex = /[a-z]/; // matches all lowercase letters regex = /[A-Z]/; // matches all uppercase letters regex = /[e-l]/; // matches lowercase letters e to l (inclusive) regex = /[F-P]/; // matches all uppercase letters F to P (inclusive) regex = /[0-9]/; // matches all digits regex = /[5-9]/; // matches any digit from 5 to 9 (inclusive) regex = /[a-zA-Z]/; // matches all lowercase and uppercase letters regex = /[^a-zA-Z]/; // matches non-letters /* matching repetitions using quantifiers */ regex = /(hello){4}/; // matches "hellohellohellohello" regex = /hello{3}/; // matches "hellooo" and "helloooo" but not "helloo" regex = /\d{3}/; // matches 3 digits ("312", "122", "111", "12312321" but not "12") regex = /\d{3,7}/; // matches digits that occur between 3 and 7 times (inclusive) regex = /\d{3,}/; // matches digits that occur at least 3 times /* matching repetitions using star and plus */ regex = /ab*c/; // matches zero or more repetitions of "b" (matches "abc", "abbbbc", "ac") regex = /ab+c/; // matches one or more repetitions of "b" (matches "abc", "abbbbc", but not "ac") /* matching beginning and end items */ regex = /^[A-Z]\w*/; // matches "H", "Hello", but not "hey" regex = /\w*s$/; // matches "cats", "dogs", "avocados", but not "javascript" /* matching word boundaries positions of word boundaries: 1. before the first character in string (if first character is a word character) 2. after the last character in the string, if the last character is a word character 3. between two characters in string, where one is a word character and the other isn't */ regex = /\bmeow\b/; // matches "hey meow lol", "hey:meow:lol", but not "heymeow lol" /* groups */ regex = /it is (ice )?cold outside/; // matches "it is ice cold outside" and "it is cold outside" regex = /it is (?:ice )?cold outside/; // same as above except it is a non-capturing group regex = /do (cats) like taco \1/; // matches "do cats like taco cats" regex = /do (cats) like (taco)\? do \2 \1 like you\?/; // matches "do cats like taco? do taco cats like you?" //branch reset group (available in Perl, PHP, R, Delphi... commented out because this is a js file) // regex = /(?|(cat)|(dog))\1/; // matches "catcat" and "dogdog" /* alternative matching */ regex = /i like (tacos|boba|guacamole)\./; // matches "i like tacos.", "i like boba.", and "i like guacamole." /* forward reference (available in Perl, PHP, Java, Ruby, etc... commented out because this is a js file) */ // regex = /(\2train|(choo))+/; // matches "choo", "choochoo", "chootrain", choochootrain", but not "train" /* lookaheads */ regex = /z(?=a)/; // positive lookahead... matches the "z" before the "a" in pizza" but not the first "z" regex = /z(?!a)/; // negative lookahead... matches the first "z" but not the "z" before the "a" /* lookbehinds */ regex = /(?<=[aeiou])\w/; // positive lookbehind... matches any word character that is preceded by a vowel regex = /(?<![aeiou])\w/; // negative lookbehind... matches any word character that is not preceded by a vowel /* functions I find useful */ regex.test("hello"); // returns true if found a match, false otherwise regex.exec("hello"); // returns result array, null otherwise "football".replace(/foot/,"basket"); // replaces matches with second argument ``` 感謝 Sarthak 建立了我的備忘錄的[GitHub 要點](https://gist.github.com/sarthology/b269c4ab81832c03f80eb48920f1abce),也感謝 Xian-an 將其翻譯成[中文](https://gist.github.com/cxa/901e1862cd9ddf5c721cea6f7807d77a)👏 資源 == - 「正規表示式」挑戰是[FreeCodeCamp](https://freecodecamp.org)上「Javascript 演算法和資料結構認證」的一部分 - [MDN 正規表示式文件](https://developer.mozilla.org/en-US/docs/Web/JavaScript/Guide/Regular_Expressions) - [正規表示式](https://regexone.com/) - [Regex101](https://regex101.com/)用於測試(您也可以使用 Chrome 開發者控制台) - [HackerRank](https://hackerrank.com/)正規表示式挑戰練習  就是這樣,夥計們!希望這對您有幫助☺️ --- 原文出處:https://dev.to/catherinecodes/a-regex-cheatsheet-for-all-those-regex-haters-and-lovers--2cj1
我決定是時候學習[Rust 了](https://www.rust-lang.org/),為了保持自己的動力,我將在這裡記錄學習的進展。  有關於我的一些;我是一名 Web 開發人員,雖然已經涉足多年,但已經從事了大約 5 年。我有使用[Perl](https://www.perl.org/)和[PHP](https://www.php.net/)的經驗,但我的日常工作是 JavaScript/TypeScript,無論是透過[NodeJS](https://nodejs.org/en)還是[ReactJS](https://react.dev/) 。我想學習 Rust 沒有什麼特別的原因,只是學習新事物很有趣。 我的第一個停靠點是Google `learn rust` ,這引導我找到了[「這本書」](https://doc.rust-lang.org/book/) 。這本書是 Rust 社群為新手(或所謂的 Rustlings)編寫的入門指南,旨在「紮實掌握這門語言」。 公共學習 ---- 我選擇公開記錄我的 Rust 學習之旅,因為我相信公開學習的力量。透過分享我的成功、挑戰和見解,我將加強自己的理解,並希望為其他走類似道路的人提供資源。 我親眼目睹了這種方法的價值。我邀請讀者提供回饋、更正和貢獻。雖然我認識到公共學習並不適合所有人,但我個人發現它非常有益,並希望激勵其他人考慮它。那麼,讓我們深入學習這些課程。 第 1 課“入門” --------- 本課分為 3 個部分: - 安裝 - 你好世界! - 你好,貨物! ### 安裝 看到列出的安裝,我鬆了口氣,我擔心我必須查找如何安裝 Rust。我使用的是 Windows 計算機,但決定在 Linux 中學習 Rust,因此我將透過 WSL 使用 Ubuntu。 安裝指令看起來很簡單,它使用curl來下載一些東西,然後透過sh進行管道傳輸,所以我們可以假設下載的專案是某種bash腳本。 ``` curl --proto '=https' --tlsv1.2 https://sh.rustup.rs -sSf | sh ``` 不管你信不信,這是我犯下的第一個錯誤。我看到`Rust is installed now. Great!`訊息並繼續下一課。如果我繼續閱讀下去,我會發現我需要單獨安裝編譯器。 > Linux 使用者通常應該根據其發行版的文件安裝 GCC 或 Clang。例如,如果您使用 Ubuntu,則可以安裝 build-essential 套件。 不過,這很容易解決,我很快就回到了正軌。 ``` sudo apt install build-essential ``` ### 你好世界! 下一部分是開發社群的主要內容,即深受喜愛的“Hello, World!”例子。  我在這裡學到了一些東西,函數是用`fn`關鍵字聲明的,任何 Rust 應用程式的入口點都是`main.rs`檔案中的`main`函數,標準命名約定是使用下劃線來分隔函數和檔案名稱中的單字。 正是在這個階段,我發現我沒有安裝編譯器,我認為這是像這樣的簡單部分的真正原因,以確保我們都設定正確。 ### 你好,貨物! 上一節很簡單,這節也很簡單,但向我們介紹了[Cargo](https://crates.io/) ,它是 Rust 的套件管理器,作為一個 JS 開發者,我的腦海裡直接想到了 NPM。 Cargo 允許我們做一些很酷的事情: - 為我們的包命名。 - 新增包依賴項。 - 用一個命令執行我們的程式。 - 使用除錯模式和發布模式來建立我們的程式。 - 檢查我們的程式是否編譯,但沒有實際建立它。 這個範例讓我們重新創造我們的`Hello, World!`例如但以貨運方式。程式碼非常簡單,幾乎不值得展示,但它就是這樣。 ``` fn main() { println!("Hello, world!"); } ``` 第 2 課“猜謎遊戲” ----------- 第二課沒有任何小節,本課的目標是編寫一個猜謎遊戲,用戶輸入一個數字,我們將其與隨機選擇的數字進行比較,遊戲繼續,直到用戶猜出確切的數字。 我們仍然沒有做任何突破性的事情,但從列印靜態文字到動態獲取用戶輸入並返回結果的進展仍然很好。 ### VS程式碼 正是在這一點上,我決定在`nano`中進行程式碼變更不是一個好主意,我需要在 VSCode 中開啟專案。我加入了一些擴展,希望能讓開發變得更容易。這些是[rust-analyzer](https://marketplace.visualstudio.com/items?itemName=rust-lang.rust-analyzer) 、[板條箱](https://marketplace.visualstudio.com/items?itemName=serayuzgur.crates)和[Even Better TOML](https://marketplace.visualstudio.com/items?itemName=tamasfe.even-better-toml) 。你可以使用任何你喜歡的編輯器,我只是習慣了 VSCode。  ### 製作遊戲 讓我們來看看遊戲教程,它讓我們使用貨物來設定專案,並很快向我們介紹了一些新概念 - `use`關鍵字。 - 可變變數。 - 錯誤處理。 - 文件位置 #### `use`關鍵字 `use`關鍵字允許我們從其他庫中提取程式碼,作為一名 Web 開發人員,我想將其與[import](https://developer.mozilla.org/en-US/docs/Web/JavaScript/Reference/Statements/import)進行比較。預設情況下,Rust 將能夠存取「標準」庫中的一組專案,這稱為前奏,但如果您想存取其他任何內容,則必須使用`use` 。 在他們給出的範例中,我們確實`use std::io;`它允許我們存取`io`命名空間,這確實感覺有點奇怪,因為我們已經可以存取`std` ,這意味著`std::io`也可以存取。 #### 可變變數 在 JavaScript 領域,我們有不可變變數和可變變數的概念,它們是`const`和`let` ,其中`const`是不可變的,而`let`不是。 Rust 有點不同,因為除非另有說明,否則所有變數都是不可變的,變數關鍵字也總是`let` ,或者至少據我所知到目前為止是這樣。 ``` let mut var1 = String::new(); // mutable let mut var2 = String::from("Test String"); // mutable let var3 = 6; // immutable ``` 這本書讓我們知道,第三課將回歸可變性。 #### 錯誤處理 我們介紹了兩種類型的錯誤處理`.expect` ,它們不會嘗試任何類型的恢復,但會在應用程式崩潰和`match`時發布一條訊息。 `Match`從函數中取得`Result` ,然後允許您根據`Result`呼叫函數。在範例中,我們給出了`parse`並告訴它要么是`Ok`要么是`Err` ,在`match`中我們可以定義一個在這兩種情況下呼叫的函數。我假設當我們開始處理更多樣化的函數時,match 將能夠處理所有`Result`類型。 #### 文件位置 這是迄今為止我最喜歡 Rust 的部分,我知道它不應該那麼令人興奮,但我認為它是。當您執行命令`cargo doc` Cargo 時,Cargo 將掃描您正在使用的所有程式碼,並產生解釋功能以及如何使用它們的說明頁面。 目前還沒有太多解釋,但我希望這些文件是從程式碼中的註解產生的,即使這不是那種情況,可以自我記錄的程式碼庫對我來說是如此有趣。 ### 偏離了人跡罕至的地方 此時,我已經完成了前兩課,並決定對猜謎遊戲進行一些更改。我將遊戲循環提取到它自己的函數中,並加入了解析失敗的錯誤訊息。 我不喜歡的一件事是這條線的`magic` 。 ``` let guess: u32 = match guess.trim().parse() ``` 我不喜歡這種感覺,就像 parse 神奇地知道它的目標類型一樣。所以我閱讀了 VSCode 中的解析工具提示,它教導了有關`turbofish`語法的內容。我不知道人們是否不喜歡這種語法,或者這本書的作者是否認為它對於初學者來說太複雜,但在我看來,它更有意義。我們告訴 parse 我們想要什麼類型,然後我們的`let`從中推論出類型,而不是相反。 ``` let guess = match guess.trim().parse::<u32>() ``` 這是修改後的程式碼。 {% 嵌入 https://replit.com/@andrewb05/Guessing-game %} 註銷 -- 感謝您與我一起踏上這段旅程。我計劃繼續這個系列並涵蓋整本書。如果您想關注,可以按下「關注」按鈕以獲得新帖子的通知。 正如我之前所說,請隨意留下任何反饋,如果您也在公開學習,請在評論中留下您的系列的連結,以便我可以查看。 非常感謝您的閱讀。如果您想在開發之外與我聯繫,這裡有我的[Twitter](https://twitter.com/Link2Twenty)和[linkedin,](https://www.linkedin.com/in/andrew-bone-ba241b179/)歡迎來打個招呼 😊。 --- 原文出處:https://dev.to/link2twenty/learning-rust-a-clean-start-4eom
近年來,在各種程式設計訓練營的指導中,我獲得了獨特的機會來指導和支援眾多熱衷於在雲端工程和 DevOps 領域取得成功的初級開發人員。我注意到這些有抱負的工程師中反覆出現的一個主題是,他們渴望深入了解雲端運算的複雜性,但常常對大量可用的程式語言和工具感到不知所措。這種認識激發了我的想法,即建立一個全面且平易近人的指南,為任何開始雲端工程之旅的人介紹基本的程式語言。 同樣,到 2024 年,每個雲端工程師都應該了解以下七種程式語言,每種語言都因其相關性、功能和在實現現代雲端解決方案中的作用而被選擇。 1. 翼 ----  [Wing](https://github.com/winglang/wing)的設計理念強調生產力、安全性和效率,使開發人員能夠在整個開發過程中保持單一、直覺的工作流程。 透過將基礎設施資源視為一等公民,Wing 允許開發人員直接在其應用程式程式碼中定義、互動和管理這些資源。這種整合顯著降低了與管理雲端基礎架構相關的複雜性和潛在錯誤,從而更輕鬆地建置和部署安全、可擴展的應用程式。 Wing 的主要功能之一是它能夠編譯為基礎設施即程式碼 (IaC) 格式,例如 Terraform 和 JavaScript。 Wing 對雲端應用程式本地模擬的支援徹底改變了開發人員的工作效率。在部署之前能夠在本地環境中執行、視覺化、互動和除錯雲端應用程式可以顯著加快開發週期並提高應用程式品質。此功能與易於與 DevOps 實踐整合的語言設計相結合,可確保開發人員能夠更有效地應用持續整合和持續部署 (CI/CD) 方法,從而與現代軟體開發實踐保持一致。 看看[Wing 的互動遊樂場,](https://www.winglang.io/play/)了解 Wing 語言的工作原理。 使用 Wing 非常輕鬆且超級簡單。 您可以在幾秒鐘內安裝 Wing 並開始自動化您的雲端工作流程。 ``` npm install -g winglang ``` 您可以使用以下命令驗證您的安裝。 ``` wing -V ``` 使用 CLI 引導新專案:使用 new 命令,然後修改 main.w 使其具有以下內容: ``` wing new empty ``` ``` bring cloud; // define a queue, a bucket and a counter let bucket = new cloud.Bucket(); let counter = new cloud.Counter(initial: 1); let queue = new cloud.Queue(); // When a message is received in the queue it should be consumed // by the following closure queue.setConsumer(inflight (message: str) => { // Increment the distributed counter, the index variable will // store the value prior to the increment let index = counter.inc(); // Once two messages are pushed to the queue, e.g. "Wing" and "Queue". // Two files will be created: // - wing-1.txt with "Hello Wing" // - wing-2.txt with "Hello Queue" bucket.put("wing-{index}.txt", "Hello, welcome to winglang world!"); log("file wing-{index}.txt created"); }); ``` 使用 wing it 指令透過我們新建立的應用程式啟動控制台: ``` wing it main.w ``` Wing 控制台為您提供雲端應用程式的視圖,使開發人員能夠更快地迭代和熱重載:  透過 Wing 的有關[Wing 入門](https://www.winglang.io/docs/start-here/local)的文件探索更多資訊。 2.Python --------  由於其簡單性、多功能性和強大的生態系統, [Python](https://github.com/python)仍然是雲端工程師不可或缺的語言。其廣泛的庫和框架集合(例如用於 Web 應用程式的 Flask 和用於機器學習的 TensorFlow)使 Python 成為開發各種基於雲端的服務的首選語言。此外,Python 在自動化、腳本編寫和資料分析中的作用確保了它仍然是雲端基礎設施管理、自動化任務和雲端應用程式快速原型設計的關鍵工具。 3. 成長 -----  [Go](https://github.com/golang/go)或 Golang 由 Google 設計,在雲端工程師中越來越受歡迎,用於建立高效能和可擴展的雲端服務。它的高效、簡單和內建的並發支援使其成為開發微服務、分散式系統和容器化應用程式的絕佳選擇。 Go 與雲端平台的兼容性及其有效處理繁重網路流量和複雜處理任務的能力有助於其在雲端基礎設施專案中的日益普及。 4. JavaScript(使用 Node.js) -------------------------  [JavaScript](https://en.wikipedia.org/wiki/JavaScript) ,特別是與 Node.js 一起使用時,對於專注於建置和部署可擴展且高效的 Web 應用程式的雲端工程師來說至關重要。 Node.js 允許在伺服器端使用 JavaScript,從而能夠開發適合雲端的快速、非阻塞、事件驅動的應用程式。 JavaScript 在客戶端和伺服器端開發中的普遍存在也促進了全端開發能力,使其對於從事基於雲端的 Web 服務和應用程式的工程師來說非常寶貴。 5. 生鏽 -----  [Rust](https://www.rust-lang.org/)由於強調安全性、速度和無需垃圾收集器的並發性而在雲端運算領域獲得了發展勢頭。這些功能使 Rust 成為尋求開發高效能、安全且可靠的雲端服務和基礎設施的雲端工程師的有吸引力的選擇。 Rust 的記憶體安全保證和機器程式碼的高效編譯使其成為雲端環境中系統級和嵌入式應用程式的理想語言,在雲端環境中,效能和安全性至關重要。 6. Kubernetes YAML ------------------  雖然[Kubernetes YAML](https://kubernetes.io/docs/concepts/overview/working-with-objects/) (YAML 不是標記語言)不是傳統意義上的程式語言,但對於使用 Kubernetes(容器編排事實上的標準)的雲端工程師來說至關重要。掌握 Kubernetes YAML 對於跨雲端環境定義、部署和管理容器化應用程式至關重要。了解 Kubernetes 資源檔案和配置的複雜性使工程師能夠利用容器編排的全部功能,確保可擴展、有彈性且高效的雲端原生應用程式。 7.Terraform HCL(HashiCorp配置語言) ------------------------------  [Terraform HCL](https://github.com/hashicorp/hcl) (HashiCorp 配置語言)是 2024 年雲端工程師的必備語言,尤其是那些參與基礎設施即程式碼 (IaC) 實踐的工程師。 HCL 是 Terraform 使用的配置語言,Terraform 是一種廣泛採用的工具,使工程師能夠使用聲明性配置方法定義、配置和管理雲端基礎架構。學習 Terraform HCL 使雲端工程師能夠自動化跨不同服務供應商的雲端資源部署和生命週期管理,確保雲端環境的一致性、可重複性和可擴展性。 ### 包起來 到 2024 年,所有語言都有自己的優勢,我很高興將自己關於雲端工程和 DevOps 的想法放在一起。 如果我能為我的學生提供建議,在這個不斷發展的領域迅速擴展的過程中,掌握 Wing 將成為一個令人信服的選擇。 [Wing](https://www.winglang.io/)為雲端工程師和開發人員提供了獨特的優勢,提供控制臺本地測試、熱重載(對大多數雲端工程師來說是一個挑戰)和增強的可擴展性,更不用說雲端應用程式的安全性了。 --- 原文出處:https://dev.to/pavanbelagatti/7-programming-languages-every-cloud-engineer-should-know-in-2024-1kcd
您可以使用無數的框架和函式庫來改進您的全端應用程式。 我們將介紹令人興奮的概念,例如應用程式內通知、使用 React 製作影片、從為開發人員提供的電子郵件 API 到在瀏覽器中建立互動式音樂。 那我們就開始吧。 (不要忘記為這些庫加註星標以表示您的支持)。  https://github.com/CopilotKit/CopilotKit --- 1. [CopilotKit](https://github.com/CopilotKit/CopilotKit) - 在數小時內為您的產品提供 AI Copilot。 ------------------------------------------------------------------------------------  您可以使用兩個 React 元件將關鍵 AI 功能整合到 React 應用程式中。它們還提供內建(完全可自訂)Copilot 原生 UX 元件,例如`<CopilotKit />` 、 `<CopilotPopup />` 、 `<CopilotSidebar />` 、 `<CopilotTextarea />` 。 開始使用以下 npm 指令。 ``` npm i @copilotkit/react-core @copilotkit/react-ui @copilotkit/react-textarea ``` 這是整合 CopilotTextArea 的方法。 ``` import { CopilotTextarea } from "@copilotkit/react-textarea"; import { useState } from "react"; export function SomeReactComponent() { const [text, setText] = useState(""); return ( <> <CopilotTextarea className="px-4 py-4" value={text} onValueChange={(value: string) => setText(value)} placeholder="What are your plans for your vacation?" autosuggestionsConfig={{ textareaPurpose: "Travel notes from the user's previous vacations. Likely written in a colloquial style, but adjust as needed.", chatApiConfigs: { suggestionsApiConfig: { forwardedParams: { max_tokens: 20, stop: [".", "?", "!"], }, }, }, }} /> </> ); } ``` 您可以閱讀[文件](https://docs.copilotkit.ai/getting-started/quickstart-textarea)。 基本概念是在幾分鐘內建立可用於基於 LLM 的全端應用程式的 AI 聊天機器人。 https://github.com/CopilotKit/CopilotKit --- 2. [Storybook](https://github.com/storybookjs/storybook) - UI 開發、測試和文件變得簡單。 ---------------------------------------------------------------------------  Storybook 是一個用於獨立建立 UI 元件和頁面的前端工作坊。它有助於 UI 開發、測試和文件編制。 他們在 GitHub 上有超過 57,000 次提交、81,000 多個 star 和 1300 多個版本。 這是您為專案建立簡單元件的方法。 ``` import type { Meta, StoryObj } from '@storybook/react'; import { YourComponent } from './YourComponent'; //👇 This default export determines where your story goes in the story list const meta: Meta<typeof YourComponent> = { component: YourComponent, }; export default meta; type Story = StoryObj<typeof YourComponent>; export const FirstStory: Story = { args: { //👇 The args you need here will depend on your component }, }; ``` 您可以閱讀[文件](https://storybook.js.org/docs/get-started/setup)。 如今,UI 除錯起來很痛苦,因為它們與業務邏輯、互動狀態和應用程式上下文糾纏在一起。 Storybook 提供了一個獨立的 iframe 來渲染元件,而不會受到應用程式業務邏輯和上下文的干擾。這可以幫助您將開發重點放在元件的每個變體上,甚至是難以觸及的邊緣情況。 https://github.com/storybookjs/storybook --- 3. [Appwrite](https://github.com/appwrite/appwrite) - 您的後端減少麻煩。 ---------------------------------------------------------------   Appwrite 的開源平台可讓您將身份驗證、資料庫、函數和儲存體新增至您的產品中,並建立任何規模的任何應用程式、擁有您的資料並使用您喜歡的編碼語言和工具。 他們有很好的貢獻指南,甚至不厭其煩地詳細解釋架構。 開始使用以下 npm 指令。 ``` npm install appwrite ``` 您可以像這樣建立一個登入元件。 ``` "use client"; import { useState } from "react"; import { account, ID } from "./appwrite"; const LoginPage = () => { const [loggedInUser, setLoggedInUser] = useState(null); const [email, setEmail] = useState(""); const [password, setPassword] = useState(""); const [name, setName] = useState(""); const login = async (email, password) => { const session = await account.createEmailSession(email, password); setLoggedInUser(await account.get()); }; const register = async () => { await account.create(ID.unique(), email, password, name); login(email, password); }; const logout = async () => { await account.deleteSession("current"); setLoggedInUser(null); }; if (loggedInUser) { return ( <div> <p>Logged in as {loggedInUser.name}</p> <button type="button" onClick={logout}> Logout </button> </div> ); } return ( <div> <p>Not logged in</p> <form> <input type="email" placeholder="Email" value={email} onChange={(e) => setEmail(e.target.value)} /> <input type="password" placeholder="Password" value={password} onChange={(e) => setPassword(e.target.value)} /> <input type="text" placeholder="Name" value={name} onChange={(e) => setName(e.target.value)} /> <button type="button" onClick={() => login(email, password)}> Login </button> <button type="button" onClick={register}> Register </button> </form> </div> ); }; export default LoginPage; ``` 您可以閱讀[文件](https://appwrite.io/docs)。 Appwrite 可以非常輕鬆地建立具有開箱即用的擴充功能的可擴展後端應用程式。 https://github.com/appwrite/appwrite --- 4. [Wasp](https://github.com/wasp-lang/wasp) - 用於 React、node.js 和 prisma 的類似 Rails 的框架。 --------------------------------------------------------------------------------------- 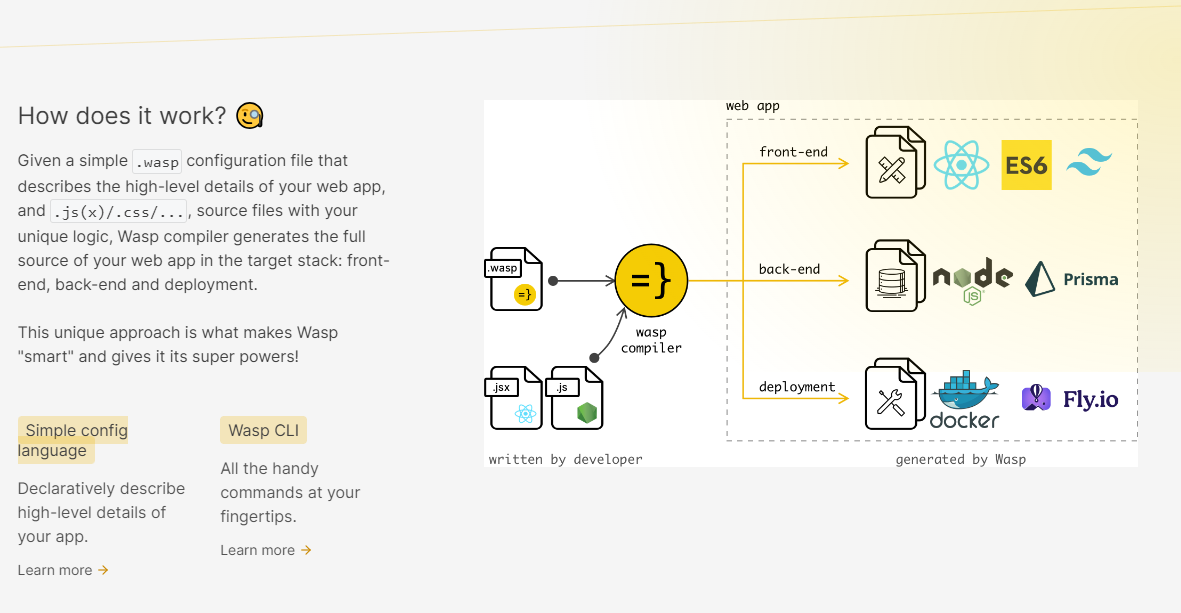 使用 React 和 Node.js 開發全端 Web 應用程式的最快方法。這不是一個想法,而是一種建立瘋狂快速全端應用程式的不同方法。 這是將其整合到元件中的方法。 ``` import getRecipes from "@wasp/queries/getRecipes"; import { useQuery } from "@wasp/queries"; import type { User } from "@wasp/entities"; export function HomePage({ user }: { user: User }) { // Due to full-stack type safety, `recipes` will be of type `Recipe[]` here. const { data: recipes, isLoading } = useQuery(getRecipes); // Calling our query here! if (isLoading) { return <div>Loading...</div>; } return ( <div> <h1>Recipes</h1> <ul> {recipes ? recipes.map((recipe) => ( <li key={recipe.id}> <div>{recipe.title}</div> <div>{recipe.description}</div> </li> )) : 'No recipes defined yet!'} </ul> </div> ); } ``` 您可以閱讀[文件](https://wasp-lang.dev/docs)。 https://github.com/wasp-lang/wasp --- 5. [Novu](https://github.com/novuhq/novu) - 將應用程式內通知新增至您的應用程式! -------------------------------------------------------------- 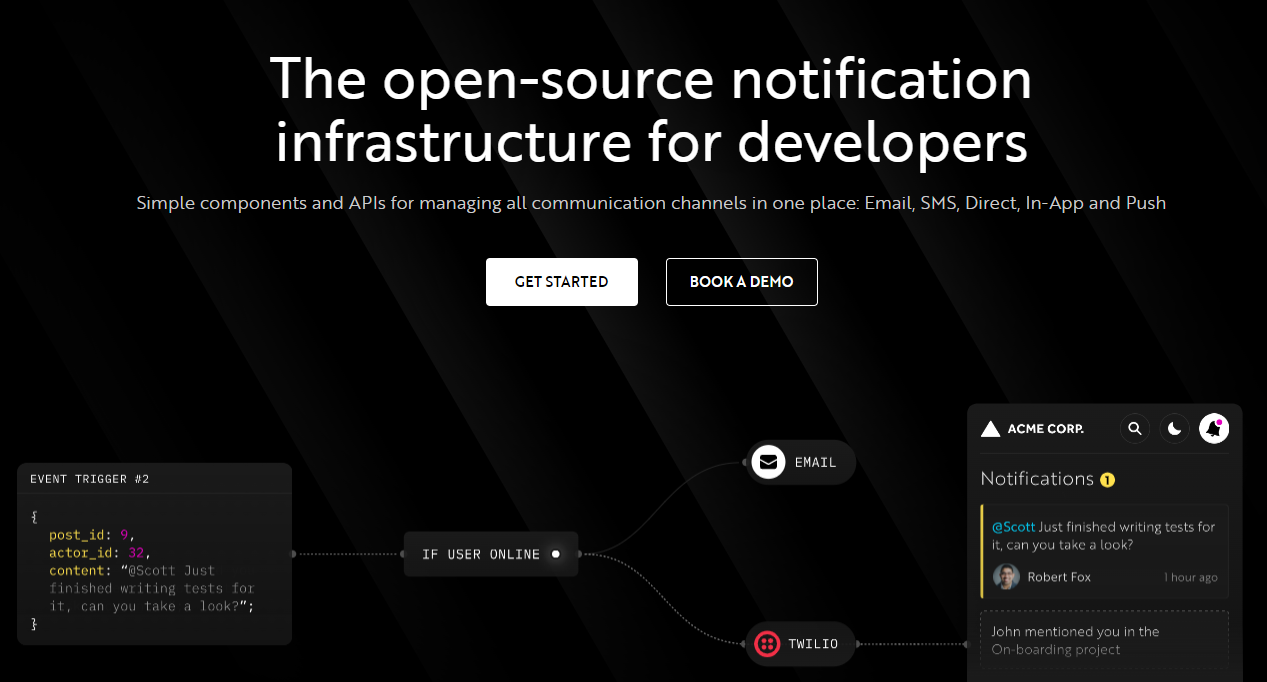 Novu 提供開源通知基礎架構和功能齊全的嵌入式通知中心。 這就是如何使用`React`建立 novu 元件以用於應用程式內通知。 ``` import { NovuProvider, PopoverNotificationCenter, NotificationBell, } from "@novu/notification-center"; function App() { return ( <> <NovuProvider subscriberId={process.env.REACT_APP_SUB_ID} applicationIdentifier={process.env.REACT_APP_APP_ID} > <PopoverNotificationCenter> {({ unseenCount }) => <NotificationBell unseenCount={unseenCount} />} </PopoverNotificationCenter> </NovuProvider> </> ); } export default App; ``` 您可以閱讀[文件](https://docs.novu.co/getting-started/introduction)。 https://github.com/novuhq/novu --- 6. [Remotion](https://github.com/remotion-dev/remotion) - 使用 React 以程式設計方式製作影片。 -------------------------------------------------------------------------------  使用 React 建立真正的 MP4 影片,使用伺服器端渲染和參數化擴展影片製作。 開始使用以下 npm 指令。 ``` npm init video ``` 它為您提供了一個幀號和一個空白畫布,您可以在其中使用 React 渲染任何您想要的內容。 這是一個範例 React 元件,它將當前幀渲染為文字。 ``` import { AbsoluteFill, useCurrentFrame } from "remotion"; export const MyComposition = () => { const frame = useCurrentFrame(); return ( <AbsoluteFill style={{ justifyContent: "center", alignItems: "center", fontSize: 100, backgroundColor: "white", }} > The current frame is {frame}. </AbsoluteFill> ); }; ``` 您可以閱讀[文件](https://www.remotion.dev/docs/)。 過去兩年,remotion 團隊因製作 GitHub Wrapped 而聞名。 https://github.com/remotion-dev/remotion --- [7.NocoDB](https://github.com/nocodb/nocodb) - Airtable 的替代品。 ------------------------------------------------------------- 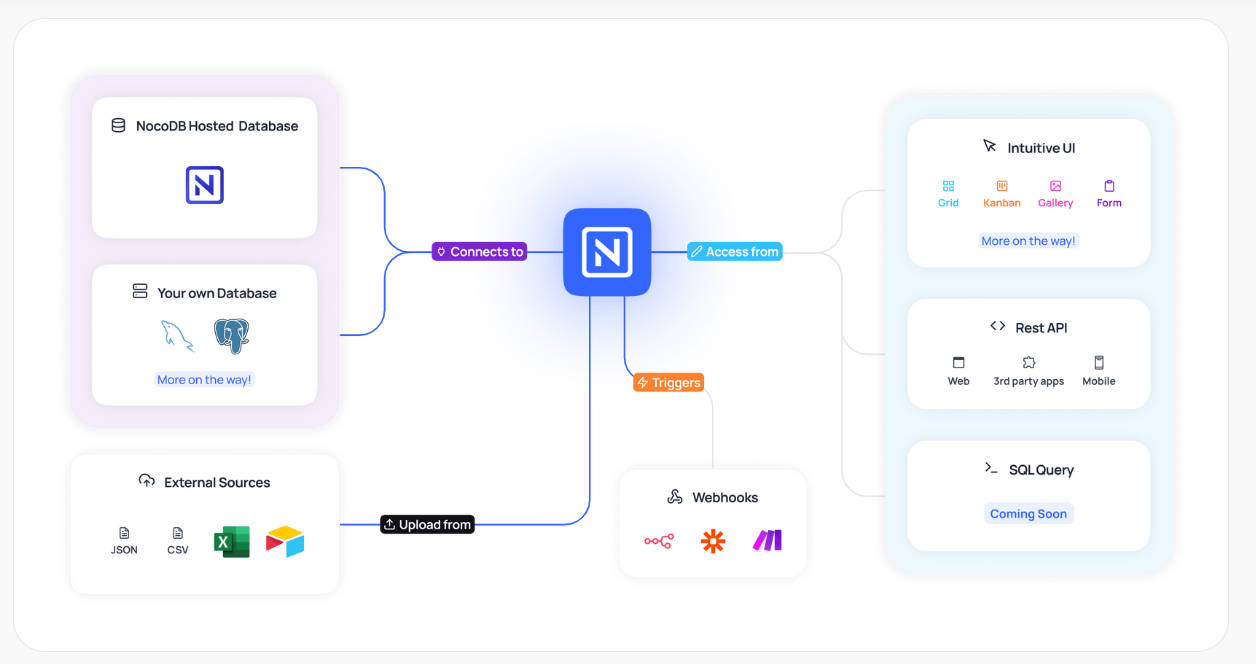 Airtable 的免費開源替代品是 NocoDB。它可以使用任何 MySQL、PostgreSQL、SQL Server、SQLite 或 MariaDB 資料庫製作智慧型電子表格。 其主要目標是讓強大的計算工具得到更廣泛的使用。 開始使用以下 npx 指令。 ``` npx create-nocodb-app ``` 您可以閱讀[文件](https://docs.nocodb.com/)。 NocoDB 的建立是為了為世界各地的數位企業提供強大的開源和無程式碼資料庫介面。 您可以非常快速地將airtable資料匯入NocoDB。 https://github.com/nocodb/nocodb --- 8.[新穎](https://github.com/steven-tey/novel)- 所見即所得編輯器,具有人工智慧自動完成功能。 -------------------------------------------------------------------  它使用`Next.js` 、 `Vercel AI SDK` 、 `Tiptap`作為文字編輯器。 開始使用以下 npm 指令。 ``` npm i novel ``` 您可以這樣使用它。有多種選項可用於改進您的應用程式。 ``` import { Editor } from "novel"; export default function App() { return <Editor />; } ``` https://github.com/steven-tey/novel --- 9. [Blitz](https://github.com/blitz-js/blitz) - 缺少 NextJS 的全端工具包。 ----------------------------------------------------------------- 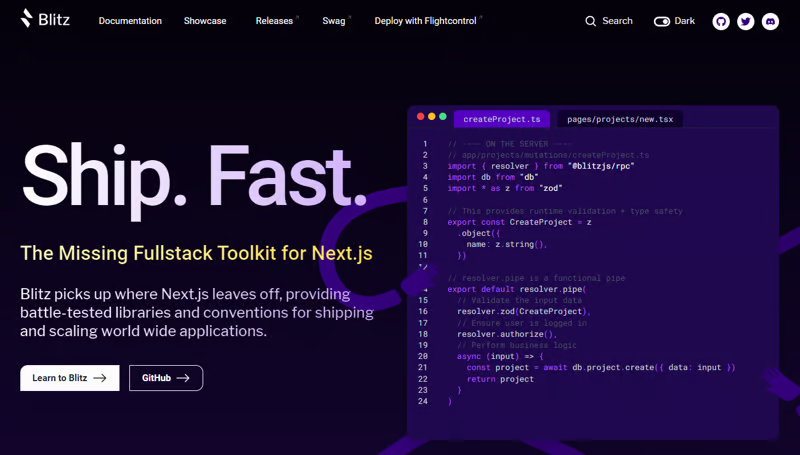 Blitz 繼承了 Next.js 的不足,為全球應用程式的交付和擴展提供了經過實戰考驗的函式庫和約定。 開始使用以下 npm 指令。 ``` npm install -g blitz ``` 這就是您如何使用 Blitz 建立新頁面。 ``` const NewProjectPage: BlitzPage = () => { const router = useRouter() const [createProjectMutation] = useMutation(createProject) return ( <div> <h1>Create New Project</h1> <ProjectForm submitText="Create Project" schema={CreateProject} onSubmit={async (values) => { // This is equivalent to calling the server function directly const project = await createProjectMutation(values) // Notice the 'Routes' object Blitz provides for routing router.push(Routes.ProjectsPage({ projectId: project.id })) }} /> </div> ); }; NewProjectPage.authenticate = true NewProjectPage.getLayout = (page) => <Layout>{page}</Layout> export default NewProjectPage ``` 您可以閱讀[文件](https://blitzjs.com/docs/get-started)。 它使建築物改善了數倍。  https://github.com/blitz-js/blitz --- 10. [Supabase](https://github.com/supabase/supabase) - 開源 Firebase 替代品。 -----------------------------------------------------------------------  我們大多數人都已經預料到 SUPABASE 會出現在這裡,因為它實在是太棒了。 開始使用以下 npm 指令 (Next.js)。 ``` npx create-next-app -e with-supabase ``` 這是使用 supabase 建立用戶的方法。 ``` import { createClient } from '@supabase/supabase-js' // Initialize const supabaseUrl = 'https://chat-room.supabase.co' const supabaseKey = 'public-anon-key' const supabase = createClient(supabaseUrl, supabaseKey) // Create a new user const { user, error } = await supabase.auth.signUp({ email: '[email protected]', password: 'example-password', }) ``` 您可以閱讀[文件](https://supabase.com/docs)。 您可以使用身份驗證、即時、邊緣功能、儲存等功能建立一個速度極快的應用程式。 Supabase 涵蓋了這一切! 他們還提供了一些入門套件,例如 AI 聊天機器人和 Stripe 訂閱。 https://github.com/supabase/supabase --- [11.Refine](https://github.com/refinedev/refine) - 企業開源重組工具。 ------------------------------------------------------------ 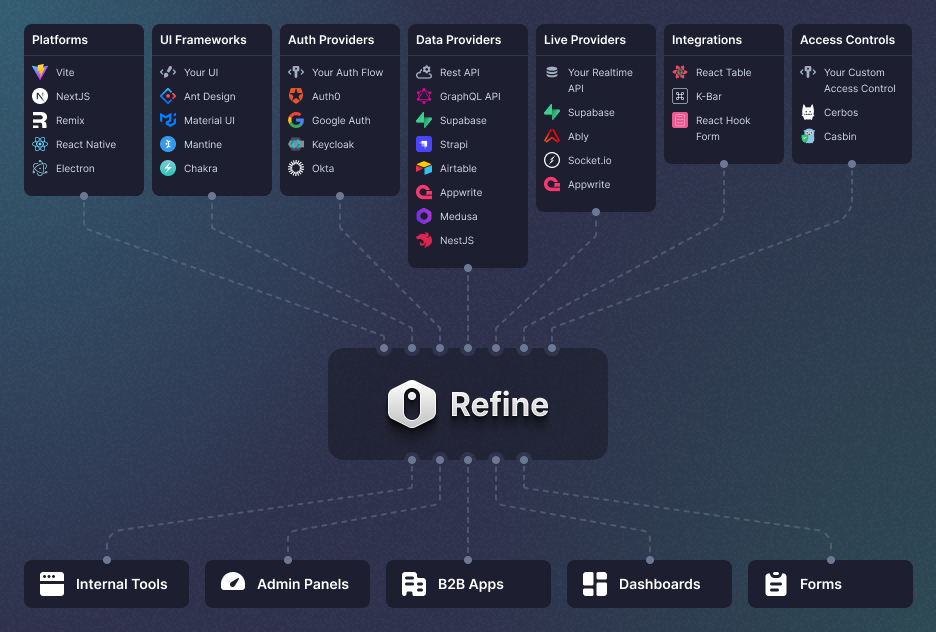 建立具有無與倫比的靈活性的管理面板、儀表板和 B2B 應用程式 您可以在一分鐘內使用單一 CLI 命令進行設定。 它具有適用於 15 多個後端服務的連接器,包括 Hasura、Appwrite 等。 開始使用以下 npm 指令。 ``` npm create refine-app@latest ``` 這就是使用 Refine 新增登入資訊的簡單方法。 ``` import { useLogin } from "@refinedev/core"; const { login } = useLogin(); ``` 您可以閱讀[文件](https://refine.dev/docs/)。 https://github.com/refinedev/refine --- 12. [Zenstack](https://github.com/zenstackhq/zenstack) - 資料庫到 API 和 UI 只需幾分鐘。 ----------------------------------------------------------------------------- 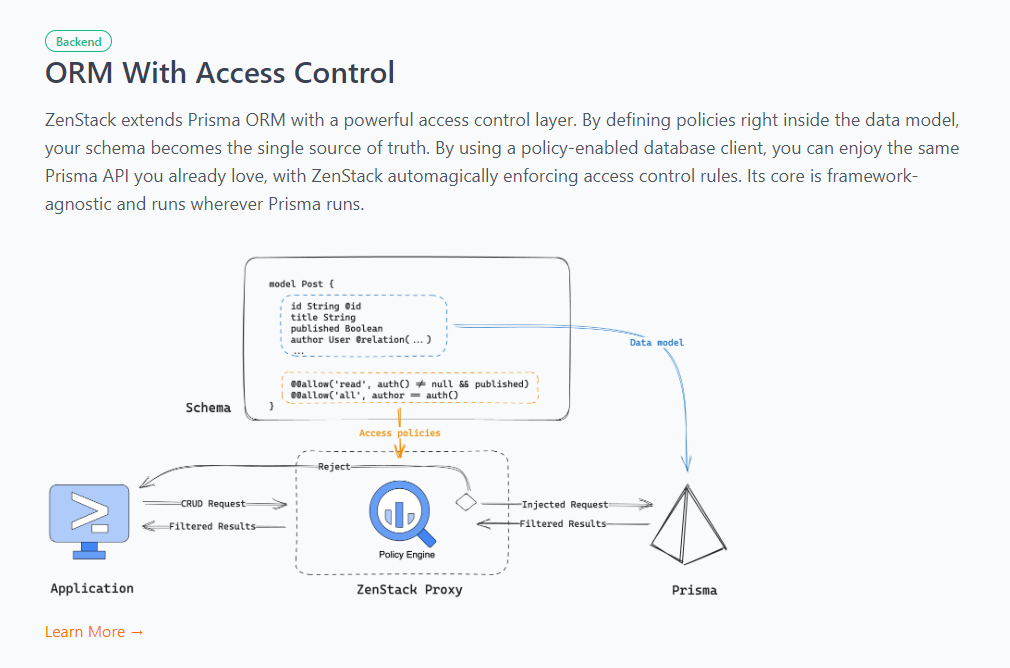 TypeScript 工具包,透過強大的存取控制層增強 Prisma ORM,並釋放其全端開發的全部功能。 開始使用以下 npx 指令。 ``` npx zenstack@latest init ``` 這是透過伺服器適配器建立 RESTful API 的方法。 ``` // pages/api/model/[...path].ts import { requestHandler } from '@zenstackhq/next'; import { enhance } from '@zenstackhq/runtime'; import { getSessionUser } from '@lib/auth'; import { prisma } from '@lib/db'; // Mount Prisma-style APIs: "/api/model/post/findMany", "/api/model/post/create", etc. // Can be configured to provide standard RESTful APIs (using JSON:API) instead. export default requestHandler({ getPrisma: (req, res) => enhance(prisma, { user: getSessionUser(req, res) }), }); ``` 您可以閱讀[文件](https://zenstack.dev/docs/welcome)。 https://github.com/zenstackhq/zenstack --- 13. [Buildship](https://github.com/rowyio/buildship) - 低程式碼視覺化後端建構器。 --------------------------------------------------------------------  對於您正在使用無程式碼應用程式建構器(FlutterFlow、Webflow、Framer、Adalo、Bubble、BravoStudio...)或前端框架(Next.js、React、Vue...)建立的應用程式,您需要一個後端來支援可擴展的 API、安全工作流程、自動化等。BuildShip 為您提供了一種完全視覺化的方式,可以在易於使用的完全託管體驗中可擴展地建立這些後端任務。 這意味著您不需要在雲端平台上爭論或部署東西、執行 DevOps 等。只需立即建置和交付 🚀 https://github.com/rowyio/buildship --- 14. [Taipy](https://github.com/Avaiga/taipy) - 將資料和人工智慧演算法整合到生產就緒的 Web 應用程式中。 -----------------------------------------------------------------------------  Taipy 是一個開源 Python 庫,用於輕鬆的端到端應用程式開發, 具有假設分析、智慧管道執行、內建調度和部署工具。 開始使用以下命令。 ``` pip install taipy ``` 這是一個典型的Python函數,也是過濾器場景中使用的唯一任務。 ``` def filter_genre(initial_dataset: pd.DataFrame, selected_genre): filtered_dataset = initial_dataset[initial_dataset['genres'].str.contains(selected_genre)] filtered_data = filtered_dataset.nlargest(7, 'Popularity %') return filtered_data ``` 您可以閱讀[文件](https://docs.taipy.io/en/latest/)。 他們還有很多可供您建立的[演示應用程式教學](https://docs.taipy.io/en/latest/knowledge_base/demos/)。 https://github.com/Avaiga/taipy --- 15. [LocalForage](https://github.com/localForage/localForage) - 改進了離線儲存。 ------------------------------------------------------------------------  LocalForage 是一個 JavaScript 函式庫,它透過使用非同步資料儲存和簡單的、類似 localStorage 的 API 來改善 Web 應用程式的離線體驗。它允許開發人員儲存多種類型的資料而不僅僅是字串。 開始使用以下 npm 指令。 ``` npm install localforage ``` 只需包含 JS 檔案並開始使用 localForage。 ``` <script src="localforage.js"></script> ``` 您可以閱讀[文件](https://localforage.github.io/localForage/#installation)。 https://github.com/localForage/localForage --- 16. [Zod](https://github.com/colinhacks/zod) - 使用靜態類型推斷的 TypeScript-first 模式驗證。 -------------------------------------------------------------------------------  Zod 的目標是透過最大限度地減少重複的類型聲明來對開發人員友好。使用 Zod,您聲明一次驗證器,Zod 將自動推斷靜態 TypeScript 類型。將更簡單的類型組合成複雜的資料結構很容易。 開始使用以下 npm 指令。 ``` npm install zod ``` 這是您在建立字串架構時自訂一些常見錯誤訊息的方法。 ``` const name = z.string({ required_error: "Name is required", invalid_type_error: "Name must be a string", }); ``` 您可以閱讀[文件](https://zod.dev/)。 它適用於 Node.js 和所有現代瀏覽器 https://github.com/colinhacks/zod --- 17.[多普勒](https://github.com/DopplerHQ)- 管理你的秘密。 -----------------------------------------------  您可以透過在具有開發、暫存和生產環境的專案中組織機密來消除機密蔓延。 開始使用以下指令 (MacOS)。 ``` $ brew install dopplerhq/cli/doppler $ doppler --version ``` 這是安裝 Doppler CLI[的 GitHub Actions 工作流程](https://github.com/DopplerHQ/cli-action)。 您可以閱讀[文件](https://docs.doppler.com/docs/start)。 ``` name: Example action on: [push] jobs: my-job: runs-on: ubuntu-latest steps: - name: Install CLI uses: dopplerhq/cli-action@v3 - name: Do something with the CLI run: doppler secrets --only-names env: DOPPLER_TOKEN: ${{ secrets.DOPPLER_TOKEN }} ``` https://github.com/DopplerHQ --- 18. [FastAPI](https://github.com/tiangolo/fastapi) - 高效能、易於學習、快速編碼、可用於生產。 -------------------------------------------------------------------------  FastAPI 是一個現代、快速(高效能)的 Web 框架,用於基於標準 Python 類型提示使用 Python 3.8+ 建立 API。 開始使用以下命令。 ``` $ pip install fastapi ``` 這是您開始使用 FastAPI 的方式。 ``` from typing import Union from fastapi import FastAPI app = FastAPI() @app.get("/") def read_root(): return {"Hello": "World"} @app.get("/items/{item_id}") def read_item(item_id: int, q: Union[str, None] = None): return {"item_id": item_id, "q": q} ``` 您的編輯器將自動完成屬性並了解它們的類型,這是使用 FastAPI 的最佳功能之一。 您可以閱讀[文件](https://fastapi.tiangolo.com/)。 https://github.com/tiangolo/fastapi --- 19. [Flowise](https://github.com/FlowiseAI/Flowise) - 拖放 UI 來建立您的客製化 LLM 流程。 ----------------------------------------------------------------------------  Flowise 是一款開源 UI 視覺化工具,用於建立客製化的 LLM 編排流程和 AI 代理程式。 開始使用以下 npm 指令。 ``` npm install -g flowise npx flowise start OR npx flowise start --FLOWISE_USERNAME=user --FLOWISE_PASSWORD=1234 ``` 這就是整合 API 的方式。 ``` import requests url = "/api/v1/prediction/:id" def query(payload): response = requests.post( url, json = payload ) return response.json() output = query({ question: "hello!" )} ``` 您可以閱讀[文件](https://docs.flowiseai.com/)。 https://github.com/FlowiseAI/Flowise --- 20. [Scrapy](https://github.com/scrapy/scrapy) - Python 的快速進階網頁爬行和抓取框架.. ------------------------------------------------------------------------  Scrapy 是一個快速的高級網路爬行和網頁抓取框架,用於爬行網站並從頁面中提取結構化資料。它可用於多種用途,從資料探勘到監控和自動化測試。 開始使用以下命令。 ``` pip install scrapy ``` 建造並執行您的網路蜘蛛。 ``` pip install scrapy cat > myspider.py <<EOF import scrapy class BlogSpider(scrapy.Spider): name = 'blogspider' start_urls = ['https://www.zyte.com/blog/'] def parse(self, response): for title in response.css('.oxy-post-title'): yield {'title': title.css('::text').get()} for next_page in response.css('a.next'): yield response.follow(next_page, self.parse) EOF scrapy runspider myspider.py ``` 您可以閱讀[文件](https://scrapy.org/doc/)。 它擁有大約 50k+ 的星星,因此對於網頁抓取來說具有巨大的可信度。 https://github.com/scrapy/scrapy --- 21. [Tone](https://github.com/Tonejs/Tone.js) - 在瀏覽器中製作互動式音樂。 -------------------------------------------------------------  開始使用以下 npm 指令。 ``` npm install tone ``` 這是您開始使用 Tone.js 的方法 ``` // To import Tone.js: import * as Tone from 'tone' //create a synth and connect it to the main output (your speakers) const synth = new Tone.Synth().toDestination(); //play a middle 'C' for the duration of an 8th note synth.triggerAttackRelease("C4", "8n"); ``` 您可以閱讀[文件](https://github.com/Tonejs/Tone.js?tab=readme-ov-file#installation)。 https://github.com/Tonejs/Tone.js --- 22. [Spacetime](https://github.com/spencermountain/spacetime) - 輕量級 javascript 時區庫。 ----------------------------------------------------------------------------------- 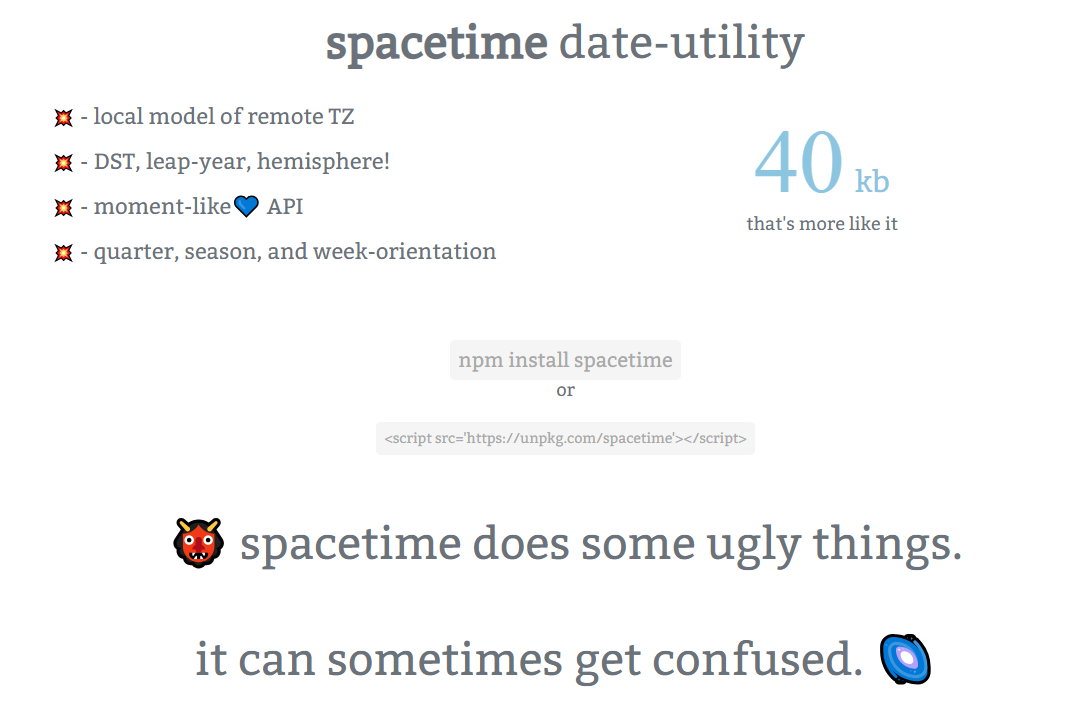 您可以計算遠端時區的時間;支持夏令時、閏年和半球。按季度、季節、月份、週來定位時間.. 開始使用以下 npm 指令。 ``` npm install spacetime ``` 您可以這樣使用它。 ``` <script src="https://unpkg.com/spacetime"></script> <script> var d = spacetime('March 1 2012', 'America/New_York') //set the time d = d.time('4:20pm') d = d.goto('America/Los_Angeles') d.time() //'1:20pm' </script> ``` https://github.com/spencermountain/spacetime --- 23. [Mermaid](https://github.com/mermaid-js/mermaid) - 從類似 markdown 的文字產生圖表。 ----------------------------------------------------------------------------  您可以使用 Markdown with Mermaid 等文字產生流程圖或序列圖等圖表。 這就是建立圖表的方法。 ``` sequenceDiagram Alice->>John: Hello John, how are you? loop Healthcheck John->>John: Fight against hypochondria end Note right of John: Rational thoughts! John-->>Alice: Great! John->>Bob: How about you? Bob-->>John: Jolly good! ``` 它將做出如下圖。 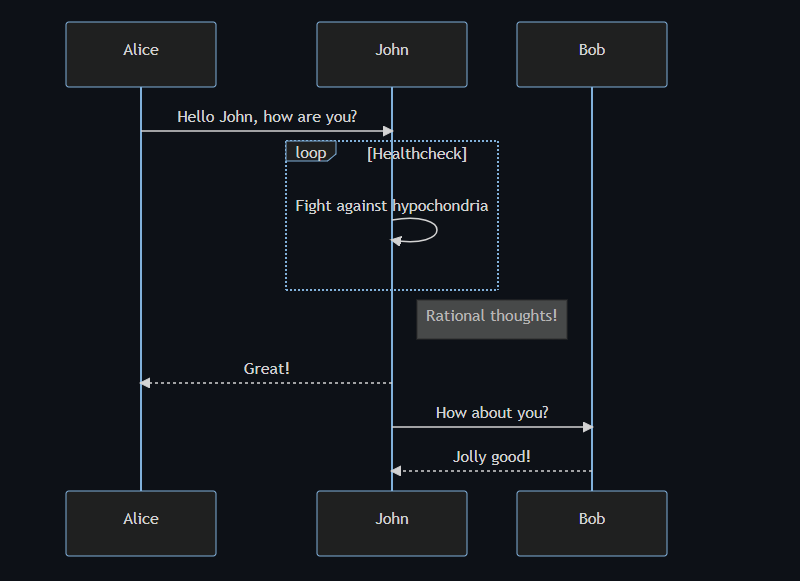 您可以閱讀[VS Code](https://docs.mermaidchart.com/plugins/visual-studio-code)的[文件](https://mermaid.js.org/intro/getting-started.html)和外掛程式。 請參閱[即時編輯器](https://mermaid.live/edit#pako:eNpVkE1PwzAMhv9KlvM-2AZj62EIxJd24ADXXLzEbaKlcUkdUDX1v5MONomcnNevXz32UWoyKAvZ4mfCoPHRQRWhVuHeO42T7XZHNhTiFb0nMdRjYelbQETRUbpTwRM1uQ2erbaoDyqI_AbnZfjZVZYFVOBCy8J2DWlLwUQHKmAwKrwRo4gnF5Xid-gd2FEAL9hSyp12pMIpNcee2ArxEhH4LG-3D7TPoAPcnhL_4WVxcgHZkfedqIjMSI5ljbEGZ_LyxwFaSbZYo5JFLg3Eg5Iq9NkHiemjC1oWHBOOZWoM8PlQ_8Un45iiLErwbRY9gcH8PUrumuHKlWs5J2oKpasGPUWfZcvctMVsNrSnlWOb9lNN9ax1xkJk-7VZzVaL1RoWS1zdLuFmuTR6P9-sy8X1vDS3V_MFyL7vfwD_bJ1W)中的範例。 https://github.com/mermaid-js/mermaid --- 24.[公共 API](https://github.com/public-apis/public-apis) - 20 多個類別的 1400 多個 API。 -------------------------------------------------------------------------------  我們主要使用外部 API 來建立應用程式,在這裡您可以找到所有 API 的清單。網站連結在最後。 它在 GitHub 上擁有大約 279k+ 顆星。 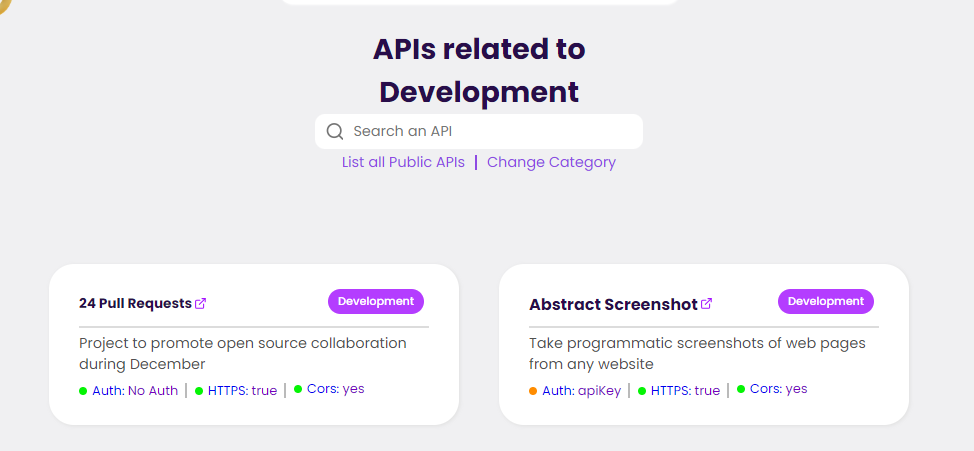 從儲存庫取得網站連結非常困難。所以,我把它貼在這裡。 網址 - [Collective-api.vercel.app/](https://collective-api.vercel.app/) https://github.com/public-apis/public-apis --- 25. [Framer Motion](https://github.com/framer/motion) - 像魔法一樣的動畫。 ----------------------------------------------------------------- 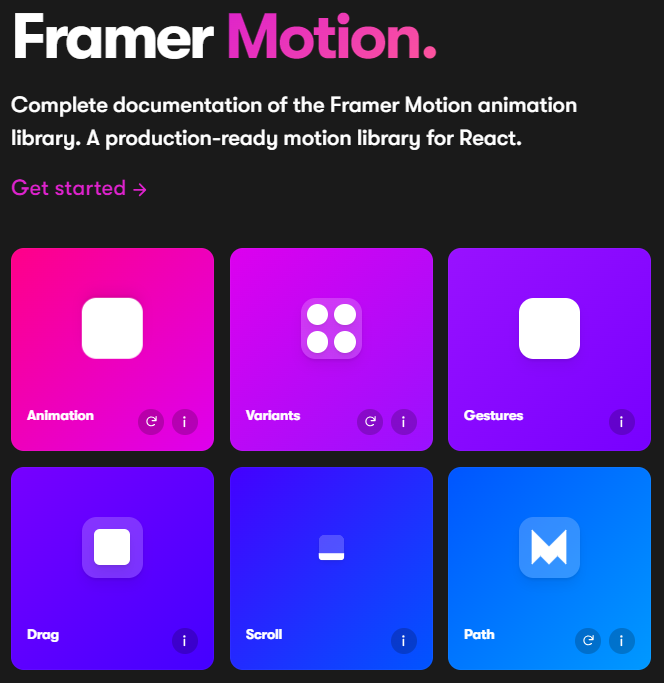 可用的最強大的動畫庫之一。 Framer 使用簡單的聲明性語法意味著您編寫的程式碼更少。更少的程式碼意味著您的程式碼庫更易於閱讀和維護。 您可以建立事件和手勢,並且使用 Framer 的社區很大,這意味著良好的支援。 開始使用以下 npm 指令。 ``` npm install framer-motion ``` 您可以這樣使用它。 ``` import { motion } from "framer-motion" <motion.div whileHover={{ scale: 1.2 }} whileTap={{ scale: 1.1 }} drag="x" dragConstraints={{ left: -100, right: 100 }} /> ``` 您可以閱讀[文件](https://www.framer.com/motion/introduction/)。 https://github.com/framer/motion --- 26.[順便說一句](https://github.com/btw-so/btw)- 在幾分鐘內建立您的個人部落格。 ---------------------------------------------------------- 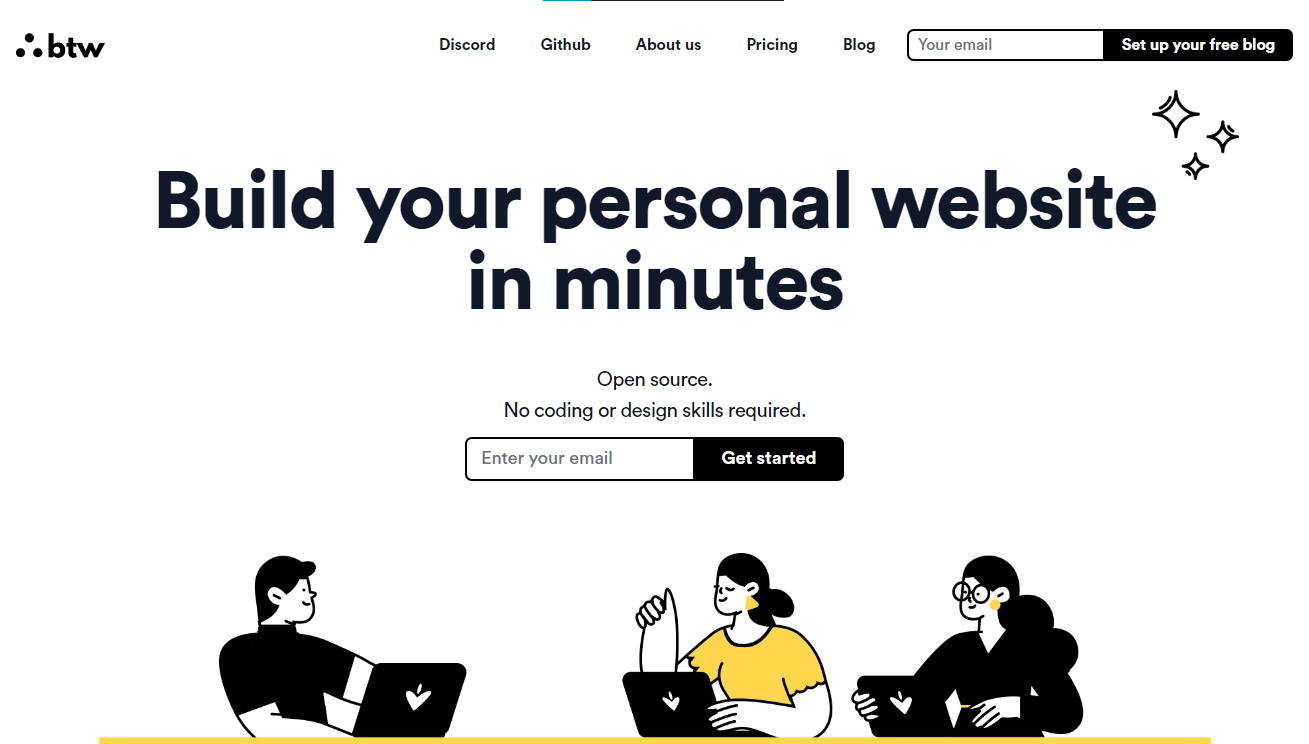 順便說一句,您可以註冊並使用,而無需安裝任何東西。您也可以使用開源版本自行託管。  使用順便說一句建立的[範例部落格](https://www.siddg.com/about)。 https://github.com/btw-so/btw --- 27. [Formbricks](https://github.com/formbricks/formbricks) - 開源調查平台。 --------------------------------------------------------------------  Formbricks 提供免費、開源的測量平台。透過精美的應用程式內、網站、連結和電子郵件調查收集用戶旅程中每個點的回饋。在 Formbricks 之上建置或利用預先建置的資料分析功能。 開始使用以下 npm 指令。 ``` npm install @formbricks/js ``` 這就是您開始使用 formbricks 的方法。 ``` import formbricks from "@formbricks/js"; if (typeof window !== "undefined") { formbricks.init({ environmentId: "claV2as2kKAqF28fJ8", apiHost: "https://app.formbricks.com", }); } ``` 您可以閱讀[文件](https://formbricks.com/docs/getting-started/quickstart-in-app-survey)。 https://github.com/formbricks/formbricks --- 28. [Stripe](https://github.com/stripe) - 支付基礎設施。 -------------------------------------------------  數以百萬計的各種規模的公司在線上和親自使用 Stripe 來接受付款、發送付款、自動化財務流程並最終增加收入。 開始使用以下 npm 指令 (React.js)。 ``` npm install @stripe/react-stripe-js @stripe/stripe-js ``` 這就是使用鉤子的方法。 ``` import React, {useState} from 'react'; import ReactDOM from 'react-dom'; import {loadStripe} from '@stripe/stripe-js'; import { PaymentElement, Elements, useStripe, useElements, } from '@stripe/react-stripe-js'; const CheckoutForm = () => { const stripe = useStripe(); const elements = useElements(); const [errorMessage, setErrorMessage] = useState(null); const handleSubmit = async (event) => { event.preventDefault(); if (elements == null) { return; } // Trigger form validation and wallet collection const {error: submitError} = await elements.submit(); if (submitError) { // Show error to your customer setErrorMessage(submitError.message); return; } // Create the PaymentIntent and obtain clientSecret from your server endpoint const res = await fetch('/create-intent', { method: 'POST', }); const {client_secret: clientSecret} = await res.json(); const {error} = await stripe.confirmPayment({ //`Elements` instance that was used to create the Payment Element elements, clientSecret, confirmParams: { return_url: 'https://example.com/order/123/complete', }, }); if (error) { // This point will only be reached if there is an immediate error when // confirming the payment. Show error to your customer (for example, payment // details incomplete) setErrorMessage(error.message); } else { // Your customer will be redirected to your `return_url`. For some payment // methods like iDEAL, your customer will be redirected to an intermediate // site first to authorize the payment, then redirected to the `return_url`. } }; return ( <form onSubmit={handleSubmit}> <PaymentElement /> <button type="submit" disabled={!stripe || !elements}> Pay </button> {/* Show error message to your customers */} {errorMessage && <div>{errorMessage}</div>} </form> ); }; const stripePromise = loadStripe('pk_test_6pRNASCoBOKtIshFeQd4XMUh'); const options = { mode: 'payment', amount: 1099, currency: 'usd', // Fully customizable with appearance API. appearance: { /*...*/ }, }; const App = () => ( <Elements stripe={stripePromise} options={options}> <CheckoutForm /> </Elements> ); ReactDOM.render(<App />, document.body); ``` 您可以閱讀[文件](https://github.com/stripe/react-stripe-js?tab=readme-ov-file#minimal-example)。 您幾乎可以整合任何東西。它有一個巨大的選項清單。  https://github.com/stripe --- 29. [Upscayl](https://github.com/upscayl/upscayl) - 開源 AI 影像升級器。 ----------------------------------------------------------------  適用於 Linux、MacOS 和 Windows 的免費開源 AI Image Upscaler 採用 Linux 優先概念建構。 它可能與全端無關,但它對於升級圖像很有用。  透過最先進的人工智慧,Upscayl 可以幫助您將低解析度影像變成高解析度。清脆又鋒利! https://github.com/upscayl/upscayl --- 30.[重新發送](https://github.com/resend)- 為開發人員提供的電子郵件 API。 -------------------------------------------------------  您可以使用 React 建立和傳送電子郵件。 2023 年最受炒作的產品之一。 開始使用以下 npm 指令。 ``` npm install @react-email/components -E ``` 這是將其與 next.js 專案整合的方法。 ``` import { EmailTemplate } from '@/components/email-template'; import { Resend } from 'resend'; const resend = new Resend(process.env.RESEND_API_KEY); export async function POST() { const { data, error } = await resend.emails.send({ from: '[email protected]', to: '[email protected]', subject: 'Hello world', react: EmailTemplate({ firstName: 'John' }), }); if (error) { return Response.json({ error }); } return Response.json(data); } ``` 您可以閱讀[文件](https://resend.com/docs/introduction)。  基本概念是一個簡單、優雅的介面,讓您可以在幾分鐘內開始發送電子郵件。它可以透過適用於您最喜歡的程式語言的 SDK 直接融入您的程式碼中。 https://github.com/resend --- 哇!如此長的專案清單。 我知道您有更多想法,分享它們,讓我們一起建造:D 如今建立全端應用程式並不難,但每個應用程式都可以透過有效地使用優秀的開源專案來解決任何問題來增加這一獨特因素。 例如,您可以建立一些提供通知或建立 UI 流來抓取資料的東西。 我希望其中一些內容對您的開發之旅有用。他們擁有一流的開發人員經驗;你可以依賴他們。 由於您將要建造東西,因此您可以在這裡找到一些[瘋狂的想法](https://github.com/florinpop17/app-ideas)。 祝你有美好的一天!直到下一次。 --- 原文出處:https://dev.to/copilotkit/im-building-a-full-stack-app-here-are-the-libraries-im-going-to-use-51nk
目錄 == - [介紹](#introduction) - [技術堆疊](#tech-stack) - [特徵](#features) - [設定 Next.js 應用程式](#step-1-setting-up-the-nextjs-application) - [安裝所需的套件](#step-2-installing-required-packages) - [設定 Redis 連接](#step-3-setting-up-redis-connection) - [配置 BullMQ 佇列](#step-4-configuring-bullmq-queue) - [Next.js 儀器設置](#step-5-nextjs-instrumentation-setup) - [設定 Bright Data 的抓取瀏覽器](#step-6-setting-up-bright-datas-scraping-browser) - [Bright Data 的抓取瀏覽器是什麼?](#what-is-bright-datas-scraping-browser) - [設定 Bright Data 抓取瀏覽器的步驟](#steps-to-set-up-bright-datas-scraping-browser) - [使用 Puppeteer 實作抓取邏輯](#implementing-the-scraping-logic-with-puppeteer) - [航班搜尋功能](#flight-search-feature) - [顯示航班搜尋結果](#displaying-flight-search-results) - [探索完整的指南和程式碼庫](#discover-the-complete-guide-and-codebase) - [在 YouTube 上觀看詳細說明](#watch-the-detailed-explanation-on-youtube) - [在 GitHub 上探索完整程式碼](#explore-the-full-code-on-github) - [結論](#conclusion) 介紹 == 在不斷發展的 Web 開發領域,有效收集、處理和顯示外部來源資料的能力變得越來越有價值。無論是市場研究、競爭分析或客戶洞察,網路抓取在釋放網路資料的巨大潛力方面都發揮著至關重要的作用。 這篇部落格文章介紹了建立強大的 Next.js 應用程式的綜合指南,該應用程式旨在從領先的旅行搜尋引擎之一 Kayak 抓取航班資料。透過利用 Next.js 的強大功能以及 BullMQ、Redis 和 Puppeteer 等現代技術。 技術堆疊 ==== - [Next.js](https://nextjs.org/docs) - [順風CSS](https://tailwindcss.com/docs) - [下一個介面](https://nextui.org/docs) - [健康)狀況](https://zustand.surge.sh/) - [條紋](https://stripe.com/docs) - [Bright Data 的抓取瀏覽器](https://brdta.com/kishansheth21) - [打字稿](https://www.typescriptlang.org/docs) - [雷迪斯](https://redis.io/documentation) - [BullMQ](https://docs.bullmq.io/) - [傀儡師](https://pptr.dev/) - [智威湯遜](https://jwt.io/introduction) - [阿克西奧斯](https://axios-http.com/docs/intro) - [PostgreSQL](https://www.postgresql.org/docs) - [棱鏡](https://www.prisma.io/docs) 特徵 == - 🚀 帶有 Tailwind CSS 的 Next.js 14 應用程式目錄 - 體驗由最新 Next.js 14 提供支援的時尚現代的 UI,並使用 Tailwind CSS 進行設計,以實現完美的外觀和感覺。 - 🔗 API 路由和伺服器操作 - 深入研究與 Next.js 14 的 API 路由和伺服器操作的無縫後端集成,確保高效的資料處理和伺服器端邏輯執行。 - 🕷 使用 Puppeteer Redis 和 BullMQ 進行抓取 - 利用 Puppeteer 的強大功能進行進階 Web 抓取,並使用 Redis 和 BullMQ 管理佇列和作業以實現強大的後端操作。 - 🔑 用於身份驗證和授權的 JWT 令牌 - 使用 JWT 令牌保護您的應用程式,為整個平台提供可靠的身份驗證和授權方法。 - 💳 支付網關 Stripe - 整合 Stripe 進行無縫支付處理,為預訂旅行、航班和飯店提供安全、輕鬆的交易。 - ✈️ 使用 Stripe 支付網關預訂旅行、航班和飯店 - 使用我們的 Stripe 支援的支付系統,讓您的旅遊預訂體驗變得輕鬆。 - 📊 從多個網站抓取即時資料 - 從多個來源抓取即時資料,保持領先,讓您的應用程式更新最新資訊。 - 💾 使用 Prisma 將抓取的資料儲存在 PostgreSQL 中 - 利用 PostgreSQL 和 Prisma 高效儲存和管理抓取的資料,確保可靠性和速度。 - 🔄 用於狀態管理的 Zustand - 透過 Zustand 簡化狀態邏輯並增強效能,在您的應用程式中享受流暢且可管理的狀態管理。 - 😈 該應用程式的最佳功能 - 使用 Bright Data 的抓取瀏覽器抓取不可抓取的資料。  Bright Data的抓取瀏覽器為我們提供了自動驗證碼解決功能,可以幫助我們抓取不可抓取的資料。 第 1 步:設定 Next.js 應用程式 --------------------- 1. **建立 Next.js 應用程式**:首先建立一個新的 Next.js 應用程式(如果您還沒有)。您可以透過在終端機中執行以下命令來完成此操作: ``` npx create-next-app@latest booking-app ``` 2. **導航到您的應用程式目錄**:變更為您新建立的應用程式目錄: ``` cd booking-app ``` 步驟2:安裝所需的軟體包 ------------ 您需要安裝多個軟體包,包括 Redis、BullMQ 和 Puppeteer Core。執行以下命令來安裝它們: ``` npm install ioredis bullmq puppeteer-core ``` - `ioredis`是 Node.js 的強大 Redis 用戶端,支援與 Redis 進行通訊。 - `bullmq`以 Redis 作為後端來管理作業和訊息佇列。 - `puppeteer-core`可讓您控制外部瀏覽器以進行抓取。 步驟3:設定Redis連接 ------------- 在適當的目錄(例如`lib/` )中建立一個檔案(例如`redis.js` )來配置 Redis 連線: ``` // lib/redis.js import Redis from 'ioredis'; // Use REDIS_URL from environment or fallback to localhost const REDIS_URL = process.env.REDIS_URL || 'redis://localhost:6379'; const connection = new Redis(REDIS_URL); export { connection }; ``` 步驟4:配置BullMQ佇列 -------------- 透過在 Redis 配置所在的相同目錄中建立另一個檔案(例如, `queue.js` )來設定 BullMQ 佇列: ``` // lib/queue.js import { Queue } from 'bullmq'; import { connection } from './redis'; export const importQueue = new Queue('importQueue', { connection, defaultJobOptions: { attempts: 2, backoff: { type: 'exponential', delay: 5000, }, }, }); ``` 第 5 步:Next.js 儀器設置 ------------------ Next.js 允許偵測,可以在 Next.js 配置中啟用。您還需要建立一個用於作業處理的工作文件。 1.**在 Next.js 中啟用 Instrumentation** :將以下內容新增至`next.config.js`以啟用 Instrumentation: ``` // next.config.js module.exports = { experimental: { instrumentationHook: true, }, }; ``` 2.**建立用於作業處理的 Worker** :在您的應用程式中,建立一個檔案 ( `instrumentation.js` ) 來處理作業處理。該工作人員將使用 Puppeteer 來執行抓取任務: ``` // instrumentation.js export const register = async () => { if (process.env.NEXT_RUNTIME === 'nodejs') { const { Worker } = await import('bullmq'); const puppeteer = await import('puppeteer-core'); const { connection } = await import('./lib/redis'); const { importQueue } = await import('./lib/queue'); new Worker('importQueue', async (job) => { // Job processing logic with Puppeteer goes here }, { connection, concurrency: 10, removeOnComplete: { count: 1000 }, removeOnFail: { count: 5000 }, }); } }; ``` 第 6 步:設定 Bright Data 的抓取瀏覽器 --------------------------- 在設定 Bright 資料抓取瀏覽器之前,我們先來談談什麼是抓取瀏覽器。 ### Bright Data 的抓取瀏覽器是什麼? Bright Data 的抓取瀏覽器是一款用於自動網頁抓取的尖端工具,旨在與 Puppeteer、Playwright 和 Selenium 無縫整合。它提供了一套網站解鎖功能,包括代理輪換、驗證碼解決等,以提高抓取效率。它非常適合需要互動的複雜網頁抓取,透過在 Bright Data 基礎架構上託管無限的瀏覽器會話來實現可擴展性。如欲了解更多詳情,請造訪[光明資料](https://brdta.com/kishansheth21)。 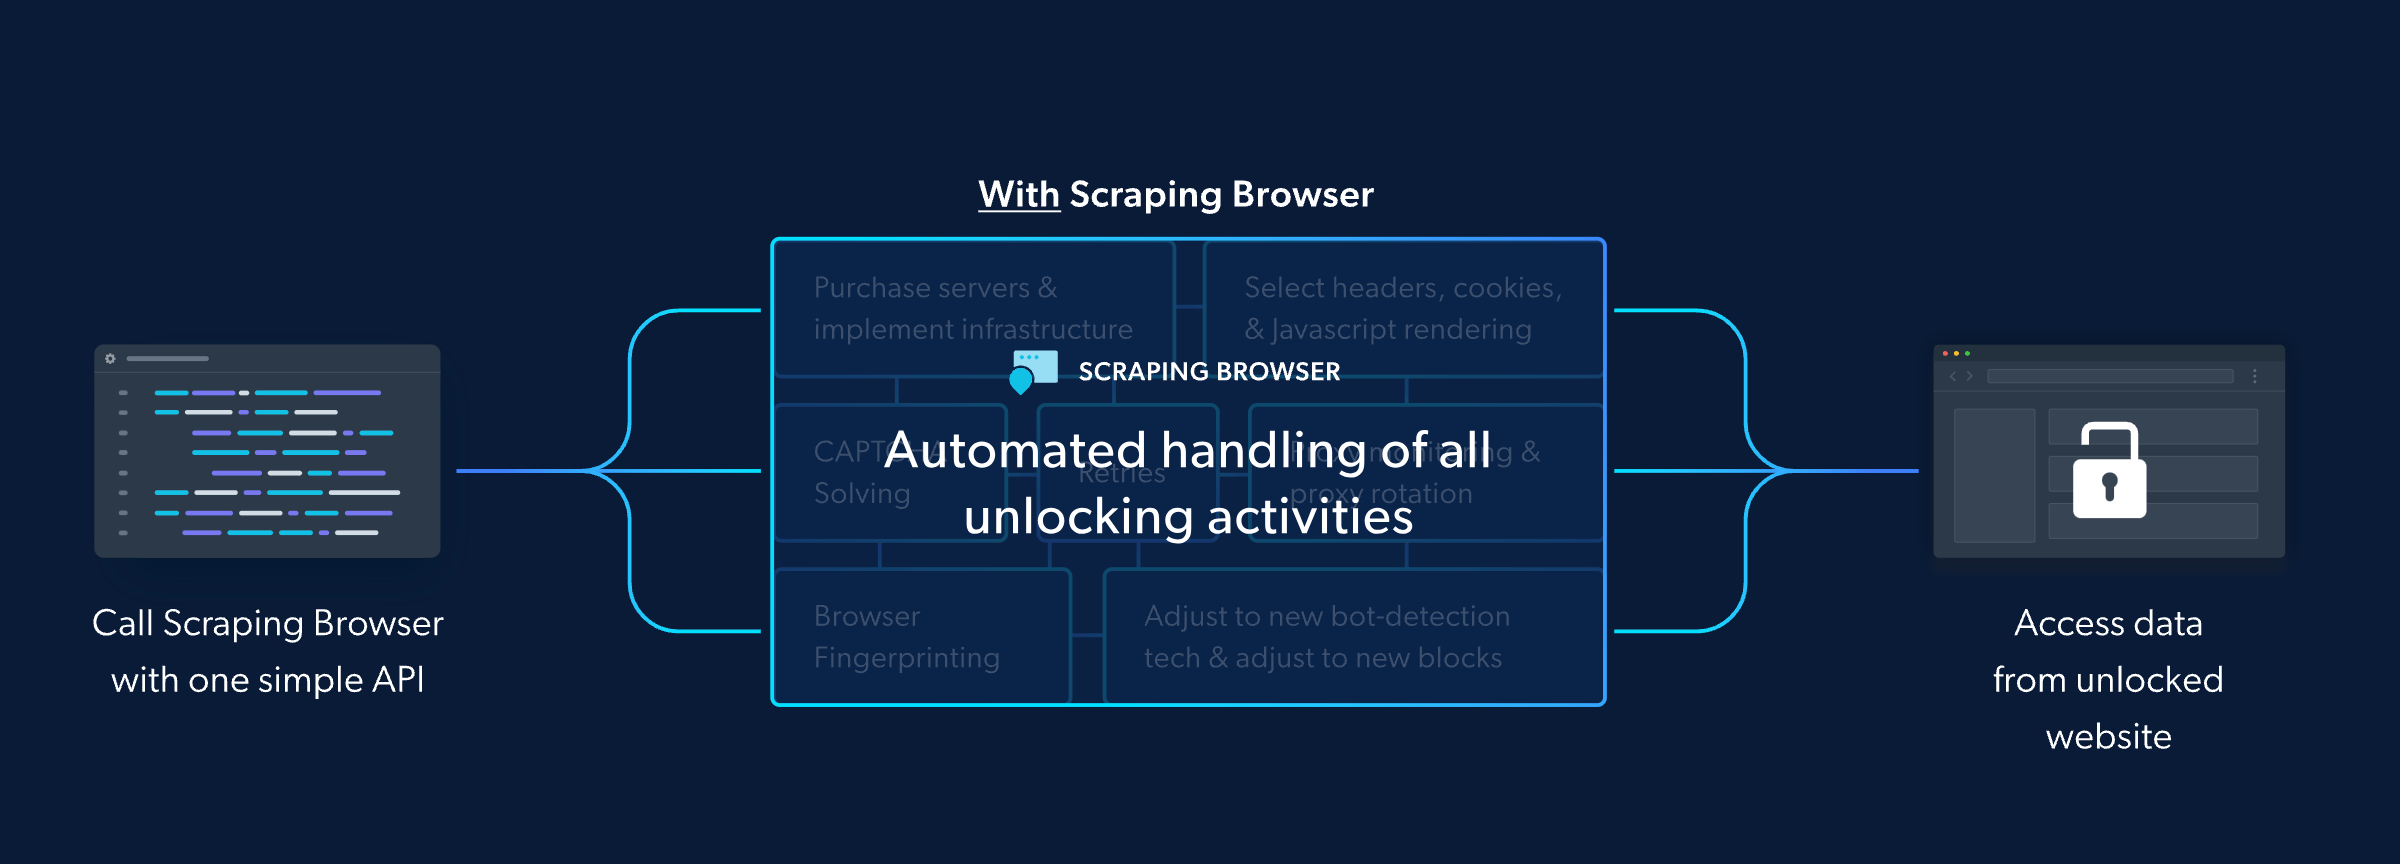 <a id="steps-to-set-up-bright-datas-scraping-browser"></a> #### 第 1 步:導覽至 Bright Data 網站 首先造訪[Brightdata.com](https://brdta.com/kishansheth21) 。這是您存取 Bright Data 提供的豐富網頁抓取資源和工具的入口。 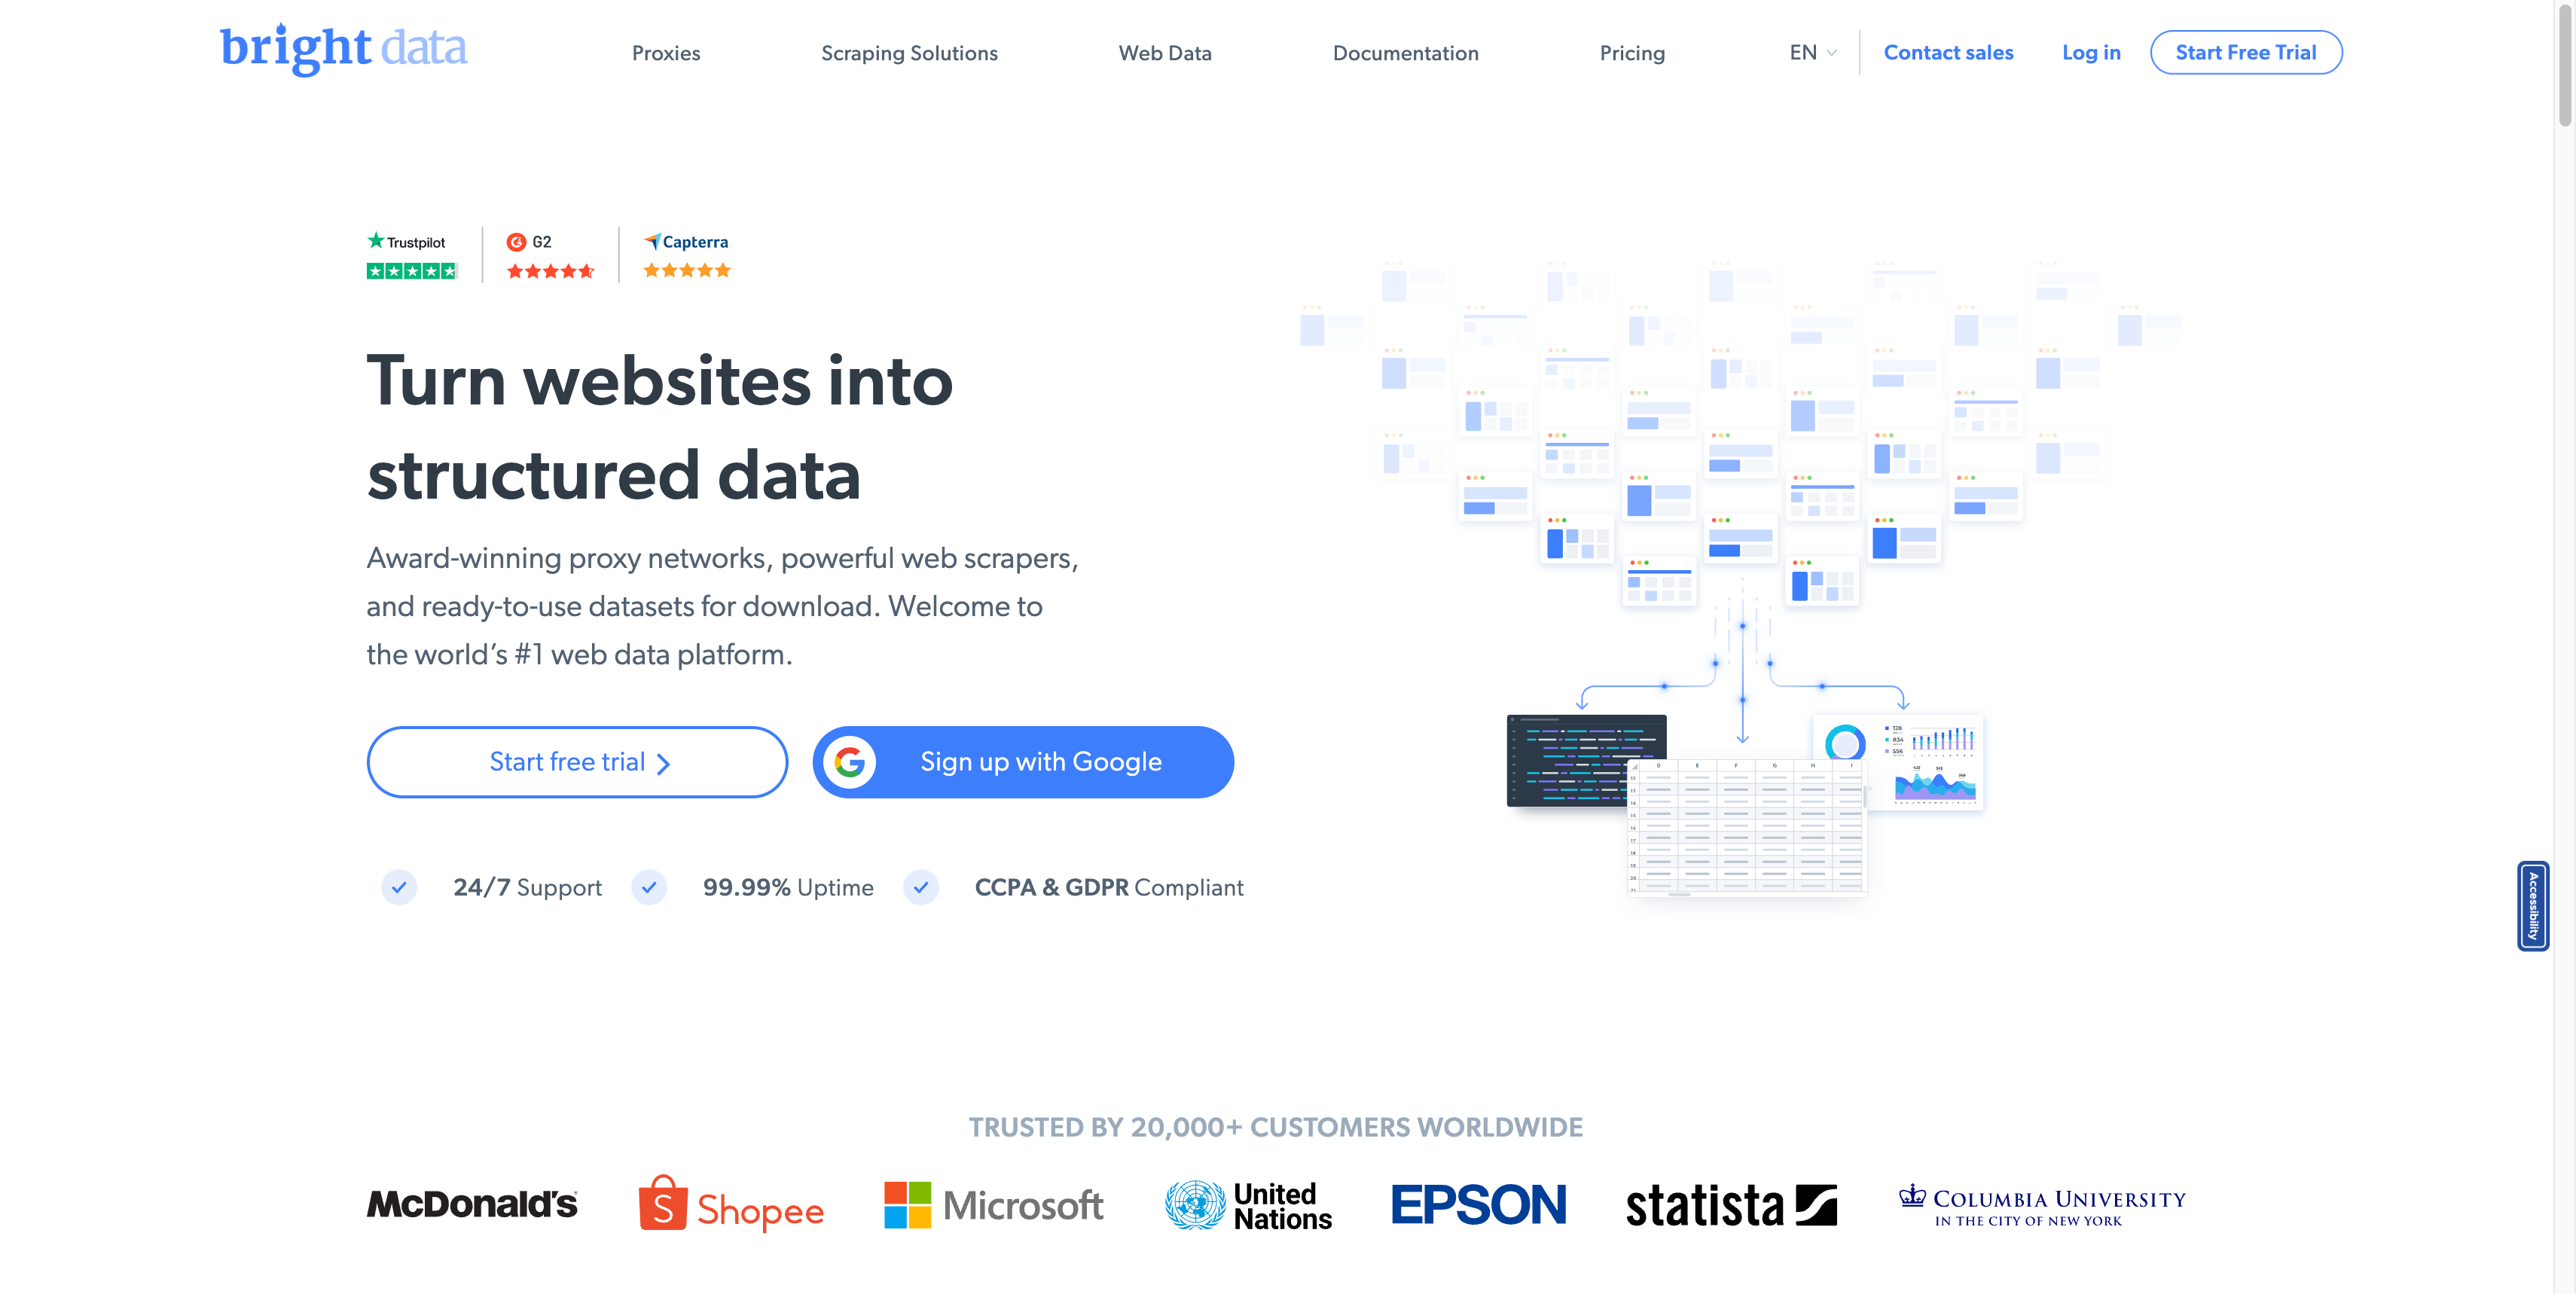 #### 第 2 步:建立帳戶 造訪 Bright Data 網站後,註冊並建立一個新帳戶。系統將提示您輸入基本資訊以啟動並執行您的帳戶。  #### 第 3 步:選擇您的產品 在產品選擇頁面上,尋找代理商和抓取基礎設施產品。本產品專為滿足您的網路抓取需求而設計,提供強大的資料擷取工具和功能。  #### 第 4 步:新增代理 在「代理程式和抓取基礎設施」頁面中,您會找到一個「新增按鈕」。點擊此按鈕開始將新的抓取瀏覽器新增到您的工具包的過程。  #### 第五步:選擇抓取瀏覽器 將出現一個下拉列表,您應該從中選擇抓取瀏覽器選項。這告訴 Bright Data 您打算設定一個新的抓取瀏覽器環境。  #### 第 6 步:為您的抓取瀏覽器命名 為您的新抓取瀏覽器指定一個唯一的名稱。這有助於稍後辨識和管理它,特別是如果您計劃對不同的抓取專案使用多個瀏覽器。  #### 步驟7:新增瀏覽器 命名您的瀏覽器後,按一下「新增」按鈕。此操作完成了新的抓取瀏覽器的建立。  #### 第 8 步:查看您的抓取瀏覽器詳細訊息 新增抓取瀏覽器後,您將被導向到一個頁面,您可以在其中查看新建立的抓取瀏覽器的所有詳細資訊。這些資訊對於整合和使用至關重要。 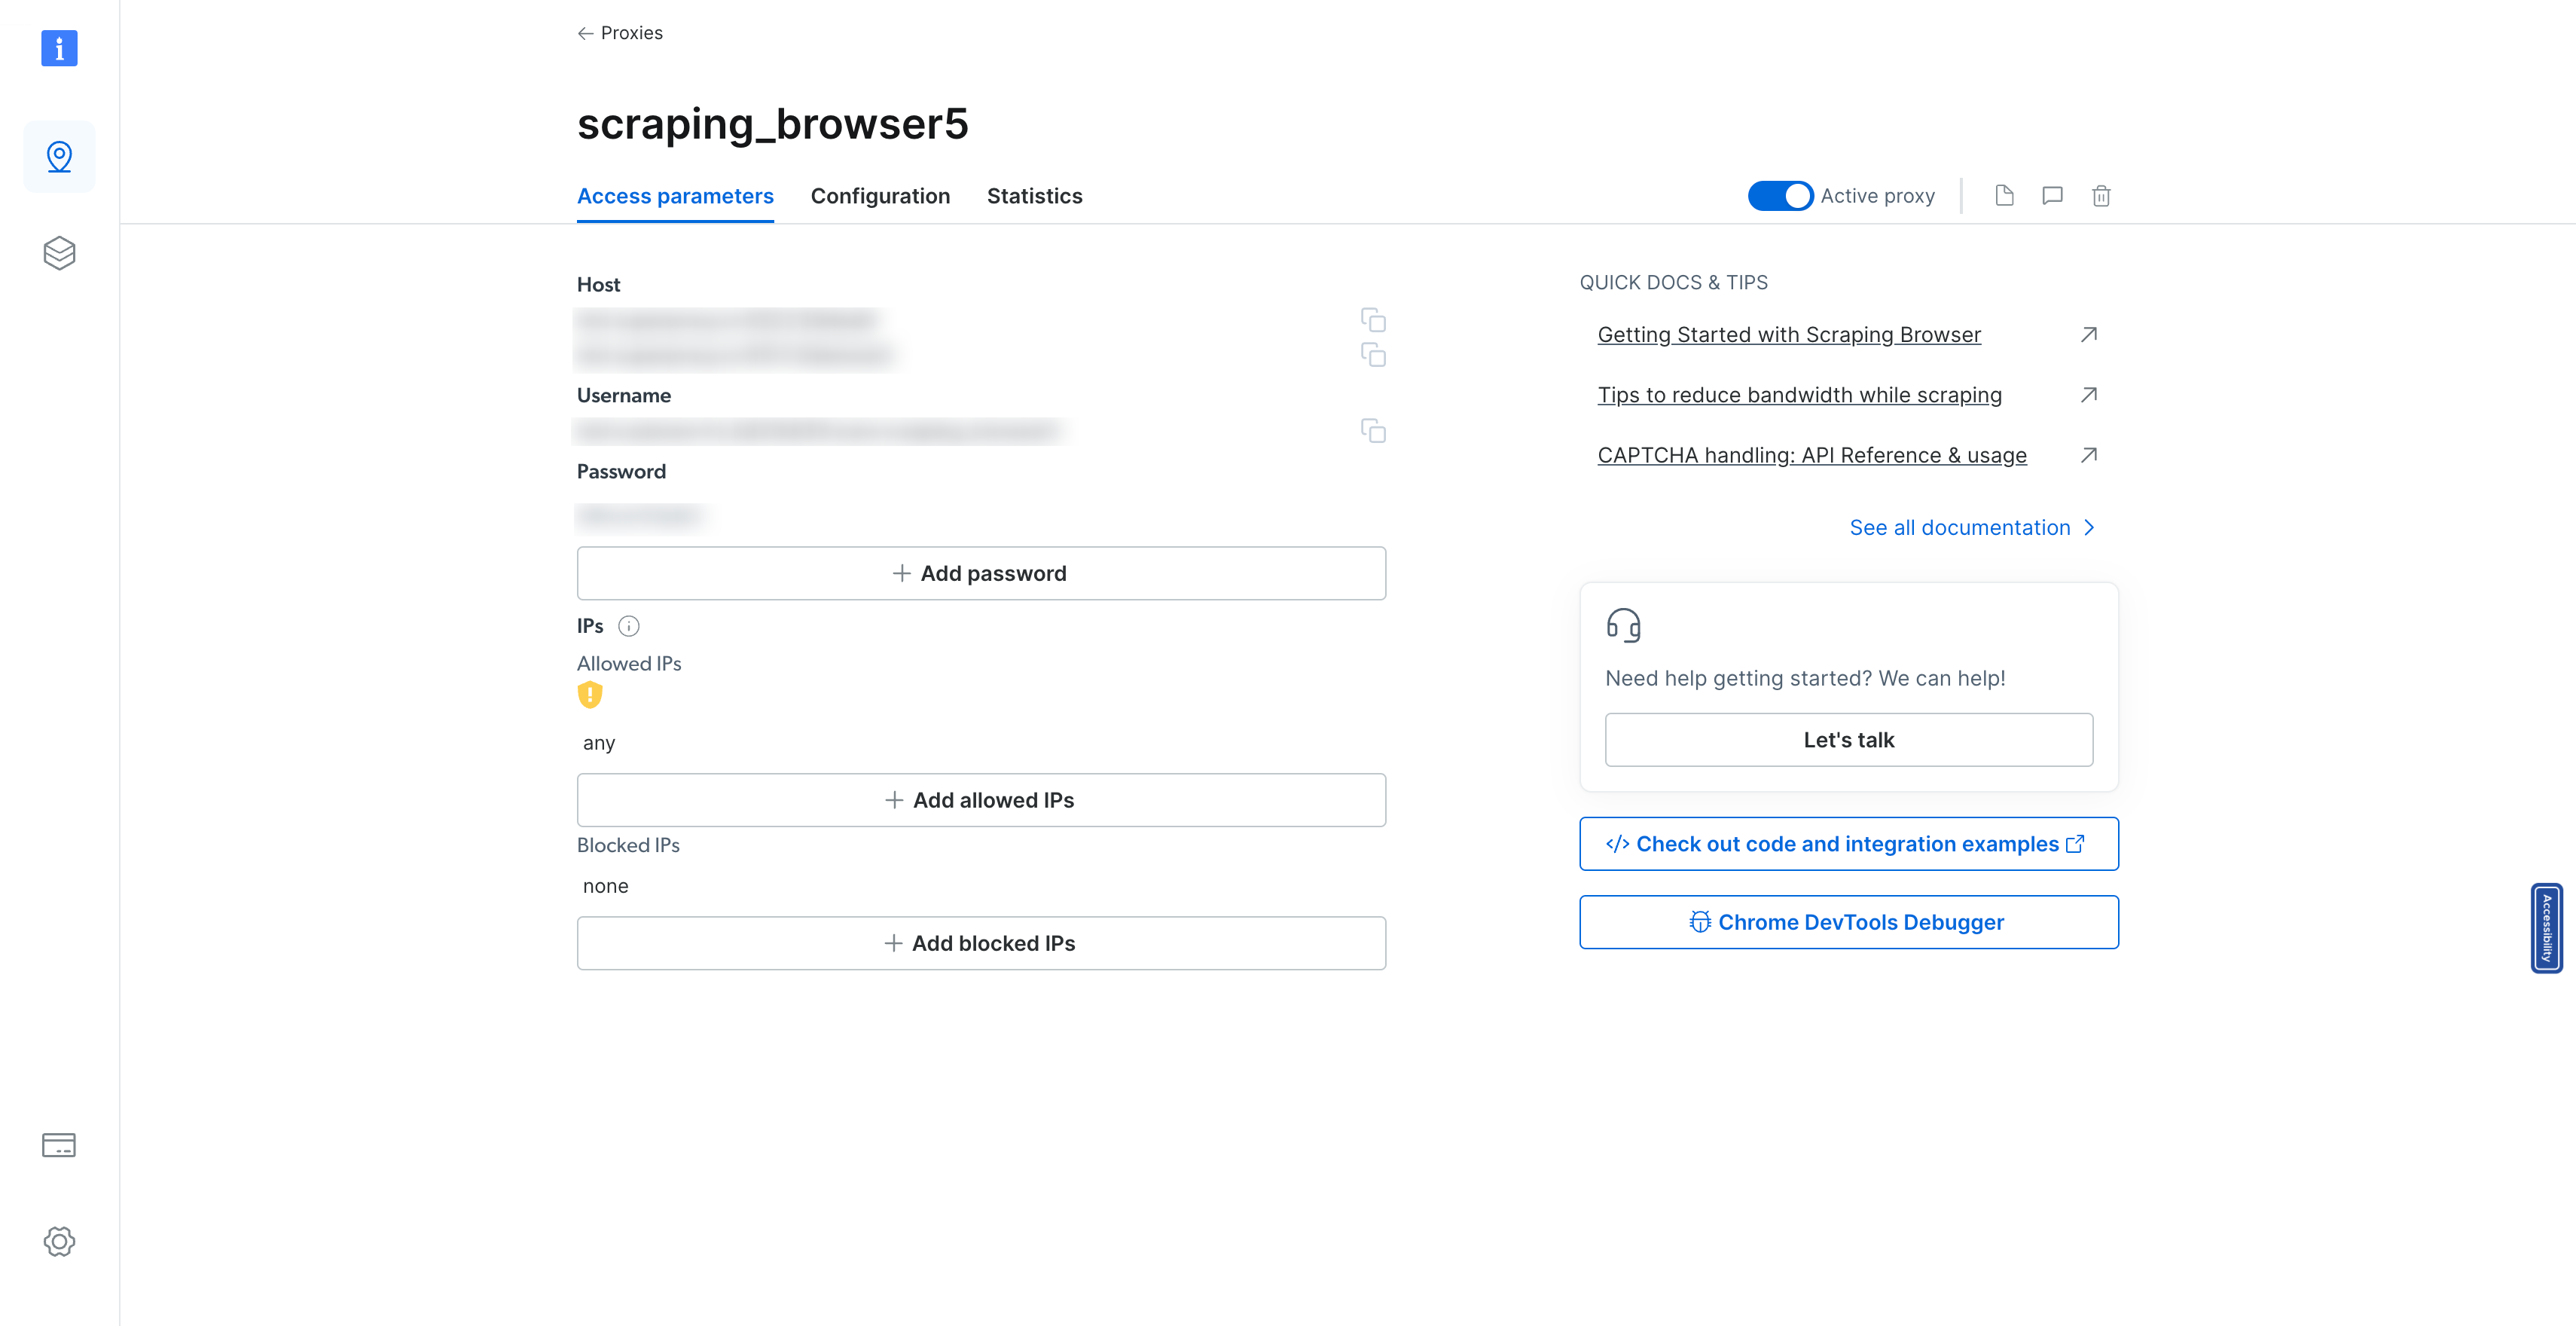 #### 第 9 步:存取程式碼和整合範例 尋找“查看程式碼和整合範例”按鈕。點擊此按鈕將為您提供如何跨多種程式語言和程式庫整合和使用抓取瀏覽器的全面視圖。對於希望自訂抓取設定的開發人員來說,此資源非常寶貴。 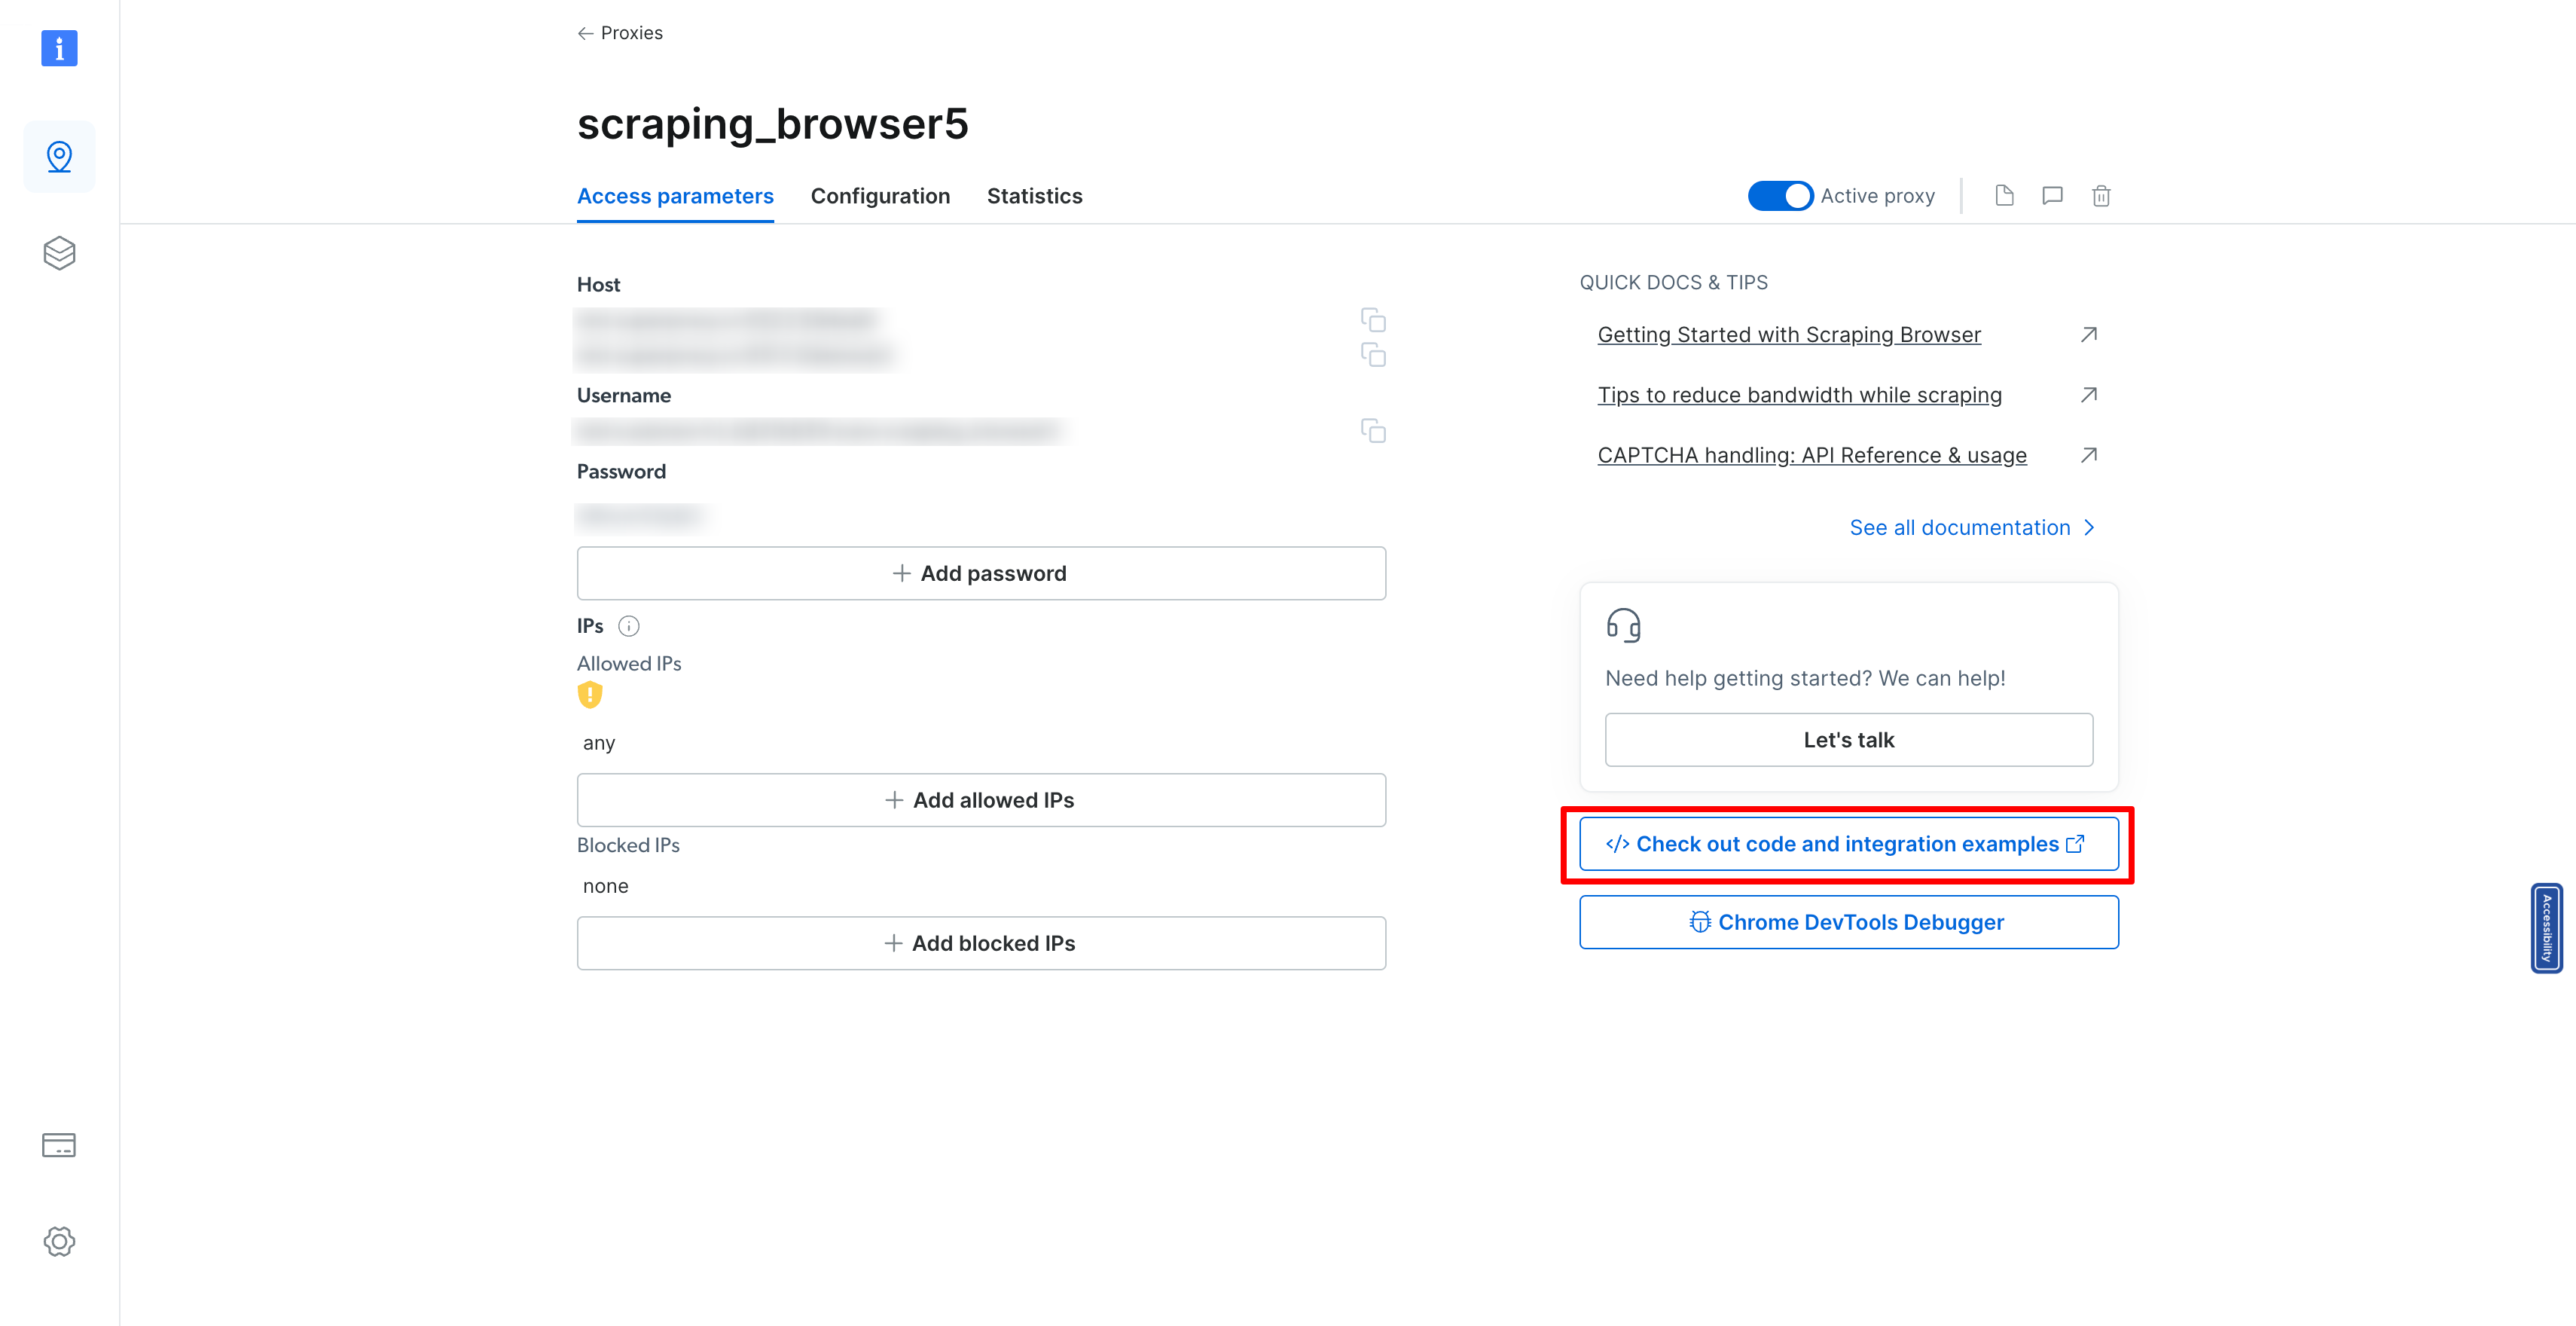 #### 第 10 步:整合您的抓取瀏覽器 最後,複製 SRS\_WS\_ENDPOINT 變數。這是一條關鍵訊息,您需要將其整合到原始程式碼中,以便您的應用程式能夠與您剛剛設定的抓取瀏覽器進行通訊。 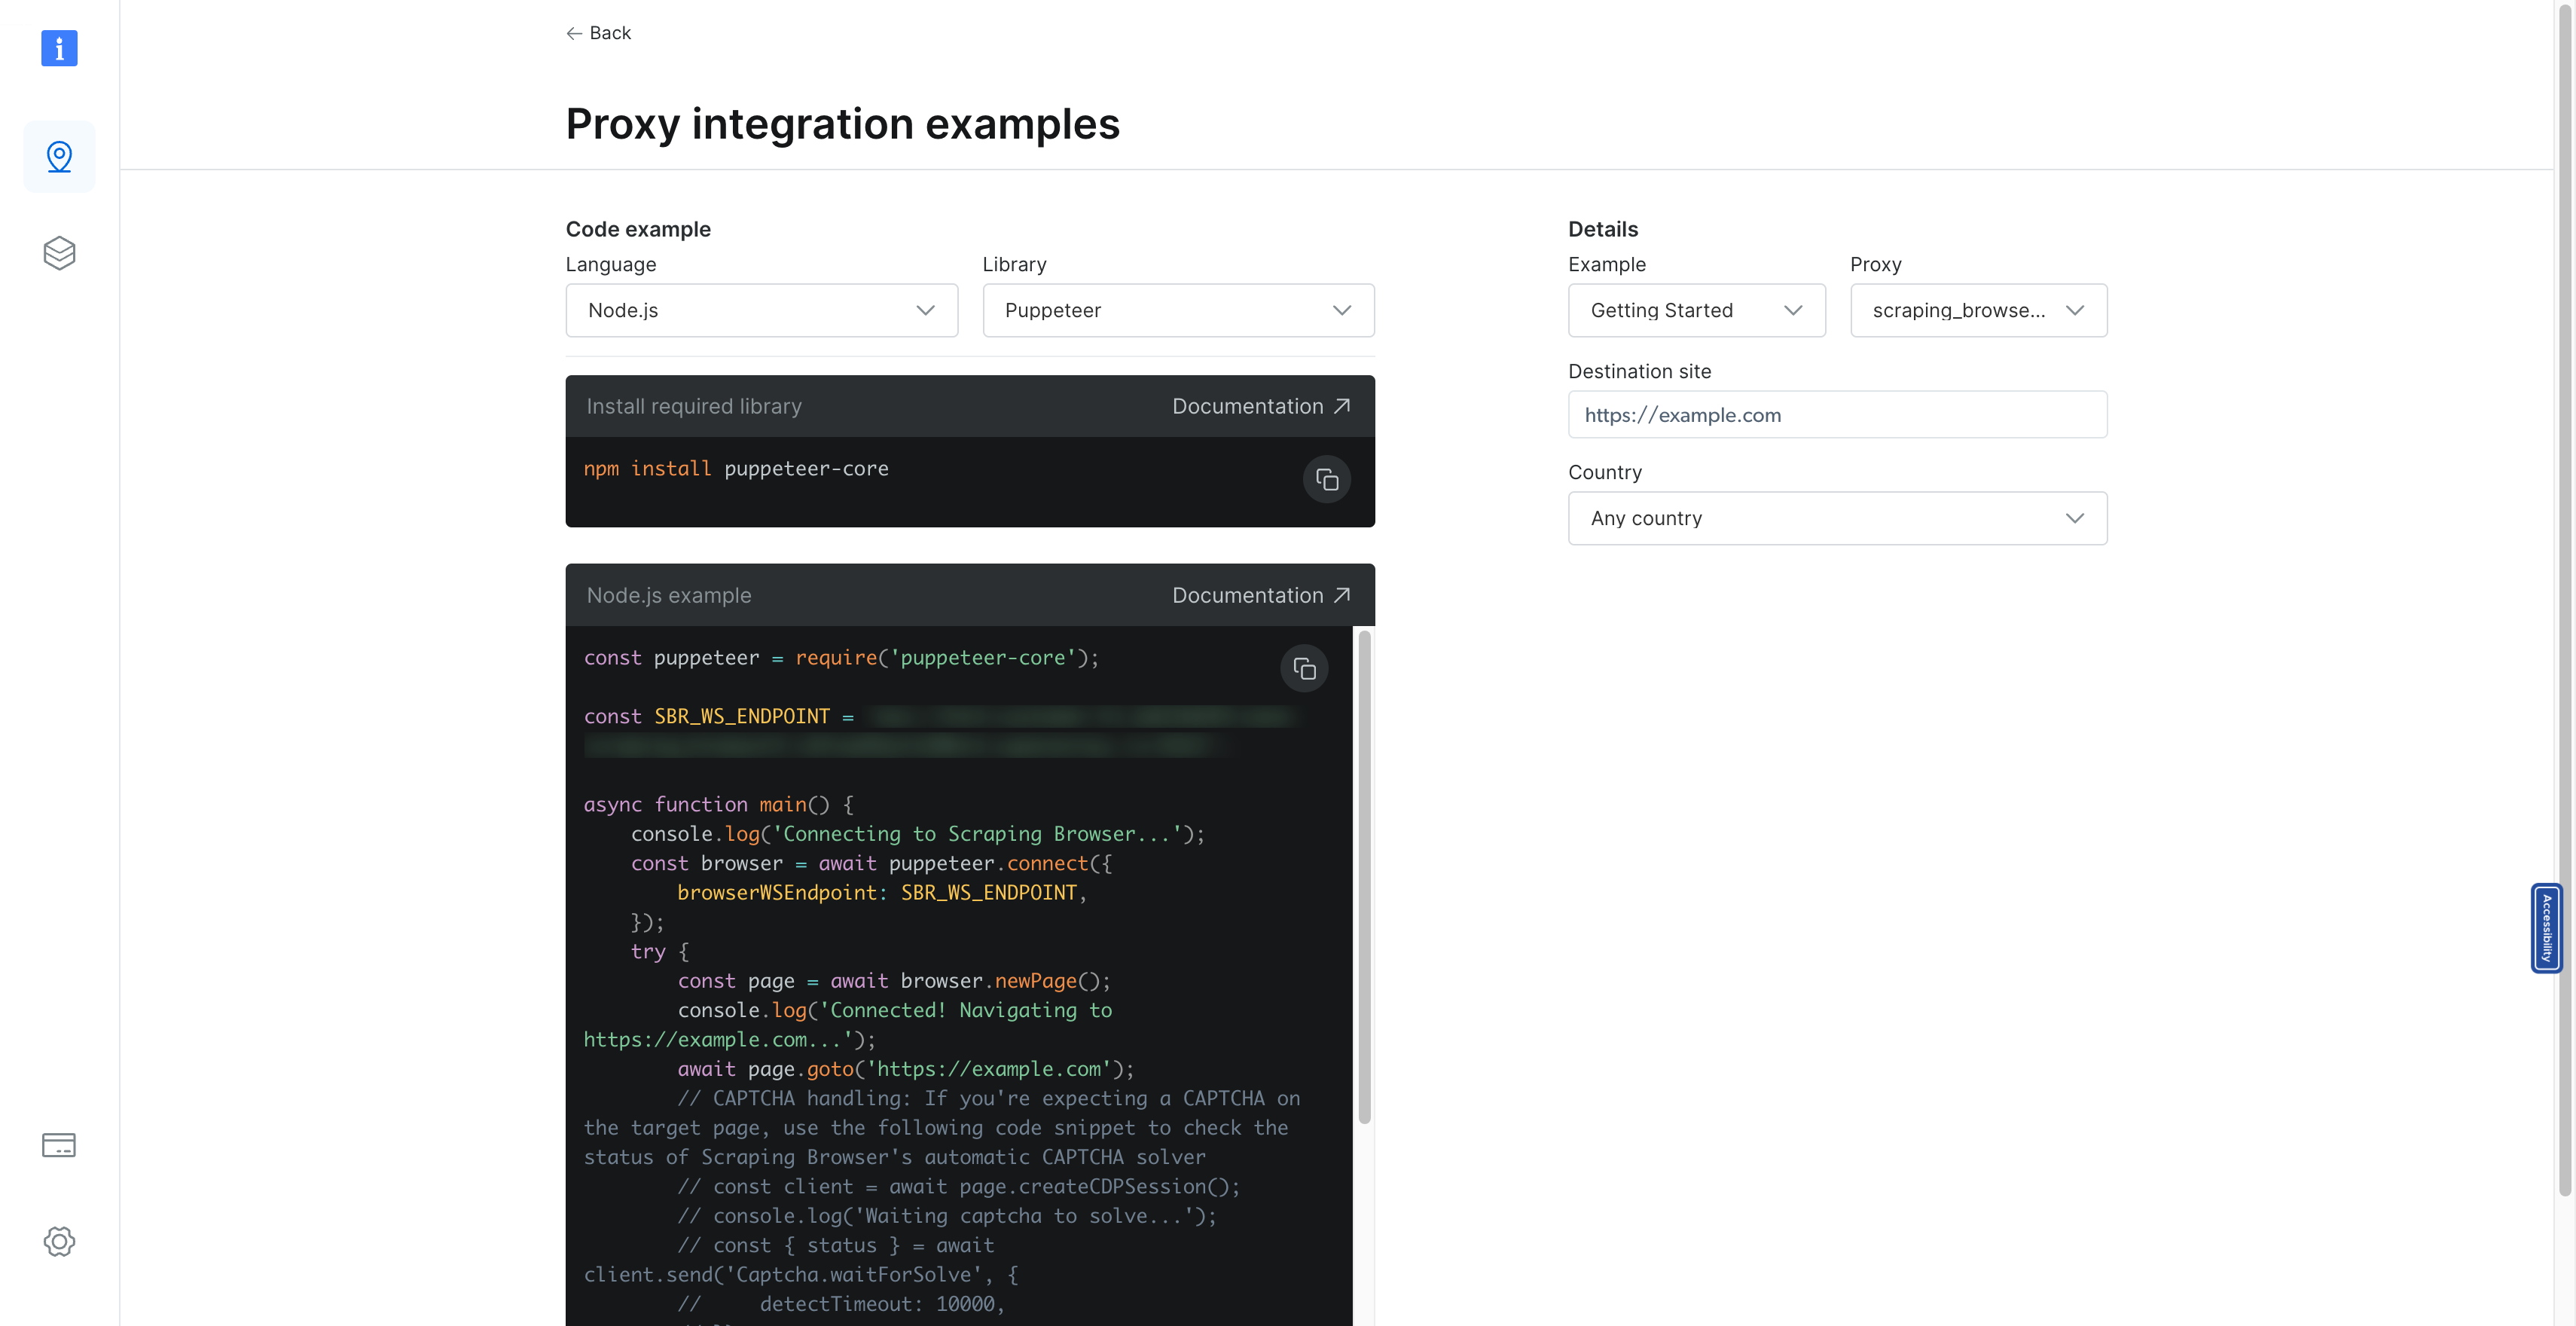 透過遵循這些詳細步驟,您已在 Bright Data 平台中成功建立了一個抓取瀏覽器,準備好處理您的網頁抓取任務。請記住,Bright Data 提供廣泛的文件和支持,幫助您最大限度地提高抓取專案的效率和效果。無論您是在收集市場情報、進行研究還是監控競爭格局,新設定的抓取瀏覽器都是資料收集庫中的強大工具。 ### 第 7 步:使用 Puppeteer 實作抓取邏輯 從我們上次設定用於抓取航班資料的 Next.js 應用程式的地方開始,下一個關鍵步驟是實現實際的抓取邏輯。此過程涉及利用 Puppeteer 連接到瀏覽器實例、導航到目標 URL(在我們的範例中為 Kayak)並抓取必要的飛行資料。提供的程式碼片段概述了實現此目標的複雜方法,與我們先前建立的 BullMQ 工作設定無縫整合。讓我們分解這個抓取邏輯的元件,並了解它如何適合我們的應用程式。 #### 建立與瀏覽器的連接 我們抓取過程的第一步是透過 Puppeteer 建立與瀏覽器的連線。這是透過利用`puppeteer.connect`方法來完成的,該方法使用 WebSocket 端點 ( `SBR_WS_ENDPOINT` ) 連接到現有的瀏覽器實例。此環境變數應設定為您正在使用的抓取瀏覽器服務的 WebSocket URL,例如 Bright Data: ``` const browser = await puppeteer.connect({ browserWSEndpoint: SBR_WS_ENDPOINT, }); ``` #### 開啟新頁面並導航到目標 URL 連線後,我們在瀏覽器中建立一個新頁面並導航到作業資料中指定的目標 URL。此 URL 是我們打算從中抓取航班資料的特定 Kayak 搜尋結果頁面: ``` const page = await browser.newPage(); await page.goto(job.data.url); ``` #### 抓取航班資料 我們邏輯的核心在於從頁面中抓取航班資料。我們透過使用`page.evaluate`來實現這一點,這是一種 Puppeteer 方法,允許我們在瀏覽器上下文中執行腳本。在此腳本中,我們等待必要的元素加載,然後繼續收集航班資訊: - **Flight Selector** :我們以`.nrc6-wrapper`類別為目標元素,其中包含航班詳細資訊。 - **資料擷取**:對於每個航班元素,我們提取詳細訊息,例如航空公司徽標、出發和到達時間、航班持續時間、航空公司名稱和價格。出發和到達時間經過清理,以刪除最後不必要的數值,確保我們準確地捕捉時間。 - **價格處理**:價格在刪除所有非數字字元後提取為整數,確保其可用於數值運算或比較。 擷取的資料被建構成飛行物件陣列,每個物件都包含上述詳細資訊: ``` const scrappedFlights = await page.evaluate(async () => { // Data extraction logic const flights = []; // Process each flight element // ... return flights; }); ``` #### 錯誤處理和清理 我們的抓取邏輯被包裝在一個 try-catch 區塊中,以在抓取過程中優雅地處理任何潛在的錯誤。無論結果如何,我們都會確保瀏覽器在finally區塊中正確關閉,從而保持資源效率並防止潛在的記憶體洩漏: ``` try { // Scraping logic } catch (error) { console.log({ error }); } finally { await browser.close(); console.log("Browser closed successfully."); } ``` #### 整個程式碼 ``` const SBR_WS_ENDPOINT = process.env.SBR_WS_ENDPOINT; export const register = async () => { if (process.env.NEXT_RUNTIME === "nodejs") { const { Worker } = await import("bullmq"); const puppeteer = await import("puppeteer"); const { connection } = await import("./lib/redis"); const { importQueue } = await import("./lib/queue"); new Worker( "importQueue", async (job) => { const browser = await puppeteer.connect({ browserWSEndpoint: SBR_WS_ENDPOINT, }); try { const page = await browser.newPage(); console.log("in flight scraping"); console.log("Connected! Navigating to " + job.data.url); await page.goto(job.data.url); console.log("Navigated! Scraping page content..."); const scrappedFlights = await page.evaluate(async () => { await new Promise((resolve) => setTimeout(resolve, 5000)); const flights = []; const flightSelectors = document.querySelectorAll(".nrc6-wrapper"); flightSelectors.forEach((flightElement) => { const airlineLogo = flightElement.querySelector("img")?.src || ""; const [rawDepartureTime, rawArrivalTime] = ( flightElement.querySelector(".vmXl")?.innerText || "" ).split(" – "); // Function to extract time and remove numeric values at the end const extractTime = (rawTime: string): string => { const timeWithoutNumbers = rawTime .replace(/[0-9+\s]+$/, "") .trim(); return timeWithoutNumbers; }; const departureTime = extractTime(rawDepartureTime); const arrivalTime = extractTime(rawArrivalTime); const flightDuration = ( flightElement.querySelector(".xdW8")?.children[0]?.innerText || "" ).trim(); const airlineName = ( flightElement.querySelector(".VY2U")?.children[1]?.innerText || "" ).trim(); // Extract price const price = parseInt( ( flightElement.querySelector(".f8F1-price-text")?.innerText || "" ) .replace(/[^\d]/g, "") .trim(), 10 ); flights.push({ airlineLogo, departureTime, arrivalTime, flightDuration, airlineName, price, }); }); return flights; }); } catch (error) { console.log({ error }); } finally { await browser.close(); console.log("Browser closed successfully."); } }, { connection, concurrency: 10, removeOnComplete: { count: 1000 }, removeOnFail: { count: 5000 }, } ); } }; ``` ### 步驟8:航班搜尋功能 基於我們的航班資料抓取功能,讓我們將全面的航班搜尋功能整合到我們的 Next.js 應用程式中。此功能將為使用者提供一個動態介面,透過指定出發地、目的地和日期來搜尋航班。利用強大的 Next.js 框架以及現代 UI 庫和狀態管理,我們建立了引人入勝且響應迅速的航班搜尋體驗。 #### 航班搜尋功能的關鍵組成部分 1. **動態城市選擇**:此功能包括來源和目的地輸入的自動完成功能,由預先定義的城市機場程式碼清單提供支援。當使用者輸入時,應用程式會過濾並顯示匹配的城市,透過更輕鬆地尋找和選擇機場來增強用戶體驗。 2. **日期選擇**:使用者可以透過日期輸入選擇預期的航班日期,為規劃旅行提供彈性。 3. **抓取狀態監控**:啟動抓取作業後,應用程式透過定期 API 呼叫來監控作業的狀態。這種非同步檢查允許應用程式使用抓取過程的狀態更新 UI,確保使用者了解進度和結果。 #### 航班搜尋元件的完整程式碼 ``` "use client"; import { useAppStore } from "@/store"; import { USER_API_ROUTES } from "@/utils/api-routes"; import { cityAirportCode } from "@/utils/city-airport-codes"; import { Button, Input, Listbox, ListboxItem } from "@nextui-org/react"; import axios from "axios"; import Image from "next/image"; import { useRouter } from "next/navigation"; import React, { useEffect, useRef, useState } from "react"; import { FaCalendarAlt, FaSearch } from "react-icons/fa"; const SearchFlights = () => { const router = useRouter(); const { setScraping, setScrapingType, setScrappedFlights } = useAppStore(); const [loadingJobId, setLoadingJobId] = useState<number | undefined>(undefined); const [source, setSource] = useState(""); const [sourceOptions, setSourceOptions] = useState< { city: string; code: string; }[] >([]); const [destination, setDestination] = useState(""); const [destinationOptions, setDestinationOptions] = useState< { city: string; code: string; }[] >([]); const [flightDate, setFlightDate] = useState(() => { const today = new Date(); return today.toISOString().split("T")[0]; }); const handleSourceChange = (query: string) => { const matchingCities = Object.entries(cityAirportCode) .filter(([, city]) => city.toLowerCase().includes(query.toLowerCase())) .map(([code, city]) => ({ code, city })) .splice(0, 5); setSourceOptions(matchingCities); }; const destinationChange = (query: string) => { const matchingCities = Object.entries(cityAirportCode) .filter(([, city]) => city.toLowerCase().includes(query.toLowerCase())) .map(([code, city]) => ({ code, city })) .splice(0, 5); setDestinationOptions(matchingCities); }; const startScraping = async () => { if (source && destination && flightDate) { const data = await axios.get(`${USER_API_ROUTES.FLIGHT_SCRAPE}?source=${source}&destination=${destination}&date=${flightDate}`); if (data.data.id) { setLoadingJobId(data.data.id); setScraping(true); setScrapingType("flight"); } } }; useEffect(() => { if (loadingJobId) { const checkIfJobCompleted = async () => { try { const response = await axios.get(`${USER_API_ROUTES.FLIGHT_SCRAPE_STATUS}?jobId=${loadingJobId}`); if (response.data.status) { set ScrappedFlights(response.data.flights); clearInterval(jobIntervalRef.current); setScraping(false); setScrapingType(undefined); router.push(`/flights?data=${flightDate}`); } } catch (error) { console.log(error); } }; jobIntervalRef.current = setInterval(checkIfJobCompleted, 3000); } return () => clearInterval(jobIntervalRef.current); }, [loadingJobId]); return ( <div className="h-[90vh] flex items-center justify-center"> <div className="absolute left-0 top-0 h-[100vh] w-[100vw] max-w-[100vw] overflow-hidden overflow-x-hidden"> <Image src="/flight-search.png" fill alt="Search" /> </div> <div className="absolute h-[50vh] w-[60vw] flex flex-col gap-5"> {/* UI and functionality for flight search */} </div> </div> ); }; export default SearchFlights; ``` ### 步驟9:航班搜尋頁面UI  ### 顯示航班搜尋結果 成功抓取飛行資料後,下一個關鍵步驟是以使用者友善的方式將這些結果呈現給使用者。 Next.js 應用程式中的 Flights 元件就是為此目的而設計的。 ``` "use client"; import { useAppStore } from "@/store"; import { USER_API_ROUTES } from "@/utils/api-routes"; import { Button } from "@nextui-org/react"; import axios from "axios"; import Image from "next/image"; import { useRouter, useSearchParams } from "next/navigation"; import React from "react"; import { FaChevronLeft } from "react-icons/fa"; import { MdOutlineFlight } from "react-icons/md"; const Flights = () => { const router = useRouter(); const searchParams = useSearchParams(); const date = searchParams.get("date"); const { scrappedFlights, userInfo } = useAppStore(); const getRandomNumber = () => Math.floor(Math.random() * 41); const bookFLight = async (flightId: number) => {}; return ( <div className="m-10 px-[20vw] min-h-[80vh]"> <Button className="my-5" variant="shadow" color="primary" size="lg" onClick={() => router.push("/search-flights")} > <FaChevronLeft /> Go Back </Button> <div className="flex-col flex gap-5"> {scrappedFlights.length === 0 && ( <div className="flex items-center justify-center py-5 px-10 mt-10 rounded-lg text-red-500 bg-red-100 font-medium"> No Flights found. </div> )} {scrappedFlights.map((flight: any) => { const seatsLeft = getRandomNumber(); return ( <div key={flight.id} className="grid grid-cols-12 border bg-gray-200 rounded-xl font-medium drop-shadow-md" > <div className="col-span-9 bg-white rounded-l-xl p-10 flex flex-col gap-5"> <div className="grid grid-cols-4 gap-4"> <div className="flex flex-col gap-3 font-medium"> <div> <div className="relative w-20 h-16"> <Image src={flight.logo} alt="airline name" fill /> </div> </div> <div>{flight.name}</div> </div> <div className="col-span-3 flex justify-between"> <div className="flex flex-col gap-2"> <div className="text-blue-600">From</div> <div> <span className="text-3xl"> <strong>{flight.departureTime}</strong> </span> </div> <div>{flight.from}</div> </div> <div className="flex flex-col items-center justify-center gap-2"> <div className="bg-violet-100 w-max p-3 text-4xl text-blue-600 rounded-full"> <MdOutlineFlight /> </div> <div> <span className="text-lg"> <strong>Non-stop</strong> </span> </div> <div>{flight.duration}</div> </div> <div className="flex flex-col gap-2"> <div className="text-blue-600">To</div> <div> <span className="text-3xl"> <strong>{flight.arrivalTime}</strong> </span> </div> <div>{flight.to}</div> </div> </div> </div> <div className="flex justify-center gap-10 bg-violet-100 p-3 rounded-lg"> <div className="flex"> <span>Airplane </span> <span className="text-blue-600 font-semibold"> Boeing 787 </span> </div> <div className="flex"> <span>Travel Class: </span> <span className="text-blue-600 font-semibold">Economy</span> </div> </div> <div className="flex justify-between font-medium"> <div> Refundable <span className="text-blue-600"> $5 ecash</span> </div> <div className={`${ seatsLeft > 20 ? "text-green-500" : "text-red-500" }`} > Only {seatsLeft} Seats Left </div> <div className="cursor-pointer">Flight Details</div> </div> </div> <div className="col-span-3 bg-violet-100 rounded-r-xl h-full flex flex-col items-center justify-center gap-5"> <div> <div> <span className="line-through font-light"> ${flight.price + 140} </span> </div> <div className="flex items-center gap-2"> <span className="text-5xl font-bold">${flight.price}</span> <span className="text-blue-600">20% OFF</span> </div> </div> <Button variant="ghost" radius="full" size="lg" color="primary" onClick={() => { if (userInfo) bookFLight(flight.id); }} > {userInfo ? "Book Now" : "Login to Book"} </Button> </div> </div> ); })} </div> </div> ); }; export default Flights; ``` #### 航班搜尋結果 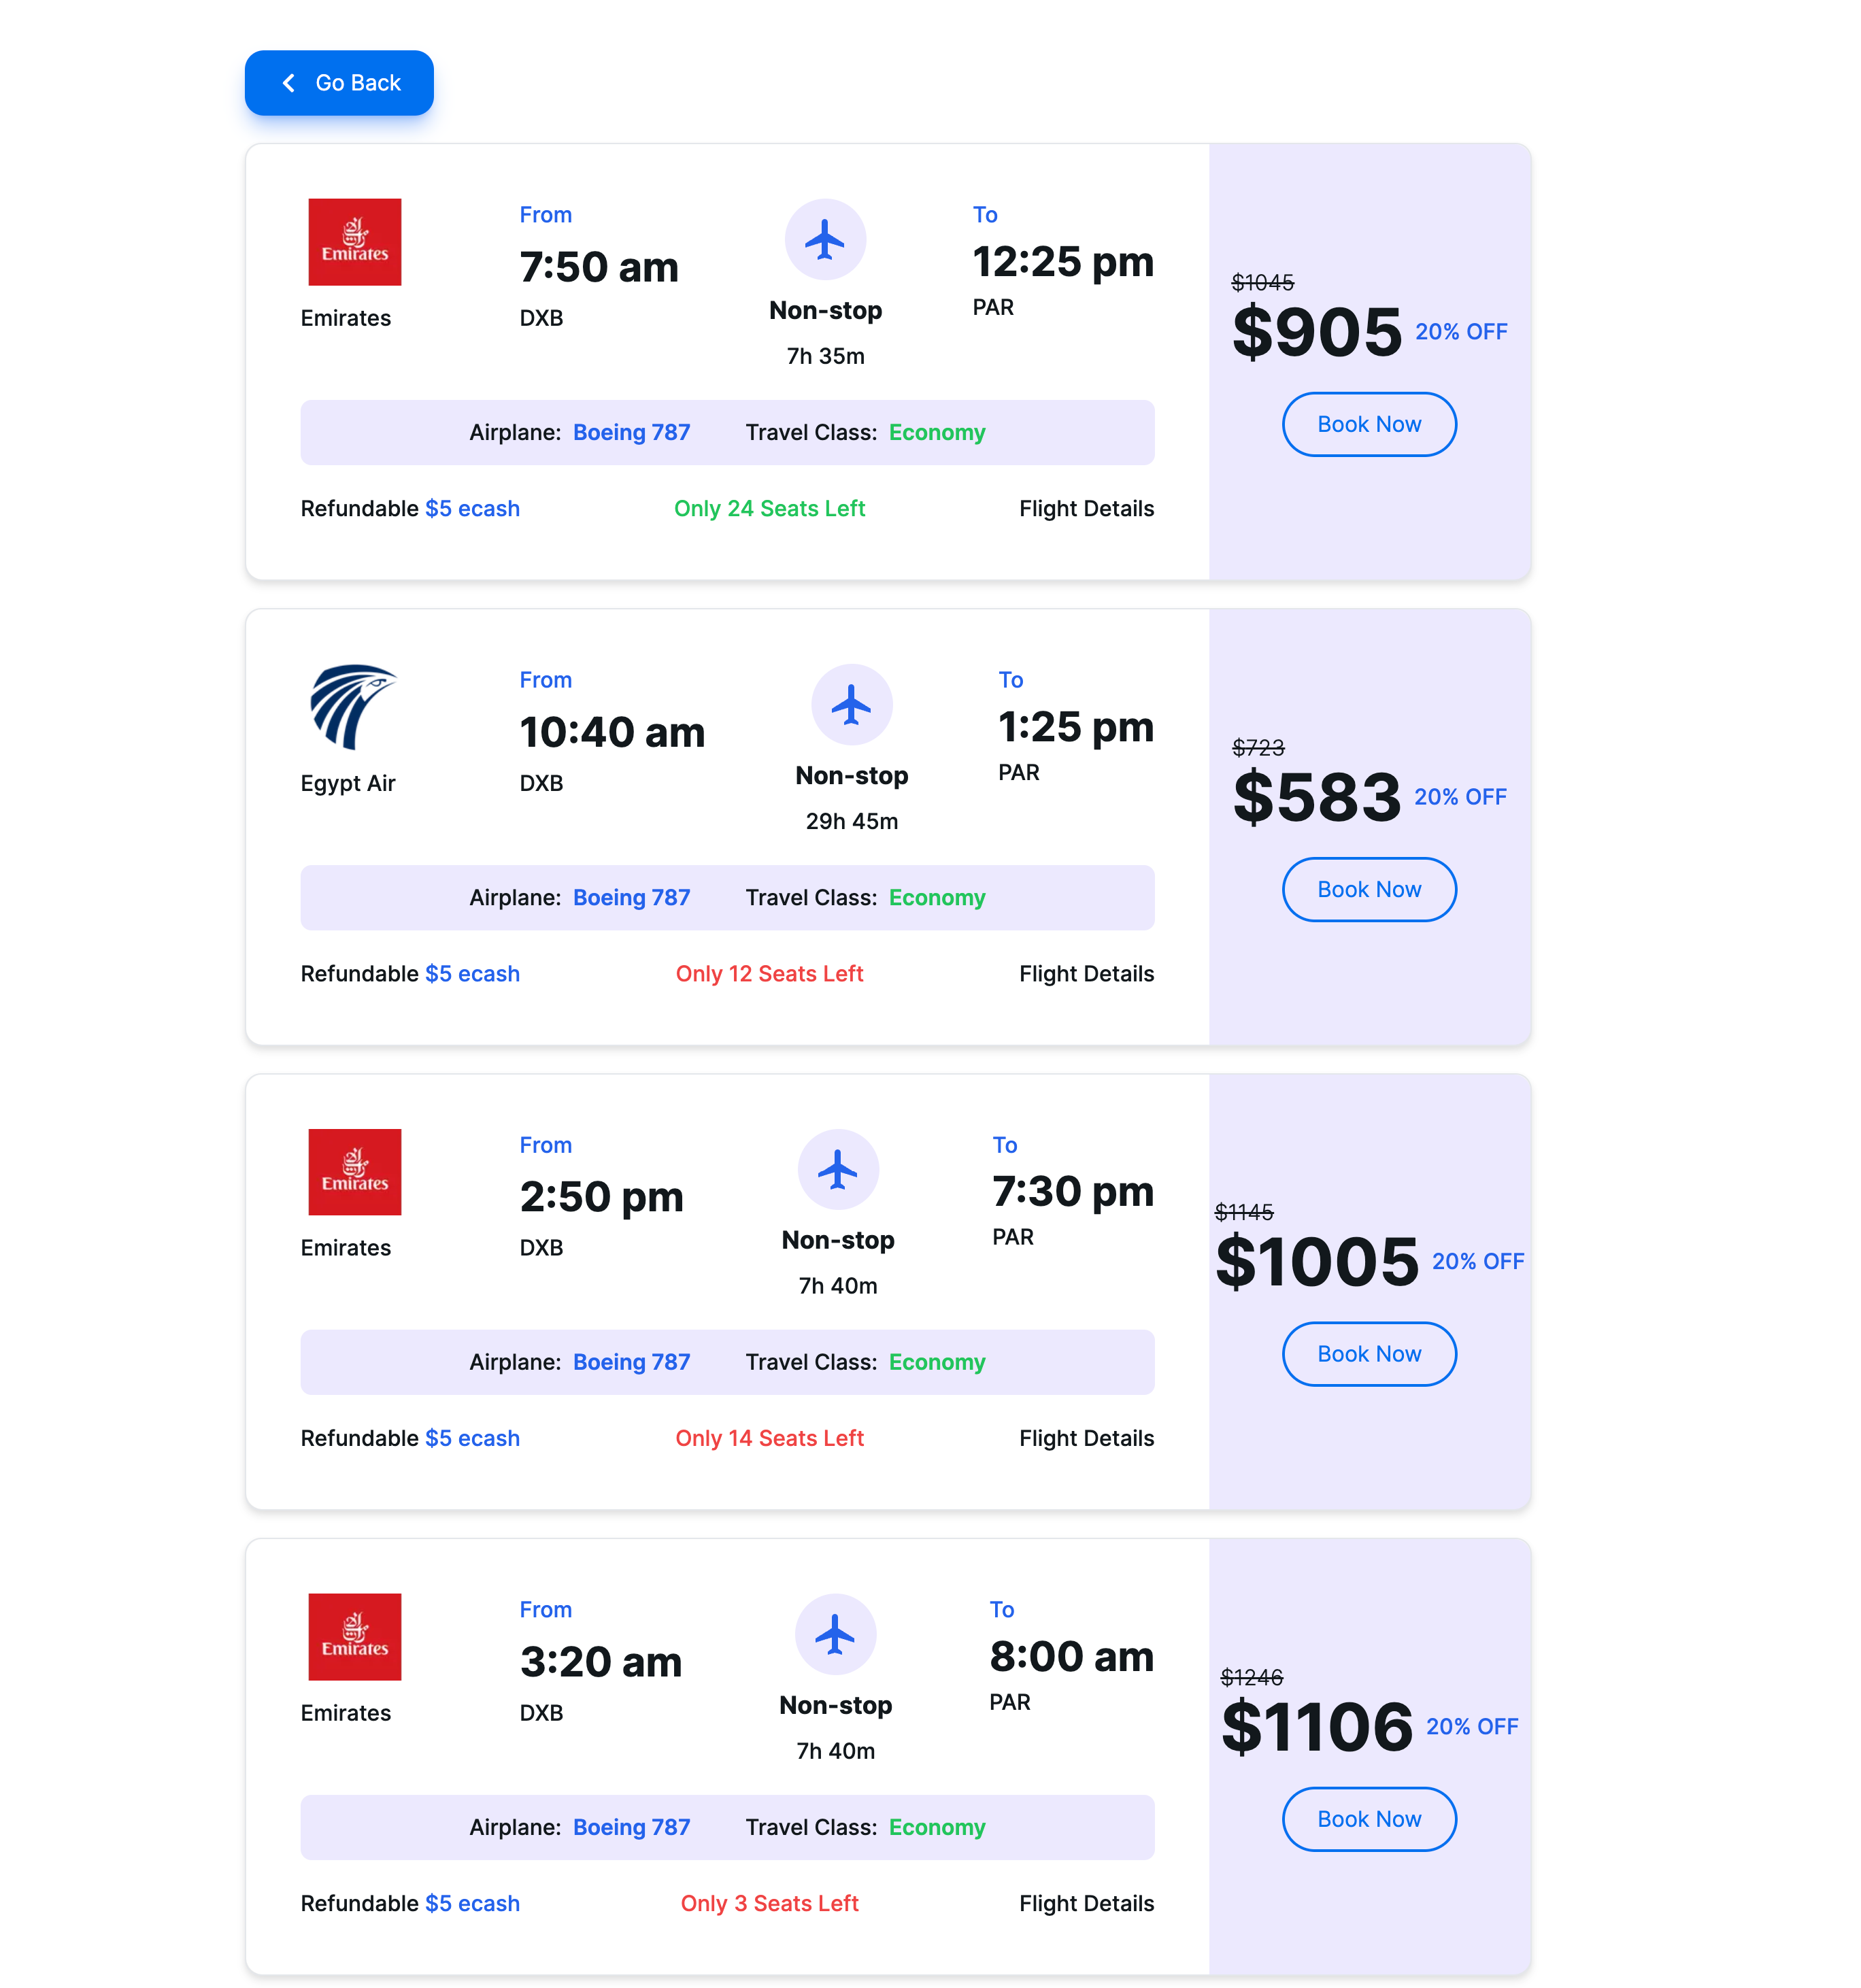 ### 探索完整的指南和程式碼庫 上面共享的部分和程式碼片段僅代表使用 Next.js 建立強大的航班資料抓取和搜尋應用程式所需的完整功能和程式碼的一小部分。為了掌握這個專案的全部內容,包括高級功能、優化和最佳實踐,我邀請您更深入地研究我的線上綜合資源。 #### 在 YouTube 上觀看詳細說明 有關引導您完成此應用程式的開發過程、編碼細微差別和功能的逐步影片指南,請觀看我的 YouTube 影片。本教程旨在讓您更深入地了解這些概念,讓您按照自己的步調進行操作並獲得對 Next.js 應用程式開發的寶貴見解。 https://www.youtube.com/watch?v=ZWVhk0fxHM0 #### 在 GitHub 上探索完整程式碼 如果您渴望探索完整的程式碼,請造訪我的 GitHub 儲存庫。在那裡,您將找到完整的程式碼庫,包括讓該應用程式在您自己的電腦上執行所需的所有元件、實用程式和設定說明。 https://github.com/koolkishan/nextjs-travel-planner ### 結論 使用 Next.js 建立飛行資料抓取和搜尋工具等綜合應用程式展示了現代 Web 開發工具和框架的強大功能和多功能性。無論您是希望提高技能的經驗豐富的開發人員,還是渴望深入 Web 開發的初學者,這些資源都是為您的旅程量身定制的。在 YouTube 上觀看詳細教程,在 GitHub 上探索完整程式碼,並加入對話以增強您的開發專業知識並為充滿活力的開發者社群做出貢獻。 --- 原文出處:https://dev.to/kishansheth/nextjs-14-booking-app-with-live-data-scraping-using-scraping-browser-610
 在嘗試在個人react.js專案中實作Google地圖API時,我遇到了幾個非常複雜且令人困惑的範例。這是我如何在我的應用程式中使用 Google 地圖的簡短範例! 首先,事情第一! -------- 前往[Google 地圖 API](https://developers.google.com/maps/documentation/)頁面,註冊並取得令牌以供使用!您必須輸入信用卡號才能接收令牌。然而,谷歌聲稱,如果您不親自升級服務,他們不會向您的帳戶收取費用。**請自行決定是否繼續**。 獲得 API 金鑰後,您就可以開始建立您的應用程式了! ### 建立您的 react 應用程式 ``` npm init react-app my-app ``` ### 安裝依賴項 ``` npm install --save google-maps-react ``` 這就是我們如何將谷歌地圖作為一個元件來獲取! 檢查您的 package.json 檔案以確保它已安裝! 初始設定完成後,您就可以開始編碼了! 1.導入google-maps-react! ---------------------- ``` import { Map, GoogleApiWrapper } from 'google-maps-react'; ``` 2. 將地圖元件加入渲染函數中! ---------------- ``` render() { return ( <Map google={this.props.google} zoom={8} style={mapStyles} initialCenter={{ lat: 47.444, lng: -122.176}} /> ); } ``` 3. 編輯您的匯出預設語句 ------------- ``` export default GoogleApiWrapper({ apiKey: 'TOKEN HERE' })(MapContainer); ``` 請務必在此處插入您的 API 金鑰! 4.加入樣式 ------ 如果您願意,可以變更一些樣式屬性。我在課堂外將其作為常變數。 ``` const mapStyles = { width: '100%', height: '100%', }; ``` 5. 啟動你的伺服器! -----------  偉大的!你做到了!但說實話,沒有任何標記的地圖有什麼意義!那麼讓我們來加入一些吧! 6. 標記它! ------- ``` import { Map, GoogleApiWrapper, Marker } from 'google-maps-react'; ``` 更新您的地圖元件以包含標記元件! ``` render() { return ( <Map google={this.props.google} zoom={8} style={mapStyles} initialCenter={{ lat: 47.444, lng: -122.176}} > <Marker position={{ lat: 48.00, lng: -122.00}} /> </Map> ); } ``` 然後你就會擁有這個!  讓我們加入更多! -------- 您可以透過程式設計方式循環狀態來顯示地點,而不是新增一個標記。在我的範例中,我展示了該地區的一些舊貨店。您也可以為它們加入事件,例如 onClick! ``` export class MapContainer extends Component { constructor(props) { super(props); this.state = { stores: [{lat: 47.49855629475769, lng: -122.14184416996333}, {latitude: 47.359423, longitude: -122.021071}, {latitude: 47.2052192687988, longitude: -121.988426208496}, {latitude: 47.6307081, longitude: -122.1434325}, {latitude: 47.3084488, longitude: -122.2140121}, {latitude: 47.5524695, longitude: -122.0425407}] } } displayMarkers = () => { return this.state.stores.map((store, index) => { return <Marker key={index} id={index} position={{ lat: store.latitude, lng: store.longitude }} onClick={() => console.log("You clicked me!")} /> }) } render() { return ( <Map google={this.props.google} zoom={8} style={mapStyles} initialCenter={{ lat: 47.444, lng: -122.176}} > {this.displayMarkers()} </Map> ); } } ``` 這就是大家!  我希望本教程有助於建立您自己的應用程式! --- 原文出處:https://dev.to/jessicabetts/how-to-use-google-maps-api-and-react-js-26c2
--- 標題:6 個 JavaScript 控制台方法,如泰勒絲民間傳說歌詞 發表:真實 描述:了解六種鮮為人知的 JavaScript 控制台方法,這些方法與泰勒絲 (Taylor Swift) 最新專輯《Followre》中的歌詞類似。 標籤: javascript、webdev、除錯、生產力 封面圖片:https://twilio-cms-prod.s3.amazonaws.com/images/ts\_AMVvYGp.width-1616.png --- 這篇部落格文章是為[Twilio](https://www.twilio.com/)撰寫的,[最初發佈在 Twilio 部落格上](https://www.twilio.com/blog/js-console-methods-like-taylor-swift-folklore-lyrics)。 如果您進行 Web 開發,您可能至少使用過一次`console.log` (或超過一千次...誰在數?),因為這是最好的偵錯方法!但您知道還有其他控制台方法嗎? Taylor Swift 的最新專輯《Followre》 充滿了沉思的隱喻、典故和象徵意義,這篇文章將其中一些歌詞比作 6 個鮮為人知的 JavaScript `console`方法。 ### 控制台到底是什麼? `console`是一個[全域物件](https://developer.mozilla.org/en-US/docs/Glossary/Global_object),允許開發人員存取偵錯控制台。它有大量的方法,可以更輕鬆地記錄語句、變數、函數、錯誤等——天哪! #### 6種類似民間傳說歌詞的控制台方法 #### *1. console.log = "但這會很有趣 // 如果你是那個人"* `console.log`是最常用的方法。用於通用日誌記錄,它在 Web 控制台中顯示傳遞給它的訊息。你知道你可以用 CSS 來裝飾它嗎? ``` console.log("%cWARNING: you will be obsessed with folklore", "font: 2em sans-serif; color: yellow; background-color: red;"); ```  `Log`簡單、可靠,並且可以完成工作,但它被過度使用,吸引了類似`console`方法的所有註意力,這些方法做得更多。如果`Log`是您需要的一種或唯一的控制台方法,那麼它會很有趣 - 但正如本文將要展示的,您將透過其他`console`方法獲得更多樂趣! #### *2. console.table = "我是一個鏡球 // 今晚我會向你展示你自己的每個版本"* `table`方法接受一個物件或陣列並將輸入記錄為表格,使其看起來更乾淨:它就像`log`的更好版本。與鏡像球一樣, `table`可以透過接受可選參數`columns`來選擇要顯示的列子集來顯示不同版本的輸入。 陣列中的每個元素(如果資料是物件,則為每個可枚舉屬性)將是表中的一行。下面的 JavaScript 程式碼有一個物件,您可以看到最初使用 log 的輸出。 ``` function Album(name, year, numSongs) { this.name = name; this.year = year; this.numSongs = numSongs; } const fearless = new Album("Fearless", 2008, 13); const speakNow = new Album("Speak Now", 2010, 19); const folklore = new Album("folklore", 2020, 16); console.log([fearless, speakNow, folklore]); ```  這很好,但是給定陣列時`table`的輸出看起來更好: ``` console.table([fearless, speakNow, folklore]); ```  接受`columns`參數,如`console.table([fearless, speakNow, folklore], ["name"]);`會顯示:  您也可以傳遞它(而不是`name` ) `year`或`numSongs` - 就像鏡子球一樣,表格可以向您顯示其輸入的每個版本! #### *3. console.assert =“如果你從不流血,你就永遠不會成長”* `console.assert(expression, message)`僅在表達式為 false 時才列印。泰勒絲 (Taylor Swift) 在歌曲*《The 1》*中的歌詞「如果你從不流血,你就永遠不會成長」也同意這一點——如果你從不流血,或者失敗,或者有時不正確,你就永遠不會成長。 `assert`表明,透過錯誤,您可以成長為一名開發人員,因為您可以修復錯誤,控制台會透過將斷言變成漂亮的紅色來幫助您。 ``` const numFolkloreSongs = 16; const num1989Songs = 13; console.assert(numFolkloreSongs > num1989Songs, 'folklore has more songs than 1989'); //won't run console.assert(num1989Songs + 3 > numFolkloreSongs, 'the number of songs on 1989 + 3 is not greater than the number of folklore songs'); ```  #### *4. console.time/console.timeEnd = "時間,神秘的時間/切開我,然後治癒我。"* `console.time()`建立一個計時器來查看某些操作需要多長時間。它可以採用名稱或標籤的可選參數來區分網頁上最多 10,000 個計時器。 `console.timeEnd()`停止計時器,並在控制台中顯示結果。 時間可能很艱難——它可以讓你心碎,但它也可以治癒你,讓你感覺更好。 ``` console.time('sms timer'); let x = 0; while (x < 3) { console.log("They told me all of my cages were mental/So I got wasted like all my potential"); x+=1; } console.timeEnd('sms timer'); ```  如果沒有標籤傳遞給`console.time()` ,它將記錄 default 而不是*sms time* 。 #### *5. console.clear:“如果我對你來說已經死了,為什麼你還在守靈?”* `console.clear`簡短、甜蜜、簡潔。它會清除控制台,並且在某些環境中,可能會列印諸如“控制台已清除”之類的訊息。 歌詞“如果我對你來說已經死了,為什麼你還在守靈?”是憂鬱的,但也有一些尖銳的味道:它非常適合當你想要結束對話時,就像`clear`一樣,你可以重新開始,重新開始。 #### *6. console.group/console.groupEnd ="想到一直以來有一條看不見的繩子把你和我綁在一起,這不是很美好嗎?"* `console.group`表示內聯訊息群組的開始, `console.groupEnd`標記其結束。如果群組包含日誌,它們將作為一個群組列印,因此格式更清晰,您可以更輕鬆地了解群組包含的內容。 就像有一些看不見的字串(或`console`命令)將群組中的專案捆綁在一起。 ``` console.group("folklore"); console.log("the 1"); console.log("cardigan"); console.log("the last great american dynasty"); console.log("invisible string"); console.log("my tears ricochet"); console.groupEnd(); console.log("outside"); ```  #### 控制台的下一步是什麼?  還有許多其他控制台方法未包含在此處(部分原因是它們與 Taylor Swift 歌詞的關係不大。)有關控制台方法的更多訊息,[請查看 Mozilla 開發者網絡有關 Web 技術的文件](https://developer.mozilla.org/en-US/docs/Web/API/console)。讓我知道您最喜歡或最不喜歡的民俗歌曲在線或在評論中! 1. 推特: [@lizziepika](https://twitter.com/lizziepika) 2. GitHub:[伊莉莎白西格爾](https://github.com/elizabethsiegle) 3. 電子郵件:[email protected] --- 原文出處:https://dev.to/twilio/6-javascript-console-methods-like-taylor-swift-folklore-lyrics-3h0k
你的轉職路上,還缺少一份自學作業包!寫完這幾包,直接拿作品去面試上班!
本論壇另有附設一個 LINE 新手發問&交流群組!歡迎加入討論!