長話短說 ==== 在本文中,您將學習如何建立由 AI 驅動的 PowerPoint 應用程式,該應用程式可以搜尋網路以自動製作有關任何主題的簡報。 我們將介紹使用: - 用於應用程式框架的 Next.js 🖥️ - 法學碩士 OpenAI 🧠 - LangChain 和 Tavily 的網路搜尋人工智慧代理🤖 - 使用 CopilotKit 將 AI 整合到您的應用程式中 🪁  --- CopilotKit:為您的應用程式建立人工智慧副駕駛 --------------------------- CopilotKit 是[開源人工智慧副駕駛平台。](https://github.com/CopilotKit/CopilotKit)我們可以輕鬆地將強大的人工智慧整合到您的 React 應用程式中。 建造: - ChatBot:上下文感知的應用內聊天機器人,可以在應用程式內執行操作 💬 - CopilotTextArea:人工智慧驅動的文字字段,具有上下文感知自動完成和插入功能📝 - 聯合代理:應用程式內人工智慧代理,可以與您的應用程式和使用者互動🤖  {% cta https://github.com/CopilotKit/CopilotKit %} Star CopilotKit ⭐️ {% endcta %} 現在回到文章。 (本文是我們三週前發表的一篇文章的進展,但您無需閱讀該文章即可理解這一點)。 --- **先決條件** -------- 在開始建立應用程式之前,讓我們先查看建置應用程式所需的依賴項或套件 `copilotkit/react-core` :CopilotKit 前端包,帶有 React hooks,用於向副駕駛提供應用程式狀態和操作(AI 功能) `copilotkit/react-ui` :聊天機器人側邊欄 UI 的 CopilotKit 前端包 `copilotkit/react-textarea` :CopilotKit 前端包,用於在演講者筆記中進行人工智慧輔助文字編輯。 `LangChainJS` :一個用於開發由語言模型支援的應用程式的框架。 `Tavily Search API` :幫助將法學碩士和人工智慧應用程式連接到可信賴的即時知識的 API。 安裝所有專案包和依賴項 ----------- 在安裝所有專案包和依賴項之前,我們首先在終端機上執行以下命令來建立 Nextjs 專案。 ``` npx create-next-app@latest ``` 然後系統會提示您選擇一些選項。請隨意標記它們,如下所示。 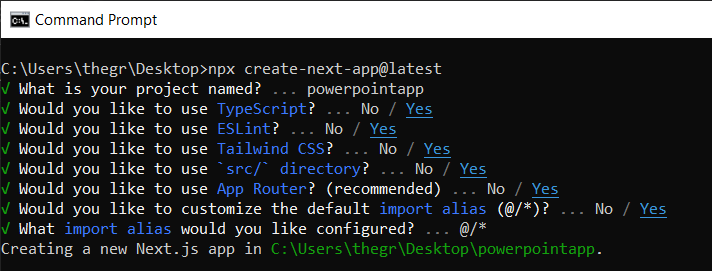 之後,使用您選擇的文字編輯器開啟新建立的 Nextjs 專案。然後在命令列中執行以下命令來安裝所有專案包和依賴項。 ``` npm i @copilotkit/backend @copilotkit/shared @langchain/langgraph @copilotkit/react-core @copilotkit/react-ui @copilotkit/react-textarea @heroicons/react ``` **建立 PowerPoint 應用程式前端** ------------------------ 讓我們先建立一個名為`Slide.tsx`的檔案。該文件將包含顯示和編輯投影片內容的程式碼,包括其`title` 、 `body text` 、 `background image`和`spoken narration text` 。 要建立該文件,請前往`/[root]/src/app`並建立一個名為`components`的資料夾。在 Components 資料夾中,建立`Slide.tsx`檔案。 之後,在文件頂部加入以下程式碼。程式碼定義了兩個名為`SlideModel`和`SlideProps`的 TypeScript 介面。 ``` "use client"; // Define an interface for the model of a slide, specifying the expected structure of a slide object. export interface SlideModel { title: string; content: string; backgroundImageDescription: string; spokenNarration: string; } // Define an interface for the properties of a component or function that manages slides. export interface SlideProps { slide: SlideModel; partialUpdateSlide: (partialSlide: Partial<SlideModel>) => void; } ``` 接下來,在上面的程式碼下面加入以下程式碼。程式碼定義了一個名為`Slide`功能元件,它接受`SlideProps`類型的 props。 ``` // Define a functional component named Slide that accepts props of type SlideProps. export const Slide = (props: SlideProps) => { // Define a constant for the height of the area reserved for speaker notes. const heightOfSpeakerNotes = 150; // Construct a URL for the background image using the description from slide properties, dynamically fetching an image from Unsplash. const backgroundImage = 'url("https://source.unsplash.com/featured/?' + encodeURIComponent(props.slide.backgroundImageDescription) + '")'; // Return JSX for the slide component. return ( <> {/* Slide content container with dynamic height calculation to account for speaker notes area. */} <div className="w-full relative bg-slate-200" style={{ height: `calc(100vh - ${heightOfSpeakerNotes}px)`, // Calculate height to leave space for speaker notes. }} > {/* Container for the slide title with centered alignment and styling. */} <div className="h-1/5 flex items-center justify-center text-5xl text-white text-center z-10" > {/* Textarea for slide title input, allowing dynamic updates. */} <textarea className="text-2xl bg-transparent text-black p-4 text-center font-bold uppercase italic line-clamp-2 resize-none flex items-center" style={{ border: "none", outline: "none", }} value={props.slide.title} placeholder="Title" onChange={(e) => { props.partialUpdateSlide({ title: e.target.value }); }} /> </div> {/* Container for the slide content with background image. */} <div className="h-4/5 flex" style={{ backgroundImage, backgroundSize: "cover", backgroundPosition: "center", }} > {/* Textarea for slide content input, allowing dynamic updates and styled for readability. */} <textarea className="w-full text-3xl text-black font-medium p-10 resize-none bg-red mx-40 my-8 rounded-xl text-center" style={{ lineHeight: "1.5", }} value={props.slide.content} placeholder="Body" onChange={(e) => { props.partialUpdateSlide({ content: e.target.value }); }} /> </div> </div> {/* Textarea for entering spoken narration with specified height and styling for consistency. */} <textarea className=" w-9/12 h-full bg-transparent text-5xl p-10 resize-none bg-gray-500 pr-36" style={{ height: `${heightOfSpeakerNotes}px`, background: "none", border: "none", outline: "none", fontFamily: "inherit", fontSize: "inherit", lineHeight: "inherit", }} value={props.slide.spokenNarration} onChange={(e) => { props.partialUpdateSlide({ spokenNarration: e.target.value }); }} /> </> ); }; ``` 之後,我們現在會建立一個名為`Presentation.tsx`的檔案。 該文件將包含初始化和更新投影片狀態、渲染目前投影片以及根據目前狀態動態啟用或停用按鈕實現導覽和投影片管理操作的程式碼。 要建立該文件,請將另一個文件新增至元件資料夾中,並將其命名為`Presentation.tsx` ,然後使用下列程式碼在檔案頂部匯入`React hooks` 、 `icons` 、 `SlideModel`和`Slide`元件。 ``` "use client"; import { useCallback, useMemo, useState } from "react"; import { BackwardIcon, ForwardIcon, PlusIcon, SparklesIcon, TrashIcon } from "@heroicons/react/24/outline"; import { SlideModel, Slide } from "./Slide"; ``` 之後,在上面的程式碼下面加入以下程式碼。程式碼定義了一個`ActionButton`功能元件,它將呈現具有可自訂屬性的按鈕元素。 ``` export const ActionButton = ({ disabled, onClick, className, children, }: { disabled: boolean; onClick: () => void; className?: string; children: React.ReactNode; }) => { return ( <button disabled={disabled} className={`bg-blue-500 text-white font-bold py-2 px-4 rounded ${disabled ? "opacity-50 cursor-not-allowed" : "hover:bg-blue-700"} ${className}`} onClick={onClick} > {children} </button> ); }; ``` 然後在上面的程式碼下面加入下面的程式碼。程式碼定義了一個名為「Presentation」的功能元件,用於初始化投影片的狀態並定義一個用於更新目前投影片的函數。 ``` // Define the Presentation component as a functional component. export const Presentation = () => { // Initialize state for slides with a default first slide and a state to track the current slide index. const [slides, setSlides] = useState<SlideModel[]>([ { title: `Welcome to our presentation!`, // Title of the first slide. content: 'This is the first slide.', // Content of the first slide. backgroundImageDescription: "hello", // Description for background image retrieval. spokenNarration: "This is the first slide. Welcome to our presentation!", // Spoken narration text for the first slide. }, ]); const [currentSlideIndex, setCurrentSlideIndex] = useState(0); // Current slide index, starting at 0. // Use useMemo to memoize the current slide object to avoid unnecessary recalculations. const currentSlide = useMemo(() => slides[currentSlideIndex], [slides, currentSlideIndex]); // Define a function to update the current slide. This function uses useCallback to memoize itself to prevent unnecessary re-creations. const updateCurrentSlide = useCallback( (partialSlide: Partial<SlideModel>) => { // Update the slides state by creating a new array with the updated current slide. setSlides((slides) => [ ...slides.slice(0, currentSlideIndex), // Copy all slides before the current one. { ...slides[currentSlideIndex], ...partialSlide }, // Merge the current slide with the updates. ...slides.slice(currentSlideIndex + 1), // Copy all slides after the current one. ]); }, [currentSlideIndex, setSlides] // Dependencies for useCallback. ); // The JSX structure for the Presentation component. return ( <div className="relative"> {/* Render the current slide by passing the currentSlide and updateCurrentSlide function as props. */} <Slide slide={currentSlide} partialUpdateSlide={updateCurrentSlide} /> {/* Container for action buttons located at the top-left corner of the screen. */} <div className="absolute top-0 left-0 mt-6 ml-4 z-30"> {/* Action button to add a new slide. Disabled state is hardcoded to true for demonstration. */} <ActionButton disabled={true} onClick={() => { // Define a new slide object. const newSlide: SlideModel = { title: "Title", content: "Body", backgroundImageDescription: "random", spokenNarration: "The speaker's notes for this slide.", }; // Update the slides array to include the new slide. setSlides((slides) => [ ...slides.slice(0, currentSlideIndex + 1), newSlide, ...slides.slice(currentSlideIndex + 1), ]); // Move to the new slide by updating the currentSlideIndex. setCurrentSlideIndex((i) => i + 1); }} className="rounded-r-none" > <PlusIcon className="h-6 w-6" /> {/* Icon for the button. */} </ActionButton> {/* Another action button, currently disabled and without functionality. */} <ActionButton disabled={true} onClick={async () => { }} // Placeholder async function. className="rounded-l-none ml-[1px]" > <SparklesIcon className="h-6 w-6" /> {/* Icon for the button. */} </ActionButton> </div> {/* Container for action buttons at the top-right corner for deleting slides, etc. */} <div className="absolute top-0 right-0 mt-6 mr-24"> <ActionButton disabled={slides.length === 1} // Disable button if there's only one slide. onClick={() => {}} // Placeholder function for the button action. className="ml-5 rounded-r-none" > <TrashIcon className="h-6 w-6" /> {/* Icon for the button. */} </ActionButton> </div> {/* Display current slide number and total slides at the bottom-right corner. */} <div className="absolute bottom-0 right-0 mb-20 mx-24 text-xl" style={{ textShadow: "1px 1px 0 #ddd, -1px -1px 0 #ddd, 1px -1px 0 #ddd, -1px 1px 0 #ddd", }} > Slide {currentSlideIndex + 1} of {slides.length} {/* Current slide and total slides. */} </div> {/* Container for navigation buttons (previous and next) at the bottom-right corner. */} <div className="absolute bottom-0 right-0 mb-6 mx-24"> {/* Button to navigate to the previous slide. */} <ActionButton className="rounded-r-none" disabled={ currentSlideIndex === 0 || true} // Example condition to disable button; 'true' is just for demonstration. onClick={() => { setCurrentSlideIndex((i) => i - 1); // Update currentSlideIndex to move to the previous slide. }} > <BackwardIcon className="h-6 w-6" /> {/* Icon for the button. */} </ActionButton> {/* Button to navigate to the next slide. */} <ActionButton className="mr-[1px] rounded-l-none" disabled={ true || currentSlideIndex + 1 === slides.length} // Example condition to disable button; 'true' is just for demonstration. onClick={async () => { setCurrentSlideIndex((i) => i + 1); // Update currentSlideIndex to move to the next slide. }} > <ForwardIcon className="h-6 w-6" /> {/* Icon for the button. */} </ActionButton> </div> </div> ); }; ``` 要在瀏覽器上呈現 PowerPoint 應用程式,請前往`/[root]/src/app/page.tsx`檔案並新增以下程式碼。 ``` "use client"; import "./style.css"; import { Presentation } from "./components/Presentation"; export default function AIPresentation() { return ( <Presentation /> ); } ``` 如果您想要在 Powerpoint 應用程式前端新增樣式,請在`/[root]/src/app`資料夾中建立名為`style.css`的檔案。 然後導航[到此 gist 文件](https://gist.github.com/TheGreatBonnie/e7c0b790a2e2af3e669810539ba54fed),複製 CSS 程式碼,並將其新增至 style.css 檔案。 最後,在命令列上執行命令`npm run dev` ,然後導航到 http://localhost:3000/。 現在您應該在瀏覽器上查看 PowerPoint 應用程式,如下所示。  **將 PowerPoint 應用程式與 CopilotKit 後端集成** -------------------------------------- 讓我們先在根目錄中建立一個名為`.env.local`的檔案。然後在保存 ChatGPT 和 Tavily Search API 金鑰的檔案中加入下面的環境變數。 ``` OPENAI_API_KEY="Your ChatGPT API key" TAVILY_API_KEY="Your Tavily Search API key" ``` 若要取得 ChatGPT API 金鑰,請導覽至 https://platform.openai.com/api-keys。 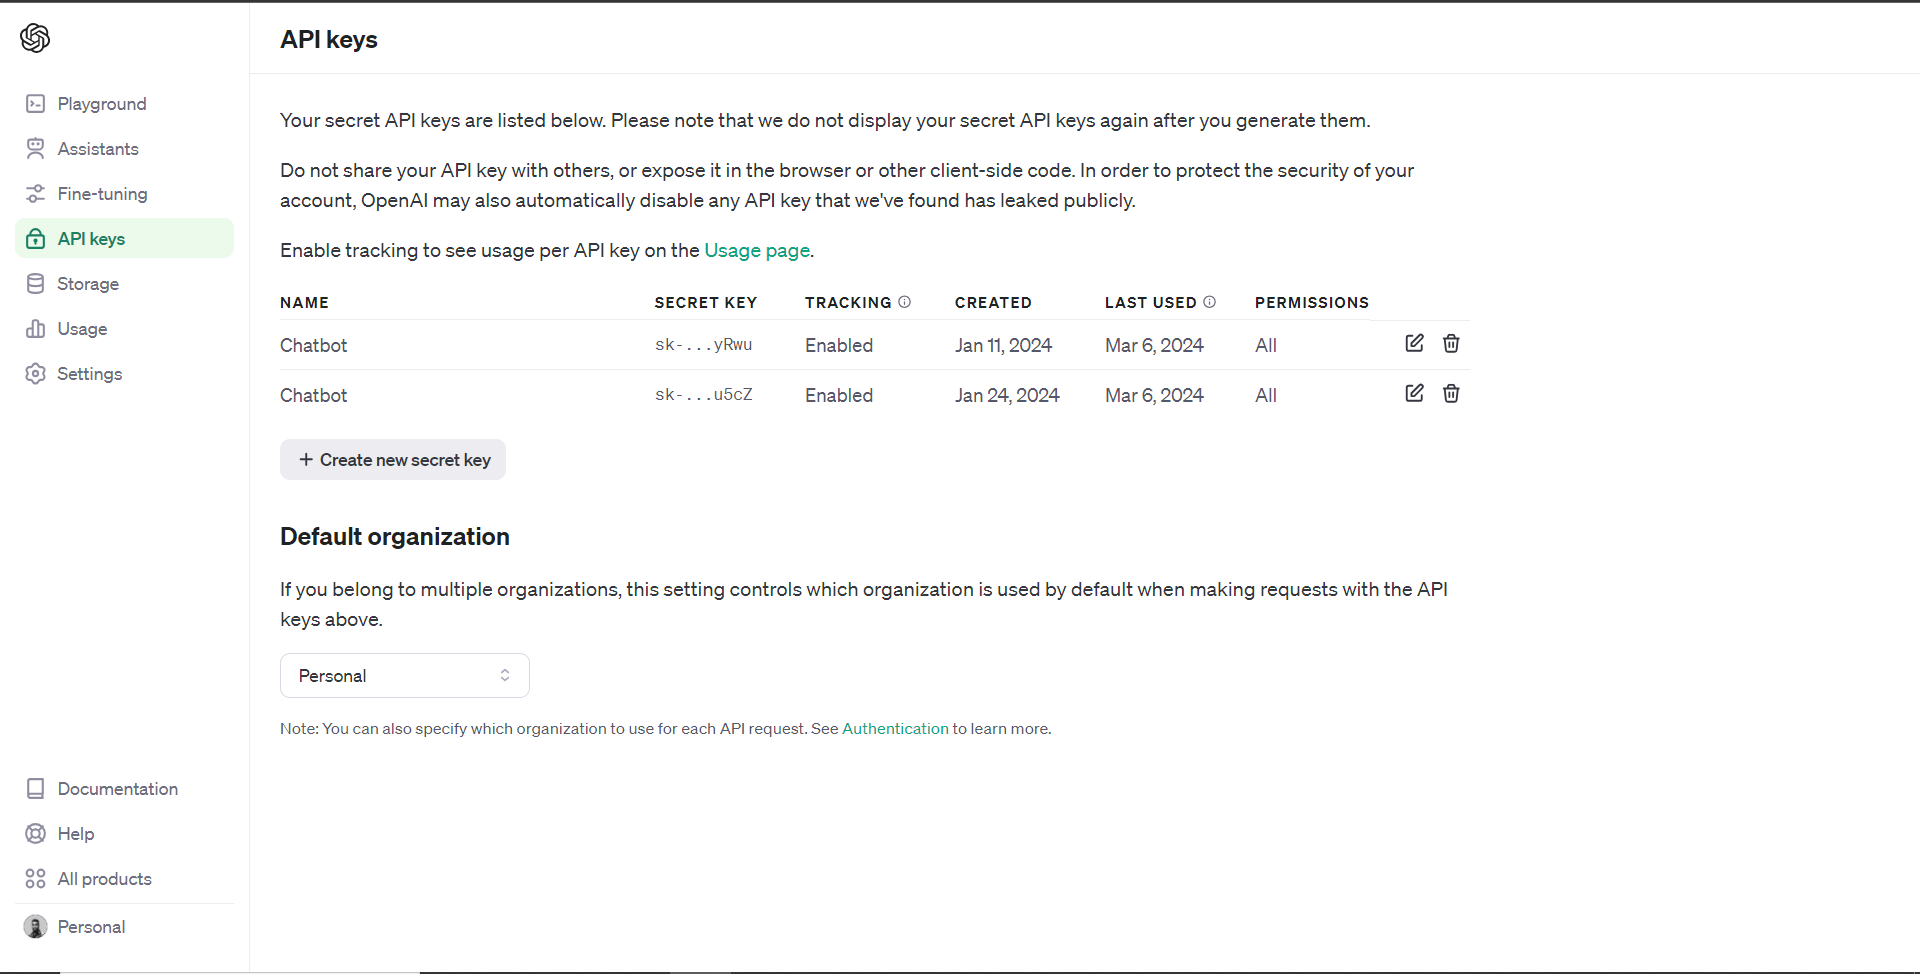 若要取得 Tavilly Search API 金鑰,請導覽至 https://app.tavily.com/home 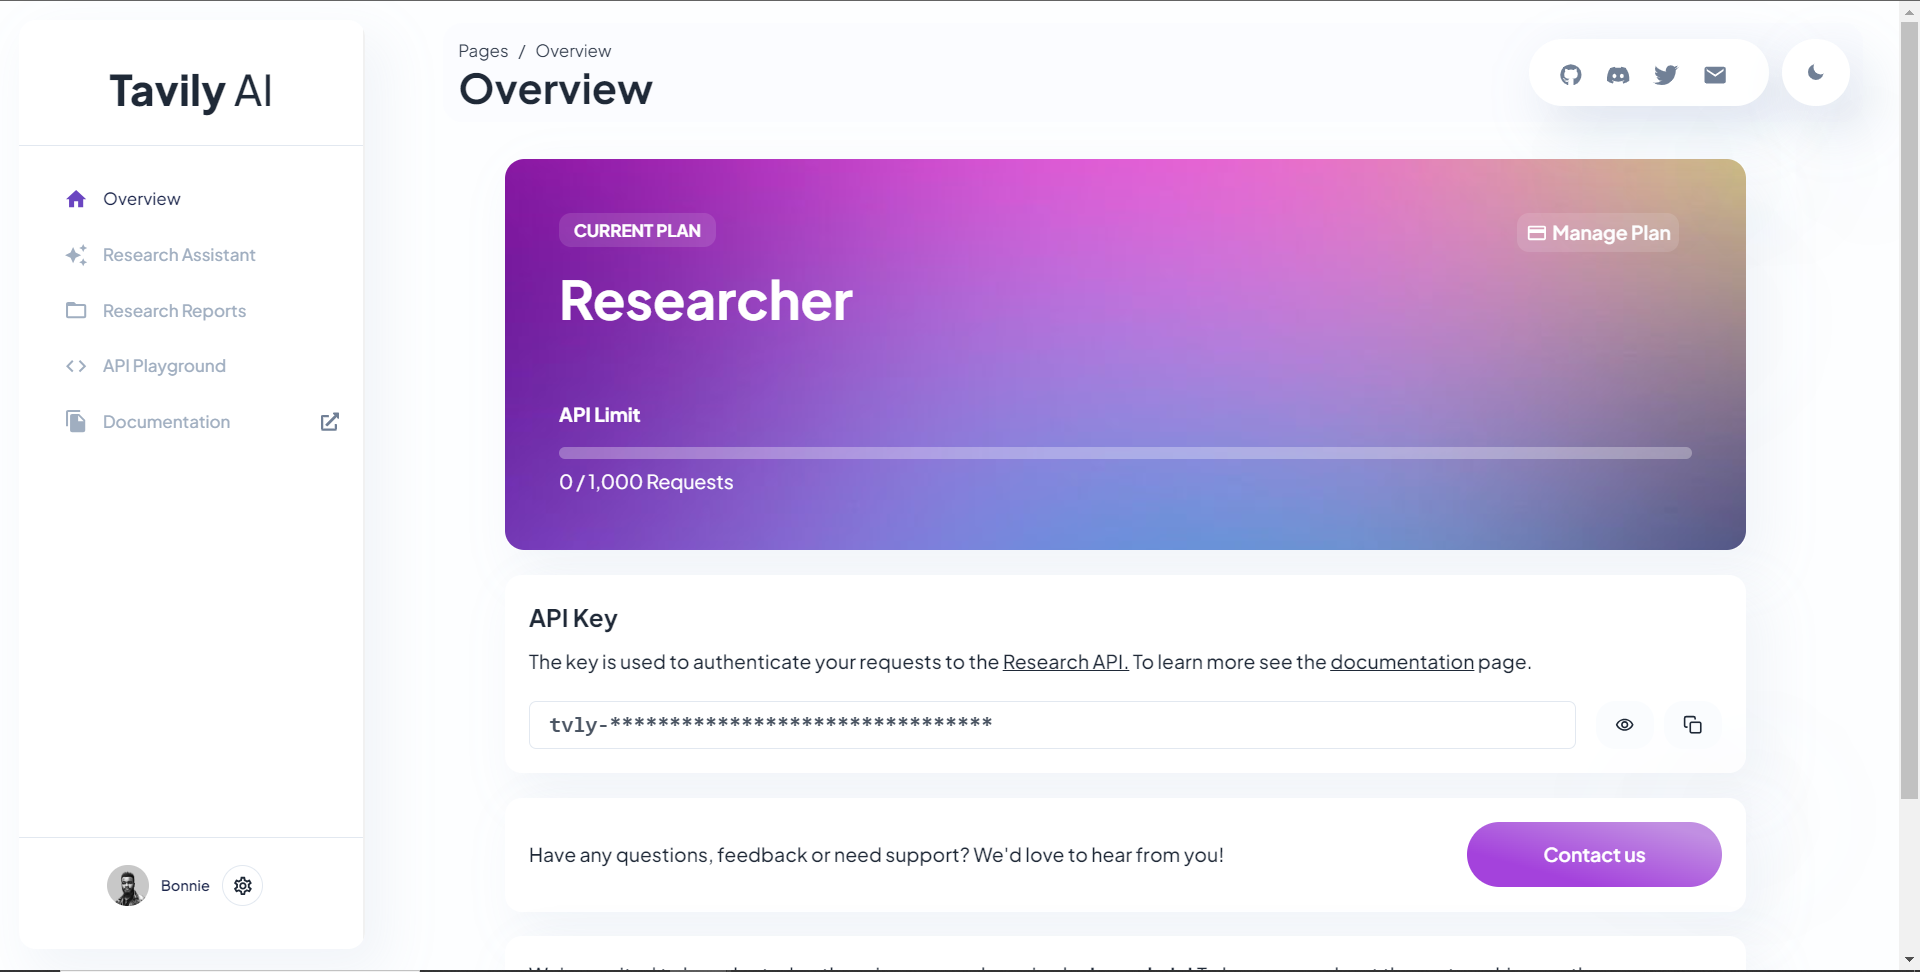 之後,轉到`/[root]/src/app`並建立一個名為`api`的資料夾。在`api`資料夾中,建立一個名為`copilotkit`的資料夾。 在`copilotkit`資料夾中,建立一個名為`research.ts`的檔案。然後導航到[該 Research.ts gist 文件](https://gist.github.com/TheGreatBonnie/58dc21ebbeeb8cbb08df665db762738c),複製程式碼,並將其新增至**`research.ts`**檔案中 接下來,在`/[root]/src/app/api/copilotkit`資料夾中建立一個名為`route.ts`的檔案。該文件將包含設定後端功能來處理 POST 請求的程式碼。它有條件地包括對給定主題進行研究的“研究”操作。 現在在文件頂部導入以下模組。 ``` import { CopilotBackend, OpenAIAdapter } from "@copilotkit/backend"; // For backend functionality with CopilotKit. import { researchWithLangGraph } from "./research"; // Import a custom function for conducting research. import { AnnotatedFunction } from "@copilotkit/shared"; // For annotating functions with metadata. ``` 在上面的程式碼下面,定義一個執行時環境變數和一個註解的函數,以便使用下面的程式碼進行研究。 ``` // Define a runtime environment variable, indicating the environment where the code is expected to run. export const runtime = "edge"; // Define an annotated function for research. This object includes metadata and an implementation for the function. const researchAction: AnnotatedFunction<any> = { name: "research", // Function name. description: "Call this function to conduct research on a certain topic. Respect other notes about when to call this function", // Function description. argumentAnnotations: [ // Annotations for arguments that the function accepts. { name: "topic", // Argument name. type: "string", // Argument type. description: "The topic to research. 5 characters or longer.", // Argument description. required: true, // Indicates that the argument is required. }, ], implementation: async (topic) => { // The actual function implementation. console.log("Researching topic: ", topic); // Log the research topic. return await researchWithLangGraph(topic); // Call the research function and return its result. }, }; ``` 然後在上面的程式碼下加入下面的程式碼來定義處理POST請求的非同步函數。 ``` // Define an asynchronous function that handles POST requests. export async function POST(req: Request): Promise<Response> { const actions: AnnotatedFunction<any>[] = []; // Initialize an array to hold actions. // Check if a specific environment variable is set, indicating access to certain functionality. if (process.env["TAVILY_API_KEY"]) { actions.push(researchAction); // Add the research action to the actions array if the condition is true. } // Instantiate CopilotBackend with the actions defined above. const copilotKit = new CopilotBackend({ actions: actions, }); // Use the CopilotBackend instance to generate a response for the incoming request using an OpenAIAdapter. return copilotKit.response(req, new OpenAIAdapter()); } ``` **將 PowerPoint 應用程式與 CopilotKit 前端集成** -------------------------------------- 讓我們先導入`/[root]/src/app/components/Slide.tsx`檔案頂部的`useMakeCopilotActionable`掛鉤。 ``` import { useMakeCopilotActionable } from "@copilotkit/react-core"; ``` 在 Slide 函數中,新增以下程式碼,該程式碼使用`useMakeCopilotActionable`掛鉤來設定一個名為`updateSlide`的操作,該操作具有特定參數以及根據提供的值更新投影片的實作。 ``` useMakeCopilotActionable({ // Defines the action name. This is a unique identifier for the action within the application. name: "updateSlide", // Describes what the action does. In this case, it updates the current slide. description: "Update the current slide.", // Details the arguments that the action accepts. Each argument has a name, type, description, and a flag indicating if it's required. argumentAnnotations: [ { name: "title", // The argument name. type: "string", // The data type of the argument. description: "The title of the slide. Should be a few words long.", // Description of the argument. required: true, // Indicates that this argument must be provided for the action to execute. }, { name: "content", type: "string", description: "The content of the slide. Should generally consists of a few bullet points.", required: true, }, { name: "backgroundImageDescription", type: "string", description: "What to display in the background of the slide. For example, 'dog', 'house', etc.", required: true, }, { name: "spokenNarration", type: "string", description: "The spoken narration for the slide. This is what the user will hear when the slide is shown.", required: true, }, ], // The implementation of the action. This is a function that will be called when the action is executed. implementation: async (title, content, backgroundImageDescription, spokenNarration) => { // Calls a function passed in through props to partially update the slide with new values for the specified properties. props.partialUpdateSlide({ title, content, backgroundImageDescription, spokenNarration, }); }, }, [props.partialUpdateSlide]); // Dependencies array for the custom hook or function. This ensures that the action is re-initialized only when `props.partialUpdateSlide` changes. ``` 之後,請前往`/[root]/src/app/components/Presentation.tsx`檔案並使用下面的程式碼匯入頂部的 CopilotKit 前端套件。 ``` import { useCopilotContext } from "@copilotkit/react-core"; import { CopilotTask } from "@copilotkit/react-core"; import { useMakeCopilotActionable, useMakeCopilotReadable } from "@copilotkit/react-core"; ``` 在演示函數中,加入以下程式碼,該程式碼使用`useMakeCopilotReadable`掛鉤加入`Slides`和`currentSlide`幻燈片陣列作為應用程式內聊天機器人的上下文。掛鉤使副駕駛可以讀取簡報中的整個幻燈片集合以及當前幻燈片的資料。 ``` useMakeCopilotReadable("These are all the slides: " + JSON.stringify(slides)); useMakeCopilotReadable( "This is the current slide: " + JSON.stringify(currentSlide) ); ``` 在`useMakeCopilotReadable`掛鉤下方,新增以下程式碼,該程式碼使用`useCopilotActionable`掛鉤來設定名為`appendSlide`的操作,其中包含說明和加入多張幻燈片的實作函數。 ``` useMakeCopilotActionable( { // Defines the action's metadata. name: "appendSlide", // Action identifier. description: "Add a slide after all the existing slides. Call this function multiple times to add multiple slides.", // Specifies the arguments that the action takes, including their types, descriptions, and if they are required. argumentAnnotations: [ { name: "title", // The title of the new slide. type: "string", description: "The title of the slide. Should be a few words long.", required: true, }, { name: "content", // The main content or body of the new slide. type: "string", description: "The content of the slide. Should generally consist of a few bullet points.", required: true, }, { name: "backgroundImageDescription", // Description for fetching or generating the background image of the new slide. type: "string", description: "What to display in the background of the slide. For example, 'dog', 'house', etc.", required: true, }, { name: "spokenNarration", // Narration text that will be read aloud during the presentation of the slide. type: "string", description: "The text to read while presenting the slide. Should be distinct from the slide's content, and can include additional context, references, etc. Will be read aloud as-is. Should be a few sentences long, clear, and smooth to read.", required: true, }, ], // The function to execute when the action is triggered. It creates a new slide with the provided details and appends it to the existing slides array. implementation: async (title, content, backgroundImageDescription, spokenNarration) => { const newSlide: SlideModel = { // Constructs the new slide object. title, content, backgroundImageDescription, spokenNarration, }; // Updates the slides state by appending the new slide to the end of the current slides array. setSlides((slides) => [...slides, newSlide]); }, }, [setSlides] // Dependency array for the hook. This action is dependent on the `setSlides` function, ensuring it reinitializes if `setSlides` changes. ); ``` 在上面的程式碼下方,定義一個名為`context`的變數,該變數使用名為`useCopilotContext`的自訂掛鉤從 copilot 上下文中檢索當前上下文。 ``` const context = useCopilotContext(); ``` 之後,定義一個名為`generateSlideTask`的函數,它包含一個名為`CopilotTask`的類別。 `CopilotTask`類別定義用於產生與簡報的整體主題相關的新投影片的指令 ``` const generateSlideTask = new CopilotTask({ instructions: "Make the next slide related to the overall topic of the presentation. It will be inserted after the current slide. Do NOT carry any research", }); ``` 然後在上面的程式碼下面初始化一個名為`generateSlideTaskRunning`的狀態變數,預設值為false。 ``` const [generateSlideTaskRunning, **setGenerateSlideTaskRunning**] = useState(false); ``` 之後,使用下面的程式碼更新簡報元件中的操作按鈕,以透過新增、刪除和導覽投影片來新增動態互動。 ``` // The JSX structure for the Presentation component. return ( <div className="relative"> {/* Renders the current slide using a Slide component with props for the slide data and a method to update it. */} <Slide slide={currentSlide} partialUpdateSlide={updateCurrentSlide} /> {/* Container for action buttons positioned at the top left corner of the relative parent */} <div className="absolute top-0 left-0 mt-6 ml-4 z-30"> {/* ActionButton to add a new slide. It is disabled when a generateSlideTask is running to prevent concurrent modifications. */} <ActionButton disabled={generateSlideTaskRunning} onClick={() => { const newSlide: SlideModel = { title: "Title", content: "Body", backgroundImageDescription: "random", spokenNarration: "The speaker's notes for this slide.", }; // Inserts the new slide immediately after the current slide and updates the slide index to point to the new slide. setSlides((slides) => [ ...slides.slice(0, currentSlideIndex + 1), newSlide, ...slides.slice(currentSlideIndex + 1), ]); setCurrentSlideIndex((i) => i + 1); }} className="rounded-r-none" > <PlusIcon className="h-6 w-6" /> </ActionButton> {/* ActionButton to generate a new slide based on the current context, also disabled during task running. */} <ActionButton disabled={generateSlideTaskRunning} onClick={async () => { setGenerateSlideTaskRunning(true); // Indicates the task is starting. await generateSlideTask.run(context); // Executes the task with the current context. setGenerateSlideTaskRunning(false); // Resets the flag when the task is complete. }} className="rounded-l-none ml-[1px]" > <SparklesIcon className="h-6 w-6" /> </ActionButton> </div> {/* Container for action buttons at the top right, including deleting the current slide and potentially other actions. */} <div className="absolute top-0 right-0 mt-6 mr-24"> {/* ActionButton for deleting the current slide, disabled if a task is running or only one slide remains. */} <ActionButton disabled={generateSlideTaskRunning || slides.length === 1} onClick={() => { console.log("delete slide"); // Removes the current slide and resets the index to the beginning as a simple handling strategy. setSlides((slides) => [ ...slides.slice(0, currentSlideIndex), ...slides.slice(currentSlideIndex + 1), ]); setCurrentSlideIndex((i) => 0); }} className="ml-5 rounded-r-none" > <TrashIcon className="h-6 w-6" /> </ActionButton> </div> {/* Display showing the current slide index and the total number of slides. */} <div className="absolute bottom-0 right-0 mb-20 mx-24 text-xl" style={{ textShadow: "1px 1px 0 #ddd, -1px -1px 0 #ddd, 1px -1px 0 #ddd, -1px 1px 0 #ddd", }} > Slide {currentSlideIndex + 1} of {slides.length} </div> {/* Navigation buttons to move between slides, disabled based on the slide index or if a task is running. */} <div className="absolute bottom-0 right-0 mb-6 mx-24"> {/* Button to move to the previous slide, disabled if on the first slide or a task is running. */} <ActionButton className="rounded-r-none" disabled={generateSlideTaskRunning || currentSlideIndex === 0} onClick={() => { setCurrentSlideIndex((i) => i - 1); }} > <BackwardIcon className="h-6 w-6" /> </ActionButton> {/* Button to move to the next slide, disabled if on the last slide or a task is running. */} <ActionButton className="mr-[1px] rounded-l-none" disabled={generateSlideTaskRunning || currentSlideIndex + 1 === slides.length} onClick={async () => { setCurrentSlideIndex((i) => i + 1); }} > <ForwardIcon className="h-6 w-6" /> </ActionButton> </div> </div> ); ``` 現在讓我們轉到`/[root]/src/app/page.tsx`文件,使用下面的程式碼匯入 CopilotKit 前端包和文件頂部的樣式。 ``` import { CopilotKit, } from "@copilotkit/react-core"; import { CopilotSidebar } from "@copilotkit/react-ui"; import "@copilotkit/react-ui/styles.css"; import "@copilotkit/react-textarea/styles.css"; ``` 然後使用`CopilotKit`和`CopilotSidebar`來包裝Presentation元件,如下所示。 ``` export default function AIPresentation() { return ( <CopilotKit url="/api/copilotkit/"> <CopilotSidebar instructions="Help the user create and edit a powerpoint-style presentation. IMPORTANT NOTE: SOMETIMES you may want to research a topic, before taking further action. BUT FIRST ASK THE USER if they would like you to research it. If they answer 'no', do your best WITHOUT researching the topic first." defaultOpen={true} labels={{ title: "Presentation Copilot", initial: "Hi you! 👋 I can help you create a presentation on any topic.", }} clickOutsideToClose={false} > <Presentation /> </CopilotSidebar> </CopilotKit> ); } ``` 之後,執行開發伺服器並導航到 http://localhost:3000/。您應該會看到應用程式內聊天機器人已整合到 PowerPoint Web 應用中。 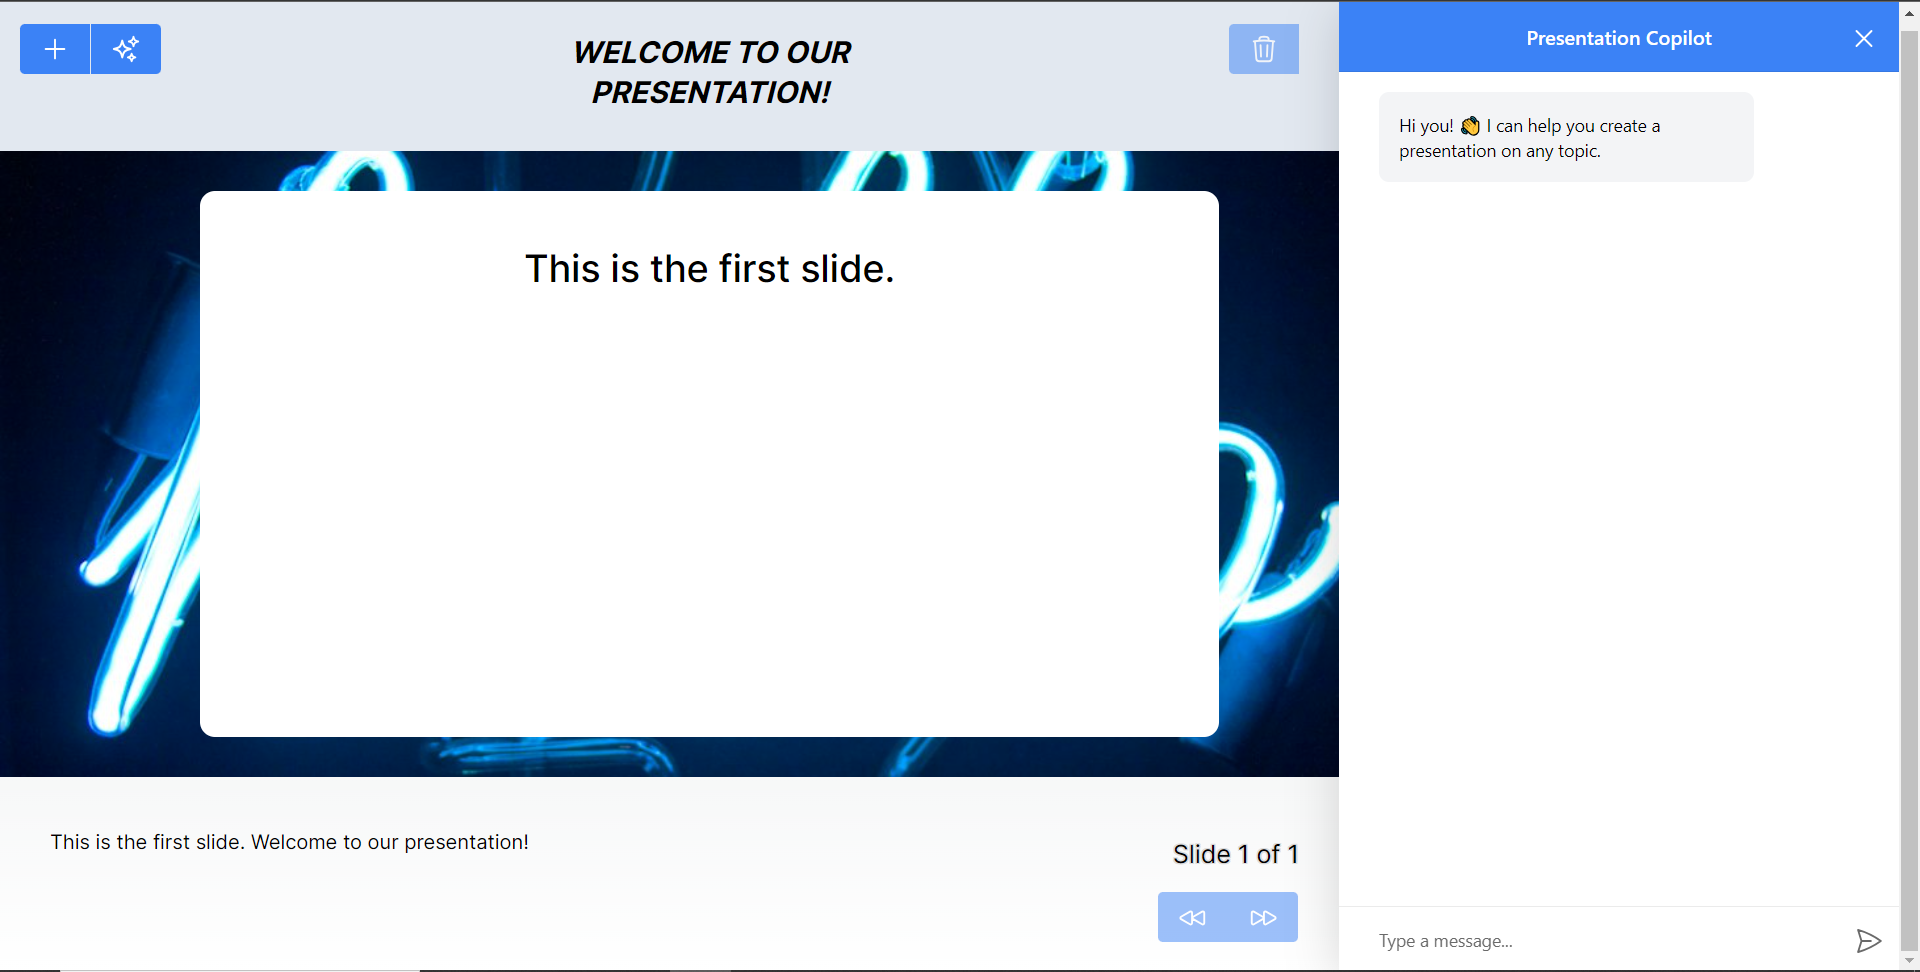 最後,給右側的聊天機器人一個提示,例如“在 JavaScript 上建立 PowerPoint 簡報”,聊天機器人將開始產生回應,完成後,使用底部的前進按鈕瀏覽產生的幻燈片。 注意:如果聊天機器人沒有立即產生投影片,請根據其回應給予適當的後續提示。 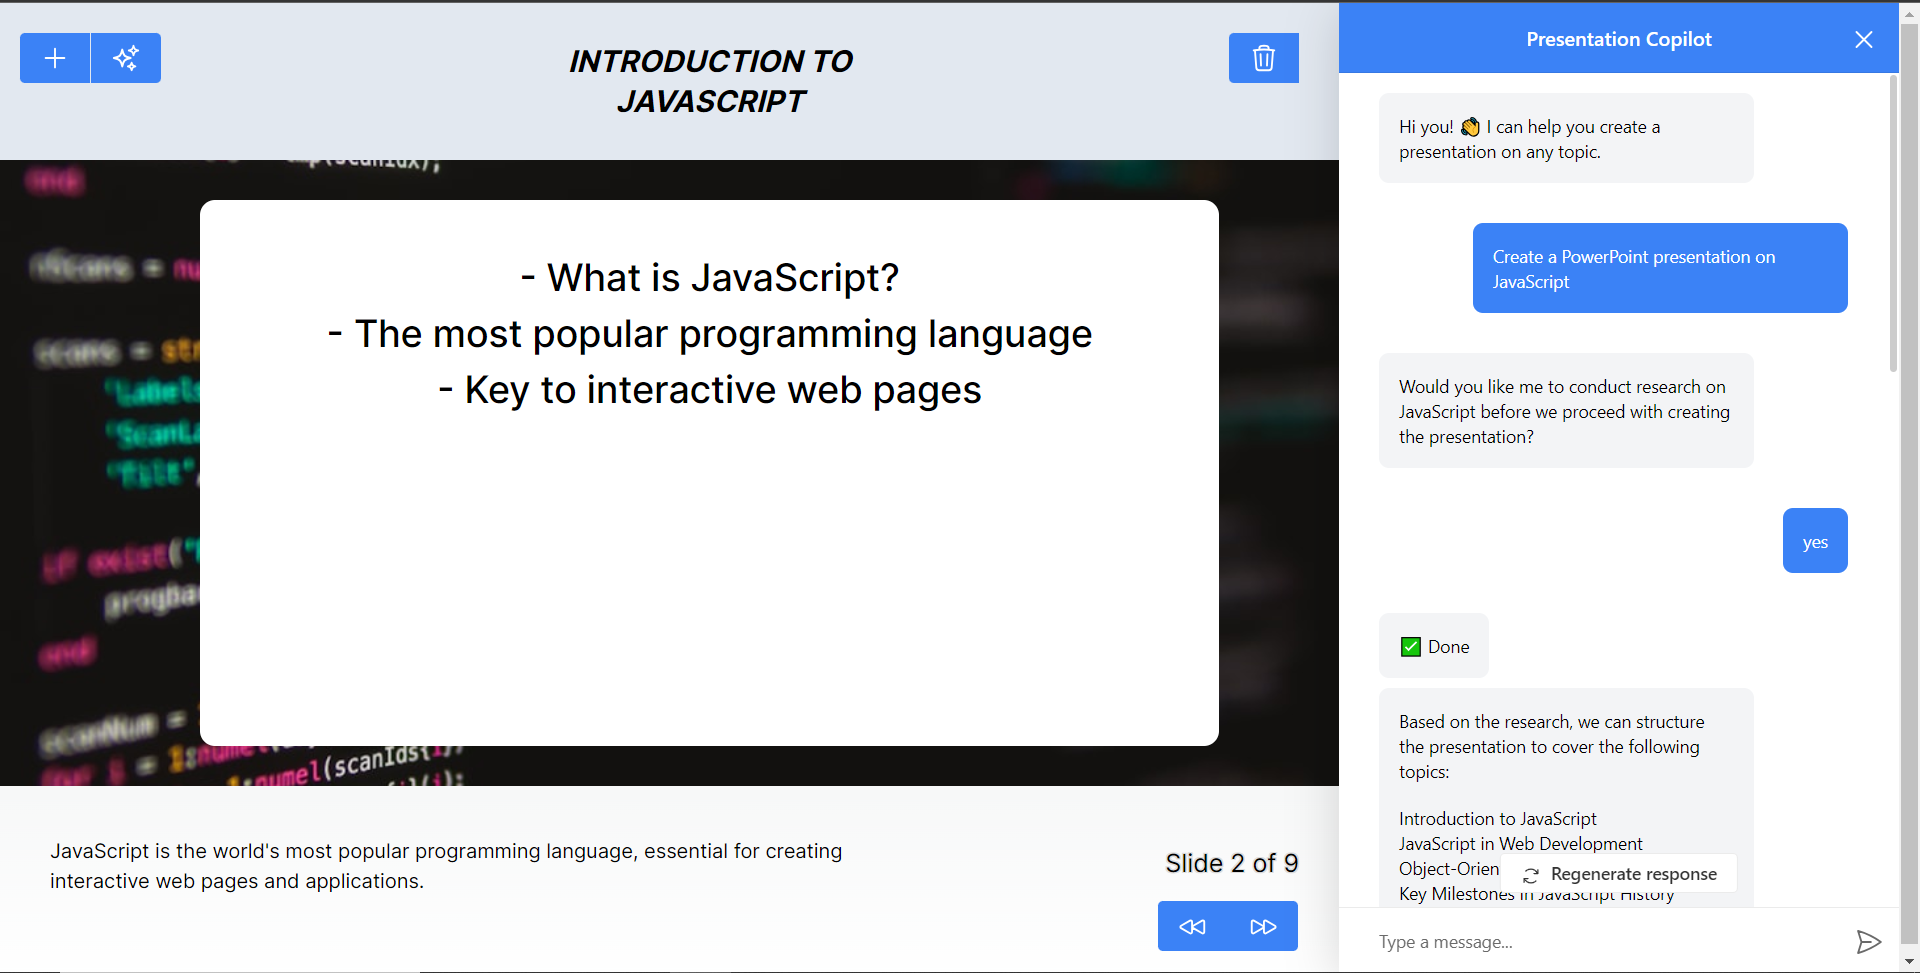 結論 -- 總而言之,您可以使用 CopilotKit 建立應用內 AI 聊天機器人,該機器人可以查看當前應用程式狀態並在應用程式內執行操作。 AI 聊天機器人可以與您的應用程式前端、後端和第三方服務對話。 完整的原始碼:https://github.com/TheGreatBonnie/aipoweredpowerpointapp --- 原文出處:https://dev.to/copilotkit/how-to-build-an-ai-powered-powerpoint-generator-langchain-copilotkit-openai-nextjs-4c76
## 前言 在2010年前,前端只是一个项目的“附赠品”,对于整个项目来说他显得无关紧要,甚至没有前后端之分,但后来为了提升用户体验,工程师们不得不把界面和交互做的更加优美和便捷,于是前端慢慢地脱离出来变成了一个单独地岗位和方向。 随着前端项目复杂度的提升,传统的前端开发方式(html+css+js)已经无法满足复杂多变的开发需求,因为无论是从开发效率、心智负担、时间成本等各个方面来看都是非常不划算的,于是工程师们为了解决这个问题,经过不断地探索和事件慢慢地形成了前端工程化的开发理念和实践方法。 ## 什么是前端工程化? 开局讲了这么多,但到底什么是前端工程化呢?请先看下面这个示意图: ![前端工程化.png][1] 简单来说,前端工程化就是指通过工具、流程和方法来提高前端开发效率、降低维护成本、增强代码质量的一种开发方式。 ## 如何实践前端工程化? ### 1. 项目构建时 使用如Vite、vue-cli、Create React App等开源前端脚手架,或者使用自己公司内部脚手架统一构建项目基础框架; ### 2. 项目开发时 - 协作开发&版本控制:我们可以使用git、svn等控制代码版本的迭代,也可以合理利用分支实现多人协作开发。 - 代码风格:在项目中配置Lint工具(如ESLint、Stylelint等),并定义一套符合团队规范的Lint规则,以保证代码风格的一致性。代码风格精确到命名规则、语言版本规范等。 - 模块化:将一些项目中通用的函数、类等代码单独封装到一个公共模块,并且区分出每个模块的职责,有利于代码维护,避免大多数冗余代码。 - 组件化:将一些高度可复用的组件尽量解耦封装成公共组件,实现一套组件多次使用,更有甚者可以单独抽离到组件库,可在多个项目重复利用。 ### 3. 测试阶段 - 单元测试:合理使用单元测试可以避免大多数bug的产生,尤其是在一些特殊场景下,比如涉及到支付等场景,单元测试尤为重要。 ### 4. 打包构建 使用打包工具,使用构建工具(如Webpack、Rollup等)对项目进行自动化构建,包括代码打包、压缩、转译、资源管理等,这样不仅可以有效减小代码体积,还可以利用babel对代码进行转译到兼容性最高的语言版本,减少设备兼容性问题。 ### 5. 自动化部署 - 持续集成/持续部署工具(CI/CD):CI/CD工具(如Jenkins、GitLab CI/CD等)可以在代码提交后自动触发构建、测试和部署流程,实现代码的自动化集成和部署。 - 容器化部署:使用容器化技术(如Docker、Kubernetes)可以将应用程序与其依赖项打包成一个容器,实现环境的统一和隔离,便于部署和管理。 - 自动化部署脚本:编写自动化部署脚本(如Shell脚本、Python脚本等),实现自动化地将代码从源代码库中拉取并部署到目标环境中。 以上就是简单的前端工程化内容了,希望能帮到你! [1]: https://www.zowlsat.com/usr/uploads/2024/02/3774073632.png
作為開發人員,**確定工具的優先順序至關重要,**因為它們對於實現您的目標至關重要。熟練是有價值的,但正確的工具可以增強這些技能,從而在您的領域中取得更大的成功。 在本文中,我將分享我每天使用的提高工作效率的工具。這些工具幫助我完成各種任務,包括文件、線框圖、開發、測試、除錯和研究。 我將這些工具分為三類:*任務管理*、*開發*和*文件*。 **讓我們事不宜遲地深入研究這些工具。** 任務管理工具:讓事情井井有條 -------------- 對於軟體開發人員來說,保持任務有序非常重要。無論您計劃的是本月、一周還是今天,都沒關係。寫下所有任務會很有幫助,這樣您就可以了解自己的表現。 我主要使用兩個工具: **Notion**和**Linear** 。 ### Notion 當您是軟體工程師時,您經常需要組織您的工作、快速做筆記,甚至即時編寫一些文件。概念對此非常有用。 Notion讓我可以輕鬆地整理我的想法、規劃我的內容並安排我的工作。日曆範本使用簡單,您可以根據自己的喜好進行更改,並且可以加入許多詳細資訊(例如標籤)來追蹤您的任務。 我使用 Notion 來規劃我的內容。 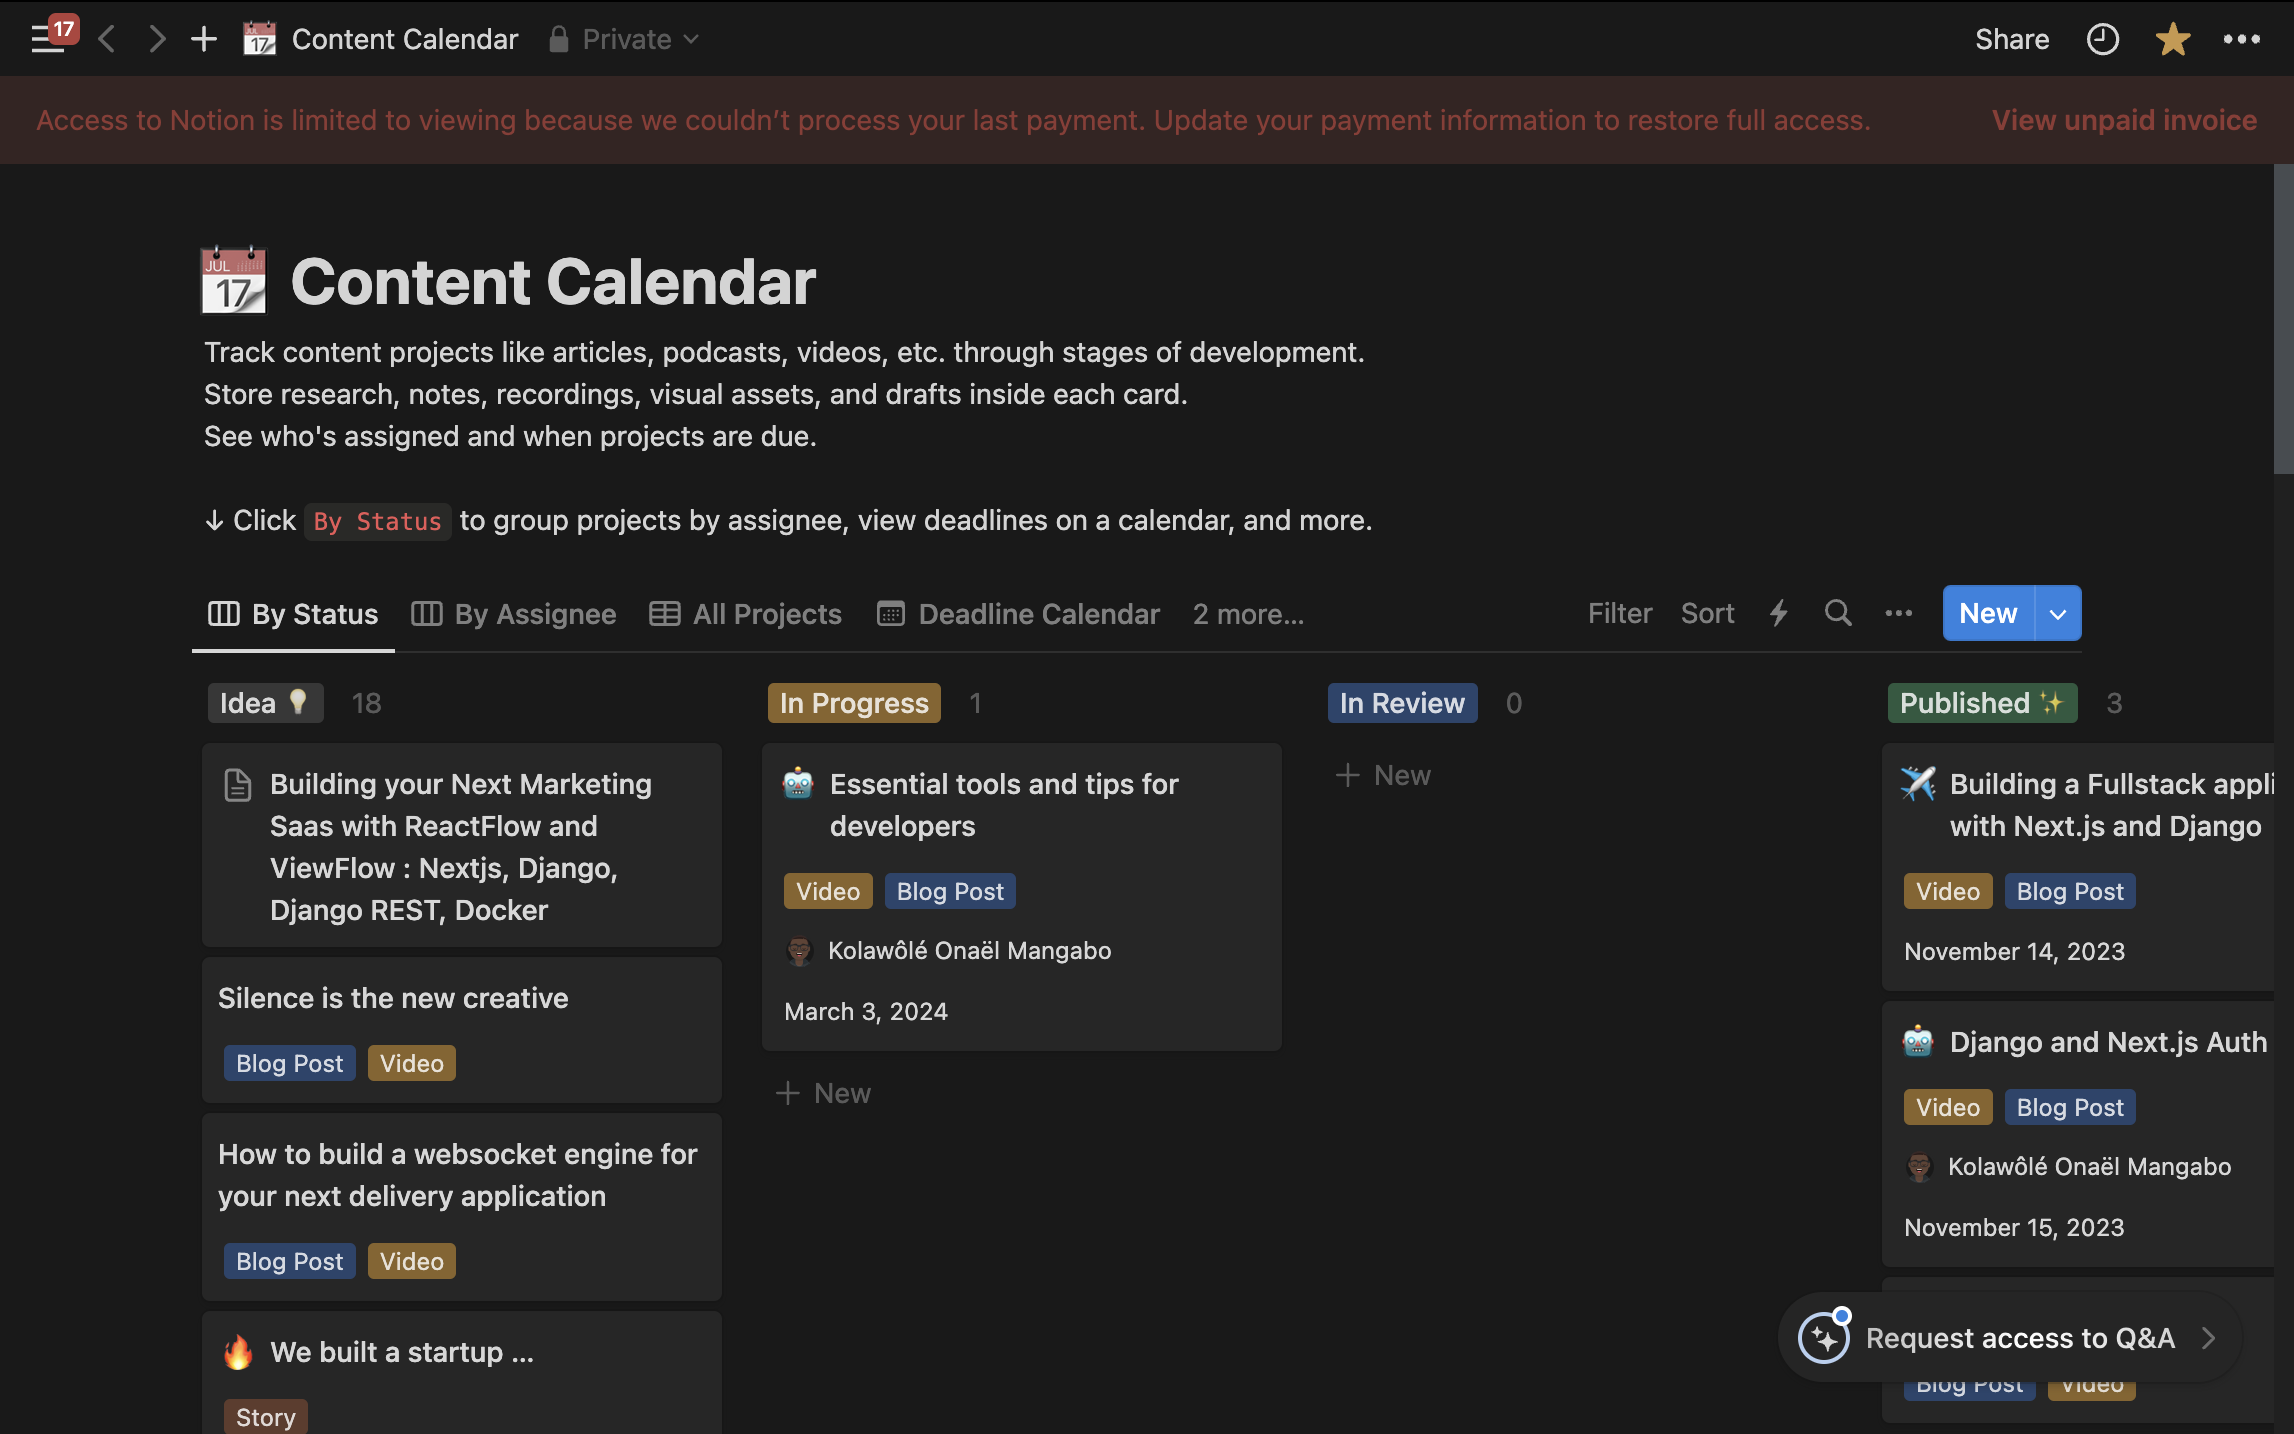 概念也有利於團隊追蹤任務。但是,我要討論的下一個工具對於管理軟體開發任務來說更加簡單。 我真的不喜歡到處移動門票或花很多時間在門票報告上。這個工具讓這些任務變得更容易,我認識的許多開發人員都喜歡每天使用它。這就是為什麼我想介紹 Linear。 ### [Linear](https://linear.app/) 我之前嘗試過使用 Trello 或 Jira 等工具,但我不太喜歡它。 Trello 太簡單,功能不多,而 Jira 功能很多,但使用起來很複雜(甚至 GitLab 的 Issue board 似乎更好)。 然後我找到了 Linear,它是為像我們這樣的開發者設計的。 Linear 可以輕鬆實現工作流程自動化並整合其他工具,而不會使事情變得複雜。而且用起來真的很好。使用線性,您可以獲得: - 根據您的 PR/MR 變更或進度自動更新票證。 - 複製分支名稱的簡單方法。 - 不傷眼的深色模式。 - 鍵盤快捷鍵可讓您在應用程式中快速移動。 - 使用起來既快速又有趣。 使用 Linear,我不會花太多時間在任務管理上,因此我可以更專注於編碼。 現在我們已經討論瞭如何管理任務,接下來我將分享我用於文件編寫的工具。 文件工具:軟體工程的支柱 ------------ 文件是軟體工程的基石,以至於人們常說,最好的開發人員花在編寫文件的時間比編寫程式碼的時間還要多。它有多種用途,從規劃和假設建立到追蹤效能、教育用戶以及詳細說明功能或錯誤。 在這裡,我將分享我用於文件編寫的工具,從文字編寫到圖形建立。 ### [Obsidian](https://obsidian.md/) 雖然 Notion 是一個很棒的工具,許多人可能想知道為什麼它不是我的文件首選,但我發現它更傾向於記筆記。儘管 Notion 的小部件增強了其功能,但我最近需要一個簡單的離線工具來組織想法並有效地將它們連結起來。 Obsidian 在這一領域表現出色,在反向連結和創意組織方面超越了 Notion。 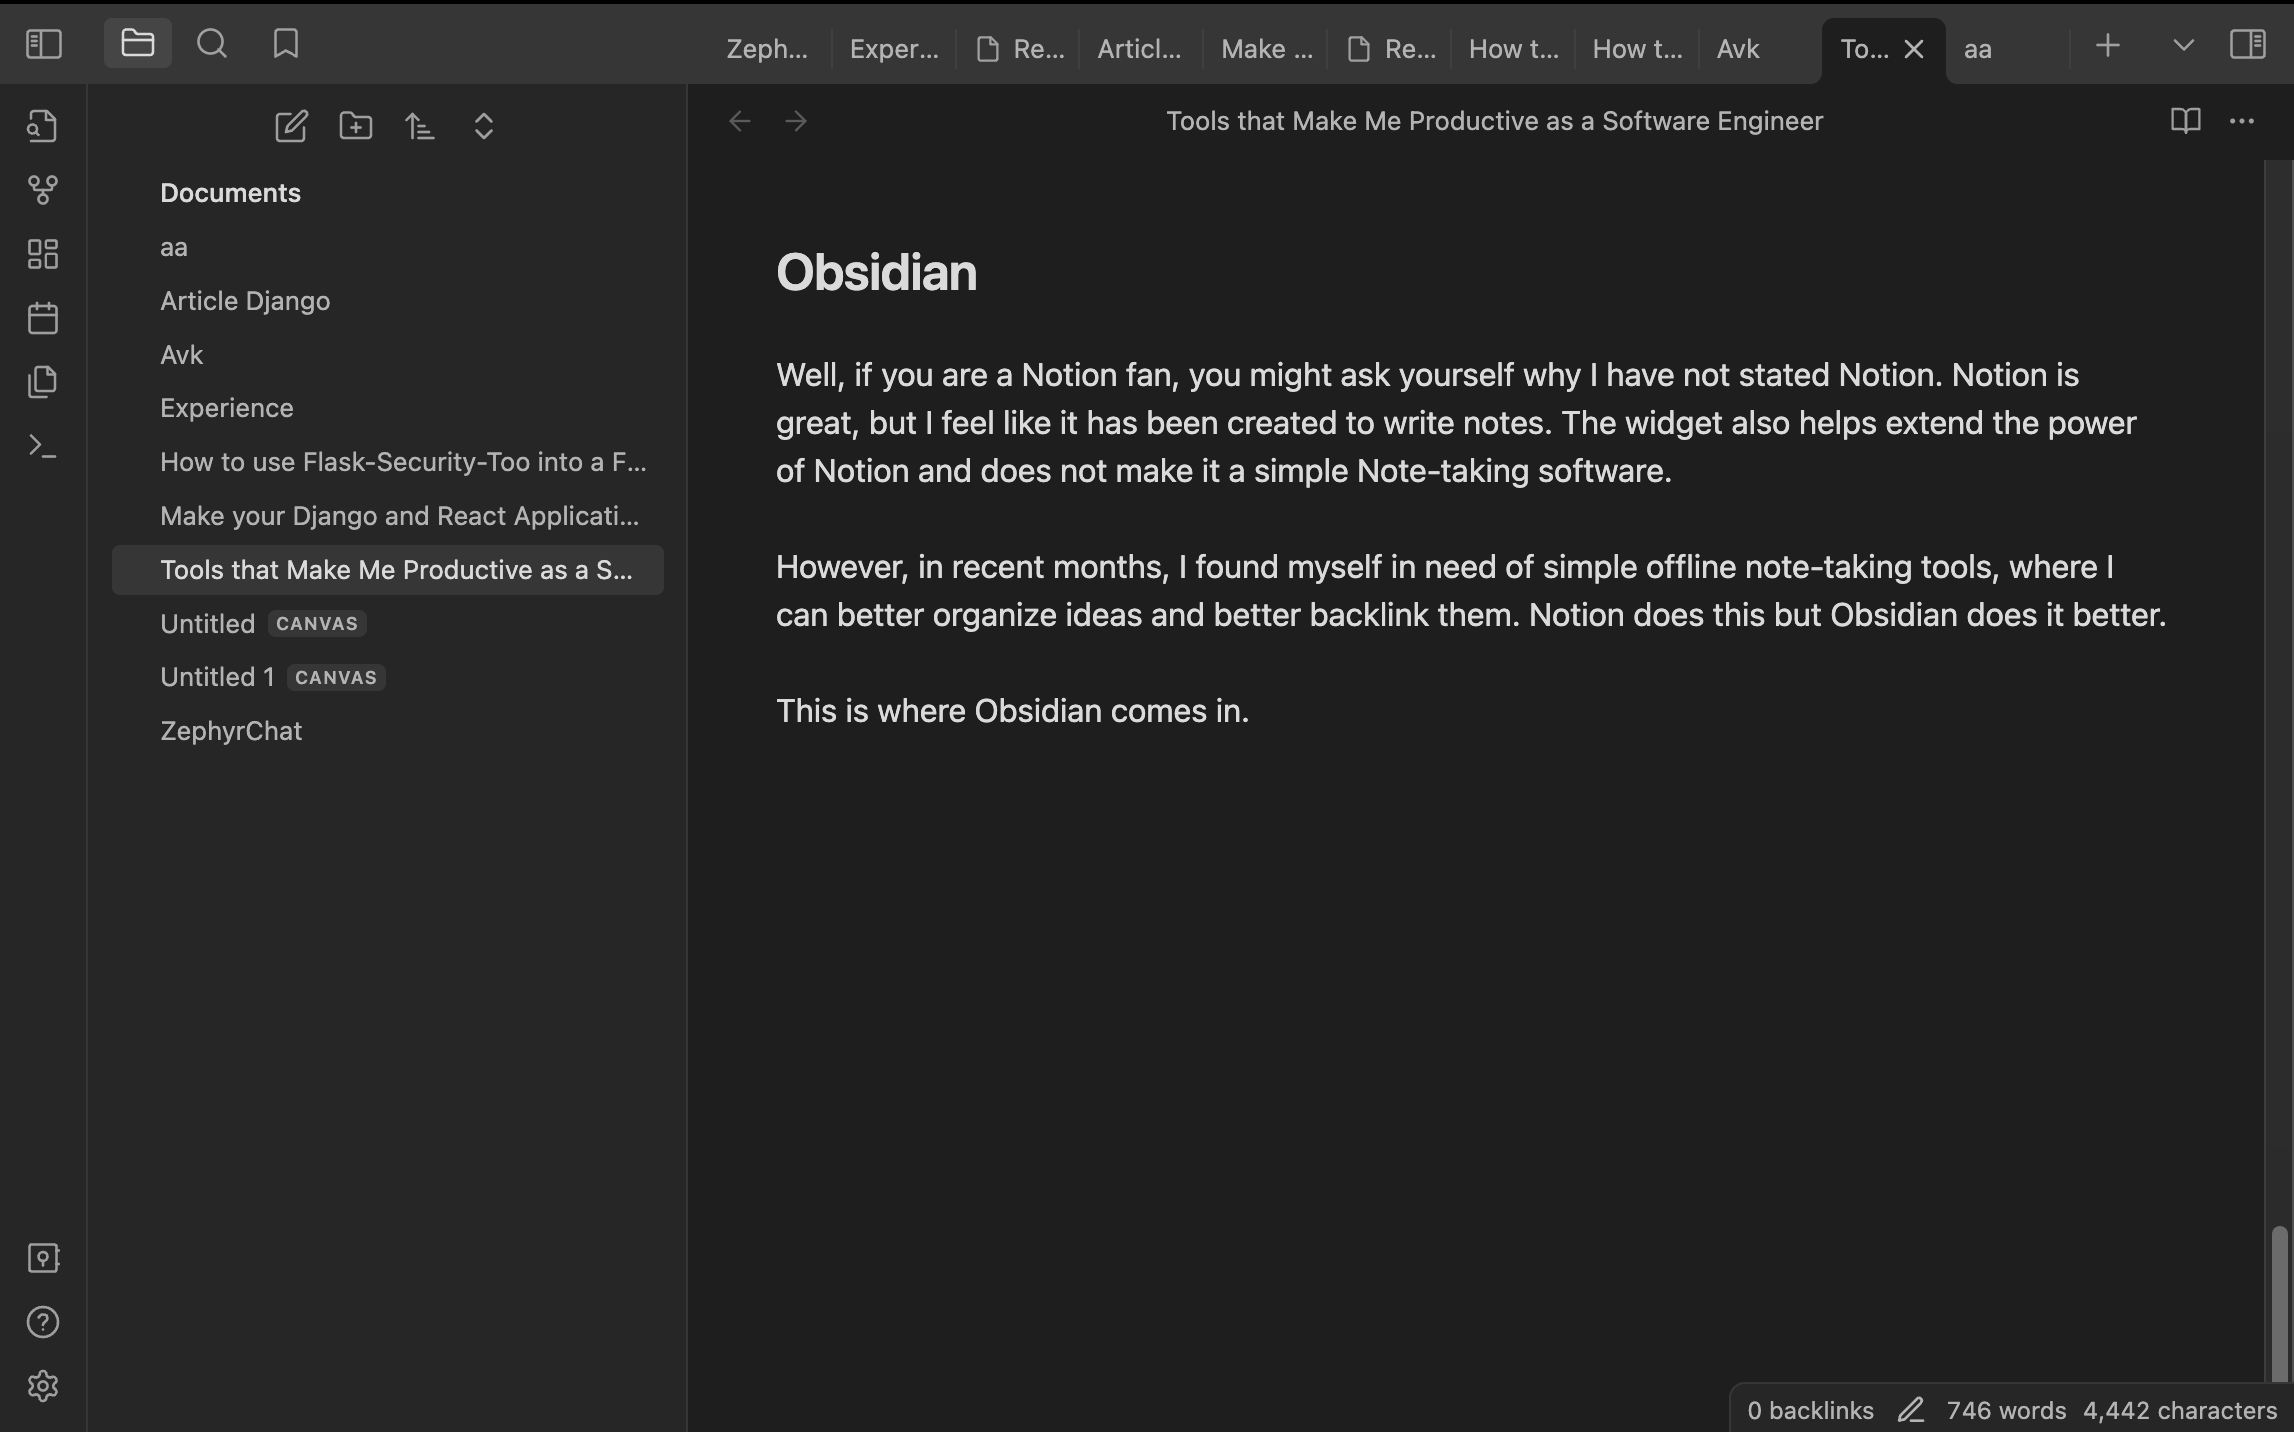 Obsidian 提供了一套廣泛的筆記記錄和知識管理功能。它的知識圖直觀地表示了筆記之間的聯繫,有助於深入挖掘資訊。完整的 Markdown 支援允許靈活且強大的格式設定。 該應用程式的離線功能確保其無需網路連接即可使用,拼字檢查、API 支援以及將筆記發佈為網站或使用統一筆記結構模板的能力等其他功能也很突出。 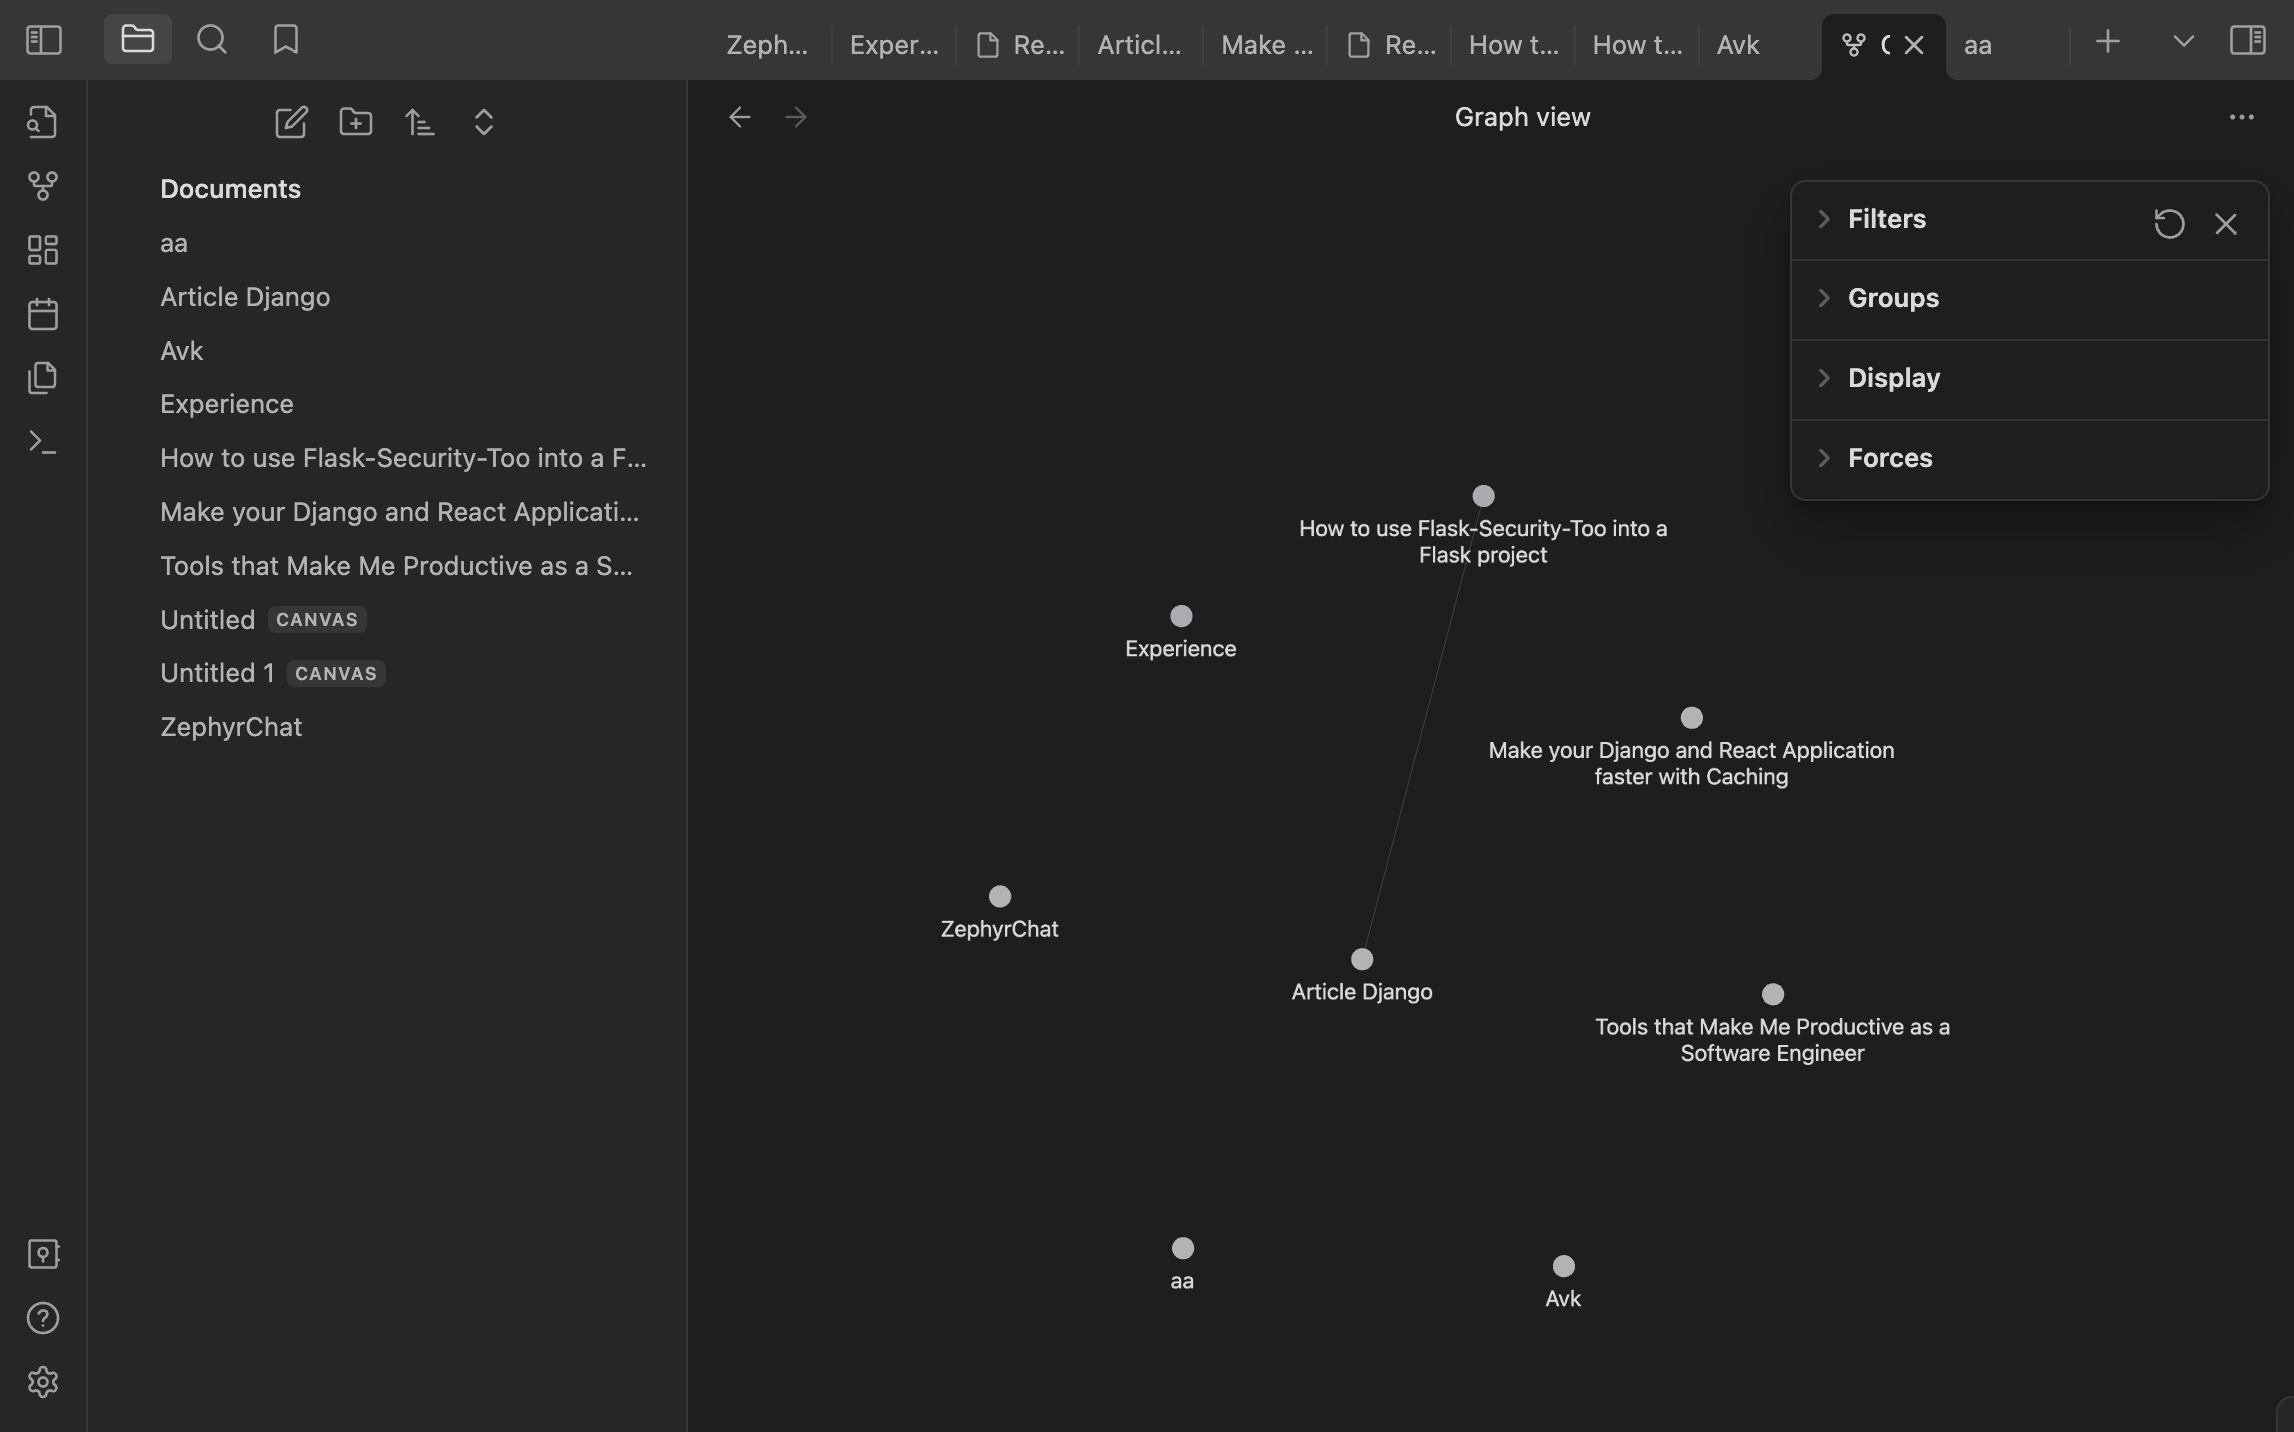 我主要使用 Obsidian 來整理我的筆記。組織好後,我將它們轉移到 Notion 進行共享,因為 Obsidian 缺乏共享和同步功能。儘管如此,與 Notion 相比,Obsidian 仍然是我首選的文件工具。 然而,Notion和Obsidian只能幫助你寫文件。那麼,一些視覺效果怎麼樣呢?我們來談談[Excalidraw](https://excalidraw.com/) 。 ### [Excalidraw](https://excalidraw.com/) 向遠距工作的過渡讓我懷念使用記號筆和白板進行腦力激盪的簡單性。當語言無法表達時,視覺效果可以彌補理解複雜想法的差距。 Excalidraw 以數位方式重新建立白板體驗,這對於補充文件的快速圖表或插圖具有無價的價值。 這是我建立的圖表範例,用於闡明 React 元件生命週期。 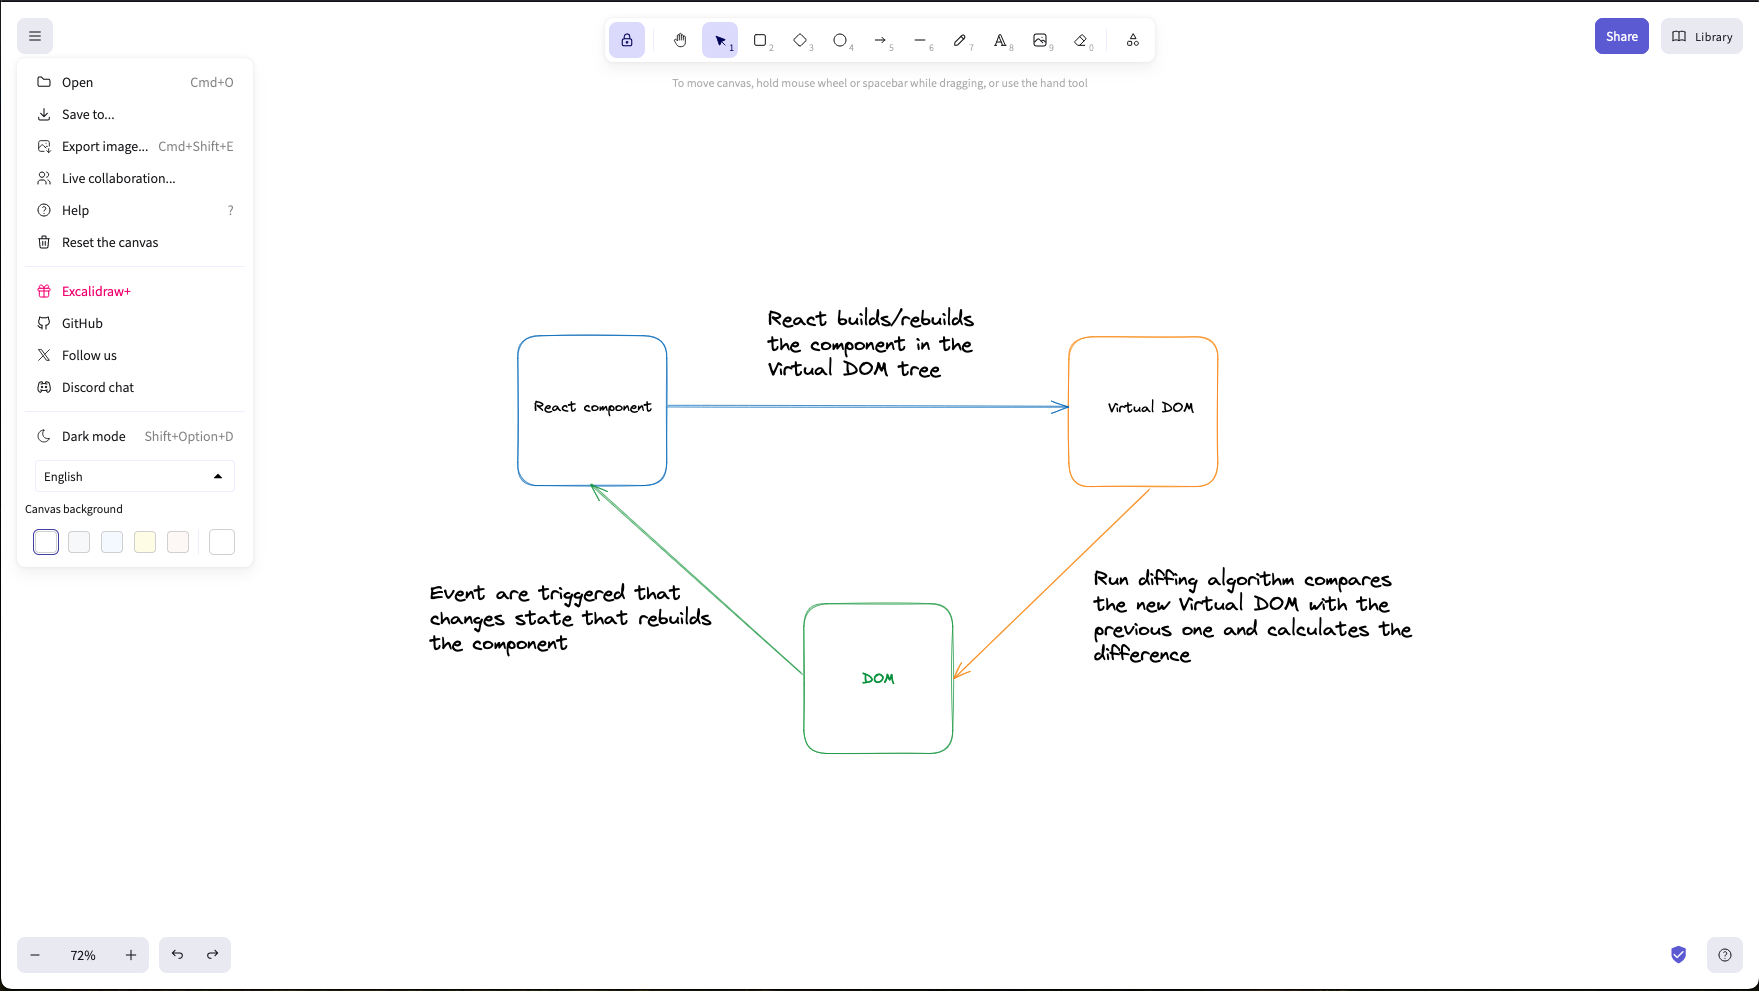 這些工具構成了我作為軟體工程師的文件實踐的基礎。接下來,我們將探討提高編碼效率的開發工具。 開發工具 ---- 多年來,我的開發工具發生了很大變化,隨著最近人工智慧的引入和大量使用,我發現自己發現了更多可以幫助我作為軟體工程師提高工作效率的工具。但在討論人工智慧工具之前,我們先來談談程式設計和測試工具。 我是軟體工程師,使用 Django、Next.js,有時也使用 Golang 進行開發。我建立了為資料提供服務的 API 和/或使用這些資料的接口,因此編碼和測試我的工作非常重要。這就是 Jetbrains 發揮作用的地方。 ### 編碼工具 [Jetbrains](https://www.jetbrains.com/)提供了非常強大的 IDE,讓您的工作變得更輕鬆。我堅信他們為開發人員打造了最好的 IDE。我認為,無需配置即可立即開始編碼,這是一個很大的優勢。 這是我離開使用 VsCode 的原因之一(嗯,我仍然將它用於快速專案或不太複雜的專案),因為我每次都需要同步才能確保我可以開始工作。例如,當使用 Webstorm 啟動 Next.js 專案時,我只需選擇在每次儲存時執行 Eslint、prettier 的選項,還可以自動設定可以在寫入提交之前執行的 git 掛鉤。 [Webstorm](https://www.jetbrains.com/webstorm/) IDE 還有一個漂亮的 UI,用於在偵錯模式下執行專案,而且功能非常強大。我在 Pycharm 和 Goland 上也經歷過。這些 IDE 功能強大且使用起來非常簡單。 不要誤會我的意思,VsCode 已經很強大了,但是當涉及到執行基本任務時,沒有太多麻煩或配置,例如:搜尋、重構、Git 任務(獲取、拉取、推送、PR/MR 管理等)。 感謝 Jetbrains 團隊製作如此強大的工具。 ### 測試:Insomnia、Postman 起初,我使用[Postman](https://www.postman.com/)來測試API,因為它有很多功能。但我改用了[Insomnia](https://insomnia.rest/) ,因為它更容易使用並且讓一切井井有條。 Insomnia 的一個大問題是,當它讓我建立一個帳戶來繼續使用它時,它刪除了我所有保存的工作。 這讓我在一年後又回到了 Postman。 Postman 沒有太大變化,但它有一些我非常喜歡的新的、更好的功能。現在,我又回到了 Postman,因為它感覺像是我熟悉的東西,但也有新的東西。 Insomnia 使用起來很簡單,但每次打開筆記型電腦時都必須登錄,這很煩人。本來可以很棒,但這些問題讓我開始尋找別的東西。 現在,我正在考慮嘗試[Bruno](https://www.usebruno.com/) ,這是我聽說過的新工具。 Bruno 擁有您想要的所有功能,例如 Websocket 的支援。 Bruno 的優點是一次性支付僅需 19 美元,看起來很划算。我想看看它對我來說效果如何,是否像聽起來那麼好。我很高興嘗試一下,也許稍後再討論。 ### 人工智慧工具 我經常使用 ChatGPT 和[Phind.ai](https://www.phind.com/)來撰寫技術文章、除錯和集思廣益解決方案。雖然有些人可能對他們的回答持保留態度,但我發現它們是有用的指南,補充了我自己的研究。 [Phind.ai](https://www.phind.com/)對於提供進一步探索和加強研究過程的連結特別有價值。 其他 AI 工具(例如[Copilot](https://github.com/features/copilot)和[Codium.ai)](https://www.codium.ai/)與流行的編輯器和 IDE(例如 VSCode)很好地集成,從而提高您的技能和生產力。 在編碼中有效使用人工智慧需要清楚了解您的目標。在沒有紮實掌握底層技術和清晰的溝通技巧的情況下,不建議初學者開始使用人工智慧進行編碼。一旦您掌握了這些技能,人工智慧工具就可以極大地有益於您的工作。 結論 -- 這是我很久以來第一次寫一篇與程式設計無關的文章。由於生產力是軟體工程的一個重要方面,因此我希望撰寫更多有關幫助我成為更好的軟體工程師的工具或策略的文章。 如果您對本文有疑問或回饋,請在評論中分享。您的意見有助於使該資源更好地服務每個人。以下是我們在本文中所使用的資源。 目前為止就這樣了。快樂編碼!🚀 --- 原文出處:https://dev.to/koladev/tools-that-make-me-productive-as-a-software-engineer-2dge
🔑 關鍵概念 ------ 什麼是可重複使用的 React 元件?您可以將它們視為建置塊。 它們是獨立的程式碼片段,可以在整個網站中重複使用,以節省您的時間和精力。 它們可以是從簡單按鈕到複雜表單的任何內容。 **為什麼要使用可重複使用的元件?** 隨著您的網站的發展,您可以透過組合現有元件輕鬆加入新功能。這使您的程式碼更具可擴展性和適應性。 您可以**在未來的專案中使用可重複使用的程式碼,**而無需從頭開始重新編寫。 --- 🧩 如何寫出乾淨、可重複使用的 React 元件 ------------------------ 在編寫乾淨的可重複使用 React 元件時,需要記住以下*兩個最重要的*事情:  **1. 🩼避免副作用。**不要將與外部資料互動的邏輯(例如進行 API 呼叫)直接放入可重複使用元件中。相反,將此邏輯作為`props`傳遞給元件。 例如,如果一個按鈕不僅僅是看起來漂亮,例如從網路獲取資料,**那麼它可能無法重複使用。** 在您掌握透過最佳實踐傳遞 props 的概念之前,我不會向您展示這方面的範例。繼續閱讀。 這是一個可重複使用的按鈕元件。但它缺乏最佳實踐。我將在範例部分向您展示原因。 ``` // This is a reusable button component (bad practice!) const Button = () => { return ( <button> Click Me </button> ); } ``` **2. 🗃️使用 props。** Props 是傳遞給元件以自訂其行為和外觀的參數。這允許您將相同的元件用於不同的目的。 ``` // This is a button component that can change its color const Button = ({ color }) => { return ( <button style={{ backgroundColor: color }}> Click Here </button> ); } ``` 這仍然是一個不好的做法,因為您有一個名為「點擊這裡」的固定標籤。如果您想更改按鈕上的文本,例如“註冊”,那麼您必須返回按鈕元件並進行更改。 這意味著每次我們想要使用不同的文字時,我們都必須返回並編輯程式碼。換句話說,它不再可重複使用。 **💪 挑戰:**那麼解決方案是什麼? 你已經有了答案。但如果您不這樣做,我將在範例部分向您展示。 **🌴提示:**考慮一下您可能希望如何在不同情況下使用該元件,並將其設計得靈活且適應性強。 🍃可重複使用 React 元件的範例 ------------------ 以下是可重複使用 React 元件的一些常見範例,以及一些幫助您入門的程式碼範例: **1. 按鈕:**具有不同樣式和功能的基本按鈕。 ``` // Button component import React from "react"; const Button = ({ color, label, onClick }) => { return ( <button className={`padding-2 shadow-none hover:shadow background-light-${color} hover:background-dark-${color}`} onClick={onClick} > {label} </button> ); }; export default Button; // Using the Button component <Button color="blue" label="Click Here" onClick={() => console.log("Button clicked!")} /> ``` 正如你所看到的,我沒有在按鈕元件中寫“Click Here”。我想讓我的按鈕可重複使用,因此它不知道有關自訂樣式或文字的任何資訊。 因此,我將它們作為 props(例如,顏色、標籤、onClick)傳遞,以便將來更改它們,而無需觸摸原始按鈕元件。希望這能說清楚。 > **🪜解決方案:**您需要將每個功能作為可重複使用元件中的`props`傳遞 - 就是這樣。 **2. 導覽列:**在整個網站上提供一致導覽的導覽列。 ``` // Navbar component import React from "react"; const Navbar = ({ isLoggedIn }) => { return ( <div className="navbar"> <div className="navbar-container"> <div className="navbar-logo"> <img src={logo} alt="logo" /> </div> <div className="navbar-links"> <a href="/">Home</a> <a href="/about">About</a> <a href="/contact">Contact</a> {isLoggedIn ? ( <a href="/profile">Profile</a> ) : ( <a href="/login">Login</a> )} </div> </div> </div> ); }; export default Navbar; // Using the Navbar component <Navbar isLoggedIn={true} /> ``` 如您所見,我通過了`<Navbar isLoggedIn={true} />` 此行利用`Navbar`元件並傳遞值為 true 的`isLoggedIn`屬性,表示使用者已登入。這將顯示「個人資料」連結並隱藏「登入」連結。 與按鈕元件類似,導覽列元件是可重複使用的,並接受 props 來自訂其行為。完美的! **3. 為什麼在按鈕元件中呼叫 API 是不好的做法** 現在,您已經了解了 React 中可重複使用元件的所有內容。 讓我們透過解決一個複雜的問題來更深入地研究。 考慮這樣的場景,您有一個執行 API 呼叫的按鈕。按鈕元件的程式碼可以如下: ``` import React from "react"; import doAPICall from "../api" const SaveButton = () => { return ( <button onClick={() => { doAPICall(); }} > Save </button> ); } export default SaveButton ``` 很明顯,您不能在多個地方重複使用上述按鈕,因為該按鈕元件內部包含副作用( `doAPICall()` )。 為了使該元件可重複使用,首先,您必須提取副作用並將其作為 prop 傳遞給按鈕元件,如下所示: ``` const App = () => { function doAPICall() { // Does an API call to save the current state of the app. } return ( <div> <SaveButton onClick={doAPICall}/> </div> ) } ``` 按鈕元件將如下所示: ``` const SaveButton = ({ onClick }) => { return ( <button onClick={onClick} > Save </button> ); } ``` 正如您所看到的,現在可以在您想要透過點擊按鈕儲存資料的所有位置重複使用上面的按鈕。該按鈕現在可以在多個地方像這樣使用: ``` const App = () => { function saveUser() { // Does an API call to save the user. } function saveProject() { // Does an API call to save the project. } return ( <div> <SaveButton onClick={saveUser}/> <SaveButton onClick={saveProject}/> </div> ) } ``` 您也可以透過使用 prop 來控制標籤,使按鈕元件更具可重複使用性,如下所示: ``` const App = () => { function saveUser() { // Does an API call to save the user. } function saveProject() { // Does an API call to save the project. } return ( <div> <SaveButton onClick={saveUser} label="Save user" /> <SaveButton onClick={saveProject} label="Save project" /> </div> ) } ``` 按鈕元件將如下所示: ``` const SaveButton = ({ onClick, label }) => { return ( <button onClick={onClick} > {label} </button> ); } ``` **🫧 推薦:🤖🦾 [Figma AI:](https://psxid.figma.com/8g4g75niz3sg-7v0ro9)** 如果您需要快速設計簡報或網站,Figma AI 可以提供現成的範本。並且它可以與[Figma](https://psxid.figma.com/pq1612tcamkx)順利配合。只要告訴它你想要什麼,畫一點,然後繁榮——你的想法就變成現實了! 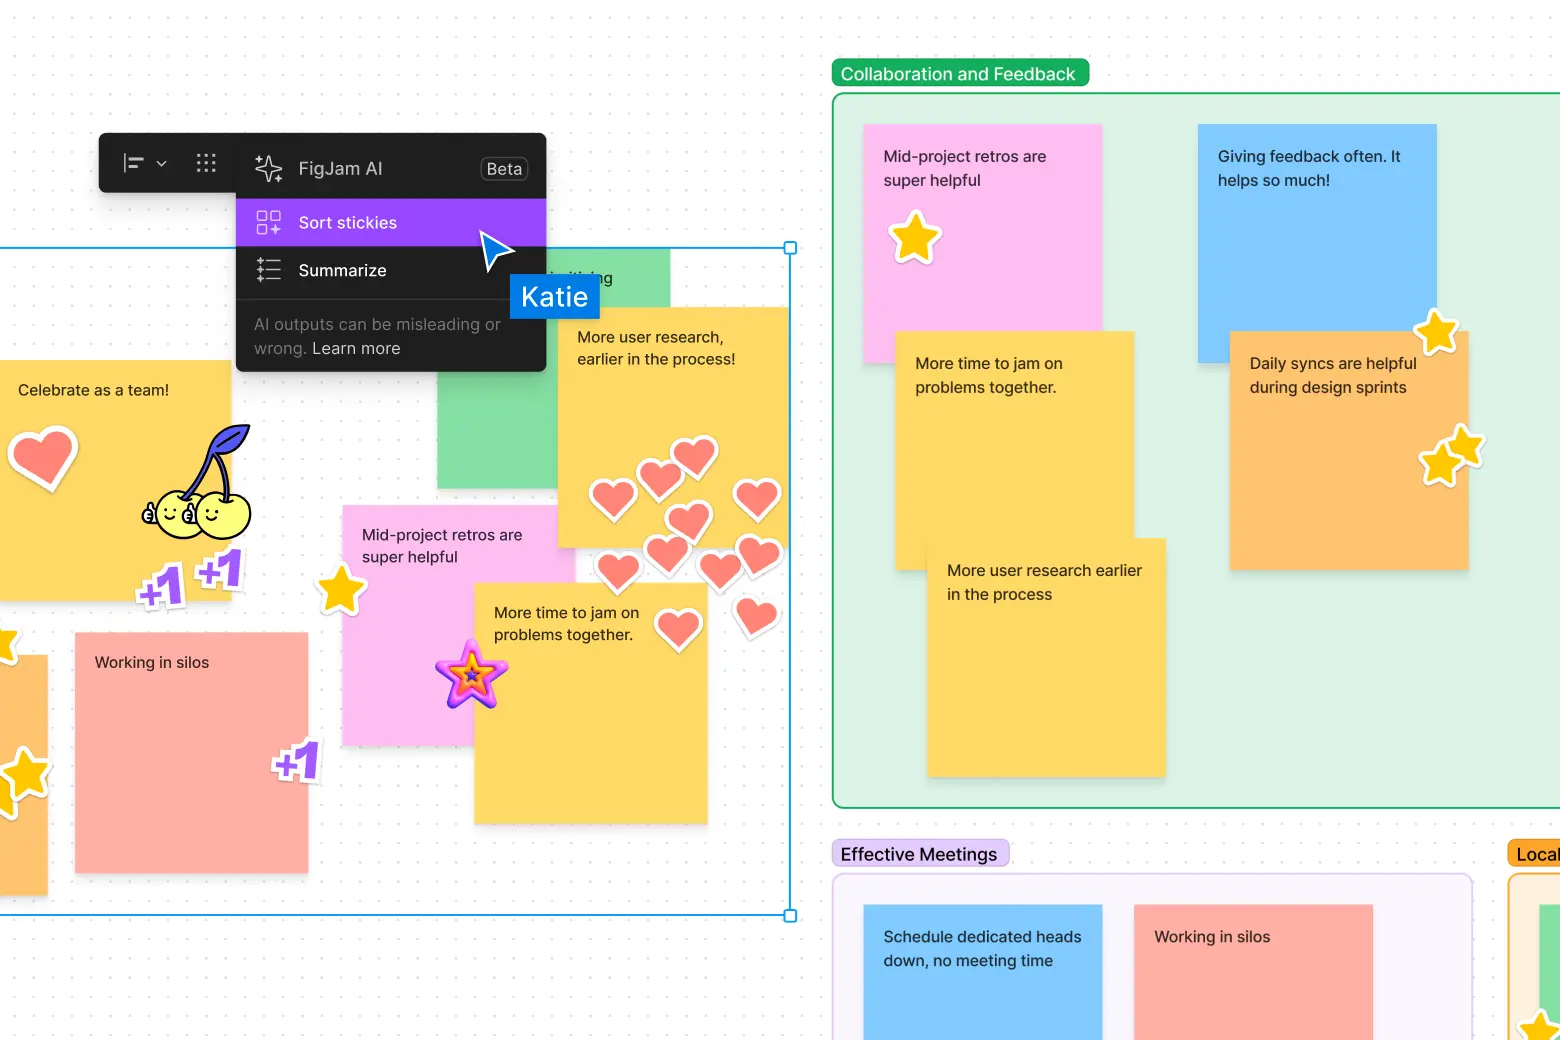 您可以嘗試[Figma AI](https://psxid.figma.com/8g4g75niz3sg-7v0ro9) ,目前它對所有人免費。 --- 👏結論 --- 恭喜!您已經成功學習如何使用最佳實踐建立乾淨的可重複使用 React 元件。 請記住,**可重複使用元件是健壯的 React 開發的建置塊**。透過練習可重複使用元件,您可以建立更乾淨、更有效率、更易於維護的 React 應用程式。 您練習得越多,您就越能更好地辨識在專案中使用它們的機會! 如果您喜歡這篇文章,您可能也會喜歡我的[𝕏](https://twitter.com/shahancd)帳戶,以了解更多有關前端開發的課程。 **閱讀更多:**[前端開發的未來](https://dev.to/codewithshahan/the-future-of-frontend-development-1amd) --- 原文出處:https://dev.to/codewithshahan/writing-clean-reusable-components-in-react-best-practices-2gka
**編輯**:大家好!在對本文做出驚人反應後,我建立了一個名為「每週專案俱樂部」的專案。每週您的收件匣都會收到需要解決的問題。你可以努力解決問題,並且你將得到整個俱樂部的幫助,讓你走上正軌。了解更多並[在這裡](https://weeklyproject.club)註冊! 有一天我注意到一個模式。我注意到很多人都在努力 學習編程,但他們心中沒有特定的目標。我已經討論過如何了解您想要學習程式設計的原因可以幫助您選擇要學習的語言[!](https://pickaframework.com/articles/why/) ,以及如何實際做出決定([在這裡!](https://pickaframework.com/feature_fishing/) )但是專案有什麼幫助呢? 當我指導程式設計師時,我發現有一個專案可以幫助排除其他一些幹擾,例如想知道你是否使用了正確的語言。透過專注於一個特定的目標,你就不用那麼費力去擔心*這*是否正是你應該使用的語言。結果是你建立了一些簡潔的東西,並且一路上你學到了一些東西! 2隻鳥,1塊石頭。 這就是為什麼我為初學者程式設計師策劃了這個專案清單。許多人列出了大量的專案來學習編程,但很少按照難度進行組織。我瀏覽了幾個流行的程式設計專案想法清單。如果您想查看完整列表,可以在頁面底部找到來源。 我將其分為教程和想法。教程包含資源連結,而想法只是專案的一般描述。我還列出了我最喜歡的初學者清單。 看看,看看是否有什麼啟發你! 教學 == 我的最愛 ---- - [透過 30 個教學在 30 天內建立 30 個東西](https://javascript30.com) - [在 30 分鐘內建立一個簡單的搜尋機器人](https://medium.freecodecamp.org/how-to-build-a-simple-search-bot-in-30-minutes-eb56fcedcdb1) - [使用 Xamarin 和 Visual Studio 建立 iOS 照片庫應用程式](https://www.raywenderlich.com/134049/building-ios-apps-with-xamarin-and-visual-studio) - [建立 Android 手電筒應用程式](https://www.youtube.com/watch?v=dhWL4DC7Krs)(影片) - [製作聊天應用程式](https://medium.freecodecamp.org/how-to-build-a-chat-application-using-react-redux-redux-saga-and-web-sockets-47423e4bc21a) - [使用 React Native 建立 ToDo 應用程式](https://blog.hasura.io/tutorial-fullstack-react-native-with-graphql-and-authentication-18183d13373a) 簡單的 --- - [使用 C# 和 Xamarin 建立空白應用程式(正在進行中)](https://www.intertech.com/Blog/xamarin-tutorial-part-1-create-a-blank-app/) - [使用 Xamarin 和 Visual Studio 建立 iOS 照片庫應用程式](https://www.raywenderlich.com/134049/building-ios-apps-with-xamarin-and-visual-studio) - [建立加載畫面](https://medium.freecodecamp.org/how-to-build-a-delightful-loading-screen-in-5-minutes-847991da509f) - [使用 JS 建立 HTML 計算器](https://medium.freecodecamp.org/how-to-build-an-html-calculator-app-from-scratch-using-javascript-4454b8714b98) - [建立 React Native Todo 應用程式](https://egghead.io/courses/build-a-react-native-todo-application) - 使用 Node.js 編寫 Twitter 機器人 ``` - [Part 1](https://codeburst.io/build-a-simple-twitter-bot-with-node-js-in-just-38-lines-of-code-ed92db9eb078) ``` ``` - [Part 2](https://codeburst.io/build-a-simple-twitter-bot-with-node-js-part-2-do-more-2ef1e039715d) ``` - [建立一個簡單的 RESTFUL Web 應用程式](https://closebrace.com/tutorials/2017-03-02/creating-a-simple-restful-web-app-with-nodejs-express-and-mongodb) - [在 30 分鐘內建立一個簡單的搜尋機器人](https://medium.freecodecamp.org/how-to-build-a-simple-search-bot-in-30-minutes-eb56fcedcdb1) - [建立一個工作抓取 Web 應用程式](https://medium.freecodecamp.org/how-i-built-a-job-scraping-web-app-using-node-js-and-indreed-7fbba124bbdc) - [使用 Python 挖掘 Twitter 資料](https://marcobonzanini.com/2015/03/02/mining-twitter-data-with-python-part-1/) - [使用 Scrapy 和 MongoDB 抓取網站](https://realpython.com/blog/python/web-scraping-with-scrapy-and-mongodb/) - [如何使用 Python 和 Selenium WebDriver 進行抓取](http://www.byperth.com/2018/04/25/guide-web-scraping-101-what-you-need-to-know-and-how-to-scrape-with-python-selenium-webdriver/) - [我應該使用 BeautifulSoup 觀看哪部電影](https://medium.com/@nishantsahoo.in/which-movie-should-i-watch-5c83a3c0f5b1) - [使用 Flask 建立微博](https://blog.miguelgrinberg.com/post/the-flask-mega-tutorial-part-i-hello-world) - 在 Django 中建立部落格 Web 應用程式 ``` - [Part I : Introduction](https://tutorial.djangogirls.org/en/) ``` ``` - [Part II : Extension To Add More Features](https://legacy.gitbook.com/book/djangogirls/django-girls-tutorial-extensions/details) ``` - [選擇您自己的冒險演示](https://www.twilio.com/blog/2015/03/choose-your-own-adventures-presentations-wizard-mode-part-1-of-3.html) - [使用 Flask 和 RethinkDB 建立待辦事項列表](https://realpython.com/blog/python/rethink-flask-a-simple-todo-list-powered-by-flask-and-rethinkdb/) 中等的 --- - [透過建立簡單的 RPG 遊戲來學習 C#](http://scottlilly.com/learn-c-by-building-a-simple-rpg-index/) - [用 C# 創作 Rogue-like 遊戲](https://roguesharp.wordpress.com/) - [使用 Clojure 建構 Twitter 機器人](http://howistart.org/posts/clojure/1/index.html) - [建立拼字檢查器](https://bernhardwenzel.com/articles/clojure-spellchecker/) - [使用 Java 建立簡單的 HTTP 伺服器](http://javarevisited.blogspot.com/2015/06/how-to-create-http-server-in-java-serversocket-example.html) - [建立 Android 手電筒應用程式](https://www.youtube.com/watch?v=dhWL4DC7Krs)(影片) - [建立具有使用者身份驗證的 Spring Boot 應用程式](https://scotch.io/tutorials/build-a-spring-boot-app-with-user-authentication) - [透過 30 個教學在 30 天內建立 30 個東西](https://javascript30.com) - [使用純 JS 建立應用程式](https://medium.com/codingthesmartway-com-blog/pure-javascript-building-a-real-world-application-from-scratch-5213591cfcd6) - [建立無伺服器 React.js 應用程式](http://serverless-stack.com/) - [建立 Trello 克隆](http://codeloveandboards.com/blog/2016/01/04/trello-tribute-with-phoenix-and-react-pt-1/) - [使用 React、Node、MongoDB 和 SocketIO 建立角色投票應用程式](http://sahatyalkabov.com/create-a-character-voting-app-using-react-nodejs-mongodb-and-socketio/) - [React 教學:克隆 Yelp](https://www.fullstackreact.com/articles/react-tutorial-cloning-yelp/) - [使用 React.js 和 Node.js 建立簡單的中型克隆](https://codeburst.io/build-simple-medium-com-on-node-js-and-react-js-a278c5192f47) - [在 JS 中整合 MailChimp](https://medium.freecodecamp.org/how-to-integrate-mailchimp-in-a-javascript-web-app-2a889fb43f6f) - [使用 React Native 建立 ToDo 應用程式](https://blog.hasura.io/tutorial-fullstack-react-native-with-graphql-and-authentication-18183d13373a) - [製作聊天應用程式](https://medium.freecodecamp.org/how-to-build-a-chat-application-using-react-redux-redux-saga-and-web-sockets-47423e4bc21a) - [使用 React Native 建立新聞應用程式](https://medium.freecodecamp.org/create-a-news-app-using-react-native-ced249263627) - [學習 React 的 Webpack](https://medium.freecodecamp.org/learn-webpack-for-react-a36d4cac5060) - [建立您自己的 React 樣板](https://medium.freecodecamp.org/how-to-build-your-own-react-boilerplate-2f8cbbeb9b3f) - [基本 React+Redux 入門教學](https://hackernoon.com/a-basic-react-redux-introductory-tutorial-adcc681eeb5e) - [建立一個預約安排程序](https://hackernoon.com/build-an-appointment-scheduler-using-react-twilio-and-cosmic-js-95377f6d1040) - 使用 Angular 2+ 建立具有離線功能的 Hacker News 用戶端 ``` - [Part 1](https://houssein.me/angular2-hacker-news) ``` ``` - [Part 2](https://houssein.me/progressive-angular-applications) ``` - 帶有 Angular 5 的 ToDo 應用程式 ``` - [Introduction to Angular](http://www.discoversdk.com/blog/intro-to-angular-and-the-evolution-of-the-web) ``` ``` - [Part 1](http://www.discoversdk.com/blog/angular-5-to-do-list-app-part-1) ``` - 帶有 Angular 5 的 ToDo 應用程式 ``` - [Introduction to Angular](http://www.discoversdk.com/blog/intro-to-angular-and-the-evolution-of-the-web) ``` ``` - [Part 1](http://www.discoversdk.com/blog/angular-5-to-do-list-app-part-1) ``` 難的 -- - [建構一個解釋器](http://www.craftinginterpreters.com/)(第 14 章是用 C 寫的) - [用 C 語言寫一個 Shell](https://brennan.io/2015/01/16/write-a-shell-in-c/) - [編寫 FUSE 文件系統](https://www.cs.nmsu.edu/~pfeiffer/fuse-tutorial/) - [建立您自己的文字編輯器](http://viewsourcecode.org/snaptoken/kilo/) - [建立自己的 Lisp](http://www.buildyourownlisp.com/) - [建構 CoreWiki](https://www.youtube.com/playlist?list=PLVMqA0_8O85yC78I4Xj7z48ES48IQBa7p)這是一個 Wiki 風格的內容管理系統,完全用 C# 使用 ASP.NET Core 和 Razor Pages 編寫。您可以[在這裡](https://github.com/csharpfritz/CoreWiki)找到原始程式碼。 - [建構 JIRA 與 Clojure 和 Atlassian Connect 的集成](https://hackernoon.com/building-a-jira-integration-with-clojure-atlassian-connect-506ebd112807) - [建構一個解釋器](http://www.craftinginterpreters.com/)(第 4-13 章是用 Java 寫的) - [使用 Mocha、React、Redux 和 Immutable 透過測試優先開發來建立全端電影投票應用程式](https://teropa.info/blog/2015/09/10/full-stack-redux-tutorial.html) - [使用 React 和 Node 建立 Twitter Stream](https://scotch.io/tutorials/build-a-real-time-twitter-stream-with-node-and-react-js) - 使用 Webtask.io 建立無伺服器 MERN Story 應用程式 ``` - [Part 1](https://scotch.io/tutorials/build-a-serverless-mern-story-app-with-webtask-io-zero-to-deploy-1) ``` ``` - [Part 2](https://scotch.io/tutorials/build-a-serverless-mern-story-app-with-webtask-io-zero-to-deploy-2) ``` - [使用 React + Parcel 建立 Chrome 擴充功能](https://medium.freecodecamp.org/building-chrome-extensions-in-react-parcel-79d0240dd58f) ``` [Testing React App With Pupepeteer and Jest](https://blog.bitsrc.io/testing-your-react-app-with-puppeteer-and-jest-c72b3dfcde59) ``` - [用 React 編寫生命遊戲](https://medium.freecodecamp.org/create-gameoflife-with-react-in-one-hour-8e686a410174) - [建立帶有情感分析的聊天應用程式](https://codeburst.io/build-a-chat-app-with-sentiment-analysis-using-next-js-c43ebf3ea643) - [建立全端 Web 應用程式設置](https://hackernoon.com/full-stack-web-application-using-react-node-js-express-and-webpack-97dbd5b9d708) - 建立隨機報價機 ``` - [Part 1](https://www.youtube.com/watch?v=3QngsWA9IEE) ``` ``` - [Part 2](https://www.youtube.com/watch?v=XnoTmO06OYo) ``` ``` - [Part 3](https://www.youtube.com/watch?v=us51Jne67_I) ``` ``` - [Part 4](https://www.youtube.com/watch?v=iZx7hqHb5MU) ``` ``` - [Part 5](https://www.youtube.com/watch?v=lpba9vBqXl0) ``` ``` - [Part 6](https://www.youtube.com/watch?v=Jvp8j6zrFHE) ``` ``` - [Part 7](https://www.youtube.com/watch?v=M_hFfrN8_PQ) ``` - 使用 Angular 6 建立美麗的現實世界應用程式: ``` - [Part I](https://medium.com/@hamedbaatour/build-a-real-world-beautiful-web-app-with-angular-6-a-to-z-ultimate-guide-2018-part-i-e121dd1d55e) ``` - [使用 BootStrap 4 和 Angular 6 建立響應式佈局](https://medium.com/@tomastrajan/how-to-build-responsive-layouts-with-bootstrap-4-and-angular-6-cfbb108d797b) - [使用 Django 和測試驅動開發建立待辦事項列表](http://www.obeythetestinggoat.com/) - [使用 Python 建立 RESTful 微服務](http://www.skybert.net/python/developing-a-restful-micro-service-in-python/) - [使用 Docker、Flask 和 React 的微服務](https://testdriven.io/) - [使用 Flask 建立簡單的 Web 應用程式](https://pythonspot.com/flask-web-app-with-python/) - [使用 Flask 建立 RESTful API – TDD 方式](https://scotch.io/tutorials/build-a-restful-api-with-flask-the-tdd-way) - [在 20 分鐘內建立 Django API](https://codeburst.io/create-a-django-api-in-under-20-minutes-2a082a60f6f3) 想法 == 簡單的 --- ### 99 瓶 - 建立一個程序,列印歌曲“牆上的 99 瓶啤酒”的每一行。 - 不要使用所有數字的列表,也不要手動輸入所有數字。請改用內建函數。 - 除了短語“取下一個”之外,您不得直接在歌詞中輸入任何數字/數字名稱。 - 請記住,當您還剩下 1 瓶時,「瓶子」一詞將變為單數。 ### 魔術8球 - 模擬神奇的 8 球。 - 允許使用者輸入他們的問題。 - 顯示正在進行的訊息(即“思考”)。 - 建立 20 個回應,並顯示隨機回應。 - 允許用戶提出另一個問題或退出。 - 獎金: ``` - Add a gui. ``` ``` - It must have a box for users to enter the question. ``` ``` - It must have at least 4 buttons: ``` ``` - ask ``` ``` - clear (the text box) ``` ``` - play again ``` ``` - quit (this must close the window) ``` ### 石頭剪刀布遊戲 - 建立一個石頭剪刀布遊戲。 - 讓玩家選擇石頭、剪刀或布。 - 讓計算機選擇它的移動方式。 - 比較選擇並決定誰獲勝。 - 列印結果。 - 子目標: ``` - Give the player the option to play again. ``` ``` - Keep a record of the score (e.g. Player: 3 / Computer: 6). ``` ### 倒數時鐘 - 建立一個程序,允許使用者選擇時間和日期,然後以給定的時間間隔(例如每秒)列印一條訊息,告訴使用者距離所選時間還有多長時間。 - 子目標: ``` - If the selected time has already passed, have the program tell the user to start over. ``` ``` - If your program asks for the year, month, day, hour, etc. separately, allow the user to be able to type in either the month name or its number. ``` ``` - TIP: Making use of built in modules such as time and datetime can change this project from a nightmare into a much simpler task. ``` 中等的 --- ### 番茄計時器 建立一個番茄計時器。 番茄計時器是一種時間管理方法。該技術使用計時器將工作分解為多個時間間隔,通常長度為 25 分鐘,中間間隔短暫的休息。這些間隔被命名為“pomodoros”,是意大利語單字“pomodoro”(番茄)的英文複數形式,以西里洛在大學時使用的番茄形狀的廚房計時器命名。 原始技巧有六個步驟: 決定要完成的任務。 設定番茄計時器(傳統上為 25 分鐘)。 完成任務。 當計時器響起時結束工作並在一張紙上畫上複選標記。 如果您的複選標記少於四個,請短暫休息(3-5 分鐘),然後轉到步驟 2。 四個番茄鐘後,休息較長時間(15-30 分鐘),將複選標記計數重設為零,然後轉到步驟 1。 要了解有關番茄計時器的更多訊息[,請單擊此處](https://en.wikipedia.org/wiki/Pomodoro_Technique) ### 谷歌案例 - 這是一個可以讓你玩英文句子的遊戲。 - 使用者將以任何格式輸入一個句子。(大寫或小寫或兩者的混合) - 程式必須將給定的句子轉換為Google大小寫。什麼是Google大小寫句子風格?\[know\_about\_it\_here:\](這是一種寫作風格,我們將所有小寫字母替換為大寫字母,留下所有單字的首字母)。 - 子目標: ``` - Program must then convert the given sentence in camel case.To know more about camel case ``` ``` [click_here](https://en.wikipedia.org/wiki/Camel_case) ``` ``` - Sentence can be entered with any number of spaces. ``` ### 擲骰子模擬器 - 允許使用者輸入骰子的面數以及應擲骰子的次數。 - 您的程式應該模擬擲骰子並追蹤每個數字出現的次數(這不必顯示)。 - 最後,列印出每個數字出現的次數。 - 子目標: ``` - Adjust your program so that if the user does not type in a number when they need to, the program will keep prompting them to type in a real number until they do so. ``` ``` - Put the program into a loop so that the user can continue to simulate dice rolls without having to restart the entire program. ``` ``` - In addition to printing out how many times each side appeared, also print out the percentage it appeared. If you can, round the percentage to 4 digits total OR two decimal places. ``` - 獎金: ``` - You are about to play a board game, but you realize you don't have any dice. Fortunately you have this program. ``` ``` - 1. Create a program that opens a new window and draws 2 six-sided dice ``` ``` - 2. Allow the user to quit, or roll again ``` ``` - Allow the user to select the number of dice to be drawn on screen(1-4) 2. Add up the total of the dice and display it ``` ### 計算並修復綠雞蛋和火腿 你們有些人可能還記得蘇博士的故事「綠雞蛋和火腿」。對於那些不記得或從未聽說過的人,[這](http://pastebin.com/XMY48CnN)是這個故事。然而,我給你的故事有一個問題——每次使用「我」這個詞時,它都是小寫的。 由於此問題,您的工作是執行以下操作: - 將我給您的故事複製到常規文字檔案中。 - 建立一個程式來通讀故事並在任何時候將字母 i 變為大寫。 (當它也用在 sam-I-am 的名字中時,請務必更改它。) - 讓你的程式建立一個新文件,並讓它正確地寫出故事。 - 印出有多少錯誤被修正。 - 完成後,您應該已經糾正了[這麼多](https://i.imgur.com/GRkj3yz.jpg)錯誤。 難的 -- ### 隨機維基百科文章 如果您曾造訪維基百科,您可能已經注意到螢幕左側有一個指向隨機文章的連結。雖然看到您被帶到哪篇文章可能很有趣,但有時看到文章的名稱會很好,這樣您就可以在聽起來很無聊時跳過它。幸運的是,維基百科有一個 API,允許我們這樣做[點擊這裡](https://en.wikipedia.org/w/api.php?action=query&list=random&rnnamespace=0&rnlimit=10&format=json)。 然而,有一個困境。由於維基百科擁有有關世界各地主題的文章,其中一些文章的標題中包含特殊字元。例如,關於西班牙畫家[埃拉斯托·科爾特斯·華雷斯 (Erasto Cortés Juárez)](https://en.wikipedia.org/wiki/Erasto_Cort%C3%A9s_Ju%C3%A1rez)的文章中就有 é 和 á。如果您查看這篇特定文章的[API](https://en.wikipedia.org/w/api.php?action=query&prop=info&pageids=39608394&inprop=url&format=json) ,您將看到標題是“Erasto Cort\\u00e9s Ju\\u00e1rez”,並且 \\u00e9 和 \\u00e1 正在替換前面提到的兩個字母。 (有關這是什麼的訊息,請首先查看文件中[本頁](https://docs.python.org/2/howto/unicode.html)的前半部分)。為了讓你的程式正常運作,你必須以某種方式處理這個問題。 - 建立一個程序,從官方維基百科 API 中提取標題,然後一一詢問用戶是否願意閱讀該文章。 - 例子: ``` - If the first title is Reddit, then the program should ask something along the lines of "Would you like to read about Reddit?" If the user says yes, then the program should open up the article for the user to read. ``` ``` - HINT: Click [here](https://en.wikipedia.org/wiki?curid=39608394) to see how the article's ID can be used to access the actual article. ``` - 子目標: ``` - As mentioned before, do something about the possibility of unicode appearing in the title. ``` ``` - Whether you want your program to simply filter out these articles or you want to actually turn the codes into readable characters, that's up to you. ``` ``` - Make the program pause once the user has selected an article to read, and allow him or her to continue browsing different article titles once finished reading. ``` ``` - Allow the user to simply press ENTER to be asked about a new article. ``` ### 天氣如何? 如果您想了解 API 的基礎知識,請查看 iamapizza 的[這篇](http://www.reddit.com/r/explainlikeimfive/comments/qowts/eli5_what_is_api/c3z9kok)文章。 - 建立一個程序,從 OpenWeatherMap.org 提取資料並列印有關當前天氣的訊息,例如您居住的地方的最高氣溫、最低氣溫和雨量。 - 子目標: ``` - Print out data for the next 5-7 days so you have a 5 day/week long forecast. ``` ``` - Print the data to another file that you can open up and view at, instead of viewing the information in the command line. ``` ``` - If you know html, write a file that you can print information to so that your project is more interesting. ``` - 尖端: ``` - APIs that are in Json are essentially lists and dictionaries. Remember that to reference something in a list, you must refer to it by what number element it is in the list, and to reference a key in a dictionary, you must refer to it by its name. ``` ``` - Don't like Celsius? Add &units=imperial to the end of the URL of the API to receive your data in Fahrenheit. ``` ### 來源 - https://github.com/tuvtran/project-based-learning - https://github.com/jorgegonzalez/beginner-projects - https://github.com/MunGell/awesome-for-beginners/blob/master/README.md - https://github.com/sarahbohr/AbsoluteBeginnerProjects --- 你怎麼認為?您喜歡透過特定專案進行學習還是不喜歡透過特定專案進行學習? --- 原文出處:https://dev.to/samborick/100-project-ideas-oda
我決定是時候學習[Rust 了](https://www.rust-lang.org/),為了保持自己的動力,我將在這裡記錄學習的進展。  有關於我的一些;我是一名 Web 開發人員,雖然已經涉足多年,但已經從事了大約 5 年。我有使用[Perl](https://www.perl.org/)和[PHP](https://www.php.net/)的經驗,但我的日常工作是 JavaScript/TypeScript,無論是透過[NodeJS](https://nodejs.org/en)還是[ReactJS](https://react.dev/) 。我想學習 Rust 沒有什麼特別的原因,只是學習新事物很有趣。 我的第一個停靠點是Google `learn rust` ,這引導我找到了[「這本書」](https://doc.rust-lang.org/book/) 。這本書是 Rust 社群為新手(或所謂的 Rustlings)編寫的入門指南,旨在「紮實掌握這門語言」。 公共學習 ---- 我選擇公開記錄我的 Rust 學習之旅,因為我相信公開學習的力量。透過分享我的成功、挑戰和見解,我將加強自己的理解,並希望為其他走類似道路的人提供資源。 我親眼目睹了這種方法的價值。我邀請讀者提供回饋、更正和貢獻。雖然我認識到公共學習並不適合所有人,但我個人發現它非常有益,並希望激勵其他人考慮它。那麼,讓我們深入學習這些課程。 第 1 課“入門” --------- 本課分為 3 個部分: - 安裝 - 你好世界! - 你好,貨物! ### 安裝 看到列出的安裝,我鬆了口氣,我擔心我必須查找如何安裝 Rust。我使用的是 Windows 計算機,但決定在 Linux 中學習 Rust,因此我將透過 WSL 使用 Ubuntu。 安裝指令看起來很簡單,它使用curl來下載一些東西,然後透過sh進行管道傳輸,所以我們可以假設下載的專案是某種bash腳本。 ``` curl --proto '=https' --tlsv1.2 https://sh.rustup.rs -sSf | sh ``` 不管你信不信,這是我犯下的第一個錯誤。我看到`Rust is installed now. Great!`訊息並繼續下一課。如果我繼續閱讀下去,我會發現我需要單獨安裝編譯器。 > Linux 使用者通常應該根據其發行版的文件安裝 GCC 或 Clang。例如,如果您使用 Ubuntu,則可以安裝 build-essential 套件。 不過,這很容易解決,我很快就回到了正軌。 ``` sudo apt install build-essential ``` ### 你好世界! 下一部分是開發社群的主要內容,即深受喜愛的“Hello, World!”例子。  我在這裡學到了一些東西,函數是用`fn`關鍵字聲明的,任何 Rust 應用程式的入口點都是`main.rs`檔案中的`main`函數,標準命名約定是使用下劃線來分隔函數和檔案名稱中的單字。 正是在這個階段,我發現我沒有安裝編譯器,我認為這是像這樣的簡單部分的真正原因,以確保我們都設定正確。 ### 你好,貨物! 上一節很簡單,這節也很簡單,但向我們介紹了[Cargo](https://crates.io/) ,它是 Rust 的套件管理器,作為一個 JS 開發者,我的腦海裡直接想到了 NPM。 Cargo 允許我們做一些很酷的事情: - 為我們的包命名。 - 新增包依賴項。 - 用一個命令執行我們的程式。 - 使用除錯模式和發布模式來建立我們的程式。 - 檢查我們的程式是否編譯,但沒有實際建立它。 這個範例讓我們重新創造我們的`Hello, World!`例如但以貨運方式。程式碼非常簡單,幾乎不值得展示,但它就是這樣。 ``` fn main() { println!("Hello, world!"); } ``` 第 2 課“猜謎遊戲” ----------- 第二課沒有任何小節,本課的目標是編寫一個猜謎遊戲,用戶輸入一個數字,我們將其與隨機選擇的數字進行比較,遊戲繼續,直到用戶猜出確切的數字。 我們仍然沒有做任何突破性的事情,但從列印靜態文字到動態獲取用戶輸入並返回結果的進展仍然很好。 ### VS程式碼 正是在這一點上,我決定在`nano`中進行程式碼變更不是一個好主意,我需要在 VSCode 中開啟專案。我加入了一些擴展,希望能讓開發變得更容易。這些是[rust-analyzer](https://marketplace.visualstudio.com/items?itemName=rust-lang.rust-analyzer) 、[板條箱](https://marketplace.visualstudio.com/items?itemName=serayuzgur.crates)和[Even Better TOML](https://marketplace.visualstudio.com/items?itemName=tamasfe.even-better-toml) 。你可以使用任何你喜歡的編輯器,我只是習慣了 VSCode。  ### 製作遊戲 讓我們來看看遊戲教程,它讓我們使用貨物來設定專案,並很快向我們介紹了一些新概念 - `use`關鍵字。 - 可變變數。 - 錯誤處理。 - 文件位置 #### `use`關鍵字 `use`關鍵字允許我們從其他庫中提取程式碼,作為一名 Web 開發人員,我想將其與[import](https://developer.mozilla.org/en-US/docs/Web/JavaScript/Reference/Statements/import)進行比較。預設情況下,Rust 將能夠存取「標準」庫中的一組專案,這稱為前奏,但如果您想存取其他任何內容,則必須使用`use` 。 在他們給出的範例中,我們確實`use std::io;`它允許我們存取`io`命名空間,這確實感覺有點奇怪,因為我們已經可以存取`std` ,這意味著`std::io`也可以存取。 #### 可變變數 在 JavaScript 領域,我們有不可變變數和可變變數的概念,它們是`const`和`let` ,其中`const`是不可變的,而`let`不是。 Rust 有點不同,因為除非另有說明,否則所有變數都是不可變的,變數關鍵字也總是`let` ,或者至少據我所知到目前為止是這樣。 ``` let mut var1 = String::new(); // mutable let mut var2 = String::from("Test String"); // mutable let var3 = 6; // immutable ``` 這本書讓我們知道,第三課將回歸可變性。 #### 錯誤處理 我們介紹了兩種類型的錯誤處理`.expect` ,它們不會嘗試任何類型的恢復,但會在應用程式崩潰和`match`時發布一條訊息。 `Match`從函數中取得`Result` ,然後允許您根據`Result`呼叫函數。在範例中,我們給出了`parse`並告訴它要么是`Ok`要么是`Err` ,在`match`中我們可以定義一個在這兩種情況下呼叫的函數。我假設當我們開始處理更多樣化的函數時,match 將能夠處理所有`Result`類型。 #### 文件位置 這是迄今為止我最喜歡 Rust 的部分,我知道它不應該那麼令人興奮,但我認為它是。當您執行命令`cargo doc` Cargo 時,Cargo 將掃描您正在使用的所有程式碼,並產生解釋功能以及如何使用它們的說明頁面。 目前還沒有太多解釋,但我希望這些文件是從程式碼中的註解產生的,即使這不是那種情況,可以自我記錄的程式碼庫對我來說是如此有趣。 ### 偏離了人跡罕至的地方 此時,我已經完成了前兩課,並決定對猜謎遊戲進行一些更改。我將遊戲循環提取到它自己的函數中,並加入了解析失敗的錯誤訊息。 我不喜歡的一件事是這條線的`magic` 。 ``` let guess: u32 = match guess.trim().parse() ``` 我不喜歡這種感覺,就像 parse 神奇地知道它的目標類型一樣。所以我閱讀了 VSCode 中的解析工具提示,它教導了有關`turbofish`語法的內容。我不知道人們是否不喜歡這種語法,或者這本書的作者是否認為它對於初學者來說太複雜,但在我看來,它更有意義。我們告訴 parse 我們想要什麼類型,然後我們的`let`從中推論出類型,而不是相反。 ``` let guess = match guess.trim().parse::<u32>() ``` 這是修改後的程式碼。 {% 嵌入 https://replit.com/@andrewb05/Guessing-game %} 註銷 -- 感謝您與我一起踏上這段旅程。我計劃繼續這個系列並涵蓋整本書。如果您想關注,可以按下「關注」按鈕以獲得新帖子的通知。 正如我之前所說,請隨意留下任何反饋,如果您也在公開學習,請在評論中留下您的系列的連結,以便我可以查看。 非常感謝您的閱讀。如果您想在開發之外與我聯繫,這裡有我的[Twitter](https://twitter.com/Link2Twenty)和[linkedin,](https://www.linkedin.com/in/andrew-bone-ba241b179/)歡迎來打個招呼 😊。 --- 原文出處:https://dev.to/link2twenty/learning-rust-a-clean-start-4eom
 **TL;DR - 儘管困難重重,我們建立的 Web 框架還是達到了一個里程碑!請查看(如果您喜歡的[話,請給我們加星支持](https://github.com/wasp-lang/wasp)- 謝謝!🙏),並閱讀下文以了解我們的故事以及我們是如何走到這一步的。** 作為一名開發人員,建立自己的 Web 框架可能是您能做的最可怕的事情之一。幾乎可以肯定你的專案將會失敗,作為額外的好處,其他開發人員會一路取笑你,數出它不起作用的所有原因。 < 圖>  分享您對新 Web 框架的想法是怎樣的感覺 這對我們來說沒有什麼不同。當我們開始 Wasp 時,每個人都問*“為什麼要另一個 Web 框架?為什麼有人會在成熟、著名的框架旁邊使用你的工具?”* 。我承認,這些都是好問題,但我們並沒有找到所有答案,甚至還沒有接近答案。但這絕對不是我們不這麼做的理由。 < 圖>  三年前,當我們推出 Wasp Alpha 時 我們繼續前進。我們心中有一個願景,我們想看看能否將其變成現實。**我們根本不在乎黃蜂是死是活,我們只知道我們需要堅持到底,這才是最重要的**。幾個月後,我們發布了 Alpha 版本並獲得了第一批 100 顆星。結果,這帶來了更多問題,我們距離弄清楚我們想像的概念是否真的能飛還差得遠。 **但是,我們也無法相信有人真的為我們的倉庫加註了星標。我們既驚訝又興奮**。我仍然清楚地記得 Martin Šošić 問我*“Matija,你能想像我們建立的專案在 GitHub 上獲得 1000 星嗎?”* 。我們倆立即搖頭大笑,心想*:“是啊,就是這樣啊!”* 。 < 圖> 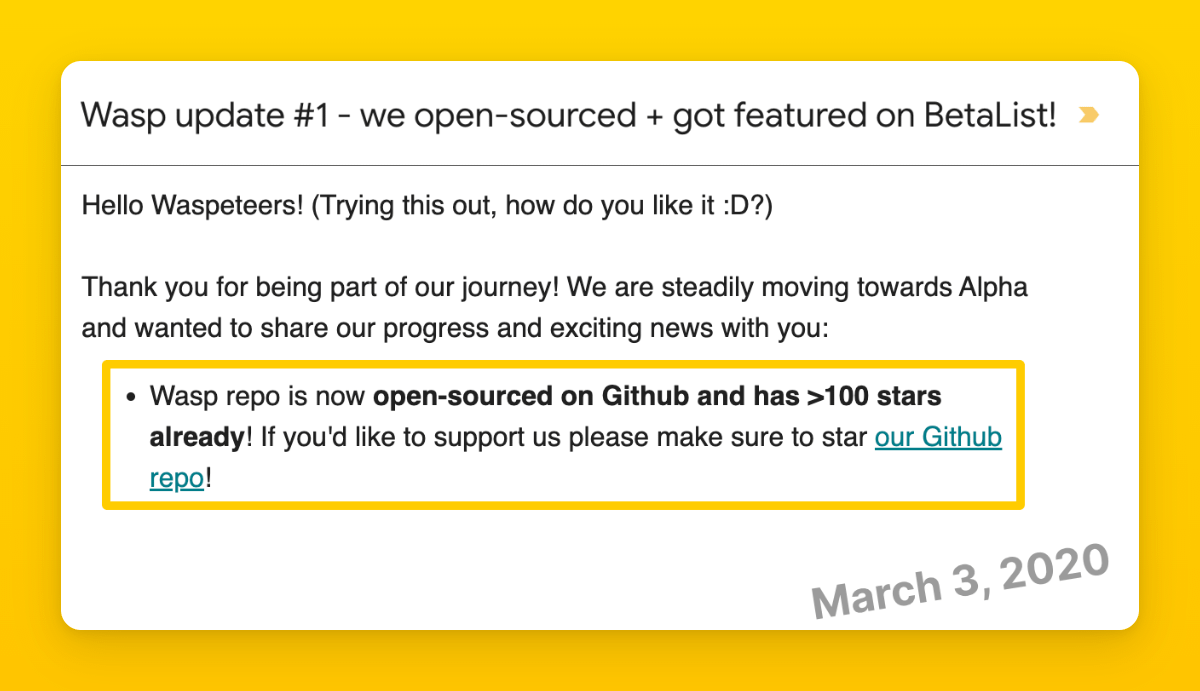 我們的第一次社群更新,慶祝 GitHub 上的 100 顆星! 9,500 顆星,近 3 年後,我們今天在這裡。 Wasp 即將進入 GitHub 上的精英 10,000 星俱樂部,與行業巨頭並駕齊驅。**我們啟動的框架,並根據社群的寶貴回饋進一步開發,正在被各種開發人員使用 - 從週末專案到新創公司和頂級企業**。用 Wasp 建立的新創公司[已被收購](https://dev.to/wasp/from-idea-to-exit-building-and-selling-an-ai-powered-saas-in-5-months-27d9)。我今天剛在 Upwork 上看到一則招募廣告,其中一家公司正在招募[Open SaaS](https://github.com/wasp-lang/open-saas) (React 和 Node.js 的開源免費樣板啟動器,由 Wasp 提供支援)開發人員🤯。 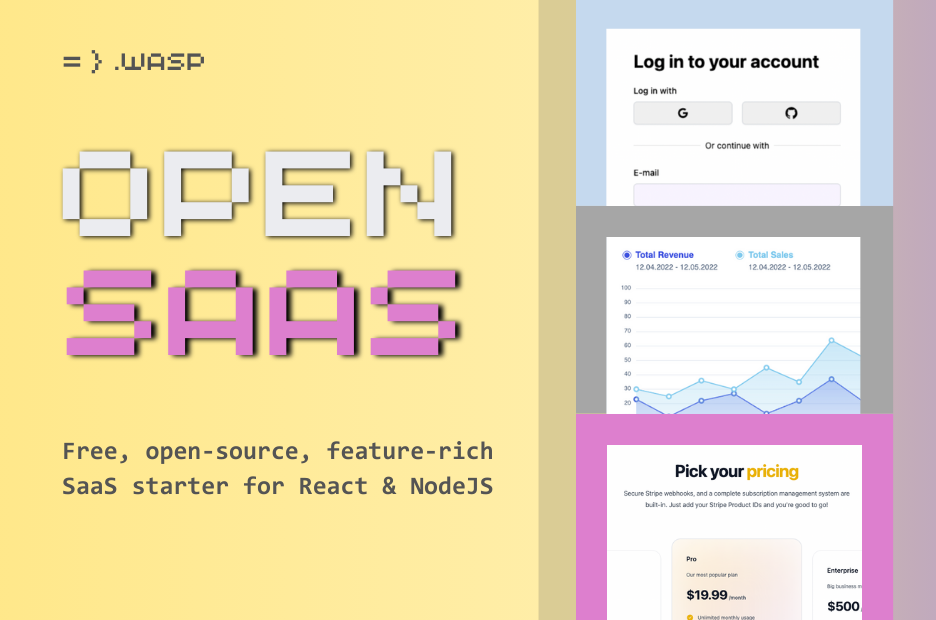 回想起來,我仍然覺得難以置信。從我哥哥女朋友(現在是妻子)的公寓開始,我們幾乎沒有開源也沒有社區建設經驗,但我們卻做出了全世界開發人員日常使用的產品,並且願意選擇使用它而不是主流的著名框架我們都知道。我們對此感到無比榮幸和謙卑。 我們仍然有很多問題(認為這些問題永遠不會消失),但現在也開始感覺我們得到了一些正確的答案。 < 圖>  我們今天收到的回饋 謝謝閱讀了解有關 Wasp 的更多資訊並支持我們達到 10,000 顆星的旅程。 PS:如果您想知道誰是黃蜂隊的真正老闆,現在我們終於在上面的照片中明確了這一點。必須把這個小傢伙一直帶到山頂,這樣他才能得到一個漂亮的鏡頭。 🐝 --- 原文出處:https://dev.to/wasp/our-web-framework-reached-9000-stars-on-github-9000-jij
您的普通 bash 可能具有您通常需要的功能,但**如果您是常規終端用戶,zsh 將改變您鍵入命令的方式。** zsh、ohmyzsh 和 hyper 一起提供的功能將讓您大吃一驚。 > 您知道您可以從終端控制 Spotify 嗎?是的,超級插件可以讓您做到這一點。 對於初學者來說,設定這些東西可能會讓人不知所措,所以這裡有一個非常簡單的入門指南! 🤩 --- 🔥 簡介 ---- 如果您使用的是如下所示的常規終端,則您會錯過 OhMyZsh 提供的許多功能。  今天,您將進行終端改造,使其看起來像這樣...  不僅僅是外觀,OhMyZsh 還具有豐富的功能來點亮您的程式設計之旅。 在教程結束時,這就是您可以在終端機中執行的操作... - NPM、Git 自動完成 - 在終端機中輸入時自動建議 - 語法高亮顯示指令是否已定義 - 使用遊標編輯終端命令 - 查看目前目錄的`git branch`和`git status` - 開啟與目前分頁相同目錄的新分頁 - 使用 OhMyZsh 功能,例如不使用`cd`進行導航、使用`ll` 、更簡單的基於 Tab 鍵單擊的導航等等! --- ❤️ 開始吧 ------ 首先,您必須安裝`zsh` 。在某些情況下(取決於您正在執行的作業系統),它可能已經安裝。因此,請透過在終端機中執行`zsh --version`檢查它是否已安裝。 `zsh`在不同作業系統的安裝過程有所不同。查看[Zsh 安裝指南](https://github.com/robbyrussell/oh-my-zsh/wiki/Installing-ZSH)來安裝 zsh。 安裝 Zsh 後,請確保將其設為預設 shell。為此,請在終端機中執行以下命令。 ``` $ sudo chsh -s $(which zsh) ``` 登出並登入回預設 shell。執行`echo $SHELL`並預期輸出`/bin/zsh`或類似內容。 --- 🔰 安裝 OhMyZsh ------------ > 請注意,zsh 和 OhMyZsh 是不同的。 透過在終端機中執行以下命令來安裝`OhMyZsh` 。 ``` $ sudo sh -c "$(curl -fsSL https://raw.githubusercontent.com/robbyrussell/oh-my-zsh/master/tools/install.sh)" ``` 當您安裝 OhMyZsh 時,它會附帶許多插件來幫助您! 若要新增實用的插件,請在 TextEdit/Notepad/Vim/VSCode 中開啟`~/.zshrc` 。 在檔案中看到的插件清單中,只需新增一個名為`npm`的插件,如下所示 👇 ``` plugins=( git bundler dotenv osx rake rbenv ruby npm # you added this ) ``` 瞧!您已經完成了 OhMyZsh!若要查看更改,請在終端機中執行`source ~/.zshrc` ,現在您就擁有了 OhMyZsh shell 的功能。 --- 🔰 依時間安裝 HyperTerm ----------------- Zeit(now.sh 和 Next.js 的建立者)為我們建立了一個很棒的終端應用程式,它是用 Electron 建置的。 從[這裡](https://hyper.is/)下載 Hyper。 --- ### ⚛️ 使用 OhMyZsh 設定 Hyper 打開超級終端機。您不會看到 OhMyZsh 在那裡執行。因此,請轉到超級設定。在 OSX 上,它是`Hyper > Preferences` 。 這將在您最喜歡的編輯器中開啟一個`.hyper.js`檔案。該文件包含您的終端的所有設置,非常容易控制! 若要在 Hyper 中啟用 OhMyZsh 作為預設 shell,請在`.hyper.js`中進行此變更 👇 ``` - shell: '/bin/bash' + shell: '/bin/zsh' ``` **這將使 OhMyZsh 成為您的預設超級終端 shell!** --- ### 🤩 輸入指令時自動完成 Git 將`zsh-autocomplete`插件複製到 OhMyZsh 插件資料夾中。 ``` $ sudo git clone https://github.com/zsh-users/zsh-autosuggestions ${ZSH_CUSTOM:-~/.oh-my-zsh/custom}/plugins/zsh-autosuggestions ``` 完成後,將外掛程式新增至`~/.zshrc`檔案的外掛程式清單中。 ``` plugins=( ... zsh-autosuggestions ) ``` --- ### 🎉 Zsh 語法高亮 Git 將`zsh-syntax-highlighting`外掛程式克隆到 OhMyZsh 外掛程式資料夾中。 ``` $ sudo git clone https://github.com/zsh-users/zsh-syntax-highlighting.git ${ZSH_CUSTOM:-~/.oh-my-zsh/custom}/plugins/zsh-syntax-highlighting ``` 並再次將其新增至`.zshrc`檔案的外掛程式清單。 ``` plugins=( ... zsh-syntax-highlighting ) ``` > 注意:若要反映您所做的每項更改,請在終端機中執行`source ~/.zshrc` 。 --- ### 📯 啟用 Hyper 相關功能與主題 透過切換超級終端的設定來開啟`.hyper.js` 。 請查看`plugins: [...]`部分並將這些插件名稱貼到此處。 ``` plugins: [ ... 'hypercwd', 'hyper-statusline', 'hyper-alt-click', 'hyperterm-safepaste', 'hyper-search', 'hypergoogle', 'hyperborder', 'hyper-tab-icons', 'hyper-hide-title', 'shades-of-purple-hyper' ], ``` 儲存文件,Hyper 會自動為您安裝這些外掛程式和主題。要反映更改,只需關閉並再次啟動超級終端即可。 萬歲!**現在,您的終端機中已擁有本 DEV.to 文章開頭列出的所有功能。** --- 獎勵:在 VSCode 中為整合終端設定相同的終端配置 --------------------------- 在 VSCode 設定中,新增以下 JSON 鍵值對,然後就可以開始了! ``` { ... "terminal.integrated.shell.osx": "/bin/zsh", "terminal.integrated.fontSize": 16 } ``` **就是這樣,夥計們!** --- 🔥 資源 ---- - <https://ohmyz.sh> - <https://hyper.is> --- 🏆 關於我 ----- **我是 Kumar Abhirup,一位來自印度的 16 歲 JavaScript React 開發人員,每天都在學習新事物。** [在 Twitter 上與我聯絡 🐦](https://twitter.com/kumar_abhirup) [我的個人網站和作品集🖥️](https://kumar.now.sh) *請在下面評論您更好的方法以及改進本文的建議。 :)* --- 原文出處:https://dev.to/kumareth/a-beginner-s-guide-for-setting-up-autocomplete-on-ohmyzsh-hyper-with-plugins-themes-47f2
您可以使用無數的框架和函式庫來改進您的全端應用程式。 我們將介紹令人興奮的概念,例如應用程式內通知、使用 React 製作影片、從為開發人員提供的電子郵件 API 到在瀏覽器中建立互動式音樂。 那我們就開始吧。 (不要忘記為這些庫加註星標以表示您的支持)。  https://github.com/CopilotKit/CopilotKit --- 1. [CopilotKit](https://github.com/CopilotKit/CopilotKit) - 在數小時內為您的產品提供 AI Copilot。 ------------------------------------------------------------------------------------  您可以使用兩個 React 元件將關鍵 AI 功能整合到 React 應用程式中。它們還提供內建(完全可自訂)Copilot 原生 UX 元件,例如`<CopilotKit />` 、 `<CopilotPopup />` 、 `<CopilotSidebar />` 、 `<CopilotTextarea />` 。 開始使用以下 npm 指令。 ``` npm i @copilotkit/react-core @copilotkit/react-ui @copilotkit/react-textarea ``` 這是整合 CopilotTextArea 的方法。 ``` import { CopilotTextarea } from "@copilotkit/react-textarea"; import { useState } from "react"; export function SomeReactComponent() { const [text, setText] = useState(""); return ( <> <CopilotTextarea className="px-4 py-4" value={text} onValueChange={(value: string) => setText(value)} placeholder="What are your plans for your vacation?" autosuggestionsConfig={{ textareaPurpose: "Travel notes from the user's previous vacations. Likely written in a colloquial style, but adjust as needed.", chatApiConfigs: { suggestionsApiConfig: { forwardedParams: { max_tokens: 20, stop: [".", "?", "!"], }, }, }, }} /> </> ); } ``` 您可以閱讀[文件](https://docs.copilotkit.ai/getting-started/quickstart-textarea)。 基本概念是在幾分鐘內建立可用於基於 LLM 的全端應用程式的 AI 聊天機器人。 https://github.com/CopilotKit/CopilotKit --- 2. [Storybook](https://github.com/storybookjs/storybook) - UI 開發、測試和文件變得簡單。 ---------------------------------------------------------------------------  Storybook 是一個用於獨立建立 UI 元件和頁面的前端工作坊。它有助於 UI 開發、測試和文件編制。 他們在 GitHub 上有超過 57,000 次提交、81,000 多個 star 和 1300 多個版本。 這是您為專案建立簡單元件的方法。 ``` import type { Meta, StoryObj } from '@storybook/react'; import { YourComponent } from './YourComponent'; //👇 This default export determines where your story goes in the story list const meta: Meta<typeof YourComponent> = { component: YourComponent, }; export default meta; type Story = StoryObj<typeof YourComponent>; export const FirstStory: Story = { args: { //👇 The args you need here will depend on your component }, }; ``` 您可以閱讀[文件](https://storybook.js.org/docs/get-started/setup)。 如今,UI 除錯起來很痛苦,因為它們與業務邏輯、互動狀態和應用程式上下文糾纏在一起。 Storybook 提供了一個獨立的 iframe 來渲染元件,而不會受到應用程式業務邏輯和上下文的干擾。這可以幫助您將開發重點放在元件的每個變體上,甚至是難以觸及的邊緣情況。 https://github.com/storybookjs/storybook --- 3. [Appwrite](https://github.com/appwrite/appwrite) - 您的後端減少麻煩。 ---------------------------------------------------------------   Appwrite 的開源平台可讓您將身份驗證、資料庫、函數和儲存體新增至您的產品中,並建立任何規模的任何應用程式、擁有您的資料並使用您喜歡的編碼語言和工具。 他們有很好的貢獻指南,甚至不厭其煩地詳細解釋架構。 開始使用以下 npm 指令。 ``` npm install appwrite ``` 您可以像這樣建立一個登入元件。 ``` "use client"; import { useState } from "react"; import { account, ID } from "./appwrite"; const LoginPage = () => { const [loggedInUser, setLoggedInUser] = useState(null); const [email, setEmail] = useState(""); const [password, setPassword] = useState(""); const [name, setName] = useState(""); const login = async (email, password) => { const session = await account.createEmailSession(email, password); setLoggedInUser(await account.get()); }; const register = async () => { await account.create(ID.unique(), email, password, name); login(email, password); }; const logout = async () => { await account.deleteSession("current"); setLoggedInUser(null); }; if (loggedInUser) { return ( <div> <p>Logged in as {loggedInUser.name}</p> <button type="button" onClick={logout}> Logout </button> </div> ); } return ( <div> <p>Not logged in</p> <form> <input type="email" placeholder="Email" value={email} onChange={(e) => setEmail(e.target.value)} /> <input type="password" placeholder="Password" value={password} onChange={(e) => setPassword(e.target.value)} /> <input type="text" placeholder="Name" value={name} onChange={(e) => setName(e.target.value)} /> <button type="button" onClick={() => login(email, password)}> Login </button> <button type="button" onClick={register}> Register </button> </form> </div> ); }; export default LoginPage; ``` 您可以閱讀[文件](https://appwrite.io/docs)。 Appwrite 可以非常輕鬆地建立具有開箱即用的擴充功能的可擴展後端應用程式。 https://github.com/appwrite/appwrite --- 4. [Wasp](https://github.com/wasp-lang/wasp) - 用於 React、node.js 和 prisma 的類似 Rails 的框架。 --------------------------------------------------------------------------------------- 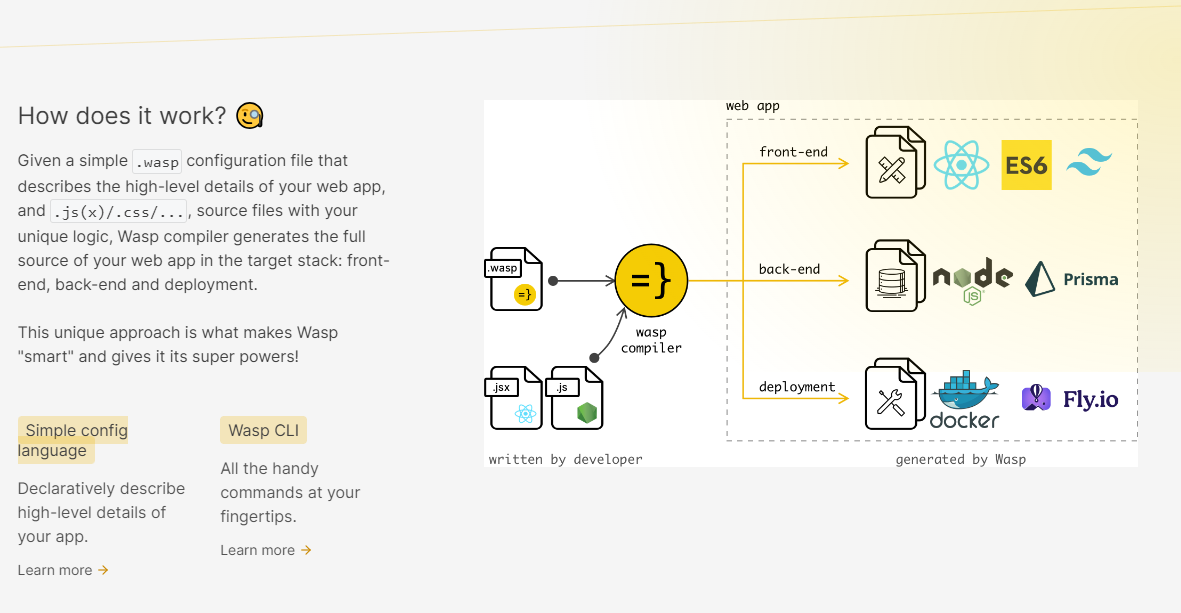 使用 React 和 Node.js 開發全端 Web 應用程式的最快方法。這不是一個想法,而是一種建立瘋狂快速全端應用程式的不同方法。 這是將其整合到元件中的方法。 ``` import getRecipes from "@wasp/queries/getRecipes"; import { useQuery } from "@wasp/queries"; import type { User } from "@wasp/entities"; export function HomePage({ user }: { user: User }) { // Due to full-stack type safety, `recipes` will be of type `Recipe[]` here. const { data: recipes, isLoading } = useQuery(getRecipes); // Calling our query here! if (isLoading) { return <div>Loading...</div>; } return ( <div> <h1>Recipes</h1> <ul> {recipes ? recipes.map((recipe) => ( <li key={recipe.id}> <div>{recipe.title}</div> <div>{recipe.description}</div> </li> )) : 'No recipes defined yet!'} </ul> </div> ); } ``` 您可以閱讀[文件](https://wasp-lang.dev/docs)。 https://github.com/wasp-lang/wasp --- 5. [Novu](https://github.com/novuhq/novu) - 將應用程式內通知新增至您的應用程式! -------------------------------------------------------------- 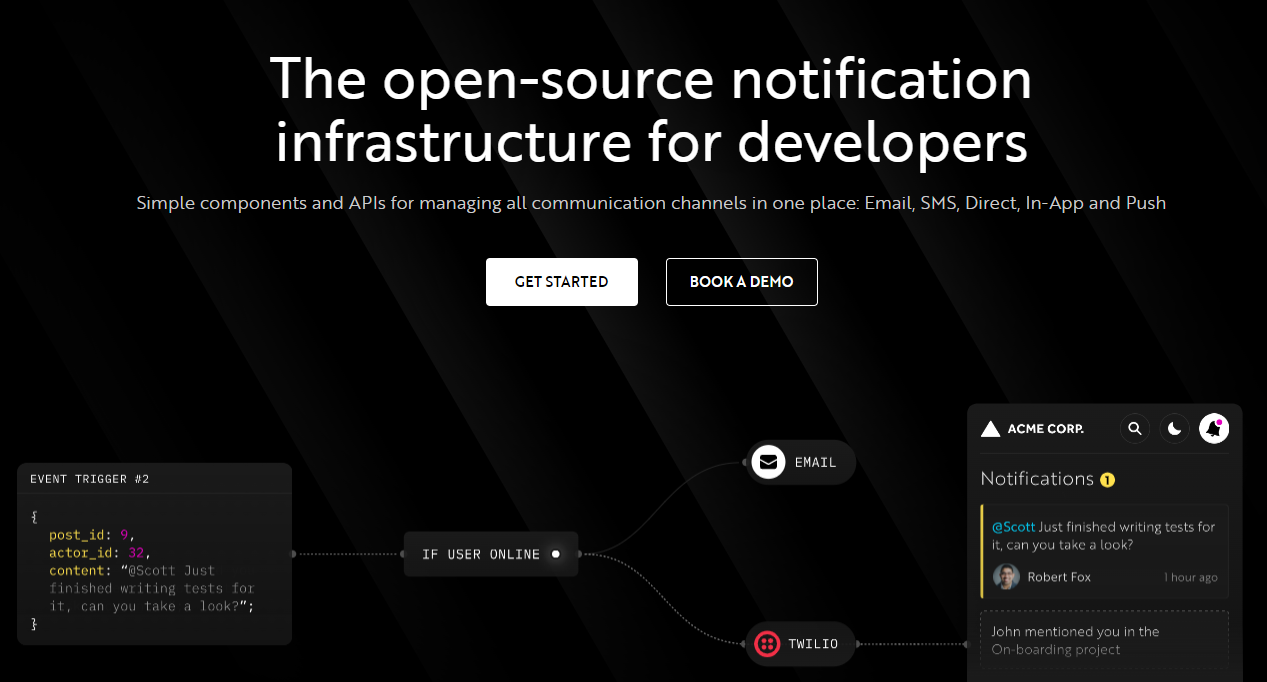 Novu 提供開源通知基礎架構和功能齊全的嵌入式通知中心。 這就是如何使用`React`建立 novu 元件以用於應用程式內通知。 ``` import { NovuProvider, PopoverNotificationCenter, NotificationBell, } from "@novu/notification-center"; function App() { return ( <> <NovuProvider subscriberId={process.env.REACT_APP_SUB_ID} applicationIdentifier={process.env.REACT_APP_APP_ID} > <PopoverNotificationCenter> {({ unseenCount }) => <NotificationBell unseenCount={unseenCount} />} </PopoverNotificationCenter> </NovuProvider> </> ); } export default App; ``` 您可以閱讀[文件](https://docs.novu.co/getting-started/introduction)。 https://github.com/novuhq/novu --- 6. [Remotion](https://github.com/remotion-dev/remotion) - 使用 React 以程式設計方式製作影片。 -------------------------------------------------------------------------------  使用 React 建立真正的 MP4 影片,使用伺服器端渲染和參數化擴展影片製作。 開始使用以下 npm 指令。 ``` npm init video ``` 它為您提供了一個幀號和一個空白畫布,您可以在其中使用 React 渲染任何您想要的內容。 這是一個範例 React 元件,它將當前幀渲染為文字。 ``` import { AbsoluteFill, useCurrentFrame } from "remotion"; export const MyComposition = () => { const frame = useCurrentFrame(); return ( <AbsoluteFill style={{ justifyContent: "center", alignItems: "center", fontSize: 100, backgroundColor: "white", }} > The current frame is {frame}. </AbsoluteFill> ); }; ``` 您可以閱讀[文件](https://www.remotion.dev/docs/)。 過去兩年,remotion 團隊因製作 GitHub Wrapped 而聞名。 https://github.com/remotion-dev/remotion --- [7.NocoDB](https://github.com/nocodb/nocodb) - Airtable 的替代品。 ------------------------------------------------------------- 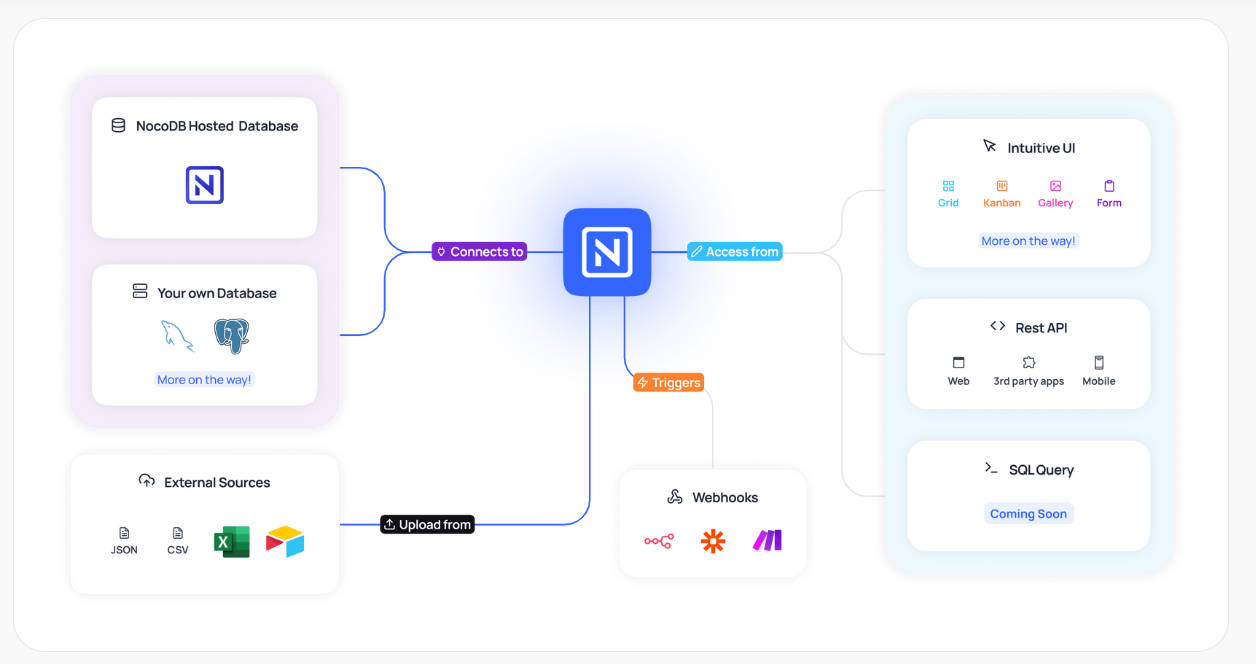 Airtable 的免費開源替代品是 NocoDB。它可以使用任何 MySQL、PostgreSQL、SQL Server、SQLite 或 MariaDB 資料庫製作智慧型電子表格。 其主要目標是讓強大的計算工具得到更廣泛的使用。 開始使用以下 npx 指令。 ``` npx create-nocodb-app ``` 您可以閱讀[文件](https://docs.nocodb.com/)。 NocoDB 的建立是為了為世界各地的數位企業提供強大的開源和無程式碼資料庫介面。 您可以非常快速地將airtable資料匯入NocoDB。 https://github.com/nocodb/nocodb --- 8.[新穎](https://github.com/steven-tey/novel)- 所見即所得編輯器,具有人工智慧自動完成功能。 -------------------------------------------------------------------  它使用`Next.js` 、 `Vercel AI SDK` 、 `Tiptap`作為文字編輯器。 開始使用以下 npm 指令。 ``` npm i novel ``` 您可以這樣使用它。有多種選項可用於改進您的應用程式。 ``` import { Editor } from "novel"; export default function App() { return <Editor />; } ``` https://github.com/steven-tey/novel --- 9. [Blitz](https://github.com/blitz-js/blitz) - 缺少 NextJS 的全端工具包。 -----------------------------------------------------------------  Blitz 繼承了 Next.js 的不足,為全球應用程式的交付和擴展提供了經過實戰考驗的函式庫和約定。 開始使用以下 npm 指令。 ``` npm install -g blitz ``` 這就是您如何使用 Blitz 建立新頁面。 ``` const NewProjectPage: BlitzPage = () => { const router = useRouter() const [createProjectMutation] = useMutation(createProject) return ( <div> <h1>Create New Project</h1> <ProjectForm submitText="Create Project" schema={CreateProject} onSubmit={async (values) => { // This is equivalent to calling the server function directly const project = await createProjectMutation(values) // Notice the 'Routes' object Blitz provides for routing router.push(Routes.ProjectsPage({ projectId: project.id })) }} /> </div> ); }; NewProjectPage.authenticate = true NewProjectPage.getLayout = (page) => <Layout>{page}</Layout> export default NewProjectPage ``` 您可以閱讀[文件](https://blitzjs.com/docs/get-started)。 它使建築物改善了數倍。  https://github.com/blitz-js/blitz --- 10. [Supabase](https://github.com/supabase/supabase) - 開源 Firebase 替代品。 -----------------------------------------------------------------------  我們大多數人都已經預料到 SUPABASE 會出現在這裡,因為它實在是太棒了。 開始使用以下 npm 指令 (Next.js)。 ``` npx create-next-app -e with-supabase ``` 這是使用 supabase 建立用戶的方法。 ``` import { createClient } from '@supabase/supabase-js' // Initialize const supabaseUrl = 'https://chat-room.supabase.co' const supabaseKey = 'public-anon-key' const supabase = createClient(supabaseUrl, supabaseKey) // Create a new user const { user, error } = await supabase.auth.signUp({ email: '[email protected]', password: 'example-password', }) ``` 您可以閱讀[文件](https://supabase.com/docs)。 您可以使用身份驗證、即時、邊緣功能、儲存等功能建立一個速度極快的應用程式。 Supabase 涵蓋了這一切! 他們還提供了一些入門套件,例如 AI 聊天機器人和 Stripe 訂閱。 https://github.com/supabase/supabase --- [11.Refine](https://github.com/refinedev/refine) - 企業開源重組工具。 ------------------------------------------------------------ 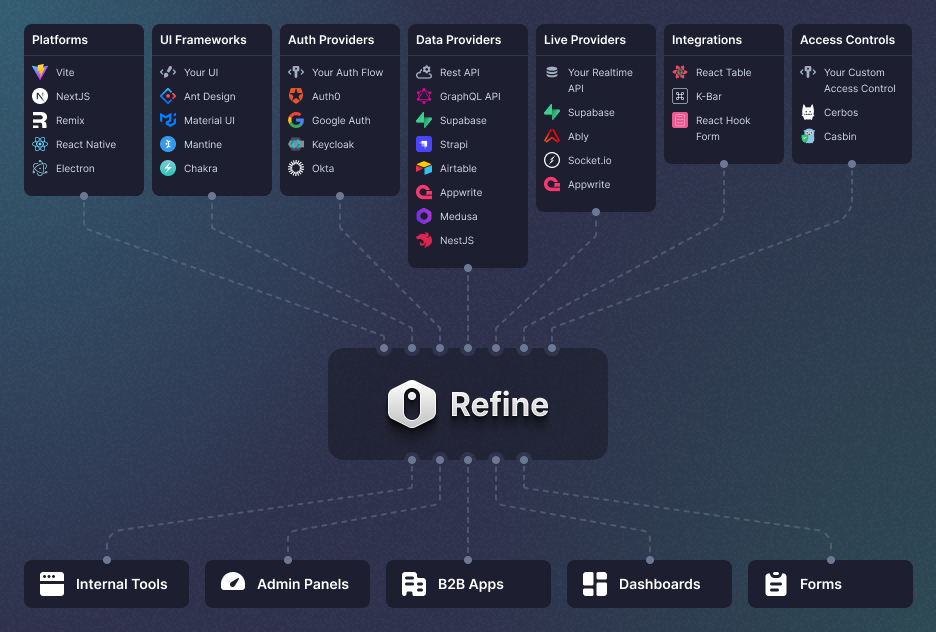 建立具有無與倫比的靈活性的管理面板、儀表板和 B2B 應用程式 您可以在一分鐘內使用單一 CLI 命令進行設定。 它具有適用於 15 多個後端服務的連接器,包括 Hasura、Appwrite 等。 開始使用以下 npm 指令。 ``` npm create refine-app@latest ``` 這就是使用 Refine 新增登入資訊的簡單方法。 ``` import { useLogin } from "@refinedev/core"; const { login } = useLogin(); ``` 您可以閱讀[文件](https://refine.dev/docs/)。 https://github.com/refinedev/refine --- 12. [Zenstack](https://github.com/zenstackhq/zenstack) - 資料庫到 API 和 UI 只需幾分鐘。 ----------------------------------------------------------------------------- 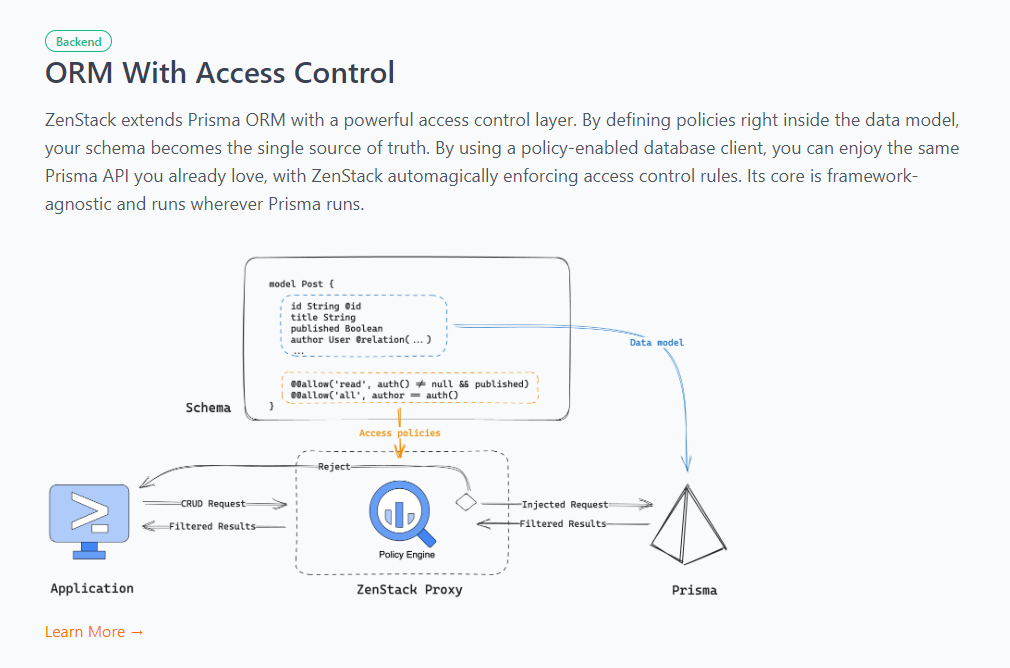 TypeScript 工具包,透過強大的存取控制層增強 Prisma ORM,並釋放其全端開發的全部功能。 開始使用以下 npx 指令。 ``` npx zenstack@latest init ``` 這是透過伺服器適配器建立 RESTful API 的方法。 ``` // pages/api/model/[...path].ts import { requestHandler } from '@zenstackhq/next'; import { enhance } from '@zenstackhq/runtime'; import { getSessionUser } from '@lib/auth'; import { prisma } from '@lib/db'; // Mount Prisma-style APIs: "/api/model/post/findMany", "/api/model/post/create", etc. // Can be configured to provide standard RESTful APIs (using JSON:API) instead. export default requestHandler({ getPrisma: (req, res) => enhance(prisma, { user: getSessionUser(req, res) }), }); ``` 您可以閱讀[文件](https://zenstack.dev/docs/welcome)。 https://github.com/zenstackhq/zenstack --- 13. [Buildship](https://github.com/rowyio/buildship) - 低程式碼視覺化後端建構器。 --------------------------------------------------------------------  對於您正在使用無程式碼應用程式建構器(FlutterFlow、Webflow、Framer、Adalo、Bubble、BravoStudio...)或前端框架(Next.js、React、Vue...)建立的應用程式,您需要一個後端來支援可擴展的 API、安全工作流程、自動化等。BuildShip 為您提供了一種完全視覺化的方式,可以在易於使用的完全託管體驗中可擴展地建立這些後端任務。 這意味著您不需要在雲端平台上爭論或部署東西、執行 DevOps 等。只需立即建置和交付 🚀 https://github.com/rowyio/buildship --- 14. [Taipy](https://github.com/Avaiga/taipy) - 將資料和人工智慧演算法整合到生產就緒的 Web 應用程式中。 -----------------------------------------------------------------------------  Taipy 是一個開源 Python 庫,用於輕鬆的端到端應用程式開發, 具有假設分析、智慧管道執行、內建調度和部署工具。 開始使用以下命令。 ``` pip install taipy ``` 這是一個典型的Python函數,也是過濾器場景中使用的唯一任務。 ``` def filter_genre(initial_dataset: pd.DataFrame, selected_genre): filtered_dataset = initial_dataset[initial_dataset['genres'].str.contains(selected_genre)] filtered_data = filtered_dataset.nlargest(7, 'Popularity %') return filtered_data ``` 您可以閱讀[文件](https://docs.taipy.io/en/latest/)。 他們還有很多可供您建立的[演示應用程式教學](https://docs.taipy.io/en/latest/knowledge_base/demos/)。 https://github.com/Avaiga/taipy --- 15. [LocalForage](https://github.com/localForage/localForage) - 改進了離線儲存。 ------------------------------------------------------------------------  LocalForage 是一個 JavaScript 函式庫,它透過使用非同步資料儲存和簡單的、類似 localStorage 的 API 來改善 Web 應用程式的離線體驗。它允許開發人員儲存多種類型的資料而不僅僅是字串。 開始使用以下 npm 指令。 ``` npm install localforage ``` 只需包含 JS 檔案並開始使用 localForage。 ``` <script src="localforage.js"></script> ``` 您可以閱讀[文件](https://localforage.github.io/localForage/#installation)。 https://github.com/localForage/localForage --- 16. [Zod](https://github.com/colinhacks/zod) - 使用靜態類型推斷的 TypeScript-first 模式驗證。 -------------------------------------------------------------------------------  Zod 的目標是透過最大限度地減少重複的類型聲明來對開發人員友好。使用 Zod,您聲明一次驗證器,Zod 將自動推斷靜態 TypeScript 類型。將更簡單的類型組合成複雜的資料結構很容易。 開始使用以下 npm 指令。 ``` npm install zod ``` 這是您在建立字串架構時自訂一些常見錯誤訊息的方法。 ``` const name = z.string({ required_error: "Name is required", invalid_type_error: "Name must be a string", }); ``` 您可以閱讀[文件](https://zod.dev/)。 它適用於 Node.js 和所有現代瀏覽器 https://github.com/colinhacks/zod --- 17.[多普勒](https://github.com/DopplerHQ)- 管理你的秘密。 -----------------------------------------------  您可以透過在具有開發、暫存和生產環境的專案中組織機密來消除機密蔓延。 開始使用以下指令 (MacOS)。 ``` $ brew install dopplerhq/cli/doppler $ doppler --version ``` 這是安裝 Doppler CLI[的 GitHub Actions 工作流程](https://github.com/DopplerHQ/cli-action)。 您可以閱讀[文件](https://docs.doppler.com/docs/start)。 ``` name: Example action on: [push] jobs: my-job: runs-on: ubuntu-latest steps: - name: Install CLI uses: dopplerhq/cli-action@v3 - name: Do something with the CLI run: doppler secrets --only-names env: DOPPLER_TOKEN: ${{ secrets.DOPPLER_TOKEN }} ``` https://github.com/DopplerHQ --- 18. [FastAPI](https://github.com/tiangolo/fastapi) - 高效能、易於學習、快速編碼、可用於生產。 -------------------------------------------------------------------------  FastAPI 是一個現代、快速(高效能)的 Web 框架,用於基於標準 Python 類型提示使用 Python 3.8+ 建立 API。 開始使用以下命令。 ``` $ pip install fastapi ``` 這是您開始使用 FastAPI 的方式。 ``` from typing import Union from fastapi import FastAPI app = FastAPI() @app.get("/") def read_root(): return {"Hello": "World"} @app.get("/items/{item_id}") def read_item(item_id: int, q: Union[str, None] = None): return {"item_id": item_id, "q": q} ``` 您的編輯器將自動完成屬性並了解它們的類型,這是使用 FastAPI 的最佳功能之一。 您可以閱讀[文件](https://fastapi.tiangolo.com/)。 https://github.com/tiangolo/fastapi --- 19. [Flowise](https://github.com/FlowiseAI/Flowise) - 拖放 UI 來建立您的客製化 LLM 流程。 ----------------------------------------------------------------------------  Flowise 是一款開源 UI 視覺化工具,用於建立客製化的 LLM 編排流程和 AI 代理程式。 開始使用以下 npm 指令。 ``` npm install -g flowise npx flowise start OR npx flowise start --FLOWISE_USERNAME=user --FLOWISE_PASSWORD=1234 ``` 這就是整合 API 的方式。 ``` import requests url = "/api/v1/prediction/:id" def query(payload): response = requests.post( url, json = payload ) return response.json() output = query({ question: "hello!" )} ``` 您可以閱讀[文件](https://docs.flowiseai.com/)。 https://github.com/FlowiseAI/Flowise --- 20. [Scrapy](https://github.com/scrapy/scrapy) - Python 的快速進階網頁爬行和抓取框架.. ------------------------------------------------------------------------  Scrapy 是一個快速的高級網路爬行和網頁抓取框架,用於爬行網站並從頁面中提取結構化資料。它可用於多種用途,從資料探勘到監控和自動化測試。 開始使用以下命令。 ``` pip install scrapy ``` 建造並執行您的網路蜘蛛。 ``` pip install scrapy cat > myspider.py <<EOF import scrapy class BlogSpider(scrapy.Spider): name = 'blogspider' start_urls = ['https://www.zyte.com/blog/'] def parse(self, response): for title in response.css('.oxy-post-title'): yield {'title': title.css('::text').get()} for next_page in response.css('a.next'): yield response.follow(next_page, self.parse) EOF scrapy runspider myspider.py ``` 您可以閱讀[文件](https://scrapy.org/doc/)。 它擁有大約 50k+ 的星星,因此對於網頁抓取來說具有巨大的可信度。 https://github.com/scrapy/scrapy --- 21. [Tone](https://github.com/Tonejs/Tone.js) - 在瀏覽器中製作互動式音樂。 -------------------------------------------------------------  開始使用以下 npm 指令。 ``` npm install tone ``` 這是您開始使用 Tone.js 的方法 ``` // To import Tone.js: import * as Tone from 'tone' //create a synth and connect it to the main output (your speakers) const synth = new Tone.Synth().toDestination(); //play a middle 'C' for the duration of an 8th note synth.triggerAttackRelease("C4", "8n"); ``` 您可以閱讀[文件](https://github.com/Tonejs/Tone.js?tab=readme-ov-file#installation)。 https://github.com/Tonejs/Tone.js --- 22. [Spacetime](https://github.com/spencermountain/spacetime) - 輕量級 javascript 時區庫。 -----------------------------------------------------------------------------------  您可以計算遠端時區的時間;支持夏令時、閏年和半球。按季度、季節、月份、週來定位時間.. 開始使用以下 npm 指令。 ``` npm install spacetime ``` 您可以這樣使用它。 ``` <script src="https://unpkg.com/spacetime"></script> <script> var d = spacetime('March 1 2012', 'America/New_York') //set the time d = d.time('4:20pm') d = d.goto('America/Los_Angeles') d.time() //'1:20pm' </script> ``` https://github.com/spencermountain/spacetime --- 23. [Mermaid](https://github.com/mermaid-js/mermaid) - 從類似 markdown 的文字產生圖表。 ----------------------------------------------------------------------------  您可以使用 Markdown with Mermaid 等文字產生流程圖或序列圖等圖表。 這就是建立圖表的方法。 ``` sequenceDiagram Alice->>John: Hello John, how are you? loop Healthcheck John->>John: Fight against hypochondria end Note right of John: Rational thoughts! John-->>Alice: Great! John->>Bob: How about you? Bob-->>John: Jolly good! ``` 它將做出如下圖。 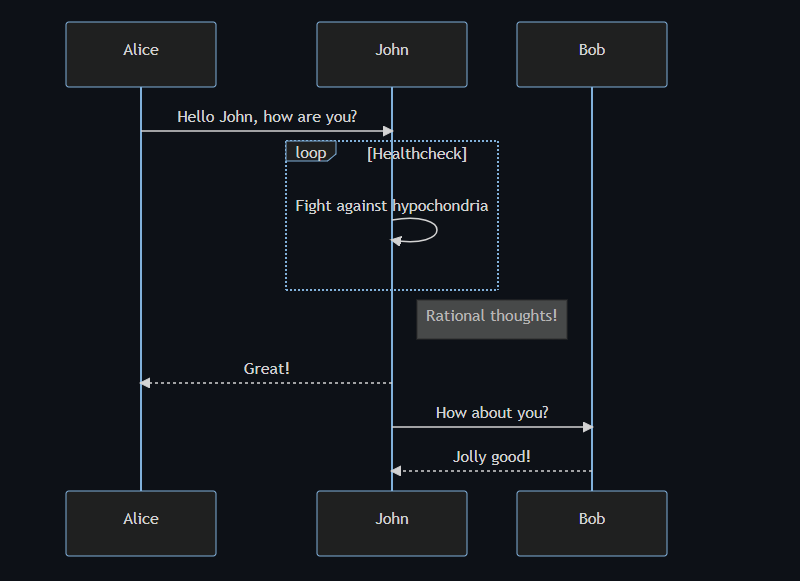 您可以閱讀[VS Code](https://docs.mermaidchart.com/plugins/visual-studio-code)的[文件](https://mermaid.js.org/intro/getting-started.html)和外掛程式。 請參閱[即時編輯器](https://mermaid.live/edit#pako:eNpVkE1PwzAMhv9KlvM-2AZj62EIxJd24ADXXLzEbaKlcUkdUDX1v5MONomcnNevXz32UWoyKAvZ4mfCoPHRQRWhVuHeO42T7XZHNhTiFb0nMdRjYelbQETRUbpTwRM1uQ2erbaoDyqI_AbnZfjZVZYFVOBCy8J2DWlLwUQHKmAwKrwRo4gnF5Xid-gd2FEAL9hSyp12pMIpNcee2ArxEhH4LG-3D7TPoAPcnhL_4WVxcgHZkfedqIjMSI5ljbEGZ_LyxwFaSbZYo5JFLg3Eg5Iq9NkHiemjC1oWHBOOZWoM8PlQ_8Un45iiLErwbRY9gcH8PUrumuHKlWs5J2oKpasGPUWfZcvctMVsNrSnlWOb9lNN9ax1xkJk-7VZzVaL1RoWS1zdLuFmuTR6P9-sy8X1vDS3V_MFyL7vfwD_bJ1W)中的範例。 https://github.com/mermaid-js/mermaid --- 24.[公共 API](https://github.com/public-apis/public-apis) - 20 多個類別的 1400 多個 API。 -------------------------------------------------------------------------------  我們主要使用外部 API 來建立應用程式,在這裡您可以找到所有 API 的清單。網站連結在最後。 它在 GitHub 上擁有大約 279k+ 顆星。 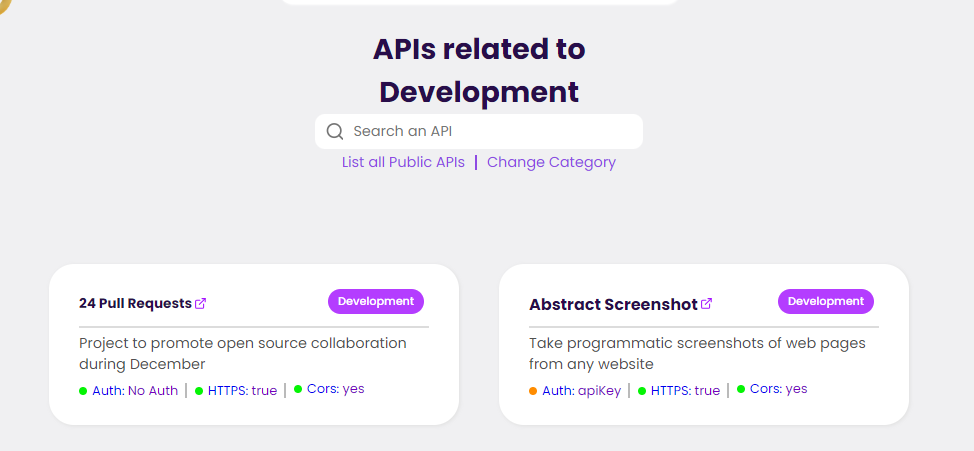 從儲存庫取得網站連結非常困難。所以,我把它貼在這裡。 網址 - [Collective-api.vercel.app/](https://collective-api.vercel.app/) https://github.com/public-apis/public-apis --- 25. [Framer Motion](https://github.com/framer/motion) - 像魔法一樣的動畫。 -----------------------------------------------------------------  可用的最強大的動畫庫之一。 Framer 使用簡單的聲明性語法意味著您編寫的程式碼更少。更少的程式碼意味著您的程式碼庫更易於閱讀和維護。 您可以建立事件和手勢,並且使用 Framer 的社區很大,這意味著良好的支援。 開始使用以下 npm 指令。 ``` npm install framer-motion ``` 您可以這樣使用它。 ``` import { motion } from "framer-motion" <motion.div whileHover={{ scale: 1.2 }} whileTap={{ scale: 1.1 }} drag="x" dragConstraints={{ left: -100, right: 100 }} /> ``` 您可以閱讀[文件](https://www.framer.com/motion/introduction/)。 https://github.com/framer/motion --- 26.[順便說一句](https://github.com/btw-so/btw)- 在幾分鐘內建立您的個人部落格。 ----------------------------------------------------------  順便說一句,您可以註冊並使用,而無需安裝任何東西。您也可以使用開源版本自行託管。 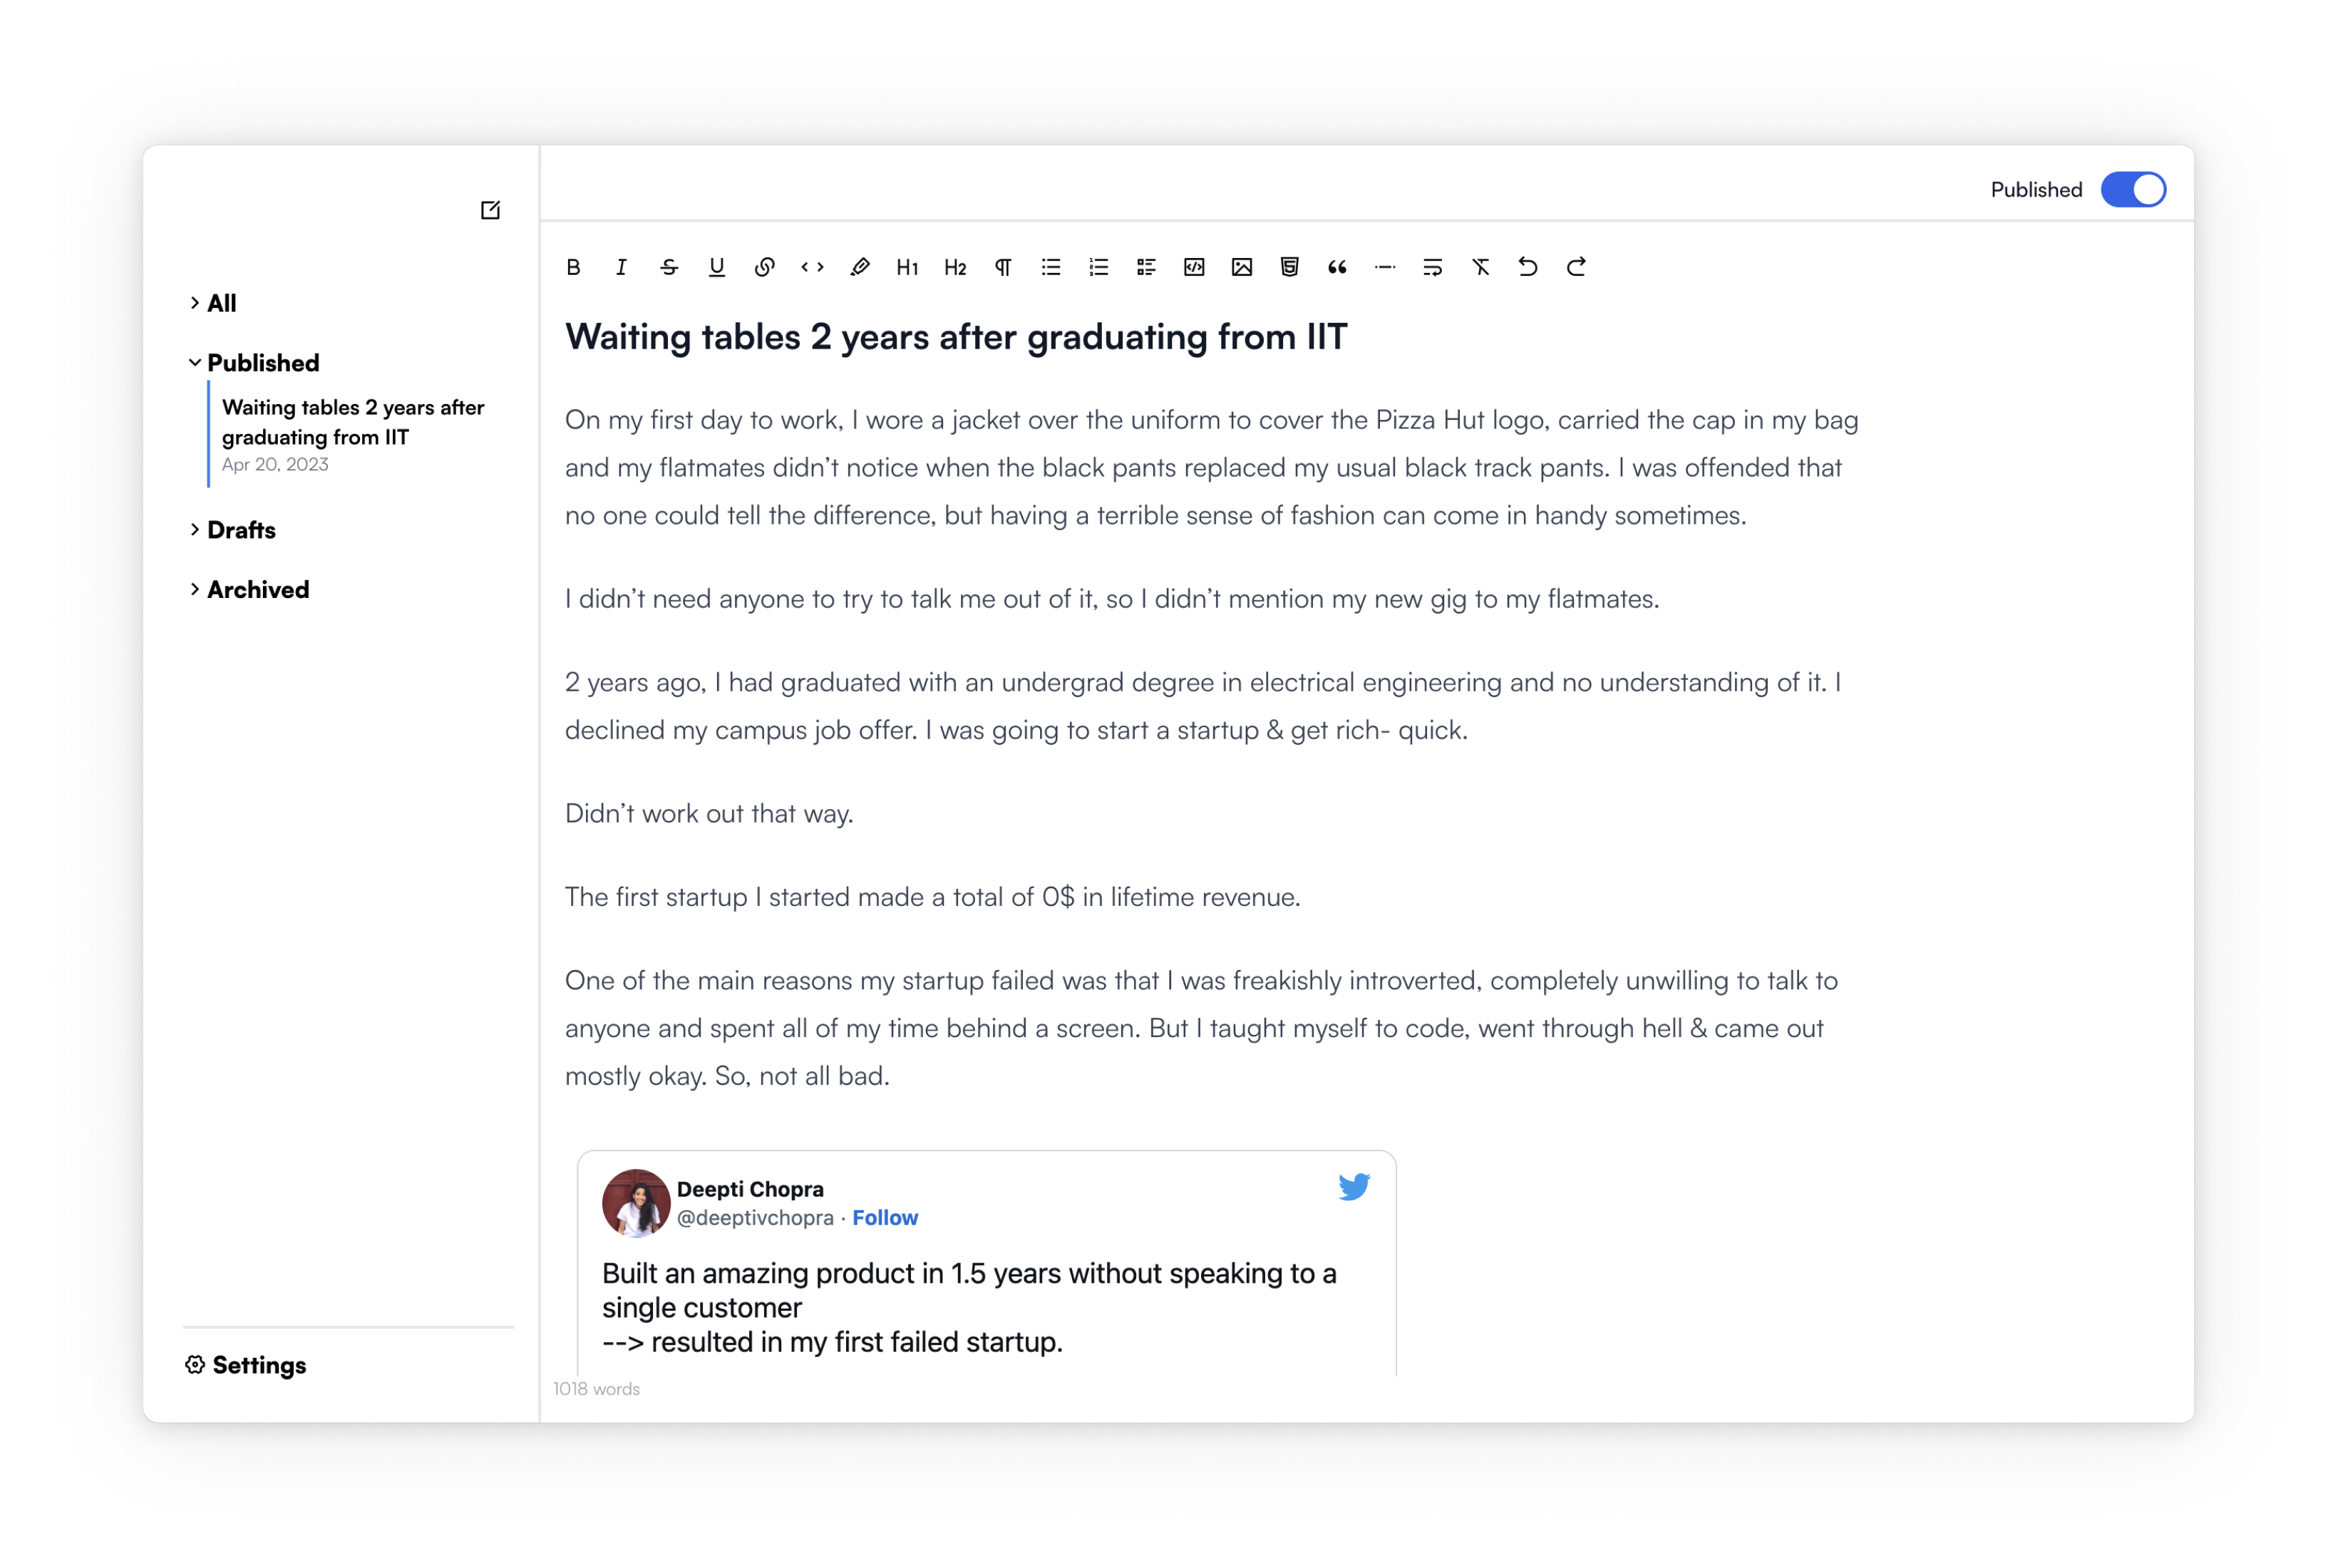 使用順便說一句建立的[範例部落格](https://www.siddg.com/about)。 https://github.com/btw-so/btw --- 27. [Formbricks](https://github.com/formbricks/formbricks) - 開源調查平台。 --------------------------------------------------------------------  Formbricks 提供免費、開源的測量平台。透過精美的應用程式內、網站、連結和電子郵件調查收集用戶旅程中每個點的回饋。在 Formbricks 之上建置或利用預先建置的資料分析功能。 開始使用以下 npm 指令。 ``` npm install @formbricks/js ``` 這就是您開始使用 formbricks 的方法。 ``` import formbricks from "@formbricks/js"; if (typeof window !== "undefined") { formbricks.init({ environmentId: "claV2as2kKAqF28fJ8", apiHost: "https://app.formbricks.com", }); } ``` 您可以閱讀[文件](https://formbricks.com/docs/getting-started/quickstart-in-app-survey)。 https://github.com/formbricks/formbricks --- 28. [Stripe](https://github.com/stripe) - 支付基礎設施。 -------------------------------------------------  數以百萬計的各種規模的公司在線上和親自使用 Stripe 來接受付款、發送付款、自動化財務流程並最終增加收入。 開始使用以下 npm 指令 (React.js)。 ``` npm install @stripe/react-stripe-js @stripe/stripe-js ``` 這就是使用鉤子的方法。 ``` import React, {useState} from 'react'; import ReactDOM from 'react-dom'; import {loadStripe} from '@stripe/stripe-js'; import { PaymentElement, Elements, useStripe, useElements, } from '@stripe/react-stripe-js'; const CheckoutForm = () => { const stripe = useStripe(); const elements = useElements(); const [errorMessage, setErrorMessage] = useState(null); const handleSubmit = async (event) => { event.preventDefault(); if (elements == null) { return; } // Trigger form validation and wallet collection const {error: submitError} = await elements.submit(); if (submitError) { // Show error to your customer setErrorMessage(submitError.message); return; } // Create the PaymentIntent and obtain clientSecret from your server endpoint const res = await fetch('/create-intent', { method: 'POST', }); const {client_secret: clientSecret} = await res.json(); const {error} = await stripe.confirmPayment({ //`Elements` instance that was used to create the Payment Element elements, clientSecret, confirmParams: { return_url: 'https://example.com/order/123/complete', }, }); if (error) { // This point will only be reached if there is an immediate error when // confirming the payment. Show error to your customer (for example, payment // details incomplete) setErrorMessage(error.message); } else { // Your customer will be redirected to your `return_url`. For some payment // methods like iDEAL, your customer will be redirected to an intermediate // site first to authorize the payment, then redirected to the `return_url`. } }; return ( <form onSubmit={handleSubmit}> <PaymentElement /> <button type="submit" disabled={!stripe || !elements}> Pay </button> {/* Show error message to your customers */} {errorMessage && <div>{errorMessage}</div>} </form> ); }; const stripePromise = loadStripe('pk_test_6pRNASCoBOKtIshFeQd4XMUh'); const options = { mode: 'payment', amount: 1099, currency: 'usd', // Fully customizable with appearance API. appearance: { /*...*/ }, }; const App = () => ( <Elements stripe={stripePromise} options={options}> <CheckoutForm /> </Elements> ); ReactDOM.render(<App />, document.body); ``` 您可以閱讀[文件](https://github.com/stripe/react-stripe-js?tab=readme-ov-file#minimal-example)。 您幾乎可以整合任何東西。它有一個巨大的選項清單。 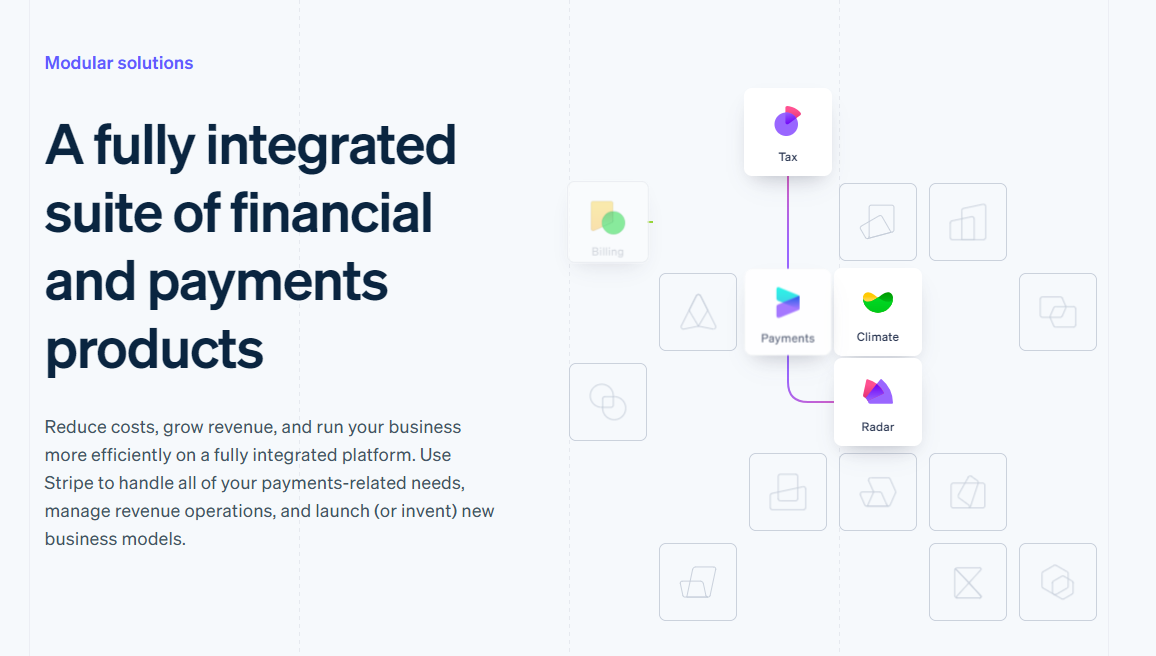 https://github.com/stripe --- 29. [Upscayl](https://github.com/upscayl/upscayl) - 開源 AI 影像升級器。 ----------------------------------------------------------------  適用於 Linux、MacOS 和 Windows 的免費開源 AI Image Upscaler 採用 Linux 優先概念建構。 它可能與全端無關,但它對於升級圖像很有用。  透過最先進的人工智慧,Upscayl 可以幫助您將低解析度影像變成高解析度。清脆又鋒利! https://github.com/upscayl/upscayl --- 30.[重新發送](https://github.com/resend)- 為開發人員提供的電子郵件 API。 -------------------------------------------------------  您可以使用 React 建立和傳送電子郵件。 2023 年最受炒作的產品之一。 開始使用以下 npm 指令。 ``` npm install @react-email/components -E ``` 這是將其與 next.js 專案整合的方法。 ``` import { EmailTemplate } from '@/components/email-template'; import { Resend } from 'resend'; const resend = new Resend(process.env.RESEND_API_KEY); export async function POST() { const { data, error } = await resend.emails.send({ from: '[email protected]', to: '[email protected]', subject: 'Hello world', react: EmailTemplate({ firstName: 'John' }), }); if (error) { return Response.json({ error }); } return Response.json(data); } ``` 您可以閱讀[文件](https://resend.com/docs/introduction)。  基本概念是一個簡單、優雅的介面,讓您可以在幾分鐘內開始發送電子郵件。它可以透過適用於您最喜歡的程式語言的 SDK 直接融入您的程式碼中。 https://github.com/resend --- 哇!如此長的專案清單。 我知道您有更多想法,分享它們,讓我們一起建造:D 如今建立全端應用程式並不難,但每個應用程式都可以透過有效地使用優秀的開源專案來解決任何問題來增加這一獨特因素。 例如,您可以建立一些提供通知或建立 UI 流來抓取資料的東西。 我希望其中一些內容對您的開發之旅有用。他們擁有一流的開發人員經驗;你可以依賴他們。 由於您將要建造東西,因此您可以在這裡找到一些[瘋狂的想法](https://github.com/florinpop17/app-ideas)。 祝你有美好的一天!直到下一次。 --- 原文出處:https://dev.to/copilotkit/im-building-a-full-stack-app-here-are-the-libraries-im-going-to-use-51nk
上週,我推出了[notesGPT](https://usenotesgpt.com/) ,這是一款免費開源語音記事應用程式,上週迄今為止已有[35,000 名訪客](https://twitter.com/nutlope/status/1760053364791050285)、7,000 名用戶和超過 1,000 名 GitHub star。它允許您錄製語音筆記,使用[Whisper](https://github.com/openai/whisper)進行轉錄,並透過[Together](https://together.ai/)使用 Mixtral 來提取操作項並將其顯示在操作項視圖中。它也是[完全開源的](https://github.com/nutlope/notesgpt),配備了身份驗證、儲存、向量搜尋、操作項,並且在行動裝置上完全響應,易於使用。 我將向您詳細介紹我是如何建造它的。 架構和技術堆疊 ------- 這是架構的快速圖表。我們將更深入地討論每個部分,並同時展示程式碼範例。 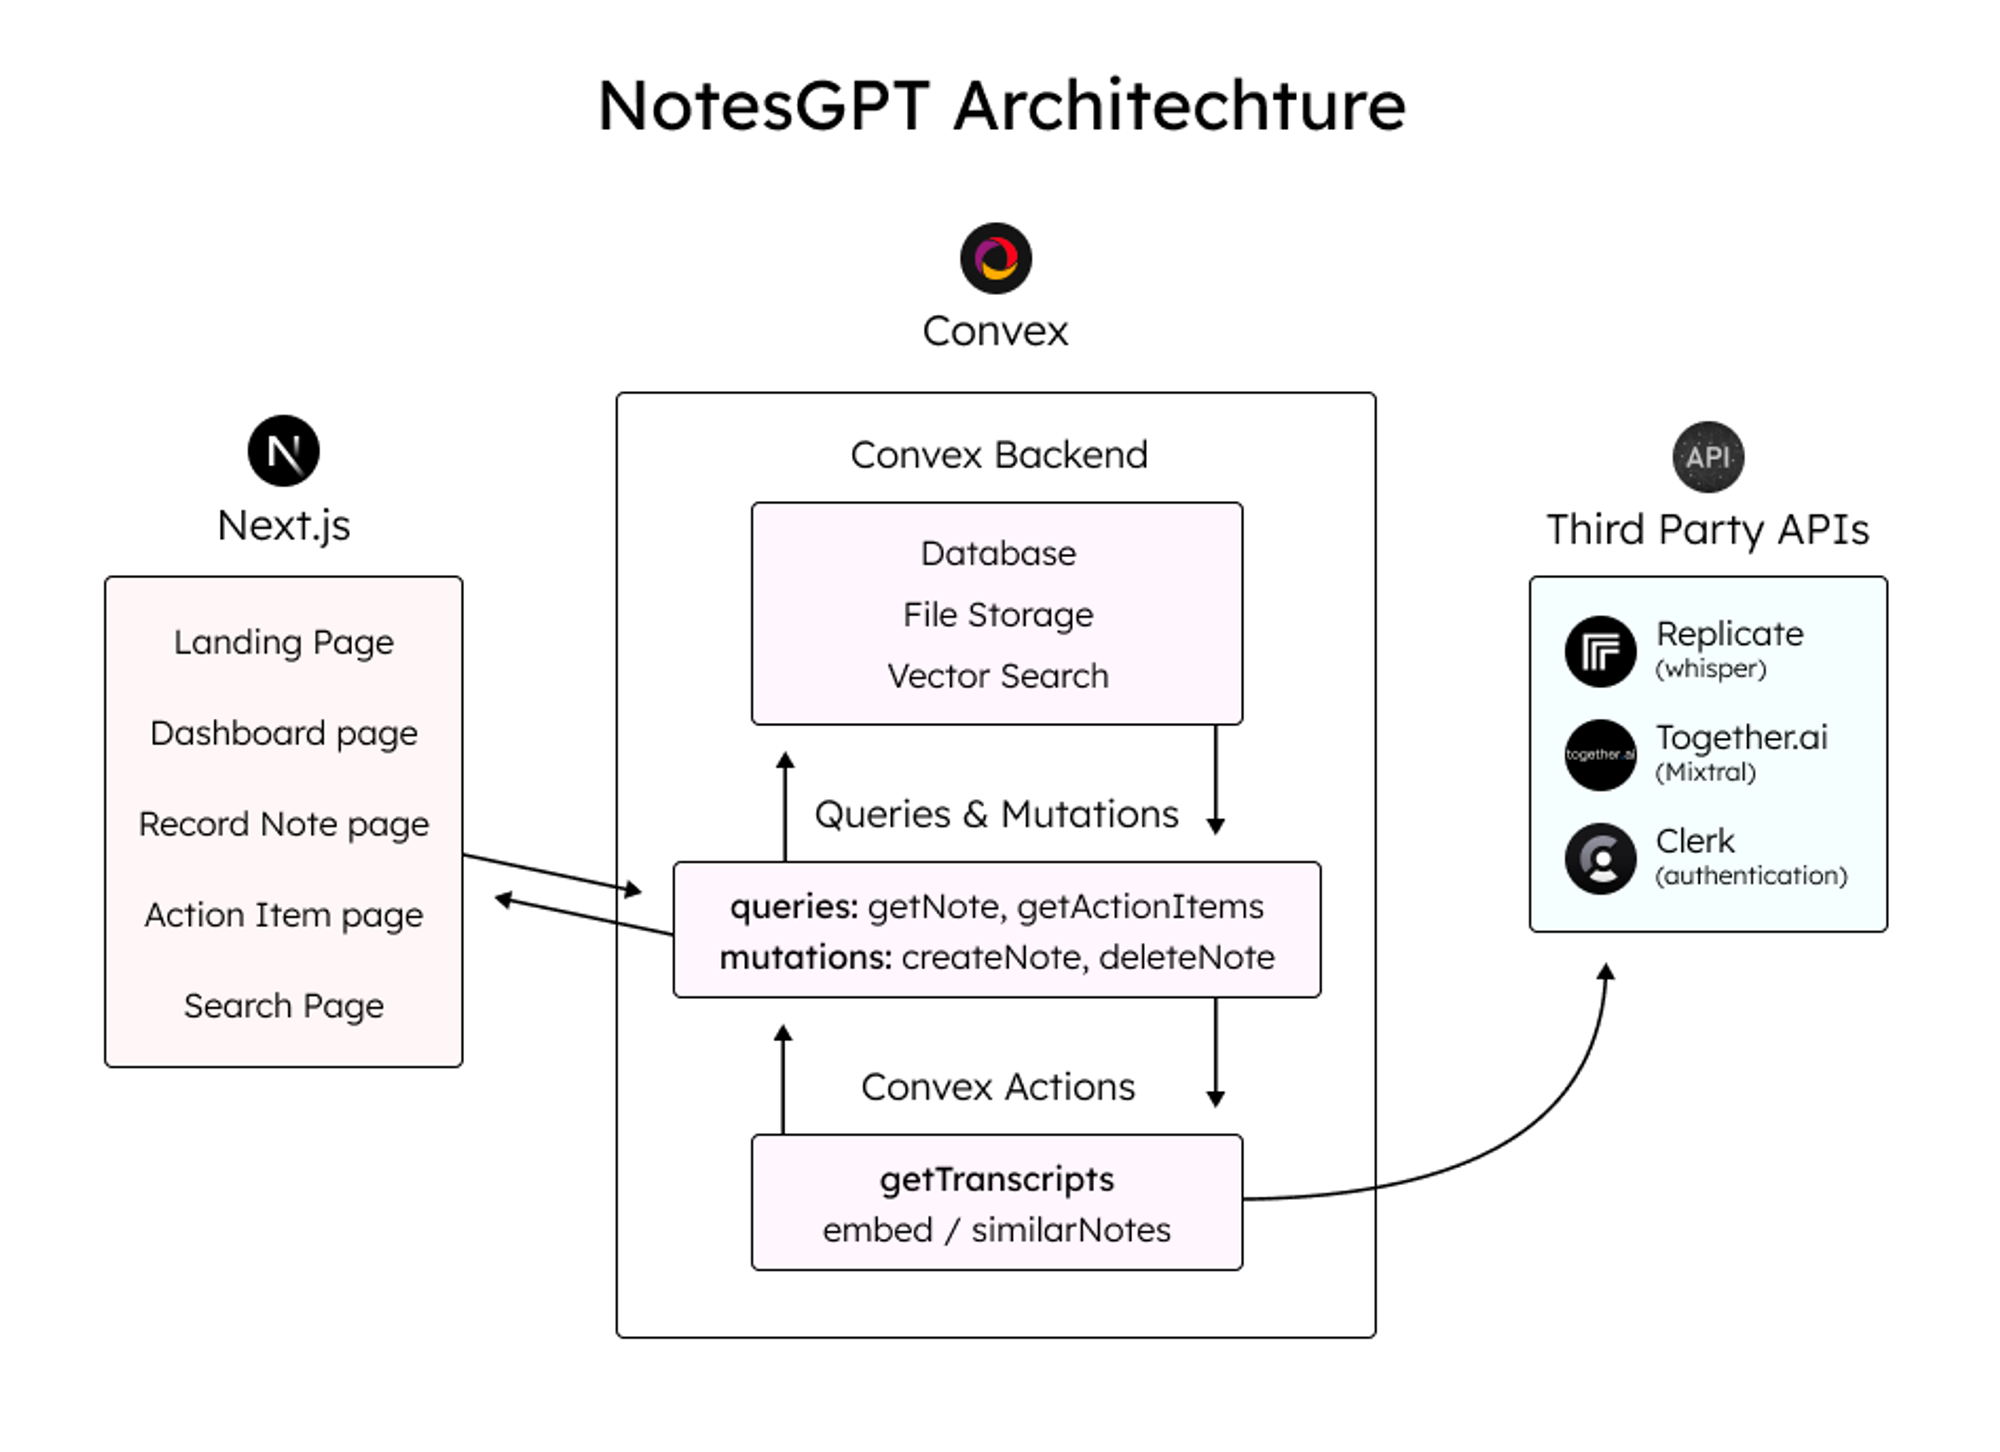 這是我使用的整體技術堆疊: - 資料庫和雲端函數的[convex](https://convex.dev/) - Next.js [App Router](https://nextjs.org/docs/app)框架 - [複製](https://replicate.com/)Whisper 轉錄 - LLM 與[JSON 模式](https://docs.together.ai/docs/json-mode)的[Mixtral](https://mistral.ai/news/mixtral-of-experts/) - [Together.ai](http://Together.ai)用於推理和嵌入 - 用於儲存語音註釋的[凸檔存儲](https://docs.convex.dev/file-storage) - [凸向量搜尋](https://docs.convex.dev/vector-search)用於向量搜尋 - 負責使用者身份驗證的[職員](https://clerk.dev/) - [Tailwind CSS](https://tailwindcss.com/)樣式 登陸頁面 ---- 該應用程式的第一部分是您導航到notesGPT 時看到的登入頁面。  用戶首先看到的是這個登陸頁面,它與應用程式的其餘部分一起使用 Next.js 和 Tailwind CSS 進行樣式建立。我喜歡使用 Next.js,因為它可以輕鬆啟動 Web 應用程式並編寫 React 程式碼。 Tailwind CSS 也很棒,因為它允許您在網頁上快速迭代,同時與 JSX 保持在同一檔案中。 與 Clerk 和 Convex 進行身份驗證 ----------------------- 當使用者點擊主頁上的任一按鈕時,他們將被導向到登入畫面。這是由 Clerk 提供支援的,這是一個與 Convex 很好整合的簡單身份驗證解決方案,我們將在整個後端使用它,包括雲端功能、資料庫、儲存和向量搜尋。  Clerk 和 Convex 都很容易設定。您只需在這兩個服務上建立一個帳戶,安裝它們的 npm 庫,執行`npx convex dev`來設定您的凸資料夾,然後建立一個如下所示的`ConvexProvider.ts`檔案來包裝您的應用程式。 ``` 'use client'; import { ReactNode } from 'react'; import { ConvexReactClient } from 'convex/react'; import { ConvexProviderWithClerk } from 'convex/react-clerk'; import { ClerkProvider, useAuth } from '@clerk/nextjs'; const convex = new ConvexReactClient(process.env.NEXT_PUBLIC_CONVEX_URL!); export default function ConvexClientProvider({ children, }: { children: ReactNode; }) { return ( <ClerkProvider publishableKey={process.env.NEXT_PUBLIC_CLERK_PUBLISHABLE_KEY!} > <ConvexProviderWithClerk client={convex} useAuth={useAuth}> {children} </ConvexProviderWithClerk> </ClerkProvider> ); } ``` 請查看[Convex Quickstart](https://docs.convex.dev/quickstart/nextjs)和[Convex Clerk](https://docs.convex.dev/auth/clerk) auth 部分以了解更多詳細資訊。 設定我們的架構 ------- 您可以在有或沒有模式的情況下使用 Convex。就我而言,我知道資料的結構並想要定義它,所以我在下面這樣做了。這也為您提供了一個非常好的類型安全 API,可以在與資料庫互動時使用。我們定義兩個表格-一個用於儲存所有語音註解資訊的`notes`表和用於提取的操作專案的`actionItems`表。我們還將定義索引,以便能夠透過`userId`和`noteId`快速查詢資料。 ``` import { defineSchema, defineTable } from 'convex/server'; import { v } from 'convex/values'; export default defineSchema({ notes: defineTable({ userId: v.string(), audioFileId: v.string(), audioFileUrl: v.string(), title: v.optional(v.string()), transcription: v.optional(v.string()), summary: v.optional(v.string()), embedding: v.optional(v.array(v.float64())), generatingTranscript: v.boolean(), generatingTitle: v.boolean(), generatingActionItems: v.boolean(), }) .index('by_userId', ['userId']) .vectorIndex('by_embedding', { vectorField: 'embedding', dimensions: 768, filterFields: ['userId'], }), actionItems: defineTable({ noteId: v.id('notes'), userId: v.string(), task: v.string(), }) .index('by_noteId', ['noteId']) .index('by_userId', ['userId']), }); ``` 儀表板 --- 現在我們已經有了後端和身份驗證設定以及模式,我們可以看看如何獲取資料。登入應用程式後,用戶可以查看其儀表板,其中列出了他們錄製的所有語音筆記。  為此,我們首先在凸資料夾中定義一個查詢,該查詢使用 auth 接收`userId` ,驗證其有效,並傳回與使用者的`userId`相符的所有註解。 ``` export const getNotes = queryWithUser({ args: {}, handler: async (ctx, args) => { const userId = ctx.userId; if (userId === undefined) { return null; } const notes = await ctx.db .query('notes') .withIndex('by_userId', (q) => q.eq('userId', userId)) .collect(); const results = Promise.all( notes.map(async (note) => { const count = ( await ctx.db .query('actionItems') .withIndex('by_noteId', (q) => q.eq('noteId', note._id)) .collect() ).length; return { count, ...note, }; }), ); return results; }, }); ``` 之後,我們可以透過凸提供的函數使用使用者的驗證令牌來呼叫此`getNotes`查詢,以在儀表板中顯示所有使用者的註解。我們使用伺服器端渲染在伺服器上取得此資料,然後將其傳遞到`<DashboardHomePage />`客戶端元件。這也確保了客戶端上的資料也保持最新。 ``` import { api } from '@/convex/_generated/api'; import { preloadQuery } from 'convex/nextjs'; import DashboardHomePage from './dashboard'; import { getAuthToken } from '../auth'; const ServerDashboardHomePage = async () => { const token = await getAuthToken(); const preloadedNotes = await preloadQuery(api.notes.getNotes, {}, { token }); return <DashboardHomePage preloadedNotes={preloadedNotes} />; }; export default ServerDashboardHomePage; ``` 錄製語音筆記 ------ 最初,使用者的儀表板上不會有任何語音註釋,因此他們可以點擊「錄製新語音註釋」按鈕來錄製。他們將看到以下螢幕,允許他們進行錄製。  這將使用本機瀏覽器 API 錄製語音筆記,將檔案保存在 Convex 檔案儲存中,然後透過 Replicate 將其傳送至 Whisper 進行轉錄。我們要做的第一件事是在凸資料夾中定義一個`createNote`突變,它將接收此記錄,在凸資料庫中保存一些訊息,然後呼叫耳語操作。 ``` export const createNote = mutationWithUser({ args: { storageId: v.id('_storage'), }, handler: async (ctx, { storageId }) => { const userId = ctx.userId; let fileUrl = (await ctx.storage.getUrl(storageId)) as string; const noteId = await ctx.db.insert('notes', { userId, audioFileId: storageId, audioFileUrl: fileUrl, generatingTranscript: true, generatingTitle: true, generatingActionItems: true, }); await ctx.scheduler.runAfter(0, internal.whisper.chat, { fileUrl, id: noteId, }); return noteId; }, }); ``` 耳語動作如下圖所示。它使用 Replicate 作為 Whisper 的託管提供者。 ``` export const chat = internalAction({ args: { fileUrl: v.string(), id: v.id('notes'), }, handler: async (ctx, args) => { const replicateOutput = (await replicate.run( 'openai/whisper:4d50797290df275329f202e48c76360b3f22b08d28c196cbc54600319435f8d2', { input: { audio: args.fileUrl, model: 'large-v3', translate: false, temperature: 0, transcription: 'plain text', suppress_tokens: '-1', logprob_threshold: -1, no_speech_threshold: 0.6, condition_on_previous_text: true, compression_ratio_threshold: 2.4, temperature_increment_on_fallback: 0.2, }, }, )) as whisperOutput; const transcript = replicateOutput.transcription || 'error'; await ctx.runMutation(internal.whisper.saveTranscript, { id: args.id, transcript, }); }, }); ``` 此外,所有這些檔案都可以在 Convex 儀表板的「檔案」下看到。 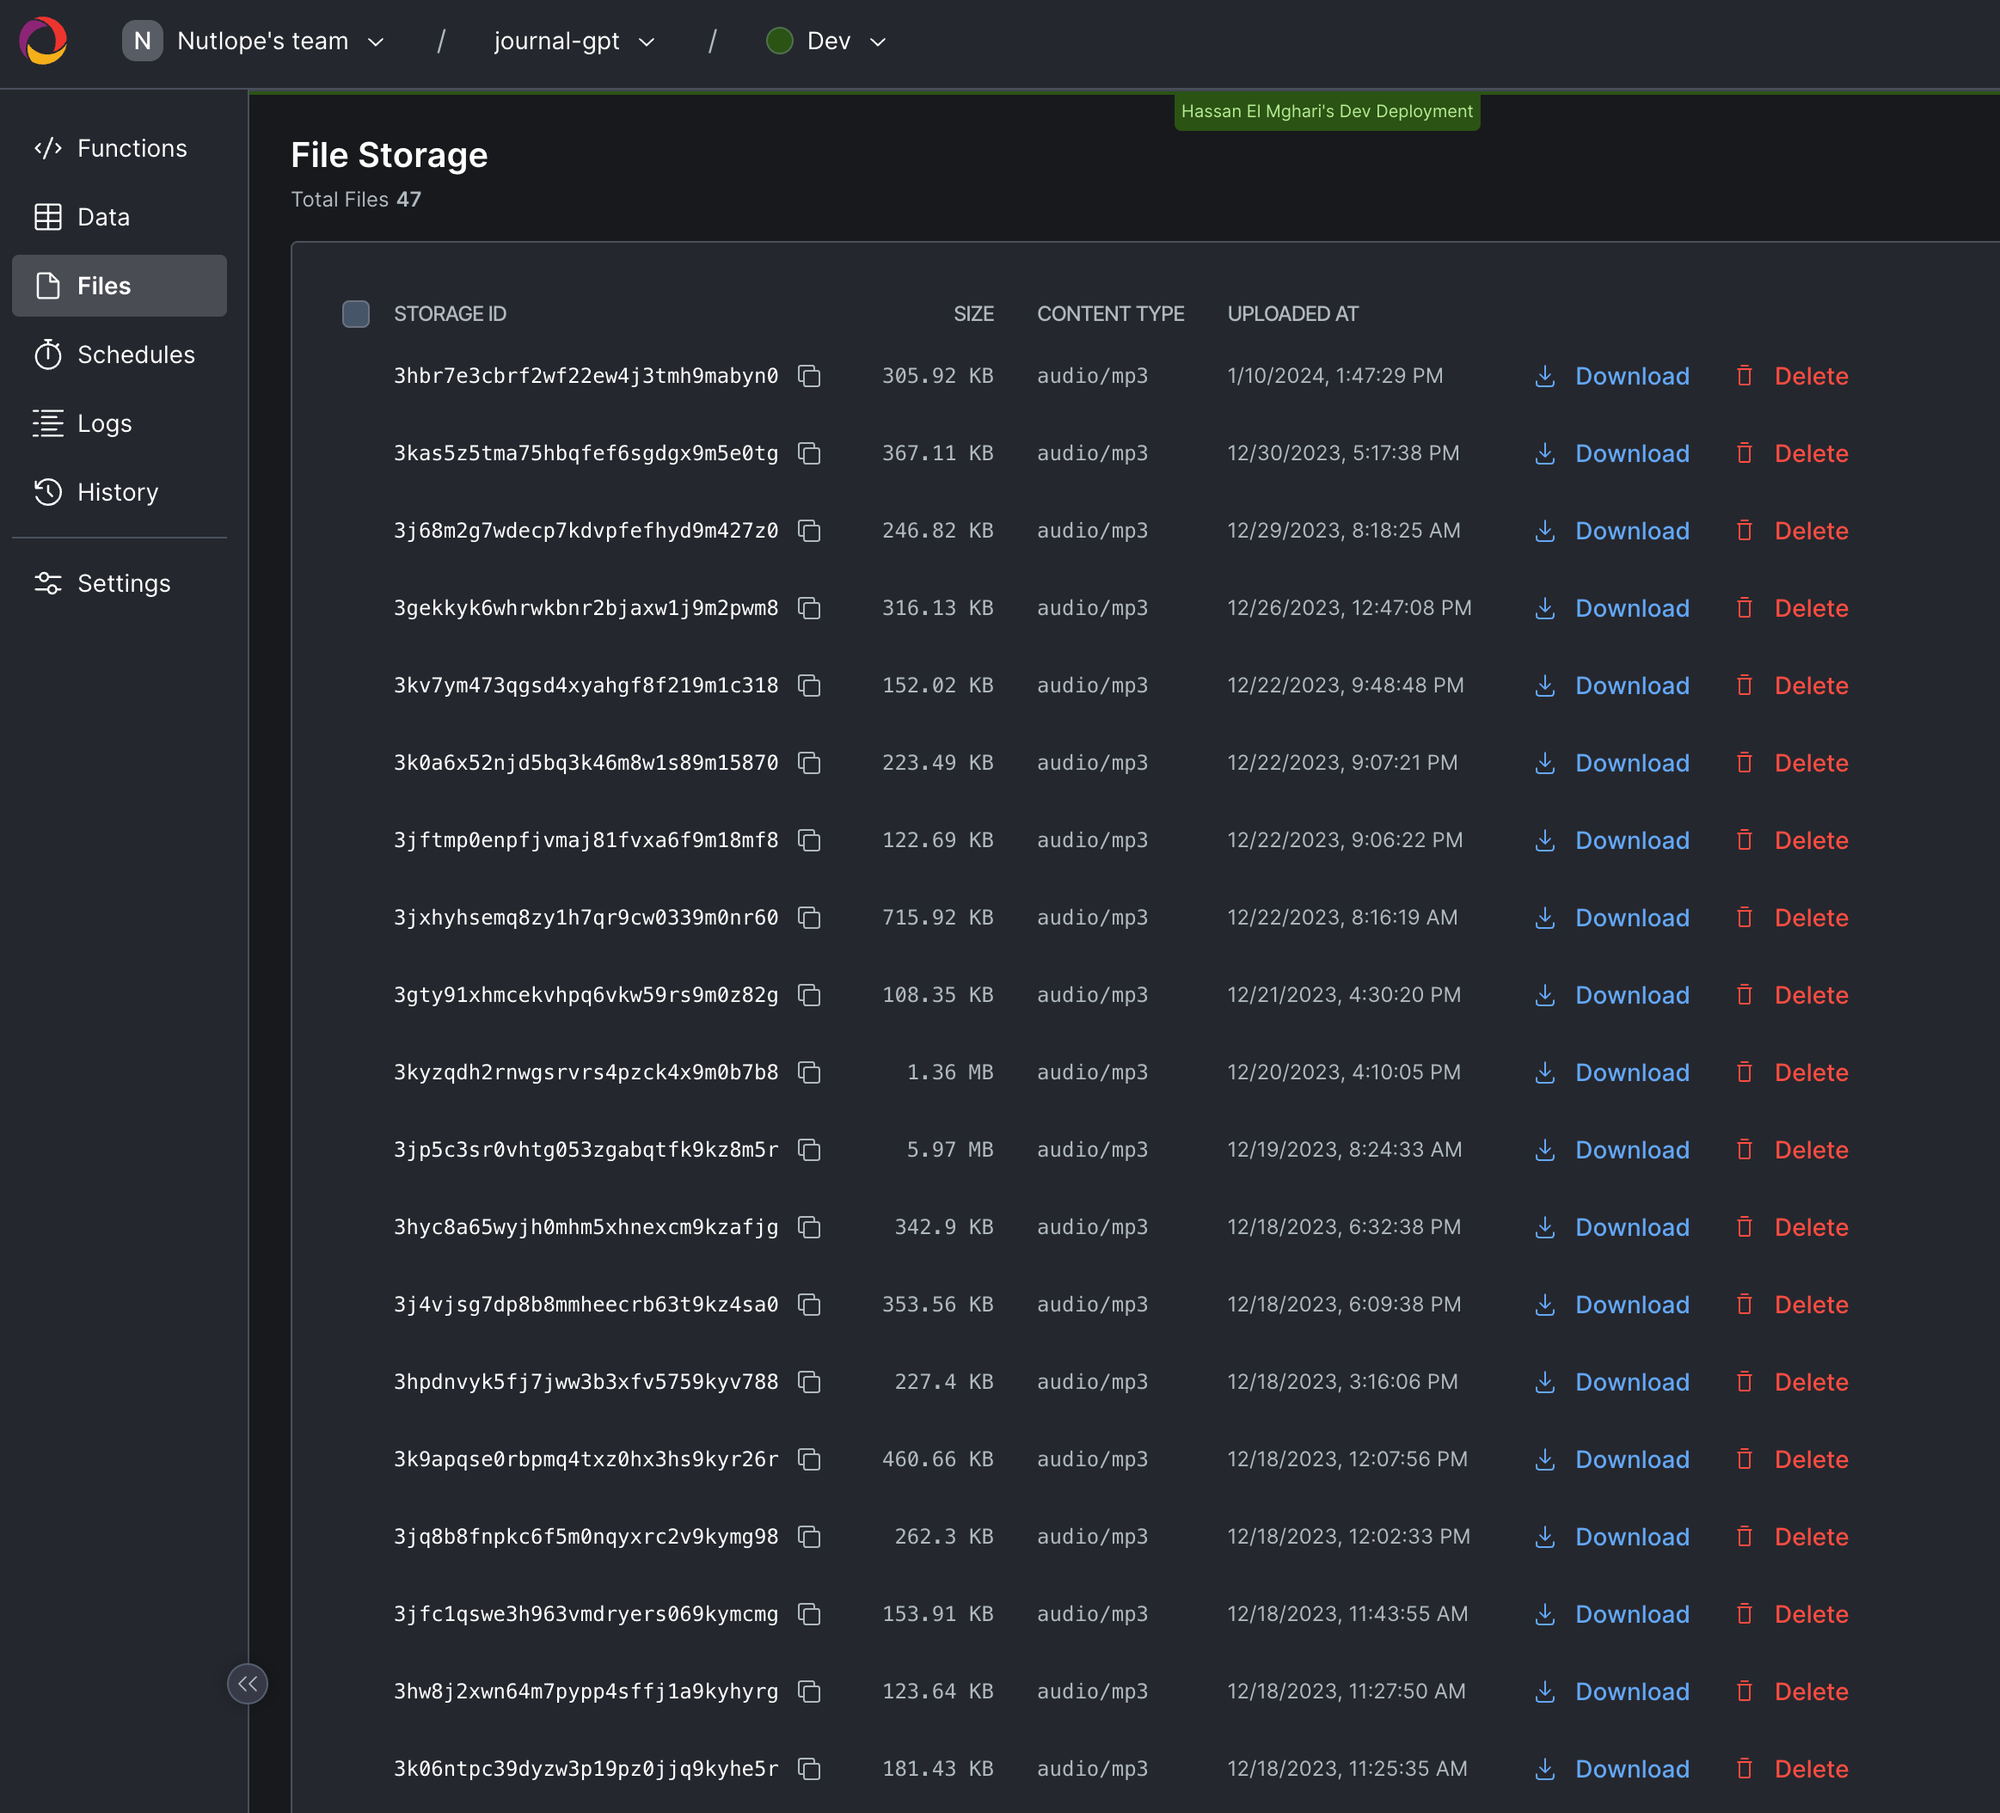 生成行動專案 ------ 使用者完成語音記錄並透過耳語進行轉錄後,輸出將傳遞到 Together AI 中。我們同時顯示此加載畫面。  我們首先定義一個我們希望輸出所在的模式。然後,我們將此模式傳遞到 Together.ai 上託管的 Mixtral 模型中,並提示辨識語音註釋的摘要、文字記錄,並根據成績單。然後我們將所有這些資訊保存到 Convex 資料庫中。為此,我們在凸資料夾中建立一個凸動作。 ``` // convex/together.ts const NoteSchema = z.object({ title: z .string() .describe('Short descriptive title of what the voice message is about'), summary: z .string() .describe( 'A short summary in the first person point of view of the person recording the voice message', ) .max(500), actionItems: z .array(z.string()) .describe( 'A list of action items from the voice note, short and to the point. Make sure all action item lists are fully resolved if they are nested', ), }); export const chat = internalAction({ args: { id: v.id('notes'), transcript: v.string(), }, handler: async (ctx, args) => { const { transcript } = args; const extract = await client.chat.completions.create({ messages: [ { role: 'system', content: 'The following is a transcript of a voice message. Extract a title, summary, and action items from it and answer in JSON in this format: {title: string, summary: string, actionItems: [string, string, ...]}', }, { role: 'user', content: transcript }, ], model: 'mistralai/Mixtral-8x7B-Instruct-v0.1', response_model: { schema: NoteSchema, name: 'SummarizeNotes' }, max_tokens: 1000, temperature: 0.6, max_retries: 3, }); const { title, summary, actionItems } = extract; await ctx.runMutation(internal.together.saveSummary, { id: args.id, summary, actionItems, title, }); }); ``` 當 Together.ai 做出回應時,我們會看到最終畫面,使用者可以在左側的記錄和摘要之間切換,並查看並勾選右側的操作專案。 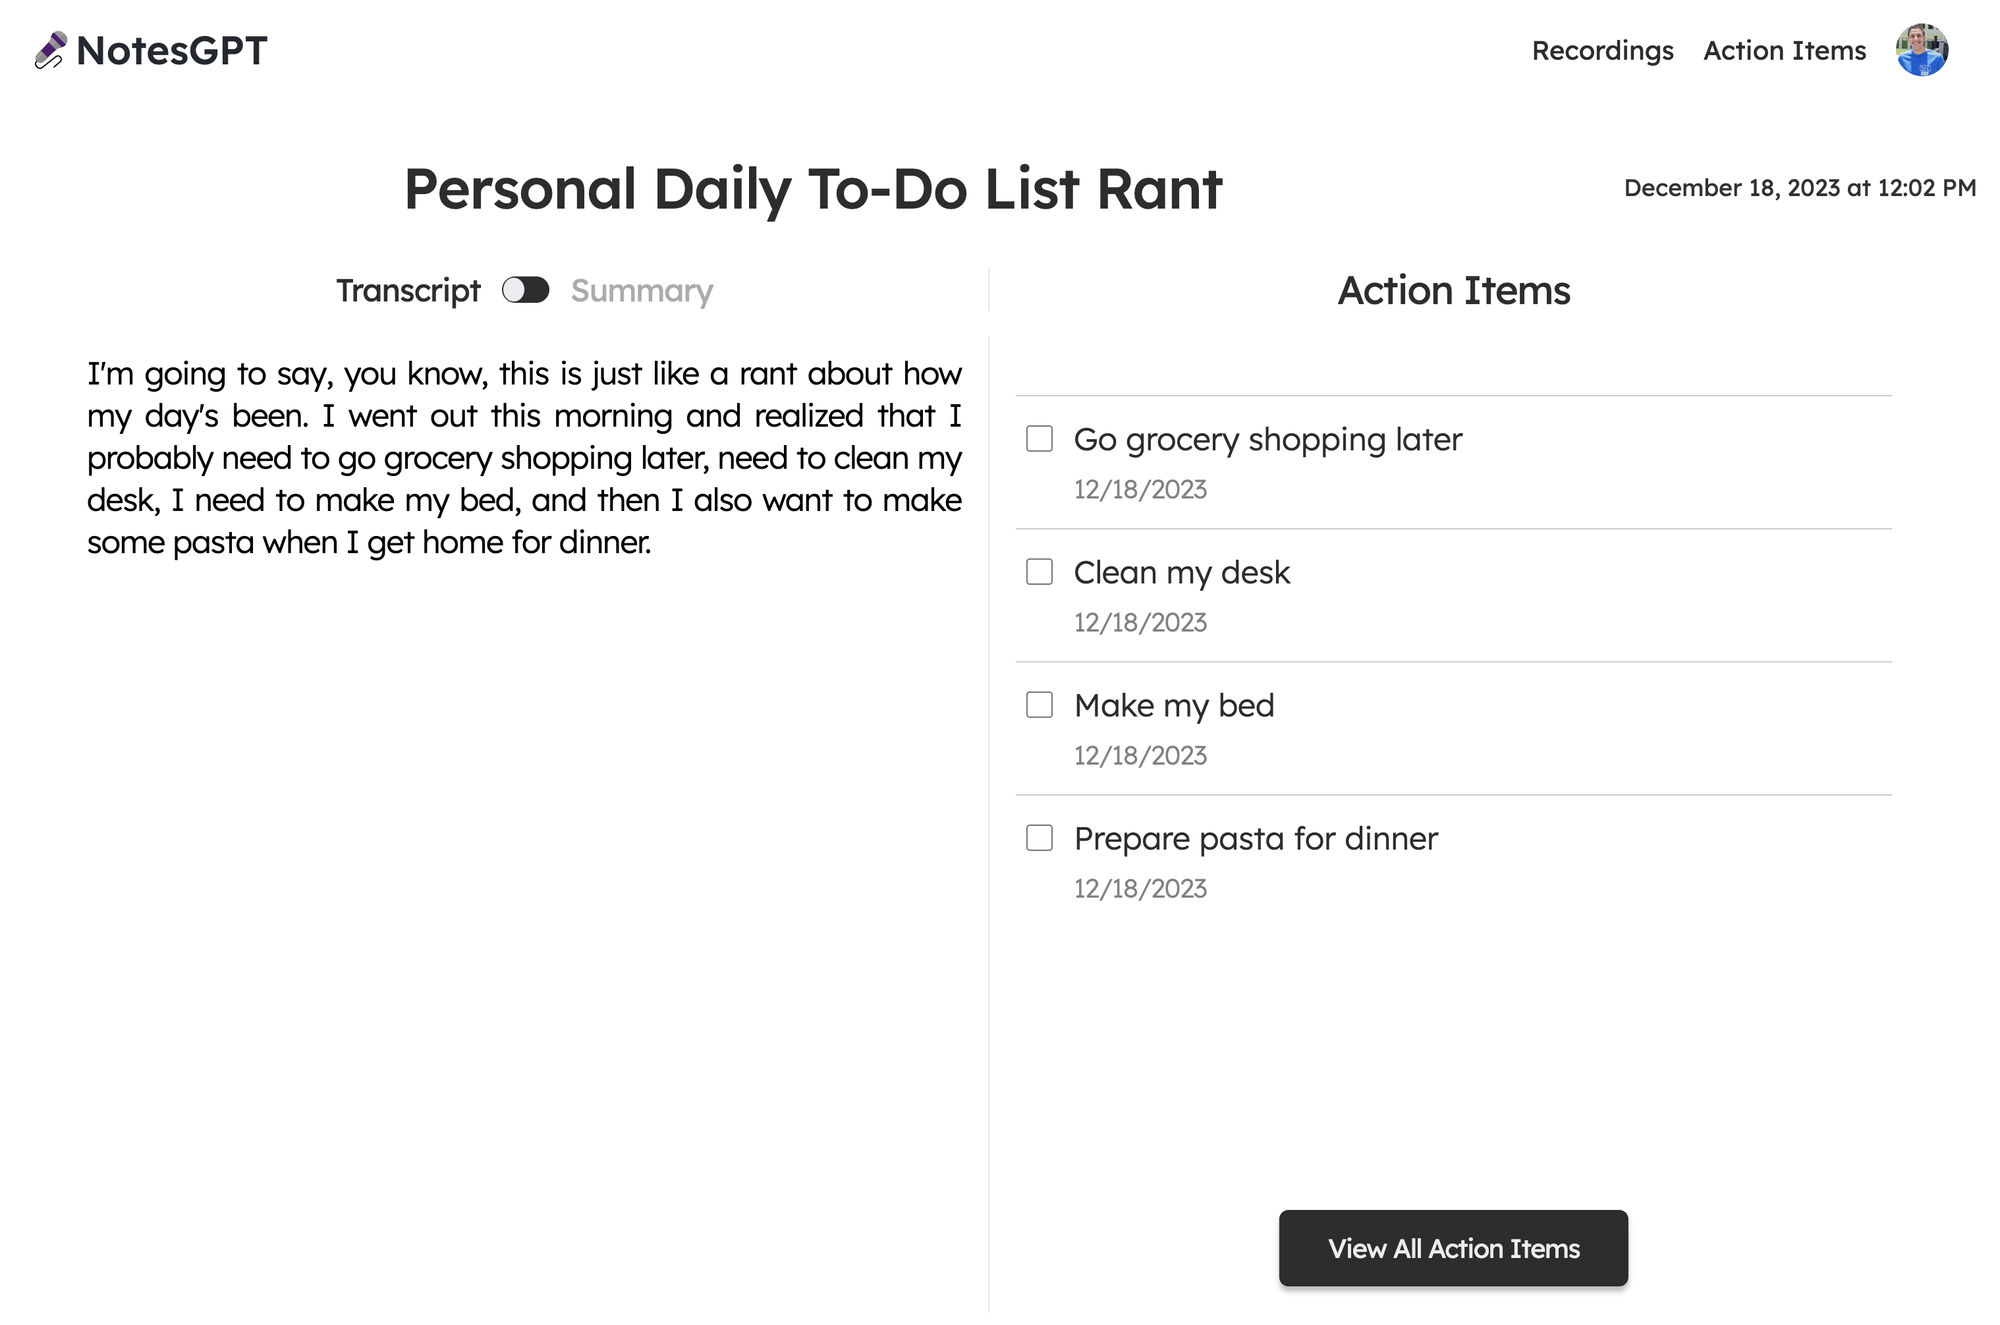 向量搜尋 ---- 該應用程式的最後一部分是向量搜尋。我們使用 Together.ai 嵌入來嵌入文字記錄,並使人們可以根據文字記錄的語義在儀表板中進行搜尋。 我們透過在凸資料夾中建立一個`similarNotes`操作來實現此目的,該操作接受使用者的搜尋查詢,為其產生嵌入,並找到要在頁面上顯示的最相似的註釋。 ``` export const similarNotes = actionWithUser({ args: { searchQuery: v.string(), }, handler: async (ctx, args): Promise<SearchResult[]> => { // 1. Create the embedding const getEmbedding = await togetherai.embeddings.create({ input: [args.searchQuery.replace('/n', ' ')], model: 'togethercomputer/m2-bert-80M-32k-retrieval', }); const embedding = getEmbedding.data[0].embedding; // 2. Then search for similar notes const results = await ctx.vectorSearch('notes', 'by_embedding', { vector: embedding, limit: 16, filter: (q) => q.eq('userId', ctx.userId), // Only search my notes. }); return results.map((r) => ({ id: r._id, score: r._score, })); }, }); ``` 結論 -- 就像這樣,我們建立了一個可投入生產的全端人工智慧應用程式,配備身份驗證、資料庫、儲存和 API。請隨意查看[notesGPT,](https://usenotesgpt.com/)以從您的筆記或[GitHub 儲存庫](https://github.com/nutlope/notesGPT)產生操作專案以供參考。如果您有任何疑問,[請私訊我](twitter.com/nutlope),我將非常樂意回答! --- 原文出處:https://dev.to/nutlope/how-i-built-notesgpt-a-full-stack-ai-voice-note-app-265o
目錄 == - [介紹](#introduction) - [技術堆疊](#tech-stack) - [特徵](#features) - [設定 Next.js 應用程式](#step-1-setting-up-the-nextjs-application) - [安裝所需的套件](#step-2-installing-required-packages) - [設定 Redis 連接](#step-3-setting-up-redis-connection) - [配置 BullMQ 佇列](#step-4-configuring-bullmq-queue) - [Next.js 儀器設置](#step-5-nextjs-instrumentation-setup) - [設定 Bright Data 的抓取瀏覽器](#step-6-setting-up-bright-datas-scraping-browser) - [Bright Data 的抓取瀏覽器是什麼?](#what-is-bright-datas-scraping-browser) - [設定 Bright Data 抓取瀏覽器的步驟](#steps-to-set-up-bright-datas-scraping-browser) - [使用 Puppeteer 實作抓取邏輯](#implementing-the-scraping-logic-with-puppeteer) - [航班搜尋功能](#flight-search-feature) - [顯示航班搜尋結果](#displaying-flight-search-results) - [探索完整的指南和程式碼庫](#discover-the-complete-guide-and-codebase) - [在 YouTube 上觀看詳細說明](#watch-the-detailed-explanation-on-youtube) - [在 GitHub 上探索完整程式碼](#explore-the-full-code-on-github) - [結論](#conclusion) 介紹 == 在不斷發展的 Web 開發領域,有效收集、處理和顯示外部來源資料的能力變得越來越有價值。無論是市場研究、競爭分析或客戶洞察,網路抓取在釋放網路資料的巨大潛力方面都發揮著至關重要的作用。 這篇部落格文章介紹了建立強大的 Next.js 應用程式的綜合指南,該應用程式旨在從領先的旅行搜尋引擎之一 Kayak 抓取航班資料。透過利用 Next.js 的強大功能以及 BullMQ、Redis 和 Puppeteer 等現代技術。 技術堆疊 ==== - [Next.js](https://nextjs.org/docs) - [順風CSS](https://tailwindcss.com/docs) - [下一個介面](https://nextui.org/docs) - [健康)狀況](https://zustand.surge.sh/) - [條紋](https://stripe.com/docs) - [Bright Data 的抓取瀏覽器](https://brdta.com/kishansheth21) - [打字稿](https://www.typescriptlang.org/docs) - [雷迪斯](https://redis.io/documentation) - [BullMQ](https://docs.bullmq.io/) - [傀儡師](https://pptr.dev/) - [智威湯遜](https://jwt.io/introduction) - [阿克西奧斯](https://axios-http.com/docs/intro) - [PostgreSQL](https://www.postgresql.org/docs) - [棱鏡](https://www.prisma.io/docs) 特徵 == - 🚀 帶有 Tailwind CSS 的 Next.js 14 應用程式目錄 - 體驗由最新 Next.js 14 提供支援的時尚現代的 UI,並使用 Tailwind CSS 進行設計,以實現完美的外觀和感覺。 - 🔗 API 路由和伺服器操作 - 深入研究與 Next.js 14 的 API 路由和伺服器操作的無縫後端集成,確保高效的資料處理和伺服器端邏輯執行。 - 🕷 使用 Puppeteer Redis 和 BullMQ 進行抓取 - 利用 Puppeteer 的強大功能進行進階 Web 抓取,並使用 Redis 和 BullMQ 管理佇列和作業以實現強大的後端操作。 - 🔑 用於身份驗證和授權的 JWT 令牌 - 使用 JWT 令牌保護您的應用程式,為整個平台提供可靠的身份驗證和授權方法。 - 💳 支付網關 Stripe - 整合 Stripe 進行無縫支付處理,為預訂旅行、航班和飯店提供安全、輕鬆的交易。 - ✈️ 使用 Stripe 支付網關預訂旅行、航班和飯店 - 使用我們的 Stripe 支援的支付系統,讓您的旅遊預訂體驗變得輕鬆。 - 📊 從多個網站抓取即時資料 - 從多個來源抓取即時資料,保持領先,讓您的應用程式更新最新資訊。 - 💾 使用 Prisma 將抓取的資料儲存在 PostgreSQL 中 - 利用 PostgreSQL 和 Prisma 高效儲存和管理抓取的資料,確保可靠性和速度。 - 🔄 用於狀態管理的 Zustand - 透過 Zustand 簡化狀態邏輯並增強效能,在您的應用程式中享受流暢且可管理的狀態管理。 - 😈 該應用程式的最佳功能 - 使用 Bright Data 的抓取瀏覽器抓取不可抓取的資料。  Bright Data的抓取瀏覽器為我們提供了自動驗證碼解決功能,可以幫助我們抓取不可抓取的資料。 第 1 步:設定 Next.js 應用程式 --------------------- 1. **建立 Next.js 應用程式**:首先建立一個新的 Next.js 應用程式(如果您還沒有)。您可以透過在終端機中執行以下命令來完成此操作: ``` npx create-next-app@latest booking-app ``` 2. **導航到您的應用程式目錄**:變更為您新建立的應用程式目錄: ``` cd booking-app ``` 步驟2:安裝所需的軟體包 ------------ 您需要安裝多個軟體包,包括 Redis、BullMQ 和 Puppeteer Core。執行以下命令來安裝它們: ``` npm install ioredis bullmq puppeteer-core ``` - `ioredis`是 Node.js 的強大 Redis 用戶端,支援與 Redis 進行通訊。 - `bullmq`以 Redis 作為後端來管理作業和訊息佇列。 - `puppeteer-core`可讓您控制外部瀏覽器以進行抓取。 步驟3:設定Redis連接 ------------- 在適當的目錄(例如`lib/` )中建立一個檔案(例如`redis.js` )來配置 Redis 連線: ``` // lib/redis.js import Redis from 'ioredis'; // Use REDIS_URL from environment or fallback to localhost const REDIS_URL = process.env.REDIS_URL || 'redis://localhost:6379'; const connection = new Redis(REDIS_URL); export { connection }; ``` 步驟4:配置BullMQ佇列 -------------- 透過在 Redis 配置所在的相同目錄中建立另一個檔案(例如, `queue.js` )來設定 BullMQ 佇列: ``` // lib/queue.js import { Queue } from 'bullmq'; import { connection } from './redis'; export const importQueue = new Queue('importQueue', { connection, defaultJobOptions: { attempts: 2, backoff: { type: 'exponential', delay: 5000, }, }, }); ``` 第 5 步:Next.js 儀器設置 ------------------ Next.js 允許偵測,可以在 Next.js 配置中啟用。您還需要建立一個用於作業處理的工作文件。 1.**在 Next.js 中啟用 Instrumentation** :將以下內容新增至`next.config.js`以啟用 Instrumentation: ``` // next.config.js module.exports = { experimental: { instrumentationHook: true, }, }; ``` 2.**建立用於作業處理的 Worker** :在您的應用程式中,建立一個檔案 ( `instrumentation.js` ) 來處理作業處理。該工作人員將使用 Puppeteer 來執行抓取任務: ``` // instrumentation.js export const register = async () => { if (process.env.NEXT_RUNTIME === 'nodejs') { const { Worker } = await import('bullmq'); const puppeteer = await import('puppeteer-core'); const { connection } = await import('./lib/redis'); const { importQueue } = await import('./lib/queue'); new Worker('importQueue', async (job) => { // Job processing logic with Puppeteer goes here }, { connection, concurrency: 10, removeOnComplete: { count: 1000 }, removeOnFail: { count: 5000 }, }); } }; ``` 第 6 步:設定 Bright Data 的抓取瀏覽器 --------------------------- 在設定 Bright 資料抓取瀏覽器之前,我們先來談談什麼是抓取瀏覽器。 ### Bright Data 的抓取瀏覽器是什麼? Bright Data 的抓取瀏覽器是一款用於自動網頁抓取的尖端工具,旨在與 Puppeteer、Playwright 和 Selenium 無縫整合。它提供了一套網站解鎖功能,包括代理輪換、驗證碼解決等,以提高抓取效率。它非常適合需要互動的複雜網頁抓取,透過在 Bright Data 基礎架構上託管無限的瀏覽器會話來實現可擴展性。如欲了解更多詳情,請造訪[光明資料](https://brdta.com/kishansheth21)。 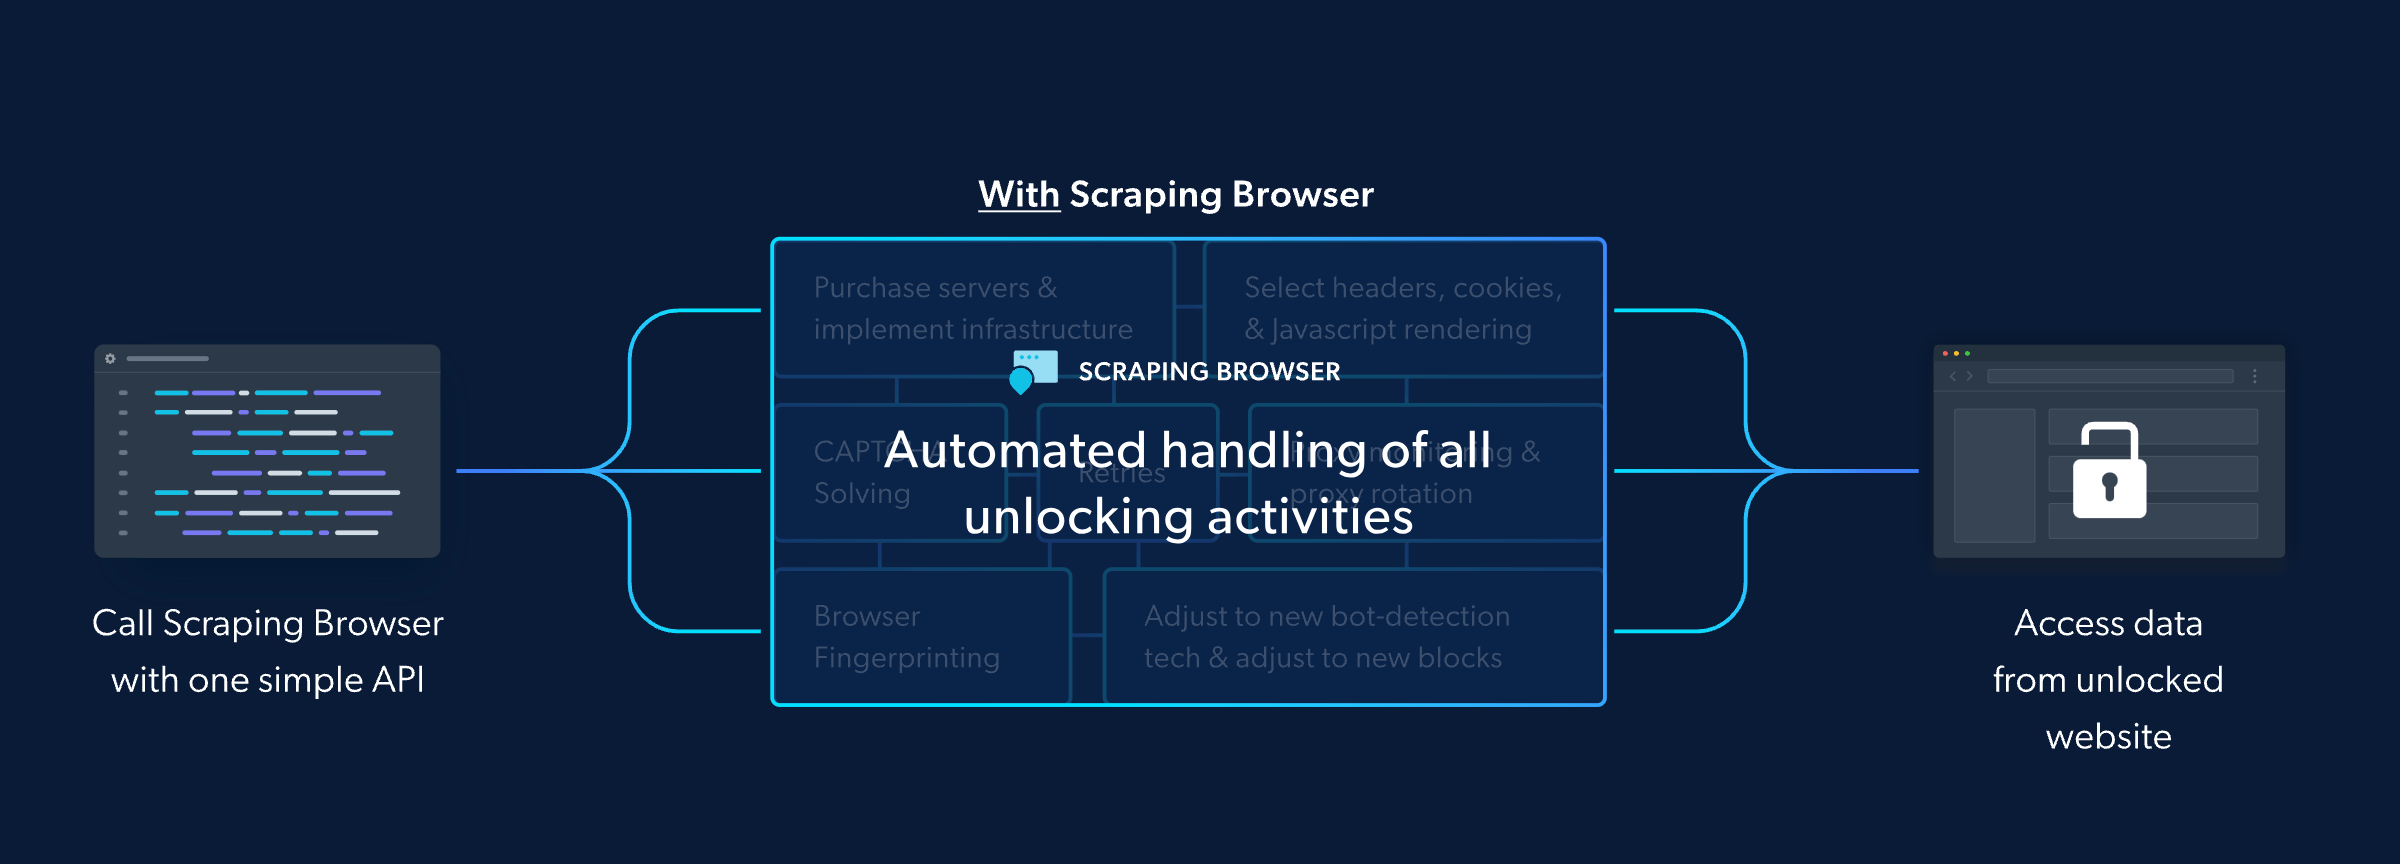 <a id="steps-to-set-up-bright-datas-scraping-browser"></a> #### 第 1 步:導覽至 Bright Data 網站 首先造訪[Brightdata.com](https://brdta.com/kishansheth21) 。這是您存取 Bright Data 提供的豐富網頁抓取資源和工具的入口。 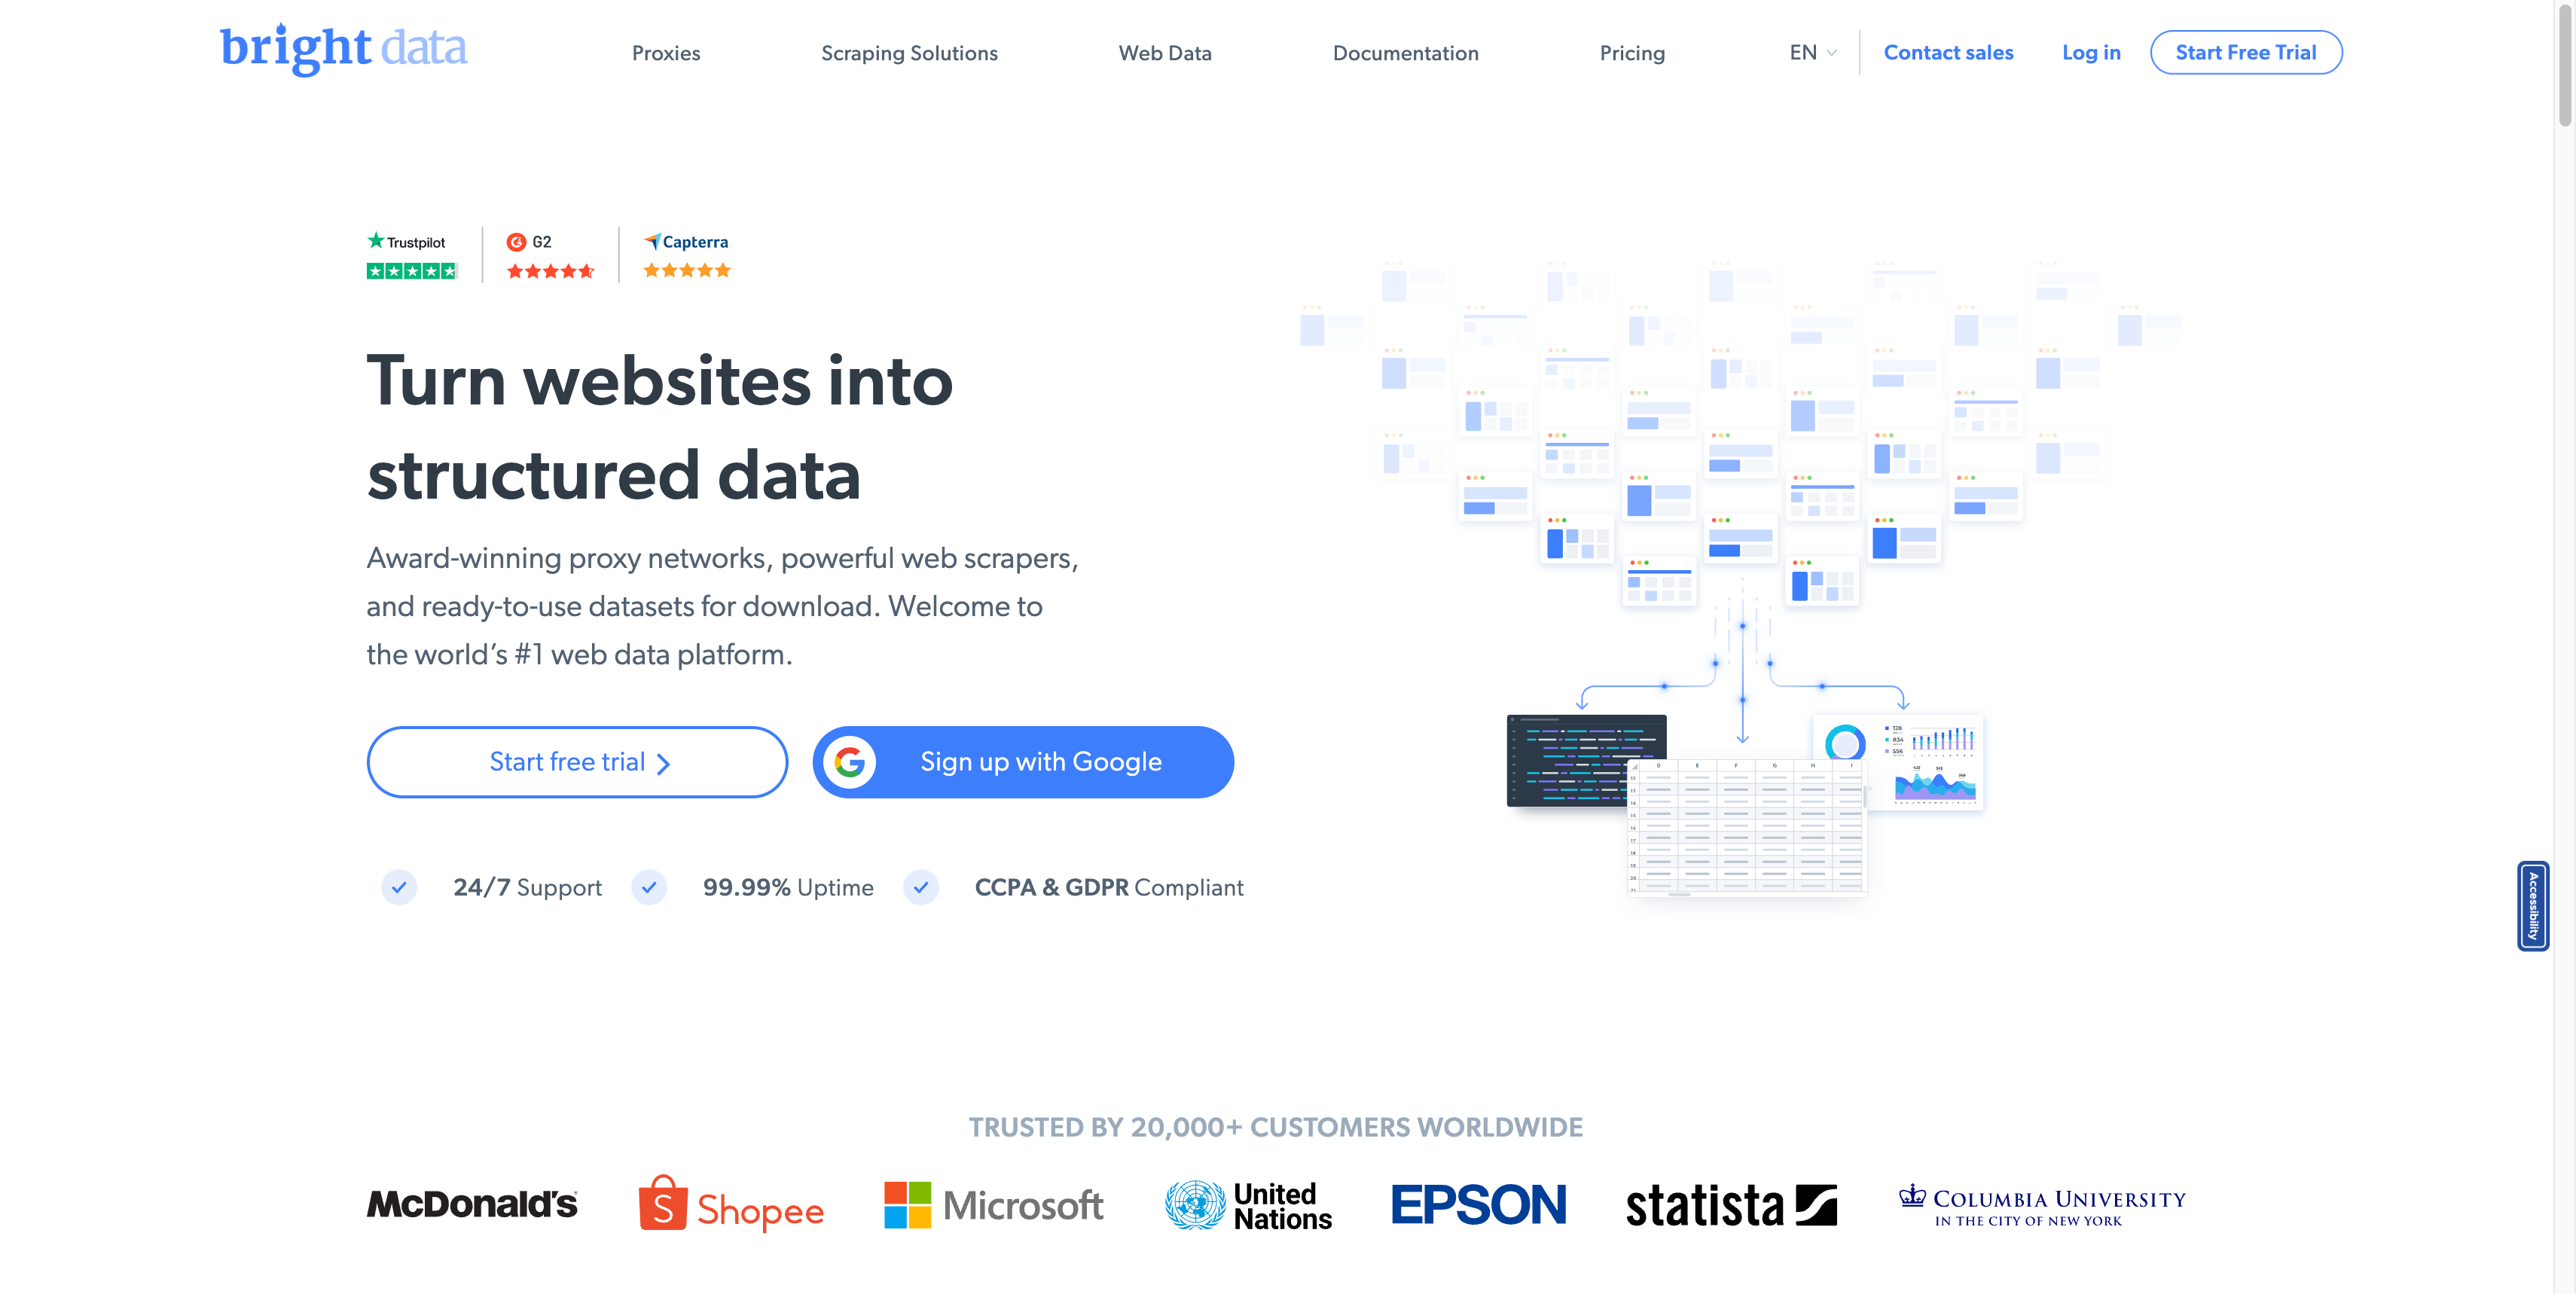 #### 第 2 步:建立帳戶 造訪 Bright Data 網站後,註冊並建立一個新帳戶。系統將提示您輸入基本資訊以啟動並執行您的帳戶。  #### 第 3 步:選擇您的產品 在產品選擇頁面上,尋找代理商和抓取基礎設施產品。本產品專為滿足您的網路抓取需求而設計,提供強大的資料擷取工具和功能。 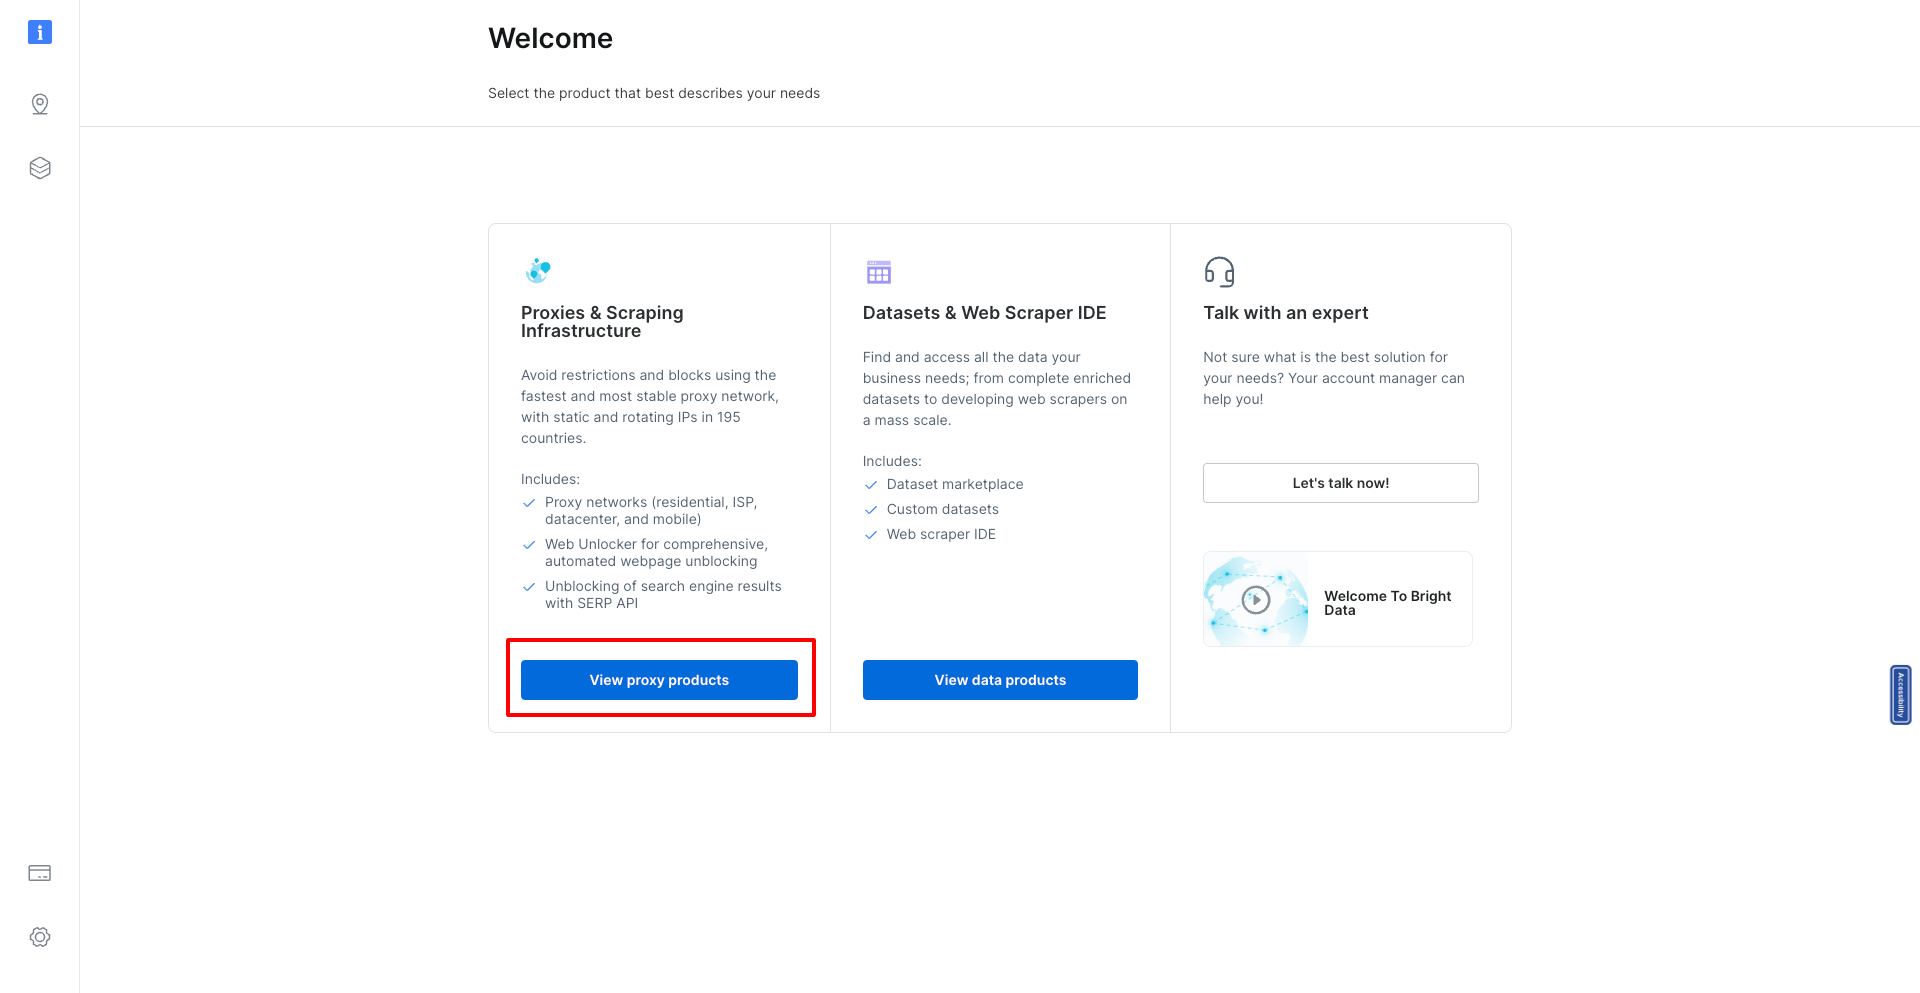 #### 第 4 步:新增代理 在「代理程式和抓取基礎設施」頁面中,您會找到一個「新增按鈕」。點擊此按鈕開始將新的抓取瀏覽器新增到您的工具包的過程。 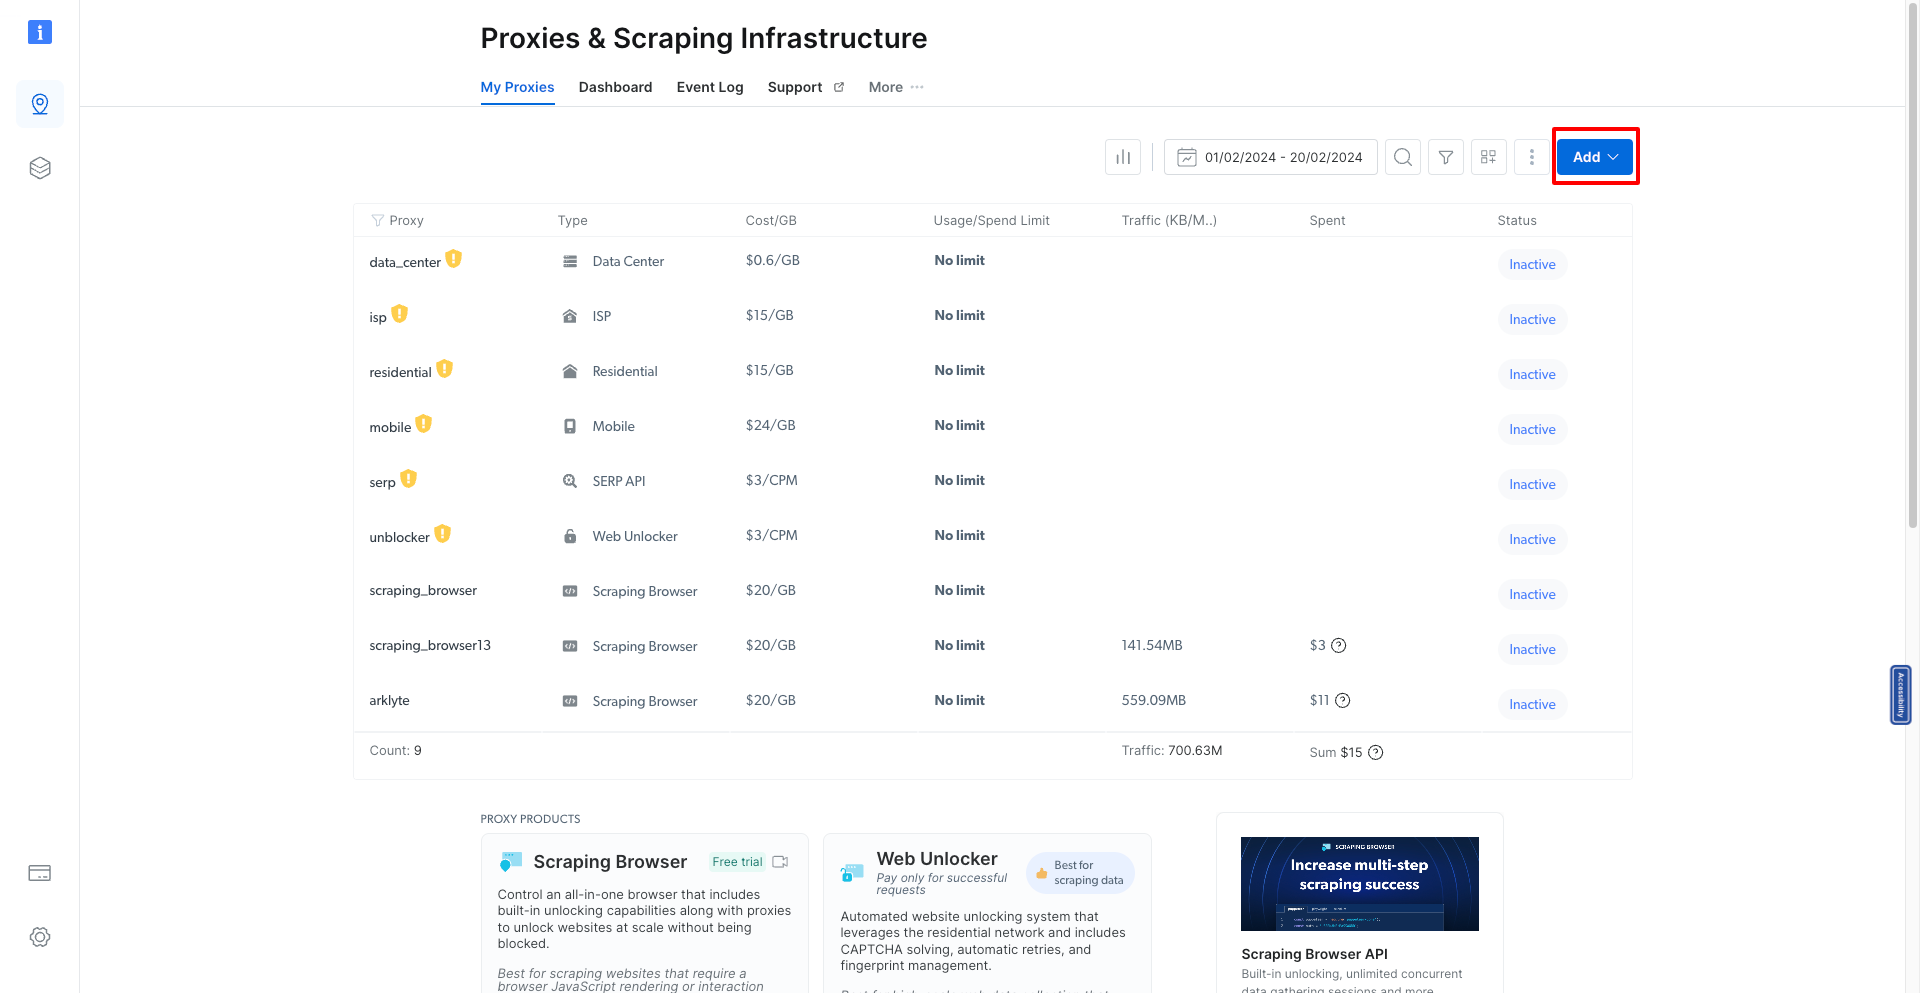 #### 第五步:選擇抓取瀏覽器 將出現一個下拉列表,您應該從中選擇抓取瀏覽器選項。這告訴 Bright Data 您打算設定一個新的抓取瀏覽器環境。  #### 第 6 步:為您的抓取瀏覽器命名 為您的新抓取瀏覽器指定一個唯一的名稱。這有助於稍後辨識和管理它,特別是如果您計劃對不同的抓取專案使用多個瀏覽器。 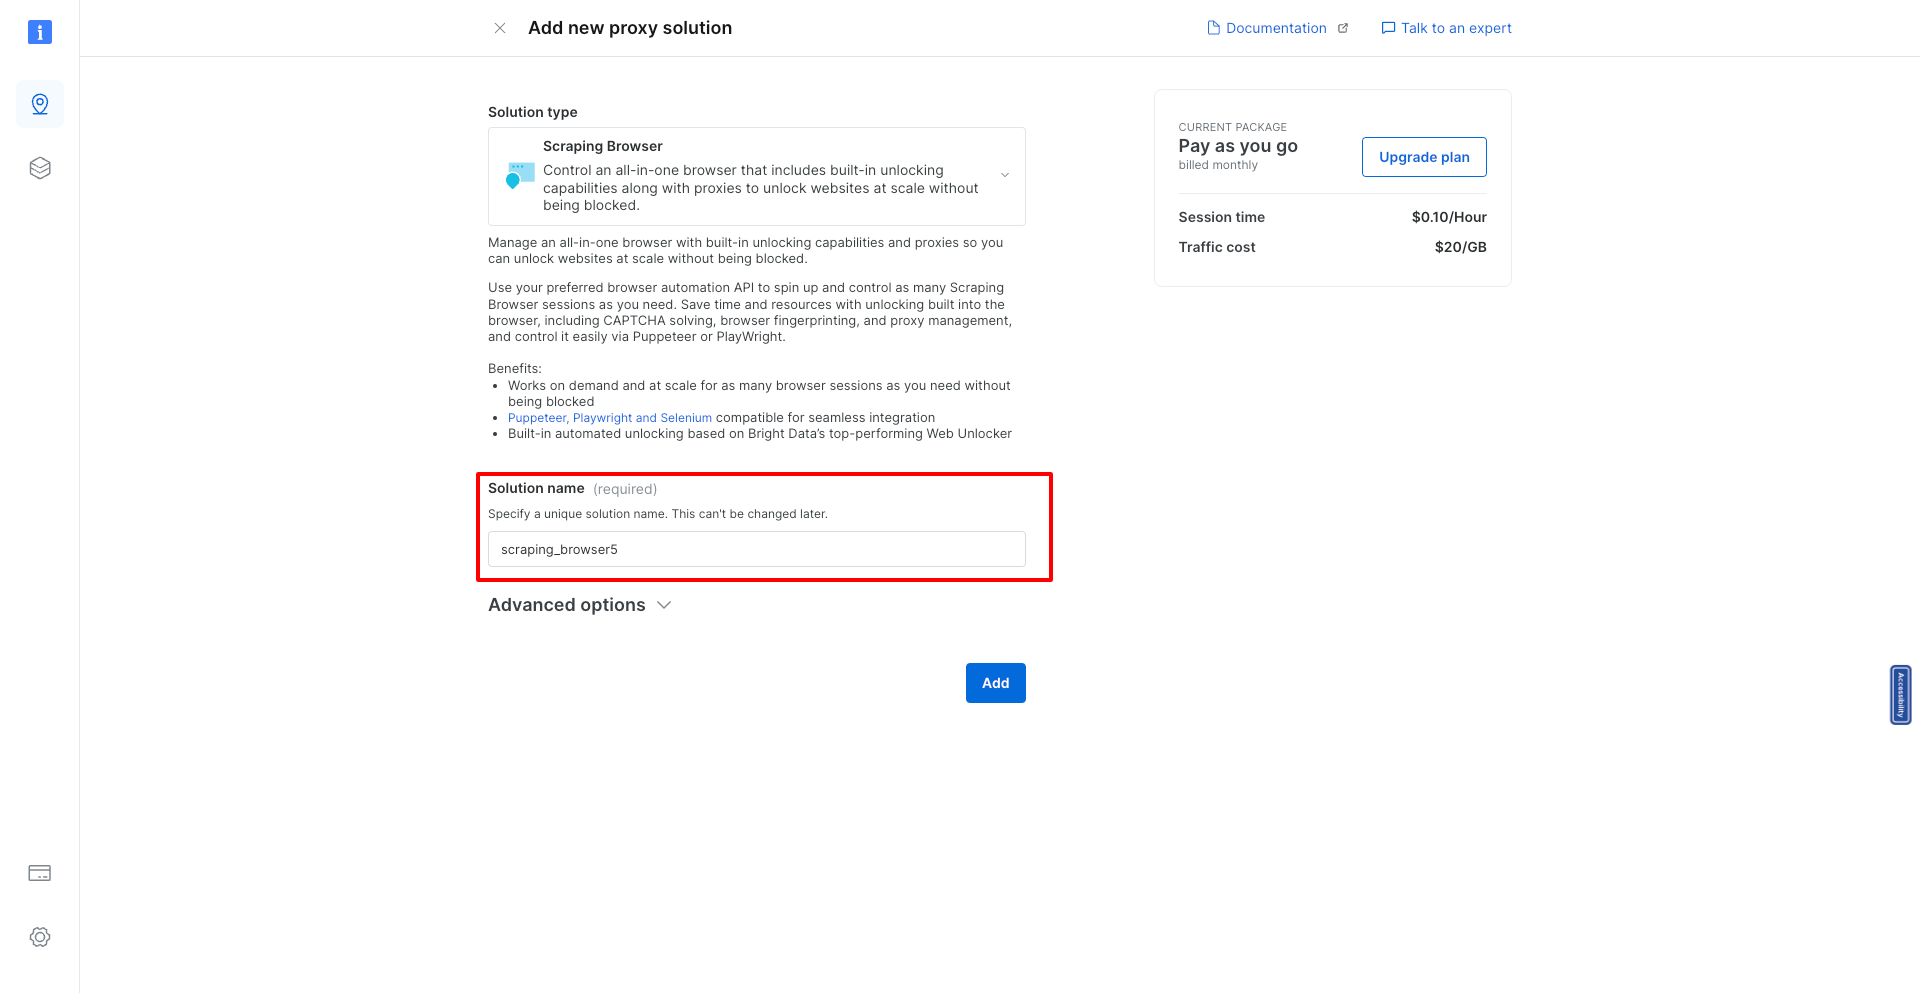 #### 步驟7:新增瀏覽器 命名您的瀏覽器後,按一下「新增」按鈕。此操作完成了新的抓取瀏覽器的建立。 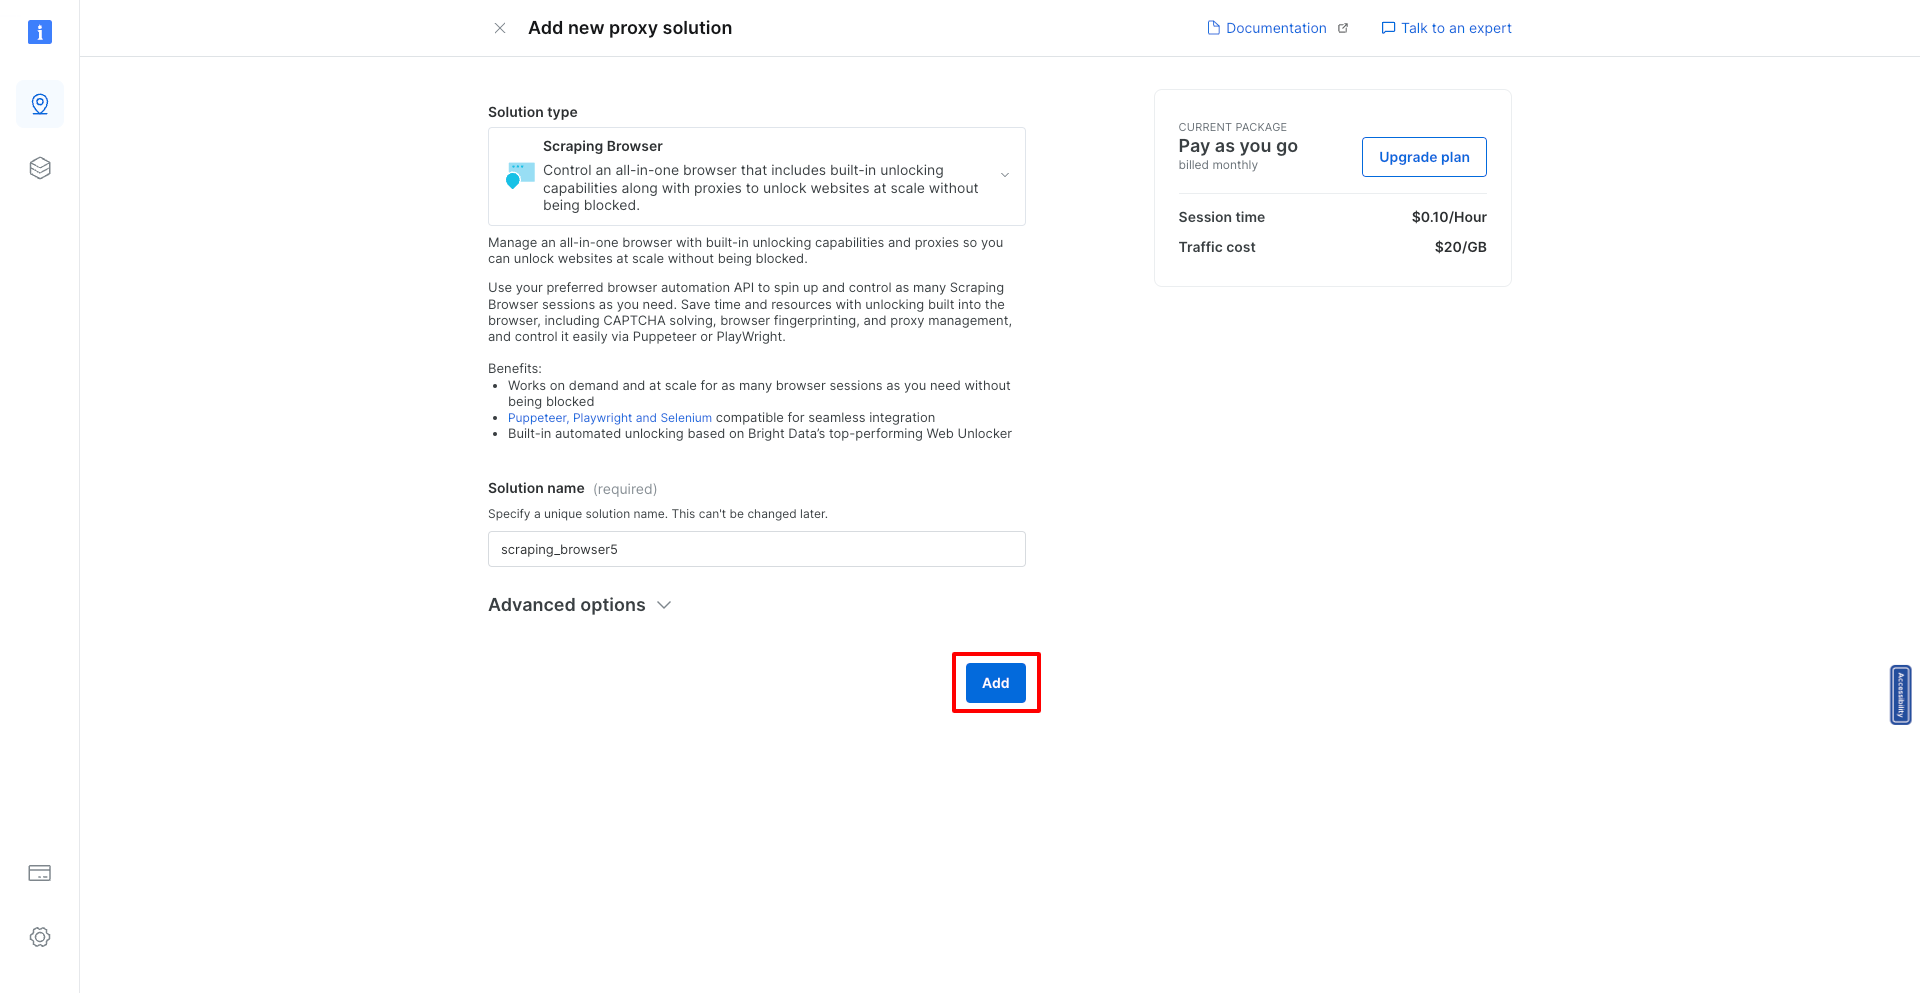 #### 第 8 步:查看您的抓取瀏覽器詳細訊息 新增抓取瀏覽器後,您將被導向到一個頁面,您可以在其中查看新建立的抓取瀏覽器的所有詳細資訊。這些資訊對於整合和使用至關重要。 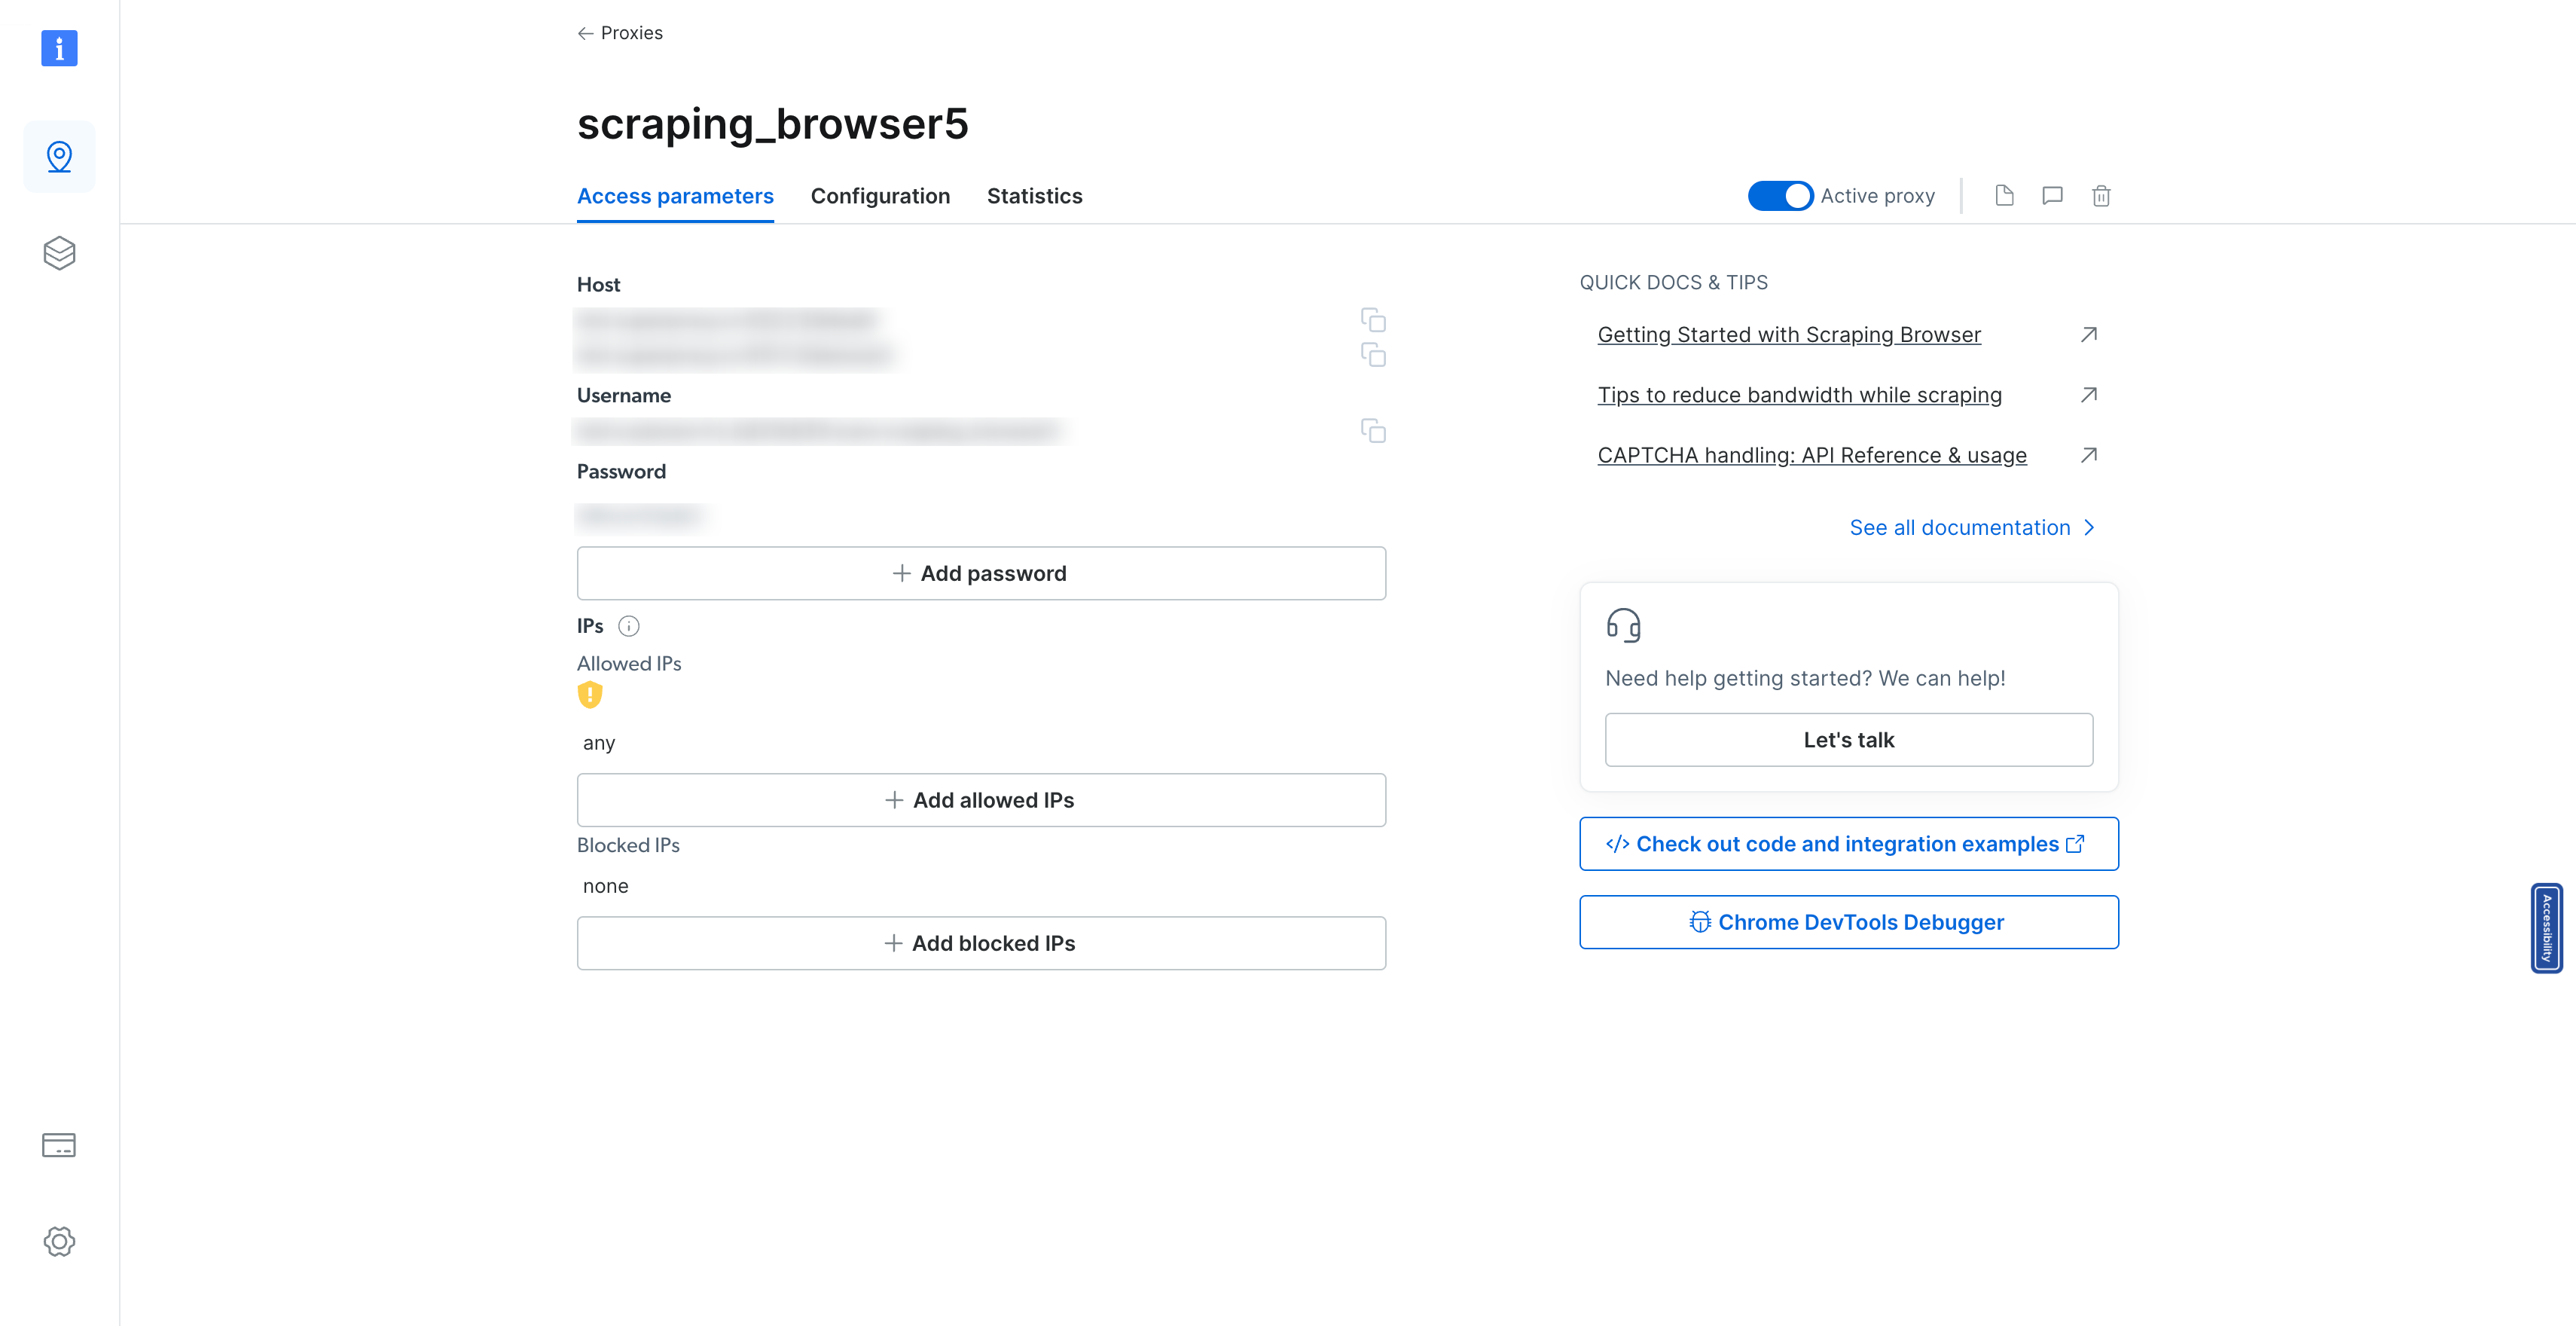 #### 第 9 步:存取程式碼和整合範例 尋找“查看程式碼和整合範例”按鈕。點擊此按鈕將為您提供如何跨多種程式語言和程式庫整合和使用抓取瀏覽器的全面視圖。對於希望自訂抓取設定的開發人員來說,此資源非常寶貴。  #### 第 10 步:整合您的抓取瀏覽器 最後,複製 SRS\_WS\_ENDPOINT 變數。這是一條關鍵訊息,您需要將其整合到原始程式碼中,以便您的應用程式能夠與您剛剛設定的抓取瀏覽器進行通訊。  透過遵循這些詳細步驟,您已在 Bright Data 平台中成功建立了一個抓取瀏覽器,準備好處理您的網頁抓取任務。請記住,Bright Data 提供廣泛的文件和支持,幫助您最大限度地提高抓取專案的效率和效果。無論您是在收集市場情報、進行研究還是監控競爭格局,新設定的抓取瀏覽器都是資料收集庫中的強大工具。 ### 第 7 步:使用 Puppeteer 實作抓取邏輯 從我們上次設定用於抓取航班資料的 Next.js 應用程式的地方開始,下一個關鍵步驟是實現實際的抓取邏輯。此過程涉及利用 Puppeteer 連接到瀏覽器實例、導航到目標 URL(在我們的範例中為 Kayak)並抓取必要的飛行資料。提供的程式碼片段概述了實現此目標的複雜方法,與我們先前建立的 BullMQ 工作設定無縫整合。讓我們分解這個抓取邏輯的元件,並了解它如何適合我們的應用程式。 #### 建立與瀏覽器的連接 我們抓取過程的第一步是透過 Puppeteer 建立與瀏覽器的連線。這是透過利用`puppeteer.connect`方法來完成的,該方法使用 WebSocket 端點 ( `SBR_WS_ENDPOINT` ) 連接到現有的瀏覽器實例。此環境變數應設定為您正在使用的抓取瀏覽器服務的 WebSocket URL,例如 Bright Data: ``` const browser = await puppeteer.connect({ browserWSEndpoint: SBR_WS_ENDPOINT, }); ``` #### 開啟新頁面並導航到目標 URL 連線後,我們在瀏覽器中建立一個新頁面並導航到作業資料中指定的目標 URL。此 URL 是我們打算從中抓取航班資料的特定 Kayak 搜尋結果頁面: ``` const page = await browser.newPage(); await page.goto(job.data.url); ``` #### 抓取航班資料 我們邏輯的核心在於從頁面中抓取航班資料。我們透過使用`page.evaluate`來實現這一點,這是一種 Puppeteer 方法,允許我們在瀏覽器上下文中執行腳本。在此腳本中,我們等待必要的元素加載,然後繼續收集航班資訊: - **Flight Selector** :我們以`.nrc6-wrapper`類別為目標元素,其中包含航班詳細資訊。 - **資料擷取**:對於每個航班元素,我們提取詳細訊息,例如航空公司徽標、出發和到達時間、航班持續時間、航空公司名稱和價格。出發和到達時間經過清理,以刪除最後不必要的數值,確保我們準確地捕捉時間。 - **價格處理**:價格在刪除所有非數字字元後提取為整數,確保其可用於數值運算或比較。 擷取的資料被建構成飛行物件陣列,每個物件都包含上述詳細資訊: ``` const scrappedFlights = await page.evaluate(async () => { // Data extraction logic const flights = []; // Process each flight element // ... return flights; }); ``` #### 錯誤處理和清理 我們的抓取邏輯被包裝在一個 try-catch 區塊中,以在抓取過程中優雅地處理任何潛在的錯誤。無論結果如何,我們都會確保瀏覽器在finally區塊中正確關閉,從而保持資源效率並防止潛在的記憶體洩漏: ``` try { // Scraping logic } catch (error) { console.log({ error }); } finally { await browser.close(); console.log("Browser closed successfully."); } ``` #### 整個程式碼 ``` const SBR_WS_ENDPOINT = process.env.SBR_WS_ENDPOINT; export const register = async () => { if (process.env.NEXT_RUNTIME === "nodejs") { const { Worker } = await import("bullmq"); const puppeteer = await import("puppeteer"); const { connection } = await import("./lib/redis"); const { importQueue } = await import("./lib/queue"); new Worker( "importQueue", async (job) => { const browser = await puppeteer.connect({ browserWSEndpoint: SBR_WS_ENDPOINT, }); try { const page = await browser.newPage(); console.log("in flight scraping"); console.log("Connected! Navigating to " + job.data.url); await page.goto(job.data.url); console.log("Navigated! Scraping page content..."); const scrappedFlights = await page.evaluate(async () => { await new Promise((resolve) => setTimeout(resolve, 5000)); const flights = []; const flightSelectors = document.querySelectorAll(".nrc6-wrapper"); flightSelectors.forEach((flightElement) => { const airlineLogo = flightElement.querySelector("img")?.src || ""; const [rawDepartureTime, rawArrivalTime] = ( flightElement.querySelector(".vmXl")?.innerText || "" ).split(" – "); // Function to extract time and remove numeric values at the end const extractTime = (rawTime: string): string => { const timeWithoutNumbers = rawTime .replace(/[0-9+\s]+$/, "") .trim(); return timeWithoutNumbers; }; const departureTime = extractTime(rawDepartureTime); const arrivalTime = extractTime(rawArrivalTime); const flightDuration = ( flightElement.querySelector(".xdW8")?.children[0]?.innerText || "" ).trim(); const airlineName = ( flightElement.querySelector(".VY2U")?.children[1]?.innerText || "" ).trim(); // Extract price const price = parseInt( ( flightElement.querySelector(".f8F1-price-text")?.innerText || "" ) .replace(/[^\d]/g, "") .trim(), 10 ); flights.push({ airlineLogo, departureTime, arrivalTime, flightDuration, airlineName, price, }); }); return flights; }); } catch (error) { console.log({ error }); } finally { await browser.close(); console.log("Browser closed successfully."); } }, { connection, concurrency: 10, removeOnComplete: { count: 1000 }, removeOnFail: { count: 5000 }, } ); } }; ``` ### 步驟8:航班搜尋功能 基於我們的航班資料抓取功能,讓我們將全面的航班搜尋功能整合到我們的 Next.js 應用程式中。此功能將為使用者提供一個動態介面,透過指定出發地、目的地和日期來搜尋航班。利用強大的 Next.js 框架以及現代 UI 庫和狀態管理,我們建立了引人入勝且響應迅速的航班搜尋體驗。 #### 航班搜尋功能的關鍵組成部分 1. **動態城市選擇**:此功能包括來源和目的地輸入的自動完成功能,由預先定義的城市機場程式碼清單提供支援。當使用者輸入時,應用程式會過濾並顯示匹配的城市,透過更輕鬆地尋找和選擇機場來增強用戶體驗。 2. **日期選擇**:使用者可以透過日期輸入選擇預期的航班日期,為規劃旅行提供彈性。 3. **抓取狀態監控**:啟動抓取作業後,應用程式透過定期 API 呼叫來監控作業的狀態。這種非同步檢查允許應用程式使用抓取過程的狀態更新 UI,確保使用者了解進度和結果。 #### 航班搜尋元件的完整程式碼 ``` "use client"; import { useAppStore } from "@/store"; import { USER_API_ROUTES } from "@/utils/api-routes"; import { cityAirportCode } from "@/utils/city-airport-codes"; import { Button, Input, Listbox, ListboxItem } from "@nextui-org/react"; import axios from "axios"; import Image from "next/image"; import { useRouter } from "next/navigation"; import React, { useEffect, useRef, useState } from "react"; import { FaCalendarAlt, FaSearch } from "react-icons/fa"; const SearchFlights = () => { const router = useRouter(); const { setScraping, setScrapingType, setScrappedFlights } = useAppStore(); const [loadingJobId, setLoadingJobId] = useState<number | undefined>(undefined); const [source, setSource] = useState(""); const [sourceOptions, setSourceOptions] = useState< { city: string; code: string; }[] >([]); const [destination, setDestination] = useState(""); const [destinationOptions, setDestinationOptions] = useState< { city: string; code: string; }[] >([]); const [flightDate, setFlightDate] = useState(() => { const today = new Date(); return today.toISOString().split("T")[0]; }); const handleSourceChange = (query: string) => { const matchingCities = Object.entries(cityAirportCode) .filter(([, city]) => city.toLowerCase().includes(query.toLowerCase())) .map(([code, city]) => ({ code, city })) .splice(0, 5); setSourceOptions(matchingCities); }; const destinationChange = (query: string) => { const matchingCities = Object.entries(cityAirportCode) .filter(([, city]) => city.toLowerCase().includes(query.toLowerCase())) .map(([code, city]) => ({ code, city })) .splice(0, 5); setDestinationOptions(matchingCities); }; const startScraping = async () => { if (source && destination && flightDate) { const data = await axios.get(`${USER_API_ROUTES.FLIGHT_SCRAPE}?source=${source}&destination=${destination}&date=${flightDate}`); if (data.data.id) { setLoadingJobId(data.data.id); setScraping(true); setScrapingType("flight"); } } }; useEffect(() => { if (loadingJobId) { const checkIfJobCompleted = async () => { try { const response = await axios.get(`${USER_API_ROUTES.FLIGHT_SCRAPE_STATUS}?jobId=${loadingJobId}`); if (response.data.status) { set ScrappedFlights(response.data.flights); clearInterval(jobIntervalRef.current); setScraping(false); setScrapingType(undefined); router.push(`/flights?data=${flightDate}`); } } catch (error) { console.log(error); } }; jobIntervalRef.current = setInterval(checkIfJobCompleted, 3000); } return () => clearInterval(jobIntervalRef.current); }, [loadingJobId]); return ( <div className="h-[90vh] flex items-center justify-center"> <div className="absolute left-0 top-0 h-[100vh] w-[100vw] max-w-[100vw] overflow-hidden overflow-x-hidden"> <Image src="/flight-search.png" fill alt="Search" /> </div> <div className="absolute h-[50vh] w-[60vw] flex flex-col gap-5"> {/* UI and functionality for flight search */} </div> </div> ); }; export default SearchFlights; ``` ### 步驟9:航班搜尋頁面UI  ### 顯示航班搜尋結果 成功抓取飛行資料後,下一個關鍵步驟是以使用者友善的方式將這些結果呈現給使用者。 Next.js 應用程式中的 Flights 元件就是為此目的而設計的。 ``` "use client"; import { useAppStore } from "@/store"; import { USER_API_ROUTES } from "@/utils/api-routes"; import { Button } from "@nextui-org/react"; import axios from "axios"; import Image from "next/image"; import { useRouter, useSearchParams } from "next/navigation"; import React from "react"; import { FaChevronLeft } from "react-icons/fa"; import { MdOutlineFlight } from "react-icons/md"; const Flights = () => { const router = useRouter(); const searchParams = useSearchParams(); const date = searchParams.get("date"); const { scrappedFlights, userInfo } = useAppStore(); const getRandomNumber = () => Math.floor(Math.random() * 41); const bookFLight = async (flightId: number) => {}; return ( <div className="m-10 px-[20vw] min-h-[80vh]"> <Button className="my-5" variant="shadow" color="primary" size="lg" onClick={() => router.push("/search-flights")} > <FaChevronLeft /> Go Back </Button> <div className="flex-col flex gap-5"> {scrappedFlights.length === 0 && ( <div className="flex items-center justify-center py-5 px-10 mt-10 rounded-lg text-red-500 bg-red-100 font-medium"> No Flights found. </div> )} {scrappedFlights.map((flight: any) => { const seatsLeft = getRandomNumber(); return ( <div key={flight.id} className="grid grid-cols-12 border bg-gray-200 rounded-xl font-medium drop-shadow-md" > <div className="col-span-9 bg-white rounded-l-xl p-10 flex flex-col gap-5"> <div className="grid grid-cols-4 gap-4"> <div className="flex flex-col gap-3 font-medium"> <div> <div className="relative w-20 h-16"> <Image src={flight.logo} alt="airline name" fill /> </div> </div> <div>{flight.name}</div> </div> <div className="col-span-3 flex justify-between"> <div className="flex flex-col gap-2"> <div className="text-blue-600">From</div> <div> <span className="text-3xl"> <strong>{flight.departureTime}</strong> </span> </div> <div>{flight.from}</div> </div> <div className="flex flex-col items-center justify-center gap-2"> <div className="bg-violet-100 w-max p-3 text-4xl text-blue-600 rounded-full"> <MdOutlineFlight /> </div> <div> <span className="text-lg"> <strong>Non-stop</strong> </span> </div> <div>{flight.duration}</div> </div> <div className="flex flex-col gap-2"> <div className="text-blue-600">To</div> <div> <span className="text-3xl"> <strong>{flight.arrivalTime}</strong> </span> </div> <div>{flight.to}</div> </div> </div> </div> <div className="flex justify-center gap-10 bg-violet-100 p-3 rounded-lg"> <div className="flex"> <span>Airplane </span> <span className="text-blue-600 font-semibold"> Boeing 787 </span> </div> <div className="flex"> <span>Travel Class: </span> <span className="text-blue-600 font-semibold">Economy</span> </div> </div> <div className="flex justify-between font-medium"> <div> Refundable <span className="text-blue-600"> $5 ecash</span> </div> <div className={`${ seatsLeft > 20 ? "text-green-500" : "text-red-500" }`} > Only {seatsLeft} Seats Left </div> <div className="cursor-pointer">Flight Details</div> </div> </div> <div className="col-span-3 bg-violet-100 rounded-r-xl h-full flex flex-col items-center justify-center gap-5"> <div> <div> <span className="line-through font-light"> ${flight.price + 140} </span> </div> <div className="flex items-center gap-2"> <span className="text-5xl font-bold">${flight.price}</span> <span className="text-blue-600">20% OFF</span> </div> </div> <Button variant="ghost" radius="full" size="lg" color="primary" onClick={() => { if (userInfo) bookFLight(flight.id); }} > {userInfo ? "Book Now" : "Login to Book"} </Button> </div> </div> ); })} </div> </div> ); }; export default Flights; ``` #### 航班搜尋結果 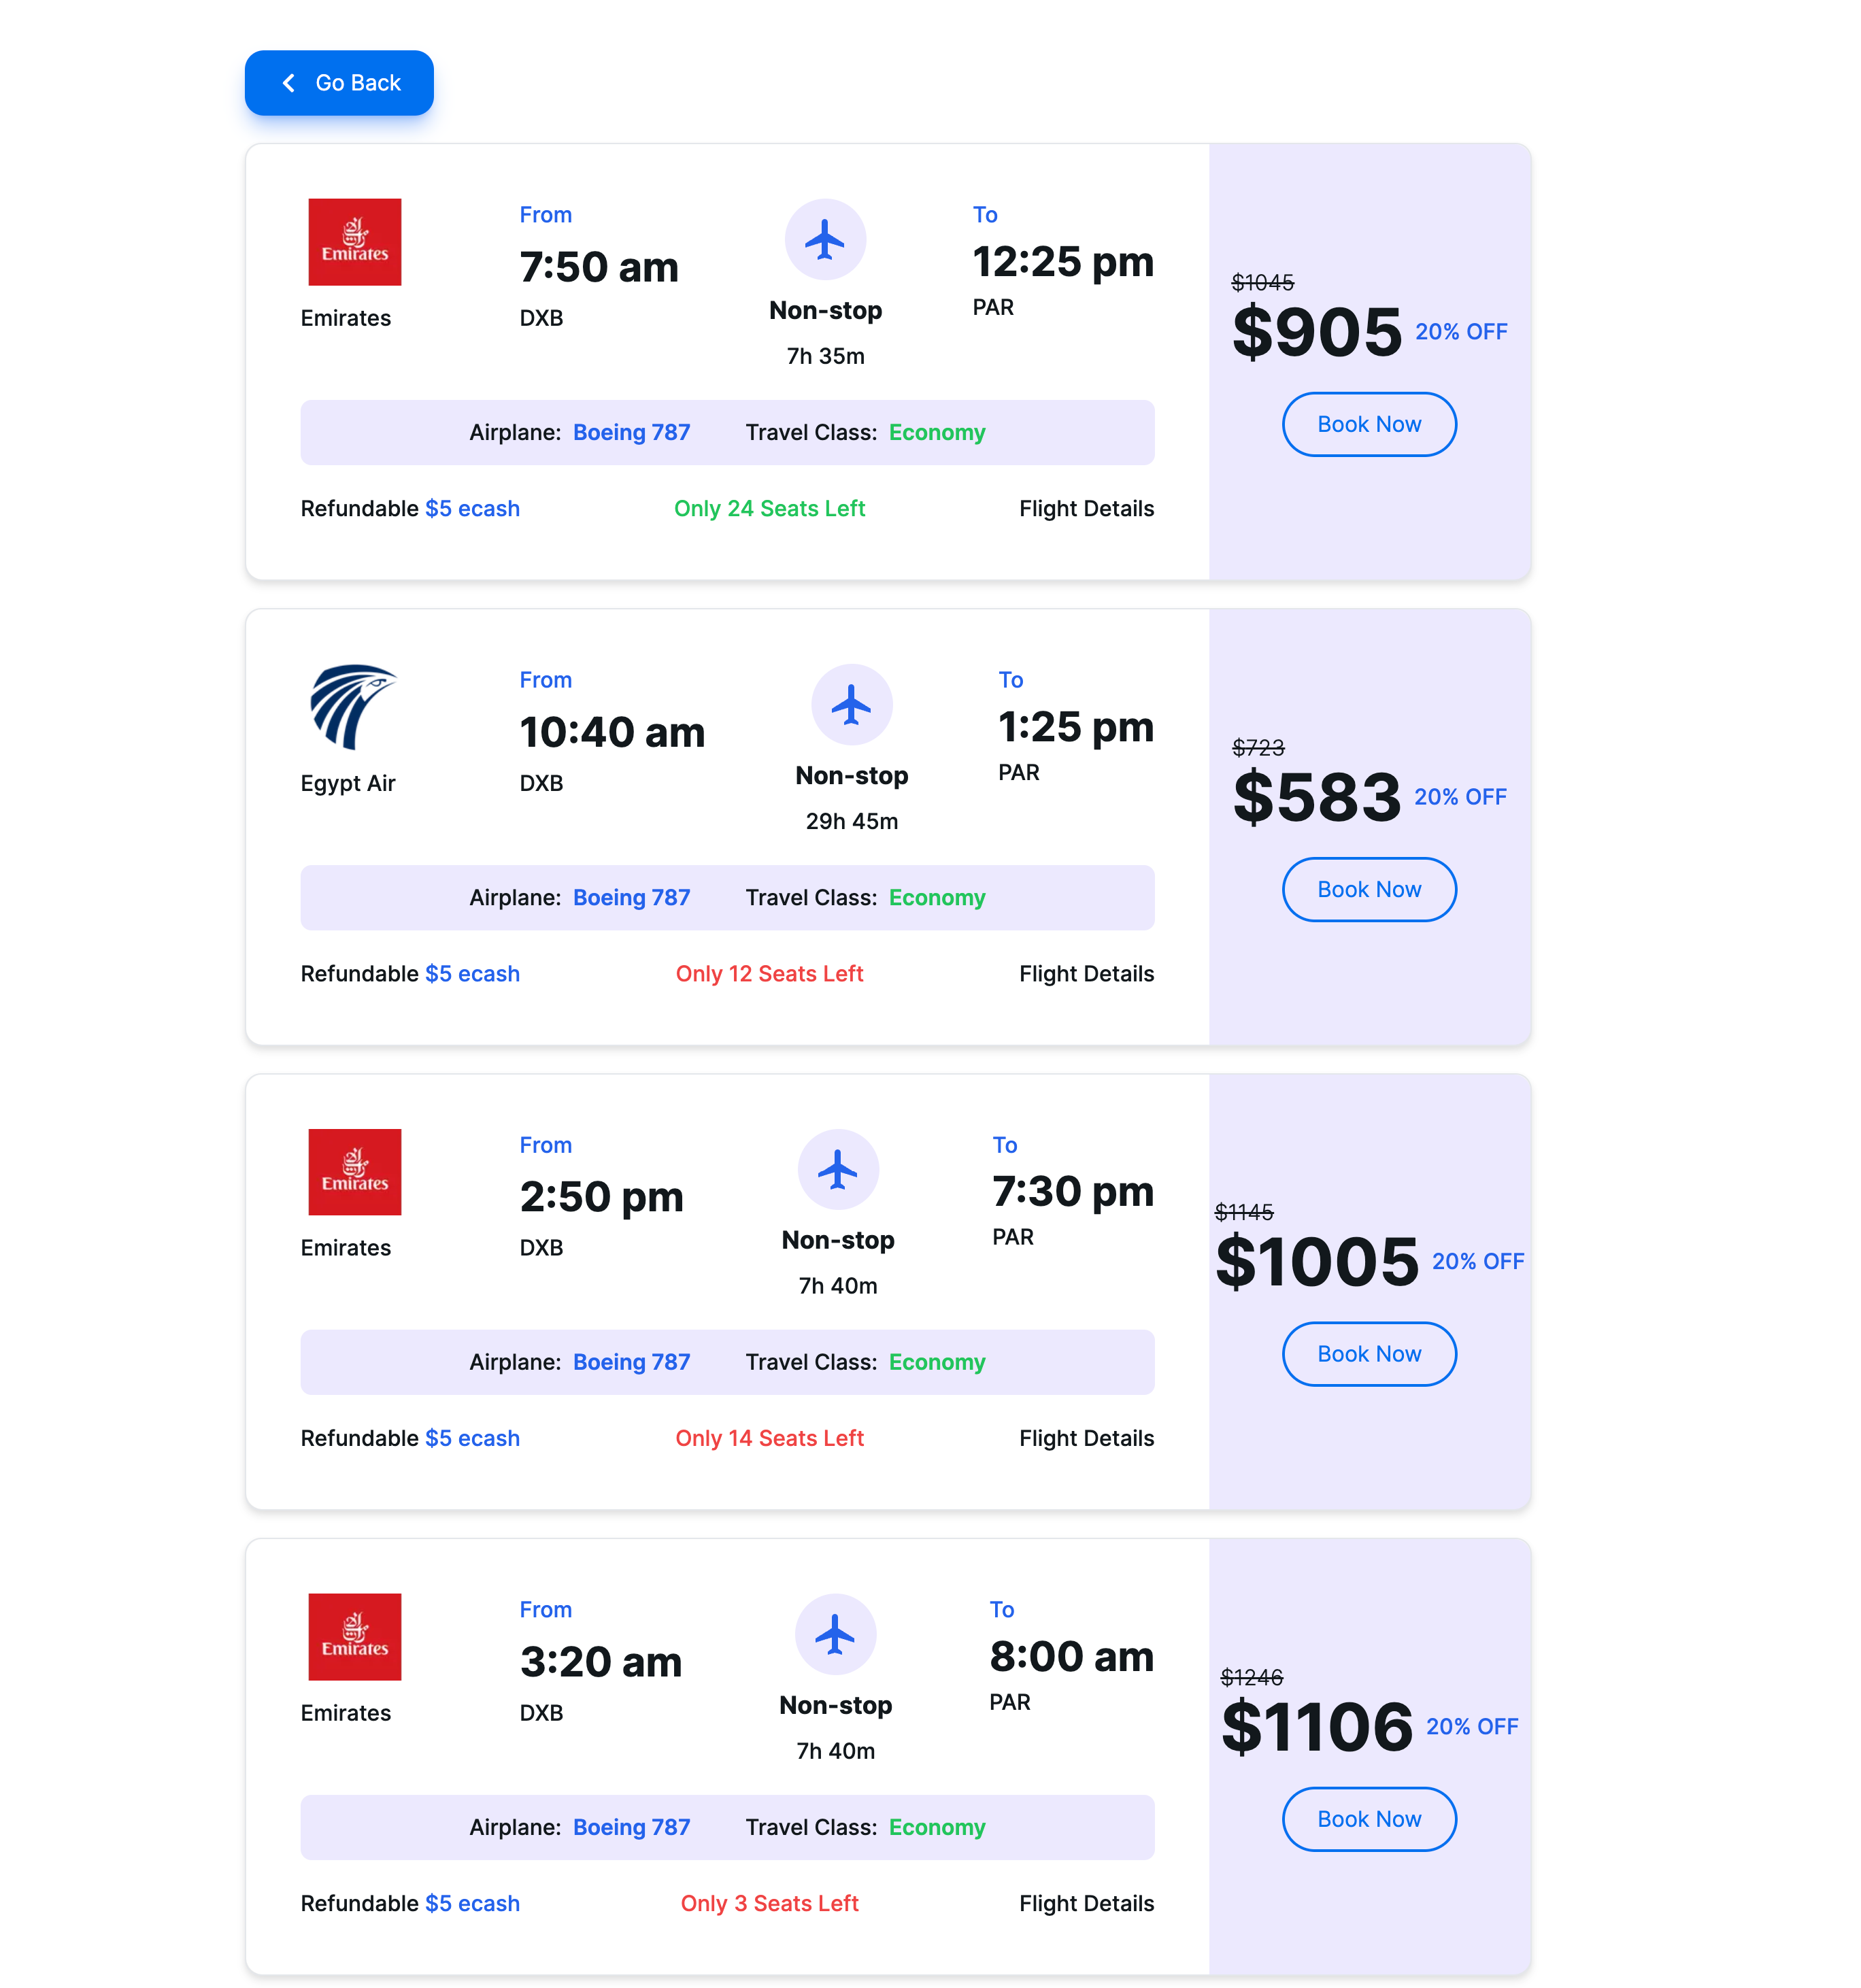 ### 探索完整的指南和程式碼庫 上面共享的部分和程式碼片段僅代表使用 Next.js 建立強大的航班資料抓取和搜尋應用程式所需的完整功能和程式碼的一小部分。為了掌握這個專案的全部內容,包括高級功能、優化和最佳實踐,我邀請您更深入地研究我的線上綜合資源。 #### 在 YouTube 上觀看詳細說明 有關引導您完成此應用程式的開發過程、編碼細微差別和功能的逐步影片指南,請觀看我的 YouTube 影片。本教程旨在讓您更深入地了解這些概念,讓您按照自己的步調進行操作並獲得對 Next.js 應用程式開發的寶貴見解。 https://www.youtube.com/watch?v=ZWVhk0fxHM0 #### 在 GitHub 上探索完整程式碼 如果您渴望探索完整的程式碼,請造訪我的 GitHub 儲存庫。在那裡,您將找到完整的程式碼庫,包括讓該應用程式在您自己的電腦上執行所需的所有元件、實用程式和設定說明。 https://github.com/koolkishan/nextjs-travel-planner ### 結論 使用 Next.js 建立飛行資料抓取和搜尋工具等綜合應用程式展示了現代 Web 開發工具和框架的強大功能和多功能性。無論您是希望提高技能的經驗豐富的開發人員,還是渴望深入 Web 開發的初學者,這些資源都是為您的旅程量身定制的。在 YouTube 上觀看詳細教程,在 GitHub 上探索完整程式碼,並加入對話以增強您的開發專業知識並為充滿活力的開發者社群做出貢獻。 --- 原文出處:https://dev.to/kishansheth/nextjs-14-booking-app-with-live-data-scraping-using-scraping-browser-610
 在嘗試在個人react.js專案中實作Google地圖API時,我遇到了幾個非常複雜且令人困惑的範例。這是我如何在我的應用程式中使用 Google 地圖的簡短範例! 首先,事情第一! -------- 前往[Google 地圖 API](https://developers.google.com/maps/documentation/)頁面,註冊並取得令牌以供使用!您必須輸入信用卡號才能接收令牌。然而,谷歌聲稱,如果您不親自升級服務,他們不會向您的帳戶收取費用。**請自行決定是否繼續**。 獲得 API 金鑰後,您就可以開始建立您的應用程式了! ### 建立您的 react 應用程式 ``` npm init react-app my-app ``` ### 安裝依賴項 ``` npm install --save google-maps-react ``` 這就是我們如何將谷歌地圖作為一個元件來獲取! 檢查您的 package.json 檔案以確保它已安裝! 初始設定完成後,您就可以開始編碼了! 1.導入google-maps-react! ---------------------- ``` import { Map, GoogleApiWrapper } from 'google-maps-react'; ``` 2. 將地圖元件加入渲染函數中! ---------------- ``` render() { return ( <Map google={this.props.google} zoom={8} style={mapStyles} initialCenter={{ lat: 47.444, lng: -122.176}} /> ); } ``` 3. 編輯您的匯出預設語句 ------------- ``` export default GoogleApiWrapper({ apiKey: 'TOKEN HERE' })(MapContainer); ``` 請務必在此處插入您的 API 金鑰! 4.加入樣式 ------ 如果您願意,可以變更一些樣式屬性。我在課堂外將其作為常變數。 ``` const mapStyles = { width: '100%', height: '100%', }; ``` 5. 啟動你的伺服器! -----------  偉大的!你做到了!但說實話,沒有任何標記的地圖有什麼意義!那麼讓我們來加入一些吧! 6. 標記它! ------- ``` import { Map, GoogleApiWrapper, Marker } from 'google-maps-react'; ``` 更新您的地圖元件以包含標記元件! ``` render() { return ( <Map google={this.props.google} zoom={8} style={mapStyles} initialCenter={{ lat: 47.444, lng: -122.176}} > <Marker position={{ lat: 48.00, lng: -122.00}} /> </Map> ); } ``` 然後你就會擁有這個!  讓我們加入更多! -------- 您可以透過程式設計方式循環狀態來顯示地點,而不是新增一個標記。在我的範例中,我展示了該地區的一些舊貨店。您也可以為它們加入事件,例如 onClick! ``` export class MapContainer extends Component { constructor(props) { super(props); this.state = { stores: [{lat: 47.49855629475769, lng: -122.14184416996333}, {latitude: 47.359423, longitude: -122.021071}, {latitude: 47.2052192687988, longitude: -121.988426208496}, {latitude: 47.6307081, longitude: -122.1434325}, {latitude: 47.3084488, longitude: -122.2140121}, {latitude: 47.5524695, longitude: -122.0425407}] } } displayMarkers = () => { return this.state.stores.map((store, index) => { return <Marker key={index} id={index} position={{ lat: store.latitude, lng: store.longitude }} onClick={() => console.log("You clicked me!")} /> }) } render() { return ( <Map google={this.props.google} zoom={8} style={mapStyles} initialCenter={{ lat: 47.444, lng: -122.176}} > {this.displayMarkers()} </Map> ); } } ``` 這就是大家!  我希望本教程有助於建立您自己的應用程式! --- 原文出處:https://dev.to/jessicabetts/how-to-use-google-maps-api-and-react-js-26c2
第1課 ── 認識 Vue 基本環境與 render state https://jsfiddle.net/ZooeyLai/x1sq7mhg/23/ 第2課 ── 體驗一下 Reactivity 的效果與便利 https://jsfiddle.net/ZooeyLai/kfv4szoy/43/ 第3課 ── 學習 Vue 條件判斷式的寫法 https://jsfiddle.net/ZooeyLai/oq36rkdw/3/ 第4課 ── 學習 Vue 迴圈的寫法 https://jsfiddle.net/ZooeyLai/bruyxjdv/20/ 第5課 ── 學習 Vue 事件處理的寫法 https://jsfiddle.net/ZooeyLai/dgk9vfuo/115/ 第6課 ── 認識 Lifecycle Hooks 與 Watchers https://jsfiddle.net/ZooeyLai/8b7ocvg1/6/ 第7課 ── 認識 Template Refs https://jsfiddle.net/ZooeyLai/bsq3wo2d/7/
介紹 == Visual Studio Code 允許您透過命令面板或鍵盤上的快捷鍵存取它提供的幾乎所有功能。 您可能每個工作日工作 8 小時,希望您能在這些工作時間中大部分時間進行編碼。所以你花了很多時間盯著你選擇的程式碼編輯器。 了解一些快捷方式可以幫助您更快地完成工作。知道如何更快地找到您需要的文件。您需要立即執行 NPM 命令,而不是開啟外部終端。  捷徑備忘單 ===== Visual Studio Code 的開發者 - [視窗](https://code.visualstudio.com/shortcuts/keyboard-shortcuts-windows.pdf) - [Linux](https://code.visualstudio.com/shortcuts/keyboard-shortcuts-linux.pdf) - [蘋果系統](https://code.visualstudio.com/shortcuts/keyboard-shortcuts-macos.pdf) 您可以下載這些備忘單,列印出來,然後將其放在辦公桌上以供快速參考,或嘗試在上班途中學習它們。不要試圖一次學會所有這些。這需要時間。所以要有耐心,你就會掌握它們。 鍵位圖 === 您是 Vim 用戶嗎?也許 Emacs 快捷方式已經刻在你的大腦裡了?或者,無論出於何種原因,您使用記事本++並欣賞記事本++的鍵盤快捷鍵😵? Visual Studio 為大家提供了一個擴充功能!讓我們安裝 ⚛ `Atom Keymap` 。我們將在沒有我們心愛的滑鼠的幫助下(幾乎)做到這一點。 1\) 開啟 Visual Studio 程式碼。 2\) Visual Studio Code 開啟後,按: `CTRL+SHIFT+X` 。該快捷方式將打開擴展列表,並且您的遊標將聚焦在搜尋欄上。輸入以下`@category:keymaps` 。 (如果您想了解更多有關本節中擴展程序如何工作的訊息,請在下面發表評論!) 3\) 您現在會看到鍵盤映射清單。按`Tab` ,然後按`Down Arrow ⬇` 。 4\) 按`⬇`直到選擇`Atom Keymap` 。現在按`Enter` 。 5)遺憾的是我找不到選擇「安裝」按鈕的方法。您現在需要點擊🖱! 您可以找到幾乎所有您能想像到的編輯器的鍵盤映射。安裝您最喜歡的那個,您就有了快捷方式!很酷吧? 鍵盤快速鍵設定 (JSON) ============== 有多種方法可以查看鍵盤快捷鍵設定。其中一種是透過圖形介面,也可以選擇使用透過 JSON 檔案來編輯捷徑。 圖形介面 ---- 我們可以按`CTRL+k`開啟圖形介面,然後仍然按住`CTRL` ,您應該按`CTRL+s` 。 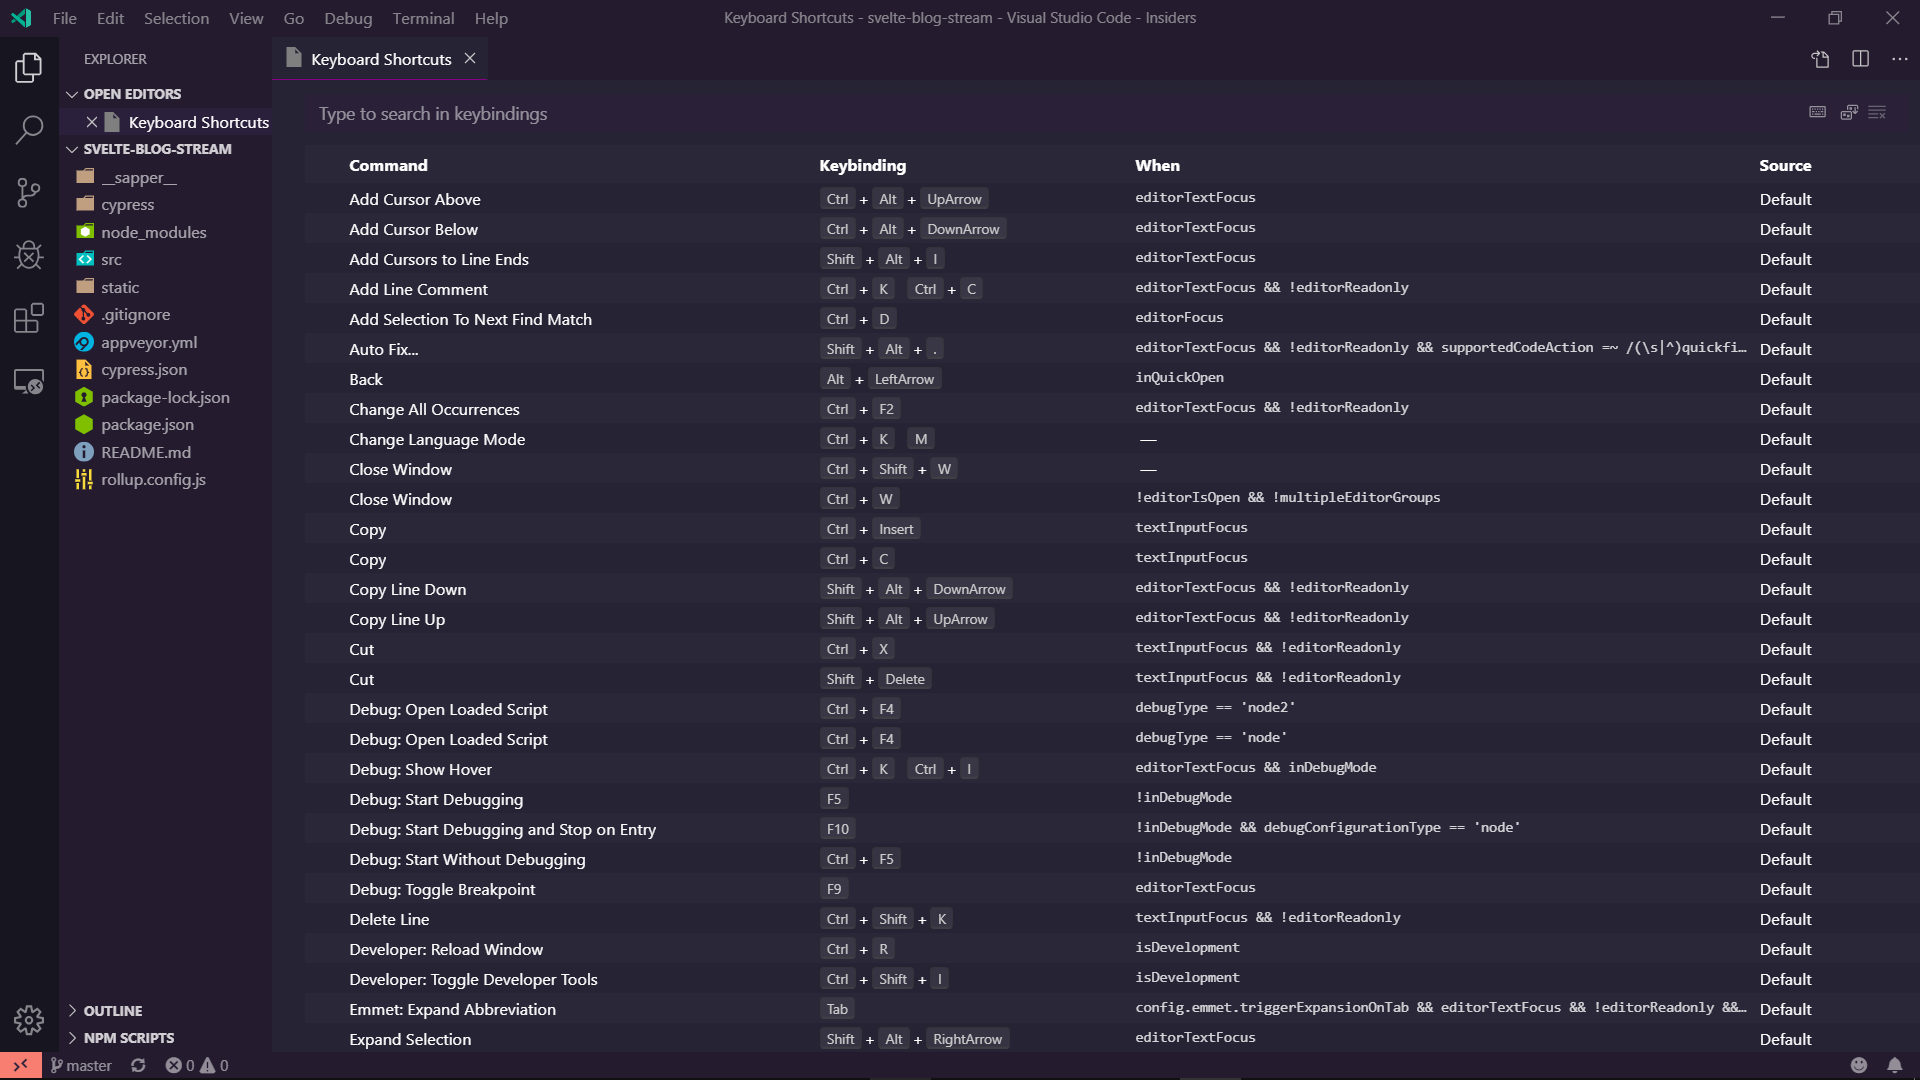 頂部有一個搜尋欄,您可以在其中搜尋要查看的命令或鍵盤快捷鍵。這些對話框在 Visual Studio Code 中看起來往往相同,您將開始經常看到它們。 您可以看到四列。讓我們來看看它們。 \*指令:Visual Studio Code 執行的操作。 - 鍵綁定:執行操作時必須按下的按鍵組合。 - 何時:這是 Visual Studio Code 的過濾器,它告訴 Visual Studio Code 捷徑是否應該在該上下文中可操作。有些過濾器可能是整合終端、原始碼中的錯誤等等。 - 來源:Visual Studio 程式碼可以透過多種方式了解捷徑。最常見的是`Default` ,這些命令是 Visual Studio Code 隨附的開箱即用命令。顧名思義`User`是由用戶建立的命令。第三種方式是透過`Extension` 。擴展作者還可以決定加入快捷方式。如果您最喜歡的快捷方式不起作用,這可能是它停止工作的原因。 若要變更鍵綁定,請雙擊該行,然後會彈出一個模式。然後按下所需的組合鍵並按下`Enter` 。 鍵綁定 JSON 文件 ----------- 現在我們知道了鍵綁定的一般工作原理,讓我們來看看`keybindings.json`檔案。 其中有兩個:預設的`keybindings.json`和使用者特定的`keybindings.json`檔案。按`CTRL+SHIFT+P`或`F1`開啟命令匣並鍵入`keyboard shortcuts`現在您應該在命令托盤中看到至少兩個條目。 - 首選項:開啟預設鍵盤快速鍵 (JSON)。 這是 Visual Studio Code 儲存所有預設快捷方式的文件,以及底部未使用的可用捷徑清單。我會避免在這裡更改它們。 - 首選項:開啟鍵盤快速鍵 (JSON) 這是用戶特定的鍵綁定文件,您應該編輯此文件。一開始,它只是一個空陣列而已! 要在 JSON 檔案中新增快捷方式,您只需新增一個如下所示的物件: ``` [ { "key": "CTRL+ALT+P", "command": "git.pull", "when": "" } ] ``` 您需要指定密鑰和命令。 `when`告訴 Visual Studio Code 應在何處執行此命令。如果你把它留空,它會到處監聽。我們在上一部分談到了這一點。 有用的快捷鍵 ====== 打開命令面板 ------ 您已經知道這一點,但也許您跳到了這一部分 😉 - `CRTL+SHIFT+P`或`F1` 這將開啟 Visual Studio Code 中最強大的功能。命令面板。只需輸入您認為想要的內容,它仍然可以找到它! 打開和關閉側邊欄 -------- 有時您想要更多的水平空間,但側邊欄卻妨礙了您!只需按 - `CTRL+B` 您可以打開和關閉側邊欄 輸入禪宗模式 ------ 你喜歡 Visual Studio 程式碼中的 Zen Mod 嗎?是的,它是內建的! 為此,您需要按: - `CTRL+k` ,放開兩個按鍵並按`z` 。 這將打開和關閉 Zen Mod。 聚焦綜合終端 ------ 我最喜歡的功能之一是 Visual Studio Code 中的整合終端機。我99%的時間都在用它!因此要快速打開或關閉它,您需要按: - `CTRL+j` 這將打開整合終端並將遊標聚焦在其中。如果您再次按下它,它將關閉,並且您的遊標將返回到原來的位置。 在您的專案中搜尋文件 ---------- Visual Studio Code 有一個很棒的檔案搜尋內建功能。當您使用遠端擴展時,它也非常快。要打開它,您只需按: - `CTRL+p` 這將打開一個對話框,您可以在其中查看最近打開的文件,這本身就非常好。它還支援模糊搜尋。這意味著您可以鍵入任何單字,它會在檔案的路徑中找到。所以你不必精確!該對話還支持更多的事情。例如`go-to line`或除錯以及更多功能!如果您想了解更多請在下面評論。 切換到最近開啟的工作區 ----------- 您在微服務架構中工作並且需要一直切換資料夾?因為你不使用 mono 倉庫?我有捷徑給你!按: - `CTRL+r` 這將開啟一個對話框,其中包含最近開啟的工作區/資料夾的清單。 額外提示:如果您在該對話方塊中按`CTRL+ENTER` Visual Studio Code 將在新視窗中開啟它。 分割編輯器視窗 ------- 人們喜歡 vim,因為它很容易在編輯器之間分割視圖。 Visual Studio Code 也內建了功能。只需按 - `CTRL+\` 若要建立 2 列或 - `CTRL+k` ,放開`k`並按住`CTRL`並按`\` 建立一個新行。第二個聽起來比它更難,但是一旦它進入你的大腦,它需要你幾秒鐘的時間,你現在知道如何更改或建立新的快捷方式😉 聚焦編輯器視窗 ------- 既然您知道如何拆分編輯器窗口,您還需要學習如何快速跳轉這些視圖。這非常簡單,並且還有預設的鍵綁定。你需要按 - `CTRL+[1-9]` 這表示您需要按`CTRL`加您想要關注的視窗的編號。對於第一個視窗按`CTRL+1` ,第二個視窗`CTRL+2` ,您明白了 Easy 的想法嗎? 關閉目前編輯器視窗 --------- 現在您打開了太多編輯器窗口,並且您想要關閉它們。這可以透過按快速完成 - `CTRL+w` 這將關閉目前開啟的視窗。 僅關閉已儲存的編輯器視窗 ------------ 有時您會開啟如此多的編輯器,以至於您不再知道要儲存了什麼。是的,我知道您可以透過選項卡欄中的那個點看到這一點,但是,您仍然無法集中精力並找到正確的檔案。 Visual Studio Code 為您提供支援!只需按 - `CTRL+k`然後放開`CTRL`和`k`並按`u` 這將保存所有窗口,以便您可以檢查未保存的窗口並保存它們。 開啟一個新文件 ------- 您需要一個新檔案來繪製一些程式碼嗎?或者,您需要為您的寵物專案建立一個新檔案?按 - `CTRL+n` 這將開啟一個新編輯器。 更改目前文件的語言 --------- 您想切換目前文件中選定的語言,因為您想要`Javascript (react)`而不是`Javascript` ?按 - `CTRL+k` 然後放開`CTRL`和`k`並按 'm`。 這將打開一個新的對話,您可以在其中搜尋所需的語言。 前往線路 ---- 現在讓我們專注於如何讓編輯變得更容易。第 1042 行有錯誤(如果您的文件那麼長,那麼問題就來了)。你不想滾動!按 - `CTRL+g` 這將開啟一個對話框,您需要輸入要跳到的行號。與`CTRL+p`結合使用會非常強大。 轉到符號 ---- 您的第一個問題是,什麼是符號?在程式語言中,符號通常是變數。在 CSS 中,它們是選擇器。若要查看對話,請按 - `CTRL+SHIFT+O` 這將開啟一個對話框,其中包含目前文件中可用符號的清單。 - `CTRL+t` 您會看到一個只有`#`的對話框,您需要鍵入所需的符號,Visual Studio Code 會在空工作區中搜尋該符號(如果您使用的語言支援該符號)。所以你需要自己檢查一下。 向上或向下移動一條線。 ----------- 有時您需要移出`if`內的那行程式碼,或只是移動一行,因為它被提前呼叫了。您可以透過按 - `Alt+Down` 將目前選定的行向下移動一行 - `Alt+Up` 將目前選定的行向上移動一行 複製目前行 ----- 您想用一些變數填充該陣列,但您懶得寫一個循環。那麼要如何填滿`array[0]` `array[1]`和`array[2]`呢?透過複製第一行兩次並僅更改您需要的內容。對於那個新聞界 - `ALT+SHIFT+Up` 這將複製當前選定的行並將其貼上到上面的一行中 - `ALT+SHIFT+Down` 這將複製目前選定的行並將其貼上到下面的一行中 (這個快捷方式在這裡會很方便) 顯示建議 ---- Visual Studio Code 有內建建議。大多數時候它會自動為您彈出,但有時不會,而您確實需要它。簡單,按 - `CTRL+Spacebar` 這將打開建議對話框 註解掉目前選擇 ------- 有時您需要隔離程式碼並註解掉它周圍的所有內容。按 - `CTRL+/` 如果您選擇了多行,則會將其註解掉。如果您沒有選擇任何內容,它只會註解掉這一行。 選擇多行程式碼 ------- 要註解掉該程式碼區塊,您需要選擇多行。這是透過按完成的 - `CTRL+Shift+Up` 從目前行開始選擇並向上移動遊標。 - `CTRL+Shift+down` 從目前行開始選擇並向下移動遊標。 折疊和展開您的程式碼 ---------- 你有這麼大的功能,但你真的看不到它了,因為它太大了,需要重構,但你沒有時間,所以你想忘記它嗎?您可以折疊和展開程式碼,以便在 100 行中可以產生 1 行。若要執行此操作,請按 - `CTRL+SHIFT+[` 折疊(隱藏)程式碼 - `CTRL+SHIFT+]` 展開(顯示)程式碼 切一條孔線 ----- 對於此,您不能選擇任何程式碼。按 - `CTRL+x` 當沒有選擇任何內容時,這會剪切整行。 縮排/減少線 ------ 人們通常知道如何縮排程式碼。您可以選擇要縮排的程式碼並按 - `Tab` 按下您想要的次數按 Tab 鍵,這樣效果就適合您了。 您知道可以取消縮排嗎?將程式碼從右移到左?您可以透過按 - `SHIFT+tab` 結論 == 還有更多的捷徑。這些快捷鍵是我最常使用的快捷鍵。我希望這可以幫助您更多地了解 Visual Studio Code 中的快捷方式,並且您現在可以建立自己的快捷方式。 我是否忽略了每個人都需要知道的有用命令? 你錯過了什麼嗎?有什麼不清楚嗎? 請寫評論。我盡我所能回答你所有的問題! **👋問好!** [Instagram](https://www.instagram.com/lampewebdev/) |[推特](https://twitter.com/lampewebdev)|[領英](https://www.linkedin.com/in/michael-lazarski-25725a87)|[中等](https://medium.com/@lampewebdevelopment)|[抽搐](https://dev.to/twitch_live_streams/lampewebdev)| [Youtube](https://www.youtube.com/channel/UCYCe4Cnracnq91J0CgoyKAQ) --- 原文出處:https://dev.to/lampewebdev/the-guide-to-visual-studio-code-shortcuts-higher-productivity-and-30-of-my-favourite-shortcuts-you-need-to-learn-mb3
*ESLINT* :你有沒有想過ESLINT 是什麼,當我第一次聽說ESLINT 時,我很好奇它到底是怎麼回事,從那時起我就一直在我的專案中使用它,儘管一開始我錯誤地使用了它,那就是為什麼我發布這篇文章是為了讓人們能夠正確理解。但在深入探討之前,讓我先快速解釋一下什麼是 ESLINT 和 VS Code。 **ESLINT**是用於 Javascript 和 JSX 的可插入 linting 實用程序,它有助於發現可能的錯誤。 **VS Code**是頂級的開發編輯器之一,它由 Microsoft 開發和維護,它有助於提高生產力,並且還具有許多功能,我要強調的功能之一是擴充。擴充功能是 VS Code 中的外部套件,可讓您擴展編輯器的功能 你可以從他們的官方網站下載 VS Code [VS Code Download](https://code.visualstudio.com/) **注意:***我不會深入研究 VS Code。本文中有關 VS Code 的所有內容都只與 ESLINT 相關*。 **腳步**: - 建立一個 JavaScript 專案 - 在 VS Code 編輯器中安裝 eslint 作為擴展 - 使用 npm 將 eslint 安裝為全域包 - 在您的 javascript 專案中初始化 eslint - 修改專案中的 eslint 設定檔。 讓我們使用`npm init --yes`建立一個簡單的 javascript 專案  操作成功後,它將建立一個*package.json*文件,該文件將管理我們專案的所有配置。 讓我們嘗試在 VS Code 編輯器上安裝 ESLINT 擴充  一旦我們在 VS Code 編輯器上安裝了 eslint 擴展,然後使用下面的程式碼透過 npm 將 eslint 安裝為全域包 ``` npm install eslint -g ``` 您需要在專案中初始化 eslint,以便可以利用 eslint 的強大功能。從您的根專案輸入以下程式碼來初始化 eslint ``` eslint --init ``` 在初始化期間 eslint 會問你一些問題,更像是設定你的設定檔。 - **您想如何使用 ESLint?** ``` * __To check syntax only__ => it helps you correct your syntax and make sure it conform to standard. ``` ``` * __To check syntax and find problems__ => to help you check for syntax correctness and also help to find any problems in your code base ``` ``` * __To check syntax, find problems, and enforce code style___ => to help you check for syntax, find problem and enforce style, enforcing style means to conforms to a particular coding standard such as Airbnb, Google and other Standard coding style. But I always go for the last option the one with syntax, find problems and enforce code style ``` - **您的專案使用什麼類型的模組?** ``` * __Javascript module (import/export)__ => if your project has babel installed then you definitely need to choose this option. If you are working on a project such as React, Vue, Angular e.t.c they all use babel so you need choose this option. ``` ``` * __CommonJS (require/exports)__ => this option is meant for commonJS that has nothing to do with babel, maybe your nodejs project and any other javascript project ``` - **您的專案使用哪個框架?** ``` * __React__ => if you are using react in/for your project then this option is for you ``` ``` * __Vue__ => if you are using Vue in/for your project then this option is for you ``` ``` * __None of these__ => if you are using neither React or Vue in your project choose this option ``` - **你的程式碼在哪裡執行?** ``` * __Browser__ => if your project runs on browser e.g React, Angular, Vue e.t.c then go for this option ``` ``` * __Node__ => if your project is a node based then gladly choose this option ``` - **您希望如何為您的專案定義風格?** ``` * __Use a popular style guide__ => This allows you to choose from set of popular style such as Airbnb,Standard and Google style guide, it is advisable to choose this option in order for you to follow popular and most used style guide and i will be choosen this option in this post. ``` ``` * Answer questions about your style: _This is for custom style guide_ ``` ``` * Inspect your JavaScript file(s).: _custom style guide_ ``` - **您希望設定檔採用什麼格式?** ``` * __Javascript__ => whether you want your eslint config file to be in *.js* file ``` ``` * __YAML__ => whether you want your eslint config file to be in *.yaml* file ``` ``` * __JSON__ => whether you want your eslint config file to be in *.json* file ``` 您可以選擇此部分中的任何選項 選擇首選設定檔類型後,它將提示您安裝所有必要的依賴項。成功安裝所有必要的依賴項後,它將產生一個帶有“.eslintrc”.“js/json/yaml”的設定檔。 **如下所示的設定檔範例**  下面是一個小動畫圖像,顯示 VS Code 如何與 eslint 配合使用來通知您 javascript 專案中的錯誤  **在專案中設定 ESLINT 規則** 在專案中定義 ESLINT 規則會告知 eslint 您要新增或刪除的規則類型。您可以在設定檔的規則部分修改/設定規則 要設定的規則範例是 ``` "rules" : { no-console: 0; no-empty: 0; no-irregular-whitespace:0; } ``` 您可以定義盡可能多的規則,您可以在其官方文件[ESLINT Rules Documentation](https://eslint.org/docs/rules/)上閱讀有關 ESLINT 規則的更多訊息 最後,我將向您展示如何將 eslint 連結到 javascript 專案編譯器/轉譯器 以下步驟 - 前往`package.json`文件,在文件的腳本段中加入以下內容 ``` script:{ "lint":"eslint" } ``` **注意:** *“lint”只是一個普通單詞,您可以使用任何您喜歡的單詞* 然後在你的根專案中你可以執行你的 linting 腳本 ``` npm run lint ``` > ESLINT 有助於提高工作效率,根據標準編寫程式碼,並在您的程式碼庫違反樣式指南規則時標記錯誤。透過這篇文章,您應該能夠將 ESLINT 整合到您的 Javascript 專案中。 --- 原文出處:https://dev.to/devdammak/setting-up-eslint-in-your-javascript-project-with-vs-code-2amf
我第一次開始編碼是在 14 歲時,當時我正在尋求建立我的第一家新創公司。我不知道從哪裡開始,最後選擇了一個名為 OpenCart 的熱門開源電子商務平台。經過大量時間和不眠之夜後,我發布了我的新創公司的第一個版本,用戶可以在其中交易和出售二手 DVD。幾個版本之後,我應用了該程式碼庫中的所有最佳實踐來建立一個自訂平台,如果沒有任何範例可供學習,我就無法做到這一點。 在這篇文章中,我收集了 5 個使用 React 建立的專案範例,可以幫助每個新手 (React) 開發人員提高技能。有時教程有點太慢或不夠複雜,而您只是想探索“真正的”程式碼庫。所有列出的專案都附帶自訂後端或使用開放 API 來獲取資料,因此您不必使用模擬資料。享受! TMDB 電影資料庫 ---------- 作為一名電影迷,我花了很多時間在 IMDb 上尋找節目或人物,但不幸的是他們不提供開放的 API。這就是電影資料庫 (TMDb) 的用武之地,它提供了一個[出色的開源 API](https://www.themoviedb.org/documentation/api?language=en-US) ,其中包含有關大多數電影和電視節目的資訊。這是一個流行的 API,可用於(愛好)專案或當您真正喜歡電影時。 [Stephen Kempin](https://twitter.com/s_kempin)的這個專案展示瞭如何在此 API 之上建立電影資料庫應用程式,使用 React 和 Twitter 的 typeahead.js 庫來實現自動建議搜尋功能。 https://github.com/SKempin/reactjs-tmdb-app 電子商務入門者 ------- 在過去的幾年裡,訂閱食品、刮鬍產品或衣服變得非常流行。使用這個開源產品,您可以建立自己的訂閱服務,而且它是全端的!(!!!)。使用 Crate,您可以獲得使用 React 建立的前端以及 Node.js 和 GraphQL 後端。如果您渴望創辦自己的公司,並且正在尋找好的材料來學習如何模組化程式碼或整合前端和後端,那麼一定要看看這個儲存庫。他們甚至使用[StoryBook](https://storybook.js.org/) ,因此您可以檢查該專案中使用的所有元件。 https://github.com/atulmy/crate 蘋果音樂克隆 ------ 您聽過 Apple Music、Spotify 或 Google 上的音樂嗎?該專案是第一個專案的克隆,甚至帶有您可以使用的後端。想建立自己的後端嗎?有說明可以您自己執行此操作。在前端,React 與 Redux 和 Redux Thunk 一起使用,為您提供了一個廣泛的範例來開始使用 Redux 進行狀態管理。該專案尚不支援 React Hooks,因此請考慮這是一個挑戰,看看是否可以重構它。 https://github.com/tvillarete/apple-music-js Slack 克隆 ---- 如果您是一家公司的開發人員,那麼您很有可能一直在使用 Slack 作為溝通工具。還有什麼比建立您每天使用的工具的克隆更好的學習方法呢? [Luke Jackson](https://twitter.com/lukejacksonn)的 Slack 克隆版本使用 React 和流行的產品[ChatKit](https://pusher.com/chatkit) ,可讓您輕鬆建立進階聊天應用程式。您可以透過請求 API 金鑰免費開始使用。發現任何錯誤並願意開始為開源做出貢獻嗎?此存儲庫中有開放的[初學者友好](https://github.com/pusher/react-slack-clone/issues?q=is%3Aissue+is%3Aopen+label%3A%22good+first+issue%22)票證。 https://github.com/lukejacksonn/react-slack-clone Hacker News 克隆 ------ [駭客新聞](https://news.ycombinator.com/)不僅是與程式設計和技術相關的新聞的重要來源。它也是開發人員中的經典,通常是展示新前端框架或語言的演示的起點。 [Clinton D'Annolfo](https://twitter.com/clintondannolfo)的這個特定專案透過在前端使用 React 和 GraphQL,以及在 Node.js 和 GraphQL 上執行的伺服器來實現這一目標。作為獎勵,加入了[Next.js](https://nextjs.org/)以支援伺服器端渲染 (SSR)。 https://github.com/clintonwoo/hackernews-react-graphql 您對這些專案有何看法?希望他們可以幫助您提高 React 技能,並且不要忘記留下任何反饋 😄! --- 原文出處:https://dev.to/gethackteam/5-examples-of-react-applications-to-learn-from-275b
確保為變數設定的值符合您的預期的一個好方法是為它們設定特定類型。 如果您已經在物件或陣列中擁有資料。以下方法非常適合建立您的類型! 假設您有以下資料: ``` const data = { value: 123, text: 'text' }; ``` 然後您可以使用以下命令建立基於該類型的類型: ``` type Data = typeof data; // type Data = { // value: number; // text: string; // } ``` 您可以對嵌套物件執行相同的操作: ``` const data = { value: 123, text: 'text', subData: { value: false } }; type Data = typeof data; // type Data = { // value: number; // text: string; // subData: { // value: boolean; // }; // } ``` 從 TypeScript 3.4 開始,如果你有一個字串陣列,你可以執行以下操作(注意`as const` ): ``` const data = ['text 1', 'text 2'] as const; type Data = typeof data[number]; // type Data = "text 1" | "text 2" ``` 也可以從有物件的陣列中取得類型: ``` const locales = [ { locale: 'se', language: 'Swedish', }, { locale: 'en', language: 'English', } ] as const; type Locale = typeof locales[number]['locale']; // type Locale = "se" | "en" ``` 也可以從鍵取得類型: ``` const currencySymbols = { GBP: '£', USD: '$', EUR: '€', } type CurrencySymbol = keyof typeof currencySymbols; // type CurrencySymbol = "GBP" | "USD" | "EUR" ``` 關於`as const`與使用`<const>`的通知。它們的工作原理相同,但`<const>`在 .tsx 檔案中會失敗(React)。 ``` const data = ['text 1', 'text 2'] as const; // is the same as const data = <const>['text 1', 'text 2']; ``` --- 原文出處:https://dev.to/andreasbergqvist/typescript-get-types-from-data-using-typeof-4b9c
嗨大家好,新年快樂:煙火::煙火::煙火:! ---------------------- 這是一篇很長的文章,所以請耐心聽我一秒鐘或一個小時。每個問題的每個答案都有一個向上箭頭**↑**連結,可讓您返回到問題列表,這樣您就不會浪費時間上下滾動。 ### 問題 - [1. `undefined`和`null`有什麼差別?](#1-whats-the-difference-between-undefined-and-null) - [2. && 運算子的作用是什麼?](#2-what-does-the-ampamp-operator-do) - [3. || 是什麼意思?運營商做什麼?](#3-what-does-the-operator-do) - [4. 使用 + 或一元加運算子是將字串轉換為數字的最快方法嗎?](#4-is-using-the-or-unary-plus-operator-the-fastest-way-in-converting-a-string-to-a-number) - [5.什麼是DOM?](#5-what-is-the-dom) - [6.什麼是事件傳播?](#6-what-is-event-propagation) - [7.什麼是事件冒泡?](#7-whats-event-bubbling) - [8. 什麼是事件擷取?](#8-whats-event-capturing) - [9. `event.preventDefault()`和`event.stopPropagation()`方法有什麼差別?](#9-whats-the-difference-between-eventpreventdefault-and-eventstoppropagation-methods) - [10. 如何知道元素中是否使用了`event.preventDefault()`方法?](#10-how-to-know-if-the-eventpreventdefault-method-was-used-in-an-element) - [11. 為什麼這段程式碼 obj.someprop.x 會拋出錯誤?](#11-why-does-this-code-objsomepropx-throw-an-error) - \[12.什麼是`event.target` ?\](#12-什麼是 eventtarget- ) - [13.什麼是`event.currentTarget` ?](#13-what-is-eventcurrenttarget) - [14. `==`和`===`有什麼差別?](#14-whats-the-difference-between-and-) - [15. 為什麼在 JavaScript 中比較兩個相似的物件時回傳 false?](#15-why-does-it-return-false-when-comparing-two-similar-objects-in-javascript) - [16. `!!`是什麼意思?運營商做什麼?](#16-what-does-the-operator-do) - [17. 如何計算一行中的多個表達式?](#17-how-to-evaluate-multiple-expressions-in-one-line) - [18.什麼是吊裝?](#18-what-is-hoisting) - [19.什麼是範圍?](#19-what-is-scope) - [20.什麼是閉包?](#20-what-are-closures) - [21. JavaScript 中的假值是什麼?](#21-what-are-the-falsy-values-in-javascript) - [22. 如何檢查一個值是否為假值?](#22-how-to-check-if-a-value-is-falsy) - [23. `"use strict"`有什麼作用?](#23-what-does-use-strict-do) - [24. JavaScript 中`this`的值是什麼?](#24-whats-the-value-of-this-in-javascript) - [25. 物件的`prototype`是什麼?](#25-what-is-the-prototype-of-an-object) - \[26.什麼是 IIFE,它有什麼用?\](#26-what-is-an-iife-what-is-the-use-of-it ) - [27. `Function.prototype.apply`方法有什麼用?](#27-what-is-the-use-functionprototypeapply-method) - [28. `Function.prototype.call`方法有什麼用?](#28-what-is-the-use-functionprototypecall-method) - [29. `Function.prototype.apply`和`Function.prototype.call`有什麼差別?](#29-whats-the-difference-between-functionprototypeapply-and-functionprototypecall) - [30. `Function.prototype.bind`的用法是什麼?](#30-what-is-the-usage-of-functionprototypebind) - \[31.什麼是函數式程式設計以及 JavaScript 的哪些特性使其成為函數式語言的候選者?\](#31-什麼是函數式程式設計和 javascript 的特性是什麼-使其成為函數式語言的候選者 ) - [32.什麼是高階函數?](#32-what-are-higher-order-functions) - [33.為什麼函數被稱為First-class Objects?](#33-why-are-functions-called-firstclass-objects) - \[34.手動實作`Array.prototype.map`方法。\](#34-手動實作 arrayprototypemap-method ) - [35. 手動實作`Array.prototype.filter`方法。](#35-implement-the-arrayprototypefilter-method-by-hand) - [36. 手動實作`Array.prototype.reduce`方法。](#36-implement-the-arrayprototypereduce-method-by-hand) - [37.什麼是`arguments`物件?](#37-what-is-the-arguments-object) - [38. 如何創造沒有**原型的**物件?](#38-how-to-create-an-object-without-a-prototype) - [39. 為什麼當你呼叫這個函數時,這段程式碼中的`b`會變成全域變數?](#39-why-does-b-in-this-code-become-a-global-variable-when-you-call-this-function) - [40.什麼是**ECMAScript** ?](#40-what-is-ecmascript) - [41. **ES6**或**ECMAScript 2015**有哪些新功能?](#41-what-are-the-new-features-in-es6-or-ecmascript-2015) - [42. `var` 、 `let`和`const`關鍵字有什麼差別?](#42-whats-the-difference-between-var-let-and-const-keywords) - [43. 什麼是**箭頭函數**?](#43-what-are-arrow-functions) - [44.什麼是**類別**?](#44-what-are-classes) - [45.什麼是**模板文字**?](#45-what-are-template-literals) - [46.什麼是**物件解構**?](#46-what-is-object-destructuring) - [47.什麼是`ES6 Modules` ?](#47-what-are-es6-modules) - [48.什麼是`Set`物件以及它如何運作?](#48-what-is-the-set-object-and-how-does-it-work) - [49. 什麼是回呼函數?](#49-what-is-a-callback-function) - [50. 什麼是**Promise** ?](#50-what-are-promises) - [51. 什麼是*async/await*以及它是如何運作的?](#51-what-is-asyncawait-and-how-does-it-work) - [52. **Spread 運算子**和**Rest 運算**子有什麼差別?](#52-whats-the-difference-between-spread-operator-and-rest-operator) - [53. 什麼是**預設參數**?](#53-what-are-default-parameters) - [54.什麼是**包裝物件**?](#54-what-are-wrapper-objects) - [55.**隱性強制**和**顯性**強制有什麼差別?](#55-what-is-the-difference-between-implicit-and-explicit-coercion) - [56. 什麼是`NaN` ?以及如何檢查值是否為`NaN` ?](#56-what-is-nan-and-how-to-check-if-a-value-is-nan) - [57. 如何檢查一個值是否為一個**陣列**?](#57-how-to-check-if-a-value-is-an-array) - [58. 如何在不使用`%`或模運算子的情況下檢查數字是否為偶數?](#58-how-to-check-if-a-number-is-even-without-using-the-or-modulo-operator) - [59. 如何檢查物件中是否存在某個屬性?](#59-how-to-check-if-a-certain-property-exists-in-an-object) - [60.什麼是**AJAX** ?](#60-what-is-ajax) - [61. JavaScript 中建立物件的方式有哪些?](#61-what-are-the-ways-of-making-objects-in-javascript) - [62. `Object.seal`和`Object.freeze`方法有什麼不同?](#62-whats-the-difference-between-objectseal-and-objectfreeze-methods) - [63. `in`運算子和物件中的`hasOwnProperty`方法有什麼差別?](#63-whats-the-difference-between-the-in-operator-and-the-hasownproperty-method-in-objects) - [64. JavaScript中處理**非同步程式碼的**方法有哪些?](#64-what-are-the-ways-to-deal-with-asynchronous-code-in-javasscript) - [65.**函數表達式**和**函數宣告**有什麼不同?](#65-whats-the-difference-between-a-function-expression-and-function-declaration) - \[66.一個函數有多少種*呼叫*方式?\]( 66-函數可以有多少種方式被呼叫) ================= - [67. 什麼是*記憶*,它有什麼用?](#67-what-is-memoization-and-whats-the-use-it) - [68. 實現記憶輔助功能。](#68-implement-a-memoization-helper-function) - [69. 為什麼`typeof null`回傳`object` ?如何檢查一個值是否為`null` ?](#69-why-does-typeof-null-return-object-how-to-check-if-a-value-is-null) - [`new`關鍵字有什麼作用?](#70-what-does-the-new-keyword-do) ### 1. `undefined`和`null`有什麼差別? [^](#the-questions "返回問題")在了解`undefined`和`null`之間的差異之前,我們必須先了解它們之間的相似之處。 - 它們屬於**JavaScript 的**7 種基本型別。 ``` let primitiveTypes = ['string','number','null','undefined','boolean','symbol', 'bigint']; ``` - 它們是**虛假的**價值觀。使用`Boolean(value)`或`!!value`將其轉換為布林值時計算結果為 false 的值。 ``` console.log(!!null); //logs false console.log(!!undefined); //logs false console.log(Boolean(null)); //logs false console.log(Boolean(undefined)); //logs false ``` 好吧,我們來談談差異。 - `undefined`是尚未指派特定值的變數的預設值。或一個沒有**明確**回傳值的函數。 `console.log(1)` 。或物件中不存在的屬性。 JavaScript 引擎為我們完成了**指派**`undefined`值的任務。 ``` let _thisIsUndefined; const doNothing = () => {}; const someObj = { a : "ay", b : "bee", c : "si" }; console.log(_thisIsUndefined); //logs undefined console.log(doNothing()); //logs undefined console.log(someObj["d"]); //logs undefined ``` - `null`是**「代表無值的值」** 。 `null`是已**明確**定義給變數的值。在此範例中,當`fs.readFile`方法未引發錯誤時,我們得到`null`值。 ``` fs.readFile('path/to/file', (e,data) => { console.log(e); //it logs null when no error occurred if(e){ console.log(e); } console.log(data); }); ``` 當比較`null`和`undefined`時,使用`==`時我們得到`true` ,使用`===`時得到`false` 。您可以[在此處](#14-whats-the-difference-between-and-)閱讀原因。 ``` console.log(null == undefined); // logs true console.log(null === undefined); // logs false ``` ### 2. `&&`運算子的作用是什麼? [^](#the-questions "返回問題") `&&`或**邏輯 AND**運算子在其運算元中尋找第一個*假*表達式並傳回它,如果沒有找到任何*假*表達式,則傳回最後一個表達式。它採用短路來防止不必要的工作。在我的一個專案中關閉資料庫連線時,我在`catch`區塊中使用了它。 ``` console.log(false && 1 && []); //logs false console.log(" " && true && 5); //logs 5 ``` 使用**if**語句。 ``` const router: Router = Router(); router.get('/endpoint', (req: Request, res: Response) => { let conMobile: PoolConnection; try { //do some db operations } catch (e) { if (conMobile) { conMobile.release(); } } }); ``` 使用**&&**運算子。 ``` const router: Router = Router(); router.get('/endpoint', (req: Request, res: Response) => { let conMobile: PoolConnection; try { //do some db operations } catch (e) { conMobile && conMobile.release() } }); ``` ### 3. `||`是什麼意思?運營商做什麼? [↑](#the-questions "返回問題") `||` or**邏輯 OR**運算子尋找其運算元中的第一個*真值*表達式並傳回它。這也採用短路來防止不必要的工作。在**ES6預設函數參數**被支援之前,它被用來初始化函數中的預設參數值。 ``` console.log(null || 1 || undefined); //logs 1 function logName(name) { var n = name || "Mark"; console.log(n); } logName(); //logs "Mark" ``` ### 4. 使用**+**或一元加運算子是將字串轉換為數字的最快方法嗎? [^](#the-questions "返回問題")根據[MDN 文件,](https://developer.mozilla.org/en-US/docs/Web/JavaScript/Reference/Operators/Arithmetic_Operators#Unary_plus) `+`是將字串轉換為數字的最快方法,因為如果該值已經是數字,它不會對該值執行任何操作。 ### 5.什麼是**DOM** ? [^](#the-questions "返回問題") **DOM**代表**文件物件模型,**是 HTML 和 XML 文件的介面 ( **API** )。當瀏覽器第一次讀取(*解析*)我們的 HTML 文件時,它會建立一個大物件,一個基於 HTML 文件的非常大的物件,這就是**DOM** 。它是根據 HTML 文件建模的樹狀結構。 **DOM**用於互動和修改**DOM 結構**或特定元素或節點。 想像一下,如果我們有這樣的 HTML 結構。 ``` <!DOCTYPE html> <html lang="en"> <head> <meta charset="UTF-8"> <meta name="viewport" content="width=device-width, initial-scale=1.0"> <meta http-equiv="X-UA-Compatible" content="ie=edge"> <title>Document Object Model</title> </head> <body> <div> <p> <span></span> </p> <label></label> <input> </div> </body> </html> ``` 等效的**DOM**應該是這樣的。 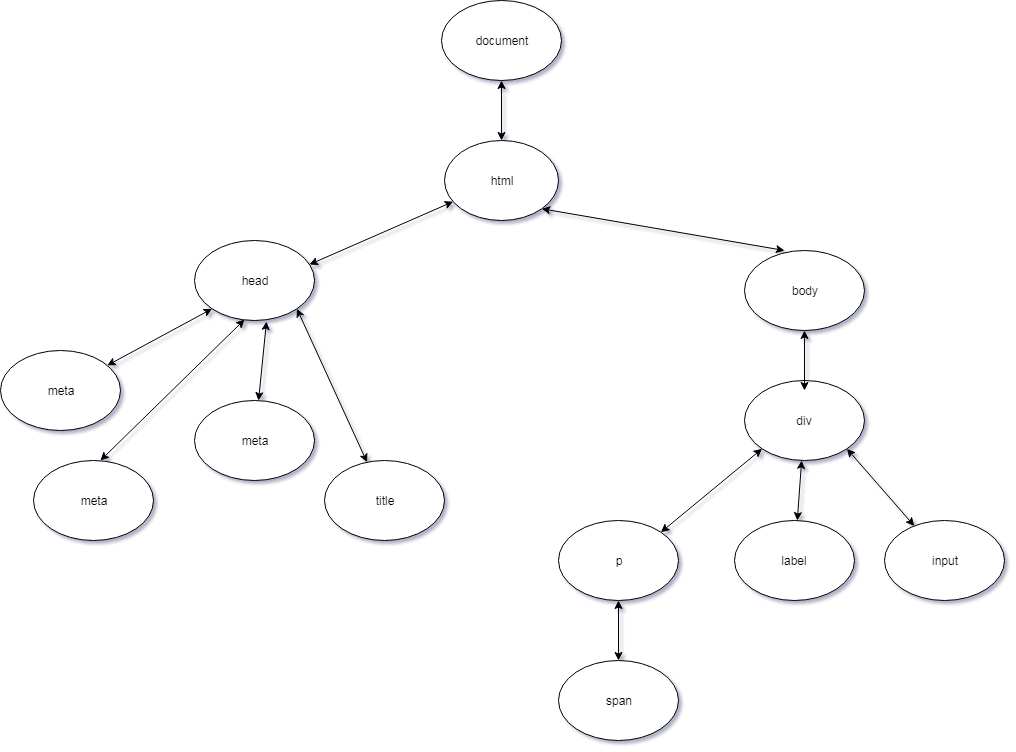 **JavaScript**中的`document`物件代表**DOM** 。它為我們提供了許多方法,我們可以用來選擇元素來更新元素內容等等。 ### 6.什麼是**事件傳播**? [↑](#the-questions "返回問題")當某個**事件**發生在**DOM**元素上時,該**事件**並非完全發生在該元素上。在**冒泡階段**,**事件**向上冒泡,或到達其父級、祖父母、祖父母的父級,直到一直到達`window` ,而在**捕獲階段**,事件從`window`開始向下到達觸發的元素事件或`<a href="#12-what-is-eventtarget-">event.target</a>` 。 **事件傳播**分為**三個**階段。 1. [捕獲階段](#8-whats-event-capturing)-事件從`window`開始,然後向下到達每個元素,直到到達目標元素。 2. [目標階段](#12-what-is-eventtarget-)– 事件已到達目標元素。 3. [冒泡階段](#7-whats-event-bubbling)-事件從目標元素冒起,然後向上移動到每個元素,直到到達`window` 。 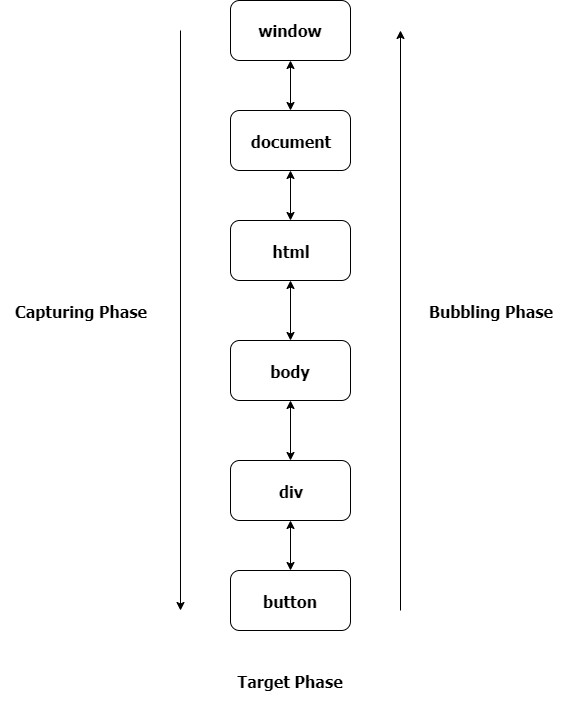 ### 7.什麼是**事件冒泡**? [↑](#the-questions "返回問題")當某個**事件**發生在**DOM**元素上時,該**事件**並非完全發生在該元素上。在**冒泡階段**,**事件**向上冒泡,或到達其父級、祖父母、祖父母的父級,直到一直到達`window` 。 如果我們有一個像這樣的範例標記。 ``` <div class="grandparent"> <div class="parent"> <div class="child">1</div> </div> </div> ``` 還有我們的js程式碼。 ``` function addEvent(el, event, callback, isCapture = false) { if (!el || !event || !callback || typeof callback !== 'function') return; if (typeof el === 'string') { el = document.querySelector(el); }; el.addEventListener(event, callback, isCapture); } addEvent(document, 'DOMContentLoaded', () => { const child = document.querySelector('.child'); const parent = document.querySelector('.parent'); const grandparent = document.querySelector('.grandparent'); addEvent(child, 'click', function (e) { console.log('child'); }); addEvent(parent, 'click', function (e) { console.log('parent'); }); addEvent(grandparent, 'click', function (e) { console.log('grandparent'); }); addEvent(document, 'click', function (e) { console.log('document'); }); addEvent('html', 'click', function (e) { console.log('html'); }) addEvent(window, 'click', function (e) { console.log('window'); }) }); ``` `addEventListener`方法有第三個可選參數**useCapture ,**預設值為`false`事件將在**冒泡階段**發生,如果為`true` ,事件將在**捕獲階段**發生。如果我們點擊`child`元素,它會分別在**控制台**上記錄`child` 、 `parent`元素、 `grandparent` 、 `html` 、 `document`和`window` 。這就是**事件冒泡**。 ### 8. 什麼是**事件擷取**? [↑](#the-questions "返回問題")當某個**事件**發生在**DOM**元素上時,該**事件**並非完全發生在該元素上。在**捕獲階段**,事件從`window`開始一直到觸發事件的元素。 如果我們有一個像這樣的範例標記。 ``` <div class="grandparent"> <div class="parent"> <div class="child">1</div> </div> </div> ``` 還有我們的js程式碼。 ``` function addEvent(el, event, callback, isCapture = false) { if (!el || !event || !callback || typeof callback !== 'function') return; if (typeof el === 'string') { el = document.querySelector(el); }; el.addEventListener(event, callback, isCapture); } addEvent(document, 'DOMContentLoaded', () => { const child = document.querySelector('.child'); const parent = document.querySelector('.parent'); const grandparent = document.querySelector('.grandparent'); addEvent(child, 'click', function (e) { console.log('child'); }, true); addEvent(parent, 'click', function (e) { console.log('parent'); }, true); addEvent(grandparent, 'click', function (e) { console.log('grandparent'); }, true); addEvent(document, 'click', function (e) { console.log('document'); }, true); addEvent('html', 'click', function (e) { console.log('html'); }, true) addEvent(window, 'click', function (e) { console.log('window'); }, true) }); ``` `addEventListener`方法有第三個可選參數**useCapture ,**預設值為`false`事件將在**冒泡階段**發生,如果為`true` ,事件將在**捕獲階段**發生。如果我們點擊`child`元素,它會分別在**控制台**上記錄`window` 、 `document` 、 `html` 、 `grandparent` 、 `parent`和`child` 。這就是**事件捕獲**。 ### 9. `event.preventDefault()`和`event.stopPropagation()`方法有什麼差別? [↑](#the-questions "返回問題") `event.preventDefault()`方法**阻止**元素的預設行為。如果在`form`元素中使用,它**會阻止**其提交。如果在`anchor`元素中使用,它**會阻止**其導航。如果在`contextmenu`中使用,它**會阻止**其顯示或顯示。而`event.stopPropagation()`方法會停止事件的傳播或停止事件在[冒泡](#7-whats-event-bubbling)或[捕獲](#8-whats-event-capturing)階段發生。 ### 10. 如何知道元素中是否使用了`event.preventDefault()`方法? [↑](#the-questions "返回問題")我們可以使用事件物件中的`event.defaultPrevented`屬性。它傳回一個`boolean` ,指示是否在特定元素中呼叫了`event.preventDefault()` 。 ### 11. 為什麼這段程式碼`obj.someprop.x`會拋出錯誤? ``` const obj = {}; console.log(obj.someprop.x); ``` [^](#the-questions "返回問題")顯然,由於我們嘗試存取 a 的原因,這會引發錯誤 `someprop`屬性中的`x`屬性具有`undefined`值。請記住,物件中的**屬性**本身並不存在,且其**原型**具有預設值`undefined`且`undefined`沒有屬性`x` 。 ### 12.什麼是**event.target** ? [↑](#the-questions "返回問題")最簡單來說, **event.target**是**發生**事件的元素或**觸發**事件的元素。 HTML 標記範例。 ``` <div onclick="clickFunc(event)" style="text-align: center;margin:15px; border:1px solid red;border-radius:3px;"> <div style="margin: 25px; border:1px solid royalblue;border-radius:3px;"> <div style="margin:25px;border:1px solid skyblue;border-radius:3px;"> <button style="margin:10px"> Button </button> </div> </div> </div> ``` JavaScript 範例。 ``` function clickFunc(event) { console.log(event.target); } ``` 如果您單擊按鈕,它會記錄**按鈕**標記,即使我們將事件附加在最外部的`div`上,它也會始終記錄**按鈕**,因此我們可以得出結論, **event.target**是觸發事件的元素。 ### 13.什麼是**event.currentTarget** ? [↑](#the-questions "返回問題") **event.currentTarget**是我們**明確**附加事件處理程序的元素。 複製**問題 12**中的標記。 HTML 標記範例。 ``` <div onclick="clickFunc(event)" style="text-align: center;margin:15px; border:1px solid red;border-radius:3px;"> <div style="margin: 25px; border:1px solid royalblue;border-radius:3px;"> <div style="margin:25px;border:1px solid skyblue;border-radius:3px;"> <button style="margin:10px"> Button </button> </div> </div> </div> ``` 並且稍微改變我們的**JS** 。 ``` function clickFunc(event) { console.log(event.currentTarget); } ``` 如果您按一下該按鈕,即使我們按一下該按鈕,它也會記錄最外層的**div**標記。在此範例中,我們可以得出結論, **event.currentTarget**是我們附加事件處理程序的元素。 ### 14. `==`和`===`有什麼差別? [^](#the-questions "返回問題") `==` \_\_(抽象相等)\_\_ 和`===` \_\_(嚴格相等)\_\_ 之間的區別在於`==`在*強制轉換*後按**值**進行比較,而`===`在不進行*強制轉換的*情況下按**值**和**類型**進行比較。 讓我們更深入地研究`==` 。那麼首先我們來談談*強制*。 *強制轉換*是將一個值轉換為另一種類型的過程。在本例中, `==`進行*隱式強制轉換*。在比較兩個值之前, `==`需要執行一些條件。 假設我們必須比較`x == y`值。 1. 如果`x`和`y`具有相同的類型。 然後將它們與`===`運算子進行比較。 2. 如果`x`為`null`且`y` `undefined` ,則傳回`true` 。 3. 如果`x` `undefined`且`y`為`null`則傳回`true` 。 4. 如果`x`是`number`類型, `y`是`string`類型 然後回傳`x == toNumber(y)` 。 5. 如果`x`是`string`類型, `y`是`number`類型 然後返回`toNumber(x) == y` 。 6. 如果`x`是`boolean`類型 然後返回`toNumber(x) == y` 。 7. 如果`y`是`boolean`類型 然後回傳`x == toNumber(y)` 。 8. 如果`x`是`string` 、 `symbol`或`number`且`y`是 type `object` 然後回傳`x == toPrimitive(y)` 。 9. 如果`x`是`object`且`x`是`string` 、 `symbol` 然後返回`toPrimitive(x) == y` 。 10. 返回`false` 。 **注意:** `toPrimitive`首先使用物件中的`valueOf`方法,然後使用`toString`方法來取得該物件的原始值。 讓我們舉個例子。 | `x` | `y` | `x == y` | | ------------- |:-------------:| ----------------: | | `5` | `5` | `true` | | `1` | `'1'` | `true` | | `null` | `undefined` | `true` | | `0` | `false` | `true` | | `'1,2'` | `[1,2]` | `true` | | `'[object Object]'` | `{}` | `true` | 這些範例都傳回`true` 。 **第一個範例**屬於**條件一**,因為`x`和`y`具有相同的類型和值。 **第二個範例**轉到**條件四,**在比較之前將`y`轉換為`number` 。 **第三個例子**涉及**條件二**。 **第四個範例**轉到**條件七,**因為`y`是`boolean` 。 **第五個範例**適用於**條件八**。使用`toString()`方法將陣列轉換為`string` ,該方法傳回`1,2` 。 **最後一個例子**適用於**條件十**。使用傳回`[object Object]`的`toString()`方法將該物件轉換為`string` 。 | `x` | `y` | `x === y` | | ------------- |:-------------:| ----------------: | | `5` | `5` | `true` | | `1` | `'1'` | `false` | | `null` | `undefined` | `false` | | `0` | `false` | `false` | | `'1,2'` | `[1,2]` | `false` | | `'[object Object]'` | `{}` | `false` | 如果我們使用`===`運算符,則除第一個範例之外的所有比較都將傳回`false` ,因為它們不具有相同的類型,而第一個範例將傳回`true` ,因為兩者俱有相同的類型和值。 ### 15. 為什麼在 JavaScript 中比較兩個相似的物件時回傳**false** ? [^](#the-questions "返回問題")假設我們有下面的例子。 ``` let a = { a: 1 }; let b = { a: 1 }; let c = a; console.log(a === b); // logs false even though they have the same property console.log(a === c); // logs true hmm ``` **JavaScript**以不同的方式比較*物件*和*基元*。在*基元*中,它透過**值**來比較它們,而在*物件*中,它透過**引用**或**儲存變數的記憶體位址**來比較它們。這就是為什麼第一個`console.log`語句回傳`false`而第二個`console.log`語句回傳`true`的原因。 `a`和`c`有相同的引用,而`a`和`b`則不同。 ### 16. **!!**是什麼意思?運營商做什麼? [↑](#the-questions "返回問題")**雙非**運算子或**!!**將右側的值強制轉換為布林值。基本上,這是一種將值轉換為布林值的奇特方法。 ``` console.log(!!null); //logs false console.log(!!undefined); //logs false console.log(!!''); //logs false console.log(!!0); //logs false console.log(!!NaN); //logs false console.log(!!' '); //logs true console.log(!!{}); //logs true console.log(!![]); //logs true console.log(!!1); //logs true console.log(!![].length); //logs false ``` ### 17. 如何計算一行中的多個表達式? [↑](#the-questions "返回問題")我們可以使用`,`或逗號運算子來計算一行中的多個表達式。它從左到右計算並傳回右側最後一項或最後一個操作數的值。 ``` let x = 5; x = (x++ , x = addFive(x), x *= 2, x -= 5, x += 10); function addFive(num) { return num + 5; } ``` 如果記錄`x`的值,它將是**27** 。首先,我們**增加**x 的值,它將是**6** ,然後我們呼叫函數`addFive(6)`並將 6 作為參數傳遞,並將結果分配給`x` , `x`的新值將是**11** 。之後,我們將`x`的當前值乘以**2**並將其分配給`x` , `x`的更新值將是**22** 。然後,我們將`x`的當前值減去 5 並將結果指派給`x` ,更新後的值將是**17** 。最後,我們將`x`的值增加 10 並將更新後的值指派給`x` ,現在`x`的值將是**27** 。 ### 18.什麼是**吊裝**? [^](#the-questions "返回問題")**提升**是一個術語,用於描述將*變數*和*函數*移動到其*(全域或函數)*作用域的頂部(即我們定義該變數或函數的位置)。 要理解**提升**,我必須解釋*執行上下文*。 **執行上下文**是目前正在執行的「程式碼環境」。**執行上下文**有兩個階段*:編譯*和*執行*。 **編譯**- 在此階段,它獲取所有*函數聲明*並將它們*提升*到作用域的頂部,以便我們稍後可以引用它們並獲取所有*變數聲明***(使用 var 關鍵字聲明)** ,並將它們*提升*並給它們一個默認值*未定義*的 . **執行**- 在此階段,它將值指派給先前*提升的*變數,並*執行*或*呼叫*函數**(物件中的方法)** 。 **注意:**只有使用*var*關鍵字宣告的**函數宣告**和變數才會*被提升*,而不是**函數表達式**或**箭頭函數**、 `let`和`const`關鍵字。 好吧,假設我們在下面的*全域範圍*內有一個範例程式碼。 ``` console.log(y); y = 1; console.log(y); console.log(greet("Mark")); function greet(name){ return 'Hello ' + name + '!'; } var y; ``` 此程式碼記錄`undefined` , `1` , `Hello Mark!`分別。 所以*編譯*階段看起來像這樣。 ``` function greet(name) { return 'Hello ' + name + '!'; } var y; //implicit "undefined" assignment //waiting for "compilation" phase to finish //then start "execution" phase /* console.log(y); y = 1; console.log(y); console.log(greet("Mark")); */ ``` 出於範例目的,我對變數和*函數呼叫*的*賦值*進行了評論。 *編譯*階段完成後,它開始*執行*階段,呼叫方法並向變數賦值。 ``` function greet(name) { return 'Hello ' + name + '!'; } var y; //start "execution" phase console.log(y); y = 1; console.log(y); console.log(greet("Mark")); ``` ### 19.什麼是**範圍**? [↑](#the-questions "返回問題") JavaScript 中的**作用域**是我們可以有效存取變數或函數的**區域**。 JavaScript 有三種類型的作用域。**全域作用域**、**函數作用域**和**區塊作用域(ES6)** 。 - **全域作用域**- 在全域命名空間中宣告的變數或函數位於全域作用域中,因此可以在程式碼中的任何位置存取。 ``` //global namespace var g = "global"; function globalFunc(){ function innerFunc(){ console.log(g); // can access "g" because "g" is a global variable } innerFunc(); } ``` - **函數作用域**- 函數內聲明的變數、函數和參數可以在該函數內部存取,但不能在函數外部存取。 ``` function myFavoriteFunc(a) { if (true) { var b = "Hello " + a; } return b; } myFavoriteFunc("World"); console.log(a); // Throws a ReferenceError "a" is not defined console.log(b); // does not continue here ``` - **區塊作用域**- 在區塊`{}`內宣告的變數**( `let` 、 `const` )**只能在區塊內存取。 ``` function testBlock(){ if(true){ let z = 5; } return z; } testBlock(); // Throws a ReferenceError "z" is not defined ``` **範圍**也是一組查找變數的規則。如果一個變數在**當前作用域中**不存在,它會在**外部作用域中查找**並蒐索該變數,如果不存在,它會再次**查找,**直到到達**全域作用域。**如果該變數存在,那麼我們可以使用它,如果不存在,我們可以使用它來拋出錯誤。它搜尋**最近的**變數,一旦找到它就停止**搜尋**或**尋找**。這稱為**作用域鏈**。 ``` /* Scope Chain Inside inner function perspective inner's scope -> outer's scope -> global's scope */ //Global Scope var variable1 = "Comrades"; var variable2 = "Sayonara"; function outer(){ //outer's scope var variable1 = "World"; function inner(){ //inner's scope var variable2 = "Hello"; console.log(variable2 + " " + variable1); } inner(); } outer(); // logs Hello World // because (variable2 = "Hello") and (variable1 = "World") are the nearest // variables inside inner's scope. ``` 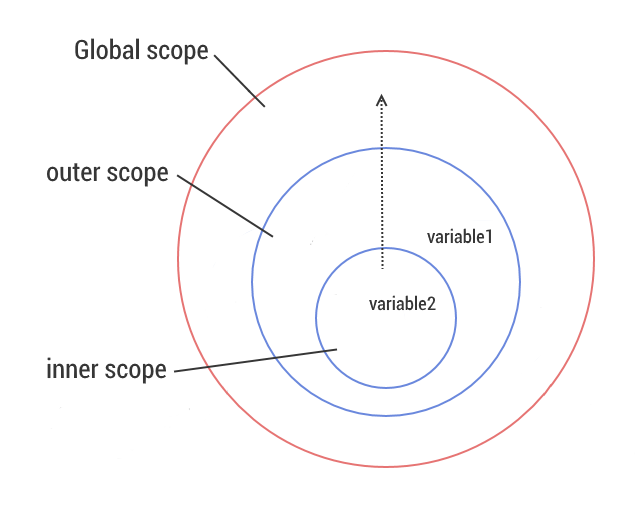 ### 20.什麼是**閉包**? [^](#the-questions "返回問題")這可能是所有這些問題中最難的問題,因為**閉包**是一個有爭議的話題。那我就從我的理解來解釋。 **閉包**只是函數在宣告時記住其當前作用域、其父函數作用域、其父函數的父函數作用域上的變數和參數的引用的能力,直到在**作用域鏈**的幫助下到達全域作用域。基本上它是聲明函數時建立的**作用域**。 例子是解釋閉包的好方法。 ``` //Global's Scope var globalVar = "abc"; function a(){ //testClosures's Scope console.log(globalVar); } a(); //logs "abc" /* Scope Chain Inside a function perspective a's scope -> global's scope */ ``` 在此範例中,當我們宣告`a`函數時**,全域**作用域是`a's`*閉包*的一部分。 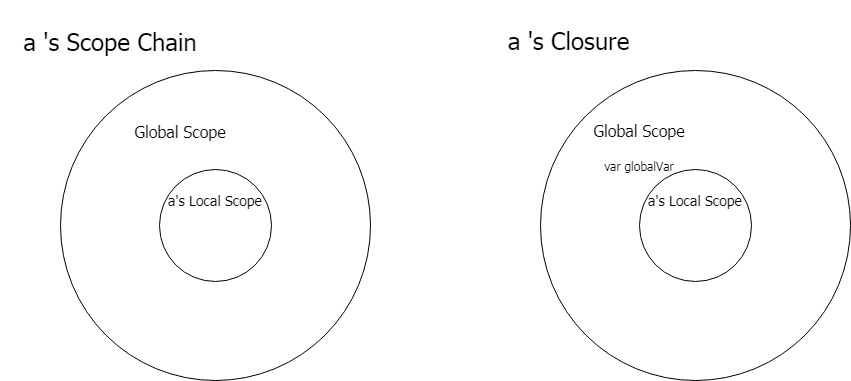 變數`globalVar`在影像中沒有值的原因是該變數的值可以根據我們呼叫`a`**位置**和**時間**而改變。 但在上面的範例中, `globalVar`變數的值為**abc** 。 好吧,讓我們來看一個複雜的例子。 ``` var globalVar = "global"; var outerVar = "outer" function outerFunc(outerParam) { function innerFunc(innerParam) { console.log(globalVar, outerParam, innerParam); } return innerFunc; } const x = outerFunc(outerVar); outerVar = "outer-2"; globalVar = "guess" x("inner"); ``` 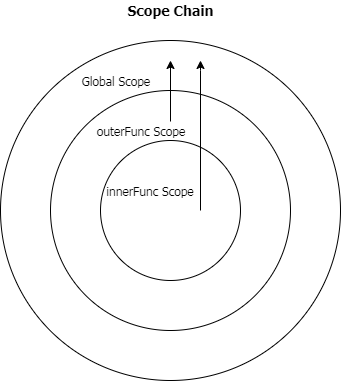 這將列印“猜測外部內部”。對此的解釋是,當我們呼叫`outerFunc`函數並將`innerFunc`函數的回傳值指派給變數`x`時,即使我們將新值**outer-2**指派給`outerVar`變數, `outerParam`也會具有**outer**值,因為 重新分配發生在呼叫`outer`函數之後,當我們呼叫`outerFunc`函數時,它會在**作用域鏈**中尋找`outerVar`的值,而`outerVar`的值為**「outer」** 。現在,當我們呼叫引用了`innerFunc`的`x`變數時, `innerParam`的值為**inner,**因為這是我們在呼叫中傳遞的值,而`globalVar`變數的值為**猜測**,因為在呼叫`x`變數之前,我們為`globalVar`分配了一個新值,並且在呼叫`x`時**作用域鏈**中`globalVar`的值是**猜測**。 我們有一個例子來示範沒有正確理解閉包的問題。 ``` const arrFuncs = []; for(var i = 0; i < 5; i++){ arrFuncs.push(function (){ return i; }); } console.log(i); // i is 5 for (let i = 0; i < arrFuncs.length; i++) { console.log(arrFuncs[i]()); // all logs "5" } ``` 由於**Closures**的原因,此程式碼無法按我們的預期工作。 `var`關鍵字建立一個全域變數,當我們推送一個函數時 我們返回全域變數`i` 。因此,當我們在循環之後呼叫該陣列中的其中一個函數時,它會記錄`5` ,因為我們得到 `i`的目前值為`5` ,我們可以存取它,因為它是全域變數。因為**閉包**保留該變數的**引用,**而不是其建立時的**值**。我們可以使用**IIFES**或將`var`關鍵字變更為`let`來解決此問題,以實現區塊作用域。 ### 21. **JavaScript**中的**假**值是什麼? [↑](#the-questions "返回問題") ``` const falsyValues = ['', 0, null, undefined, NaN, false]; ``` **假**值是轉換為布林值時變成**false 的**值。 ### 22. 如何檢查一個值是否為**假值**? [↑](#the-questions "返回問題")使用**布林**函數或雙非運算符**[!!](#16-what-does-the-operator-do)** ### 23. `"use strict"`有什麼作用? [^](#the-questions "返回問題") `"use strict"`是**JavaScript**中的 ES5 功能,它使我們的程式碼在*函數*或*整個腳本*中處於**嚴格模式**。**嚴格模式**幫助我們避免程式碼早期出現**錯誤**並為其加入限制。 **嚴格模式**給我們的限制。 - 分配或存取未宣告的變數。 ``` function returnY(){ "use strict"; y = 123; return y; } ``` - 為唯讀或不可寫的全域變數賦值; ``` "use strict"; var NaN = NaN; var undefined = undefined; var Infinity = "and beyond"; ``` - 刪除不可刪除的屬性。 ``` "use strict"; const obj = {}; Object.defineProperty(obj, 'x', { value : '1' }); delete obj.x; ``` - 參數名稱重複。 ``` "use strict"; function someFunc(a, b, b, c){ } ``` - 使用**eval**函數建立變數。 ``` "use strict"; eval("var x = 1;"); console.log(x); //Throws a Reference Error x is not defined ``` - **該**值的預設值是`undefined` 。 ``` "use strict"; function showMeThis(){ return this; } showMeThis(); //returns undefined ``` **嚴格模式**的限制遠不止這些。 ### 24. JavaScript 中`this`的值是什麼? [↑](#the-questions "返回問題")基本上, `this`是指目前正在執行或呼叫函數的物件的值。我說**目前**是因為**它**的值會根據我們使用它的上下文和使用它的位置而改變。 ``` const carDetails = { name: "Ford Mustang", yearBought: 2005, getName(){ return this.name; }, isRegistered: true }; console.log(carDetails.getName()); // logs Ford Mustang ``` 這是我們通常所期望的,因為在**getName**方法中我們傳回`this.name` ,在此上下文中`this`指的是`carDetails`物件,該物件目前是正在執行的函數的「擁有者」物件。 好吧,讓我們加入一些程式碼讓它變得奇怪。在`console.log`語句下面加入這三行程式碼 ``` var name = "Ford Ranger"; var getCarName = carDetails.getName; console.log(getCarName()); // logs Ford Ranger ``` 第二個`console.log`語句印製了**「Ford Ranger」**一詞,這很奇怪,因為在我們的第一個`console.log`語句中它印了**「Ford Mustang」** 。原因是`getCarName`方法有一個不同的「擁有者」物件,即`window`物件。在全域作用域中使用`var`關鍵字聲明變數會在`window`物件中附加與變數同名的屬性。請記住,當未使用`"use strict"`時,全域範圍內的`this`指的是`window`物件。 ``` console.log(getCarName === window.getCarName); //logs true console.log(getCarName === this.getCarName); // logs true ``` 本例中的`this`和`window`指的是同一個物件。 解決此問題的一種方法是使用函數中的`<a href="#27-what-is-the-use-functionprototypeapply-method">apply</a>`和`<a href="#28-what-is-the-use-functionprototypecall-method">call</a>`方法。 ``` console.log(getCarName.apply(carDetails)); //logs Ford Mustang console.log(getCarName.call(carDetails)); //logs Ford Mustang ``` `apply`和`call`方法期望第一個參數是一個物件,該物件將是該函數內`this`的值。 **IIFE** (即**立即呼叫函數表達式)** 、在全域作用域中宣告的函數、物件內部方法中的**匿名函數**和內部函數都有一個指向**window**物件的預設**值**。 ``` (function (){ console.log(this); })(); //logs the "window" object function iHateThis(){ console.log(this); } iHateThis(); //logs the "window" object const myFavoriteObj = { guessThis(){ function getThis(){ console.log(this); } getThis(); }, name: 'Marko Polo', thisIsAnnoying(callback){ callback(); } }; myFavoriteObj.guessThis(); //logs the "window" object myFavoriteObj.thisIsAnnoying(function (){ console.log(this); //logs the "window" object }); ``` 如果我們想要取得`myFavoriteObj`物件中的`name`屬性**(Marko Polo)**的值,有兩種方法可以解決這個問題。 首先,我們將`this`的值保存在變數中。 ``` const myFavoriteObj = { guessThis(){ const self = this; //saves the this value to the "self" variable function getName(){ console.log(self.name); } getName(); }, name: 'Marko Polo', thisIsAnnoying(callback){ callback(); } }; ``` 在此圖像中,我們保存`this`的值,該值將是`myFavoriteObj`物件。所以我們可以在`getName`內部函數中存取它。 其次,我們使用**ES6[箭頭函數](#43-what-are-arrow-functions)**。 ``` const myFavoriteObj = { guessThis(){ const getName = () => { //copies the value of "this" outside of this arrow function console.log(this.name); } getName(); }, name: 'Marko Polo', thisIsAnnoying(callback){ callback(); } }; ``` [箭頭函數](#43-what-are-arrow-functions)沒有自己的`this` 。它複製封閉詞法範圍的`this`值,或複製`getName`內部函數外部的`this`值(即`myFavoriteObj`物件)。我們也可以根據[函數的呼叫方式](#66-how-many-ways-can-a-function-be-invoked)來決定`this`的值。 ### 25. 物件的`prototype`是什麼? [↑](#the-questions "返回問題")最簡單的`prototype`是一個物件的*藍圖*。如果目前物件中確實存在它,則將其用作**屬性**和**方法**的後備。這是在物件之間共享屬性和功能的方式。這是 JavaScript**原型繼承**的核心概念。 ``` const o = {}; console.log(o.toString()); // logs [object Object] ``` 即使`o.toString`方法不存在於`o`物件中,它也不會拋出錯誤,而是傳回字串`[object Object]` 。當物件中不存在屬性時,它會尋找其**原型**,如果仍然不存在,則會尋找**原型的原型**,依此類推,直到在**原型鏈**中找到具有相同屬性的屬性。**原型鏈**的末尾在**Object.prototype**之後為`null` 。 ``` console.log(o.toString === Object.prototype.toString); // logs true // which means we we're looking up the Prototype Chain and it reached // the Object.prototype and used the "toString" method. ``` ### 26. 什麼是**IIFE** ,它有什麼用? [^](#the-questions "返回問題") **IIFE**或**立即呼叫函數表達式**是在建立或宣告後將被呼叫或執行的函數。建立**IIFE**的語法是,我們將`function (){}`包裝在括號`()`或**分組運算**子內,以將函數視為表達式,然後用另一個括號`()`呼叫它。所以**IIFE**看起來像這樣`(function(){})()` 。 ``` (function () { }()); (function () { })(); (function named(params) { })(); (() => { })(); (function (global) { })(window); const utility = (function () { return { //utilities }; })(); ``` 這些範例都是有效的**IIFE** 。倒數第二個範例顯示我們可以將參數傳遞給**IIFE**函數。最後一個範例表明我們可以將**IIFE**的結果保存到變數中,以便稍後引用它。 **IIFE**的最佳用途是進行初始化設定功能,並避免與全域範圍內的其他變數**發生命名衝突**或污染全域名稱空間。讓我們舉個例子。 ``` <script src="https://cdnurl.com/somelibrary.js"></script> ``` 假設我們有一個指向庫`somelibrary.js`的連結,該庫公開了我們可以在程式碼中使用的一些全域函數,但該庫有兩個我們不使用`createGraph`和`drawGraph`方法,因為這些方法中有錯誤。我們想要實作我們自己的`createGraph`和`drawGraph`方法。 - 解決這個問題的一種方法是改變腳本的結構。 ``` <script src="https://cdnurl.com/somelibrary.js"></script> <script> function createGraph() { // createGraph logic here } function drawGraph() { // drawGraph logic here } </script> ``` 當我們使用這個解決方案時,我們將覆蓋庫為我們提供的這兩種方法。 - 解決這個問題的另一種方法是更改我們自己的輔助函數的名稱。 ``` <script src="https://cdnurl.com/somelibrary.js"></script> <script> function myCreateGraph() { // createGraph logic here } function myDrawGraph() { // drawGraph logic here } </script> ``` 當我們使用此解決方案時,我們還將這些函數呼叫更改為新函數名稱。 - 另一種方法是使用**IIFE** 。 ``` <script src="https://cdnurl.com/somelibrary.js"></script> <script> const graphUtility = (function () { function createGraph() { // createGraph logic here } function drawGraph() { // drawGraph logic here } return { createGraph, drawGraph } })(); </script> ``` 在此解決方案中,我們建立一個實用程式變數,它是**IIFE**的結果,它傳回一個包含`createGraph`和`drawGraph`兩個方法的物件。 **IIFE**解決的另一個問題就是這個例子。 ``` var li = document.querySelectorAll('.list-group > li'); for (var i = 0, len = li.length; i < len; i++) { li[i].addEventListener('click', function (e) { console.log(i); }) } ``` 假設我們有一個`ul`元素,其類別為**list-group** ,並且它有 5 個`li`子元素。當我們**點擊**單一`li`元素時,我們希望`console.log` `i`的值。 但我們想要的程式碼中的行為不起作用。相反,它會在對`li`元素的任何**點擊**中記錄`5` 。我們遇到的問題是由於**閉包的**工作方式造成的。**閉包**只是函數記住其當前作用域、其父函數作用域和全域作用域中的變數引用的能力。當我們在全域範圍內使用`var`關鍵字聲明變數時,顯然我們正在建立一個全域變數`i` 。因此,當我們單擊`li`元素時,它會記錄**5** ,因為這是我們稍後在回調函數中引用它時的`i`值。 - 解決這個問題的一種方法是**IIFE** 。 ``` var li = document.querySelectorAll('.list-group > li'); for (var i = 0, len = li.length; i < len; i++) { (function (currentIndex) { li[currentIndex].addEventListener('click', function (e) { console.log(currentIndex); }) })(i); } ``` 這個解決方案之所以有效,是因為**IIFE**為每次迭代建立一個新範圍,並且我們捕獲`i`的值並將其傳遞到`currentIndex`參數中,因此當我們呼叫**IIFE**時,每次迭代的`currentIndex`值都是不同的。 ### 27. `Function.prototype.apply`方法有什麼用? [^](#the-questions "返回問題") `apply`呼叫一個函數,在呼叫時指定`this`或該函數的「所有者」物件。 ``` const details = { message: 'Hello World!' }; function getMessage(){ return this.message; } getMessage.apply(details); // returns 'Hello World!' ``` 這個方法的工作方式類似於`<a href="#28-what-is-the-use-functionprototypecall-method">Function.prototype.call</a>`唯一的差異是我們傳遞參數的方式。在`apply`中,我們將參數作為陣列傳遞。 ``` const person = { name: "Marko Polo" }; function greeting(greetingMessage) { return `${greetingMessage} ${this.name}`; } greeting.apply(person, ['Hello']); // returns "Hello Marko Polo!" ``` ### 28. `Function.prototype.call`方法有什麼用? [^](#the-questions "返回問題")此`call`呼叫一個函數,指定呼叫時該函數的`this`或「擁有者」物件。 ``` const details = { message: 'Hello World!' }; function getMessage(){ return this.message; } getMessage.call(details); // returns 'Hello World!' ``` 這個方法的工作方式類似於`<a href="#27-what-is-the-use-functionprototypeapply-method">Function.prototype.apply</a>`唯一的差異是我們傳遞參數的方式。在`call`中,我們直接傳遞參數,對於每個參數`,`用逗號分隔它們。 ``` const person = { name: "Marko Polo" }; function greeting(greetingMessage) { return `${greetingMessage} ${this.name}`; } greeting.call(person, 'Hello'); // returns "Hello Marko Polo!" ``` ### 29. `Function.prototype.apply`和`Function.prototype.call`有什麼差別? [↑](#the-questions "返回問題") `apply`和`call`之間的唯一區別是我們如何在被呼叫的函數中傳遞**參數**。在`apply`中,我們將參數作為**陣列**傳遞,而在`call`中,我們直接在參數列表中傳遞參數。 ``` const obj1 = { result:0 }; const obj2 = { result:0 }; function reduceAdd(){ let result = 0; for(let i = 0, len = arguments.length; i < len; i++){ result += arguments[i]; } this.result = result; } reduceAdd.apply(obj1, [1, 2, 3, 4, 5]); // returns 15 reduceAdd.call(obj2, 1, 2, 3, 4, 5); // returns 15 ``` ### 30. `Function.prototype.bind`的用法是什麼? [↑](#the-questions "返回問題") `bind`方法傳回一個新*綁定的*函數 到特定的`this`值或“所有者”物件,因此我們可以稍後在程式碼中使用它。 `call` 、 `apply`方法立即呼叫函數,而不是像`bind`方法那樣傳回一個新函數。 ``` import React from 'react'; class MyComponent extends React.Component { constructor(props){ super(props); this.state = { value : "" } this.handleChange = this.handleChange.bind(this); // Binds the "handleChange" method to the "MyComponent" component } handleChange(e){ //do something amazing here } render(){ return ( <> <input type={this.props.type} value={this.state.value} onChange={this.handleChange} /> </> ) } } ``` ### 31.什麼是**函數式程式設計**? **JavaScript**的哪些特性使其成為**函數式語言**的候選者? [^](#the-questions "返回問題")**函數式程式設計**是一種**聲明式**程式設計範式或模式,它介紹如何**使用表達式來**計算值而不改變傳遞給它的參數的函數來建立應用程式。 JavaScript**陣列**具有**map** 、 **filter** 、 **reduce**方法,這些方法是函數式程式設計世界中最著名的函數,因為它們非常有用,而且它們不會改變或改變陣列,這使得這些函數變得**純粹**,並且JavaScript 支援**閉包**和**高階函數**,它們是**函數式程式語言**的一個特徵。 - **map**方法建立一個新陣列,其中包含對陣列中每個元素呼叫提供的回調函數的結果。 ``` const words = ["Functional", "Procedural", "Object-Oriented"]; const wordsLength = words.map(word => word.length); ``` - **filter**方法會建立一個新陣列,其中包含透過回調函數中測試的所有元素。 ``` const data = [ { name: 'Mark', isRegistered: true }, { name: 'Mary', isRegistered: false }, { name: 'Mae', isRegistered: true } ]; const registeredUsers = data.filter(user => user.isRegistered); ``` - **reduce**方法對累加器和陣列中的每個元素(從左到右)套用函數,將其減少為單一值。 ``` const strs = ["I", " ", "am", " ", "Iron", " ", "Man"]; const result = strs.reduce((acc, currentStr) => acc + currentStr, ""); ``` ### 32.什麼是**高階函數**? [^](#the-questions "返回問題")**高階函數**是可以傳回函數或接收具有函數值的一個或多個參數的函數。 ``` function higherOrderFunction(param,callback){ return callback(param); } ``` ### 33.為什麼函數被稱為**First-class Objects** ? [^](#the-questions "返回問題") JavaScript 中的 \_\_Functions\_\_ 是**一流物件**,因為它們被視為該語言中的任何其他值。它們可以分配給**變數**,可以是稱為**方法的物件的屬性**,可以是**陣列中的專案**,可以**作為參數傳遞給函數**,也可以**作為函數的值返回**。函數與**JavaScript**中任何其他值之間的唯一區別是**函數**可以被呼叫。 ### 34. 手動實作`Array.prototype.map`方法。 [↑](#the-questions "返回問題") ``` function map(arr, mapCallback) { // First, we check if the parameters passed are right. if (!Array.isArray(arr) || !arr.length || typeof mapCallback !== 'function') { return []; } else { let result = []; // We're making a results array every time we call this function // because we don't want to mutate the original array. for (let i = 0, len = arr.length; i < len; i++) { result.push(mapCallback(arr[i], i, arr)); // push the result of the mapCallback in the 'result' array } return result; // return the result array } } ``` 正如`Array.prototype.map`方法的MDN描述。 **map() 方法建立一個新陣列,其中包含對呼叫陣列中的每個元素呼叫所提供函數的結果。** ### 35. 手動實作`Array.prototype.filter`方法。 [↑](#the-questions "返回問題") ``` function filter(arr, filterCallback) { // First, we check if the parameters passed are right. if (!Array.isArray(arr) || !arr.length || typeof filterCallback !== 'function') { return []; } else { let result = []; // We're making a results array every time we call this function // because we don't want to mutate the original array. for (let i = 0, len = arr.length; i < len; i++) { // check if the return value of the filterCallback is true or "truthy" if (filterCallback(arr[i], i, arr)) { // push the current item in the 'result' array if the condition is true result.push(arr[i]); } } return result; // return the result array } } ``` 正如`Array.prototype.filter`方法的 MDN 描述。 **filter() 方法建立一個新陣列,其中包含透過所提供函數實現的測試的所有元素。** ### 36. 手動實作`Array.prototype.reduce`方法。 [↑](#the-questions "返回問題") ``js 函數reduce(arr,reduceCallback,initialValue){ // 首先,我們檢查傳遞的參數是否正確。 if (!Array.isArray(arr) || !arr.length || typeof reduceCallback !== 'function') { ``` return []; ``` } 別的 { ``` // If no initialValue has been passed to the function we're gonna use the ``` ``` let hasInitialValue = initialValue !== undefined; ``` ``` let value = hasInitialValue ? initialValue : arr[0]; ``` ``` // first array item as the initialValue ``` ``` // Then we're gonna start looping at index 1 if there is no ``` ``` // initialValue has been passed to the function else we start at 0 if ``` ``` // there is an initialValue. ``` ``` for (let i = hasInitialValue ? 0 : 1, len = arr.length; i < len; i++) { ``` ``` // Then for every iteration we assign the result of the ``` ``` // reduceCallback to the variable value. ``` ``` value = reduceCallback(value, arr[i], i, arr); ``` ``` } ``` ``` return value; ``` } } ``` As the MDN description of the <code>Array.prototype.reduce</code> method. __The reduce() method executes a reducer function (that you provide) on each element of the array, resulting in a single output value.__ ###37. What is the __arguments__ object? [↑](#the-questions "Back To Questions") The __arguments__ object is a collection of parameter values pass in a function. It's an __Array-like__ object because it has a __length__ property and we can access individual values using array indexing notation <code>arguments[1]</code> but it does not have the built-in methods in an array <code>forEach</code>,<code>reduce</code>,<code>filter</code> and <code>map</code>. It helps us know the number of arguments pass in a function. We can convert the <code>arguments</code> object into an array using the <code>Array.prototype.slice</code>. ``` 函數一(){ 返回 Array.prototype.slice.call(參數); } ``` Note: __the <code>arguments</code> object does not work on ES6 arrow functions.__ ``` 函數一(){ 返回參數; } 常數二 = 函數 () { 返回參數; } 常量三 = 函數三() { 返回參數; } const 四 = () => 參數; 四(); // 拋出錯誤 - 參數未定義 ``` When we invoke the function <code>four</code> it throws a <code>ReferenceError: arguments is not defined</code> error. We can solve this problem if your enviroment supports the __rest syntax__. ``` const 四 = (...args) => args; ``` This puts all parameter values in an array automatically. ###38. How to create an object without a __prototype__? [↑](#the-questions "Back To Questions") We can create an object without a _prototype_ using the <code>Object.create</code> method. ``` 常數 o1 = {}; console.log(o1.toString()); // Logs \[object Object\] 取得此方法到Object.prototype const o2 = Object.create(null); // 第一個參數是物件「o2」的原型,在此 // case 將為 null 指定我們不需要任何原型 console.log(o2.toString()); // 拋出錯誤 o2.toString 不是函數 ``` ###39. Why does <code>b</code> in this code become a global variable when you call this function? [↑](#the-questions "Back To Questions") ``` 函數 myFunc() { 令a = b = 0; } myFunc(); ``` The reason for this is that __assignment operator__ or __=__ has right-to-left __associativity__ or __evaluation__. What this means is that when multiple assignment operators appear in a single expression they evaluated from right to left. So our code becomes likes this. ``` 函數 myFunc() { 令 a = (b = 0); } myFunc(); ``` First, the expression <code>b = 0</code> evaluated and in this example <code>b</code> is not declared. So, The JS Engine makes a global variable <code>b</code> outside this function after that the return value of the expression <code>b = 0</code> would be 0 and it's assigned to the new local variable <code>a</code> with a <code>let</code> keyword. We can solve this problem by declaring the variables first before assigning them with value. ``` 函數 myFunc() { 令 a,b; a = b = 0; } myFunc(); ``` ###40. <div id="ecmascript">What is __ECMAScript__</div>? [↑](#the-questions "Back To Questions") __ECMAScript__ is a standard for making scripting languages which means that __JavaScript__ follows the specification changes in __ECMAScript__ standard because it is the __blueprint__ of __JavaScript__. ###41. What are the new features in __ES6__ or __ECMAScript 2015__? [↑](#the-questions "Back To Questions") * [Arrow Functions](#43-what-are-arrow-functions) * [Classes](#44-what-are-classes) * [Template Strings](#45-what-are-template-literals) * __Enhanced Object literals__ * [Object Destructuring](#46-what-is-object-destructuring) * [Promises](#50-what-are-promises) * __Generators__ * [Modules](#47-what-are-es6-modules) * Symbol * __Proxies__ * [Sets](#48-what-is-the-set-object-and-how-does-it-work) * [Default Function parameters](#53-what-are-default-parameters) * [Rest and Spread](#52-whats-the-difference-between-spread-operator-and-rest-operator) * [Block Scoping with <code>let</code> and <code>const</code>](#42-whats-the-difference-between-var-let-and-const-keywords) ###42. What's the difference between <code>var</code>, <code>let</code> and <code>const</code> keywords? [↑](#the-questions "Back To Questions") Variables declared with <code>var</code> keyword are _function scoped_. What this means that variables can be accessed across that function even if we declare that variable inside a block. ``` 函數給MeX(showX) { 如果(顯示X){ ``` var x = 5; ``` } 返回x; } console.log(giveMeX(false)); console.log(giveMeX(true)); ``` The first <code>console.log</code> statement logs <code>undefined</code> and the second <code>5</code>. We can access the <code>x</code> variable due to the reason that it gets _hoisted_ at the top of the function scope. So our function code is intepreted like this. ``` 函數給MeX(showX) { 變數 x; // 有一個預設值未定義 如果(顯示X){ ``` x = 5; ``` } 返回x; } ``` If you are wondering why it logs <code>undefined</code> in the first <code>console.log</code> statement remember variables declared without an initial value has a default value of <code>undefined</code>. Variables declared with <code>let</code> and <code>const</code> keyword are _block scoped_. What this means that variable can only be accessed on that block <code>{}</code> on where we declare it. ``` 函數給MeX(showX) { 如果(顯示X){ ``` let x = 5; ``` } 返回x; } 函數給MeY(顯示Y){ 如果(顯示Y){ ``` let y = 5; ``` } 返回y; } ``` If we call this functions with an argument of <code>false</code> it throws a <code>Reference Error</code> because we can't access the <code>x</code> and <code>y</code> variables outside that block and those variables are not _hoisted_. There is also a difference between <code>let</code> and <code>const</code> we can assign new values using <code>let</code> but we can't in <code>const</code> but <code>const</code> are mutable meaning. What this means is if the value that we assign to a <code>const</code> is an object we can change the values of those properties but can't reassign a new value to that variable. ###43. What are __Arrow functions__? [↑](#the-questions "Back To Questions") __Arrow Functions__ are a new way of making functions in JavaScript. __Arrow Functions__ takes a little time in making functions and has a cleaner syntax than a __function expression__ because we omit the <code>function</code> keyword in making them. ``` //ES5版本 var getCurrentDate = 函數 (){ 返回新日期(); } //ES6版本 const getCurrentDate = () => new Date(); ``` In this example, in the ES5 Version have <code>function(){}</code> declaration and <code>return</code> keyword needed to make a function and return a value respectively. In the __Arrow Function__ version we only need the <code>()</code> parentheses and we don't need a <code>return</code> statement because __Arrow Functions__ have a implicit return if we have only one expression or value to return. ``` //ES5版本 函數問候(名稱){ return '你好' + 名字 + '!'; } //ES6版本 const 問候 = (name) => `Hello ${name}` ; constgreet2 = 名稱 => `Hello ${name}` ; ``` We can also parameters in __Arrow functions__ the same as the __function expressions__ and __function declarations__. If we have one parameter in an __Arrow Function__ we can omit the parentheses it is also valid. ``` const getArgs = () => 參數 const getArgs2 = (...休息) => 休息 ``` __Arrow functions__ don't have access to the <code>arguments</code> object. So calling the first <code>getArgs</code> func will throw an Error. Instead we can use the __rest parameters__ to get all the arguments passed in an arrow function. ``` 常量資料 = { 結果:0, 數字:\[1,2,3,4,5\], 計算結果() { ``` // "this" here refers to the "data" object ``` ``` const addAll = () => { ``` ``` // arrow functions "copies" the "this" value of ``` ``` // the lexical enclosing function ``` ``` return this.nums.reduce((total, cur) => total + cur, 0) ``` ``` }; ``` ``` this.result = addAll(); ``` } }; ``` __Arrow functions__ don't have their own <code>this</code> value. It captures or gets the <code>this</code> value of lexically enclosing function or in this example, the <code>addAll</code> function copies the <code>this</code> value of the <code>computeResult</code> method and if we declare an arrow function in the global scope the value of <code>this</code> would be the <code>window</code> object. ###44. What are __Classes__? [↑](#the-questions "Back To Questions") __Classes__ is the new way of writing _constructor functions_ in __JavaScript__. It is _syntactic sugar_ for using _constructor functions_, it still uses __prototypes__ and __Prototype-Based Inheritance__ under the hood. ``` //ES5版本 函數人(名字,姓氏,年齡,地址){ ``` this.firstName = firstName; ``` ``` this.lastName = lastName; ``` ``` this.age = age; ``` ``` this.address = address; ``` } Person.self = 函數(){ ``` return this; ``` } Person.prototype.toString = function(){ ``` return "[object Person]"; ``` } Person.prototype.getFullName = function (){ ``` return this.firstName + " " + this.lastName; ``` } //ES6版本 類人{ ``` constructor(firstName, lastName, age, address){ ``` ``` this.lastName = lastName; ``` ``` this.firstName = firstName; ``` ``` this.age = age; ``` ``` this.address = address; ``` ``` } ``` ``` static self() { ``` ``` return this; ``` ``` } ``` ``` toString(){ ``` ``` return "[object Person]"; ``` ``` } ``` ``` getFullName(){ ``` ``` return `${this.firstName} ${this.lastName}`; ``` ``` } ``` } ``` __Overriding Methods__ and __Inheriting from another class__. ``` //ES5版本 Employee.prototype = Object.create(Person.prototype); 函數 Employee(名字, 姓氏, 年齡, 地址, 職位名稱, 開始年份) { Person.call(this, 名字, 姓氏, 年齡, 地址); this.jobTitle = jobTitle; this.yearStarted = YearStarted; } Employee.prototype.describe = function () { return `I am ${this.getFullName()} and I have a position of ${this.jobTitle} and I started at ${this.yearStarted}` ; } Employee.prototype.toString = function () { 返回“\[物件員工\]”; } //ES6版本 class Employee extends Person { //繼承自「Person」類 建構函數(名字,姓氏,年齡,地址,工作標題,開始年份){ ``` super(firstName, lastName, age, address); ``` ``` this.jobTitle = jobTitle; ``` ``` this.yearStarted = yearStarted; ``` } 描述() { ``` return `I am ${this.getFullName()} and I have a position of ${this.jobTitle} and I started at ${this.yearStarted}`; ``` } toString() { // 重寫「Person」的「toString」方法 ``` return "[object Employee]"; ``` } } ``` So how do we know that it uses _prototypes_ under the hood? ``` 類別東西{ } 函數 AnotherSomething(){ } const as = new AnotherSomething(); const s = new Something(); console.log(typeof Something); // 記錄“函數” console.log(AnotherSomething 類型); // 記錄“函數” console.log(as.toString()); // 記錄“\[物件物件\]” console.log(as.toString()); // 記錄“\[物件物件\]” console.log(as.toString === Object.prototype.toString); console.log(s.toString === Object.prototype.toString); // 兩個日誌都回傳 true 表示我們仍在使用 // 底層原型,因為 Object.prototype 是 // 原型鏈的最後一部分和“Something” // 和「AnotherSomething」都繼承自Object.prototype ``` ###45. What are __Template Literals__? [↑](#the-questions "Back To Questions") __Template Literals__ are a new way of making __strings__ in JavaScript. We can make __Template Literal__ by using the backtick or back-quote symbol. ``` //ES5版本 vargreet = '嗨,我是馬克'; //ES6版本 讓問候 = `Hi I'm Mark` ; ``` In the ES5 version, we need to escape the <code>'</code> using the <code>\\</code> to _escape_ the normal functionality of that symbol which in this case is to finish that string value. In Template Literals, we don't need to do that. ``` //ES5版本 var 最後一個字 = '\\n' - ' 在' - '我\\n' - '鋼鐵人\\n'; //ES6版本 讓最後一個單字=` ``` I ``` ``` Am ``` 鋼鐵人 `; ``` In the ES5 version, we need to add this <code>\n</code> to have a new line in our string. In Template Literals, we don't need to do that. ``` //ES5版本 函數問候(名稱){ return '你好' + 名字 + '!'; } //ES6版本 const 問候 = 名稱 => { 返回`Hello ${name} !` ; } ``` In the ES5 version, If we need to add an expression or value in a string we need to use the <code>+</code> or string concatenation operator. In Template Literals, we can embed an expression using <code>${expr}</code> which makes it cleaner than the ES5 version. ###46. What is __Object Destructuring__? [↑](#the-questions "Back To Questions") __Object Destructuring__ is a new and cleaner way of __getting__ or __extracting__ values from an object or an array. Suppose we have an object that looks like this. ``` 常量僱員 = { 名字:“馬可”, 姓氏:“波羅”, 職位:“軟體開發人員”, 聘用年份:2017 }; ``` The old way of getting properties from an object is we make a variable t
長話短說 ==== 在本文中,您將學習如何使用 Nextjs、CopilotKit 和 OpenAI 建立人工智慧驅動的 PowerPoint 應用程式。我們將涵蓋: - 利用 ChatGPT 建立您的 PowerPoint 簡報📊 - 與您的 PowerPoint 簡報聊天💬 - 將音訊和圖像新增至您的 PowerPoint 簡報🔉  --- CopilotKit:建構深度整合的應用內人工智慧聊天機器人💬 ------------------------------- CopilotKit 是[開源人工智慧副駕駛平台。](https://github.com/CopilotKit/CopilotKit)我們可以輕鬆地將強大的人工智慧聊天機器人整合到您的 React 應用程式中。完全可定制和深度集成。  {% cta https://github.com/CopilotKit/CopilotKit %} Star CopilotKit ⭐️ {% endcta %} ###### \*在布胡布上 現在回到文章。 --- **先決條件** -------- 要開始學習本教程,您需要在電腦上安裝以下軟體: - 文字編輯器(例如 Visual Studio Code) - Node.js - 套件管理器 使用 NextJS 建立 PowerPoint 應用程式前端 ------------------------------ **步驟 1:**使用下列指令 Git 複製 PowerPoint 應用程式樣板。 ``` git clone https://github.com/TheGreatBonnie/aipoweredpowerpointpresentation ``` **步驟 2:**在文字編輯器上開啟 PowerPoint 應用程式樣板,並使用下列指令安裝所有專案相依性。 ``` npm install ``` 步驟3: • 前往根目錄\*\*\*\*並建立一個名為**`.env.local`的檔案。**在該文件中,加入下面保存您的 ChatGPT API 金鑰的環境變數。 ``` OPENAI_API_KEY="Your ChatGPT API Key” ``` **步驟4:**在命令列執行命令*npm run dev* 。導航至 http://localhost:3000/,您應該會看到 PowerPoint 應用程式前端。  建立 PowerPoint 投影片功能 ------------------- 步驟 1:前往**`/[root]/src/app/components`** ,並建立一個名為`present.tsx`的檔案。然後在文件頂部導入以下相依性。 ``` "use client"; import { useCopilotContext } from "@copilotkit/react-core"; import { CopilotTask } from "@copilotkit/react-core"; import { useMakeCopilotActionable, useMakeCopilotReadable, } from "@copilotkit/react-core"; import { useEffect, useState } from "react"; import "./../presentation/styles.css"; import Markdown from "react-markdown"; ``` 步驟 2:定義一個名為 Slide 的 TypeScript 接口,其中包含 PowerPoint 簡報投影片的標題和內容屬性。 ``` // Define slide interface interface Slide { title: string; content: string; } ``` 步驟 3:建立一個名為`Presentation`函數,並使用usestate 初始化名為`allSlides`和`currentSlideIndex`狀態變數`usestate.`變數`allSlides`將保存幻燈片陣列,而`currentSlideIndex`將保存目前幻燈片索引。 ``` export function Presentation (){ const [allSlides, setAllSlides] = useState<Slide[]>([]); const [currentSlideIndex, setCurrentSlideIndex] = useState<number>(0); } ``` 步驟 4:在`Presentation`函數中,使用`useMakeCopilotReadable`掛鉤新增投影片的`allSlides`陣列作為應用程式內聊天機器人的上下文。 ``` useMakeCopilotReadable("Powerpoint presentation slides: " + JSON.stringify(allSlides)); ``` 步驟 5:使用`useMakeCopilotActionable`掛鉤設定一個名為`createNewPowerPointSlide`操作,其中包含描述和更新`allSlides`和`currentSlideIndex`狀態變數的實作函數,如下所示。 ``` useMakeCopilotActionable( { name: "createNewPowerPointSlide", description: "create slides for a powerpoint presentation. Call this function multiple times to present multiple slides.", argumentAnnotations: [ { name: "slideTitle", type: "string", description: "The topic to display in the presentation slide. Use simple markdown to outline your speech, like a headline.", required: true, }, { name: "content", type: "string", description: "The content to display in the presentation slide. Use simple markdown to outline your speech, like lists, paragraphs, etc.", required: true }, ], implementation: async (newSlideTitle, newSlideContent) => { const newSlide: Slide = { title: newSlideTitle, content: newSlideContent}; const updatedSlides = [...allSlides, newSlide]; setAllSlides(updatedSlides); setCurrentSlideIndex(updatedSlides.length - 1); }, }, [], ); ``` 步驟6:定義一個名為`displayCurrentSlide`的函數,用於在前端顯示目前投影片索引。 ``` // Display current slide const displayCurrentSlide = () => { const slide = allSlides[currentSlideIndex]; return slide ? ( <div className="h-screen flex flex-col justify-center items-center text-5xl text-white bg-cover bg-center bg-no-repeat p-10 text-center" style={{ textShadow: "1px 1px 0 #000, -1px -1px 0 #000, 1px -1px 0 #000, -1px 1px 0 #000", }} > <Markdown className="markdown">{slide.title}</Markdown> <Markdown className="markdown">{slide.content}</Markdown> </div> ) : ( <div className="h-screen flex flex-col justify-center items-center text-5xl text-white bg-cover bg-center bg-no-repeat p-10 text-center"> No Slide To Display </div> ); }; ``` 步驟 7: 定義一個名為 addSlide 的函數,該函數包含一個名為 CopilotTask 的類別。 CopilotTask 類別定義新增投影片的功能。 ``` // Add new slide function const addSlide = new CopilotTask({ instructions: "create a new slide", actions: [ { name: "newSlide", description: "Make a new slide related to the current topic.", argumentAnnotations: [ { name: "title", type: "string", description: "The title to display in the presentation slide.", required: true, }, { name: "content", type: "string", description: "The title to display in the presentation slide.", required: true, }, ], implementation: async (newSlideTitle,newSlideContent,) => { const newSlide: Slide = {title: newSlideTitle,content: newSlideContent,}; const updatedSlides = [...allSlides, newSlide]; setAllSlides(updatedSlides); setCurrentSlideIndex(updatedSlides.length - 1); }, }, ], }); const context = useCopilotContext(); const [randomSlideTaskRunning, setRandomSlideTaskRunning] = useState(false); ``` 步驟 8:定義兩個函數 goBack 和 goForward。 goBack 函數定義導覽到上一張投影片的功能,而 goForward 函數定義導覽到下一張投影片的功能。 ``` // Button click handlers for navigation const goBack = () => setCurrentSlideIndex((prev) => Math.max(0, prev - 1)); const goForward = () => setCurrentSlideIndex((prev) => Math.min(allSlides.length - 1, prev + 1)); ``` 步驟9:傳回一個呼叫displayCurrentSlide函數的元件,並包含呼叫addSlide、goBack和goForward函數的按鈕。 ``` return ( <div> {displayCurrentSlide()} <button disabled={randomSlideTaskRunning} className={`absolute bottom-12 left-0 mb-4 ml-4 bg-blue-500 text-white font-bold py-2 px-4 rounded ${randomSlideTaskRunning ? "opacity-50 cursor-not-allowed" : "hover:bg-blue-700"}`} onClick={async () => { try { setRandomSlideTaskRunning(true); await addSlide.run(context); } finally { setRandomSlideTaskRunning(false); } }} > {randomSlideTaskRunning ? "Loading slide..." : "Add Slide +"} </button> <button className={`absolute bottom-0 left-0 mb-4 ml-4 bg-blue-500 text-white font-bold py-2 px-4 rounded ${randomSlideTaskRunning ? "opacity-50 cursor-not-allowed" : "hover:bg-blue-700"}`} onClick={goBack}>Prev</button> <button className={`absolute bottom-0 left-20 mb-4 ml-4 bg-blue-500 text-white font-bold py-2 px-4 rounded ${randomSlideTaskRunning ? "opacity-50 cursor-not-allowed" : "hover:bg-blue-700"}`} onClick={goForward}>Next</button> </div> ); ``` 步驟10:在Presentation資料夾中,將以下程式碼加入page.tsx檔案。 ``` "use client"; import { CopilotKit } from "@copilotkit/react-core"; import { CopilotSidebar } from "@copilotkit/react-ui"; import {Presentation} from "../components/present"; import "./styles.css"; let globalAudio: any = undefined; let globalAudioEnabled = false; const Demo = () => { return ( <CopilotKit url="/api/copilotkit/openai"> <CopilotSidebar defaultOpen={true} labels={{ title: "Presentation Copilot", initial: "Hi you! 👋 I can give you a presentation on any topic.", }} clickOutsideToClose={false} onSubmitMessage={async (message) => { if (!globalAudioEnabled) { globalAudio.play(); globalAudio.pause(); } globalAudioEnabled = true; }} > <Presentation/> </CopilotSidebar> </CopilotKit> ); }; export default Demo; ``` 步驟11:導覽至http://localhost:3000/,點擊「開始」按鈕,您將被重定向到與聊天機器人整合的演示頁面,如下所示。 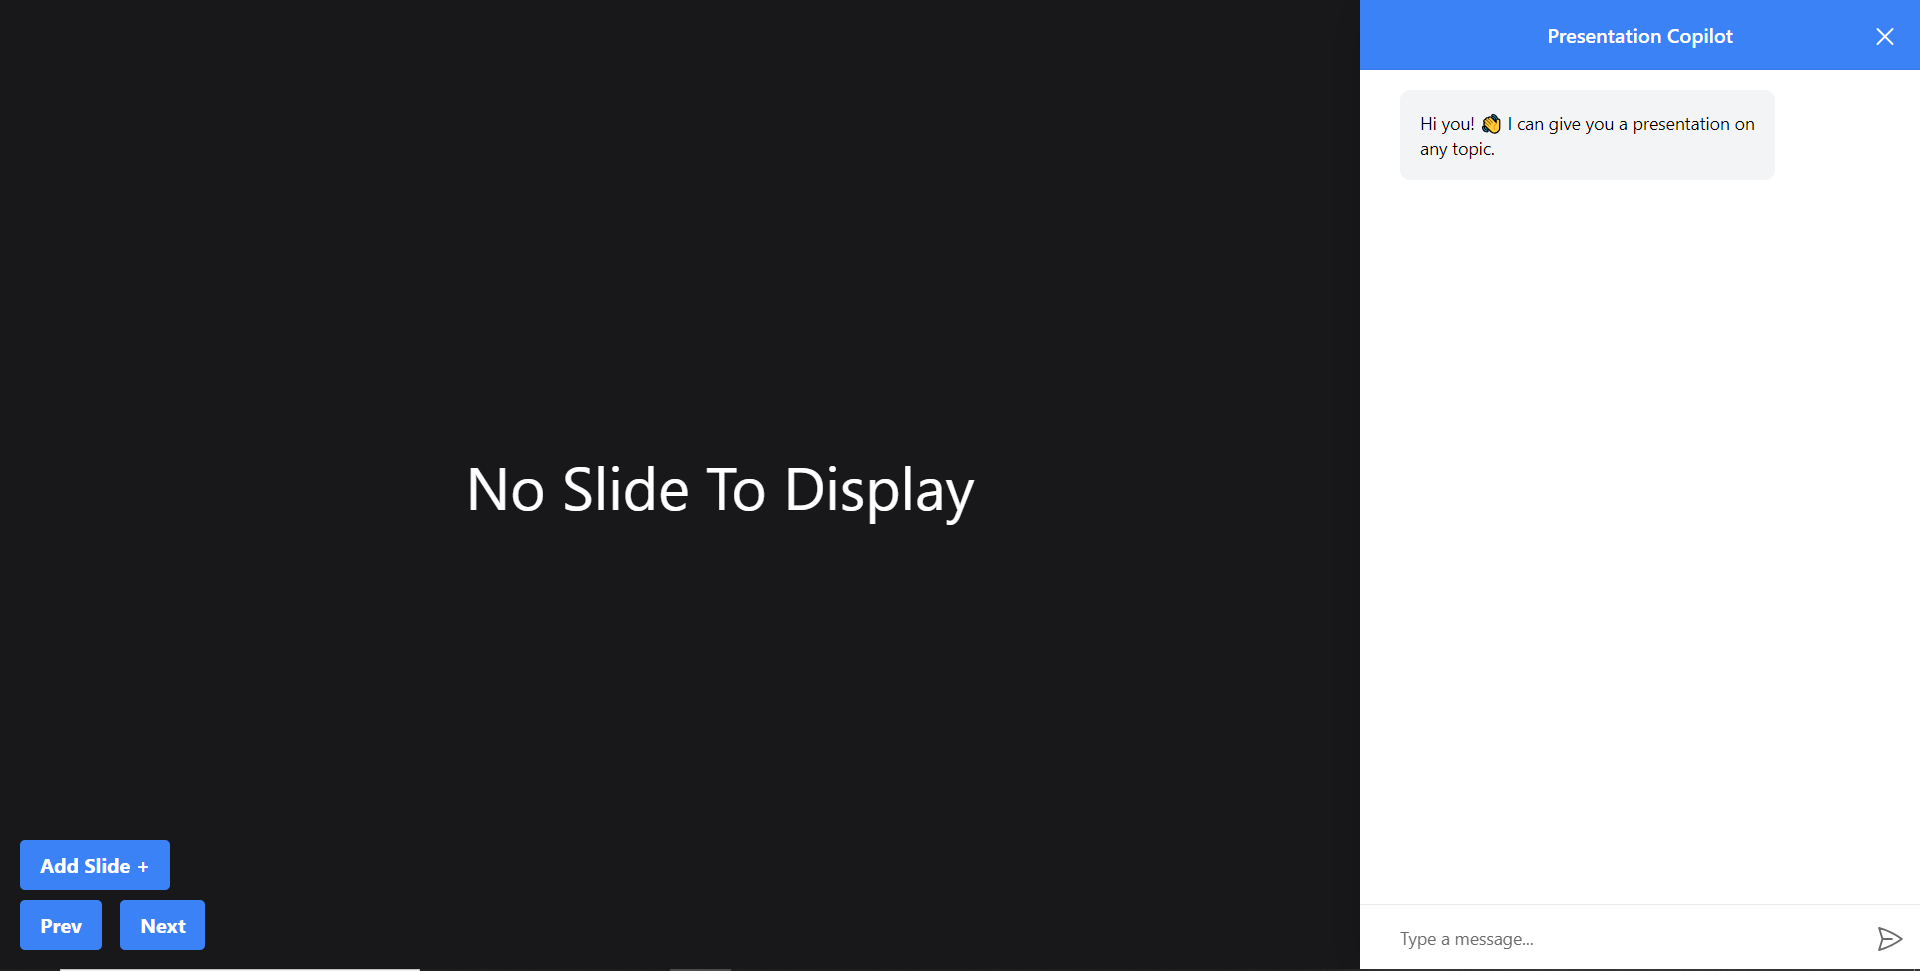 步驟12:給右側的聊天機器人一個提示,例如「在TypeScript上建立PowerPoint簡報」聊天機器人將開始產生回應,完成後,它將在頁面左側顯示產生的PowerPoint投影片,如下圖所示  步驟 13:關閉聊天機器人窗口,然後按一下新增投影片 + 按鈕將新投影片新增至 PowerPoint 簡報中,如下所示。  第 14 步:按一下「上一張」按鈕,您將導覽至上一張投影片。如果您按一下「下一步」按鈕,您將導覽至下一張投影片。 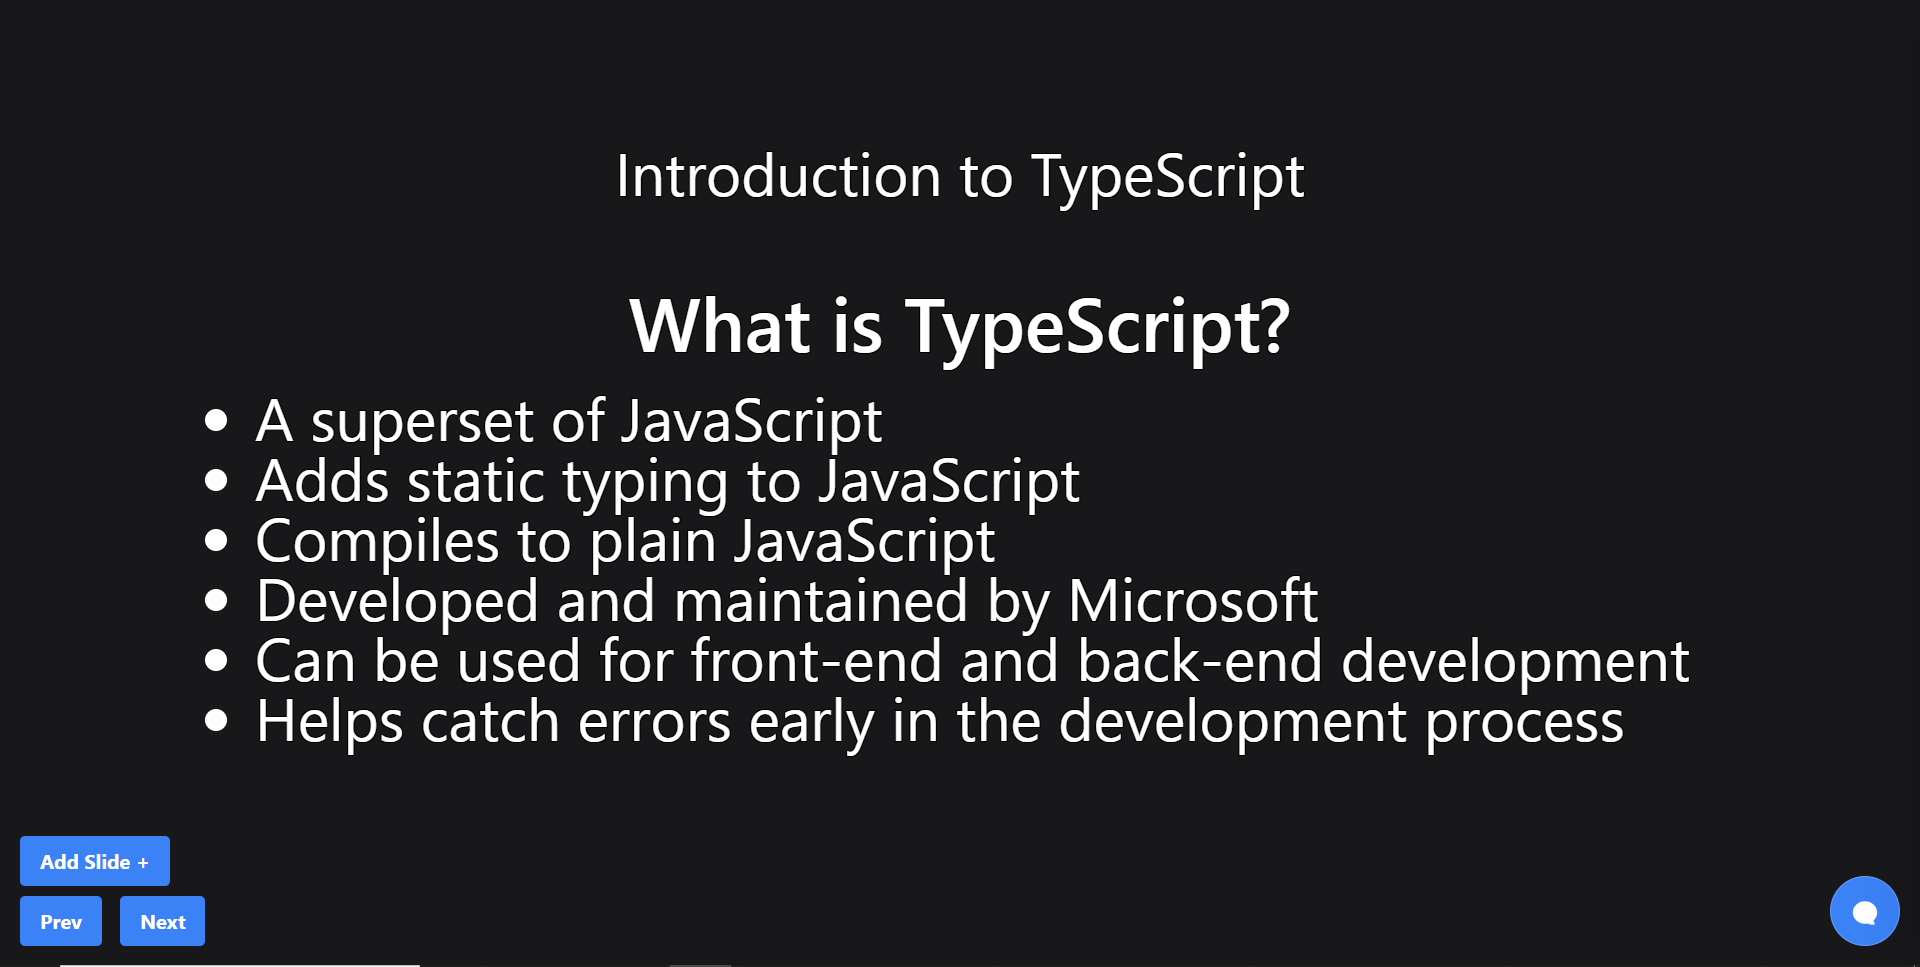 建立 PowerPoint 投影片 自動語音功能 ------------------------ 步驟1:在`present.tsx`檔案中,宣告一個名為`globalAudio`的變數,如下所示。 ``` let globalAudio: any = undefined; ``` 步驟2:在`Presentation`元件中,宣告一個`useEffect`鉤子,用一個新的**`Audio`**物件初始化**`globalAudio`** ,如下所示。 ``` useEffect(() => { if (!globalAudio) { globalAudio = new Audio(); } }, []); ``` 步驟 3:更新 useMakeCopilotActionable 掛鉤,透過 API 將 PowerPoint 幻燈片文字轉換為語音,如下所示。 ``` useMakeCopilotActionable( { name: "createNewPowerPointSlide", description: "create slides for a powerpoint presentation. Call this function multiple times to present multiple slides.", argumentAnnotations: [ { name: "slideTitle", type: "string", description: "The topic to display in the presentation slide. Use simple markdown to outline your speech, like a headline.", required: true, }, { name: "content", type: "string", description: "The content to display in the presentation slide. Use simple markdown to outline your speech, like lists, paragraphs, etc.", required: true }, { name: "speech", type: "string", description: "An informative speech about the current slide.", required: true, }, ], implementation: async (newSlideTitle, newSlideContent, speech) => { const newSlide: Slide = { title: newSlideTitle, content: newSlideContent }; const updatedSlides = [...allSlides, newSlide]; setAllSlides(updatedSlides); setCurrentSlideIndex(updatedSlides.length - 1); const encodedText = encodeURIComponent(speech); const url = `/api/tts?text=${encodedText}`; globalAudio.src = url; await globalAudio.play(); await new Promise<void>((resolve) => { globalAudio.onended = function () { resolve(); }; }); await new Promise((resolve) => setTimeout(resolve, 500)); }, }, [], ); ``` 步驟 4:更新 addSlide 函數,透過 API 將新的 PowerPoint 投影片文字轉換為語音,如下所示。 ``` // Add new slide function const addSlide = new CopilotTask({ instructions: "create a new slide", actions: [ { name: "newSlide", description: "Make a new slide related to the current topic.", argumentAnnotations: [ { name: "title", type: "string", description:"The title to display in the presentation slide.", required: true, }, { name: "content", type: "string", description:"The title to display in the presentation slide.", required: true, }, { name: "speech", type: "string", description: "An informative speech about the current slide.", required: true, }, ], implementation: async (newSlideTitle, newSlideContent, speech) => { const newSlide: Slide = { title: newSlideTitle, content: newSlideContent }; const updatedSlides = [...allSlides, newSlide]; setAllSlides(updatedSlides); setCurrentSlideIndex(updatedSlides.length - 1); const encodedText = encodeURIComponent(speech); const url = `/api/tts?text=${encodedText}`; globalAudio.src = url; await globalAudio.play(); await new Promise<void>((resolve) => { globalAudio.onended = function () { resolve(); }; }); await new Promise((resolve) => setTimeout(resolve, 500)); }, } ] }); ``` 步驟 5: 再次向聊天機器人發出「在 TypeScript 上建立 PowerPoint 簡報」提示,您應該會聽到簡報投影片的聲音。  建立圖像生成功能 -------- 步驟1:在present.tsx檔案中,新增一個名為backgroundImage的新屬性來鍵入介面Slide,如下所示。 ``` // Define slide interface interface Slide { title: string; content: string; backgroundImage: string; } ``` 步驟 2:更新 useMakeCopilotActionable 掛鉤以產生 PowerPoint 簡報投影片的圖片。 ``` useMakeCopilotActionable( { name: "createPowerPointSlides", description: "create slides for a powerpoint presentation. Call this function multiple times to present multiple slides.", argumentAnnotations: [ { name: "slideTitle", type: "string", description: "The topic to display in the presentation slide. Use simple markdown to outline your speech, like a headline.", required: true, }, { name: "content", type: "string", description: "The content to display in the presentation slide. Use simple markdown to outline your speech, like lists, paragraphs, etc.", required: true }, { name: "backgroundImage", type: "string", description: "What to display in the background of the slide (i.e. 'dog' or 'house').", required: true, }, { name: "speech", type: "string", description: "An informative speech about the current slide.", required: true, }, ], implementation: async (newSlideTitle, newSlideContent, newSlideBackgroundImage, speech) => { const newSlide: Slide = { title: newSlideTitle, content: newSlideContent, backgroundImage: newSlideBackgroundImage }; const updatedSlides = [...allSlides, newSlide]; setAllSlides(updatedSlides); setCurrentSlideIndex(updatedSlides.length - 1); const encodedText = encodeURIComponent(speech); const url = `/api/tts?text=${encodedText}`; globalAudio.src = url; await globalAudio.play(); await new Promise<void>((resolve) => { globalAudio.onended = function () { resolve(); }; }); await new Promise((resolve) => setTimeout(resolve, 500)); }, }, [], ); ``` 步驟 2:更新 addSlide 函數以產生新的 PowerPoint 簡報投影片的圖片。 **步驟3:**更新`slide.tsx`檔案中的`Slide`元件以透過[`unsplash.com`](http://unsplash.com/)產生映像 ``` // Add new slide function const addSlide = new CopilotTask({ instructions: "create a new slide", functions: [ { name: "newSlide", description: "Make a new slide related to the current topic.", argumentAnnotations: [ { name: "title", type: "string", description:"The title to display in the presentation slide.", required: true, }, { name: "content", type: "string", description:"The title to display in the presentation slide.", required: true, }, { name: "backgroundImage", type: "string", description: "What to display in the background of the slide (i.e. 'dog' or 'house').", required: true, }, { name: "speech", type: "string", description: "An informative speech about the current slide.", required: true, }, ], implementation: async (newSlideTitle, newSlideContent, newSlideBackgroundImage, speech) => { const newSlide: Slide = { title: newSlideTitle, content: newSlideContent, backgroundImage: newSlideBackgroundImage }; const updatedSlides = [...allSlides, newSlide]; setAllSlides(updatedSlides); setCurrentSlideIndex(updatedSlides.length - 1); const encodedText = encodeURIComponent(speech); const url = `/api/tts?text=${encodedText}`; globalAudio.src = url; await globalAudio.play(); await new Promise<void>((resolve) => { globalAudio.onended = function () { resolve(); }; }); await new Promise((resolve) => setTimeout(resolve, 500)); }, } ] }); ``` 步驟 3:更新 displayCurrentSlide 函數以將背景圖像新增至 PowerPoint 簡報投影片中。 ``` // Display current slide const displayCurrentSlide = () => { const slide = allSlides[currentSlideIndex]; return slide ? ( <div className="h-screen flex flex-col justify-center items-center text-5xl text-white bg-cover bg-center bg-no-repeat p-10 text-center" style={{ backgroundImage: 'url("https://source.unsplash.com/featured/?' + encodeURIComponent(allSlides[currentSlideIndex].backgroundImage) + '")', textShadow: "1px 1px 0 #000, -1px -1px 0 #000, 1px -1px 0 #000, -1px 1px 0 #000", }} > <Markdown className="markdown">{slide.title}</Markdown> <Markdown className="markdown">{slide.content}</Markdown> </div> ) : ( <div className="h-screen flex flex-col justify-center items-center text-5xl text-white bg-cover bg-center bg-no-repeat p-10 text-center"> No Slide To Display </div> ); }; ``` **步驟 4:**前往 Web 應用程式,您應該會看到背景圖像已新增至 PowerPoint 投影片中。  結論 -- 總而言之,您可以使用 CopilotKit 建立應用內 AI 聊天機器人,該機器人可以查看當前應用程式狀態並在應用程式內執行操作。 AI 聊天機器人可以與您的應用程式前端、後端和第三方服務對話。 筆記: - 告訴聊天機器人要寫什麼 - 建立包含文字、圖片和自動語音的幻燈片。 這是全部實作程式碼: https://github.com/CopilotKit/CopilotKit/blob/mme/tools/CopilotKit/examples/next-openai/src/app/helloworld/page.tsx 你可以拿程式碼寫文章,一定要截圖。 確保按照邏輯實現的順序寫文章: - 首先,外部 React 元件( `page.tsx`中的`HelloWorld`元件) ``` - cover `CopilotKit` and `CopliotSidebar` ``` - 然後覆蓋`Presentation`反應元件而不加入 Copilot 功能 ``` - include the `Slide` react component ``` - 最後,在建立基本的 React 應用程式後,加入描述 Copilot 特定功能的部分( `useMakeCopilotReadable`和`useMakeCopilotActionable` ) - 最後,介紹生成音訊+影像的函數。保持描述非常簡短,只需說“我們透過瀏覽器audio-gen API產生音訊”和“我們透過[`unsplash.com`](http://unsplash.com/)產生圖像” 執行演示: - 請參閱文件/貢獻指南,以了解如何執行 CopilotKit 儲存庫中包含的範例應用程式:https://docs.copilotkit.ai/contribute/quickstart-contribute - 執行 - 前往`/helloworld`頁面 --- 結論 -- 總而言之,您可以使用 CopilotKit 建立應用內 AI 聊天機器人,該機器人可以查看當前應用程式狀態並在應用程式內執行操作。 AI 聊天機器人可以與您的應用程式前端、後端和第三方服務對話。 對於完整的源程式碼: https://github.com/TheGreatBonnie/aipoweredpresentation 感謝@theGreatBonnie 在本文中所做的出色工作。 別忘了...  {% cta https://github.com/CopilotKit/CopilotKit %} Star CopilotKit ⭐️ {% endcta %} --- 原文出處:https://dev.to/copilotkit/how-to-build-ai-powered-powerpoint-app-nextjs-openai-copilotkit-ji2
嗨,我是文斯 ------ 大家好,我是[Vince](https://twitter.com/hot_town) ,一位全球教育家轉型為 Web 開發人員。  上圖中間的就是我,當時我在肯亞北部從事農業教育計畫。 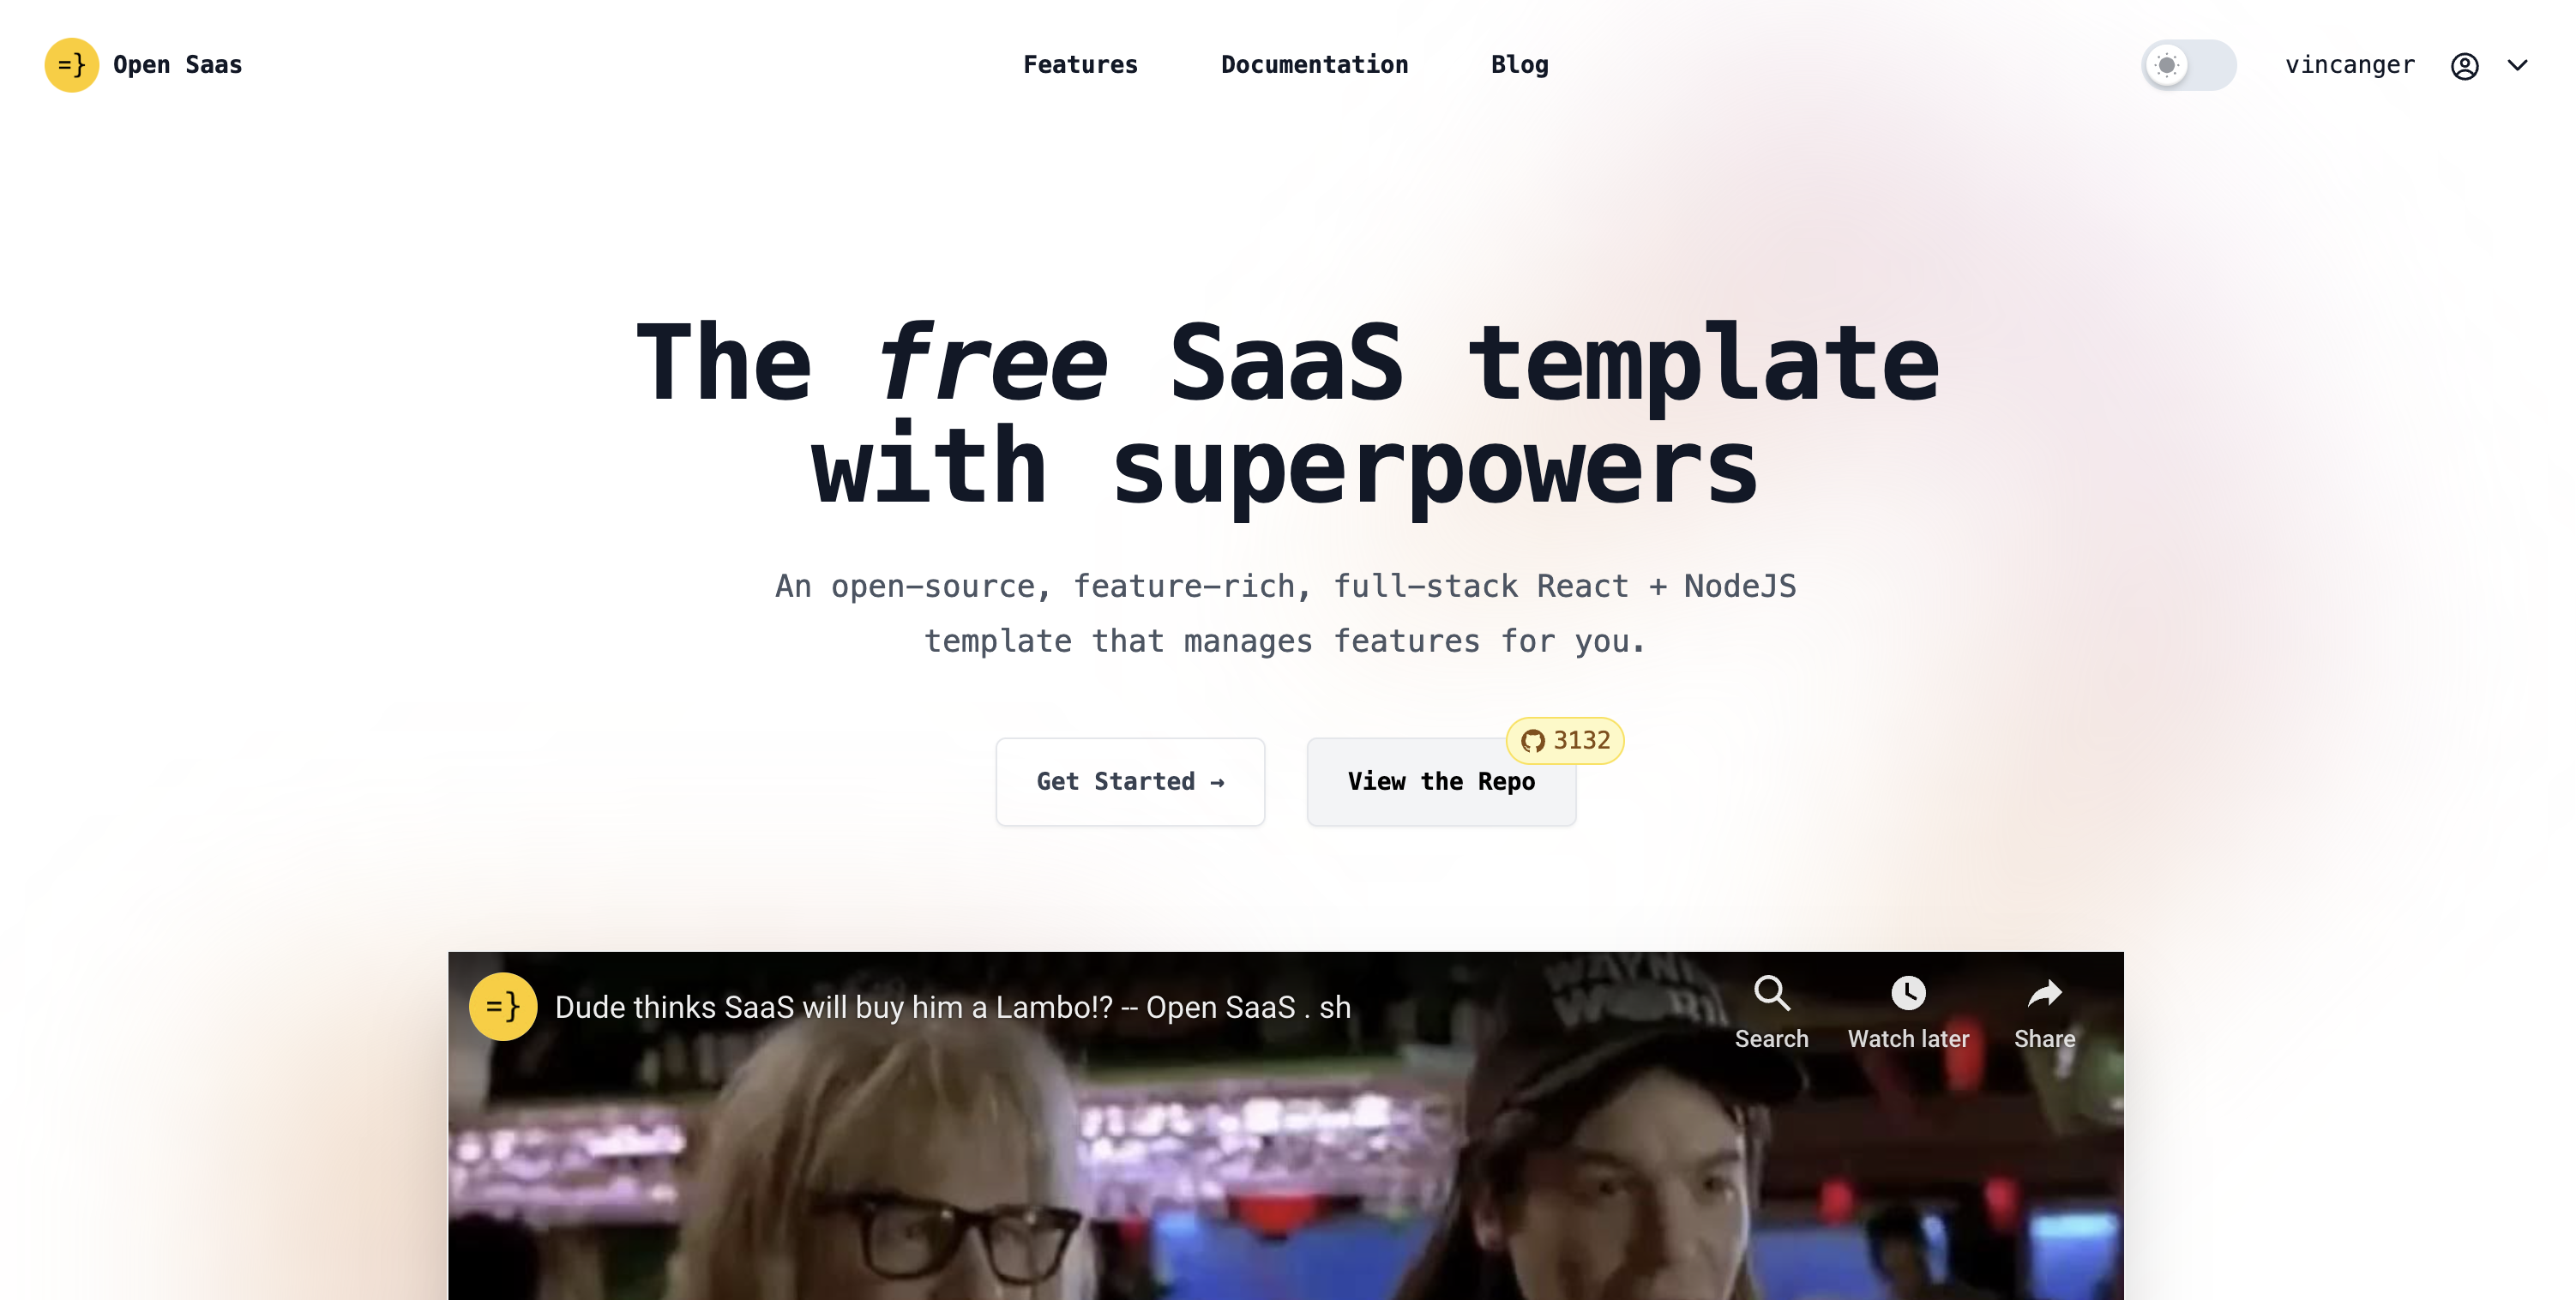 這些天,我正在建立業餘專案(如上圖所示的[Open SaaS)](https://opensaas.sh) ,並擔任開發人員關係工程師。 提升你的開發生涯 -------- 我必須承認,我即將向您呈現的「10個殘酷事實」不一定是事實,而是我在轉行過程中形成的觀點。我想我的獨特視角可能對有抱負的開發人員和其他職業轉換者有一定的價值。 眾所周知,對於那些想要尋找新職業而不走傳統教育路線的人來說,軟體開發是一個可行的選擇。正因為如此,而且事實上薪水往往非常好,我認為一部分做出轉變的人可能是出於錯誤的原因。 一旦你確立了自己的初級地位,通常很難知道你應該做什麼來推進你的職業生涯。正如我和我的同事在最近的[Reddit 貼文](https://www.reddit.com/r/webdev/comments/112im2m/senior_devs_what_are_the_most_damaging/)和[後續影片](/blog/2023/02/21/junior-developer-misconceptions)中討論的那樣,那裡有很多觀點(包括我的),而後輩往往會產生很多誤解。 因此,我列出了在開始從事科技職業時應考慮的事項。 10 個殘酷的事實 --------- 1 👎**如果你只是為了錢而做,你就不會成功。**確實,你不需要學位或任何人的許可才能在這個職業中取得進步,但你需要野心和精神耐力。需要真正的興趣來維持它們。 2 🧱**盡快開始建造。**找到您感興趣的問題並自行建立解決方案。為您使用的開源專案做出貢獻。一系列獨特的作品充分說明了您的能力。另外,沒有比經驗更好的老師了。 3 💰**您無需支付樣板、訓練營或課程的費用。**事實上,你最好自己解決問題,只有在真正陷入困境時才尋求幫助。那裡有大量的免費資源,當您在工作時,這些可能是唯一可以幫助您的東西。 --- 說到樣板,我們剛剛發布了[Open SaaS](https://opensaas.sh) ,這是一個完全免費、開源、功能豐富的 React + NodeJS SaaS 模板,可幫助您快速輕鬆地啟動 SaaS 應用程式。 [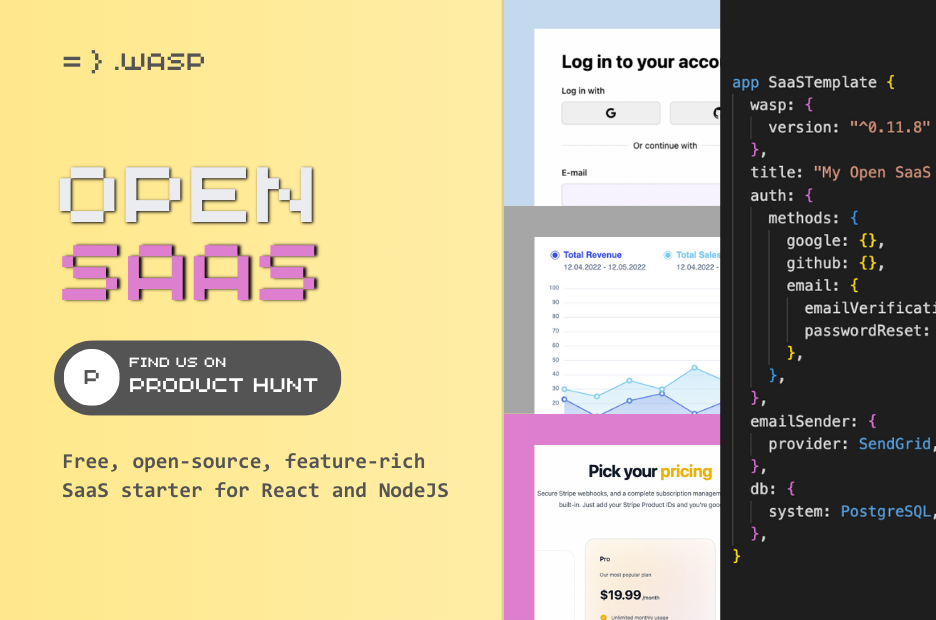](https://opensaas.sh) 如果您對此有疑問、需要幫助、反饋或靈感,請跳入[Discord 伺服器](https://discord.gg/zKFDFrsHa9)並介紹自己。 --- 4 😎**你不必跟隨潮流。跟隨你感興趣的。**正如我之前所說,從事這份工作需要有心理承受能力。追隨你的興趣會讓你保持專注並有助於避免倦怠。 5 👩💻**您不需要對一項技術瞭如指掌,這**與一些開發人員可能希望您相信的相反。事實是,你一直在學習,你的知識中總是會存在差距。重要的是您對能夠填補這些空白的信心。 6 😱**無所畏懼並尋求回饋。**把你的作品放在那裡,並準備好接受批評。如果你能忍受它,你就會成為一個更好的開發者。 7 🧐**你應該對自己在做什麼有深刻的體會。**不要只是複製貼上別人的答案(或 GPT 的答案)來解決您的問題,然後就到此為止。質疑事物為何有效,自己找出答案。 8 🏋️♀️**不幸的是,你必須做繁重的工作。不要一開始就期望高薪。**而且您可能希望透過在空閒時間從事業餘專案來改進您的作品集,或者您可能會比您希望的時間更長時間地擔任初級開發人員。 9 🧗♂️**挑戰自我。但不要太多。**如果你不尋求挑戰,你就不會進步。但如果你承擔的任務遠遠超出你目前的能力,你就會受苦。找到最佳位置,處理那些讓你感覺有點不舒服的事情,但你仍然可以集中註意力。堅持下去,一年後你會對自己所取得的成就感到驚訝。 10 🗣**程式設計絕對不是您需要的唯一技能。**尊重他人、善於溝通、認真負責、雄心勃勃和謙遜將使您處於不同的聯盟,並使您成為任何技術團隊中的寶貴資產。 現在開始工作吧! -------- 這就是我的總結。 對於這10個“真相”,你有何看法?我錯過了什麼?我是不是已經完全飽了💩?!請在下面的評論中告訴我們。 --- 原文出處:https://dev.to/wasp/10-hard-truths-junior-developers-need-to-hear-3j0e
你的轉職路上,還缺少一份自學作業包!寫完這幾包,直接拿作品去面試上班!
本論壇另有附設一個 LINE 新手發問&交流群組!歡迎加入討論!


