過去十年來,人工智慧世界取得了長足發展。 人工智慧無所不在,從語音助理到軟體開發,如果我們正確使用它,它會非常有幫助。 在這樣的世界中,製作 AI 應用程式是有利可圖的,因此我在這裡介紹 25 個開源專案,您可以使用它們來製作 AI 應用程式並將其提升到新的水平。 其中有一些令人興奮的概念,例如使用語音合成與 3D 角色進行互動式溝通。堅持到底。 將會有大量的資源、文章、專案想法、指南等可供參考。 讓我們涵蓋這一切! --- 1. [Taipy](https://github.com/Avaiga/taipy) - 將資料和人工智慧演算法整合到生產就緒的 Web 應用程式中。 ---------------------------------------------------------------------------- 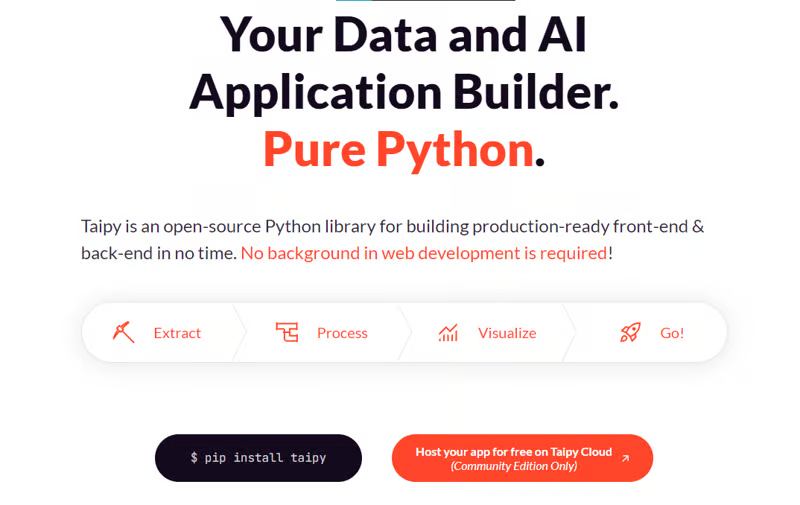 Taipy 是一個開源 Python 庫,可用於輕鬆的端到端應用程式開發,具有假設分析、智慧管道執行、內建調度和部署工具。 我相信你們大多數人都不明白 Taipy 用於為基於 Python 的應用程式建立 GUI 介面並改進資料流管理。 因此,您可以繪製資料集的圖表,並使用類似 GUI 的滑桿來提供使用其他實用功能來處理資料的選項。 雖然 Streamlit 是一種流行的工具,但在處理大型資料集時,其效能可能會顯著下降,這使得它在生產級使用上不切實際。 另一方面,Taipy 在不犧牲性能的情況下提供了簡單性和易用性。透過嘗試 Taipy,您將親身體驗其用戶友好的介面和高效的資料處理。 在底層,Taipy 利用各種函式庫來簡化開發並增強功能。  開始使用以下命令。 ``` pip install taipy ``` 我們來談談最新的[Taipy v3.1 版本](https://docs.taipy.io/en/latest/relnotes/)。 最新版本使得在 Taipy 的多功能零件物件中可視化任何 HTML 或 Python 物件成為可能。 這意味著[Folium](https://python-visualization.github.io/folium/latest/) 、 [Bokeh](https://bokeh.org/) 、 [Vega-Altair](https://altair-viz.github.io/)和[Matplotlib](https://matplotlib.org/)等程式庫現在可用於視覺化。 這也帶來了對[Plotly python 的](https://plotly.com/python/)原生支持,使繪製圖表變得更加容易。  他們還使用分散式運算提高了效能,但最好的部分是 Taipy,它的所有依賴項現在都與 Python 3.12 完全相容,因此您可以在使用 Taipy 進行專案的同時使用最新的工具和程式庫。 您可以閱讀[文件](https://docs.taipy.io/en/latest/)。 例如,您可以看到[聊天演示](https://docs.taipy.io/en/release-3.1/gallery/llm/5_chatbot/),它使用 OpenAI 的 GPT-4 API 來產生對您的訊息的回應。您可以輕鬆更改程式碼以使用任何其他 API 或模型。 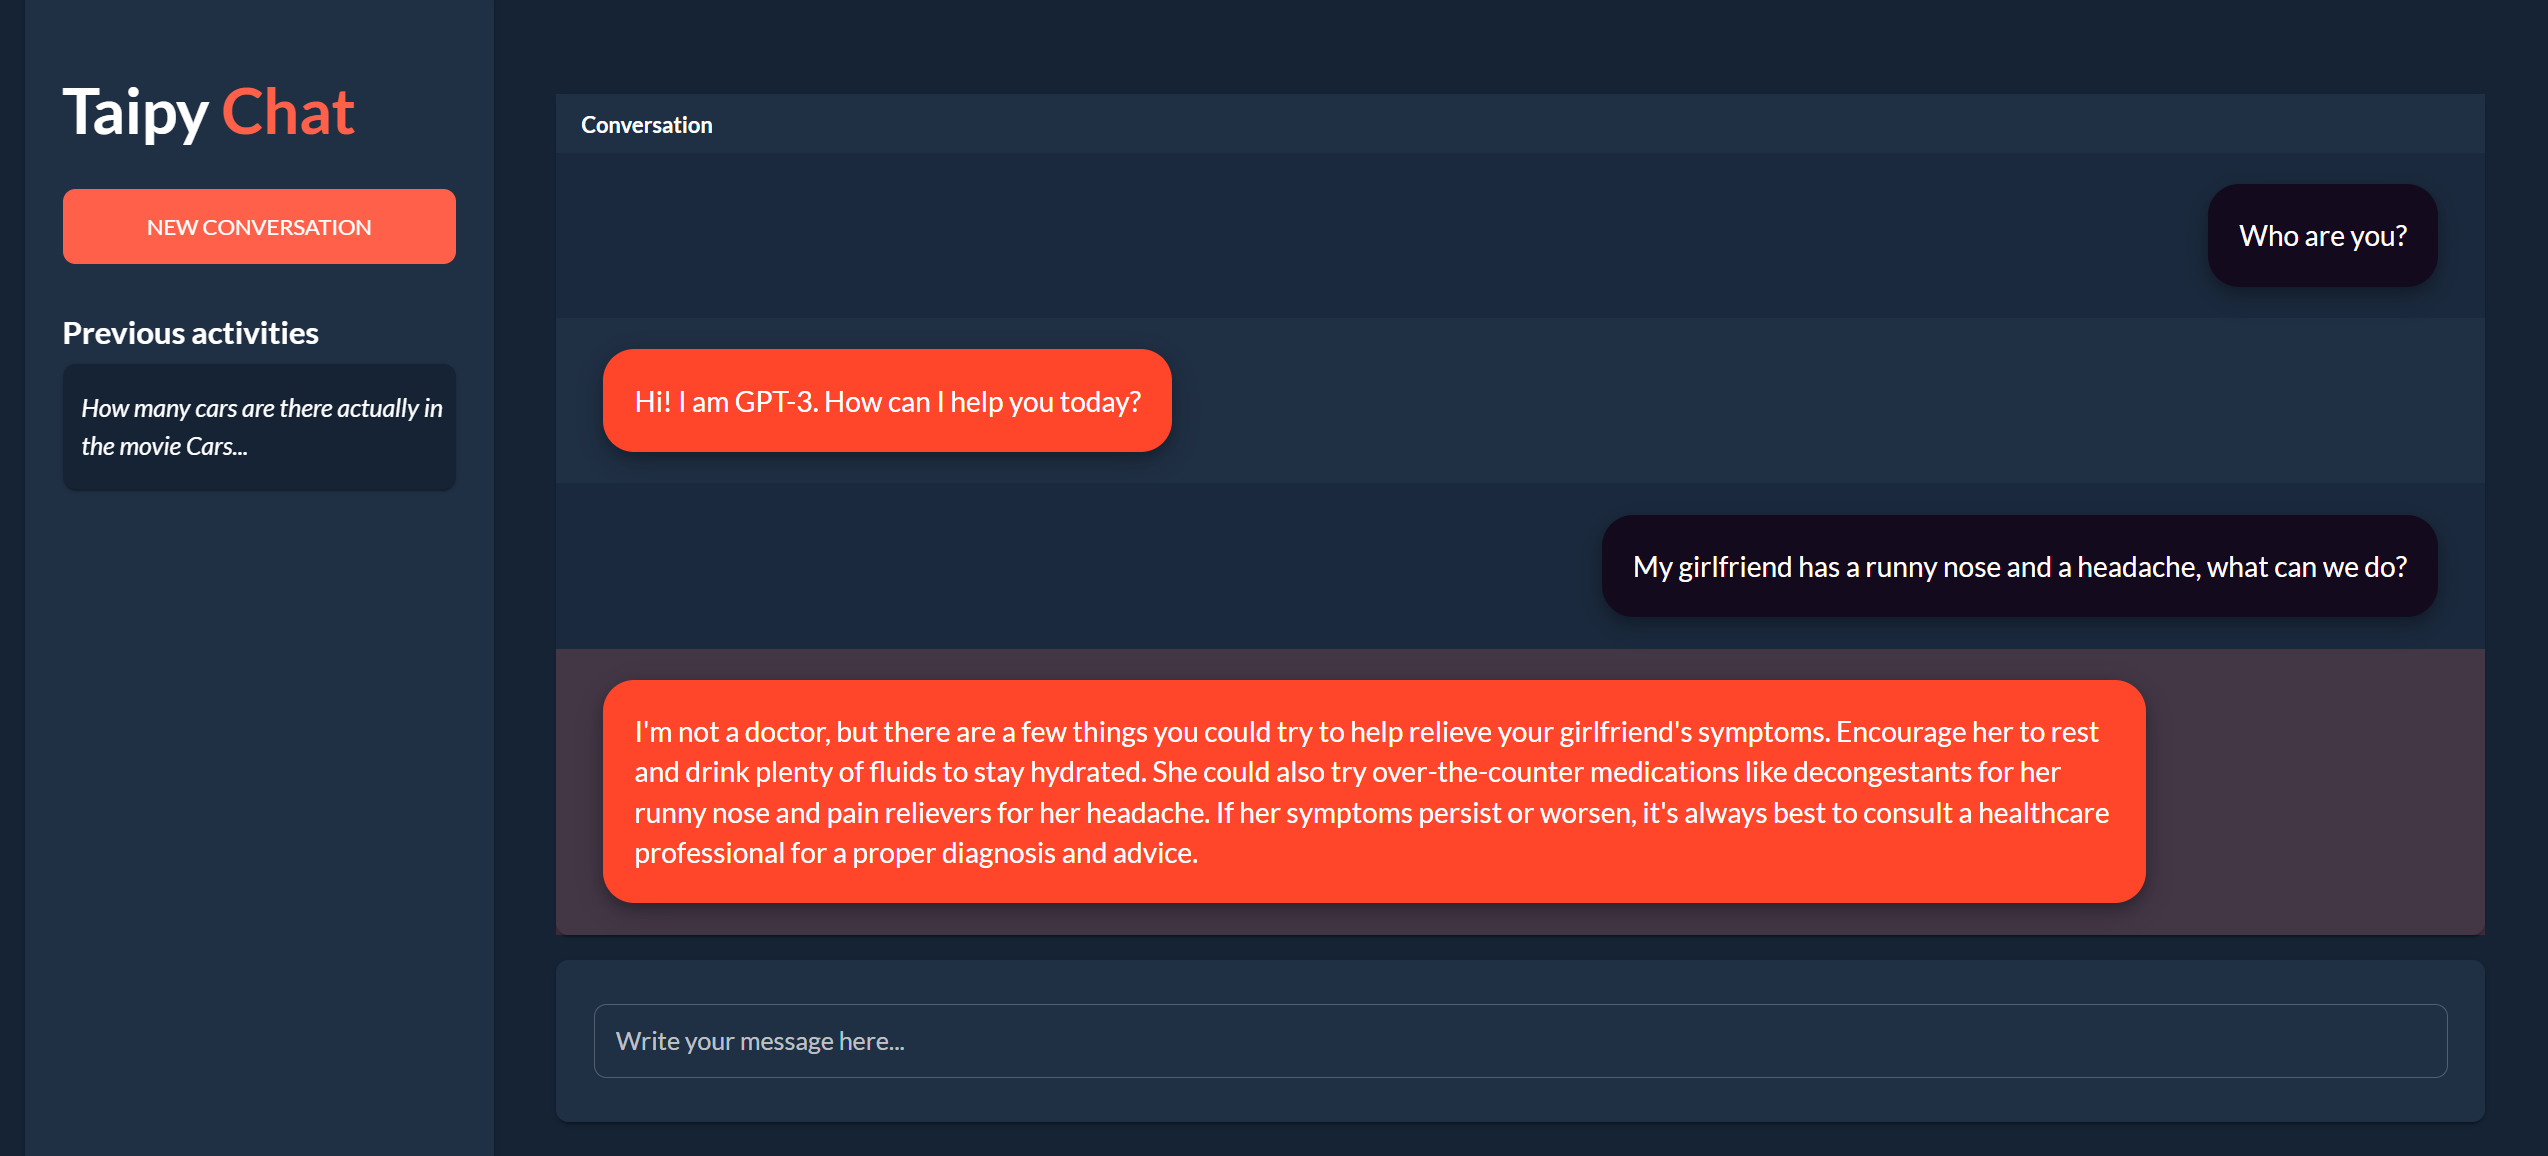 另一個有用的事情是,Taipy 團隊提供了一個名為[Taipy Studio](https://docs.taipy.io/en/latest/manuals/studio/)的 VSCode 擴充功能來加速 Taipy 應用程式的建置。 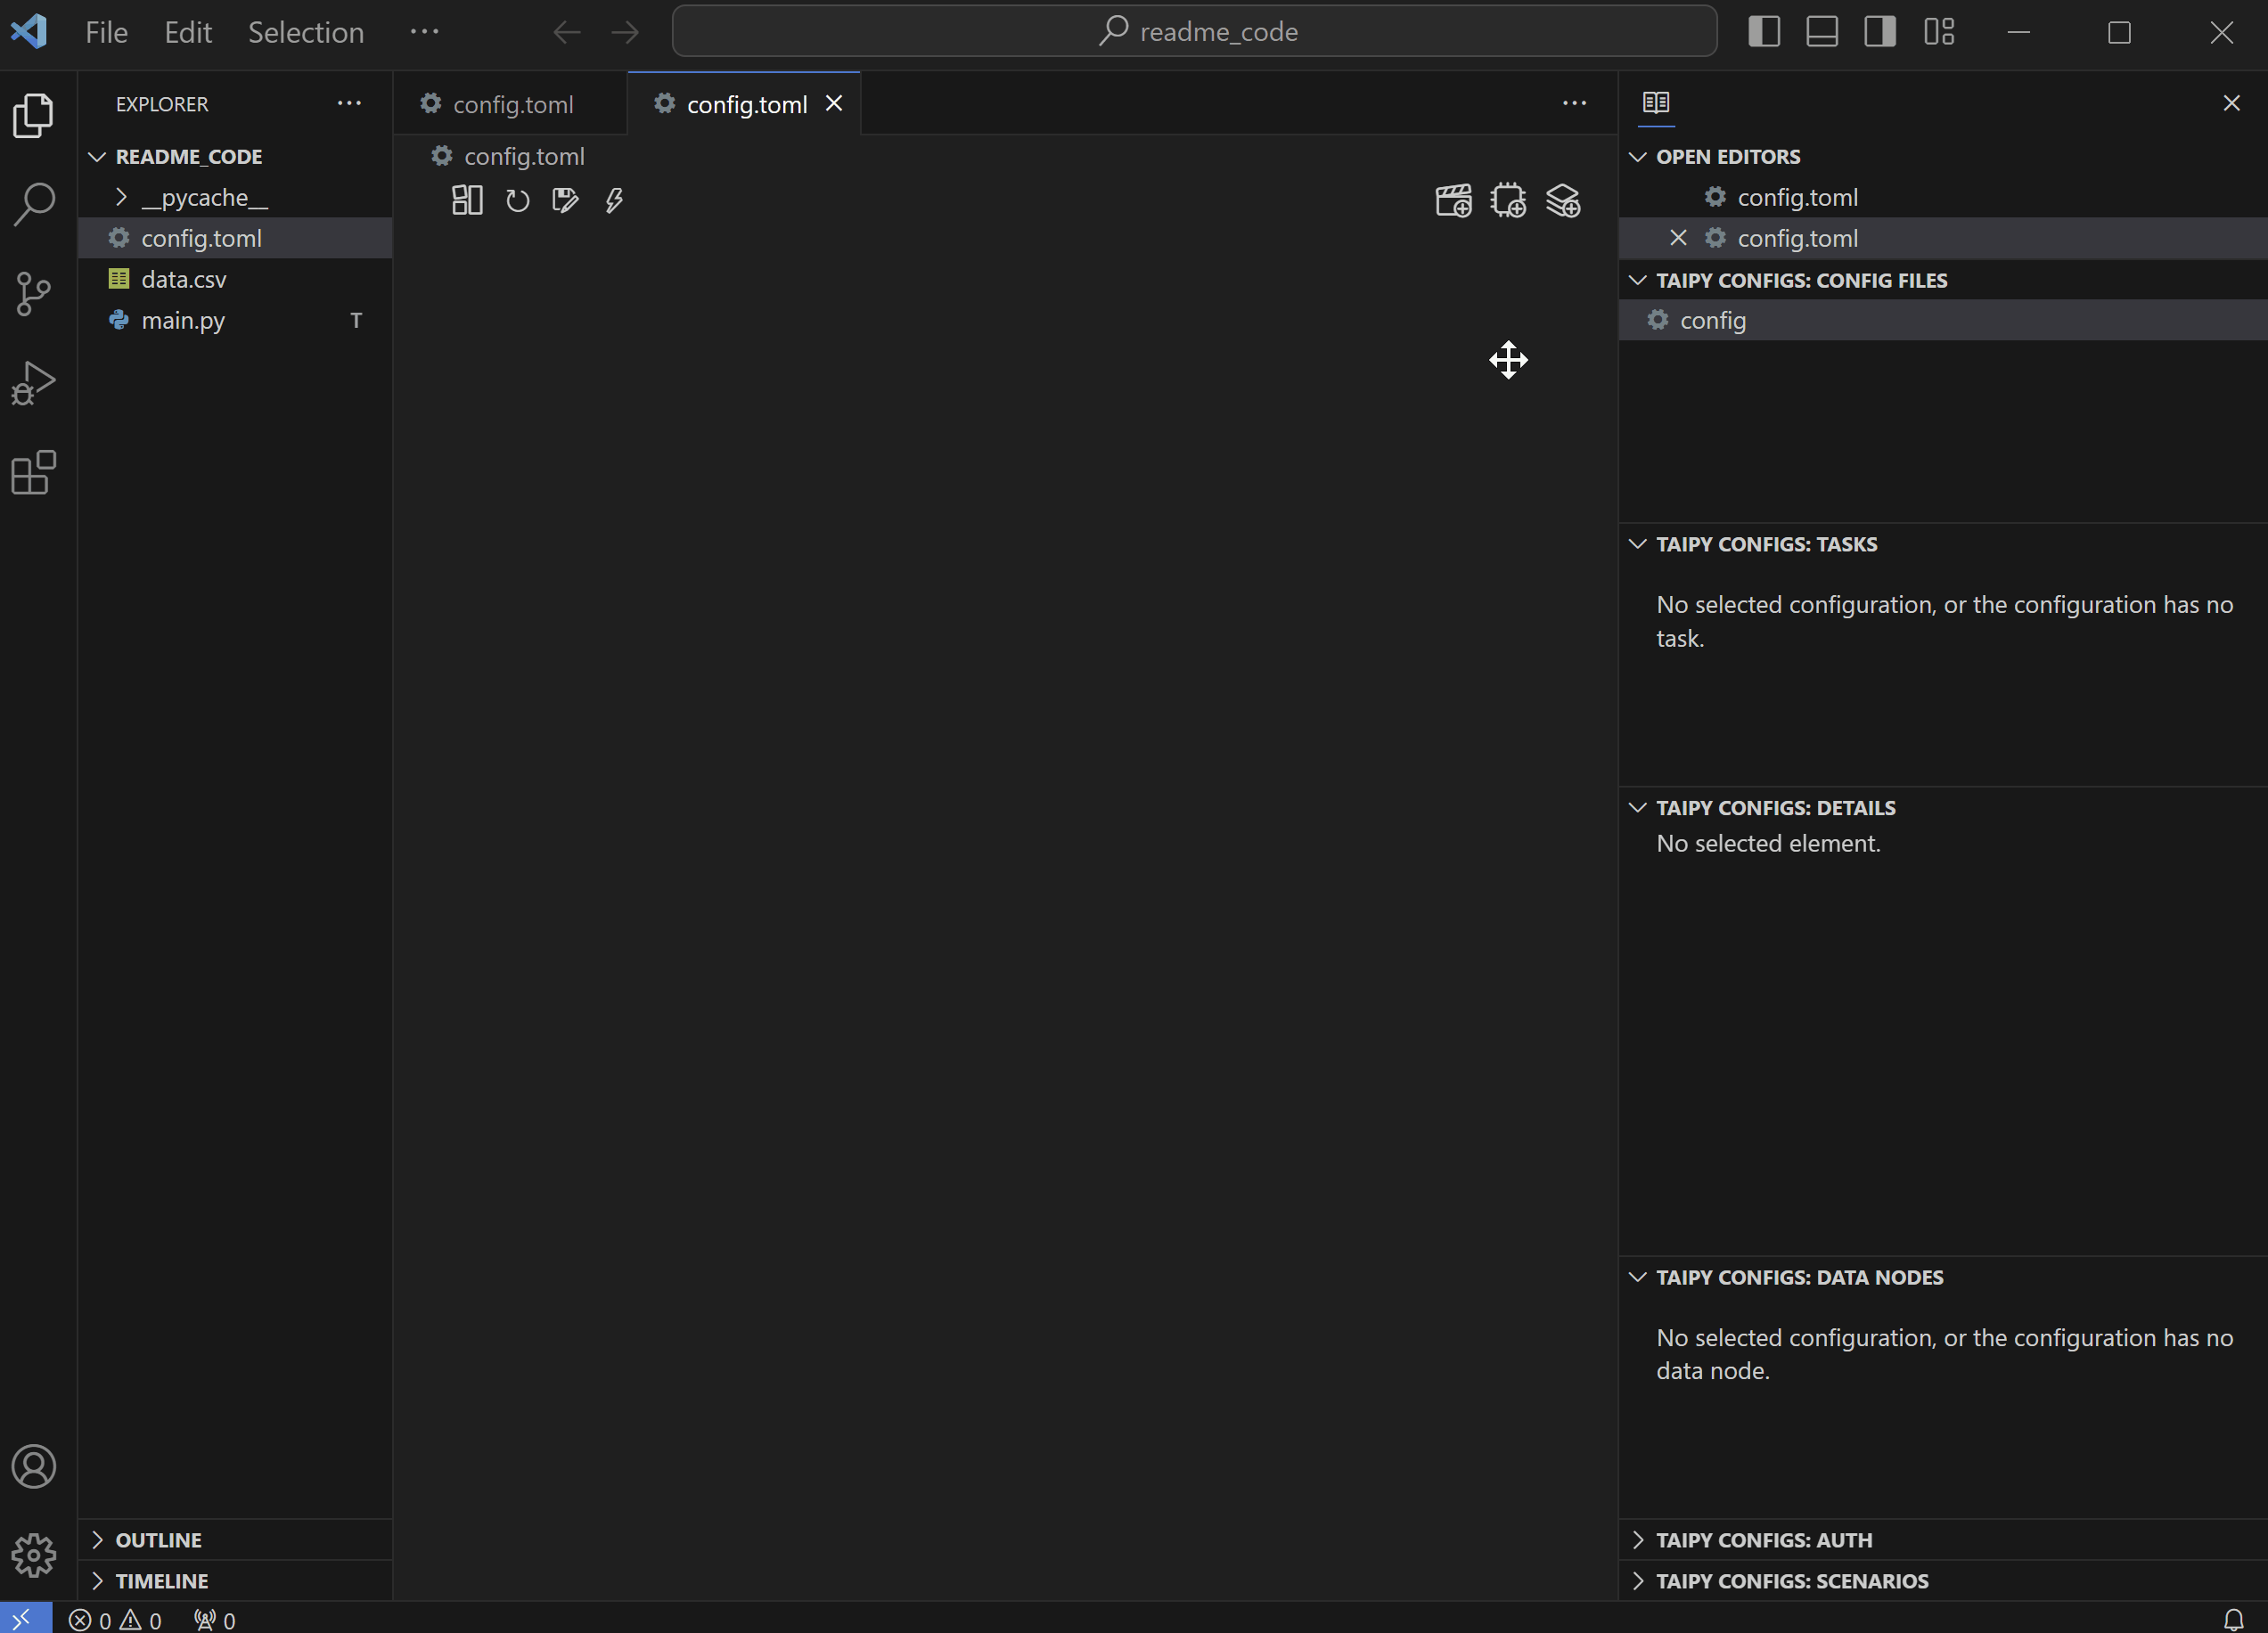 您也可以使用 Taipy 雲端部署應用程式。 如果您想閱讀部落格來了解程式碼庫結構,您可以閱讀 HuggingFace 的[使用 Taipy 在 Python 中為您的 LLM 建立 Web 介面](https://huggingface.co/blog/Alex1337/create-a-web-interface-for-your-llm-in-python)。 嘗試新技術通常很困難,但 Taipy 提供了[10 多個演示教程](https://docs.taipy.io/en/release-3.1/gallery/),其中包含程式碼和適當的文件供您遵循。 例如,一些現場演示範例: - [新冠儀表板](https://covid-dashboard.taipy.cloud/Country) - [推文生成](https://tweet-generation.taipy.cloud/) - [資料視覺化](https://production-planning.taipy.cloud/Data-Visualization) - [即時人臉辨識](https://face-recognition.taipy.cloud/) Taipy 在 GitHub 上有 7k+ Stars,並且處於`v3`版本,因此它們正在不斷改進。  https://github.com/Avaiga/taipy Star Taipy ⭐️ --- 2. [Supabase](https://github.com/supabase/supabase) - 開源 Firebase 替代品。 ----------------------------------------------------------------------  要建立AI應用程式,您需要一個後端,而Supabase作為優秀的後端服務提供者可以滿足這一需求。 開始使用以下 npm 指令 (Next.js)。 ``` npx create-next-app -e with-supabase ``` 這就是使用 CRUD 操作的方式。 ``` import { createClient } from '@supabase/supabase-js' // Initialize const supabaseUrl = 'https://chat-room.supabase.co' const supabaseKey = 'public-anon-key' const supabase = createClient(supabaseUrl, supabaseKey) // Create a new chat room const newRoom = await supabase .from('rooms') .insert({ name: 'Supabase Fan Club', public: true }) // Get public rooms and their messages const publicRooms = await supabase .from('rooms') .select(` name, messages ( text ) `) .eq('public', true) // Update multiple users const updatedUsers = await supabase .from('users') .eq('account_type', 'paid') .update({ highlight_color: 'gold' }) ``` 您可以閱讀[文件](https://supabase.com/docs)。 您可以使用身份驗證、即時、邊緣功能、儲存等功能建立一個速度極快的應用程式。 Supabase 涵蓋了這一切! Supabase 也提供了幾個入門套件,例如[Nextjs 與 LangChain](https://github.com/langchain-ai/langchain-nextjs-template) 、 [Stripe 與 Nextjs](https://github.com/vercel/nextjs-subscription-payments)或[AI Chatbot](https://github.com/supabase-community/vercel-ai-chatbot) 。 Supabase 在 GitHub 上擁有超過 63,000 顆星,並且擁有大量提交超過 27,000 次的貢獻者。 https://github.com/supabase/supabase 明星 Supabase ⭐️ --- 3. [Chatwoot](https://github.com/chatwoot/chatwoot) - 即時聊天、電子郵件支援、全通路服務台並擁有您的資料。 --------------------------------------------------------------------------------  Chatwoot 連接流行的客戶溝通管道,如電子郵件、網站即時聊天、Facebook、Twitter、WhatsApp、Instagram、Line 等。這有助於您從單一儀表板跨管道提供一致的客戶體驗。 這在各種情況下都可能很重要,例如當您圍繞人工智慧應用程式建立社群時。 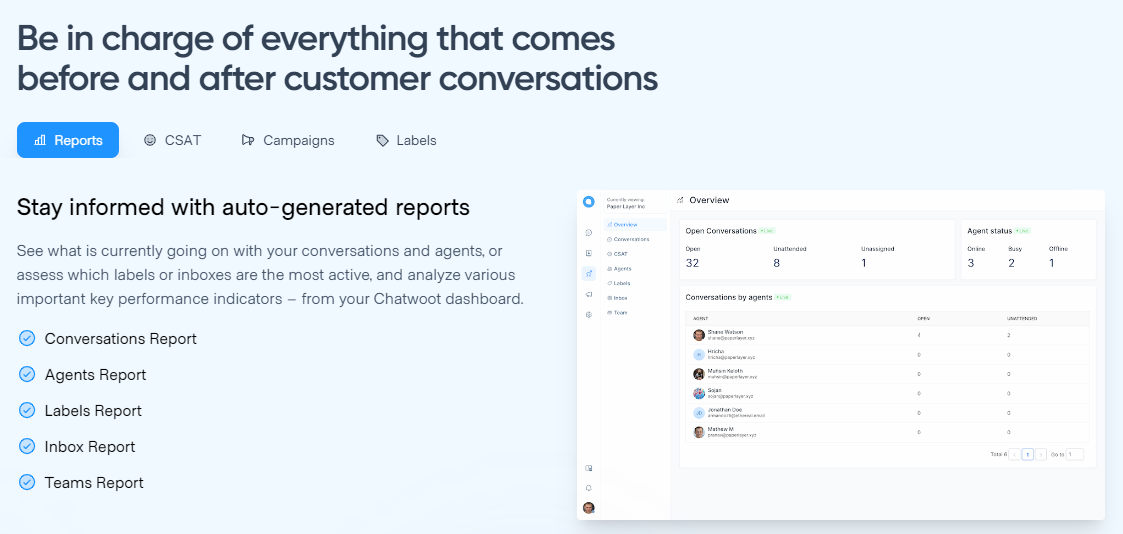 您可以閱讀[文件](https://www.chatwoot.com/docs/product)來發現各種整合選項,以便更輕鬆地管理整個生態系統。 他們在每個整合中都有非常詳細的文件和快照範例,例如[帶有 WhatsApp Cloud API 的 WhatsApp 通道](https://www.chatwoot.com/docs/product/channels/whatsapp/whatsapp-cloud)。您可以根據需要一鍵式或自架部署到 Heroku。 他們在 GitHub 上擁有 18k+ Stars,並且發布了`v3.6`版本。 https://github.com/chatwoot/chatwoot 明星 Chatwoot ⭐️ --- 4. [CopilotKit](https://github.com/CopilotKit/CopilotKit) - 在數小時內為您的產品提供 AI Copilot。 ------------------------------------------------------------------------------------ 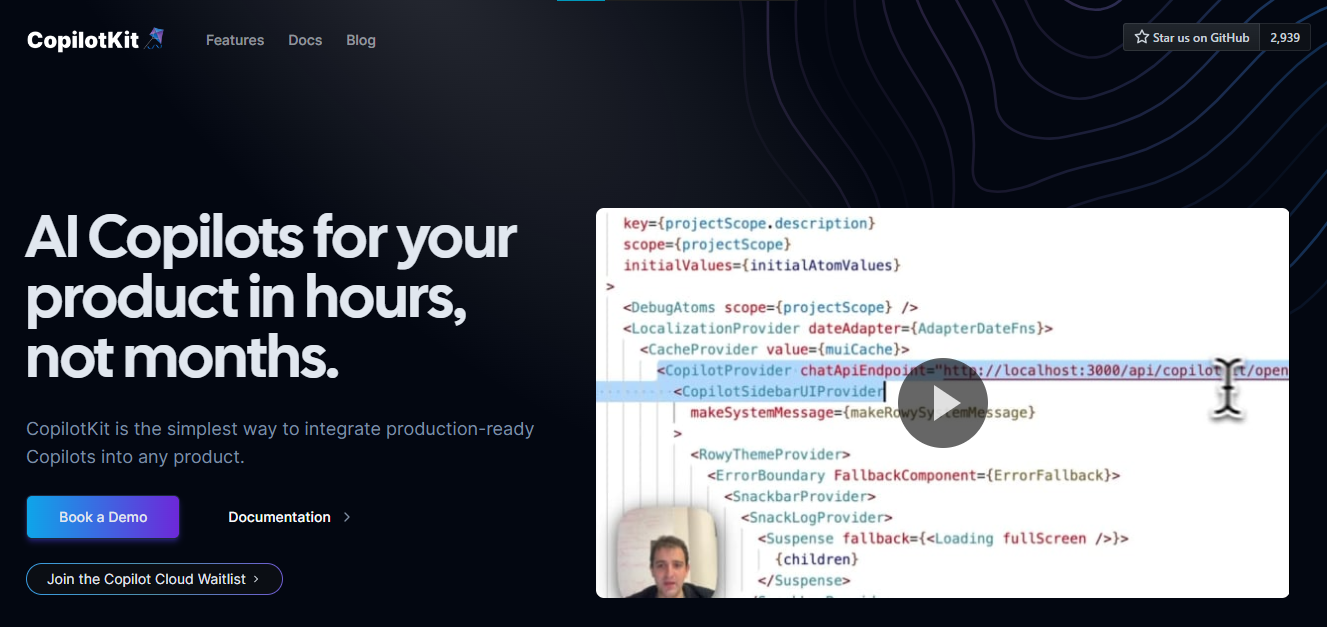 您可以使用兩個 React 元件將關鍵 AI 功能整合到 React 應用程式中。它們還提供內建(完全可自訂)Copilot 原生 UX 元件,例如`<CopilotKit />` 、 `<CopilotPopup />` 、 `<CopilotSidebar />` 、 `<CopilotTextarea />` 。 開始使用以下 npm 指令。 ``` npm i @copilotkit/react-core @copilotkit/react-ui @copilotkit/react-textarea ``` 這是整合 CopilotTextArea 的方法。 ``` import { CopilotTextarea } from "@copilotkit/react-textarea"; import { useState } from "react"; export function SomeReactComponent() { const [text, setText] = useState(""); return ( <> <CopilotTextarea className="px-4 py-4" value={text} onValueChange={(value: string) => setText(value)} placeholder="What are your plans for your vacation?" autosuggestionsConfig={{ textareaPurpose: "Travel notes from the user's previous vacations. Likely written in a colloquial style, but adjust as needed.", chatApiConfigs: { suggestionsApiConfig: { forwardedParams: { max_tokens: 20, stop: [".", "?", "!"], }, }, }, }} /> </> ); } ``` 您可以閱讀[文件](https://docs.copilotkit.ai/getting-started/quickstart-textarea)。 基本概念是在幾分鐘內建立可用於基於 LLM 的全端應用程式的 AI 聊天機器人。 https://github.com/CopilotKit/CopilotKit Star CopilotKit ⭐️ --- 5. [DALL·E Mini](https://github.com/borisdayma/dalle-mini) - 根據文字提示產生圖像。 ------------------------------------------------------------------------ 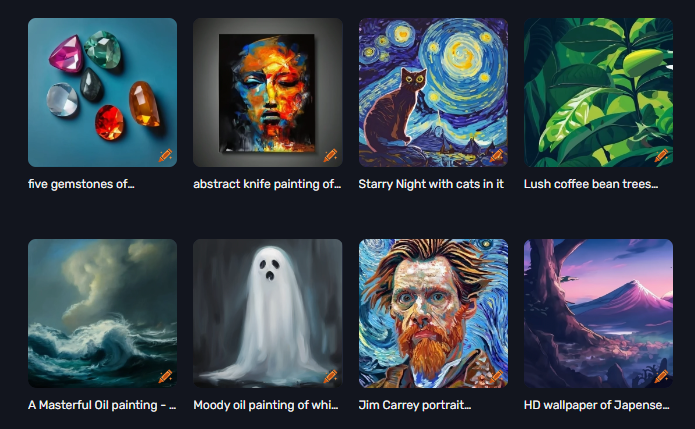 OpenAI 擁有第一個令人印象深刻的模型,用於使用 DALL·E 生成圖像。 Craiyon/DALL·E mini 嘗試使用開源模型重現這些結果。 如果您想知道這個名字,DALL-E mini 應母公司的要求更名為 Craiyon,並以更易於存取的網路應用程式格式使用類似的技術。 您可以在[Craiyon](https://www.craiyon.com/)上使用該模型。 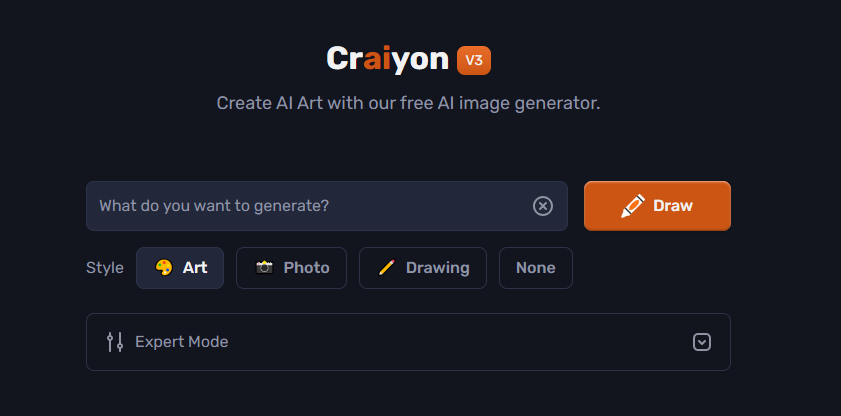 開始使用以下命令(用於開發)。 ``` pip install dalle-mini ``` 您可以閱讀[文件](https://github.com/borisdayma/dalle-mini?tab=readme-ov-file#development)。 您可以閱讀[DALL-E Mini 解釋](https://wandb.ai/dalle-mini/dalle-mini/reports/DALL-E-Mini-Explained-with-Demo--Vmlldzo4NjIxODA)來了解有關資料集、架構和所涉及演算法的更多資訊。 您可以閱讀[最佳真實感 AI 圖像和提示的終極指南](https://www.craiyon.com/blog/ultimate-guide-best-ai-art-photorealistic-images-and-prompts),以便更好地理解優質資源。 DALL·E Mini 在 GitHub 上擁有 14k+ Stars,目前處於`v0.1`版本。 https://github.com/borisdayma/dalle-mini 明星 DALL·E Mini ⭐️ --- 6. [Deepgram](https://github.com/deepgram) - 將語音 AI 建置到您的應用程式中。 --------------------------------------------------------------- 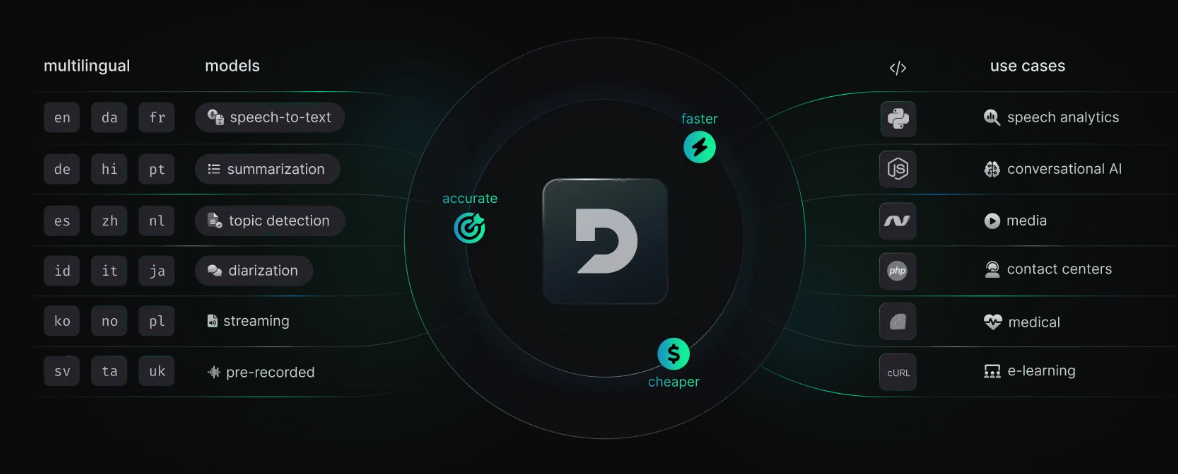 從新創公司到 NASA,Deepgram API 每天都用於轉錄和理解數百萬分鐘的音訊。快速、準確、可擴展且經濟高效。 它為開發人員提供語音到文字和音訊智慧模型。 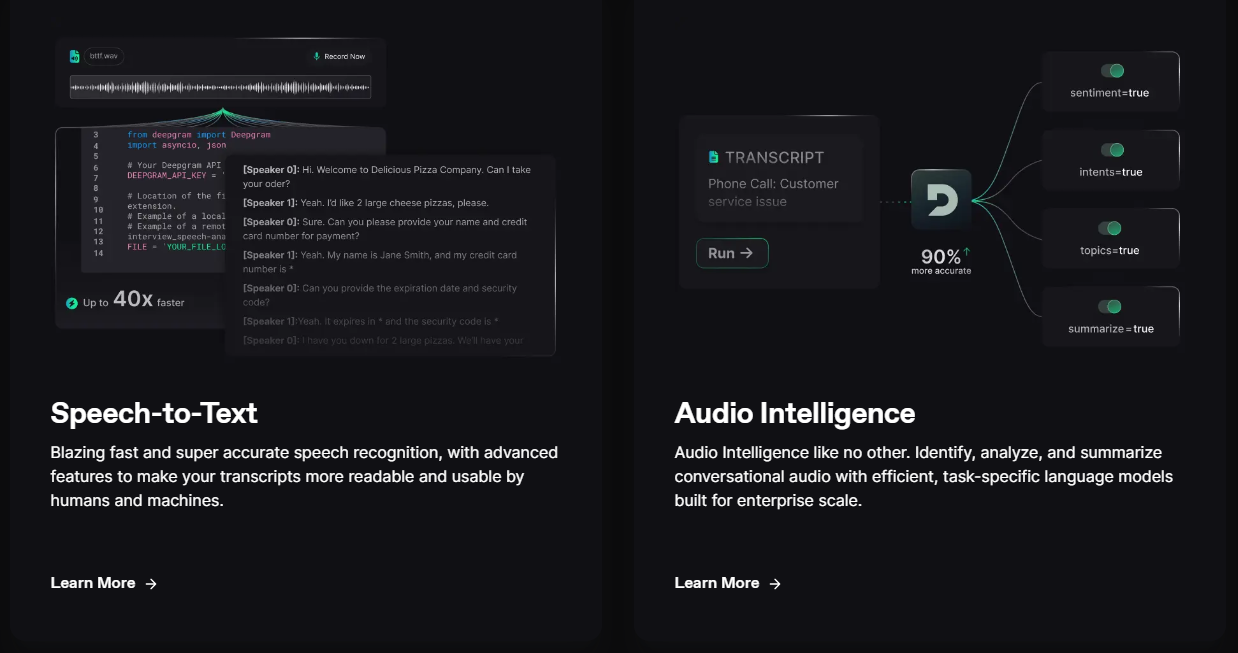 儘管他們有免費增值模式,但免費套餐的限制足以讓您入門。 可視化效果更上一層樓。您可以檢查即時串流媒體回應或音訊檔案並比較音訊的智慧程度。 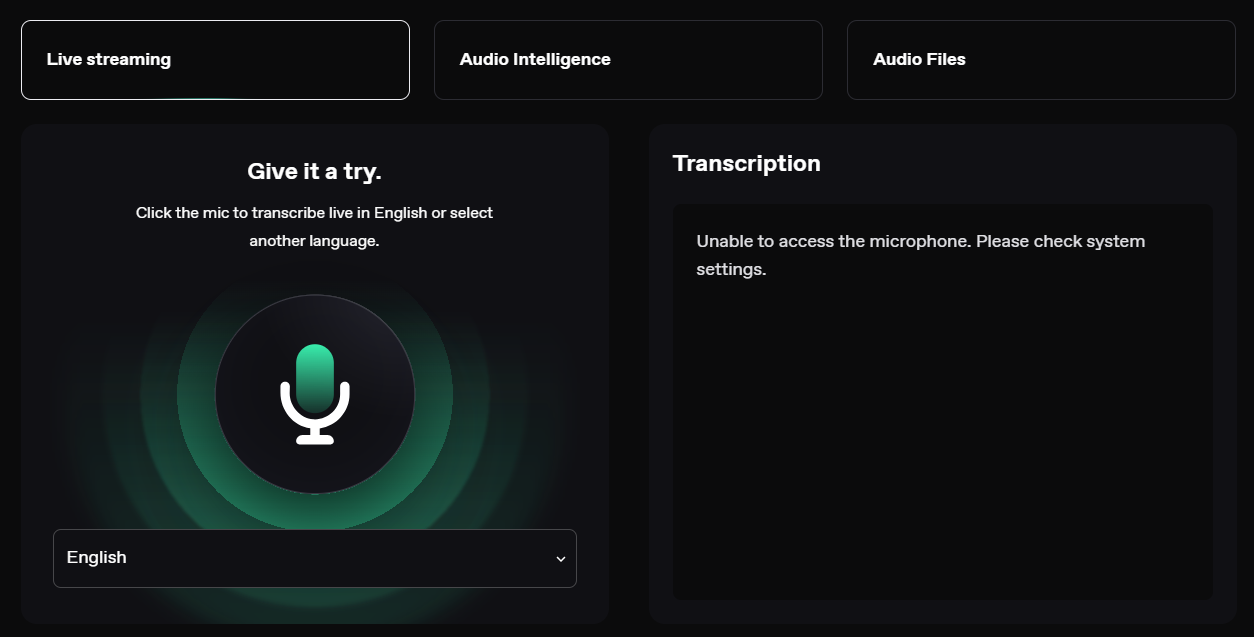 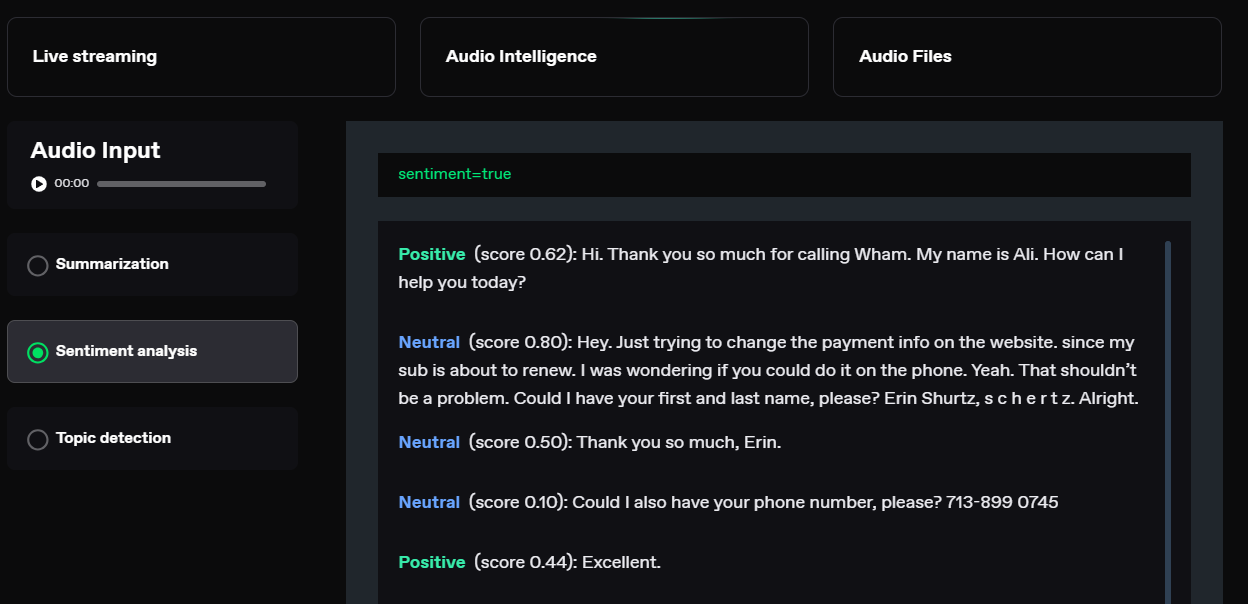 您可以閱讀[文件](https://developers.deepgram.com/docs/introduction)。 您也可以閱讀 Deepgram 撰寫的[關於如何將語音辨識新增至您的 React 和 Node.js 專案的](https://deepgram.com/learn/how-to-add-speech-recognition-to-your-react-project)範例部落格。 如果您想嘗試 API 來親自了解模型的靈活性,請查看他們的[API Playground](https://playground.deepgram.com/?smart_format=true&language=en&model=nova-2) 。 https://github.com/deepgram 明星 Deepgram ⭐️ --- 7. [InvokeAI](https://github.com/invoke-ai/InvokeAI) - 領先的穩定擴散模型創意引擎。 ---------------------------------------------------------------------  關於 InvokeAI 是 Stable Diffusion(開源文字到圖像和圖像到圖像生成器)的實現。 它可以在 Windows、Mac 和 Linux 機器上執行,並在 RAM 低至 4 GB 的 GPU 卡上執行。 此解決方案提供業界領先的WebUI,支援透過CLI進行終端使用,並作為多種商業產品的基礎。 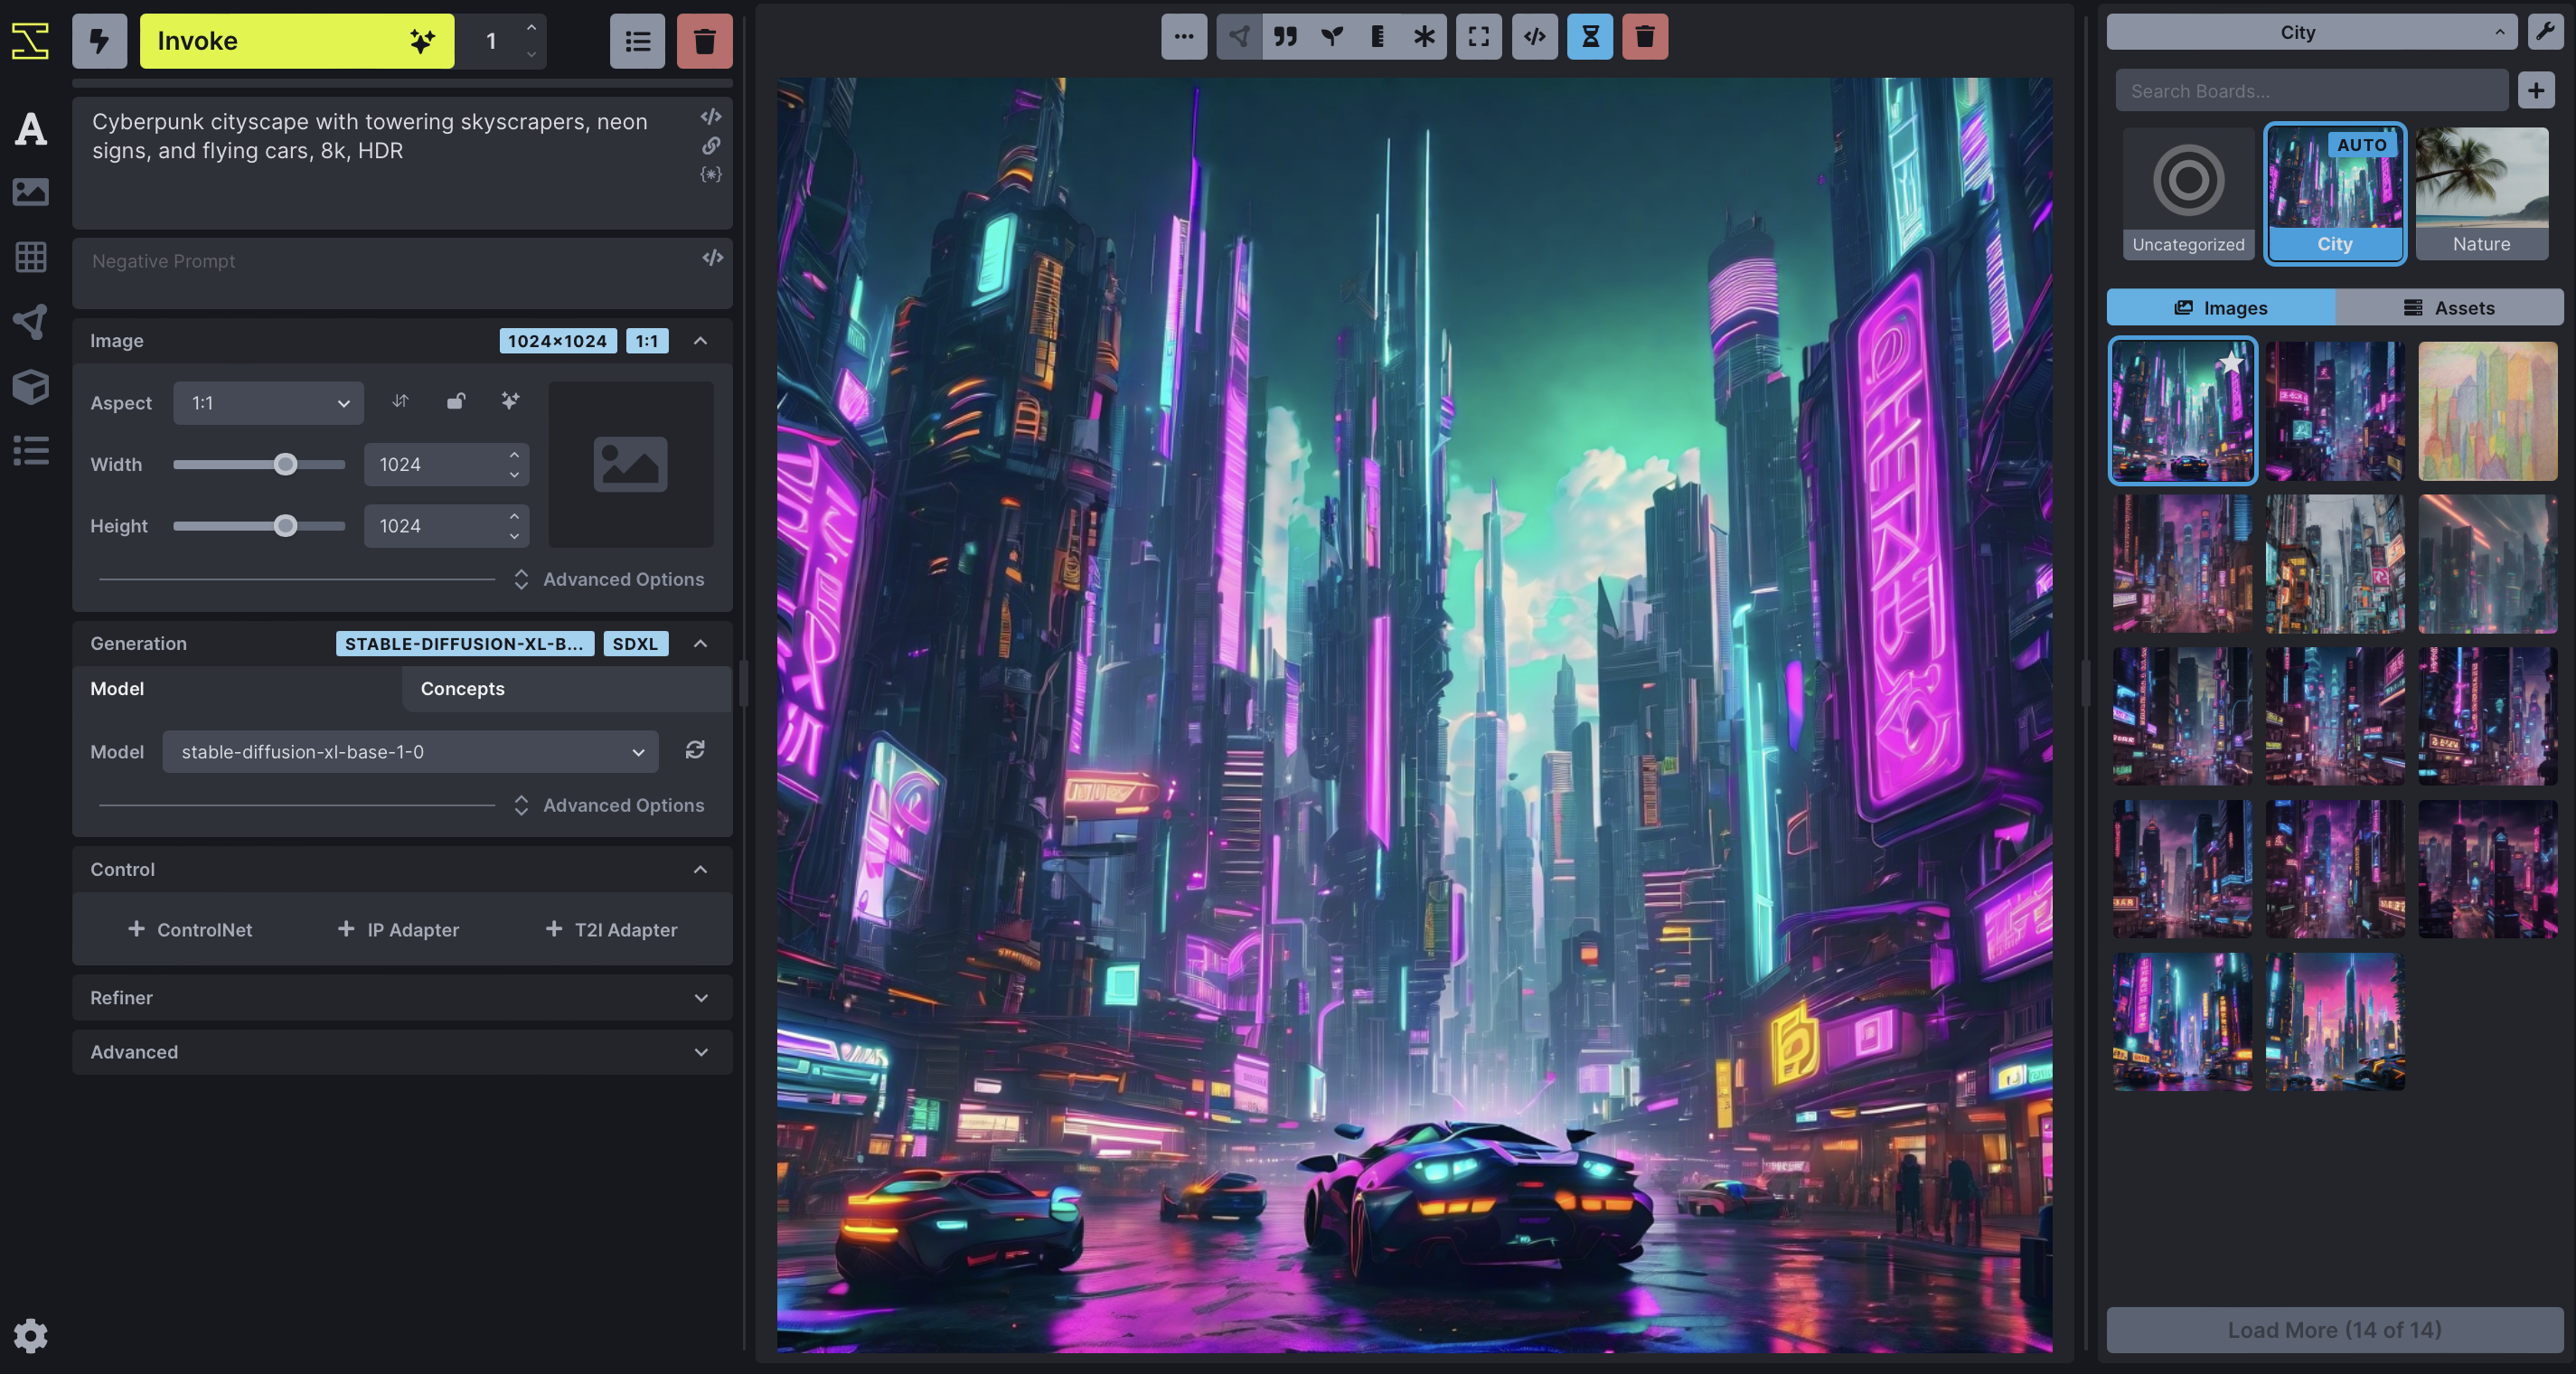 您可以閱讀有關[安裝和硬體要求](https://invoke-ai.github.io/InvokeAI/installation/INSTALLATION/)、[如何安裝不同型號](https://invoke-ai.github.io/InvokeAI/installation/050_INSTALLING_MODELS/)以及最重要的[自動安裝的資訊](https://invoke-ai.github.io/InvokeAI/installation/010_INSTALL_AUTOMATED/)。 令人興奮的功能是能夠使用另一個圖像生成圖像,如[文件](https://invoke-ai.github.io/InvokeAI/features/IMG2IMG/)中所述。 InvokeAI 在 GitHub 上有近 21k 顆星, https://github.com/invoke-ai/InvokeAI 明星 InvokeAI ⭐️ --- 8. [OpenAI](https://github.com/openai) - 您所需要的一切。 ------------------------------------------------- 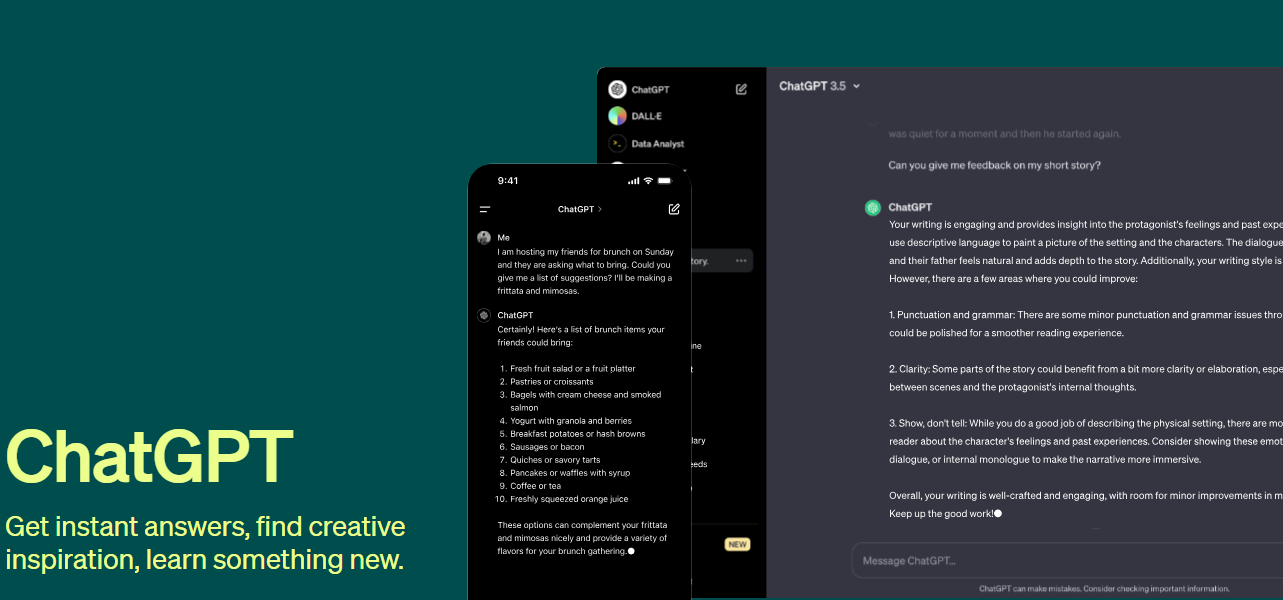 Gemini by Google 和 OpenAI 非常受歡迎,但我們在此列表中專注於 OpenAI。 如果您想了解更多訊息,可以在 Medium 上閱讀[Google AI Gemini API in web using React 🤖](https://generativeai.pub/google-gemini-api-in-web-using-react-7e5bf0bf0abc) 。這很簡單,也很切中要害。 透過 OpenAI,您可以使用 DALL·E(根據文字描述建立原創、逼真的圖像和藝術)、Whisper(語音辨識模型)和 GPT-4。在評論中告訴我們關於索拉的事吧! 您可以使用簡單的 API 開始建置。 ``` completion = openai.ChatCompletion.create( model="gpt-3.5-turbo", messages=[ {"role": "system", "content": "You are a helpful assistant."}, {"role": "user", "content": "What are some famous astronomical observatories?"} ] ) ``` 您可以閱讀[文件](https://platform.openai.com/docs/introduction)。它提供瞭如此多的選項來建立非常酷的東西! 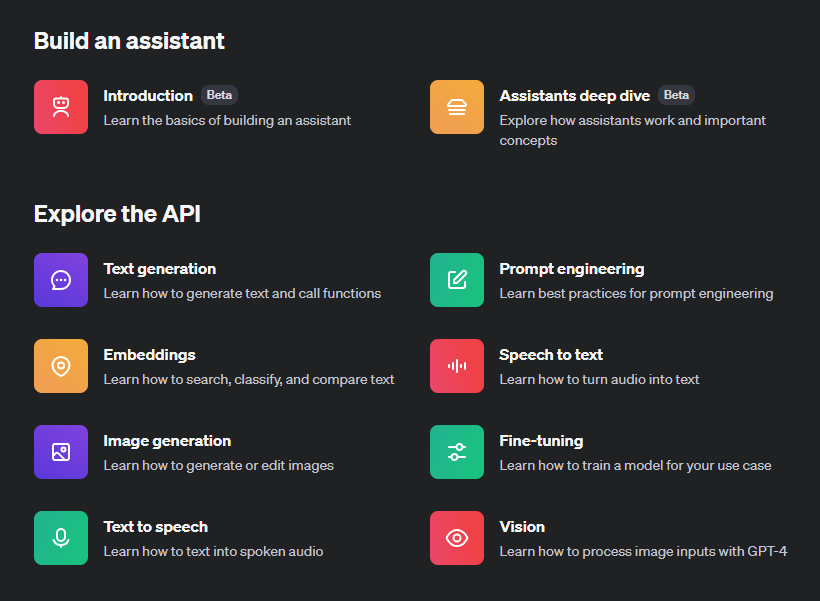 甚至 Stripe 也使用 GPT-4 來改善使用者體驗。 例如,您可以建立[Assistant 應用程式](https://platform.openai.com/docs/assistants/overview)並查看[API 遊樂場](https://platform.openai.com/playground/p/default-chat?model=text-davinci-003)以更好地理解它。  如果您需要指南,可以閱讀 Dzone 的[Integrating ChatGPT With ReactJS](https://dzone.com/articles/integrating-chatgpt-with-reactjs-a-comprehensive-g) 。 其間,OpenAI收購了Sora,獲得了壟斷地位。你怎麼認為? https://github.com/openai 明星 OpenAI ⭐️ --- 9. [DeepFaceLab](https://github.com/iperov/DeepFaceLab) - 用於建立深度贗品的領先軟體。 ------------------------------------------------------------------------ 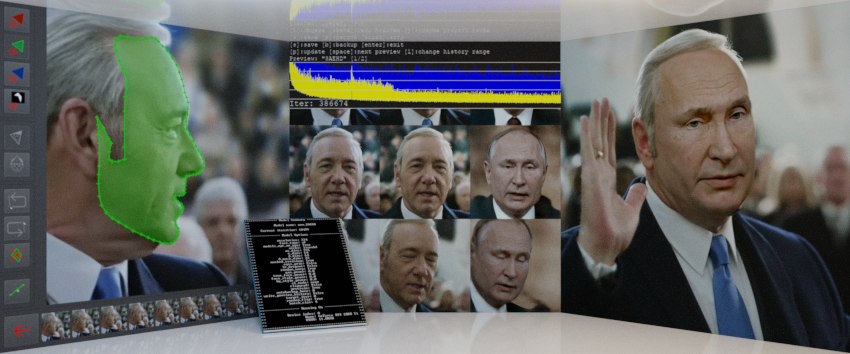 DeepFaceLab 是製作 Deepfakes 的頂級開源工具。 Deepfakes 是透過深度學習製作的經過修改的圖像和影片。它們經常被用來交換圖片或剪輯中的臉孔,有時是為了開玩笑,但也有出於有害的原因。 DeepFaceLab,用Python建置,是一個強大的deepfake工具。它可以改變媒體中的臉孔,甚至消除皺紋和老化跡象。 這些是您可以使用 DeepFaceLab 執行的一些操作。 - 換臉。  - [臉部抗衰老 - YouTube](https://www.youtube.com/watch?v=Ddx5B-84ebo) 。  - 更換頭部。  - 操縱嘴唇。 您可以使用這個基本教學來了解[如何有效地使用 DeepFaceLab](https://www.youtube.com/watch?v=kOIMXt8KK8M)來完成這些事情。 您可以在[YouTube](https://www.youtube.com/channel/UCGf4OlX_aTt8DlrgiH3jN3g/videos)上看到使用此 DeepLab 演算法的影片。 不幸的是,DeepFaceLab 中沒有「讓一切正常」按鈕,但值得根據您的特定需求了解其工作流程。 儘管它於 2023 年 11 月 9 日存檔,在 GitHub 上有近 44k+ 顆星,但由於其大量的教程和可靠的演算法,它仍然是您的 AI 應用程式的可靠選擇。 https://github.com/iperov/DeepFaceLab 明星 DeepFaceLab ⭐️ --- 10. [Detectron2](https://github.com/facebookresearch/detectron2) - 基於 PyTorch 的模組化物件偵測庫。 ---------------------------------------------------------------------------------------- 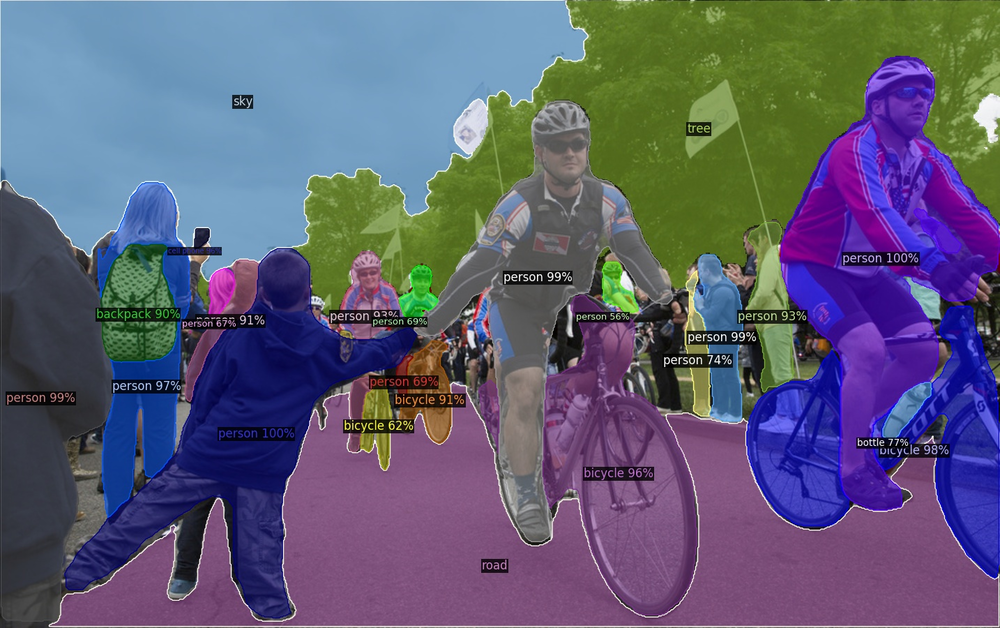 Detectron2 是 Facebook AI Research 的下一代函式庫,提供最先進的偵測和分割演算法。它是 Detectron 和 maskrcnn-benchmark 的後繼者。 它支援 Facebook 上的多個電腦視覺研究專案和生產應用程式。 使用此[YouTube 教學](https://www.youtube.com/watch?v=eUSgtfK4ivk)將 Detectron2 與 Facebook 開發者倡導者的機器學習結合使用。 Detectron2 旨在支援各種最先進的物件偵測和分割模型,同時也適應不斷發展的前沿研究領域。 您可以閱讀[如何入門](https://detectron2.readthedocs.io/en/latest/tutorials/getting_started.html)以及 [元博客](https://ai.meta.com/blog/-detectron2-a-pytorch-based-modular-object-detection-library-/),其中深入介紹了 Detectron 的目標。 舊版的 Detectron 使用的是 Caffe,因此很難與後來結合 Caffe2 和 PyTorch 的程式碼變更一起使用。為了回應社群回饋,Facebook AI 發布了 Detectron2 作為更新的、更容易使用的版本。 Detectron2 配備了用於物件偵測的先進演算法,例如 DensePose 和全景特徵金字塔網路。 此外,Detectron2 還可以進行語義分割和全景分割,這有助於更準確地偵測和分割影像和影片中的物件。 Detectron2 不僅支援使用邊界框和實例分割遮罩進行物件偵測,還可以預測人體姿勢,與 Detectron 類似。 它們在 GitHub 儲存庫上擁有 28k+ Stars,並在 GitHub 上被 1.6k+ 開發人員使用。 https://github.com/facebookresearch/detectron2 Star Detectron2 ⭐️ --- [11.FastAI-](https://github.com/fastai/fastai)深度學習庫。 ---------------------------------------------------- 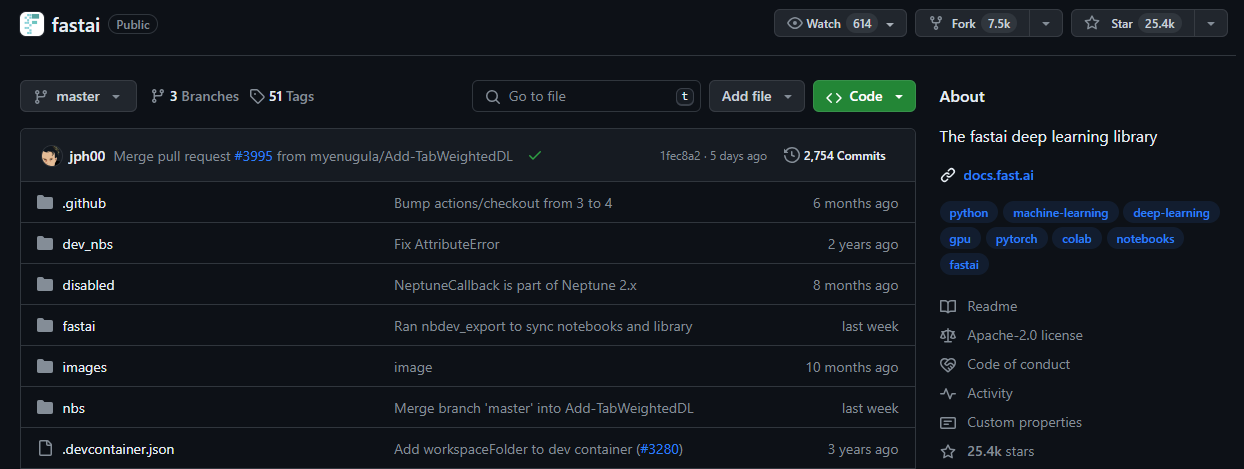 Fastai 是一個多功能的深度學習庫,旨在滿足從業者和研究人員的需求。它為從業者提供了高級元件,以便他們在常見的深度學習任務中快速獲得一流的結果。 同時,它為研究人員提供低階元件來實驗和開發新方法。 Detectron2 透過其分層架構實現了易用性和靈活性之間的平衡。 該架構將複雜的深度學習技術分解為可管理的抽象,簡潔地利用了 Python 的動態特性和 PyTorch 的靈活性。 它建構在較低層級 API 的層次結構之上,這些 API 提供可組合的建構塊。這樣,想要重寫部分高級 API 或加入特定行為以滿足其需求的用戶無需學習如何使用最低級別。 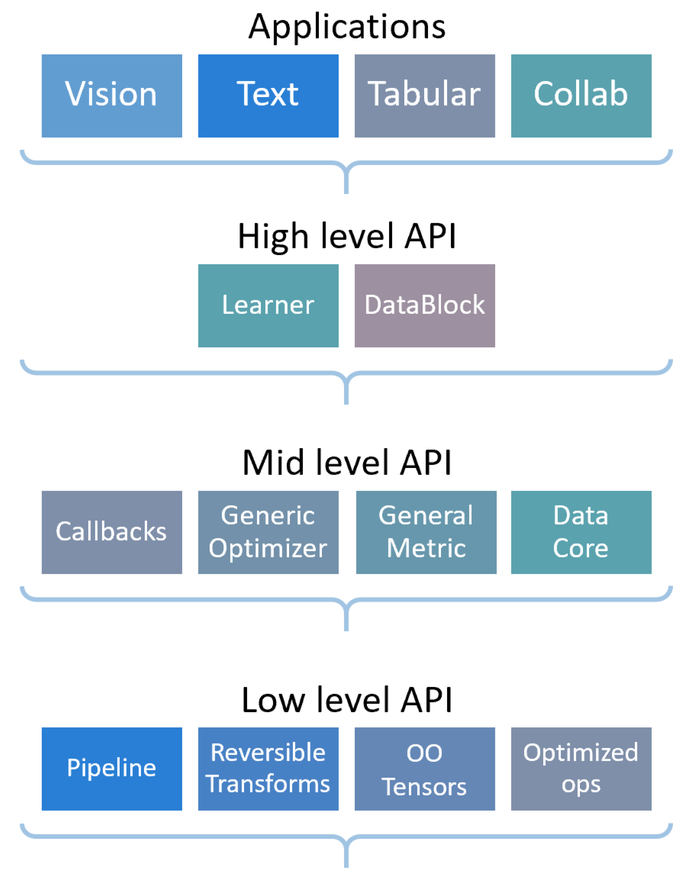 [安裝 pyTorch](https://pytorch.org/get-started/locally/)後即可開始使用以下命令。 ``` conda install -c fastai fastai ``` 您可以閱讀[文件](https://docs.fast.ai/)。 它們針對初學者、中級和專家的[教程](https://docs.fast.ai/tutorial.html)有不同的起點。 如果您想為 FastAI 做出貢獻,您應該閱讀他們的[程式碼風格指南](https://docs.fast.ai/dev/style.html)。 如果您更喜歡影片,可以在 YouTube 上觀看傑里米霍華德 (Jeremy Howard) 撰寫的[課程“0”:程式設計師實用深度學習 (fastai)](https://www.youtube.com/watch?v=gGxe2mN3kAg) 。 它們在 GitHub 上擁有超過 25,000 顆星,並已被 GitHub 上超過 16,000 名開發人員使用。 https://github.com/fastai/fastai 明星 FastAI ⭐️ --- 12.[穩定擴散](https://github.com/CompVis/stable-diffusion)- 潛在文字到影像擴散模型。 --------------------------------------------------------------------  > 什麼是穩定擴散? 穩定擴散是指生成模型中使用的一種技術,特別是在文字到圖像合成的背景下,其中將資訊從文字描述轉移到圖像的過程是逐漸且平滑地完成的。 在潛在文字到影像擴散模型中,穩定擴散可確保來自文字描述的訊息在整個模型的潛在空間中一致地擴散或傳播。這種擴散過程有助於產生與給定文字輸入相符的高品質和逼真的圖像。 穩定的擴散機制確保模型在生成過程中不會出現突然的跳躍或不穩定。我希望這能解決問題! 下載和採樣穩定擴散的簡單方法是使用[擴散器庫](https://github.com/huggingface/diffusers/tree/main#new--stable-diffusion-is-now-fully-compatible-with-diffusers)。 ``` # make sure you're logged in with `huggingface-cli login` from torch import autocast from diffusers import StableDiffusionPipeline pipe = StableDiffusionPipeline.from_pretrained( "CompVis/stable-diffusion-v1-4", use_auth_token=True ).to("cuda") prompt = "a photo of an astronaut riding a horse on mars" with autocast("cuda"): image = pipe(prompt)["sample"][0] image.save("astronaut_rides_horse.png") ``` 您可以閱讀[研究論文](https://ommer-lab.com/research/latent-diffusion-models/)以及有關[穩定擴散影像修改](https://github.com/CompVis/stable-diffusion?tab=readme-ov-file#image-modification-with-stable-diffusion)的更多資訊。 例如,這是輸入。  這是放大一點後的輸出。  Stable Diffusion v1 是一種特定的模型配置,它採用 860M UNet 和 CLIP ViT-L/14 文字編碼器進行擴散模型,並具有下採樣因子 8 自動編碼器。該模型在 256x256 影像上進行了預訓練,隨後在 512x512 影像上進行了微調。 他們在 GitHub 儲存庫上擁有大約 64k+ Stars。 https://github.com/CompVis/stable-diffusion 恆星穩定擴散 ⭐️ --- 13. [Mocap Drones](https://github.com/jyjblrd/Mocap-Drones) - 用於房間規模追蹤的低成本動作捕捉系統。 ---------------------------------------------------------------------------------  該專案需要 SFM(運動結構)OpenCV 模組,這需要您從原始程式碼編譯 OpenCV。 從`computer_code`目錄中,執行此命令來安裝節點相依性。 ``` yarn install yarn run dev // to start the web server. ``` 您將獲得前端介面的 URL 視圖。 開啟一個單獨的終端機視窗並執行命令`python3 api/index.py`來啟動後端伺服器。此伺服器負責接收攝影機串流並執行動作捕捉計算。 架構如下。 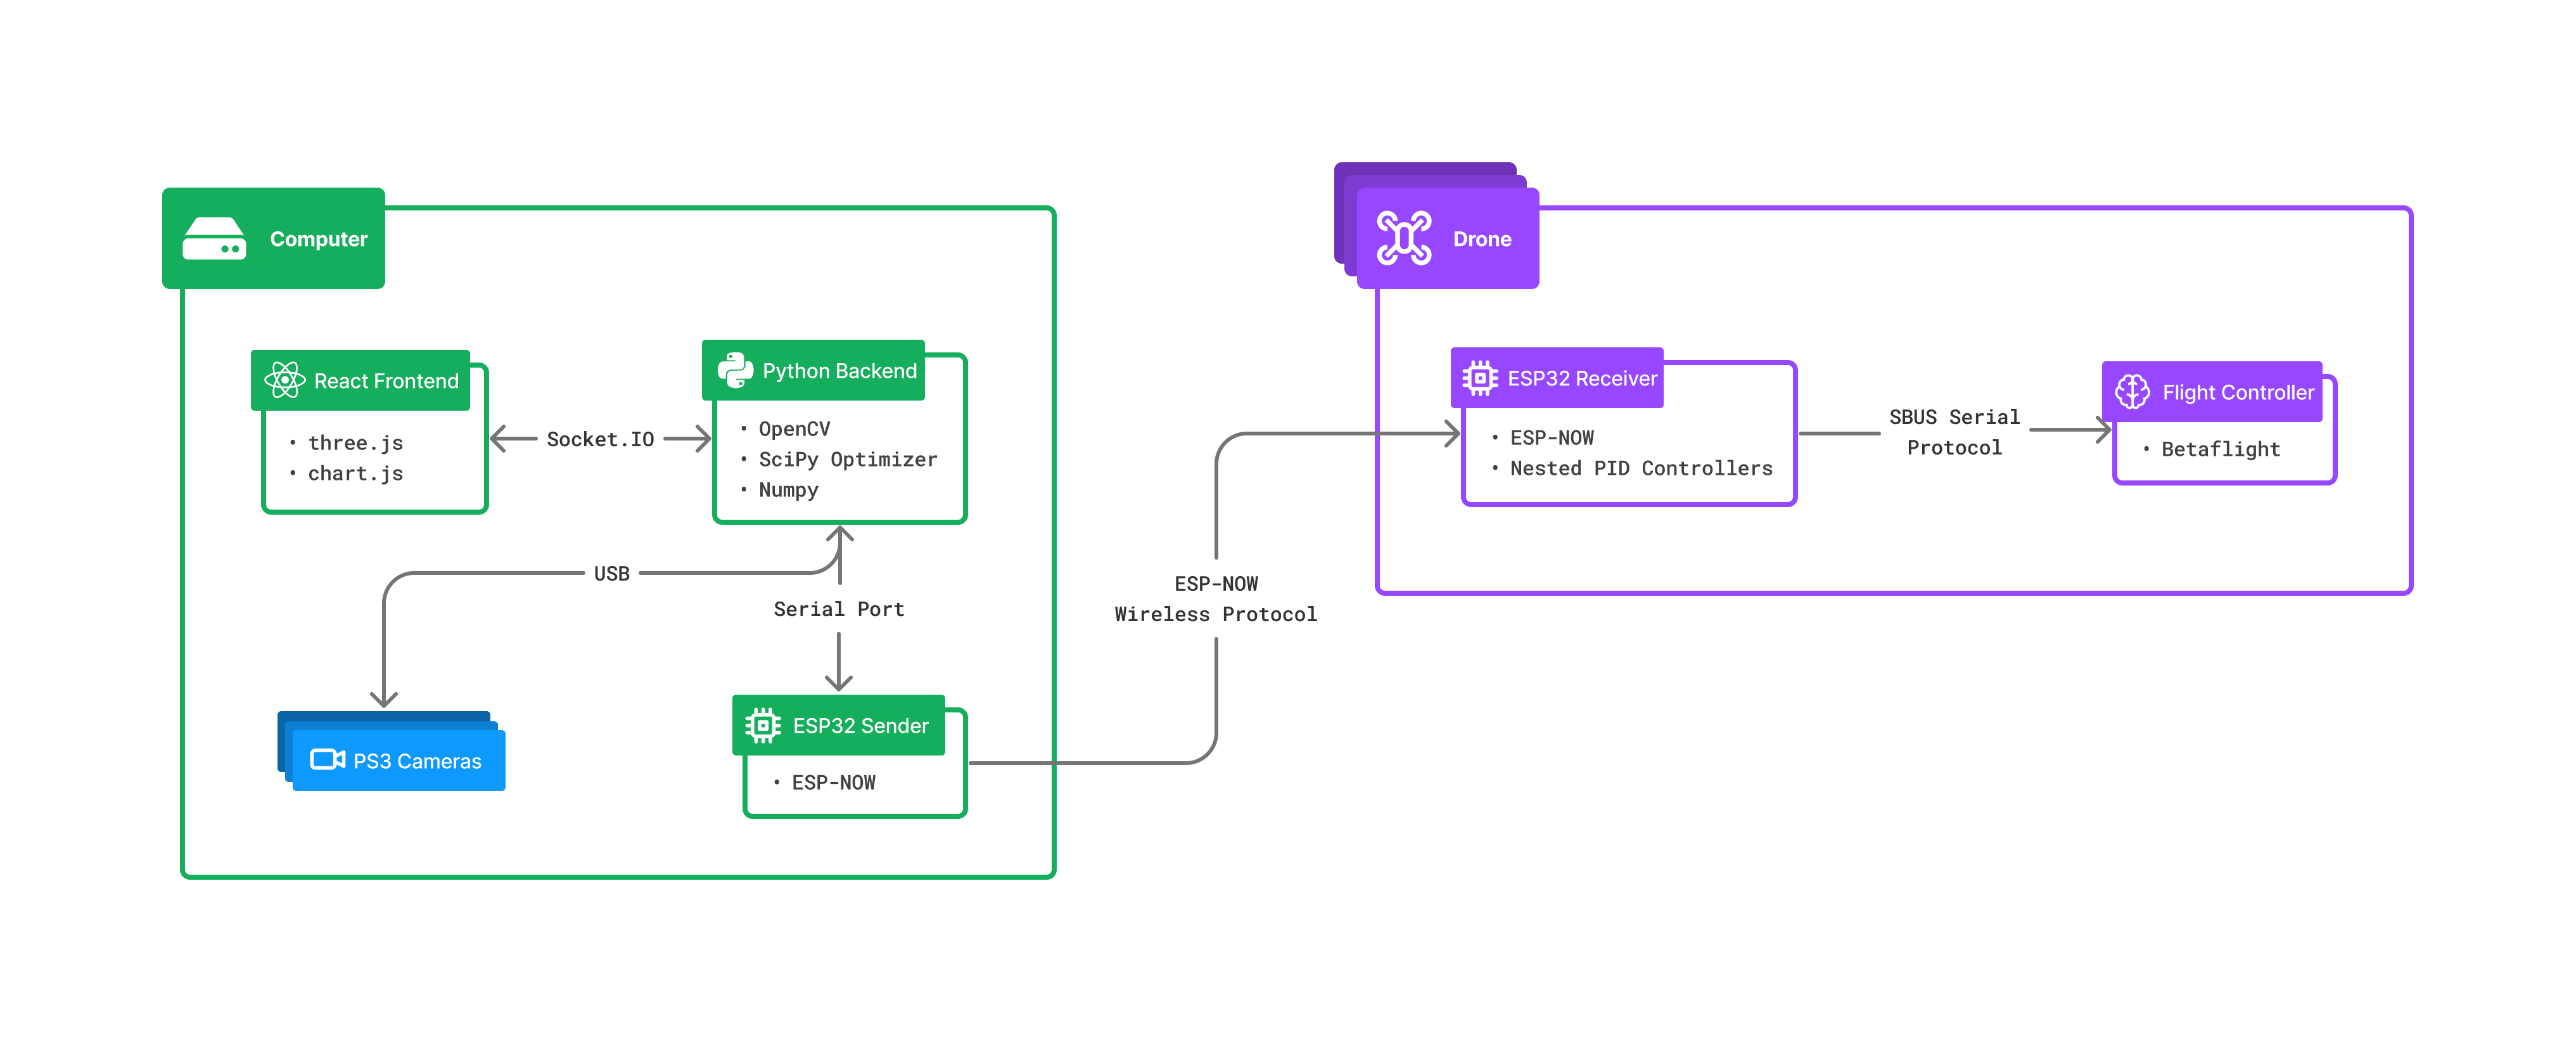 您可以觀看此[YouTube 影片](https://www.youtube.com/watch?v=0ql20JKrscQ)來了解 Mocap 無人機的工作原理,也可以觀看該專案所有者的[部落格](https://joshuabird.com/blog/post/mocap-drones)。 https://www.youtube.com/watch?v=0ql20JKrscQ 您可以閱讀[文件](https://github.com/jyjblrd/Mocap-Drones?tab=readme-ov-file#runing-the-code)。 這是一個最近的開源專案,在 GitHub 儲存庫上擁有 900 多個 star。 https://github.com/jyjblrd/Mocap-Drones 明星動捕無人機 ⭐️ --- 14. [Whisper Speech](https://github.com/collabora/WhisperSpeech) - 透過反轉 Whisper 建構的文字轉語音系統。 ------------------------------------------------------------------------------------------- 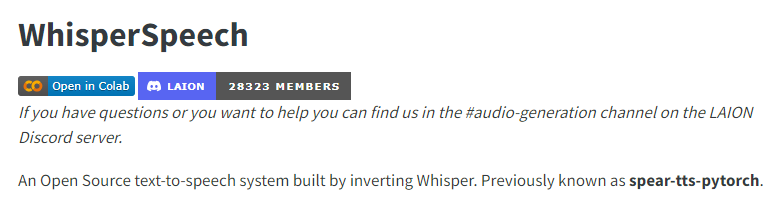 該模型與穩定擴散類似,但用於語音,功能強大且高度可自訂。 該團隊確保使用經過適當許可的語音錄音,並且所有程式碼都是開源的,使該模型對於商業應用程式來說是安全的。 目前,這些模型是在英語 LibreLight 資料集上進行訓練的。 您可以進一步研究[架構](https://github.com/collabora/WhisperSpeech?tab=readme-ov-file#architecture)。 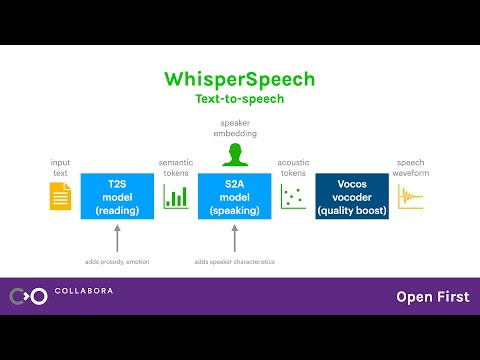 您可以聽到[範例聲音](https://github.com/collabora/WhisperSpeech/assets/107984/aa5a1e7e-dc94-481f-8863-b022c7fd7434)並使用[colab](https://colab.research.google.com/drive/1xxGlTbwBmaY6GKA24strRixTXGBOlyiw)自行嘗試。 它們相當新,在 GitHub 上有大約 3k+ 的星星。 https://github.com/collabora/WhisperSpeech 星語語音 ⭐️ --- 15. [eSpeak NG](https://github.com/espeak-ng/espeak-ng) - 支援一百多種語言和口音的語音合成器。 ----------------------------------------------------------------------------  eSpeak NG 是一款緊湊型開源軟體文字語音合成器,適用於 Linux、Windows、Android 和其他作業系統。它支援 100 多種語言和口音。它基於 Jonathan Duddington 建立的 eSpeak 引擎。 您可以閱讀各種系統上的[安裝指南](https://github.com/espeak-ng/espeak-ng/blob/master/docs/guide.md)。 對於類似 Debian 的發行版(例如 Ubuntu、Mint 等)。您可以使用此命令。 ``` sudo apt-get install espeak-ng ``` 您可以查看[支援的語言](https://github.com/espeak-ng/espeak-ng/blob/master/docs/languages.md)清單、閱讀[文件](https://github.com/espeak-ng/espeak-ng/tree/master?tab=readme-ov-file#documentation)並查看[功能](https://github.com/espeak-ng/espeak-ng/tree/master?tab=readme-ov-file#features)。 該模型將文字轉換為音素程式碼,表明其作為另一個語音合成引擎前端的潛在能力。 他們在 GitHub 上有 2700+ 顆星星, https://github.com/espeak-ng/espeak-ng 明星 eSpeak NG ⭐️ --- 16.[聊天機器人 UI](https://github.com/mckaywrigley/chatbot-ui) - 每個模型的人工智慧聊天。 ------------------------------------------------------------------------ 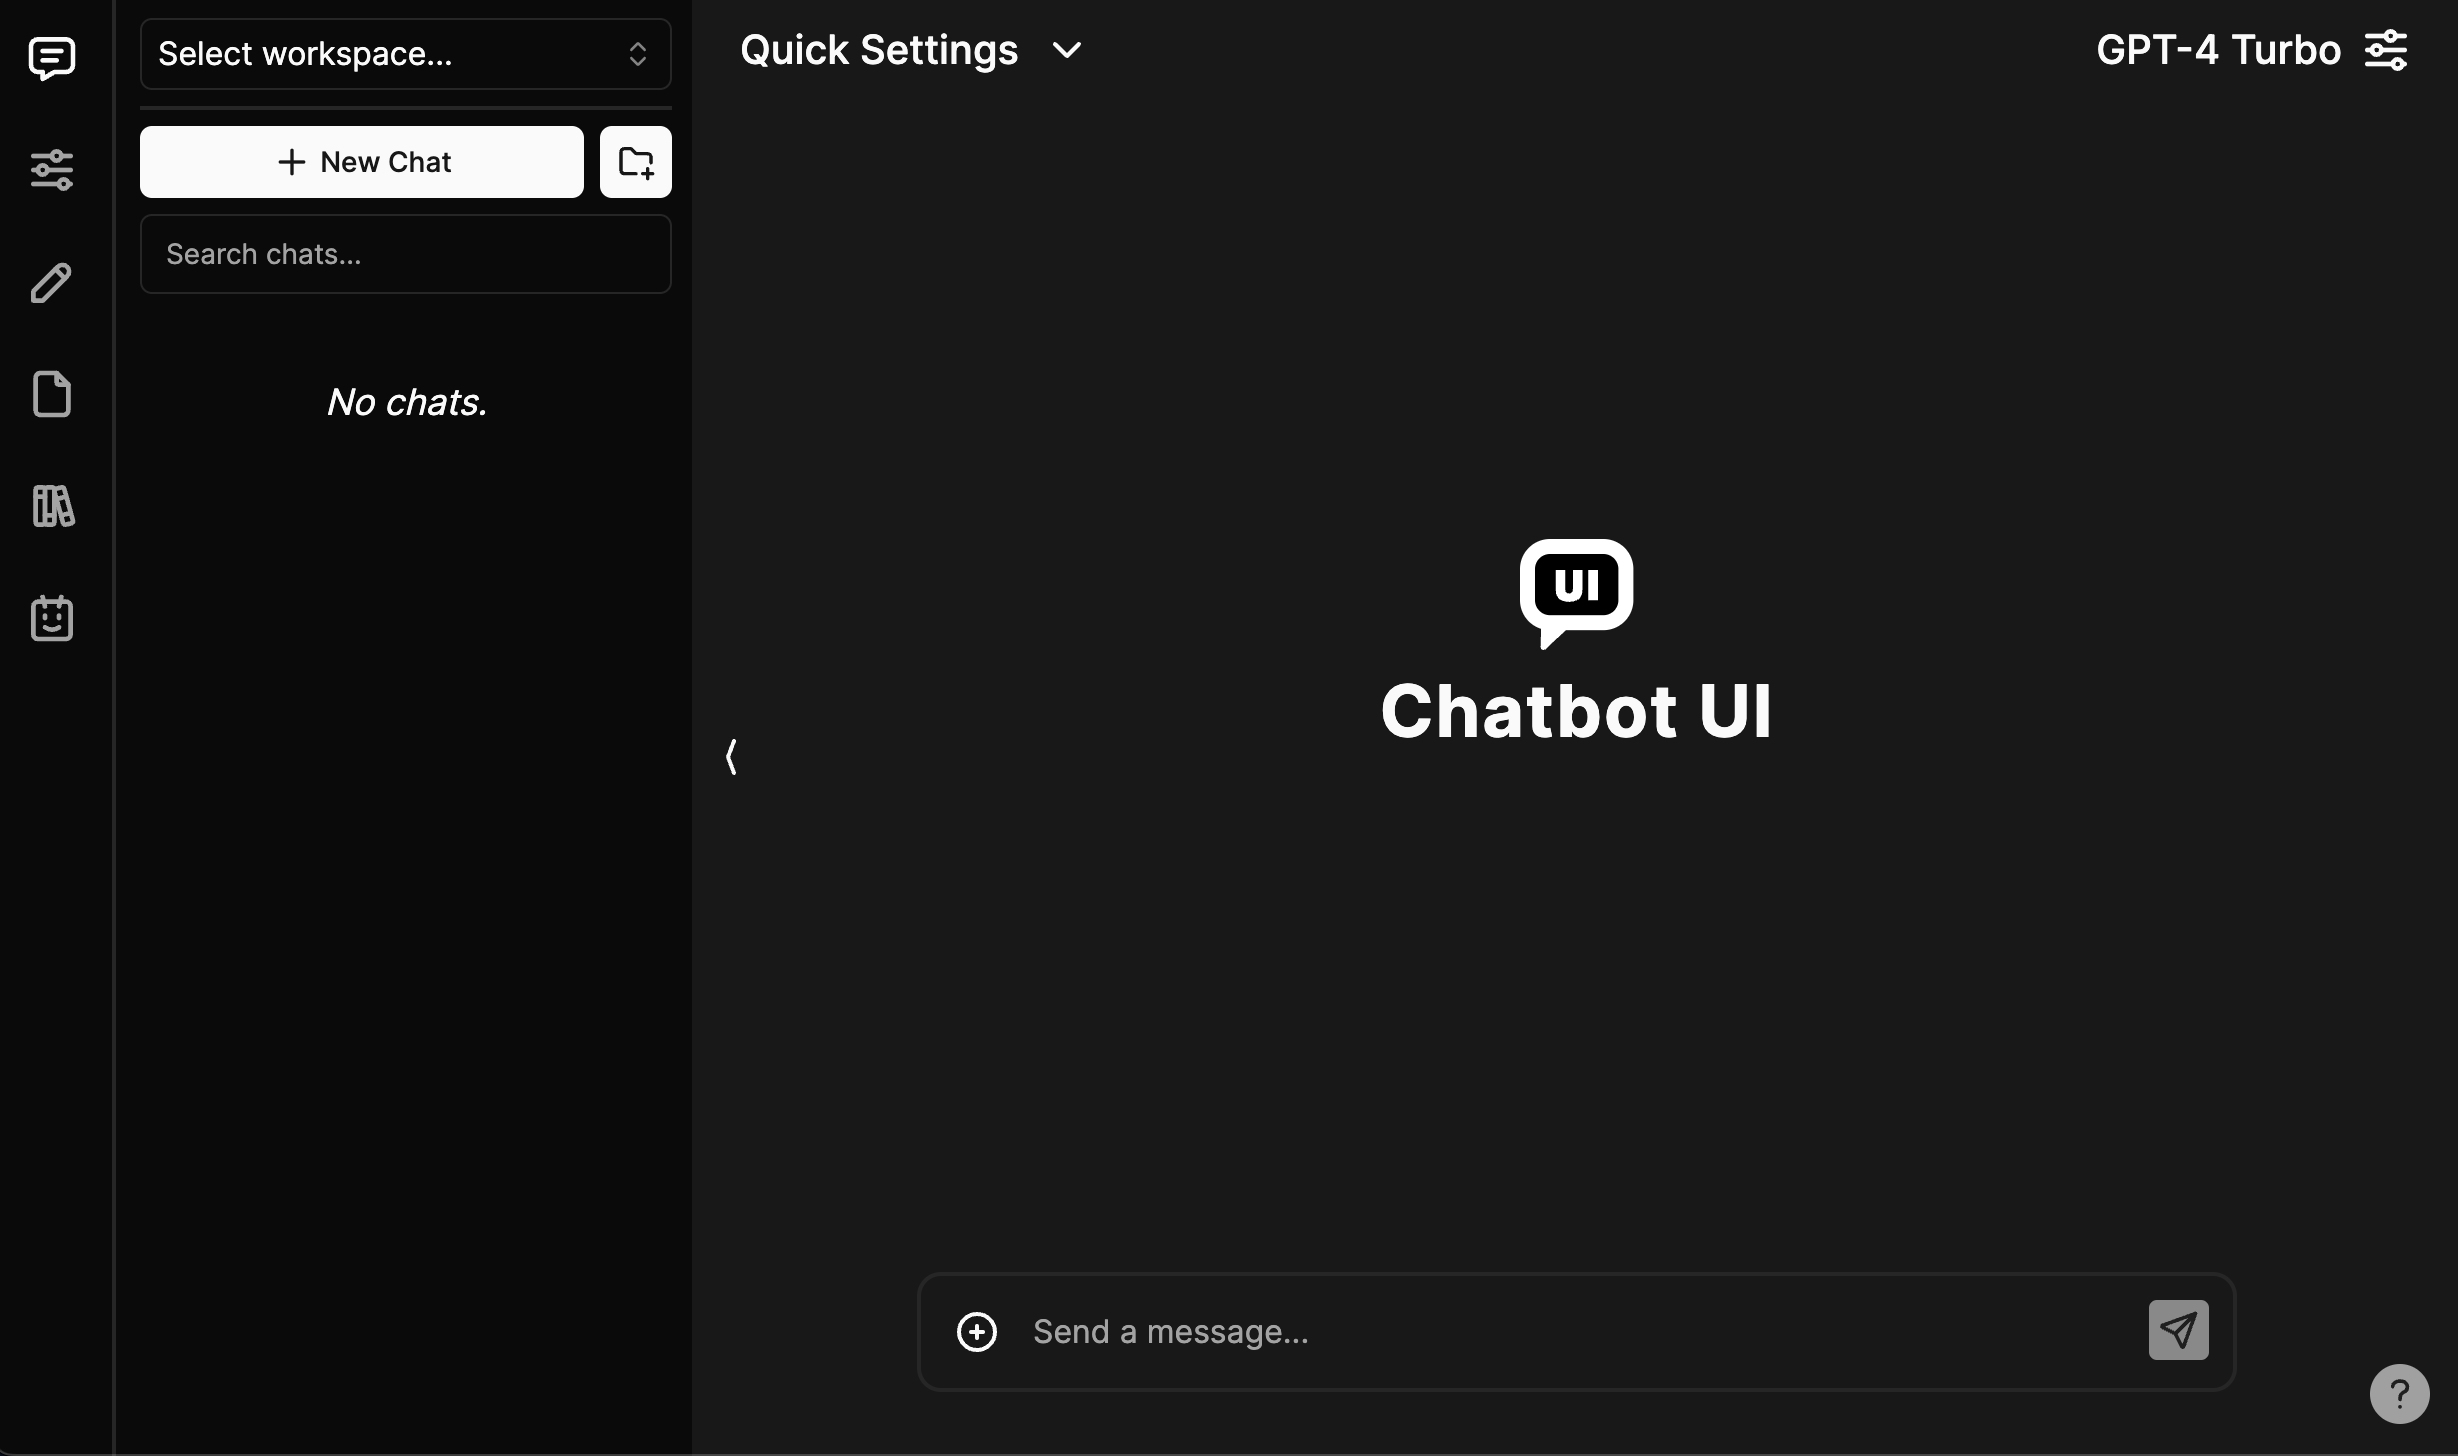 我們都使用過 ChatGPT,這個專案可以幫助我們為任何 AI 聊天機器人設定使用者介面。少一麻煩! 你可以閱讀[安裝指南](https://github.com/mckaywrigley/chatbot-ui?tab=readme-ov-file#1-install-docker)來安裝 docker、supabase CLI 和其他東西。 您可以閱讀<a href="">文件</a>並查看[演示](https://twitter.com/mckaywrigley/status/1738273242283151777?s=20)。 這在底層使用了 Supabase (Postgres),這就是我們之前討論它的原因。 我沒有討論 Vercel AI 聊天機器人,因為它與此機器人相比是一個相當新的比較。 Chatbot UI 在 GitHub 上擁有大約 25k+ Stars,因此它仍然是開發人員為任何聊天機器人建立 UI 介面的首選。 https://github.com/mckaywrigley/chatbot-ui 明星聊天機器人 UI ⭐️ --- 17. [GPT-4 & LangChain](https://github.com/mayooear/gpt4-pdf-chatbot-langchain) - 用於大型 PDF 文件的 GPT4 和 LangChain 聊天機器人。 --------------------------------------------------------------------------------------------------------------------------  這可用於新的 GPT-4 API 來為多個大型 PDF 檔案建立 chatGPT 聊天機器人。 該系統是使用 LangChain、Pinecone、Typescript、OpenAI 和 Next.js 建構的。 LangChain 是一個簡化可擴展 AI/LLM 應用程式和聊天機器人開發的框架。 Pinecone 用作向量存儲,用於以文字格式儲存嵌入和 PDF,以便以後檢索類似文件。 您可以閱讀涉及複製、安裝依賴項和設定環境 API 金鑰[的開發指南](https://github.com/mayooear/gpt4-pdf-chatbot-langchain?tab=readme-ov-file#development)。 您可以觀看[YouTube 影片](https://www.youtube.com/watch?v=ih9PBGVVOO4),了解如何遵循和使用它。 他們在 GitHub 上擁有 14k+ Stars,僅提交了 34 次。在您的下一個人工智慧應用程式中嘗試! https://github.com/mayooear/gpt4-pdf-chatbot-langchain 明星 GPT-4 和 Langchain ⭐️ --- 18. [Amica](https://github.com/semperai/amica) - 允許您在瀏覽器中輕鬆與 3D 角色聊天。 ---------------------------------------------------------------------  Amica 是一個開源接口,用於透過語音合成和語音辨識與 3D 角色進行互動式通訊。 您可以匯入 VRM 文件,調整聲音以適合角色,並產生包含情緒表達的回應文字。 他們使用 Three.js、OpenAI、Whisper、Bakllava 等進行視覺處理。您可以閱讀[Amica 的工作原理](https://docs.heyamica.com/overview/how-amica-works)及其所涉及的[核心概念](https://docs.heyamica.com/overview/core-concepts)。 您可以克隆該存儲庫並使用它來[開始](https://docs.heyamica.com/getting-started/installation)。 ``` npm i npm run dev ``` 您可以閱讀[文件](https://docs.heyamica.com/)並查看[演示](https://amica.arbius.ai/),這真是太棒了:D 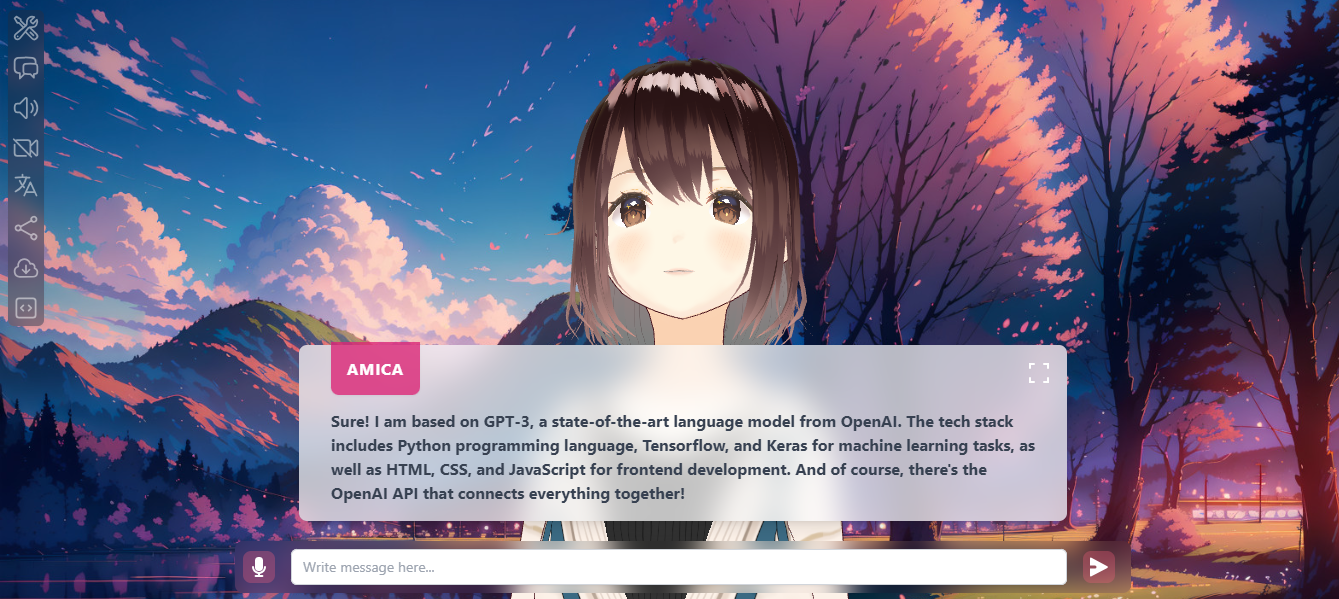 您可以觀看這段簡短的影片,了解它的功能。 https://www.youtube.com/watch?v=hUxAEnFiXH8 Amica 使用 Tauri 建立桌面應用程式。別擔心,我們在此清單的後面部分介紹了金牛座。 他們在 GitHub 上有 400 多個 Star,看起來非常容易使用。 https://github.com/semperai/amica Star Amica ⭐️ --- 19. [Hugging Face Transformers](https://github.com/huggingface/transformers) - 適用於 Pytorch、TensorFlow 和 JAX 的最先進的機器學習。 ---------------------------------------------------------------------------------------------------------------------- 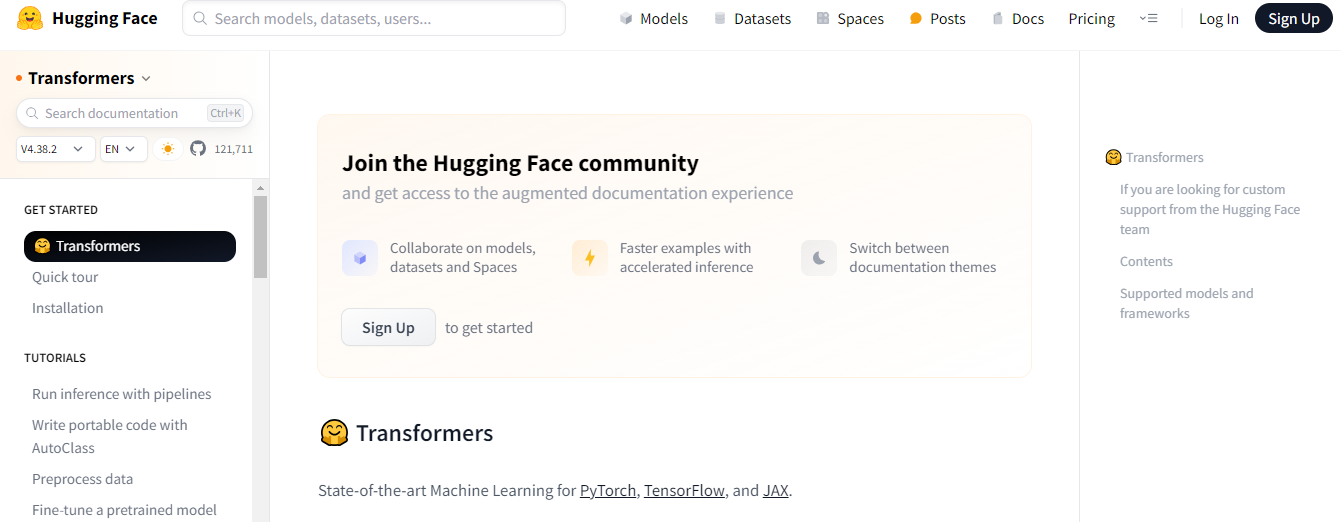 Hugging Face Transformers 可以輕鬆存取最先進的預訓練模型和演算法,用於文字分類、語言生成和問答等任務。該庫建置在 PyTorch 和 TensorFlow 之上,允許用戶以最少的努力將高級 NLP 功能無縫整合到他們的應用程式中。 憑藉大量預訓練模型和支援社區,Hugging Face Transformers 簡化了基於 NLP 的解決方案的開發。 這些模型可用於執行 100 多種語言的文本相關任務,例如文字分類、資訊擷取、問答、摘要、翻譯和文字生成。 它們還可以處理與影像相關的任務,例如影像分類、物件偵測和分割,以及與音訊相關的任務,例如語音辨識和音訊分類。 他們還可以執行各種模式的多任務處理,包括表格問答、光學字元辨識、從掃描文件中提取資訊、視訊分類和視覺問答。 您可以看到大量可用的[模型](https://huggingface.co/models)。 您可以瀏覽[文件](https://huggingface.co/docs/transformers/task_summary)以取得完整的目標並向您展示可以執行的各種任務的範例。 例如,使用管道的一種方法是用於影像分割。 ``` from transformers import pipeline segmenter = pipeline(task="image-segmentation") preds = segmenter( "https://huggingface.co/datasets/huggingface/documentation-images/resolve/main/pipeline-cat-chonk.jpeg" ) preds = [{"score": round(pred["score"], 4), "label": pred["label"]} for pred in preds] print(*preds, sep="\n") ``` Transformer 得到了 Jax、PyTorch 和 TensorFlow 這三個最廣泛使用的深度學習庫的支持,並且它們之間可以無縫整合。這種整合可以使用一個庫輕鬆訓練模型,然後加載它們以使用另一個庫進行推理。 它們在 GitHub 上擁有大約 120k+ 星,並被 142k+ 大量開發人員使用。試試看! https://github.com/huggingface/transformers 明星抱臉變形金剛 ⭐️ --- 20. [LLAMA](https://github.com/facebookresearch/llama) - LLaMA 模型的推理程式碼。 ------------------------------------------------------------------------  Llama 2 是 Facebook Research 開發的尖端技術,使個人、創作者、研究人員和各種規模的企業能夠使用大型語言模型負責任地實驗、創新和擴展他們的想法。 最新版本包括模型權重以及預訓練和微調 Llama 語言模型的起始程式碼,參數範圍從 7B 到 70B。 開始使用涵蓋以下步驟的[安裝指南](https://github.com/facebookresearch/llama?tab=readme-ov-file#quick-start)。 - 克隆並下載儲存庫。 - 安裝所需的依賴項。 - 從 Meta 網站註冊並下載模型。 - 執行提供的腳本來下載模型。 - 使用提供的命令在本地執行所需的模型。 您可以觀看由 ZeroToMastery 製作的關於什麼是美洲駝的[YouTube 影片](https://www.youtube.com/watch?v=OqZ0CSKzu10)。 您也可以在[Hugging Face](https://huggingface.co/meta-llama)和[Meta 官方頁面](https://llama.meta.com/)上查看型號清單和更多資訊。 Ollama 基於 llama,在 GitHub 上擁有 50k+ star。請參閱文件並使用此模型進行更多研究。 https://github.com/facebookresearch/llama 明星 LLAMA ⭐️ --- 21. [Fonoster](https://github.com/fonoster/fonoster) - Twilio 的開源替代品。 ---------------------------------------------------------------------  Fonoster Inc. 研究了一種創新的可編程電信堆棧,該堆疊將為企業提供完全基於雲端的實用程序,將電話服務與網路連接起來。 根據您想要實現的目標,有多種開始方法。 開始使用以下 npm 指令。 ``` npm install @fonoster/websdk // CDN is also available ``` 例如,您可以透過以下方式將 Fonoster 與 Google Speech API 結合使用。 (您將需要服務帳戶的金鑰) ``` npm install @fonoster/googleasr @fonoster/googletts ``` 這是您可以配置語音伺服器以使用插件的方法。 ``` const { VoiceServer } = require("@fonoster/voice"); const GoogleTTS = require("@fonoster/googletts"); const GoogleASR = require("@fonoster/googleasr"); const voiceServer = new VoiceServer(); const speechConfig = { keyFilename: "./google.json" }; // Set the server to use the speech APIS voiceServer.use(new GoogleTTS(speechConfig)); voiceServer.use(new GoogleASR(speechConfig)); voiceServer.listen(async(req, res) => { console.log(req); await res.answer(); // To use this verb you MUST have a TTS plugin const speech = await res.gather(); await res.say("You said " + speech); await res.hangup(); }); ``` 您可以閱讀[文件](https://fonoster.com/docs/overview/)。 他們提供了一個足以入門的免費套餐。 他們在 GitHub 上擁有大約 6k+ 顆星,並發布了 250 多個版本。 https://github.com/fonoster/fonoster 明星 Fonoster ⭐️ --- 22. [DIPY](https://github.com/dipy/dipy) - Python 中的 paragon 3D/4D+ 成像庫。 ------------------------------------------------------------------------  DIPY 是 Python 中領先的 3D/4D+ 成像庫。它包含用於空間歸一化、訊號處理、機器學習、統計分析和醫學影像視覺化的各種方法。 此外,它還包含計算解剖學的專門方法,包括擴散、灌注和結構成像。 您可以開始使用。 ``` pip install dipy // run this in python console import dipy print(dipy.get_info()) ``` 如果您使用的是 anaconda 或其他系統,您可以閱讀完整的[安裝指南](https://docs.dipy.org/stable/examples_built/quick_start/quick_start.html#sphx-glr-examples-built-quick-start-quick-start-py)。 您可以閱讀[文件](https://docs.dipy.org/stable/)並存取他們的[YouTube 頻道](https://www.youtube.com/c/diffusionimaginginpython)。 你可以看看詳細的[例子](https://docs.dipy.org/stable/examples_built/index.html)。 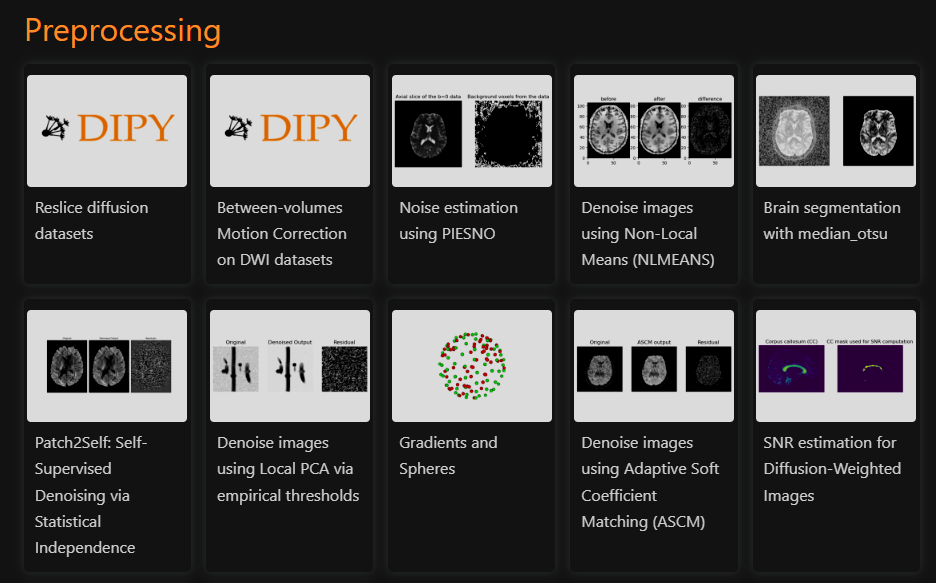 他們的下載量超過 428k,並且在 GitHub 儲存庫上擁有 600 多個 Star。 https://github.com/dipy/dipy 明星 DIPY ⭐️ --- 23. [Elastic Search](https://github.com/elastic/elasticsearch) - 免費開放式、分散式、RESTful 搜尋引擎。 ----------------------------------------------------------------------------------------  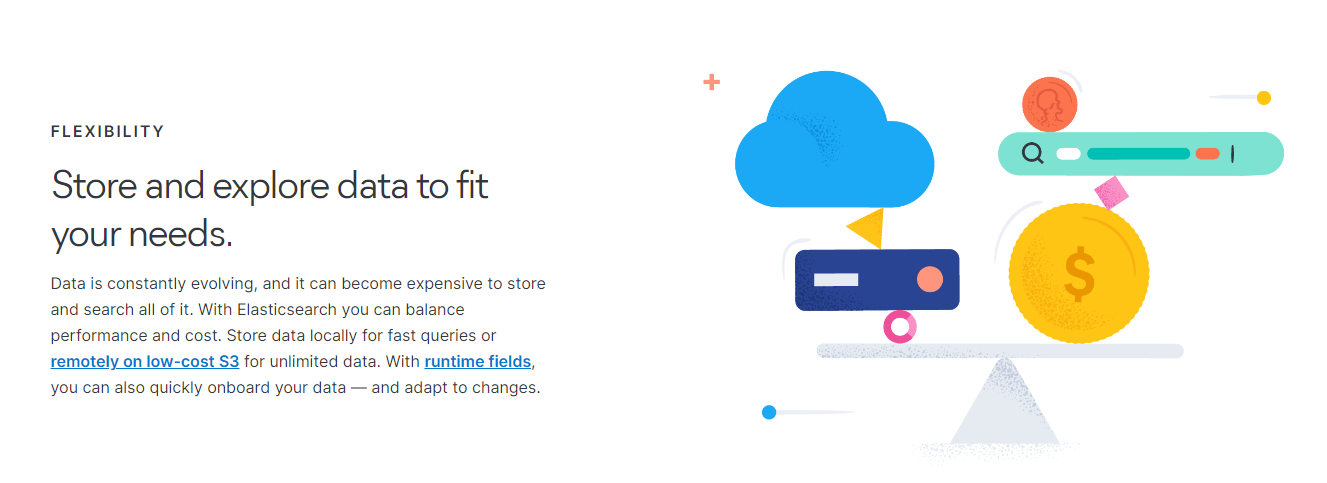 Elasticsearch 是一種分散式、RESTful 搜尋和分析引擎,能夠解決大量使用案例。 作為 Elastic Stack 的核心,它集中儲存您的資料,以實現閃電般的快速搜尋、微調的相關性以及可輕鬆擴展的強大分析。 他們闡述了使用 ElasticSearch 的用例。 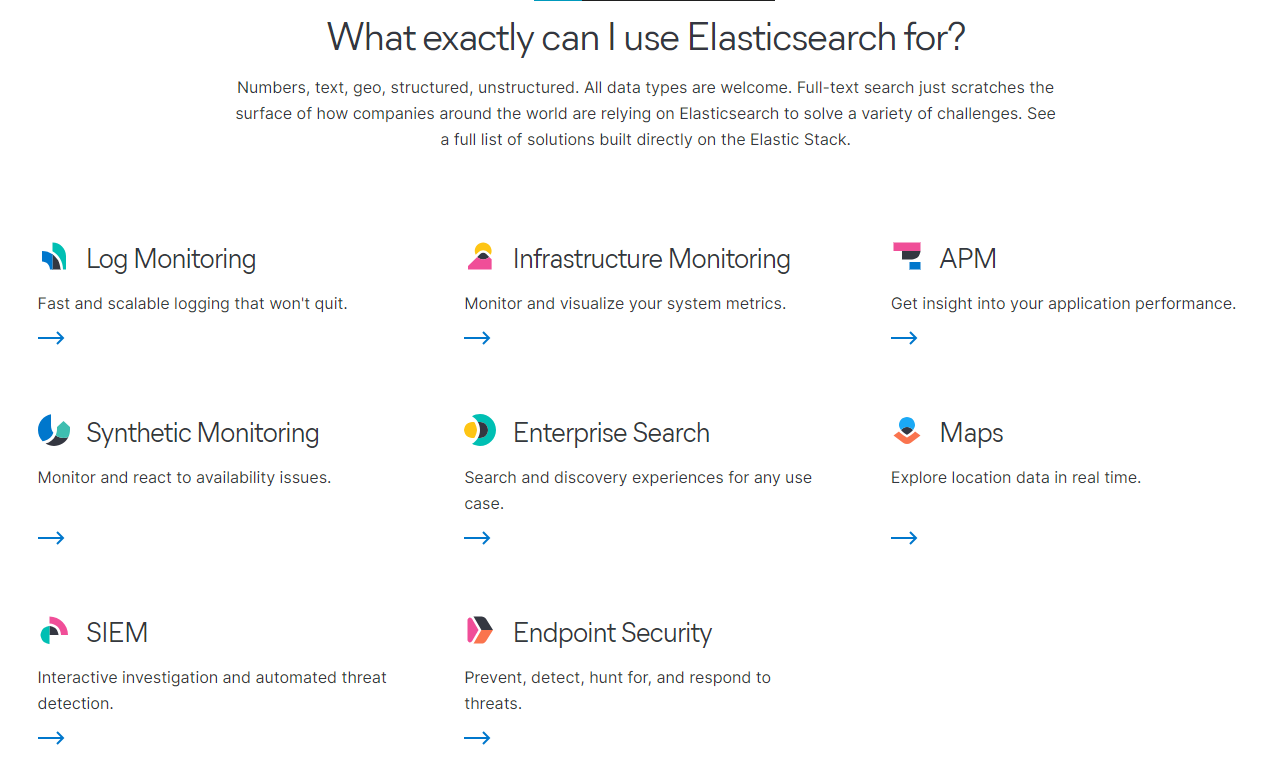 Elasticsearch 使用標準 RESTful API 和 JSON。我們也使用多種語言(例如 Java、Python、.NET、SQL 和 PHP)來建立和維護客戶端。 該結構如下。 ``` const { Client } = require('@elastic/elasticsearch') const client = new Client({ node: 'http://localhost:9200' }) client .search({ index: 'social-*', body: { query: { match: { message: 'myProduct' } }, aggs: { top_10_states: { terms: { field: 'state', size: 10 } } } } }) .then(({ body }) => { const { hits } = body.hits console.log(hits) }) .catch(console.error) ``` 您可以閱讀<a href="">文件</a>並查看[功能清單](https://www.elastic.co/elasticsearch/features)。 儘管具有有用的功能,Elastic Search 的主要缺點是缺乏免費套餐。但是,您仍然可以利用免費試用版來探索和了解開源專案的架構。 Elastic Search 在 GitHub 上擁有超過 67k+ 的星星和近 1900 名貢獻者,並且處於`v8`版本中,正在不斷發展和改進。 https://github.com/elastic/elasticsearch 明星 Elastic Search ⭐️ --- 24. [Tauri](https://github.com/tauri-apps/tauri) - 使用 Web 前端建立更小、更快且安全的桌面應用程式。 ------------------------------------------------------------------------------ 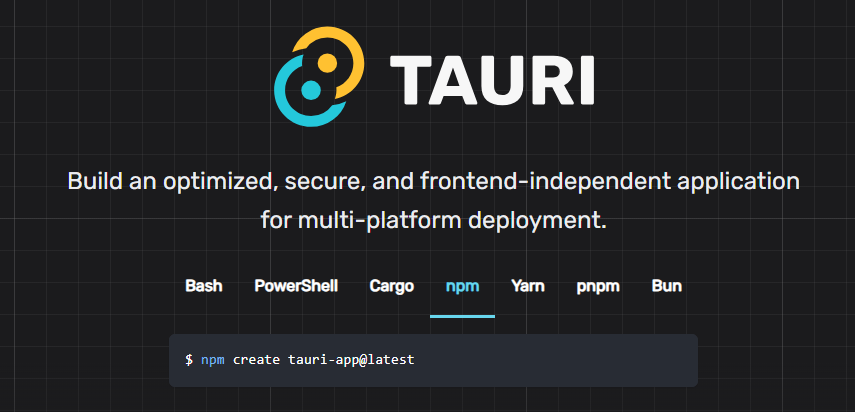 Tauri 是一個工具包,旨在幫助開發人員利用幾乎任何可用的前端框架為主要桌面平台建立應用程式。其核心是使用 Rust 開發的,而 CLI 利用 Node.js,提供了一種真正的多語言方法來開發和維護卓越的應用程式。 Tauri 應用程式中的使用者介面目前利用 Tao 作為 macOS、Windows、Linux、Android 和 iOS 上的視窗處理庫。 為了渲染您的應用程式,Tauri 使用 WRY,這是一個為系統 Web 視圖提供統一介面的程式庫。它在 macOS 和 iOS 上利用 WKWebView、在 Windows 上利用 WebView2、在 Linux 上利用 WebKitGTK 以及在 Android 上利用 Android System WebView。 您可以使用 Vite、HTML/CSS/JS、Next.js、Svelte 等等。 開始使用以下 npm 指令。 ``` npm create tauri-app@latest ``` 您可以閱讀[文件](https://tauri.app/v1/guides/getting-started/prerequisites)並查看 Tauri 提供的[功能清單](https://tauri.app/v1/guides/features/)。 您甚至可以使用 Tauri 建立自己的 CLI,這有多酷:) 團隊提供了[YouTube 影片](https://www.youtube.com/watch?v=UxTJeEbZX-0&t=2s),讓您了解更多關於 Tauri 的訊息。 他們在 GitHub 上擁有超過 75k 顆星星,並發布了 800 多個版本。 https://github.com/tauri-apps/tauri 金牛座之星 ⭐️ --- 25. [AutoGPT](https://github.com/Significant-Gravitas/AutoGPT) - 比 ChatGPT 更令人興奮。 --------------------------------------------------------------------------------- 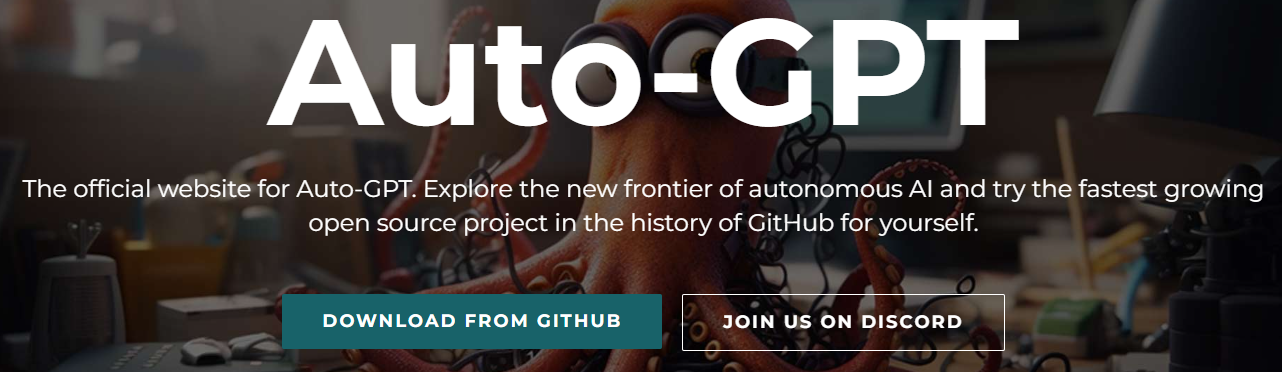 AutoGPT 的核心在於其主要專案,即由大型語言模型 (LLM) 驅動的半自治代理,旨在為您執行任何任務。 AutoGPT 計畫由[四個主要部分](https://docs.agpt.co/#agent)組成: - 代理 – 也稱為“AutoGPT” - 基準 – 又稱 agbenchmark - 熔爐 - 前端 了解如何使用 OpenAI 金鑰[設定 AutoGPT](https://docs.agpt.co/autogpt/setup/) 。 您可以觀看[Fireship 發布的有關 AutoGPT 的 YouTube 影片](https://www.youtube.com/watch?v=_rGXIXyNqpk)。 https://www.youtube.com/watch?v=\_rGXIXyNqpk 您也可以觀看 Sentral Media 提供的[AutoGPT 教學](https://www.youtube.com/watch?v=FeIIaJUN-4A)。 您可以閱讀[文件](https://docs.agpt.co/)並查看[專案板](https://github.com/orgs/Significant-Gravitas/projects/1),以了解目前正在開發的內容。 即使您對 AI 不太了解,您也可以嘗試 AutoGPT 以了解如何節省時間並建立很酷的東西。 由於如此出色的用例和自動化功能,他們在 GitHub Repo 上擁有大約 159k+ 的星星。 https://github.com/Significant-Gravitas/AutoGPT 明星 AutoGPT ⭐️ --- 還沒結束。 現在,讓我們探索一些有價值的資源,這些資源將幫助您學習新概念並製作更好的人工智慧應用程式。 我們會保持簡單。不掛! - [人工智慧 (AI) 課程、書籍、視訊講座和論文](https://github.com/owainlewis/awesome-artificial-intelligence) - [機器學習/深度學習/AI + Web3 - 教程](https://github.com/TarrySingh/Artificial-Intelligence-Deep-Learning-Machine-Learning-Tutorials) - [ML 初學者](https://github.com/microsoft/ML-For-Beginners)- 12 週、26 節課程、52 個測驗,適合所有人的經典機器學習。 - [機器學習框架、函式庫和軟體](https://github.com/josephmisiti/awesome-machine-learning) - [如何製作人工智慧:逐步指南 - Revelo](https://www.revelo.com/blog/how-to-make-an-ai) 希望這將幫助您學習更多概念! --- 我希望您在列表中找到有用的東西。 我介紹了一些很棒的開源專案,它們可以將您的 AI 應用程式提升到一個新的水平。 人工智慧正在改變世界,最好與人工智慧保持朋友關係,而不是忽視它。 利用它來提高生產力,並抓住機會開發一些非凡的東西。 如果您想以最佳方式改進您的專案,有些開源專案比其他專案更有用,尤其是 Taipy 和 AutoGPT。 請發表評論,讓我們知道哪個專案最讓您感到驚訝。 祝你有美好的一天!直到下一次。 在 GitHub 上關注我。 https://github.com/Anmol-Baranwal 關注 Taipy 以了解更多此類內容。 https://dev.to/taipy --- 原文出處:https://dev.to/taipy/all-the-tools-i-need-to-build-a-perfect-ai-app-2oeh
長話短說 ==== 在本文中,您將學習如何建立由 AI 驅動的 PowerPoint 應用程式,該應用程式可以搜尋網路以自動製作有關任何主題的簡報。 我們將介紹使用: - 用於應用程式框架的 Next.js 🖥️ - 法學碩士 OpenAI 🧠 - LangChain 和 Tavily 的網路搜尋人工智慧代理🤖 - 使用 CopilotKit 將 AI 整合到您的應用程式中 🪁  --- CopilotKit:為您的應用程式建立人工智慧副駕駛 --------------------------- CopilotKit 是[開源人工智慧副駕駛平台。](https://github.com/CopilotKit/CopilotKit)我們可以輕鬆地將強大的人工智慧整合到您的 React 應用程式中。 建造: - ChatBot:上下文感知的應用內聊天機器人,可以在應用程式內執行操作 💬 - CopilotTextArea:人工智慧驅動的文字字段,具有上下文感知自動完成和插入功能📝 - 聯合代理:應用程式內人工智慧代理,可以與您的應用程式和使用者互動🤖  {% cta https://github.com/CopilotKit/CopilotKit %} Star CopilotKit ⭐️ {% endcta %} 現在回到文章。 (本文是我們三週前發表的一篇文章的進展,但您無需閱讀該文章即可理解這一點)。 --- **先決條件** -------- 在開始建立應用程式之前,讓我們先查看建置應用程式所需的依賴項或套件 `copilotkit/react-core` :CopilotKit 前端包,帶有 React hooks,用於向副駕駛提供應用程式狀態和操作(AI 功能) `copilotkit/react-ui` :聊天機器人側邊欄 UI 的 CopilotKit 前端包 `copilotkit/react-textarea` :CopilotKit 前端包,用於在演講者筆記中進行人工智慧輔助文字編輯。 `LangChainJS` :一個用於開發由語言模型支援的應用程式的框架。 `Tavily Search API` :幫助將法學碩士和人工智慧應用程式連接到可信賴的即時知識的 API。 安裝所有專案包和依賴項 ----------- 在安裝所有專案包和依賴項之前,我們首先在終端機上執行以下命令來建立 Nextjs 專案。 ``` npx create-next-app@latest ``` 然後系統會提示您選擇一些選項。請隨意標記它們,如下所示。 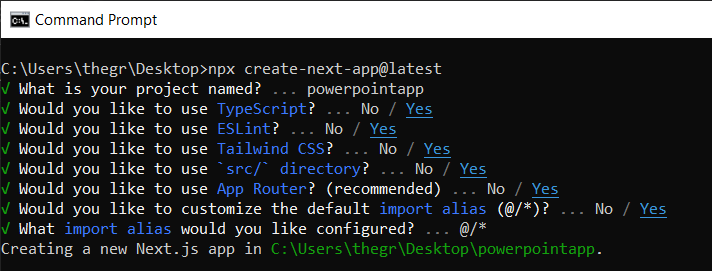 之後,使用您選擇的文字編輯器開啟新建立的 Nextjs 專案。然後在命令列中執行以下命令來安裝所有專案包和依賴項。 ``` npm i @copilotkit/backend @copilotkit/shared @langchain/langgraph @copilotkit/react-core @copilotkit/react-ui @copilotkit/react-textarea @heroicons/react ``` **建立 PowerPoint 應用程式前端** ------------------------ 讓我們先建立一個名為`Slide.tsx`的檔案。該文件將包含顯示和編輯投影片內容的程式碼,包括其`title` 、 `body text` 、 `background image`和`spoken narration text` 。 要建立該文件,請前往`/[root]/src/app`並建立一個名為`components`的資料夾。在 Components 資料夾中,建立`Slide.tsx`檔案。 之後,在文件頂部加入以下程式碼。程式碼定義了兩個名為`SlideModel`和`SlideProps`的 TypeScript 介面。 ``` "use client"; // Define an interface for the model of a slide, specifying the expected structure of a slide object. export interface SlideModel { title: string; content: string; backgroundImageDescription: string; spokenNarration: string; } // Define an interface for the properties of a component or function that manages slides. export interface SlideProps { slide: SlideModel; partialUpdateSlide: (partialSlide: Partial<SlideModel>) => void; } ``` 接下來,在上面的程式碼下面加入以下程式碼。程式碼定義了一個名為`Slide`功能元件,它接受`SlideProps`類型的 props。 ``` // Define a functional component named Slide that accepts props of type SlideProps. export const Slide = (props: SlideProps) => { // Define a constant for the height of the area reserved for speaker notes. const heightOfSpeakerNotes = 150; // Construct a URL for the background image using the description from slide properties, dynamically fetching an image from Unsplash. const backgroundImage = 'url("https://source.unsplash.com/featured/?' + encodeURIComponent(props.slide.backgroundImageDescription) + '")'; // Return JSX for the slide component. return ( <> {/* Slide content container with dynamic height calculation to account for speaker notes area. */} <div className="w-full relative bg-slate-200" style={{ height: `calc(100vh - ${heightOfSpeakerNotes}px)`, // Calculate height to leave space for speaker notes. }} > {/* Container for the slide title with centered alignment and styling. */} <div className="h-1/5 flex items-center justify-center text-5xl text-white text-center z-10" > {/* Textarea for slide title input, allowing dynamic updates. */} <textarea className="text-2xl bg-transparent text-black p-4 text-center font-bold uppercase italic line-clamp-2 resize-none flex items-center" style={{ border: "none", outline: "none", }} value={props.slide.title} placeholder="Title" onChange={(e) => { props.partialUpdateSlide({ title: e.target.value }); }} /> </div> {/* Container for the slide content with background image. */} <div className="h-4/5 flex" style={{ backgroundImage, backgroundSize: "cover", backgroundPosition: "center", }} > {/* Textarea for slide content input, allowing dynamic updates and styled for readability. */} <textarea className="w-full text-3xl text-black font-medium p-10 resize-none bg-red mx-40 my-8 rounded-xl text-center" style={{ lineHeight: "1.5", }} value={props.slide.content} placeholder="Body" onChange={(e) => { props.partialUpdateSlide({ content: e.target.value }); }} /> </div> </div> {/* Textarea for entering spoken narration with specified height and styling for consistency. */} <textarea className=" w-9/12 h-full bg-transparent text-5xl p-10 resize-none bg-gray-500 pr-36" style={{ height: `${heightOfSpeakerNotes}px`, background: "none", border: "none", outline: "none", fontFamily: "inherit", fontSize: "inherit", lineHeight: "inherit", }} value={props.slide.spokenNarration} onChange={(e) => { props.partialUpdateSlide({ spokenNarration: e.target.value }); }} /> </> ); }; ``` 之後,我們現在會建立一個名為`Presentation.tsx`的檔案。 該文件將包含初始化和更新投影片狀態、渲染目前投影片以及根據目前狀態動態啟用或停用按鈕實現導覽和投影片管理操作的程式碼。 要建立該文件,請將另一個文件新增至元件資料夾中,並將其命名為`Presentation.tsx` ,然後使用下列程式碼在檔案頂部匯入`React hooks` 、 `icons` 、 `SlideModel`和`Slide`元件。 ``` "use client"; import { useCallback, useMemo, useState } from "react"; import { BackwardIcon, ForwardIcon, PlusIcon, SparklesIcon, TrashIcon } from "@heroicons/react/24/outline"; import { SlideModel, Slide } from "./Slide"; ``` 之後,在上面的程式碼下面加入以下程式碼。程式碼定義了一個`ActionButton`功能元件,它將呈現具有可自訂屬性的按鈕元素。 ``` export const ActionButton = ({ disabled, onClick, className, children, }: { disabled: boolean; onClick: () => void; className?: string; children: React.ReactNode; }) => { return ( <button disabled={disabled} className={`bg-blue-500 text-white font-bold py-2 px-4 rounded ${disabled ? "opacity-50 cursor-not-allowed" : "hover:bg-blue-700"} ${className}`} onClick={onClick} > {children} </button> ); }; ``` 然後在上面的程式碼下面加入下面的程式碼。程式碼定義了一個名為「Presentation」的功能元件,用於初始化投影片的狀態並定義一個用於更新目前投影片的函數。 ``` // Define the Presentation component as a functional component. export const Presentation = () => { // Initialize state for slides with a default first slide and a state to track the current slide index. const [slides, setSlides] = useState<SlideModel[]>([ { title: `Welcome to our presentation!`, // Title of the first slide. content: 'This is the first slide.', // Content of the first slide. backgroundImageDescription: "hello", // Description for background image retrieval. spokenNarration: "This is the first slide. Welcome to our presentation!", // Spoken narration text for the first slide. }, ]); const [currentSlideIndex, setCurrentSlideIndex] = useState(0); // Current slide index, starting at 0. // Use useMemo to memoize the current slide object to avoid unnecessary recalculations. const currentSlide = useMemo(() => slides[currentSlideIndex], [slides, currentSlideIndex]); // Define a function to update the current slide. This function uses useCallback to memoize itself to prevent unnecessary re-creations. const updateCurrentSlide = useCallback( (partialSlide: Partial<SlideModel>) => { // Update the slides state by creating a new array with the updated current slide. setSlides((slides) => [ ...slides.slice(0, currentSlideIndex), // Copy all slides before the current one. { ...slides[currentSlideIndex], ...partialSlide }, // Merge the current slide with the updates. ...slides.slice(currentSlideIndex + 1), // Copy all slides after the current one. ]); }, [currentSlideIndex, setSlides] // Dependencies for useCallback. ); // The JSX structure for the Presentation component. return ( <div className="relative"> {/* Render the current slide by passing the currentSlide and updateCurrentSlide function as props. */} <Slide slide={currentSlide} partialUpdateSlide={updateCurrentSlide} /> {/* Container for action buttons located at the top-left corner of the screen. */} <div className="absolute top-0 left-0 mt-6 ml-4 z-30"> {/* Action button to add a new slide. Disabled state is hardcoded to true for demonstration. */} <ActionButton disabled={true} onClick={() => { // Define a new slide object. const newSlide: SlideModel = { title: "Title", content: "Body", backgroundImageDescription: "random", spokenNarration: "The speaker's notes for this slide.", }; // Update the slides array to include the new slide. setSlides((slides) => [ ...slides.slice(0, currentSlideIndex + 1), newSlide, ...slides.slice(currentSlideIndex + 1), ]); // Move to the new slide by updating the currentSlideIndex. setCurrentSlideIndex((i) => i + 1); }} className="rounded-r-none" > <PlusIcon className="h-6 w-6" /> {/* Icon for the button. */} </ActionButton> {/* Another action button, currently disabled and without functionality. */} <ActionButton disabled={true} onClick={async () => { }} // Placeholder async function. className="rounded-l-none ml-[1px]" > <SparklesIcon className="h-6 w-6" /> {/* Icon for the button. */} </ActionButton> </div> {/* Container for action buttons at the top-right corner for deleting slides, etc. */} <div className="absolute top-0 right-0 mt-6 mr-24"> <ActionButton disabled={slides.length === 1} // Disable button if there's only one slide. onClick={() => {}} // Placeholder function for the button action. className="ml-5 rounded-r-none" > <TrashIcon className="h-6 w-6" /> {/* Icon for the button. */} </ActionButton> </div> {/* Display current slide number and total slides at the bottom-right corner. */} <div className="absolute bottom-0 right-0 mb-20 mx-24 text-xl" style={{ textShadow: "1px 1px 0 #ddd, -1px -1px 0 #ddd, 1px -1px 0 #ddd, -1px 1px 0 #ddd", }} > Slide {currentSlideIndex + 1} of {slides.length} {/* Current slide and total slides. */} </div> {/* Container for navigation buttons (previous and next) at the bottom-right corner. */} <div className="absolute bottom-0 right-0 mb-6 mx-24"> {/* Button to navigate to the previous slide. */} <ActionButton className="rounded-r-none" disabled={ currentSlideIndex === 0 || true} // Example condition to disable button; 'true' is just for demonstration. onClick={() => { setCurrentSlideIndex((i) => i - 1); // Update currentSlideIndex to move to the previous slide. }} > <BackwardIcon className="h-6 w-6" /> {/* Icon for the button. */} </ActionButton> {/* Button to navigate to the next slide. */} <ActionButton className="mr-[1px] rounded-l-none" disabled={ true || currentSlideIndex + 1 === slides.length} // Example condition to disable button; 'true' is just for demonstration. onClick={async () => { setCurrentSlideIndex((i) => i + 1); // Update currentSlideIndex to move to the next slide. }} > <ForwardIcon className="h-6 w-6" /> {/* Icon for the button. */} </ActionButton> </div> </div> ); }; ``` 要在瀏覽器上呈現 PowerPoint 應用程式,請前往`/[root]/src/app/page.tsx`檔案並新增以下程式碼。 ``` "use client"; import "./style.css"; import { Presentation } from "./components/Presentation"; export default function AIPresentation() { return ( <Presentation /> ); } ``` 如果您想要在 Powerpoint 應用程式前端新增樣式,請在`/[root]/src/app`資料夾中建立名為`style.css`的檔案。 然後導航[到此 gist 文件](https://gist.github.com/TheGreatBonnie/e7c0b790a2e2af3e669810539ba54fed),複製 CSS 程式碼,並將其新增至 style.css 檔案。 最後,在命令列上執行命令`npm run dev` ,然後導航到 http://localhost:3000/。 現在您應該在瀏覽器上查看 PowerPoint 應用程式,如下所示。 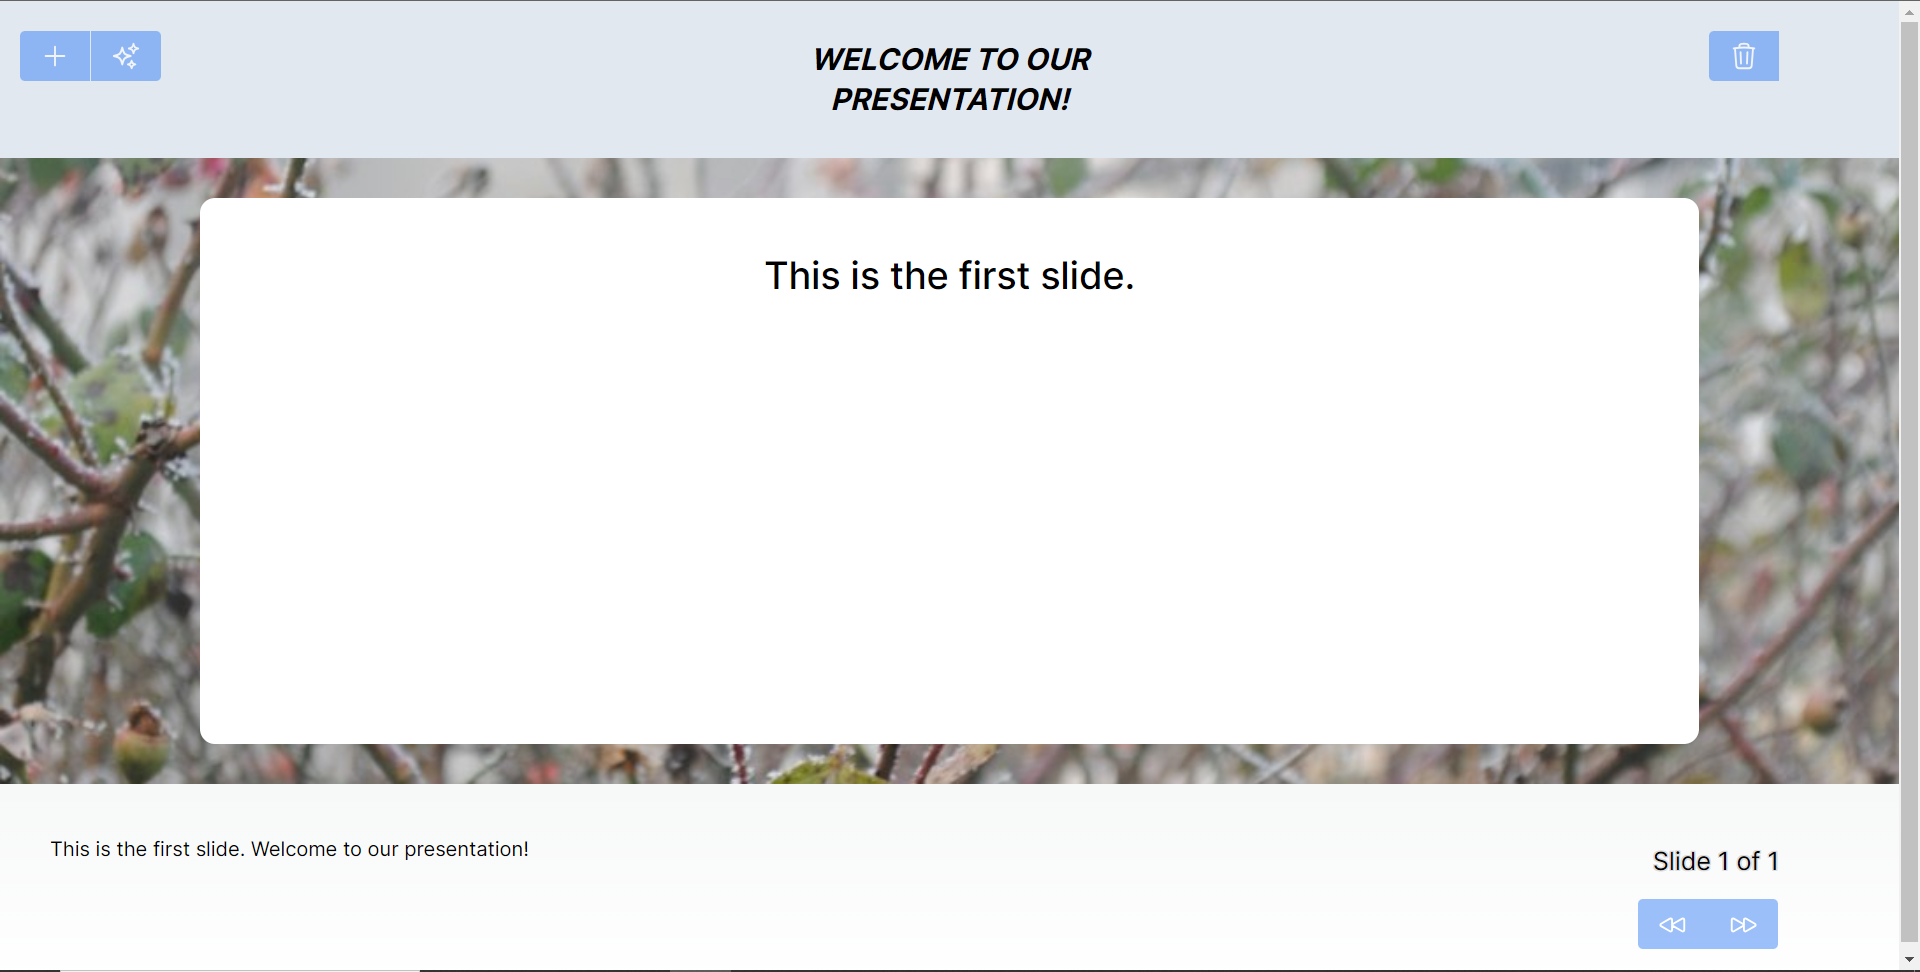 **將 PowerPoint 應用程式與 CopilotKit 後端集成** -------------------------------------- 讓我們先在根目錄中建立一個名為`.env.local`的檔案。然後在保存 ChatGPT 和 Tavily Search API 金鑰的檔案中加入下面的環境變數。 ``` OPENAI_API_KEY="Your ChatGPT API key" TAVILY_API_KEY="Your Tavily Search API key" ``` 若要取得 ChatGPT API 金鑰,請導覽至 https://platform.openai.com/api-keys。 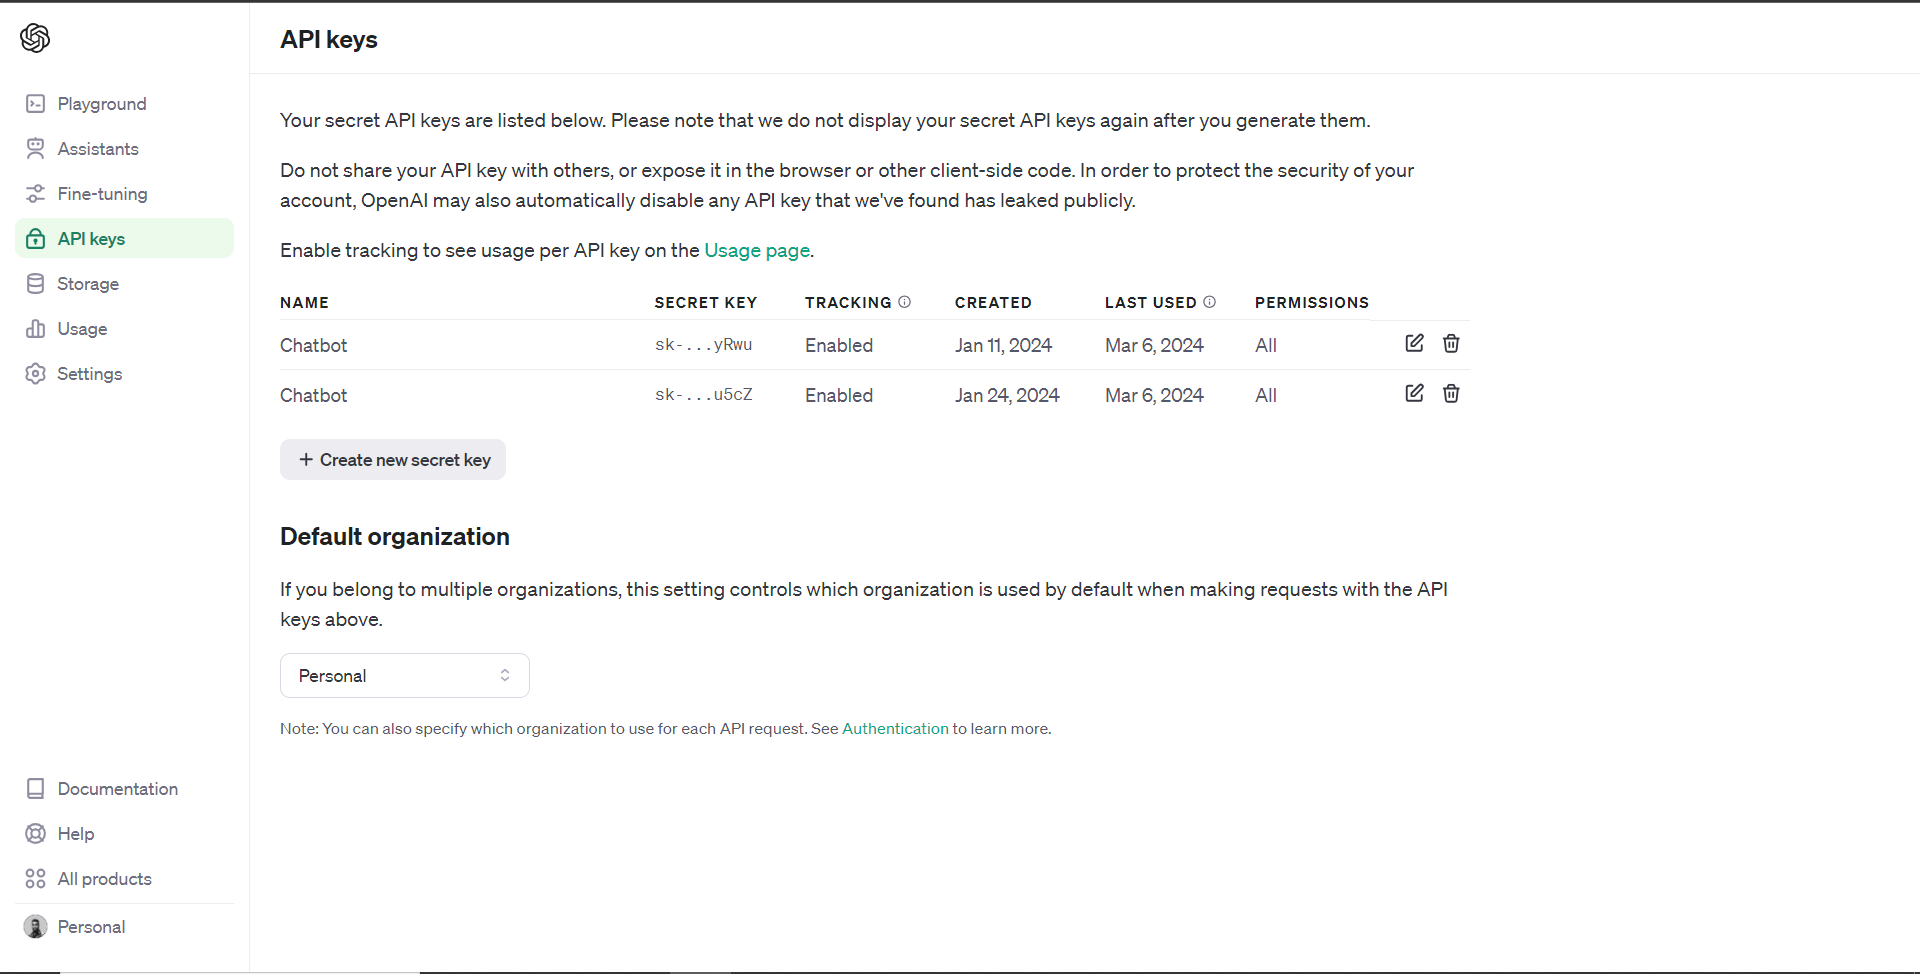 若要取得 Tavilly Search API 金鑰,請導覽至 https://app.tavily.com/home 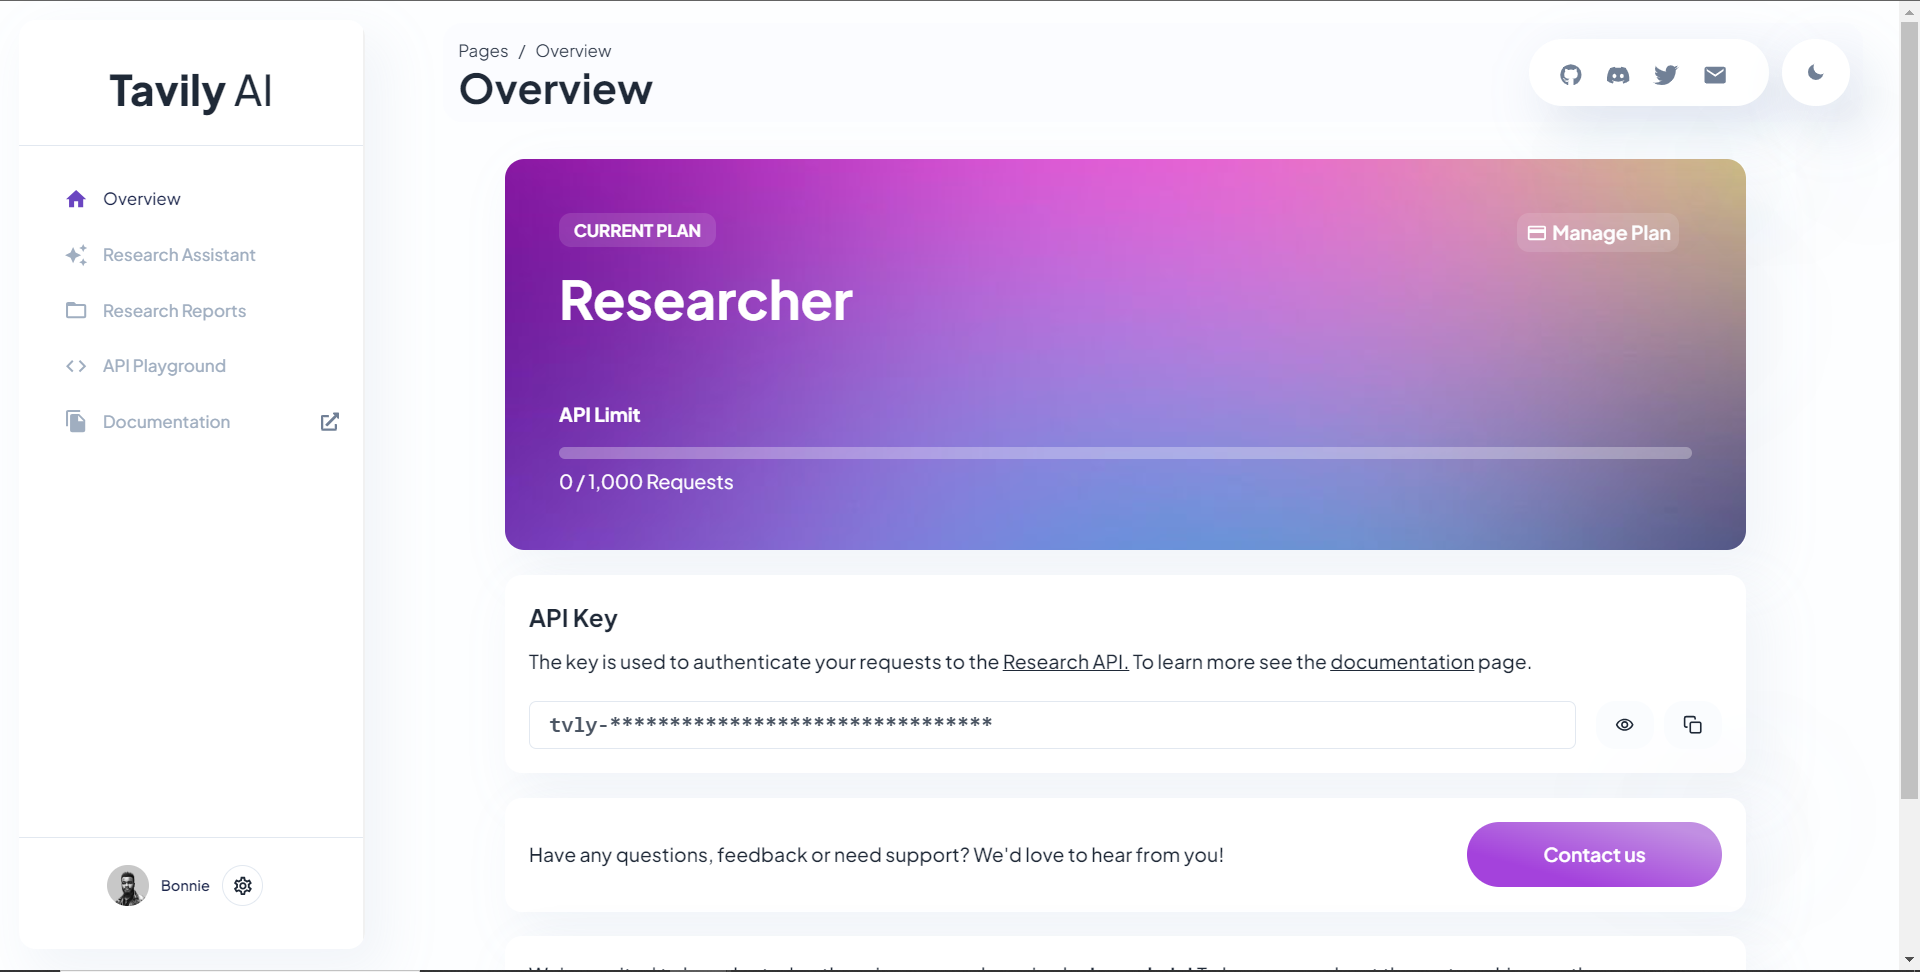 之後,轉到`/[root]/src/app`並建立一個名為`api`的資料夾。在`api`資料夾中,建立一個名為`copilotkit`的資料夾。 在`copilotkit`資料夾中,建立一個名為`research.ts`的檔案。然後導航到[該 Research.ts gist 文件](https://gist.github.com/TheGreatBonnie/58dc21ebbeeb8cbb08df665db762738c),複製程式碼,並將其新增至**`research.ts`**檔案中 接下來,在`/[root]/src/app/api/copilotkit`資料夾中建立一個名為`route.ts`的檔案。該文件將包含設定後端功能來處理 POST 請求的程式碼。它有條件地包括對給定主題進行研究的“研究”操作。 現在在文件頂部導入以下模組。 ``` import { CopilotBackend, OpenAIAdapter } from "@copilotkit/backend"; // For backend functionality with CopilotKit. import { researchWithLangGraph } from "./research"; // Import a custom function for conducting research. import { AnnotatedFunction } from "@copilotkit/shared"; // For annotating functions with metadata. ``` 在上面的程式碼下面,定義一個執行時環境變數和一個註解的函數,以便使用下面的程式碼進行研究。 ``` // Define a runtime environment variable, indicating the environment where the code is expected to run. export const runtime = "edge"; // Define an annotated function for research. This object includes metadata and an implementation for the function. const researchAction: AnnotatedFunction<any> = { name: "research", // Function name. description: "Call this function to conduct research on a certain topic. Respect other notes about when to call this function", // Function description. argumentAnnotations: [ // Annotations for arguments that the function accepts. { name: "topic", // Argument name. type: "string", // Argument type. description: "The topic to research. 5 characters or longer.", // Argument description. required: true, // Indicates that the argument is required. }, ], implementation: async (topic) => { // The actual function implementation. console.log("Researching topic: ", topic); // Log the research topic. return await researchWithLangGraph(topic); // Call the research function and return its result. }, }; ``` 然後在上面的程式碼下加入下面的程式碼來定義處理POST請求的非同步函數。 ``` // Define an asynchronous function that handles POST requests. export async function POST(req: Request): Promise<Response> { const actions: AnnotatedFunction<any>[] = []; // Initialize an array to hold actions. // Check if a specific environment variable is set, indicating access to certain functionality. if (process.env["TAVILY_API_KEY"]) { actions.push(researchAction); // Add the research action to the actions array if the condition is true. } // Instantiate CopilotBackend with the actions defined above. const copilotKit = new CopilotBackend({ actions: actions, }); // Use the CopilotBackend instance to generate a response for the incoming request using an OpenAIAdapter. return copilotKit.response(req, new OpenAIAdapter()); } ``` **將 PowerPoint 應用程式與 CopilotKit 前端集成** -------------------------------------- 讓我們先導入`/[root]/src/app/components/Slide.tsx`檔案頂部的`useMakeCopilotActionable`掛鉤。 ``` import { useMakeCopilotActionable } from "@copilotkit/react-core"; ``` 在 Slide 函數中,新增以下程式碼,該程式碼使用`useMakeCopilotActionable`掛鉤來設定一個名為`updateSlide`的操作,該操作具有特定參數以及根據提供的值更新投影片的實作。 ``` useMakeCopilotActionable({ // Defines the action name. This is a unique identifier for the action within the application. name: "updateSlide", // Describes what the action does. In this case, it updates the current slide. description: "Update the current slide.", // Details the arguments that the action accepts. Each argument has a name, type, description, and a flag indicating if it's required. argumentAnnotations: [ { name: "title", // The argument name. type: "string", // The data type of the argument. description: "The title of the slide. Should be a few words long.", // Description of the argument. required: true, // Indicates that this argument must be provided for the action to execute. }, { name: "content", type: "string", description: "The content of the slide. Should generally consists of a few bullet points.", required: true, }, { name: "backgroundImageDescription", type: "string", description: "What to display in the background of the slide. For example, 'dog', 'house', etc.", required: true, }, { name: "spokenNarration", type: "string", description: "The spoken narration for the slide. This is what the user will hear when the slide is shown.", required: true, }, ], // The implementation of the action. This is a function that will be called when the action is executed. implementation: async (title, content, backgroundImageDescription, spokenNarration) => { // Calls a function passed in through props to partially update the slide with new values for the specified properties. props.partialUpdateSlide({ title, content, backgroundImageDescription, spokenNarration, }); }, }, [props.partialUpdateSlide]); // Dependencies array for the custom hook or function. This ensures that the action is re-initialized only when `props.partialUpdateSlide` changes. ``` 之後,請前往`/[root]/src/app/components/Presentation.tsx`檔案並使用下面的程式碼匯入頂部的 CopilotKit 前端套件。 ``` import { useCopilotContext } from "@copilotkit/react-core"; import { CopilotTask } from "@copilotkit/react-core"; import { useMakeCopilotActionable, useMakeCopilotReadable } from "@copilotkit/react-core"; ``` 在演示函數中,加入以下程式碼,該程式碼使用`useMakeCopilotReadable`掛鉤加入`Slides`和`currentSlide`幻燈片陣列作為應用程式內聊天機器人的上下文。掛鉤使副駕駛可以讀取簡報中的整個幻燈片集合以及當前幻燈片的資料。 ``` useMakeCopilotReadable("These are all the slides: " + JSON.stringify(slides)); useMakeCopilotReadable( "This is the current slide: " + JSON.stringify(currentSlide) ); ``` 在`useMakeCopilotReadable`掛鉤下方,新增以下程式碼,該程式碼使用`useCopilotActionable`掛鉤來設定名為`appendSlide`的操作,其中包含說明和加入多張幻燈片的實作函數。 ``` useMakeCopilotActionable( { // Defines the action's metadata. name: "appendSlide", // Action identifier. description: "Add a slide after all the existing slides. Call this function multiple times to add multiple slides.", // Specifies the arguments that the action takes, including their types, descriptions, and if they are required. argumentAnnotations: [ { name: "title", // The title of the new slide. type: "string", description: "The title of the slide. Should be a few words long.", required: true, }, { name: "content", // The main content or body of the new slide. type: "string", description: "The content of the slide. Should generally consist of a few bullet points.", required: true, }, { name: "backgroundImageDescription", // Description for fetching or generating the background image of the new slide. type: "string", description: "What to display in the background of the slide. For example, 'dog', 'house', etc.", required: true, }, { name: "spokenNarration", // Narration text that will be read aloud during the presentation of the slide. type: "string", description: "The text to read while presenting the slide. Should be distinct from the slide's content, and can include additional context, references, etc. Will be read aloud as-is. Should be a few sentences long, clear, and smooth to read.", required: true, }, ], // The function to execute when the action is triggered. It creates a new slide with the provided details and appends it to the existing slides array. implementation: async (title, content, backgroundImageDescription, spokenNarration) => { const newSlide: SlideModel = { // Constructs the new slide object. title, content, backgroundImageDescription, spokenNarration, }; // Updates the slides state by appending the new slide to the end of the current slides array. setSlides((slides) => [...slides, newSlide]); }, }, [setSlides] // Dependency array for the hook. This action is dependent on the `setSlides` function, ensuring it reinitializes if `setSlides` changes. ); ``` 在上面的程式碼下方,定義一個名為`context`的變數,該變數使用名為`useCopilotContext`的自訂掛鉤從 copilot 上下文中檢索當前上下文。 ``` const context = useCopilotContext(); ``` 之後,定義一個名為`generateSlideTask`的函數,它包含一個名為`CopilotTask`的類別。 `CopilotTask`類別定義用於產生與簡報的整體主題相關的新投影片的指令 ``` const generateSlideTask = new CopilotTask({ instructions: "Make the next slide related to the overall topic of the presentation. It will be inserted after the current slide. Do NOT carry any research", }); ``` 然後在上面的程式碼下面初始化一個名為`generateSlideTaskRunning`的狀態變數,預設值為false。 ``` const [generateSlideTaskRunning, **setGenerateSlideTaskRunning**] = useState(false); ``` 之後,使用下面的程式碼更新簡報元件中的操作按鈕,以透過新增、刪除和導覽投影片來新增動態互動。 ``` // The JSX structure for the Presentation component. return ( <div className="relative"> {/* Renders the current slide using a Slide component with props for the slide data and a method to update it. */} <Slide slide={currentSlide} partialUpdateSlide={updateCurrentSlide} /> {/* Container for action buttons positioned at the top left corner of the relative parent */} <div className="absolute top-0 left-0 mt-6 ml-4 z-30"> {/* ActionButton to add a new slide. It is disabled when a generateSlideTask is running to prevent concurrent modifications. */} <ActionButton disabled={generateSlideTaskRunning} onClick={() => { const newSlide: SlideModel = { title: "Title", content: "Body", backgroundImageDescription: "random", spokenNarration: "The speaker's notes for this slide.", }; // Inserts the new slide immediately after the current slide and updates the slide index to point to the new slide. setSlides((slides) => [ ...slides.slice(0, currentSlideIndex + 1), newSlide, ...slides.slice(currentSlideIndex + 1), ]); setCurrentSlideIndex((i) => i + 1); }} className="rounded-r-none" > <PlusIcon className="h-6 w-6" /> </ActionButton> {/* ActionButton to generate a new slide based on the current context, also disabled during task running. */} <ActionButton disabled={generateSlideTaskRunning} onClick={async () => { setGenerateSlideTaskRunning(true); // Indicates the task is starting. await generateSlideTask.run(context); // Executes the task with the current context. setGenerateSlideTaskRunning(false); // Resets the flag when the task is complete. }} className="rounded-l-none ml-[1px]" > <SparklesIcon className="h-6 w-6" /> </ActionButton> </div> {/* Container for action buttons at the top right, including deleting the current slide and potentially other actions. */} <div className="absolute top-0 right-0 mt-6 mr-24"> {/* ActionButton for deleting the current slide, disabled if a task is running or only one slide remains. */} <ActionButton disabled={generateSlideTaskRunning || slides.length === 1} onClick={() => { console.log("delete slide"); // Removes the current slide and resets the index to the beginning as a simple handling strategy. setSlides((slides) => [ ...slides.slice(0, currentSlideIndex), ...slides.slice(currentSlideIndex + 1), ]); setCurrentSlideIndex((i) => 0); }} className="ml-5 rounded-r-none" > <TrashIcon className="h-6 w-6" /> </ActionButton> </div> {/* Display showing the current slide index and the total number of slides. */} <div className="absolute bottom-0 right-0 mb-20 mx-24 text-xl" style={{ textShadow: "1px 1px 0 #ddd, -1px -1px 0 #ddd, 1px -1px 0 #ddd, -1px 1px 0 #ddd", }} > Slide {currentSlideIndex + 1} of {slides.length} </div> {/* Navigation buttons to move between slides, disabled based on the slide index or if a task is running. */} <div className="absolute bottom-0 right-0 mb-6 mx-24"> {/* Button to move to the previous slide, disabled if on the first slide or a task is running. */} <ActionButton className="rounded-r-none" disabled={generateSlideTaskRunning || currentSlideIndex === 0} onClick={() => { setCurrentSlideIndex((i) => i - 1); }} > <BackwardIcon className="h-6 w-6" /> </ActionButton> {/* Button to move to the next slide, disabled if on the last slide or a task is running. */} <ActionButton className="mr-[1px] rounded-l-none" disabled={generateSlideTaskRunning || currentSlideIndex + 1 === slides.length} onClick={async () => { setCurrentSlideIndex((i) => i + 1); }} > <ForwardIcon className="h-6 w-6" /> </ActionButton> </div> </div> ); ``` 現在讓我們轉到`/[root]/src/app/page.tsx`文件,使用下面的程式碼匯入 CopilotKit 前端包和文件頂部的樣式。 ``` import { CopilotKit, } from "@copilotkit/react-core"; import { CopilotSidebar } from "@copilotkit/react-ui"; import "@copilotkit/react-ui/styles.css"; import "@copilotkit/react-textarea/styles.css"; ``` 然後使用`CopilotKit`和`CopilotSidebar`來包裝Presentation元件,如下所示。 ``` export default function AIPresentation() { return ( <CopilotKit url="/api/copilotkit/"> <CopilotSidebar instructions="Help the user create and edit a powerpoint-style presentation. IMPORTANT NOTE: SOMETIMES you may want to research a topic, before taking further action. BUT FIRST ASK THE USER if they would like you to research it. If they answer 'no', do your best WITHOUT researching the topic first." defaultOpen={true} labels={{ title: "Presentation Copilot", initial: "Hi you! 👋 I can help you create a presentation on any topic.", }} clickOutsideToClose={false} > <Presentation /> </CopilotSidebar> </CopilotKit> ); } ``` 之後,執行開發伺服器並導航到 http://localhost:3000/。您應該會看到應用程式內聊天機器人已整合到 PowerPoint Web 應用中。 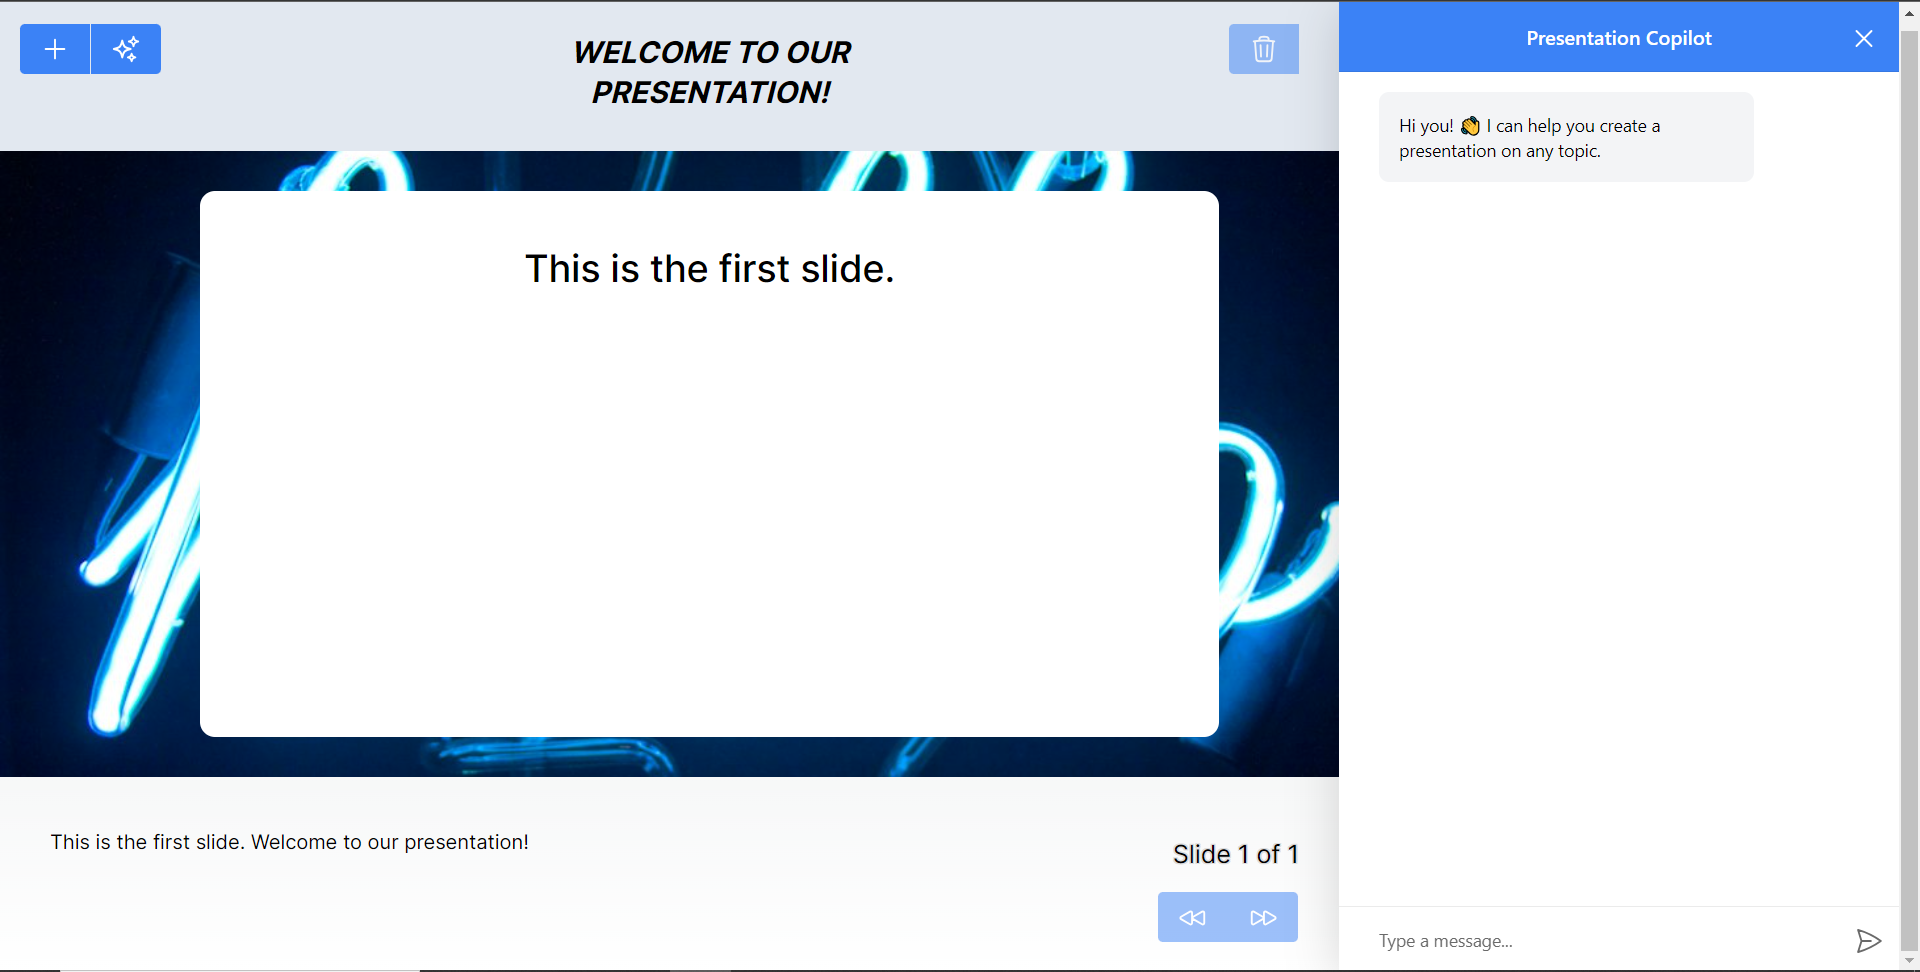 最後,給右側的聊天機器人一個提示,例如“在 JavaScript 上建立 PowerPoint 簡報”,聊天機器人將開始產生回應,完成後,使用底部的前進按鈕瀏覽產生的幻燈片。 注意:如果聊天機器人沒有立即產生投影片,請根據其回應給予適當的後續提示。 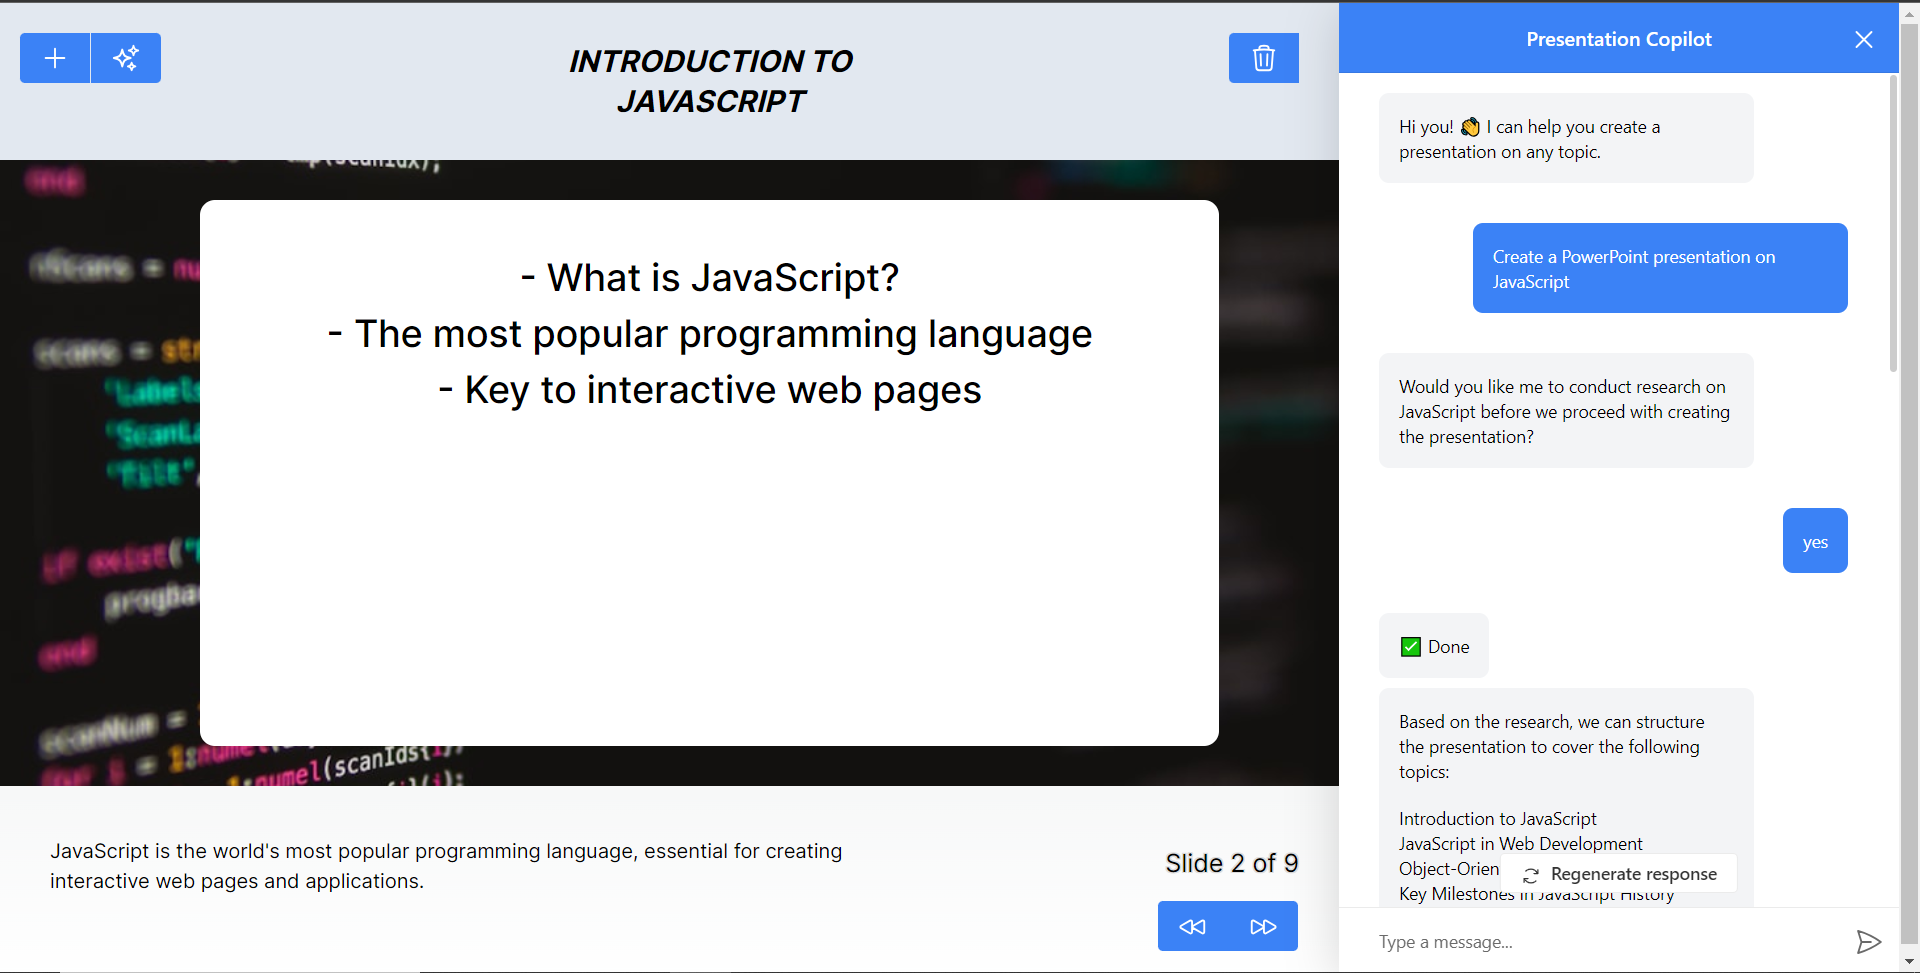 結論 -- 總而言之,您可以使用 CopilotKit 建立應用內 AI 聊天機器人,該機器人可以查看當前應用程式狀態並在應用程式內執行操作。 AI 聊天機器人可以與您的應用程式前端、後端和第三方服務對話。 完整的原始碼:https://github.com/TheGreatBonnie/aipoweredpowerpointapp --- 原文出處:https://dev.to/copilotkit/how-to-build-an-ai-powered-powerpoint-generator-langchain-copilotkit-openai-nextjs-4c76
您可以使用無數的框架和函式庫來改進您的全端應用程式。 我們將介紹令人興奮的概念,例如應用程式內通知、使用 React 製作影片、從為開發人員提供的電子郵件 API 到在瀏覽器中建立互動式音樂。 那我們就開始吧。 (不要忘記為這些庫加註星標以表示您的支持)。  https://github.com/CopilotKit/CopilotKit --- 1. [CopilotKit](https://github.com/CopilotKit/CopilotKit) - 在數小時內為您的產品提供 AI Copilot。 ------------------------------------------------------------------------------------  您可以使用兩個 React 元件將關鍵 AI 功能整合到 React 應用程式中。它們還提供內建(完全可自訂)Copilot 原生 UX 元件,例如`<CopilotKit />` 、 `<CopilotPopup />` 、 `<CopilotSidebar />` 、 `<CopilotTextarea />` 。 開始使用以下 npm 指令。 ``` npm i @copilotkit/react-core @copilotkit/react-ui @copilotkit/react-textarea ``` 這是整合 CopilotTextArea 的方法。 ``` import { CopilotTextarea } from "@copilotkit/react-textarea"; import { useState } from "react"; export function SomeReactComponent() { const [text, setText] = useState(""); return ( <> <CopilotTextarea className="px-4 py-4" value={text} onValueChange={(value: string) => setText(value)} placeholder="What are your plans for your vacation?" autosuggestionsConfig={{ textareaPurpose: "Travel notes from the user's previous vacations. Likely written in a colloquial style, but adjust as needed.", chatApiConfigs: { suggestionsApiConfig: { forwardedParams: { max_tokens: 20, stop: [".", "?", "!"], }, }, }, }} /> </> ); } ``` 您可以閱讀[文件](https://docs.copilotkit.ai/getting-started/quickstart-textarea)。 基本概念是在幾分鐘內建立可用於基於 LLM 的全端應用程式的 AI 聊天機器人。 https://github.com/CopilotKit/CopilotKit --- 2. [Storybook](https://github.com/storybookjs/storybook) - UI 開發、測試和文件變得簡單。 ---------------------------------------------------------------------------  Storybook 是一個用於獨立建立 UI 元件和頁面的前端工作坊。它有助於 UI 開發、測試和文件編制。 他們在 GitHub 上有超過 57,000 次提交、81,000 多個 star 和 1300 多個版本。 這是您為專案建立簡單元件的方法。 ``` import type { Meta, StoryObj } from '@storybook/react'; import { YourComponent } from './YourComponent'; //👇 This default export determines where your story goes in the story list const meta: Meta<typeof YourComponent> = { component: YourComponent, }; export default meta; type Story = StoryObj<typeof YourComponent>; export const FirstStory: Story = { args: { //👇 The args you need here will depend on your component }, }; ``` 您可以閱讀[文件](https://storybook.js.org/docs/get-started/setup)。 如今,UI 除錯起來很痛苦,因為它們與業務邏輯、互動狀態和應用程式上下文糾纏在一起。 Storybook 提供了一個獨立的 iframe 來渲染元件,而不會受到應用程式業務邏輯和上下文的干擾。這可以幫助您將開發重點放在元件的每個變體上,甚至是難以觸及的邊緣情況。 https://github.com/storybookjs/storybook --- 3. [Appwrite](https://github.com/appwrite/appwrite) - 您的後端減少麻煩。 --------------------------------------------------------------- 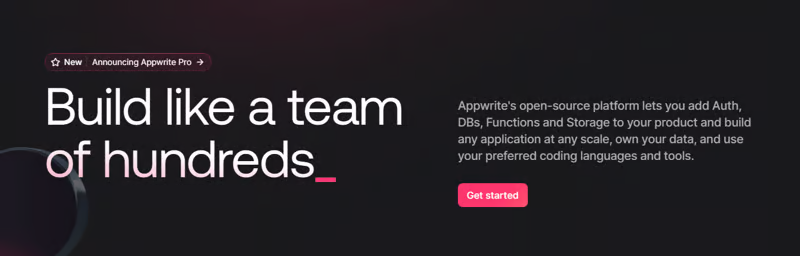  Appwrite 的開源平台可讓您將身份驗證、資料庫、函數和儲存體新增至您的產品中,並建立任何規模的任何應用程式、擁有您的資料並使用您喜歡的編碼語言和工具。 他們有很好的貢獻指南,甚至不厭其煩地詳細解釋架構。 開始使用以下 npm 指令。 ``` npm install appwrite ``` 您可以像這樣建立一個登入元件。 ``` "use client"; import { useState } from "react"; import { account, ID } from "./appwrite"; const LoginPage = () => { const [loggedInUser, setLoggedInUser] = useState(null); const [email, setEmail] = useState(""); const [password, setPassword] = useState(""); const [name, setName] = useState(""); const login = async (email, password) => { const session = await account.createEmailSession(email, password); setLoggedInUser(await account.get()); }; const register = async () => { await account.create(ID.unique(), email, password, name); login(email, password); }; const logout = async () => { await account.deleteSession("current"); setLoggedInUser(null); }; if (loggedInUser) { return ( <div> <p>Logged in as {loggedInUser.name}</p> <button type="button" onClick={logout}> Logout </button> </div> ); } return ( <div> <p>Not logged in</p> <form> <input type="email" placeholder="Email" value={email} onChange={(e) => setEmail(e.target.value)} /> <input type="password" placeholder="Password" value={password} onChange={(e) => setPassword(e.target.value)} /> <input type="text" placeholder="Name" value={name} onChange={(e) => setName(e.target.value)} /> <button type="button" onClick={() => login(email, password)}> Login </button> <button type="button" onClick={register}> Register </button> </form> </div> ); }; export default LoginPage; ``` 您可以閱讀[文件](https://appwrite.io/docs)。 Appwrite 可以非常輕鬆地建立具有開箱即用的擴充功能的可擴展後端應用程式。 https://github.com/appwrite/appwrite --- 4. [Wasp](https://github.com/wasp-lang/wasp) - 用於 React、node.js 和 prisma 的類似 Rails 的框架。 --------------------------------------------------------------------------------------- 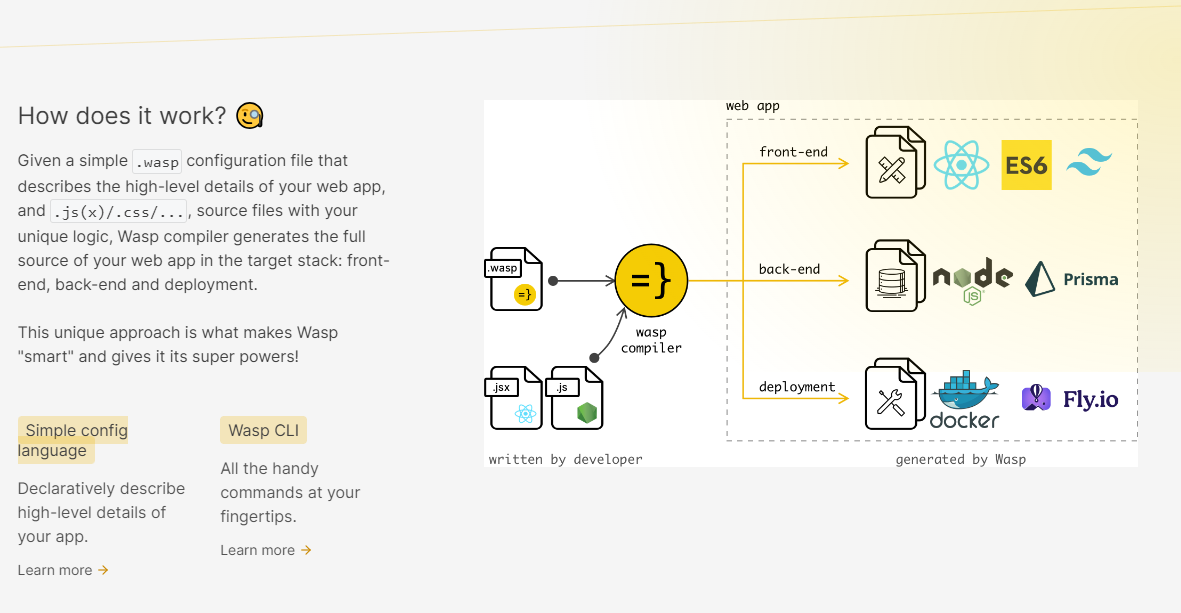 使用 React 和 Node.js 開發全端 Web 應用程式的最快方法。這不是一個想法,而是一種建立瘋狂快速全端應用程式的不同方法。 這是將其整合到元件中的方法。 ``` import getRecipes from "@wasp/queries/getRecipes"; import { useQuery } from "@wasp/queries"; import type { User } from "@wasp/entities"; export function HomePage({ user }: { user: User }) { // Due to full-stack type safety, `recipes` will be of type `Recipe[]` here. const { data: recipes, isLoading } = useQuery(getRecipes); // Calling our query here! if (isLoading) { return <div>Loading...</div>; } return ( <div> <h1>Recipes</h1> <ul> {recipes ? recipes.map((recipe) => ( <li key={recipe.id}> <div>{recipe.title}</div> <div>{recipe.description}</div> </li> )) : 'No recipes defined yet!'} </ul> </div> ); } ``` 您可以閱讀[文件](https://wasp-lang.dev/docs)。 https://github.com/wasp-lang/wasp --- 5. [Novu](https://github.com/novuhq/novu) - 將應用程式內通知新增至您的應用程式! -------------------------------------------------------------- 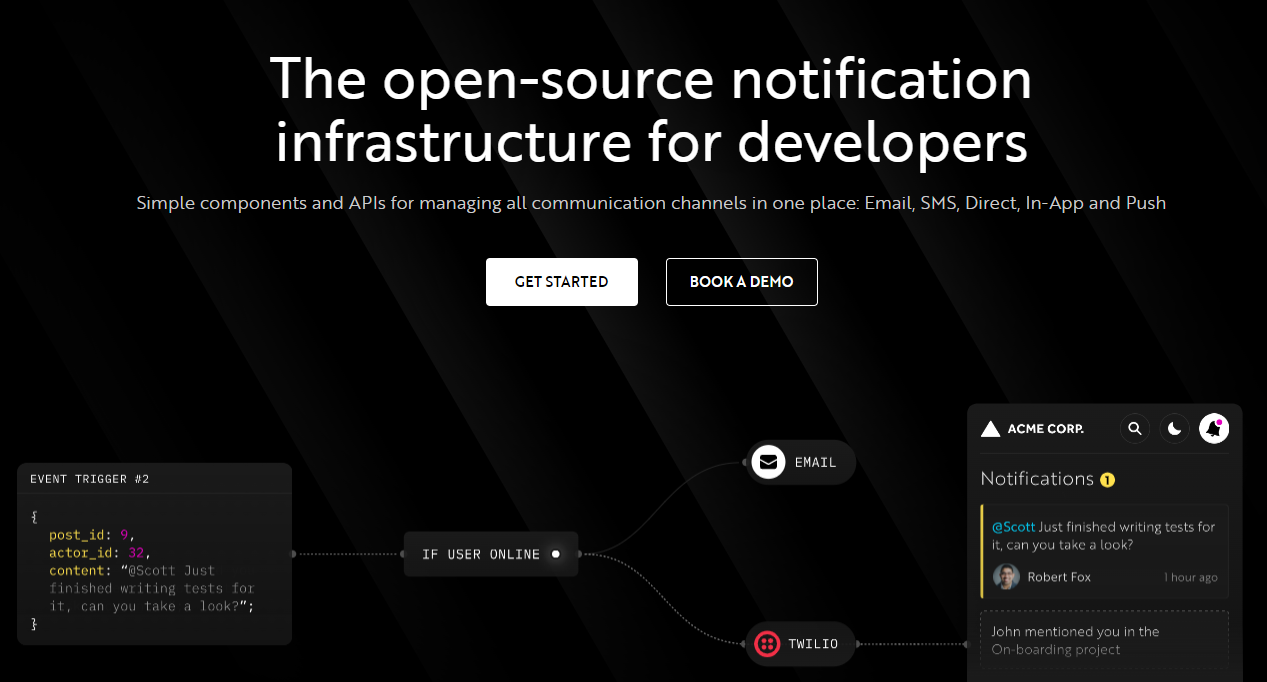 Novu 提供開源通知基礎架構和功能齊全的嵌入式通知中心。 這就是如何使用`React`建立 novu 元件以用於應用程式內通知。 ``` import { NovuProvider, PopoverNotificationCenter, NotificationBell, } from "@novu/notification-center"; function App() { return ( <> <NovuProvider subscriberId={process.env.REACT_APP_SUB_ID} applicationIdentifier={process.env.REACT_APP_APP_ID} > <PopoverNotificationCenter> {({ unseenCount }) => <NotificationBell unseenCount={unseenCount} />} </PopoverNotificationCenter> </NovuProvider> </> ); } export default App; ``` 您可以閱讀[文件](https://docs.novu.co/getting-started/introduction)。 https://github.com/novuhq/novu --- 6. [Remotion](https://github.com/remotion-dev/remotion) - 使用 React 以程式設計方式製作影片。 ------------------------------------------------------------------------------- 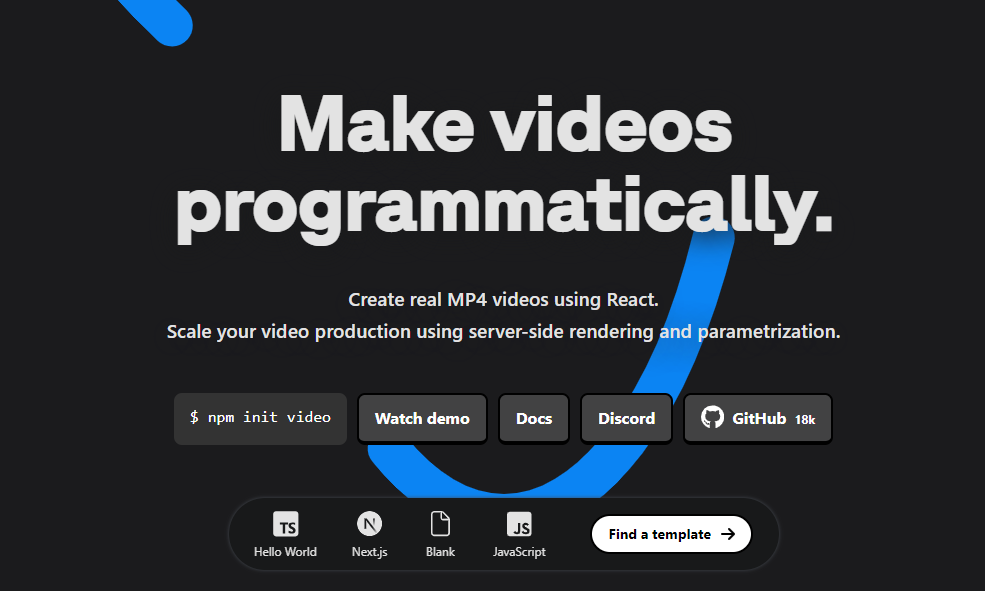 使用 React 建立真正的 MP4 影片,使用伺服器端渲染和參數化擴展影片製作。 開始使用以下 npm 指令。 ``` npm init video ``` 它為您提供了一個幀號和一個空白畫布,您可以在其中使用 React 渲染任何您想要的內容。 這是一個範例 React 元件,它將當前幀渲染為文字。 ``` import { AbsoluteFill, useCurrentFrame } from "remotion"; export const MyComposition = () => { const frame = useCurrentFrame(); return ( <AbsoluteFill style={{ justifyContent: "center", alignItems: "center", fontSize: 100, backgroundColor: "white", }} > The current frame is {frame}. </AbsoluteFill> ); }; ``` 您可以閱讀[文件](https://www.remotion.dev/docs/)。 過去兩年,remotion 團隊因製作 GitHub Wrapped 而聞名。 https://github.com/remotion-dev/remotion --- [7.NocoDB](https://github.com/nocodb/nocodb) - Airtable 的替代品。 ------------------------------------------------------------- 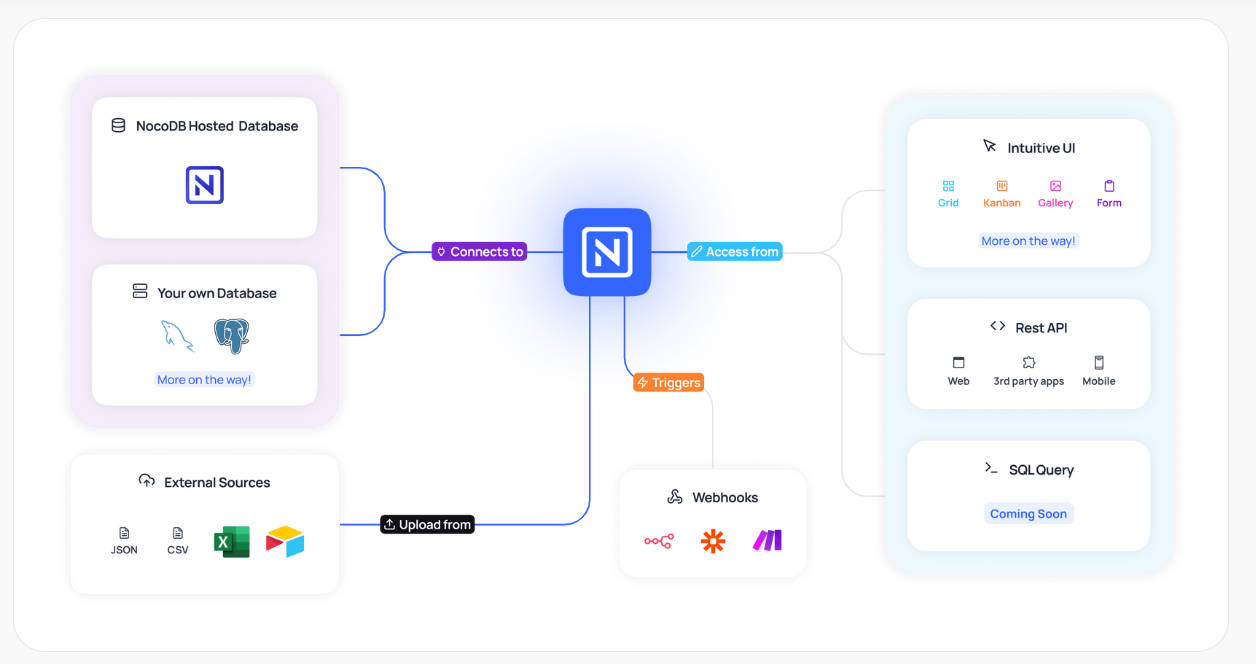 Airtable 的免費開源替代品是 NocoDB。它可以使用任何 MySQL、PostgreSQL、SQL Server、SQLite 或 MariaDB 資料庫製作智慧型電子表格。 其主要目標是讓強大的計算工具得到更廣泛的使用。 開始使用以下 npx 指令。 ``` npx create-nocodb-app ``` 您可以閱讀[文件](https://docs.nocodb.com/)。 NocoDB 的建立是為了為世界各地的數位企業提供強大的開源和無程式碼資料庫介面。 您可以非常快速地將airtable資料匯入NocoDB。 https://github.com/nocodb/nocodb --- 8.[新穎](https://github.com/steven-tey/novel)- 所見即所得編輯器,具有人工智慧自動完成功能。 ------------------------------------------------------------------- 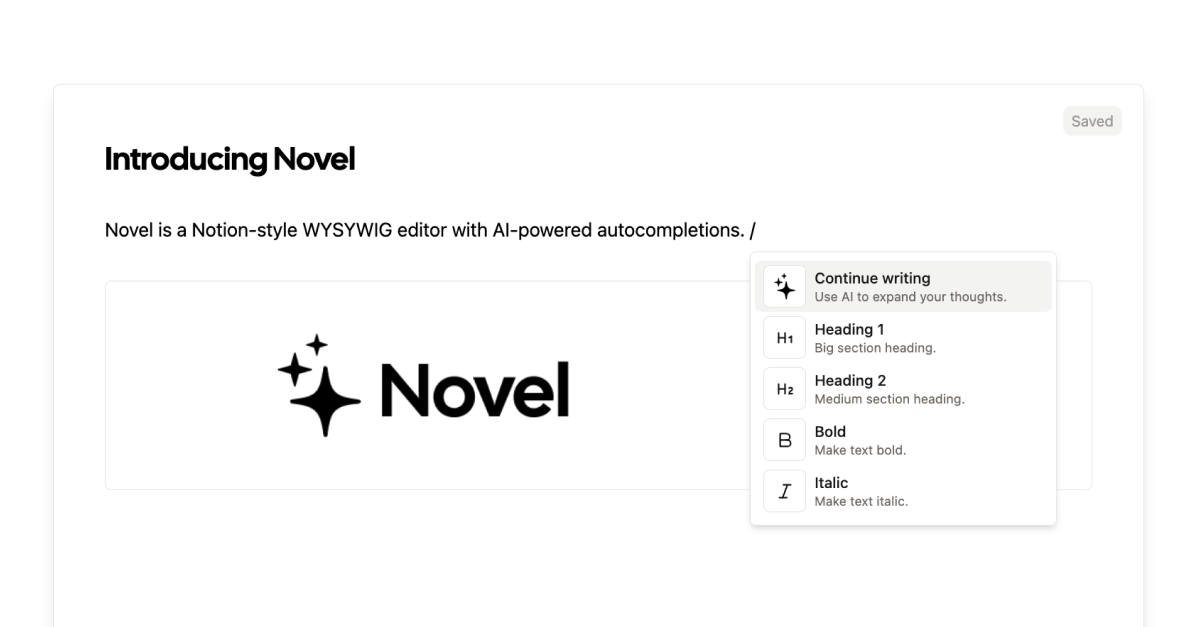 它使用`Next.js` 、 `Vercel AI SDK` 、 `Tiptap`作為文字編輯器。 開始使用以下 npm 指令。 ``` npm i novel ``` 您可以這樣使用它。有多種選項可用於改進您的應用程式。 ``` import { Editor } from "novel"; export default function App() { return <Editor />; } ``` https://github.com/steven-tey/novel --- 9. [Blitz](https://github.com/blitz-js/blitz) - 缺少 NextJS 的全端工具包。 ----------------------------------------------------------------- 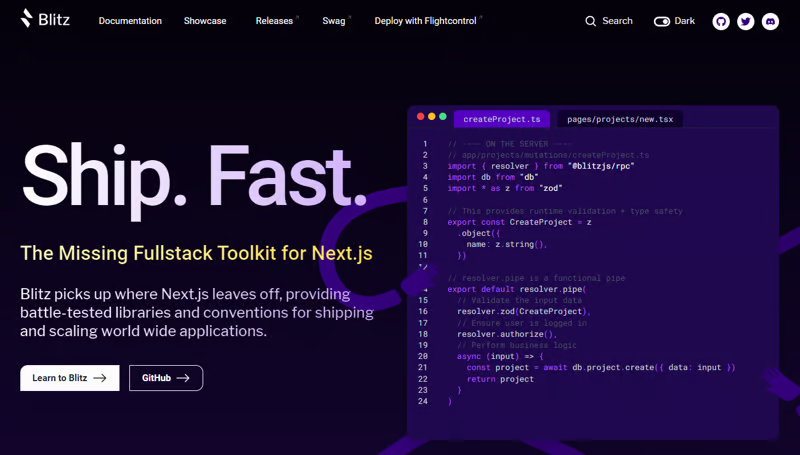 Blitz 繼承了 Next.js 的不足,為全球應用程式的交付和擴展提供了經過實戰考驗的函式庫和約定。 開始使用以下 npm 指令。 ``` npm install -g blitz ``` 這就是您如何使用 Blitz 建立新頁面。 ``` const NewProjectPage: BlitzPage = () => { const router = useRouter() const [createProjectMutation] = useMutation(createProject) return ( <div> <h1>Create New Project</h1> <ProjectForm submitText="Create Project" schema={CreateProject} onSubmit={async (values) => { // This is equivalent to calling the server function directly const project = await createProjectMutation(values) // Notice the 'Routes' object Blitz provides for routing router.push(Routes.ProjectsPage({ projectId: project.id })) }} /> </div> ); }; NewProjectPage.authenticate = true NewProjectPage.getLayout = (page) => <Layout>{page}</Layout> export default NewProjectPage ``` 您可以閱讀[文件](https://blitzjs.com/docs/get-started)。 它使建築物改善了數倍。 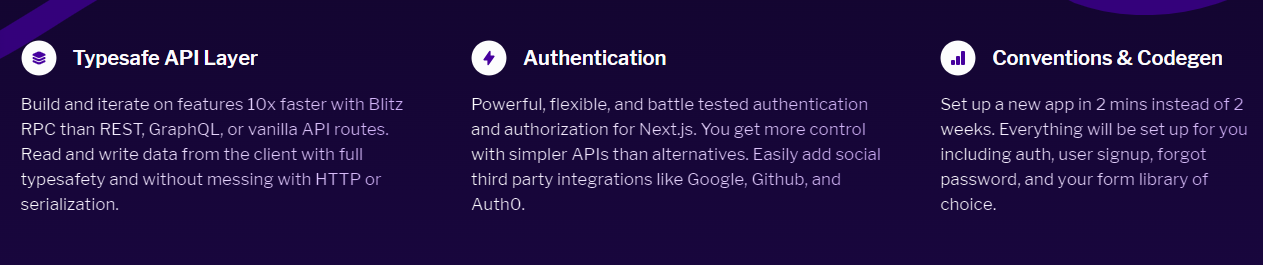 https://github.com/blitz-js/blitz --- 10. [Supabase](https://github.com/supabase/supabase) - 開源 Firebase 替代品。 -----------------------------------------------------------------------  我們大多數人都已經預料到 SUPABASE 會出現在這裡,因為它實在是太棒了。 開始使用以下 npm 指令 (Next.js)。 ``` npx create-next-app -e with-supabase ``` 這是使用 supabase 建立用戶的方法。 ``` import { createClient } from '@supabase/supabase-js' // Initialize const supabaseUrl = 'https://chat-room.supabase.co' const supabaseKey = 'public-anon-key' const supabase = createClient(supabaseUrl, supabaseKey) // Create a new user const { user, error } = await supabase.auth.signUp({ email: '[email protected]', password: 'example-password', }) ``` 您可以閱讀[文件](https://supabase.com/docs)。 您可以使用身份驗證、即時、邊緣功能、儲存等功能建立一個速度極快的應用程式。 Supabase 涵蓋了這一切! 他們還提供了一些入門套件,例如 AI 聊天機器人和 Stripe 訂閱。 https://github.com/supabase/supabase --- [11.Refine](https://github.com/refinedev/refine) - 企業開源重組工具。 ------------------------------------------------------------ 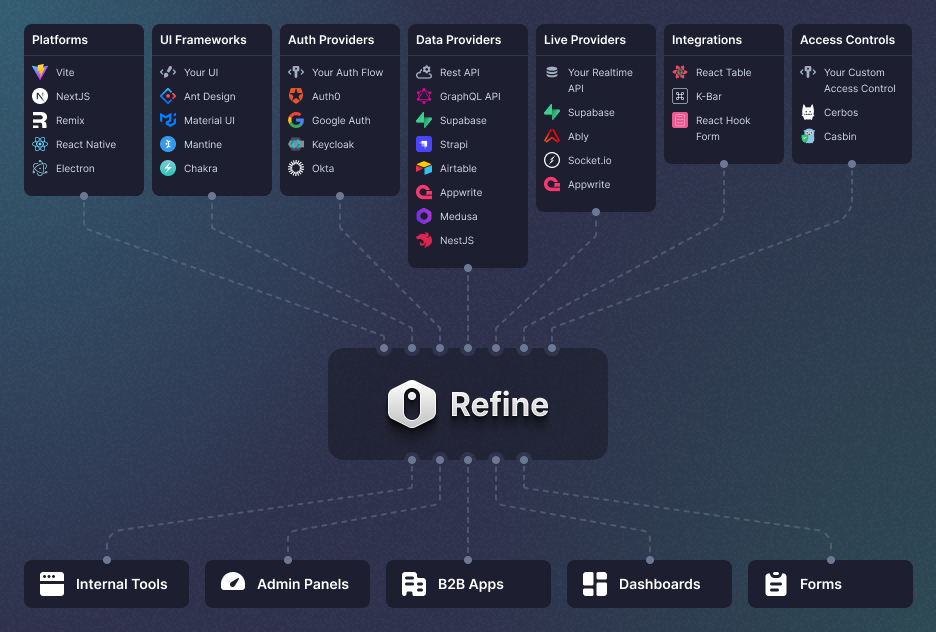 建立具有無與倫比的靈活性的管理面板、儀表板和 B2B 應用程式 您可以在一分鐘內使用單一 CLI 命令進行設定。 它具有適用於 15 多個後端服務的連接器,包括 Hasura、Appwrite 等。 開始使用以下 npm 指令。 ``` npm create refine-app@latest ``` 這就是使用 Refine 新增登入資訊的簡單方法。 ``` import { useLogin } from "@refinedev/core"; const { login } = useLogin(); ``` 您可以閱讀[文件](https://refine.dev/docs/)。 https://github.com/refinedev/refine --- 12. [Zenstack](https://github.com/zenstackhq/zenstack) - 資料庫到 API 和 UI 只需幾分鐘。 ----------------------------------------------------------------------------- 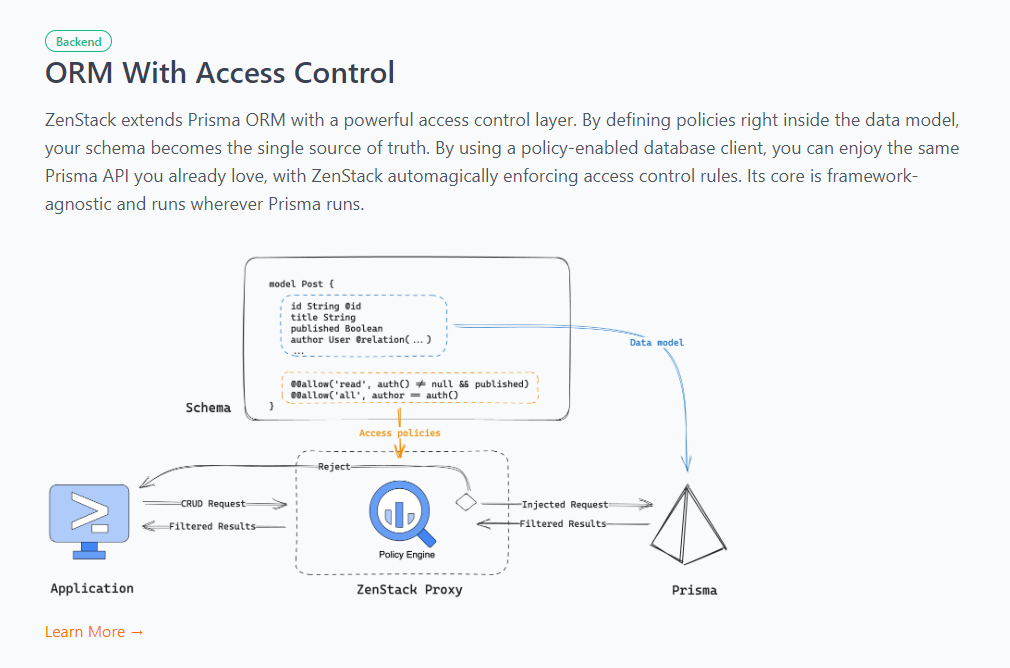 TypeScript 工具包,透過強大的存取控制層增強 Prisma ORM,並釋放其全端開發的全部功能。 開始使用以下 npx 指令。 ``` npx zenstack@latest init ``` 這是透過伺服器適配器建立 RESTful API 的方法。 ``` // pages/api/model/[...path].ts import { requestHandler } from '@zenstackhq/next'; import { enhance } from '@zenstackhq/runtime'; import { getSessionUser } from '@lib/auth'; import { prisma } from '@lib/db'; // Mount Prisma-style APIs: "/api/model/post/findMany", "/api/model/post/create", etc. // Can be configured to provide standard RESTful APIs (using JSON:API) instead. export default requestHandler({ getPrisma: (req, res) => enhance(prisma, { user: getSessionUser(req, res) }), }); ``` 您可以閱讀[文件](https://zenstack.dev/docs/welcome)。 https://github.com/zenstackhq/zenstack --- 13. [Buildship](https://github.com/rowyio/buildship) - 低程式碼視覺化後端建構器。 --------------------------------------------------------------------  對於您正在使用無程式碼應用程式建構器(FlutterFlow、Webflow、Framer、Adalo、Bubble、BravoStudio...)或前端框架(Next.js、React、Vue...)建立的應用程式,您需要一個後端來支援可擴展的 API、安全工作流程、自動化等。BuildShip 為您提供了一種完全視覺化的方式,可以在易於使用的完全託管體驗中可擴展地建立這些後端任務。 這意味著您不需要在雲端平台上爭論或部署東西、執行 DevOps 等。只需立即建置和交付 🚀 https://github.com/rowyio/buildship --- 14. [Taipy](https://github.com/Avaiga/taipy) - 將資料和人工智慧演算法整合到生產就緒的 Web 應用程式中。 -----------------------------------------------------------------------------  Taipy 是一個開源 Python 庫,用於輕鬆的端到端應用程式開發, 具有假設分析、智慧管道執行、內建調度和部署工具。 開始使用以下命令。 ``` pip install taipy ``` 這是一個典型的Python函數,也是過濾器場景中使用的唯一任務。 ``` def filter_genre(initial_dataset: pd.DataFrame, selected_genre): filtered_dataset = initial_dataset[initial_dataset['genres'].str.contains(selected_genre)] filtered_data = filtered_dataset.nlargest(7, 'Popularity %') return filtered_data ``` 您可以閱讀[文件](https://docs.taipy.io/en/latest/)。 他們還有很多可供您建立的[演示應用程式教學](https://docs.taipy.io/en/latest/knowledge_base/demos/)。 https://github.com/Avaiga/taipy --- 15. [LocalForage](https://github.com/localForage/localForage) - 改進了離線儲存。 ------------------------------------------------------------------------ 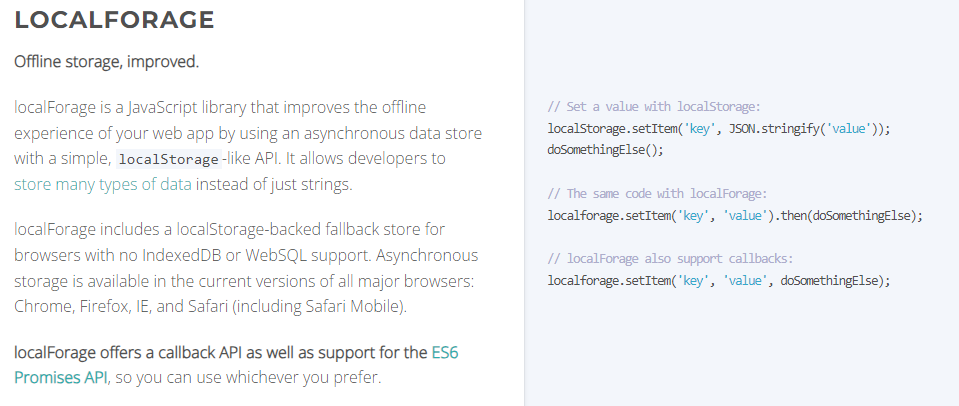 LocalForage 是一個 JavaScript 函式庫,它透過使用非同步資料儲存和簡單的、類似 localStorage 的 API 來改善 Web 應用程式的離線體驗。它允許開發人員儲存多種類型的資料而不僅僅是字串。 開始使用以下 npm 指令。 ``` npm install localforage ``` 只需包含 JS 檔案並開始使用 localForage。 ``` <script src="localforage.js"></script> ``` 您可以閱讀[文件](https://localforage.github.io/localForage/#installation)。 https://github.com/localForage/localForage --- 16. [Zod](https://github.com/colinhacks/zod) - 使用靜態類型推斷的 TypeScript-first 模式驗證。 -------------------------------------------------------------------------------  Zod 的目標是透過最大限度地減少重複的類型聲明來對開發人員友好。使用 Zod,您聲明一次驗證器,Zod 將自動推斷靜態 TypeScript 類型。將更簡單的類型組合成複雜的資料結構很容易。 開始使用以下 npm 指令。 ``` npm install zod ``` 這是您在建立字串架構時自訂一些常見錯誤訊息的方法。 ``` const name = z.string({ required_error: "Name is required", invalid_type_error: "Name must be a string", }); ``` 您可以閱讀[文件](https://zod.dev/)。 它適用於 Node.js 和所有現代瀏覽器 https://github.com/colinhacks/zod --- 17.[多普勒](https://github.com/DopplerHQ)- 管理你的秘密。 -----------------------------------------------  您可以透過在具有開發、暫存和生產環境的專案中組織機密來消除機密蔓延。 開始使用以下指令 (MacOS)。 ``` $ brew install dopplerhq/cli/doppler $ doppler --version ``` 這是安裝 Doppler CLI[的 GitHub Actions 工作流程](https://github.com/DopplerHQ/cli-action)。 您可以閱讀[文件](https://docs.doppler.com/docs/start)。 ``` name: Example action on: [push] jobs: my-job: runs-on: ubuntu-latest steps: - name: Install CLI uses: dopplerhq/cli-action@v3 - name: Do something with the CLI run: doppler secrets --only-names env: DOPPLER_TOKEN: ${{ secrets.DOPPLER_TOKEN }} ``` https://github.com/DopplerHQ --- 18. [FastAPI](https://github.com/tiangolo/fastapi) - 高效能、易於學習、快速編碼、可用於生產。 -------------------------------------------------------------------------  FastAPI 是一個現代、快速(高效能)的 Web 框架,用於基於標準 Python 類型提示使用 Python 3.8+ 建立 API。 開始使用以下命令。 ``` $ pip install fastapi ``` 這是您開始使用 FastAPI 的方式。 ``` from typing import Union from fastapi import FastAPI app = FastAPI() @app.get("/") def read_root(): return {"Hello": "World"} @app.get("/items/{item_id}") def read_item(item_id: int, q: Union[str, None] = None): return {"item_id": item_id, "q": q} ``` 您的編輯器將自動完成屬性並了解它們的類型,這是使用 FastAPI 的最佳功能之一。 您可以閱讀[文件](https://fastapi.tiangolo.com/)。 https://github.com/tiangolo/fastapi --- 19. [Flowise](https://github.com/FlowiseAI/Flowise) - 拖放 UI 來建立您的客製化 LLM 流程。 ----------------------------------------------------------------------------  Flowise 是一款開源 UI 視覺化工具,用於建立客製化的 LLM 編排流程和 AI 代理程式。 開始使用以下 npm 指令。 ``` npm install -g flowise npx flowise start OR npx flowise start --FLOWISE_USERNAME=user --FLOWISE_PASSWORD=1234 ``` 這就是整合 API 的方式。 ``` import requests url = "/api/v1/prediction/:id" def query(payload): response = requests.post( url, json = payload ) return response.json() output = query({ question: "hello!" )} ``` 您可以閱讀[文件](https://docs.flowiseai.com/)。 https://github.com/FlowiseAI/Flowise --- 20. [Scrapy](https://github.com/scrapy/scrapy) - Python 的快速進階網頁爬行和抓取框架.. ------------------------------------------------------------------------  Scrapy 是一個快速的高級網路爬行和網頁抓取框架,用於爬行網站並從頁面中提取結構化資料。它可用於多種用途,從資料探勘到監控和自動化測試。 開始使用以下命令。 ``` pip install scrapy ``` 建造並執行您的網路蜘蛛。 ``` pip install scrapy cat > myspider.py <<EOF import scrapy class BlogSpider(scrapy.Spider): name = 'blogspider' start_urls = ['https://www.zyte.com/blog/'] def parse(self, response): for title in response.css('.oxy-post-title'): yield {'title': title.css('::text').get()} for next_page in response.css('a.next'): yield response.follow(next_page, self.parse) EOF scrapy runspider myspider.py ``` 您可以閱讀[文件](https://scrapy.org/doc/)。 它擁有大約 50k+ 的星星,因此對於網頁抓取來說具有巨大的可信度。 https://github.com/scrapy/scrapy --- 21. [Tone](https://github.com/Tonejs/Tone.js) - 在瀏覽器中製作互動式音樂。 -------------------------------------------------------------  開始使用以下 npm 指令。 ``` npm install tone ``` 這是您開始使用 Tone.js 的方法 ``` // To import Tone.js: import * as Tone from 'tone' //create a synth and connect it to the main output (your speakers) const synth = new Tone.Synth().toDestination(); //play a middle 'C' for the duration of an 8th note synth.triggerAttackRelease("C4", "8n"); ``` 您可以閱讀[文件](https://github.com/Tonejs/Tone.js?tab=readme-ov-file#installation)。 https://github.com/Tonejs/Tone.js --- 22. [Spacetime](https://github.com/spencermountain/spacetime) - 輕量級 javascript 時區庫。 -----------------------------------------------------------------------------------  您可以計算遠端時區的時間;支持夏令時、閏年和半球。按季度、季節、月份、週來定位時間.. 開始使用以下 npm 指令。 ``` npm install spacetime ``` 您可以這樣使用它。 ``` <script src="https://unpkg.com/spacetime"></script> <script> var d = spacetime('March 1 2012', 'America/New_York') //set the time d = d.time('4:20pm') d = d.goto('America/Los_Angeles') d.time() //'1:20pm' </script> ``` https://github.com/spencermountain/spacetime --- 23. [Mermaid](https://github.com/mermaid-js/mermaid) - 從類似 markdown 的文字產生圖表。 ----------------------------------------------------------------------------  您可以使用 Markdown with Mermaid 等文字產生流程圖或序列圖等圖表。 這就是建立圖表的方法。 ``` sequenceDiagram Alice->>John: Hello John, how are you? loop Healthcheck John->>John: Fight against hypochondria end Note right of John: Rational thoughts! John-->>Alice: Great! John->>Bob: How about you? Bob-->>John: Jolly good! ``` 它將做出如下圖。 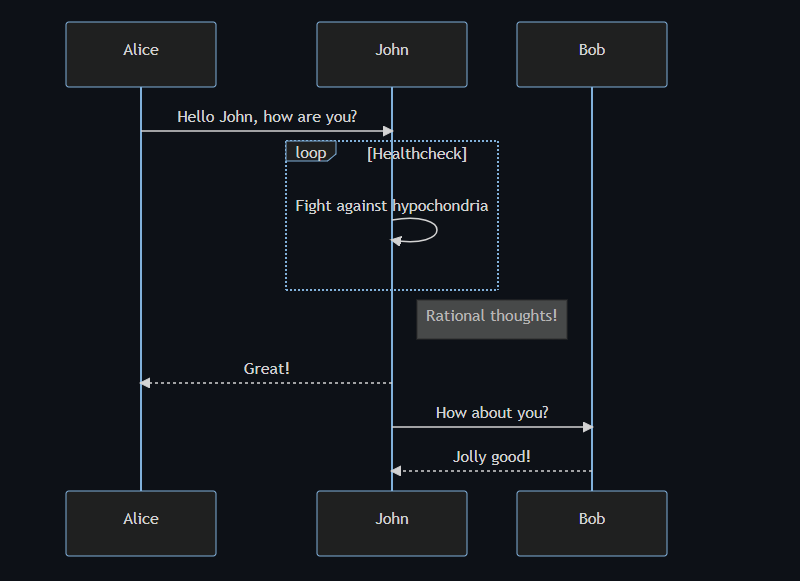 您可以閱讀[VS Code](https://docs.mermaidchart.com/plugins/visual-studio-code)的[文件](https://mermaid.js.org/intro/getting-started.html)和外掛程式。 請參閱[即時編輯器](https://mermaid.live/edit#pako:eNpVkE1PwzAMhv9KlvM-2AZj62EIxJd24ADXXLzEbaKlcUkdUDX1v5MONomcnNevXz32UWoyKAvZ4mfCoPHRQRWhVuHeO42T7XZHNhTiFb0nMdRjYelbQETRUbpTwRM1uQ2erbaoDyqI_AbnZfjZVZYFVOBCy8J2DWlLwUQHKmAwKrwRo4gnF5Xid-gd2FEAL9hSyp12pMIpNcee2ArxEhH4LG-3D7TPoAPcnhL_4WVxcgHZkfedqIjMSI5ljbEGZ_LyxwFaSbZYo5JFLg3Eg5Iq9NkHiemjC1oWHBOOZWoM8PlQ_8Un45iiLErwbRY9gcH8PUrumuHKlWs5J2oKpasGPUWfZcvctMVsNrSnlWOb9lNN9ax1xkJk-7VZzVaL1RoWS1zdLuFmuTR6P9-sy8X1vDS3V_MFyL7vfwD_bJ1W)中的範例。 https://github.com/mermaid-js/mermaid --- 24.[公共 API](https://github.com/public-apis/public-apis) - 20 多個類別的 1400 多個 API。 -------------------------------------------------------------------------------  我們主要使用外部 API 來建立應用程式,在這裡您可以找到所有 API 的清單。網站連結在最後。 它在 GitHub 上擁有大約 279k+ 顆星。 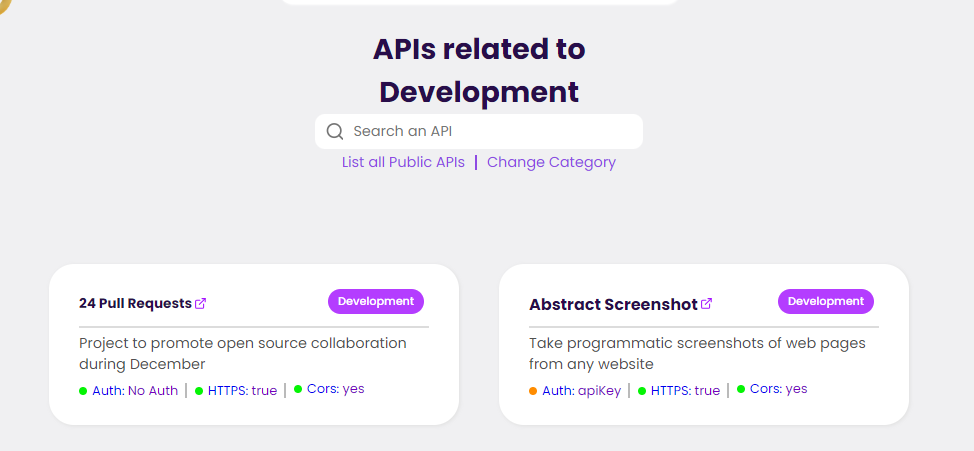 從儲存庫取得網站連結非常困難。所以,我把它貼在這裡。 網址 - [Collective-api.vercel.app/](https://collective-api.vercel.app/) https://github.com/public-apis/public-apis --- 25. [Framer Motion](https://github.com/framer/motion) - 像魔法一樣的動畫。 ----------------------------------------------------------------- 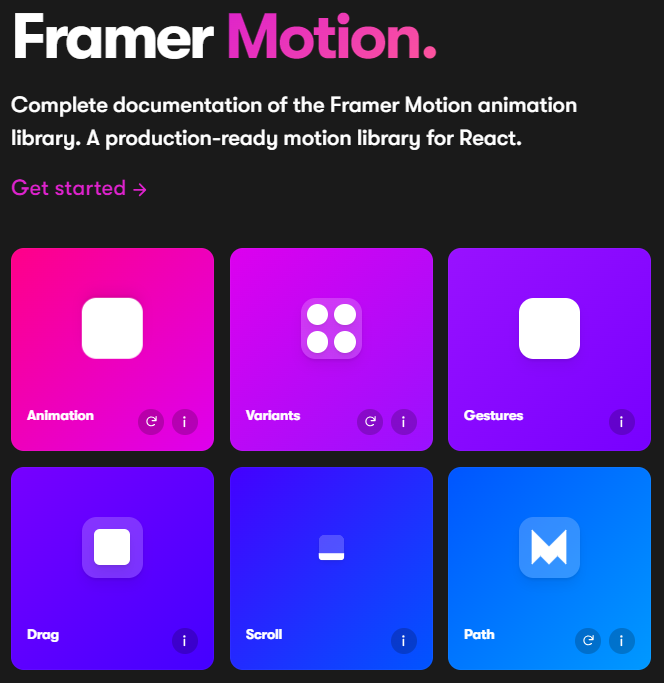 可用的最強大的動畫庫之一。 Framer 使用簡單的聲明性語法意味著您編寫的程式碼更少。更少的程式碼意味著您的程式碼庫更易於閱讀和維護。 您可以建立事件和手勢,並且使用 Framer 的社區很大,這意味著良好的支援。 開始使用以下 npm 指令。 ``` npm install framer-motion ``` 您可以這樣使用它。 ``` import { motion } from "framer-motion" <motion.div whileHover={{ scale: 1.2 }} whileTap={{ scale: 1.1 }} drag="x" dragConstraints={{ left: -100, right: 100 }} /> ``` 您可以閱讀[文件](https://www.framer.com/motion/introduction/)。 https://github.com/framer/motion --- 26.[順便說一句](https://github.com/btw-so/btw)- 在幾分鐘內建立您的個人部落格。 ----------------------------------------------------------  順便說一句,您可以註冊並使用,而無需安裝任何東西。您也可以使用開源版本自行託管。  使用順便說一句建立的[範例部落格](https://www.siddg.com/about)。 https://github.com/btw-so/btw --- 27. [Formbricks](https://github.com/formbricks/formbricks) - 開源調查平台。 --------------------------------------------------------------------  Formbricks 提供免費、開源的測量平台。透過精美的應用程式內、網站、連結和電子郵件調查收集用戶旅程中每個點的回饋。在 Formbricks 之上建置或利用預先建置的資料分析功能。 開始使用以下 npm 指令。 ``` npm install @formbricks/js ``` 這就是您開始使用 formbricks 的方法。 ``` import formbricks from "@formbricks/js"; if (typeof window !== "undefined") { formbricks.init({ environmentId: "claV2as2kKAqF28fJ8", apiHost: "https://app.formbricks.com", }); } ``` 您可以閱讀[文件](https://formbricks.com/docs/getting-started/quickstart-in-app-survey)。 https://github.com/formbricks/formbricks --- 28. [Stripe](https://github.com/stripe) - 支付基礎設施。 -------------------------------------------------  數以百萬計的各種規模的公司在線上和親自使用 Stripe 來接受付款、發送付款、自動化財務流程並最終增加收入。 開始使用以下 npm 指令 (React.js)。 ``` npm install @stripe/react-stripe-js @stripe/stripe-js ``` 這就是使用鉤子的方法。 ``` import React, {useState} from 'react'; import ReactDOM from 'react-dom'; import {loadStripe} from '@stripe/stripe-js'; import { PaymentElement, Elements, useStripe, useElements, } from '@stripe/react-stripe-js'; const CheckoutForm = () => { const stripe = useStripe(); const elements = useElements(); const [errorMessage, setErrorMessage] = useState(null); const handleSubmit = async (event) => { event.preventDefault(); if (elements == null) { return; } // Trigger form validation and wallet collection const {error: submitError} = await elements.submit(); if (submitError) { // Show error to your customer setErrorMessage(submitError.message); return; } // Create the PaymentIntent and obtain clientSecret from your server endpoint const res = await fetch('/create-intent', { method: 'POST', }); const {client_secret: clientSecret} = await res.json(); const {error} = await stripe.confirmPayment({ //`Elements` instance that was used to create the Payment Element elements, clientSecret, confirmParams: { return_url: 'https://example.com/order/123/complete', }, }); if (error) { // This point will only be reached if there is an immediate error when // confirming the payment. Show error to your customer (for example, payment // details incomplete) setErrorMessage(error.message); } else { // Your customer will be redirected to your `return_url`. For some payment // methods like iDEAL, your customer will be redirected to an intermediate // site first to authorize the payment, then redirected to the `return_url`. } }; return ( <form onSubmit={handleSubmit}> <PaymentElement /> <button type="submit" disabled={!stripe || !elements}> Pay </button> {/* Show error message to your customers */} {errorMessage && <div>{errorMessage}</div>} </form> ); }; const stripePromise = loadStripe('pk_test_6pRNASCoBOKtIshFeQd4XMUh'); const options = { mode: 'payment', amount: 1099, currency: 'usd', // Fully customizable with appearance API. appearance: { /*...*/ }, }; const App = () => ( <Elements stripe={stripePromise} options={options}> <CheckoutForm /> </Elements> ); ReactDOM.render(<App />, document.body); ``` 您可以閱讀[文件](https://github.com/stripe/react-stripe-js?tab=readme-ov-file#minimal-example)。 您幾乎可以整合任何東西。它有一個巨大的選項清單。  https://github.com/stripe --- 29. [Upscayl](https://github.com/upscayl/upscayl) - 開源 AI 影像升級器。 ----------------------------------------------------------------  適用於 Linux、MacOS 和 Windows 的免費開源 AI Image Upscaler 採用 Linux 優先概念建構。 它可能與全端無關,但它對於升級圖像很有用。  透過最先進的人工智慧,Upscayl 可以幫助您將低解析度影像變成高解析度。清脆又鋒利! https://github.com/upscayl/upscayl --- 30.[重新發送](https://github.com/resend)- 為開發人員提供的電子郵件 API。 -------------------------------------------------------  您可以使用 React 建立和傳送電子郵件。 2023 年最受炒作的產品之一。 開始使用以下 npm 指令。 ``` npm install @react-email/components -E ``` 這是將其與 next.js 專案整合的方法。 ``` import { EmailTemplate } from '@/components/email-template'; import { Resend } from 'resend'; const resend = new Resend(process.env.RESEND_API_KEY); export async function POST() { const { data, error } = await resend.emails.send({ from: '[email protected]', to: '[email protected]', subject: 'Hello world', react: EmailTemplate({ firstName: 'John' }), }); if (error) { return Response.json({ error }); } return Response.json(data); } ``` 您可以閱讀[文件](https://resend.com/docs/introduction)。  基本概念是一個簡單、優雅的介面,讓您可以在幾分鐘內開始發送電子郵件。它可以透過適用於您最喜歡的程式語言的 SDK 直接融入您的程式碼中。 https://github.com/resend --- 哇!如此長的專案清單。 我知道您有更多想法,分享它們,讓我們一起建造:D 如今建立全端應用程式並不難,但每個應用程式都可以透過有效地使用優秀的開源專案來解決任何問題來增加這一獨特因素。 例如,您可以建立一些提供通知或建立 UI 流來抓取資料的東西。 我希望其中一些內容對您的開發之旅有用。他們擁有一流的開發人員經驗;你可以依賴他們。 由於您將要建造東西,因此您可以在這裡找到一些[瘋狂的想法](https://github.com/florinpop17/app-ideas)。 祝你有美好的一天!直到下一次。 --- 原文出處:https://dev.to/copilotkit/im-building-a-full-stack-app-here-are-the-libraries-im-going-to-use-51nk
長話短說 ==== 在本文中,您將學習如何使用 Nextjs、CopilotKit 和 OpenAI 建立人工智慧驅動的 PowerPoint 應用程式。我們將涵蓋: - 利用 ChatGPT 建立您的 PowerPoint 簡報📊 - 與您的 PowerPoint 簡報聊天💬 - 將音訊和圖像新增至您的 PowerPoint 簡報🔉  --- CopilotKit:建構深度整合的應用內人工智慧聊天機器人💬 ------------------------------- CopilotKit 是[開源人工智慧副駕駛平台。](https://github.com/CopilotKit/CopilotKit)我們可以輕鬆地將強大的人工智慧聊天機器人整合到您的 React 應用程式中。完全可定制和深度集成。  {% cta https://github.com/CopilotKit/CopilotKit %} Star CopilotKit ⭐️ {% endcta %} ###### \*在布胡布上 現在回到文章。 --- **先決條件** -------- 要開始學習本教程,您需要在電腦上安裝以下軟體: - 文字編輯器(例如 Visual Studio Code) - Node.js - 套件管理器 使用 NextJS 建立 PowerPoint 應用程式前端 ------------------------------ **步驟 1:**使用下列指令 Git 複製 PowerPoint 應用程式樣板。 ``` git clone https://github.com/TheGreatBonnie/aipoweredpowerpointpresentation ``` **步驟 2:**在文字編輯器上開啟 PowerPoint 應用程式樣板,並使用下列指令安裝所有專案相依性。 ``` npm install ``` 步驟3: • 前往根目錄\*\*\*\*並建立一個名為**`.env.local`的檔案。**在該文件中,加入下面保存您的 ChatGPT API 金鑰的環境變數。 ``` OPENAI_API_KEY="Your ChatGPT API Key” ``` **步驟4:**在命令列執行命令*npm run dev* 。導航至 http://localhost:3000/,您應該會看到 PowerPoint 應用程式前端。  建立 PowerPoint 投影片功能 ------------------- 步驟 1:前往**`/[root]/src/app/components`** ,並建立一個名為`present.tsx`的檔案。然後在文件頂部導入以下相依性。 ``` "use client"; import { useCopilotContext } from "@copilotkit/react-core"; import { CopilotTask } from "@copilotkit/react-core"; import { useMakeCopilotActionable, useMakeCopilotReadable, } from "@copilotkit/react-core"; import { useEffect, useState } from "react"; import "./../presentation/styles.css"; import Markdown from "react-markdown"; ``` 步驟 2:定義一個名為 Slide 的 TypeScript 接口,其中包含 PowerPoint 簡報投影片的標題和內容屬性。 ``` // Define slide interface interface Slide { title: string; content: string; } ``` 步驟 3:建立一個名為`Presentation`函數,並使用usestate 初始化名為`allSlides`和`currentSlideIndex`狀態變數`usestate.`變數`allSlides`將保存幻燈片陣列,而`currentSlideIndex`將保存目前幻燈片索引。 ``` export function Presentation (){ const [allSlides, setAllSlides] = useState<Slide[]>([]); const [currentSlideIndex, setCurrentSlideIndex] = useState<number>(0); } ``` 步驟 4:在`Presentation`函數中,使用`useMakeCopilotReadable`掛鉤新增投影片的`allSlides`陣列作為應用程式內聊天機器人的上下文。 ``` useMakeCopilotReadable("Powerpoint presentation slides: " + JSON.stringify(allSlides)); ``` 步驟 5:使用`useMakeCopilotActionable`掛鉤設定一個名為`createNewPowerPointSlide`操作,其中包含描述和更新`allSlides`和`currentSlideIndex`狀態變數的實作函數,如下所示。 ``` useMakeCopilotActionable( { name: "createNewPowerPointSlide", description: "create slides for a powerpoint presentation. Call this function multiple times to present multiple slides.", argumentAnnotations: [ { name: "slideTitle", type: "string", description: "The topic to display in the presentation slide. Use simple markdown to outline your speech, like a headline.", required: true, }, { name: "content", type: "string", description: "The content to display in the presentation slide. Use simple markdown to outline your speech, like lists, paragraphs, etc.", required: true }, ], implementation: async (newSlideTitle, newSlideContent) => { const newSlide: Slide = { title: newSlideTitle, content: newSlideContent}; const updatedSlides = [...allSlides, newSlide]; setAllSlides(updatedSlides); setCurrentSlideIndex(updatedSlides.length - 1); }, }, [], ); ``` 步驟6:定義一個名為`displayCurrentSlide`的函數,用於在前端顯示目前投影片索引。 ``` // Display current slide const displayCurrentSlide = () => { const slide = allSlides[currentSlideIndex]; return slide ? ( <div className="h-screen flex flex-col justify-center items-center text-5xl text-white bg-cover bg-center bg-no-repeat p-10 text-center" style={{ textShadow: "1px 1px 0 #000, -1px -1px 0 #000, 1px -1px 0 #000, -1px 1px 0 #000", }} > <Markdown className="markdown">{slide.title}</Markdown> <Markdown className="markdown">{slide.content}</Markdown> </div> ) : ( <div className="h-screen flex flex-col justify-center items-center text-5xl text-white bg-cover bg-center bg-no-repeat p-10 text-center"> No Slide To Display </div> ); }; ``` 步驟 7: 定義一個名為 addSlide 的函數,該函數包含一個名為 CopilotTask 的類別。 CopilotTask 類別定義新增投影片的功能。 ``` // Add new slide function const addSlide = new CopilotTask({ instructions: "create a new slide", actions: [ { name: "newSlide", description: "Make a new slide related to the current topic.", argumentAnnotations: [ { name: "title", type: "string", description: "The title to display in the presentation slide.", required: true, }, { name: "content", type: "string", description: "The title to display in the presentation slide.", required: true, }, ], implementation: async (newSlideTitle,newSlideContent,) => { const newSlide: Slide = {title: newSlideTitle,content: newSlideContent,}; const updatedSlides = [...allSlides, newSlide]; setAllSlides(updatedSlides); setCurrentSlideIndex(updatedSlides.length - 1); }, }, ], }); const context = useCopilotContext(); const [randomSlideTaskRunning, setRandomSlideTaskRunning] = useState(false); ``` 步驟 8:定義兩個函數 goBack 和 goForward。 goBack 函數定義導覽到上一張投影片的功能,而 goForward 函數定義導覽到下一張投影片的功能。 ``` // Button click handlers for navigation const goBack = () => setCurrentSlideIndex((prev) => Math.max(0, prev - 1)); const goForward = () => setCurrentSlideIndex((prev) => Math.min(allSlides.length - 1, prev + 1)); ``` 步驟9:傳回一個呼叫displayCurrentSlide函數的元件,並包含呼叫addSlide、goBack和goForward函數的按鈕。 ``` return ( <div> {displayCurrentSlide()} <button disabled={randomSlideTaskRunning} className={`absolute bottom-12 left-0 mb-4 ml-4 bg-blue-500 text-white font-bold py-2 px-4 rounded ${randomSlideTaskRunning ? "opacity-50 cursor-not-allowed" : "hover:bg-blue-700"}`} onClick={async () => { try { setRandomSlideTaskRunning(true); await addSlide.run(context); } finally { setRandomSlideTaskRunning(false); } }} > {randomSlideTaskRunning ? "Loading slide..." : "Add Slide +"} </button> <button className={`absolute bottom-0 left-0 mb-4 ml-4 bg-blue-500 text-white font-bold py-2 px-4 rounded ${randomSlideTaskRunning ? "opacity-50 cursor-not-allowed" : "hover:bg-blue-700"}`} onClick={goBack}>Prev</button> <button className={`absolute bottom-0 left-20 mb-4 ml-4 bg-blue-500 text-white font-bold py-2 px-4 rounded ${randomSlideTaskRunning ? "opacity-50 cursor-not-allowed" : "hover:bg-blue-700"}`} onClick={goForward}>Next</button> </div> ); ``` 步驟10:在Presentation資料夾中,將以下程式碼加入page.tsx檔案。 ``` "use client"; import { CopilotKit } from "@copilotkit/react-core"; import { CopilotSidebar } from "@copilotkit/react-ui"; import {Presentation} from "../components/present"; import "./styles.css"; let globalAudio: any = undefined; let globalAudioEnabled = false; const Demo = () => { return ( <CopilotKit url="/api/copilotkit/openai"> <CopilotSidebar defaultOpen={true} labels={{ title: "Presentation Copilot", initial: "Hi you! 👋 I can give you a presentation on any topic.", }} clickOutsideToClose={false} onSubmitMessage={async (message) => { if (!globalAudioEnabled) { globalAudio.play(); globalAudio.pause(); } globalAudioEnabled = true; }} > <Presentation/> </CopilotSidebar> </CopilotKit> ); }; export default Demo; ``` 步驟11:導覽至http://localhost:3000/,點擊「開始」按鈕,您將被重定向到與聊天機器人整合的演示頁面,如下所示。 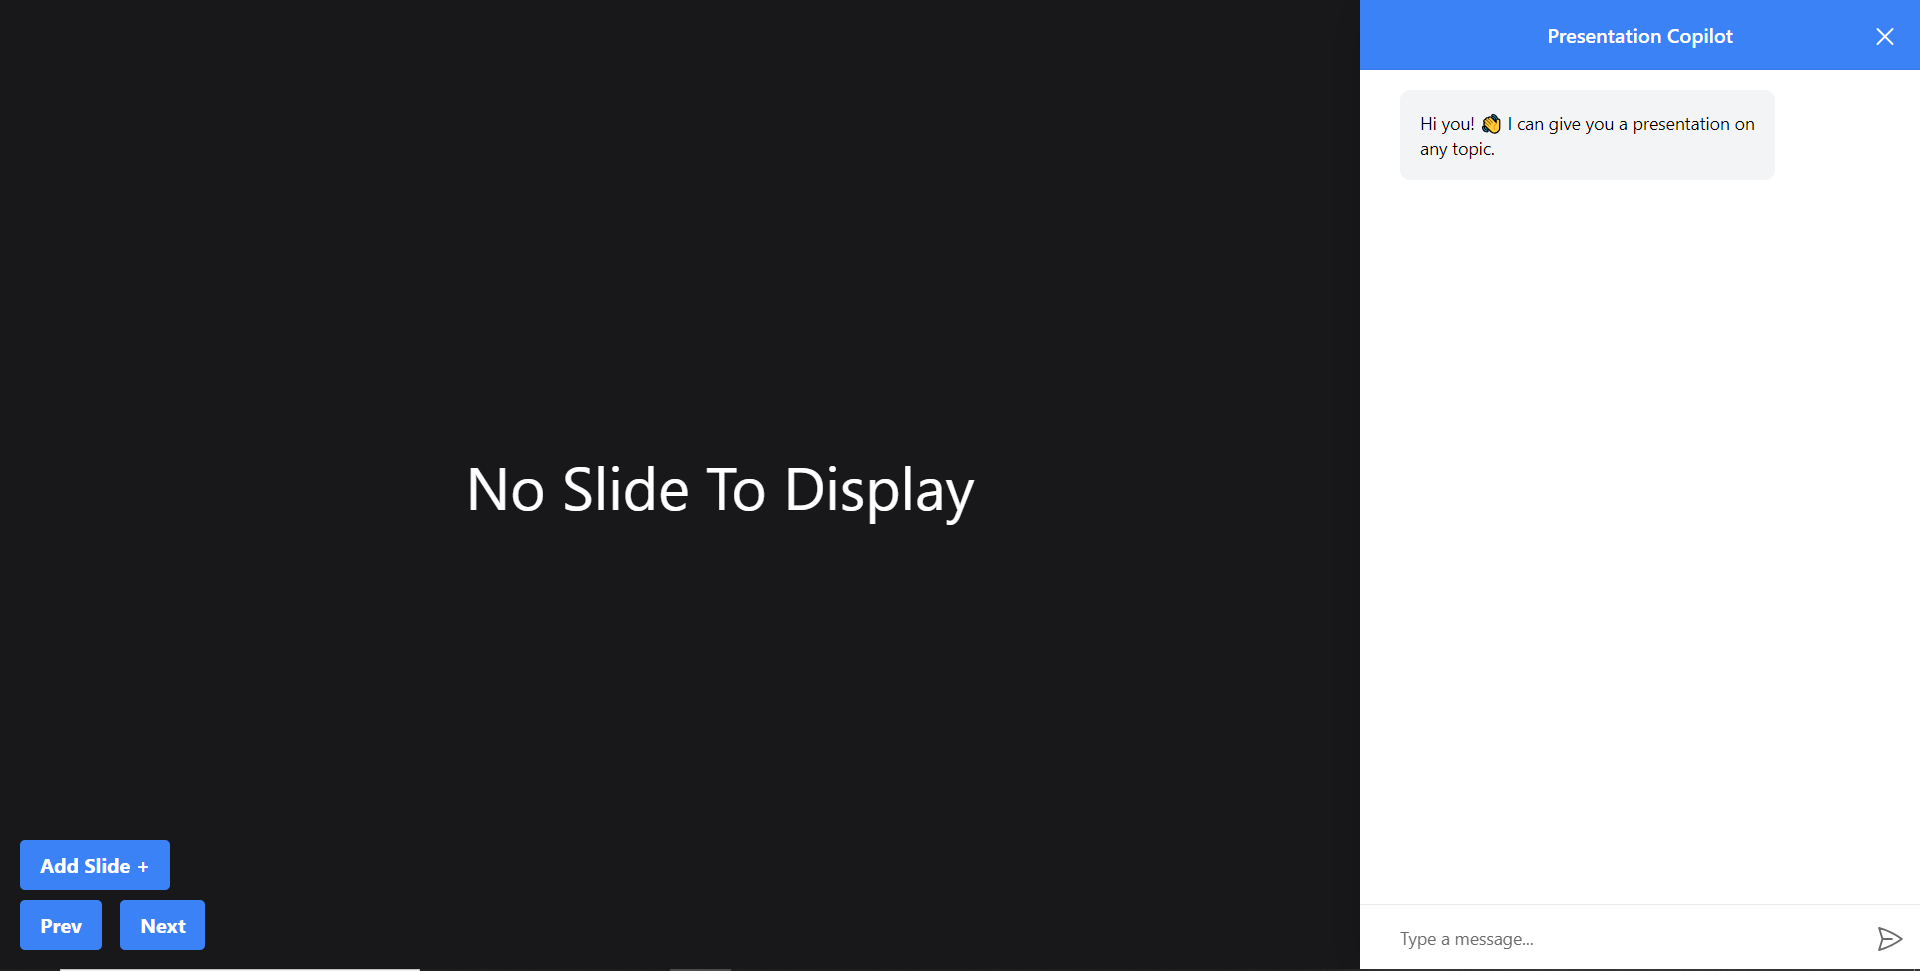 步驟12:給右側的聊天機器人一個提示,例如「在TypeScript上建立PowerPoint簡報」聊天機器人將開始產生回應,完成後,它將在頁面左側顯示產生的PowerPoint投影片,如下圖所示  步驟 13:關閉聊天機器人窗口,然後按一下新增投影片 + 按鈕將新投影片新增至 PowerPoint 簡報中,如下所示。 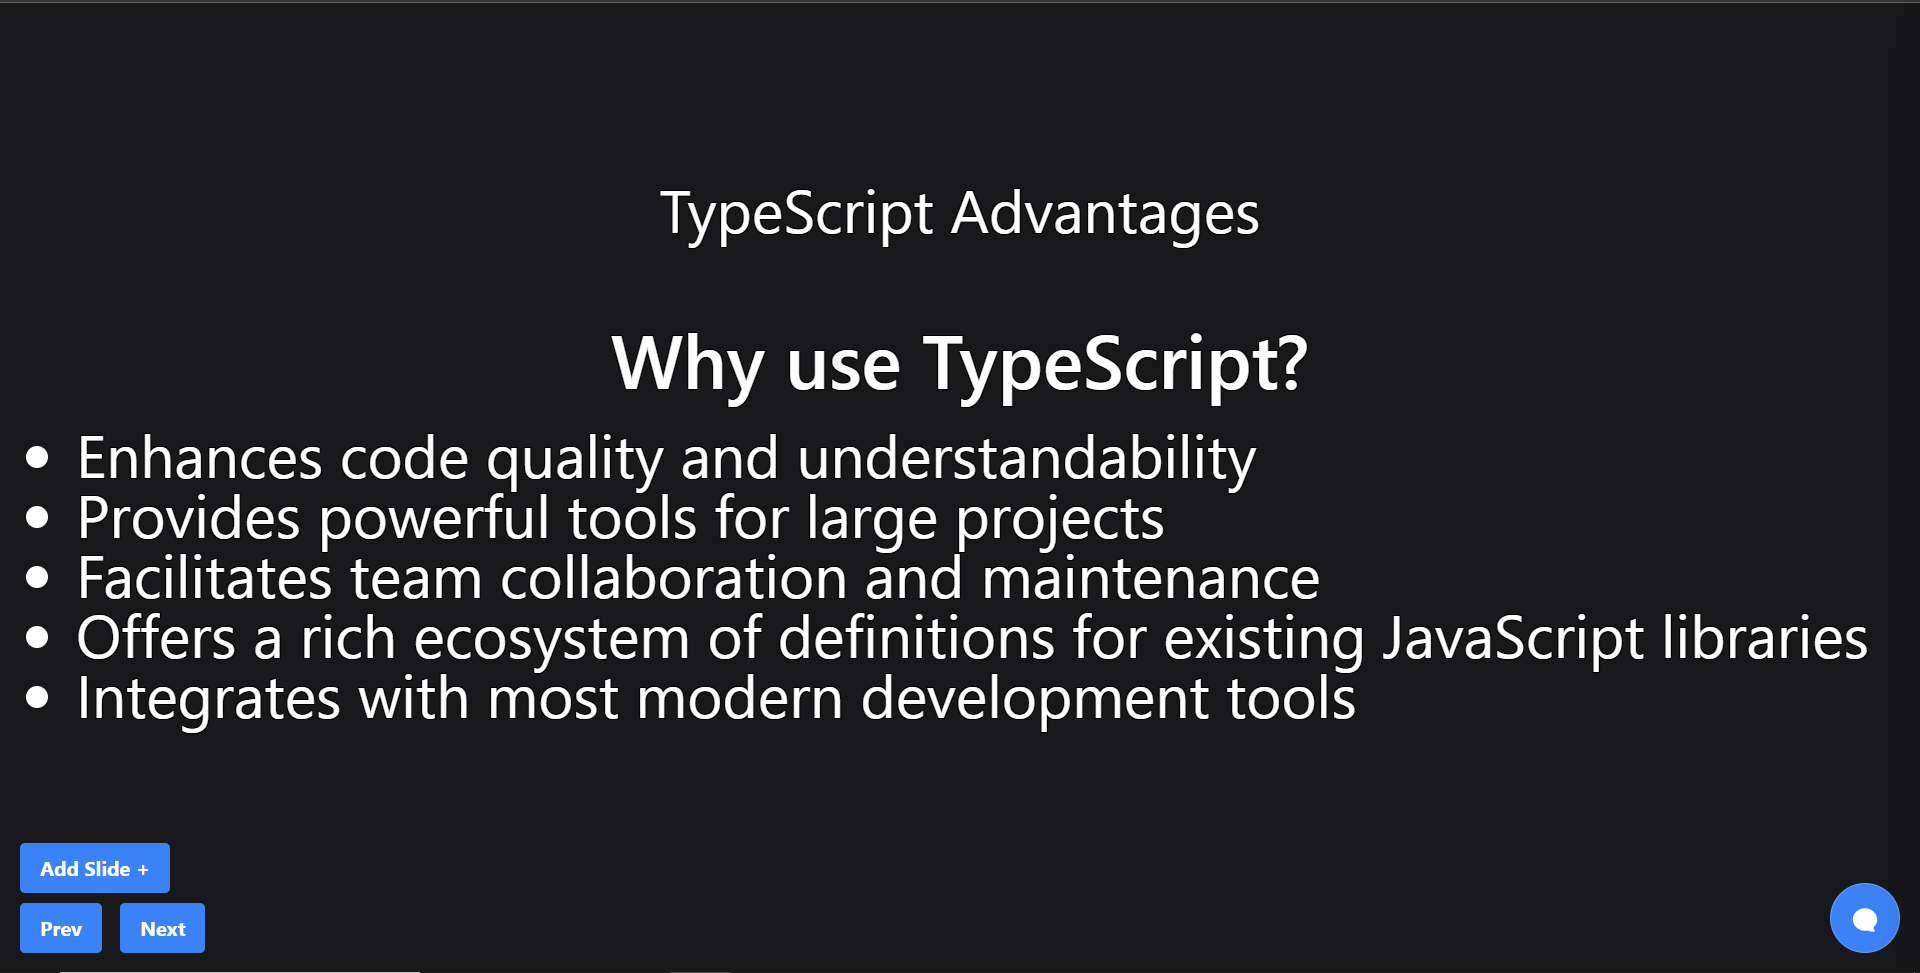 第 14 步:按一下「上一張」按鈕,您將導覽至上一張投影片。如果您按一下「下一步」按鈕,您將導覽至下一張投影片。 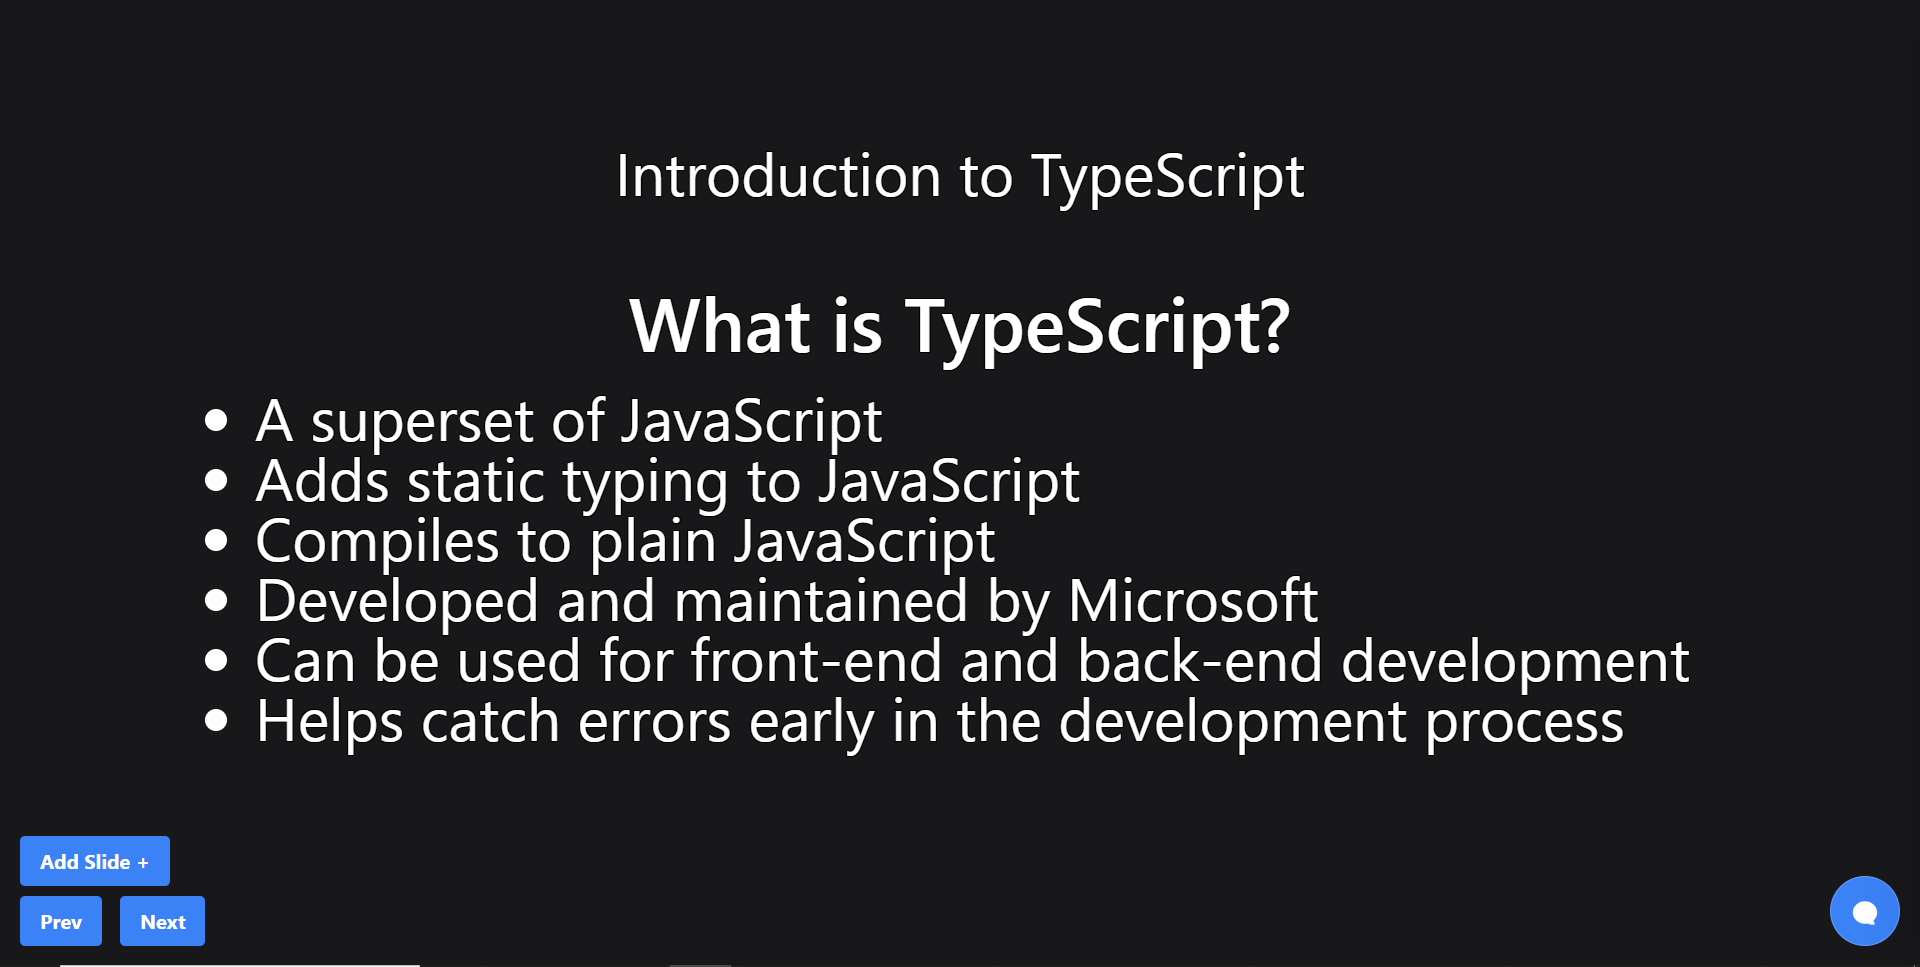 建立 PowerPoint 投影片 自動語音功能 ------------------------ 步驟1:在`present.tsx`檔案中,宣告一個名為`globalAudio`的變數,如下所示。 ``` let globalAudio: any = undefined; ``` 步驟2:在`Presentation`元件中,宣告一個`useEffect`鉤子,用一個新的**`Audio`**物件初始化**`globalAudio`** ,如下所示。 ``` useEffect(() => { if (!globalAudio) { globalAudio = new Audio(); } }, []); ``` 步驟 3:更新 useMakeCopilotActionable 掛鉤,透過 API 將 PowerPoint 幻燈片文字轉換為語音,如下所示。 ``` useMakeCopilotActionable( { name: "createNewPowerPointSlide", description: "create slides for a powerpoint presentation. Call this function multiple times to present multiple slides.", argumentAnnotations: [ { name: "slideTitle", type: "string", description: "The topic to display in the presentation slide. Use simple markdown to outline your speech, like a headline.", required: true, }, { name: "content", type: "string", description: "The content to display in the presentation slide. Use simple markdown to outline your speech, like lists, paragraphs, etc.", required: true }, { name: "speech", type: "string", description: "An informative speech about the current slide.", required: true, }, ], implementation: async (newSlideTitle, newSlideContent, speech) => { const newSlide: Slide = { title: newSlideTitle, content: newSlideContent }; const updatedSlides = [...allSlides, newSlide]; setAllSlides(updatedSlides); setCurrentSlideIndex(updatedSlides.length - 1); const encodedText = encodeURIComponent(speech); const url = `/api/tts?text=${encodedText}`; globalAudio.src = url; await globalAudio.play(); await new Promise<void>((resolve) => { globalAudio.onended = function () { resolve(); }; }); await new Promise((resolve) => setTimeout(resolve, 500)); }, }, [], ); ``` 步驟 4:更新 addSlide 函數,透過 API 將新的 PowerPoint 投影片文字轉換為語音,如下所示。 ``` // Add new slide function const addSlide = new CopilotTask({ instructions: "create a new slide", actions: [ { name: "newSlide", description: "Make a new slide related to the current topic.", argumentAnnotations: [ { name: "title", type: "string", description:"The title to display in the presentation slide.", required: true, }, { name: "content", type: "string", description:"The title to display in the presentation slide.", required: true, }, { name: "speech", type: "string", description: "An informative speech about the current slide.", required: true, }, ], implementation: async (newSlideTitle, newSlideContent, speech) => { const newSlide: Slide = { title: newSlideTitle, content: newSlideContent }; const updatedSlides = [...allSlides, newSlide]; setAllSlides(updatedSlides); setCurrentSlideIndex(updatedSlides.length - 1); const encodedText = encodeURIComponent(speech); const url = `/api/tts?text=${encodedText}`; globalAudio.src = url; await globalAudio.play(); await new Promise<void>((resolve) => { globalAudio.onended = function () { resolve(); }; }); await new Promise((resolve) => setTimeout(resolve, 500)); }, } ] }); ``` 步驟 5: 再次向聊天機器人發出「在 TypeScript 上建立 PowerPoint 簡報」提示,您應該會聽到簡報投影片的聲音。 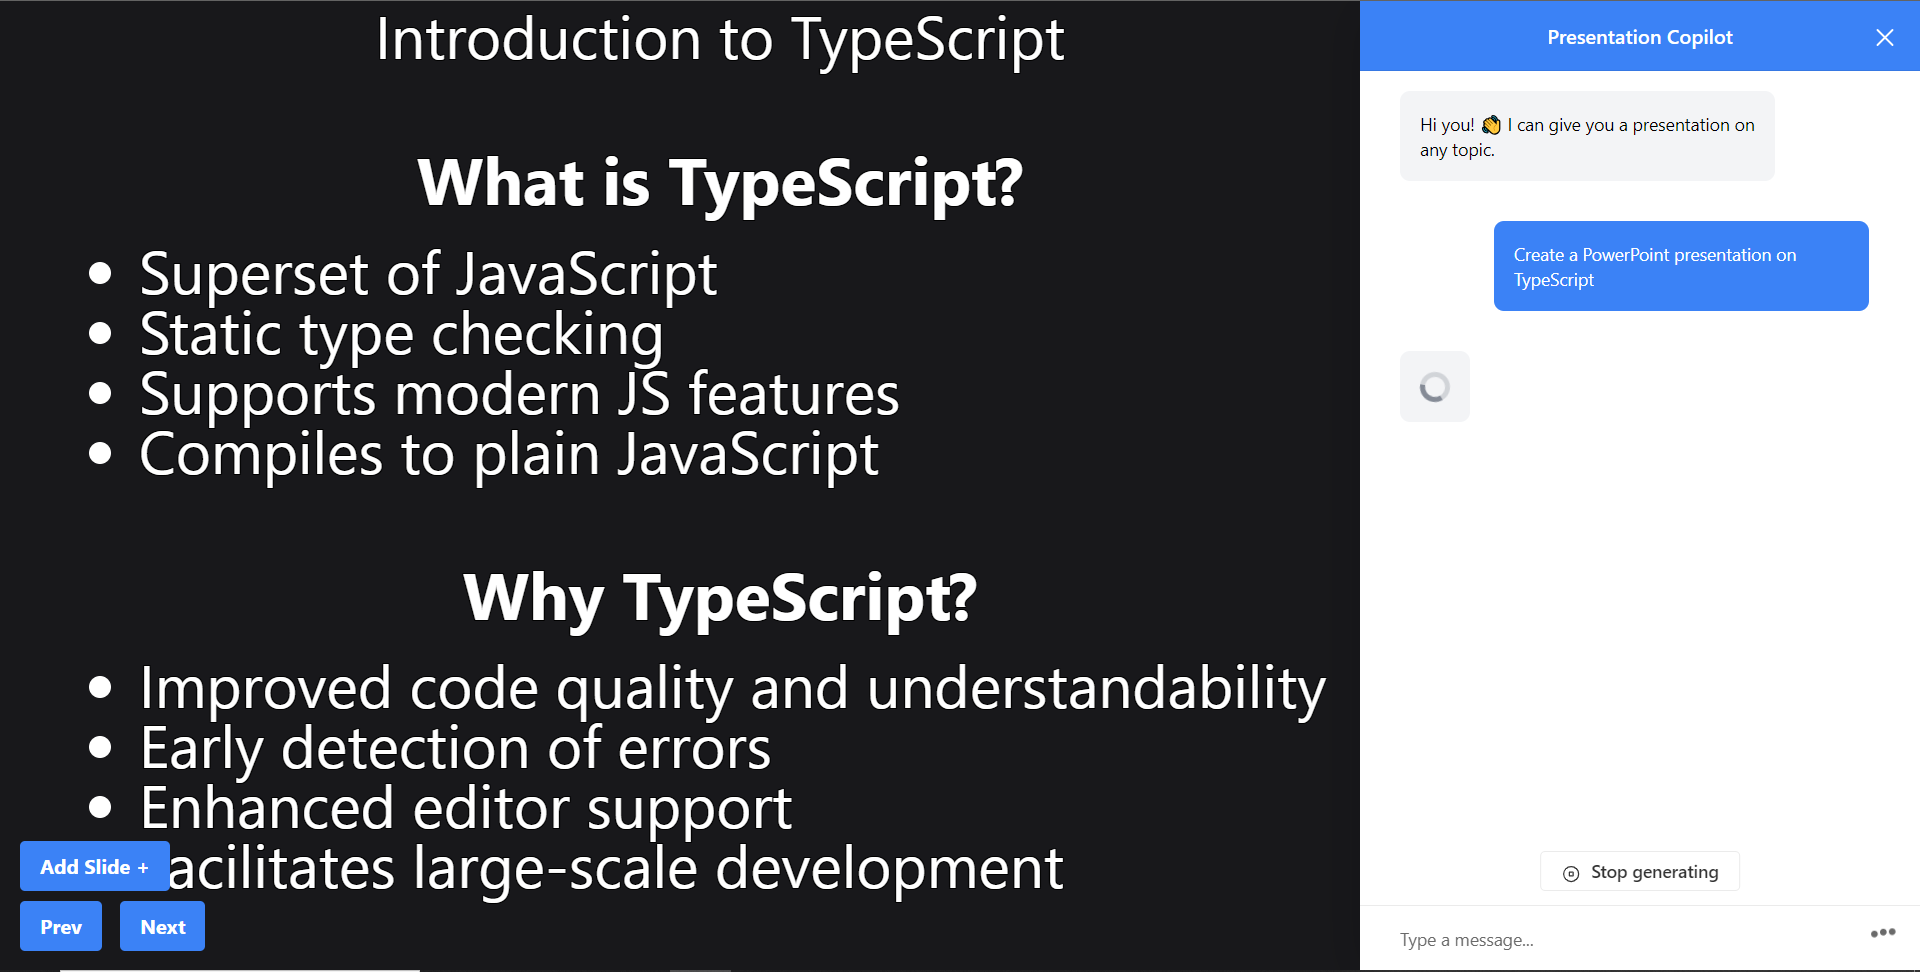 建立圖像生成功能 -------- 步驟1:在present.tsx檔案中,新增一個名為backgroundImage的新屬性來鍵入介面Slide,如下所示。 ``` // Define slide interface interface Slide { title: string; content: string; backgroundImage: string; } ``` 步驟 2:更新 useMakeCopilotActionable 掛鉤以產生 PowerPoint 簡報投影片的圖片。 ``` useMakeCopilotActionable( { name: "createPowerPointSlides", description: "create slides for a powerpoint presentation. Call this function multiple times to present multiple slides.", argumentAnnotations: [ { name: "slideTitle", type: "string", description: "The topic to display in the presentation slide. Use simple markdown to outline your speech, like a headline.", required: true, }, { name: "content", type: "string", description: "The content to display in the presentation slide. Use simple markdown to outline your speech, like lists, paragraphs, etc.", required: true }, { name: "backgroundImage", type: "string", description: "What to display in the background of the slide (i.e. 'dog' or 'house').", required: true, }, { name: "speech", type: "string", description: "An informative speech about the current slide.", required: true, }, ], implementation: async (newSlideTitle, newSlideContent, newSlideBackgroundImage, speech) => { const newSlide: Slide = { title: newSlideTitle, content: newSlideContent, backgroundImage: newSlideBackgroundImage }; const updatedSlides = [...allSlides, newSlide]; setAllSlides(updatedSlides); setCurrentSlideIndex(updatedSlides.length - 1); const encodedText = encodeURIComponent(speech); const url = `/api/tts?text=${encodedText}`; globalAudio.src = url; await globalAudio.play(); await new Promise<void>((resolve) => { globalAudio.onended = function () { resolve(); }; }); await new Promise((resolve) => setTimeout(resolve, 500)); }, }, [], ); ``` 步驟 2:更新 addSlide 函數以產生新的 PowerPoint 簡報投影片的圖片。 **步驟3:**更新`slide.tsx`檔案中的`Slide`元件以透過[`unsplash.com`](http://unsplash.com/)產生映像 ``` // Add new slide function const addSlide = new CopilotTask({ instructions: "create a new slide", functions: [ { name: "newSlide", description: "Make a new slide related to the current topic.", argumentAnnotations: [ { name: "title", type: "string", description:"The title to display in the presentation slide.", required: true, }, { name: "content", type: "string", description:"The title to display in the presentation slide.", required: true, }, { name: "backgroundImage", type: "string", description: "What to display in the background of the slide (i.e. 'dog' or 'house').", required: true, }, { name: "speech", type: "string", description: "An informative speech about the current slide.", required: true, }, ], implementation: async (newSlideTitle, newSlideContent, newSlideBackgroundImage, speech) => { const newSlide: Slide = { title: newSlideTitle, content: newSlideContent, backgroundImage: newSlideBackgroundImage }; const updatedSlides = [...allSlides, newSlide]; setAllSlides(updatedSlides); setCurrentSlideIndex(updatedSlides.length - 1); const encodedText = encodeURIComponent(speech); const url = `/api/tts?text=${encodedText}`; globalAudio.src = url; await globalAudio.play(); await new Promise<void>((resolve) => { globalAudio.onended = function () { resolve(); }; }); await new Promise((resolve) => setTimeout(resolve, 500)); }, } ] }); ``` 步驟 3:更新 displayCurrentSlide 函數以將背景圖像新增至 PowerPoint 簡報投影片中。 ``` // Display current slide const displayCurrentSlide = () => { const slide = allSlides[currentSlideIndex]; return slide ? ( <div className="h-screen flex flex-col justify-center items-center text-5xl text-white bg-cover bg-center bg-no-repeat p-10 text-center" style={{ backgroundImage: 'url("https://source.unsplash.com/featured/?' + encodeURIComponent(allSlides[currentSlideIndex].backgroundImage) + '")', textShadow: "1px 1px 0 #000, -1px -1px 0 #000, 1px -1px 0 #000, -1px 1px 0 #000", }} > <Markdown className="markdown">{slide.title}</Markdown> <Markdown className="markdown">{slide.content}</Markdown> </div> ) : ( <div className="h-screen flex flex-col justify-center items-center text-5xl text-white bg-cover bg-center bg-no-repeat p-10 text-center"> No Slide To Display </div> ); }; ``` **步驟 4:**前往 Web 應用程式,您應該會看到背景圖像已新增至 PowerPoint 投影片中。 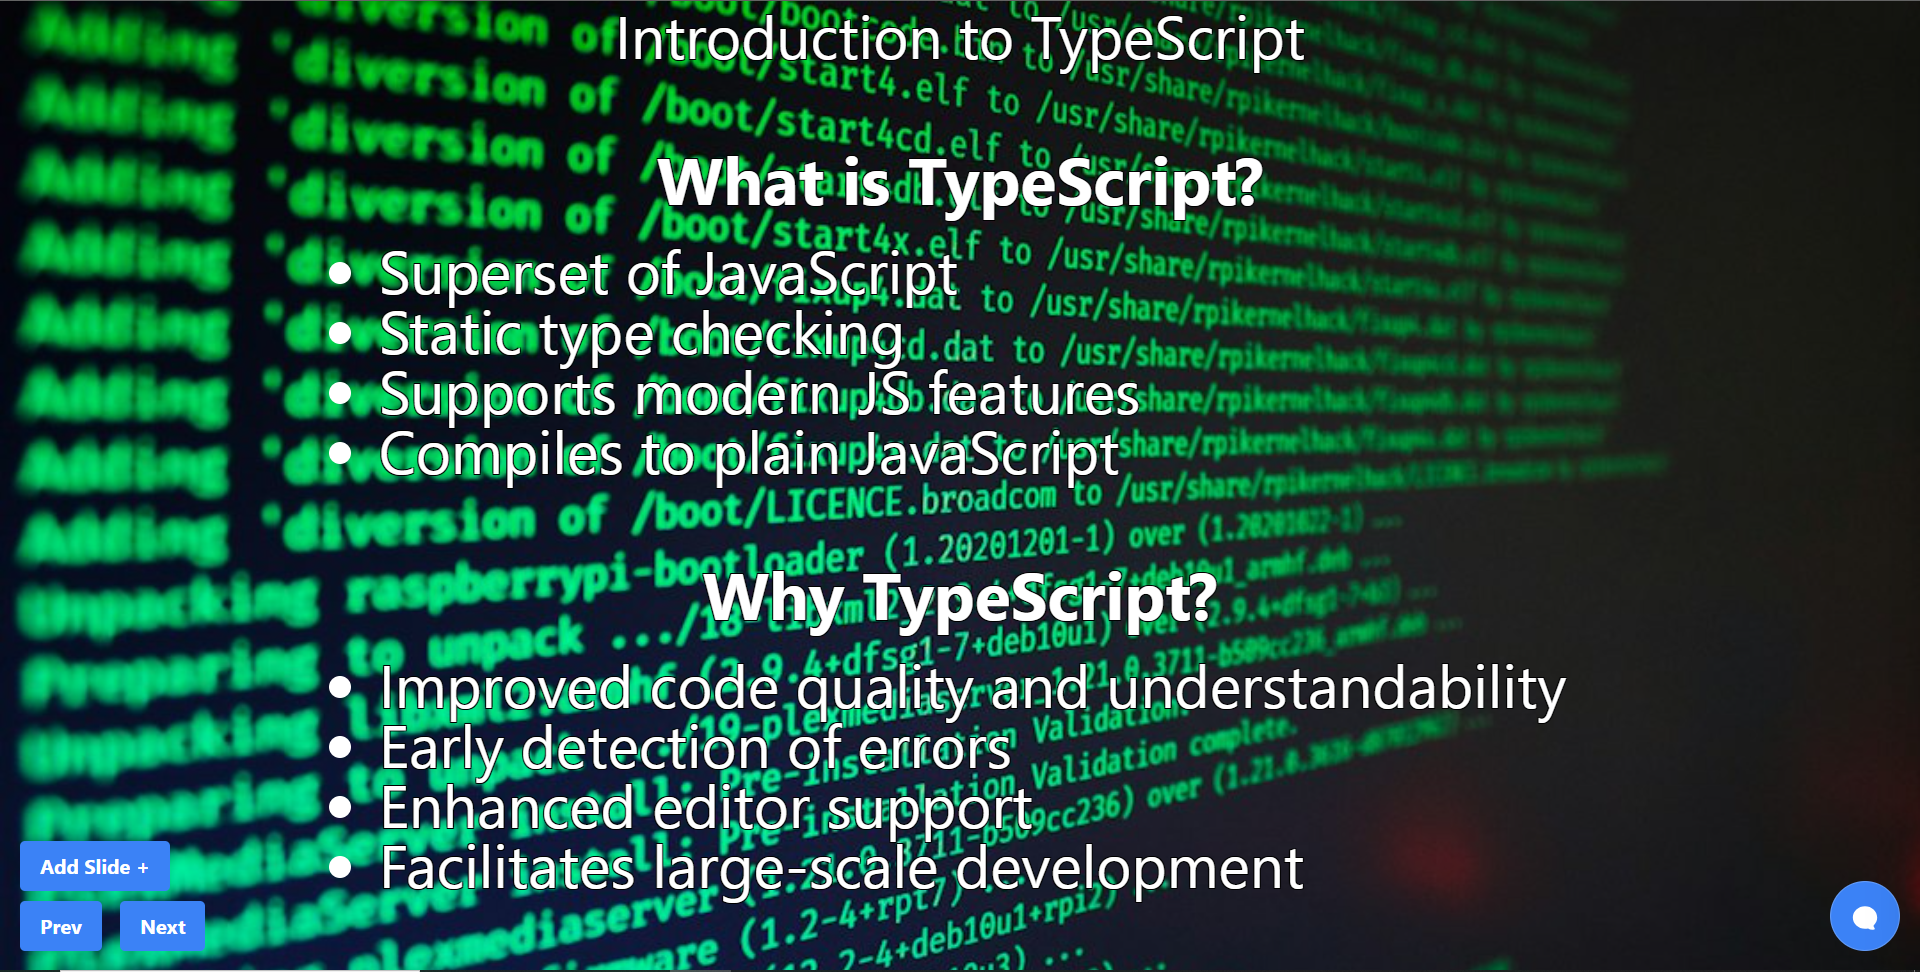 結論 -- 總而言之,您可以使用 CopilotKit 建立應用內 AI 聊天機器人,該機器人可以查看當前應用程式狀態並在應用程式內執行操作。 AI 聊天機器人可以與您的應用程式前端、後端和第三方服務對話。 筆記: - 告訴聊天機器人要寫什麼 - 建立包含文字、圖片和自動語音的幻燈片。 這是全部實作程式碼: https://github.com/CopilotKit/CopilotKit/blob/mme/tools/CopilotKit/examples/next-openai/src/app/helloworld/page.tsx 你可以拿程式碼寫文章,一定要截圖。 確保按照邏輯實現的順序寫文章: - 首先,外部 React 元件( `page.tsx`中的`HelloWorld`元件) ``` - cover `CopilotKit` and `CopliotSidebar` ``` - 然後覆蓋`Presentation`反應元件而不加入 Copilot 功能 ``` - include the `Slide` react component ``` - 最後,在建立基本的 React 應用程式後,加入描述 Copilot 特定功能的部分( `useMakeCopilotReadable`和`useMakeCopilotActionable` ) - 最後,介紹生成音訊+影像的函數。保持描述非常簡短,只需說“我們透過瀏覽器audio-gen API產生音訊”和“我們透過[`unsplash.com`](http://unsplash.com/)產生圖像” 執行演示: - 請參閱文件/貢獻指南,以了解如何執行 CopilotKit 儲存庫中包含的範例應用程式:https://docs.copilotkit.ai/contribute/quickstart-contribute - 執行 - 前往`/helloworld`頁面 --- 結論 -- 總而言之,您可以使用 CopilotKit 建立應用內 AI 聊天機器人,該機器人可以查看當前應用程式狀態並在應用程式內執行操作。 AI 聊天機器人可以與您的應用程式前端、後端和第三方服務對話。 對於完整的源程式碼: https://github.com/TheGreatBonnie/aipoweredpresentation 感謝@theGreatBonnie 在本文中所做的出色工作。 別忘了...  {% cta https://github.com/CopilotKit/CopilotKit %} Star CopilotKit ⭐️ {% endcta %} --- 原文出處:https://dev.to/copilotkit/how-to-build-ai-powered-powerpoint-app-nextjs-openai-copilotkit-ji2
有了正確的函式庫,任何開發人員都可以在他們的應用程式中建立強大的人工智慧功能(如 Ninja 🥷)。 在此列表中,我編譯了 7 個很棒的 AI 庫,您現在可以使用它們(相對)輕鬆地發布功能。 不要忘記為這些圖書館加註星標以表達您的支持。  https://github.com/CopilotKit/CopilotKit --- 1. [CopilotPortal](https://github.com/CopilotKit/CopilotKit) :建構應用程式原生人工智慧聊天機器人 ------------------------------------------------------------------------------- 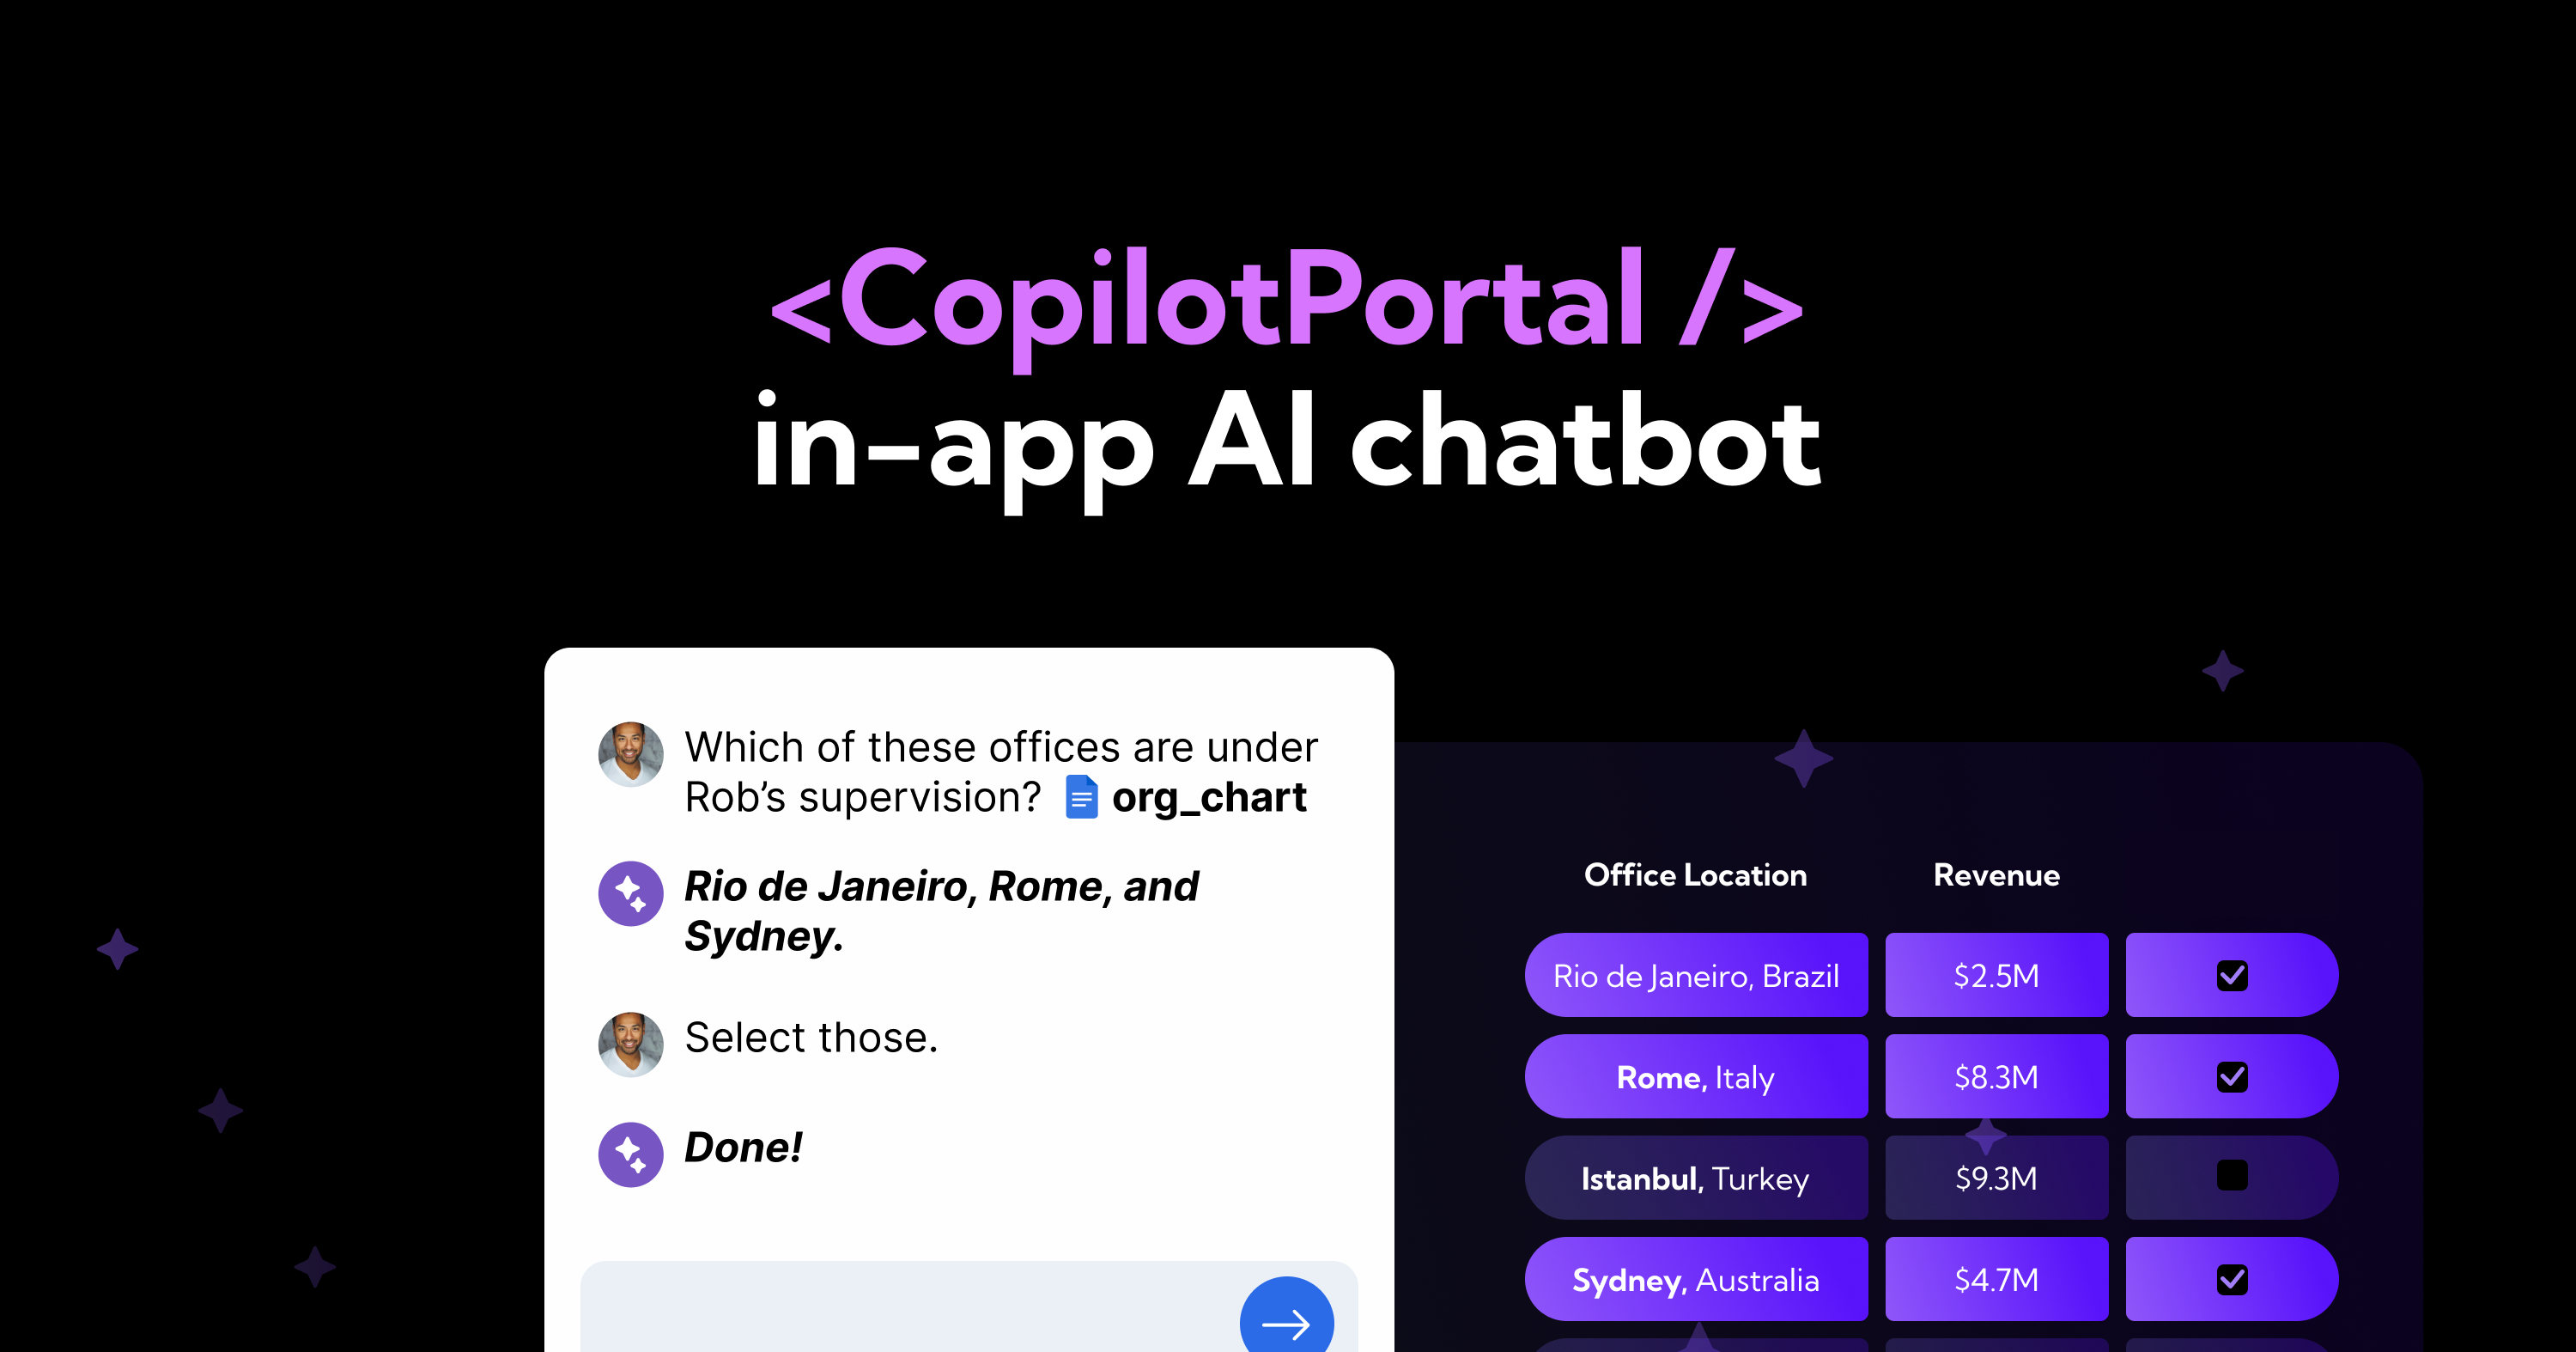 應用程式內人工智慧聊天機器人助理可以「查看」您目前的應用程式狀態並在前端和後端採取操作。 一組完全可自訂的反應元件和掛鉤以及用於建立 LLM 和您的應用程式之間互動的架構。 定義*useMakeCopilotReadable* 、 *useMakeCopilotActionable*和*CopilotSidebarUIProvider*使其運作。 ``` import "@copilotkit/react-ui/styles.css"; import { CopilotProvider } from "@copilotkit/react-core"; import { CopilotSidebarUIProvider } from "@copilotkit/react-ui"; export default function App(): JSX.Element { return ( <CopilotProvider chatApiEndpoint="/api/copilotkit/chat"> <CopilotSidebarUIProvider> <YourContent /> </CopilotSidebarUIProvider> </CopilotProvider> ); } ``` https://github.com/CopilotKit/CopilotKit --- 2. [RAGxplorer](https://github.com/gabrielchua/RAGxplorer) - 視覺化並探索您的 RAG 文件 ---------------------------------------------------------------------------- 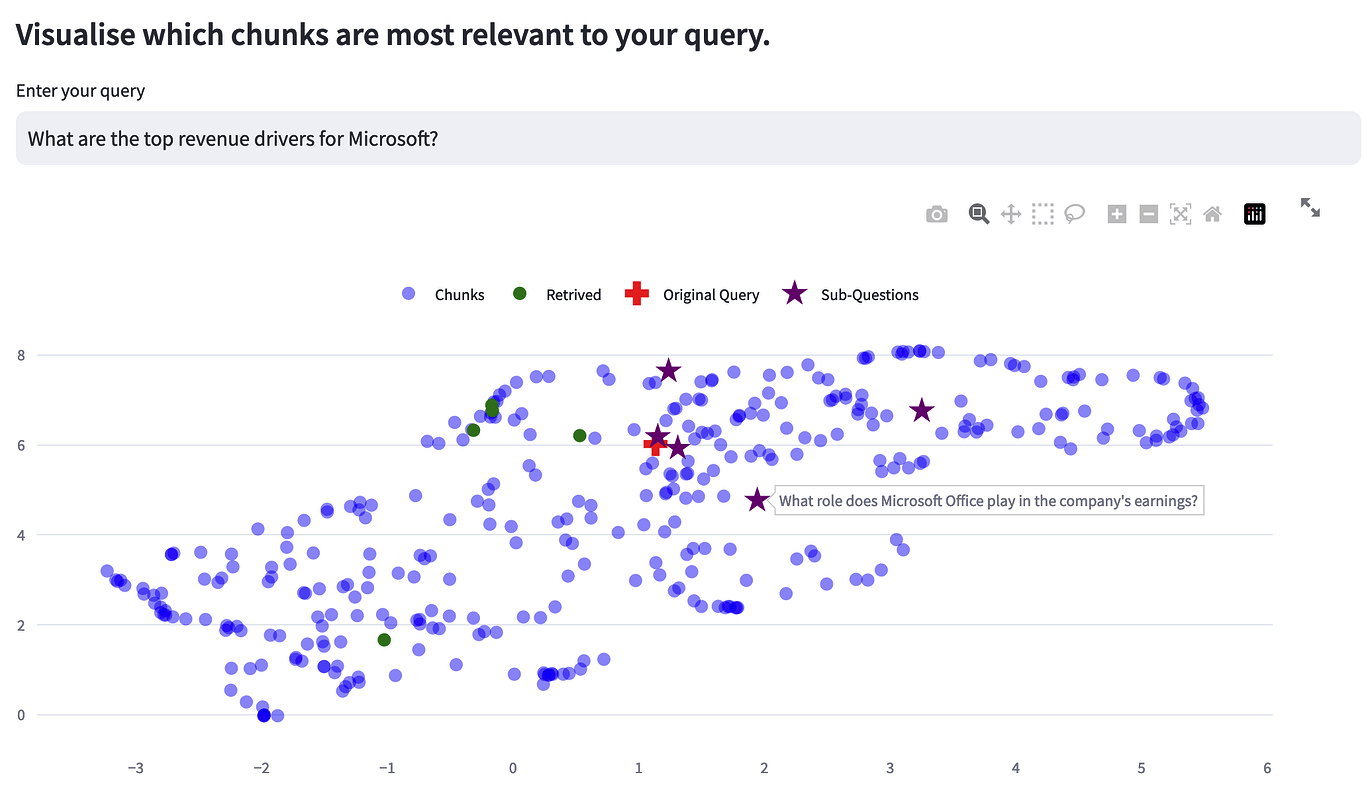 RAGxplorer 是一個 Python 工具,用於視覺化機器學習和自然語言處理中的 RAG(檢索增強生成)文件。 以互動方式探索 RAG 流程中使用的文件中的聯繫和內容。 若要設定 RAGxplorer,請在程式碼中定義 RAG 檢查點路徑並安裝指定的依賴項。 ``` import streamlit as st from utils.rag import build_vector_database st.set_page_config(page_title="RAGxplorer", page_icon="🔍") uploaded_file = st.file_uploader("Upload your PDF", type='pdf') query = st.text_input("Enter your query") search = st.button("Search") top_k = st.number_input("Number of Chunks", value=5, min_value=1) st.session_state["chroma"] = build_vector_database(uploaded_file, ...) st.session_state['retrieved_id'] = query_chroma(...) plot_embeddings(...) ``` https://github.com/gabrielchua/RAGxplorer --- 3. [Tavily GPT 研究員](https://github.com/assafelovic/gpt-researcher)- 獲得法學碩士以搜尋網路和資料庫 -----------------------------------------------------------------------------------  Tavilly 可讓您將 GPT 支援的研究和內容產生工具新增至您的 React 應用程式中,從而增強其資料處理和內容建立功能。 ``` # Create an assistant assistant = client.beta.assistants.create( instructions=assistant_prompt_instruction, model="gpt-4-1106-preview", tools=[{ "type": "function", "function": { "name": "tavily_search", "description": "Get information on recent events from the web.", "parameters": { "type": "object", "properties": { "query": {"type": "string", "description": "The search query to use. For example: 'Latest news on Nvidia stock performance'"}, }, "required": ["query"] } } }] ) ``` https://github.com/assafelovic/gpt-researcher --- 4. [Pezzo.ai](https://github.com/pezzolabs/pezzo) - 開發者優先的 LLMOps 平台 -------------------------------------------------------------------- 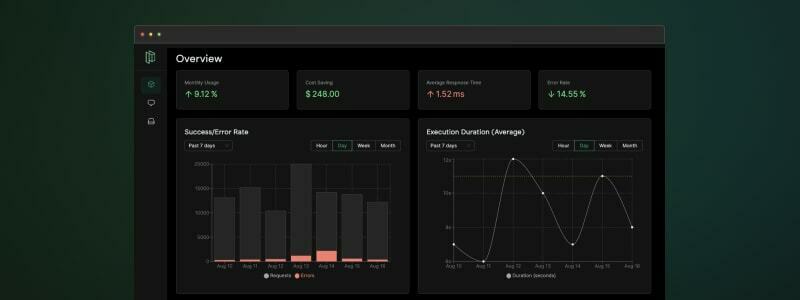 用於管理 OpenAI 通話的集中平台。 優化您的提示和令牌使用。追蹤您的人工智慧使用情況。 免費且易於整合。 ``` const prompt = await pezzo.getPrompt("AnalyzeSentiment"); const response = await openai.chat.completions.create(prompt); ``` https://github.com/pezzolabs/pezzo --- 5. [DeepEval](https://github.com/confident-ai/deepeval) - 評估 LLM、RAG 和微調性能 --------------------------------------------------------------------------  DeepEval 是一個開源框架,透過將評估視為單元測試來簡化法學碩士的評估。 它提供了評估 LLM 輸出的各種指標,其模組化設計允許開發人員定制他們的評估流程 要使用它,您需要安裝該程式庫、編寫測試案例並執行這些用例來評估您的 LLM 的效能。 ``` Pytest Integration: from deepeval import assert_test from deepeval.metrics import HallucinationMetric from deepeval.test_case import LLMTestCase test_case = LLMTestCase( input="How many evaluation metrics does DeepEval offers?", actual_output="14+ evaluation metrics", context=["DeepEval offers 14+ evaluation metrics"] ) metric = HallucinationMetric(minimum_score=0.7) def test_hallucination(): assert_test(test_case, [metric]) ``` https://github.com/confident-ai/deepeval --- 6. [CopilotTextarea](https://github.com/RecursivelyAI/CopilotKit) - React 應用程式中的 AI 驅動寫作 ----------------------------------------------------------------------------------------  具有 Github CopilotX 功能的任何 React `<textarea>`的直接替代品。 自動完成、插入、編輯。 可以即時或由開發人員提前提供任何上下文。 ``` import { CopilotTextarea } from "@copilotkit/react-textarea"; import { CopilotProvider } from "@copilotkit/react-core"; // Provide context... useMakeCopilotReadable(...) // in your component... <CopilotProvider> <CopilotTextarea/> </CopilotProvider>` ``` https://github.com/RecursivelyAI/CopilotKit --- 7. [SwirlSearch](https://github.com/swirlai/swirl-search) - 人工智慧驅動的搜尋。 ----------------------------------------------------------------------  Swirl Search 是一個開源平台,它使用人工智慧同時搜尋多個資料來源並提供有關這些資料的起草報告。 它可以跨各種來源進行搜尋,包括搜尋引擎、資料庫和雲端服務,並且可以按照儲存庫中提供的安裝說明輕鬆設定。 Swirl Search 建置在 Python/Django 堆疊上,在 Apache 2.0 授權下發布,並作為 Docker 映像提供,使其可供使用者存取和自訂。 https://github.com/swirlai/swirl-search --- 謝謝閱讀!不要忘記為文章加入書籤,給出您的反應,並支持和查看提到的很棒的庫。 乾杯! --- 原文出處:https://dev.to/copilotkit/im-building-an-ai-project-here-are-the-libraries-im-going-to-use-pd0
#TL;博士 在本文中,您將了解如何使用 Nextjs、CopilotKit 和 OpenAI 建立人工智慧驅動的簡歷產生器應用程式。 我們將涵蓋: - 利用 ChatGPT 撰寫履歷和求職信 📑 - 透過與履歷聊天逐漸完善你的履歷💬 - 將您的履歷和求職信匯出為 PDF 🖨️  --- ## CopilotKit:建構深度整合的應用內人工智慧聊天機器人 💬 只是簡單介紹一下我們的背景。 CopilotKit 是[開源 AI 副駕駛平台。](https://github.com/CopilotKit/CopilotKit) 我們可以輕鬆地將強大的 AI 聊天機器人整合到您的 React 應用程式中。完全可定制和深度集成。  {% cta https://github.com/CopilotKit/CopilotKit %} Star CopilotKit ⭐️ {% endcta %} 現在回到文章。 --- ## **先決條件** 要開始學習本教程,您需要在電腦上安裝以下軟體: - 文字編輯器(例如 Visual Studio Code) - 節點.js - 套件管理器 ## **使用 NextJS 建立簡歷應用程式前端** **步驟 1:** 開啟命令提示字元並執行下列命令。 ``` npx create-next-app@latest ``` --- **第 2 步:** 系統將提示您選擇一些選項,如下所示。 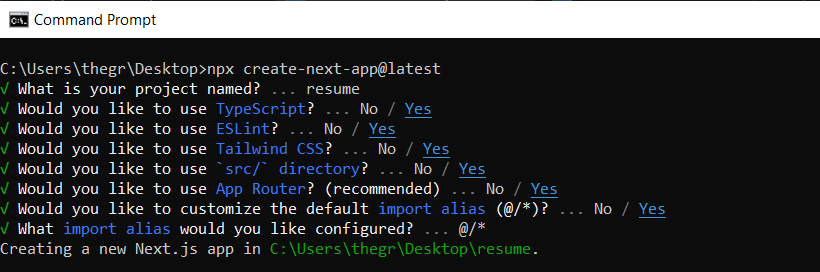 **步驟 3:** 使用您選擇的文字編輯器開啟新建立的 Nextjs 專案。然後,在命令列上執行以下命令,以使用 Tailwind CSS 安裝帶有 NextJS 的 Preline UI。依照[本指南](https://preline.co/docs/frameworks-nextjs.html)完成 Preline 設定。 ``` npm install preline ``` --- **步驟4:** 在resume/app/page.tsx檔案中,新增以下程式碼內容。 ``` export default function Home() { return ( <> <header className="flex flex-wrap sm:justify-start sm:flex-nowrap z-50 w-full bg-slate-900 bg-gradient-to-b from-violet-600/[.15] via-transparent text-sm py-3 sm:py-0 dark:bg-gray-800 dark:border-gray-700"> <nav className="relative max-w-7xl w-full mx-auto px-4 sm:flex sm:items-center sm:justify-between sm:px-6 lg:px-8 " aria-label="Global"> <div className="flex items-center justify-between"> <a className="flex-none text-xl text-gray-200 font-semibold dark:text-white py-8" href="#" aria-label="Brand"> ResumeBuilder </a> </div> </nav> </header> {/* <!-- Hero --> */} <div className="bg-slate-900 h-screen"> <div className="bg-gradient-to-b from-violet-600/[.15] via-transparent"> <div className="max-w-[85rem] mx-auto px-4 sm:px-6 lg:px-8 py-24 space-y-8"> {/* <!-- Title --> */} <div className="max-w-3xl text-center mx-auto pt-10"> <h1 className="block font-medium text-gray-200 text-4xl sm:text-5xl md:text-6xl lg:text-7xl"> Craft A Compelling Resume With AI Resume Builder </h1> </div> {/* <!-- End Title --> */} <div className="max-w-3xl text-center mx-auto"> <p className="text-lg text-gray-400"> ResumeBuilder helps you create a resume that effectively highlights your skills and experience. </p> </div> {/* <!-- Buttons --> */} <div className="text-center"> <a className="inline-flex justify-center items-center gap-x-3 text-center bg-gradient-to-tl from-blue-600 to-violet-600 shadow-lg shadow-transparent hover:shadow-blue-700/50 border border-transparent text-white text-sm font-medium rounded-full focus:outline-none focus:ring-2 focus:ring-blue-600 focus:ring-offset-2 focus:ring-offset-white py-3 px-6 dark:focus:ring-offset-gray-800" href="#"> Get started <svg className="flex-shrink-0 w-4 h-4" xmlns="http://www.w3.org/2000/svg" width="24" height="24" viewBox="0 0 24 24" fill="none" stroke="currentColor" stroke-width="2" stroke-linecap="round" stroke-linejoin="round"> <path d="m9 18 6-6-6-6" /> </svg> </a> </div> {/* <!-- End Buttons --> */} </div> </div> </div> {/* <!-- End Hero --> */} </> ); } ``` **步驟 5:** 在命令列上執行命令 *npm run dev*。導航至 http://localhost:3000/,您應該會看到新建立的 NextJS 專案。 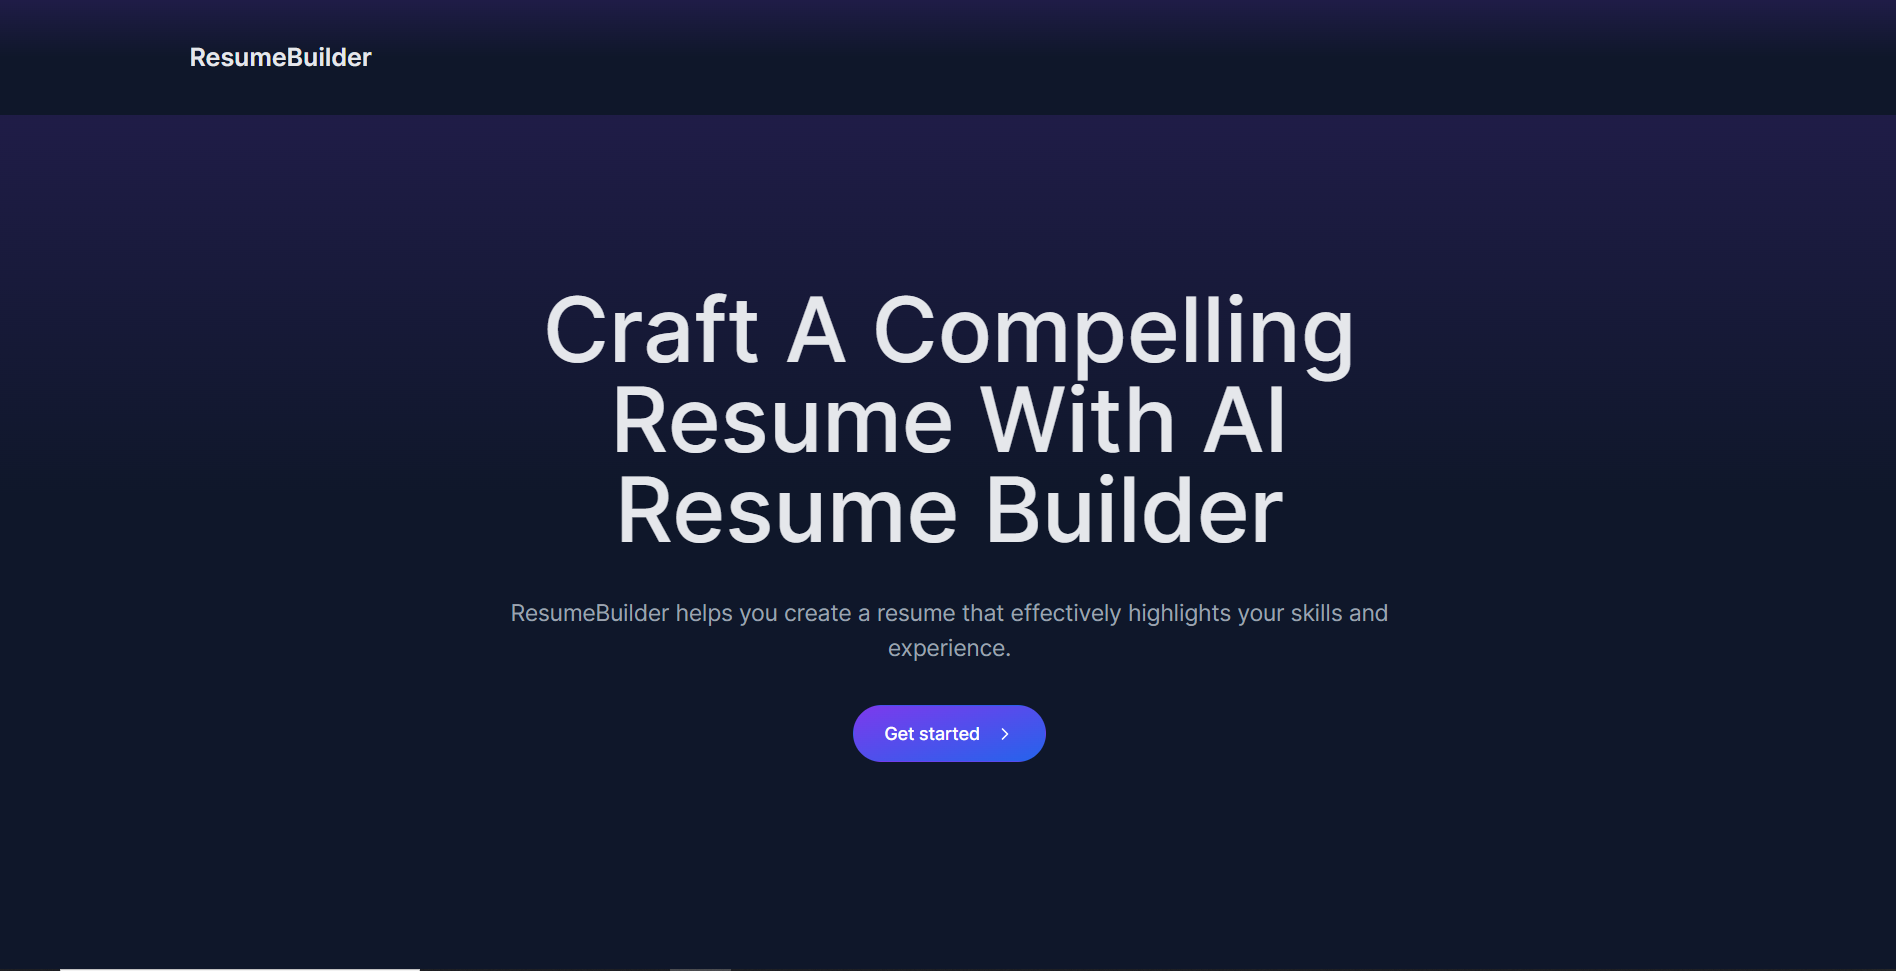 --- ## 使用 GitHub GraphQL 從 GitHub 取得履歷資料 **步驟 1:** 使用下列命令安裝 Axios HTTP 用戶端。 ``` npm i axios ``` **步驟 2:** 在應用程式資料夾中,建立一個名為 API 的資料夾。然後,在 API 資料夾中建立一個名為 GitHub 的資料夾。在GitHub資料夾中建立一個名為route.ts的檔案並加入以下程式碼。 ``` import { NextResponse } from "next/server"; import axios from "axios"; // Environment variables for GitHub API token and user details const GITHUB_TOKEN = "Your GitHub personal access token"; const GITHUB_USERNAME = "Your GitHub account username"; // Axios instance for GitHub GraphQL API const githubApi = axios.create({ baseURL: "https://api.github.com/graphql", headers: { Authorization: `bearer ${GITHUB_TOKEN}`, "Content-Type": "application/json", }, }); // GraphQL query to fetch user and repository data const getUserAndReposQuery = ` query { user(login: "${GITHUB_USERNAME}") { name email company bio repositories(first: 3, orderBy: {field: CREATED_AT, direction: DESC}) { edges { node { name url description createdAt ... on Repository { primaryLanguage{ name } stargazers { totalCount } } } } } } } `; // API route to handle resume data fetching export async function GET(request: any) { try { // Fetch data from GitHub const response = await githubApi.post("", { query: getUserAndReposQuery }); const userData = response.data.data.user; // Format resume data const resumeData = { name: userData.name, email: userData.email, company: userData.company, bio: userData.bio, repositories: userData.repositories.edges.map((repo: any) => ({ name: repo.node.name, url: repo.node.url, created: repo.node.createdAt, description: repo.node.description, language: repo.node.primaryLanguage.name, stars: repo.node.stargazers.totalCount, })), }; // Return formatted resume data return NextResponse.json(resumeData); } catch (error) { console.error("Error fetching data from GitHub:", error); return NextResponse.json({ message: "Internal Server Error" }); } } ``` **步驟 3:** 在應用程式資料夾中,建立一個名為 Components 的資料夾。然後,在元件資料夾中建立一個名為 githubdata.tsx 的檔案並新增以下程式碼。 ``` "use client"; import React, { useEffect, useState } from "react"; import axios from "axios"; // Resume data interface interface ResumeData { name: string; email: string; company: string; bio: string; repositories: { name: string; url: string; created: string; description: string; language: string; stars: number; }[]; } export const useGithubData = () => { const [resumeData, setResumeData] = useState<ResumeData | null>(null); // Fetch resume data from API useEffect(() => { axios .get("/api/github") .then((response) => { setResumeData(response.data); }) }, []); return { resumeData, }; } ``` --- ## 建立求職信和履歷功能 **步驟 1:** 透過在命令列上執行以下命令來安裝 CopilotKit 前端軟體包。 ``` npm i @copilotkit/react-core @copilotkit/react-ui @copilotkit/react-textarea ``` **步驟2:** 在元件資料夾中建立一個名為resume.tsx 的檔案。然後在檔案頂端匯入 useMakeCopilotReadable、useMakeCopilotActionable 和 useGithubData 自訂掛鉤,如下所示。 ``` import React, { useState } from "react"; import { useGithubData } from "./githubdata"; import { useMakeCopilotReadable, useMakeCopilotActionable, } from "@copilotkit/react-core"; ``` **第 3 步:** 建立一個名為 CoverLetterAndResume 的元件。在元件內部,使用 useGithubData 掛鉤檢索從 GitHub 取得的資料。然後,宣告一個名為 createCoverLetterAndResume 的狀態變數和一個用於更新它的名為 setCreateCoverLetterAndResume 的函數。使用包含 letter 和 resume 兩個屬性的物件初始化 useState,如下所示。 ``` export const CoverLetterAndResume = () => { const {resumeData } = useGithubData(); const [createCoverLetterAndResume, setCreateCoverLetterAndResume] = useState({ letter: "", resume: "" }); } ``` **步驟 4:** 使用 useMakeCopilotReadable 掛鉤將從 GitHub 取得的資料新增為應用程式內聊天機器人的上下文。 ``` useMakeCopilotReadable(JSON.stringify(resumeData)); ``` **步驟 5:** 使用 useMakeCopilotActionable 掛鉤設定一個名為 createCoverLetterAndResume 的操作,其中包含描述和實作函數,該函數使用提供的求職信和簡歷更新 createCoverLetterAndResume 狀態,如下所示。 ``` useMakeCopilotActionable( { name: "createCoverLetterAndResume", description: "Create a cover letter and resume for a software developer job application.", argumentAnnotations: [ { name: "coverLetterMarkdown", type: "string", description: "Markdown text for a cover letter to introduce yourself and briefly summarize your professional background as a software developer.", required: true, }, { name: "resumeMarkdown", type: "string", description: "Markdown text for a resume that displays your professional background and relevant skills.", required: true, }, ], implementation: async (coverLetterMarkdown, resumeMarkdown) => { setCreateCoverLetterAndResume((prevState) => ({ ...prevState, letter: coverLetterMarkdown, resume: resumeMarkdown, })); }, }, [] ); ``` **步驟 6:** 在 CoverLetterAndResume 元件外部,建立一個名為 CoverLetterResume 的元件,用於在 Web 應用程式 UI 上顯示求職信和履歷。 ``` type CoverLetterResumeProps = { letter: string; resume: string; }; const CoverLetterResume = ({ letter, resume }: CoverLetterResumeProps) => { return ( <div className="px-4 sm:px-6 lg:px-8 bg-slate-50 py-4"> <div className="sm:flex sm:items-center"> <div className="sm:flex-auto"> <h1 className="text-3xl font-semibold leading-6 text-gray-900"> ResumeBuilder </h1> </div> </div> {/* Cover Letter Start */} <div className="mt-8 flow-root bg-slate-200"> <div className="-mx-4 -my-2 overflow-x-auto sm:-mx-6 lg:-mx-8"> <div className="inline-block min-w-full py-2 align-middle sm:px-6 lg:px-8"> <div> <h2 className="text-lg font-semibold leading-6 text-gray-900 mb-4 p-2"> Cover Letter </h2> <div className="min-w-full divide-y divide-gray-300 p-2"> {/* <Thead /> */} <div className="divide-y divide-gray-200 bg-white p-2"> <ReactMarkdown>{letter}</ReactMarkdown> </div> </div> </div> </div> </div> </div> {/* Cover Letter End */} {/* Cover Letter Preview Start */} <div className="mt-8 flow-root bg-slate-200"> <div className="-mx-4 -my-2 overflow-x-auto sm:-mx-6 lg:-mx-8"> <div className="inline-block min-w-full py-2 align-middle sm:px-6 lg:px-8"> <div> <h2 className="text-lg font-semibold leading-6 text-gray-900 mb-4 p-2"> Cover Letter Preview </h2> <div className="min-w-full divide-y divide-gray-300"> {/* <Thead /> */} <div className="divide-y divide-gray-200 bg-white"> <textarea className="p-2" id="coverLetter" value={letter} rows={20} cols={113} /> </div> </div> </div> </div> </div> </div> {/* Cover Letter Preview End */} {/* Resume Start */} <div className="mt-8 flow-root bg-slate-200"> <div className="-mx-4 -my-2 overflow-x-auto sm:-mx-6 lg:-mx-8"> <div className="inline-block min-w-full py-2 align-middle sm:px-6 lg:px-8"> <h2 className="text-lg font-semibold leading-6 text-gray-900 mb-4 p-2"> Resume </h2> <div className="min-w-full divide-y divide-gray-300"> {/* <Thead /> */} <div className="divide-y divide-gray-200 bg-white"> <ReactMarkdown>{resume}</ReactMarkdown> </div> </div> </div> </div> </div> {/* Resume End */} {/* Cover Letter Preview Start */} <div className="mt-8 flow-root bg-slate-200"> <div className="-mx-4 -my-2 overflow-x-auto sm:-mx-6 lg:-mx-8"> <div className="inline-block min-w-full py-2 align-middle sm:px-6 lg:px-8"> <div> <h2 className="text-lg font-semibold leading-6 text-gray-900 mb-4 p-2"> Cover Letter Preview </h2> <div className="min-w-full divide-y divide-gray-300"> {/* <Thead /> */} <div className="divide-y divide-gray-200 bg-white"> {/* {letter} */} {/* <ReactMarkdown>{letter}</ReactMarkdown> */} <textarea className="p-2" id="resume" value={resume} rows={20} cols={113} /> </div> </div> </div> </div> </div> </div> {/* Cover Letter Preview End */} </div> ); }; ``` **第7步:**然後返回CoverLetterAndResume元件內的CoverLetterResume元件,如下圖所示。 ``` return <CoverLetterResume {...createCoverLetterAndResume}/>; ``` **第8步:** 在應用程式資料夾中建立一個名為resumeandcoverletter的資料夾。然後,建立一個名為 page.tsx 的檔案並新增以下程式碼。 ``` "use client"; import { CopilotProvider } from "@copilotkit/react-core"; import { CopilotSidebarUIProvider } from "@copilotkit/react-ui"; import "@copilotkit/react-textarea/styles.css"; // also import this if you want to use the CopilotTextarea component import "@copilotkit/react-ui/styles.css"; // also import this if you want to use the chatbot component import React, { useEffect, useState } from "react"; import { CoverLetterAndResume } from "../components/resume"; function buildResume () { return ( <CopilotProvider chatApiEndpoint="./../api/copilotkit/chat"> <CopilotSidebarUIProvider> <CoverLetterAndResume /> </CopilotSidebarUIProvider> </CopilotProvider> ); } export default buildResume; ``` **步驟 9:** 使用下列指令安裝 openai 軟體套件。 ``` npm i openai ``` **步驟 10:** 在應用程式資料夾中,建立一個名為 API 的資料夾。然後,在 API 資料夾中建立一個名為 copilotkit 的資料夾。在 copilotkit 資料夾中,建立一個名為 chat 的資料夾。然後,在聊天資料夾中建立一個名為route.ts的檔案並新增以下程式碼。 ``` import OpenAI from "openai"; const openai = new OpenAI({ apiKey: "Your ChatGPT API key", }); export const runtime = "edge"; export async function POST(req: Request): Promise<Response> { try { const forwardedProps = await req.json(); const stream = openai.beta.chat.completions .stream({ model: "gpt-4-1106-preview", ...forwardedProps, stream: true, }) .toReadableStream(); return new Response(stream); } catch (error: any) { return new Response("", { status: 500, statusText: error.error.message }); } } ``` **步驟 11:** 在應用程式資料夾中的 page.tsx 檔案中,在「開始」按鈕中新增一個連結,用於導航到簡歷和求職信頁面,如下所示。 ``` <div className="text-center"> <Link className="inline-flex justify-center items-center gap-x-3 text-center bg-gradient-to-tl from-blue-600 to-violet-600 shadow-lg shadow-transparent hover:shadow-blue-700/50 border border-transparent text-white text-sm font-medium rounded-full focus:outline-none focus:ring-2 focus:ring-blue-600 focus:ring-offset-2 focus:ring-offset-white py-3 px-6 dark:focus:ring-offset-gray-800" href="/resumeandcoverletter"> Get started <svg className="flex-shrink-0 w-4 h-4" xmlns="http://www.w3.org/2000/svg" width="24" height="24" viewBox="0 0 24 24" fill="none" stroke="currentColor" stroke-width="2" stroke-linecap="round" stroke-linejoin="round"> <path d="m9 18 6-6-6-6" /> </svg> </Link> </div> ``` **第12步:**導航至http://localhost:3000/,點擊「開始」按鈕,您將被重新導向到與聊天機器人整合的履歷和求職信頁面,如下所示。 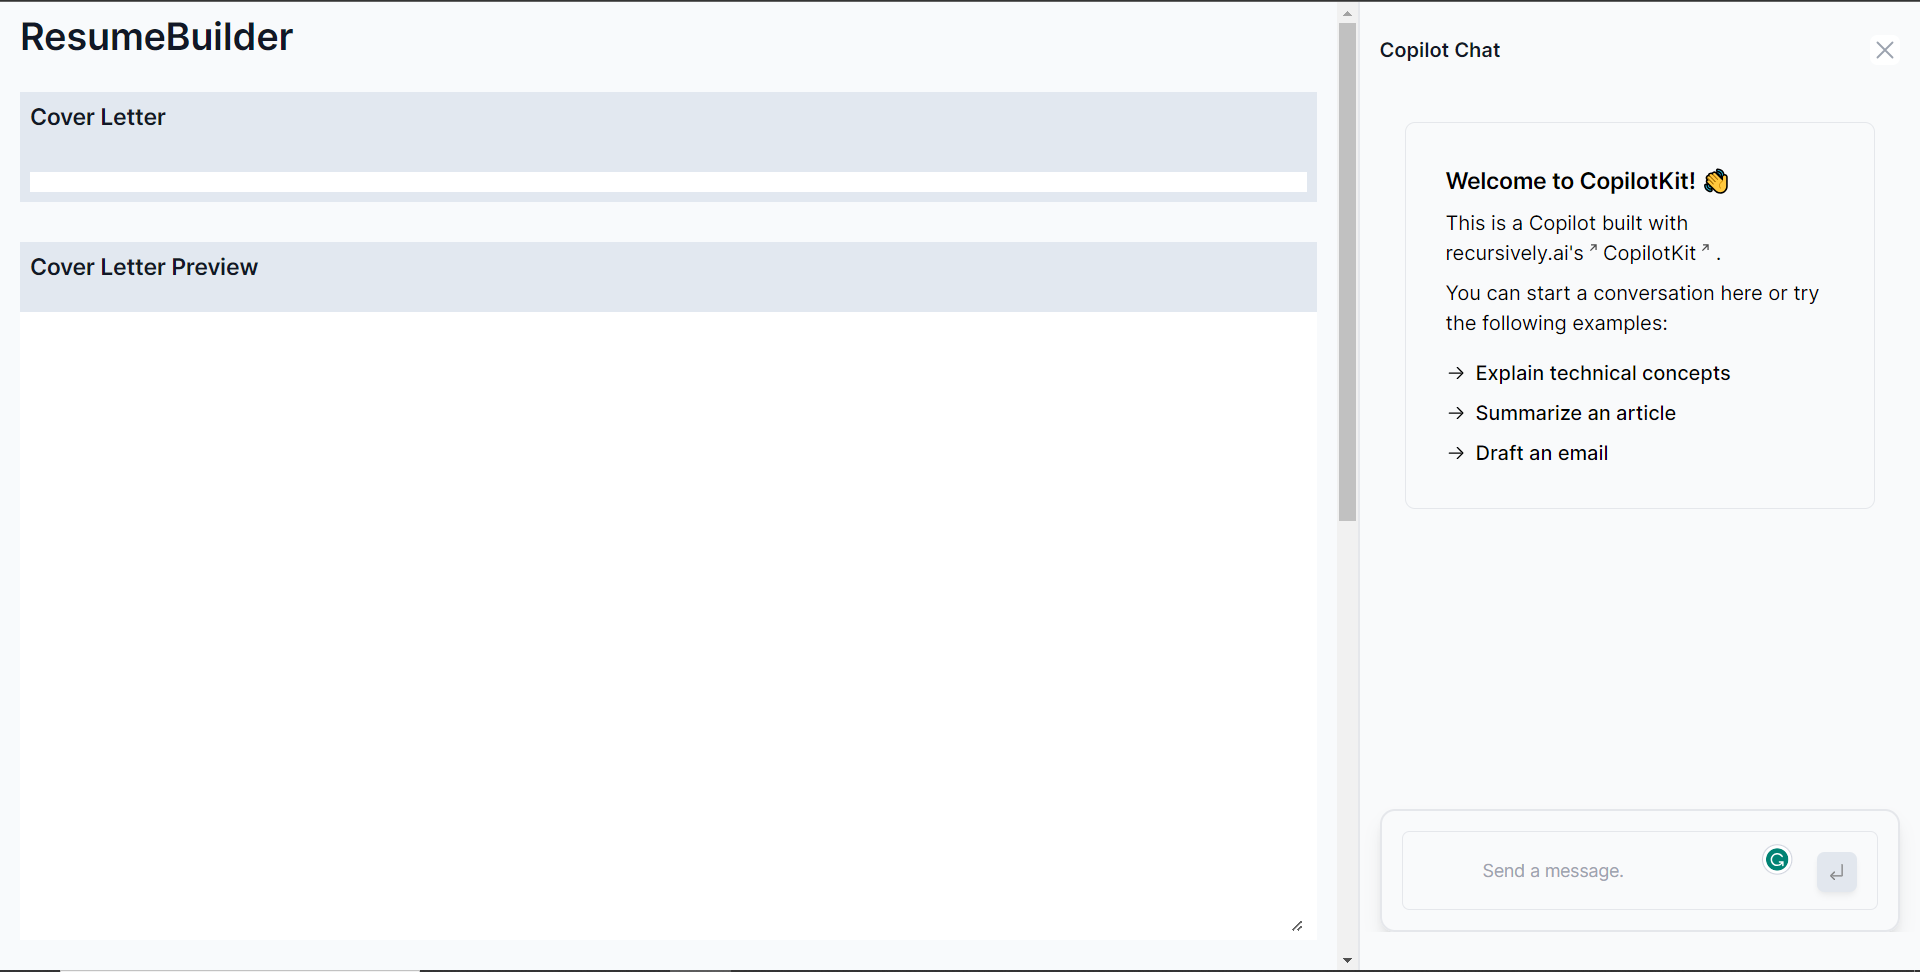 **第 13 步:** 向右側的聊天機器人發出諸如“建立求職信和簡歷”之類的提示。聊天機器人將開始產生回應,完成後,它將在頁面左側顯示產生的求職信和履歷,如下所示。 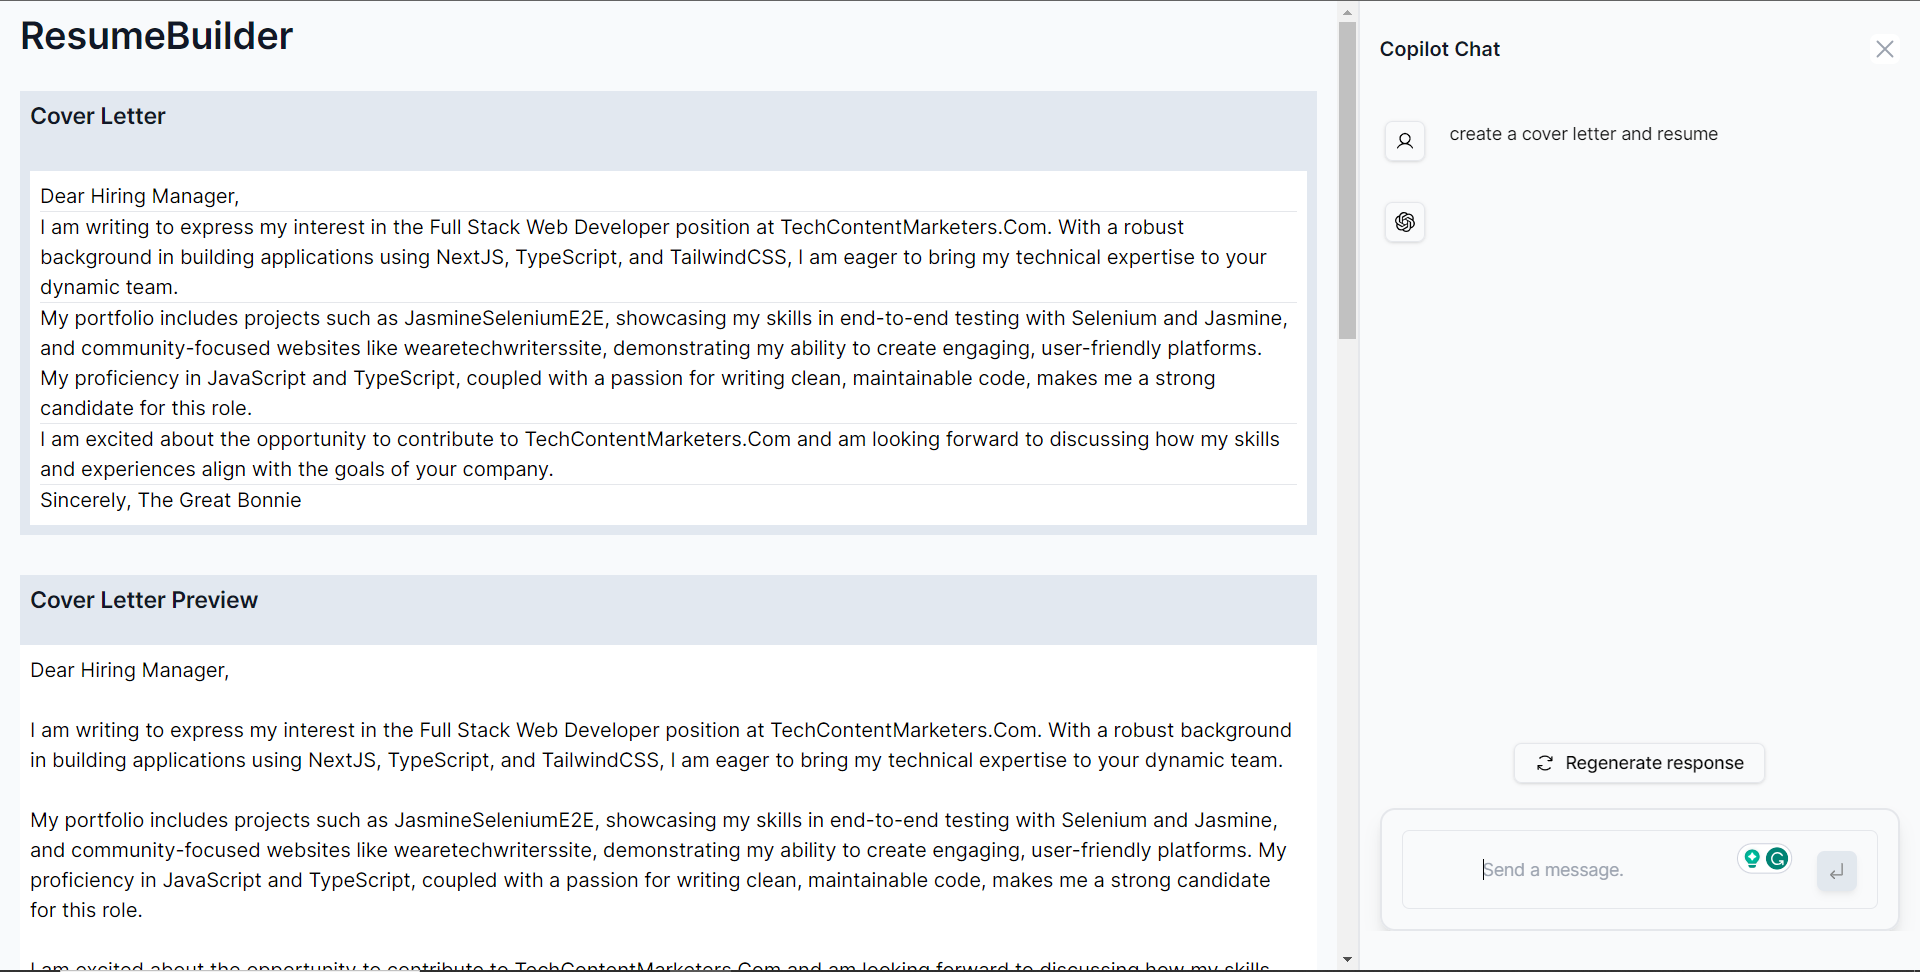 --- ## 建立更新求職信功能 **第 1 步:** 宣告一個名為 updateLetter 的變數,用於保存先前產生的求職信。 ``` const updateLetter = createCoverLetterAndResume.letter; ``` **步驟 2:** 使用 useMakeCopilotReadable 掛鉤新增 updateLetter 作為應用程式內聊天機器人的上下文。 ``` useMakeCopilotReadable("Cover Letter:" + JSON.stringify(updateLetter)); ``` **步驟 3:** 使用 useMakeCopilotActionable 掛鉤設定一個名為 updateCoverLetter 的操作,其中包含描述和實作函數,該函數使用提供的求職信更新來更新 createCoverLetterAndResume 狀態,如下所示。 ``` useMakeCopilotActionable( { name: "updateCoverLetter", description: "Update cover letter for a software developer job application.", argumentAnnotations: [ { name: "updateCoverLetterMarkdown", type: "string", description: "Update markdown text for a cover letter to introduce yourself and briefly summarize your professional background as a software developer.", required: true, }, { name: "resumeMarkdown", type: "string", description: "Markdown text for a resume that displays your professional background and relevant skills.", required: true, }, ], implementation: async (updatedCoverLetterMarkdown) => { setCreateCoverLetterAndResume((prevState) => ({ ...prevState, letter: updatedCoverLetterMarkdown, })); }, }, [] ); ``` ** 步驟 4:** 給聊天機器人一個提示,例如“更新求職信並加入我正在申請 CopilotKit 的技術寫作職位。”如下圖所示,您可以看到求職信已更新。 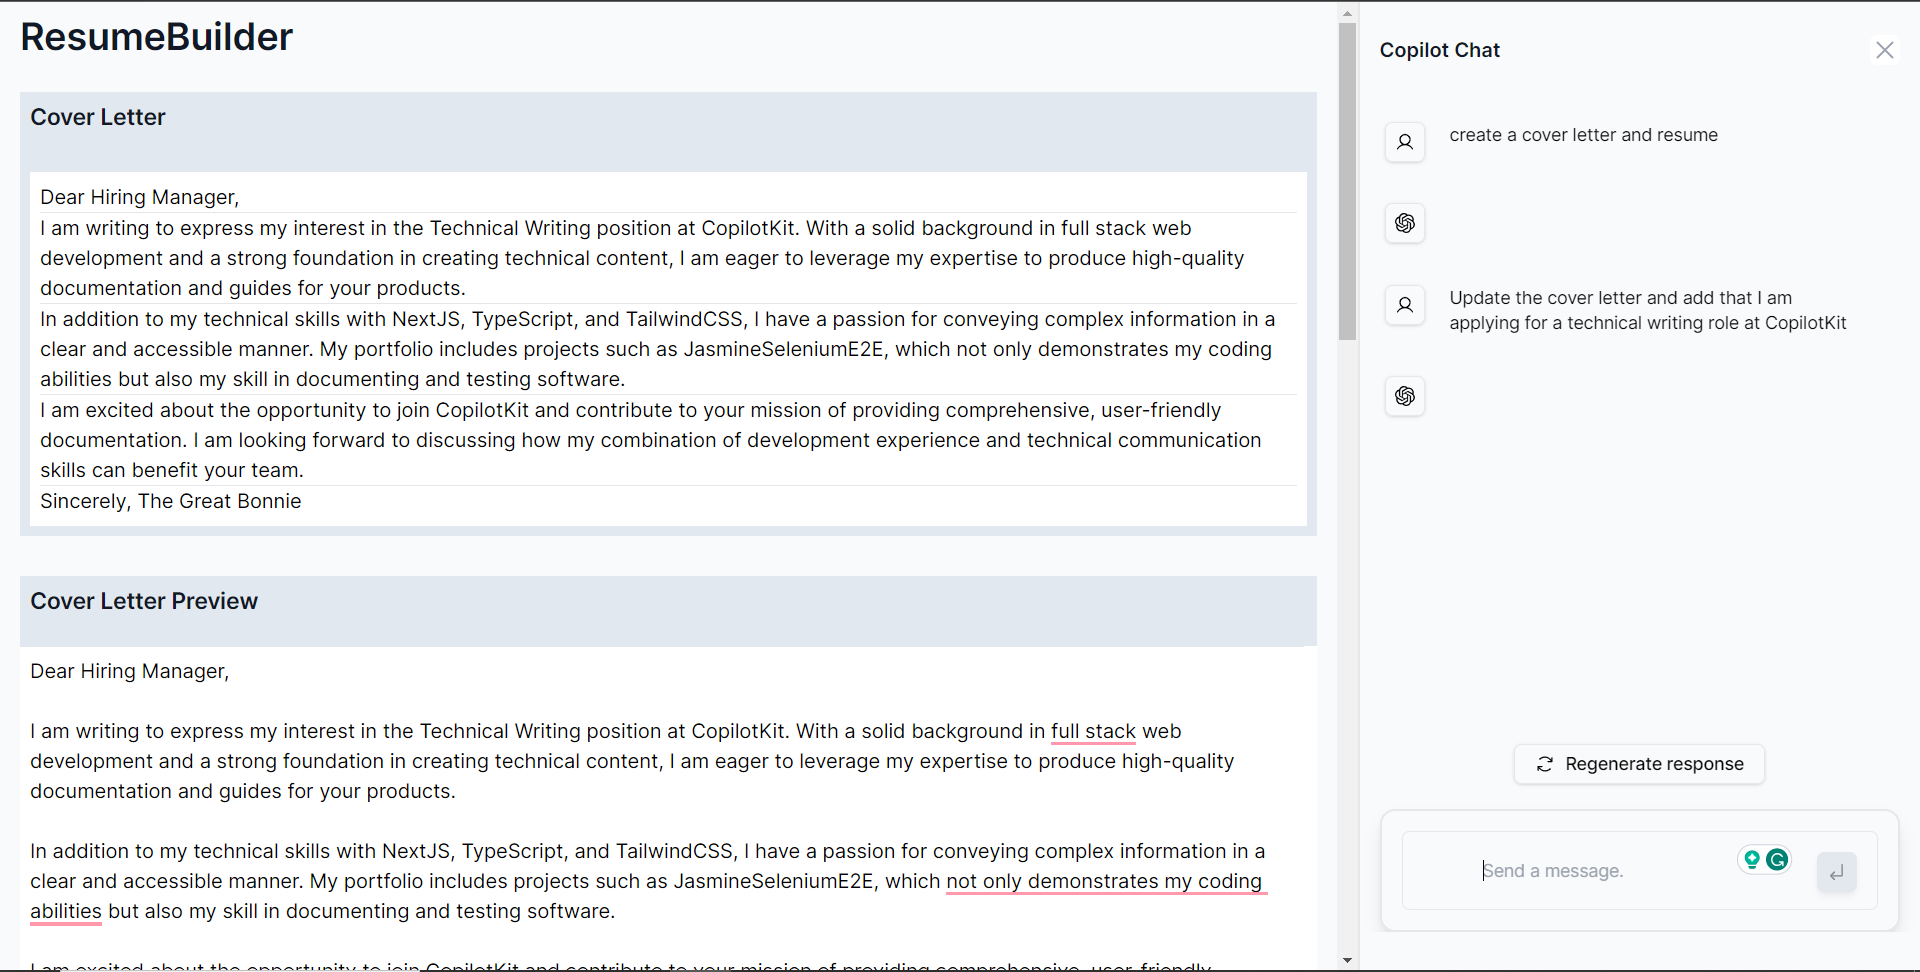 --- ## 建立更新復原功能 **第 1 步:** 宣告一個名為 updateResume 的變數,用於保存先前產生的求職信。 ``` const updateResume = createCoverLetterAndResume.resume; ``` **步驟 2:** 使用 useMakeCopilotReadable 掛鉤新增 updateResume 作為應用程式內聊天機器人的上下文。 ``` useMakeCopilotReadable("Resume:" + JSON.stringify(updateResume)); ``` **步驟 3:** 使用 useMakeCopilotActionable 掛鉤設定一個名為 updateResume 的操作,其中包含描述和實作函數,該函數使用提供的求職信更新來更新 createCoverLetterAndResume 狀態,如下所示。 ``` useMakeCopilotActionable( { name: "updateResume", description: "Update resume for a software developer job application.", argumentAnnotations: [ { name: "updateResumeMarkdown", type: "string", description: "Update markdown text for a resume that displays your professional background and relevant skills.", required: true, }, ], implementation: async (updatedResumeMarkdown) => { setCreateCoverLetterAndResume((prevState) => ({ ...prevState, resume: updatedResumeMarkdown, })); }, }, [] ); ``` **第 4 步:** 向聊天機器人發出提示,例如「更新履歷並將我的姓名加入為 John Doe,將我的電子郵件加入為 [email protected]」。如下圖所示,可以看到履歷已更新。 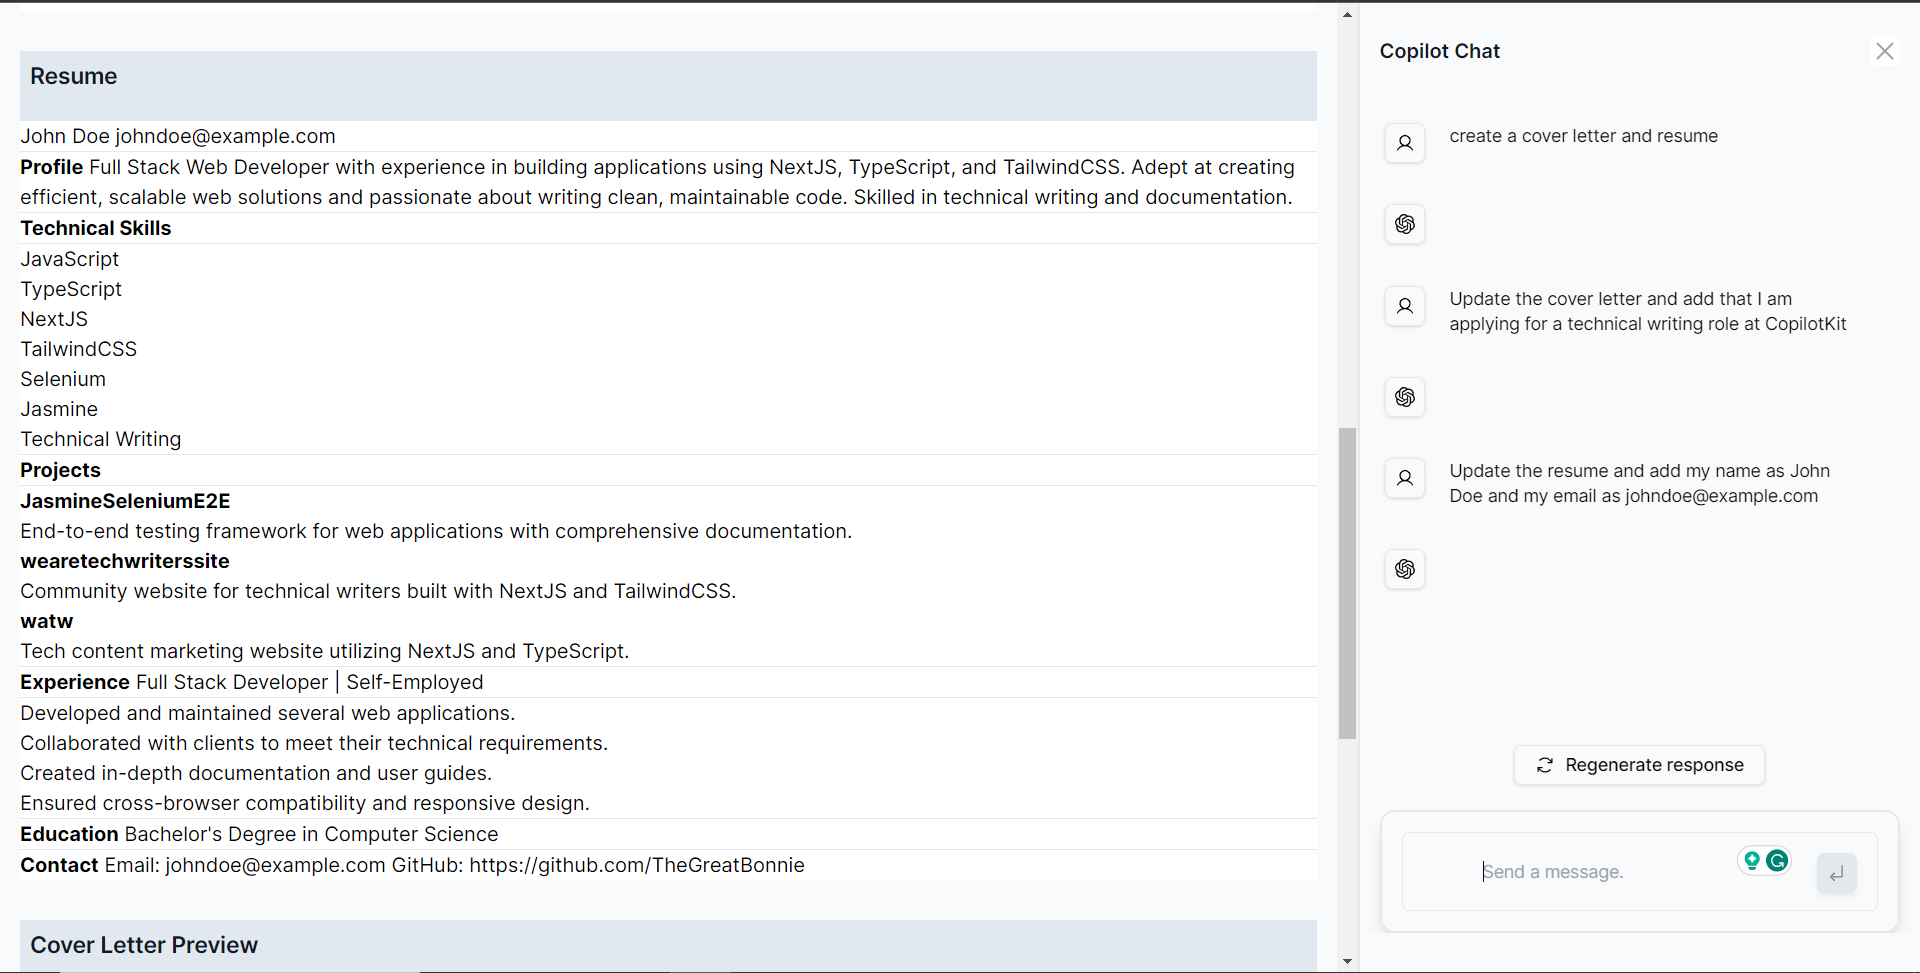 --- ## 建立下載求職信和履歷表 Pdfs 功能 **第 1 步:** 安裝 jsPDF,一個用 JavaScript 產生 PDF 的函式庫。 ``` npm i jspdf ``` **步驟 2:** 在 CoverLetterAndResume 元件內,使用 useMakeCopilotActionable 掛鉤設定一個名為“downloadPdfs”的操作,其中包含描述和實現函數,該函數使用 jsPDF 庫為求職信和簡歷建立 PDF,然後保存它們, 如下所示。 ``` function addTextToPDF(doc: any, text: any, x: any, y: any, maxWidth: any) { // Split the text into lines const lines = doc.splitTextToSize(text, maxWidth); // Add lines to the document doc.text(lines, x, y); } useMakeCopilotActionable( { name: "downloadPdfs", description: "Download pdfs of the cover letter and resume.", argumentAnnotations: [ { name: "coverLetterPdfA4", type: "string", description: "A Pdf that contains the cover letter converted from markdown text and fits A4 paper.", required: true, }, { name: "resumePdfA4Paper", type: "string", description: "A Pdf that contains the resume converted from markdown text and fits A4 paper.", required: true, }, ], implementation: async () => { const marginLeft = 10; const marginTop = 10; const maxWidth = 180; const coverLetterDoc = new jsPDF(); addTextToPDF( coverLetterDoc, createCoverLetterAndResume.letter, marginLeft, marginTop, maxWidth ); coverLetterDoc.save("coverLetter.pdf"); const resumeDoc = new jsPDF(); addTextToPDF( resumeDoc, createCoverLetterAndResume.resume, marginLeft, marginTop, maxWidth ); resumeDoc.save("resume.pdf"); }, }, [createCoverLetterAndResume] ); ``` **第 3 步:** 返回網頁應用程式中的聊天機器人,並提示「下載求職信和簡歷的 pdf 檔案」。 PDF 將開始下載,如果您開啟 coverLetter.pdf,您應該會看到產生的求職信,如下所示。 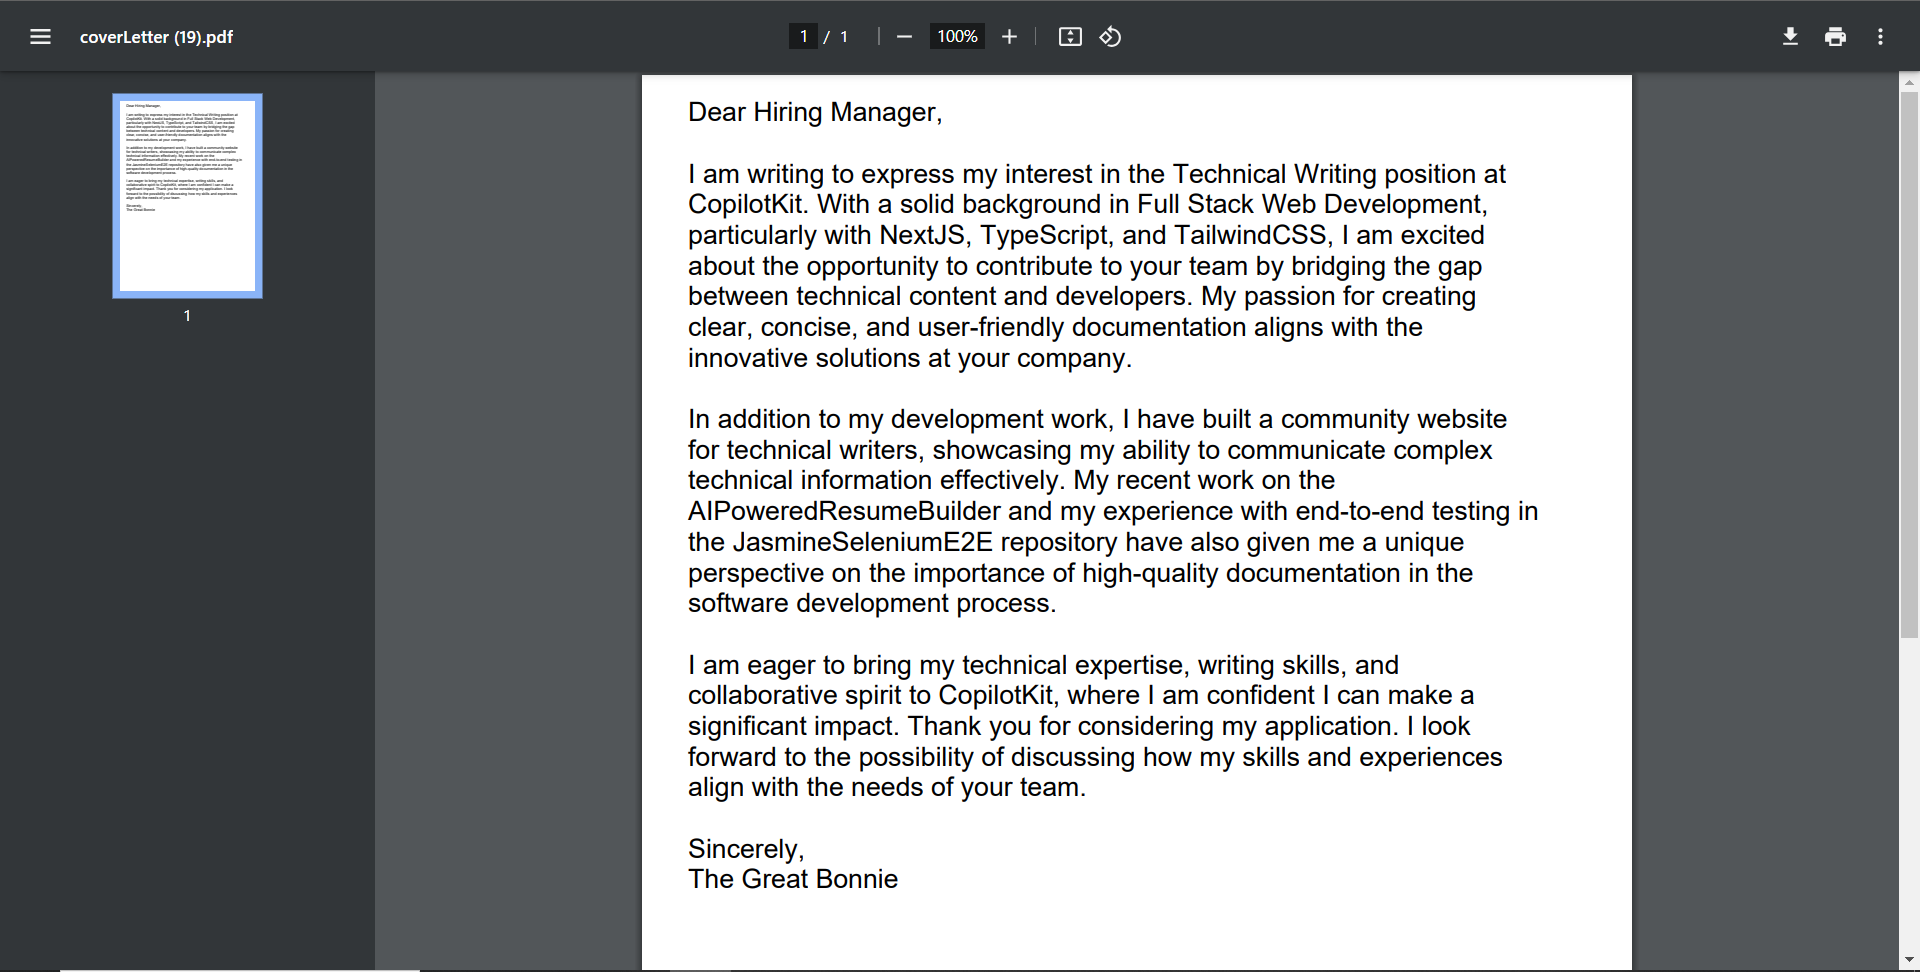 --- ## 結論 總而言之,您可以使用 CopilotKit 建立應用內 AI 聊天機器人,該機器人可以查看當前應用程式狀態並在應用程式內執行操作。 AI 聊天機器人可以與您的應用程式前端、後端和第三方服務對話。 對於完整的源程式碼: https://github.com/TheGreatBonnie/AIPoweredResumeBuilder --- 原文出處:https://dev.to/copilotkit/how-to-build-the-with-nextjs-openai-1mhb
為優秀的開源庫做出貢獻是建立您的作品集並加入令人驚嘆的社群的最佳方式。 我編譯了 31 個開源程式庫和一些好的第一期,以幫助推動您的旅程。 不要忘記加星號並支持這些🌟  --- #AI最愛🦾: ### 1. [CopilotKit](https://github.com/CopilotKit/CopilotKit) - 應用內 AI 聊天機器人與 AI 文字區域 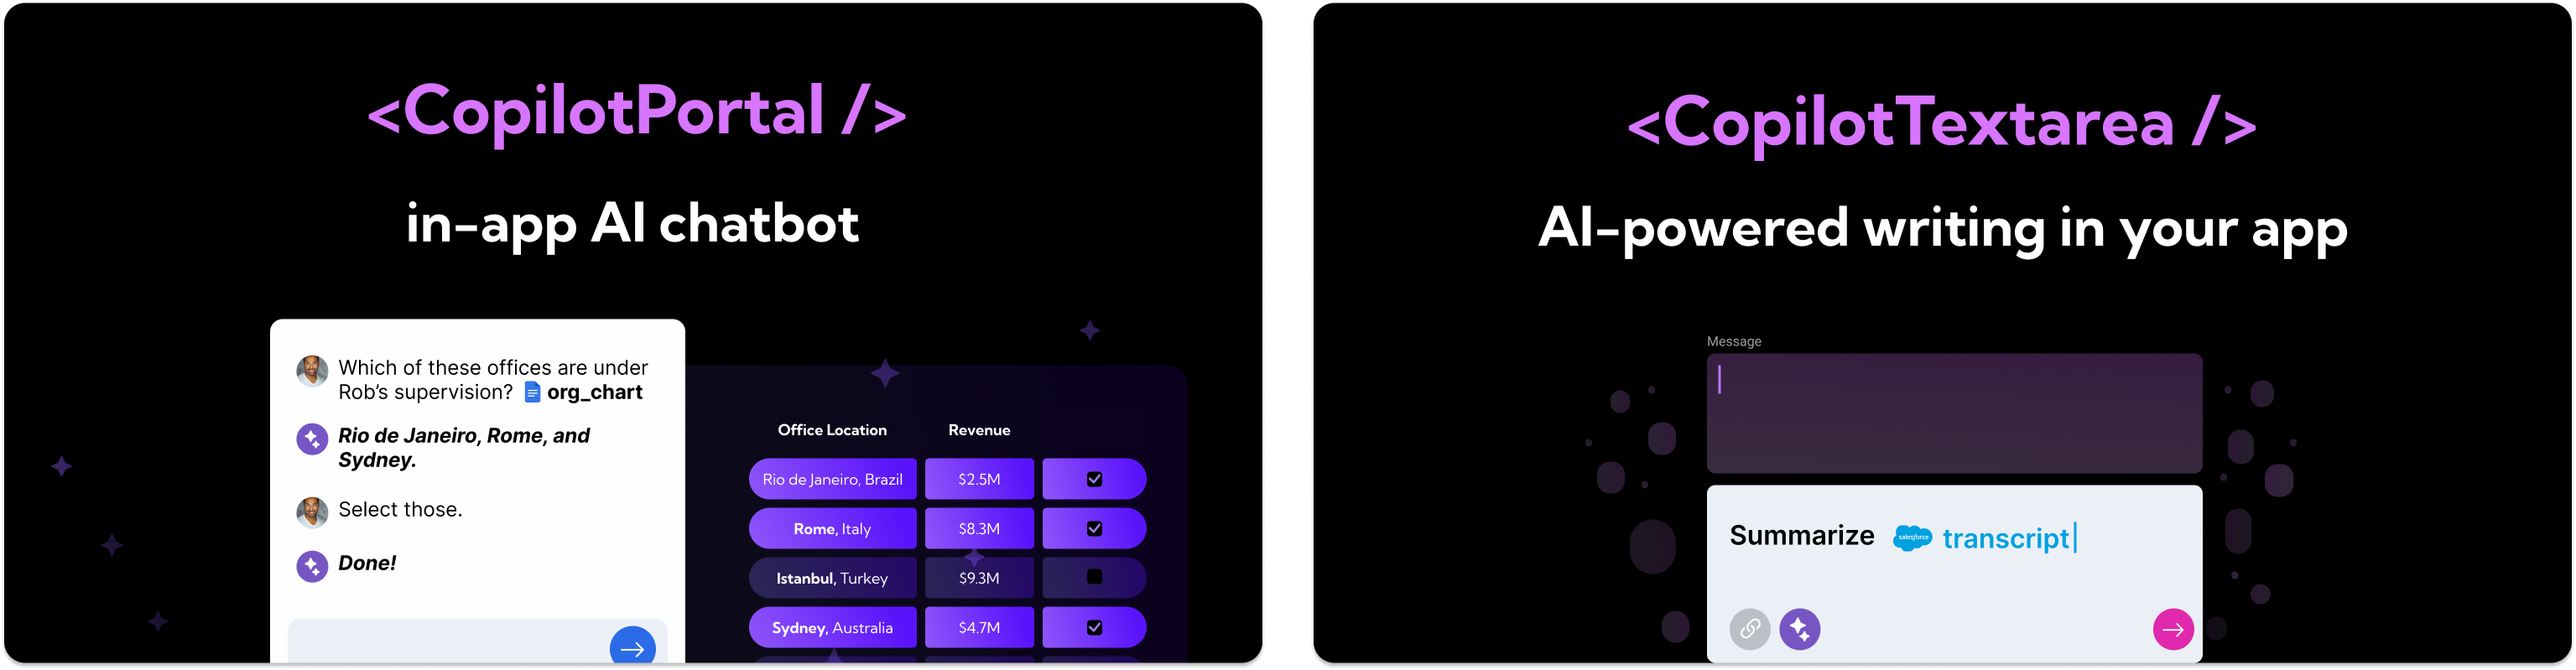 開源平台,用於使用兩個 React 元件將關鍵 AI 功能整合到 React 應用程式中。 CopilotPortal:應用程式內人工智慧聊天機器人,可以「查看」當前應用程式狀態並採取行動。 CopilotTextarea:AI 驅動的 <textarea /'> 替換。具有自動完成、插入和生成功能。 ###[好第一期:](https://github.com/CopilotKit/CopilotKit/issues/62) ``` Gracefully fail if CopilotProvider is omitted The bug: Virtually every CopilotKit functionality depends on a CopilotContext provided by the CopilotProvider. e.g. CopilotTextarea autocompletions, chatbot, etc. However when a CopilotProvider does not wrap the component, functionality fails silently. To Reproduce 1. Omit <CopilotProvider>...</CopilotProvider> 2. trigger useMakeCopilotReadable, useMakeCopilotActionable, CopilotTextarea, CopilotSidebarUIProvider 3. See how functionality does not work, but no error is emitted Expected behavior An error is emitted, with clear description of the likely core issue and how to resolve it (namely, wrap the app in a CopilotProvider). Point to docs. ``` {% cta https://github.com/CopilotKit/CopilotKit %} Star CopilotKit ⭐️ {% endcta %} --- ###2.[PortKeyAI](https://github.com/Portkey-AI/gateway){% embed https://github.com/Portkey-AI/gateway no-readme %} ###3.[Pezzo.ai](https://github.com/pezzolabs/pezzo){% 嵌入 https://github.com/pezzolabs/pezzo no-readme %} ###4.[OpenVoice](https://github.com/myshell-ai/OpenVoice){% 嵌入 https://github.com/myshell-ai/OpenVoice no-readme %} ###5.[LLMCourse](https://github.com/mlabonne/llm-course){% 嵌入 https://github.com/mlabonne/llm-course no-readme %} --- #雲端和資料庫☁️ ### 6. [Winglang](https://github.com/winglang/wing) - 雲端導向的程式語言  Wing 是一種用於雲端應用程式的程式語言。 它結合了雲端基礎設施和應用程式的程式碼,使雲端服務開發變得更加容易。 Wing 獨特的執行模型和測試模擬器有助於高效建置和部署雲端應用程式。 ###[第一期好:](https://github.com/winglang/wing/issues/4998) ``` Support Array.sort() method Feature Spec: let arr: MutArray<num>=[2, 1, 3, 9, 6, 4]; arr.sort(); log("${arr}"); // it should print sorted array in ascending order, eg: [1, 2, 3, 4, 6, 9] Component: Wing SDK Community Notes: If you are interested to work on this issue, please leave a comment. If this issue is labeled needs-discussion, it means the spec has not been finalized yet. Please reach out on the #dev channel in the Wing Slack. ``` {% cta https://github.com/winglang/wing %} 星翼朗 ⭐️ {% endcta %} --- ### 7. [StackQL](https://github.com/stackql/stackql) - 以 SQL 為基礎的雲端資源管理  StackQL 提供了一個獨特的 SQL 為基礎的框架來管理和查詢跨不同提供者(例如 Google、AWS、Azure 等)的雲端資源和 API。 它允許使用類似 SQL 的命令來配置和操作雲端服務,從而簡化了雲端操作。 這使得 StackQL 成為雲端資源管理和互動的多功能工具,特別是對於熟悉 SQL 的人來說。 ###[好第一期:](https://github.com/stackql/stackql/issues/280) ``` Add unit testing to package writer Add unit testing for internal/stackql/writer . Description: add implementation for testing sql_writer.go modify sql_writer.go by adding function for dependency injection add implementation for testing generic.go modify generic.go by adding variable for patching GetDB function modify entryutil.go to adjust sql_writer.go ``` {% cta https://github.com/stackql/stackql/ %} Star StackSQL ⭐️ {% endcta %} --- ###8.[Appwrite](https://github.com/appwrite/appwrite){% 嵌入 https://github.com/appwrite/appwrite no-readme %} ###9.[Supabase](https://github.com/supabase/supabase){% 嵌入 https://github.com/supabase/supabase no-readme %} ###10.[SuperDuperDB](https://github.com/SuperDuperDB/superduperdb){% 嵌入 https://github.com/SuperDuperDB/superduperdb no-readme %} --- #開發實用程式🛠️ ### 11. [Firecamp](https://github.com/firecamp-dev/firecamp) - 多協定 API 協作工具  Firecamp 是一款多功能 API 開發工具,支援 Rest、GraphQL 和 WebSockets 等協定。 它簡化了 API 的設計、測試和記錄,並增強了 API 專案的團隊協作。 ###[好第一期:](https://github.com/firecamp-dev/firecamp/issues/137) ``` Help out with Manual Testing of Firecamp Responsibilities: Executing test cases and reporting results Logging bugs and issues in the Github issue tracker Providing feedback on usability and the testing process Suggesting improvements to tests and expanding test coverage. Benefits Benefits for your testing profile and career: Experience testing a real-world open source application Each release will include your name with bugs fixes. Exposure to different types of testing such as UI, API, integration, etc Opportunity to have your contributions and feedback incorporated into the product Collaborating with an open source community Having your testing work visible to potential employers Firecamp Swags (T-shirts and stickers) Community shoutout and promotion ``` {% cta https://github.com/firecamp-dev/firecamp %} 星際火營 ⭐️ {% endcta %} --- ###12.[Odigos](https://github.com/keyval-dev/odigos){% 嵌入 https://github.com/keyval-dev/odigos no-readme %} ###13.[Digger](https://github.com/diggerhq/digger){% 嵌入 https://github.com/diggerhq/digger no-readme %} ###14.[鏡像](https://github.com/metalbear-co/mirrord){% 嵌入 https://github.com/metalbear-co/mirrord no-readme %} --- #後端⚙️ ### 15. [Cerbos](https://github.com/cerbos/cerbos) - 可擴充、與語言無關的授權  Cerbos 提供獨特、可擴展的解決方案,用於在應用程式中實施特定於上下文的使用者權限。 其靈活的、與語言無關的方法可以輕鬆整合和管理複雜的授權結構。 與眾不同的是,Cerbos 簡化了存取控制策略的開發,使其更能適應各種應用需求。 ###[第一期好:](https://github.com/cerbos/cerbos/issues/1920) ``` Produce output when the rule condition is not satisfied Currently the output block is only evaluated if the rule is actually activated (action, roles and conditions are satisfied). In certain situations, it's desirable to produce output when the rule is nearly activated (action and roles match but the condition is not satisfied). In order to maintain backward compatibility, reduce noise, and to keep policy execution as fast as possible (outputs incur a tiny overhead), the proposal is to let users add an optional when section to the output block to opt into this behaviour. - actions: ['view'] effect: EFFECT_ALLOW roles: ['user'] condition: match: expr: timestamp(R.expiry_date) > now() output: expr: > format("%d hours until expiry", (timestamp(R.expiry_date) - now()).getHours()) when: cond_fail: > format("expired on %s", R.expiry_date) When evaluating the above rule, if the action, roles and condition match, output will be the result of evaluating output.expr If the condition is not satisfied, output will be the result of evaluating output. when.cond_fail if it exists. Otherwise no output will be produced. ``` {% cta https://github.com/cerbos/cerbos %} 明星 Cerbos ⭐️ {% endcta %} --- ###16.[Novu](https://github.com/novuhq/novu){% 嵌入 https://github.com/novuhq/novu no-readme %} ###17.[Trigger.dev](https://github.com/triggerdotdev/trigger.dev){% 嵌入 https://github.com/triggerdotdev/trigger.dev no-readme %} ###18.[SuperTokens](https://github.com/supertokens/supertokens-core){% 嵌入 https://github.com/supertokens/supertokens-core no-readme %} ###19.[Wazuh](https://github.com/wazuh/wazuh){% 嵌入 https://github.com/wazuh/wazuh no-readme %} --- #UI/UX🦋: ### 20. [Flowbite](https://github.com/themesberg/flowbite) - 頂級 CSS 元件庫  最好、最受尊敬的 UI 元件庫之一。 基於實用優先的 CSS 框架。 易於使用,充滿重要的支援和模板。 {% cta https://github.com/themesberg/flowbite %} 明星 Flowbite ⭐️ {% endcta %} ###21.[MaterialUI](https://github.com/mui/material-ui) - 使用 Google 的 Material Design 實現的基礎 React 元件 {% 嵌入 https://github.com/mui/material-ui no-readme %} ###22。 [SwiperUI](https://github.com/nolimits4web/swiper) - 用於實現行動滑動 UI 的受人尊敬的庫 {% 嵌入 https://github.com/nolimits4web/swiper no-readme %} ###23.[ReactSpring](https://github.com/pmndrs/react-spring) - 在 React 中實現具有真實物理效果的動畫 {% 嵌入 https://github.com/pmndrs/react-spring no-readme %} --- #雜項🎨 ### 24. [SwirlSearch](https://github.com/swirlai/swirl-search) - 多源人工智慧資料搜尋器  Swirl 是一款由人工智慧驅動的搜尋工具,可同時查詢多個資料來源,包括資料庫和公用資料服務。 它使用人工智慧對結果進行排名並產生見解,從而可以跨不同的資料儲存庫進行全面搜尋。 Swirl 一次簡化了對各種來源的資料的搜尋和分析,使其成為資料驅動洞察的獨特工具。 ###[第一期好:](https://github.com/swirlai/swirl-search/issues/789) ``` Add a Connector: Yahoo search It would help to search anything with Swirl on Yahoo effectively. Locate and read a bit in their search API first. You might just need to make a new SearchProvider configration vs. a new Connector. Their docs should help guide you a bit in which way you might need to go. ``` {% cta https://github.com/swirlai/swirl-search/ %} Star SwirlSearch ⭐️ {% endcta %} --- ### 25. [Wasp](https://github.com/wasp-lang/wasp) - 使用 React 和 Node.js 開發全端 Web 應用程式  使用 React 和 Node.js 進行快速全端 Web 應用程式開發。 Wasp 提供了一種建立現代 Web 應用程式的簡化方法,將前端的 React 和後端的 Node.js 結合在一個緊密結合的框架中。 ###[好第一期:](https://github.com/wasp-lang/wasp/issues/874) ``` Add images (or link to the example app) of auth UI helpers Wasp provides At this point in docs (also in the tutorial if we're using it), it would be nice to add an image of UI helpers for Auth (login/signup form, Google/GitHub button, ...) so developers can immediately see what they are getting and how nice it looks. ``` {% cta https://github.com/wasp-lang/wasp %} 星黃蜂 ⭐️ {% endcta %} ###26.[Logstash](https://github.com/elastic/logstash) {% 嵌入 https://github.com/elastic/logstash 無自述文件 %} ###27.[Snapify](https://github.com/MarconLP/snapify) {% 嵌入 https://github.com/MarconLP/snapify 無自述文件 %} --- #為了好玩🎭 ###28.[Twitter 的演算法](https://github.com/twitter/the-algorithm){% embed https://github.com/twitter/the-algorithm no-readme %} ###29.[十億行挑戰](https://github.com/gunnarmorling/1brc){% embed https://github.com/gunnarmorling/1brc no-readme %} ###30.【秘密知識之書】(https://github.com/trimstray/the-book-of-secret-knowledge){% embed https://github.com/trimstray/the-book-of -秘密知識無自述文件%} ###31.[GenAI 初學者](https://github.com/microsoft/generative-ai-for-beginners){% 嵌入 https://github.com/microsoft/generative-ai-for-beginners no -自述文件%} --- 原文出處:https://dev.to/copilotkit/31-open-source-libraries-to-kickstart-your-journey-4hhd
這是開源的季節☃️ 假期編碼可以是一種幸福的經歷,沒有什麼比在休息時間建立一個很棒的專案更好的了。 我瀏覽了無數的儲存庫,找到了 24 個最適合聖誕節編碼的庫。  不要忘記 STAR 🌟 這些儲存庫並保存本文以供日後使用。 --- #Web-Dev🌐: ### 1. [CopilotTextarea ](https://github.com/CopilotKit/CopilotKit) - React 應用程式中的 AI 驅動寫作 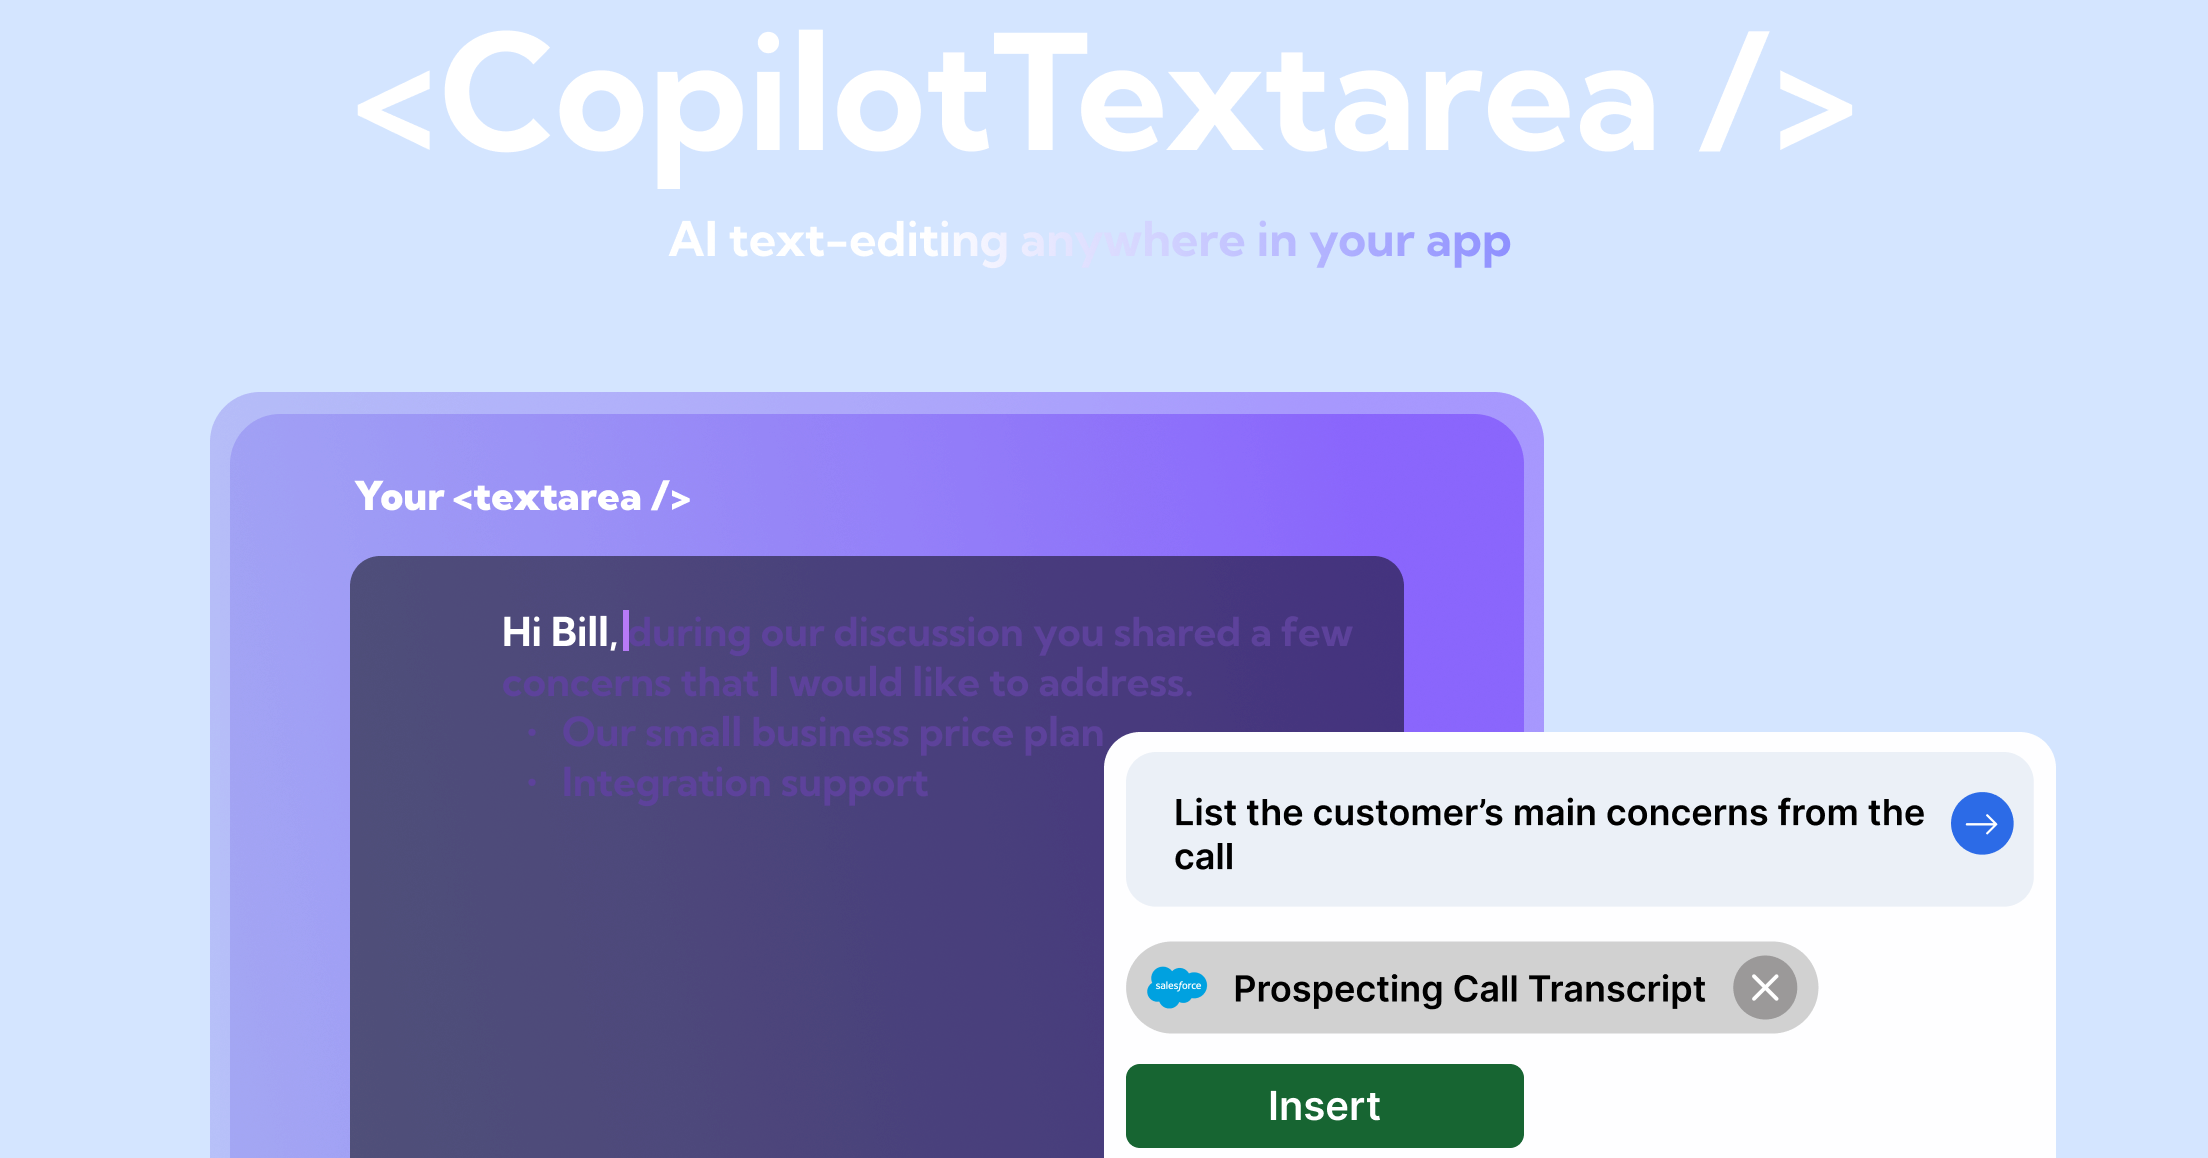 具有 Github CopilotX 功能的任何 React `<textarea>` 的直接替代品。 自動完成、插入、編輯。 可以即時或由開發人員提前提供任何上下文。 ###2.[React Joyride](https://github.com/gilbarbara/react-joyride) - 建立產品演練 ###3.[NextAuthJS](https://github.com/nextauthjs/next-auth) - 輕鬆設定驗證 ###4.[Trigger.dev](https://github.com/triggerdotdev/trigger.dev) - 可靠地執行長時間作業而不會逾時 --- #UI/UX🦋: ### 5. [Flowbite](https://github.com/themesberg/flowbite) - 頂級 CSS 元件庫  最好、最受尊敬的 UI 元件庫之一。 基於實用優先的 CSS 框架。 易於使用,充滿重要的支援和模板。 ###6.[MaterialUI](https://github.com/mui/material-ui) - 使用 Google 的 Material Design 實現的基礎 React 元件 ###7。 [SwiperUI](https://github.com/nolimits4web/swiper) - 用於實現行動滑動 UI 的受人尊敬的庫 ###8.[ReactSpring](https://github.com/pmndrs/react-spring) - 在 React 中實現具有真實物理效果的動畫 --- #GenAI🤖: ## 9. [CopilotPortal](https://github.com/RecursivelyAI/CopilotKit):在您的應用程式中嵌入可操作的 LLM 聊天機器人。 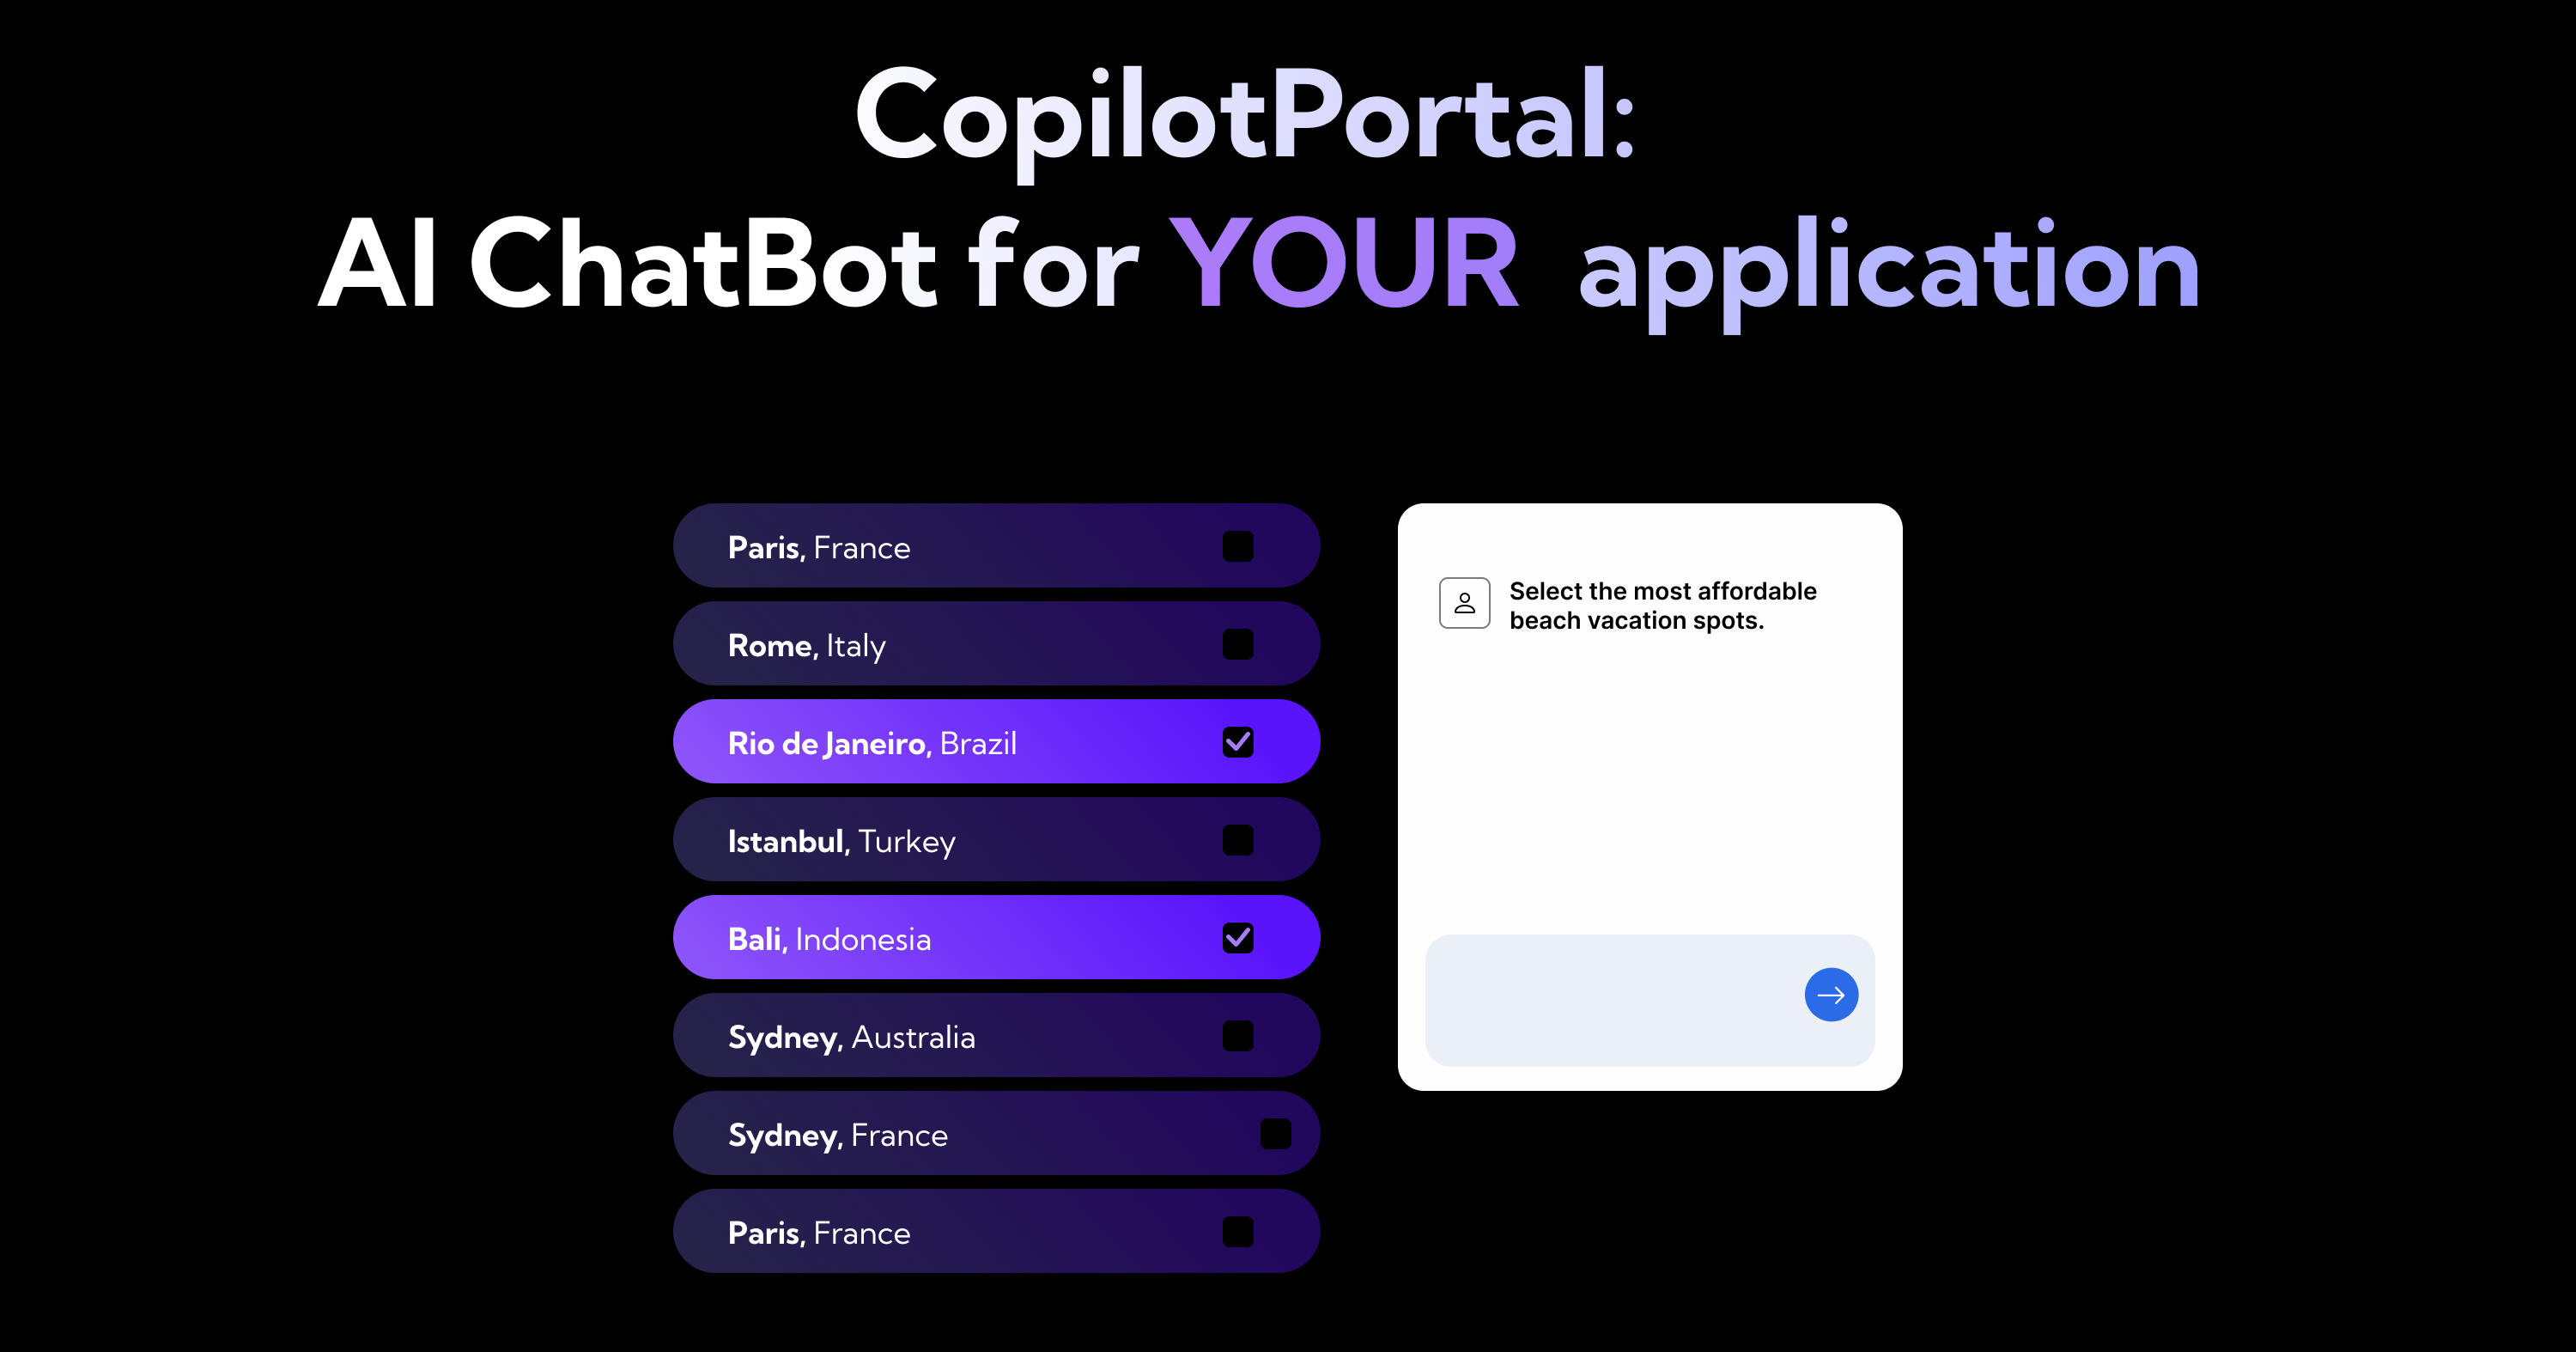 應用程式中的上下文感知 LLM 聊天機器人可以回答問題並採取行動。 只需幾行程式碼即可獲得一個可用的聊天機器人,然後根據需要進行自訂和嵌入。 ###10.[llamafile](https://github.com/Mozilla-Ocho/llamafile) - 將使用 LLM 的複雜性壓縮到單一檔案 ###11。 [Pezzo.ai](https://github.com/pezzolabs/pezzo) - 開發人員最喜歡的 LLM 操作和可觀察性 ###12.[Tavily](https://github.com/assafelovic/gpt-researcher) - 開發人員友善的自治 GPT 代理,可搜尋資料並撰寫報告 --- #安全/隱私🔐: ### 13. [Wazuh](https://github.com/wazuh/wazuh) - 統一開源安全平台  適用於端點和雲端工作負載的統一開源安全平台。 威脅偵測、預防和回應。 保護本地、容器化和雲端環境。 ###14.[Zeek](https://github.com/zeek/zeek) - 深入分析網路流量 ###15。 [SuperTokens](https://github.com/supertokens/supertokens-core) - 開源身分驗證提供者 ###16.[Sniffnet](https://github.com/GyulyVGC/sniffnet) - 本地監控您的網路流量 --- #移動📱: ### 17. [Tamagui ](https://github.com/tamagui/tamagui) - 受人尊敬的 React Native UI 與最佳化函式庫  Tamagui 旨在快速設計 React 應用程式。 它包含一個可選的 UI 套件和一個用於增強效能的最佳化編譯器。 允許在 Web 和本機平台之間實現無縫程式碼共享,為每個環境最佳化樣式元件。 ###18.[EarlGrey](https://github.com/google/EarlGrey) - Google 進行的 iOS UI 測試 ###19。 [ReactNativeMaps](https://github.com/react-native-maps/react-native-maps) - 高度可自訂的應用程式地圖元件 ###20.[ReactNativePaper](https://github.com/callstack/react-native-paper) - 適用於 iOS 和 Android 的設計庫 --- #其他🎅: ### 21. [LangChain ](https://github.com/CopilotKit/CopilotKit) - 使用 LLM 建立自訂操作鏈  一個著名的庫,但仍然包含在內,因為它是我最喜歡的庫之一,並且建置起來很有趣。 模組化元件可協助您將 LLM 整合到與許多應用程式和 API 整合的操作中。 用於建立 LLM 代理的強大框架。 ###22.[ReactAgent](https://github.com/eylonmiz/react-agent) - 實驗專案。將提示轉變為有效的反應元件 ###23.[Awesome for Beginners](https://github.com/MunGell/awesome-for-beginners) - Github 初學者友好專案列表 ###24.[Appwrite](https://github.com/appwrite/appwrite) - 適用於網路和行動應用程式的強大後端平台 --- 而且……就是這樣,夥計們! 希望您喜歡這些庫,並且它們可以幫助/激勵您在假期期間建立一些很酷的東西。 ##如果您喜歡本文,請不要忘記對儲存庫加 STAR🌟 並透過回饋來支持本文。 #聖誕節快樂! 🎅🏽☃️ --- [PS:本文附有我用 [Suno.ai](https://www.suno.ai) 產生的伴奏歌曲。他們很搞笑,很棒,也很令人毛骨悚然。告訴我你最喜歡哪一個: 1. [開源聖誕老人](https://app.suno.ai/song/e5d415a5-2914-4fc4-b3e5-136ea0a8ef5a/) 2.【聖誕老人的程式設計師聖誕魔法】(https://app.suno.ai/song/5794dcf0-e9cc-4e0d-a80f-f70ef4b73150/)] --- 原文出處:https://dev.to/copilotkit/24-must-try-open-source-projects-for-your-christmas-coding-3603
科技愛好者常有遠大的夢想,渴望實現突破創新和個人發展界限的目標。為了幫助建立這些雄心壯志,我為科技愛好者量身定制了廣泛的願望清單。此清單不僅概述了各種目標,還包括「靈感」、「如何」、「年份」、「狀態」和「紀念品」等附加欄,為您的技術之旅提供全面的路線圖。 ## 清單中有什麼? 該清單涵蓋了廣泛的目標,從培養特定技能(例如達到 150 WPM 的打字速度)到雄心勃勃的專案(例如製作 DIY 電動滑板或自行車)。它包括參加重大活動,例如參加大型技術會議,以及個人發展的里程碑,例如指導初級開發人員。每個目標都經過分類以便於參考,涵蓋 DIY 專案、程式設計、開發、學習等領域。 ## 列表 [我的遺願清單進度](https://syki.dev/bucket-list) |目標|類別|靈感|年份|狀態|紀念品| |---------------------------|----------------|----------------| ----|------|--------| |成為大型專案的貢獻者 |開發 |[如何像專業人士一樣開源](https://www.youtube.com/watch?v=MT6M_sqAuZo) | | | | |建立新聞聚合器 |開發 |[Feedly](https://feedly.com/) | | | | |建立實體引擎 |開發 |[我正在從頭開始編寫整個實體引擎](https://www.youtube.com/watch?v=iSMbRGTBOHU) | | | | |建立推薦系統 |開發 |[推薦系統如何運作 (Netflix/Amazon)](https://www.youtube.com/watch?v=n3RKsY2H-NE) | | | | |建構情緒分析工具 |開發 |【2023 如何掌握人工智慧驅動的情緒分析?】(https://brand24.com/blog/sentiment-analysis/) | | | | |建立擴增實境 (AR) 應用程式 |開發 |[關於如何在 2023 年建立擴增實境應用程式的指南](https://www.tekrevol.com/blogs/how-to-build-an-augmented-reality -應用程式/) | | | | |建置與部署聊天伺服器 |開發 |[IRC](https://en.wikipedia.org/wiki/Internet_Relay_Chat) | | | | |建立網路安全工具|開發|[Kali Tools](https://www.kali.org/tools/) | | | | |建立多人線上遊戲|開發|[Dani](https://www.youtube.com/watch?v=_ze26M_Fm6g) | | | | |建立 PWA(漸進式 Web 應用程式)|開發 |[PWA](https://developer.mozilla.org/en-US/docs/Web/Progressive_web_apps) | | | | |建立 AI 影響者 |開發 |[AI 影響者變得非常富有...讓我們建立一個](https://www.youtube.com/watch?v=ky5ZB-mqZKM&t=11s) | | | | |開發區塊鏈應用程式 |開發 |[使用以太坊智能合約和 Solidity 建置您的第一個區塊鏈應用程式](https://www.youtube.com/watch?v=coQ5dg8wM2o) | | | | |開發一種加密貨幣 |開發 |[您需要立即建立一種加密貨幣!!](https://www.youtube.com/watch?v=befUVytFC80) | | | | |開發VR 應用程式|開發|[教學 - 在Meta Quest 耳機上建立您的第一個VR 應用程式](https://developer.oculus.com/documentation/unity/unity-tutorial-hello-vr/) | | | | |開發一個電子商務網站 |開發 |[Next.js Commerce](https://nextjs.org/commerce) | | | | |開發開源遊戲引擎 |開發 |[C++ 中的 GameDev](https://www.youtube.com/watch?v=LyJkcv_rL9Y&list=PLpM-Dvs8t0Va6RoHkaLuPbRh7Fwpy4nbV) | | | | |開發瀏覽器擴充 |開發 |[Chrome 擴充應該會嚇到你。](https://www.youtube.com/watch?v=xIKwkPWUgOA) | | | | |在 github 上有一個擁有 100 顆星的專案 |開發 |[Linus Torvalds](https://github.com/torvalds?achievement=starstruck&tab=achievements) | | | | |擁有自己的 Tor 頁面 |開發 |[我在 Raspberry Pi 上放置了一個 DARK WEB 網站!!](https://www.youtube.com/watch?v=bllS9tkCkaM) | | | | |發明手勢控制介面 |開發 |[鋼鐵人](https://www.youtube.com/watch?v=P5k-4-OEuTk) | | | | |建立持續整合/持續部署管道|開發|[自動化您的工作流程](https://github.com/features/actions)從想法到生產]| | | | |設定 Kubernetes 叢集 |開發 |[為什麼要建置 Raspberry Pi 叢集?](https://www.youtube.com/watch?v=8zXG4ySy1m8) | | | | |贊助開源專案 |開發 |[投資為您的世界提供動力的軟體](https://github.com/sponsors) | | | | |使用查詢機制編寫自己的資料庫|開發|[製作我們自己的資料庫](https://acmiitr.medium.com/making-our-own-database-part-1-6cd9c49ed924) | | | | |在靜態網站產生器中撰寫頁面 |開發 |[Gatsby](https://www.gatsbyjs.com/) | | | | |編寫單頁應用程式 |開發 |[React](https://react.dev/) | | | | |使用 Raspberry Pi 專案實現家居自動化 |DIY |[我建立了一個更聰明的智慧家庭](https://www.youtube.com/watch?v=0rIvB3LZiKA) | | | | |建立自訂鍵盤 |DIY |[建立自己的機械鍵盤......正確的方式](https://www.youtube.com/watch?v=bBon6WwkdJE) | | | | |DIY電動滑板或自行車 |DIY |[我做了一個電動滑板!](https://www.youtube.com/watch?v=3bcvFzecg2Q) | | | | |以自訂遊戲建立迷你街機 |DIY |[終極 DIY 街機指南](https://www.youtube.com/watch?v=oTydZBIGAuk) | | | | |組裝一台 PC |DIY |[為 Minecraft 組裝一台價值 100,000 美元的 PC](https://www.youtube.com/watch?v=AHR80l7od2Q) | | | | |建立個人雲端儲存系統 |DIY |【這是我的終局之戰 - Mother Vault 伺服器機房更新】(https://www.youtube.com/watch?v=pLC0FUnko-M) | | | | |利用 IoT 建造自動澆水花園系統 |DIY |[Arduino 花園控制器 - 自動澆水和資料記錄](https://www.youtube.com/watch?v=O_Q1WKCtWiA) | | | | |打造小型自動駕駛汽車或機器人 |DIY |[快速巡線機器人](https://www.youtube.com/watch?v=lnP32gzHdvI) | | | | |建造水下ROV |DIY |[建造一艘DIY潛水艇](建造一艘DIY潛水艇) | | | | |搭建並飛行 FPV 無人機 |DIY |[為什麼要以 800mW 功率自由式飛行? | [FPV](https://www.youtube.com/watch?v=bBb_kSO3vTo) | | | | |設計具有互動功能的智慧鏡子|DIY |[DIY智慧鏡子 - 完整教學](https://www.youtube.com/watch?v=OYlloiaBINo) | | | | | 以 3D 方式設計和列印一些東西 |DIY |[我在房間中央製作了一個機器人手臂!](https://www.youtube.com/watch?v=nRsaf16EdNM) | | | | |設計您自己的 PCB |DIY |[PCB 建立初學者 - 10 分鐘內開始完成教程](https://www.youtube.com/watch?v=MsdJgEinb34) | | | | |修復損壞的電子產品 |DIY |[ElectroBOOM](https://www.youtube.com/@ElectroBOOM) | | | | |在本地擁有自己的伺服器 |DIY |[為什麼要建立 Raspberry Pi 叢集?](https://www.youtube.com/watch?v=8zXG4ySy1m8) | | | | |實現智慧家庭|DIY |[我建造了一個更聰明的智慧家庭](https://www.youtube.com/watch?v=0rIvB3LZiKA) | | | | |製作機械手臂 |DIY |[我在房間中央製作了機械手臂!](https://www.youtube.com/watch?v=nRsaf16EdNM) | | | | | 用 Flipper Zero 開啟一些東西 |DIY |[這讓駭客攻擊太容易了 - Flipper Zero](https://www.youtube.com/watch?v=nLIp4wd0oXs) | | | | |成為智慧型手機應用程式的擁有者|創業|[VoidLog](https://www.youtube.com/watch?v=LY4rxYe-jKI&list=PLN3n1USn4xllDDLwgJ4avEqgj4dWynofp) | | | | |開發 SaaS 產品 |創業精神|[我如何在一天內建立一個新的 SaaS 產品](https://www.youtube.com/watch?v=v_3lcqUOaOA) | | | | |在店裡擁有自己的遊戲 |創業|[Dani](https://www.youtube.com/watch?v=_ze26M_Fm6g) | | | | |在新創公司工作 |創業精神|[新創工程師在家工作的一天](https://www.youtube.com/watch?v=TLysAkFM4cA) | | | | |一週多相睡眠|創業|| | | | |參加播客 |創業|[Lex Fridman](https://www.youtube.com/lexfridman) | | | | |完全存取伺服器 - 黑客 |黑客 |[先生。機器人](https://www.youtube.com/watch?v=QqknSms8VVI&t=16s) | | | | |獲得錯誤賞金 |駭客 |[HackerOne](https://www.hackerone.com/) | | | | |在奪旗大賽中進行駭客攻擊 |駭客攻擊 |[Mr.機器人](https://www.youtube.com/watch?v=6MrQ-mN8HM8) | | | | |編寫惡意軟體 |駭客 |[惡意軟體開發:進程、執行緒與句柄](https://www.youtube.com/watch?v=aNEqC-U5tHM) | | | | |150 wpm 速度打字 |程式設計 |[Monkeytype](https://github.com/monkeytypegame/monkeytype) | | | | |使用 Python 腳本自動化您的日常任務 |程式設計 |[開始使用 Python 自動化您的生活! (Python檔案管理教學)](https://www.youtube.com/watch?v=NCvI-K0Gp90) | | | | |建立 Twitter 機器人 |程式設計 |[如何使用人工智慧發布熱門推文 // Twitter 機器人教學](https://www.youtube.com/watch?v=V7LEihbOv3Y) | | | | |編譯您自己的 Linux 核心 |程式設計 |[如何編譯自訂 Linux 核心](https://www.youtube.com/watch?v=APQY0wUbBow) | | | | |建立聊天機器人 |程式設計 |[使用深度學習、Python 和 TensorFlow 建立聊天機器人 p.1](https://www.youtube.com/watch?v=dvOnYLDg8_Y&list=PLQVvvaa0QuDdc2k5dwtDTyT9aCja0on8j) | | | | |使用 D3.js 建立資料視覺化專案 |程式設計 |[使用 D3.js 進行資料視覺化 - 完整教學課程](https://www.youtube.com/watch?v=_8V5o2UHG0E) | | | | |建立照片編輯工具 |程式設計 |[如何製作照片編輯應用程式的完整指南](https://www.cleveroad.com/blog/how-to-build-a-photo-editing-app-like-棱鏡並使其蓬勃發展/) | | | | |開發數位藝術作品產生器 |程式設計 |[如何為初學者產生瘋狂的人工智慧藝術(Midjourney V4)](https://www.youtube.com/watch?v=zf4z8A-OWBY) | | | | |開發檔案加密工具 |程式設計 |[製作您自己的加密程式](https://www.youtube.com/watch?v=TZT7wvTeVyY) | | | | |開發影片編輯軟體|程式設計|[我寫了一個影片編輯器(有點糟糕)](https://www.youtube.com/watch?v=iydG-e1dQGA) | | | | |開發語音助理應用程式 |程式設計 |[建立由 OpenAI 和 Python 驅動的 Jarvis | ChatGPT](https://www.youtube.com/watch?v=BEw5EFqCCEI) | | | | |開發智慧手錶應用程式 |程式設計 |[使用 Android Studio 在 WearOS 上建立並執行穿戴式應用程式](https://www.youtube.com/watch?v=-JO5oHRkybk) | | | | |開發您自己的 Slack/Discord 機器人 |程式設計 |[使用 Python 編寫 Discord 機器人 - 在雲端免費託管](https://www.youtube.com/watch?v=SPTfmiYiuok) | | | | |實現臉部辨識系統 |程式設計 |[從紙張到程式碼建立深度臉部辨識應用程式](https://www.youtube.com/watch?v=bK_k7eebGgc&list=PLgNJO2hghbmhHuhURAGbe6KWpiYZt0AMH) | | | | |學習函數式程式語言 |程式設計 |[函數式程式設計 - 概述](https://www.youtube.com/watch?v=8z_bUIl_uPo) | | | | |學習古老的語言 |程式設計 |[100 秒內的 COBOL](https://www.youtube.com/watch?v=7d7-etf-wNI) | | | | |學習並使用 Docker 進行容器化 |程式設計 |[Docker](https://www.docker.com/) | | | | |學習極快的語言 |程式設計 |[ThePrimeagen](https://www.youtube.com/@ThePrimeagen) | | | | |學習一門不尋常的語言(例如 Brainfuck) |程式設計 |[100 秒內完成 Brainfuck](https://www.youtube.com/watch?v=hdHjjBS4cs8) | | | | |學習量子運算基礎 |程式設計 |[在量子電腦上編碼](https://www.youtube.com/watch?v=q3ecPsMd4tA) | | | | |掌握高階演算法與資料結構(100道LeatCode) |程式設計|【569道 Leetcode 題後的我的大腦】(https://www.youtube.com/watch?v=8wysIxzqgPI) | | | | |對自訂語音控製家庭助理進行程式設計 |程式設計 |[建立由 OpenAI 和 Python 提供支援的 Jarvis | ChatGPT](https://www.youtube.com/watch?v=BEw5EFqCCEI) | | | | |對微控制器進行程式設計 |程式設計 |[微控制器程式設計駭客指南 [教學]](https://www.youtube.com/watch?v=XlFO5Iat178) | | | | |在 Vim 中編程 |程式設計 |[Vim 作為你的編輯器](https://www.youtube.com/watch?v=X6AR2RMB5tE&list=PLm323Lc7iSW_wuxqmKx_xxNtJC_hJbQ7R) | | | | |使用分離式鍵盤|編程|[拆箱新鍵盤!!! (也進行打字測試!)](https://www.youtube.com/watch?v=nh-BAxbithc&t=156s) | | | | |網頁抓取資料 |程式 |[使用 AI 和代理網路進行工業規模的網頁抓取](https://www.youtube.com/watch?v=qo_fUjb02ns) | | | | |用組合語言寫程式 |程式設計 |[Tsoding](https://www.youtube.com/watch?v=WnBXLmKk_qw&t=82s) | | | | |寫一個 NPM 模組 |程式設計 |[NPM](https://www.npmjs.com/) | | | | |編寫伺服器端應用程式 |程式設計 |[Next.js](https://nextjs.org/) | | | | |編寫您自己的人工智慧模型 |程式設計 |[讓我們建立 GPT:從頭開始,用程式碼,拼寫出來。](https://www.youtube.com/watch?v=kCc8FmEb1nY) | | | | |編寫您自己的作業系統 |程式設計 |[Linus Torvalds](https://github.com/torvalds) | | | | |寫你自己的程式語言 |程式設計 |[我製作了自己的程式語言](https://www.youtube.com/watch?v=pgeSGBwtHW8&t=132s) | | | | |擁有私人部落格 |教學 |[Dan Abramov](https://overreacted.io/) | | | | |對學生的講座 |教學 |[馬克·祖克柏的 CS50 講座 - 2005 年 12 月 7 日](https://www.youtube.com/watch?v=xFFs9UgOAlE&t=807s) | | | | |指導初級開發人員 |教學 |[如何正確指導初級開發人員](https://stablekernel.com/article/how-to-properly-mentor-a-junior-developer/) | | | | |寫一篇關於科技主題的論文並發表 |教學 |[兩分鐘論文](https://www.youtube.com/@TwoMinutePapers) | | | | |編寫技術書籍或電子書 |教學 |[編寫技術書籍](https://paulcunningham.me/writing-technical-books/) | | | | |參加大型科技會議 |旅遊 |[CES](https://www.ces.tech/) | | | | |參加黑客松 |旅行 |[我挑戰自己贏得黑客馬拉松](https://www.youtube.com/watch?v=mAJlZUKhOGs) | | | | |參觀電腦歷史博物館 |旅行 |[工程師的旅行願望清單](https://www.mwrf.com/community/article/21848496/the-engineers-travel-bucket-list) | | | | |參觀 NASA 約翰遜航天中心 |旅行 |[工程師的旅行願望清單](https://www.mwrf.com/community/article/21848496/the-engineers-travel-bucket-list) | | | | |參觀國家航空暨太空博物館 |旅行 |[工程師的旅行願望清單](https://www.mwrf.com/community/article/21848496/the-engineers-travel-bucket-list) | | | | |參觀歷史科學儀器收藏 |旅行 |[工程師的旅行願望清單](https://www.mwrf.com/community/article/21848496/the-engineers-travel-bucket-list) | | | | |參觀大型強子對撞機 |旅行 |[工程師的旅行願望清單](https://www.mwrf.com/community/article/21848496/the-engineers-travel-bucket-list) | | | | |參觀麻省理工學院博物館 |旅行 |[工程師的旅行願望清單](https://www.mwrf.com/community/article/21848496/the-engineers-travel-bucket-list) | | | | |參觀國家核科學與歷史博物館 |旅行 |[工程師的旅行願望清單](https://www.mwrf.com/community/article/21848496/the-engineers-travel-bucket-list) | | | | ### 下載列表 [下載 CSV](https://syki.dev/uploads/bucket-list.csv) [下載 JSON](https://syki.dev/uploads/bucket-list.json) ## 附加列解釋 ### 靈感 本專欄反映了是什麼激發了追求特定目標的想法或願望。它可以是一個人、一個事件、一本書,甚至一部電影,點燃了人們對特定成就的熱情。例如,DIY 電動滑板的靈感可能是對永續交通的熱情或最喜歡的科技影片部落客的專案。 ### 年 本專欄提出了實現該目標的時間表或目標年份。它有助於規劃和設定現實的時間表。例如,您可能計劃在 2025 年之前參加一次大型技術會議。 ### 地位 狀態追蹤您的進度。它可以是“未開始”“進行中”“已完成”或“暫停”這有助於追蹤您的旅程並保持動力。 ### 紀念品 本專欄是一個獨特的補充,旨在紀念這一成就。它可以是實體、數位徽章、部落格文章,甚至是照片。例如,組裝 PC 的紀念品可能是已完成設定的第一張照片。 ## 結論 技術愛好者的願望清單不僅僅是目標的集合;這是技術領域個人和職業成長的路線圖。透過附加專欄提供靈感、方法、計時、追蹤和紀念成就的框架,此列表對於任何熱衷於技術的人來說都是一個動態工具。 快樂的科技冒險! --- 原文出處:https://dev.to/syki/100-bucket-list-ideas-for-programmers-506m
為優秀的開源庫做出貢獻是建立作品集的好方法。 我已經編譯了 23 個優秀的開源程式庫和一些很好的入門問題。 不要忘記加星號並支持這些🌟  --- #產品中的人工智慧: ### 1. [CopilotKit](https://github.com/CopilotKit/CopilotKit) - 應用內 AI 聊天機器人與 AI 文字區域  開源平台,用於使用兩個 React 元件將關鍵 AI 功能整合到 React 應用程式中。 CopilotPortal:應用程式內人工智慧聊天機器人,可以「查看」當前應用程式狀態並採取行動。 CopilotTextarea:AI 驅動的 <textarea /'> 替換。具有自動完成、插入和生成功能。 ###[好第一期:](https://github.com/CopilotKit/CopilotKit/issues/62) ``` Support bold and italicized text in CopilotTextarea Proposal: Add support for bold and italicized text in CopilotTextarea CopilotTextarea uses slate-js under the hood. Lots of examples for adding bold/italicized support Initially only add programatic support. UI support will be added separately in [TODO add issue] Implementation tips: changes will be made to render-element.tsx and base-copilot-textarea.tsx custom-editor.tsx structures may also require changes ``` {% cta https://github.com/CopilotKit/CopilotKit %} Star CopilotKit ⭐️ {% endcta %} --- ###2.[Tavily GPT 研究員](https://github.com/assafelovic/gpt-researcher){% embed https://github.com/assafelovic/gpt-researcher no-readme %} ###3.[Pezzo.ai](https://github.com/pezzolabs/pezzo){% 嵌入 https://github.com/pezzolabs/pezzo no-readme %} ###4.[Weaviate](https://github.com/weaviate/weaviate){% 嵌入 https://github.com/weaviate/weaviate no-readme %} ###5.[LangChain](https://github.com/langchain-ai/langchain){% 嵌入 https://github.com/langchain-ai/langchain no-readme %} --- #🛜網頁開發: ### 6. [Wasp](https://github.com/wasp-lang/wasp) - 使用 React 和 Node.js 開發全端 Web 應用程式  使用 React 和 Node.js 進行快速全端 Web 應用程式開發。 Wasp 提供了一種建立現代 Web 應用程式的簡化方法,將前端的 React 和後端的 Node.js 結合在一個緊密結合的框架中。 ###[好第一期:](https://github.com/wasp-lang/wasp/issues/874) ``` Add images (or link to the example app) of auth UI helpers Wasp provides At this point in docs (also in the tutorial if we're using it), it would be nice to add an image of UI helpers for Auth (login/signup form, Google/GitHub button, ...) so developers can immediately see what they are getting and how nice it looks. ``` {% cta https://github.com/wasp-lang/wasp %} 星黃蜂 ⭐️ {% endcta %} --- ###7.[ClickVote](https://github.com/clickvote/clickvote) {% 嵌入 https://github.com/clickvote/clickvote no-readme %} ###8.[ReactFlow](https://github.com/xyflow/xyflow) {% 嵌入 https://github.com/xyflow/xyflow no-readme %} ###9.[Trigger.dev](https://github.com/triggerdotdev/trigger.dev) {% 嵌入 https://github.com/triggerdotdev/trigger.dev no-readme %} ###10.[Novu](https://github.com/novuhq/novu) {% 嵌入 https://github.com/novuhq/novu no-readme %} --- #🧑💻DevOps: ### 11. [Logstash](https://github.com/elastic/logstash) - 由 elastic 傳輸和處理日誌和事件。  輕鬆將點讚、按讚和評論加入到您的網路應用程式中。 用於加入這些元件的簡單反應程式碼。 ### [第一期好](https://github.com/elastic/logstash/issues/15561) ``` Allow comments in pipeline config between hash entries Currently it seems not allowed to make comments between hash entries, this is a feature request to allow it. ``` {% cta https://github.com/elastic/logstash %} 明星 Logstash ⭐️ {% endcta %} --- ###12.[Odigos](https://github.com/keyval-dev/odigos) {% 嵌入 https://github.com/keyval-dev/odigos no-readme %} ###13.[Glasskube](https://github.com/glasskube/operator) {% 嵌入 https://github.com/glasskube/operator no-readme %} ###14.[鏡像](https://github.com/metalbear-co/mirrord){% 嵌入 https://github.com/metalbear-co/mirrord no-readme %} ###15.[挖土機](https://github.com/diggerhq/digger) {% 嵌入 https://github.com/diggerhq/digger no-readme %} --- #💽資料庫: ### 16. [Supabase](https://github.com/supabase/supabase) - 開源 Rirebase 替代品 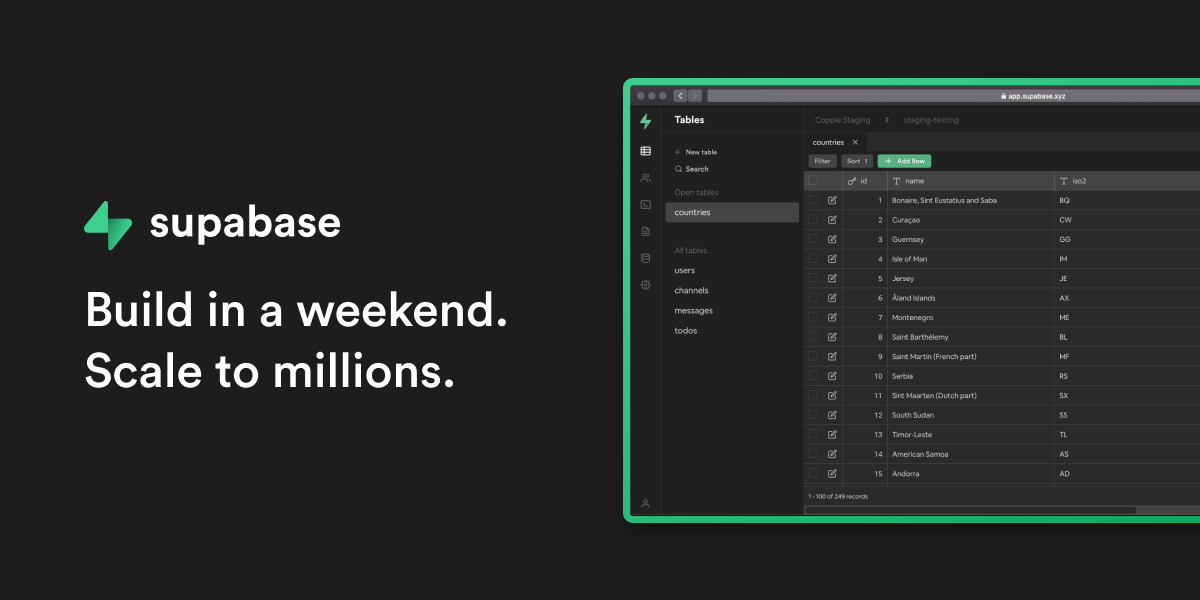 使用託管 Postgres、身份驗證和即時功能建立現代資料驅動應用程式 ###[第一期好:](https://github.com/supabase/supabase/issues/19396) ``` Horizontal Scroll for CodeBlocks Currently when reading the dcs, it's not possible to view all of the code for alot of the samples. Is this the Component rendered across all of the web properties, if so I'll be happy to throw on a horizontal scroll bar that matches supabase branding. ``` {% cta https://github.com/supabase/supabase %} 明星 Supabase ⭐️ {% endcta %} --- ###17.[Appwrite](https://github.com/appwrite/appwrite){% 嵌入 https://github.com/appwrite/appwrite no-readme %} ###18.[Superduperdb] (https://github.com/SuperDuperDB/superduperdb){% 嵌入 https://github.com/SuperDuperDB/superduperdb no-readme %} ###19.[Milvus](https://github.com/milvus-io/milvus) {% 嵌入 https://github.com/milvus-io/milvus no-readme %} --- #👾其他: ### 21. [Snapify](https://github.com/MarconLP/snapify) - 開源螢幕錄製  螢幕錄製,但免費、開源,您負責自己的資料。 ###[好第一期:](https://github.com/MarconLP/snapify/issues/18) ``` Ability to create GIFs and take screenshots to also store in S3 ``` {% cta https://github.com/MarconLP/snapify %} 明星 Snapify ⭐️ {% endcta %} --- ###22.[ReactAgent](https://github.com/eylonmiz/react-agent){% 嵌入 https://github.com/eylonmiz/react-agent no-readme %} ###23.[對初學者來說很棒](https://github.com/MunGell/awesome-for-beginners){% embed https://github.com/MunGell/awesome-for-beginners no -readme %} --- #就是這樣,夥計們! ## 別忘了按讚、留言和收藏🫡 --- 原文出處:https://dev.to/copilotkit/23-open-source-libraries-to-launch-your-portfolio-to-the-moon-fe
## 簡介 我收集了最好的 React 元件,您可以使用它來建立強大的 Web 應用程式。 每個都有自己的味道。 別忘了表達你的支持🌟 現在,讓我們仔細閱讀這段程式碼! 🍽️  --- ## 1. [CopilotPortal](https://github.com/RecursivelyAI/CopilotKit):將可操作的 GPT 聊天機器人嵌入您的網路應用程式中。 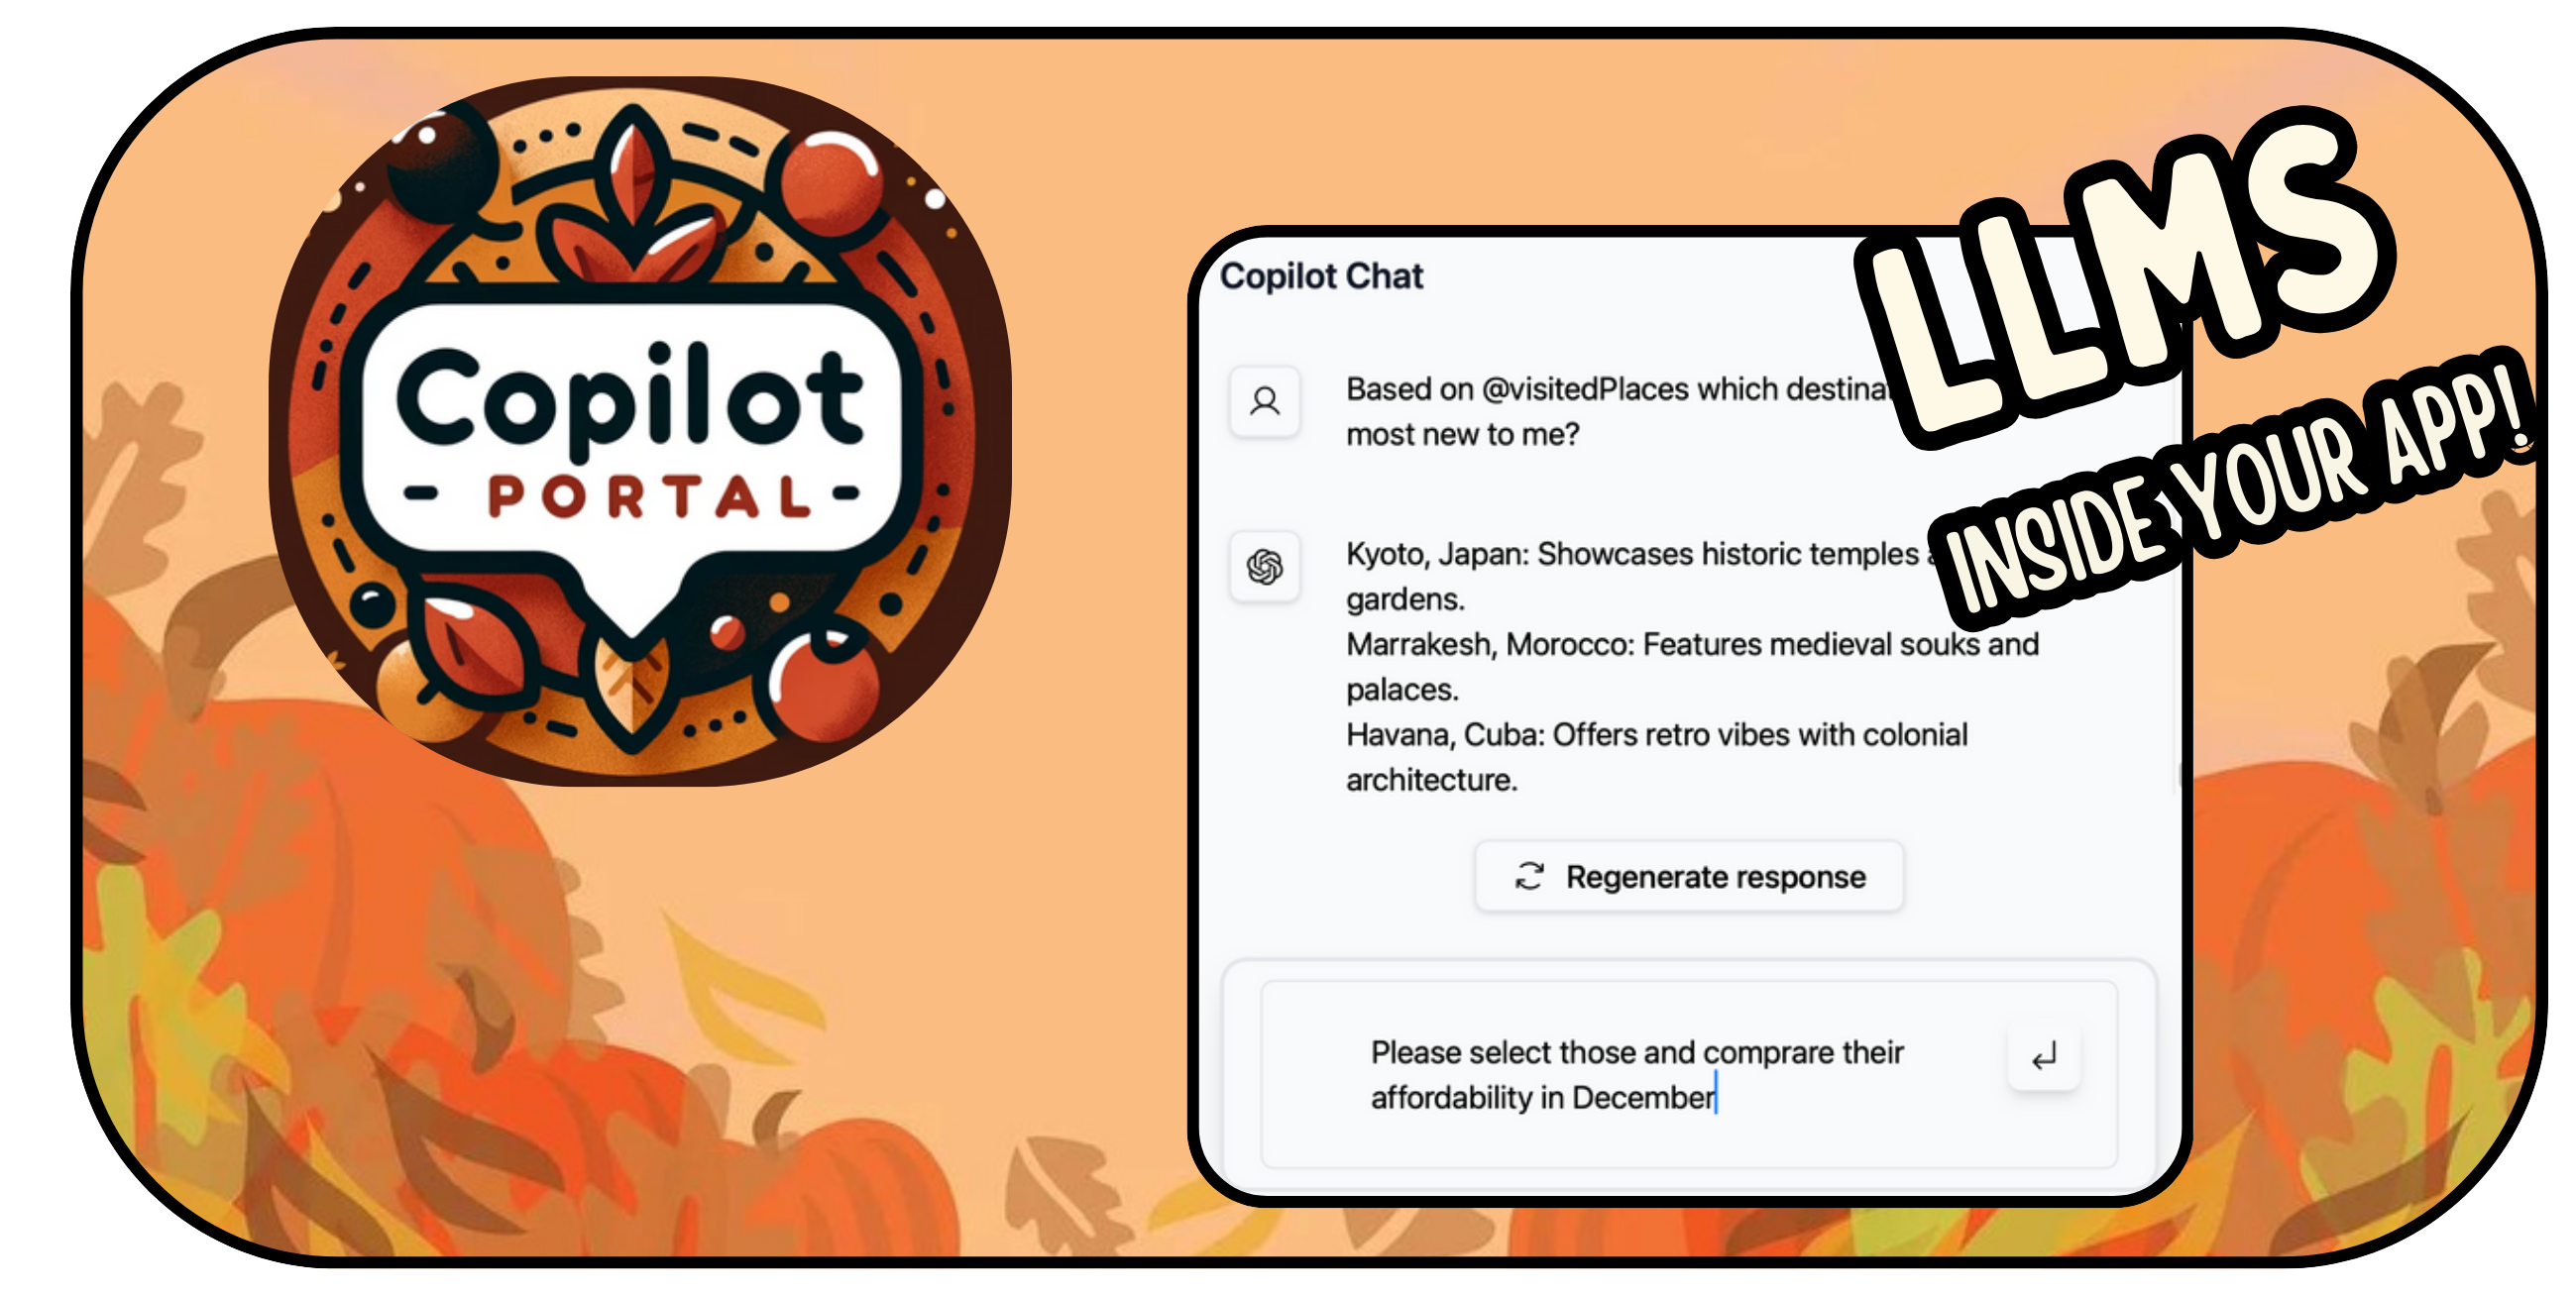 將 GPT 支援的聊天機器人插入您的 React 應用程式中。 可以將 RAG 與雲端和應用程式狀態即時整合。 需要幾行程式碼才能嵌入。 ``` import "@copilotkit/react-ui/styles.css"; import { CopilotProvider } from "@copilotkit/react-core"; import { CopilotSidebarUIProvider } from "@copilotkit/react-ui"; export default function App(): JSX.Element { return ( <CopilotProvider chatApiEndpoint="/api/copilotkit/chat"> <CopilotSidebarUIProvider> <YourContent /> </CopilotSidebarUIProvider> </CopilotProvider> ); } ``` https://github.com/RecursivelyAI/CopilotKit --- ## 2. [ClickVote](https://github.com/clickvote/clickvote) - 按讚、投票並查看任何上下文  輕鬆將點讚、按讚和評論加入到您的網路應用程式中。 用於加入這些元件的簡單反應程式碼。 ``` import { ClickVoteProvider } from '@clickvote/react'; import { ClickVoteComponent } from '@clickvote/react'; import { LikeStyle } from '@clickvote/react'; <ClickVoteProvider> <ClickVoteComponent id={CONTEXT} voteTo={ID}> {(props) => <LikeStyle {...props} />} </ClickVoteComponent> </ClickVoteProvider> ``` https://github.com/clickvote/clickvote --- ## 3. [React Flow](https://github.com/xyflow/xyflow) - 建立可拖曳工作流程的最佳方式!  專為建立基於節點的編輯器和互動式圖表而客製化的 React 元件。 它具有高度可自訂性,提供拖放功能以實現高效的工作流程建立。 ``` import ReactFlow, { MiniMap, Controls, Background, useNodesState, useEdgesState, addEdge, } from 'reactflow'; <ReactFlow nodes={nodes} edges={edges} onNodesChange={onNodesChange} onEdgesChange={onEdgesChange} onConnect={onConnect} > <MiniMap /> <Controls /> <Background /> </ReactFlow> ``` https://github.com/xyflow/xyflow --- ## 4. [CopilotTextarea](https://github.com/RecursivelyAI/CopilotKit/tree/main/CopilotKit/packages/react-textarea) - React 應用程式中的 AI 驅動寫作 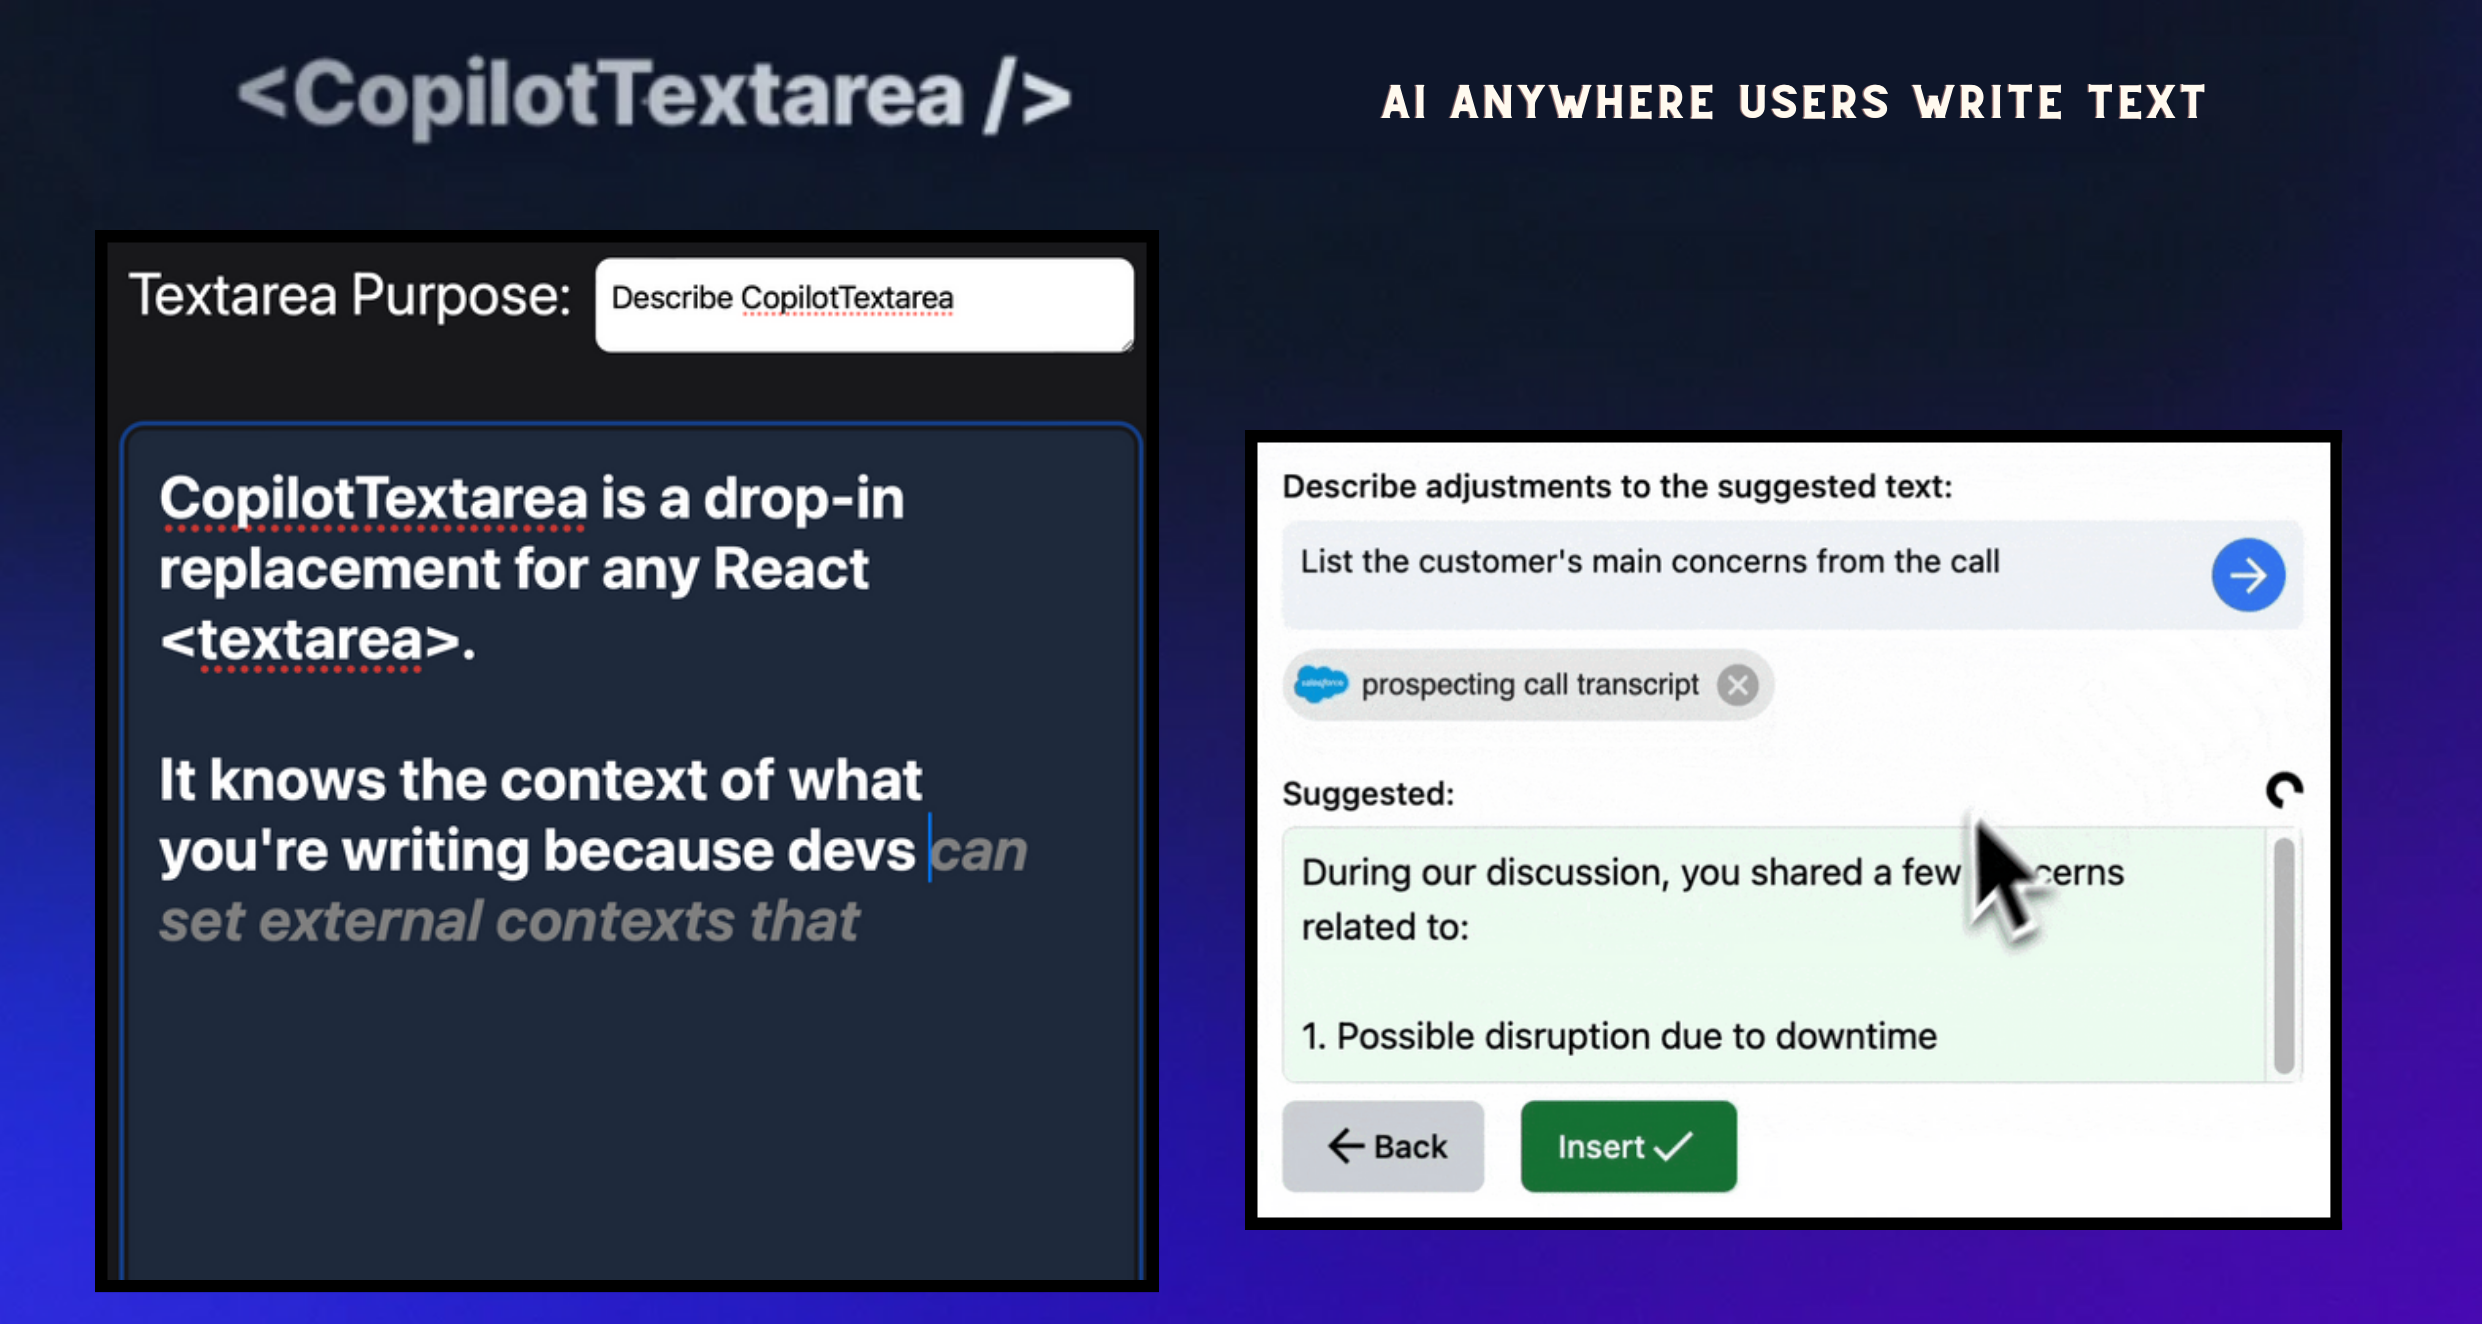 具有 Github CopilotX 功能的任何 React `<textarea>` 的直接替代品。 自動完成、插入、編輯。 可以即時或由開發人員提前提供任何上下文。 ``` import { CopilotTextarea } from "@copilotkit/react-textarea"; import { CopilotProvider } from "@copilotkit/react-core"; // Provide context... useMakeCopilotReadable(...) // in your component... <CopilotProvider> <CopilotTextarea/> </CopilotProvider>` ``` https://github.com/RecursivelyAI/CopilotKit --- ## 5. [Novu](https://github.com/novuhq/novu) - 將應用程式內通知新增至您的應用程式!  用於在一個地方管理所有通訊管道的簡單元件和 API:電子郵件、SMS、Direct 和 Push 您可以使用此 React 元件為您的應用程式新增應用程式內通知。 ``` import { NovuProvider, PopoverNotificationCenter, NotificationBell, IMessage, } from "@novu/notification-center"; <NovuProvider subscriberId={"SUBSCRIBER_ID"} applicationIdentifier={"APPLICATION_IDENTIFIER"} > <PopoverNotificationCenter colorScheme="dark"> {({ unseenCount }) => <NotificationBell unseenCount={unseenCount} />} </PopoverNotificationCenter> </NovuProvider> ``` https://github.com/novuhq/novu --- ## 6. [ReactIcons](https://github.com/react-icons/react-icons) - 最受歡迎的反應圖示集合  輕鬆將 Font Awesome、Material Design 等中的流行圖標加入到您的 React 應用程式中。 為開發人員提供簡單、廣泛的選擇。 ``` import { FaBeer } from "react-icons/fa"; function Question() { return ( <h3> Lets go for a <FaBeer />? </h3> ); } ``` https://github.com/react-icons/react-icons --- ## 7. [React-dropzone](https://github.com/react-dropzone/react-dropzone) - 新增 HTML5 拖放 UI。  用於實作 HTML5 拖放區域的簡單 React 鉤子,重點放在檔案互動。 它提供了一個易於使用的介面,用於向 React 應用程式加入檔案拖放功能。 ``` import React from 'react'; import {useDropzone} from 'react-dropzone'; const Basic = (props)=>{ const {acceptedFiles, getRootProps, getInputProps} = useDropzone(); const files = acceptedFiles.map(file => ( <li key={file.path}> {file.path} - {file.size} bytes </li> )); return ( <section className="container"> <div {...getRootProps({className: 'dropzone'})}> <input {...getInputProps()} /> <p>Drag 'n' drop some files here, or click to select files</p> </div> <aside> <h4>Files</h4> <ul>{files}</ul> </aside> </section> ); } export default Basic; ``` https://github.com/react-dropzone/react-dropzone --- ## 8. [React ChartJS 2](https://github.com/reactchartjs/react-chartjs-2) - 建立和整合各種圖表。  用於在 React 應用程式中繪製圖表的即插即用解決方案,類似於 Chart.js 功能。 啟用動態、互動式圖表。 適用於即時資料或預定義資料集。 ``` import React from 'react'; import { Chart as ChartJS, ArcElement, Tooltip, Legend } from 'chart.js'; import { Doughnut } from 'react-chartjs-2'; ChartJS.register(ArcElement, Tooltip, Legend); const data = { labels: ['Red', 'Blue', 'Yellow', 'Green', 'Purple', 'Orange'], datasets: [ { label: '# of Votes', data: [12, 19, 3, 5, 2, 3], backgroundColor: [ 'rgba(255, 99, 132, 0.2)', ], borderColor: [ 'rgba(255, 99, 132, 1)', ], borderWidth: 1, }, ], }; export default function ShowChart() { return <Doughnut data={data} />; } ``` https://github.com/reactchartjs/react-chartjs-2 ## 9. [Redux](https://github.com/reduxjs/redux) - 可預測的狀態容器庫  JavaScript 應用程式中 Redux 的無縫補充,提供可靠的狀態管理。 確保一致的應用程式行為。 便於輕鬆除錯和測試。 與各種庫整合。 https://github.com/reduxjs/redux --- ## 10. [Blueprint](https://github.com/palantir/blueprint) - Palantir 的密集 UI 庫  提供一組用於建立複雜且資料豐富的介面的元件和樣式。 設計和開發具有現代外觀和感覺的類似桌面的 Web 應用程式。 由 Palantir 開發 ``` import React from 'react'; import '@blueprintjs/core/lib/css/blueprint.css'; import { H3, H4, OL, Pre } from "@blueprintjs/core"; function App() { return ( <div style={{ display: 'block', width: 500, padding: 30 }}> <h4>ReactJS Blueprint HTML Elements Component</h4> Heading Component: <H4>H4 Size Heading</H4> <H3>H3 Size Heading</H3> <br></br> OrderList Component: <OL> <li>1st item</li> <li>2nd item</li> </OL> Pre Component: <Pre>Sample Pre</Pre> </div> ); } ``` https://github.com/palantir/blueprint --- ## 11. [Headless UI](https://github.com/tailwindlabs/headlessui) - 可存取的 Tailwind 整合 UI 元件。  在 React 和 Vue 應用程式中建立可存取的 UI 元件。 適用於即時資料或預定義資料集,使其成為現代 Web 開發專案的寶貴補充 ``` import React, { useState } from 'react'; import { Dialog } from '@headlessui/react'; function MyDialog() { let [isOpen, setIsOpen] = useState(true); return ( <Dialog open={isOpen} onClose={() => setIsOpen(false)} className="relative z-50"> {/* The backdrop, rendered as a fixed sibling to the panel container */} <div className="fixed inset-0 bg-black/30" aria-hidden="true" /> {/* Full-screen container to center the panel */} <div className="fixed inset-0 flex w-screen items-center justify-center p-4"> {/* Your dialog content goes here */} </div> </Dialog> ); } ``` https://github.com/tailwindlabs/headlessui --- 保存這些元件,以便像朝聖者一樣專業地建造。 謝謝大家,節日快樂! --- 原文出處:https://dev.to/copilotkit/reacts-giving-11-react-components-for-aspiring-pros-eck
## 簡介 最佳的易於建構的人工智慧產品整合清單。 這些可以為你的專案帶來魔力,所以別忘了向他們表達支持🌟 現在讓我們一起走上AI之路👨🌾 --- ## 1. [CopilotPortal](https://github.com/RecursivelyAI/CopilotKit):將可操作的 LLM 聊天機器人嵌入您的應用程式中。  應用程式中的上下文感知 LLM 聊天機器人可以回答問題並採取行動。 只需幾行程式碼即可獲得一個可用的聊天機器人,然後根據需要進行自訂和嵌入。 ``` import "@copilotkit/react-ui/styles.css"; import { CopilotProvider } from "@copilotkit/react-core"; import { CopilotSidebarUIProvider } from "@copilotkit/react-ui"; export default function App(): JSX.Element { return ( <CopilotProvider chatApiEndpoint="/api/copilotkit/chat"> <CopilotSidebarUIProvider> <YourContent /> </CopilotSidebarUIProvider> </CopilotProvider> ); } ``` https://github.com/RecursivelyAI/CopilotKit --- ## 2. [LinguiJS](https://github.com/lingui/js-lingui) - 自動且簡單的國際化  簡單而強大的開源國際化函式庫。 易於整合的框架,用於建立多語言反應應用程式。 ``` import { Trans } from "@lingui/macro" function App() { return ( <Trans id="msg.docs" /* id is optional */> Read the <a href="https://lingui.dev">documentation</a> for more info. </Trans> ) } ``` https://github.com/lingui/js-lingui --- ## 3. Pezzo.ai - 可觀測性、成本和即時工程平台  用於管理 OpenAI 通話的集中平台。 優化您的提示和令牌使用。追蹤您的人工智慧使用情況。 免費且易於整合。 ``` const prompt = await pezzo.getPrompt("AnalyzeSentiment"); const response = await openai.chat.completions.create(prompt); ``` https://github.com/pezzolabs/pezzo --- ## 4. CopilotTextarea - React 應用程式中的 AI 驅動寫作  具有 Github CopilotX 功能的任何 React `<textarea>` 的直接替代品。 自動完成、插入、編輯。 可以即時或由開發人員提前提供任何上下文。 ``` import { CopilotTextarea } from "@copilotkit/react-textarea"; import { CopilotProvider } from "@copilotkit/react-core"; // Provide context... useMakeCopilotReadable(...) // in your component... <CopilotProvider> <CopilotTextarea/> </CopilotProvider>` ``` https://github.com/RecursivelyAI/CopilotKit --- ## 5. LangChain - 將人工智慧整合到鏈中。  易於使用的 API 和函式庫,用於將 LLM 新增到應用程式中。 將不同的人工智慧元件和模型連接在一起。 輕鬆嵌入上下文和語義資料以實現強大的整合。 https://github.com/langchain-ai/langchain --- ## 6. SwirlSearch - 人工智慧驅動的搜尋。  LLM 支援的搜尋、摘要和輸出。 同時搜尋多個內容來源並產生整合輸出。 功能強大,可自訂各種資料來源的應用程式內整合。 https://github.com/swirlai/swirl-search --- ## 7. ReactAgent - 用於從使用者故事產生 React 元件的實驗性 LLM 代理 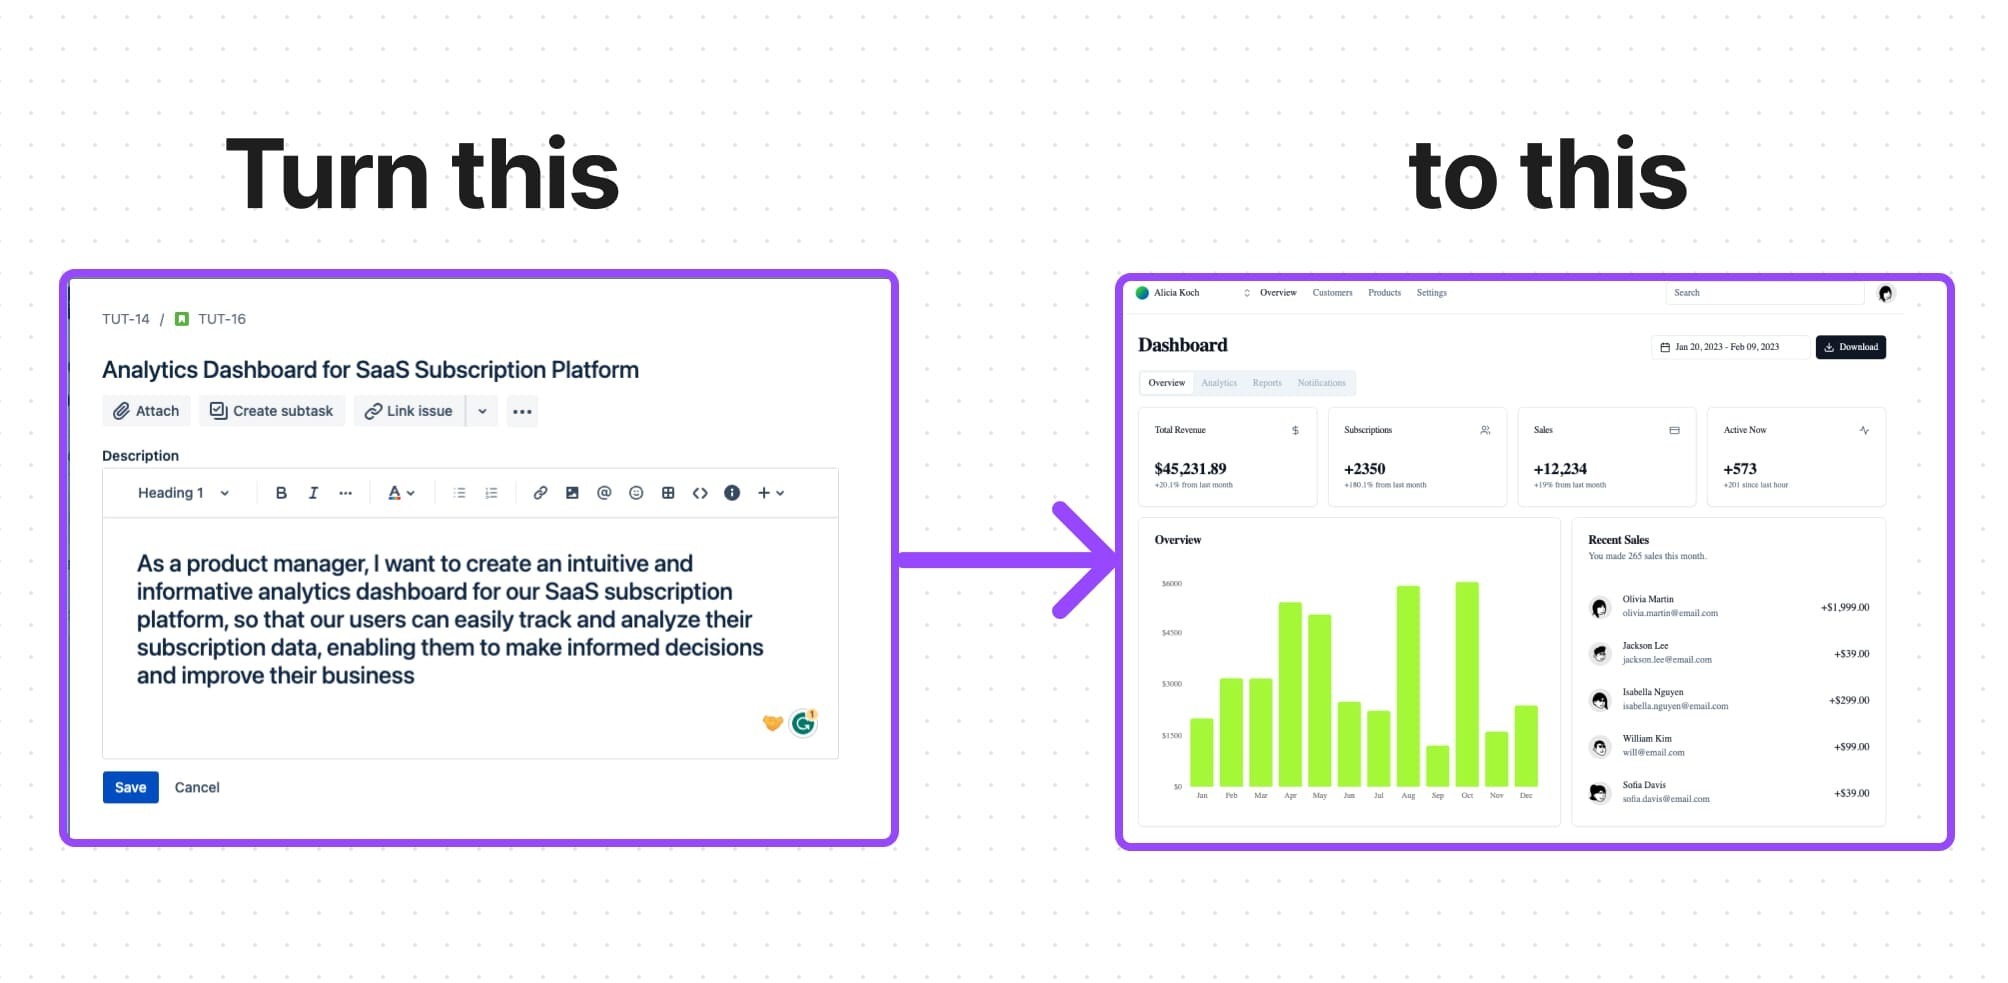 使用 GPT-4 將使用者故事轉化為可用的 React 元件的實驗工具。 為其提供本地設計以實現一致的輸出和設計語言。 https://github.com/eylonmiz/react-agent --- 感謝大家! --- 原文出處:https://dev.to/copilotkit/7-easy-ai-product-integrations-to-keep-up-with-the-times--1cg2
作為一名開發人員,了解最新的技術和工具對於在就業市場上保持競爭力至關重要。 在這篇文章中,我們整理了一份 2023 年最熱門開發專案的完整列表,以及掌握每個專案的教程和資源。 無論您是希望提高技能的初學者,還是希望擴展您的技能組合的資深開發人員,此列表都適合每個人。 - 原文出處:https://dev.to/rahul3002/2023s-top-development-projects-for-programmers-a-complete-list-of-tutorials-and-tools-for-mastering-the-latest-technologies-37o3 --- ## 專案教程列表: ### Web開發: |專案 |技術 |連結 | | :--- |:---|:---| |使用 NextJS 建置 Reddit 2.0 克隆 | React、SQL、Supabase、Next.js、GraphQL | [連結](https://projectlearn.io/learn/web-development/project/build-reddit-2.0-clone-with-nextjs-205?from=github)| |使用 React 建置 YouTube 克隆 | Express、Node、JavaScript、HTML、CSS | [連結](https://projectlearn.io/learn/web-development/project/build-a-youtube-clone-with-react-200?from=github)| |使用 JavaScript 圖表庫建立發散條形圖 | JavaScript、HTML、CSS | [連結](https://projectlearn.io/learn/web-development/project/create-a-diverging-bar-chart-with-a-javascript-charting-library-197?from=github)| |通過建置卡片組件學習 CSS 基礎知識 | HTML, CSS | [連結](https://projectlearn.io/learn/web-development/project/learn-css-basics-by-building-a-card-component-196?from=github)| |建立無伺服器模因即服務 | JavaScript、Rust、CSS、HTML | [連結](https://projectlearn.io/learn/web-development/project/create-a-serverless-meme-as-a-service-194?from=github)| |天氣預報網站 | JavaScript、HTML、CSS、React | [連結](https://projectlearn.io/learn/web-development/project/weather-forecast-website-193?from=github)| |連結縮短網站 | JavaScript、Vue、HTML、CSS、React | [連結](https://projectlearn.io/learn/web-development/project/link-shortener-website-192?from=github)| |抄襲檢查器網站 | Python, 引導 | [連結](https://projectlearn.io/learn/web-development/project/plagiarism-checker-website-189?from=github)| |建置自定義 Google 地圖主題 | JavaScript、HTML、CSS | [連結](https://projectlearn.io/learn/web-development/project/build-a-custom-google-maps-theme-187?from=github)| |使用 JavaScript 建置超級馬里奧主題的 Google 地圖 | JavaScript、HTML5、CSS3 | [連結](https://projectlearn.io/learn/web-development/project/build-a-super-mario-themed-google-map-with-javascript-180?from=github)| |建置社區驅動的交付應用程式 | Python、Django、PostgreSQL、JavaScript、Mapbox | [連結](https://projectlearn.io/learn/web-development/project/build-a-community-driven-delivery-application-176?from=github)| |建置本地商店搜尋和發現應用程式 | Python、Django、PostgreSQL、JavaScript、Mapbox | [連結](https://projectlearn.io/learn/web-development/project/build-a-local-store-search-and-discovery-application-175?from=github)| |使用 React.js 和 Node.js 的中型克隆 |React、Node、CSS3、JavaScript、HTML5 | [連結](https://projectlearn.io/learn/web-development/project/medium-clone-using-react.js-and-node.js-174?from=github)| |使用 React JS 克隆 Facebook |React、Firebase、CSS3、JavaScript、HTML5 | [連結](https://projectlearn.io/learn/web-development/project/facebook-clone-with-react-js-171?from=github)| | JavaScript30 - 30 天 Vanilla JS 編碼挑戰 | JavaScript | [連結](https://projectlearn.io/learn/web-development/project/javascript30---30-day-vanilla-js-coding-challenge-170?from=github)| |使用 Gatsby 和 GraphCMS 的旅行遺願清單地圖 |Gatsby、Leaflet、GraphCMS、HTML、CSS | [連結](https://projectlearn.io/learn/web-development/project/travel-bucket-list-map-with-gatsby-and-graphcms-168?from=github)| |使用 Vue.js 的記憶卡遊戲 | Vue、JavaScript、HTML、CSS | [連結](https://projectlearn.io/learn/web-development/project/memory-card-game-with-vue.js-167?from=github)| | Strapi 和 GatsbyJS 課程 - 投資組合專案 | Strapi、Gatsby、JavaScript、HTML、CSS | [連結](https://projectlearn.io/learn/web-development/project/strapi-and-gatsbyjs-course---portfolio-project-166?from=github)| | Storybook - Node、Express、MongoDB 和 Google OAuth | MongoDB、Node、JavaScript、HTML、CSS | [連結](https://projectlearn.io/learn/web-development/project/storybook---node,-express,-mongodb-and-google-oauth-165?from=github)| |呼吸和放鬆應用程式 - JavaScript 和 CSS 動畫 | JavaScript、HTML、CSS | [連結](https://projectlearn.io/learn/web-development/project/breathe-and-relax-app---javascript-and-css-animations-164?from=github)| |用於加密貨幣價格的 Node.js CLI |Node,JavaScript | [連結](https://projectlearn.io/learn/web-development/project/node.js-cli-for-cryptocurrency-prices-163?from=github)| | React 和 Tailwind CSS 圖片庫 |React,順風,JavaScript,HTML,CSS | [連結](https://projectlearn.io/learn/web-development/project/react-and-tailwind-css-image-gallery-162?from=github)| |使用 React 的番茄鐘 |React,JavaScript,HTML,CSS | [連結](https://projectlearn.io/learn/web-development/project/pomodoro-clock-using-react-161?from=github)| | Laravel 從零開始的關鍵字密度工具 | Laravel、PHP、JQuery、AJAX、SEO | [連結](https://projectlearn.io/learn/web-development/project/keyword-density-tool-with-laravel-from-scratch-160?from=github)| |使用 Yii2 PHP 框架克隆 YouTube | Yii2, PHP | [連結](https://projectlearn.io/learn/web-development/project/youtube-clone-using-yii2-php-framework-159?from=github)| |使用 React、GraphQL 和 Amplify 克隆 Reddit | React、Amplify、AWS、GraphQL、Node | [連結](https://projectlearn.io/learn/web-development/project/reddit-clone-with-react,-graphql-and-amplify-157?from=github)| |使用 React 和 GraphQL 的全棧 Yelp 克隆 |React、GraphQL、HTML、CSS、JavaScript | [連結](https://projectlearn.io/learn/web-development/project/full-stack-yelp-clone-with-react-and-graphql-155?from=github)| |帶有 React Hooks 和 Context API 的 Pokémon Web App |React、HTML、CSS、JavaScript | [連結](https://projectlearn.io/learn/web-development/project/pokémon-web-app-with-react-hooks-and-context-api-154?from=github)| |使用 JavaScript 和 Rails 進行分水嶺監控 | Ruby、Rails、JavaScript | [連結](https://projectlearn.io/learn/web-development/project/watershed-monitor-using-javascript-and-rails-153?from=github)| |使用 React 和 Redux 的氣候資料儀表板 | React、Redux、HTML、CSS、JavaScript | [連結](https://projectlearn.io/learn/web-development/project/climate-data-dashboard-using-react-and-redux-152?from=github)| |僅使用 CSS 翻轉 UNO 卡片 | HTML, CSS | [連結](https://projectlearn.io/learn/web-development/project/flipping-uno-cards-using-only-css-151?from=github)| |使用 Redis、WebSocket 和 Go 的聊天應用程式 | Redis、Web Socket、Go、Azure | [連結](https://projectlearn.io/learn/web-development/project/chat-app-with-redis,-websocket-and-go-146?from=github)| |使用 React 導航的 Spotify 登錄動畫 |React、HTML、CSS、JavaScript | [連結](https://projectlearn.io/learn/web-development/project/spotify-login-animation-with-react-navigation-145?from=github)| |僅使用 CSS 的動態天氣界面 | HTML, CSS | [連結](https://projectlearn.io/learn/web-development/project/dynamic-weather-interface-with-just-css-144?from=github)| |使用 Airtable 和 Vue 的簡單 CRUD 應用程式 | Airtable、Vue、Vuetify、API、HTML | [連結](https://projectlearn.io/learn/web-development/project/simple-crud-app-with-airtable-and-vue-143?from=github)| |帶有 MEVN 堆棧的全棧 RPG 角色生成器 | MongoDB、Express、Vue、Node、HTML | [連結](https://projectlearn.io/learn/web-development/project/full-stack-rpg-character-generator-with-mevn-stack-142?from=github)| |帶有 PERN 堆棧的 Todo 應用 | PostgreSQL、Express、React、Node、HTML | [連結](https://projectlearn.io/learn/web-development/project/todo-app-with-the-pern-stack-141?from=github)| |帶有 Gatsby 的夏季公路旅行地圖應用程式 |React,Gatsby,Leaflet | [連結](https://projectlearn.io/learn/web-development/project/summer-road-trip-mapping-app-with-gatsby-140?from=github)| |使用 Socket.io 的多人紙牌遊戲 | Phaser 3、Express、Socket.io、JavaScript | [連結](https://projectlearn.io/learn/web-development/project/multiplayer-card-game-with-socket.io-139?from=github)| |帶有 Gatsby 的 COVID-19 儀表板和地圖應用程式 |React,Gatsby,Leaflet | [連結](https://projectlearn.io/learn/web-development/project/covid-19-dashboard-and-map-app-with-gatsby-138?from=github)| | React 抽認卡測驗 |React、API、JavaScript、HTML5、CSS3 | [連結](https://projectlearn.io/learn/web-development/project/flashcard-quiz-with-react-125?from=github)| |用純 JavaScript 打地鼠 | JavaScript、HTML5、CSS3 | [連結](https://projectlearn.io/learn/web-development/project/whack-a-mole-with-pure-javascript-124?from=github)| |使用 JavaScript 的諾基亞 3310 貪吃蛇遊戲 | JavaScript、HTML5、CSS3 | [連結](https://projectlearn.io/learn/web-development/project/nokia-3310-snake-game-using-javascript-123?from=github)| |原版 JavaScript 中的石頭剪刀布 | JavaScript、HTML5、CSS3 | [連結](https://projectlearn.io/learn/web-development/project/rock-paper-scissors-in-vanilla-javascript-122?from=github)| |純 JavaScript 的俄羅斯方塊 | JavaScript、HTML5、CSS3 | [連結](https://projectlearn.io/learn/web-development/project/tetris-with-pure-javascript-121?from=github)| |使用 React 製作 Meme Maker |React,JavaScript,HTML5,CSS3 | [連結](https://projectlearn.io/learn/web-development/project/meme-maker-with-react-119?from=github)| |使用 React 克隆 Evernote |React、Firebase、Node、JavaScript、HTML5 | [連結](https://projectlearn.io/learn/web-development/project/evernote-clone-with-react-118?from=github)| |開發者 Meetup App with Vue | Vue、Firebase、Vuetify、JavaScript、HTML5 | [連結](https://projectlearn.io/learn/web-development/project/developer-meetup-app-with-vue-117?from=github)| | Vue 實時聊天應用 | Vue、Firebase、Vuex、JavaScript、HTML5 | [連結](https://projectlearn.io/learn/web-development/project/real-time-chat-app-with-vue-116?from=github)| |使用 Vue 的加密貨幣追踪器 | Vue、Vuetify、API、JavaScript、HTML5 | [連結](https://projectlearn.io/learn/web-development/project/cryptocurrency-tracker-with-vue-115?from=github)| | Vue 多人問答遊戲 | Vue、Pusher、Node、Express、JavaScript | [連結](https://projectlearn.io/learn/web-development/project/multiplayer-quiz-game-with-vue-114?from=github)| | Vue 掃雷遊戲 | Vue、Vuex、Vuetify、JavaScript、HTML5 | [連結](https://projectlearn.io/learn/web-development/project/minesweeper-game-with-vue-113?from=github)| |使用 Vue 克隆 Instagram | Vue、CSSGram、JavaScript、HTML5、CSS3 | [連結](https://projectlearn.io/learn/web-development/project/instagram-clone-with-vue-112?from=github)| |使用 Angular 克隆黑客新聞 |角度、燈塔、JavaScript、HTML5、CSS3 | [連結](https://projectlearn.io/learn/web-development/project/hacker-news-clone-with-angular-111?from=github)| |聊天界面 | HTML5, CSS3 | [連結](https://projectlearn.io/learn/web-development/project/chat-interface-110?from=github)| |純 CSS3 工具提示 | HTML5, CSS3 | [連結](https://projectlearn.io/learn/web-development/project/pure-css3-tooltip-109?from=github)| |社交媒體按鈕 | HTML5, CSS3 | [連結](https://projectlearn.io/learn/web-development/project/social-media-buttons-108?from=github)| |推薦卡 | HTML5, CSS3 | [連結](https://projectlearn.io/learn/web-development/project/testimonial-card-107?from=github)| |帶有 CSS3 Flexbox 的導航欄 | HTML5, CSS3 | [連結](https://projectlearn.io/learn/web-development/project/navigation-bar-with-css3-flexbox-106?from=github)| |使用 CSS3 Flexbox 的移動應用程式佈局 | HTML5, CSS3 | [連結](https://projectlearn.io/learn/web-development/project/mobile-app-layout-with-css3-flexbox-105?from=github)| |受 Reddit 啟發的加載微調器 | HTML5, CSS3 | [連結](https://projectlearn.io/learn/web-development/project/reddit-inspired-loading-spinner-104?from=github)| |帶 CSS3 網格的日曆 | JavaScript、HTML5、CSS3 | [連結](https://projectlearn.io/learn/web-development/project/calendar-with-css3-grid-103?from=github)| | React 中的俄羅斯方塊遊戲 |React,JavaScript,HTML5,CSS3 | [連結](https://projectlearn.io/learn/web-development/project/tetris-game-in-react-102?from=github)| | 2D 突圍遊戲 | JavaScript、HTML5、CSS3 | [連結](https://projectlearn.io/learn/web-development/project/2d-breakout-game-101?from=github)| |精靈動畫 | JavaScript、HTML5、CSS3 | [連結](https://projectlearn.io/learn/web-development/project/sprite-animation-100?from=github)| |蛇遊戲 | JavaScript、HTML5、CSS3 | [連結](https://projectlearn.io/learn/web-development/project/snake-game-99?from=github)| |記憶遊戲 | JavaScript、HTML5、CSS3 | [連結](https://projectlearn.io/learn/web-development/project/memory-game-98?from=github)| |簡單的身份驗證和授權 | GraphQL、Apollo、Node、JavaScript、HTML5 | [連結](https://projectlearn.io/learn/web-development/project/simple-authentication-and-authorization-97?from=github)| |加密貨幣追踪器 | NextJS、GraphQL、Apollo、Node、JavaScript | [連結](https://projectlearn.io/learn/web-development/project/cryptocurrency-tracker-96?from=github)| |使用 Vanilla Javascript 進行即時搜尋 | JavaScript、HTML5、CSS3 | [連結](https://projectlearn.io/learn/web-development/project/instant-search-with-vanilla-javascript-95?from=github)| |計算器應用 | JavaScript、HTML5、CSS3 | [連結](https://projectlearn.io/learn/web-development/project/calculator-app-94?from=github)| |待辦事項 | Vue、JavaScript、CSS3、HTML5 | [連結](https://projectlearn.io/learn/web-development/project/todo-app-45?from=github)| |博客應用 | Vue、GraphQL、阿波羅、JavaScript、CSS3 | [連結](https://projectlearn.io/learn/web-development/project/blog-app-44?from=github)| |簡單的預算應用程式 | Vue、布爾瑪、JavaScript、CSS3、HTML5 | [連結](https://projectlearn.io/learn/web-development/project/simple-budgeting-app-43?from=github)| |搜尋機器人 |Node、Twilio、Cheerio、API、自動化 | [連結](https://projectlearn.io/learn/web-development/project/search-bot-42?from=github)| |推特機器人 |Node、JavaScript、API、自動化 | [連結](https://projectlearn.io/learn/web-development/project/twitter-bot-41?from=github)| |實時 Markdown 編輯器 |Node、JavaScript、Express、Redis、HTML5 | [連結](https://projectlearn.io/learn/web-development/project/real-time-markdown-editor-40?from=github)| |待辦事項 | Angular、TypeScript、RxJS、HTML5、CSS3 | [連結](https://projectlearn.io/learn/web-development/project/todo-app-39?from=github)| |黑客新聞客戶端 |角度、RxJS、Webpack、HTML5、CSS3 | [連結](https://projectlearn.io/learn/web-development/project/hacker-news-client-38?from=github)| |隨機報價機 |React,JavaScript,HTML5,CSS3 | [連結](https://projectlearn.io/learn/web-development/project/random-quote-machine-37?from=github)| | Todoist克隆| React, Firebase, JavaScript, 測試, HTML5 | [連結](https://projectlearn.io/learn/web-development/project/todoist-clone-36?from=github)| |帶有情感分析的聊天應用 | NextJS、Pusher、Sentiment、Node、React | [連結](https://projectlearn.io/learn/web-development/project/chat-app-with-sentiment-analysis-35?from=github)| |預約安排 | React、Twilio、CosmicJS、Material-UI、JavaScript | [連結](https://projectlearn.io/learn/web-development/project/appointment-scheduler-34?from=github)| |生命遊戲 |React、2D、JavaScript、HTML5、CSS3 | [連結](https://projectlearn.io/learn/web-development/project/game-of-life-33?from=github)| |新聞應用 | React Native、Node、API、React、JavaScript | [連結](https://projectlearn.io/learn/web-development/project/news-app-32?from=github)| |聊天應用 | React、Redux、Redux Saga、Web 套接字、Node | [連結](https://projectlearn.io/learn/web-development/project/chat-app-31?from=github)| |待辦事項 | React Native、GraphQL、Apollo、API、Hasura | [連結](https://projectlearn.io/learn/web-development/project/todo-app-30?from=github)| | Chrome 擴展 |React,包裹,JavaScript,HTML5,CSS3 | [連結](https://projectlearn.io/learn/web-development/project/chrome-extension-29?from=github)| |電影投票應用 | React、Redux、API、不可變、JavaScript | [連結](https://projectlearn.io/learn/web-development/project/movie-voting-app-27?from=github)| |特雷洛克隆 | React、Elixir、Phoenix、JWT、JavaScript | [連結](https://projectlearn.io/learn/web-development/project/trello-clone-25?from=github)| | Wiki 風格的 CMS | C#、.NET、Razor 頁面 | [連結](https://projectlearn.io/learn/web-development/project/wiki-style-cms-18?from=github)| |使用 ReactJS 克隆 Spotify |React,HTML5,CSS3 | [連結](https://projectlearn.io/learn/web-development/project/spotify-clone-with-reactjs-15?from=github)| |微軟主頁克隆 | HTML5、CSS3、JavaScript | [連結](https://projectlearn.io/learn/web-development/project/microsoft-homepage-clone-14?from=github)| |簡單甘特圖 | HTML5、CSS3、JavaScript | [連結](https://projectlearn.io/learn/web-development/project/simple-gantt-chart-13?from=github)| |工作抓取應用 |Node、JavaScript、REST、API、Express | [連結](https://projectlearn.io/learn/web-development/project/job-scraping-app-12?from=github)| |電子商務應用 |React,引導程序,JavaScript,HTML5,CSS3 | [連結](https://projectlearn.io/learn/web-development/project/e-commerce-app-11?from=github)| | Netflix 著陸頁 | HTML5、CSS3、JavaScript | [連結](https://projectlearn.io/learn/web-development/project/netflix-landing-page-10?from=github)| |人工智能聊天機器人 | Web 語音 API、Node、JavaScript、Express、Socket.io | [連結](https://projectlearn.io/learn/web-development/project/ai-chatbot-9?from=github)| |社交網絡應用 |React、Node、Redux、Firebase、REST | [連結](https://projectlearn.io/learn/web-development/project/social-networking-app-8?from=github)| |在 Node.js 中建置一個簡單的加密貨幣區塊鏈 |Node、JavaScript、密碼學、區塊鏈 | [連結](https://projectlearn.io/learn/web-development/project/build-a-simple-cryptocurrency-blockchain-in-node.js-7?from=github)| | BT 客戶端 |Node、JavaScript、TCP、計算機網絡 | [連結](https://projectlearn.io/learn/web-development/project/bittorrent-client-6?from=github)| |使用 JavaScript 的待辦事項列表應用 | JavaScript、HTML5、CSS3 | [連結](https://projectlearn.io/learn/web-development/project/todo-list-app-with-javascript-4?from=github)| |使用 Anime.js 的 JavaScript 動畫 | JavaScript、CSS3、庫、HTML5、API | [連結](https://projectlearn.io/learn/web-development/project/javascript-animations-with-anime.js-3?from=github)| |帶有 React 的工作板應用程式 |React、Node、Cron、JavaScript、HTML5 | [連結](https://projectlearn.io/learn/web-development/project/job-board-app-with-react-1?from=github)| ### 移動開發: |專案 |技術 |連結 | | :--- |:---|:---| |使用 React Native 建置一個 Uber Eats 克隆 | React Native、Javascript、Android、iOS | [連結](https://projectlearn.io/learn/mobile-development/project/build-an-uber-eats-clone-with-react-native-204?from=github)| |使用 React Native 建置一個 Uber 克隆 | React Native、Javascript、Android、iOS | [連結](https://projectlearn.io/learn/mobile-development/project/build-an-uber-clone-with-react-native-203?from=github)| |使用 Flutter SDK 建置帶有故事的聊天應用程式 |顫振,飛鏢 | [連結](https://projectlearn.io/learn/mobile-development/project/build-a-chat-app-with-stories-using-the-flutter-sdk-199?from=github)| |建置 Robinhood 風格的應用程式來跟踪 COVID-19 病例 |科特林, 安卓 | [連結](https://projectlearn.io/learn/mobile-development/project/build-a-robinhood-style-app-to-track-covid-19-cases-198?from=github)| | Tinder 風格的 Swipe 移動應用程式 |科特林、Java、斯威夫特 | [連結](https://projectlearn.io/learn/mobile-development/project/tinder-style-swipe-mobile-app-186?from=github)| |加密貨幣價格列表移動應用程式 | React Native、Swift、Flutter、Dart | [連結](https://projectlearn.io/learn/mobile-development/project/cryptocurrency-price-listing-mobile-app-185?from=github)| |餐廳社交移動應用程式 | React Native、Swift、Flutter、Dart | [連結](https://projectlearn.io/learn/mobile-development/project/restaurants-social-mobile-app-184?from=github)| |休息時間提醒移動應用 | React Native、Kotlin、Java、Swift | [連結](https://projectlearn.io/learn/mobile-development/project/break-time-reminder-mobile-app-183?from=github)| |發票和付款提醒移動應用程式 | React、Node、Express、MongoDB | [連結](https://projectlearn.io/learn/mobile-development/project/invoicing-and-payment-reminder-mobile-app-182?from=github)| |倒計時移動應用 | Swift、Java、React Native | [連結](https://projectlearn.io/learn/mobile-development/project/countdown-mobile-app-181?from=github)| |使用 Swift 的 Flappy Bird iOS 遊戲 |斯威夫特、XCode、iOS | [連結](https://projectlearn.io/learn/mobile-development/project/flappy-bird-ios-game-using-swift-130?from=github)| |使用 Swift 的 Bull's Eye iOS 遊戲 |斯威夫特、XCode、iOS | [連結](https://projectlearn.io/learn/mobile-development/project/bull's-eye-ios-game-using-swift-129?from=github)| |使用 SwiftUI 的任務列表 iOS 應用 |斯威夫特、XCode、iOS | [連結](https://projectlearn.io/learn/mobile-development/project/task-list-ios-app-using-swiftui-128?from=github)| |使用 SwiftUI 的餐廳 iOS 應用 |斯威夫特、XCode、iOS | [連結](https://projectlearn.io/learn/mobile-development/project/restaurant-ios-app-using-swiftui-127?from=github)| |使用 Swift 的骰子 iOS 應用 |斯威夫特、XCode、iOS | [連結](https://projectlearn.io/learn/mobile-development/project/dice-ios-app-with-swift-126?from=github)| | TrueCaller 克隆 | Java、MySQL、XAMPP、Android | [連結](https://projectlearn.io/learn/mobile-development/project/truecaller-clone-83?from=github)| |天氣應用 | Java, API, Android | [連結](https://projectlearn.io/learn/mobile-development/project/weather-app-82?from=github)| |電子商務應用 | Java、Firebase、Android | [連結](https://projectlearn.io/learn/mobile-development/project/e-commerce-app-81?from=github)| |聊天應用 | Java、Firebase、Android | [連結](https://projectlearn.io/learn/mobile-development/project/chat-app-80?from=github)| |待辦事項 | Flutter、Dart、Android、iOS | [連結](https://projectlearn.io/learn/mobile-development/project/todo-app-79?from=github)| |旅遊應用程式用戶界面 | Flutter、Dart、Android、iOS | [連結](https://projectlearn.io/learn/mobile-development/project/travel-app-ui-78?from=github)| | Reddit 客戶端 |安卓,科特林 | [連結](https://projectlearn.io/learn/mobile-development/project/reddit-client-46?from=github)| |待辦事項 | React Native、Android、iOS、JavaScript | [連結](https://projectlearn.io/learn/mobile-development/project/todo-app-24?from=github) |照片庫查看器 | C#、iOS、Xamarin、Visual Studio、Android | [連結](https://projectlearn.io/learn/mobile-development/project/photo-library-viewer-19?from=github)| |使用 React Native 克隆 WhatsApp | React Native、Node、GraphQL、Apollo、JavaScript | [連結](https://projectlearn.io/learn/mobile-development/project/whatsapp-clone-with-react-native-2?from=github)| ### 遊戲開發: |專案 |技術 |連結 | | :--- |:---|:---| |使用 Kaboom.js 建置超級馬里奧兄弟、塞爾達傳說和太空侵略者 | JavaScript,Kaboom | [連結](https://projectlearn.io/learn/game-development/project/build-super-mario-bros,-zelda,-and-space-invaders-with-kaboom.js-201?from=github) | |使用 TypeScript 建立打磚塊遊戲 |打字稿、HTML、CSS、JavaScript | [連結](https://projectlearn.io/learn/game-development/project/create-an-arkanoid-game-with-typescript-195?from=github)| |簡單遊戲 | Lua、LÖVE、Python、Pygame 零 | [連結](https://projectlearn.io/learn/game-development/project/simple-games-179?from=github)| | Python在線多人遊戲|蟒蛇 | [連結](https://projectlearn.io/learn/game-development/project/python-online-multiplayer-game-173?from=github)| |打敗他們格鬥遊戲 |統一,C# | [連結](https://projectlearn.io/learn/game-development/project/beat-em-up-fight-game-172?from=github)| |使用 Godot 3.1 的簡單 3D 遊戲 |戈多,C#,3D | [連結](https://projectlearn.io/learn/game-development/project/simple-3d-game-using-godot-3.1-150?from=github)| | Godot 中的簡單益智遊戲- Box and Switch |戈多,C#,二維 | [連結](https://projectlearn.io/learn/game-development/project/simple-puzzle-game-in-godot---box-and-switch-149?from=github)| | Godot 3 中的遊戲界面從頭開始 |戈多,C#,二維 | [連結](https://projectlearn.io/learn/game-development/project/game-interface-from-scratch-in-godot-3-148?from=github)| | Godot 的 2D 遊戲:玩家與敵人 |戈多,C#,二維 | [連結](https://projectlearn.io/learn/game-development/project/2d-game-with-godot:-player-and-enemy-147?from=github)| |使用 Socket.io 的多人紙牌遊戲 | Phaser 3、Express、Socket.io、JavaScript | [連結](https://projectlearn.io/learn/game-development/project/multiplayer-card-game-with-socket.io-139?from=github)| |使用 Unity 2D 和 Mirror 的多人紙牌遊戲 | C#、Unity、二維、鏡像 | [連結](https://projectlearn.io/learn/game-development/project/multiplayer-card-game-with-unity-2d-and-mirror-137?from=github)| | Rust 中的 Roguelike 教程 |生鏽,二維 | [連結](https://projectlearn.io/learn/game-development/project/roguelike-tutorial-in-rust-136?from=github)| | Rust 歷險記 - 一款基本的 2D 遊戲 |生鏽,二維 | [連結](https://projectlearn.io/learn/game-development/project/adventures-in-rust---a-basic-2d-game-135?from=github)| |使用 Ruby 的終端貪吃蛇遊戲 |紅寶石,二維 | [連結](https://projectlearn.io/learn/game-development/project/terminal-snake-game-with-ruby-134?from=github)| |使用 OpenGL 的太空入侵者 | OpenGL、C/C++、2D | [連結](https://projectlearn.io/learn/game-development/project/space-invaders-using-opengl-133?from=github)| | C 中的數獨求解器 | C/C++, 二維 | [連結](https://projectlearn.io/learn/game-development/project/sudoku-solver-in-c-132?from=github)| | C 中的國際象棋引擎 | C/C++, 二維 | [連結](https://projectlearn.io/learn/game-development/project/chess-engine-in-c-131?from=github)| |使用 Swift 的 Flappy Bird iOS 遊戲 |斯威夫特、XCode、iOS | [連結](https://projectlearn.io/learn/game-development/project/flappy-bird-ios-game-using-swift-130?from=github)| |使用 Swift 的 Bull's Eye iOS 遊戲 |斯威夫特、XCode、iOS | [連結](https://projectlearn.io/learn/game-development/project/bull's-eye-ios-game-using-swift-129?from=github)| |用純 JavaScript 打地鼠 | JavaScript、HTML5、CSS3 | [連結](https://projectlearn.io/learn/game-development/project/whack-a-mole-with-pure-javascript-124?from=github)| |使用 JavaScript 的諾基亞 3310 貪吃蛇遊戲 | JavaScript、HTML5、CSS3 | [連結](https://projectlearn.io/learn/game-development/project/nokia-3310-snake-game-using-javascript-123?from=github)| |原版 JavaScript 中的石頭剪刀布 | JavaScript、HTML5、CSS3 | [連結](https://projectlearn.io/learn/game-development/project/rock-paper-scissors-in-vanilla-javascript-122?from=github)| |純 JavaScript 的俄羅斯方塊 | JavaScript、HTML5、CSS3 | [連結](https://projectlearn.io/learn/game-development/project/tetris-with-pure-javascript-121?from=github)| | Vue 多人問答遊戲 | Vue、Pusher、Node、Express、JavaScript | [連結](https://projectlearn.io/learn/game-development/project/multiplayer-quiz-game-with-vue-114?from=github)| | Vue 掃雷遊戲 | Vue、Vuex、Vuetify、JavaScript、HTML5 | [連結](https://projectlearn.io/learn/game-development/project/minesweeper-game-with-vue-113?from=github)| | React 中的俄羅斯方塊遊戲 |React,JavaScript,HTML5,CSS3 | [連結](https://projectlearn.io/learn/game-development/project/tetris-game-in-react-102?from=github)| | 2D 突圍遊戲 | JavaScript、HTML5、CSS3 | [連結](https://projectlearn.io/learn/game-development/project/2d-breakout-game-101?from=github)| |精靈動畫 | JavaScript、HTML5、CSS3 | [連結](https://projectlearn.io/learn/game-development/project/sprite-animation-100?from=github)| |蛇遊戲 | JavaScript、HTML5、CSS3 | [連結](https://projectlearn.io/learn/game-development/project/snake-game-99?from=github)| |記憶遊戲 | JavaScript、HTML5、CSS3 | [連結](https://projectlearn.io/learn/game-development/project/memory-game-98?from=github)| |坦克射手 | 3D、統一、C# | [連結](https://projectlearn.io/learn/game-development/project/tanks-shooter-93?from=github)| | 2D Roguelike |二維、Unity、C# | [連結](https://projectlearn.io/learn/game-development/project/2d-roguelike-92?from=github)| |約翰·萊蒙鬧鬼的短途旅行 3D | 3D、統一、C# | [連結](https://projectlearn.io/learn/game-development/project/john-lemon's-haunted-jaunt-3d-91?from=github)| | VR 初學者:密室逃脫 |虛擬現實、Unity、C# | [連結](https://projectlearn.io/learn/game-development/project/vr-beginner:-the-escape-room-90?from=github)| |露比的冒險 |二維、Unity、C# | [連結](https://projectlearn.io/learn/game-development/project/ruby's-adventure-89?from=github)| |角色扮演遊戲 |二維、Unity、C# | [連結](https://projectlearn.io/learn/game-development/project/rpg-game-88?from=github)| |滾球| 3D、統一、C# | [連結](https://projectlearn.io/learn/game-development/project/roll-a-ball-87?from=github)| | FPS 微型遊戲 |統一,C# | [連結](https://projectlearn.io/learn/game-development/project/fps-microgame-86?from=github)| |平台微遊戲 | Unity、C#、2D | [連結](https://projectlearn.io/learn/game-development/project/platformer-microgame-85?from=github)| |卡丁車小遊戲 |統一,C# | [連結](https://projectlearn.io/learn/game-development/project/karting-microgame-84?from=github)| |街機射擊 | Lua,愛 | [連結](https://projectlearn.io/learn/game-development/project/arcade-shooter-47?from=github)| |生命遊戲 |React、2D、JavaScript、HTML5、CSS3 | [連結](https://projectlearn.io/learn/game-development/project/game-of-life-33?from=github)| |手工英雄 | C/C++、OpenGL、2D | [連結](https://projectlearn.io/learn/game-development/project/handmade-hero-23?from=github)| |突圍 | C/C++、OpenGL、2D | [連結](https://projectlearn.io/learn/game-development/project/breakout-22?from=github)| |俄羅斯方塊 | C/C++, 二維 | [連結](https://projectlearn.io/learn/game-development/project/tetris-21?from=github)| |紅白機遊戲 | C/C++、Python、二維 | [連結](https://projectlearn.io/learn/game-development/project/nes-game-20?from=github)| | Roguelike 遊戲 | C#、.NET、RogueSharp、MonoGame、RLNet | [連結](https://projectlearn.io/learn/game-development/project/roguelike-game-17?from=github)| |簡單的角色扮演遊戲 | C#、SQL、二維 | [連結](https://projectlearn.io/learn/game-development/project/simple-rpg-game-16?from=github)| ### 機器學習與人工智能: |專案 |技術 |連結 | | :--- |:---|:---| |使用 BeautifulSoup 建置網絡爬蟲 | Python, BeautifulSoup | [連結](https://projectlearn.io/learn/machine-learning-and-ai/project/build-a-web-scraper-using-beautifulsoup-202?from=github)| |從胸部 X 光檢測肺炎的 CNN |美國有線電視新聞網,蟒蛇 | [連結](https://projectlearn.io/learn/machine-learning-and-ai/project/cnn-that-detects-pneumonia-from-chest-x-rays-169?from=github)| |使用 AWS 在 Python 中自動更新資料可視化 | Python、AWS、Matplotlib | [連結](https://projectlearn.io/learn/machine-learning-and-ai/project/auto-updating-data-visualizations-in-python-with-aws-158?from=github)| |使用 GCP 和 Node 的 Twitter 情感分析工具 | API、GCP、Node、JavaScript | [連結](https://projectlearn.io/learn/machine-learning-and-ai/project/twitter-sentiment-analysis-tool-using-gcp-and-node-156?from=github)| |使用 CNN 進行 Twitter 情緒分析 | Python、Matplotlib、Numpy、熊貓 | [連結](https://projectlearn.io/learn/machine-learning-and-ai/project/twitter-sentiment-analysis-using-cnn-120?from=github)| |泰勒斯威夫特歌詞生成器 | Python、Keras、Numpy、熊貓 | [連結](https://projectlearn.io/learn/machine-learning-and-ai/project/taylor-swift-lyrics-generator-77?from=github)| | MNIST 數字辨識器 | Python、Keras、TensorFlow、Numpy、SciKit | [連結](https://projectlearn.io/learn/machine-learning-and-ai/project/mnist-digit-recognizer-76?from=github)| |訓練模型生成顏色 | Python、Keras、TensorFlow、Numpy | [連結](https://projectlearn.io/learn/machine-learning-and-ai/project/train-a-model-to-generate-colors-75?from=github)| |圖片說明生成器 | Python、TensorFlow、Numpy | [連結](https://projectlearn.io/learn/machine-learning-and-ai/project/image-caption-generator-74?from=github)| |使用 CNN 破解驗證碼系統 | Python、Keras、TensorFlow、OpenCV、Numpy | [連結](https://projectlearn.io/learn/machine-learning-and-ai/project/break-a-captcha-system-using-cnn-73?from=github)| |生成一張平均臉 | Python、OpenCV、Numpy、C/C++ | [連結](https://projectlearn.io/learn/machine-learning-and-ai/project/generate-an-average-face-72?from=github)| |圖像拼接 | Python、OpenCV、Numpy | [連結](https://projectlearn.io/learn/machine-learning-and-ai/project/image-stitching-71?from=github)| |手部關鍵點檢測 | Python、OpenCV、Numpy、C/C++ | [連結](https://projectlearn.io/learn/machine-learning-and-ai/project/hand-keypoint-detection-70?from=github)| |特徵臉 | Python、OpenCV、Numpy、C/C++ | [連結](https://projectlearn.io/learn/machine-learning-and-ai/project/eigenface-69?from=github)| |無人機目標檢測 | Python、OpenCV、Numpy | [連結](https://projectlearn.io/learn/machine-learning-and-ai/project/drone-target-detection-68?from=github)| |使用 Mask R-CNN 進行目標檢測 | Python、OpenCV、Numpy | [連結](https://projectlearn.io/learn/machine-learning-and-ai/project/object-detection-using-mask-r-cnn-67?from=github)| |面部地標檢測 | Python、OpenCV、DLib、Numpy | [連結](https://projectlearn.io/learn/machine-learning-and-ai/project/facial-landmark-detection-66?from=github)| |文本傾斜校正 | Python、OpenCV、Numpy | [連結](https://projectlearn.io/learn/machine-learning-and-ai/project/text-skew-correction-65?from=github)| | OCR 和文本辨識 | Python、OpenCV、Tesseract、Numpy | [連結](https://projectlearn.io/learn/machine-learning-and-ai/project/ocr-and-text-recognition-64?from=github)| |人數統計 | Python、OpenCV、Numpy | [連結](https://projectlearn.io/learn/machine-learning-and-ai/project/people-counter-63?from=github)| |文本檢測 | Python、OpenCV、Numpy | [連結](https://projectlearn.io/learn/machine-learning-and-ai/project/text-detection-62?from=github)| |語義分割 | Python、OpenCV、Numpy | [連結](https://projectlearn.io/learn/machine-learning-and-ai/project/semantic-segmentation-61?from=github)| |物件跟踪 | Python、OpenCV、Numpy、CamShift | [連結](https://projectlearn.io/learn/machine-learning-and-ai/project/object-tracking-60?from=github)| |人臉聚類 | Python、OpenCV、Numpy | [連結](https://projectlearn.io/learn/machine-learning-and-ai/project/face-clustering-59?from=github)| |條碼掃描儀 | Python、OpenCV、ZBar、Numpy | [連結](https://projectlearn.io/learn/machine-learning-and-ai/project/barcode-scanner-58?from=github)| |顯著性檢測 | Python、OpenCV、Numpy | [連結](https://projectlearn.io/learn/machine-learning-and-ai/project/saliency-detection-57?from=github)| |人臉檢測 | Python、OpenCV、Numpy | [連結](https://projectlearn.io/learn/machine-learning-and-ai/project/face-detection-56?from=github)| |文件掃描儀 | Python、OpenCV、Numpy、SciKit | [連結](https://projectlearn.io/learn/machine-learning-and-ai/project/document-scanner-55?from=github)| |音樂推薦 | Python、SciKit、Numpy、熊貓 | [連結](https://projectlearn.io/learn/machine-learning-and-ai/project/music-recommender-54?from=github)| |預測葡萄酒質量 | Python、Matplotlib、Numpy、熊貓 | [連結](https://projectlearn.io/learn/machine-learning-and-ai/project/predict-quality-of-wine-53?from=github)| |遺傳算法 | Python、SciKit、Numpy、熊貓 | [連結](https://projectlearn.io/learn/machine-learning-and-ai/project/genetic-algorithms-52?from=github)| |深夢 | Python、TensorFlow、可視化 | [連結](https://projectlearn.io/learn/machine-learning-and-ai/project/deepdream-51?from=github)| |股價預測| Python、SciKit、Matplotlib | [連結](https://projectlearn.io/learn/machine-learning-and-ai/project/stock-price-prediction-50?from=github)| |電影推薦系統 | Python, LightFM | [連結](https://projectlearn.io/learn/machine-learning-and-ai/project/movie-recommendation-systems-49?from=github)| | Twitter 情緒分析 | Python, API | [連結](https://projectlearn.io/learn/machine-learning-and-ai/project/twitter-sentiment-analysis-48?from=github)| |帶有情感分析的聊天應用 | NextJS、Pusher、Sentiment、Node、React | [連結](https://projectlearn.io/learn/machine-learning-and-ai/project/chat-app-with-sentiment-analysis-35?from=github)| --- **結論** 2023 年將成為令人振奮的發展年,新技術和工具層出不窮。 希望這篇文章對您有幫助。
https://chat.openai.com/chat 昨天認識了這個ChatGPT 還可以教程式語言 真的太神奇了,大家可以試試 
你的轉職路上,還缺少一份自學作業包!寫完這幾包,直接拿作品去面試上班!
本論壇另有附設一個 LINE 新手發問&交流群組!歡迎加入討論!


